
You also want an ePaper? Increase the reach of your titles
YUMPU automatically turns print PDFs into web optimized ePapers that Google loves.
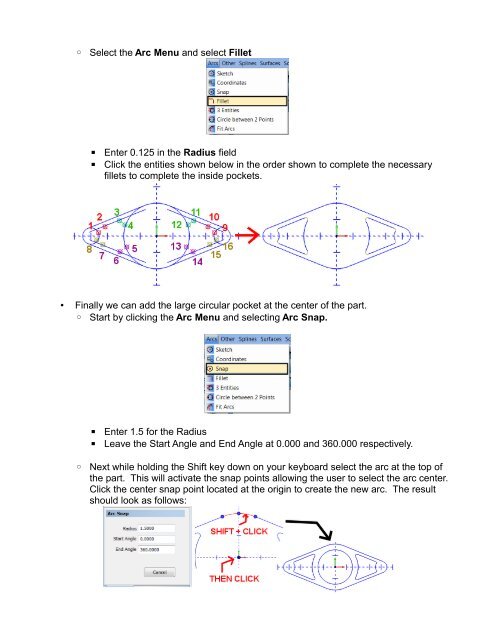
◦ Select the Arc Menu and select Fillet<br />
▪<br />
▪<br />
Enter 0.125 in the Radius field<br />
Click the entities shown below in the order shown to complete the necessary<br />
fillets to complete the inside pockets.<br />
• Finally we can add the large circular pocket at the center of the part.<br />
◦ Start by clicking the Arc Menu and selecting Arc Snap.<br />
▪<br />
▪<br />
Enter 1.5 for the Radius<br />
Leave the Start Angle and End Angle at 0.000 and 360.000 respectively.<br />
◦ Next while holding the Shift key down on your keyboard select the arc at the top of<br />
the part. This will activate the snap points allowing the user to select the arc center.<br />
Click the center snap point located at the origin to create the new arc. The result<br />
should look as follows: