to download LG Multi V Plus - Hawco
to download LG Multi V Plus - Hawco
to download LG Multi V Plus - Hawco

Create successful ePaper yourself
Turn your PDF publications into a flip-book with our unique Google optimized e-Paper software.
System<br />
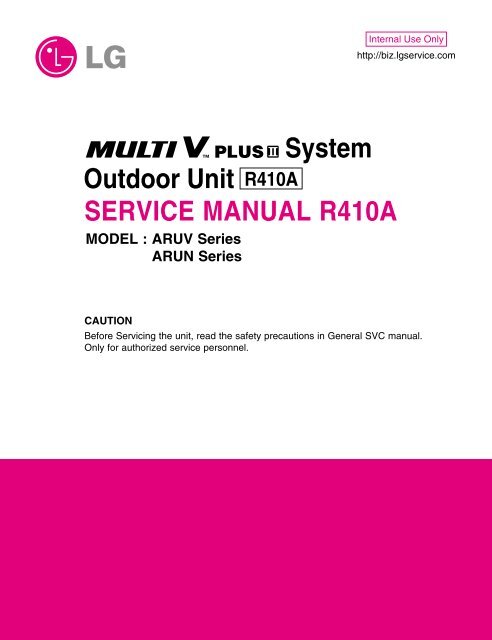
Outdoor Unit R410A<br />
SERVICE MANUAL R410A<br />
MODEL : ARUV Series<br />
ARUN Series<br />
Internal Use Only<br />
http://biz.lgservice.com<br />
CAUTION<br />
Before Servicing the unit, read the safety precautions in General SVC manual.<br />
Only for authorized service personnel.
Copyright ©2007 <strong>LG</strong> Electronics. Inc. All right reserved.<br />
Only for training and service purposes<br />
Air Conditioner Service Manual<br />
TABLE OF CONTENTS<br />
Safety Precautions............................................................................................................................3<br />
Part 1 General Information .............................................................................................................10<br />
Model Names .............................................................................................................................11<br />
External Appearance .................................................................................................................12<br />
Combination of Outdoor Units .................................................................................................14<br />
Nomenclature .............................................................................................................................15<br />
Outdoor Units Information ........................................................................................................16<br />
Part 2 Outdoor Units ................................................................................................................19<br />
Part 3 PCB Setting and Test Run ........................................................................................57<br />
Part 4 Trouble shooting guide ............................................................................................. 69<br />
- 2 -<br />
<strong>LG</strong>E Internal Use Only
Safety Precautions<br />
Copyright ©2007 <strong>LG</strong> Electronics. Inc. All right reserved.<br />
Only for training and service purposes<br />
- 3 -<br />
Safety Precautions<br />
To prevent injury <strong>to</strong> the user or other people and property damage, the following instructions must<br />
be followed.<br />
■ Incorrect operation due <strong>to</strong> ignoring instruction will cause harm or damage. The seriousness is<br />
classified by the following indications.<br />
WARNING<br />
CAUTION<br />
This symbol indicates the possibility of death or serious injury.<br />
This symbol indicates the possibility of injury or damage <strong>to</strong> properties only.<br />
■ Meanings of symbols used in this manual are as shown below.<br />
■ Installation<br />
Have all electric work done by a licensed<br />
electrician according <strong>to</strong> "Electric Facility<br />
Engineering Standard" and "Interior Wire<br />
Regulations" and the instructions given in<br />
this manual and always use a special circuit.<br />
• If the power source capacity is inadequate or<br />
electric work is performed improperly, electric<br />
shock or fire may result.<br />
Always ground the product.<br />
• There is risk of fire or electric shock.<br />
Be sure not <strong>to</strong> do.<br />
Be sure <strong>to</strong> follow the instruction.<br />
WARNING<br />
Ask the dealer or an authorized technician <strong>to</strong><br />
install the air conditioner.<br />
• Improper installation by the user may result in<br />
water leakage, electric shock, or fire.<br />
Always intstall a dedicated circuit and breaker.<br />
• Improper wiring or installation may cause fire or<br />
electric shock.<br />
<strong>LG</strong>E Internal Use Only
Safety Precautions<br />
For re-installation of the installed product,<br />
always contact a dealer or an Authorized<br />
Service Center.<br />
• There is risk of fire, electric shock, explosion, or<br />
injury.<br />
Do not s<strong>to</strong>re or use flammable gas or<br />
combustibles near the air conditioner.<br />
• There is risk of fire or failure of product.<br />
Gasolin<br />
Prepare for strong wind or earthquake and<br />
install the unit at the specified place.<br />
• Improper installation may cause the unit <strong>to</strong> <strong>to</strong>pple<br />
and result in injury.<br />
When installing and moving the air conditioner<br />
<strong>to</strong> another site, do not charge it with a<br />
different refrigerant from the refrigerant<br />
specified on the unit.<br />
• If a different refrigerant or air is mixed with the<br />
original refrigerant, the refrigerant cycle may<br />
malfunction and the unit may be damaged.<br />
R410A<br />
R22<br />
R407C<br />
Copyright ©2007 <strong>LG</strong> Electronics. Inc. All right reserved.<br />
Only for training and service purposes<br />
- 4 -<br />
Do not install, remove, or re-install the unit<br />
by yourself (cus<strong>to</strong>mer).<br />
• There is risk of fire, electric shock, explosion, or<br />
injury.<br />
Use the correctly rated breaker or fuse.<br />
• There is risk of fire or electric shock.<br />
Do not install the product on a defective<br />
installation stand.<br />
• It may cause injury, accident, or damage <strong>to</strong> the<br />
product.<br />
Do not reconstruct <strong>to</strong> change the settings of<br />
the protection devices.<br />
• If the pressure switch, thermal switch, or other<br />
protection device is shorted and operated<br />
forcibly, or parts other than those specified by<br />
<strong>LG</strong>E are used, fire or explosion may result.<br />
<strong>LG</strong>E Internal Use Only
Ventilate before operating air conditioner<br />
when gas leaked out.<br />
• It may cause explosion, fire, and burn.<br />
■ Operation<br />
Copyright ©2007 <strong>LG</strong> Electronics. Inc. All right reserved.<br />
Only for training and service purposes<br />
- 5 -<br />
Safety Precautions<br />
Securely install the cover of control box and<br />
the panel.<br />
• If the cover and panel are not installed securely,<br />
dust or water may enter the outdoor unit and fire<br />
or electric shock may result.<br />
If the air conditioner is installed in a small room, measures must be taken <strong>to</strong> prevent the<br />
refrigerant concentration from exceeding the safety limit when the refrigerant leaks.<br />
• Consult the dealer regarding the appropriate measures <strong>to</strong> prevent the safety limit from being exceeded.<br />
Should the refrigerant leak and cause the safety limit <strong>to</strong> be exceeded, harzards due <strong>to</strong> lack of oxygen<br />
in the room could result.<br />
Do not damage or use an unspecified power<br />
cord.<br />
• There is risk of fire, electric shock, explosion, or<br />
injury.<br />
Be cautious that water could not enter the<br />
product.<br />
• There is risk of fire, electric shock, or product<br />
damage.<br />
Use a dedicated outlet for this appliance.<br />
• There is risk of fire or electrical shock.<br />
Do not <strong>to</strong>uch the power switch with wet<br />
hands.<br />
• There is risk of fire, electric shock, explosion, or<br />
injury.<br />
<strong>LG</strong>E Internal Use Only
Safety Precautions<br />
When the product is soaked (flooded or<br />
submerged), contact an Authorized Service<br />
Center.<br />
• There is risk of fire or electric shock.<br />
Take care <strong>to</strong> ensure that nobody could step<br />
on or fall on<strong>to</strong> the outdoor unit.<br />
• This could result in personal injury and product<br />
damage.<br />
■ Installation<br />
Always check for gas (refrigerant) leakage<br />
after installation or repair of product.<br />
• Low refrigerant levels may cause failure of<br />
product.<br />
Keep level even when installing the product.<br />
• To avoid vibration or water leakage.<br />
90˚<br />
Copyright ©2007 <strong>LG</strong> Electronics. Inc. All right reserved.<br />
Only for training and service purposes<br />
CAUTION<br />
- 6 -<br />
Be cautious not <strong>to</strong> <strong>to</strong>uch the sharp edges<br />
when installing.<br />
• It may cause injury.<br />
Do not open the inlet grille of the product<br />
during operation. (Do not <strong>to</strong>uch the electrostatic<br />
filter, if the unit is so equipped.)<br />
• There is risk of physical injury, electric shock, or<br />
product failure.<br />
Do not install the product where the noise or<br />
hot air from the outdoor unit could damage<br />
the neighborhoods.<br />
• It may cause a problem for your neighbors.<br />
Do not install the unit where combustible gas<br />
may leak.<br />
• If the gas leaks and<br />
accumulates around the<br />
unit, an explosion may<br />
result.<br />
Gasolin<br />
<strong>LG</strong>E Internal Use Only
Use power cables of sufficient current<br />
carrying capacity and rating.<br />
• Cables that are <strong>to</strong>o small may leak, generate<br />
heat, and cause a fire.<br />
Keep the unit away from children. The heat<br />
exchanger is very sharp.<br />
• It can cause the injury, such as cutting the finger.<br />
Also the damaged fin may result in degradation<br />
of capacity.<br />
Copyright ©2007 <strong>LG</strong> Electronics. Inc. All right reserved.<br />
Only for training and service purposes<br />
- 7 -<br />
Safety Precautions<br />
Do not use the product for special purposes,<br />
such as preserving foods, works of art, etc. It<br />
is a consumer air conditioner, not a precision<br />
refrigeration system.<br />
• There is risk of damage or loss of property.<br />
When installting the unit in a hospital, communication<br />
station, or similar place, provide<br />
sufficient protection against noise.<br />
• The inverter equipment, private power genera<strong>to</strong>r,<br />
high-frequency medical equipment, or radio communication<br />
equipment may cause the air conditioner<br />
<strong>to</strong> operate erroneously, or fail <strong>to</strong> operate. On the<br />
other hand, the air conditioner may affect such<br />
equipment by creating noise that disturbs medical<br />
treatment or image broadcasting.<br />
Do not install the product where it is exposed <strong>to</strong> sea wind (salt spray) directly.<br />
• It may cause corrosion on the product. Corrosion, particularly on the condenser and evapora<strong>to</strong>r fins,<br />
could cause product malfunction or inefficient operation.<br />
<strong>LG</strong>E Internal Use Only
Safety Precautions<br />
■ Operation<br />
Do not use the air conditioner in special<br />
environments.<br />
• Oil, steam, sulfuric smoke, etc. can significantly<br />
reduce the performance of the air conditioner or<br />
damage its parts.<br />
Make the connections securely so that the<br />
outside force of the cable may not be applied<br />
<strong>to</strong> the terminals.<br />
• Inadequate connection and fastening may generate<br />
heat and cause a fire.<br />
Copyright ©2007 <strong>LG</strong> Electronics. Inc. All right reserved.<br />
Only for training and service purposes<br />
- 8 -<br />
Do not block the inlet or outlet.<br />
• It may cause failure of appliance or accident.<br />
Be sure the installation area does not deteriorate<br />
with age.<br />
• If the base collapses, the air conditioner could<br />
fall with it, causing property damage, product<br />
failure, or personal injury.<br />
Install and insulate the drain hose <strong>to</strong> ensure that water is drained away properly based on the<br />
installation manual.<br />
• A bad connection may cause water leakage.<br />
Be very careful about product transportation.<br />
• Only one person should not carry the product if it weighs more<br />
than 20 kg.<br />
• Some products use PP bands for packaging. Do not use any PP<br />
bands for a means of transportation. It is dangerous.<br />
• Do not <strong>to</strong>uch the heat exchanger fins. Doing so may cut your fingers.<br />
• When transporting the outdoor unit, suspending it at the specified<br />
positions on the unit base. Also support the outdoor unit at four<br />
points so that it cannot slip sideways.<br />
<strong>LG</strong>E Internal Use Only
Safely dispose of the packing materials.<br />
• Packing materials, such as nails and other metal or<br />
wooden parts, may cause stabs or other injuries.<br />
• Tear apart and throw away plastic packaging bags<br />
so that children may not play with them. If children<br />
play with a plastic bag which was<br />
not <strong>to</strong>rn apart, they face the<br />
risk of suffocation.<br />
Do not <strong>to</strong>uch any of the refrigerant piping<br />
during and after operation.<br />
• It can cause a burn or frostbite.<br />
Do not directly turn off the main power<br />
switch after s<strong>to</strong>pping operation.<br />
• Wait at least 5 minutes before turning off the<br />
main power switch. Otherwise<br />
it may result in water leakage<br />
or other problems.<br />
Use a firm s<strong>to</strong>ol or ladder when cleaning or<br />
maintaining the air conditioner.<br />
• Be careful and avoid personal injury.<br />
Copyright ©2007 <strong>LG</strong> Electronics. Inc. All right reserved.<br />
Only for training and service purposes<br />
- 9 -<br />
Safety Precautions<br />
Turn on the power at least 6 hours before<br />
starting operation.<br />
• Starting operation immediately after turning on<br />
the main power switch can result in severe<br />
damage <strong>to</strong> internal parts. Keep the power switch<br />
turned on during the operational season.<br />
Do not operate the air conditioner with the<br />
panels or guards removed.<br />
• Rotating, hot, or high-voltage parts can cause<br />
injuries.<br />
Au<strong>to</strong>-addressing should be done in condition of<br />
connecting the power of all indoor and outdoour<br />
units. Au<strong>to</strong>-addressing should also be done in<br />
case of changing the indoor unit PCB.<br />
Do not insert hands or other objects through<br />
the air inlet or outlet while the air conditioner<br />
is plugged in.<br />
• There are sharp and moving parts that could<br />
cause personal injury.<br />
<strong>LG</strong>E Internal Use Only
Part 1<br />
General Information<br />
Copyright ©2007 <strong>LG</strong> Electronics. Inc. All right reserved.<br />
Only for training and service purposes<br />
1. Model Names ................................................................11<br />
1.1 Indoor Unit .............................................................11<br />
1.2 Outdoor Unit ..........................................................11<br />
2. External Appearance.....................................................12<br />
2.1 Indoor Unit .............................................................12<br />
2.2 Outdoor Unit ..........................................................13<br />
3. Combination of Outdoor Units .....................................15<br />
4. Nomenclature.................................................................17<br />
4.1 Indoor Unit .............................................................17<br />
4.2 Outdoor Unit ..........................................................17<br />
- 10 -<br />
<strong>LG</strong>E Internal Use Only
1. Model Names<br />
1.1 Indoor Unit<br />
* ART COOL- Color, Ceiling Cassette- A:Basic C:Plasma, Wall Mounted- A:Basic L:Plasma<br />
1.2 Outdoor Unit<br />
Copyright ©2007 <strong>LG</strong> Electronics. Inc. All right reserved.<br />
Only for training and service purposes<br />
- 11 -<br />
Model Names<br />
Category Chassis<br />
Name 7k<br />
(2.2)<br />
9k<br />
(2.8)<br />
12k<br />
(3.6)<br />
Capacity(Btu/h(kW))<br />
18k 24k 28k<br />
(5.6) (7.1) (8.2)<br />
36k<br />
(10.6)<br />
42k<br />
(12.3)<br />
48k<br />
(14.1)<br />
Wall Mounted SE ARNU07GSE*1 ARNU09GSE*1 ARNU12GSE*1<br />
(General) S5 ARNU18GS5*1 ARNU24GS5*1<br />
Mirror<br />
SE<br />
S3<br />
ARNU07GSE*1 ARNU09GSE*1 ARNU12GSE*1<br />
ARNU18GS3*1 ARNU24GS3*1<br />
ART COOL ART COOL SP ARNU07GSP*1 ARNU09GSP*1 ARNU12GSP*1<br />
ART Cool Gallery SF ARNU07GSF*1 ARNU09GSF*1 ARNU12GSF*1<br />
ART COOL Wide SV ARNU18GSV*1<br />
1 Way TJ ARNU07GTJ*1 ARNU09GTJ*1 ARNU12GTJ*1<br />
2 Way TL ARNU18GTL*1 ARNU24GTL*1<br />
TE ARNU07GTE*1 ARNU09GTE*1 ARNU12GTE*1 ARNU18GTE*1<br />
Ceiling<br />
Cassette<br />
4 Way<br />
TH<br />
TD<br />
TP<br />
ARNU24GTH*1<br />
ARNU24GTP*2<br />
ARNU28GTH*1<br />
ARNU28GTP*2<br />
ARNU36GTD*1 ARNU42GTD*1 ARNU48GTD*1<br />
TN ARNU36GTN*2<br />
TM ARNU42GTM*2 ARNU48GTM*2<br />
BH ARNU18GBHA1 ARNU24GBHA1<br />
High Static BG ARNU28GBGA1 ARNU36GBGA1 ARNU42GBGA1<br />
BR ARNU48GBRA1<br />
Ceiling<br />
Concealed<br />
Duct<br />
Low Static<br />
B1<br />
B2<br />
B3<br />
ARNU07GB1G1<br />
ARNU07GB3G1+<br />
PBSGB30(Acc'y),<br />
ARNU09GB1G1<br />
ARNU09GB3G1+<br />
PBSGB30(Acc'y),<br />
ARNU12GB1G1<br />
ARNU12GB3G1+<br />
PBSGB30(Acc'y),<br />
ARNU18GB2G1 ARNU24GB2G1<br />
Built In<br />
PBSC30(Acc'y) PBSC30(Acc'y) PBSC30(Acc'y)<br />
ARNU18GB4G1+ ARNU24GB4G1+<br />
B4 PBSGB40(Acc'y), PBSGB40(Acc'y),<br />
PBSC40(Acc'y) PBSC40(Acc'y)<br />
Ceiling & Floor VE ARNU09GVEA1 ARNU12GVEA1<br />
Ceiling Suspended VJ ARNU18GVJA1 ARNU24GVJA1<br />
Floor<br />
With Case<br />
CE<br />
CF<br />
ARNU07GCEA1 ARNU09GCEA1 ARNU12GCEA1<br />
ARNU18GCFA1 ARNU24GCFA1<br />
Standing<br />
Without Case<br />
CE<br />
CF<br />
ARNU07GCEU1 ARNU09GCEU1 ARNU12GCEU1<br />
ARNU18GCFU1 ARNU24GCFU1<br />
Power Supply 5HP 6HP 8HP 10HP 12HP 14HP 16HP 18HP 20HP<br />
3Ø, 380 ~ 415V, 50Hz<br />
3Ø, 380V, 60Hz 50LT2 60LT2 80LT2 100LT2 120LT2 140LT2 160LT2 180LT2 200LT2<br />
Power Supply 22HP 24HP 26HP 28HP 30HP 32HP 34HP 36HP 38HP<br />
3Ø, 380 ~ 415V, 50Hz<br />
3Ø, 380V, 60Hz 220LT2 240LT2 260LT2 280LT2 300LT2 320LT2 340LT2 360LT2 380LT2<br />
Power Supply 40HP 42HP 44HP 46HP 48HP<br />
3Ø, 380 ~ 415V, 50Hz<br />
3Ø, 380V, 60Hz<br />
400LT2 420LT2 440LT2 460LT2 480LT2<br />
Heat Pump ARUN<br />
Cooling Only ARUV<br />
<strong>LG</strong>E Internal Use Only
External Appearance<br />
2. External Appearance<br />
2.1 Indoor Units<br />
Ceiling Cassette- 1Way<br />
ARNU07GTJ*1<br />
ARNU09GTJ*1<br />
ARNU12GTJ*1<br />
Ceiling Cassette- 4Way<br />
ARNU07GTE*1<br />
ARNU09GTE*1<br />
ARNU12GTE*1<br />
ARNU18GTE*1<br />
ARNU24GTH*1<br />
ARNU28GTH*1<br />
ARNU36GTD*1<br />
ARNU42GTD*1<br />
ARNU48GTD*1<br />
ART COOL Mirror<br />
ART COOL Wide<br />
Ceiling & Floor<br />
ARNU24GTP*2<br />
ARNU28GTP*2<br />
ARNU36GTN*2<br />
ARNU42GTM*2<br />
ARNU48GTM*2<br />
Ceiling Concealed Duct - Low Static<br />
ARNU07GB1G1<br />
ARNU09GB1G1<br />
ARNU12GB1G1<br />
ARNU18GB2G1<br />
ARNU24GB2G1<br />
Ceiling Concealed Duct – Built-in<br />
ARNU07GB3G1+PBSGB30(Acc'y), PBSC30(Acc'y)<br />
ARNU09GB3G1+PBSGB30(Acc'y), PBSC30(Acc'y)<br />
ARNU12GB3G1+PBSGB30(Acc'y), PBSC30(Acc'y)<br />
ARNU18GB4G1+PBSGB40(Acc'y), PBSC40(Acc'y)<br />
ARNU24GB4G1+PBSGB40(Acc'y), PBSC40(Acc'y)<br />
ARNU07GSE*1<br />
ARNU09GSE*1<br />
ARNU12GSE*1<br />
ARNU18GS3*1<br />
ARNU24GS3*1<br />
ARNU18GSV*1<br />
* B : Blue M : Metal<br />
D : Wood<br />
ARNU09GVEA1<br />
ARNU12GVEA1<br />
Ceiling Suspended<br />
ARNU18GVJA1<br />
ARNU24GVJA1<br />
Copyright ©2007 <strong>LG</strong> Electronics. Inc. All right reserved.<br />
Only for training and service purposes<br />
Ceiling Cassette -2Way<br />
ARNU18GTL*1<br />
ARNU24GTL*1<br />
* A:Basic, C:Plasma * A:Basic, C:Plasma<br />
* A:Basic, C:Plasma<br />
S3: * B : Blue<br />
M : Metal<br />
D : Wood<br />
R : Mirror<br />
W : White<br />
SE: * R:Mirror<br />
V:Silver<br />
B : Blue<br />
These are model names of the basic function.<br />
Ceiling Concealed Duct - High Static<br />
ARNU18GBHA1<br />
ARNU24GBHA1<br />
ARNU28GBGA1<br />
ARNU36GBGA1<br />
ARNU42GBGA1<br />
ARNU48GBRA1<br />
Wall Mounted<br />
ARNU07GSE*1<br />
ARNU09GSE*1<br />
ARNU12GSE*1<br />
ARNU18GS5*1<br />
ARNU24GS5*1<br />
ART COOL<br />
ARNU07GSP*1<br />
ARNU09GSP*1<br />
ARNU12GSP*1<br />
Floor Standing<br />
With case<br />
ARNU07GCEA1<br />
ARNU09GCEA1<br />
ARNU12GCEA1<br />
ARNU18GCFA1<br />
ARNU24GCFA1<br />
Without case<br />
ARNU07GCEU1<br />
ARNU09GCEU1<br />
ARNU12GCEU1<br />
ARNU18GCFU1<br />
ARNU24GCFU1<br />
- 12 -<br />
* A:Basic, L:Plasma<br />
ART COOL Gallery<br />
ARNU07GSF*1<br />
ARNU09GSF*1<br />
ARNU12GSF*1<br />
* E:Red V:Silver<br />
G:Gold 1:Kiss<br />
* B : Blue M : Metal<br />
D : Wood W : White<br />
<strong>LG</strong>E Internal Use Only
2.2 Outdoor Units<br />
2.2.1 Cooling Only<br />
ARUV50LT2<br />
ARUV60LT2<br />
ARUV80LT2<br />
ARUV180LT2<br />
ARUV200LT2<br />
ARUV220LT2<br />
ARUV340LT2<br />
ARUV360LT2<br />
ARUV380LT2<br />
ARUV400LT2<br />
ARUV420LT2<br />
ARUV440LT2<br />
ARUV460LT2<br />
ARUV480LT2<br />
Copyright ©2007 <strong>LG</strong> Electronics. Inc. All right reserved.<br />
Only for training and service purposes<br />
- 13 -<br />
ARUV100LT2<br />
ARUV120LT2<br />
ARUV140LT2<br />
ARUV160LT2<br />
ARUV240LT2<br />
ARUV260LT2<br />
ARUV280LT2<br />
ARUV300LT2<br />
ARUV320LT2<br />
External Appearance<br />
<strong>LG</strong>E Internal Use Only
External Appearance<br />
2.2.2 Heat Pump<br />
ARUN50LT2<br />
ARUN60LT2<br />
ARUN180LT2<br />
ARUN200LT2<br />
ARUN220LT2<br />
ARUN340LT2<br />
ARUN360LT2<br />
ARUN380LT2<br />
ARUN400LT2<br />
ARUN420LT2<br />
ARUN440LT2<br />
ARUN460LT2<br />
ARUN480LT2<br />
Copyright ©2007 <strong>LG</strong> Electronics. Inc. All right reserved.<br />
Only for training and service purposes<br />
- 14 -<br />
ARUN80LT2<br />
ARUN100LT2<br />
ARUN120LT2<br />
ARUN140LT2<br />
ARUN160LT2<br />
ARUN240LT2<br />
ARUN260LT2<br />
ARUN280LT2<br />
ARUN300LT2<br />
ARUN320LT2<br />
<strong>LG</strong>E Internal Use Only
3. Combination of Outdoor Units<br />
3.1 Cooling Only<br />
System Number of Units<br />
Capacity 50Hz / 60Hz<br />
Copyright ©2007 <strong>LG</strong> Electronics. Inc. All right reserved.<br />
Only for training and service purposes<br />
- 15 -<br />
Module<br />
Combination of Outdoor Units<br />
5 6 8 10 12 14 16<br />
5HP 1 1<br />
6HP 1 1<br />
8HP 1 1<br />
10HP 1 1<br />
12HP 1 1<br />
14HP 1 1<br />
16HP 1 1<br />
18HP 2 1 1<br />
20HP 2 1 1<br />
22HP 2 1 1<br />
24HP 2 1 1<br />
26HP 2 1 1<br />
28HP 2 2<br />
30HP 2 1 1<br />
32HP 2 2<br />
34HP 3 1 2<br />
36HP 3 1 1 1<br />
38HP 3 1 2<br />
40HP 3 1 1 1<br />
42HP 3 1 2<br />
44HP 3 2 1<br />
46HP 3 1 2<br />
48HP 3 3<br />
<strong>LG</strong>E Internal Use Only
Combination of Outdoor Units<br />
3.2 Heat Pump<br />
System Number of Units<br />
Capacity 50Hz / 60Hz<br />
Copyright ©2007 <strong>LG</strong> Electronics. Inc. All right reserved.<br />
Only for training and service purposes<br />
- 16 -<br />
Module<br />
5 6 8 10 12 14 16<br />
5HP 1 1<br />
6HP 1 1<br />
8HP 1 1<br />
10HP 1 1<br />
12HP 1 1<br />
14HP 1 1<br />
16HP 1 1<br />
18HP 2 1 1<br />
20HP 2 1 1<br />
22HP 2 1 1<br />
24HP 2 1 1<br />
26HP 2 1 1<br />
28HP 2 2<br />
30HP 2 1 1<br />
32HP 2 2<br />
34HP 3 1 2<br />
36HP 3 1 1 1<br />
38HP 3 1 2<br />
40HP 3 1 2<br />
42HP 3 3<br />
44HP 3 2 1<br />
46HP 3 1 2<br />
48HP 3 3<br />
<strong>LG</strong>E Internal Use Only
4. Nomenclature<br />
4.1 Indoor Unit<br />
ARN U 07 G TJ A 1<br />
4.2 Outdoor Unit<br />
ARU N 100 L T 2<br />
Copyright ©2007 <strong>LG</strong> Electronics. Inc. All right reserved.<br />
Only for training and service purposes<br />
- 17 -<br />
Nomenclature<br />
Serial Number<br />
Combinations of functions<br />
A:Basic function<br />
L:Neo Plasma(Wall Mounted)<br />
C:Plasma(Ceiling Cassette)<br />
G: Low Static<br />
ART COOL Type Panel Color<br />
B:Blue D:Wood M:Metal R:Mirror W:White<br />
V: Silver E:Red G:Gold 1:Kiss<br />
Chassis Name<br />
Electrical Ratings<br />
1:1Ø, 115V, 60Hz 2: 1Ø, 220V, 60Hz<br />
6:1Ø, 220 ~ 240V, 50Hz 7: 1Ø, 100V, 50/60Hz<br />
G:1Ø, 220 ~ 240V, 50Hz / 220V 60Hz<br />
Total Cooling Capacity in Btu/h<br />
EX) 5,000 Btu/h➞'05' 18,000 Btu/h➞'18'<br />
Combination of Inverter Type and<br />
Cooling Only or Heat Pump<br />
N: AC Inverter and H/P V: AC Inverter and C/O<br />
U: DC Inverter and H/P and C/O<br />
System with<br />
Indoor Unit using R410A<br />
Serial Number<br />
Air Discharge Type<br />
S:Side Discharge<br />
T:Top Discharge<br />
Electrical Ratings<br />
8: 3Ø, 380 ~ 415V, 50Hz 9: 3Ø, 380V, 60Hz<br />
A: 3Ø, 220V, 50Hz B: 3Ø, 220V, 60Hz<br />
L: 3Ø, 380 ~ 415V, 50Hz / 3Ø, 380V, 60Hz<br />
Total Cooling Capacity in Horse Power(HP) unit<br />
EX) 4.5HP➞'45' 10HP➞'100'<br />
Combination of Inverter Type and<br />
Cooling Only or Heat Pump<br />
N: Inverter and H/P V: Inverter and C/O<br />
H: H/P(Sub Unit) C: C/O(Sub Unit)<br />
B: Inverter and Heat Recovery<br />
S: Heat Recovery (Sub Unit)<br />
System with<br />
Outdoor Unit using R410A<br />
<strong>LG</strong>E Internal Use Only
Copyright ©2007 <strong>LG</strong> Electronics. Inc. All right reserved.<br />
Only for training and service purposes<br />
- 18 -<br />
<strong>LG</strong>E Internal Use Only
Part 2<br />
Outdoor Units<br />
Copyright ©2007 <strong>LG</strong> Electronics. Inc. All right reserved.<br />
Only for training and service purposes<br />
- 19 -<br />
<strong>LG</strong>E Internal Use Only
ARUV/ARUN Series<br />
• Function ........................................................................................21<br />
• Replacement procedure for Compressor<br />
(ARUN508T2 To ARUN4808T2)....................................................57<br />
Copyright ©2007 <strong>LG</strong> Electronics. Inc. All right reserved.<br />
Only for training and service purposes<br />
- 20 -<br />
<strong>LG</strong>E Internal Use Only
Function<br />
Copyright ©2007 <strong>LG</strong> Electronics. Inc. All right reserved.<br />
Only for training and service purposes<br />
- 21 -<br />
Function<br />
1. Basic control ...................................................................................................................22<br />
1.1 Normal operation .......................................................................................................22<br />
1.2 Compressor control....................................................................................................22<br />
1.3 Master and slave unit's EEV control...........................................................................23<br />
2. Special control ................................................................................................................24<br />
2.1 Oil return control ........................................................................................................24<br />
2.2 Defrost control............................................................................................................26<br />
2.3 Oil equalizing control..................................................................................................27<br />
3. Protection control ...........................................................................................................28<br />
3.1 Pressure protection control ........................................................................................28<br />
3.2 Discharge temperature control...................................................................................29<br />
3.3 Inverter protection control ..........................................................................................29<br />
3.4 Liquid back control .....................................................................................................30<br />
3.5 Phase detection .........................................................................................................30<br />
3.6 Pressure switch..........................................................................................................30<br />
4. Other control ...................................................................................................................31<br />
4.1 Initial setup.................................................................................................................31<br />
4.2 Instant indoor unit checking mode .............................................................................33<br />
4.3 Emergency operation.................................................................................................34<br />
4.4 Refrigerant Au<strong>to</strong> Charging .........................................................................................36<br />
4.5 Refrigerant Checking Function...................................................................................38<br />
4.6 Pump Down................................................................................................................40<br />
4.7 Pump Out...................................................................................................................41<br />
4.8 Au<strong>to</strong> Back Up Function_Inverter compressor ............................................................43<br />
4.9 Au<strong>to</strong> Back Up Function_constant speed compressor ................................................44<br />
4.10 Night Low Noise Function ........................................................................................45<br />
4.11 Vacuum Mode ..........................................................................................................47<br />
4.13 Black Box Function ..................................................................................................48<br />
<strong>LG</strong>E Internal Use Only
Function<br />
1. Basic control<br />
1.1 Normal operation<br />
Actua<strong>to</strong>r<br />
Compressor<br />
Fan<br />
Main EEV<br />
4way valve<br />
Subcooling<br />
EEV<br />
Indoor Unit<br />
EEV<br />
Fuzzy control<br />
Fuzzy control<br />
Full open<br />
Off<br />
Fuzzy control<br />
Superheat fuzzy<br />
control<br />
Note : Heating operation is not functional at an outdoor air temperature of 27°C or more.<br />
Cooling operation is not functional at an outdoor air temperature of 2°C or less with indoor unit combination<br />
of 10% or less<br />
1.2 Compressor control<br />
Fuzzy control : Maintain evaporating temperature(Te) <strong>to</strong> be constant on cooling mode and condensing temperature(Tc)<br />
on heating mode by Fuzzy control <strong>to</strong> ensure the stable system performance.<br />
(Tc:47 ~51°C, Te:2 ~ 5°C)<br />
(1) Cooling mode<br />
Te can be set by initial dip switch setting. (Normal mode, capacity up mode, and energy save mode)<br />
(2) Heating mode<br />
Tc can be set by initial dip switch setting. (Normal mode, capacity up mode, and energy save mode)<br />
Note: By setting dip switch, Te and Tc are decided simultaneously.<br />
S<strong>to</strong>p(0Hz)<br />
Copyright ©2007 <strong>LG</strong> Electronics. Inc. All right reserved.<br />
Only for training and service purposes<br />
Cooling operation Heating operation<br />
Fuzzy control start<br />
Min. frequency<br />
Fuzzy Control<br />
Fuzzy control<br />
Fuzzy control<br />
Fuzzy control<br />
On<br />
• Normal : minimum pulse<br />
• Avoiding control of high<br />
discharge temperature<br />
Target<br />
Subcooling fuzzy control<br />
System Capacity<br />
- 22 -<br />
S<strong>to</strong>p state<br />
s<strong>to</strong>p<br />
s<strong>to</strong>p<br />
Before 15 min. : Max. pulse<br />
After 15 min. : Min. pulse<br />
After 60 min. : Off<br />
Before 15 min. : Max. pulse<br />
After 15 min. : Min. pulse<br />
Before 10 min. : Min. pulse<br />
After 10 min. : Max. pulse<br />
(Linear Control)<br />
Inverter<br />
Comperssor<br />
Inverter<br />
Comperssor<br />
Constant Speed<br />
Compressor<br />
B<br />
Inverter<br />
Comperssor<br />
Constant Speed<br />
Compressor<br />
A<br />
Constant Speed<br />
Compressor<br />
B<br />
Inverter<br />
Comperssor<br />
Constant Speed<br />
Compressor<br />
C<br />
Constant Speed<br />
Compressor<br />
A<br />
Constant Speed<br />
Compressor<br />
B<br />
Cooling and heating load<br />
Inverter linear control as cooling and heating load increasing<br />
<strong>LG</strong>E Internal Use Only
1.3 Master and slave Unit's EEV control<br />
(1) Main EEV control<br />
Main EEV operates with fuzzy control rules <strong>to</strong> keep the degree of super Heat(Superheat) (about 3°C)at<br />
the evapora<strong>to</strong>r outlet stable during heating mode<br />
The degree of Superheat = Tsuction - Tevaporation<br />
Tsuction : temperature at suction pipe sensor(°C)<br />
Tevaporation : evaporation temperature equivalent <strong>to</strong> low pressure(°C)<br />
(2) Subcooling EEV control(about 15°C)<br />
Subcooling EEV works with fuzzy rules <strong>to</strong> keep the degree of Subcool at the outlet of subcooler during<br />
cooling mode<br />
The degree of Subcool = Tcondensation - Tliquid<br />
Tliquid : temperature at outlet of subcooler(°C)<br />
Tcondensation : condensation temperature equivalent <strong>to</strong> high pressure(°C)<br />
Copyright ©2007 <strong>LG</strong> Electronics. Inc. All right reserved.<br />
Only for training and service purposes<br />
- 23 -<br />
Function<br />
(3) Avoiding excessive high discharge temperature : when main EEV opens some given opening (R22 :<br />
1000pls, R410A : 800 pls) and discharge temperature is above 85°C in heating operation, subcooling<br />
EEV may control the "subcooling out temperature-evaporating temperature" <strong>to</strong> be some given difference.<br />
<strong>LG</strong>E Internal Use Only
Function<br />
2. Special control<br />
2.1 Oil return control<br />
2.1.1 Oil return control on cooling mode<br />
Oil return operation recovers oil amount in compressor by collecting oil accumulated in pipe.<br />
Each cycle component operates as following table during oil return operation.<br />
Outdoor Unit<br />
Constant Speed Compressor<br />
Indoor Unit<br />
Component<br />
Inv Compressor<br />
FAN<br />
Main EEV<br />
Subcooling EEV<br />
4way valve<br />
Hot gas bypass valve<br />
Component<br />
Fan<br />
Thermo on unit EEV<br />
Thermo off unit EEV<br />
Oil return signal<br />
■ Oil return operation time : 3 min for running step<br />
■ Starting condition:every 6 hours operate<br />
■ Oil return process ends if compressor protection control starts<br />
Copyright ©2007 <strong>LG</strong> Electronics. Inc. All right reserved.<br />
Only for training and service purposes<br />
Starting<br />
25Hz<br />
OFF<br />
Normal control<br />
Max. pulse<br />
Normal control<br />
OFF<br />
Normal control<br />
Starting<br />
Normal control<br />
Normal control<br />
Min. pulse<br />
OFF<br />
- 24 -<br />
Running<br />
Setting Value<br />
ON<br />
Normal control<br />
Max. pulse<br />
Main. pluse<br />
OFF<br />
Normal control<br />
Running<br />
OFF<br />
1200 pulse<br />
1200 pulse<br />
ON<br />
Ending<br />
40Hz<br />
OFF<br />
Normal control<br />
Max. pulse<br />
100 pulse<br />
OFF<br />
Normal control<br />
Ending<br />
Normal control<br />
Normal control<br />
Min. pulse<br />
OFF<br />
<strong>LG</strong>E Internal Use Only
2.1.2 Oil return control on heating mode<br />
Outdoor Unit<br />
Indoor Unit<br />
Component<br />
Inv Compressor<br />
Constant Speed Compressor<br />
FAN<br />
Main EEV<br />
Subcooling EEV<br />
4way valve<br />
Hot gas bypass valve<br />
Component<br />
Fan<br />
Thermo on unit EEV<br />
Thermo off unit EEV<br />
Oil return signal<br />
■ Oil return operation time : 3 min for running step<br />
■ Starting condition:same as cooling mode<br />
■ Oil return process ends if compressor protection control starts<br />
Copyright ©2007 <strong>LG</strong> Electronics. Inc. All right reserved.<br />
Only for training and service purposes<br />
Starting<br />
25Hz<br />
OFF<br />
Normal control<br />
Max. pulse<br />
Normal control<br />
OFF<br />
Normal control<br />
Starting<br />
Normal control<br />
Normal control<br />
Min. pulse<br />
OFF<br />
- 25 -<br />
Running<br />
Setting Value<br />
ON<br />
Normal control<br />
Max. pulse<br />
Min. pulse<br />
ON<br />
Normal control<br />
Running<br />
OFF<br />
1200 pulse<br />
1200 pulse<br />
ON<br />
Ending<br />
25Hz<br />
OFF<br />
Normal control<br />
Max. pulse<br />
100 pulse<br />
ON<br />
Normal control<br />
Ending<br />
Normal control<br />
Normal control<br />
Min. pulse<br />
OFF<br />
Function<br />
<strong>LG</strong>E Internal Use Only
Function<br />
2.2 Defrost<br />
Defrost operation eliminates ice attached on heat exchanger, recovering performance of heat exchanger.<br />
Each cycle component operates as following table during defrost operation.<br />
Outdoor Unit<br />
Indoor Unit<br />
Component<br />
Inv Compressor<br />
Constant Speed Compressor<br />
FAN<br />
Main EEV<br />
Subcooling EEV<br />
4way valve<br />
Hot gas bypass valve<br />
Component<br />
Fan<br />
Thermo on unit EEV<br />
Thermo off unit EEV<br />
Copyright ©2007 <strong>LG</strong> Electronics. Inc. All right reserved.<br />
Only for training and service purposes<br />
Starting<br />
25Hz<br />
OFF<br />
S<strong>to</strong>p<br />
Normal control<br />
Min. pulse<br />
On → OFF<br />
Normal control<br />
Starting<br />
OFF<br />
Normal control<br />
Min. pulse<br />
- 26 -<br />
Running<br />
Setting Value<br />
ON<br />
High pressure control<br />
Max. pulse<br />
Min. pulse<br />
OFF<br />
Normal control<br />
Running<br />
OFF<br />
1200 pulse<br />
1200 pulse<br />
■ Ending condition<br />
1) All heat exchanger pipe temperature are above 15°C(UY2) or 20°C(UW1) for 30 sec.<br />
2) The running time of defrost operation is over 30% of the <strong>to</strong>tal heating time<br />
3) If compressor protection control starts by high discharge temperature of compressor etc.<br />
Ending<br />
25Hz<br />
OFF<br />
50Hz<br />
200 pulse<br />
Min. pulse<br />
ON<br />
Normal control<br />
Ending<br />
OFF<br />
Normal control<br />
Min. pulse<br />
<strong>LG</strong>E Internal Use Only
2.3 S<strong>to</strong>pping operation<br />
2.3.1 S<strong>to</strong>pping operation on cooling mode<br />
Component<br />
Inv Compressor<br />
Constant Speed Compressor<br />
FAN<br />
Main EEV<br />
Subcooling EEV<br />
4way valve<br />
Hot gas bypass valve<br />
2.3.2 S<strong>to</strong>pping operation on heating mode<br />
Component<br />
Inv Compressor<br />
Constant Speed Compressor<br />
FAN<br />
Main EEV<br />
Subcooling EEV<br />
4way valve<br />
Hot gas bypass valve<br />
Copyright ©2007 <strong>LG</strong> Electronics. Inc. All right reserved.<br />
Only for training and service purposes<br />
Operation<br />
0Hz<br />
OFF<br />
S<strong>to</strong>p<br />
Max. pulse<br />
Max. pulse<br />
OFF<br />
OFF<br />
Operation<br />
0Hz<br />
OFF<br />
S<strong>to</strong>p<br />
Max. pulse<br />
Max. pulse<br />
OFF<br />
OFF<br />
- 27 -<br />
Note<br />
After 15 min.<br />
(Before 15 min. : Min. pulse)<br />
After 15 min.<br />
(Before 15 min. : Min. pulse)<br />
After 15 min.<br />
(Before 15 Min. : ON)<br />
After 15 min.<br />
(Before 15 min. : Min. pulse)<br />
After 15 min.<br />
(Before 15 min. : Min. pulse)<br />
After 15 min.<br />
(Before 15 Min. : ON)<br />
-<br />
-<br />
-<br />
-<br />
Note<br />
-<br />
-<br />
-<br />
After 60 min.<br />
Function<br />
<strong>LG</strong>E Internal Use Only
Function<br />
3. Protection control<br />
3.1 Pressure protection control<br />
3.1.1 Pressure control on cooling mode<br />
■ High pressure control<br />
■ Low pressure control<br />
3.1.2 Pressure control on heating mode<br />
■ High pressure control<br />
Pressure Range Compressor Fan Hot_gas<br />
Pd ≥ 4003kPa S<strong>to</strong>p S<strong>to</strong>p On<br />
Pd > 3676kPa -5Hz/4sec. 1) -50RPM/4sec.<br />
Pd ≤ 3448kPa Normal control Normal control<br />
Pd ≤ Target press Normal control off<br />
■ Low pressure control<br />
2<br />
2<br />
Pressure Range Compressor Fan Hot_gas<br />
Pd ≥ 4003 kPa S<strong>to</strong>p S<strong>to</strong>p<br />
Pd > 3676 kPa -5Hz/4sec. +100RPM/4sec.<br />
Pd ≥ 3448 kPa Frequency holding Normal control<br />
Pd < 3284 kPa Normal control -<br />
Pressure Range Compressor Fan Hot_gas<br />
Ps ≤ 229 kPa<br />
1 after 1min<br />
Ps ≤ 229 kPa before<br />
1min<br />
❈ Frequency holding : frequency (or RPM) is not increasing ( can decrease )<br />
Pressure Range Compressor Fan Hot_gas<br />
1 Ps ≤ 229 kPa<br />
after 1min<br />
Ps ≤ 229 kPa before<br />
1min<br />
❈ Frequency holding : frequency (or RPM) is not increasing ( can decrease )<br />
Copyright ©2007 <strong>LG</strong> Electronics. Inc. All right reserved.<br />
Only for training and service purposes<br />
S<strong>to</strong>p S<strong>to</strong>p<br />
-5Hz/4sec. -100RPM/4sec.<br />
Ps ≤ 242 kPa Normal control Normal control<br />
3<br />
Ps ≥ 399 kPa Normal control Off<br />
S<strong>to</strong>p S<strong>to</strong>p<br />
-5Hz/4sec. +100RPM/4sec.<br />
3 Ps ≤ 242 kPa Frequency holding Normal control<br />
Ps ≤ 268kPa<br />
Normal control<br />
Ps > 307kPa Off<br />
- 28 -<br />
-<br />
On<br />
On<br />
On<br />
<strong>LG</strong>E Internal Use Only
3.2 Discharge temperature control<br />
■ Outdoor unit control<br />
Temperature range Compressor<br />
Tdis >115˚C<br />
105˚C
Function<br />
3.4 Liquid back control<br />
■ Cooling mode<br />
Discharge temperature Indoor unit’s EEV<br />
Tdis < Tc + 12˚C<br />
Tdis > Tc + 16˚C<br />
■ Heating mode<br />
❇ The logic starts after 9 min. on heating mode and 4 min. on cooling mode from the compressor running.<br />
3.5 Phase detection<br />
■ Main unit<br />
If a phase is missed, 7-segment displays 50* on main PCB.<br />
If phases are reversed, 7-segment displays 54* on main PCB.<br />
3.6 Pressure switch<br />
- Main has pressure sensing switch in series between compressor and power relay.<br />
- The state of pressure sensing switch is normally on. It has small electric current from 220V AC. Never <strong>to</strong>uch<br />
the connecting terminal with hand nor short two wires directly.<br />
Copyright ©2007 <strong>LG</strong> Electronics. Inc. All right reserved.<br />
Only for training and service purposes<br />
SH increasing control<br />
Normal SH control<br />
Discharge temperature Outdoor unit ’s EEV<br />
Tdis < Tc + 17˚C<br />
Tdis > Tc + 18˚C<br />
SH increasing control<br />
Normal SH control<br />
- 30 -<br />
<strong>LG</strong>E Internal Use Only
4. Other control<br />
4.1 Initial setup<br />
There are 4 initial setup steps before running.<br />
All DIP switch setting must be completed before initial setup.<br />
1) Step 1 : fac<strong>to</strong>ry setting value display<br />
Fac<strong>to</strong>ry setting value is displayed in 7 segment on PCB for 24sec.<br />
All dip switches must be set properly before step 1.<br />
Power is on<br />
Master model code is displayed (3sec)<br />
Slave1 model code is displayed (3sec)<br />
Slave2 model code is displayed (3sec)<br />
Total capacity including sub units is<br />
displayed (2sec)<br />
Heat pump : Display 2 is default value<br />
Cooling only : no display<br />
Fac<strong>to</strong>ry setting(25 is normal)<br />
Refrigerant display<br />
Copyright ©2007 <strong>LG</strong> Electronics. Inc. All right reserved.<br />
Only for training and service purposes<br />
- 31 -<br />
Function<br />
<strong>LG</strong>E Internal Use Only
Function<br />
2) Step 2 : Communication check<br />
- If all model code is displayed in 7 segment including all Slave unit,<br />
communication between outdoor units is normal.<br />
- If 104* is displayed in 7-segment, check communication wires between outdoor units and Dip switch setting.<br />
3) Step 3 : PCB error check<br />
- After 40 sec, error check begins.<br />
■ Master/ Slave unit<br />
- All errors of units including Slave units are displayed in 7 segment.<br />
- If communication between main PCB and inverter PCB isn't normal, 52* is displayed in 7-segment<br />
If communication between main PCB and fan PCB isn't normal, 105* is displayed in 7-segment.<br />
If error is displayed, check corresponding wires.<br />
4) Step 4 : Au<strong>to</strong> addressing of indoor units<br />
- Au<strong>to</strong> addressing begins when address(red) but<strong>to</strong>n in Main PCB is pressed for 6 sec.<br />
- During au<strong>to</strong> addressing, 7 segment on main PCB displays "88"<br />
- After au<strong>to</strong> addressing, the number of indoor units is displayed in 7 segment for 30 sec. The address of each<br />
indoor unit is displayed on each wired remote controller.<br />
Push address(red) but<strong>to</strong>n for 6 sec.<br />
Au<strong>to</strong> address starts<br />
Au<strong>to</strong> address is in progress (max. 15 min.)<br />
The number of indoor units is displayed for 30 sec.<br />
Au<strong>to</strong> address process is finished.<br />
Every indoor unit displays its address on<br />
wired remote controller and the 7 segment of<br />
main PCB is off.<br />
Copyright ©2007 <strong>LG</strong> Electronics. Inc. All right reserved.<br />
Only for training and service purposes<br />
- 32 -<br />
ON<br />
1 2 3 4 5 6 7<br />
ON<br />
1 2 3 4 5 6 7<br />
1 2 3 4 5 6 7 8 9 10 11 12 13 14<br />
(35 indoor units found)<br />
6 sec.<br />
<strong>LG</strong>E Internal Use Only
4.2 Emergency operation<br />
- If a compressor is out of order, the system can be run except the defective compressor by backup function.<br />
■ Au<strong>to</strong>matic emergency operation(au<strong>to</strong>matic back up function)<br />
If outdoor unit detect comp defect during operation,, au<strong>to</strong>matic back up mode is set.<br />
1) Inverter compressor au<strong>to</strong>matic emergency operation(refer <strong>to</strong> ** page)<br />
2) Constant compressor au<strong>to</strong>matic emergency operation(refer <strong>to</strong> ** page)<br />
■ Manual emergency operation(Manual back up function)<br />
1) Check which compressor is broken.(refer <strong>to</strong> °∞Trouble Shooting Guide°±)<br />
2) Turn off the power.<br />
3) Set the dip S/W of defective outdoor unit.<br />
- Inverter compressor defect : dip S/W No.3<br />
- Unit defect : dip S/W No.4<br />
4) Turn on the power.<br />
Normal<br />
Copyright ©2007 <strong>LG</strong> Electronics. Inc. All right reserved.<br />
Only for training and service purposes<br />
MASTER SLAVE1 SLAVE2<br />
INV C1 INV C1 INV C1<br />
MASTER SLAVE1 SLAVE2<br />
Inv. comp.<br />
Fail of Slave1 INV C1 INV C1 INV C1<br />
Unit fail of<br />
MASTER SLAVE1 SLAVE2<br />
Slave2 INV C1 INV C1 INV C1<br />
CAUTION<br />
- 33 -<br />
DIP switch of Slave1<br />
ON<br />
ON<br />
1 2 3 4 5 6 7 1 2 3 4 5 6 7<br />
1 2 3 4 5 6 7 8 9 10 11 12 13 14<br />
DIP switch of Slave2<br />
ON<br />
ON<br />
Function<br />
1 2 3 4 5 6 7 1 2 3 4 5 6 7<br />
1 2 3 4 5 6 7 8 9 10 11 12 13 14<br />
Emergency operation with inverter compressor failure should not last 48 hours. ➔ It causes other<br />
compressor failure.<br />
During the emergency operation, cooling/heating capacity may be lower.<br />
<strong>LG</strong>E Internal Use Only
Function<br />
4.3 Sensor checking function<br />
Sensor checking function judges whether the current temperature of indoor and outdoor unit sensors is right or<br />
not. It checks 3 indoor temperature sensors, 9 outdoor temperature sensors, 2 outdoor pressure sensors.<br />
It is used for judging sensor abnormality. Note 2)<br />
Main PCB<br />
SW01S<br />
Main PCB<br />
SW01B<br />
SW02B<br />
Main PCB<br />
SW01V<br />
Main pcb<br />
LED<br />
Main PCB<br />
SW01V<br />
Start<br />
Wait for 3 min. after power<br />
reset<br />
Set the DIP switch according <strong>to</strong> the function<br />
Sensor Checking ➠ Refrigerant Au<strong>to</strong> Charging : 1,2,7 ON<br />
Sensor Checking ➠ Refrigerant Checking : 1,2,7,14 ON<br />
Would you perform<br />
the Sensor<br />
checking?<br />
Yes<br />
Press the black but<strong>to</strong>n for 2 sec. on main PCB.<br />
Indoor/Outdoor units operate with<br />
air circulation mode<br />
Judging sensor<br />
normality<br />
No<br />
Error Display<br />
Press the black but<strong>to</strong>n on the main PCB for 2 sec.<br />
Press the black but<strong>to</strong>n for 2 sec. after turning off all<br />
of SIP switch.<br />
Completed.<br />
Copyright ©2007 <strong>LG</strong> Electronics. Inc. All right reserved.<br />
Only for training and service purposes<br />
Don’t Perform Sensor Checking<br />
No<br />
Note 3)<br />
Yes<br />
Note 4)<br />
- 34 -<br />
Note<br />
1. Sensor checking function is used with Refrigerant<br />
Checking and Refrigerant Au<strong>to</strong> Charging.<br />
2. Check abnormal sensor<br />
3. It is displayed at the LED on the main PCB at each step.<br />
4. Reference the sensor error in ** page.<br />
5. Refer <strong>to</strong> service manual about refrigerant au<strong>to</strong><br />
charging<br />
Caution<br />
1. Confirm au<strong>to</strong> addressing has been performed (Check<br />
installed number of IDU).<br />
2. The error can be displayed even if the sensor is<br />
normal according <strong>to</strong> installation and temperature<br />
condition. If error occurs, check the sensor and<br />
judge abnormality.<br />
Refrigerant Au<strong>to</strong> Charging<br />
Press the black but<strong>to</strong>n<br />
until '508' is displayed<br />
Refrigerant<br />
Au<strong>to</strong> Charging<br />
Refrigerant Checking<br />
Press the black but<strong>to</strong>n<br />
until '608' is displayed.<br />
Refrigerant<br />
Checking<br />
Note 1)<br />
<strong>LG</strong>E Internal Use Only
■ Sensor Check Error Code Display<br />
In case error occurs during sensor checking process, error display is as shown below.<br />
Following contents are displayed one after the other on the main PCB of master outdoor unit.<br />
Indoor sensor error :<br />
319<br />
Outdoor sensor error :<br />
309<br />
Displaying error content<br />
* 5 number of errors is displayed<br />
continuously and repeatedly.<br />
Displaying error content<br />
■ Indoor unit error display<br />
1.1st and 2nd number represents indoor unit number.<br />
2. Last number represents sensor.<br />
1: Pipe inlet temperature sensor<br />
2: Pipe outlet temperature sensor<br />
3: Air temperature sensor<br />
■ Displaying outdoor unit error<br />
1.1st and 2nd number represents error content(code).<br />
2.Last number represents outdoor unit number.<br />
1 : Master<br />
2 : Slave 1<br />
3 : Slave 2<br />
4 : Slave 3<br />
* Indoor unit number follows au<strong>to</strong> addressing number.<br />
1 Outdoor Air Temperature<br />
2 Heat Exchanger 1<br />
3 Heat Exchanger 2<br />
4 Inverter Compressor Discharge Temperature<br />
5 Constant Speed Compressor Discharge Temperature<br />
6 Suction Temperature<br />
7 Liquid Pipe Temperature<br />
8 SC pipe in<br />
9 SC pipe out<br />
10 High Pressure Sensor<br />
11 Low Pressure Sensor<br />
Copyright ©2007 <strong>LG</strong> Electronics. Inc. All right reserved.<br />
Only for training and service purposes<br />
- 35 -<br />
ex) Indoor unit No. 2 pipe inlet temperature sensor<br />
error<br />
ex) Outdoor master unit liquid pipe temperature<br />
sensor error<br />
ex) IDU No.2 pipe inlet temperature sensor error and master<br />
ODU suction temperature sensor, slave 3 high pressure<br />
sensor error<br />
Caution<br />
Function<br />
........<br />
1. Up <strong>to</strong> 5 number of errors is displayed continuously and<br />
repeatedly. In case 5 number of errors occurs, again<br />
perform sensor checking after solving errors.<br />
2. IDU in which error occurred operates air circulation mode.<br />
<strong>LG</strong>E Internal Use Only
Function<br />
4.4 Refrigerant Au<strong>to</strong> Charging<br />
This function charges appropriate amount of refrigerant au<strong>to</strong>matically through cycle operation.<br />
It can be used when refrigerant amount Isn't certain because of SVC and leakage.<br />
Main PCB<br />
SW01S<br />
Main PCB<br />
SW01B<br />
SW02B<br />
Main PCB<br />
SW01V<br />
Main PCB<br />
SW01V<br />
Main PCB<br />
SW01V<br />
Start<br />
Wait for 3 min. after power reset<br />
Set the Dip S/W.<br />
Refrigerant Au<strong>to</strong> Changing : 1,2,7 ON<br />
Press the black but<strong>to</strong>n on main PCB.<br />
( Press until ‘508’ is displayed )<br />
Press the black but<strong>to</strong>n on main PCB.<br />
IDU runs with cooling mode In designated order.<br />
Is it necessary <strong>to</strong><br />
charge refrigerant?<br />
No<br />
Press the black but<strong>to</strong>n for 2 sec. after turning off<br />
all of dip S/W.<br />
Copyright ©2007 <strong>LG</strong> Electronics. Inc. All right reserved.<br />
Only for training and service purposes<br />
- 36 -<br />
Yes<br />
IDU and ODU are turned off when Au<strong>to</strong> Charging<br />
is completed. Close the valve.<br />
Press the black but<strong>to</strong>n<br />
Completed.<br />
Note<br />
1. After installing the refrigerant charging<br />
device as shown below in figure,<br />
open the valve.<br />
2. In case air temperature is out of guaranteed<br />
temperature, it may end without performing<br />
au<strong>to</strong> charging.<br />
3. Refrigerant Charging Time may change<br />
according <strong>to</strong> the charging amount.<br />
(Refrigerant Charging Time : about 3 min/kg)<br />
Press the black but<strong>to</strong>n<br />
Refrigerant Au<strong>to</strong><br />
Charging Process<br />
*1)<br />
*2)<br />
<strong>LG</strong>E Internal Use Only
Liquid Pipe<br />
Gas Pipe<br />
Procedure<br />
1. Arrange manifold,capillary assembly, refrigerant vessel and scale<br />
2. Connect manifold <strong>to</strong> the gas pipe service valve of ODU as shown in the figure.<br />
3. Connect manifold and Capillary tube.<br />
Use designated capillary assembly only.<br />
If designated capillary assembly isn't used, the system may get damaged.<br />
4. Connect capillary and refrigerant vessel.<br />
5. Purge hose and manifold.<br />
6. After Is displayed, open the valve and charge the refrigerant<br />
Copyright ©2007 <strong>LG</strong> Electronics. Inc. All right reserved.<br />
Only for training and service purposes<br />
manifold<br />
Capillary Assembly<br />
■ Error contents about au<strong>to</strong> refrigerant charging function<br />
1. : Temperature Range Error (In case that IDU or ODU is out of range)<br />
2. : Low Pressure Descent Error (In case the system runs at low pressure limit for over 10 minutes)<br />
CAUTION<br />
1. Guaranteed temperature range (Error will occur if temperature is out of range)<br />
IDU : 20~32°C<br />
ODU : 0~43°C<br />
2. For refrigerant charging, use designated device only. (Capillary Assem Set)<br />
3. Set the IDU wired remote controller temperature sensing mode as IDU<br />
4. Be careful that IDU should not be thermo off.<br />
- 37 -<br />
Function<br />
3. : Judging rapid refrigerant inflow ( In case the liquid refrigerant flows in because of not using designated<br />
Capillary Assembly)<br />
4. : Instability Error( In case the high/low pressure target doesn't get satisfied for some time<br />
after the starting operation)<br />
<strong>LG</strong>E Internal Use Only
Function<br />
4.5 Refrigerant Checking Function<br />
1. This function charges appropriate amount of refrigerant au<strong>to</strong>matically through cycle operation.<br />
2. This function judges refrigerant leakage and overcharging.<br />
3. It can be used with refrigerant au<strong>to</strong> charging function.<br />
Main<br />
PCB<br />
SW01S<br />
Main<br />
PCB<br />
SW01B<br />
SW02B<br />
Main<br />
PCB<br />
SW01V<br />
Main<br />
PCB<br />
SW01V<br />
Start<br />
Wait for 3 min. after power reset<br />
Set the Dip S/W.<br />
Refrigerant Checking : 1,2,7,14 ON<br />
Press the black but<strong>to</strong>n on main PCB.<br />
( Press until ‘608’ is displayed )<br />
Press the black but<strong>to</strong>n on main PCB<br />
IDU runs with cooling mode in order.<br />
Excess of<br />
Refrigerant<br />
Main<br />
PCB<br />
SW01V<br />
Judging<br />
Refrigerant<br />
Amount<br />
Scarcity of<br />
Refrigerant<br />
IDU, ODU are turned off<br />
Press the black but<strong>to</strong>n on main PCB<br />
Press the black but<strong>to</strong>n for 2 sec. after<br />
turning off all of dip S/W.<br />
Completed<br />
Copyright ©2007 <strong>LG</strong> Electronics. Inc. All right reserved.<br />
Only for training and service purposes<br />
Impossible<br />
To Judge<br />
Note<br />
1. In case air temperature is out of guaranteed<br />
temperature, refrigerant checking function may end<br />
without performing refrigerant checking. Use<br />
guaranteed temperature range only.<br />
2. During the process of judging refrigerant amount, if<br />
the cycle isn't stable, refrigerant checking function<br />
may end without performing refrigerant checking.<br />
- 38 -<br />
Note<br />
Note 1)<br />
<strong>LG</strong>E Internal Use Only
CAUTION<br />
1. Guaranteed Temperature range(Error occurs out of guaranteed temperature range)<br />
IDU : 20~32°C (buffer ±1°C)<br />
ODU : 10~38°C (buffer ±1°C)<br />
2. Set IDU wired remote controller temperature sensor setting as 'IDU'.<br />
3. Make certain that IDU doesn't run with thermo off mode during operation.<br />
[ Error contents about au<strong>to</strong> refrigerant charging function ]<br />
1. : Temperature Range Error (In case that IDU or ODU is out of range)<br />
2. : System Unstable Error (In case, After 45 min operating the system, it does not be stable)<br />
Copyright ©2007 <strong>LG</strong> Electronics. Inc. All right reserved.<br />
Only for training and service purposes<br />
- 39 -<br />
Function<br />
How <strong>to</strong> Cope with Result of Refrigerant checking<br />
1. If the temperature is not in guaranteed Temperature range, the system will not execute Refrigerant checking<br />
and the system will be OFF.<br />
2. Excess of Refrigerant(619)<br />
After remove the 20% of calculated <strong>to</strong>tal refrigerant, recharge the refrigerant by using Refrigerant Au<strong>to</strong><br />
Charging Function.<br />
3. Scarcity of Refrigerant(629)<br />
Charge the refrigerant by using Refrigerant Au<strong>to</strong> Charging Function.<br />
4. Impossible <strong>to</strong> Judge(639)<br />
IF the system is not in order, check the other problem except refrigerant.<br />
<strong>LG</strong>E Internal Use Only
Function<br />
4.6 Pump Down<br />
This function gathers the refrigerant present in the system <strong>to</strong> ODU<br />
Use this function <strong>to</strong> s<strong>to</strong>re refrigerant of system in ODU for leakage or IDU replacement.<br />
Main PCB<br />
SW02B<br />
Main PCB<br />
SW01V<br />
Close liquid SVC v/v of each unit.<br />
Open gas SVC v/v of each unit.<br />
Power Reset<br />
after Master Unit Dip switch No.10 ON<br />
Note 2)<br />
Low pressure < 229kpa<br />
Main PCB<br />
SW02B<br />
Press the black but<strong>to</strong>n<br />
All IDU cooling operation<br />
Satisfy low<br />
pressure target?<br />
Yes<br />
IDU, ODU OFF<br />
Power reset after Dop switch No.10 off<br />
Copyright ©2007 <strong>LG</strong> Electronics. Inc. All right reserved.<br />
Only for training and service purposes<br />
Pump down completed<br />
Press the black but<strong>to</strong>n<br />
- 40 -<br />
Note 1)<br />
ODU SVC V/V Setting<br />
Close Open<br />
Ball Valve(Liquid Pipe)<br />
Elbow<br />
Ball Valve(Gas Pipe)<br />
ODU SVC V/V Setting<br />
Close Close<br />
Ball Valve(Liquid Pipe)<br />
[Note]<br />
If is displayed, close gas SVC V/V of all ODU immediately.<br />
If low pressure descends below 229 kPa, the system turns off au<strong>to</strong>matically. Close the gas SVC V/V immediately.<br />
Caution<br />
1.Use pump down function within guaranteed temperature range<br />
IDU : 20~32°C<br />
ODU : 5~40°C<br />
2. Make certain that IDU doesn't run with thermo off mode during operation<br />
3. Maximum operation time of pump down function is 30 min.<br />
(in case low pressure doesn't go down)<br />
4. Press black+red but<strong>to</strong>n during operation <strong>to</strong> end pump down.(IDU,ODU off)<br />
No<br />
Elbow<br />
Ball Valve(Gas Pipe)<br />
<strong>LG</strong>E Internal Use Only
4.7 Pump Out<br />
This function gathers the refrigerant <strong>to</strong> other ODU and IDU.<br />
Use this function in case of compressor failure, ODU parts defect, leakage.<br />
Main PCB<br />
SW01B<br />
SW02B<br />
Main PCB<br />
SW01V<br />
Close liquid SVC V/V of each unit.<br />
Open gas SVC V/V of each unit.<br />
Close high/low pressure common pipe<br />
of corresponding ODU<br />
Power reset after Dip switch setting of ODU<br />
General case: No.10,14 on<br />
Inv Compressor failure:No.3,10,14 on<br />
Note 2)<br />
Low pressure > 229kpa<br />
Main PCB<br />
SW02V<br />
SW01V<br />
Press the black but<strong>to</strong>n<br />
All IDU heating operation<br />
Satisfy low pressure target?<br />
Yes<br />
IDU, ODU OFF<br />
Copyright ©2007 <strong>LG</strong> Electronics. Inc. All right reserved.<br />
Only for training and service purposes<br />
Pump out completed<br />
Power reset after Dip switch No.(3), 10, 14 off<br />
No<br />
Press the black but<strong>to</strong>n<br />
- 41 -<br />
Note 1)<br />
ODU SVC V/V Setting<br />
Close Open<br />
Ball Valve(Liquid Pipe)<br />
Elbow<br />
Ball Valve(Gas Pipe)<br />
ODU SVC V/V Setting<br />
Close Close<br />
Ball Valve(Liquid Pipe)<br />
[Note]<br />
If is displayed, close gas SVC V/V of all ODU immediately.<br />
If low pressure descends below 229 kPa, the system turns off au<strong>to</strong>matically. Close gas SVC V/V immediately.<br />
Caution<br />
1.Use pump out function within guaranteed temperature range<br />
IDU : 10~30°C<br />
ODU : 5~40°C<br />
2. Make certain that IDU doesn't run with thermo off mode during operation<br />
3. Pump out function takes 2~5 min. after compressor start.<br />
Make certain that IDU doesn't run with thermo off mode during operation<br />
(in case low pressure doesn't go down)<br />
4. Press black+red but<strong>to</strong>n during operation <strong>to</strong> end pump out.(IDU,ODU off)<br />
Elbow<br />
Ball Valve(Gas Pipe)<br />
Function<br />
<strong>LG</strong>E Internal Use Only
Function<br />
■ Example. Slave2 ODU Inv Comp failure<br />
Heating mode<br />
Slave2<br />
Comp failure unit<br />
gas<br />
pipe<br />
liquid<br />
pipe<br />
1. Close liquid pipe and common pipe of the unit for pump out operation.<br />
2. Operate pump out<br />
3. Close gas pipe of unit after completion<br />
4. End pump out<br />
5. Close common pipe of no.1,2.<br />
6. Eliminate refrigerant in common pipe after opening the common pipe of corresponding ODU.<br />
Replace compressor and perform vacuum.<br />
7. Add the refrigerant with au<strong>to</strong> charging function<br />
Copyright ©2007 <strong>LG</strong> Electronics. Inc. All right reserved.<br />
Only for training and service purposes<br />
Heating mode<br />
Slave1<br />
gas<br />
pipe<br />
- 42 -<br />
liquid<br />
pipe<br />
Heating mode<br />
Master<br />
gas<br />
pipe<br />
liquid<br />
pipe<br />
<strong>LG</strong>E Internal Use Only
4.8 Au<strong>to</strong> Back Up Function_Inverter compressor<br />
This function allows the system <strong>to</strong> operate in case of inverter compressor failure by backing up compressor<br />
au<strong>to</strong>matically.<br />
SVC can be asked by displaying error <strong>to</strong> the cus<strong>to</strong>mer every 6 hours.<br />
Caution<br />
Operation<br />
1. Request SVC immediately if error occurs.<br />
2. Au<strong>to</strong> back up is set up <strong>to</strong> 1 inverter Comp<br />
3. If Inverter Comp Au<strong>to</strong> Back up starts, error displays for 10 min. every 6 hours.<br />
4. Error displays continuously at the corresponding ODU.<br />
Copyright ©2007 <strong>LG</strong> Electronics. Inc. All right reserved.<br />
Only for training and service purposes<br />
Inverter compressor failure<br />
(NO.21,22,26,27 error occur)<br />
INV Comp Au<strong>to</strong> Back up Operation<br />
IDU,ODU display error for 10 min.<br />
IDU remote controller error clear<br />
IDU operation possible<br />
Timer > 6hr<br />
Yes<br />
Example) Slave1 Unit INV Comp start failure error occur<br />
ODU unit<br />
Error number<br />
- 43 -<br />
No<br />
Function<br />
<strong>LG</strong>E Internal Use Only
Function<br />
4.9 Au<strong>to</strong> Back Up Function_constant speed compressor<br />
This function allows the system <strong>to</strong> operate in case of constant speed compressor failure<br />
by backing up compressor au<strong>to</strong>matically.<br />
Caution<br />
Operation<br />
Constant speed comp failure<br />
Constant speed Comp Au<strong>to</strong> Backup<br />
Error Display 173+Unit No<br />
30min delay<br />
Operation possible<br />
1. Request SVC immediately if error occurs<br />
Copyright ©2007 <strong>LG</strong> Electronics. Inc. All right reserved.<br />
Only for training and service purposes<br />
- 44 -<br />
ODU Main PCB<br />
Display<br />
Error clear IDU,ODU off<br />
Example) Slave1 Unit constant speed Comp failure(No.173)<br />
ODU<br />
Error number<br />
Constant speed comp<br />
permanent back up starts<br />
<strong>LG</strong>E Internal Use Only
4.10 Night Low Noise Function<br />
In cooling mode, this function makes the ODU fan operate at low RPM <strong>to</strong> reduce the fan noise of ODU at night<br />
which has low cooling load.<br />
Note 1)<br />
Caution<br />
Copyright ©2007 <strong>LG</strong> Electronics. Inc. All right reserved.<br />
Only for training and service purposes<br />
Max. RPM setting method<br />
Dip S/W No.12+14 ON<br />
Main PCB Power Reset<br />
STEP 1: Max. RPM =510<br />
Black but<strong>to</strong>n 1 time + red but<strong>to</strong>n 1 time<br />
STEP 2: Max. RPM = 450<br />
Black but<strong>to</strong>n 2 times + red but<strong>to</strong>n 1 time<br />
STEP 3: Max. RPM = 400<br />
Black but<strong>to</strong>n 3 times + red but<strong>to</strong>n 1 time<br />
Setting Complete<br />
Night Low Noise Start<br />
8 hours after max. ODU temp. sensing,<br />
Operates with setting RPM<br />
Night Low Noise End<br />
9 hours after Night Low Noise function<br />
start, the function ends au<strong>to</strong>matically.<br />
1. Request installer <strong>to</strong> set the function during installation.<br />
2. In case the function is not used, set the dip S/W OFF and reset the power.<br />
3. If ODU RPM changes, cooling capacity may go down.<br />
[Note]<br />
1. Select appropriate RPM referencing noise table.<br />
- 45 -<br />
Master ODU<br />
SW01B<br />
Master ODU<br />
SW01S<br />
SW01V<br />
SW02V<br />
Function<br />
<strong>LG</strong>E Internal Use Only
Function<br />
Flow chart<br />
End<br />
Timer(A) > 10min<br />
Yes<br />
Timer(A)=0<br />
T_out ≥ T_max<br />
Timer(B) ≥ 8hr<br />
Start<br />
No<br />
Yes<br />
Tmax = 0<br />
Timer(B)=0<br />
Timer(C) ≥ 9hr<br />
End<br />
No<br />
Timer(C)= 0<br />
Copyright ©2007 <strong>LG</strong> Electronics. Inc. All right reserved.<br />
Only for training and service purposes<br />
Yes<br />
No<br />
No<br />
Start Condition Setting<br />
- 46 -<br />
Timer(A) increase<br />
Timer(B) increase<br />
T_max=T_out<br />
Timer(B)=0<br />
End Condition Setting<br />
Step = 1<br />
Step = 2<br />
Step = 3<br />
Error<br />
Timer(C) increase<br />
RPM_max=510<br />
RPM_max=450<br />
RPM_max=400<br />
<strong>LG</strong>E Internal Use Only
4.11 Vacuum Mode<br />
This function is used for creating vacuum in the system after compressor replacement, ODU parts replacement<br />
or IDU addition/replacement.<br />
Main PCB<br />
SW01S<br />
Main PCB<br />
SW02B<br />
Main PCB<br />
SW01V<br />
ODU power reset<br />
Master Main PCB D/W ON ( No.11,14)<br />
Press the black but<strong>to</strong>n Main PCB (5 sec.)<br />
Vacuum mode setting<br />
ODU V/V OPEN<br />
Main Lev, SC Lev OPEN<br />
IDU Lev OPEN<br />
4.12 Static pressure compensation mode<br />
This function secures the air flow rate of ODU, in case static pressure has been applied like using duct at fan<br />
discharge of ODU.<br />
■ Static pressure compensation dip S/W setting method<br />
High static pressure mode (Max. RPM 930) : Master ODU Main PCB SW02B NO.13 Dip S/W<br />
Low static pressure mode (Max. RPM 900) : Master ODU Main PCB SW02B NO.12 Dip S/W<br />
Copyright ©2007 <strong>LG</strong> Electronics. Inc. All right reserved.<br />
Only for training and service purposes<br />
Vacuum mode setting method Vacuum mode cancellation method<br />
Caution<br />
ODU operation s<strong>to</strong>ps during vacuum mode. Compressor can't operate.<br />
Static pressure compensation mode setting<br />
method<br />
Dip SW setting<br />
High static pressure:No. 13<br />
Low static pressure:No.12<br />
Power Reset<br />
Static pressure compensation mode is set<br />
- 47 -<br />
Master Main PCB D/W OFF( No.11,14)<br />
Power Reset<br />
Vacuum Mode cancellation<br />
Static pressure compensation mode cancellation<br />
method<br />
Dip SW OFF<br />
Power Reset<br />
Static pressure compensation mode is cancelled<br />
Function<br />
<strong>LG</strong>E Internal Use Only
Function<br />
4.13 Black Box Function<br />
This function saves data immediately before the error occurs in ODU main PCB, and thus making error analysis<br />
cause possible.<br />
Copyright ©2007 <strong>LG</strong> Electronics. Inc. All right reserved.<br />
Only for training and service purposes<br />
Data Loading Method<br />
IDU, ODU s<strong>to</strong>p<br />
Press the black but<strong>to</strong>n (5 sec.)<br />
EEPROM ➠ Main Micom data Loading<br />
Yellow LED(LED01C) s<strong>to</strong>ps when data is loading<br />
After completion, it is starts blinking (about 20 sec.).<br />
EEPROM data save <strong>to</strong> PC by using<br />
in <strong>LG</strong>MV<br />
■ Saving process : Making Data ➠ Save EEP data ➠ data saving place select ➠ file save<br />
- 48 -<br />
<strong>LG</strong>E Internal Use Only
Part 3<br />
PCB Setting and Test Run<br />
Copyright ©2007 <strong>LG</strong> Electronics. Inc. All right reserved.<br />
Only for training and service purposes<br />
- 49 -<br />
<strong>LG</strong>E Internal Use Only
Test Run<br />
1<br />
2<br />
3<br />
4<br />
Test Run<br />
1. Checks Before Test Run<br />
Check <strong>to</strong> see whether there is any refrigerant leakage, and slack of power or transmission cable.<br />
Confirm that 500 V megger shows 2.0 MΩ or more between power supply terminal block and ground.<br />
Do not operate in the case of 2.0 MΩ or less.<br />
NOTE: Never carry out megaohm check over terminal control board. Otherwise the control board<br />
would be broken.<br />
Immediately after mounting the unit or after leaving it turned off for an extended length of time,<br />
the resistance of the insulation between the power supply terminal board and the ground may<br />
decrease <strong>to</strong> approx. 2 MΩ as a result of refrigerant accumulating in the internal compressor.<br />
If the insulation resistance is less than 2 MΩ, turning on the main power supply and energizing<br />
the crankcase heater for more than 6 hours will cause the refrigerant <strong>to</strong> evaporate, increasing<br />
the insulation resistance.<br />
Check if high/low pressure common pipe, liquid pipe and gas pipe valves are fully opened.<br />
NOTE: Be sure <strong>to</strong> tighten caps.<br />
Check if there are any problems in au<strong>to</strong>matic addressing or not:<br />
Check and confirm that there are no error messages in the display of indoor units or remote controls<br />
and LED in outdoor units.<br />
CAUTION<br />
when cutting main power of the <strong>Multi</strong> V<br />
• Always apply main power of the outdoor unit during use of product<br />
(cooling season/heating season).<br />
• Always apply power before 6 hours <strong>to</strong> heat the crank case heater where performing test run after<br />
installation of product. It may result in burning out of the compressor if not preheating the crank<br />
case with the electrical heater for more than 6 hours.(In case of the outdoor temperature below 10°C)<br />
• When operating the unit after powering off, au<strong>to</strong>matically run in<strong>to</strong> in the preheat mode for 3 hours<br />
and "PH" is indicated on the outdoor unit 7-Segment.<br />
CAUTION<br />
Preheat of compressor<br />
• Start preheat operation for 3 hours after supplying main power.<br />
• In case that the outdoor temperature is low, be sure <strong>to</strong> supply power 6 hours before operation so<br />
that the heater is heated(insufficient heating may cause damage of the compressor.)<br />
Copyright ©2007 <strong>LG</strong> Electronics. Inc. All right reserved.<br />
Only for training and service purposes<br />
- 50 -<br />
<strong>LG</strong>E Internal Use Only
2. How <strong>to</strong> cope with Test Run abnormality<br />
The phenomena from main component failure<br />
Compressor<br />
Outdoor<br />
fan<br />
Outdoor<br />
EEV<br />
Not operating<br />
S<strong>to</strong>p during running<br />
Abnormal noise<br />
during running<br />
High pressure error<br />
at cooling<br />
Heating failure, frequent<br />
defrosting<br />
No operating sound<br />
at applying power<br />
Heating failure,<br />
frozen outdoor heat<br />
exchanger part<br />
Low pressure error<br />
or discharge temperature<br />
error<br />
Copyright ©2007 <strong>LG</strong> Electronics. Inc. All right reserved.<br />
Only for training and service purposes<br />
Mo<strong>to</strong>r insulation broken<br />
Strainer clogged<br />
Oil leakage<br />
Mo<strong>to</strong>r insulation failure<br />
R-S-T misconnection<br />
Mo<strong>to</strong>r failure,<br />
bad ventilation around<br />
outdoor heat exchanger<br />
Bad connec<strong>to</strong>r contact<br />
Coil failure<br />
EEV clogged<br />
EEV clogged<br />
- 51 -<br />
Check resistance between terminals and<br />
chassis<br />
Change strainer<br />
Check oil amount after opening oil port<br />
Check resistance between terminals and<br />
chassis<br />
Check compressor R-S-T connection<br />
Test Run<br />
Component Phenomenon Cause Check method and Trouble shooting<br />
Check the outdoor fan operation after being<br />
turned the outdoor units off for some time.<br />
Remove obstacles around the outdoor units<br />
Check connec<strong>to</strong>r<br />
Check resistance between terminals<br />
Service necessary<br />
Service necessary<br />
When system fault occurs, the error code is displayed at indoor unit display or remote control display, the trouble<br />
shooting guide is in the service manual<br />
• When CH05/53/11 ERROR occurs, check if au<strong>to</strong>-addressing has done and communication wiring is ok.<br />
<strong>LG</strong>E Internal Use Only
Test Run<br />
3. DIP Switch Setting<br />
3.1 Location of setting Switch<br />
Copyright ©2007 <strong>LG</strong> Electronics. Inc. All right reserved.<br />
Only for training and service purposes<br />
Main PCB<br />
- 52 -<br />
SW01B<br />
(DIP S/W)<br />
SW02B<br />
(DIP S/W)<br />
7 - Segment<br />
SW02V<br />
Au<strong>to</strong> addressing<br />
<strong>LG</strong>E Internal Use Only
■ Checking according <strong>to</strong> dip switch setting<br />
1. You can check the setting values of the Master outdoor unit from the 7 segment LED.<br />
The dip switch setting should be changed when the power is OFF.<br />
2. It checks whether the input is properly performed without the bad contact of the dip switch or not<br />
■ Checking the setting of the Master unit<br />
The number is sequentially appeared at the 7 segment in 5 seconds after applying the power. This<br />
number represents the setting condition. (For example, represents R410A 30HP)<br />
Master model code ➔ Slave1 model code ➔ Slave2 model code ➔ <strong>to</strong>tal capacity ➔ 2 ➔ 25 ➔ 41<br />
1 ~255 : Master model code<br />
} 1 ~255 : Slave1 model code<br />
1 ~255 : Slave2 model code<br />
5~48HP : HP number(sum of master capacity and slave capacity)<br />
No display : cooling only 2 : heat pump<br />
25 : normal<br />
22 : R22 model 41 : R410A model<br />
Example) 30Hp, R410A<br />
66 → 65 → 30 → 2 → 25 → 41<br />
Refer <strong>to</strong> table code<br />
CAUTION<br />
Product may not properly operate if the relevant DIP switch is not properly setup.<br />
Model Code<br />
Model Code Unit (HP) Unit Ref.<br />
60 5<br />
61 6<br />
62 8<br />
63 10<br />
64 12<br />
65 14<br />
66 16<br />
Master &<br />
Slave<br />
Copyright ©2007 <strong>LG</strong> Electronics. Inc. All right reserved.<br />
Only for training and service purposes<br />
R410A<br />
- 53 -<br />
Test Run<br />
<strong>LG</strong>E Internal Use Only
Test Run<br />
■ Setting the DIP switch (SW03M)<br />
• Set the dip switch with the power turned off. If you change the setting when the power is on, the changed<br />
setting is not applied immediately. The changed setting is applied at the moment that the power is on.<br />
• Instant indoor unit checking, data display mode, and forced oil collecting operation are used when theunits<br />
are running. If you don't have <strong>to</strong> use those functions after using them, res<strong>to</strong>re the dip switch setting.<br />
1. Settings of main outdoor unit<br />
Function<br />
SW01B Setting<br />
Standard<br />
Short Pipe<br />
Length<br />
Long Pipe Length<br />
Longest Pipe<br />
Length<br />
Indoor Unit<br />
Forced Operation<br />
( Cooling )<br />
Indoor Unit<br />
Forced Operation<br />
( Heating )<br />
ON<br />
Copyright ©2007 <strong>LG</strong> Electronics. Inc. All right reserved.<br />
Only for training and service purposes<br />
1 2 3 4 5 6 7<br />
- 54 -<br />
ON<br />
SW02B Setting<br />
1 2 3 4 5 6 7<br />
1 2 3 4 5 6 7 8 9 10 11 12 13 14<br />
ON<br />
1 2 3 4 5 6 7<br />
ON<br />
1 2 3 4 5 6 7<br />
1 2 3 4 5 6 7 8 9 10 11 12 13 14<br />
ON<br />
1 2 3 4 5 6 7<br />
ON<br />
1 2 3 4 5 6 7<br />
1 2 3 4 5 6 7 8 9 10 11 12 13 14<br />
ON<br />
1 2 3 4 5 6 7<br />
ON<br />
1 2 3 4 5 6 7<br />
1 2 3 4 5 6 7 8 9 10 11 12 13 14<br />
ON<br />
1 2 3 4 5 6 7<br />
ON<br />
1 2 3 4 5 6 7<br />
1 2 3 4 5 6 7 8 9 10 11 12 13 14<br />
ON<br />
1 2 3 4 5 6 7<br />
ON<br />
1 2 3 4 5 6 7<br />
1 2 3 4 5 6 7 8 9 10 11 12 13 14<br />
ON<br />
1 2 3 4 5 6 7<br />
ON<br />
1 2 3 4 5 6 7<br />
1 2 3 4 5 6 7 8 9 10 11 12 13 14<br />
ON<br />
1 2 3 4 5 6 7<br />
ON<br />
1 2 3 4 5 6 7<br />
1 2 3 4 5 6 7 8 9 10 11 12 13 14<br />
Remarks<br />
<strong>LG</strong>E Internal Use Only
Function<br />
Dry Contact<br />
Snow<br />
Forced<br />
Defrosting<br />
Snow + Forced<br />
Defrosting<br />
Outdoor Unit Fan<br />
Low Static<br />
Pressure<br />
Compensation<br />
Outdoor Unit Fan<br />
High Static<br />
Pressure<br />
Compensation<br />
Night Low Noise<br />
Pump Down<br />
Forced Oil Return Return<br />
Vacuum Mode<br />
ON<br />
SW01B Setting<br />
Copyright ©2007 <strong>LG</strong> Electronics. Inc. All right reserved.<br />
Only for training and service purposes<br />
1 2 3 4 5 6 7<br />
- 55 -<br />
ON<br />
SW02B Setting<br />
1 2 3 4 5 6 7<br />
1 2 3 4 5 6 7 8 9 10 11 12 13 14<br />
ON<br />
1 2 3 4 5 6 7<br />
ON<br />
1 2 3 4 5 6 7<br />
1 2 3 4 5 6 7 8 9 10 11 12 13 14<br />
ON<br />
1 2 3 4 5 6 7<br />
ON<br />
1 2 3 4 5 6 7<br />
1 2 3 4 5 6 7 8 9 10 11 12 13 14<br />
ON<br />
1 2 3 4 5 6 7<br />
ON<br />
1 2 3 4 5 6 7<br />
1 2 3 4 5 6 7 8 9 10 11 12 13 14<br />
ON<br />
1 2 3 4 5 6 7<br />
ON<br />
1 2 3 4 5 6 7<br />
1 2 3 4 5 6 7 8 9 10 11 12 13 14<br />
ON<br />
1 2 3 4 5 6 7<br />
ON<br />
1 2 3 4 5 6 7<br />
1 2 3 4 5 6 7 8 9 10 11 12 13 14<br />
ON<br />
1 2 3 4 5 6 7<br />
ON<br />
1 2 3 4 5 6 7<br />
1 2 3 4 5 6 7 8 9 10 11 12 13 14<br />
ON<br />
1 2 3 4 5 6 7<br />
ON<br />
1 2 3 4 5 6 7<br />
1 2 3 4 5 6 7 8 9 10 11 12 13 14<br />
ON<br />
1 2 3 4 5 6 7<br />
ON<br />
1 2 3 4 5 6 7<br />
ON<br />
1 2 3 4 5 6 7<br />
1 2 3 4 5 6 7 8 9 10 11 12 13 14<br />
ON<br />
1 2 3 4 5 6 7<br />
1 2 3 4 5 6 7 8 9 10 11 12 13 14<br />
Remarks<br />
Test Run<br />
<strong>LG</strong>E Internal Use Only
Test Run<br />
2. Settings of slave outdoor unit<br />
Function<br />
SW01B Setting<br />
Slave 1<br />
Slave 2<br />
Slave 3<br />
Function<br />
Inv Back Up<br />
Unit Back Up<br />
Pump Out<br />
ON<br />
1 2 3 4 5 6 7<br />
Copyright ©2007 <strong>LG</strong> Electronics. Inc. All right reserved.<br />
Only for training and service purposes<br />
- 56 -<br />
ON<br />
SW02B Setting<br />
1 2 3 4 5 6 7<br />
1 2 3 4 5 6 7 8 9 10 11 12 13 14<br />
ON<br />
1 2 3 4 5 6 7<br />
ON<br />
1 2 3 4 5 6 7<br />
1 2 3 4 5 6 7 8 9 10 11 12 13 14<br />
ON<br />
1 2 3 4 5 6 7<br />
3. Settings of corresponding outdoor unit<br />
ON<br />
1 2 3 4 5 6 7<br />
1 2 3 4 5 6 7 8 9 10 11 12 13 14<br />
ON<br />
SW01B Setting<br />
1 2 3 4 5 6 7<br />
ON<br />
SW02B Setting<br />
1 2 3 4 5 6 7<br />
1 2 3 4 5 6 7 8 9 10 11 12 13 14<br />
ON<br />
1 2 3 4 5 6 7<br />
ON<br />
1 2 3 4 5 6 7<br />
1 2 3 4 5 6 7 8 9 10 11 12 13 14<br />
ON<br />
1 2 3 4 5 6 7<br />
ON<br />
1 2 3 4 5 6 7<br />
1 2 3 4 5 6 7 8 9 10 11 12 13 14<br />
Remarks<br />
Remarks<br />
<strong>LG</strong>E Internal Use Only
Replacement procedure for<br />
Compressor(ARUN50LT2 - ARUN480LT2)<br />
1. Replacement procedure for Compressor.................................58<br />
1.1 Replacement procedure......................................................58<br />
Copyright ©2007 <strong>LG</strong> Electronics. Inc. All right reserved.<br />
Only for training and service purposes<br />
- 57 -<br />
<strong>LG</strong>E Internal Use Only
Replacement procedure for Compressor(ARUN508T2-ARUN4808T2)<br />
Replacement procedure for Compressor(ARUN50LT2 - ARUN480LT2)<br />
1) Collect the refrigerant by using refrigerant recovery<br />
unit<br />
(Since the setting on outdoor unit PCB is required for<br />
refrigerant recovery, refer <strong>to</strong> the warming plate<br />
Precautions in service work attached on the switch<br />
box cover)<br />
2) Remove the sound insula<strong>to</strong>r mat covering the<br />
faulty compressor, and disconnect the power<br />
3) Disconnect the brazing sections of suction pipe<br />
and discharge pipe by using brazing <strong>to</strong>rch after the<br />
refrigerant has been collected completely.<br />
4) Remove equalizing pipe nut.<br />
5) Remove three bolts at cushion rubber section <strong>to</strong><br />
take out the faulty compressor outside the unit.<br />
6) Install the new compressor in the unit.(Be sure <strong>to</strong><br />
insert the cushion rubbers before tightening the<br />
fixing bolts of compressor.)<br />
7) Remove the rubber caps put on the suction and<br />
discharge pipe of the new compressor <strong>to</strong><br />
release.the sealing nitrogen gas.(Take note that oil<br />
may spout due <strong>to</strong> the pipe inside pressure if the<br />
plug put on the equalizing seat is removed before<br />
removing of rubber cap.)<br />
8) Fasten equalizing pipe with nut.(14 ~ 18N.m)<br />
9) Braze the suction and discharge pipe with brazing<br />
<strong>to</strong>rch <strong>to</strong> the compressor.<br />
Cut section<br />
10) Conduct air tight test <strong>to</strong> check the piping system<br />
is free from leakage.<br />
11) Connect power cable <strong>to</strong> the terminal board of<br />
compressor and cover the compressor with<br />
sound insula<strong>to</strong>r mat.<br />
12) Conduct vacuum drying.(Since the setting on outdoor<br />
unit PCB is required for vacuum drying, refer<br />
<strong>to</strong> the warning plate recautions in service work”<br />
attached on the switch box cover.)<br />
13) Charge refrigerant after the completion of vacuum<br />
drying, and check the function of compressor<br />
with cooling or heating operation.<br />
Copyright ©2007 <strong>LG</strong> Electronics. Inc. All right reserved.<br />
Only for training and service purposes<br />
- 58 -<br />
Discharge pipe<br />
Suction pipe<br />
Oil Return pipe<br />
Equalizing seat outlet<br />
<strong>LG</strong>E Internal Use Only
Part 4<br />
Trouble shooting guide<br />
Copyright ©2007 <strong>LG</strong> Electronics. Inc. All right reserved.<br />
Only for training and service purposes<br />
- 59 -<br />
<strong>LG</strong>E Internal Use Only
Trouble shooting guide<br />
1. The phenomena from main component failure ..............................61<br />
2. Checking Method for Key Components<br />
2.1 Compressor ........................................................................................62<br />
2.2 Fan Mo<strong>to</strong>r ............................................................................................63<br />
2.3 Electronic Expansion Valve...............................................................64<br />
2.4 Phase Bridge Diode Checking Method.............................................67<br />
2.5 Inverter IPM Checking Method ................................................................68<br />
2.6 Fan IPM Checking Method .......................................................................69<br />
2.7 UW1,UY2 chassis 2Fan ............................................................................69<br />
2.8 Fan IPM Checking Method .......................................................................70<br />
2.9 UY2,UV1 chassis 1Fan .............................................................................70<br />
2.10 Other ........................................................................................................71<br />
3. Self-diagnosis function .................................................................72<br />
Copyright ©2007 <strong>LG</strong> Electronics. Inc. All right reserved.<br />
Only for training and service purposes<br />
- 60 -<br />
<strong>LG</strong>E Internal Use Only
Copyright ©2007 <strong>LG</strong> Electronics. Inc. All right reserved.<br />
Only for training and service purposes<br />
- 61 -<br />
The phenomena from main component failure<br />
1. The phenomena from main component failure<br />
The phenomena from main component failure<br />
Component Phenomenon Cause Check method and Trouble shooting<br />
Compressor<br />
Outdoor<br />
fan<br />
Outdoor<br />
EEV<br />
Not operating<br />
S<strong>to</strong>p during running<br />
Abnormal noise<br />
during running<br />
High pressure error<br />
in cooling mode<br />
operation<br />
Heating failure, frequent<br />
defrosting<br />
No operation sound<br />
after switching ON<br />
the power supply<br />
Heating failure,<br />
frozen outdoor heat<br />
exchanger part<br />
Low pressure error<br />
or discharge temperature<br />
error<br />
Mo<strong>to</strong>r insulation broken<br />
Strainer clogged<br />
Oil leakage<br />
Mo<strong>to</strong>r insulation failure<br />
R-S-T misconnection<br />
Mo<strong>to</strong>r failure,<br />
bad ventilation around<br />
outdoor heat exchanger<br />
Bad connec<strong>to</strong>r contact<br />
Coil failure<br />
EEV clogged<br />
EEV clogged<br />
Check resistance between terminals and<br />
chassis<br />
Change strainer<br />
Check oil amount after opening oil port<br />
Check resistance between terminals and<br />
chassis<br />
Check compressor R-S-T connection<br />
Check the fan operation <strong>to</strong> confirm proper<br />
mo<strong>to</strong>r functioning. Switch OFF the outdoor<br />
unit and remove obstacles, if any, around<br />
the HEX. Check connec<strong>to</strong>r<br />
Check resistance between terminals<br />
Service necessary<br />
Service necessary<br />
When system fault occurs, the error code is displayed on the indoor unit display or remote control display. The<br />
trouble shooting guide is available in the service manual.<br />
• When CH05/53/11 ERROR occurs, check if au<strong>to</strong>-addressing has done and communication wiring is ok.<br />
<strong>LG</strong>E Internal Use Only
2. Checking Method for Key Fompornents<br />
2.1 Compressor<br />
Check and ensure in following order when error related with the compressor or error related with power occurs<br />
during operation:<br />
No. Checking Item Symp<strong>to</strong>m Countermeasure<br />
1<br />
2<br />
Is how long power on during<br />
operation?<br />
Does failure appears again<br />
when starting operation?<br />
Method <strong>to</strong> measure insulation<br />
resistance<br />
Figure 1.<br />
Method <strong>to</strong> measure coil<br />
resistance<br />
V<br />
Comp.<br />
Comp.<br />
U<br />
[Cautions when measuring voltage and current of inverter power circuit]<br />
Measuring values may differ depending on measuring <strong>to</strong>ols and measuring circuits since voltage, current in the<br />
power supply or output side of the inverter has no since waveform.<br />
Especially, output voltage changes when output voltage of the inverter has a pattern of pulse wave.<br />
In addition, measuring values appear largely differently depending on measuring <strong>to</strong>ols.<br />
1) If using a movable tester when checking that output voltage of the inverter is constant (when comparing relative<br />
voltage between lines), always use an analog tester. Especially exercise particular caution if the output<br />
frequency of the inverter is low, when using a movable tester, where change of measured voltage values is<br />
large between other lines, when virtually same values appear actually or where there is danger <strong>to</strong> determine<br />
that failure of the inverter occurred.<br />
2) You can use rectification voltmeter ( ) if using commercial frequency tester when measuring output values<br />
of the inverter (when measuring absolute values). Accurate measuring values cannot be obtained with a general<br />
movable tester (For analog and digital mode).<br />
Copyright ©2007 <strong>LG</strong> Electronics. Inc. All right reserved.<br />
Only for training and service purposes<br />
W<br />
Figure 2.<br />
pipe<br />
Mo<strong>to</strong>r<br />
Ω<br />
Mo<strong>to</strong>r<br />
Ω<br />
1) Power on for 12 hours or more<br />
2) Power on for 12 hours or less<br />
1) The compressor s<strong>to</strong>ps andsame<br />
error appears again.<br />
2) If output voltage of the inverter is<br />
stably output. *1<br />
3) If output voltage of the inverter is<br />
unstable or it is 0V.<br />
(When incapable of using a digital<br />
tester)<br />
- 62 -<br />
* Go <strong>to</strong> No.2.<br />
* Go <strong>to</strong> No.2 after applying<br />
power for designated time (12<br />
hours).<br />
* Check IMP may fail.<br />
* Check coil resis<strong>to</strong>r and insulation<br />
resis<strong>to</strong>r. If normal, restart<br />
the unit. If same symp<strong>to</strong>m<br />
occurs, replace the compressor.<br />
* Insulation resis<strong>to</strong>r: 2MW or<br />
more<br />
Coil resis<strong>to</strong>r:<br />
Inveter Constant<br />
U-V 0.35±7%Ω 1.96±7%Ω<br />
V-W 0.35±7%Ω 1.91±7%Ω<br />
W-U 0.35±7%Ω 1.99±7%Ω<br />
* Check the IPM.<br />
If the IPM is normal, replace<br />
the inverter board.<br />
* Check coil resis<strong>to</strong>r and insulation<br />
resis<strong>to</strong>r.<br />
<strong>LG</strong>E Internal Use Only
2.2 Fan Mo<strong>to</strong>r<br />
Checking Item Symp<strong>to</strong>m Countermeasure<br />
(1) The fan mo<strong>to</strong>r does not<br />
operate.<br />
Does failure appears<br />
again when starting<br />
operation?<br />
(2) Vibration of the fan<br />
mo<strong>to</strong>r is large.<br />
1) When power supply is<br />
abnormal<br />
2) For wrong wiring<br />
3) For failure of mo<strong>to</strong>r<br />
Copyright ©2007 <strong>LG</strong> Electronics. Inc. All right reserved.<br />
Only for training and service purposes<br />
4) For defective fuse<br />
5) For failure of circuit board<br />
- 63 -<br />
* Modify connection status in front of or at the rear of<br />
the breaker, or if the power terminal console is at<br />
frosting condition.<br />
* Modify the power supply voltage is beyond specified<br />
scope.<br />
* For following wiring.<br />
1. Check connection status.<br />
2. Check contact of the connec<strong>to</strong>r.<br />
3. Check that parts are firmly secured by tightening<br />
screws.<br />
4. Check connection of polarity.<br />
5. Check short circuit and grounding.<br />
* Measure winding resistance of the mo<strong>to</strong>r coils.<br />
Main outdoor unit: INV [19.0±7%Ω(75˚C)]<br />
Sub outdoor unit: Main [22.8±7%Ω(75˚C)]<br />
R1 [34.8±7%Ω(75˚C)]<br />
R2 [3.7±7%Ω(75˚C)]<br />
* Replace the fuse if there is defect (Fuse 800V<br />
30A).<br />
Replace the circuit board in following procedures if<br />
problems occur again when powering on and if<br />
there are no matters equivalent <strong>to</strong> items as specified<br />
in above 1) through 4).<br />
(Carefully check both connec<strong>to</strong>r and grounding<br />
wires when replacing the circuit board.)<br />
1. Replace only fan control boards.<br />
If starting is done, it means that the fan control<br />
board has defect.<br />
2. Replace both fan control board and the main<br />
board.<br />
If starting is done, it means that the main board<br />
has defect.<br />
3. If problems continue <strong>to</strong> occur even after countermeasure<br />
of No.1 and No.2, it means that both<br />
boards has defect.<br />
<strong>LG</strong>E Internal Use Only
Checking Method for Key Components<br />
2.3 Electronic Expansion Valve<br />
EEV<br />
M<br />
1 5 3<br />
Copyright ©2007 <strong>LG</strong> Electronics. Inc. All right reserved.<br />
Only for training and service purposes<br />
4<br />
6<br />
2<br />
ø5 Red<br />
White<br />
Yellow<br />
Orange<br />
Blue<br />
• Pulse signal output value and valve operation<br />
Output(ø) No.<br />
• Output pulse sequence<br />
ø4<br />
ø3<br />
ø2<br />
ø1<br />
- 64 -<br />
5<br />
4<br />
3<br />
2<br />
1<br />
DC 12V<br />
- In valve close state: 1 → 2 → 3 → 4 → 5 → 6 → 7 → 8 → 9 → 10 → 11 → 1<br />
- In valve open state: 11 → 10 → 9→ 8 → 7 → 6 → 5 → 4 → 3 → 2 → 1 → 11<br />
Driving<br />
circuit<br />
ø1 ON ON OFF OFF OFF OFF OFF ON ON ON OFF<br />
ø2 ON ON ON ON OFF OFF OFF ON ON ON OFF<br />
ø3 OFF OFF OFF ON ON ON OFF OFF OFF OFF OFF<br />
ø4 OFF OFF OFF OFF OFF ON ON ON ON ON OFF<br />
* 1. If EEV open angle does not change, all of output phase will be OFF<br />
2. If output phase is different or continuously in the ON state, mo<strong>to</strong>r will not operate smoothly and start<br />
vibrating.<br />
• EEV valve operation<br />
Valve<br />
open<br />
Angle<br />
Output state<br />
1 2 3 4 5 6 7 8 9 10 11<br />
close<br />
open<br />
pulse<br />
Full open<br />
1350 pulses<br />
ø4<br />
ø3<br />
ø2<br />
ø1<br />
- At power ON, open angle signal of 1400 pulses output<br />
and valve position is set <strong>to</strong><br />
If valve operates smoothly, no noise and vibration<br />
occurs and if valve is closed. noise occurs.<br />
- Noise from EEV can be confirmed by <strong>to</strong>uching the<br />
EEV surface with a screw driver and listening the<br />
EEV noise.<br />
- If liquid refrigerant is in EEV, the noise is lower.<br />
<strong>LG</strong>E Internal Use Only
• EEV Coil and body(Outdoor unit)<br />
Coil part Body<br />
• Remove and assemble the coil<br />
Copyright ©2007 <strong>LG</strong> Electronics. Inc. All right reserved.<br />
Only for training and service purposes<br />
Lead wire<br />
Remove Assemble<br />
A part<br />
- 65 -<br />
Checking Method for Key Components<br />
• Grip the A part tightly, and pull up coil part<br />
upward.<br />
When the coil part is removed or assembled,<br />
be careful not <strong>to</strong> bend the pipe of the body.<br />
<strong>LG</strong>E Internal Use Only
Checking Method for Key Components<br />
• EEV failure check method<br />
Failure mode Diagnosis Repair process Unit<br />
Microcomputer<br />
Driving circuit<br />
failure<br />
1.Disconnect the EEV connec<strong>to</strong>r form control board and<br />
connect testing LED<br />
2. Main power ON, pulse signal is out from EEV for 17 sec.<br />
If LEDs do not turn on, or are in on state continuously,<br />
then driving circuit is abnormal<br />
EEV locking 1.If EEV is locked, in no load state, the driving mo<strong>to</strong>r rotate,<br />
and clicking sound always occurs<br />
EEV Mo<strong>to</strong>r coil<br />
short or<br />
misconnection<br />
Full closing<br />
(valve leakage)<br />
1. Check the resistance between coil terminal<br />
(red-white, red-yellow, red-orange, red-blue)<br />
2. If the estimated resistance value is in 52 ± 3Ω<br />
then the EEV is normal<br />
1. Check the resistance between coil terminal<br />
(brown-white, brown-yellow, brown-orange, brown-blue)<br />
2. If the estimated resistance value is in 150 ± 10Ω<br />
then the EEV is normal<br />
1. Operate indoor unit with FAN mode and operate another<br />
indoor unit with COOLING mode<br />
2. Check indoor unit(FAN mode) liquid pipe temperature<br />
(from operation moni<strong>to</strong>r of outdoor unit control board)<br />
3. When fan rotate and EEV is fully closed, if there is any<br />
leakage, then the temperature is down<br />
Copyright ©2007 <strong>LG</strong> Electronics. Inc. All right reserved.<br />
Only for training and service purposes<br />
1K LED<br />
If estimated temperature is very low in comparison with<br />
suction temperature which is displayed at remote<br />
controller then the valve is not fully closed<br />
- 66 -<br />
Check and replace<br />
Indoor unit control<br />
board<br />
Indoor<br />
unit<br />
Replace EEV Indoor<br />
/ Outdoor<br />
unit<br />
Replace EEV Outdoor<br />
unit<br />
Replace EEV Indoor<br />
unit<br />
If the amount of<br />
leakage is much,<br />
Replace EEV<br />
Indoor<br />
unit<br />
<strong>LG</strong>E Internal Use Only
2.4 Phase Bridge Diode Checking Method<br />
Copyright ©2007 <strong>LG</strong> Electronics. Inc. All right reserved.<br />
Only for training and service purposes<br />
- 67 -<br />
Checking Method for Key Components<br />
Internal circuit diagram Appearance<br />
1. Wait until inverter PCB DC voltage gets discharged, after the main power switch off.<br />
2. Pull out all the connec<strong>to</strong>rs connected with 3 phase bridge diode.<br />
3. Set multi tester in diode mode.<br />
4. Measured value should be 0.4~0.7V measuring as below table.<br />
5. In case the measured value is different from the table, set multi tester <strong>to</strong> resistance mode and measure. If<br />
the value is small (0 Ω) or high (hundreds M Ω), PCB needs <strong>to</strong> be replaced.<br />
6. In case that bridge diode is damaged, check if inverter PCB assembly(IPM) is needed <strong>to</strong> be replaced.<br />
Tester terminal<br />
Diode terminal<br />
+ terminal: black(-) - terminal: red(+)<br />
R(~) : red(+) 0.4 V ~ 0.7 V -<br />
S(~) : red(+) 0.4 V ~ 0.7 V -<br />
T(~) : red(+) 0.4 V ~ 0.7 V -<br />
R(~) : black(-) - 0.4 V ~ 0.7 V<br />
S(~) : black(-) - 0.4 V ~ 0.7 V<br />
T(~) : black(-) - 0.4 V ~ 0.7 V<br />
✽ Red(+) and black(-) are the measuring terminals of multi tester.<br />
Caution<br />
• Check the electric parts of c/box, 10 minutes after switching off the main supply and<br />
checking DC voltage is discharged. Otherwise, there is chance of getting electric<br />
shock.<br />
• There is chance of electric shock by charged voltage.<br />
R<br />
S<br />
T<br />
<strong>LG</strong>E Internal Use Only
Checking Method for Key Components<br />
2.5 Inverter IPM Checking Method<br />
CN-P1<br />
CN-N1<br />
N terminal<br />
P terminal<br />
1. Wait until inverter PCB DC voltage is discharged after main power off.<br />
2. Pull out CN-P1, CN-N1 connec<strong>to</strong>rs and U,V,W COMP connec<strong>to</strong>r connected with the inverter PCB.<br />
3. Set multi tester <strong>to</strong> resistance mode.<br />
4. If the value between P and N terminal of IPM is short(0Ω) or open(hundreds MΩ), PCB needs <strong>to</strong> be<br />
replaced.(IPM damaged)<br />
5. In the measured value with resistance mode should be within 28K Ω ±10%.<br />
6. In case measured value is different from the table, PCB needs <strong>to</strong> be replaced.(PCB damaged).<br />
✽ Red(+) and black(-) are the measuring terminals of multi tester.<br />
Copyright ©2007 <strong>LG</strong> Electronics. Inc. All right reserved.<br />
Only for training and service purposes<br />
U terminal<br />
P terminal : black (-) N terminal : red (-)<br />
U terminal : red(+) 28K Ω ± 10% Open<br />
V terminal : red(+) 28K Ω ± 10% Open<br />
W terminal : red(+) 28K Ω ± 10% Open<br />
P terminal : red(+) N terminal : red (+)<br />
U terminal : black(-) Open 28K Ω ± 10%<br />
V terminal : black(-) Open 28K Ω ± 10%<br />
W terminal : black(-) Open 28K Ω ± 10%<br />
- 68 -<br />
V terminal<br />
W terminal<br />
<strong>LG</strong>E Internal Use Only
2.6 Fan IPM Checking Method<br />
2.7 UW1 chassis(2 Fan)<br />
Copyright ©2007 <strong>LG</strong> Electronics. Inc. All right reserved.<br />
Only for training and service purposes<br />
- 69 -<br />
Checking Method for Key Components<br />
1. Wait until inverter PCB DC voltage gets discharged after the main power switch off.<br />
2. Pull out DC connec<strong>to</strong>r and U,V,W fan mo<strong>to</strong>r connec<strong>to</strong>r connected with fan PCB<br />
3. Set multi tester in resistance mode .<br />
4. If the value between P and N terminal of IPM is small (0Ω) or tens KΩ, PCB needs <strong>to</strong> be replaced (IPM damaged).<br />
5. In case the measured value is open(hundreds KΩ), measure resistance mode, and the value should be within<br />
35 KΩ ±10% as shown below table.<br />
6. If the measured value is different from the value given in the table, PCB is needs <strong>to</strong> be replaced.<br />
P terminal : black (-) N terminal : red (-)<br />
U terminal : red(+) 35K Ω ± 10% Open<br />
V terminal : red(+) 35K Ω ± 10% Open<br />
W terminal : red(+) 35K Ω ± 10% Open<br />
P terminal : red(+) N terminal : red (+)<br />
U terminal : black(-) Open 35K Ω ± 10%<br />
V terminal : black(-) Open 35K Ω ± 10%<br />
W terminal : black(-) Open 35K Ω ± 10%<br />
✽ Red(+) and black(-) are the measuring terminals of multi tester.<br />
U terminal V terminal W terminal<br />
P terminal<br />
U,V,W connec<strong>to</strong>r<br />
N terminal<br />
U terminal V terminal W terminal<br />
DC connec<strong>to</strong>r<br />
U,V,W connec<strong>to</strong>r<br />
P terminal<br />
N terminal<br />
<strong>LG</strong>E Internal Use Only
Checking Method for Key Components<br />
2.8 Fan IPM Checking Method<br />
1. Wait until inverter PCB DC voltage gets discharged after the main power switch off.<br />
2. Pull out DC connec<strong>to</strong>r and U,V,W fan mo<strong>to</strong>r connec<strong>to</strong>r connected with fan PCB<br />
3. Set multi tester in resistance mode .<br />
4. If the value between P and N terminal of IPM is small (0Ω) or tens KΩ, PCB needs <strong>to</strong> be replaced (IPM damaged).<br />
5. In case the measured value is open(hundreds KΩ), measure resistance mode, and the value should be within<br />
35 KΩ ±10% as shown below table.<br />
6. If the measured value is different from the value given in the table, PCB is needs <strong>to</strong> be replaced.<br />
2.9 UY2 chassis(2 Fan)<br />
Copyright ©2007 <strong>LG</strong> Electronics. Inc. All right reserved.<br />
Only for training and service purposes<br />
P terminal : black (-) N terminal : red (-)<br />
U terminal : red(+) 35K Ω ± 10% Open<br />
V terminal : red(+) 35K Ω ± 10% Open<br />
W terminal : red(+) 35K Ω ± 10% Open<br />
P terminal : red(+) N terminal : red (+)<br />
U terminal : black(-) Open 35K Ω ± 10%<br />
V terminal : black(-) Open 35K Ω ± 10%<br />
W terminal : black(-) Open 35K Ω ± 10%<br />
✽ Red(+) and black(-) are the measuring terminals of multi tester.<br />
P terminal<br />
U terminal<br />
V terminal<br />
U.V.W connec<strong>to</strong>r<br />
- 70 -<br />
W terminal<br />
N terminal<br />
DC connec<strong>to</strong>r<br />
<strong>LG</strong>E Internal Use Only
2.10 Other<br />
Copyright ©2007 <strong>LG</strong> Electronics. Inc. All right reserved.<br />
Only for training and service purposes<br />
- 71 -<br />
Checking Method for Key Components<br />
Electrolytic Guide of capaci<strong>to</strong>r check electrolytic and resis<strong>to</strong>r capaci<strong>to</strong>r for voltage and distribution resis<strong>to</strong>r for voltage distribution<br />
Caution<br />
1) Disconnect an terminal of voltage distribution resis<strong>to</strong>r from each DC link<br />
electrolytic capaci<strong>to</strong>r<br />
2) Set the multi meter <strong>to</strong> resistance mode, connect the probe <strong>to</strong> +,- terminal<br />
of the capaci<strong>to</strong>r. If the estimated resistance value is increase<br />
continuously without short(value is 0), then the resis<strong>to</strong>r is normal<br />
3) Set the multi meter <strong>to</strong> resistance mode, confirm that the resistance value<br />
of the resis<strong>to</strong>r is around 270 kOhm<br />
Check and replace inferior<br />
components<br />
In case that the control box is opened and before checking electrical parts,<br />
it should be checked that the LED 01Y turned off (wait 3 minutes after main power<br />
OFF), otherwise it may cause electrical shock.<br />
<strong>LG</strong>E Internal Use Only
Self-diagnosis function<br />
3. Self-diagnosis function<br />
Self-Diagnosis Function<br />
Error Indica<strong>to</strong>r<br />
• This function indicates types of failure in self-diagnosis and occurrence of failure for air condition.<br />
• Error mark is displayed on display window of indoor units and wired remote controller, and 7-segment LED of<br />
outdoor unit control board as shown in the table.<br />
• If more than two troubles occur simultaneously, lower number of error code is first displayed.<br />
• After error occurrence, if error is released, error LED is also released simultaneously.<br />
Error Display<br />
1st,2nd LED of 7-segment indicates error number, 3rd LED indicates unit number.<br />
Ex) 211 : No.21 error of master unit<br />
213 : No.21 error of slave2<br />
011 → 051 : No.105 error of master unit<br />
Indoor unit related error<br />
Outdoor unit related error<br />
Display Title Cause of Error<br />
0 1 - Air temperature sensor of indoor unit Air temperature sensor of indoor unit is open or short<br />
0 2 - Inlet pipe temperature sensor of indoor unit Inlet pipe temperature sensor of indoor unit is open or short<br />
0 3 -<br />
Transmission error : wired remote controller<br />
↔ indoor unit<br />
Failing <strong>to</strong> receive wired remote controller signal in indoor unit PCB<br />
0 4 - Drain pump<br />
Malfunction of drain pump<br />
0 5 -<br />
Transmission error : outdoor unit ↔ indoor<br />
unit<br />
Failing <strong>to</strong> receive outdoor unit signal in indoor unit PCB<br />
0 6 - Outlet pipe temperature sensor of indoor unit Outlet pipe temperature sensor of indoor unit is open or short<br />
0 7 - Different operation mode<br />
Operation mode between indoor unit and outdoor unit is different<br />
0 9 -<br />
Serial No.<br />
In case when the serial number marked on<br />
EEPROM of Indoor unit is 0 or FFFFFF<br />
1 0 -<br />
Poor fan mo<strong>to</strong>r operation<br />
Disconnecting the fan mo<strong>to</strong>r connec<strong>to</strong>r/Failure of indoor fan mo<strong>to</strong>r<br />
lock<br />
1 1 -<br />
Transmission error: indoor unit → main PCB<br />
of outdoor.<br />
When the addressing signal doesn't respond for 3mins. suddenly,<br />
while the indoor unit gets the calling signal from the outdoor unit,<br />
1<br />
Master Outdoor Unit Inverter Compressor<br />
IPM Fault<br />
Master Outdoor Unit Inverter Compressor Drive IPM Fault<br />
2 1<br />
2<br />
3<br />
Slave1 Outdoor Unit Inverter Compressor<br />
IPM Fault<br />
Slave2 Outdoor Unit Inverter Compressor IPM<br />
Fault<br />
Slave1 Outdoor Unit Inverter Compressor Drive IPM Fault<br />
Slave2 Outdoor Unit Inverter Compressor Drive IPM Fault<br />
4<br />
Slave3 Outdoor Unit Inverter Compressor IPM<br />
Fault<br />
Slave3 Outdoor Unit Inverter Compressor Drive IPM Fault<br />
1<br />
Inverter Board Input Over Current(RMS) of<br />
Master Outdoor Unit<br />
Master Outdoor Unit Inverter Board Input Current excess (RMS)<br />
2 2<br />
2<br />
3<br />
Inverter Board Input Over Current(RMS) of<br />
Slave1 Outdoor Unit<br />
Inverter Board Input Over Current(RMS) of<br />
Slave2 Outdoor Unit<br />
Slave1 Outdoor Unit Inverter Board Input Current excess (RMS)<br />
Slave2 Outdoor Unit Inverter Board Input Current excess (RMS)<br />
4<br />
Inverter Board Input Over Current(RMS) of<br />
Slave3 Outdoor Unit<br />
Slave3 Outdoor Unit Inverter Board Input Current excess (RMS)<br />
Copyright ©2007 <strong>LG</strong> Electronics. Inc. All right reserved.<br />
Only for training and service purposes<br />
- 72 -<br />
<strong>LG</strong>E Internal Use Only
Outdoor unit related error<br />
Display Title Cause of Error<br />
2 3<br />
2 4<br />
2 5<br />
2 6<br />
2 8<br />
2 9<br />
1<br />
2<br />
3<br />
4<br />
1<br />
2<br />
3<br />
4<br />
1<br />
2<br />
3<br />
4<br />
1<br />
2<br />
3<br />
4<br />
1<br />
2<br />
3<br />
4<br />
1<br />
2<br />
3<br />
4<br />
Master Outdoor Unit Inverter<br />
Compressor DC link Low Voltage<br />
Slave1 Outdoor Unit Inverter<br />
Compressor DC link Low Voltage<br />
Slave2 Outdoor Unit Inverter<br />
Compressor DC link Low Voltage<br />
Slave3 Outdoor Unit Inverter<br />
Compressor DC link Low Voltage<br />
Master Outdoor Unit High<br />
Pressure Switch<br />
Slave1 Outdoor Unit High<br />
Pressure Switch<br />
Slave2 Outdoor Unit High<br />
Pressure Switch<br />
Slave3 Outdoor Unit High<br />
Pressure Switch<br />
Master Outdoor Unit Input Voltage<br />
High/ Low Voltage<br />
Slave1 Outdoor Unit Input Voltage<br />
High/ Low Voltage<br />
Slave2 Outdoor Unit Input Voltage<br />
High/ Low Voltage<br />
Slave3 Outdoor Unit Input Voltage<br />
High/ Low Voltage<br />
Master Outdoor Unit Inverter<br />
Compressor Start Failure<br />
Slave1 Outdoor Unit Inverter<br />
Compressor Start Failure<br />
Slave2 Outdoor Unit Inverter<br />
Compressor Start Failure<br />
Slave3 Outdoor Unit Inverter<br />
Compressor Start Failure<br />
Master Outdoor Unit Inverter DC<br />
link High Voltage<br />
Slave1 Outdoor Unit Inverter DC<br />
link High Voltage<br />
Slave2 Outdoor Unit Inverter DC<br />
link High Voltage<br />
Slave3 Outdoor Unit Inverter DC<br />
link High Voltage<br />
Master Outdoor Unit Inverter<br />
Compressor Over Current<br />
Slave1 Outdoor Unit Inverter<br />
Compressor Over Current<br />
Slave2 Outdoor Unit Inverter<br />
Compressor Over Current<br />
Slave3 Outdoor Unit Inverter<br />
Compressor Over Current<br />
Copyright ©2007 <strong>LG</strong> Electronics. Inc. All right reserved.<br />
Only for training and service purposes<br />
- 73 -<br />
Self-diagnosis function<br />
DC charging is not performed at Master outdoor unit<br />
after starting relay turn on.<br />
DC charging is not performed at Slave1 outdoor unit<br />
after starting relay turn on.<br />
DC charging is not performed at Slave2 outdoor unit<br />
after starting relay turn on.<br />
DC charging is not performed at Slave3 outdoor unit<br />
after starting relay turn on.<br />
System is turned off by Master outdoor unit high pressure<br />
switch.<br />
System is turned off by slave1 outdoor unit high pressure<br />
switch.<br />
System is turned off by slave2 outdoor unit high pressure<br />
switch.<br />
System is turned off by slave3 outdoor unit high pressure<br />
switch.<br />
Master Outdoor Unit input voltage is over 487V or<br />
below 270V<br />
Slave1 Outdoor Unit input voltage is over 487V or<br />
below 270V<br />
Slave2 Outdoor Unit input voltage is over 487V or<br />
below 270V<br />
Slave3 Outdoor Unit input voltage is over 487V or<br />
below 270V<br />
The First Start Failure by Master Outdoor Unit Inverter<br />
Compressor Abnormality<br />
The First Start Failure by Slave1 Outdoor Unit Inverter<br />
Compressor Abnormality<br />
The First Start Failure by Slave2 Outdoor Unit Inverter<br />
Compressor Abnormality<br />
The First Start Failure by Slave3 Outdoor Unit Inverter<br />
Compressor Abnormality<br />
System is turned off by Master outdoor unit DC Voltage<br />
Over Charging<br />
System is turned off by Slave1 Outdoor unit DC<br />
Voltage Over Charging<br />
System is turned off by Slave2 Outdoor unit DC<br />
Voltage Over Charging<br />
System is turned off by Slave3 Outdoor unit DC<br />
Voltage Over Charging<br />
Master Outdoor Unit Inverter Compressor Fault OR<br />
Drive Fault<br />
Slave1 Outdoor Unit Inverter Compressor Fault OR<br />
Drive Fault<br />
Slave2 Outdoor Unit Inverter Compressor Fault OR<br />
Drive Fault<br />
Slave3 Outdoor Unit Inverter Compressor Fault OR<br />
Drive Fault<br />
<strong>LG</strong>E Internal Use Only
Self-diagnosis function<br />
Outdoor unit related error<br />
Display Title Cause of Error<br />
3 4<br />
3 5<br />
1<br />
3 2<br />
3 3<br />
3<br />
4<br />
1<br />
2<br />
3<br />
4<br />
1<br />
2<br />
3<br />
4<br />
1<br />
2<br />
3<br />
4<br />
Master Outdoor Unit Inverter<br />
Compressor High Discharge<br />
Temperature<br />
Slave1 Outdoor Unit Inverter<br />
Compressor High Discharge<br />
Temperature<br />
Slave2 Outdoor Unit Inverter<br />
Compressor Discharge High<br />
Temperature<br />
Slave3 Outdoor Unit Inverter<br />
Compressor High Discharge<br />
Temperature<br />
Master Outdoor Unit Constant<br />
Speed Compressor High<br />
Discharge Temperature<br />
Slave1 Outdoor Unit Constant<br />
Speed Compressor High<br />
Discharge Temperature<br />
Slave2 Outdoor Unit Constant<br />
Speed Compressor High<br />
Discharge Temperature<br />
Slave3 Outdoor Unit Constant<br />
Speed Compressor High<br />
Discharge Temperature<br />
High Pressure of Master Outdoor<br />
Unit<br />
High Pressure of Slave1 Outdoor<br />
Unit<br />
High Pressure of Slave2 Outdoor<br />
Unit<br />
High Pressure of Slave3 Outdoor<br />
Unit<br />
Low Pressure of Master Outdoor<br />
Unit<br />
Low Pressure of Slave1 Outdoor<br />
Unit<br />
Low Pressure of Slave2 Outdoor<br />
Unit<br />
Low Pressure of Slave3 Outdoor<br />
Unit<br />
Copyright ©2007 <strong>LG</strong> Electronics. Inc. All right reserved.<br />
Only for training and service purposes<br />
System is turned off by Master outdoor unit Inverter<br />
Compressor High Discharge Temperature<br />
System is turned off by Slave1 Outdoor unit Inverter<br />
Compressor High Discharge Temperature<br />
System is turned off by Slave2 Outdoor Unit Inverter<br />
Compressor High Discharge Temperature<br />
System is turned off by Slave3 Outdoor Unit Inverter<br />
Compressor High Discharge Temperature<br />
System is turned off by Master Outdoor Uunit Constant<br />
Speed High Discharge Temperature<br />
System is turned off by Slave1 Outdoor Unit Constant<br />
Speed High Discharge Temperature<br />
System is turned off by Slave2 Outdoor Unit Constant<br />
Speed High Discharge Temperature<br />
System is turned off by Slave3 Outdoor Unit Constant<br />
Speed High Discharge Temperature<br />
System is turned off by excessive increase of high<br />
pressure of Master outdoor unit<br />
System is turned off by excessive increase of high<br />
pressure of Slave1 outdoor unit<br />
System is turned off by excessive increase of high<br />
pressure of Slave2 outdoor unit<br />
System is turned off by excessive increase of high<br />
pressure of Slave3 outdoor unit<br />
System is turned off by excessive decrease of low<br />
pressure of Master outdoor unit<br />
System is turned off by excessive decrease of low<br />
pressure of Slave1 outdoor unit<br />
System is turned off by excessive decrease of low<br />
pressure of Slave2 outdoor unit<br />
System is turned off by excessive decrease of low<br />
pressure of Slave3 outdoor unit<br />
- 74 -<br />
<strong>LG</strong>E Internal Use Only
Outdoor unit related error<br />
Display Title Cause of Error<br />
4 0<br />
4 1<br />
4 2<br />
4 3<br />
4 4<br />
1<br />
2<br />
3<br />
4<br />
1<br />
2<br />
3<br />
4<br />
1<br />
2<br />
3<br />
4<br />
1<br />
2<br />
3<br />
4<br />
1<br />
2<br />
3<br />
4<br />
Master Outdoor Unit Inverter<br />
Compressor CT Sensor Fault<br />
Slave1 Outdoor Unit Inverter<br />
Compressor CT Sensor Fault<br />
Slave2 Outdoor Unit Inverter<br />
Compressor CT Sensor Fault<br />
Slave3 Outdoor Unit Inverter<br />
Compressor CT Sensor Fault<br />
Master Outdoor Unit Inverter<br />
Compressor Discharge<br />
Temperature Sensor Fault<br />
Slave1 Outdoor Unit Inverter<br />
Compressor Discharge<br />
Temperature Sensor Fault<br />
Slave2 Outdoor Unit Inverter<br />
Compressor Discharge<br />
Temperature Sensor Fault<br />
Slave3 Outdoor Unit Inverter<br />
Compressor Discharge<br />
Temperature Sensor Fault<br />
Master Outdoor Unit Low Pressure<br />
Sensor Fault<br />
Slave1 Outdoor Unit Low Pressure<br />
Sensor Fault<br />
Slave2 Outdoor Unit Low Pressure<br />
Sensor Fault<br />
Slave3 Outdoor Unit Low Pressure<br />
Sensor Fault<br />
Master Outdoor Unit High<br />
Pressure Sensor Fault<br />
Slave1 Outdoor Unit High<br />
Pressure Sensor Fault<br />
Slave2 Outdoor Unit High<br />
Pressure Sensor Fault<br />
Slave3 Outdoor Unit High<br />
Pressure Sensor Fault<br />
Master Outdoor Unit Air<br />
Temperature Sensor Fault<br />
Slave1 Outdoor Unit Air<br />
Temperature Sensor Fault<br />
Slave2 Outdoor Unit Air<br />
Temperature Sensor Fault<br />
Slave3 Outdoor Unit Air<br />
Temperature Sensor Fault<br />
Copyright ©2007 <strong>LG</strong> Electronics. Inc. All right reserved.<br />
Only for training and service purposes<br />
- 75 -<br />
Self-diagnosis function<br />
Master Outdoor Unit Inverter Compressor CT Sensor<br />
open or short<br />
Slave1 Outdoor Unit Inverter Compressor CT Sensor<br />
open or short<br />
Slave2 Outdoor Unit Inverter Compressor CT Sensor<br />
open or short<br />
Slave3 Outdoor Unit Inverter Compressor CT Sensor<br />
open or short<br />
Master Outdoor Unit Inverter Compressor Discharge<br />
Temperature Sensor open or short<br />
Slave1 Outdoor Unit Inverter Compressor Discharge<br />
Temperature Sensor open or short<br />
Slave2 Outdoor Unit Inverter Compressor Discharge<br />
Temperature Sensor open or short<br />
Slave3 Outdoor Unit Inverter Compressor Discharge<br />
Temperature Sensor open or short<br />
Master Outdoor Unit Low Pressure Sensor open or<br />
short<br />
Slave1 Outdoor Unit Low Pressure Sensor open or<br />
short<br />
Slave2 Outdoor Unit Low Pressure Sensor open or<br />
short<br />
Slave3 Outdoor Unit Low Pressure Sensor open or<br />
short<br />
Master Outdoor Unit High Pressure Sensor open or<br />
short<br />
Slave1 Outdoor Unit High Pressure Sensor open or<br />
short<br />
Slave2 Outdoor Unit High Pressure Sensor open or<br />
short<br />
Slave3 Outdoor Unit High Pressure Sensor open or<br />
short<br />
Master Outdoor Unit Air Temperature Sensor open or<br />
short<br />
Slave1 Outdoor Unit Air Temperature Sensor open or<br />
short<br />
Slave2 Outdoor Unit Air Temperature Sensor open or<br />
short<br />
Slave3 Outdoor Unit Air Temperature Sensor open or<br />
short<br />
<strong>LG</strong>E Internal Use Only
Self-diagnosis function<br />
Outdoor unit related error<br />
Display Title Cause of Error<br />
4 5<br />
4 6<br />
4 7<br />
4 8<br />
1<br />
2<br />
3<br />
4<br />
1<br />
2<br />
3<br />
4<br />
1<br />
2<br />
3<br />
4<br />
1<br />
2<br />
3<br />
4<br />
Master Outdoor Unit Heat<br />
Exchanger Temperature<br />
Sensor(A) Fault<br />
Slave1 Outdoor Unit Heat<br />
Exchanger Temperature<br />
Sensor(A) Fault<br />
Slave2 Outdoor Unit Heat<br />
Exchanger Temperature<br />
Sensor(A) Fault<br />
Slave3 Outdoor Unit Heat<br />
Exchanger Temperature<br />
Sensor(A) Fault<br />
Master Outdoor Unit Suction<br />
Temperature Sensor Fault<br />
Slave1 Outdoor Unit Suction<br />
Temperature Sensor Fault<br />
Slave2 Outdoor Unit Suction<br />
Temperature Sensor Fault<br />
Slave3 Outdoor Unit Suction<br />
Temperature Sensor Fault<br />
Master Outdoor Unit Constant<br />
Speed Compressor Discharge<br />
Temperature Sensor Fault<br />
Slave1 Outdoor Unit Constant<br />
Speed Compressor Discharge<br />
Temperature Sensor Fault<br />
Slave2 Outdoor Unit Constant<br />
Speed Compressor Discharge<br />
Temperature Sensor Fault<br />
Slave3 Outdoor Unit Constant<br />
Speed Compressor Discharge<br />
Temperature Sensor Fault<br />
Master Outdoor Unit Heat<br />
Exchanger Temperature<br />
Sensor(B) Fault<br />
Slave1 Outdoor Unit Heat<br />
Exchanger Temperature<br />
Sensor(B) Fault<br />
Slave2 Outdoor Unit Heat<br />
Exchanger Temperature<br />
Sensor(B) Fault<br />
Slave3 Outdoor Unit Heat<br />
Exchanger Temperature<br />
Sensor(B) Fault<br />
Copyright ©2007 <strong>LG</strong> Electronics. Inc. All right reserved.<br />
Only for training and service purposes<br />
Master Outdoor Unit Heat Exchanger Temperature<br />
Sensor(A) open or short<br />
Slave1 Outdoor Unit Heat Exchanger Temperature<br />
Sensor(A) open or short<br />
Slave2 Outdoor Unit Heat Exchanger Temperature<br />
Sensor(A) open or short<br />
Slave3 Outdoor Unit Heat Exchanger Temperature<br />
Sensor(A) open or short<br />
Master Outdoor Unit Suction Temperature Sensor<br />
open or short<br />
Slave1 Outdoor Unit Suction Temperature Sensor<br />
open or short<br />
Slave2 Outdoor Unit Suction Temperature Sensor<br />
open or short<br />
Slave3 Outdoor Unit Suction Temperature Sensor<br />
open or short<br />
Master Outdoor Unit Constant Speed Compressor<br />
Discharge Temperature Sensor open or short<br />
Slave1 Outdoor Unit Constant Speed Compressor<br />
Discharge Temperature Sensor open or short<br />
Slave2 Outdoor Unit Constant Speed Compressor<br />
Discharge Temperature Sensor open or short<br />
Slave3 Outdoor Unit Constant Speed Compressor<br />
Discharge Temperature Sensor open or short<br />
Master Outdoor Unit Heat Exchanger Temperature<br />
Sensor(B) open or short<br />
Slave1 Outdoor Unit Heat Exchanger Temperature<br />
Sensor(B) open or short<br />
Slave2 Outdoor Unit Heat Exchanger Temperature<br />
Sensor(B) open or short<br />
Slave3 Outdoor Unit Heat Exchanger Temperature<br />
Sensor(B) open or short<br />
- 76 -<br />
<strong>LG</strong>E Internal Use Only
Outdoor unit related error<br />
Copyright ©2007 <strong>LG</strong> Electronics. Inc. All right reserved.<br />
Only for training and service purposes<br />
- 77 -<br />
Self-diagnosis function<br />
Display Title Cause of Error<br />
1<br />
Omitting connection of R, S, T<br />
power of Master Outdoor unit<br />
Omitting connection of Master outdoor unit<br />
5 0<br />
2<br />
3<br />
Omitting connection of R, S, T<br />
power of Slave1 outdoor unit<br />
Omitting connection of R, S, T<br />
power of Slave2 outdoor unit<br />
Omitting connection of Slave1 outdoor unit<br />
Omitting connection of Slave2 outdoor unit<br />
4<br />
Omitting connection of R, S, T<br />
power of Slave3 outdoor unit<br />
Omitting connection of Slave3 outdoor unit<br />
5 1 1<br />
Excessive capacity of indoor units Excessive connection of indoor units compared <strong>to</strong><br />
capacity of outdoor unit<br />
1<br />
Transmission error : inverter PCB<br />
→ Main PCB<br />
Failing <strong>to</strong> receive inverter signal at main PCB of Master<br />
Outdoor Unit<br />
2<br />
Transmission error : inverter PCB<br />
→ Main PCB<br />
Failing <strong>to</strong> receive inverter signal at main PCB of Slave1<br />
Outdoor Unit<br />
5 2<br />
3<br />
Transmission error : inverter PCB<br />
→ Main PCB<br />
Failing <strong>to</strong> receive inverter signal at main PCB of Slave2<br />
Outdoor Unit<br />
4<br />
Transmission error : inverter PCB<br />
→ Main PCB<br />
Failing <strong>to</strong> receive inverter signal at main PCB of Slave3<br />
Outdoor Unit<br />
5 3 1<br />
Transmission error : indoor unit →<br />
main PCB of outdoor unit<br />
Failing <strong>to</strong> receive indoor unit signal at main PCB of outdoor<br />
Unit.<br />
1<br />
Reverse connection of R, S, T<br />
power of Master Outdoor unit<br />
Reverse connection or omitting connection of R, S, T<br />
power of Master outdoor unit<br />
5 4<br />
2<br />
3<br />
Reverse connection of R, S, T<br />
power of Slave1 outdoor unit<br />
Reverse connection of R, S, T<br />
power of Slave2 outdoor unit<br />
Reverse connection or omitting connection of R, S, T<br />
power of Slave1 outdoor unit<br />
Reverse connection or omitting connection of R, S, T<br />
power of Slave2 outdoor unit<br />
4<br />
Reverse connection of R, S, T<br />
power of Slave3 outdoor unit<br />
Reverse connection or omitting connection of R, S, T<br />
power of Slave3 outdoor unit<br />
5 9 1<br />
Mixing Installation of Sub Outdoor<br />
Unit<br />
Mixing Installation of Old Sub outdoor unit and New<br />
Slave Outdoor Unit<br />
6 0<br />
6 7<br />
1<br />
2<br />
3<br />
4<br />
1<br />
2<br />
3<br />
4<br />
Inverter PCB EEPROM Error of<br />
Master Outdoor Unit<br />
Inverter PCB EEPROM Error of<br />
Slave1 Unit<br />
Inverter PCB EEPROM Error of<br />
Slave2 Unit<br />
Inverter PCB EEPROM Error of<br />
Slave3 Unit<br />
Master Outdoor Unit Fan Lock<br />
Slave1 Outdoor Unit Fan Lock<br />
Slave2 Outdoor Unit Fan Lock<br />
Slave3 Outdoor Unit Fan Lock<br />
Access Error of Inverter PCB of Master Outdoor Unit<br />
Access Error of Inverter PCB of Slave1 Outdoor Unit<br />
Access Error of Inverter PCB of Slave2 Outdoor Unit<br />
Access Error of Inverter PCB of Slave3 Outdoor Unit<br />
Restriction of Master Outdoor Unit<br />
Restriction of Slave1 Outdoor Unit<br />
Restriction of Slave2 Outdoor Unit<br />
Restriction of Slave3 Outdoor Unit<br />
<strong>LG</strong>E Internal Use Only
Self-diagnosis function<br />
Outdoor unit related error<br />
Display Title Cause of Error<br />
1<br />
Constant CT Sensor Error of Master<br />
Outdoor Unit<br />
Constant CT Sensor open or short of Master Outdoor Unit<br />
7 0<br />
2<br />
3<br />
Constant CT Sensor Error of Slave1<br />
Outdoor Unit<br />
Constant CT Sensor Error of Slave2<br />
Outdoor Unit<br />
Constant CT Sensor open or short of Slave1 Outdoor Unit<br />
Constant CT Sensor open or short of Slave2 Outdoor Unit<br />
4<br />
Constant CT Sensor Error of Slave3<br />
Outdoor Unit<br />
Constant CT Sensor open or short of Slave3 Outdoor Unit<br />
1<br />
PFC CT Sensor Error of Master<br />
Outdoor Unit<br />
Master Outdoor Unit PFC CT Sensor open or short<br />
7 1<br />
2<br />
3<br />
PFC CT Sensor Error of Slave1<br />
Outdoor Unit<br />
PFC CT Sensor Error of Slave2<br />
Outdoor Unit<br />
Slave1 Outdoor Unit PFC CT Sensor open or short<br />
Slave2 Outdoor Unit PFC CT Sensor open or short<br />
4<br />
PFC CT Sensor Error of Slave3<br />
Outdoor Unit<br />
Slave3 Outdoor Unit PFC CT Sensor open or short<br />
1<br />
Instant Over Current(Peak) of Master<br />
Outdoor Unit PFC<br />
Instant Over Current(Peak) of Master Outdoor Unit PFC<br />
7 3<br />
2<br />
3<br />
Instant Over Current(Peak) of Slave1<br />
Outdoor Unit PFC<br />
Instant Over Current(Peak) of Slave2<br />
Outdoor Unit PFC<br />
Instant Over Current(Peak) of Slave1 Outdoor Unit PFC<br />
Instant Over Current(Peak) of Slave2 Outdoor Unit PFC<br />
4<br />
Instant Over Current(Peak) of Slave3<br />
Outdoor Unit PFC<br />
Instant Over Current(Peak) of Slave3 Outdoor Unit PFC<br />
1<br />
Master Outdoor Unit 3 Phase Power<br />
unbalance<br />
Master Outdoor Unit R-T Phase Difference is over 5A<br />
7 4<br />
2<br />
3<br />
Slave1 Outdoor Unit 3 Phase Power<br />
unbalance<br />
Slave2 Outdoor Unit 3 Phase Power<br />
unbalance<br />
Slave1 Outdoor Unit R-T Phase Difference is over 5A<br />
Slave2 Outdoor Unit R-T Phase Difference is over 5A<br />
4<br />
Slave3 Outdoor Unit 3 Phase Power<br />
unbalance<br />
Slave3 Outdoor Unit R-T Phase Difference is over 5A<br />
1<br />
Master Outdoor Unit Fan CT Sensor<br />
Error<br />
Master Outdoor Unit Fan CT Sensor open or short<br />
7 5<br />
2<br />
3<br />
Slave1 Outdoor Unit Fan CT Sensor<br />
Error<br />
Slave2 Outdoor Unit Fan CT Sensor<br />
Error<br />
Slave1 Outdoor Unit Fan CT Sensor open or short<br />
Slave2 Outdoor Unit Fan CT Sensor open or short<br />
4<br />
Slave3 Outdoor Unit Fan CT Sensor<br />
Error<br />
Slave3 Outdoor Unit Fan CT Sensor open or short<br />
1<br />
Master Outdoor Unit Fan DC Link<br />
High Voltage Error<br />
Master Outdoor Unit Fan DC Link High Voltage Error<br />
7 6<br />
2<br />
3<br />
Slave1 Outdoor Unit Fan DC Link<br />
High Voltage Error<br />
Slave2 Outdoor Unit Fan DC Link<br />
High Voltage Error<br />
Slave1 Outdoor Unit Fan DC Link High Voltage Error<br />
Slave2 Outdoor Unit Fan DC Link High Voltage Error<br />
4<br />
Slave3 Outdoor Unit Fan DC Link<br />
High Voltage Error<br />
Slave3 Outdoor Unit Fan DC Link High Voltage Error<br />
Copyright ©2007 <strong>LG</strong> Electronics. Inc. All right reserved.<br />
Only for training and service purposes<br />
- 78 -<br />
<strong>LG</strong>E Internal Use Only
Outdoor unit related error<br />
Copyright ©2007 <strong>LG</strong> Electronics. Inc. All right reserved.<br />
Only for training and service purposes<br />
- 79 -<br />
Self-diagnosis function<br />
Display Title Cause of Error<br />
1<br />
Master Outdoor Unit Fan Over Current<br />
Error<br />
Master Outdoor Unit Fan Current is over 5A<br />
7 7<br />
2<br />
3<br />
Slave1 Outdoor Unit Fan Over Current<br />
Error<br />
Slave2 Outdoor Unit Fan Over Current<br />
Error<br />
Slave1 Outdoor Unit Fan is over 5A<br />
Slave2 Outdoor Unit Fan is over 5A<br />
4<br />
Slave3 Outdoor Unit Fan Over Current<br />
Error<br />
Slave3 Outdoor Unit Fan is over 5A<br />
1<br />
Master Outdoor Unit Fan Hall Sensor<br />
Error<br />
Master Outdoor Unit Fan Hall Sensor open or short<br />
7 8<br />
2<br />
3<br />
Slave1 Outdoor Unit Fan Hall Sensor<br />
Error<br />
Slave2 Outdoor Unit Fan Hall Sensor<br />
Error<br />
Slave1 Outdoor Unit Fan Hall Sensor open or short<br />
Slave2 Outdoor Unit Fan Hall Sensor open or short<br />
4<br />
Slave3 Outdoor Unit Fan Hall Sensor<br />
Error<br />
Slave3 Outdoor Unit Fan Hall Sensor open or short<br />
1<br />
Master Outdoor Unit Fan Start Failure<br />
Error<br />
Master Outdoor Unit Fan First Position Sensing Failure<br />
7 9<br />
2<br />
3<br />
Slave1 Outdoor Unit Fan Start Failure<br />
Error<br />
Slave2 Outdoor Unit Fan Start Failure<br />
Error<br />
Slave1 Outdoor Unit Fan First Position Sensing Failure<br />
Slave2 Outdoor Unit Fan First Position Sensing Failure<br />
4<br />
Slave3 Outdoor Unit Fan Start Failure<br />
Error<br />
Slave3 Outdoor Unit Fan First Position Sensing Failure<br />
1<br />
Master Outdoor Unit Main PCB EEP-<br />
ROM Error<br />
Communication Fail Between Master Outdoor Unit Main<br />
MICOM and EEPROM or omitting EEPROM<br />
8 6<br />
2<br />
3<br />
Slave1 Outdoor Unit Main PCB EEP-<br />
ROM Error<br />
Slave2 Outdoor Unit Main PCB EEP-<br />
ROM Error<br />
Communication Fail Between Slave1 Outdoor Unit Main<br />
MICOM and EEPROM or omitting EEPROM<br />
Communication Fail Between Slave2 Outdoor Unit Main<br />
MICOM and EEPROM or omitting EEPROM<br />
4<br />
Slave3 Outdoor Unit Main PCB EEP-<br />
ROM Error<br />
Communication Fail Between Slave3 Outdoor Unit Main<br />
MICOM and EEPROM or omitting EEPROM<br />
1<br />
Master Outdoor Unit Fan PCB EEP-<br />
ROM Error<br />
Communication Fail Between Master Outdoor Unit Fan<br />
MICOM and EEPROM or omitting EEPROM<br />
8 7<br />
2<br />
3<br />
Slave1 Outdoor Unit Fan PCB EEP-<br />
ROM Error<br />
Slave2 Outdoor Unit Fan PCB EEP-<br />
ROM Error<br />
Communication Fail Between Slave1 Outdoor Unit Fan<br />
MICOM and EEPROM or omitting EEPROM<br />
Communication Fail Between Slave2 Outdoor Unit Fan<br />
MICOM and EEPROM or omitting EEPROM<br />
4<br />
Slave3 Outdoor Unit Fan PCB EEP-<br />
ROM Error<br />
Communication Fail Between Slave3 Outdoor Unit Fan<br />
MICOM and EEPROM or omitting EEPROM<br />
<strong>LG</strong>E Internal Use Only
Self-diagnosis function<br />
Outdoor unit related error<br />
Display Title Cause of Error<br />
1 0 4<br />
1 0 5<br />
1 0 6<br />
1 0 7<br />
1 1 3<br />
1<br />
2<br />
3<br />
4<br />
Communication Error Between<br />
Master Outdoor Unit and Other<br />
Outdoor Unit<br />
Communication Error Between<br />
Slave1 Outdoor Unit and Other<br />
Outdoor Unit<br />
Communication Error Between<br />
Slave2 Outdoor Unit and Other<br />
Outdoor Unit<br />
Communication Error Between<br />
Slave3 Outdoor Unit and Other<br />
Outdoor Unit<br />
Master Outdoor Unit Fan PCB<br />
1<br />
Communication Error<br />
Slave1 Outdoor Unit Fan PCB<br />
2<br />
Communication Error<br />
Slave2 Outdoor Unit Fan PCB<br />
3<br />
Communication Error<br />
Slave3 Outdoor Unit Fan PCB<br />
4<br />
Communication Error<br />
Master Outdoor Unit FAN IPM<br />
1<br />
Fault Error<br />
Slave1 Outdoor Unit FAN IPM<br />
2<br />
Fault Error<br />
Slave2 Outdoor Unit FAN IPM<br />
3 Fault Error<br />
Slave3 Outdoor Unit FAN IPM<br />
4 Fault Error<br />
Master Outdoor Unit Fan DC Link<br />
1 Low Voltage Error<br />
Slave1 Outdoor Unit Fan DC Link<br />
2 Low Voltage Error<br />
Slave2 Outdoor Unit Fan DC Link<br />
3 Low Voltage Error<br />
Slave3 Outdoor Unit Fan DC Link<br />
4 Low Voltage Error<br />
Master Outdoor Unit Liquid pipe<br />
1 Temperature Sensor Error<br />
Slave1 Outdoor Unit Liquid pipe<br />
2 Temperature Sensor Error<br />
Slave2 Outdoor Unit Liquid pipe<br />
3 Temperature Sensor Error<br />
Slave3 Outdoor Unit Liquid pipe<br />
4<br />
Temperature Sensor Error<br />
Copyright ©2007 <strong>LG</strong> Electronics. Inc. All right reserved.<br />
Only for training and service purposes<br />
Failing <strong>to</strong> receive Slave Unit signal at main PCB of<br />
Master outdoor unit<br />
Failing <strong>to</strong> receive master and other Slave Unit signal at<br />
main PCB of Slave1 outdoor unit<br />
Failing <strong>to</strong> receive master and other Slave Unit signal at<br />
main PCB of Slave2 outdoor unit<br />
Failing <strong>to</strong> receive master and other Slave Unit signal at<br />
main PCB of Slave3 outdoor unit<br />
Failing <strong>to</strong> receive fan signal at main PCB of master<br />
unit.<br />
Failing <strong>to</strong> receive fan signal at main PCB of slave1<br />
unit.<br />
Failing <strong>to</strong> receive fan signal at main PCB of slave2<br />
unit.<br />
Failing <strong>to</strong> receive fan signal at main PCB of slave3<br />
unit.<br />
Instant Over Current at Master Outdoor Unit Fan IPM<br />
Instant Over Current at Slave1 Outdoor Unit Fan IPM<br />
Instant Over Current at Slave2 Outdoor Unit Fan IPM<br />
Instant Over Current at Slave3 Outdoor Unit Fan IPM<br />
Master Outdoor Unit Fan DC Link Input Voltage is<br />
under 380V<br />
Slave1 Outdoor Unit Fan DC Link Input Voltage is<br />
under 380V<br />
Slave2 Outdoor Unit Fan DC Link Input Voltage is<br />
under 380V<br />
Slave3 Outdoor Unit Fan DC Link Input Voltage is<br />
under 380V<br />
Liquid pipe temperature sensor of Master outdoor unit<br />
is open or short<br />
Liquid pipe temperature sensor of slave1 outdoor unit<br />
is open or short<br />
Liquid pipe temperature sensor of slave2 outdoor unit<br />
is open or short<br />
Liquid pipe temperature sensor of slave3 outdoor unit<br />
is open or short<br />
- 80 -<br />
<strong>LG</strong>E Internal Use Only
Outdoor unit related error<br />
Display Title Cause of Error<br />
1 1 4<br />
1 1 5<br />
1 5 1<br />
1 7 3<br />
1 9 3<br />
1<br />
2<br />
3<br />
4<br />
1<br />
2<br />
3<br />
4<br />
1<br />
2<br />
3<br />
4<br />
1<br />
2<br />
3<br />
4<br />
1<br />
2<br />
3<br />
4<br />
Master Outdoor Unit Subcooling<br />
Inlet Temperature Sensor Error<br />
Slave1 Outdoor Unit Subcooling<br />
Inlet Temperature Sensor Error<br />
Slave2 Outdoor Unit Subcooling<br />
Inlet Temperature Sensor Error<br />
Slave3 Outdoor Unit Subcooling<br />
Inlet Temperature Sensor Error<br />
Master Outdoor Unit Subcooling<br />
Outlet Temperature Sensor Error<br />
Slave1 Outdoor Unit Subcooling<br />
Outlet Temperature Sensor Error<br />
Slave2 Outdoor Unit Subcooling<br />
Outlet Temperature Sensor Error<br />
Slave3 Outdoor Unit Subcooling<br />
Outlet Temperature Sensor Error<br />
Failure of operation mode conversion<br />
at Master Outdoor Unit<br />
Failure of operation mode conversion<br />
at Slave1 Outdoor Unit<br />
Failure of operation mode conversion<br />
at Slave2 Outdoor Unit<br />
Failure of operation mode conversion<br />
at Slave3 Outdoor Unit<br />
Master Outdoor Unit Constant<br />
Speed Compressor Fault<br />
Slave1 Outdoor Unit Constant<br />
Speed Compressor Fault<br />
Slave2 Outdoor Unit Constant<br />
Speed Compressor Fault<br />
Slave3 Outdoor Unit Constant<br />
Speed Compressor Fault<br />
Excessive increase of Master<br />
Outdoor Unit Fan PCB Heat Sink<br />
Temperature<br />
Excessive increase of Slave1<br />
Outdoor Unit Fan PCB Heat Sink<br />
Temperature<br />
Excessive increase of Slave2<br />
Outdoor Unit Fan PCB Heat Sink<br />
Temperature<br />
Excessive increase of Slave3<br />
Outdoor Unit Fan PCB Heat Sink<br />
Temperature<br />
Copyright ©2007 <strong>LG</strong> Electronics. Inc. All right reserved.<br />
Only for training and service purposes<br />
- 81 -<br />
Self-diagnosis function<br />
Master Outdoor Unit Subcooling Inlet Temperature<br />
Sensor open or short<br />
Slave1 Outdoor Unit Subcooling Inlet Temperature<br />
Sensor open or short<br />
Slave2 Outdoor Unit Subcooling Inlet Temperature<br />
Sensor open or short<br />
Slave3 Outdoor Unit Subcooling Inlet Temperature<br />
Sensor open or short<br />
Master Outdoor Unit Subcooling Outlet Temperature<br />
Sensor open or short<br />
Slave1 Outdoor Unit Subcooling Outlet Temperature<br />
Sensor open or short<br />
Slave2 Outdoor Unit Subcooling Outlet Temperature<br />
Sensor open or short<br />
Slave3 Outdoor Unit Subcooling Outlet Temperature<br />
Sensor open or short<br />
Pressure unbalance between outdoor units<br />
Pressure unbalance between outdoor units<br />
Pressure unbalance between outdoor units<br />
Pressure unbalance between outdoor units<br />
Comp locking, Check Valve leakage, comp dielectric<br />
break down at Master Outdoor Unit<br />
Comp locking, Check Valve leakage, comp dielectric at<br />
Slave1 Outdoor Unit<br />
Comp locking, Check Valve leakage, comp dielectric at<br />
Slave2 Outdoor Unit<br />
Comp locking, Check Valve leakage, comp dielectric at<br />
Slave3 Outdoor Unit<br />
Master Outdoor Unit Fan Inverter PCB Temperature is<br />
Over 95°C<br />
Slave1 Outdoor Unit Fan Inverter PCB Temperature is<br />
Over 95°C<br />
Slave2 Outdoor Unit Fan Inverter PCB Temperature is<br />
Over 95°C<br />
Slave3 Outdoor Unit Fan Inverter PCB Temperature is<br />
Over 95°C<br />
<strong>LG</strong>E Internal Use Only
Self-diagnosis function<br />
Outdoor unit related error<br />
Display Title Cause of Error<br />
1 9 4<br />
1<br />
2<br />
3<br />
4<br />
Master Outdoor Unit Fan PCB<br />
Heat Sink Temperature Sensor<br />
Error<br />
Slave1 Outdoor Unit Fan PCB<br />
Heat Sink Temperature Sensor<br />
Error<br />
Slave2 Outdoor Unit Fan PCB<br />
Heat Sink Temperature Sensor<br />
Error<br />
Slave3 Outdoor Unit Fan PCB<br />
Heat Sink Temperature Sensor<br />
Error<br />
Copyright ©2007 <strong>LG</strong> Electronics. Inc. All right reserved.<br />
Only for training and service purposes<br />
Master Outdoor Unit Fan PCB Heat Sink Temperature<br />
Sensor open or short<br />
Slave1 Outdoor Unit Fan PCB Heat Sink Temperature<br />
Sensor open or short<br />
Slave2 Outdoor Unit Fan PCB Heat Sink Temperature<br />
Sensor open or short<br />
Slave3 Outdoor Unit Fan PCB Heat Sink Temperature<br />
Sensor open or short<br />
- 82 -<br />
<strong>LG</strong>E Internal Use Only
Error<br />
No.<br />
01 Indoor unit air sensor error<br />
02 Indoor unit pipe inlet sensor error<br />
06 Indoor unit pipe outlet sensor error<br />
Copyright ©2007 <strong>LG</strong> Electronics. Inc. All right reserved.<br />
Only for training and service purposes<br />
- 83 -<br />
Troubleshooting Guide<br />
Error Type Error Point Main Reasons<br />
Indoor unit sensor is<br />
open/short<br />
■ Error diagnosis and countermeasure flow chart<br />
Is sensor properly<br />
connected <strong>to</strong> PCB?<br />
Yes<br />
Is the resistance value<br />
of sensor normal?*<br />
Yes<br />
Change the PCB<br />
No<br />
No<br />
Connect properly <strong>to</strong> PCB<br />
Change the sensor<br />
** In case the value is more than 100kΩ (open) or less than 100Ω (short), Error occurs<br />
Refer: Resistance value maybe change according <strong>to</strong> temperature of temp sensor,<br />
It shows according <strong>to</strong> criteria of current temperature(±5% margin) ➔ Normal<br />
Air temp sensor: 10°C = 20.7kΩ : 25°C= 10kΩ : 50°C= 3.4kΩ<br />
Pipe temp sensor: 10°C = 10kΩ : 25°C= 5kΩ : 50°C= 1.8kΩ<br />
1. Indoor unit PCB wrong connection<br />
2. Indoor unit PCB failure<br />
3. Sensor problem (main reason)<br />
CN-ROOM : Indoor air temp sensor<br />
CN-PIPE2 : Pipe outlet temp sensor<br />
CN-PIPE1 : Pipe inlet temp sensor<br />
Measure the resistance of outlet pipe temp sensor.<br />
<strong>LG</strong>E Internal Use Only
Troubleshooting Guide<br />
Error<br />
No.<br />
03 No transmission between cabled<br />
remote controller & indoor unit<br />
* If there is no remote controller <strong>to</strong> replace : Use another unit’s remote controller doing well<br />
** Check cable : Contact failure of connected portion or extension of cable are main cause<br />
Check any surrounded noise ( check the distance with main power cable)<br />
➔ make safe distance from the devices generate electromagnetic wave<br />
*** After replacing indoor unit PCB, do Au<strong>to</strong> Addressing & input unit’s address if connected <strong>to</strong> central controller.<br />
(All the indoor units connected should be turned on before Au<strong>to</strong> Addressing<br />
Copyright ©2007 <strong>LG</strong> Electronics. Inc. All right reserved.<br />
Only for training and service purposes<br />
Error Type Error Point Main Reasons<br />
The remote controller<br />
did not receive the signal<br />
from indoor unit<br />
during specific time<br />
■ Error diagnosis and countermeasure flow chart<br />
Does the error happens<br />
again if the remote<br />
controller is replaced?*<br />
Yes<br />
Does the error occurred<br />
when the cable of remote<br />
controller is replaced?<br />
Yes<br />
Replace indoor unit PCB ***<br />
No<br />
No<br />
Replace cabled remote<br />
controller<br />
Check connection &<br />
transmission cable **<br />
- 84 -<br />
CN-REMO<br />
1. Remote controller fault<br />
2. Indoor unit PCB fault<br />
3. Connec<strong>to</strong>r fault, Wrong connection<br />
4. transmission cable problem<br />
: Remote controller connection<br />
❇ The PCB can differ from model <strong>to</strong> model.<br />
Check from the right source.<br />
Checking transmission cable connection status<br />
<strong>LG</strong>E Internal Use Only
Troubleshooting Guide<br />
float<br />
A:Point <strong>to</strong> check rotating<br />
[***] Standard of drain pipe head height / slope<br />
Copyright ©2007 <strong>LG</strong> Electronics. Inc. All right reserved.<br />
Only for training and service purposes<br />
- 86 -<br />
*** Indoor PCB drain pump connec<strong>to</strong>r<br />
(Check input of 220V)<br />
(Marked as CN-DPUMP)<br />
Float switch connec<strong>to</strong>r<br />
Float switch Housing (CN-FLOAT)<br />
MAX 450<br />
<strong>LG</strong>E Internal Use Only
Error<br />
No.<br />
Error Type Error Point Main Reasons<br />
Copyright ©2007 <strong>LG</strong> Electronics. Inc. All right reserved.<br />
Only for training and service purposes<br />
- 87 -<br />
Troubleshooting Guide<br />
05 Indoor & Outdoor unit<br />
transmission error<br />
No signal transmission<br />
between indoor & outdoor<br />
units.<br />
1. Au<strong>to</strong> addressing is not done<br />
2. transmission cable is not connected<br />
3. Short circuit of transmission cable<br />
4. Indoor unit transmission circuit fault<br />
5. Outdoor unit transmission circuit fault<br />
6. Not enough distance between power and transmission<br />
cable?<br />
■ Error diagnosis and countermeasure flow chart<br />
Does all the IDUs show<br />
same error code CH05?<br />
Yes<br />
Is outdoor PCB LED<br />
blinking?<br />
Yes<br />
Check if the<br />
transmission cable is<br />
properly connected<br />
<strong>to</strong> indoor / outdoor<br />
terminal block?*<br />
Yes<br />
No<br />
Check the main power<br />
supply at the ODU<br />
terminal block?<br />
Yes<br />
Is main circuit breaker off?<br />
Yes<br />
* (Note1) Transmission from IDU is normal if voltage<br />
fluctuation(-9V ~ +9V) exists when checking DC voltage<br />
of communication terminal between IDU and ODU<br />
No<br />
No<br />
Is <strong>to</strong>tal number of indoor<br />
units connected displayed<br />
after au<strong>to</strong> addressing?<br />
END<br />
Improper connection of power supply cable<br />
Main power supply problem<br />
Re connect transmission cable<br />
Outdoor PCB fault<br />
Replace after checking<br />
Indoor PCB fault<br />
Replace after checking<br />
No<br />
No<br />
No<br />
Replace the PCB of indoor unit<br />
displayed error<br />
Re-connect after check the<br />
transmission cable of indoor<br />
unit displayed error**<br />
Replace outdoor PCB after<br />
checking<br />
Replace TRANS after checking<br />
Check the insulation of inverter<br />
/ constant compressor and replace<br />
if required<br />
Check the capacity of main circuit<br />
breaker and replace if required<br />
If all ok,<br />
Turn on main circuit breaker<br />
* If the DC voltage between transmission terminal A, B<br />
of indoor unit is fluctuate within (-9V~+9V) then<br />
transmission from outdoor unit is normal<br />
<strong>LG</strong>E Internal Use Only
Troubleshooting Guide<br />
Error<br />
No.<br />
06<br />
Error<br />
No.<br />
07<br />
Error Type Error Point Main Reasons<br />
Indoor unit outlet pipe<br />
temperature sensor<br />
error<br />
Copyright ©2007 <strong>LG</strong> Electronics. Inc. All right reserved.<br />
Only for training and service purposes<br />
Indoor unit outlet pipe<br />
temperature sensor open<br />
or short<br />
- 88 -<br />
Refer <strong>to</strong> CH02<br />
Error Type Error Point Main Reasons<br />
All Indoor units are not<br />
running in same mode<br />
The Indoor units started<br />
later are operated in different<br />
mode from earlier<br />
one.<br />
■ Error diagnosis and countermeasure flow chart<br />
1. Indoor units are in different mode<br />
2. PCB fault<br />
3. cabled remote controller fault<br />
❊ Checking ch07 method<br />
IDU doesn’t operate as Operation mode is<br />
flickering at IDU wired remote controller and IDU<br />
display window.<br />
* Check mode selection setting of wired remote controller.<br />
** Outdoor main PCB dip switch no.5 (Cooling) or no.6 (heating) is in On, different mode operation error<br />
may occur because the operation mode is fixed by dip switch setting.<br />
♦ Dip switch Setting ♦<br />
ON<br />
Is operation mode of<br />
outdoor & Indoor units<br />
same?<br />
Yes<br />
Adjust outdoor main PCB<br />
dip switch setting *<br />
1 2 3 4 5 6 7<br />
ON<br />
No<br />
1 2 3 4 5 6 7<br />
1 2 3 4 5 6 7 8 9 10 11 12 13 14<br />
ON<br />
1 2 3 4 5 6 7<br />
ON<br />
1 2 3 4 5 6 7<br />
1 2 3 4 5 6 7 8 9 10 11 12 13 14<br />
Does error code<br />
disappear<br />
after set operation<br />
mode same?**<br />
Yes<br />
END<br />
Replace Indoor PCB***<br />
*** Dissolution method CH07 with remote controller<br />
1) Error removal method : Turn off remote controller by pressing the On/Off but<strong>to</strong>n on the cabled remote controller.<br />
The error code will be removed au<strong>to</strong>matically after few seconds.<br />
With cableless remote controller: Turn off indoor unit, and then turn on by changing the operation<br />
mode. The error will disappear.<br />
No<br />
<strong>LG</strong>E Internal Use Only
09<br />
Copyright ©2007 <strong>LG</strong> Electronics. Inc. All right reserved.<br />
Only for training and service purposes<br />
- 89 -<br />
Troubleshooting Guide<br />
**** After replacing the indoor unit PCB, make sure <strong>to</strong> be done <strong>to</strong> do Au<strong>to</strong> addressing and input the address of central control<br />
***** If ODU Dry Contact function is set , different mode operation error may be occurred because the operation mode is fixed.<br />
Error<br />
No.<br />
Error Type Error Point Main Reasons<br />
Indoor unit EEPROM<br />
error<br />
■ Error diagnosis and countermeasure flow chart<br />
1. Error developed in transmission between the<br />
micro- processor and the EEPROM on the surface<br />
of the PCB.<br />
2. ERROR due <strong>to</strong> the EEPROM damage<br />
- Replace the indoor unit PCB, and then make sure <strong>to</strong> perform Au<strong>to</strong> addressing and input the address of central control<br />
<strong>LG</strong>E Internal Use Only
Troubleshooting Guide<br />
Error<br />
No.<br />
10<br />
Error Type Error Point Main Reasons<br />
Indoor unit BLDC fan mo<strong>to</strong>r<br />
failure<br />
Copyright ©2007 <strong>LG</strong> Electronics. Inc. All right reserved.<br />
Only for training and service purposes<br />
Indoor BLDC fan mo<strong>to</strong>r<br />
feedback signal is absent<br />
(for 50 sec.)<br />
■ Error diagnosis and countermeasure flow chart<br />
Is connec<strong>to</strong>r<br />
connection proper?<br />
Yes<br />
Is fan mo<strong>to</strong>r<br />
normal?*<br />
Yes<br />
Replace indoor unit PCB **<br />
No<br />
No<br />
Connect properly<br />
Replace indoor unit fan mo<strong>to</strong>r<br />
* It is normal when check hall sensor of indoor fan mo<strong>to</strong>r as shown below<br />
1 4 5 6 7<br />
<br />
Each termainl with the tester<br />
Tester Normal resistance(±10%)<br />
+ - TH chassis TD chassis<br />
1 4 ∞ ∞<br />
5<br />
6<br />
7<br />
4<br />
4<br />
4<br />
hundreds kΩ hundreds kkΩ<br />
∞ ∞<br />
hundreds kΩ hundreds kΩ<br />
** Replace the indoor unit PCB, and then make sure <strong>to</strong> do Au<strong>to</strong> addressing and input the<br />
address of central control<br />
(Notice: The connection of mo<strong>to</strong>r connec<strong>to</strong>r <strong>to</strong> PCB should be done under no power<br />
supplying <strong>to</strong> PCB)<br />
- 90 -<br />
1. Mo<strong>to</strong>r connec<strong>to</strong>r connection fault<br />
2. Indoor PCB fault<br />
3. Mo<strong>to</strong>r fault<br />
<strong>LG</strong>E Internal Use Only
Error<br />
No.<br />
11<br />
Indoor unit transmission error<br />
Copyright ©2007 <strong>LG</strong> Electronics. Inc. All right reserved.<br />
Only for training and service purposes<br />
- 91 -<br />
Troubleshooting Guide<br />
Error Type Error Point Main Reasons<br />
Indoor unit doesn’t get signal<br />
from ODU for 3 minutes<br />
continuously<br />
■ Error diagnosis and countermeasure flow chart<br />
After ODU main PCB<br />
reset, error code<br />
disappears?<br />
Yes<br />
No<br />
END<br />
After Au<strong>to</strong> addressing,<br />
error code disappears?<br />
Yes<br />
No<br />
1. Indoor 485 transmission PCB fault<br />
2. After PCB replacing, au<strong>to</strong> addressing<br />
was not done<br />
Replace indoor unit 485<br />
transmission PCB<br />
<strong>LG</strong>E Internal Use Only
Troubleshooting Guide<br />
Error<br />
No.<br />
21*<br />
Master<br />
211<br />
Slave1<br />
212<br />
Slave2<br />
213<br />
Error Type Error Point Main Reasons<br />
Inverter PCB Assy IPM<br />
Fault occur<br />
Copyright ©2007 <strong>LG</strong> Electronics. Inc. All right reserved.<br />
Only for training and service purposes<br />
IPM self protection circuit<br />
activation<br />
(Overcurrent/IPM overheating/Vcc<br />
low voltage)<br />
■ Error diagnosis and countermeasure flow chart<br />
Are the resistance<br />
Between each phase and<br />
insulation resistance of Inverter<br />
compressor normal?<br />
Yes<br />
Is compressor<br />
Wire connection<br />
condition normal?<br />
Yes<br />
Is inverter heat sink<br />
cooling fan normal?<br />
Yes<br />
Is inverter PCB assembly<br />
normal?<br />
Yes<br />
Recheck power and installation condition<br />
No<br />
No<br />
No<br />
No<br />
- 92 -<br />
1.Over current detection at Inverter compressor(U,V,W)<br />
2.Compressor damaged (insulation damaged/Mo<strong>to</strong>r<br />
damaged)<br />
3.IPM overheating<br />
(Heat sink fan damaged/Heat sink fan connec<strong>to</strong>r<br />
disconnected/Heat sink disassembled)<br />
4.Inverter compressor terminal disconnected<br />
or loose<br />
5.Inverter PCB assembly damaged<br />
6.ODU input current low<br />
1. Check resistance between each terminal of compressor<br />
(0.34~0.35Ω ±7%)<br />
2. Check insulation resistance between compressor<br />
terminal and pipe (over 50MΩ )<br />
→ Replace compressor if abnormality found<br />
1.Check inverter PCB assembly U,V,W connec<strong>to</strong>r<br />
connection condition<br />
2. Check wire disconnection and wiring<br />
3. Check compressor terminal connection condition<br />
(bad contact)<br />
→ Reassemble if abnormality found<br />
1. Check heat sink cooling fan connec<strong>to</strong>r connection<br />
condition<br />
2. Check heat sink cooling fan wire disconnection and<br />
wiring<br />
→ Reassemble and change wire if abnormality found<br />
3. Check heat sink cooling fan output voltage during<br />
compressor operation<br />
(Check main PCB assembly CN15 fan connec<strong>to</strong>r output<br />
voltage : AC 220V)<br />
→ Replace main PCB if output voltage isn't AC 220V<br />
4. Check heat sink cooling fan mo<strong>to</strong>r wire disconnection<br />
(measure resistance between each ends of mo<strong>to</strong>r<br />
connec<strong>to</strong>r)<br />
(measured value should be within 1.7kΩ ±10%)<br />
→ Replace fan mo<strong>to</strong>r if mo<strong>to</strong>r wire is disconnected.<br />
Check inverter PCB assembly IPM normality.<br />
→ Replace inverter PCB assembly if abnormality found.<br />
<strong>LG</strong>E Internal Use Only
* Measuring resistance between<br />
each terminal of compressor<br />
* IPM joining point<br />
Check joining condi<strong>to</strong>n<br />
Copyright ©2007 <strong>LG</strong> Electronics. Inc. All right reserved.<br />
Only for training and service purposes<br />
- 93 -<br />
Troubleshooting Guide<br />
* Heat sink cooling fan connec<strong>to</strong>r * Compressor wire connec<strong>to</strong>r connection<br />
point<br />
* Heat sink cooling fan * Measuring insulation resistance between Comp output terminal<br />
and chassis<br />
<strong>LG</strong>E Internal Use Only
Troubleshooting Guide<br />
Error<br />
No.<br />
22*<br />
Master<br />
221<br />
Slave1<br />
222<br />
Slave2<br />
223<br />
Error Type Error Point Main Reasons<br />
AC Input Current Over Error<br />
Copyright ©2007 <strong>LG</strong> Electronics. Inc. All right reserved.<br />
Only for training and service purposes<br />
Inverter PCB Assembly<br />
input 3 phase power<br />
current is over limited<br />
value(22A)<br />
■ Error Diagnosis and Countermeasure Flow Chart<br />
Is installation<br />
condition normal?<br />
Yes<br />
Are the resistance<br />
Between each phase and<br />
insulation resistance of Inverter<br />
compressor normal?<br />
Yes<br />
Is compressor<br />
Wire connection<br />
condition normal?<br />
Yes<br />
Is inverter PCB assembly<br />
power connection normal?<br />
Yes<br />
Is input voltage normal?<br />
Yes<br />
Is inverter PCB assembly<br />
normal?<br />
Yes<br />
Recheck power and installation condition<br />
No<br />
No<br />
No<br />
No<br />
No<br />
- 94 -<br />
1. Overload operation (Pipe<br />
clogging/Covering/EEV defect/Ref.<br />
overcharge)<br />
2. Compressor damage(Insulation<br />
damage/Mo<strong>to</strong>r damage)<br />
3. Input voltage low<br />
4. Power Line Misconnection<br />
5. Inverter PCB Assembly damage<br />
(Input current sensing part)<br />
1. Check Pipe clogging/dis<strong>to</strong>rtion<br />
2. Check Covering (Indoor/Outdoor Unit)<br />
3. Check EEV connec<strong>to</strong>r assemble condition/normal<br />
operation<br />
4. Check refrigerant pressure<br />
→ Reassemble or manage if abnormality found<br />
1. Check resistance between each terminal of compressor<br />
(0.34~0.35Ω ±7%)<br />
2. Check insulation resistance between compressor<br />
terminal and pipe (over 50MΩ )<br />
→ Replace compressor if abnormality found<br />
1. Check inverter PCB assembly U,V,W connec<strong>to</strong>r<br />
connection condition<br />
2. Check wire disconnection and wiring<br />
3. Check compressor terminal connection condition<br />
(bad contact)<br />
→ Reassemble if abnormality found<br />
Check connection between inverter PCB assembly and<br />
bridge diode(misconnection, disconnection)<br />
→ wiring again if abnormality found<br />
Check<br />
R~S/S~T/T~R phase voltage is 380V ±10%<br />
R~N/S~N/T~N phase voltage is 220V ±10%<br />
→ Check connection condition and wiring if power is<br />
abnormal<br />
No Check inverter PCB assembly IPM normality<br />
→ Replace inverter PCB assembly<br />
<strong>LG</strong>E Internal Use Only
* Measuring resistance between<br />
each terminal of compressor<br />
* Compressor wire connec<strong>to</strong>r<br />
connection<br />
* Measuring input voltage<br />
Copyright ©2007 <strong>LG</strong> Electronics. Inc. All right reserved.<br />
Only for training and service purposes<br />
* Inverter PCB & bridge diode wiring<br />
- 95 -<br />
Check joining condition<br />
Troubleshooting Guide<br />
<strong>LG</strong>E Internal Use Only
Troubleshooting Guide<br />
Error<br />
No.<br />
23*<br />
Master<br />
231<br />
Slave1<br />
232<br />
Slave2<br />
233<br />
Error Type Error Point Main Reasons<br />
Inverter Compressor DC<br />
Link Low Voltage<br />
Copyright ©2007 <strong>LG</strong> Electronics. Inc. All right reserved.<br />
Only for training and service purposes<br />
DC Voltage isn't charged<br />
after starting relay on<br />
■ Error Diagnosis and Countermeasure Flow Chart<br />
Is input voltage normal?<br />
Yes<br />
Is inverter PCB assembly<br />
power connection normal?<br />
Yes<br />
Is inverter PCB assembly normal?<br />
Yes<br />
Recheck power and installation condition<br />
No<br />
No<br />
No<br />
- 96 -<br />
1. DC Link terminal misconnection/terminal<br />
contact fault<br />
2. Starting relay damage<br />
3. Condenser damage<br />
4. Inverter PCB assembly damage<br />
(DC Link voltage sensing part)<br />
5. Input voltage low<br />
Check<br />
R~S/S~T/T~R phase voltage is 380V ±10%<br />
R~N/S~N/T~N phase voltage is 220V ±10%<br />
→ Check connection condition and wiring if power is<br />
abnormal<br />
Check connection between inverter PCB assembly and<br />
bridge diode(misconnection, disconnection)<br />
→ wiring again if abnormality found<br />
Check inverter PCB assembly IPM normality<br />
→ Replace inverter PCB assembly<br />
<strong>LG</strong>E Internal Use Only
* Inverter PCB & bridge diode wiring<br />
* Measuring input voltage<br />
Copyright ©2007 <strong>LG</strong> Electronics. Inc. All right reserved.<br />
Only for training and service purposes<br />
- 97 -<br />
Troubleshooting Guide<br />
<strong>LG</strong>E Internal Use Only
Troubleshooting Guide<br />
Error<br />
No.<br />
25*<br />
Master<br />
251<br />
Slave1<br />
252<br />
Slave2<br />
253<br />
Error Type Error Point Main Reasons<br />
Input Voltage high/low<br />
Copyright ©2007 <strong>LG</strong> Electronics. Inc. All right reserved.<br />
Only for training and service purposes<br />
Input voltage is over limited<br />
value of the product (173V<br />
or less, 289V or more)<br />
■ Error Diagnosis and Countermeasure Flow Chart<br />
Is input voltage normal?<br />
Yes<br />
Is inverter PCB assembly normal?<br />
Yes<br />
Recheck power and installation condition<br />
No<br />
No<br />
- 98 -<br />
1. Input voltage abnormal (T-N)<br />
2. Outdoor unit inverter PCB assembly damage<br />
(input voltage sensing part)<br />
Check<br />
R~S/S~T/T~R phase voltage is 380V ±10%<br />
R~N/S~N/T~N phase voltage is 220V ±10%<br />
→ Check connection condition and wiring if power is<br />
abnormal<br />
Replace inverter PCB assembly<br />
* Measuring input voltage * Inverter PCB assembly power wiring<br />
<strong>LG</strong>E Internal Use Only
Error<br />
No.<br />
26*<br />
Master<br />
261<br />
Slave1<br />
262<br />
Slave2<br />
263<br />
Error Type Error Point Main Reasons<br />
Inverter compressor starting<br />
failure Error<br />
Copyright ©2007 <strong>LG</strong> Electronics. Inc. All right reserved.<br />
Only for training and service purposes<br />
Starting failure because of<br />
compressor abnormality<br />
■ Error Diagnosis and Countermeasure Flow Chart<br />
Is installation<br />
condition normal?<br />
Yes<br />
Are the resistance<br />
Between each phase and<br />
insulation resistance of Inverter<br />
compressor normal?<br />
Yes<br />
Is compressor<br />
Wire connection<br />
condition normal?<br />
Yes<br />
Is inverter PCB assembly normal?<br />
Yes<br />
Recheck power and installation condition<br />
No<br />
No<br />
No<br />
No<br />
- 99 -<br />
Troubleshooting Guide<br />
1. Overload operation<br />
(Pipe clogging/Covering/EEV defect/Ref.<br />
overcharge)<br />
2. Compressor damage<br />
(Insulation damage/Mo<strong>to</strong>r damage)<br />
3. Compressor wiring fault<br />
4. ODU inverter PCB damage (CT)<br />
1. Check Pipe clogging/dis<strong>to</strong>rtion<br />
2. Check Covering (Indoor/Outdoor Unit)<br />
3. Check EEV connec<strong>to</strong>r assemble condition/normal<br />
operation<br />
4. Check refrigerant pressure<br />
→ Reassemble or manage if abnormality found<br />
1. Check resistance between each terminal of compressor<br />
(0.34~0.35Ω ±7%)<br />
2. Check insulation resistance between compressor<br />
terminal and pipe (over 50MΩ )<br />
→ Replace compressor if abnormality found<br />
1. Check inverter PCB assembly U,V,W connec<strong>to</strong>r<br />
connection condition<br />
2. Check wire disconnection and wiring<br />
3. Check compressor terminal connection condition<br />
(bad contact)<br />
→ Reassemble if abnormality found<br />
Check inverter PCB assembly IPM normality<br />
→ Replace inverter PCB assembly<br />
<strong>LG</strong>E Internal Use Only
Troubleshooting Guide<br />
* Measuring resistance<br />
between each terminal of<br />
compressor<br />
* Compressor wire connection<br />
Copyright ©2007 <strong>LG</strong> Electronics. Inc. All right reserved.<br />
Only for training and service purposes<br />
- 100 -<br />
<strong>LG</strong>E Internal Use Only
Error<br />
No.<br />
28*<br />
Master<br />
281<br />
Slave1<br />
282<br />
Slave2<br />
283<br />
Error Type Error Point Main Reasons<br />
Inverter DC link high<br />
voltage error<br />
Copyright ©2007 <strong>LG</strong> Electronics. Inc. All right reserved.<br />
Only for training and service purposes<br />
Inv PCB DC link voltage<br />
supplied over 780V<br />
■ Error Diagnosis and Countermeasure Flow Chart<br />
Is input voltage normal?<br />
Yes<br />
Is inverter PCB assembly normal?<br />
Yes<br />
Recheck power and installation condition<br />
* Measuring input voltage * Noise filter wiring<br />
No<br />
No<br />
T S R<br />
- 101 -<br />
Troubleshooting Guide<br />
1. Input voltage abnormal (R,S,T,N)<br />
2. ODU inverter PCB damage<br />
(DC Link voltage sensing part)<br />
Check<br />
R~S/S~T/T~R phase voltage is 380V ±10%<br />
R~N/S~N/T~N phase voltage is 220V ±10%<br />
→ Check connection condition and wiring if power is<br />
abnormal<br />
Replace inverter PCB assembly<br />
N T S R<br />
Noise filter output(lower part) Noise filter input (upper part)<br />
<strong>LG</strong>E Internal Use Only
Troubleshooting Guide<br />
Error<br />
No.<br />
29*<br />
Master<br />
291<br />
Slave1<br />
292<br />
Slave2<br />
293<br />
Error Type Error Point Main Reasons<br />
Inverter compressor over<br />
current<br />
Copyright ©2007 <strong>LG</strong> Electronics. Inc. All right reserved.<br />
Only for training and service purposes<br />
Inverter compressor input<br />
current is over 30A<br />
■ Error Diagnosis and Countermeasure Flow Chart<br />
Is installation<br />
condition normal?<br />
Yes<br />
Are the resistance<br />
Between each phase and<br />
insulation resistance of Inverter<br />
compressor normal?<br />
Yes<br />
Is compressor<br />
Wire connection<br />
condition normal?<br />
Yes<br />
Is input voltage normal?<br />
Yes<br />
Is inverter PCB assembly normal?<br />
Yes<br />
Recheck power and installation condition<br />
No<br />
No<br />
No<br />
No<br />
- 102 -<br />
1. Overload operation<br />
(Pipe clogging/Covering/EEV defect/Ref.<br />
overcharge)<br />
2. Compressor damage(Insulation<br />
damage/Mo<strong>to</strong>r damage)<br />
3. Input voltage low<br />
4. ODU inverter PCB assembly damage<br />
1. Check Pipe clogging/dis<strong>to</strong>rtion<br />
2. Check Covering (Indoor/Outdoor Unit)<br />
3. Check EEV connec<strong>to</strong>r assemble condition/normal<br />
operation<br />
4. Check refrigerant pressure<br />
→ Reassemble or manage if abnormality found<br />
1.Check resistance between each terminal of compressor<br />
(0.34~0.35Ω ±7%)<br />
2.Check insulation resistance between compressor terminal<br />
and pipe (over 50MΩ )<br />
→ Replace compressor if abnormality found<br />
1. Check inverter PCB assembly U,V,W connec<strong>to</strong>r<br />
connection condition<br />
2. Check wire disconnection and wiring<br />
3. Check compressor terminal connection condition<br />
(bad contact)<br />
→ Reassemble if abnormality found<br />
Check<br />
R~S/S~T/T~R phase voltage is 380V ±10%<br />
R~N/S~N/T~N phase voltage is 220V ±10%<br />
→ Check connection condition and wiring if power is<br />
abnorma<br />
No Check inverter PCB assembly IPM normality<br />
→ Replace inverter PCB assembly<br />
<strong>LG</strong>E Internal Use Only
* Measuring resistance between each<br />
terminal of compressor<br />
* Measuring input voltage<br />
Copyright ©2007 <strong>LG</strong> Electronics. Inc. All right reserved.<br />
Only for training and service purposes<br />
* Compressor wire connection<br />
- 103 -<br />
Troubleshooting Guide<br />
<strong>LG</strong>E Internal Use Only
Troubleshooting Guide<br />
Error<br />
No.<br />
32*<br />
Master 321<br />
Slave1 322<br />
Slave2 323<br />
33*<br />
Master 331<br />
Slave1 332<br />
Slave2 333<br />
Error Type Error Point Main Reasons<br />
Over-increase discharge<br />
temperature of inverter compressor<br />
at main outdoor unit<br />
Over-increase discharge<br />
temperature of constant<br />
compressor at main constant<br />
outdoor and sub constant<br />
outdoor unit<br />
■ Error diagnosis and countermeasure flow chart<br />
Is the amount of<br />
refrigerant normal?<br />
[refer refrigerant part]<br />
Yes<br />
Is the resistance of discharge<br />
temperature sensor normal?*<br />
Yes<br />
Is EEV in<br />
outdoor unit normal<br />
at heating operation?<br />
[refer electric<br />
component part]<br />
Yes<br />
Does liquid injection<br />
corresponded<br />
operate normally?<br />
Yes<br />
Is there pipe<br />
(strainer etc.) clogging?<br />
Yes<br />
Replace strainer<br />
No<br />
No<br />
No<br />
No<br />
No<br />
Copyright ©2007 <strong>LG</strong> Electronics. Inc. All right reserved.<br />
Only for training and service purposes<br />
Compressor is off<br />
because of over-increase<br />
discharge temperature of<br />
inverter compressor<br />
Compressor is off<br />
because of over-increase<br />
discharge temperature of<br />
constant compressor at<br />
main and sub outdoor unit<br />
Is there pipe crack<br />
or trace of leakage?<br />
Yes<br />
Weld / reconnect the cracked<br />
portion and recharge refrigerant<br />
Replace discharge<br />
temperature sensor<br />
Replace outdoor unit EEV<br />
Check liquid injection<br />
corresponded<br />
Check another components<br />
and operation conditions<br />
/ Take measures<br />
- 104 -<br />
1. Temperature sensor defect of inverter compressor<br />
discharge pipe<br />
2. Refrigerant shortage / leak<br />
3. EEV defect<br />
4. Liquid injection valve defect<br />
1. Temperature sensor defect of constant<br />
compressor discharge pipe?<br />
2. Refrigerant shortage/leak<br />
3. EEV defect<br />
4. Liquid injection valve defect<br />
No<br />
Change the amount of<br />
refrigerant<br />
(Charge additive amount)<br />
* Resistance value of discharge temperature sensor<br />
10°C = 362kΩ, 25°C= 200kΩ, 50°C= 82kΩ, 100°C= 18.5kΩ<br />
<strong>LG</strong>E Internal Use Only
Error<br />
No.<br />
34*<br />
Master<br />
341<br />
Slave1<br />
342<br />
Slave2<br />
343<br />
Error Type Error Point Main Reasons<br />
Over-increase of discharge<br />
pressure of<br />
compressor<br />
■ Error diagnosis and countermeasure flow chart<br />
Is service valve opened ?<br />
Yes<br />
Are transmission<br />
cable / pipe connection<br />
normal?<br />
Yes<br />
Is refrigerant<br />
amount normal?<br />
[refer refrigerant part]<br />
Yes<br />
Is fan normal?<br />
(Indoor fan during heating<br />
Outdoor fan during cooling)<br />
Yes<br />
Is filter blocked<br />
(Heating:indoor,<br />
Cooling:outdoor<br />
heat exchanger)?<br />
Yes<br />
Is value of high pressure<br />
sensor same as Manifold<br />
value(Is it high actually)?<br />
Yes<br />
Check indoor unit LEV<br />
Check indoor unit PCB<br />
Check in/outdoor installation<br />
condition<br />
No<br />
No<br />
No<br />
No<br />
Copyright ©2007 <strong>LG</strong> Electronics. Inc. All right reserved.<br />
Only for training and service purposes<br />
Error happens<br />
because of 3 times<br />
successive compressor<br />
off due <strong>to</strong> overincrease<br />
of high pressure<br />
by high pressure<br />
sensor<br />
Open service valve<br />
Check and repair transmission<br />
cable / pipe connection<br />
Adjust refrigerant amount<br />
Replace related parts<br />
(Refer <strong>to</strong> Error 105~107)<br />
No Clean indoor filter (heating)<br />
/outdoor heat exchanger (cooling)?<br />
No<br />
Replace sensor of high pressure<br />
- 105 -<br />
Troubleshooting Guide<br />
1. Defect of high pressure sensor<br />
2. Defect of indoor or outdoor unit fan<br />
3. Deformation because of damage of refrigerant pipe<br />
4. Over-charged refrigerant<br />
5. Defective indoor / outdoor unit EEV<br />
6. When blocked<br />
- Outdoor unit is blocked during cooling<br />
- Indoor unit filter is blocked during heating<br />
7. SVC valve is clogged<br />
8. PCB defect of outdoor unit<br />
10. Indoor unit pipe temperature sensor defect<br />
<strong>LG</strong>E Internal Use Only
Troubleshooting Guide<br />
Error<br />
No.<br />
35*<br />
Master<br />
351<br />
Slave1<br />
352<br />
Slave2<br />
353<br />
Error Type Error Point Main Reasons<br />
Excessive drop of<br />
discharge pressure<br />
of compressor<br />
■ Error diagnosis and countermeasure flow chart<br />
Is service valve<br />
opened?<br />
Yes<br />
Are transmission cable/<br />
piping normal?<br />
Yes<br />
Is amount of refrigerant<br />
normal?<br />
[refer refrigerant part]<br />
Yes<br />
Is fan normal?<br />
(in heating outdoor fan,<br />
in cooling indoor fan)<br />
Yes<br />
Is strainer Ok?*<br />
Yes<br />
Are the values of manifold<br />
and low pressure sensor same?<br />
( Is the low pressure value<br />
actually low?)<br />
Yes<br />
Check indoor / outdoor unit LEV<br />
Check Indoor unit PCB<br />
Check indoor / outdoor unit<br />
installation conditions<br />
No<br />
No<br />
No<br />
No<br />
No<br />
Copyright ©2007 <strong>LG</strong> Electronics. Inc. All right reserved.<br />
Only for training and service purposes<br />
Error happens<br />
because of 3 times<br />
successive compressor<br />
off due <strong>to</strong> excessive<br />
drop of low pressure<br />
by the low pressure<br />
sensor<br />
Open service valve<br />
check transmission/<br />
piping correction.<br />
Is there pipe crack or trace<br />
of refrigerant leakage?<br />
Yes<br />
Weld / reconnect the cracked<br />
portion and recharge refrigerant<br />
Check and replace related parts<br />
(error 105~108 reference)<br />
Replace the strainer<br />
Replace the pressure sensor<br />
- 106 -<br />
1. Defective low pressure sensor<br />
2. Defective outdoor/indoor unit fan<br />
3. Refrigerant shortage/leakage<br />
4. Deformation because of damage of refrigerant pipe<br />
5. Defective indoor / outdoor unit EEV<br />
6. Covering / clogging<br />
(outdoor unit covering during the cooling mode/<br />
indoor unit filter clogging during heating mode)<br />
7. SVC valve clogging<br />
8. Defective outdoor unit PCB<br />
9. Defective indoor unit pipe sensor<br />
No<br />
Adjust the amount of<br />
refrigerant (Additive charge)<br />
* If the temperature difference between inlet and outlet of strainer<br />
is so large that frost or ice formation can be seen or confirmed<br />
then clogging of strainer should be checked<br />
(Notice: it is not full ice forming of strainer, in case that there is<br />
not at inlet portion but at outlet portion)<br />
<strong>LG</strong>E Internal Use Only
Error<br />
No.<br />
40*<br />
Master<br />
401<br />
Slave1<br />
402<br />
Slave2<br />
403<br />
Error Type Error Point Main Reasons<br />
Inverter compressor CT<br />
sensor error<br />
Copyright ©2007 <strong>LG</strong> Electronics. Inc. All right reserved.<br />
Only for training and service purposes<br />
Micom input voltage isn't<br />
within 2.5V ±0.3V at initial<br />
state of power supply<br />
■ Error Diagnosis and Countermeasure Flow Chart<br />
Is input voltage normal?<br />
Yes<br />
Is inverter PCB assembly normal?<br />
Yes<br />
Recheck power and installation condition<br />
* Measuring input voltage<br />
* Inverter PCB assembly<br />
No<br />
No<br />
- 107 -<br />
1. Input voltage abnormal (T-N)<br />
2. ODU inverter PCB damage<br />
(CT sensing part)<br />
Check<br />
R~S/S~T/T~R phase voltage is 380V ±10%<br />
R~N/S~N/T~N phase voltage is 220V ±10%<br />
→ Check connection condition and wiring if power is<br />
abnormal<br />
Replace inverter PCB assembly<br />
* <strong>LG</strong>MV Part<br />
Troubleshooting Guide<br />
<strong>LG</strong>E Internal Use Only
Troubleshooting Guide<br />
Error No. Error Type Error Point Main Reasons<br />
41*<br />
(Inverter)<br />
Master 411<br />
Slave1 412<br />
Slave2 413<br />
47*<br />
(Constant)<br />
Master 471<br />
Slave1 472<br />
Slave2 473<br />
Compressor discharge<br />
pipe temperature<br />
sensor<br />
error<br />
■ Error diagnosis and countermeasure flow chart<br />
Sensor connection <strong>to</strong> PCB<br />
is normal?<br />
Yes<br />
Is the resistance of<br />
sensor normal?*<br />
Yes<br />
Is sensor resistance<br />
value same as temperature<br />
value of <strong>LG</strong>MV?<br />
Yes<br />
Replace corresponding sensor<br />
No<br />
No<br />
No<br />
Copyright ©2007 <strong>LG</strong> Electronics. Inc. All right reserved.<br />
Only for training and service purposes<br />
Check the resistance<br />
inverter compressor<br />
discharge temperature<br />
sensor<br />
Sensor measurement<br />
valve is abnormal<br />
(Open/Short)<br />
Insert sensor connec<strong>to</strong>r <strong>to</strong> PCB properly<br />
Replace sensor<br />
Replace corresponding outdoor PCB<br />
* Error is generated if the resistance is more than 5MΩ(open) and less than 2kΩ (short)<br />
Note: Standard values of resistance of sensors at different temperatures (±5% variation)<br />
10°C = 362kΩ : 25°C= 200kΩ : 50°C= 82kΩ : 100°C= 18.5kΩ<br />
- 108 -<br />
Check the resistance<br />
of constant compressor<br />
discharge temperature<br />
sensor<br />
1. Defective connection of the<br />
compressor discharge pipe temperature<br />
sensor<br />
2. Defective discharge pipe compressor<br />
sensor of the compressor<br />
(open/short)<br />
3. Defective outdoor PCB<br />
<strong>LG</strong>E Internal Use Only
Error<br />
No.<br />
42*<br />
Master 421<br />
Slave1 422<br />
Slave2 423<br />
43*<br />
Master 431<br />
Slave1 432<br />
Slave2 433<br />
Error Type Error Point Main Reasons<br />
Sensor error of low<br />
pressure<br />
Sensor error of high<br />
pressure<br />
■ Error diagnosis and countermeasure flow chart<br />
Is sensor connected<br />
<strong>to</strong> PCB correctly?<br />
Yes<br />
After replacement of<br />
outdoor unit main PCB<br />
is the system normal?<br />
Yes<br />
END<br />
No<br />
No<br />
Low pressure sensor<br />
Abnormal value of<br />
sensor<br />
(Open/Short)<br />
Abnormal value of<br />
sensor<br />
(Open/Short)<br />
High pressure sensor<br />
Copyright ©2007 <strong>LG</strong> Electronics. Inc. All right reserved.<br />
Only for training and service purposes<br />
Connect sensor <strong>to</strong> PCB correctly<br />
Replace corresponding<br />
pressure sensor<br />
- 109 -<br />
Troubleshooting Guide<br />
1. Bad connection of low pressure connec<strong>to</strong>r<br />
2. Defect of low pressure connec<strong>to</strong>r (Open/Short)<br />
3. Defect of outdoor PCB<br />
1. Bad connection of high pressure connec<strong>to</strong>r<br />
2. Defect of high pressure connec<strong>to</strong>r (Open/Short)<br />
3. Defect of outdoor PCB<br />
<strong>LG</strong>E Internal Use Only
Troubleshooting Guide<br />
Error No. Error Type Error Point Main Reasons<br />
44*<br />
Master 441<br />
Slave1 442<br />
Slave2 443<br />
45*<br />
Master 451<br />
Slave1 452<br />
Slave2 453<br />
48*<br />
Master 481<br />
Slave1 482<br />
Slave2 483<br />
46*<br />
Master 461<br />
Slave1 462<br />
Slave2 463<br />
■ Error diagnosis and countermeasure flow chart<br />
Is sensor connected<br />
<strong>to</strong> PCB correctly??<br />
Yes<br />
Is sensor value correct?*<br />
Yes<br />
Replace corresponding<br />
outdoor unit PCB<br />
Sensor error of<br />
outdoor air temperature<br />
Piping temperature<br />
sensor error of heat<br />
exchanger in<br />
master & slave outdoor<br />
unit heat<br />
exchanger (A,B)<br />
Compressor suction<br />
temperature<br />
sensor error<br />
No<br />
No<br />
Copyright ©2007 <strong>LG</strong> Electronics. Inc. All right reserved.<br />
Only for training and service purposes<br />
Abnormal value of<br />
sensor (Open/Short)<br />
Abnormal value of<br />
sensor<br />
(Open/Short)<br />
Abnormal value of<br />
sensor (Open/Short)<br />
Connect sensor <strong>to</strong> PCB correctly<br />
Replace sensor<br />
* If value is 100kΩ ↑(open) or 100 Ω↓(short), error occurs<br />
- 110 -<br />
1. Bad connection of air temperature connec<strong>to</strong>r<br />
2. Defect of air temperature connec<strong>to</strong>r(Open/Short)<br />
3. Defect of outdoor PCB<br />
1. Bad connection of air temperature connec<strong>to</strong>r<br />
2. Defect of air temperature connec<strong>to</strong>r(Open/Short)<br />
3. Defect of outdoor PCB<br />
1. Bad connection of air temperature connec<strong>to</strong>r<br />
2. Defect of air temperature connec<strong>to</strong>r(Open/Short)<br />
3. Defect of outdoor PCB<br />
NB: Resistance value of temperature sensor change according <strong>to</strong><br />
temperature<br />
It is normal if value shown as below (±5% error)<br />
Sensor of air temperature: 10°C = 20.7kΩ : 25°C= 10kΩ : 50°C= 3.4kΩ<br />
Sensor of piping temperature: 10°C = 10kΩ : 25°C= 5kΩ : 50°C= 1.8kΩ<br />
Error No. Error Type Error Point Main Reasons<br />
47*<br />
Master 471<br />
Slave1 472<br />
Slave2 473<br />
48*<br />
Master 481<br />
Slave1 482<br />
Slave2 483<br />
Discharge piping<br />
temperature sensor<br />
error of constant<br />
compressor<br />
Piping temperature<br />
sensor error of heat<br />
Exchanger in master<br />
& slave outdoor unit<br />
heat exchanger (B)<br />
Abnormal value of<br />
sensor (Open/Short)<br />
Abnormal value of<br />
sensor (Open/Short)<br />
Refer <strong>to</strong> CH41<br />
Refer <strong>to</strong> CH45<br />
<strong>LG</strong>E Internal Use Only
Troubleshooting Guide<br />
Error<br />
No.<br />
51<br />
Error Type Error Point Main Reasons<br />
Over-Capacity<br />
(Sum of indoor unit capacity<br />
is more than outdoor<br />
capacity)<br />
Copyright ©2007 <strong>LG</strong> Electronics. Inc. All right reserved.<br />
Only for training and service purposes<br />
Sum of indoor unit capacity<br />
exceed outdoor unit<br />
capacity specification<br />
■ Error diagnosis and countermeasure flow chart<br />
Is capacity sum of<br />
indoor units less than<br />
130% of outdoor unit<br />
capacity at <strong>LG</strong>MV?<br />
Yes<br />
Check following<br />
dip S/W setting is on<br />
Slave1: No.5,7<br />
Slave2: No. 6,7<br />
Slave3: No. 5,6,7<br />
Yes<br />
Is power of Slave PCB<br />
On? (Check LED blinking)<br />
Yes<br />
Is transmission<br />
cables between outdoor units<br />
connected correctly?*<br />
Yes<br />
Is error code released<br />
in order(Slave2➠Slave1➠Main)<br />
after power reset?<br />
Yes<br />
End<br />
* In order <strong>to</strong> check transmission<br />
cables between outdoor units,<br />
check in order as below<br />
: PCB connec<strong>to</strong>rs ➠<br />
terminal block ➠<br />
transmission cables<br />
No<br />
No<br />
No<br />
No<br />
No<br />
Are quantity and capacity<br />
of indoor units installed<br />
same as the data of <strong>LG</strong>MV?<br />
Yes<br />
Adjust the capacity of indoor<br />
and outdoor unit<br />
Adjust corresponding DIP switch<br />
Is main power really supplied?<br />
(Terminal Block T-N)<br />
Yes<br />
Check and replace PCB,<br />
Line Fuse, Transformer<br />
Re-connect<br />
Replace Main or Slave PCB<br />
- 112 -<br />
1. 130% more than outdoor unit rated capacity<br />
2. Wrong connection of transmission<br />
cable/piping<br />
3. Control error of slave outdoor unit Dip switch<br />
4. Power supply defect of slave unit PCB<br />
5. Defect of outdoor unit PCB<br />
No<br />
Check transmission cables<br />
between indoor and outdoor<br />
units<br />
No Supply main<br />
power again<br />
<strong>LG</strong>E Internal Use Only
Error<br />
No.<br />
52*<br />
Master 521<br />
Slave1 522<br />
Slave2 523<br />
Error Type Error Point Main Reasons<br />
Transmission error between<br />
(Inverter PCB ➔ Main PCB)<br />
Copyright ©2007 <strong>LG</strong> Electronics. Inc. All right reserved.<br />
Only for training and service purposes<br />
Main controller of Master<br />
unit of Master unit can’t<br />
receive signal from<br />
inverter controller<br />
■ Error diagnosis and countermeasure flow chart<br />
Is transmission<br />
LED (Yellow) of inverter<br />
compressor<br />
PCB on?<br />
Yes<br />
Is transmission cable<br />
connected correctly?<br />
Yes<br />
Is MAIN PCB normal?<br />
Yes<br />
No Is noise filter or fuse<br />
normal?<br />
No<br />
No<br />
Replace inverter compressor PCB<br />
Yes<br />
Replace inverter compressor PCB<br />
Re-connect transmission cable<br />
Replace MAIN PCB<br />
- 113 -<br />
Troubleshooting Guide<br />
1. Power cable or transmission cable is not<br />
connected<br />
2. Defect of outdoor Main fuse/Noise Filter<br />
3. Defect of outdoor Main / inverter PCB<br />
Replace noise filter or fuse<br />
* The method of checking MAIN PCB and inverter compressor PCB (If normal, transmission LED blinks)<br />
Transmission connec<strong>to</strong>r & LED in MAIN PCB Transmission connec<strong>to</strong>r & LED in inverter compressor PCB<br />
No<br />
<strong>LG</strong>E Internal Use Only
Troubleshooting Guide<br />
Error<br />
No.<br />
53<br />
Error Type Error Point Main Reasons<br />
Transmission error<br />
(Indoor unit ➔ Main PCB)<br />
Copyright ©2007 <strong>LG</strong> Electronics. Inc. All right reserved.<br />
Only for training and service purposes<br />
In case Main PCB can’t<br />
receive signal from indoor<br />
unit<br />
■ Error diagnosis and countermeasure flow chart<br />
Are quantity of indoor<br />
units installed same as<br />
the data of <strong>LG</strong>MV?<br />
Yes<br />
Is power supplied<br />
<strong>to</strong> indoor units?<br />
Yes<br />
Replace indoor unit PCB or<br />
transmission PCB<br />
after check defected indoor<br />
No<br />
No<br />
Is indoor unit<br />
quantity correct after<br />
Au<strong>to</strong> Addressing?<br />
Yes<br />
End<br />
Supply power<br />
- 114 -<br />
1. Transmission cables are not connected<br />
2. Transmission cables are short / open<br />
3. Defect of outdoor Main / indoor PCB<br />
In case of CH53, almost happened with CH05, the indoor units not operated actually are normal so check with<br />
same method of CH05. and additionally check as shown as below and above flow chart<br />
• Although the quantity of indoor units installed is same as <strong>LG</strong>MV data there may be a few indoor units with<br />
which the number of transmission is not increased with <strong>LG</strong>MV<br />
• Although the quantity of indoor units installed is not same as <strong>LG</strong>MV data, and if transmission of the indoor unit<br />
displayed at <strong>LG</strong>MV is done well then the indoor unit suspected <strong>to</strong> have some problem (and is not appear at<br />
<strong>LG</strong>MV) may have following problems<br />
➀ wrong connection of transmission cable or power cable<br />
➁ fault of power / PCB / transmission cable<br />
➂ duplication of indoor unit number<br />
• If transmission is not doing well wholly then the Au<strong>to</strong> Addressing is not done<br />
• The case that CH53 appear at indoor unit also Au<strong>to</strong> Addressing is not done so indoor unit address may be<br />
duplicated<br />
* After replacement of indoor unit PCB, Au<strong>to</strong> Addressing should be done, if central controller is installed then the<br />
central control address also should be input.<br />
In case that only transmission PCB is replaced above process is not needed<br />
No<br />
<strong>LG</strong>E Internal Use Only
Error<br />
No.<br />
Error Type Error Point Main Reasons<br />
54* Wrong connection of 3Ø<br />
Master 541 power supply cable<br />
Slave1 542 (Reverse direction / missing<br />
Slave2 543 a phase)<br />
Copyright ©2007 <strong>LG</strong> Electronics. Inc. All right reserved.<br />
Only for training and service purposes<br />
Wrong connection of 3Ø<br />
power supply cable<br />
(Reverse direction / missing<br />
a phase)<br />
■ Error diagnosis and countermeasure flow chart<br />
Is connection and phase<br />
order of power cables <strong>to</strong> main /<br />
slave outdoor unit correct?*<br />
Yes<br />
Is connection and phase<br />
order of power distribution<br />
panel correct?**<br />
Yes<br />
Is CH 54 occurred again<br />
after reset MAIN<br />
circuit breaker?<br />
Yes<br />
Is main PCB fuse normal?<br />
Yes<br />
Replace main PCB<br />
No<br />
No<br />
No<br />
* Check power cable connection state,<br />
phase (R-S-T) order, power supply state<br />
in control box of product<br />
Connect correctly<br />
No Connect power cables in<br />
distribution panel correctly<br />
End<br />
Replace Fuse<br />
- 115 -<br />
Troubleshooting Guide<br />
1. Main PCB defect<br />
2. No power of R,S,T supplied<br />
3. Wring connection of R,S,T cables<br />
4. Main Pcb Fuse failure<br />
** Check power cable connection state, phase order, power<br />
supply state in distribution panel<br />
<strong>LG</strong>E Internal Use Only
Troubleshooting Guide<br />
Error<br />
No.<br />
59<br />
Error Type Error Point Main Reasons<br />
Slave ODU mixed<br />
installation<br />
Copyright ©2007 <strong>LG</strong> Electronics. Inc. All right reserved.<br />
Only for training and service purposes<br />
Installing old Sub ODU and<br />
new slave ODU <strong>to</strong>gether<br />
■ Error Diagnosis and Countermeasure Flow Chart<br />
Installed 3 UNIT or more?<br />
Yes<br />
Is <strong>LG</strong>DC Slave Unit installed?<br />
Yes<br />
Is Super Sub Unit installed ?<br />
Yes<br />
Slave,Sub Unit mixed installation<br />
✻ Slave Unit Dip S/W Setting<br />
Slave 1<br />
Slave 2<br />
ON<br />
No<br />
No<br />
No<br />
1 2 3 4 5 6 7<br />
ON<br />
- 116 -<br />
Installing <strong>LG</strong>DC Slave Unit and Super sub<br />
Unit <strong>to</strong>gether<br />
Recheck power and installation condition<br />
Recheck power and installation condition<br />
Recheck power and installation condition<br />
1 2 3 4 5 6 7<br />
1 2 3 4 5 6 7 8 9 10 11 12 13 14<br />
ON<br />
1 2 3 4 5 6 7<br />
ON<br />
1 2 3 4 5 6 7<br />
1 2 3 4 5 6 7 8 9 10 11 12 13 14<br />
<strong>LG</strong>E Internal Use Only
Error<br />
No.<br />
60*<br />
Master<br />
601<br />
Slave1<br />
602<br />
Slave2<br />
603<br />
Error Type Error Point Main Reasons<br />
Inverter PCB EEPROM<br />
error<br />
Copyright ©2007 <strong>LG</strong> Electronics. Inc. All right reserved.<br />
Only for training and service purposes<br />
EEPROM Access error and<br />
Check SUM error<br />
■ Error Diagnosis and Countermeasure Flow Chart<br />
Is EEPROM insertion normal?<br />
Yes<br />
Is inverter PCB assembly normal?<br />
Yes<br />
Recheck power and installation condition<br />
* Inverter EEPROM inserting point<br />
No<br />
No<br />
* Right inserting direction of inverter EEPROM<br />
❊ Note : Replace after power off<br />
- 117 -<br />
Troubleshooting Guide<br />
1. EEPROM contact defect/wrong insertion<br />
2. Different EEPROM Version<br />
3. ODU inverter PCB assembly damage<br />
1.Check EEPROM insert direction/connection condition<br />
2.Check EEPROM Check SUM<br />
→ Replace if abnormality found<br />
Replace inverter PCB assembly<br />
EEPROM enlarged picture<br />
<strong>LG</strong>E Internal Use Only
Troubleshooting Guide<br />
Error<br />
No.<br />
67*<br />
Master<br />
671<br />
Slave1<br />
672<br />
Slave2<br />
673<br />
Fan Lock Error<br />
Error Type Error Point Main Reasons<br />
Copyright ©2007 <strong>LG</strong> Electronics. Inc. All right reserved.<br />
Only for training and service purposes<br />
Fan RPM is 10RPM or less<br />
for 5 sec. when ODU fan<br />
starts or 40 RPM or less<br />
after fan starting.<br />
■ Error Diagnosis and Countermeasure Flow Chart<br />
Is ODU Fan Mo<strong>to</strong>r Assemble<br />
condition normal?<br />
Yes<br />
Is ODU Fan Mo<strong>to</strong>r normal?<br />
Yes<br />
Is wire connection of<br />
ODU Fan Mo<strong>to</strong>r wire normal?<br />
Yes<br />
Is Fan PCB assembly normal?<br />
Yes<br />
Recheck power and installation condition<br />
* Fan Mo<strong>to</strong>r resistance measuring<br />
between each phase<br />
No<br />
No<br />
No<br />
No<br />
* Hall Sensor connec<strong>to</strong>r<br />
- 118 -<br />
1. Fan mo<strong>to</strong>r defect / assembly condition<br />
abnormal<br />
2. Wrong connection of fan mo<strong>to</strong>r connec<strong>to</strong>r<br />
(Hall sensor, U,V,W output)<br />
3. Reversing rotation after RPM target apply<br />
4. Fan PCB assembly defect<br />
Check ODU Fan Mo<strong>to</strong>r assemble condition and fan locking<br />
→ Reassemble or replace if abnormality found<br />
1. Check resistance between each phase(U,V,W) of ODU<br />
fan mo<strong>to</strong>r terminal (16.8Ω ±5% at 75°…)<br />
2. Check insulation resistance between ODU fan mo<strong>to</strong>r<br />
terminal(U,V,W)<br />
→ Replace fan mo<strong>to</strong>r if abnormality found<br />
Check wiring between OUD fan mo<strong>to</strong>r and fan PCB<br />
( Check if Hall Senor and Mo<strong>to</strong>r output terminal color is<br />
matched)<br />
→ Reassemble if abnormality found<br />
Replace Fan PCB assembly<br />
* Fan Mo<strong>to</strong>r Wire connection<br />
<strong>LG</strong>E Internal Use Only
Error<br />
No.<br />
70*<br />
Master<br />
701<br />
Slave1<br />
702<br />
Slave2<br />
703<br />
Error Type Error Point Main Reasons<br />
Constant Speed<br />
Compressor CT Sensor<br />
Error<br />
Copyright ©2007 <strong>LG</strong> Electronics. Inc. All right reserved.<br />
Only for training and service purposes<br />
Constant Speed<br />
Compressor CT Sensor<br />
Open/short<br />
■ Error Diagnosis and Countermeasure Flow Chart<br />
Is constant speed compressor<br />
CT Sensor connection condition<br />
normal?<br />
Yes<br />
Recheck power and installation condition<br />
No<br />
- 119 -<br />
Troubleshooting Guide<br />
1. Constant Speed Compressor CT Sensor<br />
defect<br />
Check constant speed compressor<br />
CT Sensor wiring condition and locking<br />
<strong>LG</strong>E Internal Use Only
Copyright ©2007 <strong>LG</strong> Electronics. Inc. All right reserved.<br />
Only for training and service purposes<br />
- 121 -<br />
Troubleshooting Guide<br />
Error No. Error Type Error Point Main Reasons<br />
73*<br />
Master 731<br />
Slave1 732<br />
Slave2 733<br />
AC input instant over current<br />
error (Matter of software)<br />
Inverter PCB input 3 phase power<br />
current is over 50A(peak) for 2ms<br />
■ Error Diagnosis and Countermeasure Flow Chart<br />
Is installation<br />
condition normal?<br />
Yes<br />
Is input voltage normal?<br />
Yes<br />
Is AC input Wire connection<br />
condition normal?<br />
Yes<br />
Is compressor<br />
Wire connection<br />
condition normal?<br />
Yes<br />
Is inverter PCB assembly<br />
normal?<br />
Yes<br />
Recheck power and<br />
installation condition<br />
No<br />
No<br />
No<br />
No<br />
No<br />
1.Check Pipe clogging/dis<strong>to</strong>rtion<br />
2.Check Covering (Indoor/Outdoor Unit)<br />
3.Check EEV connec<strong>to</strong>r assemble condition/normal operation<br />
4.Check refrigerant pressure<br />
→ Reassemble or manage if abnormality found<br />
Check<br />
R~S/S~T/T~R phase voltage is 380V ± 10%<br />
R~N/S~N/T~N phase voltage is 220V ± 10%<br />
→ Check connection condition and wiring if power is abnormal<br />
1.Check R,S,T,N connection condition<br />
2.Check wire disconnection and wiring<br />
→ Reassemble if abnormality found<br />
1.Overload operation (Pipe clogging/Covering/EEV<br />
defect/Ref.<br />
overcharge)<br />
2.Compressor damage(Insulation<br />
damage/Mo<strong>to</strong>r damage)<br />
3.Input voltage abnormal(R,S,T,N)<br />
4.Power line assemble condition<br />
abnormal<br />
5.Inverter PCB assembly<br />
damage(input current sensing part)<br />
1.Check inverter PCB assembly U,V,W connec<strong>to</strong>r connection condition<br />
2.Check wire disconnection and wiring<br />
3.Check compressor terminal connection condition(bad contact)<br />
→ Reassemble if abnormality found<br />
Check inverter PCB assembly IPM normality<br />
→ Replace inverter PCB assembly<br />
<strong>LG</strong>E Internal Use Only
Troubleshooting Guide<br />
Measuring input voltage<br />
Noise filter wiring<br />
N T S R T S R<br />
Inverter PCB assembly power<br />
connection<br />
Copyright ©2007 <strong>LG</strong> Electronics. Inc. All right reserved.<br />
Only for training and service purposes<br />
Compressor Wire Connection<br />
Noise filter input (upper part) Noise filter output(lower part)<br />
Inverter PCB assembly/Wiring power <strong>to</strong> inverter PCB on Noise filter<br />
Noise filter power connection<br />
- 122 -<br />
<strong>LG</strong>E Internal Use Only
Copyright ©2007 <strong>LG</strong> Electronics. Inc. All right reserved.<br />
Only for training and service purposes<br />
- 123 -<br />
Troubleshooting Guide<br />
Error No. Error Type Error Point Main Reasons<br />
74*<br />
Master 741<br />
Slave1 742<br />
Slave2 743<br />
3 Phase Power Unbalance<br />
During operation(compressor frequency<br />
is over 50Hz), difference<br />
between R & T phase is 5A for 10<br />
seconds.<br />
■ Error Diagnosis and Countermeasure Flow Chart<br />
Is inverter PCB assembly<br />
power wiring normal?<br />
Yes<br />
Is input voltage normal?<br />
Yes<br />
Does indoor unit power<br />
bridge R,S,T phase equally?<br />
Yes<br />
Is inverter PCB<br />
assembly normal?<br />
Yes<br />
Recheck power and<br />
installing condition<br />
Measuring input voltage<br />
No<br />
No<br />
No<br />
No<br />
1. CT sensor defect<br />
2. Capacity over of AVR<br />
3. Bridge R-N or S-N or T-N phase<br />
voltage unequally at indoor unit<br />
etc.<br />
Check abnormal wiring between Inverter PCB assembly & bridge diode<br />
(misconnection,disconnection)<br />
→ Rewiring if abnormal wiring found<br />
Check<br />
R~S/S~T/T~R phase voltage is 380V ± 10%<br />
R~N/S~N/T~N phase voltage is 220V ± 10%<br />
→ Check connection condition and wiring if power is abnormal<br />
Bridge R-N,S-N,T-N voltage equally<br />
Replace inverter PCB assembly<br />
Inverter PCB & Bridge Diode wiring<br />
Checking joining condition<br />
<strong>LG</strong>E Internal Use Only
Troubleshooting Guide<br />
Error No. Error Type Error Point Main Reasons<br />
75*<br />
Master 751<br />
Slave1 752<br />
Slave2 753<br />
Fan CT sensor error<br />
Copyright ©2007 <strong>LG</strong> Electronics. Inc. All right reserved.<br />
Only for training and service purposes<br />
Offset of micom which senses the<br />
fan mo<strong>to</strong>r phase current is not 2.5V<br />
■ Error Diagnosis and Countermeasure Flow Chart<br />
Is input voltage normal?<br />
Yes<br />
Is Fan PCB assembly normal?<br />
Yes<br />
Recheck power and<br />
installation condition<br />
No<br />
No<br />
Check 15V wire connection<br />
→ Reassemble or manage if abnormality found<br />
Replace Fan PCB assembly<br />
- 124 -<br />
1.Input voltage is abnormal(not 15V)<br />
2.Fan PCB assembly defect<br />
Checking 15V<br />
<strong>LG</strong>E Internal Use Only
Copyright ©2007 <strong>LG</strong> Electronics. Inc. All right reserved.<br />
Only for training and service purposes<br />
- 125 -<br />
Troubleshooting Guide<br />
Error No. Error Type Error Point Main Reasons<br />
76*<br />
Master 761<br />
Slave1 762<br />
Slave2 763<br />
Fan DC Link High Voltage<br />
Error<br />
Fan PCB DC link voltage supplied<br />
over 780V\<br />
■ Error Diagnosis and Countermeasure Flow Chart<br />
Is input voltage normal?<br />
Yes<br />
Is Fan PCB assembly normal?<br />
Yes<br />
Recheck power and<br />
installation condition<br />
No<br />
No<br />
T S R<br />
Noise filter output(lower part)<br />
Check<br />
R~S/S~T/T~R phase voltage is 380V ± 10%<br />
R~N/S~N/T~N phase voltage is 220V ± 10%<br />
→ Check connection condition and wiring if power is abnormal<br />
Replace Fan PCB assembly<br />
Measuring input voltage<br />
Noise filter wiring<br />
N T S R<br />
Noise filter input (upper part)<br />
1.Input power abnormal<br />
2.Fan PCB assembly defect<br />
<strong>LG</strong>E Internal Use Only
Troubleshooting Guide<br />
Error No. Error Type Error Point Main Reasons<br />
77*<br />
Master 771<br />
Slave1 772<br />
Slave2 773<br />
Fan Over Current Error<br />
Copyright ©2007 <strong>LG</strong> Electronics. Inc. All right reserved.<br />
Only for training and service purposes<br />
Output current is over 5A for 40ms<br />
■ Error Diagnosis and Countermeasure Flow Chart<br />
Is installation<br />
condition normal?<br />
Yes<br />
Are the resistance<br />
Between each phase and insulation<br />
resistance of mo<strong>to</strong>r output<br />
terminal normal?<br />
Yes<br />
Is mo<strong>to</strong>r wire connection<br />
condition normal?<br />
Is Fan PCB assembly normal?<br />
Yes<br />
Recheck power and<br />
installation condition<br />
No<br />
No<br />
No<br />
No<br />
Check ODU fan mo<strong>to</strong>r assemble condition and locking<br />
→ Reassemble or replace if abnormality found<br />
- 126 -<br />
1.Overload operation<br />
2.Fan Mo<strong>to</strong>r defect<br />
3.Fan PCB assembly defect<br />
1.Check resistance between each mo<strong>to</strong>r output terminal<br />
(16.8Ω±5% at 75°C)<br />
2. Check insulation resistance between ODU fan mo<strong>to</strong>r terminal(U,V,W) and pipe<br />
(over 100MΩ )<br />
→ Replace fan mo<strong>to</strong>r if abnormality found<br />
1.Check if color of mo<strong>to</strong>r output terminal(U,V,W) connec<strong>to</strong>r matched with PCB’s<br />
2.Check wire disconnection and wiring<br />
→ Reassemble or replace if abnormality found<br />
1. Check fan PCB assembly IPM normal<br />
→ Replace Fan PCB assembly<br />
Measuring fan mo<strong>to</strong>r phase<br />
resistance<br />
Fan mo<strong>to</strong>r wire connection<br />
Hall Sensor connection<br />
<strong>LG</strong>E Internal Use Only
Copyright ©2007 <strong>LG</strong> Electronics. Inc. All right reserved.<br />
Only for training and service purposes<br />
- 127 -<br />
Troubleshooting Guide<br />
Error No. Error Type Error Point Main Reasons<br />
78*<br />
Master 781<br />
Slave1 782<br />
Slave2 783<br />
Fan Mo<strong>to</strong>r Hall Sensor<br />
Error<br />
Fan Mo<strong>to</strong>r Hall Sensor short/open<br />
■ Error Diagnosis and Countermeasure Flow Chart<br />
Is fan mo<strong>to</strong>r assemble<br />
condition normal?<br />
Yes<br />
Is wiring between fan mo<strong>to</strong>r<br />
and PCB normal?<br />
Yes<br />
Is connec<strong>to</strong>r color between<br />
Hall Sensor PCB matched?<br />
Yes<br />
Is fan PCB assembly normal?<br />
Yes<br />
Recheck power and<br />
installation condition<br />
No<br />
No<br />
No<br />
No<br />
Check ODU fan mo<strong>to</strong>r assemble condition and locking<br />
→ Reassemble or replace if abnormality found<br />
Recheck f an mo<strong>to</strong>r hall sensor connection<br />
→ Reassemble if abnormality found<br />
1.Fan mo<strong>to</strong>r hall sensor defect<br />
2.ODU fan mo<strong>to</strong>r hall sensor disconnection<br />
3.ODU Fan Mo<strong>to</strong>r Hall Sensor wrong<br />
insertion<br />
4.Fan PCB assembly defect<br />
Check if connec<strong>to</strong>r color matched between fan mo<strong>to</strong>r hall sensor and PCB<br />
→ Reassemble if abnormality found<br />
Replace Fan PCB assembly<br />
Fan mo<strong>to</strong>r wire connection<br />
Hall sensor connection<br />
❈ Note : If LED is blinking oppositely after connecting Hall Sensor connec<strong>to</strong>r,<br />
U.V.W output terminal oppositely, replace the mo<strong>to</strong>r.<br />
If LED is not blinking oppositely,replace fan PCB assembly.<br />
<strong>LG</strong>E Internal Use Only
Troubleshooting Guide<br />
Error No. Error Type Error Point Main Reasons<br />
79*<br />
Master 791<br />
Slave1 792<br />
Slave2 793<br />
Fan Starting Failure<br />
Error<br />
Copyright ©2007 <strong>LG</strong> Electronics. Inc. All right reserved.<br />
Only for training and service purposes<br />
Fan Mo<strong>to</strong>r initial starting failure<br />
■ Error Diagnosis and Countermeasure Flow Chart<br />
Is fan mo<strong>to</strong>r assemble<br />
condition normal?<br />
Yes<br />
Are the resistance<br />
Between each phase and insulation<br />
resistance of mo<strong>to</strong>r output<br />
terminal normal?<br />
Is fan mo<strong>to</strong>r connection<br />
condition normal?<br />
Is fan PCB assembly normal?<br />
Yes<br />
Recheck power and<br />
installation condition<br />
Measuring fan mo<strong>to</strong>r phase<br />
resistance<br />
Fan mo<strong>to</strong>r wire connection<br />
No<br />
No<br />
No<br />
No<br />
Check ODU fan mo<strong>to</strong>r assemble condition and locking<br />
→ Reassemble or replace if abnormality found<br />
- 128 -<br />
1.Fan mo<strong>to</strong>r defect/ assemble condition abnormal<br />
2.Fan mo<strong>to</strong>r connec<strong>to</strong>r misconnection(Hall sensor,<br />
U,V,W ouput)<br />
3.Fan PCB defect<br />
1. Check resistance between each mo<strong>to</strong>r output terminal<br />
(16.8 Ω ±5% at 75°C)<br />
2. Check insulation resistance between ODU fan mo<strong>to</strong>r terminal(U,V,W) and pipe<br />
(over 100MΩ)<br />
→ Replace fan mo<strong>to</strong>r if abnormality found<br />
1. Check if color of mo<strong>to</strong>r output terminal(U,V,W) connec<strong>to</strong>r matched with PCB’s<br />
2. Check wire disconnection and wiring<br />
→ Reassemble or replace if abnormality found<br />
Check fan PCB assembly IPM normal<br />
→ Replace Fan PCB assembly<br />
Measuring insulation resistance<br />
between fan terminal & chassis<br />
Hall Sensor connection<br />
Fan wire wiring<br />
<strong>LG</strong>E Internal Use Only
Error No. Error Type Error Point Main Reasons<br />
86*<br />
Master 861<br />
Slave1 862<br />
Slave2 863<br />
Main PCB EEPROM<br />
Error<br />
Copyright ©2007 <strong>LG</strong> Electronics. Inc. All right reserved.<br />
Only for training and service purposes<br />
EEPROM Access Error<br />
■ Error Diagnosis and Countermeasure Flow Chart<br />
Is EEPROM assemble<br />
condition normal?<br />
Yes<br />
Is EEPROM 24C16?<br />
Yes<br />
Recheck power and<br />
installation condition<br />
No<br />
No<br />
Reset after checking EEPROM assemble condition<br />
Replace EEPROM with 24C16<br />
- 129 -<br />
1. No EEPROM<br />
2. EEPROM wrong insertion<br />
Troubleshooting Guide<br />
<strong>LG</strong>E Internal Use Only
Troubleshooting Guide<br />
Error No. Error Type Error Point Main Reasons<br />
87*<br />
Master 871<br />
Slave1 872<br />
Slave2 873<br />
Fan PCB EEPROM<br />
Error<br />
Copyright ©2007 <strong>LG</strong> Electronics. Inc. All right reserved.<br />
Only for training and service purposes<br />
Error occurs when checking the<br />
EEPROM checksum as initializing<br />
after power is supplied<br />
■ Error Diagnosis and Countermeasure Flow Chart<br />
Is EEPROM insertion normal?<br />
Yes<br />
Is Fan PCB assembly normal?<br />
Yes<br />
Recheck power and<br />
installation condition<br />
No<br />
No<br />
1.Check EEPROM insertion direction/connection condition<br />
2.Check EEPROM checksum<br />
→ Replace EEPROM if abnormality found<br />
Fan EEPROM insertion<br />
Inverter EEPROM insertion<br />
direction<br />
❈ Note : Replace after power off<br />
Replace fan PCB assembly<br />
- 130 -<br />
1.EEPROM bad contact/wrong insertion<br />
2.EEPROM Version is different<br />
3.ODU fan PCB assembly damage<br />
Same direction both socket<br />
hole and EEPROM hole<br />
<strong>LG</strong>E Internal Use Only
Error No. Error Type Error Point Main Reasons<br />
104*<br />
Master<br />
11 → 041<br />
Slave1<br />
12 → 042<br />
Slave2<br />
13 → 043<br />
Transmission Error<br />
Between Outdoors<br />
Copyright ©2007 <strong>LG</strong> Electronics. Inc. All right reserved.<br />
Only for training and service purposes<br />
Master displays ODU number<br />
which is not communicated.<br />
Slave displays own error number<br />
■ Error Diagnosis and Countermeasure Flow Chart<br />
Is transmission<br />
cable installed<br />
normally?<br />
Yes<br />
Is Slave Unit Dip SW<br />
setting done?<br />
Yes<br />
Is main PCB power<br />
supplied?<br />
* Slave Unit Dip SW<br />
Slave1<br />
Slave2<br />
Slave3<br />
Yes<br />
Replace main PCB<br />
ON<br />
No<br />
No<br />
No<br />
1 2 3 4 5 6 7<br />
Connect transmission cable<br />
Dip SW setting<br />
Connect power cable<br />
ON<br />
1 2 3 4 5 6<br />
1 2 3 4 5 6 7 8 9 10 11 12 13 14<br />
ON<br />
1 2 3 4 5 6 7<br />
ON<br />
1 2 3 4 5 6 7<br />
1 2 3 4 5 6 7 8 9 10 11 12 13 14<br />
ON<br />
1 2 3 4 5 6 7<br />
ON<br />
1 2 3 4 5 6 7<br />
1 2 3 4 5 6 7 8 9 10 11 12 13 14<br />
- 131 -<br />
Troubleshooting Guide<br />
1.Loose connection of power cable/transmission<br />
cable¿¸(Open/Short)<br />
2.Defect of each outdoor unit PCB<br />
<strong>LG</strong>E Internal Use Only
Troubleshooting Guide<br />
Error No. Error Type Error Point Main Reasons<br />
105*<br />
Master<br />
11 → 051<br />
Slave1<br />
12 → 052<br />
Slave2<br />
13 → 053<br />
Transmission error<br />
(Fan PCB ↔ Inverter<br />
PCB)<br />
Copyright ©2007 <strong>LG</strong> Electronics. Inc. All right reserved.<br />
Only for training and service purposes<br />
Fan controller didn't receive signal<br />
from inverter controller<br />
■ Error Diagnosis and Countermeasure Flow Chart<br />
Is fan PCB transmission<br />
LED(yellow) blinking<br />
normally?<br />
Yes<br />
Is inverter PCB<br />
transmission LED(yellow)<br />
blinking normally?<br />
Yes<br />
Is fan PCB assembly normal?<br />
Yes<br />
Recheck power and<br />
installation condition<br />
Checking 15V input<br />
No<br />
No<br />
No<br />
- 132 -<br />
1. Wrong connection between Inverter and<br />
Fan PCB<br />
2. Fan PCB power not supplied<br />
3. ODU Inv/Fan PCB defect<br />
1. Check DC 15V power cable between Inverter PCB and fan PCB<br />
2. Check transmission cable between Inverter PCB and fan PCB<br />
→ Reconnect or replace wire if abnormality found<br />
Check transmission cable between Inverter PCB and fan PCB<br />
→ Reconnect or replace wire if abnormality found<br />
Fan PCB assembly<br />
Fan transmission<br />
connection<br />
Yes<br />
Transmission connec<strong>to</strong>r Transmission LED<br />
❈ Note : Check fan PCB assembly Error LED blinking (Check 108π¯ Error)<br />
No<br />
Replace inverter PCB assembly<br />
Fan Error LED<br />
Error LED<br />
<strong>LG</strong>E Internal Use Only
Error No. Error Type Error Point Main Reasons<br />
106*<br />
Master<br />
11 → 061<br />
Slave1<br />
12 → 062<br />
Slave2<br />
13 → 063<br />
ODU Fan PCB IPM<br />
Fault<br />
Copyright ©2007 <strong>LG</strong> Electronics. Inc. All right reserved.<br />
Only for training and service purposes<br />
IPM protection circuit activation<br />
(over current / overheating)<br />
■ Error Diagnosis and Countermeasure Flow Chart<br />
Is fan mo<strong>to</strong>r assemble<br />
condition normal?<br />
Yes<br />
Is fan mo<strong>to</strong>r wire connection<br />
condition normal?<br />
Yes<br />
Is fan PCB assemble<br />
condition normal?<br />
Yes<br />
Is fan PCB assembly normal?<br />
Yes<br />
Recheck power and<br />
installation condition<br />
No<br />
No<br />
No<br />
No<br />
Fan Mo<strong>to</strong>r Wire connection<br />
Hall Sensor connection<br />
Check ODU fan mo<strong>to</strong>r assemble condition and locking<br />
→ Reassemble or replace if abnormality found<br />
1.Check fan mo<strong>to</strong>r U,V,W connec<strong>to</strong>r connection condition<br />
→ Reassemble wire if abnormality found<br />
2.Check fan mo<strong>to</strong>r wire disconnection<br />
→ Replace ODU fan mo<strong>to</strong>r if abnormality found<br />
1.Check fan PCB connec<strong>to</strong>r condition<br />
→ Reassemble if abnormality found<br />
2.Check assemble condition between fan PCB and Heatsink<br />
→ Reassemble heatsink if abnormality found<br />
Replace fan PCB assembly<br />
- 133 -<br />
Troubleshooting Guide<br />
1. Overload operation (Pipe clogging/Covering/EEV<br />
defect/Ref. overcharge<br />
2. ODU fan mo<strong>to</strong>r assemble condition abnormal<br />
(Coil disconnection/Short/Insulation damage)<br />
3. Fan PCB heatsink assemble condition abnormal<br />
4. Fan PCB assembly defect<br />
Fan IPM assemble position<br />
Check assemble condition<br />
Fan Heatsink assemble position<br />
Check assemble condition<br />
<strong>LG</strong>E Internal Use Only
Troubleshooting Guide<br />
Error No. Error Type Error Point Main Reasons<br />
107*<br />
Master<br />
11 → 071<br />
Slave1<br />
12 → 072<br />
Slave2<br />
13 → 073<br />
Fan DC Link Low<br />
Voltage Error<br />
Copyright ©2007 <strong>LG</strong> Electronics. Inc. All right reserved.<br />
Only for training and service purposes<br />
Fan PCB DC link voltage supplied<br />
below 380V<br />
■ Error Diagnosis and Countermeasure Flow Chart<br />
Is wiring between fan mo<strong>to</strong>r<br />
and PCB normal?<br />
Yes<br />
Is DC_Link voltage normal?<br />
Yes<br />
Is Fan PCB assembly normal?<br />
Yes<br />
Recheck power and<br />
installation condition<br />
No<br />
No<br />
No<br />
1. Check DC_Link Wire connection<br />
2. DC_Link<br />
→ Replace wire if abnormality found<br />
Measure DC_Link voltage<br />
→ Check inverter PCB if voltage is below 380V<br />
Replace fan PCB assembly<br />
DC voltage connection<br />
DC Volt connected<br />
- 134 -<br />
1. Wrong wiring between inverter PCB and<br />
Fan PCB<br />
2. Fan PCB assembly defect<br />
<strong>LG</strong>E Internal Use Only
Copyright ©2007 <strong>LG</strong> Electronics. Inc. All right reserved.<br />
Only for training and service purposes<br />
- 135 -<br />
Troubleshooting Guide<br />
Error No. Error Type Error Point Main Reasons<br />
113*<br />
Master<br />
11 → 131<br />
Slave1<br />
12 → 132<br />
Slave2<br />
13 → 133<br />
Outdoor unit liquid pipe<br />
(condenser) temperature<br />
sensor error<br />
Abnormal sensor resistance value<br />
(Open/Short)<br />
1. Defective temperature sensor connection<br />
2. Defective temperature sensor<br />
(Open / Short)<br />
3. Defective outdoor unit PCB<br />
Error No. Error Type Error Point Main Reasons<br />
114*<br />
Master<br />
11 → 141<br />
Slave1<br />
12 → 142<br />
Slave2<br />
13 → 143<br />
Outdoor unit sub-cooling<br />
inlet / outlet temperature<br />
sensor error<br />
Abnormal sensor resistance value<br />
(Open/Short)<br />
■ Error diagnosis and countermeasure flow chart<br />
Is temperature sensor<br />
connec<strong>to</strong>r connections<br />
are normal?<br />
Yes<br />
Is the value of temperature<br />
sensor resistance normal?*<br />
Yes<br />
Replace outdoor unit PCB<br />
No<br />
No<br />
Check and correct connection<br />
Replace sensor<br />
1. Defective temperature sensor connecter<br />
connection<br />
2. Defective temperature sensor<br />
(Open/Short)<br />
3. Defective outdoor PCB<br />
* Sensor resistance 100 kΩover (open) or 100 Ω below (short) will generate error<br />
Note: Temperate sensor resistance vary with temperature, So compare temperature sensor resistance value<br />
according <strong>to</strong> outdoor unit temperature by referring below table (±5% <strong>to</strong>lerance)<br />
Air temperature sensor: 10°C = 20.7kΩ : 25°C = 10kΩ : 50°C= 3.4kΩ<br />
Pipe temperature sensor: 10°C = 10kΩ : 25°C = 5kΩ : 50°C= 1.8kΩ<br />
<strong>LG</strong>E Internal Use Only
Troubleshooting Guide<br />
Error<br />
No.<br />
151*<br />
Master<br />
11→511<br />
Slave1<br />
12→512<br />
Slave2<br />
13→513<br />
Error Type Error Point Main Reasons<br />
Function error of outdoor<br />
4way (reversing valve)<br />
Copyright ©2007 <strong>LG</strong> Electronics. Inc. All right reserved.<br />
Only for training and service purposes<br />
Function error of 4way<br />
(reversing valve) in Main or<br />
Slave outdoor units<br />
■ Error diagnosis and countermeasure flow chart<br />
Is 4-Way valve connecter<br />
connection are properly<br />
connected?<br />
Yes<br />
Is 4 Way valve coil<br />
resistance normal?*<br />
Yes<br />
Is 4 way valve coil connected<br />
<strong>to</strong> 4 way valve normally?**<br />
Yes<br />
In case of more than<br />
2 units, does master outdoor<br />
unit recognize øπ as more<br />
than 2 units? ***<br />
Yes<br />
After reset, can we<br />
check supply voltage at PCB<br />
when starting heating<br />
mode operation****<br />
Yes<br />
Is compressor working<br />
normally?<br />
Yes<br />
After opposite<br />
mode operation <strong>to</strong> present<br />
mode, is the same error<br />
occurred again?<br />
Yes<br />
Replace 4 way valve*****<br />
No<br />
No<br />
No<br />
No<br />
No<br />
No<br />
No<br />
Reconnect it<br />
Change 4 Way valve coil<br />
Re-insert 4 way valve coil<br />
Refer <strong>to</strong> CH 51 & make measure<br />
Replace outdoor unit PCB<br />
Check and replace compressor,<br />
Magnet switch, corresponding PCB<br />
[refer electric component part]<br />
If the same error is occurred in<br />
near future replace 4way valve<br />
- 136 -<br />
1. Wrong operation of 4way valve because of sludge<br />
etc. inflow<br />
2. No pressure difference because of compressor<br />
fault<br />
3. Wrong installation of In/outdoor common pipe<br />
4. Defect of 4way valve<br />
<strong>LG</strong>E Internal Use Only
* Measure the resistance of 4way valve<br />
** Confirm the 4way valve coil is inserted <strong>to</strong> the end<br />
*** When power is supplied in order as follow<br />
(Slave2 → Slave1 → Mater)<br />
ODU information is displayed one after the other at main PCB 7-segment<br />
1. Model ID<br />
→ 5HP:60 , 6HP:61 , 8HP:62 , 10HP:63, 12HP:64, 14HP:65<br />
2. Total Capacity<br />
→ Displayed with HP<br />
3. ODU Type<br />
→ HEAT PUMP : 2, Cooling : 0<br />
4. Normal mode : 25<br />
5. Refrigerant<br />
→ R410a : 41<br />
Copyright ©2007 <strong>LG</strong> Electronics. Inc. All right reserved.<br />
Only for training and service purposes<br />
- 137 -<br />
Location of 4way valve connec<strong>to</strong>r on<br />
Main PCB(marked as 4way,CN09)<br />
Troubleshooting Guide<br />
**** Check the output voltage of terminal socket<br />
during heating operation<br />
***** Checking method for outdoor unit of 3unit system<br />
(Master + Slave1 + Slave2)<br />
➀ Close all the SVC valves of high / low pressure common pipe<br />
➁ Operate system<br />
➂ Check the difference of high and low pressure with <strong>LG</strong>MV for each unit (Master, Slave1, Slave2)<br />
➃ If there is a unit in which the difference is not increased then the 4way valve of that unit is defective<br />
<strong>LG</strong>E Internal Use Only
Troubleshooting Guide<br />
Error No. Error Type Error Point Main Reasons<br />
173*<br />
Master<br />
11 → 731<br />
Slave1<br />
12 → 732<br />
Slave2<br />
13 → 733<br />
Constant compressor<br />
defect<br />
Copyright ©2007 <strong>LG</strong> Electronics. Inc. All right reserved.<br />
Only for training and service purposes<br />
Defect according <strong>to</strong> constant<br />
compressor damage or locking,<br />
over current<br />
■ Error diagnosis and countermeasure flow chart<br />
Is resistance value<br />
(insulation & phase <strong>to</strong> phase)<br />
of corresponding constant<br />
compressor normal ?<br />
[refer electric<br />
component part]<br />
Yes<br />
Is cables’ connection<br />
of compressor normal? *<br />
Yes<br />
Is discharge temperature<br />
sensor of compressor<br />
normal? [refer electric<br />
component part]<br />
Yes<br />
Replace outdoor unit PCB<br />
No<br />
No<br />
No<br />
Replace constant compressor<br />
Adjust connection of cables<br />
Replace discharge<br />
temperature sensor<br />
- 138 -<br />
1. Constant compressor damage<br />
2. Constant compressor input over<br />
current<br />
3. Discharge temperature sensor defect<br />
* cables connection between constant<br />
compressor and magnetic switch<br />
<strong>LG</strong>E Internal Use Only
No<br />
Is temperature ’ sensor<br />
Check connection of heat sink<br />
inserted <strong>to</strong> fan PCB?<br />
temperature connec<strong>to</strong>r<br />
Yes<br />
No<br />
Is temperature ’ sensor<br />
Check connection condition of<br />
attached <strong>to</strong> heat sink?<br />
heat sink and temperature sensor<br />
Copyright ©2007 <strong>LG</strong> Electronics. Inc. All right reserved.<br />
Only for training and service purposes<br />
- 139 -<br />
Troubleshooting Guide<br />
Error No. Error Type Error Point Main Reasons<br />
193*<br />
Master 11 → 931<br />
Slave1 12 → 932<br />
Slave2 13 → 933<br />
194*<br />
Master 11 → 941<br />
Slave1 12 → 942<br />
Slave2 13 → 943<br />
Yes<br />
Is termperature ’<br />
sensor normal?<br />
Yes<br />
’<br />
Is fan PCB assembly normal?<br />
Yes<br />
Recheck power and installation<br />
condition<br />
Fan PCB heatsink<br />
temperature high<br />
Fan PCB heatsink<br />
temperature sensor<br />
error<br />
No<br />
No<br />
Heat sink temperature is over<br />
95°C<br />
Heatsink temperature sensor<br />
abnormal<br />
■ Error diagnosis and countermeasure flow chart<br />
Check heat sink temperature<br />
sensor wire disconnection<br />
➔ Measure temperature sensor<br />
resistance(10kΩ ±5% at 25°C)<br />
➔ Replace the sensor if<br />
abnormality found<br />
Replace fan PCB assembly<br />
1. Heatsink temperature sensor defect<br />
2. Fan PCB assembly defect<br />
1. Heatsink temperature sensor<br />
defect(Open/Short)<br />
2. Wrong connection of temperature sensor<br />
connec<strong>to</strong>r<br />
3. Fan PCB assembly defect<br />
Fan heat sink connection<br />
Check connection condition<br />
Checking temperature sensor disconnection<br />
<strong>LG</strong>E Internal Use Only
P/NO : 3828A24006W OCT, 2007