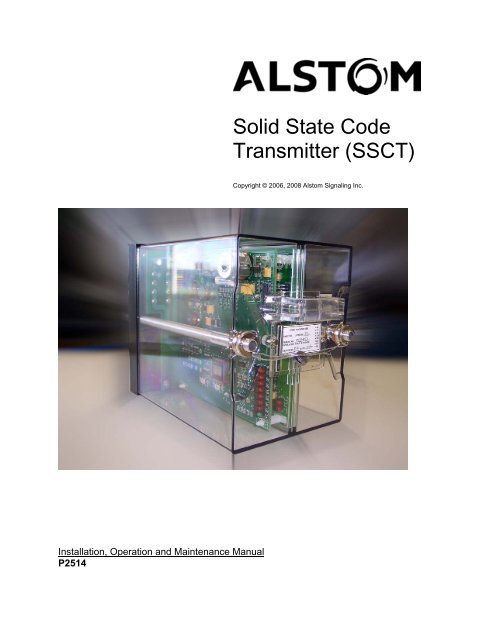
Solid State Code Transmitter (SSCT) - ALSTOM Signaling Inc.
Solid State Code Transmitter (SSCT) - ALSTOM Signaling Inc.
Solid State Code Transmitter (SSCT) - ALSTOM Signaling Inc.

Create successful ePaper yourself
Turn your PDF publications into a flip-book with our unique Google optimized e-Paper software.
<strong>Solid</strong> <strong>State</strong> <strong>Code</strong><br />
<strong>Transmitter</strong> (<strong>SSCT</strong>)<br />
Copyright © 2006, 2008 Alstom <strong>Signaling</strong> <strong>Inc</strong>.<br />
Installation, Operation and Maintenance Manual<br />
P2514
<strong>Solid</strong> <strong>State</strong> <strong>Code</strong><br />
<strong>Transmitter</strong> (<strong>SSCT</strong>)<br />
Copyright © 2006, 2008 Alstom <strong>Signaling</strong> <strong>Inc</strong>.<br />
Installation, Operation and Maintenance Manual<br />
Alstom <strong>Signaling</strong> <strong>Inc</strong>.<br />
P2514, Rev. August 2008 Printed in U.S.A.
LIST OF EFFECTIVE PAGES<br />
P2514, <strong>Solid</strong> <strong>State</strong> <strong>Code</strong> <strong>Transmitter</strong> Installation, Operation and Maintenance<br />
Manual<br />
ORIGINAL ISSUE DATE: October 2006<br />
CURRENT REVISION AND DATE: August 2008, updated Figure 1–1<br />
PAGE<br />
Cover<br />
Title page<br />
Preface<br />
i thru ii<br />
CHANGE OR REVISION LEVEL<br />
Aug/08<br />
Aug/08<br />
Aug/08<br />
Aug/08<br />
1–1 thru 1–10 Aug/08<br />
2–1 thru 2–6 Aug/08<br />
3–1 thru 3–2 Aug/08<br />
4–1 thru 4–4 Aug/08<br />
5–1 thru 5–2 Aug/08<br />
P2514, Rev Aug/08 Alstom <strong>Signaling</strong> <strong>Inc</strong>.
THIS PAGE INTENTIONALLY LEFT BLANK.<br />
P2514, Rev Aug/08 Alstom <strong>Signaling</strong> <strong>Inc</strong>.
PREFACE<br />
NOTICE OF CONFIDENTIAL INFORMATION<br />
Information contained herein is confidential and is the property of Alstom<br />
<strong>Signaling</strong> <strong>Inc</strong>orporated. Where furnished with a proposal, the recipient<br />
shall use it solely to evaluate the proposal. Where furnished to customer, it<br />
shall be used solely for the purposes of inspection, installation or<br />
maintenance. Where furnished to a supplier, it shall be used solely in the<br />
performance of the contract. The information shall not be used or<br />
disclosed by the recipient for any other purposes whatsoever.<br />
FOR QUESTIONS AND INQUIRIES, CONTACT CUSTOMER SERVICE AT<br />
1–800–717–4477<br />
OR<br />
WWW.<strong>ALSTOM</strong>SIGNALINGSOLUTIONS.COM<br />
<strong>ALSTOM</strong> SIGNALING INC.<br />
1025 JOHN STREET<br />
WEST HENRIETTA, NY 14586<br />
REVISION LOG<br />
Revision Date Description By Checked Approved<br />
0 October 2006 Original issue MAS RH NI<br />
1 August 2008 Updated Figure 1–1 MAS RH NI<br />
P2514, Rev Aug/08 Alstom <strong>Signaling</strong> <strong>Inc</strong>.
THIS PAGE INTENTIONALLY LEFT BLANK.<br />
P2514, Rev Aug/08 Alstom <strong>Signaling</strong> <strong>Inc</strong>.
ABOUT THE MANUAL<br />
This manual is intended to provide the necessary information to install, maintain and<br />
ensure proper operation of an Alstom <strong>Solid</strong> <strong>State</strong> <strong>Code</strong> <strong>Transmitter</strong> (<strong>SSCT</strong>).<br />
The information in this manual is arranged into sections. The title and a brief description<br />
of each section follow:<br />
Section 1 – GENERAL DESCRIPTION: This section gives general information on the<br />
components of the <strong>SSCT</strong>.<br />
Section 2 – INSTALLATION: This section describes the installation of the <strong>SSCT</strong>.<br />
Section 3 – PREVENTIVE MAINTENANCE: This section describes the preventive<br />
maintenance procedures performed on the <strong>SSCT</strong>.<br />
Section 4 – TROUBLESHOOTING: This section describes troubleshooting the <strong>SSCT</strong>.<br />
Section 5 – CORRECTIVE MAINTENANCE: This section describes the procedures<br />
associated with corrective maintenance of the <strong>SSCT</strong>.<br />
P2514, Rev Aug/08 Alstom <strong>Signaling</strong> <strong>Inc</strong>.
THIS PAGE INTENTIONALLY LEFT BLANK.<br />
P2514, Rev Aug/08 Alstom <strong>Signaling</strong> <strong>Inc</strong>.
MANUAL SPECIAL NOTATIONS<br />
In the Alstom manuals, there are three methods used to convey special informational<br />
notations to the reader. These notations are warnings, cautions, and notes. Both<br />
warnings and cautions are readily noticeable by boldface type two lines beneath the<br />
caption.<br />
Warning<br />
A warning is the most important notation to heed. A warning is used to tell the reader<br />
that special attention needs to be paid to the message because if the instructions or<br />
advice is not followed when working on the equipment then the result could be either<br />
serious harm or death. The sudden, unexpected operation of a switch machine, for<br />
example, or the technician contacting the third rail could lead to personal injury or death.<br />
An example of a typical warning notice follows:<br />
Caution<br />
WARNING<br />
DISCONNECT THE MOTOR ENERGY WHENEVER THE GEAR COVER<br />
IS REMOVED. OTHERWISE, THE SWITCH MACHINE MAY OPERATE<br />
UNEXPECTEDLY AND POSSIBLY CAUSE PERSONAL INJURY<br />
A caution statement is used when an operating or maintenance procedure, practice,<br />
condition, or statement, which if not strictly adhered to, could result in damage to or<br />
destruction of equipment. A caution statement is also used when personnel could be<br />
surprised if shocked by a circuit operating at a low current. A typical caution found in a<br />
manual is as follows:<br />
Note<br />
CAUTION<br />
Turn power off before attempting to remove or insert circuit boards into a<br />
module. Boards can be damaged if power is not turned off.<br />
A note is normally used to provide minor additional information to the reader to explain<br />
the reason for a given step in a test procedure or to just provide a background detail. An<br />
example of the use of a note follows:<br />
NOTE<br />
A capacitor may be mounted on the circuit board with an RTV adhesive.<br />
Use the same color RTV.<br />
P2514, Rev Aug/08 Alstom <strong>Signaling</strong> <strong>Inc</strong>.
THIS PAGE INTENTIONALLY LEFT BLANK.<br />
P2514, Rev Aug/08 Alstom <strong>Signaling</strong> <strong>Inc</strong>.
Topic<br />
TABLE OF CONTENTS<br />
Page<br />
1. SECTION 1 – GENERAL DESCRIPTION ............................................................. 1–1<br />
1.1. SCOPE OF MANUAL ....................................................................................... 1–1<br />
1.2. GENERAL ........................................................................................................ 1–1<br />
1.3. SAFETY CONSIDERATIONS .......................................................................... 1–2<br />
1.3.1. Failure Modes ................................................................................................ 1–2<br />
1.3.2. Software Safety ............................................................................................. 1–2<br />
1.4. SPECIFICATIONS............................................................................................ 1–3<br />
1.4.1. Physical Specifications .................................................................................. 1–3<br />
1.4.2. Electrical Specifications ................................................................................. 1–3<br />
1.4.3. Environmental Specifications......................................................................... 1–4<br />
1.4.4. <strong>Code</strong> Rates - Tolerance & Duty Cycle ........................................................... 1–4<br />
1.5. CONFIGURATIONS ......................................................................................... 1–5<br />
1.6. ARCHITECTURE ............................................................................................. 1–6<br />
1.6.1. LED Indicators ............................................................................................... 1–7<br />
1.7. EXTERNAL INTERFACE ................................................................................. 1–8<br />
1.7.1. DC Input......................................................................................................... 1–8<br />
1.7.2. Front Contacts ............................................................................................... 1–8<br />
1.7.3. Back Contacts................................................................................................ 1–8<br />
1.7.4. Rate Selection - Externally Selected Rates Only ........................................... 1–9<br />
1.8. INTERCHANGEABILITY ................................................................................ 1–10<br />
2. SECTION 2 – INSTALLATION............................................................................. 2–1<br />
2.1. GENERAL ........................................................................................................ 2–1<br />
2.2. INSPECTION.................................................................................................... 2–2<br />
2.3. <strong>SSCT</strong> WITH EXTERNALLY SELECTED CODE RATE .................................... 2–3<br />
2.4. NEW SOLID STATE CODE TRANSMITTER INSTALLATION......................... 2–4<br />
2.5. MECHANICAL RELAY REPLACEMENT, <strong>SSCT</strong> INSTALLATION.................... 2–5<br />
3. SECTION 3 – SCHEDULED MAINTENANCE ...................................................... 3–1<br />
3.1. GENERAL ........................................................................................................ 3–1<br />
3.2. MAINTENANCE ............................................................................................... 3–1<br />
3.3. VISUAL INSPECTION...................................................................................... 3–1<br />
4. SECTION 4 – TROUBLESHOOTING.................................................................... 4–1<br />
4.1. GENERAL PHILOSOPHY ................................................................................ 4–1<br />
4.2. TROUBLESHOOTING ..................................................................................... 4–1<br />
4.3. DIAGNOSTICS................................................................................................. 4–1<br />
5. SECTION 5 – CORRECTIVE MAINTENANCE ..................................................... 5–1<br />
5.1. GENERAL PURPOSE...................................................................................... 5–1<br />
5.2. CORRECTIVE MAINTENANCE ....................................................................... 5–1<br />
P2514, Rev Aug/08 i Alstom <strong>Signaling</strong> <strong>Inc</strong>.
Description<br />
LIST OF FIGURES<br />
Page<br />
Figure 1–1. <strong>Solid</strong> <strong>State</strong> <strong>Code</strong> <strong>Transmitter</strong> (<strong>SSCT</strong>) ...................................................... 1–1<br />
Figure 1–2. <strong>SSCT</strong> Block Diagram ............................................................................... 1–6<br />
Figure 1–3. Contact Configuration............................................................................... 1–9<br />
Description<br />
LIST OF TABLES<br />
Page<br />
Table 1–1. <strong>Code</strong> Rates & Tolerances ......................................................................... 1–4<br />
Table 1–2. Configurations ........................................................................................... 1–5<br />
Table 1–3. <strong>SSCT</strong> / Mechanical CT Cross Reference ................................................ 1–10<br />
Table 2–1. <strong>SSCT</strong> Pre-Installation Inspection Procedure ............................................. 2–2<br />
Table 2–2. <strong>Code</strong> Rate Selection.................................................................................. 2–3<br />
Table 2–3. <strong>SSCT</strong> New Installation Procedure ............................................................. 2–4<br />
Table 2–4. Mechanical Relay Replacement, <strong>SSCT</strong> Installation Procedure ................. 2–5<br />
Table 3–1. <strong>SSCT</strong> Inspection Procedure ...................................................................... 3–1<br />
Table 4–1. Hardware Failure Error <strong>Code</strong>s................................................................... 4–2<br />
P2514, Rev Aug/08 ii Alstom <strong>Signaling</strong> <strong>Inc</strong>.
General Description<br />
1. SECTION 1 – GENERAL DESCRIPTION<br />
1.1. SCOPE OF MANUAL<br />
This section provides a general description of the Alstom <strong>Solid</strong> <strong>State</strong> <strong>Code</strong> <strong>Transmitter</strong>,<br />
P/N 31750-100-XX and P/N 31750-101-XX (depending on contact configuration, see<br />
Figure 1–3).<br />
1.2. GENERAL<br />
The <strong>Solid</strong> <strong>State</strong> <strong>Code</strong> <strong>Transmitter</strong> (<strong>SSCT</strong>) is a vital code transmitter unit consisting of<br />
three printed circuit boards. The unit is totally <strong>Solid</strong> <strong>State</strong>, and does not contain any<br />
moving components, see Figure 1–1.<br />
FRONT VIEW<br />
REAR VIEW<br />
Figure 1–1. <strong>Solid</strong> <strong>State</strong> <strong>Code</strong> <strong>Transmitter</strong> (<strong>SSCT</strong>)<br />
The <strong>SSCT</strong> is a microprocessor-based replacement for mechanical code transmitters<br />
such as Alstom P/N 57490-122-01 (see Table 1–3). The <strong>SSCT</strong> generates one of seven<br />
different code rates. Four <strong>Solid</strong> <strong>State</strong> circuits emulate the contacts of the mechanical<br />
code transmitter:<br />
• Two sets of <strong>Solid</strong> <strong>State</strong> circuits emulate the two front contacts.<br />
• Two sets of <strong>Solid</strong> <strong>State</strong> circuits emulate the two back contacts.<br />
P2514, Rev Aug/08 1–1 Alstom <strong>Signaling</strong> <strong>Inc</strong>.
General Description<br />
The timing of the contacts is such that a small delay occurs during the transition<br />
between the opening of one set and the closing of the opposite set (break-beforemake).<br />
This delay simulates the operation of the front and back contacts of a<br />
mechanical code transmitter. Note that all contacts are open when power is removed<br />
from the unit, or when code generation is halted (due to a diagnostic error).<br />
1.3. SAFETY CONSIDERATIONS<br />
1.3.1. Failure Modes<br />
The <strong>SSCT</strong> is a vital product and only generates the selected code rate. All contacts may<br />
fail either in the ON or OFF state. If a failure should occur, a diagnostic code is<br />
displayed on the front of the unit.<br />
• Failure of the hardware and/or software results in a 0 (zero) rate.<br />
• If more than one rate is selected, the <strong>SSCT</strong> generates 0 (zero) rate.<br />
• If no rate is selected, the <strong>SSCT</strong> generates 0 (zero) rate.<br />
1.3.2. Software Safety<br />
The SCCT utilizes a microcontroller to accurately generate the various code rates. The<br />
microcontroller program utilizes a variety of software safety techniques to ensure the<br />
vitality of the unit.<br />
As the program is running, it performs a continuous analysis on the program memory<br />
contents. Any failure that alters the program memory is detected and prevents the unit<br />
from operating.<br />
P2514, Rev Aug/08 1–2 Alstom <strong>Signaling</strong> <strong>Inc</strong>.
General Description<br />
1.4. SPECIFICATIONS<br />
1.4.1. Physical Specifications<br />
Length: 6.4”<br />
Width: 5.0”<br />
Height: 8.5”<br />
Weight:<br />
3.5 LBS<br />
1.4.2. Electrical Specifications<br />
1.4.2.1. Input Voltage Range<br />
Minimum:<br />
Nominal:<br />
Maximum:<br />
8 VDC<br />
12 VDC<br />
16 VDC<br />
NOTE<br />
The <strong>SSCT</strong> is protected against damage by the application of reverse<br />
polarity.<br />
1.4.2.2. Current Draw<br />
At 8 VDC Input:<br />
At 12 VDC Input<br />
At 16 VDC Input<br />
420 mADC<br />
320 mADC<br />
230 mADC<br />
1.4.2.3. Low Voltage Output Circuit (Contact) Ratings<br />
Maximum Voltage:<br />
Maximum Current:<br />
Maximum ON <strong>State</strong> Voltage Drop:<br />
42 VDC or 30 VRMS<br />
5.6 ADC or 4 ARMS<br />
0.2 V<br />
1.4.2.4. High Voltage Output Circuit (Contact) Ratings<br />
Maximum Voltage:<br />
Maximum Current:<br />
Maximum ON <strong>State</strong> Voltage Drop:<br />
220 VDC or 220 VRMS<br />
2.0 ADC or 2.0 ARMS<br />
1.2 V<br />
P2514, Rev Aug/08 1–3 Alstom <strong>Signaling</strong> <strong>Inc</strong>.
General Description<br />
1.4.3. Environmental Specifications<br />
The <strong>SSCT</strong> is designed to operate reliably in the environments encountered in wayside<br />
rooms and instrument cases.<br />
• TEMPERATURE RANGE: Meets or exceeds environmental parameters as set forth<br />
in AREMA Manual Part 11.5.1 for Class C equipment (-40C to +70C).<br />
• RELATIVE HUMIDITY: Meets or exceeds environmental parameters as set forth in<br />
AREMA Manual Part 11.5.1 for Class C equipment.<br />
• MECHANICAL SHOCK: Meets or exceeds environmental parameters as set forth in<br />
AREMA Manual Part 11.5.1 for Class C equipment.<br />
• VIBRATION: Meets or exceeds environmental parameters as set forth in AREMA<br />
Manual Part 11.5.1 for Class C equipment.<br />
1.4.4. <strong>Code</strong> Rates - Tolerance & Duty Cycle<br />
Table 1–1. <strong>Code</strong> Rates & Tolerances<br />
Rate<br />
Actual Rate,<br />
Pulses Per Minute<br />
(+/- 1.0%)<br />
Nominal<br />
On Time<br />
(msec)<br />
Nominal<br />
Off Time<br />
(msec)<br />
On Time<br />
Duty<br />
Cycle %<br />
50 51.0 (50.5-51.5) 510.0 666.0 43.4<br />
75 75.0 (74.3-75.8) 378.0 422.0 47.3<br />
96 96.2 (95.2 -97.2) 294.0 330.0 47.1<br />
120 120.0 (118.8-121.2) 234.0 266.0 46.8<br />
180 180.7 (178.9-182.5) 154.0 178.0 46.4<br />
220 220.6 (218.4-222.8) 126.0 146.0 46.3<br />
270 267.9 (265.2-270.6) 104.0 120.0 46.4<br />
<strong>Code</strong> rate stability with temperature and power supply variations is better than+/-0.1%.<br />
P2514, Rev Aug/08 1–4 Alstom <strong>Signaling</strong> <strong>Inc</strong>.
General Description<br />
1.5. CONFIGURATIONS<br />
The <strong>SSCT</strong> is available in 16 separate configurations. A unique part number designates<br />
each configuration. The group number defines the method of rate selection (fixed or<br />
externally selected), the rates available for that configuration, and whether the output<br />
circuits are designed for low voltage or high voltage operation.<br />
Table 1–2. Configurations<br />
P/N Rate Low Voltage High Voltage<br />
31750-100-01 EXT* x<br />
31750-100-02 EXT* x<br />
31750-100-03 50 Fixed x<br />
31750-100-04 50 Fixed x<br />
31750-100-05 75 Fixed x<br />
31750-100-06 75 Fixed x<br />
31750-100-07 96 Fixed x<br />
31750-100-08 96 Fixed x<br />
31750-100-09 120 Fixed x<br />
31750-100-10 120 Fixed x<br />
31750-100-11 180 Fixed x<br />
31750-100-12 180 Fixed x<br />
31750-100-13 220 Fixed x<br />
31750-100-14 220 Fixed x<br />
31750-100-15 270 Fixed x<br />
31750-100-16 270 Fixed x<br />
31750-101-01 EXT* x<br />
31750-101-02 EXT* x<br />
31750-101-05 75 Fixed x<br />
31750-101-06 75 Fixed x<br />
*50, 75, 96,120, 180, 220, 270 rate externally selected with a plugboard jumper<br />
P2514, Rev Aug/08 1–5 Alstom <strong>Signaling</strong> <strong>Inc</strong>.
General Description<br />
1.6. ARCHITECTURE<br />
The <strong>SSCT</strong> is comprised of three printed circuit boards housed in a B2 relay enclosure. It<br />
utilizes the same B2 relay base as the mechanical code transmitter, including the B2<br />
contact groups. This unit is form, fit and function interchangeable with the existing line of<br />
electromechanical code rate transmitters. Additional plugboard contact positions on the<br />
<strong>SSCT</strong> are used for external rate selection in the adjustable version of the relay.<br />
The three printed circuit boards include:<br />
• Output Board<br />
• Central Processing Unit (CPU) Board<br />
• Motherboard<br />
Figure 1–2 is a block diagram showing how each of the functional units is connected.<br />
CPU Board<br />
Output Board<br />
Motherboard<br />
Input<br />
Power<br />
Filter &<br />
Protection<br />
J4<br />
DC<br />
In<br />
Vital<br />
Power<br />
Controller<br />
87C51<br />
Microcontroller<br />
Output<br />
&<br />
Output<br />
Check<br />
Circuitry<br />
J1<br />
Outputs<br />
Rate<br />
Selection<br />
Circuitry<br />
J4<br />
Rate<br />
Selection<br />
Figure 1–2. <strong>SSCT</strong> Block Diagram<br />
P2514, Rev Aug/08 1–6 Alstom <strong>Signaling</strong> <strong>Inc</strong>.
General Description<br />
1.6.1. LED Indicators<br />
1.6.1.1. Output Board<br />
The Output board contains two Red LED’s that indicate the status of the output circuits.<br />
The status of the two Front contact circuits is indicated by one LED, and the status of<br />
the two Back contact circuits is indicated by a second LED. The Outputs are ON when<br />
the LED is illuminated.<br />
1.6.1.2. CPU Board<br />
The CPU board contains a Green LED to indicate when power is applied. This LED also<br />
flashes when the internal diagnostics detect a malfunction (see Troubleshooting,<br />
Section 4).<br />
The CPU board also contains seven Red LED’s that indicate which one of the seven<br />
rates is selected.<br />
P2514, Rev Aug/08 1–7 Alstom <strong>Signaling</strong> <strong>Inc</strong>.
General Description<br />
1.7. EXTERNAL INTERFACE<br />
1.7.1. DC Input<br />
• Terminal 41: +12 VDC<br />
• Terminal 31: 12 V Common<br />
1.7.2. Front Contacts<br />
• 31750-100-XX<br />
− 63, 64 – 65, 66<br />
− 55, 56 – 53, 54<br />
• 31750-101-XX<br />
− 62-63<br />
− 65-66<br />
1.7.3. Back Contacts<br />
• 31750-100-XX<br />
− 11, 12 – 13, 14<br />
− 23, 24 – 21, 22<br />
• 31750-101-XX<br />
− 11-12<br />
− 14-15<br />
P2514, Rev Aug/08 1–8 Alstom <strong>Signaling</strong> <strong>Inc</strong>.
General Description<br />
1.7.4. Rate Selection - Externally Selected Rates Only<br />
• Rate Select: 33<br />
• 50 Rate: 43<br />
• 75 Rate: 44<br />
• 96 Rate: 45<br />
• 120 Rate: 46<br />
• 180 Rate: 36<br />
• 220 Rate: 35<br />
• 270 Rate: 34<br />
37150-100-XX<br />
GROUP SPACE - FRONT VIEW<br />
37150-101-XX<br />
GROUP SPACE - FRONT VIEW<br />
6<br />
6<br />
5<br />
5<br />
4<br />
4<br />
3<br />
3<br />
2<br />
1<br />
DC in - DC in +<br />
2<br />
1<br />
DC in - DC in +<br />
1 2 3 4 5 6<br />
1 2 3 4 5 6<br />
Contact read as (Column,Row)<br />
Figure 1–3. Contact Configuration<br />
P2514, Rev Aug/08 1–9 Alstom <strong>Signaling</strong> <strong>Inc</strong>.
General Description<br />
1.8. INTERCHANGEABILITY<br />
The <strong>SSCT</strong> can replace numerous types of mechanical code transmitters. Table 1–3 lists<br />
the mechanical code transmitters’ equivalent <strong>SSCT</strong>.<br />
NOTE<br />
Registration code of replacement <strong>SSCT</strong> may be different.<br />
Table 1–3. <strong>SSCT</strong> / Mechanical CT Cross Reference<br />
<strong>SSCT</strong> P/N<br />
Rate<br />
Low<br />
Voltage<br />
High<br />
Voltage<br />
Registration<br />
<strong>Code</strong><br />
Equivalent<br />
Mechanical CT<br />
See Note<br />
31750-100-01 EXT* x 1-3-10-32 N/A<br />
31750-100-02 EXT* x 1-4-6-23 N/A<br />
31750-100-03 50 Fixed x 1-3-10-24 57490-121-01<br />
31750-100-04 50 Fixed x 1-3-10-25 57490-122-01<br />
31750-100-05 75 Fixed x 1-2-12-27<br />
57490-065-02, -03, -<br />
04<br />
57490-075-02, -03, -<br />
04, -06, -07, -08<br />
57490-095-01, 02, -<br />
03, -04<br />
31750-100-06 75 Fixed x 1-2-17-19 57490-091-05,-06<br />
31750-100-07 96 Fixed x 1-3-8-27 57490-080-07, -09<br />
31750-100-08 96 Fixed x 1-3-10-29 57490-080-08<br />
31750-100-09<br />
31750-100-10<br />
31750-100-11<br />
31750-100-12<br />
31750-100-13<br />
120<br />
Fixed<br />
120<br />
Fixed<br />
180<br />
Fixed<br />
180<br />
Fixed<br />
220<br />
Fixed<br />
x 1-2-5-15 57490-096-01, -04<br />
x 1-2-17-20<br />
57490-082-XX (ALL)<br />
57490-092-01, -02, -<br />
03<br />
x 1-2-5-16 57490-097-01, -04<br />
x 1-2-17-21<br />
x 1-3-8-25<br />
57490-083-XX (ALL)<br />
57490-093-01, -02, -<br />
03<br />
57490-116-01<br />
57490-119-01, -02<br />
P2514, Rev Aug/08 1–10 Alstom <strong>Signaling</strong> <strong>Inc</strong>.
General Description<br />
Table 1–3. <strong>SSCT</strong> / Mechanical CT Cross Reference (Cont.)<br />
<strong>SSCT</strong> P/N<br />
Rate<br />
Low<br />
Voltage<br />
High<br />
Voltage<br />
Registration<br />
<strong>Code</strong><br />
Equivalent<br />
Mechanical CT<br />
See Note<br />
31750-100-14<br />
31750-100-15<br />
220<br />
Fixed<br />
270<br />
Fixed<br />
x 1-3-8-23 57490-111-01<br />
x 1-3-7-8<br />
57490-080-05, -06<br />
57490-098-01<br />
57490-118-01<br />
270<br />
57490-094-01<br />
31750-100-16<br />
x 1-3-9-22<br />
Fixed<br />
57490-113-01<br />
31750-101-01 EXT* x 1-4-6-24 N/A<br />
31750-101-02 EXT* x 1-4-6-25 N/A<br />
31750-101-05 75 Fixed x 1-2-12-27 57490-080-01,-10<br />
31750-101-06 75 Fixed x 1-2-14-24 57490-080-02<br />
*50, 75, 96,120, 180, 220, 270 rate externally selected with a plugboard jumper<br />
P2514, Rev Aug/08 1–11 Alstom <strong>Signaling</strong> <strong>Inc</strong>.
General Description<br />
THIS PAGE INTENTIONALLY LEFT BLANK.<br />
P2514, Rev Aug/08 1–12 Alstom <strong>Signaling</strong> <strong>Inc</strong>.
Installation<br />
2. SECTION 2 – INSTALLATION<br />
2.1. GENERAL<br />
The <strong>SSCT</strong> is available in eight separate code rate configurations, as one of 7 fixed code<br />
rates or with an externally selected code rate. See Tables 1–2 and 1–3 for the various<br />
configurations and their associated part numbers.<br />
P2514, Rev Aug/08 2–1 Alstom <strong>Signaling</strong> <strong>Inc</strong>.
Installation<br />
2.2. INSPECTION<br />
Upon receipt of an <strong>SSCT</strong> unit, inspect for cleanliness and overall condition. Also, always<br />
verify the operating characteristics of the unit before installing it in a particular circuit.<br />
Prior to installing an <strong>SSCT</strong>, follow the inspection procedure provided in Table 2–1.<br />
Table 2–1. <strong>SSCT</strong> Pre-Installation Inspection Procedure<br />
Step<br />
Procedure<br />
1 Check that the cover and seal are not damaged.<br />
2 Verify that the prong surfaces are clean and not bent.<br />
RELAY PRONG<br />
SURFACES<br />
(SIDE VIEW)<br />
While the prongs that engage with the terminals in the plugboards are clean and<br />
adjusted when they leave the factory, there is always the chance that they may<br />
become dirty or bent in handling.<br />
• If prongs are dirty, clean by burnishing.<br />
• If prongs are bent, bend them back into position so they make contact when<br />
the unit is installed.<br />
3 Review the operating characteristics of the unit and verify the appropriate<br />
configuration is being installed before proceeding. See Table 1–2 for the various<br />
configurations and their associated part numbers.<br />
P2514, Rev Aug/08 2–2 Alstom <strong>Signaling</strong> <strong>Inc</strong>.
Installation<br />
2.3. <strong>SSCT</strong> WITH EXTERNALLY SELECTED CODE RATE<br />
If the externally selected code rate version of the <strong>SSCT</strong> is installed, it must be<br />
configured to provide one of 7 different code rates: 50, 75, 96, 120, 180, 220, and 270<br />
pulses per minute. When not installed, the unit is in a “non-programmed” state. To<br />
select a code rate, a SHORT wire jumper is added to the wiring side of the B2<br />
plugboard. When the unit is installed, it becomes “programmed” by the jumper to<br />
generate one of the seven rates. An LED indicates at which rate the unit is operating.<br />
Table 2–2 lists the jumper position required for each rate.<br />
If the fixed rate version of the <strong>SSCT</strong> is installed, no external rate select jumper is<br />
required, and no connections should be made to any of the terminals shown in Table<br />
2-2.<br />
Plugboard position 33 is the Rate Select Common.<br />
Table 2–2. <strong>Code</strong> Rate Selection<br />
Rate<br />
Jumper Position<br />
50 33 to 43<br />
75 33 to 44<br />
96 33 to 45<br />
120 33 to 46<br />
180 33 to 36<br />
220 33 to 35<br />
270 33 to 34<br />
NOTE<br />
Keep the rate select jumper as short as possible. Do NOT bundle it with<br />
other relay wiring.<br />
P2514, Rev Aug/08 2–3 Alstom <strong>Signaling</strong> <strong>Inc</strong>.
Installation<br />
2.4. NEW SOLID STATE CODE TRANSMITTER INSTALLATION<br />
The procedure in Table 2–3 describes how to install the <strong>SSCT</strong> at a new site. Perform<br />
the steps in the sequence given to ensure proper operation.<br />
Table 2–3. <strong>SSCT</strong> New Installation Procedure<br />
Step<br />
Procedure<br />
1 Perform the inspection procedure provided in Table 2–1, including verifying<br />
that the appropriate unit is being installed.<br />
2 Install the plugboard to the Type B relay rack bars.<br />
3 Connect the power to:<br />
• Terminal 41 (+) 12 VDC<br />
• Terminal 31 (-) 12 V COM<br />
4 If the externally selected code rate version of the <strong>SSCT</strong> is installed, then<br />
continue with Step 5.<br />
Otherwise, a fixed code rate version is installed, skip to Step 6.<br />
5 Connect a jumper between the Rate Select Common terminal 33 and the<br />
required rate terminal. See Figure 1–3 and Table 2–2.<br />
NOTE<br />
Keep the rate select jumper as short as possible. Do NOT bundle it with other<br />
relay wiring.<br />
6 Attach the mating registration plate to the plugboard and plug in the<br />
transmitter.<br />
7 Energize the <strong>SSCT</strong>. Verify that the correct rate is being generated and that<br />
the LED indicates the selected rate.<br />
P2514, Rev Aug/08 2–4 Alstom <strong>Signaling</strong> <strong>Inc</strong>.
Installation<br />
2.5. MECHANICAL RELAY REPLACEMENT, <strong>SSCT</strong> INSTALLATION<br />
Table 2–4 describes the replacement of an existing Type B2 mechanical code<br />
transmitter relay with an <strong>SSCT</strong>.<br />
Table 2–4. Mechanical Relay Replacement, <strong>SSCT</strong> Installation Procedure<br />
Step<br />
Procedure<br />
1 Perform the inspection procedure provided in Table 2–1, including verifying<br />
that the appropriate unit is being installed.<br />
2 If the externally selected code rate version of the <strong>SSCT</strong> is to be installed, then<br />
continue with Step 3.<br />
Otherwise, a fixed code rate version is to be installed, skip to Step 4.<br />
3 Connect a jumper between the Rate Select Common terminal 33 and the<br />
required rate terminal. See Figure 1–3 and Table 2–2.<br />
NOTE<br />
Keep the rate select jumper as short as possible. Do NOT bundle it with other<br />
relay wiring.<br />
4 If necessary, replace the registration plate on the plugboard with the<br />
registration plate supplied with <strong>SSCT</strong>.<br />
5 Energize the <strong>SSCT</strong>. Verify that the correct rate is being generated and that<br />
the LED indicates the selected rate.<br />
P2514, Rev Aug/08 2–5 Alstom <strong>Signaling</strong> <strong>Inc</strong>.
Installation<br />
THIS PAGE INTENTIONALLY LEFT BLANK.<br />
P2514, Rev Aug/08 2–6 Alstom <strong>Signaling</strong> <strong>Inc</strong>.
Scheduled Maintenance<br />
3. SECTION 3 – SCHEDULED MAINTENANCE<br />
3.1. GENERAL<br />
This section describes the preventive maintenance procedures associated with proper<br />
<strong>SSCT</strong> operation.<br />
3.2. MAINTENANCE<br />
Under normal operating conditions, the <strong>SSCT</strong> requires no maintenance or inspections.<br />
Routine maintenance consists of periodic visual inspection and is at the discretion of the<br />
customer. During inspection look for damaged components, corrosion or other<br />
contamination, loose parts, broken seals, or a cracked or broken cover. Units not<br />
passing this inspection should be replaced and returned to Alstom <strong>Signaling</strong> <strong>Inc</strong>.<br />
3.3. VISUAL INSPECTION<br />
The <strong>SSCT</strong> is enclosed in a clear polycarbonate cover. The components to be inspected<br />
can be seen with the cover installed and sealed. Follow the procedure provided in Table<br />
3–1 to inspect the unit.<br />
Table 3–1. <strong>SSCT</strong> Inspection Procedure<br />
Step<br />
Procedure<br />
1 Check that the cover and seal are not cracked, broken or discolored. If any<br />
damage is detected, the unit must be removed from service and replaced.<br />
2 Verify that internal components are not loose inside the cover.<br />
3 If components inside the cover are loose, remove and replace the unit.<br />
Contact Alstom <strong>Signaling</strong> <strong>Inc</strong>. Customer Service at 1-800-717-4477 or<br />
www.Alstomsignalingsolutions.com.<br />
P2514, Rev Aug/08 3–1 Alstom <strong>Signaling</strong> <strong>Inc</strong>.
Scheduled Maintenance<br />
THIS PAGE INTENTIONALLY LEFT BLANK.<br />
P2514, Rev Aug/08 3–2 Alstom <strong>Signaling</strong> <strong>Inc</strong>.
Troubleshooting<br />
4. SECTION 4 – TROUBLESHOOTING<br />
4.1. GENERAL PHILOSOPHY<br />
This section describes the troubleshooting of the <strong>SSCT</strong>.<br />
4.2. TROUBLESHOOTING<br />
Standard troubleshooting, such as verifying field wiring and energy, can be used to<br />
identify a failure. If the unit fails to operate at all (all LEDs off), check that the input<br />
power is present at the corresponding plugboard terminals.<br />
If the selected rate LED fails to light but the GREEN LED is on, verify that the rate select<br />
jumper on the wiring side of the plugboard is in the correct positions (for externally<br />
selected rate units only). If the Green LED on the CPU board is flashing, see<br />
Diagnostics, below.<br />
Any unit that is suspected of being defective must be removed from service.<br />
NOTE<br />
If an <strong>SSCT</strong> or any component (such as one of its three boards) is<br />
suspected to be defective, return the entire unit to Alstom <strong>Signaling</strong> for<br />
repair.<br />
Contact Alstom <strong>Signaling</strong> <strong>Inc</strong>. Customer Service at 1-800-717-4477 or<br />
www.Alstomsignalingsolutions.com<br />
4.3. DIAGNOSTICS<br />
The <strong>SSCT</strong> CPU board contains a Green LED to indicate when power is applied. This<br />
LED is also used to display diagnostic information in the event of an error. The unit<br />
incorporates diagnostics to assist in the identification and remedy of internal and some<br />
external failures. Upon detection of a fault condition, the Green LED flashes a<br />
diagnostic code. This code is repeated three times, and then the unit attempts to restart.<br />
See Table 4–1 for the definition of the error codes.<br />
P2514, Rev Aug/08 4–1 Alstom <strong>Signaling</strong> <strong>Inc</strong>.
Troubleshooting<br />
Table 4–1. Hardware Failure Error <strong>Code</strong>s<br />
# of<br />
Flashes<br />
Description<br />
Remedy<br />
1 An error has been detected in the<br />
state of the output circuit for output 1.<br />
2 An error has been detected in the<br />
state of the output circuit for output 1.<br />
3 An error has been detected in the<br />
state of the output circuit for output 2.<br />
4 An error has been detected in the<br />
state of the output circuit for output 2.<br />
5 An error has been detected in the<br />
state of the output circuit for output 3.<br />
6 An error has been detected in the<br />
state of the output circuit for output 3.<br />
7 An error has been detected in the<br />
state of the output circuit for output 4.<br />
8 An error has been detected in the<br />
state of the output circuit for output 4.<br />
9 An error has been detected in the<br />
reading of the rate selection. Either a<br />
hardware fault has occurred, or more<br />
than one rate has been selected.<br />
10 An error has been detected in the<br />
reading of the rate selection. Either a<br />
hardware fault has occurred, or more<br />
than one rate has been selected.<br />
11 The normal and inverted reading of the<br />
rate selection is not in<br />
correspondence.<br />
12 An error has been detected in the<br />
comparison of the microprocessor<br />
clock to the secondary time base.<br />
Remove and replace unit and contact<br />
Alstom Customer Service.<br />
Remove and replace unit and contact<br />
Alstom Customer Service.<br />
Remove and replace unit and contact<br />
Alstom Customer Service.<br />
Remove and replace unit and contact<br />
Alstom Customer Service.<br />
Remove and replace unit and contact<br />
Alstom Customer Service.<br />
Remove and replace unit and contact<br />
Alstom Customer Service.<br />
Remove and replace unit and contact<br />
Alstom Customer Service.<br />
Remove and replace unit and contact<br />
Alstom Customer Service.<br />
For units configured with external rate<br />
selection, verify the rate selection<br />
jumper is in the correct position.<br />
Contact Alstom Customer Service if<br />
additional assistance is required.<br />
For units configured with external rate<br />
selection, verify the rate selection<br />
jumper is in the correct position.<br />
Contact Alstom Customer Service if<br />
additional assistance is required.<br />
For units configured with external rate<br />
selection, verify the rate selection<br />
jumper is in the correct position.<br />
Contact Alstom Customer Service if<br />
additional assistance is required.<br />
Remove and replace unit and contact<br />
Alstom Customer Service.<br />
P2514, Rev Aug/08 4–2 Alstom <strong>Signaling</strong> <strong>Inc</strong>.
Troubleshooting<br />
Table 4–1. Hardware Failure Error <strong>Code</strong>s (Cont.)<br />
# of<br />
Flashes<br />
Description<br />
Remedy<br />
13 An error has been detected in the<br />
comparison of the number of<br />
microprocessor cycles to execute.<br />
14 An error has been detected in the<br />
computation of the RAM check.<br />
15 An error has been detected in the<br />
computation of the program signature<br />
analysis.<br />
Remove and replace unit and contact<br />
Alstom Customer Service.<br />
Remove and replace unit and contact<br />
Alstom Customer Service.<br />
Remove and replace unit and contact<br />
Alstom Customer Service.<br />
P2514, Rev Aug/08 4–3 Alstom <strong>Signaling</strong> <strong>Inc</strong>.
Troubleshooting<br />
THIS PAGE INTENTIONALLY LEFT BLANK.<br />
P2514, Rev Aug/08 4–4 Alstom <strong>Signaling</strong> <strong>Inc</strong>.
Corrective Maintenance<br />
5. SECTION 5 – CORRECTIVE MAINTENANCE<br />
5.1. GENERAL PURPOSE<br />
This section describes the procedures associated with corrective maintenance of the<br />
<strong>SSCT</strong>.<br />
5.2. CORRECTIVE MAINTENANCE<br />
If an <strong>SSCT</strong> or any component (such as one of its three boards) is suspected to be<br />
defective, return the entire unit to Alstom <strong>Signaling</strong> for repair. Contact Alstom <strong>Signaling</strong><br />
<strong>Inc</strong>. Customer Service at 1-800-717-4477 or at www.Alstomsignalingsolutions.com<br />
P2514, Rev Aug/08 5–1 Alstom <strong>Signaling</strong> <strong>Inc</strong>.
Corrective Maintenance<br />
THIS PAGE INTENTIONALLY LEFT BLANK.<br />
P2514, Rev Aug/08 5–2 Alstom <strong>Signaling</strong> <strong>Inc</strong>.
FOR QUESTIONS AND INQUIRIES, CONTACT CUSTOMER SERVICE AT<br />
1-800-717-4477<br />
OR<br />
WWW.<strong>ALSTOM</strong>SIGNALINGSOLUTIONS.COM<br />
<strong>ALSTOM</strong> SIGNALING INC.<br />
1025 JOHN STREET<br />
WEST HENRIETTA, NY 14586