microWIU⢠- Alstom
microWIU⢠- Alstom
microWIU⢠- Alstom
- No tags were found...

Create successful ePaper yourself
Turn your PDF publications into a flip-book with our unique Google optimized e-Paper software.
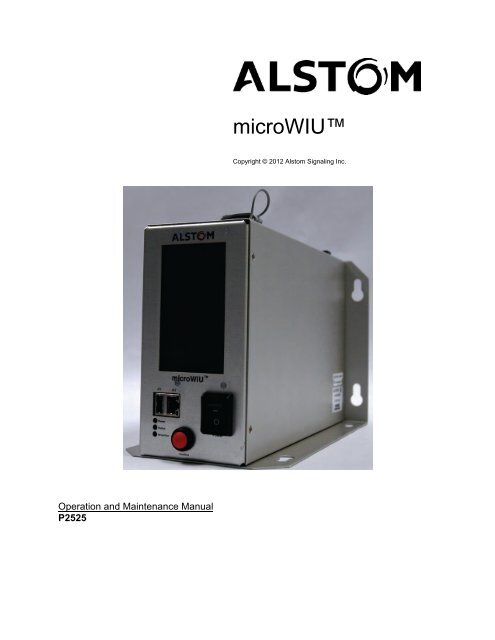
microWIUCopyright © 2012 <strong>Alstom</strong> Signaling Inc.Operation and Maintenance ManualP2525
LIST OF EFFECTIVE PAGESP2525, microWIU Operation and Maintenance ManualORIGINAL ISSUE DATE: June 2012CURRENT ISSUE DATE: September 2012PAGECoverTitle pagePrefacei through ivCHANGE OR REVISION LEVELSep/12Sep/12Sep/12Sep/121–1 through 1–16 Sep/122–1 through 2–6 Sep/123–1 through 3–6 Sep/124–1 through 4–20 Sep/125–1 through 5–2 Sep/126–1 through 6–4 Sep/127–1 through 7–2 Sep/128–1 through 8–4 Sep/12A–1 through A–8 Sep/12P2525, Rev. 3, Sep/12 <strong>Alstom</strong> Signaling Inc.
THIS PAGE INTENTIONALLY LEFT BLANK.P2525, Rev. 3, Sep/12 <strong>Alstom</strong> Signaling Inc.
THIS PAGE INTENTIONALLY LEFT BLANK.P2525, Rev. 3, Sep/12 <strong>Alstom</strong> Signaling Inc.
ABOUT THE MANUALThis manual is intended to provide the necessary information to maintain and ensurethe proper operation of the <strong>Alstom</strong> microWIU.The information in this manual is arranged into sections. The title and a brief descriptionof each section follow:Section 1 – GENERAL DESCRIPTION: This section provides general informationabout the components of the <strong>Alstom</strong> microWIU.Section 2 – THEORY OF OPERATION: This section provides general informationabout the functional operation of the <strong>Alstom</strong> microWIU.Section 3 – INSTALLATION: This section describes the field installation and setup ofthe <strong>Alstom</strong> microWIU.Section 4 – OPERATION: This section provides instructions on using the <strong>Alstom</strong>microWIU.Section 5 – PREVENTIVE MAINTENANCE: This section describes the preventivemaintenance procedures performed on the <strong>Alstom</strong> microWIU.Section 6 – TROUBLESHOOTING: This section describes possible failures/symptomsalong with the corrective action for the <strong>Alstom</strong> microWIU.Section 7 – CORRECTIVE MAINTENANCE: This section describes the correctivemaintenance of the <strong>Alstom</strong> microWIU.Section 8 – PARTS CATALOG: This section identifies and lists the spare partsassociated with the <strong>Alstom</strong> microWIU.Appendix A – TYPICAL APPLICATION CIRCUITS: This section provides examples oftypical <strong>Alstom</strong> microWIU application circuits.P2525, Rev. 3, Sep/12 <strong>Alstom</strong> Signaling Inc.
THIS PAGE INTENTIONALLY LEFT BLANK.P2525, Rev. 3, Sep/12 <strong>Alstom</strong> Signaling Inc.
MANUAL SPECIAL NOTATIONSThis <strong>Alstom</strong> manual uses three notices to convey special information to the reader:warnings, cautions, and notes. Both warnings and cautions are readily noticeable byboldface type, two lines beneath the caption, and a box around the entire statement.WarningA warning is the most important notation to heed. A warning is used to tell the readerthat special attention needs to be paid to the message because if the instructions oradvice is not followed when working on the equipment then the result could be eitherserious harm or death. The sudden, unexpected operation of a switch machine, forexample, or the technician contacting the third rail could lead to personal injury ordeath. An example of a typical warning notice is:WARNINGDISCONNECT THE MOTOR ENERGY WHENEVER THE GEARCOVER IS REMOVED. OTHERWISE, THE SWITCH MACHINE MAYOPERATE UNEXPECTEDLY AND POSSIBLY CAUSE PERSONALINJURY.CautionA caution statement is used when an operating or maintenance procedure, practice,condition, or statement, which if not strictly adhered to, could result in damage to ordestruction of equipment. A typical caution found in a manual is:CAUTIONTurn power off before attempting to remove or insert circuit boards intoa module. Boards can be damaged if electrical power is not turned off.NoteA note is normally used to provide minor additional information to the reader to explainthe reason for a given step in a test procedure or to just provide a background detail.An example of the use of a note is:Note: A capacitor may be mounted on the circuit board with an RTVadhesive. Use the same color RTV.P2525, Rev. 3, Sep/12 <strong>Alstom</strong> Signaling Inc.
THIS PAGE INTENTIONALLY LEFT BLANK.P2525, Rev. 3, Sep/12 <strong>Alstom</strong> Signaling Inc.
TopicTABLE OF CONTENTSPage1. SECTION 1 – GENERAL DESCRIPTION ........................................................ 1–11.1. INTRODUCTION ......................................................................................... 1–11.2. ABBREVIATIONS AND ACRONYMS ......................................................... 1–11.3. GENERAL ................................................................................................... 1–31.4. FEATURES ................................................................................................. 1–41.5. APPLICATIONS .......................................................................................... 1–51.6. SPECIFICATIONS....................................................................................... 1–81.7. DIMENSIONS .............................................................................................. 1–91.8. COMPONENTS ......................................................................................... 1–101.9. ITC CONFIGURATION .............................................................................. 1–141.10. ACSES CONFIGURATION ....................................................................... 1–152. SECTION 2 – THEORY OF OPERATION ........................................................ 2–12.1. GENERAL ................................................................................................... 2–12.2. INTRODUCTION ......................................................................................... 2–12.3. VITAL SYSTEM CYCLE .............................................................................. 2–22.3.1. Vital Inputs ................................................................................................... 2–22.3.2. Vital Boolean Parameters ............................................................................ 2–22.3.3. System Health Verification .......................................................................... 2–22.3.4. Vital Data Protocol ....................................................................................... 2–32.4. COMMUNICATION ..................................................................................... 2–32.4.1. WIU – ACSES Communications ................................................................. 2–32.4.2. WIU – ITC Communications ........................................................................ 2–42.5. LEDS ........................................................................................................... 2–52.6. APPLICATION PROGRAMMING OVERVIEW ........................................... 2–63. SECTION 3 – INSTALLATION ......................................................................... 3–13.1. GENERAL ................................................................................................... 3–13.2. INSTALLATION ........................................................................................... 3–13.3. WIRING RECOMMENDATIONS ................................................................. 3–44. SECTION 4 – OPERATION .............................................................................. 4–14.1. GENERAL ................................................................................................... 4–14.2. USER INTERACTION ................................................................................. 4–14.3. USER INTERFACE ACCESS ..................................................................... 4–24.4. USER INTERFACE OPERATION ............................................................... 4–44.4.1. Status Screen .............................................................................................. 4–44.4.2. IO Details Screen ........................................................................................ 4–64.4.3. Configuration Screen ................................................................................... 4–74.4.4. System Screen .......................................................................................... 4–114.4.5. Devices Screen ......................................................................................... 4–194.4.6. File Manager Screen ................................................................................. 4–20P2525, Rev. 3, Sep/12 i <strong>Alstom</strong> Signaling Inc.
5. SECTION 5 – PREVENTIVE MAINTENANCE ................................................. 5–15.1. GENERAL ................................................................................................... 5–16. SECTION 6 – TROUBLESHOOTING............................................................... 6–16.1. GENERAL ................................................................................................... 6–16.2. GENERAL TROUBLESHOOTING .............................................................. 6–16.3. LEDS ........................................................................................................... 6–26.4. HARDWARE FAULT ERROR CODES ....................................................... 6–27. SECTION 7 – CORRECTIVE MAINTENANCE ................................................ 7–17.1. GENERAL ................................................................................................... 7–17.2. UNIT REMOVAL.......................................................................................... 7–18. SECTION 8 – PARTS CATALOG .................................................................... 8–1A. APPENDIX A – TYPICAL APPLICATION CIRCUITS ..................................... A–1A.1. APPLICATION CIRCUITS .......................................................................... A–1A.2. MASTER/SLAVE CONNECTIONS ............................................................ A–7P2525, Rev. 3, Sep/12 ii <strong>Alstom</strong> Signaling Inc.
LIST OF FIGURESFigure No. Title PageFigure 1–1. microWIU with Power Switch, Front and Top Views ................................ 1–3Figure 1–2. Example microWIU ITC Application Information ...................................... 1–6Figure 1–3. Typical Application – Standalone (Small Overlay Application)microWIU .............................................................................................................. 1–7Figure 1–4. microWIU Dimensions ............................................................................. 1–9Figure 1–5. microWIU Front View Detail ................................................................... 1–11Figure 1–6. microWIU Top View Detail ..................................................................... 1–12Figure 1–7. Example ITC Configuration .................................................................... 1–14Figure 1–8. Example ACSES Configuration .............................................................. 1–15Figure 2–1. Location of LEDs and Confirm Button ...................................................... 2–5Figure 3–1. Example Mounting ................................................................................... 3–1Figure 4–1. Example microWIU Top Level Status Screen .......................................... 4–4Figure 8–1. microWIU Assembly Drawing (no Power Switch, with Hole Cover) ......... 8–2Figure 8–2. microWIU Assembly Drawing (with Power Switch) .................................. 8–3Figure 8–3. microWIU Assembly Drawing (No Power Switch) .................................... 8–4Figure A–1. Typical Color Light Application Circuit Using Current Sensors Only ........ A–2Figure A–2. Typical Color Light Application Circuit Using Current Sensors andRelay Contacts ...................................................................................................... A–3Figure A–3. D Typical Search Light Application Circuit Using Current Sensorsand Relay Contacts ............................................................................................... A–4Figure A–4. Typical Color Position Light Application Circuit Using CurrentSensors Only ......................................................................................................... A–5Figure A–5. Typical Color Position Light Application Circuit Using CurrentSensors and Relay Contacts ................................................................................. A–6Figure A–6. Master/Slave Connections ....................................................................... A–7P2525, Rev. 3, Sep/12 iii <strong>Alstom</strong> Signaling Inc.
LIST OF TABLESFigure No. Title PageTable 1–1. Terminology .............................................................................................. 1–1Table 1–2. Determining the Required Number of microWIU Units for a Location ....... 1–5Table 2–1. LED Functions ........................................................................................... 2–5Table 3–1. microWIU Installation Procedure ............................................................... 3–2Table 3–2. microWIU Wiring Connections .................................................................. 3–4Table 4–1. Accessing the Embedded Web Server Interface ...................................... 4–2Table 4–2. Status Screen Indicators and Buttons ....................................................... 4–5Table 4–3. Accessing the IO Details Screen ............................................................... 4–6Table 4–4. Accessing the Configuration Screen ......................................................... 4–7Table 4–5. Accessing the System Screen................................................................. 4–12Table 4–6. Accessing the Devices Screen ................................................................ 4–19Table 4–7. Accessing the File Manager Screen ........................................................ 4–20Table 6–1. Hardware Failure Error Codes .................................................................. 6–3Table 7–1. microWIU Removal ................................................................................... 7–1Table 8–1. microWIU Parts List .................................................................................. 8–1P2525, Rev. 3, Sep/12 iv <strong>Alstom</strong> Signaling Inc.
General Description1. SECTION 1 – GENERAL DESCRIPTION1.1. INTRODUCTIONThis section provides a general description of the <strong>Alstom</strong> microWIU.1.2. ABBREVIATIONS AND ACRONYMSSee Table 1–1 for a list of the abbreviations and acronyms used throughout thismanual.Table 1–1. TerminologyAbbreviation/AcronymAARACSESADTADVAREMAATCSBOPCANCRCEMPFRAHMACI/OIPITCLEDLoMALRUNISALDefinitionAssociation of American RailroadsAdvanced Civil Speed Enforcement SystemApplication Development ToolApplication Data VerifierAmerican Railway Engineering and Maintenance-of-Way AssociationAdvanced Train Control SystemBook Of PlansController Area NetworkCyclic Redundancy CheckEmergency Vehicle PreemptionFederal Railroad AdministrationHash Message Authentication CodeInput/OutputInternet ProtocolInteroperable Train ControlLight Emitting DiodeLimit of Movement AuthorityLowest Replaceable UnitNumerically Integrated Safety Assurance LogicP2525, Rev. 3, Sep/12 1–1 <strong>Alstom</strong> Signaling Inc.
General DescriptionTable 1–1. Terminology (Cont.)Abbreviation/AcronymNoLoMANVPOBCPOSIXPTCROMTCPTRMTTLUDPUSBVDCVSOEWIUWMSWSMDefinitionNo Limit of Movement AuthorityNon-Vital ProcessorOn-board ComputerPortable Operating System Interface for UnixPositive Train ControlRead-Only MemoryTransmission Control ProtocolTrain Request MessageTime to LiveUser Datagram ProtocolUniversal Serial BusVolts Direct CurrentVital Serial Over EthernetWayside Interface UnitWayside Management ServerWayside Status MessageP2525, Rev. 3, Sep/12 1–2 <strong>Alstom</strong> Signaling Inc.
General Description1.3. GENERALThe microWIU product is intended to be a standalone Wayside Interface Unit (WIU) toaddress the Positive Train Control (PTC) initiative mandated by the Federal RailroadAdministration (FRA). The PTC mandate does not prescribe a particular systemsolution to implement the requirement, and multiple solutions or standards are usedacross the industry. The WIU function is required for all PTC implementations toprovide the link between conventional wayside signaling devices and the signalingcommunication network.The microWIU supports two PTC system standards that are being utilized by variousU.S. railroads:• The Interoperable Train Control (ITC) standard developed by the AmericanAssociation of Railroads (AAR), and• The Advanced Civil Speed Enforcement System (ACSES), originally developed by<strong>Alstom</strong> for AmtrakFor both PTC standards, the WIU function monitors the state of wayside signalingequipment (signals, switches) and provides this information via a PTC data network toan approaching train, whose on-board computer (OBC) uses this information to enforcesafe operation of the train.The microWIU is available in three front panel configurations: with a power switch,without a power switch, and without a power switch with a power switch hole cover.Figure 1–1. microWIU with Power Switch, Front and Top ViewsP2525, Rev. 3, Sep/12 1–3 <strong>Alstom</strong> Signaling Inc.
General Description1.4. FEATURESThe <strong>Alstom</strong> microWIU provides:• Features that meet ACSES and AAR ITC WIU specifications• Stackable units with small footprints for input/output (I/O) expansion (up to 100 ft)• Low-power design for solar/alternative energy compatibility• 16 Vital digital inputs and 2 non-vital outputs per unit• Emergency Vehicle Preemption (EMP) Class C/D protocols for ITC• Local and remote configuration and monitoring• User-friendly Application Development Tool (ADT) for defining applicationconfigurations• Transmission Control Protocol/User Datagram Protocol/Internet Protocol(TCP/UDP/IP)• Embedded Data Logging• Integrated Temperature Alarm/Monitoring• Built-in Status/Report Generator• Heavy-duty USB memory stickP2525, Rev. 3, Sep/12 1–4 <strong>Alstom</strong> Signaling Inc.
General Description1.5. APPLICATIONSThe microWIU supports the following applications:• Small-to-medium scale overlay of existing signaling locations• Hand Throw Switch and Hazard (such as a slide fence) monitoring in dark territory• Interconnection of up to seven microWIU units (one master and six slaves)• Four IP ports:− One user port for simulator or embedded web server− Two ports for ITC and ACSES network− One port for master/slave IP networkTo determine how many microWIU units are required for a location, use the ADT(Application Development Tool), or follow the steps in Table 1–2.Table 1–2. Determining the Required Number of microWIU Units for a LocationStepProcedure1 Determine the number and type of devices for a location (switches, signals,and hazard detectors).2 Determine the total number of physical inputs required by adding the numberof inputs per device. If the total is over 16, more than one microWIU isrequired (stacked configuration). The number of units required is total numberof inputs required divided by 16, then rounded up to next whole number.3 For ITC configuration, use the ADT to map physical devices to device codes:• Hazard Detectors: Single bit, no mapping required• Switches: User assigns Normal and Reverse inputs• Signals: User defines signal configuration (codes mapped from railroadspecificaspect table)P2525, Rev. 3, Sep/12 1–5 <strong>Alstom</strong> Signaling Inc.
General DescriptionSIG3HAZ1SW1SIG2Sample Input MappingSIG1Input Signal Input Signal1 SW1N9 SIG2AR2 SW1R 10 SIG2BR3 SIG1AR 11 SIG2BY4 SIG1AY 12 SIG2BG5 SIG1AG 13 SIG3AR6 SIG1BR 14 SIG3BR7 SIG1BY 15 SIG3BY8 HAZ116 SIG3BGSample Aspect TableSignal Aspect Device CodeG/R 3 (00011)FY/R 6 (00110)Y/R 8 (01000)R/Y 12 (01100)R/FR 13 (01101)R/R 15 (01111)Invalid 31 (11111)Figure 1–2. Example microWIU ITC Application InformationP2525, Rev. 3, Sep/12 1–6 <strong>Alstom</strong> Signaling Inc.
General DescriptionFigure 1–3 shows a typical standalone ITC configuration.Figure 1–3. Typical Application – Standalone (Small Overlay Application) microWIUP2525, Rev. 3, Sep/12 1–7 <strong>Alstom</strong> Signaling Inc.
General Description1.6. SPECIFICATIONSThe microWIU meets or exceeds the environmental parameters as set forth in AREMAManual Part 11.5.1 for Class C equipment.• Power Supply: 10 VDC to 16.5 VDC @ 1 amp• Operating Temperature: –40 °C to +70 °C (–40 °F to +158 °F)• Storage Temperature: –55 °C to +85° C (–67 °F to +185 °F)• Humidity: 0 to 95% non-condensing• Vital Isolation (input-to-input and input-to-earth): 3000 VAC• Weight: 3.5 lbs• Vital Inputs: ON State: 8 VDC to 16.5 VDC; OFF State: 0 VDC to 3 VDC,Maximum Withstand: 18 VDC• Non-vital Outputs: 12 VDC nominal, 100 Ω to 2000 Ω loadP2525, Rev. 3, Sep/12 1–8 <strong>Alstom</strong> Signaling Inc.
General Description1.7. DIMENSIONSThe microWIU measures 5.5 in. wide x 7 in. high x 11 in. deep (14 cm w x 17.8 cm hx 27.9 cm d). When the USB memory stick is inserted, the microWIU measures10 in. high.Figure 1–4. microWIU DimensionsP2525, Rev. 3, Sep/12 1–9 <strong>Alstom</strong> Signaling Inc.
General Description1.8. COMPONENTSThe microWIU is a single, line-replaceable unit housed in a sheet metal enclosure. Thetouch screen display is mounted on the front of the unit, along with a network port andUSB port. The balance of the network ports, an additional USB port, Controller AreaNetwork (CAN) connections, and Vital input and non-vital output connections arelocated on the top of the unit. The unit is powered from a 10–16.5 VDC source, and canbe mounted on a wall, shelf, or 19-inch rack (using a B2 size relay adapter plate).The microWIU includes the following visible components:• Integrated color touch screen display:− Acts as the configuration and status interface for installation, operation, andmaintenance− Provides status and configuration access without a laptop• Embedded web server provides parallel status and configuration capabilities• Discrete LEDs provide power/health indication when the touch screen is in powersaving mode (touch to activate)• Front panel USB port for user upload and download of software components(such as RC2 Key and Maintenance Logs)• Four Ethernet Ports:− Front panel Ethernet port for user web-server access for status and configuration(same as touch screen), and ACSES and ITC simulators− Two Ethernet ports for independent PTC network communication paths capableof being configured as different subnets (ACSES and ITC)− One Ethernet port for master/slave network configuration (local only)• Heavy-duty USB memory stick (located on top of the microWIU)P2525, Rev. 3, Sep/12 1–10 <strong>Alstom</strong> Signaling Inc.
General DescriptionFigure 1–5. microWIU Front View DetailP2525, Rev. 3, Sep/12 1–11 <strong>Alstom</strong> Signaling Inc.
General DescriptionFigure 1–6. microWIU Top View DetailP2525, Rev. 3, Sep/12 1–12 <strong>Alstom</strong> Signaling Inc.
General DescriptionThe microWIU system can be divided into several architectural components:• Display Controller: The Display Controller interfaces with a standard low-levelprotocol to the touch screen for graphics display and touch screen input control; thedisplay controller has a high-speed serial data interface to the Non-Vital Processorsection• Non-Vital Processor (NVP) Section: The NVP section controls the majority of thenon-vital functions of the microWIU including network protocols, USB file system,controls and displays, and the non-vital communications protocol layers• Vital Processor Section: The Vital Processor section:− Controls and monitors the Vital input circuits and controls the non-vital outputs− Implements a CAN interface to other microWIU units if a master/slaveconfiguration is used for an application− Executes Vital Boolean equations using Numerically Integrated SafetyAssurance Logic (NISAL) safety techniques− Implements the Vital Serial Over Ethernet (VSOE) protocol if a VSOEcommunication link is defined for an application (VSOE currently not supported)− Generates Vital PTC output messages for ACSES (if enabled) based on theuser-defined application data and the state of the Vital inputs− Generates Vital PTC output messages for the ITC operating mode• Vital Input Circuits: 16 identical, isolated Vital input circuits are available forinterfacing to wayside devices; these are controlled and monitored by the VitalProcessor section through a parallel data interface; see Section 3.3 WiringRecommendations for more information• Non-vital Outputs: Two non-vital outputs are available to drive approach lightingrelays; see Section 3.3 Wiring Recommendations for more informationP2525, Rev. 3, Sep/12 1–13 <strong>Alstom</strong> Signaling Inc.
General Description1.9. ITC CONFIGURATIONFigure 1–7 shows the architecture of overall PTC system when configured for the ITCapplication. The microWIU is applicable to the Wayside Interface Unit (WIU) portion ofthe system.Figure 1–7. Example ITC ConfigurationP2525, Rev. 3, Sep/12 1–14 <strong>Alstom</strong> Signaling Inc.
General Description1.10. ACSES CONFIGURATIONFigure 1–8 shows the architecture of overall PTC system when configured for theACSES application. The microWIU is applicable to the Wayside Interface Unit (WIU)portion of the system.Figure 1–8. Example ACSES ConfigurationP2525, Rev. 3, Sep/12 1–15 <strong>Alstom</strong> Signaling Inc.
General DescriptionTHIS PAGE INTENTIONALLY LEFT BLANK.P2525, Rev. 3, Sep/12 1–16 <strong>Alstom</strong> Signaling Inc.
Theory of Operation2. SECTION 2 – THEORY OF OPERATION2.1. GENERALThis section contains a functional description of the microWIU.2.2. INTRODUCTIONThe <strong>Alstom</strong> microWIU performs the following internal functions:• Monitor System Inputs: Monitors the WIU’s Vital hardware inputs• Prepare System Outputs: For each operating mode, creates/selects PTC messageoutputs per current system inputs and updates non-vital hardware output states• Manage PTC Networks: Monitors configured Ethernet interface(s) for incoming PTCnetwork messages, processes messages, routes incoming messages, and routesoutgoing PTC network messages to configured Ethernet interface(s) fortransmission• Internal System Management: Executes system cycle, updates displays, andperforms background diagnostic monitoring and logging of system operationalevents• Manage User Interaction: Asynchronous user interaction for status queries andconfiguration actions; this function handles asynchronous user interaction for statusqueries and configuration actions• Manage Off-line Tasks: This function manages system tasks such assoftware/firmware updates, encryption key updates• ACSES and ITC Test Mode: Test feature to inject simulated ACSES train requestmessages and view content of the reply messages (if ACSES mode enabled)• Shadow Mode: Shadow Mode is available only when the microWIU is used inACSES Mode. When in Shadow Mode, the microWIU sends messages to an IPaddress as specified in the ADT instead of sending messages to the train. ThemicroWIU vitally ensures that messages accidentally sent to the train through theexisting active radio link are not processed by the on-board ACSES. Shadow Modeis enabled only through the ADT.P2525, Rev. 3, Sep/12 2–1 <strong>Alstom</strong> Signaling Inc.
Theory of Operation2.3. VITAL SYSTEM CYCLEThe microWIU Vital I/O Processor executes a one-second system cycle during whichVital inputs are read, input parameters updated, Vital equations executed, and Vitalresult parameters and non-vital outputs updated. These operations are common in allPTC operating modes.2.3.1. Vital InputsInput state detection is performed on a one-second cycle for all inputs, with each inputresult provided to the system cycle as OFF, ON, or Flashing (if flash state detection isenabled).Note: If flash state detection is enabled, the allowable flash rate range of35 ppm–75 ppm will be used).2.3.2. Vital Boolean ParametersA set of Vital Boolean parameters is maintained by the Vital Processor section using32-bit codeword representations for Vital parameters. They are updated by acombination of Vital input processes (Vital hardware reads and Vital data protocoldecoding) and Vital equation evaluation. Vital parameters are evaluated and updatedevery system cycle.ACSES messages are vitally selected by their respective unique set of Vital inputparameter states defined by the Application Program.ITC Device Code bits are represented by Vital parameters that are calculated based onVital logic determined by:• For signals, the logic defined by the Aspect Table• For switches, the inputs defined to represent normal and reverse states• For hazard detectors (such as generic single inputs), the single input state2.3.3. System Health VerificationThe system cycle on the microWIU includes a process to validate the underlyingoperation of the system, including cycle timing, ROM integrity, and Vital memorymanagement.P2525, Rev. 3, Sep/12 2–2 <strong>Alstom</strong> Signaling Inc.
Theory of Operation2.3.4. Vital Data ProtocolA Vital Serial Over Ethernet (VSOE2) protocol implementation provides Vital inputparameters from other <strong>Alstom</strong> systems (such as VPI, iVPI) to the microWIU. The Vitaldata protocol process directly updates the Vital parameter buffer each system cycle.(currently not supported.)2.4. COMMUNICATION2.4.1. WIU – ACSES CommunicationsThe microWIU generates four Vital output message types for ACSES:• Type 22 (Home Signal Status Response with LoMA)• Type 23 (Home Signal Status Response without LoMA)• Type 25 (Intermediate Signal Status Response with LoMA) (currently not supported)• Type 26 (Intermediate Signal Status Response without LoMA) (currently notsupported)These message types are always generated in response to a Type 21 (Train RequestMessage) message. The Vital message protocol used for the Vital output messages isa form of Vital ATCS that consists of a 72-bit CRC of the first 183 bits of the outputmessage data payloads.A set of output messages is defined by the application programmer for a given location.The proper message to transmit in response to a Train Request Message (TRM) is afunction of the following: 1) state of Vital inputs (switch positions, signal GO states), and2) the particular home signal status requested. Two fields in the 183-bit data block of astored message are overwritten by the data received in the TRM: the pseudo-randomtime stamp and the train ID. These values are echoed back to the requesting train toprovide an indication that the message is in response to the proper request.In normal operation, the microWIU responds to a Type 21 message (TRM) by retrievingthe proper stored message based on the following:• WIU Address• Requested Signal• Vital input states (switch and signal status); if a valid message is retrieved, themessage is then assembled and sent to the trainIf a valid message is not found, a Type 24 message (Error Response Message) is generated.While this message is functionally non-vital, it is also protected by a 72-bit CRC.P2525, Rev. 3, Sep/12 2–3 <strong>Alstom</strong> Signaling Inc.
Theory of Operation2.4.2. WIU – ITC CommunicationsThe ITC WIU standard has a single Vital output message format: the Wayside StatusMessage (WSM). Unlike ACSES, with a pre-defined set of messages indexed by inputconditions, the ITC standard defines wayside device types whose individual status isconveyed to any trains in the area. The ITC OBC is responsible for interpreting how thestatus for individual devices affects their authorized speed or limit of authority. Thethree ITC-defined device types are:• Hazard Detector (such as a slide fence, dragging equipment detector, etc.): Staterepresented by 1 bit in the WSM• Switch: Represented by 2 bits in the WSM (1 bit each for Normal and Reverseindications from a switch circuit controller)• Signal: Composite aspect code represented by 5 bits in WSM (assignments fromrailroad-specific aspect tables); bit values determined from Boolean equationsdriven by signal displaying statesA given WSM may have multiple devices of each device type depending on the layoutof the location. For the most basic Hand Throw Switch monitoring application, the WSMmay contain just a single switch device.The Vital message protocol used for the WSM is the Keyed-Hash MessageAuthentication Code (HMAC) using a truncated SHA-1 algorithm (128-bit messagedigest truncated to 32-bits). This is defined by the U.S. National Institute of Standardsand Technology (NIST) Federal Information Processing Standards Publication 180-2.The WSM is transmitted both in response to a specific request from a train, andautonomously based on a user-defined transmission rate or optionally on any inputstate change. Unlike the ACSES output messages, the WSM does not contain dataintended for a single train, but broadcasts the same wayside status information to alltrains in the area.Because the number and type of wayside devices at a given location are variable, theWSM Vital message size is also variable. Not all of the fields in the message payloadare functionally Vital, but all of the message payload bits are used in the HMACcalculation, along with two fields that are not transmitted in the message, butmaintained separately by the WIU and the OBC (POSIX time and Config CRC). Thesevalues must be in correspondence between the WIU and the OBC for Vital messagevalidation to be possible.P2525, Rev. 3, Sep/12 2–4 <strong>Alstom</strong> Signaling Inc.
Theory of Operation2.5. LEDSThree LEDs on the front of the microWIU quickly verify unit performance.See Figure 2–1 and Table 2–1 for more information.When the touch screen is in power-save mode, only the Power and Status LEDs areactive.During the microWIU power-up sequence, the Status and Attention LEDs flash GREENuntil the boot process is complete.To initiate the Touch Screen Calibration Mode, press and hold the Confirm button forapproximately 5 seconds.Figure 2–1. Location of LEDs and Confirm ButtonTable 2–1. LED FunctionsLEDPowerStatusFunctionGREEN when the microWIU is powered.• GREEN when the unit is operating normally (no warnings)• YELLOW when a warning condition has been detected, but the unit isoperating (possibly in a degraded mode depending on the warningcondition)• RED when an error condition has been detected and the unit is notoperationalAttentionRED when a condition exists that requires user attention.P2525, Rev. 3, Sep/12 2–5 <strong>Alstom</strong> Signaling Inc.
Theory of Operation2.6. APPLICATION PROGRAMMING OVERVIEWThe application programmer uses the ADT and a separate application data verifier(ADV) to generate the application file set used by the microWIU to implement thedesired functionality.The application file set is transferred to the microWIU using a USB memory stick. ThemicroWIU reads the application file set provided and uses its pre-programmed system(executive) software to execute the PTC functions of the defined PTC mode(s). At ahigh level, the PTC functions are implemented by the unit are described as follows:• ACSES:− Monitor Vital inputs− Manage Train Request Messages− Select appropriate status messages− Select Vital Output Message (LoMA, NoLoMA, Error)− Manage user interfaces (local and remote)• ITC:− Monitor Vital inputs− Assemble ITC device codes− Build Wayside Status Message (WSM)− Manage EMP Class C time updates− Manage EMP Class D Beacon messages− Manage ITC Beacon timing− Manage user interfaces (local and remote)− Manage remote systems management functionsThe normal operating modes of the microWIU are ACSES and ITC. Applications areconfigured with the ADT to support either operating mode.P2525, Rev. 3, Sep/12 2–6 <strong>Alstom</strong> Signaling Inc.
Installation3. SECTION 3 – INSTALLATION3.1. GENERALThis section contains general installation procedures for the microWIU. Included is aprocedure for inspecting each unit prior to installation, followed by the installation andconfiguration procedure.3.2. INSTALLATIONThe microWIU can be mounted on a wall, shelf, or 19-inch rack (using a B2 size relayadapter plate).Figure 3–1. Example MountingP2525, Rev. 3, Sep/12 3–1 <strong>Alstom</strong> Signaling Inc.
InstallationThe procedure in Table 3–1 provides an overview of how to install the microWIU at anew site. See the site-specific Book Of Plans (BOP) for mounting and wiring details forthe specific configuration.Table 3–1. microWIU Installation ProcedureStepProcedure1 Verify that the power to the power cable is disconnected.2 Verify the microWIU power switch is in the OFF position.P2525, Rev. 3, Sep/12 3–2 <strong>Alstom</strong> Signaling Inc.
InstallationTable 3–1. microWIU Installation Procedure (Cont.)StepProcedure3 Using the mounting holes provided on the unit, install the appropriatemounting hardware. See the Location Book Of Plans, as required.4 Connect power, input, output, and data cables as specified in the LocationBook Of Plans.5 Supply power to the unit. See the Location Book Of Plans as required.6 Turn the unit power switch to the ON position.The Power and Status LEDs flash during the microWIU boot process.7 Install the application specific files by inserting the USB memory stickcontaining the application files generated by the Application DevelopmentTool (ADT) into Port J10. For ADT specific details, see P2526, the ADTUser’s Manual.8 Configure the microWIU as appropriate (see Section 4).P2525, Rev. 3, Sep/12 3–3 <strong>Alstom</strong> Signaling Inc.
Installation3.3. WIRING RECOMMENDATIONSNote: For input wiring, use a wire gauge between 28 AWG and 12 AWG.Note: For power wiring (12 VDC nominal), use a wire gauge between16 AWG and 12 AWG.Note: Keep Ethernet cables isolated from all other wiring (for example,high current, relay contact, or coil signal).See Table 3–2 for signal-to-connector wiring connections.Table 3–2. microWIU Wiring ConnectionsSignalConnectorInput 1+ J3-1Input 1– J3-2Input 2+ J3-3Input 2– J3-4Input 3+ J3-5Input 3– J3-6Input 4+ J3-7Input 4– J3-8Input 5+ J5-1Input 5– J5-2Input 6+ J5-3Input 6– J5-4Input 7+ J5-5Input 7– J5-6Input 8+ J5-7Input 8– J5-8J3J5P2525, Rev. 3, Sep/12 3–4 <strong>Alstom</strong> Signaling Inc.
InstallationTable 3–2. microWIU Wiring Connections (Cont.)SignalConnectorInput 9+ J4-1Input 9– J4-2Input 10+ J4-3Input 10– J4-4Input 11+ J4-5Input 11– J4-6Input 12+ J4-7Input 12– J4-8Input 13+ J6-1Input 13– J6-2Input 14+ J6-3Input 14– J6-4Input 15+ J6-5Input 15– J6-6Input 16+ J6-7Input 16– J6-8OUT1 J1-1OUT2 J1-212 COM J1-312 VDC J1-4J4J6J1CANLCANHCANLCANHJ2-1J2-2shielded twisted pairJ2-3J2-4shielded twisted pairJ2P2525, Rev. 3, Sep/12 3–5 <strong>Alstom</strong> Signaling Inc.
InstallationTHIS PAGE INTENTIONALLY LEFT BLANK.P2525, Rev. 3, Sep/12 3–6 <strong>Alstom</strong> Signaling Inc.
Operation4. SECTION 4 – OPERATION4.1. GENERALThis section provides instructions for the operation of the <strong>Alstom</strong> microWIU.4.2. USER INTERACTIONWhen WIU units are installed and commissioned as part of a PTC system, they operateautonomously without direct user interaction. User interaction is required for:• Initial Configuration: Each WIU product requires configuration for its operatinglocation, functional operating parameters, communication link settings, etc.; this isperformed by an Application Engineer from <strong>Alstom</strong>, the railroad, or the contractor• Maintenance and Field Configuration: Troubleshooting and replacements areperformed by the railroad or contractor as required; field configuration is performedby the railroad maintenance staff, and includes software updates and encryption keyupdates• Operational Configuration and Status (Ethernet web server interface and touchscreen display): The User Interfaces for configuration and status of the microWIUconsist of:− An embedded Ethernet web server interface as a primary operational userinterface for configuration and status− A touch screen display as a secondary operational user interface forconfiguration and statusP2525, Rev. 3, Sep/12 4–1 <strong>Alstom</strong> Signaling Inc.
Operation4.3. USER INTERFACE ACCESSThere are two ways to interact with and configure the microWIU:• The built-in touch screen• The embedded Ethernet web server interfaceThe built-in touch screen displays any interaction from the web server interface in realtime. The user can view the monitor and see the touch screens as they are selected oraltered via the web server.Table 4–1. Accessing the Embedded Web Server InterfaceStepAction1 Plug an Ethernet cable into available Ethernet ports on the microWIU and alaptop or PC.2 Open a web browser.P2525, Rev. 3, Sep/12 4–2 <strong>Alstom</strong> Signaling Inc.
OperationStepTable 4–1. Accessing the Embedded Web Server Interface (Cont.)Action3 In the web browser’s address field, enter the User IP address for theembedded web server interface as shown on the status screen of themicroWIU’s built-in touch screen.When the web server interface opens, the microWIU touch screen appears onthe monitor in use. The monitor displays the touch screen, and the mouse andkeyboard are used to interact with the web server interface.For more information on touch screen operation, see Section 4.4.P2525, Rev. 3, Sep/12 4–3 <strong>Alstom</strong> Signaling Inc.
Operation4.4. USER INTERFACE OPERATION4.4.1. Status ScreenWhen the microWIU is powered on and the boot process is complete, the top levelStatus screen is displayed.Figure 4–1. Example microWIU Top Level Status ScreenSee Table 4–2 for descriptions of the Status screen indicators and buttons.P2525, Rev. 3, Sep/12 4–4 <strong>Alstom</strong> Signaling Inc.
OperationTable 4–2. Status Screen Indicators and ButtonsIndicator/ButtonDescriptionIndicatorsSTATUSDisplays Health Status Indication (Green/Yellow/Red).INPUTS Displays current states of Inputs 1–16(Green = ON, Black = unused, Red = OFF)OUTPUTS Displays current states of Non-vital Outputs 1–2BEACON(Green = ON, Red = OFF)Displays ITC Beacon status:• ACTIVE is ON (Green) when Beacon Time to Live (TTL) bitset in WSM• SEND blinks ON (Green) on WSM transmitUSER IPWIU ADDRESSACCESS LEVELButtonsINPUTSCONFIGSYSTEMDEVICESUPDATEDisplays the embedded web server addressDisplays the microWIU address (location configuration data)Displays the security level defined for the application(0 = read-only access, 1 and 2 = access granted to configurationparameters)The ADT defines which parameters are accessible at eachaccess level, and whether a parameter can be changed at themicroWIU or only from the ADT.Click to open the IO Details screen.Click to open the Configuration screen.Click to open the System screen.Click to open the Devices screen.Click to open the File Manager screen (enabled only when aUSB memory stick is inserted into the WIU.Note: The functions on the File Manager screen canbe performed only by qualified personnel.P2525, Rev. 3, Sep/12 4–5 <strong>Alstom</strong> Signaling Inc.
Operation4.4.2. IO Details ScreenThe IO Details screen correlates the real-time state of inputs with location signal namesin order to aid in maintenance.StepNote: The IO Details screen does not require a passcode entry in order toview the screen.Table 4–3. Accessing the IO Details ScreenAction1 From the Status screen, click (or press) the INPUTS button. The IO Detailsscreen opens.• INPUTS: Displays Vital input state information with the associated signalnames assigned by the user during application development• APPROACH LIGHTING OUTPUTS: Displays non-vital output stateinformation with the associated signal names assigned by the user duringapplication development• PAGE UP/DOWN: Click (or press) the appropriate button to scroll up ordown through the list of input and output display states2 Click (or press) EXIT to return to the Status screen.P2525, Rev. 3, Sep/12 4–6 <strong>Alstom</strong> Signaling Inc.
Operation4.4.3. Configuration ScreenThe Configuration screen provides access to configurable system parameters.Note: The ADT defines which parameters are accessible at each accesslevel, and whether a parameter can be changed at the microWIU oronly from the ADT.Table 4–4. Accessing the Configuration ScreenStepAction1 From the Status screen, click (or press) the CONFIG button.2 Note: The Configuration screen requires the user to enter a validpasscode in order to access the configurable systemparameters.If not already logged in, the Enter Passcode screen opens.Enter a valid 4-digit alphanumeric passcode and click (or press) OK.P2525, Rev. 3, Sep/12 4–7 <strong>Alstom</strong> Signaling Inc.
OperationStepTable 4–4. Accessing the Configuration Screen (Cont.)Action3 The Configuration screen opens. The available configurable systemparameters are displayed.Click (or press) the arrow buttons to scroll to the intended function and click(or press) OPEN. The selected function expands and shows the associatedconfigurable items.P2525, Rev. 3, Sep/12 4–8 <strong>Alstom</strong> Signaling Inc.
OperationTable 4–4. Accessing the Configuration Screen (Cont.)StepAction4 In the example below, Network 1 Config was selected.Use the arrow buttons to scroll to the intended configurable item. The CLOSEbutton changes to the EDIT button. Click (or press) EDIT to edit theconfigurable item.P2525, Rev. 3, Sep/12 4–9 <strong>Alstom</strong> Signaling Inc.
OperationTable 4–4. Accessing the Configuration Screen (Cont.)StepAction5 In the example below, Address was selected.Use the web server screen (or built-in touch screen) to edit the selected asneeded. Click (or press) OK when done to save the changes. The previousscreen reopens.Note: When an IP address is changed and a new Application isdownloaded to the microWIU, the microWIU must bepowered down and restarted in order for the IP addresschange to be accepted.6 Repeat Steps 4 and 5 to edit more configurable functions. When done, click(or press) EXIT to return to the Status screen.P2525, Rev. 3, Sep/12 4–10 <strong>Alstom</strong> Signaling Inc.
Operation4.4.4. System ScreenThe System screen provides access to system level data and options, such as:• Ethernet status/assigned IP address• Configuration/version numbers are displayed for the following:− CFG CRC configuration− microWIU software version and date− MityDSP SDK version− FPGA version• Setting the system date and time• Viewing the event log• Restarting the microWIU• Logging outP2525, Rev. 3, Sep/12 4–11 <strong>Alstom</strong> Signaling Inc.
OperationStepTable 4–5. Accessing the System ScreenAction1 From the Status screen, click (or press) the SYSTEM button.Note: If not already logged in, the Enter Passcode screen opens.See Step 2 in for passcode entry instructions.2 The System screen opens.To:• View the version information, see Step 3• Set the system date and time, see Steps 4 and 5• View the event log, see Step 6• Restart the microWIU, see Step 7• Log out of the microWIU, see Step 8Table 4–5. Accessing the System Screen (Cont.)P2525, Rev. 3, Sep/12 4–12 <strong>Alstom</strong> Signaling Inc.
OperationStepAction3 To view the version information, click (or press) the VERSION INFO button.The Version Display screen opens.Click (or press) EXIT to return to the System screen.P2525, Rev. 3, Sep/12 4–13 <strong>Alstom</strong> Signaling Inc.
OperationStepTable 4–5. Accessing the System Screen (Cont.)Action4 To set the system date and time, click (or press) the SET TIME button. TheSet Date screen opens.Enter the current date in MM:DD:YY format. Click (or press) OK when done.Note: Make sure to click (or press) the : (colon) button to separatethe month/date/year entries.P2525, Rev. 3, Sep/12 4–14 <strong>Alstom</strong> Signaling Inc.
OperationTable 4–5. Accessing the System Screen (Cont.)Step5 The Set Time screen opens.ActionEnter the current time in HH:MM:SS format. Click (or press) OK when done.The System screen reopens.Note: Make sure to click (or press) the : (colon) button to separatethe hour/minutes/year entries.P2525, Rev. 3, Sep/12 4–15 <strong>Alstom</strong> Signaling Inc.
OperationTable 4–5. Accessing the System Screen (Cont.)StepAction6 To view the event log, click (or press) the LOG button. The Event Log screenopens.To scroll through the list of events one by one, use the UP/DOWN arrows.To scroll through the list of events page by page, use the PAGE UP/DOWNarrows.Click (or press) EXIT to return to the System screen.P2525, Rev. 3, Sep/12 4–16 <strong>Alstom</strong> Signaling Inc.
OperationStepTable 4–5. Accessing the System Screen (Cont.)Action7 To restart the microWIU, click (or press) the RESTART button. A warningmessage appears.Click (or press) OK to continue with the restart. The microWIU restarts andreturns to the Status screen. The current user who was logged in is nowlogged out.P2525, Rev. 3, Sep/12 4–17 <strong>Alstom</strong> Signaling Inc.
OperationStepTable 4–5. Accessing the System Screen (Cont.)Action8 To log out of the microWIU, click (or press) the LOGOUT button. The user islogged out and the Status screen reopens. The Access Level is reset to 0(read-only access).P2525, Rev. 3, Sep/12 4–18 <strong>Alstom</strong> Signaling Inc.
Operation4.4.5. Devices ScreenThe DEVICES button on the Status screen displays the real-time value of the ITCDevice Code for each ITC device monitored by the microWIU.Table 4–6. Accessing the Devices ScreenStepAction1 From the Status screen, click (or press) the DEVICES button.Note: If not already logged in, the Enter Passcode screen opens.See Step 2 in for passcode entry instructions.2 The Devices screen opens.The Devices screen shows the device name and associated device code inthe Devices field. When a device is selected, assigned inputs and outputs aredisplayed below the Devices field.To scroll through the list of devices, use the UP/DOWN arrows.When done, click (or press) the EXIT button. The Status screen reopens.P2525, Rev. 3, Sep/12 4–19 <strong>Alstom</strong> Signaling Inc.
Operation4.4.6. File Manager ScreenThe UPDATE button on the Status screen displays the File Manager screen. TheUPDATE button becomes active only when a USB memory stick is inserted into theWIU. The USB memory stick must contain the file types that the WIU uses to updateconfiguration or executable files. Qualified personnel can use the File Manager screento update configuration or executable files.Note: The functions on the File Manager screen can be performed only byqualified personnel.Table 4–7. Accessing the File Manager ScreenStepAction1 From the Status screen, click (or press) the UPDATE button.2 The File Manager screen opens.3 When done, click (or press) EXIT to return to the Status screen.P2525, Rev. 3, Sep/12 4–20 <strong>Alstom</strong> Signaling Inc.
Preventive Maintenance5. SECTION 5 – PREVENTIVE MAINTENANCE5.1. GENERALThe microWIU does not require periodic or preventive maintenance.P2525, Rev. 3, Sep/12 5–1 <strong>Alstom</strong> Signaling Inc.
Preventive MaintenanceTHIS PAGE INTENTIONALLY LEFT BLANK.P2525, Rev. 3, Sep/12 5–2 <strong>Alstom</strong> Signaling Inc.
Troubleshooting6. SECTION 6 – TROUBLESHOOTING6.1. GENERALThis section describes the troubleshooting of the microWIU. Troubleshooting helps todetermine defective parts of equipment requiring repair or replacement. This is donethrough fault isolation diagrams and special instructions.For ease of maintenance, diagnostic indications are included in the microWIU statusLEDs. This gives maintenance personnel an indication that a failure has occurred.6.2. GENERAL TROUBLESHOOTINGGeneral troubleshooting can be summarized as follows:• Understand and define the problem• Confirm the problem• Isolate the fault• Perform corrective action• Verify system operationStandard troubleshooting, such as verifying wiring and energy, can identify a failure. Ifthe unit fails to operate at all (all LEDs off), check that the local energy is present at thecorresponding plug board terminals.Any unit that is suspected of being defective must be removed from service.Note: If a microWIU is suspected to be defective, return the entire unit to<strong>Alstom</strong> Signaling for repair. Contact <strong>Alstom</strong> Signaling Inc. CustomerService at 1-800-717-4477 or www.alstomsignalingsolutions.com.P2525, Rev. 3, Sep/12 6–1 <strong>Alstom</strong> Signaling Inc.
Troubleshooting6.3. LEDSThe LEDs on the microWIU indicate if the internal circuitry of the unit is powered andthe system software is executing correctly.The three LEDs, visible from the front of the microWIU, are shown in Figure 2–1. TheLEDs illuminate as follows:• Power is lit GREEN when the unit is powered on• Status is lit:− GREEN when the unit is operating normally (no warnings)− YELLOW when a warning condition has been detected, but the unit is operating(possibly in a degraded mode depending on the warning condition)− RED when an error condition has been detected and the unit is not operational• Attention is lit RED when a condition exists that requires user attentionWhen the Confirm button is pressed and held continuously for approximately5 seconds, the microWIU enters the Touch Screen Calibration Mode.During the microWIU power-up sequence, the Status and Attention LEDs flash GREENuntil the boot process is complete.6.4. HARDWARE FAULT ERROR CODESIf operational faults are suspected or detected, the unit provides clear status informationto isolate and repair the problem.The microWIU displays the real-time Vital input state status (OFF, ON, Flashing) andlog Vital input state transitions to a time-stamped event log.The microWIU implements on-board logging of diagnostic information including (but notlimited to) USB memory stick access errors, file system errors, Vital hardware inputcircuit check failures, communications port failures, and internal processing errors.P2525, Rev. 3, Sep/12 6–2 <strong>Alstom</strong> Signaling Inc.
TroubleshootingTable 6–1. Hardware Failure Error CodesError Description Remedy001 Class D Link Unable to Connect Verify from warning message the port/IPaddress of the Class D connection, and thenverify on the System screen that the networkport is GREEN.• If the network port is GREEN, troubleshootthe Application Gateway• If the network port is not GREEN,troubleshoot the physical connection tothe network for that portP2525, Rev. 3, Sep/12 6–3 <strong>Alstom</strong> Signaling Inc.
TroubleshootingTHIS PAGE INTENTIONALLY LEFT BLANK.P2525, Rev. 3, Sep/12 6–4 <strong>Alstom</strong> Signaling Inc.
Corrective Maintenance7. SECTION 7 – CORRECTIVE MAINTENANCE7.1. GENERALThe microWIU is the Lowest Replaceable Unit. If the unit fails, it is replaced.7.2. UNIT REMOVALTable 7–1. microWIU RemovalStepProcedure1 Verify the power switch on the unit to be replaced is in the OFF position.2 Remove input power form the unit.3 Disconnect power and data cables from the unit (J1–J6).4 Remove the unit mounting hardware. See the Location Book Of Plans, asrequired.5 Remove the microWIU. Return to <strong>Alstom</strong> Signaling Inc. or discard asappropriate.6 Obtain a spare or replacement unit and perform the microWIU installationprocedure provided in Table 3–1.P2525, Rev. 3, Sep/12 7–1 <strong>Alstom</strong> Signaling Inc.
Corrective MaintenanceTHIS PAGE INTENTIONALLY LEFT BLANK.P2525, Rev. 3, Sep/12 7–2 <strong>Alstom</strong> Signaling Inc.
Parts Catalog8. SECTION 8 – PARTS CATALOGThis section identifies and lists the component parts that can be ordered to repair the<strong>Alstom</strong> microWIU at the shop level. The Lowest Replaceable Unit (LRU) for themicroWIU is the unit itself. Individual parts are identified in Table 8–1.Table 8–1. microWIU Parts ListDescriptionDrawing No.microWIU (no power switch, with power switch hole cover) 41795-007-01microWIU (with power switch) 41795-007-02microWIU (no power switch) 41795-007-038-position Connector 58920-675-004-position Connector 58920-446-00USB Memory Stick 59522-165-00P2525, Rev. 3, Sep/12 8–1 <strong>Alstom</strong> Signaling Inc.
Parts CatalogFigure 8–1. microWIU Assembly Drawing (no Power Switch, with Hole Cover)P2525, Rev. 3, Sep/12 8–2 <strong>Alstom</strong> Signaling Inc.
Parts CatalogRECEPTACLE KEYING DETAILFigure 8–2. microWIU Assembly Drawing (with Power Switch)P2525, Rev. 3, Sep/12 8–3 <strong>Alstom</strong> Signaling Inc.
Parts CatalogFigure 8–3. microWIU Assembly Drawing (No Power Switch)P2525, Rev. 3, Sep/12 8–4 <strong>Alstom</strong> Signaling Inc.
Typical Application CircuitsA. APPENDIX A – TYPICAL APPLICATION CIRCUITSA.1.APPLICATION CIRCUITSWARNINGTHE MICROWIU VITAL INPUT CIRCUITS MAY ACTIVATE WITH AMINIMUM SIGNAL OF 10.2 MILLIAMPERES (AT 3.4 V OR GREATER).TO PREVENT A POTENTIAL UNSAFE CONDITION, ANY VOLTAGESOURCE ATTACHED TO A MICROWIU VITAL INPUT CIRCUIT MUSTGENERATE LESS THAN 10.2 MILLIAMPERES (AT 3.4 V ORGREATER) WHEN THE DEVICE CONTROLLING THE SOURCEVOLTAGE IS IN THE DE-ENERGIZED STATE.THIS REQUIREMENT INCLUDES ALL ENVIRONMENTALOPERATING CONDITIONS AND ALL OPERATING VALUES OFTHE OUTPUT DEVICE OVER ITS SERVICE LIFE. FAILURE TOFOLLOW THIS REQUIREMENT MAY LEAD TO UNEXPECTEDOPERATION OF THE MICROWIU INPUT CIRCUIT.WARNINGTHE MICROWIU VITAL INPUT CIRCUITS MAY FAIL WITH ACOMPLETE SHORT BETWEEN THE INPUT POSITIVE ANDNEGATIVE TERMINALS. TO PREVENT A POTENTIAL UNSAFECONDITION, THIS FAILURE MODE MUST BE CONSIDERED WHENTHE MICROWIU VITAL INPUT CIRCUIT IS CONNECTED INPARALLEL WITH ANY OTHER LOAD DEVICE (I.E., A SIGNAL LAMP).THIS REQUIREMENT INCLUDES ALL ENVIRONMENTALOPERATING CONDITIONS AND ALL OPERATING VALUES OFTHE LOAD DEVICE OVER ITS SERVICE LIFE. FAILURE TOFOLLOW THIS REQUIREMENT MAY LEAD TO UNEXPECTEDOPERATION OF THE MICROWIU INPUT CIRCUIT.P2525, Rev. 3, Sep/12 A–1 <strong>Alstom</strong> Signaling Inc.
Typical Application CircuitsFigure A–1. Typical Color Light Application Circuit Using Current Sensors Only• A single sensor is used to determine each lamp status.• Each aspect needs one current sensor.• Each current sensor connects to one microWIU input.• Shared common return is allowed between signal heads.P2525, Rev. 3, Sep/12 A–2 <strong>Alstom</strong> Signaling Inc.
Typical Application CircuitsFigure A–2. Typical Color Light Application Circuit Using Current Sensors andRelay Contacts• The microWIU uses voltage sensing combined with a single current sensor output todetermine each lamp status.• Each color light aspect and the common return needs one microWIU input for thevoltage sensing and one microcab input for the current sensing.• No shared common return is allowed between signal heads.• Voltage sensing is accomplished by a Vital relay contact closure, which shall bevoltage-free if a Vital filament check is required. If this is not practical, a safetyanalysis must be performed case by case.P2525, Rev. 3, Sep/12 A–3 <strong>Alstom</strong> Signaling Inc.
Typical Application CircuitsFigure A–3. D Typical Search Light Application Circuit Using Current Sensors andRelay Contacts• The microWIU uses a single sensor to determine the lamp status.• Each lamp (head) needs one current sensor.• Each current sensor connects to one microWIU input.• Shared common return is allowed between signal heads.• The armature drive is voltage-sensed with one microWIU input for each drive.P2525, Rev. 3, Sep/12 A–4 <strong>Alstom</strong> Signaling Inc.
Typical Application CircuitsFigure A–4. Typical Color Position Light Application Circuit Using Current Sensors Only• The microWIU uses a single current sensor to determine each color aspect status.• Each aspect needs one current sensor.• Each current sensor connects to one microWIU input.• Shared common return is allowed between signal heads.P2525, Rev. 3, Sep/12 A–5 <strong>Alstom</strong> Signaling Inc.
Typical Application CircuitsFigure A–5. Typical Color Position Light Application Circuit Using Current Sensors andRelay Contacts• The microWIU uses voltage sensing to determine each color aspect status. Thecurrent sensing is not necessary if it is assumed that the redundant lamps willprotect against a dark signal.• Each color light aspect needs one microWIU input. A current sensor can be usedand will take a microcab input.• No shared common return is allowed between signal heads if the current sensorsare used.• Voltage sensing is accomplished by a Vital relay contact closure, which shall bevoltage-free in case of a short circuit across the lamps. If this is not practical, asafety analysis must be performed case by case.P2525, Rev. 3, Sep/12 A–6 <strong>Alstom</strong> Signaling Inc.
Typical Application CircuitsA.2.MASTER/SLAVE CONNECTIONSThe ability to stack the microWIU allows multiple units to be interconnected and appearto a PTC network as a single, large WIU. This increases input count up to 112 Vitalinputs and 14 non-vital outputs with 7 stacked units.For Master/Slave wiring, use a wire gauge between 28 AWG and 12 AWG. Keep wirelengths between units as short as possible (up to 100 ft). Wire lengths should betwisted (1 twist per foot minimum). Resistors (120 Ω, 0.25 W) must be installed at thefirst and last units in the chain. See Figure A–6 for wiring details.Figure A–6. Master/Slave ConnectionsP2525, Rev. 3, Sep/12 A–7 <strong>Alstom</strong> Signaling Inc.
Typical Application CircuitsTHIS PAGE INTENTIONALLY LEFT BLANK.P2525, Rev. 3, Sep/12 A–8 <strong>Alstom</strong> Signaling Inc.
FOR QUESTIONS AND INQUIRIES, CONTACT CUSTOMER SERVICE AT1-800-717-4477ORWWW.ALSTOMSIGNALINGSOLUTIONS.COMALSTOM SIGNALING INC.1025 JOHN STREETWEST HENRIETTA, NY 14586