56038502 HSDPA User Guide:Telular UG.qxd
56038502 HSDPA User Guide:Telular UG.qxd
56038502 HSDPA User Guide:Telular UG.qxd

Create successful ePaper yourself
Turn your PDF publications into a flip-book with our unique Google optimized e-Paper software.
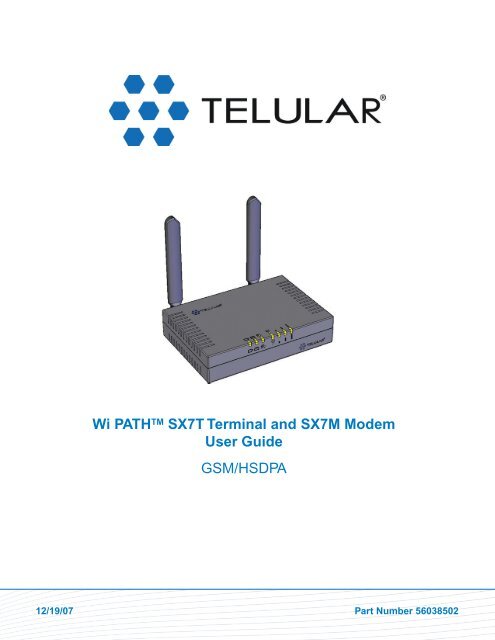
Wi PATH TM SX7T Terminal and SX7M Modem<br />
<strong>User</strong> <strong>Guide</strong><br />
GSM/<strong>HSDPA</strong><br />
12/19/07 Part Number <strong>56038502</strong>
Table of Contents<br />
Contents<br />
Introduction . . . . . . . . . . . . . . . . . . . . . . . . . . . . . . . . . . . . . . . . . . . . . . . . . . . . . . . .1<br />
Getting Started With the Wi PATH SX7 . . . . . . . . . . . . . . . . . . . . . . . . . . . . . . . . . . .1<br />
Your Wi PATH SX7 Components . . . . . . . . . . . . . . . . . . . . . . . . . . . . . . . . . . . . . . . . . . . . . .1<br />
SX7 Connections: an overview . . . . . . . . . . . . . . . . . . . . . . . . . . . . . . . . . . . . . . . . . . . . . . .2<br />
Set Up Your SX7 . . . . . . . . . . . . . . . . . . . . . . . . . . . . . . . . . . . . . . . . . . . . . . . . . . . . . . . . . .2<br />
Connect the SX7 to Your Computer . . . . . . . . . . . . . . . . . . . . . . . . . . . . . . . . . . . . . . . . . . .6<br />
Power Up the SX7 . . . . . . . . . . . . . . . . . . . . . . . . . . . . . . . . . . . . . . . . . . . . . . . . . . . . . . . . .6<br />
Using the <strong>Telular</strong> Device Manager . . . . . . . . . . . . . . . . . . . . . . . . . . . . . . . . . . . . . .7<br />
Setting Up Your Wireless WAN Data Connection . . . . . . . . . . . . . . . . . . . . . . . . . . .9<br />
Status LEDs . . . . . . . . . . . . . . . . . . . . . . . . . . . . . . . . . . . . . . . . . . . . . . . . . . . . . . .12<br />
Using the USB Connection Option . . . . . . . . . . . . . . . . . . . . . . . . . . . . . . . . . . . . .13<br />
Install the USB Drivers . . . . . . . . . . . . . . . . . . . . . . . . . . . . . . . . . . . . . . . . . . . . . . . . . . . .13<br />
Connect the SX7 to Your Computer With a USB Cable . . . . . . . . . . . . . . . . . . . . . . . . . . .14<br />
Set Up a Dial-Up Networking (DUN) Connection . . . . . . . . . . . . . . . . . . . . . . . . . . . . . . . .14<br />
Using the Voice and Fax Options (SX7T Only) . . . . . . . . . . . . . . . . . . . . . . . . . . .17<br />
Using the Voice Calling Features on Your SX7T . . . . . . . . . . . . . . . . . . . . . . . . . . . . . . . . .17<br />
Using the Fax Function on Your SX7T . . . . . . . . . . . . . . . . . . . . . . . . . . . . . . . . . . . . . . . .18<br />
Voice/Fax Programming . . . . . . . . . . . . . . . . . . . . . . . . . . . . . . . . . . . . . . . . . . . . . . . . . . .20<br />
Advanced Data Connection Options . . . . . . . . . . . . . . . . . . . . . . . . . . . . . . . . . . .23<br />
Setup Options . . . . . . . . . . . . . . . . . . . . . . . . . . . . . . . . . . . . . . . . . . . . . . . . . . . . . . . . . . .23<br />
Network Options . . . . . . . . . . . . . . . . . . . . . . . . . . . . . . . . . . . . . . . . . . . . . . . . . . . . . . . . .28<br />
Administration Options . . . . . . . . . . . . . . . . . . . . . . . . . . . . . . . . . . . . . . . . . . . . . . . . . . . .32<br />
Status Options . . . . . . . . . . . . . . . . . . . . . . . . . . . . . . . . . . . . . . . . . . . . . . . . . . . . . . . . . .34<br />
PSTN Options . . . . . . . . . . . . . . . . . . . . . . . . . . . . . . . . . . . . . . . . . . . . . . . . . . . . . . . . . . .37<br />
Advanced Settings . . . . . . . . . . . . . . . . . . . . . . . . . . . . . . . . . . . . . . . . . . . . . . . . . .39<br />
Configuring TCP/IP Settings . . . . . . . . . . . . . . . . . . . . . . . . . . . . . . . . . . . . . . . . . . . . . . . .39<br />
Glossary . . . . . . . . . . . . . . . . . . . . . . . . . . . . . . . . . . . . . . . . . . . . . . . . . . . . . . . . . .40<br />
Wi PATH TM SX7 <strong>User</strong> <strong>Guide</strong>
Introduction<br />
Thank you for choosing the Wi PATHTM SX7 as your wireless data connection solution.<br />
The SX7T Voice/Fax/Data Terminal and the SX7M Modem each provide high-speed wireless<br />
WAN connectivity, taking advantage of your current GSM wireless services to deliver the best<br />
performance available, including <strong>HSDPA</strong>, UMTS, EDGE, and GPRS service.<br />
The SX7 adapts to changing locations and service availability and always uses the best<br />
possible data connections available through your wireless service provider.<br />
In addition to providing a reliable data connection, the SX7T <strong>HSDPA</strong> terminal version offers<br />
voice and fax options that you can use simultaneously with your wireless data services<br />
(network dependent).<br />
Getting Started With the Wi PATH TM SX7<br />
Your Wi PATH SX7 Components<br />
Here’s what’s included with your Wi PATH TM SX7 purchase:<br />
� Wi PATH TM SX7<br />
� 2 TNC Antennas<br />
� Power Supply Adapter<br />
� Power Line Cord<br />
� Rechargeable<br />
Battery Pack<br />
� Ethernet Cable (RJ-45)<br />
(not pictured)<br />
� USB Cable (A to B)<br />
(not pictured)<br />
� RJ-11 Phone Cable<br />
(not pictured)<br />
� Quick Start <strong>Guide</strong><br />
(not pictured)<br />
� CD (contains <strong>User</strong> <strong>Guide</strong> and support materials)<br />
(not pictured)<br />
Make sure you have everything listed before continuing. If any items are missing or damaged,<br />
please contact your authorized distributor for assistance.<br />
IMPORTANT<br />
TNC Antennas<br />
TM Wi PATH SX7<br />
Getting Started<br />
Rechargeable<br />
Battery Pack<br />
Power Line Cord Power Supply Adapter<br />
SIM Card – You will also need to purchase and install a SIM (Subscriber Identity Module)<br />
card to enable your device to connect to your wireless service provider’s network.<br />
Depending on how you will be using the SX7, you will need to activate voice and data<br />
services (SX7T only) or data services only on the SIM card.<br />
Wi PATH TM SX7 1 <strong>User</strong> <strong>Guide</strong>
SX7 Connections: An Overview<br />
Set Up Your SX7<br />
WiPATH SX7<br />
Rear Panel View and Connectors<br />
Antenna<br />
Ethernet<br />
USB<br />
(Type B)<br />
Phone<br />
(SX7T only)<br />
Antenna<br />
Power Switch<br />
USB<br />
(Type A)<br />
(inactive / future use)<br />
Phone/Fax<br />
(SX7T only)<br />
Power Input<br />
1. Install the SIM Card into the SIM card holder in the battery compartment.<br />
� If applicable, remove the SIM Card from the larger plastic card holding it.<br />
� Remove the battery compartment door from your SX7 unit.<br />
� Carefully slide the SIM Card into the SIM card holder inside the battery compartment.<br />
It will slide lengthwise as shown below, with the gold contact surface facing into the SX7<br />
and the corner notch matching the plastic SIM holder outline.<br />
Note Do not touch the gold-colored areas of your SIM Card.<br />
Getting Started<br />
Wi PATH TM SX7 2 <strong>User</strong> <strong>Guide</strong>
2.Install the Rechargeable Battery Pack into the battery compartment.<br />
� With the battery compartment door open, insert the battery connector into the battery<br />
terminal.<br />
Tip<br />
Battery<br />
Compartment<br />
(open)<br />
SIM Card<br />
(installed)<br />
Battery Terminal<br />
Rechargeable<br />
Battery Pack<br />
Battery<br />
Connector<br />
The battery connector will have the rounded corner side on the left when inserted into the<br />
battery terminal.<br />
Getting Started<br />
� Arrange the battery pack in the battery compartment, so the battery connector wire is in<br />
the top right of the compartment.<br />
� Replace the battery compartment door.<br />
Wi PATH TM SX7 3 <strong>User</strong> <strong>Guide</strong>
3.Connect and hand-tighten the TNC Antennas. Once they are installed, orient the antennas so<br />
they point upward (vertical orientation). This is the typical desktop application.<br />
Note<br />
As marked on the back of the unit, the Antenna 1 terminal primarily handles voice and data<br />
services. The Antenna 2 terminal provides radio diversity for optimized data speeds, as well as<br />
GPS functionality for E911 and potential future location-based applications. Either TNC Antenna<br />
may be used in either terminal.<br />
4.Connect the Power Supply Adapter to the unit’s Power Input and connect the Power Line<br />
Cord to the Power Supply Adapter. Then, connect the Power Supply Adapter plug into a<br />
power outlet.<br />
IMPORTANT<br />
(to power outlet)<br />
Power Line Cord<br />
TNC Antennas<br />
Power<br />
Input<br />
Power Supply Adapter<br />
E911 (Enhanced 911) Information – Your unit is equipped with a GPS (Global Positioning<br />
System) antenna for utilizing E911 emergency location services where available. When<br />
you place an emergency 911 call from your device (SX7T only), the GPS feature will<br />
calculate and transmit your approximate location.<br />
Always report your location to the 911 operator when placing an emergency call.<br />
Some designated emergency call takers, known as Public Safety Answering Points<br />
(PSAPs) may not be equipped to receive GPS location information from your SX7T.<br />
Getting Started<br />
Wi PATH TM SX7 4 <strong>User</strong> <strong>Guide</strong>
5. (Optional) For optimal performance and protection, you may elect to connect a copper wire<br />
(not included) to the protective earth Ground Connector Screw to ground the device.<br />
� In a building environment, connecting to an earth ground (such as a cold water pipe)<br />
can protect the device and peripherals from static and conducted electricity. It can also<br />
reduce static or buzzing during voice calls (SX7T only).<br />
� In a vehicle environment, grounding to the frame and battery or alternator can reduce<br />
static or buzzing during voice calls (SX7T only).<br />
6. Connect the Ethernet (RJ-45) cable to the Ethernet Port on the SX7. (This cable will<br />
serve as the connection to your computer in most configurations, including the primary<br />
Wireless WAN data connection.)<br />
Note<br />
7. Depending on your usage needs, connect RJ-11 phone cables to the Phone (J1) and<br />
Phone/Fax (J2) ports (SX7T only).<br />
Note<br />
SX7 Bottom View<br />
Ethernet Port<br />
It is recommended that you use the Ethernet connection for your primary Wireless WAN data<br />
connection; however, you may also use Dial-Up Networking (DUN) using the supplied USB cable<br />
(see “Using the USB Connection Option” on page 12). Before connecting with a USB, install<br />
the SX7 USB drivers included on the CD that was packaged with your device (see “Install the<br />
USB Drivers” on page 12).<br />
Phone/Fax (J2)<br />
Ground Connector Screw<br />
Phone (J1)<br />
Getting Started<br />
The Phone (J1) and Phone/Fax (J2) RJ-11 ports are only available on the SX7T terminal model.<br />
See “Using the Voice and Fax Options (SX7T Only)” on page 16 for information about setting<br />
up your RJ-11 Phone and Phone/Fax jacks.<br />
Wi PATH TM SX7 5 <strong>User</strong> <strong>Guide</strong>
Connect the SX7 to Your Computer<br />
Before you connect your computer, ensure you do not have an existing landline data<br />
connection and that you have either Internet Explorer or FireFox Web browser installed on<br />
your computer.<br />
� Connect the Ethernet (RJ-45) cable from the SX7 to an available Ethernet port on your<br />
computer.<br />
Note<br />
Power Up the SX7<br />
1. With the Ethernet cable connected to both<br />
your computer and the SX7, ensure that your<br />
SX7 is off, and power up your computer.<br />
2. Slide the Power Switch from right to left to<br />
power up your SX7.<br />
3. Wait a few minutes for the SX7 to initialize.<br />
Once the signal strength LEDs are illuminated,<br />
you are ready to proceed.<br />
Note<br />
It is recommended that you use the Ethernet connection for your primary Wireless WAN data<br />
connection; however, you may also use Dial-Up Networking (DUN) using the supplied USB cable.<br />
Signal Strength LEDs<br />
Power Switch<br />
If your computer is configured with a preset IP address, you may need to adjust your network<br />
settings to automatically retrieve an IP adddress from the SX7. See “Configuring TCP/IP<br />
Settings” on page 38.<br />
Getting Started<br />
Wi PATH TM SX7 6 <strong>User</strong> <strong>Guide</strong>
Using the <strong>Telular</strong> Device Manager<br />
The <strong>Telular</strong> Device Manager will allow you to configure all your connections, view your status,<br />
and manage all your connection options in one place.<br />
1. Connect to the <strong>Telular</strong> Device Manager.<br />
� Launch your Web browser (Internet Explorer or FireFox).<br />
Note<br />
� Go to the browser’s address bar, type http://192.168.1.1, and press Enter or click the<br />
green Go arrow. A “Connect to” dialogue will be displayed.<br />
� Enter the default <strong>User</strong> name (“telular”) and Password (“1234”) and click OK.<br />
The <strong>Telular</strong> Device Manager will start and display the Home screen.<br />
Tip<br />
<strong>Telular</strong> Device Manager Overview<br />
When you launch the browser, you may get a “Cannot display web page” or similar error.<br />
This is normal.<br />
It is recommended that you bookmark the <strong>Telular</strong> Device Manager access page<br />
(http://192.168.1.1) so you can easily reconnect your data service, access your status,<br />
and customize additional features such as Firewall and Port Forwarding.<br />
When adding or changing settings in the <strong>Telular</strong> Device Manager, click Save whenever you<br />
change a setting, and then move on to the next item you want to change. When you have finished<br />
making all your changes, click Save again and then click Restart. The SX7 will power down and<br />
restart, and all your new settings will be in effect.<br />
Wi PATH TM SX7 7 <strong>User</strong> <strong>Guide</strong>
2. On the Home screen (see below), you will see the unit’s Model number, the Time, and<br />
your Wireless WAN connection status.<br />
3. Click an item in the column on the left (1) to display a Main Menu subject screen<br />
(such as Setup, below). From a main menu screen, click a Sub Menu item in the<br />
tabs at the top (2) to display the corresponding settings menu.<br />
4. After selecting or adjusting your desired settings and clicking Save (1), you will need to<br />
click Restart (2). The unit will power cycle and your new settings will be in effect.<br />
1 2<br />
<strong>Telular</strong> Device Manager Overview<br />
Wi PATH TM SX7 8 <strong>User</strong> <strong>Guide</strong>
Setting Up Your Wireless WAN Data Connection<br />
Data Connection: The Basics<br />
Once the computer and the SX7 are connected and powered up, you will need to set up your<br />
Wireless WAN data connection. The Wireless WAN connection is the primary data service<br />
connection for your SX7.<br />
1. Connect to the <strong>Telular</strong> Device Manager. (See “Using the <strong>Telular</strong> Device Manager” on<br />
page 6.)<br />
2. On the Home screen (see below), you will see the unit’s Model number, the Time, and<br />
your Wireless WAN connection status.<br />
Wi PATH TM SX7 9 <strong>User</strong> <strong>Guide</strong>
3. From the Home screen, click Setup (1) > Wireless WAN (2).<br />
4. For PSD Auto Connect, click Always On (3).<br />
Tip<br />
5. For Context APN (4), make sure the ISP (Internet Service Provider) name matches your<br />
wireless service provider. For example, if ABC Wireless is your service provider, type<br />
“isp.abcwireless.” (Please contact your wireless service provider for APN information.)<br />
6. If required by your wireless service provider, enter your <strong>User</strong>name (4a) and Password (4b)<br />
in the appropriate fields.<br />
7. Click Save (5).<br />
8. You will be prompted to restart the unit. You can continue adjusting additional settings and<br />
clicking Save to update your configuration. When you have finished making all your<br />
changes, click Restart (6) from the current screen.<br />
Note<br />
1<br />
2<br />
Connected<br />
ABC Wireless<br />
isp.abcwireless<br />
5 6<br />
If you do not have an unlimited data plan with your wireless service provider, you may want to<br />
select On Demand instead of Always On. On Demand connects to the network automatically<br />
anytime you are using data services, but disconnects whenever no data is being transferred.<br />
If you are connecting through a USB Dial-Up Networking (DUN) connection (see “Using the<br />
USB Connection Option” on page 12), your dial-up connection will be terminated and the<br />
dial-up window will appear when you restart the SX7. Re-enter your information (if it is not<br />
automatically populated) and click Connect.<br />
4<br />
3<br />
Data Connection: The Basics<br />
Wi PATH TM SX7 10 <strong>User</strong> <strong>Guide</strong><br />
4a<br />
4b
9. To confirm your data connection, click Status (1). The Status > Router page will<br />
auto-refresh every few seconds. Your WAN address from your wireless service provider<br />
will be displayed next to WAN IP Address (3).<br />
Note<br />
Tip<br />
10. Close the browser window, reopen it, and go to a website (such as www.telular.com) to<br />
verify Internet connectivity.<br />
Tip<br />
Note<br />
Data Connection: The Basics<br />
If the Current WAN Connection Status (2) indicates Not Connected or Unknown Connection<br />
Problem, go back through the previous steps to verify your information. If you are still<br />
experiencing connection problems, please contact <strong>Telular</strong> Tech Support at 1-800-229-2326 or<br />
your wireless service provider’s customer service center if you purchased your SX7 through your<br />
carrier.<br />
Only the Status page auto-refreshes when viewing the <strong>Telular</strong> Device Manager. From any other<br />
page, right-click your mouse and select Refresh or Reload to refresh the current page.<br />
Any time you want to verify your connection status, go to the <strong>Telular</strong> Device Manager<br />
(http://192.168.1.1) and sign on. Your status will appear on both the Home screen (next to<br />
“Wireless WAN”) and the Status page.<br />
For additional data connection options, settings, and features, see “Advanced Data Connection<br />
Options” on page 22.<br />
Wi PATH TM SX7 11 <strong>User</strong> <strong>Guide</strong>
Status LEDs<br />
In addition to checking your status through the <strong>Telular</strong> Device Manager on your computer, you<br />
can also use the LED indicators on the unit for a quick check of valuable connection and<br />
coverage information.<br />
The following table explains how the LED colors and blink rates indicate your device’s coverage<br />
and connection status.<br />
Power Messaging<br />
Off No Messages<br />
Solid<br />
AC / Batt<br />
Normal<br />
LED Reference Table<br />
Phone /<br />
Fax<br />
On Hook /<br />
No WAN<br />
Service /<br />
SIM<br />
Signal<br />
Strength 1<br />
Signal<br />
Strength 2<br />
Signal<br />
Strength 3<br />
Voicemail On-Hook / WAN Service / 2G 1 Bar 2 Bars 3 Bars<br />
Slow Batt Only SMS Service / 2.5 G 1 Bar 1 Bar 2 Bars<br />
Fast Both<br />
Solid<br />
AC / Batt<br />
Charging<br />
Slow Low Batt<br />
Fast<br />
On-Hook /<br />
WAN Tx<br />
Service / 3G<br />
Off-Hook / WAN Roam / 2G<br />
Off-Hook /<br />
No WAN<br />
Off-Hook /<br />
WAN Tx<br />
Roam / 2.5G<br />
Roam / 3G<br />
Solid Batt fault Off-Hook / WAN No Service<br />
Slow Batt crit<br />
Fast<br />
Power<br />
Messaging<br />
WiPATH SX7T LED Indicators<br />
Phone/Fax/Data Service/SIM<br />
Off-Hook /<br />
No WAN<br />
Off-Hook /<br />
WAN Tx<br />
PIN Locked<br />
SIM Error /<br />
No SIM /<br />
Net Reject<br />
Signal<br />
Strength<br />
1<br />
Signal<br />
Strength<br />
2<br />
Signal<br />
Strength<br />
3<br />
Status Indicators<br />
Wi PATH TM SX7 12 <strong>User</strong> <strong>Guide</strong>
Using the USB Connection Option<br />
The preferred method for establishing a data connection with the SX7 is through the Ethernet<br />
Port (see “Connect the SX7 to Your Computer” on page 5). However, you may also use the<br />
supplied USB cable instead of the Ethernet connection.<br />
The USB connection uses Dial-Up Networking (DUN) to achieve Wireless WAN connectivity to<br />
the network. Before setting up a USB connection, you must install the SX7 USB Modem drivers<br />
from the CD that was packaged with your SX7.<br />
Install the USB Drivers<br />
1. Insert the CD into your computer’s CD drive.<br />
2. Click Install USB Modem (or explore the CD contents and double-click<br />
SX7 Driver Installer.exe). (The installer will launch.)<br />
3. Click Next. (The drivers will be installed.)<br />
4. Click Finish.<br />
USB Connection Option<br />
Wi PATH TM SX7 13 <strong>User</strong> <strong>Guide</strong>
Connect the SX7 to Your Computer With a USB Cable<br />
1. With your computer and the SX7 powered on, connect the terminal end of the USB cable<br />
to the USB Type B Port on the SX7.<br />
Note The USB host (Type A) port on the SX7 is not currently active. It is reserved for future use<br />
2. Connect the other end of the USB cable to an available powered USB Type A port on<br />
your computer.<br />
3. A Found New Hardware Wizard will open. Select “Install the software automatically<br />
(Recommended)” and click Next.<br />
� If a Windows Logo testing warning appears, click Continue Anyway.<br />
4. Click Finish to complete the installation.<br />
Set Up a Dial-Up Networking (DUN) Connection<br />
1. With the drivers and USB modem installed and connected, click Start > Control Panel ><br />
Network Connections.<br />
2. Click File > New Connections.... (The New Connection Wizard will start.)<br />
3. Select the following settings and click Next after each selection:<br />
� Connect to the Internet.<br />
� Set up my connection manually.<br />
� Connect using a dial-up modem.<br />
� Set up my connection manually.<br />
USB<br />
(Type B)<br />
USB Connection Option<br />
Wi PATH TM SX7 14 <strong>User</strong> <strong>Guide</strong>
USB Connection Option<br />
� On the Select a Device screen, select Modem - SX7 USB Modem and deselect any<br />
other hardware listed.<br />
� On the Connection Name screen, enter a name for the connection (such as<br />
SX7 USB Modem).<br />
� On the Phone Number to Dial screen, enter *telular* (with asterisks).<br />
� Leave the <strong>User</strong> name and Password blank, click Next, and then click Finish.<br />
Wi PATH TM SX7 15 <strong>User</strong> <strong>Guide</strong>
4. The Connect dialog will open. Click Properties > Options. Uncheck Prompt for phone<br />
number and Prompt for name and password, certificate, etc.. Set Time between<br />
redial attempts to 10 seconds and click OK.<br />
5. Your computer will dial the new connection.<br />
USB Connection Option<br />
6. Follow the instructions found in “Using the <strong>Telular</strong> Device Manager” on page 6 and<br />
“Setting Up Your Wireless WAN Data Connection” on page 8 to launch the <strong>Telular</strong><br />
Device Manager and complete your USB data connection.<br />
Wi PATH TM SX7 16 <strong>User</strong> <strong>Guide</strong>
Using the Voice and Fax Options (SX7T Only)<br />
The Wi PATH SX7T Voice/Fax/Data terminal lets you use your wireless service provider for<br />
voice calling and faxing (similar to standard PSTN telephone operation) in addition to using the<br />
Wireless WAN data features.<br />
Note<br />
Before proceeding, please confirm with your wireless service provider that your account has<br />
been provisioned for voice services.<br />
Using the Voice Calling Features on Your SX7T<br />
1. To use the SX7T’s voice calling feature, plug an RJ-11 phone cable into the Phone or<br />
Phone/Fax input on the back panel.<br />
2. Connect the other end of the phone cable into your phone’s RJ-11 input jack.<br />
3. Lift the phone handset off the receiver (or press the TALK or ON button on a cordless<br />
phone) and listen for a dial tone.<br />
4. If you hear a dial tone, make a call to confirm your service is active.<br />
Your voice service and calling options should be the same as those on your wireless phone.<br />
For additional programming and setup options, please see “Voice/Fax Programming” on<br />
page 19.<br />
Note<br />
Tip<br />
Phone/Fax (J2)<br />
Phone (J1)<br />
Voice and Fax Options (SX7T Only)<br />
Your SX7T should be configured to accept voice signals on both the phone and the phone/fax<br />
inputs by default. For questions about your voice service, please contact your wireless service<br />
provider.<br />
If you experience a buzzing in your phone’s earpiece, try moving your phone farther away from<br />
the SX7T, and make sure the RJ-11 phone cable is routed away from the antennas.<br />
Wi PATH TM SX7 17 <strong>User</strong> <strong>Guide</strong>
Using the Fax Function on Your SX7T<br />
Note<br />
Before proceeding, please confirm with your wireless service provider that your account has<br />
been provisioned for CSD (Circuit Switched Data) and WFAX and that your service provider<br />
supports these technologies. The CSD feature in the SX7T is dependent on the technology<br />
deployed in your service provider’s network and will only work when CSD is enabled as part of<br />
your cellular service plan.<br />
1. To use your SX7T’s fax feature, you will first need to set up your device to support fax<br />
data. The <strong>Telular</strong> Device Manager allows you to configure the necessary settings.<br />
� From your Web browser, launch the <strong>Telular</strong> Device Manager. (See “Using the <strong>Telular</strong><br />
Device Manager” on page 6.)<br />
� From the home page, click PSTN (1).<br />
� Click Basic (2) to display the Basic programming page.<br />
1<br />
2<br />
� For MT Call Type (3) select FAX Next Call or FAX Always.<br />
3<br />
Voice and Fax Options (SX7T Only)<br />
Wi PATH TM SX7 18 <strong>User</strong> <strong>Guide</strong>
� For RJ-11 Jack Mode (4) select the appropriate combination of J1 Voice, J2 voice, J2<br />
FAX, or J2 Data<br />
� Click Save (5), and then click Restart (6) to save your settings and restart the SX7T.<br />
2. Plug an RJ-11 cable into the Phone/Fax input on the back panel.<br />
3. Connect the other end of the RJ-11 cable into your fax machine’s RJ-11 input jack.<br />
4. If the fax machine has a handset, lift if off the receiver and listen for a dial tone.<br />
(Depending on your fax machine, you may also press TALK, ON, Hook, or Speaker.)<br />
5. If you hear a dial tone, send a test fax to confirm your service is active.<br />
Note<br />
Phone/Fax<br />
Voice and Fax Options (SX7T Only)<br />
The SX7T is only compatible with Group 3 (G3) fax machines transmitting at 7200 or<br />
9600 bps/baud.<br />
Please confirm your SX7T and fax machine settings before calling your service provider or<br />
<strong>Telular</strong> Tech Support.<br />
Wi PATH TM SX7 19 <strong>User</strong> <strong>Guide</strong>
Voice/Fax Programming<br />
The <strong>Telular</strong> Device Manager allows you to program all the voice and fax options for service on<br />
your SX7T.<br />
1. From your Web browser, launch the <strong>Telular</strong> Device Manager. (See “Using the <strong>Telular</strong><br />
Device Manager” on page 6.)<br />
2. From the home page, click PSTN (1).<br />
3. Click Basic, Call Control, and POTS Setup (2) to display the programming pages (see<br />
“PSTN Options” on page 36 for examples of each page).<br />
4. Select your desired settings (see table below), click Save (3), and then click Restart (4) to<br />
save the settings to your SX7T.<br />
PSTN Settings<br />
Basic<br />
1<br />
MT Call Type<br />
TTY Mode<br />
2<br />
3 4<br />
Voice and Fax Options (SX7T Only)<br />
Select a setting for the phone jack:<br />
Voice Always to use the jack for voice calls only (default<br />
setting).<br />
FAX Next Call to set the jack to send or receive a fax<br />
with the next call (reverts to previous setting after call).<br />
FAX Always to use the jack for fax calls only.<br />
Data Next Call to set the jack to send or receive Circuit<br />
Switched Data (CSD) with the next call (reverts to<br />
previous setting after call).<br />
Data Always to set the jack for CSD data calls only.<br />
Allows the unit to be used with TTY (TeleTypewriter)<br />
devices for the deaf or hard of hearing. Modes include<br />
TTY VCO (voice carry over), TTY HCO (hearing carry<br />
over), and TTY Only.<br />
Wi PATH TM SX7 20 <strong>User</strong> <strong>Guide</strong>
Basic (cont.)<br />
Call Control<br />
RJ-11 Jack Mode<br />
One Minute Alert Beep<br />
Voice Privacy Tone<br />
Dialtone after Remote Disconnect<br />
Auto Send Delay<br />
Zero Delay Dialing (EOD)<br />
Glare Control<br />
Dialtone Duration<br />
ROH Duration<br />
Continuous ROH<br />
Exit E911 Mode<br />
Voice and Fax Options (SX7T Only)<br />
Select a configuration for the Phone jack (J1) and the<br />
Fax jack (J2):<br />
J1 Voice, J2 Voice to set both jacks for voice calls only<br />
(default setting).<br />
J1 Voice, J2 FAX to set the phone jack for voice calls<br />
and the fax jack to send and receive fax data.<br />
J1 Voice, J2 Data to set the phone jack for voice calls<br />
and the fax jack for CSD data calls.<br />
Select Enabled to hear a beep once every minute during<br />
a voice call.<br />
Select Enabled to hear an alert tone if Voice Privacy<br />
encryption is not available during a voice call.<br />
Select Enabled to hear a dial tone if a call is terminated<br />
from the other end.<br />
Delay between when you finish dialing and the call is<br />
sent; select from 0 to 10 seconds (3 seconds is default).<br />
Select Enabled to have the SX7T remember numbers<br />
you have dialed at least twice and send calls to those<br />
numbers with no delay when you finish dialing.<br />
Select Enabled to enable automatic handling of “callcollision”<br />
(2 calls coming in at the same time).<br />
Length of time a dialtone will remain active when the<br />
receiver is off-hook (10–90 seconds) (40 seconds is<br />
default).<br />
Length of time the Receiver Off Hook (ROH) tone<br />
will sound after the dialtone duration is complete<br />
(10–90 seconds) (40 seconds is default).<br />
Select Enabled to allow for continuous ROH tone until<br />
the unit is returned to the on-hook state.<br />
Click Exit E911 Mode button to return the unit to normal<br />
state after an emergency 911 call.<br />
Wi PATH TM SX7 21 <strong>User</strong> <strong>Guide</strong>
POTS Setup<br />
Note<br />
Tip<br />
Normal Dialtone<br />
POTS Coarse Volume<br />
Line Ring Frequency<br />
Select a dialtone frequency based on region:<br />
350Hz +440Hz – North American standard (default).<br />
425Hz – European standard.<br />
Adjusts phone volume in large increments (Low,<br />
Normal, or High).<br />
Audible ring pitch for an incoming call: 20Hz (low),<br />
25Hz (medium), 50Hz (high) (20Hz is default).<br />
Line Impedance Select setting to match phone (600 ohms is default).<br />
Disconnect Pulse Duration<br />
Caller ID Mode<br />
Caller ID Format<br />
Caller ID Type<br />
Voice and Fax Options (SX7T Only)<br />
Carrier tone sent to inform the unit a call has been<br />
disconnected (700 ms is default).<br />
Select a Caller ID signal format based on region:<br />
Bellcore (North America), Euro (Europe), UK (United<br />
Kingdom), or select DTMF to use a tone-based signal.<br />
Provides Caller ID options, depending on carrier and<br />
regional capabilities. MDMF (Multiple Data Message<br />
Format) allows multiple data types to be sent with Caller<br />
ID, such as name, phone number, location, etc.; SDMF<br />
(Single Data Message Format) allows only a single data<br />
type to be sent (phone number).<br />
Sets the Caller ID type for the SX7T:<br />
During Ring (default)<br />
DT-AS (Dual Tone Alerting System)<br />
RP-AS (Ring Pulse Alerting System)<br />
LR, RP-AS (Line Reverse, Ring Pulse Alerting System)<br />
Standard ring cadences by region (US, UK, Europe)<br />
Line Ring Format<br />
(Off is default).<br />
DTMF Blanking [advanced]<br />
Metering Pulse Gain [advanced]<br />
Your SX7T also allows Circuit Switched Data (2G) access across the GSM network via the RJ-11<br />
connections on the unit. CSD connections can be useful for machine-to-machine<br />
communications, for example, when using hyper terminal to send a file from one PC to another.<br />
Your CSD options are accessed via the PSTN programming pages, along with your voice and fax<br />
options.<br />
You can also program certain voice and fax options for your device using POTS (Plain Old<br />
Telephone Set) commands on your phone.<br />
Wi PATH TM SX7 22 <strong>User</strong> <strong>Guide</strong>
Advanced Data Connection Options<br />
The following pages outline all the advanced programming options and settings available<br />
through the <strong>Telular</strong> Device Manager interface. For information about accessing and using the<br />
<strong>Telular</strong> Device Manager, please see “Using the <strong>Telular</strong> Device Manager” on page 6.<br />
Note<br />
Setup Options<br />
Setup > LAN<br />
Advanced Data Connection Options<br />
The default settings of the SX7 accommodate most common configurations. Many of the<br />
advanced settings should be implemented or supervised by qualified IT specialists.<br />
As an alternative to the preferred Wireless WAN data connection, the SX7 offers LAN (Local<br />
Area Network) connectivity via the Ethernet port or via a USB connection (using Dial-Up<br />
Networking).<br />
LAN Features<br />
� MAC Address: The unit’s MAC address (also the serial number). This cannot be changed.<br />
� IP Address: The address the unit uses to identify itself to the computer. (192.168.1.1 is the<br />
default.)<br />
� Subnet Mask: Identifies the subnet class on the network; class 3 (255.255.255.0) or<br />
class 4 (255.255.255.255).<br />
Wi PATH TM SX7 23 <strong>User</strong> <strong>Guide</strong>
DHCP Settings<br />
� DHCP Server (Ethernet only): Dynamic Host Configuration Protocol. Select Enable to<br />
allow the unit to receive IP address, subnet mask, default gateway, and other settings<br />
dynamically through a server.<br />
� Number of DHCP <strong>User</strong>s: Maximum number of connections allowed. (Default is 50.)<br />
� Client Lease Time: Amount of time new DHCP settings remain in effect.<br />
(Default of 0 minutes signifies 1 day [24 hours].)<br />
� Static DNS 1–3: Allows you to enter known fixed DNS (Domain Name System) addresses.<br />
� WINS: Allows you to enter a known fixed WINS (Windows Internet Name Service) address.<br />
� Currently Assigned: Click DHCP Clients Table to display currently connected<br />
DHCP client information.<br />
� Timezone: Shows currently assigned time zone (assigned by the network). Can be<br />
changed by user.<br />
� Time Server: Use to select time server for the unit. (Default is Wireless Network Time [NITZ].)<br />
Setup > Wireless WAN<br />
Connected<br />
ABC Wireless<br />
isp.abcwireless<br />
Advanced Data Connection Options<br />
The settings for Wireless WAN setup are covered in “Setting Up Your Wireless WAN Data<br />
Connection” on page 8.<br />
Wi PATH TM SX7 24 <strong>User</strong> <strong>Guide</strong>
Setup > Keep Alive<br />
Keep Alive lets you prevent the wireless network from closing your data connection during<br />
extended periods of inactivity by having the unit ping a DNS address at set intervals.<br />
� Keep Alive: Select Enable to enable this feature. Select Disable to allow your connection<br />
to terminate when the DHCP lease expires (usually 24 hours).<br />
� Ping Address: Select DNS1 to use the assigned address. To enter an alternate address,<br />
select <strong>User</strong> Defined and then enter a ping IP address in the <strong>User</strong> Defined Ping IP<br />
Address field that will appear.<br />
� Ping Interval: Select an interval for pinging. (Default is 120 seconds.)<br />
Advanced Data Connection Options<br />
Wi PATH TM SX7 25 <strong>User</strong> <strong>Guide</strong>
Setup > DDNS<br />
DDNS (Dynamic Domain Name Server) settings allow the SX7 to be accessed via the Internet<br />
even when dynamic IP addresses are being assigned. DDNS allows a static domain name to<br />
be used in place of the unit’s IP address.<br />
� DDNS Service: Select a DDNS server option (such as <strong>Telular</strong>) or select Off to disable.<br />
� <strong>User</strong> Name: Enter the user name.<br />
� Password: Enter the password.<br />
� Host Name: This is the name of the server you are connecting to.<br />
� DDNS Status: This indicates the number of active DDNS connections.<br />
Advanced Data Connection Options<br />
Wi PATH TM SX7 26 <strong>User</strong> <strong>Guide</strong>
Setup > SIM<br />
These options allow you to enter a PIN number for SIM card access (if necessary). Your SIM<br />
card may be set to operate without a PIN being entered.<br />
� Automatic SIM PIN entry control: If you wish to use this feature, select Enabled, enter<br />
your SIM PIN, and click Apply. If your SIM card does not require a PIN, select Disabled.<br />
� SIM PIN: If you have selected Enabled above, select Enabled here also and re-enter your<br />
SIM PIN. Otherwise, select Disabled.<br />
Note<br />
Advanced Data Connection Options<br />
Please contact your wireless service provider for assistance with SIM card settings, PIN<br />
requirements, and other configuration information.<br />
Wi PATH TM SX7 27 <strong>User</strong> <strong>Guide</strong>
Network Options<br />
Network > Routing<br />
Routing settings allow you to control the unit’s network routing configuration. There are<br />
two primary options available, by selecting a Working Mode (1): Gateway (NAT on) and<br />
Router (NAT off).<br />
� Gateway (NAT on): Select this option (above) only if you need to use a Network Access<br />
Translator (NAT) to alter IP packets as they pass through a router or firewall. The following<br />
options are available under this configuration:<br />
● Static Routing: Select a Route Entry number (1–20).<br />
● Destination IP: Enter a destination IP address for the selected Route Entry number.<br />
● Subnet Mask: Enter a subnet mask for the selected Route Entry number.<br />
● Default Gateway: Enter the IP address of the default gateway or router.<br />
Repeat for as many Static Routing numbers you wish to set up. To see your currently<br />
configured routes, click Show Routing Table.<br />
1<br />
Advanced Data Connection Options<br />
Wi PATH TM SX7 28 <strong>User</strong> <strong>Guide</strong>
Advanced Data Connection Options<br />
� Router (NAT off): (Default setting) In addition to the options available under Gateway<br />
mode, Router mode offers the following options:<br />
● Dynamic Routing (RIP): Select Enable to use Dynamic RIP (Routing Information<br />
Protocol) to adjust to changing network environments. (Default is Disable.)<br />
● RIP Transmit: Select Enable to allow the SX7 to communicate its RIP. (Default is<br />
Disable.)<br />
● RIP Version: Select v1 or v2 (default).<br />
Wi PATH TM SX7 29 <strong>User</strong> <strong>Guide</strong>
Network > Firewall/Filters<br />
The Firewall/Filters settings allow you to customize the following access settings for the SX7<br />
on your network.<br />
� Firewall (SPI): Select Enable to use the SPI (Stateful Packet Inspection) firewall to monitor<br />
network connections and reject any that do not match its criteria.<br />
� LAN Port Filter Range: Select an option (see below) and a range (from 0 to 65535) of<br />
ports through which to allow connections.<br />
● Disable: Do not apply a LAN port filter range.<br />
● Both: Use both TCP and UDP port numbers for filtering.<br />
Advanced Data Connection Options<br />
● TCP: Use only TCP (Transmission Control Protocol) port numbers for filtering.<br />
● UDP: Use only UDP (<strong>User</strong> Datagram Protocol) port numbers for filtering.<br />
� LAN IP Filter: Select Enable and either Only Allow IP Addresses on the List or Only<br />
Deny IP Addresses on the List to allow or deny connections with specific IP addresses.<br />
Click Edit IP Filter List to enter the IP addresses to allow or deny (up to 50).<br />
� LAN MAC Filter: Select Enable and either Only Allow MAC Addresses on the List or Only<br />
Deny MAC Addresses on the List to allow or deny connections with specific MAC<br />
addresses. Click Edit MAC Filter List to enter the MAC addresses to allow or deny (up to 50).<br />
� IPSec Pass Through: Select Enable to allow connections to pass through IP Security.<br />
� PPTP Pass Through: Select Enable to allow connections to pass through Point-to-Point<br />
Tunneling Protocol.<br />
Wi PATH TM SX7 30 <strong>User</strong> <strong>Guide</strong>
Network > Port Forwarding<br />
This screen allows you to enter an Application Name, Port Extension range, select TCP or<br />
UDP protocols (or both), and complete an IP Address for up to 10 forwarded ports.<br />
Network > DMZ<br />
Advanced Data Connection Options<br />
This screen allows you to enable and define a DMZ (Demilitarized Zone or Perimeter Network)<br />
host to act as a buffer between an internal network and any external networks (usually the<br />
Internet). Select Enable and enter a DMZ Host IP Address to use this feature.<br />
Wi PATH TM SX7 31 <strong>User</strong> <strong>Guide</strong>
Administration Options<br />
Admin > Management<br />
Advanced Data Connection Options<br />
The Administration > Management screen allows you to change the following settings.<br />
� Device Manager <strong>User</strong> Name: For security purposes, you may want to change your user<br />
name for the <strong>Telular</strong> Device Manager from the default (telular). Enter a user name in this<br />
field.<br />
� Device Manager Password: For security purposes, you may want to change the SX7<br />
password from the default (1234). Enter a new password and then re-enter it in the<br />
Confirm Password field.<br />
� Remote Web Managment: Select Enable to allow remote access to the SX7 from another<br />
computer via the Internet, using the specified Port Number.<br />
Wi PATH TM SX7 32 <strong>User</strong> <strong>Guide</strong>
Admin > Factory Defaults<br />
Click Restore Defaults to reset all the device settings to the factory default settings. Any<br />
settings you have customized through the <strong>Telular</strong> Device Manager will be reset.<br />
Admin > Firmware Upgrade<br />
Advanced Data Connection Options<br />
If you have received a firmware upgrade for the SX7, click Browse to locate the upgrade file on<br />
your computer, select the file, and then click Proceed with Upgrade to update your unit.<br />
Wi PATH TM SX7 33 <strong>User</strong> <strong>Guide</strong>
Status Options<br />
The screens available under the Status menu provide information about your unit. The fields in<br />
the Status screens cannot be edited directly, but they may be changed as a result of other<br />
settings you select using the <strong>Telular</strong> Device Manager.<br />
Status > Router<br />
The Status > Router page displays most of the unit’s important information.<br />
Advanced Data Connection Options<br />
� Firmware Version: Displays the firmware version and release date for your SX7. This<br />
information is useful if you ever need to contact your wireless service provider’s customer<br />
care department or <strong>Telular</strong> Tech Support.<br />
� Current Time/Date: Displays the current time and date as provided by your wireless<br />
service provider’s network.<br />
� Router Uptime: Displays how long the unit has been powered on and connected. Router<br />
uptime is reset any time the unit restarts, such as when you have made changes to settings<br />
in the <strong>Telular</strong> Device Manager and click Restart.<br />
� LAN MAC Address: Displays the unit’s Media Access Control (MAC) address.<br />
� LAN IP Address and LAN Subnet Mask: Shows the LAN settings as defined on the<br />
Setup > LAN page. See “Setup > LAN” on page 22.<br />
� DHCP Server: Shows whether the DHCP server option (see “DHCP Settings” on<br />
page 23) is enabled or disabled.<br />
� Current WAN Connection Status: Displays your current connection status: Connected,<br />
Disconnected, or Unknown Connection Problem.<br />
Wi PATH TM SX7 34 <strong>User</strong> <strong>Guide</strong>
� Service Provider Name: The name of the wireless service provider for your unit (for<br />
example, ABC Wireless).<br />
� Radio Service Type: This displays your current data service type. From fastest to slowest<br />
(greatest throughput to least throughput), they are <strong>HSDPA</strong> DATA, UMTS DATA, EDGE DATA,<br />
and GPRS DATA.<br />
� RSSI: This is the signal strength, which is recorded in negative numbers. The farther away<br />
from zero, the better the signal strength (for example, -90 dBm represents a fairly weak<br />
signal strength; -20 dBm represents good signal strength).<br />
� Phone Number (MSISDN or MDN): This is the phone number assigned to the unit’s<br />
SIM card.<br />
� IMEI: International Mobile Equipment Identity. This is a unique number identifying your SX7<br />
as a mobile device.<br />
� WAN IP Address: This is the WAN IP address assigned to the unit by your wireless service<br />
provider. It may change depending on your service provider’s network.<br />
� WAN DNS 1 and WAN DNS 2: These are the Domain Name Server addresses assigned by<br />
your wireless service provider.<br />
The LAN Ethernet Status, LAN USB Status, and Wireless WAN Status pages provide<br />
usage statistics for each of the connection types.<br />
Status > LAN Ethernet Status<br />
Advanced Data Connection Options<br />
Wi PATH TM SX7 35 <strong>User</strong> <strong>Guide</strong>
Status > LAN USB<br />
Status > Wireless WAN Status<br />
Advanced Data Connection Options<br />
Wi PATH TM SX7 36 <strong>User</strong> <strong>Guide</strong>
PSTN Options<br />
See “Voice/Fax Programming” on page 19 for available PSTN (Public Switched Telephone<br />
Network) options. Below are examples of each of the PSTN programming pages.<br />
PSTN > Basic<br />
PSTN > Call Control<br />
Advanced Data Connection Options<br />
Wi PATH TM SX7 37 <strong>User</strong> <strong>Guide</strong>
PSTN > POTS Setup<br />
Advanced Data Connection Options<br />
Wi PATH TM SX7 38 <strong>User</strong> <strong>Guide</strong>
Advanced Settings<br />
This section explains some of the advanced configuration settings that may be required in<br />
some instances to make the SX7 operational on your computer.<br />
Configuring TCP/IP Settings<br />
If your computer is set up with a preset IP address (as may be the case with certain DSL and<br />
cable subscribers), you will need to configure your TCP/IP settings to automatically retrieve an<br />
IP address from the SX7.<br />
Windows XP<br />
1. In the Windows taskbar, click Start > Control Panel.<br />
2. Classic View: Double-click Network Connections.<br />
Category View: Click Network and Internet Connections > Network Connections.<br />
3. Double-click the network interface card icon (usually labeled Local Area Connection)<br />
and then click Properties.<br />
4. Highlight Internet Protocol (TCP/IP), make sure the box next to it is selected, and then<br />
click Properties.<br />
5. Select Obtain an IP address automatically and Obtain DNS server address<br />
automatically, click OK, and then click OK again to save your settings.<br />
Advanced Settings<br />
Wi PATH TM SX7 39 <strong>User</strong> <strong>Guide</strong>
Glossary<br />
APN - Access Point Name<br />
DDNS - Dynamic Domain Naming System<br />
DHCP - Dynamic Host Configuration Protocol<br />
Dial Tone - The tone heard when a phone receiver is off-hook.<br />
DMZ - Demilitarized Zone. A perimeter network area (subnetwork) that acts as a buffer<br />
between an internal network and an external network such as the Internet.<br />
DTMF - Dual-Tone Multi-Frequency. The standard keytones used by telephones in tone dialing.<br />
DUN - Dial-Up Networking<br />
EDGE - Enhanced Data rates for GSM Evolution (aka EGPRS - Enhanced GPRS); 2.75G<br />
(GSM networks only).<br />
GPRS - General Packet Radio Service (GSM networks only).<br />
<strong>HSDPA</strong> - High-Speed Downlink Packet Access or High-Speed Downlink Protocol Access<br />
(GSM networks only) 3G.<br />
LAN - Local Area Network<br />
MDMF - Multiple Data Message Format. A caller ID format in which several elements of<br />
information can be included in the caller ID, such as a name, a phone number, and a location.<br />
MO - Mobile Originated call<br />
MT - Mobile Terminated call<br />
NAT - Network Access Translator<br />
PDP - Packet Data Protocol<br />
POTS - Plain Old Telephone Set<br />
PPTP - Point to Point Transfer Protocol<br />
PSD - Programmable Sharing Device.<br />
PSTN - Public Switched Telephone Network<br />
RSSI - Received Signal Strength Indicator. This indicates your signal strength.<br />
SDMF - Single Data Message Format<br />
SIM Card - Subscriber Identity Module<br />
Glossary, References<br />
Wi PATH TM SX7 40 <strong>User</strong> <strong>Guide</strong>
Static DNS - Static Domain Naming System<br />
TCP - Transmission Control Protocol<br />
UDP - <strong>User</strong> Datagram Protocol<br />
UMTS - Universal Mobile Telecommunications System (aka 3GSM).<br />
USB A Host - Universal Serial Bus type A host connector. (The “USB-in” connector on a<br />
computer.)<br />
USB B Device - Universal Serial Bus type B device connector. (The “USB-out” connector on<br />
the SX7.)<br />
WINS - Windows Internet Name Service<br />
Wi PATH - Wireless Premise Access Transport Hub<br />
Glossary, References<br />
Wireless WAN - Wireless Wide Area Network. This provides data and Internet access over a<br />
GSM cellular network.<br />
Wi PATH TM SX7 41 <strong>User</strong> <strong>Guide</strong>