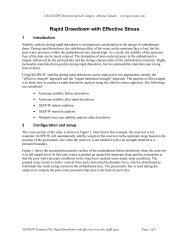
Seepage Modeling with SEEP/W - GeoStudio 2007 version 7.22
Seepage Modeling with SEEP/W - GeoStudio 2007 version 7.22
Seepage Modeling with SEEP/W - GeoStudio 2007 version 7.22

Create successful ePaper yourself
Turn your PDF publications into a flip-book with our unique Google optimized e-Paper software.
Chapter 3: Geometry and Meshing<br />
<strong>SEEP</strong>/W<br />
relative to the orientation of the triangular elements. Also, dealing <strong>with</strong> plant root zones in the<br />
VADOSE/W model necessitates that element nodes in the surface layer all fall on vertical lines.<br />
Moreover, using quadrilaterals greatly reduces the number of elements required, an important<br />
consideration when dealing <strong>with</strong> situations that will be very computationally intensive.<br />
Figure 3-21 Illustration of a surface layer mesh<br />
Surface layers have special viewing options. Consider the two meshes illustrated in Figure 3-22. The left<br />
diagram shows a surface layer <strong>with</strong>out all the cluttering details as illustrated on the right. When many thin<br />
elements are located in a close proximity to each other, they can appear indistinguishable when viewed<br />
from a far away scale. By optionally turning off the surface mesh details a clearer image of the structure<br />
of the near surface soil layers can be viewed.<br />
Figure 3-23 is another illustration of this optional viewing concept. The left diagram in the figure shows<br />
the detailed mesh and soil layers across the 0.75m thick surface region and the right diagram leaves the<br />
details out, but still shows the layer colors. A couple of additional key points can be made in regards to<br />
the figure. Notice that bottom two elements of the left diagram are the same soil type as the main<br />
underlying soil. This is a good mesh design strategy – that being to have the bottom most layer of the<br />
surface mesh be made of the same soil as the existing ground. Consider if the bottom layer of the surface<br />
soil was VERY different from the underlying soil. If a finely spaced mesh was placed directly on top of<br />
the different underlying soil then the numerical integration of material properties at the common mesh<br />
node between the two soils would be less accurate because of the influence of the large element area from<br />
the material below the common nodal point. By having the bottom layer of the surface layer be the same<br />
as the underlying soil, the element shapes are very similar in size and aspect at the common nodal point<br />
between the two very contrasting soils.<br />
The second point to node from Figure 3-23 is that in the right diagram the nodes that are located at the<br />
interface between two soils are still viewable even though the main mesh details are not. This is<br />
intentional so that you can easily see and graph data at nodes that are used for automatic tracking of<br />
interlayer fluxes in the VADOSE/W model.<br />
Page 38