Shaping with a Router - MetosExpo - Free
Shaping with a Router - MetosExpo - Free
Shaping with a Router - MetosExpo - Free

You also want an ePaper? Increase the reach of your titles
YUMPU automatically turns print PDFs into web optimized ePapers that Google loves.
<strong>Shaping</strong><br />
<strong>with</strong> a<br />
<strong>Router</strong>
IMPORTS, INC.<br />
"IMPORTERS OF FINE MACHINERY"<br />
PRICES HELD<br />
FOR 1992!<br />
10" HEAVY DUTY<br />
TABLE SAW<br />
MODELG1022<br />
Reg. $365. SALE $35500<br />
F.O.B. BElLINGHAM, WA or<br />
WILLIAMSPORT, PA<br />
SUPER HEAVY DUTY<br />
TABLE SAW<br />
MODEL G1023<br />
ONLY $89500<br />
F.O.B. BELliNGHAM,<br />
or WA, WILLIAMSPORT, PA<br />
16" BAND SAW<br />
MODEL G1538<br />
ONLY $52500<br />
or F.O.B. BELLINGHAM, WA, WIlliAMSPORT, PA<br />
2 H.P. DUST<br />
COLLECTOR<br />
MODEL G1029<br />
ONLY $29500<br />
F.e.B. BELLINGHAM, WA or<br />
WILLIAMSPORT, PA<br />
F.e.B. BElliNGHAM.<br />
1'12 H.P. SHAPER<br />
MODEL G1035<br />
ONLY $49500<br />
Of WA WlLUAMSPORT.<br />
PA<br />
F.e.B. 8£llINGHAM,<br />
3 H.P.<br />
SHAPER<br />
MODELG1026<br />
ONLY $85000<br />
Of WA WlWAMSf'ORT,<br />
PA<br />
F.e.B. or WIWAMSPORT. BEWNGIiAM, WA fA<br />
Reg. $375. SALE $34500<br />
8" x 65" SUPER<br />
HEAVY DUTY JOINTER<br />
MODEL G101 8<br />
or WllllAMSPOAT, F.O.B. BClllNGHAM, WA PA<br />
Reg. $695. SALE $65000<br />
F.O.B. BElliNGHAM,<br />
12" PLANER<br />
MODEL G1017<br />
Reg. $385. SALE $37500<br />
WA or<br />
WILLIAMSPORT, PA<br />
F.e.B. BELLINGHAM,<br />
15" PLANER<br />
MODEL G1021<br />
ONLY $73500<br />
WA or<br />
WILLIAMSPORT, fA<br />
20" PLANER<br />
MODEL G1033<br />
ONLY $1 ,29500<br />
F.O.B. BELLINGHAM, WA or<br />
WILLIAMSPORT, PA<br />
SANDER<br />
MODEL G1014<br />
ONLY $19500<br />
F.O.B. BELLINGHAM, WA or<br />
WILLIAMSPORT, PA<br />
I VISA" I 1-800-541-5537 ORDERS<br />
If you live WEST of the Mississippi:<br />
(206) 647-0801 CUSTOMER SERVICE<br />
P.O. BOX 2069<br />
BELLINGHAM, WA 98227<br />
CALL FOR YOUR<br />
FREE CATALOG/<br />
If you live EAST of the Mississippi:<br />
1-800-523-4777 ORDERS<br />
(71 7) 326-3806 CUSTOMER SERVICE<br />
2406 REACH RD.<br />
92-103R WILLIAMSPORT, PA 17701<br />
READER SERVICE NO.8
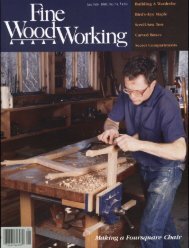
Fine<br />
Working' ________ ===March/April1992<br />
Four tablesaws <strong>with</strong> special crosscutting features,<br />
like Makita's sliding table shown above, are reviewed<br />
on p. 52. Cover: Jeff Dale tells how he<br />
shapes large, heavily contoured parts <strong>with</strong> a router<br />
and jigs on p. 44. Cover photo and photo above:<br />
Sandor Nagyszalanczy.<br />
Executive Ellitor<br />
Mu"Rging Ellitor<br />
Art Director<br />
Jim Boesel<br />
Sandor Nagyszalanczy<br />
Kathleen Rushton<br />
AssistRnt Ellitors Charley Robinson,<br />
Vincent Laurence, Alec Waters<br />
Copy Ellitor<br />
AssistRnt Art Director<br />
EllitoriRI SecretRry<br />
Deborah Surprenant<br />
Aaron Azevedo<br />
Claire Warner<br />
Contributing Ellitors Tage Frid, R. Bruce Hoadley,<br />
Christian Becksvoort, Robert M. Vaughan,<br />
Mark Duginske<br />
Consulting Ellitors<br />
Metholls of Work<br />
Inllexer<br />
Publisher<br />
Harriet Hodges<br />
John Lively<br />
AssistRnt Publisher<br />
CirculRtion MRnRger<br />
George Frank, Norman Vandal<br />
Jim Richey<br />
AllministrRtive SecretRry<br />
Allvertising SRles MRnRger<br />
James P. Chiavelli<br />
NRtionRI Accounts MRnRgers<br />
Larry White<br />
Brenda Hamilton<br />
Susan M. Clark<br />
Dick West<br />
Allvertising Coorllinmor Kathryn Mo<br />
Barney Barrett,<br />
urnian Simonds<br />
Allvertising SecretRry Betsy Quintiliano<br />
Tel. (800) 283-7252 Fax. (203) 426-3434<br />
Fine Woollworking Books & Villeo<br />
Publisher<br />
AssociRte Ellitor<br />
SecretRry<br />
John Kelsey<br />
Andy Schultz<br />
Barbara Hudson<br />
Fine Woodworking is a reader-wriuen magazine. We welcome<br />
proposals, manusQ'ipts, phOtographs and ideas from our readers,<br />
amateur or professional. We'll acknowledge all submissions<br />
and rerum those we can't publish. Send your contributions [0<br />
Fine \'(foodworking, PO Box 5506, ewtO'l\l, Conn. 06470-5506.<br />
Tide to me copyrights in dle contributions appearing in<br />
Fine Woodworking magazine remains widl me audlors, photographers<br />
and artists, unless Othelwise indicated. They have<br />
Fine Woodworking (ISSN 0361-3453) is published birnonthly,January. March, May,<br />
granted publication rights to Fine Woodworking.<br />
July. September and November, by The Taunton Press, Inc., Newtown, cr 06470.<br />
Telephone (203) 426-8171. Second-class postage paid at Newtown, cr 06470, and<br />
additional mailing offices. GST # 1232 J 0981. Copyright 1992 by TIle Taunton Press,<br />
Inc. No reproduction <strong>with</strong>out permission of The Taunton Press, Inc. Fine Woodworking®<br />
is a registered trademark of The Taunton Press, Inc. Subscription<br />
rates:<br />
United States and posseSSions, 525 for one year, 545 for two years, 566 for three<br />
years; Canada and other countries, 530 for one year, 555 for two years, S80 for three<br />
years (in U.S. dollars. please). Single copy, S5.50. Single copies outside U.S. and possessions:<br />
U.K, £3.40; other countries and possessions. 55.95. Send to Subscription<br />
Dept., The Taunton Press, PO Box 5506, Newtown, cr 06470-5506. For orders only,<br />
call (800) 888-8286. Address al1 correspondence to the appropriate department<br />
(Subscription, Editorial. or Advenising), The Taunton Press, 63 South Main Street,<br />
PO Box 5506, Newtown, cr 06470-5506. U.s. newsstand distribution: Eastern ews<br />
Distributors, Inc., I 130 Cleveland Road, SandusJ...l', OH 44870. Ust management: The<br />
K1eid Co New York, NY 10036,5101.<br />
.• .• 530 5th Ave<br />
DEPARTMENTS<br />
4 Editor's<br />
6 LeUers<br />
14 Methods<br />
24 Questions<br />
104 Events<br />
110 Books<br />
112 Notes<br />
Notebook<br />
Perspectives on scraper sharpening<br />
of Work<br />
Krenov's students; bits and braces; update on sources<br />
Radial-arm saw miters; hot-melt glue blocks; laying out cams<br />
& Answers<br />
Osage orange; drying spalted logs; formaldehyde safety<br />
ARTICLES<br />
A look at upcoming programs of interest to woodworkers<br />
and Comment<br />
Philadelphia Craft Show; bicker challenge; product reviews<br />
Desks and Bookcases; Welsh Stick Chairs; Shaker Furniture Makers<br />
44 <strong>Shaping</strong> <strong>with</strong> a <strong>Router</strong> by Jeff Dale<br />
Jigs and bits for large joints and profiles<br />
49 Paulownia by John H. Melhuish, Jr.<br />
A transplanted hardwood that grows like a weed<br />
52 Double-Duty Tablesaws by Sandor Nagyszalanczy<br />
Four machines <strong>with</strong> special crosscutting features<br />
56 Turning Thin by Toby Winkler<br />
Tool-mounted fiber optics illuminate wall thickness<br />
58 Wiring a Home Shop by Grant Beck<br />
Additional circuits and outlets get your motors rnnning<br />
63 Clamping <strong>with</strong> Wedges by Percy W. Blandford<br />
Tapered pieces can clasp or cleave<br />
.<br />
66 A Shop built Tenoning Jig by Lyle Kruger<br />
Safe, accurate tenons on the tablesaw<br />
68 Convertible Furniture by Edward R. Monteith<br />
Tables designed to lead dual lives<br />
72 From Artiture to Architure by Vincent Laurence<br />
Functional furniture <strong>with</strong> an architectural form<br />
74 After-Market Miter Accessories by Daniel Westberg<br />
In search of the perfect angle<br />
78 Cut-off table to handle small pieces by c. E. Rannefeld<br />
80<br />
Quarter Col umns Dress Up Boxy Cases by Mac Campbell<br />
How to make and inset a traditional corner detail<br />
84 Removing an Old Finish by Michael Dresdner<br />
A chemical stripper will do the work for you<br />
89 <strong>Free</strong>hand Inlay by Salvatore Pontecorvo<br />
A cribbage board provides good practice<br />
92 The Anaheim. Woodworking Fair '91 by Charley Robinson<br />
A glimpse of the year's largest trade show<br />
Postmaster: Send address changes to Fine Woodworking, The Taunton Press, Inc., PO Box 5506, Newtown, CT 06470-5506. 3
Editor's Notebook<br />
Mastering the scraper-The articles by E.S. Martin and Pat Buford<br />
about sharpening scrapers in FWW #91 elicited quite a response.<br />
I suspected we would get some mail on this subject because<br />
I knew that most woodworkers share the same kind of<br />
frustration <strong>with</strong> sharpening a scraper that Martin and Buford<br />
described in their articles.<br />
When I was introduced to a cabinet scraper by my first shop<br />
partner, Eddie Gnaedinger, back in the early 1970s, I was<br />
amazed that I'd never encountered this basic woodworking tool<br />
before. I figured that sandpaper manufacturers must have conspired<br />
to keep this handy device a secret for fear that it would<br />
drastically reduce sales of their products.<br />
For months, I continued to find new uses for my scraper and<br />
raved that it was the most used tool in the shop. But despite my<br />
vigorous testimonials, I managed to avoid learning how to sharpen<br />
it. Like Martin and Buford, I tried but never had much luck.<br />
Instead, I kept an eye on Eddie, and whenever I saw him sharpening<br />
his scraper, I'd mosey over and suggest that, in the interest<br />
of efficiency, he might as well sharpen mine too.<br />
Eventually I learned to prepare the edge and turn a burr on a<br />
scraper that would roll up a thin shaving and remain sharp for a<br />
reasonable period of time. And later, I found myself assuming<br />
the role of the designated scraper sharpener for other shopmates<br />
who were just being inu-oduced to this wonderful little workhorse.<br />
Although I haven't entirely abandoned my sandpaper-manufacturer-conspiracy<br />
theOlY, I've come to appreciate the fact that<br />
scraper knowledge isn't general knowledge but is instead passed<br />
from woodworker to woodworker-a kind of rite-of-passage into<br />
the secret society of woodworking. Here are three letters in response<br />
to Martin's article from readers offering their perspectives<br />
on sharpening a scraper. -Jim Boesel is executive editol- of FWW<br />
<strong>Free</strong> at last-I was pleased and relieved to see the article on<br />
sharpening scrapers in FWW #91. For years, I've been filing a<br />
flat (90°) edge on my scrapers and not raising a burr because it<br />
never seemed to work velY well when I tried it. The scrapers seem<br />
to work wonderfully <strong>with</strong>out a burr, but I've always looked over<br />
my shoulder (figuratively speaking) because I felt guilty about not<br />
doing something I thought I really should be doing. I'm going to<br />
continue not making a burr, but I won't feel guilty anymore.<br />
-Abijab Reed, Newton Centre, Mass.<br />
Using the right scraper for the job-I read <strong>with</strong> interest the<br />
article on sharpening scrapers in the December issue of FWW It<br />
struck home because I have been using file-sharpened cabinet<br />
scrapers for quite a while now. And just like the author, frustration<br />
<strong>with</strong> getting and holding a good burr using the traditional<br />
techniques led me to this simple method.<br />
However, there were two minor flaws in the text. First, it<br />
should have been pointed out that a filed scraper edge can never<br />
leave the same kind of surface on wood as one that has been<br />
filed, honed and burnished. Many craftsmen scrape their surfaces<br />
to perfection in preparation for finishing instead of using<br />
sandpaper. When the light strikes d1e surface of these finished<br />
pieces, the wood comes to life. You know you are looking at a<br />
surface that sandpaper has not touched. Such a surface cannot<br />
be achieved <strong>with</strong> a filed scraper because d1e marks left by the<br />
file on the scraper's edge will be u-ansferred to d1e wood. A filed<br />
scraper should be viewed as a preliminalY way of dressing down<br />
a surface speedily and efficiendy. Then you should eid1er expect<br />
to do some sanding or you should give your project a few strokes<br />
<strong>with</strong> a properly burnished scraper to bring it to perfection.<br />
The second flaw was in d1e suggestion d1at a single scraper be<br />
used both for fine finishing and glue scraping. You should have<br />
separate scrapers for various tasks: a thick one for glue, a filesharpened<br />
one for rough work on wood and a burnished one<br />
for fine work. Over d1e years I've acquired a collection of scrapers<br />
of various sizes, thicknesses and qualities of steel. Because I've become<br />
aware of the subdeties of ead1, there will always be one<br />
scraper that has just the characteristics I need for a particular job.<br />
-Thomas Wissback, Galesburg, Ill.<br />
A fool-proof method?-My method for sharpening a scraper<br />
takes some of the guesswork out of the process. The secret is a<br />
2-i 1.-thick-maple block about 12-in.-sq. <strong>with</strong> one end cut clean<br />
and square and sanded smooth. I use this end as a regisu-ation<br />
surface when filing, honing and burnishing d1e scraper's edge.<br />
Begin by clamping the block to a workbench or table. Lay d1e<br />
scraper flat on top of the block and press a fine file against<br />
d1e block's smoothed end. Now, press the scraper lighdy against<br />
d1e file; swing d1e file back and ford1 a few times to remove d1e old<br />
burr or any nicks and to square d1e scraper's edge. Repeat this on<br />
each edge of the scraper, and d1en do the same <strong>with</strong> a coarse stone<br />
followed by a fine stone. A drop or two of oil on the scraper will<br />
lubricate the stones and will also help when you get to the burnishing<br />
phase. ext, lay the coarse stone flat on the scraper and<br />
rub a bit on both sides to remove any burr d1at you've created.<br />
Finish <strong>with</strong> a fine stone against the end of the block again.<br />
At d1is pOint, you can feel that the edge is square and d1e corners<br />
are very sharp. Now, while pressing the scraper down on<br />
the block, hold a burnisher at about a 5° angle, and take a few<br />
light su-okes on the scraper's top edge. Run your knuckles along<br />
the end of d1e block to help maintain the slight angle; I usually<br />
let the scraper overhang the end of the block a bit while burnishing<br />
and adjust the overhang to help set the correct angle.<br />
I can put a good edge on a scraper in about four minutes,<br />
including taking out d1e equipment and putting it away again.<br />
The block gives the correct angle so there is no need for great<br />
care. And the swinging motion of d1e stone means there is no<br />
tendency to wear a groove in it. -David Gather, Los Angetes, Cal.<br />
UNTON<br />
PUBUCXfIONS<br />
... by fellaw enlhusillSlS<br />
The Taunton Press: Paul Roman,presitielltiJanice A. Roman, vice<br />
preSident; Carolyn Kovaleski, administrative secretary. Corporate<br />
Staff Directors: Susan Edelman, deSign; John Kelsey, editorial; john<br />
Lively, cbie! Of staff; jan Wahlin, marketing. Accounting: \Vayne<br />
Reynolds, control/c.".., Patrick Lamontagne, manager; jeffrey Shenn:Ul,<br />
Susan<br />
financial analyst; Mary Sullivan, general ledger superViSor; Carolyn<br />
Stiles,jr. cast accountant; Carol Diehm, accounts payable supervisor;<br />
Burke, accounts payable clerk; uwrence Rice, credit supervisor;<br />
Lyctia Krikorian, senior collection clerk; Judith Rivera, Victoria<br />
Theobald, collections clerks; Diana D'Onofrio, payroll coordinator;<br />
Andrea DuBois. Elaine Yamin, junior accountants; Dorothy Blasko,<br />
secretary. Corporate Design: Philip Allard, promotion services coordinator<br />
books/videos; Steven Hunter, art director, Thomas Baker, promotion<br />
services coordinator magazines; Wendy Bowes,judy Lind, associate<br />
tlrt directors; Mary Beth Cleary, promotion production<br />
roordbudor, Franc esca Arminio, promotion asst. Art Production, Robert<br />
Olah, mal101:,lf!r'; Henry Roth, Catherine Cassidy, associate art directors;<br />
Jodie DeJohery, assista11l art director; tLiana Koehler, production. ,mis·<br />
tanto Copy/Production: RUlh Dobsevage, managing editor; Peter<br />
Chapman, Pamela Purrone, COPY/production editors. Corporate<br />
Sales: lY.t1e Brown, director; Donna Pierpont, publiC relations manager;<br />
Diane i>'ducrson, executive secretary; Andrea Ondak, trat/e and<br />
special sales mQlUlger, Barbara Buckalew, marketing assistant; Marcie<br />
Siegel, publicity/trade sales asst.; Lori MOir, telemarketer. Data Pro·<br />
cessing: Drew Salisbury, manager, Brendan Bowe,Julftllment systems<br />
manager'; Roger Seliga, scniorprogrammerlanalyst; Gabriel Dunn, programmer/analyst;<br />
Arthur Caron, Roben Nielsen, programmers; james<br />
Kinnear, tech. services admin. Sherill Kolakowski, computer support<br />
tecbnician. Folkwcar: Cheryl Clark, mgr.j Garol Ge, ((t/mill. asst.;<br />
Gregory McMahan, pattern designer. Fulfillment & Operations:<br />
Tom Luxeder, director; Jane Torrence. secretary. Client Services:<br />
Patricia Williamson, coordinator, Roxanne Frimmel, Megan Sangster,<br />
client services representatives; Customer Service (subscriber):<br />
Patricia Malouff, manager; Nancy Schoch, senior customer service<br />
rep; Donna Weinstein, Diane Hurvul, Marylou 111Ompson. Mail Processing:<br />
Joyce Mc\ViUiam, supervisor; Gayle Hammond, Barbara<br />
Lowe. Customer SenJice (trat/e): Christine Cosacchi, supervisor;<br />
Kristen Boeckmann, cust. service rep.; Gloria Carson, Peggy leBlanc,<br />
Denise Pascal, data ent,y. Distribution: Paul Seipold, manager;<br />
Grace AumuUcr, David Blasko, Michael Capalbo, James Chappuis,<br />
Mary Ann Costagliola, Maureen Aynn, Fred Monnes, Alice Saxton,<br />
Astor Taylor, Robert Weinstein; Linnea Ingram, secretary. Purcbasing<br />
& Facilities: William Schappen, manager; Lois Beck, Office services supervisor;<br />
john Zor, mail services; Chuck HoUis, maintenance foreman;<br />
Mark Cole, maintenance assistant; Christopher Myers,<br />
Donna<br />
buyer;<br />
<strong>Free</strong>man, cbeflm allager; Kathleen CosteUo, Nonna-jean Taylor,<br />
assistants. Subscnption: Carole Ando, managc.j Connie Barczak,<br />
Bonnie Beardsley, Brigitte Blais, Madelaine Frengs, Marie Paw,<br />
AndrC'd. Shorrock. Manufacturing: Kathleen Davis, director. Prepress:<br />
Austin E. Starbird, manager; Robert Marsala, grapbic arts supervisor;<br />
Susan Kahn, staff photographer; Nancy Atkinson, Chansam<br />
Thammavongsa, production assistants; Deborah Cooper, color center<br />
sUpe1visorj Richard Booth, nigbt-shijt supervisor; Mark Coleman,<br />
William Godfrey, Laurene jakab, color system operators; Nancy<br />
Knapp, composition production coordinator; Margot Knorr,publications<br />
applications manager; Monica Murphy, desktop publications<br />
associate; lisa DeFeo, system operator. Print Production: Diane<br />
Flanagan, manager (promo); 1110mas Greco, manager (books);<br />
Rosemary Pagel, associate (books); Philip VanKirk, manager- Onagazilles);<br />
Deborah Baldwin, assOCiate (magazines); Tracie Pavlik, sec·<br />
retary. Personnel: Carol Marotti, managerj Linda Ballerini, Chris<br />
Lincoln, personnel assistants. Video: Craif Umanoff, vitlc."O coorclinat01<br />
1110 mas Menard, asst. video producer.<br />
4 Fine Woodworking
DOMESTIC & FOREIGN<br />
HARDWOODS<br />
Quality stock for<br />
Cabinet Work<br />
Most all sizes from<br />
1" up to 4" in thickness<br />
HARDWOODS<br />
ASH-BASSWOOD<br />
BIRCH-BUTTERNUT<br />
CHERR Y -CHESTNUT<br />
EBONY -MAPLE-OAK<br />
POPLAR-ROSEWOOD<br />
TEAK-WALNUT<br />
Also hardwood plywoods<br />
SOFTWOODS<br />
SUGAR PINE-CYPRESS<br />
CEDAR-SPRUCE<br />
DOUGLAS FIR etc.<br />
MAURICE L. CONDON CO., INC.<br />
248 Ferris A venue<br />
White Plains, NY 10603<br />
914-946-4111<br />
Monday through Friday<br />
8 AM to 4:30 PM<br />
MITRE RITE<br />
MITRERITETM<br />
FRAME MITRE<br />
TOOLS<br />
• Easy<br />
to use<br />
•<br />
Make exact complementary cuts<br />
Create 4, 6, & 8 sided frames,<br />
plus circles and ovals<br />
Complete<br />
instructions<br />
Kit contains 3 precision<br />
molded angles, each<br />
$19.95 + 3.00 S&H<br />
<strong>with</strong> adjustable stop.<br />
450 Cal. residenls add $1.45 lax<br />
4 MIC . VISA<br />
300 angle tool for 6<br />
1· sided frames<br />
22W angle tool for 8 sided frames, circles and ovals<br />
Bill Bartz Manufacturing Co.<br />
854 Arbor Oaks Dr., Vacaville, CA 95687<br />
707-451-9104 FAX 707-451-4666<br />
DEALER INQUIRIES INVITED<br />
READER SERVICE NO. 77<br />
Kasco Portable Band Saw Mill<br />
Cut Lumber<br />
When you want<br />
How you want<br />
•·24" and 30" diameter capacities<br />
Power·thru<br />
I
Letters<br />
Troubled by current trends-Recently, I set some time aside<br />
to visit several woodworking shows and galleries. I wasn't sure<br />
what I was looking for but I knew there was a trend that was<br />
making me uncomfortable.<br />
Now that I've had a chance to look around and talk to people,<br />
I'm beginning to get a handle on what's wrong. I think it's this:<br />
Woodworking isn't art and never will be. The painter who's fortunate<br />
enough to become a hot item can expect to make a decent<br />
living or even get rich, but people won't pay that kind of money<br />
for woodwork, no matter who made it. However, woodworkers,<br />
who by defInition are starving, refuse to believe this. After all,<br />
wealthy att patrons are their only hope. Therefore, woodworkers<br />
strive vigorously to make their work into art.<br />
This has led to a vicious spiral. Galleries and museums are asking<br />
art curators to jury their shows. These people choose works by<br />
academic criteria. The result is a collection of works that are funky,<br />
brighdy colored, shocking and whimsical-anything but subde.<br />
Lack of function is considered avant-garde.<br />
Up and coming woodworkers see this trend and build accordingly.<br />
At design schools, like Pat-sons and Pratt, the professors adjust<br />
their own work to suit d1e trend, and students at these schools<br />
are tacidy encouraged to build carbon copies of their teachers'<br />
work. So it all looks the san1e.<br />
Don't get me wrong. I'm not bitter because my own work is<br />
being ignored. It's not. In a gallery fIlled <strong>with</strong> purple boxes <strong>with</strong><br />
spikes and orange beads, my rocker is the fIrst thing people ask<br />
about (and often the only thing that sells), which is an object lesson<br />
in itself. The fIner points that make woodworking such a challenge-elegance,<br />
warmth, fInesse, comfort-are also what make<br />
well-crafted furniture a joy to live <strong>with</strong> over the long term. There is<br />
still plenty of room for innovation <strong>with</strong>in these constraints.<br />
-Jeremy Singley, East Middlebury, Vt.<br />
More on Krenov's students-Looking at your article on James<br />
Krenov's students' work was a sheer delight. Special attention<br />
should be paid to Mr. Radenkov's marquetry cabinet, which is so<br />
fIne that I'd be tempted to sell my house and car to buy it. I was<br />
also impressed by Page Sullivan's cabinet; it's nice to see a woman's<br />
work represented.<br />
All the pieces in the atticle illustrate how well the students have<br />
learned Mr. Krenov's basic philosophy of cabinetmaking. However,<br />
I wish there had been more pieces shown and more close-ups of<br />
some of the cabinets. I also would like to have read a bit about<br />
how each student's personal philosophy on cabinetmaking compat"es<br />
<strong>with</strong> Mr. Krenov's approach. 111ere's got to be someone else<br />
out there who feels that a Krenovian-style cabinet would certainly<br />
not be hutt by incorporating some well-proportioned and wellplaced<br />
chip or relief carving, to add to the artistry of the whole piece<br />
<strong>with</strong>out detracting from the subde beauty of a flne-grained wood.<br />
-Dave Koianek, Wolcott, Conn.<br />
Woodcarver blade interferes <strong>with</strong> grinder switch-I recendy<br />
purchased a Bosch right-angle grinder for use <strong>with</strong> a Ryobi Woodcarver<br />
blade. It didn't take long to discover that the design of the<br />
switch on the grinder makes the combination dangerous: When<br />
the switch is on, cutting debris accumulates under the switch so<br />
that it will not turn off. I suspect that this problem could also occur<br />
in any other application that created large quantities of debris, such<br />
as mst scaling. In addition, because the Bosch switch is similar to<br />
the one on my Makita grinder, and presumably to many other<br />
small hand grinders, it is likely that most such grinders will have<br />
the same problem.<br />
I'm now using the grinder plugged into a portable switch-controlled<br />
oudet box, so I don't have to rely on the tool's switch to<br />
turn off the power. 11s solves the problem, but a fIrst-time user<br />
could be caught by surprise.<br />
-Bruce Winterbon, Deep River, Ont., Canada<br />
Even more puzzling-The sidebar "A sliding-tile puzzle" by Robert<br />
Stirling (FW\V #91) was most interesting. 111e very similar plan<br />
was published in a 4-H woodworking manual (Woodworking-Beginner,<br />
Cooperative Extension Service, Purdue Univ., West Lafayette,<br />
Ind. Publication 4H 442) several years ago, and I have made many of<br />
them for gifts.<br />
With only minor alterations, another much more difficult puzzle<br />
can be made, making it a two in one. To make the alternate puzzle,<br />
one of the long rectangular tiles is replaced <strong>with</strong> two small square<br />
tiles, and the large square tile is made thinner so d1at only it will exit<br />
the tray through a slot in one end of the frame. More than 50 moves<br />
are required to move the large square from the upper center to d1e<br />
bottom center (see the drawing below) where it will slip through the<br />
slot. So many moves are involved that when you are successful,<br />
you've forgotten how you accomplished it.<br />
Start<br />
"- - /<br />
;' ',<br />
0<br />
.' 0<br />
c<br />
/ , 1<br />
: '"<br />
I<br />
End<br />
The tiles move easier if they are a bit larger than Mr. Stirling's. I<br />
make the small squares 2 in., the rectangles 2 in. by 4 in. and the<br />
large square 4 in. The large square should be about o/J6 in. thick while<br />
the other tiles are all % in. The slot should be flush <strong>with</strong> the floor of<br />
the tray so the large tile exits easily, but the others are retained. My<br />
name for this puzzle is Le Game. It is really challenging and is handy<br />
for a coffee table or in a waiting room to keep guests occupied.<br />
-0. H. White, Medalyville, Ind.<br />
Bits and braces-As a youth, I had the same question as Noah Birnel<br />
(in FW\V 91, p. 26): How do you fasten an auger bit into the<br />
chuck of a bit brace? I grew up dunking the jaws should grasp the<br />
bit's squared-and-tapered end. But the bit would often fall out of<br />
the brace when I tried to remove it from the work, and I could<br />
rat"ely get the bit straight enough or the chuck tight enough <strong>with</strong><br />
my young hands.<br />
Then as a young man, I discovered the secret. The squared-andtapered<br />
end of the bit fits neady into a square socket located deep<br />
inside the chuck The jaws of the chuck grasp the round shank of d1e<br />
bit, keeping it perfectly straight and centered Ald10ugh it is possible<br />
to pull the bit out of this socket, the jaws prevent it from coming all<br />
the way out of the chuck, even in a very tight hole.<br />
This discovery served me well for more than 25 years w1til I read<br />
Richard Starr's reply to Birnel's question. It prompted me to re-exam<br />
ine my oid Craftsman brace to see whether or not I was crazy. Sure<br />
enough, I learned something new-there are two possible positions<br />
for d1e bit. About % in. inside the chuck, the face of each jaw has a<br />
molded depression shaped to fit the squared-and-tapered end of an<br />
auger bit exacdy. On my brace, it requires a strong light and close<br />
inspection to see d1ese depressions. They allow the bit to be held<br />
further out of the chuck than does the socket deep inside, thus allowing<br />
one to drill a slighdy deeper hole. But even in this position, the<br />
outer ends of the jaws still grip the rounded shank, centering the bit<br />
and preventing it from being pulled out of the brace.<br />
I suggest that Birnel examine the chuck of his own brace closely. A<br />
6 Fine Woodworking
The PACK HORSE is<br />
a saw horse made of<br />
Southern Yellow Pine &<br />
Birch plywood and weighs<br />
32 Ibs. When latched<br />
together it stores easily<br />
in truck or trunk.<br />
Supports 21/2 tons<br />
®rn TIillillJ<br />
ill ®m TI1]®<br />
[P®[lli(<br />
PACK"<br />
$99.95 a pair<br />
Patented self-stabilizing design<br />
secure on most uneven surfaces<br />
Master Card and Visa accepted,<br />
call toll free 1-800-945-9545<br />
DAVAlCO 301 PRODUCTS 3D<br />
West<br />
NYC NY 10019 51 53rd sUIte<br />
&<br />
Money back guarantee lor , year<br />
Matenals workmanship guaranteed tor 5 years<br />
HORSE<br />
SAWHORSES<br />
plus shlwm9 & handling<br />
A New Dimension<br />
READER SERVICE NO. 38<br />
Versatility in Woodworking<br />
MAFELL<br />
Erika<br />
"Pull-Push-Saw"<br />
Table Combination and<br />
r"<br />
<br />
Radial Arm Saw<br />
Maximum Versatility<br />
US-$1395<br />
220 V Machine only<br />
Also available in 110 V<br />
Fixed blade operation for precision table saw performance.<br />
<strong>Free</strong> blade operation for versatile radial arm saw features.<br />
Lightweight design for easy transportation to the work-site.<br />
Compact construction for convenient workshop storage.<br />
Wide range of accessories for equipment customizing.<br />
• Best features of both a table and a radial arm saw.<br />
Professional Features<br />
Accurate blade tilt to 45°<br />
Blade height adjustment up to 2W'<br />
Front and rear locking rip fence<br />
Quick set miter gauge<br />
Double rail saw guides and four point mounting<br />
Ball bearing construction<br />
• Carbide-tipped blade<br />
FREE ERIKA BROCHURE<br />
MAFELL North America Inc., 80 Earhart Drive, Unit 9, Williamsville, N. Y.<br />
Phone: (716) 626-9303 . Fax: (716) 626-9304<br />
Complete Catalogue $1 Each for Stationary orTimber Framing Tools<br />
READER SERVICE NO. 124<br />
Completely NEW. telescopically helghtadjustable<br />
ladder system. Now FACTORY<br />
DIRECTI Surpasses highest safety standards.<br />
5-YEAR Extended Manufacturer's Warranty.<br />
home or<br />
Call Now For FREE VIDEO & Brochure<br />
1-800-992-8007 24-Hrs.<br />
professional use.<br />
W K Ladder. 70 Arlington Ave .. Kearny. NJ 07032<br />
A BETTER FENCE? PRECISELY!<br />
The VEGA SAW FENCE attaches to most<br />
--<br />
READER SERVICE NO. 98<br />
saws in minutes and features:<br />
on chromed stl rails for<br />
___ ............ - -SPECIAL ALLOY HEAD which glides<br />
rigidity and<br />
smoothness<br />
-MICRO-ADJUSI"ER<br />
• FINGER SAVER ATTACHMENT <strong>with</strong><br />
stock pusher and gauging block (option)<br />
• REAR HOLD IX>WN for use <strong>with</strong> roUers<br />
or feeders<br />
I'·· .<br />
. ' Decatur,<br />
9t'14 1-800-222-VEGA Illinois 62526<br />
Thought/ully designed machines made in the USA.<br />
READER SERVICE NO. 32<br />
Woodworker's<br />
HARDWARE<br />
Manufacfurer's Hardware For The Home Craftsman<br />
FREE CATALOG<br />
Huge line of SPECIALIZED Cabinet and Furniture Hardware.<br />
Knobs<br />
Pulls<br />
Hinges<br />
Drawer Slides<br />
•<br />
Lighting<br />
Cabinet Accessories<br />
Connectors<br />
• Locks<br />
• Abrasives<br />
Much, Much More!<br />
KV1 383<br />
tl2-<br />
Our Best Full Extension<br />
TV Swivel<br />
Height: 2<br />
SheH size: 26-<br />
$<br />
x 14314-<br />
Load capacity 1501<br />
Now 59.95 <br />
(mention this ad for special pricing)<br />
Visa/MC orders only,<br />
MN residents add 6.5% sales tax<br />
AK, HI add $ 15 -Canada add $ 12, ND add 5 "I. sales tax,<br />
Send or call for FREE CATALOG<br />
P.O. Box 784 St. Cloud, MN 56302<br />
1 -800-383-01 30<br />
READER SERVICE NO. 81<br />
Marchi April 1992 7
Letters (continued)<br />
well made tool will allow him to center the bit perfealy, provide a<br />
tight enough grip on the squared pan to wid1stand d1e u'emendous<br />
forces that an auger bit must sustain, and never let the bit fall<br />
either out or fanher in. If his bit brace cannot do d1is, he should<br />
get a new one.<br />
-Hugh C Laue/ Concord, Mass.<br />
More on glue shelf life-As d1e principal developer of Elmer's<br />
glue, I would like to comment on Mr. Mustoe's discussion on the<br />
stability of yellow and white glues ("Q&A," FWW #91). I wish to<br />
point out that thickening of d1e glue during storage is not due to<br />
further polymerization as stated. ll1e major ingredient in bod1 types<br />
of glue is a polyvinyl acetate emulsion made by polymerizing vinyl<br />
acetate monomer in an aqueous suspension.<br />
ll1ere are two reasons for d1ickening and subsequent gelation and<br />
solidification: 1) loss of moisture by diffusion through the normally<br />
used plastic container; and 2) hydrolysis of residual amow1ts of unpo<br />
Iymerized monomer into acetic acid. Partial collapse of the container<br />
sometimes occurs because of the first phenomenon. ll1e hydrolyzed<br />
acetic acid imparts a vinegar·like odor to the glue and promotes fur·<br />
d1er hydrolysis of d1e polyvinyl acetate into additional acetic acid and<br />
polyvinyl alcohol. 1l1is eventually leads to gelation and solidification.<br />
The shelf life of these glues could be improved by using a plastic<br />
container <strong>with</strong> a coated or built·in moisture barrier, which would<br />
n1inimize d1ickening due to moisture loss. Such containers are al·<br />
ready used in d1e food indusuy. In addition, methods are available<br />
for reducing concenu-ations of unpolymerized monomer to trace<br />
quantities. ll1is should be the responsibility of the polymer emul·<br />
sion manufacturer. Mr. Mustoe's comments on recovering thick·<br />
ened glue are quite correct so long as d1e glue has merely thick·<br />
ened and is still flowable and hasn't reached the gel or solid state.<br />
-Sidney j. Baum, Camarillo, Cal.<br />
ANTIQUE reproduction furniture HARDWARE<br />
HORTON BRASSES<br />
Nooks Hill Rd., PO Box 120F<br />
Cromwell, CT 06416<br />
203-635-4400<br />
send $3.00 Jor a catalog<br />
AMERICAN MADE, HEAVY DUTY!<br />
DRUM SANDER<br />
Stabilizing tools on wheels-In his article "Working in a small<br />
space," (FWW #91) Scott Landis says that Dick Sellew "Simply rolls<br />
the tablesaw out of d1e way" when he needs more space in 11is tiny<br />
workshop. I've thought about mounting my workbench on rollers<br />
for the same reason, but d1e only rollers I'm familiar <strong>with</strong> rely on<br />
brakes to keep them set once they are in position.<br />
I can't imagine that the brakes on rollers would provide the kind<br />
of stability that a tablesaw or a workbench would need when I'm<br />
sawing or planing away. It seems to me d1at the rollers would need<br />
to be on jacks of some sort so that the object being moved could<br />
be lowered to the floor once it's where you want it.<br />
I'm wondering if any FWW readers know if d1at kind of jacking<br />
system is available or how to put one together.<br />
-Charles Klaveness,<br />
Helnpstead, NY.<br />
Magic box-When I was a boy, I had a CI1inese "magic box" in<br />
whicl1 I kept my silver dollars. To open the box, I slid a Y2·in.-wide<br />
horizontal piece of d1e end to d1e right that allowed d1e whole end<br />
piece to move down, so the top could move across the end ... and<br />
d1en I forget. The end result was access to a thin velvet-lined tray<br />
dut would hold just six silver dollars.<br />
I'd appreciate hearing from anyone who knows what these little<br />
boxes are called and where I could fmd plans to build one or<br />
where to buy one so I could take it apan and figure it out.<br />
-Marsh Teny, Rolling Bay, Wash.<br />
Computer software price corrections-First of all, I'd like to<br />
thank you for mentioning The Woodworkers' Store as a source for<br />
computer software in your JanuatylFebruaty 1992 issue ("Computers<br />
in d1e Shop" by Sandor Nagyszalanczy). Unfortunately, I'm also<br />
writing to identi.fY a few errors we found in the article.<br />
HARPSICHORDS<br />
& FORTEPIANOS<br />
Build it yourself from<br />
one of our I,its or let our<br />
experienced erafstmen<br />
build it for you.<br />
Three Centuries of<br />
HW'psichord Ma/il1g<br />
by Franl, Hubbard<br />
($40 postpaid)<br />
For brochure<br />
send $3.00 to<br />
HUBBARD<br />
HARPSICHORDS<br />
INCORPORAnD<br />
31 Union Avenue<br />
Sudbury, MA 01776<br />
(508) 443·34 17<br />
==t Ecan-Abrasives<br />
WE MANUFACTURE ABRASIVE BELTS ANY SIZE. ANY GRfTI<br />
BELTS<br />
GAITS ASSORTED UNLESS OTHERMSE SPECIAED<br />
1 >
..<br />
VICTORIAN ELEGANCE<br />
CASINGS . BASES . CROWNS . CORNER BLOCKS<br />
DOORS . GINGERBREAD . WA INSCOT<br />
LARGEST INVENTORY<br />
OFVICTORIAN MOULDINGS<br />
&• MILLWORK ANYWHERE<br />
Specializing In Customer<br />
& CommerCial<br />
Grades<br />
No Minimum Order<br />
Rush Orders -No Problem!<br />
Expen Shipping & Packaging<br />
Lots of Construction Ideas<br />
Top Quality Precision<br />
M.IIVv'Ork<br />
• High Quality Full Color<br />
Catalog <strong>with</strong> over 60 photos<br />
or Phone<br />
•<br />
service<br />
Buy Oirea from Mfr.<br />
Premium<br />
Send 54 for<br />
& use your credJt Catalog<br />
card<br />
P.O. Box 2987-FW4<br />
303-259-5915<br />
Durango, Colorado 81302<br />
DELMHORST MODEL J-88<br />
READER SERVICE NO. 402<br />
Pocket-size Wood Moisture Tester<br />
LED display-type meter indicates ten ranges of<br />
wood moisture content between 6 and 20 percent.<br />
Ideal for a woodworking shop or serious craftsman.<br />
Limited 3-Year Warranty.<br />
Shipped complete <strong>with</strong><br />
carrying case, batteries<br />
and pins.<br />
ORDER ONE TODAY!<br />
1-800-222-0638<br />
NJ-201-334-2557<br />
DELMHORST<br />
InstrUDlent Company<br />
P.O. Box 68, Dept. 908<br />
Towaco, NJ 07082<br />
READER SERVICE NO. 86<br />
DROP-IN-THE-BUCKETTM<br />
"THE INNOVATIVE STORAGE SYSTEM"<br />
DESIGNED<br />
FOR<br />
ANYONE<br />
WITH<br />
SOMETHING<br />
TO STORE! /"<br />
DROP-IN-THE-BUCKETTM<br />
Consists of a "Standard' 5 gal. Bucket <strong>with</strong> Lid and Handle,<br />
Plus 5 Custom·Designed Interlocking Stackable Inserts.<br />
OUR INSERTS WILL FIT MOST 5 GALLON BUCKETS<br />
COMPLETE SYSTEM - $22.95 $3.75 Shipping<br />
FIVE<br />
ea.<br />
INSERTS ONLY - $19.95 + $3.50 Shipping ea.<br />
MasterCard, VISA, Checks or Money Orders Accepted<br />
Order 24-Hours a Day -7 Days a Week<br />
JOURNEYMAN PRODUCTS. LTD.<br />
Call: 1-800-248-8707<br />
P. O. Box 4472. Dept. FW<br />
Annapolis, MD 21403<br />
READER SERVICE NO. 59<br />
1-8O()..TCT-SAWS<br />
9 Otis St. - West Babylon, NY 11704<br />
(516) 491-1900<br />
CA 1-800-221 -SAWS FAX (516) 491-6712<br />
STEllAR QUAUTY BLADES, BITS AND DADO<br />
SETS. With a super-smooth cut, created for youthe<br />
professional woodworker or craftsman.<br />
Designed to cut aluminum, Corian, laminate,<br />
wood or any difficult material <strong>with</strong> ease.<br />
Our complete line of innovative products is as<br />
dose as your nearest distributor. Call or write for<br />
our complete catalog <strong>with</strong> safety guide and<br />
technical information, or call our professional<br />
staff for technical assistance anytime.<br />
"TliE MADE IN AMERICA<br />
_<br />
BLADE"<br />
SAN FRANCISCO NEW YORK<br />
READER SERVICE NO. 5<br />
DOWEL<br />
MATE<br />
PANEL<br />
TEMPLATE<br />
<strong>Router</strong> Not Included<br />
UNIVERSAL<br />
ROUTER SYSTEM<br />
<strong>Router</strong> Not Included<br />
ROUTER ARC<br />
ATTACHMENT<br />
BULLS-EYE<br />
CENTER FINDER<br />
ROUTER<br />
MATE<br />
--.- Family of Fine Wood Working Machines<br />
<strong>Router</strong> Not Included<br />
,. (ALL MADE IN THE USA)<br />
• DOWEL MATE for tough joints that are perfectly<br />
aligned. The Dowel Mate is the answer. A single step<br />
on the foot pedal first clamps the wood & then shoots<br />
in two dowel holes. Air clamp & air feed.<br />
• RING MASTER Test your imagination ...<br />
Cut rings out<br />
of a board <strong>with</strong> the renowned Ring Master & produce<br />
any hollow cylindrical shape in wood. Create beautiful<br />
wood works of art from start to finish.<br />
• PANEL TEMPLATE Produce something special!!.<br />
Route decorative panel designs in seconds. 32 different<br />
corner designs, a side design & arc attachment are<br />
available to create unique parts.<br />
• ROUTER MATE converts portable routers to precision<br />
Routing machines.<br />
• Route Faster · More Accurately · More Profitably . ...<br />
... <strong>with</strong> the All New <strong>Router</strong> Mate<br />
• ROUTER ARC ATTACHMENT cut precision arcs and<br />
circles from 9" to 50" in diameter <strong>with</strong> your router.<br />
Easily adjustable and precisely repeatable. Adaptable<br />
to any portable router.<br />
•<br />
router into 3 tools;<br />
<strong>Router</strong> Table<br />
• THE UNIVERSAL ROUTER SYSTEM turns your<br />
• Joint Maker<br />
Inverted<br />
Pin <strong>Router</strong><br />
Ruggedly built - Flat ground table - Many options.<br />
• BULLS EYE center finder for everyone to use. Quickly<br />
and accurately locates the center of the edge of a<br />
board or any flat object up to 6' wide.<br />
See your woodworking machinery dealer or call toll free for an informative brochure,<br />
PORTA-NAILS, INC - PO BOX 1257 - WILMINGTON, NC 28402, USA - 91 9-762-6334 - 1-800-634-9281<br />
READER SERVICE NO. 110<br />
Marchi April 1992 9
Letters (continued)<br />
Under the subheading about panel optimization programs, incorrect<br />
prices were given for bodl Plywood PlalU1er alld Casp'er. Plywood<br />
Planner was listed at $29.95 and Casp'er at $149.95. Plywood<br />
Planner has sold for $49.95 since we inu'oduced it to the mail-order<br />
market 18 months ago. The price given for the 2.0 version of<br />
Casp'er reviewed in dle article was correct, but that version is out<br />
of date and has been replaced by Casp'er 3.0, which we now carry<br />
and which seils for $249.95.<br />
The other errors were technical in nature and relatively minor,<br />
but I'd like to take this opponunity to correct them. The article<br />
stated dlat Casp'er was limited to laying out parts on a plywood<br />
sheet up to 145 in. sq., but actually the sheet size is unlimited. The<br />
article also suggested that both programs were limited to specifying<br />
fractions down to sixteenths of an inch alld in meu'ics down to<br />
millimeters, but eidler program will work to thousandths of an<br />
incll (or millimeters) or smaller. Finally, Plywood Planner, like<br />
Casp'er, can save layouts to diskette.<br />
I hope these corrections will help eliminate any misunderstandings<br />
on the part of readers who wish to purchase either of<br />
these programs for developing cutting diagrams on a personal<br />
computer. -Steve Krohmer, product manager, The Woodworkers'<br />
Store, Rogers, Minn.<br />
Update on Sources<br />
Vacuum pumps-The Vaccon Co. Inc., which sells compressedair<br />
powered vacuum devices used for vacuum-bag veneering alld<br />
shopmade vacuum hold-down jigs, has moved since they were listed<br />
as a source in Midlael Dresdner's article on compressed-air systems<br />
in the May,June 1990 issue of FWW: Here is dleir new address<br />
and telephone number: PO Box 324, Medfield, Mass.<br />
02052; (800) 848-8788.<br />
...<br />
370H Dozuki<br />
610 Ryoba<br />
405 Proton<br />
GYOKUCHO<br />
Traditional Japanese<br />
Pull Saws.<br />
Razor Sharp,<br />
Fine and Rip cuts<br />
SET OF THREE $85.00 (includes S&H)<br />
<strong>with</strong> Japanese ..-"'II'i)1llI"<br />
canvas saw case.<br />
Tool Catalog $3,<br />
leave thinner kerfs.<br />
Wholesale available. *'<br />
115 HIDA<br />
Send for a free brochure of all lines of RAZOR SAWSi<br />
TOOL, INC./GYOKUCHO JAPAN<br />
<br />
1333 San Pablo Ave,. 6erkele • CA 94702 1-800-443-5512 C1CIIUCHO<br />
READER SERVICE NO. 302<br />
READER SERVICE NO. 4<br />
Landing net bags-For readers who plan to build a landing net,<br />
like dle one described in Geoffrey Carson's article in FWW #92,<br />
here's another source for net bags: Bob Marriot's Fly-Fishing Store,<br />
2770 Orangethorpe Ave., Fuilenon, Cal. 92633; (714) 525-1827.<br />
They carry Broden nets, whicll are soft, black cotton in sizes based<br />
on the length of the frame.<br />
Kiln manual-A new edition of the Dly Kiln Operator's Manual,<br />
Agricultural Handbook 188, published by the USDA Forest Service's<br />
Forest Products Laboratory is now available. The mal1Ual describes<br />
both the basic alld practical aspects of kiln drying lumber<br />
alld substantially updates and expallds the 1961 edition. The 274<br />
page book includes a new chapter on energy in kiln drying alld<br />
also covers topics rallging from wood propemes and drying defects,<br />
to kiln maintenal1Ce alld lumber stacking alld loading.<br />
Copies of the new manual are available for $14 from Superintendent<br />
of Documents, Government Printing Office, 710 . Capitol St.,<br />
Washington, D.C., 20402-9325. Include the complete tide and stock<br />
number 001-000-04576-8 when ordering.<br />
About your safety:<br />
Working wood is inherendy wlgerous. Using halld or power<br />
tools improperly or neglecting standard safety practices can<br />
lead to permanent injury or death. So don't try to perform<br />
operations you learn about here (or elsewhere) until you 're<br />
certain that they are safe for you and your shop situation.<br />
We want you to enjoy your craft alld to find satisfaction in<br />
the doing, as well as in dle finished work. So please keep<br />
safety foremost in your mind whenever you're in the shop.<br />
-John Lively, puhlisber<br />
WE WILL MEET ALL ADVERTISED PRICES<br />
MAKITA PORTER CABLE<br />
All MAllTA ACCESSOIII<br />
30% OFF<br />
SlJI'EII 1!: lm ••.. .. ... . ... s r.<br />
60101lWK SPECIAL 1!: = . .<br />
60400W 50900W 318' 3-318' Con11ess Cordess<br />
Saw 0ri1 Rev.<br />
..<br />
Ki1<br />
(1tV r&l!amps<br />
.<br />
Ki19.61
9Ut-che/Zl {iJes.WR/<br />
-<br />
and<br />
&ne er nta'W ,
• Filters Dust<br />
.6 cu. ft. airflow<br />
• Completely portable, built-in filtration<br />
system. (No hoses)<br />
• Head, face and respiratory protection<br />
on one unit.<br />
• Positive pressure behind face shield.<br />
• Pleasant flow of purified air.<br />
• No extra breathing effort.<br />
• Unrestricted vision.<br />
• Filters Dust<br />
• 8 cu. ft. airflow<br />
• Filtration system located on belt pack,<br />
hose brings filtered air to headpiece.<br />
• Filters Paint & lacquer fumes, furniture<br />
strippe, polishes, etc. and/or dust<br />
• Hard hat available<br />
.6 cu. ft. airflow<br />
<br />
Cl<br />
@ (!J<br />
//<br />
,<br />
<br />
e<br />
UN OERST AN 01 NG<br />
ORIGINAL HARDWARE<br />
UNDER THE TABLE HARDWARE . ..<br />
Seldom seen, usually never<br />
polished, often taken for<br />
granted, - catches for tilt<br />
top's, hinges for drop leaves<br />
and holding clips for<br />
sectional dining tables all<br />
contribute to the function of<br />
the finished piece.<br />
Square, round, lion paw, or<br />
cup casters of all sizes, using<br />
brass, china, wood, cast iron,<br />
leather, or no wheels<br />
finished thousands of legs<br />
since 1700.<br />
Call or write for free minicatalog,<br />
or send $5.00 for<br />
our full 108 page catalog.<br />
We now reproduce more<br />
than 100 items like these.<br />
Excelient for ali woodworking jobs which create dust and fumes.<br />
All units are light-weight and can be worn <strong>with</strong> glasses or beard.<br />
Ali units available for same day shipment. We stock ali parts and<br />
optional accessories for the Airstream, Airmate and BreatheEasy<br />
products. Call for free brochures and our special coupon offer.<br />
WE WILL MATCH ALL CURRENT ADVERTISED PRICES.<br />
Airstream Dust Helmets<br />
P.O. Box 975<br />
BALLandBALL<br />
g,,,,. Q""Clly
SUNHILL MACHINERY<br />
Take Advantage of Our Limited Time Freight Specials<br />
"Freight charges will not exc<br />
eed 7% of the purchase price<br />
on any of the following items (in the 48 states). Alaska & Hawaii caN for special quote.<br />
Special Freight Rates Available Until Feb. 29th. 1992<br />
• 9" x 72" Extended Bed<br />
•<br />
CT-2ooL 8" Long Bed Jointer<br />
2HP 1PH Motor w/ Magnetic Starter<br />
$809<br />
•<br />
7" x 52" Extended Bed<br />
Enclosed Base & Motor<br />
$389<br />
CT -60L 6" Long Bed Jointer<br />
1512VSC 'Chic', Orb. Nob. Heft. Jig SIW<br />
1512DVS 'Chic', Du.d ... Orb. Jig SIW<br />
1632VSK Plnther Recp. SIW<br />
1511DVS Dutd ... Jig Sow<br />
U., SALE<br />
$265 $144<br />
$159<br />
$247 $149<br />
$290 $159<br />
•<br />
SP-102 Two Speed Spindle Shaper<br />
Extra Heavy Duty Components<br />
Reversible & Interchangeable Spindles<br />
3HP 1 PH $1295<br />
5HP 3PH $1395<br />
•<br />
RXW-10 10" Contractor Style Table Saw<br />
1.5 HP<br />
•<br />
5/S" Arbor, 4500 RPM<br />
Option: 70" Rails<br />
$449<br />
3000VSRK 9.6 Cordlo .. Drill w/2 Bill<br />
l00lVSR 3/1' Vir. Spd. Rov. DrIll<br />
1021VSR (a. abov) Hvy. Duty<br />
1023VSR 1/2' H.D., V.S. Rlv. DrIll<br />
l000VSR 3/1' Var. Spd. Rov. DrIll<br />
1194VSR 1/2' Hammer DrIll<br />
Slndlng Frame for 1273DVS<br />
32700 3' x 21' DuIU •. BeH Sander<br />
1272 3' x 24' 8tH Sinder<br />
12720 3' x 24' 8tH Sander w/D. Coil.<br />
1273 4' x 24' 8tH Sander<br />
12730 4' x 24' 8tH Sinder w/D. Coli.<br />
12900 Fin. Sander, 1/2<br />
3251 ShHI Dulttell<br />
3-1/4' Po_ Pllner<br />
13700EVS KH, H.D. Rond. Orb. SondJPol.<br />
1290 1/2 Shill Flnllhlng Sonder<br />
32830VS 5' Rand. Orb. SondIPolllh<br />
3283DVSK KH, (lime II above)<br />
$236 $129<br />
$131 $79<br />
$180 $99<br />
$199 $104<br />
$131 $79<br />
$264 $147<br />
$116<br />
$260<br />
$308<br />
$329<br />
$324<br />
$345<br />
$232<br />
$239<br />
$391<br />
$217<br />
$169<br />
$199<br />
$98<br />
$145<br />
$175<br />
$185<br />
$185<br />
$190<br />
$125<br />
$135<br />
$299<br />
$95<br />
$109<br />
$139<br />
•<br />
3/S" to 2-3/S" Capacity<br />
Four Feed Speed<br />
RM-70 Round Pole Milling Machine<br />
• 3HP, 5HP, & 7.5HP Models Available<br />
)'I r<br />
1<br />
• l!2HP<br />
10-3S FPM<br />
$3250<br />
FD-308 3 Roller. 4 Speed Feeder<br />
SUNHIL<br />
$498<br />
•<br />
The Original 15" Planer<br />
3HP 1PH Motor w/Magnetic Starter<br />
$859<br />
CT -38B 15" Two Speed Planer<br />
•<br />
CT -108 Edge Sander<br />
Inclined work table may be adjusted for<br />
even belt wear, decreased sanding marks<br />
• 6" x lOS" Belt<br />
Please Contact Us For More Information:<br />
MACHINERY<br />
$995<br />
SUNHILL MACHINERY<br />
500 Andover<br />
•<br />
Park East<br />
Seattle. WA 98188<br />
206/575-41 31 206/575-3617 FAX<br />
800/ 544 -1361<br />
READER SERVICE NO. 90<br />
1601<br />
1604<br />
1604K<br />
1606<br />
90300<br />
1608lX 16091<<br />
160910(<br />
1611<br />
1611EVS<br />
1611<br />
1611EVS<br />
CB7SF<br />
C1SFB<br />
C12FA<br />
Cl0FA<br />
Fl000A<br />
C8FB<br />
P12RA<br />
1 hp. Rout ..<br />
1-3/4 hp. <strong>Router</strong><br />
Fixed Ba .. <strong>Router</strong>,<br />
lamlntto Trimmer<br />
Inltall.,. KH<br />
(lime II above) w/Cu. & Aceo<br />
D-Hanelll, 1-3/4 hp. Rout ..<br />
3-3/4 hp.<br />
•.<br />
lamintto Trim KH<br />
Plungo <strong>Router</strong>, 3 hp.<br />
3-1/4 hp. VII. Spd. Ping. <strong>Router</strong><br />
Plunge <strong>Router</strong>, 3-1/2 hp., 220 v.<br />
3-1/4 hp. V.S. 220 v. Ping. <strong>Router</strong><br />
HITACHI<br />
Resaw Bandsaw<br />
15" Milre Saw<br />
12" Milre Saw<br />
10" Milre Saw<br />
12" Planer/6" Joinler<br />
8·1/2" Compound Milre Saw<br />
12" Planer/6" Joinler<br />
FREE FREIGHT<br />
Denver - (303) 355-2391<br />
3900 Ulster St., Denver 80207<br />
$184<br />
$236<br />
$287<br />
$273<br />
$170<br />
$309<br />
$556<br />
$361<br />
$386<br />
$448<br />
$435<br />
$509<br />
VISA Ind MASTERCARD ACCEPTED<br />
READER SERVICE NO. 17<br />
$105<br />
$145<br />
$175<br />
$147<br />
$349<br />
$99<br />
$168<br />
$199<br />
$197<br />
$233<br />
$269<br />
$310<br />
$1598<br />
$378<br />
$298<br />
$278<br />
$1498<br />
$438<br />
$778<br />
Marchi April 1992 13
Methods of Work<br />
Drill-press milling machine<br />
<strong>Router</strong> bracket<br />
attached to<br />
drill-press column<br />
This method grew out of my need to make some small, precise<br />
wooden prototypes a few months back. First I purchased one of<br />
those XIY milling vises and clamped it to my drill-press table.<br />
Then I made a simple router bracket that locks onto my drillpress<br />
column. The permanently attached bracket, which swings<br />
out of the way for drilling, enables me to quickly and easily set<br />
up for milling whenever I need to.<br />
For the bracket, I chose phenolic for the baseplate because<br />
of its flaU1ess and rigidity and 2-in.-thick hardwood for the<br />
arms. I made the hardwood arms first and clamped them to<br />
the column <strong>with</strong> threaded rod. Then I screwed the baseplate<br />
to the anns.<br />
To use the milling machine, I first make a crude height adjustment<br />
between the vise and router by moving the drill-press table<br />
up or down, and dlen I make precise adjustments <strong>with</strong> the<br />
router itself. For quick router attachment and removal, I purchased<br />
an exu'a router base that I keep screwed to dle jig.<br />
-Micbael ]. McGinnis, Santa Rosa, Cal.<br />
edited and drawn by Jim Richey<br />
manent marking pens to help me remember which bit/edge I<br />
am using. To make tile base, I cut the Lexan slightly oversize,<br />
and then, after mounting the router and making test cuts, I ran<br />
the base over a jointer to carefully trim each edge to the exact<br />
offset needed.<br />
-Derek Roff, Albuquerque, NM.<br />
<strong>Router</strong> base for grooving in two passes<br />
Recently, I needed to cut a large number of %-in. grooves across<br />
several large pieces. Because I dislike using cutters larger dlall<br />
Y2 in. in my small router and because I wanted to minimize dle<br />
number of router-fence setups, I quickly designed alld cut dle<br />
asymmetrical router-base plate shown in dle drawing.<br />
The theory is quite simple. Simply valY the base's offset by the<br />
amount you want to enlarge the groove. In my case, I wanted to<br />
enlarge the Y2-in. groove to % in. So I cut the base 3 '12 in. from<br />
the center of dle bit on one side alld 3% in. on the other, a<br />
difference of Ys in.<br />
To use the fixture, set a fence parallel to the line of cut,<br />
make one pass <strong>with</strong> the first edge against tile fence, and then<br />
make another pass <strong>with</strong> the second edge against the fence.<br />
One setup, two passes, one odd-size cut.<br />
-Allen Trivino, Rocbester, NY<br />
Quick tip: Measuring tablesaw-blade height for a dado or<br />
groove cut can be a problem, especially if the blade insert is<br />
not exactly level <strong>with</strong> the tabletop. Instead, mark the desired<br />
height on the face of a scrap board that is longer than the<br />
insert, and clalllP the board to the fence flush on the table<br />
<strong>with</strong> the mark centered over dle blade opening. Lower dle<br />
blade and pOSition the fence so dlat when the blade is raised,<br />
it will skim the face of the scrap. Turn on the saw and raise the<br />
blade until it just touches the line.<br />
-Dal'io Biagiarelli, Kirkville, NY<br />
Improved radial-arm saw miters<br />
EDITOR'S NOTE: The following two methods describe ways to use an asymmeu'ical<br />
router base to solve different setup problems.<br />
Asymmetrical router base simplifies setups<br />
RoWs router base<br />
. .' < t ;eters 1/.2. .<br />
§<br />
$"t:;;;o"<br />
•<br />
, y<br />
_.. . I ,<br />
3<br />
\. _ ._ 3<br />
3 .<br />
<br />
I, <br />
-vi, .<br />
:<br />
Trivino's router base<br />
f '<br />
Offset for cutti ng %-in.-wide groove<br />
<strong>with</strong> 'h-in.-dia. bit<br />
.. ' " . ' " ..... .<br />
This edge for - '.<br />
first pass<br />
.. : _ . .'<br />
®- .- .<br />
3'12 --<br />
3%.<br />
I used to get frustrated <strong>with</strong> the inordinate amount of time it<br />
took to set up my router for even the simplest cuts. The main<br />
problem was that the distance from dle edge of the router base<br />
to the bit was always some weird dimension like 2'%2 in. So<br />
recendy, while making some new custom router bases out of<br />
Lexan, I got an idea. I cut the rectangular base so that each edge<br />
of dle router base will be exactly 3 in. from the edge of one of<br />
my standard bits. For example, if I am using a k in. bit, the edge<br />
marked Y4 in. will be exactly 3 in. from dle edge of dle bit. I also<br />
made one edge 3 in. from dle center of the bit, which is frequently<br />
useful (see the drawing, above left). In addition to writing<br />
dle bit size on each edge, I color-coded the edges witil per-<br />
"<br />
In "Medl0ds of Work," FWW #86, Steven Springston describes<br />
a method of sawing picture-frame miters using complementary<br />
angles. Although Mr. Springston's method will produce a<br />
perfect 90° angle, if the saw's 45° setting is off much, the technique<br />
may produce miters <strong>with</strong> faces that don't match. This<br />
problem can be especially troublesome on highly detailed<br />
moldings. By contrast, my method, illustrated above, uses the<br />
actual cut line of the blade for its registration and avoids the<br />
mismatch problem.<br />
Ciall1P all auxilialY table on the main sawtable, alld cut a 'Is·in.<br />
deep sawkerf into tile table. Into ti1is kerf insert a 'I4 -in.-wide strip<br />
of '/s-in.-dlick hardboard to act as a temporary setup fence. Place<br />
a 45° drafting U'iallgle against tile fence, alld use it to set dle<br />
position of the left-side fence. Screw the fence to the table so it<br />
overlaps the kerf a bit; it will be trimmed later. Flip the triangle<br />
to the opposite side of dle hardboard, and repeat the procedure<br />
described for tile right-Side fe nce, as shown in the drawing.<br />
14 Fine Woodworking
Introducing The CMT Orange:<br />
The Symbol Of Safety. Our Florida Home<br />
find CMTs Superior Teflon® Performance<br />
Dear friends,<br />
I'm proud to introduce CMT's revolutionary full line of fine router<br />
bits,<br />
premium Italian-made tools that bear our signature orange Tetlon® coating. Like<br />
many of you, I've watched <strong>with</strong> dismay as the North American market has been<br />
flooded <strong>with</strong> cheap imported router bits from the Far East.<br />
makes it especially rewarding to offer this high-quality European<br />
alternative.<br />
For more than a qual1er century, CMT has been one of Europe's<br />
leading manufacturers of precision cutting tools.<br />
Don't let our<br />
low introductory prices mislead you- these are top-of-the-line<br />
router bits <strong>with</strong> a long list of features:<br />
- Tvflon®: Through our unique process,<br />
layer of Teflon® is baked (not painted) on every<br />
bit body to enhance visibility and performance.<br />
- Prvmiam StvClI: We use only Fatigue<br />
Proof® steel for shanks and bit bodies. This is<br />
the same steel specified by<br />
automakers like<br />
Ferrari and Porsche for critical transmission and<br />
drive train parts, steel that stands up to the heat<br />
and stress of high performance driving or high<br />
production woodworking.<br />
-Anti-Kickback Dvsign: With a series of bits<br />
specially-designed to avoid kickback, our engineers<br />
That<br />
have added a safety feature that any woodworker can appreciate.<br />
-Carbidv: At the cutting edge of every bit is the premium carbide of<br />
Cerametal, producer of high-quality alloys for over 60 years and the world's<br />
largest manufacturer of tungsten-carbide.<br />
For more than 20 years I've helped bring fine new products to North American<br />
woodworkers, and I am particularly proud to introduce you to the tools of CMT.<br />
You may already have used a CMT router bit, since we've produced bits to be sold<br />
by some of the best-known names in the woodworking industry.<br />
But now we're<br />
offering these tools under our own name <strong>with</strong> an unbeatable combination of new<br />
features, first-class materials, top-notch design and a case carved from a block<br />
solid hardwood.<br />
Best Regards,<br />
Carlo Venditto,<br />
800-503<br />
800-504<br />
CEO<br />
Includes<br />
chamfer,<br />
roman<br />
ogee, roundover,<br />
rabbeting and cove<br />
bits <strong>with</strong> shielded bearings<br />
plus a 1/2" round nose bit. All feature<br />
1/2" shanks and carbide tips.<br />
List: 157.90 Sale: $119.00<br />
of 1/4"<br />
shank carbide<br />
tipped bits<br />
i n c l u d e s<br />
chamfer, rabbet,<br />
radius, flush trim,<br />
cove and ogee bits <strong>with</strong> shielded<br />
bearings. Also included are dovetail, V<br />
groove, mortising, round nose and two straight bits.<br />
List: $224.40 Sale: $159.00<br />
Complete Sets<br />
For Incra and Leigh Jigs<br />
You invested in the jig because you demand the best.<br />
Make that investment really pay <strong>with</strong> one of our carefully-selected<br />
sets. Our 10-Piece 1/4" & 1/2" shank set for Leigh Jig (shown at left) and 8-<br />
piece sets for Incra Jig (offered in 1/4" or 1/2" shank) let you get the most<br />
from your jig. Incra sets include 2 straight and 6 dovetail bits.<br />
800-502 Set for Leigh Jig List: 180.40 Sale: $129.00<br />
800-500 1/4" set for Inera List: 137.60 Sale: $ 99.00<br />
800-501 1/2" set for Inera List: 145.80 Sale: $109.00<br />
13-Piece Set<br />
Thirteen of our finest 1/2"<br />
shank carbide-tipped<br />
bits, including dovetail,<br />
mort ising,<br />
:J round nose, V<br />
groove and three<br />
straight bits. Also<br />
includes<br />
cove,<br />
rabbeting, roundover, agee, chamfer<br />
and flush trim bits <strong>with</strong> shielded bearings.<br />
800-505 List: $275.00 Sale: $199.00<br />
Call Us For The Nearest CMT Dealer<br />
Call Toll-<strong>Free</strong>: 1-800-53 1-5559<br />
If we don't have a dealer in your area,<br />
we'll fill your order from our warehouse,<br />
and we will send it CMT-AirTM for second-day deliverv at no<br />
extra charge!<br />
Dealer Inquiries Welcome<br />
All bits are also available individually. To see the full line of CMT bits,<br />
many <strong>with</strong> top bearings, please write for our new full-color catalog.<br />
Send us your name, address and $2.00 (refundable <strong>with</strong> first purchase).<br />
Your Exclusive CMT dealer in Canada is:<br />
ToolTrend Ltd. 420 Millway Ave., Concord, Ont. L4K 3V8 1-416-663-8665<br />
Prices in Canada vary due to exchange, duty and taxes.<br />
Lifetime Warranty: We stand behind<br />
every CMT bit <strong>with</strong> a simple guarantee. If you<br />
have a problem <strong>with</strong> one of our bits before<br />
resharpening, simply return it for immediate<br />
exchange or credit. Excludes dullness due to usage.<br />
Yoar satisfaction is gaarantvvd!<br />
"Only Premium Quality Tools For Professionals"<br />
5425 Beaumont Center Boulevard, Suite 900 Tampa, Florida, 33634<br />
1-813-886-1 819, 1-800-531-5559, FAX: 1-81 3-888-661 4<br />
READER SERVICE NO. 133<br />
March/April 1992 15
Methods of Work (co1ltinued)<br />
Place the right-side fence back fa r enough to allow room between<br />
the fences for the workpiece. 111e best miter cuts are made if d1e<br />
workpieces are held firmly in place on d1e table. To accomplish<br />
this, install toggle clamps on the fences. Bear in mind that the<br />
right toggle clamp will interfere <strong>with</strong> the saw's motor unless it is<br />
placed well back on d1e right-side fence. To finish the setup,<br />
remove d1e hardboard insert and cut through d1e fence overlaps.<br />
You are now ready to produce perfect miters.<br />
-Tom Stipanovich, Cambridge, Ont., Canada<br />
Quick tip: Use a good pencil sharpener on the end of a dowel<br />
to form a point d1at can reach into an inside corner to remove<br />
fresh glue. You can also sand d1e tip of the dowel at an angle<br />
and use it to clean out dado grooves.<br />
-L. Frederick, Aspen, Colo.<br />
Gluing up mitered legs<br />
got an idea. Instead of making each leg separately, I made all<br />
four at once. The trick was to glue up a long mitered box using<br />
strap clan1ps and then to rip through the middle of each side to<br />
form the four legs. -Steven H. Klotz, West Bloomfield, Mich.<br />
Hot-melt glue blocks<br />
Fasten each clamping<br />
perch <strong>with</strong> a dab<br />
of hot-melt glue.<br />
Glue up mitered box using strap<br />
clamps, and then rip through sides to fo rm legs.<br />
I designed a coffee table <strong>with</strong> 3-in.-wide, L-shaped legs mitered<br />
at d1e corners. But <strong>with</strong> my small selection of clamps, I couldn't<br />
figure out an easy way to glue up the mitered leg joints. Then I<br />
Mitered glue joints are almost impossible to clamp even using<br />
expensive corner clamps and other jigs. Here is a simple way to<br />
apply pressure exactly where it is needed. Cut two triangular<br />
blocks from scrapwood. Glue these onto the outside of the<br />
pieces to be mitered to create two parallel clamping perches.<br />
The trick is to use only a dab of hot-melt glue to fasten the<br />
perch. ow assemble d1e joint using common C-clamps to apply<br />
pressure across the joint. The hot-glued perches stay in place<br />
nicely but can easily be popped off later <strong>with</strong> a chisel. A few<br />
strokes <strong>with</strong> sandpaper removes any glue reSidue, and then the<br />
joint is complete. -Lany Morse, Framingham, Mass.<br />
Prom th£ publishers oj<br />
Fme<br />
Wqqd.\\brking<br />
Discover all the<br />
joints in the world!<br />
llhatever structural woodworking problems you face, you'll find answers here.<br />
Master craftsman Wo lfram Graubner presents you <strong>with</strong> a complete survey of<br />
woodworking joints from all of the world's major woodworking traditions.<br />
Yo u'll be able to design and make more than 450 variations on 66 basic joints,<br />
including splicing, oblique, right-angle and edge joints. You'll learn when and<br />
where to use each joint, while the sharp photos and drawings show you how to<br />
design the mating parts. What you see on the outside of a good wood joint only<br />
hints at the intricate details inside -Graubner's photos and draWings reveal<br />
these secrets to you.<br />
SOFTCOVER, 160 PAGES, 171 PHOTOS, 310 DRAWINGS, ITEM 070153, PRICE $21.95<br />
To order, use the coupon at right, the envelope insert in this issue<br />
or call toll-free 1-800-888-8286.
From tI1£ publishers of<br />
Fille<br />
WqqWorkingo<br />
You've invested<br />
in woodworking<br />
machines -now<br />
learn how to get the<br />
most out of tliem!<br />
SAVE $9.95 ON THIS<br />
BOOK AND VIDEO SET<br />
Available Apri1 15<br />
Here's your complete gUide to getting the most out of your<br />
woodworking machines. In his new book and video set, Mark Duginske<br />
shows you how to choose, set up and tune your machines for safety,<br />
precision and effiCiency. Whatever you make in your shop, you'll work<br />
better \vith Duginske at your elbow.<br />
You'lI lcarn to diagnose problems on all common brands of machinery.<br />
The book includes detailed discussions of the table saw, shaper,<br />
bandsaw, radial-arm saw, drill press, jointer, router and planer.<br />
And just when you wish you could move in close to see precisely how<br />
Duginske works, the video camera is right there, providing a level of<br />
detail no book alone can match. Yo u see how to handle a variety of<br />
problems, from wrestling the drill bit that wanders off course to<br />
adjusting your table saw to compensate for arbor wobble. Yo u'll also<br />
learn to listen for problems, as the sounds your machines make can<br />
often serve notice that they need tuning or adjusting. Together, the<br />
book and video will help you to produce the joints and cabinet parts<br />
you need wi th whatever machines you have.<br />
THE BOOK: MASTERING WOODWORKING MACHINES<br />
SOFTCOVER, 256 PAGES, 175 PHOTOS, 150 DRAWINGS, ITEM 070136, PRICE $24.95<br />
THE VIDEO: MASTERING WOODWORKING MACHINES<br />
60 MINUTES, ITEM 060071, PRICE $34.95<br />
SAVE $9.95 ON THE BOOK AND VIDEO SET<br />
PRICE $49.95, ITEM 07A211<br />
To order, use this coupon, the envelope insert in this issue or call toll-free 1-800-888-8286.<br />
r - -<br />
rii::iirī£- ī i:;ffi :::: - : - : -------- - -------------- --------------------------------------------------------- - ------- - ---- 100794 - '<br />
_<br />
order and owe nothing. Otherwise I will be billed the prices shown plus<br />
:.:::.::::..:.:::0"'-______________________<br />
ADDRESS<br />
postage and handling as indicated below (eT residents add 6% sales tax,<br />
Canadian residents add 7% GST). CITY STATE ZIP<br />
o The book: Mastering Woodworking Machines<br />
$24.95, 070136<br />
o The video: Mastering Woodworking Machines<br />
<strong>with</strong> Mark Duginske, $34.95, 060071<br />
o SAVE $9.95 ON THE BOOK AND VIDEO SET: $49.95, 07A211<br />
o Encyclopedia of Wood Joints<br />
$21 .95, 070153<br />
TOTAL ORDER POSTAGE AND HANDLING<br />
$30 AND UNDER .................................. $3<br />
OVER $30 THROUGH $50 .................... $4<br />
OVER $50 ........................................... $5<br />
I PREFER TO PAY NOW: D MY PAYMENT IS ENCLOSED. D MC D VISA D AMEx<br />
CHARGE·CARD #<br />
EXP. DATE<br />
SIGNATURE<br />
Mail to:<br />
The Taunton Press<br />
63 South Main Street, P.O. Box 5506,<br />
1\'cwtown, CT 06470·5506<br />
UNTON BOOKS&VlDEOS<br />
... by fcllvlI' clluwsi:ISlS<br />
March/April 1992 17
Methods of Work (continued)<br />
Quick tip: A clean collet is an absolute must to avoid the disasterous<br />
consequences of a router bit slipping up or down in the<br />
collet when routing. A gun cleaning kit for a 22-caliber weapon has<br />
eveLything you need: a small brass brush and patd1 cleaning swabs<br />
that fit just right in d1e collet. -L. Frederick, Aspen, Colo.<br />
Laying out cams <strong>with</strong> string<br />
to begin. Unwind the string by moving the pencil away from d1e<br />
cylinder. The point of the pencil will scribe a can1 that expands in<br />
proportion to the diameter of the cylinder. Because d1e distance<br />
from d1e center of the can1 increases at a constant rate, the resulting<br />
cam will have a smood1 and conu'olled action.<br />
-E. W Carson, Blacksburg, Va.<br />
Metal pins eliminate miter slippage<br />
As string unwinds<br />
from can, the pencil<br />
will draw a smooth<br />
cam shape.<br />
Brads are inserted<br />
in mating holes to<br />
keep miter aligned<br />
during glue-up.<br />
The easiest way to draw a cam is to use the unwinding sU'ing principle-tie<br />
a sU'ing around a cylinder of suitable size to create the<br />
desired can1 shape. Aluminum food cans are often about the right<br />
size. First, tie a length of sU'ing around the can, and tie a loop in<br />
the end of the string. Then wind the sU'ing fully around d1e cylinder,<br />
and place a pencil in the loop <strong>with</strong> the point where the cam is<br />
This method of using metal pins to prevent miter slippage during<br />
glue-up is good on odd-shaped mitered pieces, like the bracket feet<br />
in d1e sketd1, that might otheLwise require special clamping jigs.<br />
Start by placing one of the joint halves, miter side up, on d1e<br />
drill-press table. Select a bit d1e same size as an IS·gauge brad,<br />
WOODWORKER II - Best on TABLE<br />
•<br />
SAW<br />
With this ONE ALL PURPOSE blade 40 Teeth you can<br />
SMOOTH RIP & CROSSCUT 1" - 2" ROCKHARDS and<br />
SOFTWOODS <strong>with</strong> smooth·as·sanded surface PLY-VENEERS<br />
oak/birch<br />
•<br />
crosscut <strong>with</strong> NO BOnOM SPLINTER.<br />
Mostly 1/8 kerf 15°, ATB and 20° face hook (easyfeed).<br />
DOUBLE HARDER and 40% STRONGER CARBIDE.<br />
Ends blade changing (does rip, combo and crosscut).<br />
• Ends scratchy saw cuts (for the rest of your life).<br />
Ends<br />
second step finishing (jointing and sanding).<br />
• Ends culling 1{16" oversize to allow for RESURFACE.<br />
• Buy and sharpen ONE blade instead of 3, 24T rip, 50T<br />
Combination, 80T Crosscut.<br />
•<br />
Strongly recommend our .001 flat large stiffener·<br />
dampener against outside of blade for smoothest,quietest,<br />
cuts by this and any other blade.<br />
Use 30T if ripping mostly 2" . 3" hardwoods.<br />
• Side wobble held .001-others .004/.010 is common!<br />
RAISE for THICK woods, LOWER for THIN woods and<br />
perfect cut everything! All 5/8" holes, unless otherwise noted.<br />
14" x 40T x 5215 $139<br />
14" x 30T x 1" 195 129<br />
12" x40T x1" 183 119<br />
12" x 30T x 1" 162 109<br />
10" x40T 1I8 &3/32 156 109<br />
30T 11l! &3132 135 89<br />
•<br />
518" ho les std. Boring up to H/4"<br />
57.50 extra · Shipping $4.00<br />
9" x 40T<br />
30T<br />
*8-114" x 40T 3/32<br />
8" x 40T3132<br />
30T3/32<br />
7-1/4" X 24T3/32<br />
NEW For Sears<br />
$146<br />
125<br />
136<br />
136<br />
115<br />
112<br />
$99<br />
Tablesaw<br />
89<br />
89<br />
89<br />
79<br />
49<br />
ALSO help your SEARS blade, FREUO, PIRANHA, JAPANESE<br />
o<br />
THIN SAW, OML, LEITZ,etc. FOR BmER CUTS!<br />
Use our large 1/8' DAMPENER<br />
STIFFENERS, against one side<br />
4" · $21 Tryable and RETURNABLE<br />
5"· 24 Stops vibration, flutter,<br />
O<br />
cutting<br />
noise and blade ring.<br />
7" and larger available<br />
6" · 25 Parallel and flat to .OOL<br />
WOODWORKER I - Best on RADIAL SAW<br />
(tablesaw too) This ALL PURPOSE blade gives scratch free<br />
POLISHED cuts on all materials RIP or CROSSCUT up to 2".<br />
• AII 60T and 3/32" THIN kerf 20°- ATB and 5° face hook.<br />
• OOUBLE HARDER and 40% STRONGER carbide.<br />
• THIN KERF:<br />
Saves 1/3 wood loss on each cut, radial or table.<br />
Feeds easy when used for moderate rip and crosscut on<br />
table saw.<br />
Reduces "JUMP IN" greatly for better "PULL-CONTROL".<br />
Practically eliminates bollom splinter on RADIAL·CROSSCUT.<br />
• Totally stops ALL bottom and top splinter on ply veneers<br />
•<br />
in push-cut mode on RADIAL.<br />
Our<br />
STIFFENER STRONGLY RECOMMENDED AGAINST<br />
outside of blade only for best cuts.<br />
Made and serviced in USA for your benefit.<br />
14" x 60T x 1" 11l!'<br />
12" x 60T x 1" or 5/8"<br />
10" x 60T x 5/8"<br />
9" x 60T x 5/8"<br />
8" x 60T x 5/8"<br />
New 8·1/4" x 40T x 5/8"<br />
RYOBI RA200 TS200 SEARS<br />
HITACHI PSMB<br />
List<br />
$224<br />
SALE<br />
$149<br />
198 129<br />
162 119<br />
156 109<br />
150<br />
5/8' holes std. Bonng up to 1-V4" $7.50 extra.<br />
Others available.<br />
...<br />
Add $2.50 Shipping.<br />
WE RECOMMENO OUR FACTORY SHARPENING. 2-4 DAYS ON THESE AND ALL MAKES OF CARBIDE TIP SAWS. SHIP IN UPS<br />
(600 grit microscoped) 10 x 40T $15.00. 60T $17.75 Add return UPS $4.00 or 2nd Day Air $7.<br />
NOW ORDER the one blade that will outlast you! (1 0-20 sharpenings possible).<br />
SATISFACTION GUARANTEED OR FULL CASH REFUND.<br />
45 years of fine American saw making & sharpening<br />
FORREST MANUFACTURING COMPANY, INC.<br />
461 River Road, Clifton, N.J. 07014<br />
99<br />
136 89<br />
MAKtTA 5008 N BA<br />
PORTER CABLE 368·1<br />
DADO KING MULTITOOTH LASERCUT OAOO SET cuts ALL 1/4' · 13/16'<br />
flat bottom grooves WITH or CROSSGRAIN all woods,OAK, BIRCH,<br />
VENEER PLYS,and MELAMINE. NO SPLINTERING due to unique 4T Neg.<br />
Face fillers and 24T outside saws. NOTHING LIKE IT IN THE USA!!<br />
'''!i<br />
8,.5<br />
DURALINE Hi-AT For TABLE & RADIAL SAW<br />
(very good on chop saw too!) STOP SPLINTERING<br />
those SPLINTERY OAKS, HARDWOOD VENEERS and<br />
thin 2 SIDE LAMINATES ON PARTICLE BOARD.<br />
FOR FASTER FEED RATES AND MORE ABSOLUTE<br />
SPLINTER CONTROL<br />
Note: Fine<br />
DURALINE Hi-AT<br />
Woodworking<br />
Editorial Nov.!Oec. 1988<br />
No. 73 pg. 65 S. N.<br />
recommends lJjg/]<br />
alternating top bevel (ATB)<br />
Jf!#,:;:' t1lgggtg:'1e<br />
cuts on RADIAL SAW,etc.<br />
!!!<br />
ffl· Bo <br />
re List /SALE T·10 'SA L E <br />
For HOLl·HER VERTICAL PANEL SAW<br />
220mm x 30mm Bore<br />
Teeth<br />
60 Teeth<br />
FACE FACE CONCAVE FACE<br />
r-'l A • M i7""'l fi M r-'ln A. listS204 SALE M<br />
$159 U,IS238 SALE $179 lIstS263 SALE $179<br />
READER SERVICE NO. 151<br />
'' .<br />
.. ' ..<br />
Hitachi 8-1/2' DeWalt 8·1/2"<br />
Delta<br />
Rxobi·Makita<br />
Hitachi<br />
Ryobi·Makita<br />
Hitachi<br />
Jim Forrest, President and designer<br />
microscoping cutting edge.<br />
All 5/8" holes. Boring up to H/4" $7.50 extra<br />
Larger holes - time basis. Shipping $4.00.<br />
8" x 80T 11l! & 3/32 $202<br />
9" x 80T 1/8 & 3/32 207<br />
10" x80T 118 & 3/32 207<br />
12" x80T x 1"11l! 212<br />
100T x l' 253<br />
14" x 80T $232<br />
100T 266<br />
16" x 80T 262<br />
100T 294<br />
Above l' bore std.<br />
All CARBIDE is THE HARDEST OF THE C-4 grades<br />
and 40% STRONGER, NOT WEAKER!!<br />
For 50% to 300% longer life!<br />
CHOPMASTfR sERIES FOR MITER SAWS<br />
for tight, smooth, splinter-free miter·joints.<br />
NEW AVAILABLE SIZES.<br />
BUSINESS OPEN ACCOUNTS AVAILABLE<br />
List<br />
8-1/2" x 60T x 5/8" $179<br />
9" x 80T x 518" 204<br />
10" x 80T x 5/8" 207<br />
12" x BOT x 1" 229<br />
14" xl00T x 1" 266<br />
15" xl00T x 1" 277<br />
Use small stiffener where possible.<br />
$<br />
109<br />
99<br />
129<br />
119<br />
169<br />
SALE<br />
179<br />
We honor Amex, Visa & Master Card,Money Orders, Personal<br />
Checks, and COD's.lD ORDER BY MAil clip ad, circle choices and<br />
enclose payment. Specify Dept. FW when ordering.<br />
Welcome.<br />
PHONE TOLL FREE !<br />
1-800-733-71 11 NJ; 201-473-5236)<br />
18 Fine Woodworking
DRY YOUR<br />
OWN LUMBER •••<br />
I<br />
LD800 WOOD DRYER<br />
... With an EBAC Wood<br />
Drying System.<br />
Whether you're a serious home woodworker,<br />
small cabinet shop or a large<br />
wood retailer, EBAC has a wood drying<br />
system that's right for you.<br />
1900BW<br />
31/4"<br />
PLANER WI<br />
CASE & MINI<br />
CARBIDES<br />
NEW<br />
Lisl $209<br />
RS1 15<br />
1/2' RandomOrbil<br />
... :,..<br />
lisl$t34.<br />
Ebac Wood Dryers:<br />
SALE<br />
•<br />
save you money<br />
$178.88<br />
are easy to operate<br />
10" PRECISION<br />
JM100K<br />
are energy efficient<br />
m '<br />
give you complete control over<br />
TABLE SAW " wlcase<br />
your wood 's moisture content<br />
• give you higher quality wood<br />
INCLUDES FREE .. ' SALE .<br />
STAND<br />
$214.88<br />
Call or write today!<br />
;;;::;:;:;;n;;;;:r.;r.;rr.r.;;;<br />
EBAC LUMBER DRYERS<br />
106 John Jefferson Road, Suite 102<br />
Williamsburg, VA 23185<br />
Fax (804) 229-3321 Toll free 1-800-433-9011<br />
In Canada: (416) 985-2123 Fax (416) 985-3708<br />
READER SERVICE NO. 80<br />
Anytime Anywhere<br />
or<br />
STRAIGHT<br />
MOLDINGS<br />
.' .<br />
BENCH TOP •••.<br />
" . Sander.<br />
SALE $78.88<br />
BE424<br />
E1eC1rOnic<br />
Sander.<br />
.<br />
$340. .._' . .<br />
BiSCUilJOiner<br />
<br />
BT3000 .. ,I .. lisl$430<br />
Anywood<br />
Both are yours <strong>with</strong> W&H Molder/Planer<br />
Thousands of professionals and<br />
serious woodworkers use our<br />
American-made cast iron<br />
molder/planers to produce<br />
smooth moldings, raised panels,<br />
crowns and curved molding.<br />
In the shop or at the job site,<br />
W&H meets your needs every<br />
day <strong>with</strong> quick knife changeover<br />
and ultimate versatility <strong>with</strong> all<br />
kinds of wood.<br />
Over 40 years of experience<br />
supports our products <strong>with</strong> a 5<br />
year warranty! Call or write today<br />
for our FREE information kit!<br />
Williams & Hussey<br />
Machine Co., Inc.<br />
Dept. 132 CM<br />
P.O. Box 1149 Wilton, NH 03086<br />
800-258-1380 (USA) or 603-654-6828 FAX 603-654-5446<br />
READER SERVICE NO. 7<br />
T oday's sophisticated designs demand uncommon<br />
veneering solutions. VacuPress delivers consistent, high<br />
quality results by combining atmospheric pressure as a<br />
clamp and vacuum's ability to 'draw glue into the cell<br />
structure.<br />
Push veneering-and yourcreativity-to the limit <strong>with</strong><br />
VacuPress. Please contact us for more information. Let<br />
us put the VacuPress solution to work for you!<br />
FEATURED OCTOBER IN FINE 1990, WOODWORKING, PAGE 68<br />
VACUUM PRESSING SYSTEMS, INC.<br />
1609 RIVER ROAD BRUNSWICK, MAINE 04011<br />
TELEPHONE 207·725·0935 FAX 207·725·0932<br />
READER SERVICE NO. 114<br />
MLCS, Ltd.<br />
MAKE BEAUTIFUL RAISED PANEL DOORS<br />
WITH YOUR 1/4" or 1/2" ROUTER or<br />
WITH YOUR 1/2" or 3/4" SHAPER.<br />
Professional production quality bit makes it quick and easy to<br />
produce matching rails and stiles - the panel raising bit <strong>with</strong> ball<br />
bearing guide makes the raised panel perfect every time.<br />
RAISED PA NEL BIT<br />
SUPPLIED WITH<br />
BALL BEARING<br />
2'" Carbide Tipped<br />
Large Ola. (1/4- Shank)<br />
3-1/2" Large Ola. P/2" Shank)<br />
4-5/8" Large O.a. (Shaper)<br />
Size & Form Item # Price per Set<br />
1/4" Shank <strong>Router</strong> *1554 $69.95<br />
1/2" Shank <strong>Router</strong> *1882 $79.95<br />
1/2" & 3/4" Shaper *11059 $99.95<br />
Regular value Over $150.00<br />
•<br />
I<br />
RAIL<br />
PANEL<br />
PERSPECTIVE VIEW OF PANEL DOOR<br />
(WITH ONE RAIL REMOVED)<br />
(For making matchIng and In raised ralls stIles panel<br />
doofs, elC.) WorXs wrth stock from lln to 7Ifr<br />
REVERSIBLE COMBINATION<br />
RAIL and STILE BIT<br />
NEW32 page CATALOG Featuring 100's of Bits & Shaper-Cutters<br />
To order by MasterCard or Visa Toll <strong>Free</strong><br />
7 Day - 24 Hour Order Service, Call 1-800-533-9298 or<br />
send check to: MLCS, Ltd., P.O. Box 4053 F L, Rydal, PA 19046<br />
READER SERVICE NO. III<br />
March/April 1992 19
Methods of Work (continued)<br />
and begin drilling shallow holes in the miter face in a pattern<br />
that suits the job. Place brads in these holes, nip the heads off<br />
flush <strong>with</strong> a side cutter, and then fish each brad out of its hole<br />
and reverse it end for end so the point is up. Now align the two<br />
halves of the mitered molding, and push straight down on the<br />
sharp pin points. The mating half will have an exact layout for<br />
drilling a matching set of pin holes.<br />
After tile holes have been drilled in tile mating half, remove the<br />
original pins. Put new brads in the original holes, cut these to a<br />
suitable length and reverse tilem to put tile points up. I find it<br />
helpful to countersink each of the holes slightly, to help each pin<br />
"find" its matching hole and ensure tile assembly goes smootilly.<br />
The joint can now be put together dry and pressed tight. If<br />
you have been careful, tlle joint will fit<br />
-].A.<br />
almost perfectly. A slight<br />
overlap can usually be corrected by a small amount of pressure<br />
or twisting.<br />
Binns, Tucson, Ariz.<br />
Magnetic shop helper<br />
The multipurpose magnetic strip I use in my shop started from<br />
one of those inexpensive two-track magnetic knife racks found at<br />
kitchen-gadget stores. I bought one of the racks, ripped it down<br />
the middle to form two strips and tllen sanded the fresh edges<br />
to remove the sawmarks.<br />
I use one of the strips as an instant fence on my bandsaw for<br />
ripping small strips of wood. The strips also can be used to position<br />
jointer blades at tlle right height during replacement, as a<br />
fingerboard <strong>with</strong> a piece of flexible plastic attached to one side,<br />
and for pinning plans or drawings flat on a steel surface.<br />
-Jim Van Dreese, Wieonsin Rapids, Wise.<br />
Plumbing caps as tool ferrules<br />
Magnetic knife strip<br />
Copper plumbing<br />
'-"·-caps<br />
Rip into<br />
two strips.<br />
Use as<br />
bandsaw<br />
rip fence.<br />
I use common hardware-store copper plumbing caps for ferrules<br />
on my custom turning tools. To use the caps, I turn a<br />
tenon on the tool handle to fit the inside diameter of the cap.<br />
One and Two Week Workshops<br />
JUNE 8 - AUGUST 14, 1992<br />
WOODTURNING: Ray Ferguson, Michael Hosaluk,<br />
Todd Hayer, Steve Loar - John Jordan Michael<br />
Peterson, Alan Lacer, David Ellsworth/CLAY /FIBER<br />
FABRIC/METAL/DRAWING /PAINTING/<br />
CALLIGRAPHY /PAPERMAKING/BOOKARTS/<br />
PHOTOGRAPHY<br />
Gloclote/oode!Qfoclote<br />
AlsistlJlllhijl\/hoIo""ips<br />
",dt<br />
Yeo!1cmi goUOIY extiIJl sdleW<br />
EOOAl M'OIIlJIIY ItSItlUnI»t<br />
@<br />
INSTY·BIT®<br />
Quick-Change Drilling Products<br />
Add<br />
Quick-Change<br />
to Any<br />
Power Drill!!<br />
It's 60 exciting, new<br />
pages of clockmaking and wood projects.<br />
Clock Kits • Wood Models, Whirligigs<br />
• American-made Quartz Movements •<br />
Mechanicals • Wood Plans, Parts<br />
• Dials, Hands, Numerals •<br />
At great low prices! Send for your FREE<br />
catalog today.<br />
READER SERVICE NO. 2<br />
READER SERVICE NO. 125<br />
Full-Size Professional Plan<br />
ADIRONDACK CHAIR<br />
Make this classic American<br />
design. Our special<br />
version may be<br />
lolded lor storage<br />
by using ordinary<br />
hardware available<br />
at your local<br />
store. Be ready<br />
lor Summer and<br />
get your plan now!<br />
Plan #700 ......... $14.00<br />
CATALOG 200 lult-size<br />
le.t.tog free <strong>with</strong> order)<br />
professional lurnifure<br />
plans l!oi!!!i!!J <br />
-$3.00<br />
FURNITURE DESIGNS, INC_, Dept KA-32<br />
1827 Elmdale Ave., Glenview, Il 60025<br />
(708) 657-7526<br />
READER SERVICE NO. 301<br />
Patented<br />
and<br />
Made In<br />
USA<br />
INS TY-BIT • 3336 Idaho A venue South<br />
Minneapolis, MN 55426<br />
Toll <strong>Free</strong> 1-800-426-2732 Phone/Fax<br />
READER SERVICE NO. 120<br />
20 Fine Woodworking
__<br />
Another "buy 1 tool get our 228 page tool free" offer.<br />
Just a few of the unique woodworking tools of<br />
the 3,500 others available from our most versatile<br />
tool, the 1992 Garret[ Wade Catalog.<br />
The 228 page catalog is <strong>Free</strong> <strong>with</strong> any order<br />
from this ad. Or if you would just like the<br />
catalog, send us $4.00 <strong>with</strong> your name and<br />
address.<br />
A I 2 Band Saw Books by Mark Duginske<br />
Learn what makes your bandsaw tick. Tune-up<br />
and maintenance; blade selection, tracking and<br />
tensioning; plus cutting methods for various<br />
woods and other materials. Hundreds of tips<br />
and shortcuts. Unlock your saw's potential.<br />
02L09.03 Band Saw Basics $ 9.95<br />
16L04.02 Band Saw Handbook $16.95<br />
B I The Saw Setting Gauge That Can Be<br />
Read From Any Position<br />
Most gauges have at least one or two main<br />
weaknesses. They either rest partially on the<br />
insert plate which is usually not .<br />
the sa e<br />
height as the main table, or are so thIn thar It IS<br />
difficult to ensure that teeth are being gauged<br />
at the top of the arc. This gauge is made from<br />
machined W' thick Aluminum and is 9" long.<br />
With 14" graduations on one end and lis" on the<br />
other, it will indicate any height from lis" to<br />
2". Most useful for table saws bur also handy<br />
for routers. The markings are vertical on one<br />
face and hotizontal on the other, so you can<br />
tead them easily and accurately.<br />
7lK26.02 Saw Setting Gauge $17.95<br />
D l Our 202GF Gap Filling Glue Fills Gaps<br />
It has a very high solids content so that small<br />
gaps in our joinery are actually filled - <strong>with</strong><br />
strength. And the "squeeze-out" beads right up<br />
and chips off when dry. No soaking in to ruin<br />
finishes. Dries [0 a light tan. Water clean-up.<br />
62J01.01 1 pt. 202GF $ 7.25<br />
62J0 1.03 1 qt. 202GF $13. 10<br />
C I Y16" Super Narrow Blades<br />
You may have never seen a blade like this. A<br />
24tpi raker style, it produces smooth curs<br />
while making incredibly tight turns. We recommend<br />
using our Cool Blocks <strong>with</strong> these delicate<br />
blades, because the y can be set closer ro the<br />
blade <strong>with</strong>our danger of overheating.<br />
Cabinetmaker's Special Bandsaw Blades<br />
A Garrett Wade exclusive. They look like "skip<br />
[Ooth" blades. Bur each rooth is actually<br />
formed as a hook, <strong>with</strong> every 5th [Ooth an unset<br />
raker. The result is a very smooth curting blade<br />
that feeds easily. 14" blade is for general work,<br />
and 71" for resawing and heavy straight sawing.<br />
80" Blades (Sears 12")<br />
33K12.01 Y16" Scroll<br />
33K12.02 W' Cabinet<br />
33K12.03 72" Cabinet<br />
72" Blades (Shopsmith)<br />
33K13.01 Y 1 6" Scroll<br />
33K13.02 W' Cabinet<br />
33K13.03 W' Cabinet<br />
$14.95<br />
$10.95<br />
$11.95<br />
$13.40<br />
$10.25<br />
$10.95<br />
E I The "Blind Nailer" Used To Be A Staple<br />
In Every Finish Carpenter's Tool Box<br />
This unique tool allows you [0 set nails or brads<br />
invisibly. Slip the special chisel, <strong>with</strong> its finger<br />
nail shaped cutting edge, into the positioning<br />
jig and tighten the clamping screw. Place the<br />
flat sole on the wood and strike the end of the<br />
chisel <strong>with</strong> a firm tap <strong>with</strong> the palm of your<br />
hand. The Blind Nailer will lift a perfect small<br />
chip from the surface. Hammer your nail or<br />
brad in and then glue the chip back in place.<br />
44K0 1.04 . Blind Nailer $19.95<br />
F I Special Bandsaw "Cool Blocks" Prolong<br />
Blade Life & Increase Accuracy<br />
Made of a special graphite impregnated Phenolic<br />
laminate, this set of 4 replaces your upper<br />
and lower side blade guides. Cool Blocks run<br />
cooler and are more slippery than conventional<br />
steel guides. Since they can be set actually<br />
touching the blade, they give you better control<br />
of the cut.<br />
Model<br />
33K09.01"A" Delta 14" $11.95<br />
33K09.02"B" Sears 12" $11.95<br />
33K09.04"D" Shopsmith $12.95<br />
33K09.05"E" Old Sears (W' Rd.) $11.95<br />
33K09.06"F" Jet 14" (fits Delta copies) $11.95<br />
33K09.20"K" New Tilt-Head Sears $16.95<br />
93 71" Blades (Delta 14" and copies)<br />
33Kl1.01 Y16" Scroll<br />
$15.95<br />
33Kl1 .02 14" (4 tpi) Cabinet $11.95<br />
33Kl 1.03 W' (3 tpi) Cabinet $12.95<br />
;r;a': •.'; - ..........................................................<br />
STOCK# QTY. DESCRIPTION PRICE TOTAL<br />
161 Avenue of the Americas<br />
1 1992 Catalog (free <strong>with</strong> order from this ad) $4 00<br />
New York, NY 10013 Dept. 145<br />
Call Toll <strong>Free</strong> 800·221·2942<br />
(NY 212·807·] 757 No Collect Calls Please)<br />
Please send me these Garrett Wade tools and include a FREE<br />
1992 Catalog <strong>with</strong> my order. (PriCe! good until September 14, 1992)<br />
__<br />
Name:<br />
____________________________________ __ _<br />
Address:<br />
City:<br />
State: Zip:<br />
o Check or Money Order<br />
I<br />
o<br />
I<br />
Discover<br />
I I I I I I I I I I I I I I<br />
o Visa 0 MasrerCard<br />
_ I<br />
o American Express<br />
Expiration ________________________________ Dace:<br />
GW<br />
Sub Total<br />
New York Residents add applicable Sales Tax<br />
Shipping & Handling: $3.25 for order toral up to $ 10<br />
Sales Tax<br />
$4. 55 for $IO.01 to $20<br />
Shipping<br />
$5.45 for $20.01 to $50<br />
$6.90 for over $50. Grand Total<br />
Marchi April 1992 21
Methods of Work (continued)<br />
Then I drill (and file if necessary) an opening in the cap to fit<br />
the shank of the tool. After fitting the tool to the handle, I<br />
polish the cap and spray it <strong>with</strong> a clear sealer to keep it looking<br />
good. The caps, which average about 40 cents each, are<br />
available in sizes from 1/4 in. dia. up to 2 in. dia.<br />
-Wayne Knuteson, MutTay, Uf.<br />
vert the square section into an octagonal form.<br />
How does this method<br />
-J.H.<br />
work? The proportion of 3Yz to 12 (or<br />
the easier to work widl 7/24) relates to the geometry of an octagon<br />
almost exacdy.<br />
Walker, Aspendale, Victoria, Australia<br />
Drilling accurate holes<br />
Preparing octagonal spindle stock<br />
Lay a 12-in. ruler diagonally<br />
across the face of a turning<br />
blank, and mark 3!12 in. from<br />
each end of the ruler to layout<br />
lines fo r sawing off corners.<br />
Here is a quick method of marking the amount of corner stock<br />
to be removed from a square blank you want to turn on a lathe.<br />
Simply lay a 12-in. ruler diagonally across the timber <strong>with</strong> the<br />
zero mark aligned <strong>with</strong> one edge and the 12-in. mark aligned<br />
<strong>with</strong> the opposite edge. Then mark points at 3Yz in. and 8Yz in.<br />
Lines drawn through these points and parallel <strong>with</strong> the stock's<br />
edges will indicate dle amount of stock to be removed to con-<br />
After drilling a couple of chair-seat spindle holes at the wrong<br />
angle, I came up <strong>with</strong> a simple solution to improve my angle<br />
alignment accuracy. Using a flexible steel rule, I followed the<br />
line of the drill bit to the back of dle drill, and <strong>with</strong> a fine-point<br />
felt marker, drew a horizontal axis line across the case seam at<br />
the center of the back. This gives me a perfect bull's eye to line<br />
up the desired angle. -Bruce A Goddard, Kennedy, NY<br />
Methods of Work buys readers ' tips, jigs and tricks. Send<br />
details, sketches (we'll redraw them) and photos to Methods, Fine<br />
Woodworking, PO Box 5506, Newtown, Conn. 06470-5506<br />
We 'll return only those contributions that include an SASE.<br />
ENERAYTools<br />
Built to last a lifetime<br />
10" Table Saw standard fence 350·1 Call<br />
<strong>with</strong> 50" Beisemeyer fence 350·T50 Call<br />
, <strong>with</strong> 50" Paralock or Excalibur 350P50/E5 Call<br />
' IS" Bandsaw enclosed stand 490·1 Call<br />
'Variable Speed Lathe 160·2<br />
Call<br />
Variable Speed Lathe Ihp 260·1 Call<br />
'8" Jointer enclosed stand 480·1<br />
Call<br />
, IS"<br />
'"<br />
Drill P ress 6 Speed 34·01 Call<br />
'3/4 Spindle Shaper 2800·B<br />
Call<br />
, 1 114" Spindle Shaper SS032 Call<br />
* 14" Radial Arm Saw VI54 Call<br />
'Dowel Machine 3/8"·11/4" DM·032 Call<br />
To Order or get Information:<br />
lmball AVe<br />
-8Jmii{':i.';L<br />
036<br />
READER SERVICE NO. 140<br />
22 Fine Woodworking<br />
VISIT THE SHOW NEAR YOU!<br />
•<br />
• •<br />
<strong>Free</strong> Workshops . Prizes ·<br />
•<br />
Hundreds of Products ·<br />
Seminars by Mastercraftsmen<br />
See the Widest Variety of<br />
Woodworking Products<br />
All Under One Roof!!<br />
HUNDREDS OF ITEMS! NEW PRODUCTS!!<br />
Machinery · Power & Hand Too ls · Supplies<br />
1992 SHOWS<br />
• Atlanta<br />
•<br />
No. California<br />
Philadelphia<br />
• Phoenix<br />
Portland<br />
Richmond<br />
Baltimore<br />
•<br />
Char10tte<br />
Chicago<br />
Columbus<br />
Denver<br />
Sacramento<br />
Detroit<br />
San Bernardino<br />
Ft. Lauderdale<br />
•<br />
Seattle<br />
Indianapolis<br />
So. California<br />
Kansas City<br />
•<br />
St. Louis<br />
• Milwaukee<br />
Ta mpa<br />
• North Jersey Twin Cities<br />
• Ventura<br />
1-800-826-8257 or 310-4n-8521<br />
Call NOW to be placed on mailing list for<br />
FREE Brochure & Discount Coupons<br />
Phone Hours 8-5 Pacific Time Weekdays<br />
READER SERVICE NO. 27<br />
. WEST HWY . 22, 3077399478 BOX so 1 36, WILSON, WYO, 83014<br />
'NEW· LOOSE PIN DRAWN<br />
BRASS HINGES<br />
THE SOURCE FOR ENGLISH AND AMERICAN HARDWARE<br />
LOWEST PRICES ON " BRUSSO " HARDWARE<br />
BUTT PLATE PLAIN ALL KINDS<br />
HINGES, HANDLES, KNOBS, LOCKS,<br />
H HINGES, ROSETTE PATTERN STAYS,<br />
BRUSSO HANDLES, KNOBS, CASTORS,<br />
HINGES, CHASED SHAKER BIN PULLS,<br />
FINIAL HANDLES, KNOBS, FLUSH<br />
HINGES, PIERCED WOODEN PULLS,<br />
BALL TIP HANDLES, KNOBS TABLE<br />
HINGES, DROP TURN SLIDES,<br />
ETC. HANDLES. KNOBS, CATCHES,<br />
MUCH MORE IN OUR 48 PAGE CAT, $3.00.<br />
READER SERVICE NO. 305<br />
SAVE TIME!<br />
SAVE MONEY!<br />
SAVE YOUR<br />
BACK!<br />
This time-saving tool is a<br />
must for kitchen cabinet<br />
installation<br />
d<br />
• Now one person can do the job<br />
of Iwo<br />
• Lifls 300 Ibs.<br />
• Avoids back strain and injury<br />
• Speeds up installalion<br />
GIW.nT<br />
time<br />
Call or Write<br />
• Rolls easily through for further<br />
doorways<br />
information<br />
.=-"-;L::'<br />
1605 N. River<br />
Independence, MO 64050<br />
Phone (816) 833·0611<br />
READER SERVICE NO. 39
CASCAD<br />
These offset bases offer greater<br />
support and router control over<br />
standard router bases. The small<br />
size features a 6" diameter offset<br />
base for smaller routers and the<br />
large size features a 7" diameter<br />
offset base for larger routers. Both<br />
bases feature a 2" hole for large<br />
router bits.<br />
(SMALL) PART No. C3222 ONLY $1795<br />
(LARGE) PART No. C3223 ONLY $1995<br />
TOOLS, INC.<br />
The Acculock Triangle Miter<br />
Fence is a 25" fully adjustable<br />
guide for all portable power<br />
saws, jig saws and routers. Provides<br />
right or left hand cutting<br />
positions, 3600 range of settings,<br />
precise stoplock adjustment<br />
for guaranteed accuracy<br />
<strong>with</strong> no measuring. You'll be<br />
proud to own this tool!<br />
PART No. C3260 ONLY $3495<br />
___ .. __ ---""' ___ ...<br />
1 '.j'(<br />
Dust-<strong>Free</strong> Random Orbit<br />
Sanding<br />
Sand <strong>with</strong>out dust<br />
<strong>with</strong> the new Electric<br />
Random Orbit Sander<br />
How it works<br />
from FEIN.<br />
Dust created by the<br />
sander is sucked up<br />
through holes located<br />
in the bottom of the<br />
sanding pad AND<br />
around the outside<br />
edge of the pad. This<br />
Holes in bottom of pad AND around outside<br />
edge of pad remove dust before it becomes<br />
airboume.<br />
Quick Paper Changing<br />
system removes 98% of the dust created during sanding.<br />
Ve1crJ backed sand paper is quickly & easily changed. It<br />
has no sticky back to load up <strong>with</strong> dust,just shake it off and<br />
you're back in business.<br />
Built for Production<br />
This is not a "hobby" machine. It is built for the serious<br />
professional:<br />
Call 1-800-441-9878 now to receive more information<br />
Fein Power Tools Inc.<br />
3019 W. Carson St., Pittsburgh, PA 15204<br />
(412)331-2325<br />
READER SERVICE NO. 10<br />
ANDERSON RANCH ARTS CENTER<br />
1992 SUMMER WORKSHOPS<br />
______ --.. 1 f tii(<br />
Extra long 2" drums give you that little<br />
extra length that always seems to be<br />
needed. Set includes 1/2", 3/4", 1",<br />
1-1/2", & 2" drums. Along <strong>with</strong> this<br />
are 3 sets of sanding sleeves.<br />
PART No. C3281<br />
ONLY $995<br />
Our router pad really holds work<br />
firm. Not spongy like the thicker<br />
pads. 24" x 36" large size! And<br />
priced right, too!<br />
PART No. C3238 ONLY $795<br />
1IIim ..<br />
Jim Barefoot<br />
Up holstery Design<br />
6- Technique<br />
Michael Emmons<br />
Willow Furniture<br />
Bob Flexner<br />
Understanding Finishing<br />
Michael Fortune<br />
Intennediate Furniture<br />
Making<br />
Gail Fredell<br />
Furniture Design:<br />
Developing A<br />
Personal Aesthetic<br />
Nora Hall<br />
Classic European Carving<br />
Scholarship & Summer<br />
Assistaot application deadline:<br />
March 13, 1992<br />
Studio Residency application<br />
deadline: May 1, 1992.<br />
For our free<br />
1992 ca talog contact:<br />
Bill Hochhausen<br />
Sculptural Wo odcarving<br />
Silas Kopf<br />
Marquetry, Veneering,<br />
and Inlay<br />
Peter Korn<br />
& Harv Mastalir<br />
Basic Woodworking<br />
James Krenov<br />
A PersonalApproach<br />
Kathleen Loe<br />
Faux 6- Painted Finishes<br />
Sam Maloof<br />
Furniture<br />
Stephen Proctor<br />
Advanced Furniture Making<br />
Monroe Robinson .<br />
Wo rking <strong>with</strong> Veneers<br />
Anderson Ranch Arts Center<br />
P.O. Box 5598,<br />
Snowmass Village, CO 81615<br />
303.923.3181 fax: 303.923.3871<br />
READER SERVICE NO. 88<br />
READER SERVICE NO. 67<br />
March/April 1992 23
Osage orange and its aliases<br />
In this geographical area we have a wood the "old timers"<br />
refe r to as bodock (pronounced <strong>with</strong> a long 0 and accented<br />
on both syllables). These old timers value the wood for use as<br />
fence posts because it won't succumb to termites and other<br />
insects. Can you tell me anything about this wood and lend<br />
advice about its use? -Donald E. Rutledge, Pulaski, Tenn.<br />
Jon Arno replies: I'm almost certain the wood you are describing<br />
is Osage orange, Maclura pomijera, a member of the<br />
mulberry family, Moraceae. The name bodock sounds like a corruption<br />
of bodarc (or bodark), which is, in turn, an Anglicized<br />
form of the French term bois d'arc, meaning "wood of the bow."<br />
When the early French settlers spread north from ew Orleans<br />
they encountered the Osage Indians who used this species for<br />
making their bows. This species was originally found only in the<br />
south central United States, native to eastern Texas and parts of<br />
Oklahoma, Arkansas and Louisiana. It is a small- to medium-size<br />
tree, seldom growing more than 50 ft. tall, <strong>with</strong> gnarly, thornprotected<br />
branches and large, round clusters of fruit about 4 in.<br />
to 5 in. dia., which look like rough-skinned green oranges. Prior<br />
to the introduction of barbed wire in 1874, Osage orange was<br />
planted by farmers throughout the Midwest to create what were<br />
descriptively referred to as "pig-tight" hedges, and now the tree<br />
may be seen growing along fence rows as far north as Chicago<br />
and east to the Atlantic seaboard.<br />
With an average specific gravity of 0.76 (ovendry weight/green<br />
volume), Osage orange is heavier and harder than any of our<br />
native hickories, but like the hickories, it is extremely elastic and<br />
resilient. The sapwood is white in color, while the heartwood is<br />
a vivid yellow when freshly cut, aging over time to a warm, amber<br />
gold. The pigment that gives Osage orange such a bright<br />
color is water soluble, and by boiling the wood chips, the early<br />
settlers were able to extract a dye for use <strong>with</strong> home-spun fabrics.<br />
Since the wood of Osage orange can be confused <strong>with</strong> that<br />
of black locust, Robinia pseudoacacia, the boiling of wood chips<br />
serves a modern purpose in helping to separate these two species<br />
because the yellow pigment in the latter is not easily dissolved<br />
in water. Because Osage orange is a ring-porous wood, it<br />
has a very attractive figure to complement its stuningly brilliant<br />
color. It's definitely a real challenge to work, especially <strong>with</strong><br />
hand tools, but the results can be rewarding.<br />
Uon Arno is a wood technologist and consultant in Schaumburg, Ill.]<br />
Bandsaw-blade tracking problems<br />
My 14-in. Delta bandsaw refuses to cut true when I run narrow<br />
blades. To remedy this, I'd like to fi t the saw <strong>with</strong> Thompson<br />
Model 236.2 conical blade guides. Do you know if this<br />
mOdification will improve performance or correct blade drift?<br />
-Roderick K Shaw, Jr., Tampa, Fla.<br />
Mark Duginske replies: It can be velY disturbing when a<br />
bandsaw will not cut in a straight line parallel <strong>with</strong> the saw table.<br />
This phenomenon is called either lead or drift. There are a number<br />
of possible causes for blade drift, but fortunately, the problem<br />
is often remedied or is greatly decreased by tuning up the saw.<br />
The best place to start is to properly align the bandsaw<br />
wheels. The wheels should be in line <strong>with</strong> each other when the<br />
blade is tensioned. This is particularly true of wider blades that<br />
are normally used for making straight cuts. This is described in<br />
detail in an article on bandsaw wheel alignment in Fine Woodworking<br />
#75. Next, the guides and thrust bearings must be adjusted<br />
accurately; this is a must for straight cutting. Both thrust<br />
bearings have to support the back of the blade evenly. The distance<br />
between the blade and the thrust bearing should be about<br />
.015 in. or 1/64 in., except for the Vs-in. and 1/16-in. blade, which<br />
should be against the bearing. Because the guide post rarely<br />
goes straight up and down, the top guides and thrust bearing<br />
should be readjusted every time the post is moved.<br />
The blade guides are adjusted after the thrust bearings are set.<br />
Metal guides should be adjusted until they're .004 in. (the thickness<br />
of a dollar bill) away from the blade. If you've fitted your<br />
bandsaw <strong>with</strong> non-metal guides that contain a dry lubricant,<br />
such as Cool Blocks, the guides can be set in contact <strong>with</strong> the<br />
blade. This decreases the tendency of the blade-especially<br />
narrow blades-to deflect sideways, which can lead to blade<br />
drift. Also, for straight cuts, make sure that the blade you are<br />
using is sharp; use your dull blades for curved cuts.<br />
Even <strong>with</strong> good guides and a carefully adjusted saw, you might<br />
still experience some blade lead. First, it's best to work <strong>with</strong> the<br />
lead rather than fight it. First, test the saw to see which way the<br />
blade has a tendency to lead. Do this by putting a mark about Y2<br />
in. from the edge on a 2-ft.-long board. Then, cut along this line<br />
and feed the board about 12 in. into the blade. You may have to<br />
angle the board slightly for the board to follow the line. After<br />
cutting 12 in. along tl1e line, stop the saw, and keep the board at<br />
the same angle that you fed the board to get a su-aight cut. Measure<br />
this angle and set your bandsaw's rip fence to it.<br />
[Mark Duginske is is a woodworker, teacher and author who<br />
lives in Wausau, Wisc.]<br />
Broken back due to short grain<br />
While I was gluing the backrest/aim assembly atop the spindles<br />
on a captain's chair I was building, the back cracked.<br />
These breaks occured in the same place on each side: near the<br />
ends of the middle segment of the three-piece back. If you can<br />
make some suggestions as to how I can repair the arm, I'd be<br />
most appreciative.<br />
-M. Radin, Los Angeles, Cal.<br />
Sandor Nagyszalanczy replies: As far as I can tell from your<br />
description and photos, the problem <strong>with</strong> your captain's chair's<br />
backrest has to do wim short-grain failure. By making the entire<br />
backrest/arm assembly from only tl1fee segments, as shown in<br />
the sketch below, the ends of each segment run mostly across<br />
the grain. As you discovered, mese areas of short grain are inherently<br />
weak. Even if you hadn't broken the backrest by driving<br />
the spindles into it, the back would've likely been broken by<br />
someone leaning back in the completed chair.<br />
Top view<br />
of captain's chair<br />
backla rm rest<br />
Constructing back from<br />
four short segments yields<br />
less grain runout and results<br />
in a stronger back.<br />
Short grain in these<br />
areas is weak and<br />
susceptible to<br />
breakage.<br />
I think me easiest strategy for repairing me chair is replacing<br />
the entire backrest assembly. Since you used yellow glue, I'm<br />
afraid there's no easy way to remove the backrest from tl1e spindles.<br />
Some woodworkers have successfully used lacquer minner<br />
24 Fine Woodworking
1-t--+-.y0'9!p...,"'=L"' <br />
INCA<br />
at Sale Prices<br />
EXAMPlE:<br />
New Model 2100 12' Table Saw<br />
ONLY U,185 (expires 5-1 5-92)<br />
1989 Original Price $3,1 75<br />
Shipped Direct from Inventory<br />
5 Year Limited Warranty<br />
(818) 797-8282<br />
INJECTA MACHINERY<br />
2217 EI Sol Ave<br />
Altadena, CA 91207<br />
Call or Send for More Information<br />
Modulus 88-100<br />
The SS-100 Scoring Saw attachment will cut double<br />
sided material chip-free, top and bottom, on YOUR 10"<br />
table saw.<br />
One piece cast iron body<br />
Carbide tipped blades<br />
No modification to saw<br />
Uses standard arbor nut<br />
• Uses standard table insert<br />
• 45° angle range<br />
U.S. Distributor:<br />
READER SERVICE NO. 144<br />
102 Kimball Avenue<br />
So. Burlington, VI'<br />
Phone (802) 863-9036<br />
FAX (802) 863-9660<br />
Dealer Inquiries Welcome<br />
READER SERVICE NO. 152<br />
MIRRORA • BEVELED CIRCLES<br />
PERFECTLY BEVELED MIRROR<br />
• 6 sizes of circles from Ph" to 6" and 63 other<br />
sizes. shapes and colors available • 1.000.000<br />
pieces in stock-UPS Shipable-Ready-to-go<br />
• Highest quality float glass-Double-backed<br />
for protection • We fabricate any shape<br />
or size of glass & mirror<br />
• Call 1-800-MIRRORA Now to place<br />
orders and get our color catalog<br />
tag!rl<br />
895 Motor Parkway<br />
Hauppauge. New York 11788<br />
516/ 234-2200 800-647-7672<br />
READER SERVICE NO. 19<br />
U.S. PATENT<br />
PRO<br />
",793,604 Other P.tentl Pending<br />
From the makers of the OriginallNCRA JIG<br />
When the Original lNCRA JIG was introduced in<br />
late 1987, many woodworkers began to explore the<br />
potential of this unusual new tool. They quickly<br />
discovered that not only did it make their everyday<br />
woodworking operations easier and more accurate, but it<br />
also enabled them to produce work that they would have<br />
previously thought impossible.<br />
Within a few short years, INCRA JIG became widely<br />
recognized throughout the industry as not just another interesting<br />
new gadget, but rather AN EVOLUTIONARY ADVANCEMENT IN THE<br />
ART OF WORKING WITH WOOD. If you ask an experienced INCRA<br />
JIG user he will tell you that he understands exactly what we mean. He<br />
will tell you about the absolute perfection he has been able to achieve in<br />
making box joints and dovetails. He will<br />
show you impossible looking new joints like<br />
the INCRA Double Dovetail and the INCRA<br />
Double-Double Box Joint. Or perhaps he will<br />
simply tell you that it has revolutionized the way he<br />
works on the router table or table saw.<br />
Now, four years later, the NEXT<br />
generation of INCRA has arrived . .. We<br />
are proud to introduce INCRA JIG PRO!<br />
The INCRA Double-Double Through Dovetail is but one example of<br />
the extraordinary work that you can accomplish <strong>with</strong> INCRA JIG's<br />
precision and ease of use.<br />
For a FREE INCRA PRODUCT BROCHURE and the name of your nearest dealer, write:<br />
Taylor Design Group, Inc. P.O. Box 810262 Dallas, TX 75381<br />
INCRA JIG Pro<br />
uses the same rack<br />
positioning technique<br />
that gives the Original<br />
INCRA JIG its phenomenal<br />
accuracy. And like the Original, INCRA JIG Pro can be<br />
used to produce flawless joinery of every kind, as well<br />
as other intricate work. When combined <strong>with</strong> the<br />
optional28' INCRA JIG Pro Fence System shown here,<br />
it becomes a truly superb router table or table saw<br />
fence. (Wooden base plate not included.)<br />
READER SERVICE NO. 94<br />
Also look lor these other GENUINE INCRA TOOLS<br />
• The Original lNCRA JIG<br />
• The Official iNCRA JIG Handbook<br />
& 17TEMPLATES<br />
• The Complete INCRA JIG Video<br />
• 18' INCRA Fence System<br />
©1992, Inc. Taor Design Group.<br />
In addition to all of the capabilities that<br />
have made the Original so successful,<br />
here are some of the NEW FEATURES<br />
that we've added to the INCRA JIG Pro:<br />
• Positions your work over a FULL<br />
16" RANGE. That's twice as much<br />
as before. (12' model is also<br />
available)<br />
• QUICK ACTION cam clamp lets you<br />
instantly lock the jig at any position<br />
<strong>with</strong> a single motion of the hand.<br />
• Spring loaded - FLOATS<br />
EFFORTLESSLY to any new<br />
position.<br />
• FLiPSIGHTTM hairline cursor and<br />
easy to read top mounted sliding<br />
scale.<br />
• Rugged, solid aluminum<br />
construction<br />
• Less than 0.004' error (about the<br />
thickness of this page) over the<br />
FULL 16' RANGE.<br />
• Return to any former position <strong>with</strong><br />
NO MEASURABLE ERROR.<br />
• Works <strong>with</strong> all GENUINE INCRA JIG<br />
accessories.<br />
. INCRA Right Angle Fixture<br />
• NEW! INCRA Miter Slider<br />
• NEW! INCRA Wooden Hinge Plans<br />
. INCRA Gauge<br />
• NEW! 28" INCRA Pro Fence System<br />
(for use <strong>with</strong> INCRA JIG Pro only.)<br />
INCRA is<br />
a regis1ered trademar1< of Taylor Design Group, Inc.
Q & A (continued)<br />
Z1P<br />
to soften aliphatic resin (yellow glue) that hasn't dried too much,<br />
but since the glue in your chair has had time to dry, this is an<br />
unlikely solution. You may have to hammer off the old backrest<br />
and reshape the ends of the spindles. When making the new<br />
backrest, fashion it from four segments instead of three (see the<br />
drawing). Each of d1ese segments will have a shorter arc and less<br />
short grain, therefore the new backrest will be stronger.<br />
[Sandor Nagyszalanczy is managing editor of Fine Woodworking]<br />
P<br />
ainting polyurethaned kitchen cabinets<br />
I have oak veneer kitchen cabinets, stained dark and finished<br />
<strong>with</strong> what is most likely pOlyurethane. Can you recommend a<br />
durable, white-pigmented surface coating to finish these cabinets<br />
<strong>with</strong>out stripping them down to bare wood? Could suffi <br />
cient build be achieved to eliminate the grain pattern? Would<br />
epoxy or Imron be candidates?<br />
-W. J Zahorchak, Roanoke, Va.<br />
Chris Minick replies: Certainly, a two-part epoxy paint such<br />
as Imron catalyzed finish or Sherwin Williams' Polane, would be<br />
excellent choices for refurbishing or upgrading your existing<br />
kitchen cabinets. The finish produced by any one of these systems<br />
will far surpass the ational Kitchen Cabinet Association<br />
(NKCA) standards for food-stain resistance and durability. But,<br />
unless you are very familiar and comfortable <strong>with</strong> spray application<br />
of reactive finishing materials, avoid these finishing systems.<br />
It takes a lot of patience and practice <strong>with</strong> d1ese finishes to<br />
achieve acceptable results. But fortunately, an acceptable refurbishing<br />
alternative does exist.<br />
Ideally, any restoration project should include removal of d1e<br />
old finish, as this gives you the widest choice of subsequent finishes.<br />
Finishing over the existing polyurethane varnish on your<br />
kitchen cabinets narrows your choices to either pigmented oilbase<br />
alkyd or uralkyd products. These are materials that bond<br />
satisfactorily to cured polyurethane varnish. To simulate the<br />
modern high-gloss plastic-laminate look, follow the steps below.<br />
If you would like the existing grain patterns to show in<br />
the final finish, omit d1e grain-filling step.<br />
First, remove d1e cabinet doors (and face fran1es if possible).<br />
Thoroughly wipe all surfaces <strong>with</strong> lacquer thinner to remove any<br />
condensed cooking oils or od1er contaminants. Now scuff-sand<br />
the existing finish wid1 ISO-grit sandpaper and apply a quality<br />
grain filler to d1e doors and face frames. Paste grain fillers, especially<br />
the oil-base type, take a very long time to dry, so allow at<br />
least two days drying time before proceeding. Sand the dried<br />
doors and face frames <strong>with</strong> progressively finer sandpaper to 220-<br />
grit. Wipe the surface <strong>with</strong> a tack clod1 to remove any remaining<br />
sanding dust. Finally, brush apply two or three coats of a highgloss,<br />
slow-drying alkyd enamel. Brand names are unimportant,<br />
but I personally think that Shetwin Williams' All Surface Enamel<br />
would work best in your situation. Regardless of the brand used,<br />
allow several days for it to cure before reinstalling doors and face<br />
frames. Although this finishing system would not pass the NKCA<br />
durability tests, it offers adequate protection for evetyday use. If the<br />
finish does become damaged, recoating is an easy task.<br />
[Chris Minick is a product development chemist and amateur<br />
woodworker in Stillwater, Minn.]<br />
Speed controllers for AC-only Motors?<br />
In the "Q&A" section of Fine Woodworking #85, Ed Cowern<br />
wrote a reply regarding speed control of universal or DC motors.<br />
Is there also a means of controlling speed of AC-only motors?<br />
-Steven J Moerlein, Knox, Ind.<br />
At last! A complete<br />
power-feed<br />
linin Sander at an<br />
affordable price!<br />
26" Choose from<br />
and 38" models.<br />
Now you can save hours of tedious hand scraping and<br />
sanding. In a matter of seconds, you can tum out satinsmooth<br />
panels, doors, shelves and other glued-up pieces.<br />
No more dips and waves. No more gouging. Infinitely<br />
variable power feed gives you total control. Turns out<br />
perfectly flat, glass-smooth panels that look better and<br />
take stain more evenly than any you could do by hand.<br />
Send for complete facts. See how the Woodmaster can<br />
finish cabinet pieces, resawn stock, paneling, tabletops,<br />
knees, burls and much more! Made in U.S.A. Easy terms.<br />
Call Toll <strong>Free</strong> 1(800) 821 -6651 , Ext. 0534<br />
o YES! Please rush my FREE N=ORMA-<br />
- -------,<br />
110N KIT and details on your 3O-Day <strong>Free</strong><br />
1<br />
Trial Guarantee.<br />
1 __<br />
Woodmaster Tools Dept. 0534<br />
2908 Oak, Kansas City, MO 64108<br />
• 1<br />
ADDRESS<br />
CITY<br />
STATE<br />
I PHONE ( ) I<br />
---------...<br />
READER SERVICE NO. 56<br />
CRAFTSMEN, EOUIP YOUR<br />
SHOP AT GREAT SAVINGS<br />
__________________________ 1<br />
NAME<br />
--- ___ PAXTON.HARDWARE --<br />
:::=============LTD.<br />
1<br />
Catalog of over 500 plans to<br />
build your own tools,<br />
$1.00, refundable<br />
A wide variety of plans from complete machines and<br />
anachments to handtools for home, school and commercial<br />
shops. Featured also are accessories for<br />
wood and metal cutting lathes. drills, saws, sanders,<br />
etc., plus things to make of wood and metal.<br />
WOOD-MET SERVICES, INC<br />
3314 WEST SHOFF CIR. DEPT. FWW<br />
PEORIA, ILLINOIS 61604<br />
READER SERVICE NO. 156<br />
Locked<br />
on<br />
Quality!<br />
The kind you've come to expect from us -whether<br />
it's locks and keys or any one of the thousands of fine<br />
hardware fittings for the demanding furniture craftsman.<br />
Irs all in our new 70-pa g e catalog -a valuable<br />
reference tool that fully describes our expanded line<br />
of period hardware. To get your copy, use circle #401<br />
and send $4.00.<br />
7818 Bradshaw Road, Dept. FW30. Upper Falls, MD 21156<br />
Quick Shipment <strong>Free</strong> Mini-Catalog<br />
READER SERVICE NO. 26<br />
Carter Micro-Precision<br />
and Guidall Band<br />
Saw Guides.<br />
Precision.<br />
Durability. Value.<br />
Three sizes of each model.<br />
Mounting brackets and studs to<br />
fit most band saws. Write or call<br />
now for FREE BROCHURE.<br />
PRODUCTS COMPANY, INC.<br />
437 Spring St., NE,<br />
Grand Rapids, MI 49503<br />
(616) 451-2928/ FAX: (616) 451-4330<br />
FORSTNER SPECIAL<br />
READER SERVICE NO. 61<br />
16 pc. Forstner Bit<br />
Set<br />
All bits 3-1/2" overall,<br />
precision ground, HRC 50-52.<br />
Sizes 1/4" through 2-1/8"<br />
in wooden case. All<br />
3/8" shanks. Sizes<br />
over 1-1/2" supplied<br />
<strong>with</strong> saw teeth to<br />
eliminate overheating.<br />
$87.95<br />
Hartville True Value #,,\LLE TRUE v-1{<br />
, j<br />
48 continental states only.<br />
In Ohio. please add<br />
940 W. Maple St., "e<br />
2;15-2396 <br />
Hartville, Ohio 44632<br />
6% sales Tax. Min. order $16.95.<br />
All orders add $3.00 SlH charge.<br />
READER SERVICE NO. 75<br />
26 Fine Woodworking
FEATURE<br />
PACKED<br />
•<br />
MANY<br />
OPTIONS<br />
O FFERED<br />
TURN YOUR ROUTER INTO 3 NEW TOOLS<br />
2. JOINT<br />
MAKER<br />
3. INVERTED PIN ROUTER<br />
RUGGEDLY BUILT · flAT GROUND TABLE<br />
TIlE<br />
UNIVERSAL ROUTER SYSTEM<br />
FOR THE BROCHURE YOU WANT . WRITE lODAY<br />
PORTA-NAILS, INC . . PO Box 1257 . Wilmington, NC 28402 .<br />
READER SERVICE NO. 35<br />
1-800-634-9281<br />
Swiss Quality Woodworking Machines<br />
Renowned Inca Precision<br />
Woodworking Machinery<br />
EXAMPlE:<br />
Model 570 Equipped <strong>with</strong> the<br />
Famous Tersa Instant Cutter<br />
Change System<br />
Inca Model 570 1 OW JointerfThickness Planer<br />
INCA<br />
READER SERVICE NO. 130<br />
FREE! 108<br />
Shipped Direct from Inventory<br />
5 Year Limited Warranty<br />
(BOO) 221-2942<br />
Call or Send for More Information<br />
on the Entire Inca Line<br />
Garrett Wade Co., Inc.<br />
161 Avenue of the Americas<br />
New York, NY 10013<br />
Featuring: REFINISHING<br />
pg.<br />
GUIDE<br />
Illustrated<br />
Environmentally Acceptable<br />
ter-based Zip-Guard<br />
Wood Finish and Acrylic<br />
Wood Stain!<br />
ORDER YOURS TODAY!<br />
800-321 -9870 TOLL Call FREE<br />
(Mon.<br />
-Fri. 8:00-4:00 Eastern time)<br />
READER SERVICE NO. 100<br />
[flliJ&i]@® An evolutionary advancement in the art of working <strong>with</strong> wood.<br />
The Original lNCRA JIG, and now the new<br />
INCRA JIG PRO have revolutionized the way<br />
people work <strong>with</strong> wood. Because of INCRA,<br />
most ordinary woodworking operations are<br />
now quicker, easier, and more accurate than<br />
ever before. But more importantly, these<br />
new tools have enabled woodworkers to<br />
achieve results that simply were not possible<br />
before. A quick look at some of the photos<br />
will show you what we mean. These are just<br />
a small sampling of the extraordinary work<br />
that you can now accomplish <strong>with</strong> the highly<br />
affordable INCRA Line of Precision Tools.<br />
The Complete INCRA JIG VIDEO<br />
This one hour program will help you unleash INCRA JIG's incredible<br />
versatility and inspire new ideas for its use. It includes complete<br />
step'by-step instructions for making box joints and dovetails, plus much<br />
more. Also included are full video instructions plus FREE templates and<br />
plans for making the new INCRA Double-Double Box Joint.<br />
Beautiful joinery like this can be easily<br />
accomplished using the Official iNCRA JIG<br />
Handbook & Templates <strong>with</strong> either the<br />
Original lNCRA JIG or the<br />
new INCRA<br />
JIG PRO.<br />
INCRA Miter Slider replaces the cranky, inaccurate<br />
wooden runners that you've had to rely on for your shop<br />
built table saw jigs. These 18' Iong aluminum runners<br />
adjust to fit any standard 3/4' x 3/8' mer gauge slot. A<br />
simple turn of a screw adjusts for a perfect fit. Another<br />
turn locks the jig rigidly in place. Comes <strong>with</strong> FREE<br />
illustrated plans for making a variety of popular table saw<br />
jigs and fixtures, like the miter jig shown here.<br />
The beautiful work shown here is just a small<br />
sampling of the many new woodworking<br />
capabilies that the INCRA Precision<br />
Woodworking System can bring to your shop.<br />
NEW! INeRA Wooden Hinge Plans<br />
Beautiful wooden hinges like these can bring<br />
complete wooden harmony to your next jewelry<br />
box, cabinet door, hinged table leaf, and more.<br />
These fully illustrated plans include a FREE Drilling<br />
guide for making the hinge pivot pin holes.<br />
For a FREE INCRA BROCHURE & the name of your nearest dealer, write: Taylor Design Group, Inc. P.O. Box 810262 Dallas, TX 75381<br />
• The Original lNCRA JIG<br />
• NEW! INCRA JIG PRO<br />
. 18" INCRA Fence System<br />
• NEW! 28" INCRA Pro Fence System<br />
• INCRA Right Angle Fixture<br />
• Official iNCRA JIG Handbook & Templates<br />
• The Complete INCRA JIG VIDEO<br />
• INCRA GAUGE<br />
• NEW! INCRA HINGE PLANS &<br />
DRILLING GUIDE<br />
• NEW! INCRA MITER SLIDER<br />
READER SERVICE NO. 95 © 1992, Taylor Design Group, Inc. INCRA is a registered trademark of Taylor Design Group, Inc.
Q & A (continued)<br />
Ed Cowern replies: Speed controls offered for universal motors<br />
will not work <strong>with</strong> induction motors. The speed of an induction<br />
motor is set by the way the motor is wound (number of<br />
magnetic poles) and the frequency of the power being used. In<br />
most of North America, the frequency is 60 cycles while overseas<br />
most power is supplied at a frequency of 50 cycles. Speed controls<br />
for universal motors change only the voltage to the motor.<br />
In induction motors, used on most fixed power tools, adjusting<br />
the voltage will decrease the torque available from the motor for<br />
starting but will not control speed.<br />
The only effective way to dlange the speed of power tools <strong>with</strong><br />
induction motors is by changing the frequency to a different value,<br />
and this is an expensive process. The most practical way to change<br />
tile speed of an induction motor in a small shop is to employ mechanical<br />
means, such as step pulleys. By using a matd1ing pair of<br />
step pulleys on both the motor drive shaft and the arbor shaft of<br />
tile machine, you can dloose from three or four (depending on<br />
tile pulleys) different speeds as quickly as you can slip me v belt<br />
from one position on tile pulleys to anomer.<br />
[Ed Cowern is an electrical engineer and president of EMS, a<br />
company that distributes Baldor electric motors.]<br />
Drying spalted logs<br />
I have a supply 0/ logs that are damp and many 0/ which<br />
contain lovely spalted wood. Should I resaw the logs into<br />
lumber now and stack the resulting boards under pressure to<br />
minimize warping, or should I let the logs dry naturally first?<br />
-Robert K Moxon, M.D., Columbia, S. C<br />
Bruce Hoadley replies: I would end coat and then resaw the<br />
spalted logs into slabs, flitches or boards now. Make sure to saw<br />
me stock slightiy thicker than what's desired for use, to provide<br />
shrinking and dressing allowances. Sawing tile logs now and initiating<br />
drying will arrest the development of me fungi and prevent<br />
extensively spalted areas from progressing to tile advanced decay<br />
stage. Further, tile best pieces can be selected and given special<br />
attention in dlying; tile badly decayed or unspalted portions can be<br />
discarded. As <strong>with</strong> any material, stacking in well-stickered, weighted<br />
piles will enable the most efficient drying <strong>with</strong> minimum warp.<br />
[Bruce Hoadley is professor of wood technology at the University<br />
of Massachusetts at Amherst and a contributing editor to FWW]<br />
Sheet goods and formaldehyde safety<br />
I own a small cabinet shop in western Washington and have<br />
been building cabinets for nearly 20 years. The growing popularity<br />
0/ particleboard sheet goods, such as Kortron and melamine,<br />
now widely used in casework, has made me more<br />
concerned about exposure to the formaldehyde that's said to<br />
be offgased by these products (my customers are concerned<br />
too). How much 0/ a health threat is there from working <strong>with</strong><br />
these sheet goods? -Joe Ciskowski, Eastsound, Wash.<br />
Chris Minick replies: The subject of me release of formaldehyde<br />
from manufactured wood products has been researdled for<br />
years by bom particleboard manufacturers and government agencies.<br />
A brief explanation of where tile formaldehyde comes from<br />
and what can be done about it is in order. Formaldehyde is liberated<br />
from me adhesive used in the manufacture of particleboard,<br />
medium density fiberboard (MDF), and hardwood plywood during<br />
the adhesive bonding step of the production process. Some of this<br />
formaldehyde becomes trapped in the wood product and is slowly<br />
released to me atmosphere over a period of several montils.<br />
The most common human reaction to high formaldehyde levels<br />
in the air is excessive eye blinking, eye irritation and respiratOlY<br />
(/)<br />
<br />
0 III<br />
rn<br />
• ROUTER TABLES · INCRA »<br />
FREE OJ<br />
CATALOG<br />
II<br />
»<br />
(/)<br />
__<br />
A NEW WAY TO<br />
CARRY ON A FINISHING<br />
TUDITION.<br />
The<br />
Wagner is unlike<br />
r, __ ", _-AN any finishing<br />
r', JC:'-UU' method you've<br />
ever seen before. But it can put a classic,<br />
professional finish on the woodworking<br />
projects you're doing now,<br />
right in your own workshop.<br />
FineCoat's secret is<br />
Wagner's High-Volume,<br />
Low-Pressure very little bounceback or over-spray.<br />
(HVLP) technolo- You don't need a spray booth, just an<br />
gy. It allows you open mind and a few minutes to read<br />
to spray, <strong>with</strong><br />
any finish the shelf<br />
about FineCoat's advantages.<br />
on<br />
givesyou a<br />
prifessional<br />
sprayJinish.<br />
Cove rage is<br />
smooth and<br />
even over the<br />
most intncate<br />
pieces.<br />
The FineCoat unit is<br />
portable, storable,<br />
and plugs into<br />
any120V<br />
out/et.<br />
The FineCoat can give you the<br />
type of fmish you had in mind,<br />
from the start of the project<br />
It handles urethanes, oils,<br />
varnishes, shellacs,<br />
lacquers, s tains, even<br />
enamel paints. Every<br />
FineCoat unit also<br />
comes <strong>with</strong> helpful<br />
hints for thinning and<br />
spraying different materials.<br />
Your hand has never had this much control.<br />
With FineCoat you can get close,<br />
<strong>with</strong>out dripping, or cover large areas.<br />
The spray width adjusts from V4 I<br />
to a foot wide. You can<br />
also adjust<br />
to a vertical, horizontal, or circular<br />
pattern, <strong>with</strong>out changing nozzles.<br />
While your coats are drying, the<br />
spray gun stands<br />
V4" 1b 12" Wide<br />
securely in its own<br />
unit And when the<br />
last coat is on,<br />
check your watch.<br />
You'll most likely<br />
be done finishing<br />
and cleaning-up, in less time than<br />
you used to spend on the finishing<br />
process alone.<br />
To find out more about FineCoat,<br />
call 1-800-328-8251. We'll send<br />
you more information or refer you<br />
to a FineCoat dealer.<br />
r--------------------------------------------------------,<br />
,<br />
Send<br />
a helpful<br />
for free<br />
demonstration<br />
literature or '<br />
video.<br />
Check the first box below and we'll send<br />
you more literature on HVLP spraying and the<br />
FineCoat sprayer. Or. check the second box<br />
and send $3 to cover postage and handling.<br />
We'll send you the literature along <strong>with</strong> a<br />
videotape demonstrating the usage and<br />
applications of FineCoat<br />
D Send more information, free.<br />
D Send me information and the FineCoat video<br />
for $3. (Enclcse a check payable to Wagner<br />
Spray Tech, or we'll charge it to your<br />
MasterCard # , or<br />
your Visa<br />
8: e.: #<br />
.)<br />
i NmE ________ ___<br />
r ADDRESS<br />
: CI11' _________ '0: :<br />
Sf ATE ZLP ____<br />
:<br />
.ll: Mail to, Wagner FineCoa 1770 Fernbrook Ln<br />
§: MNS5447 .. Plymouth,<br />
V" ---<br />
.!<br />
!i ii VVA&nER" ,<br />
!<br />
FW392<br />
fl AneCoalN<br />
{1 9 1. _______________________________________________________<br />
Low Overspray Finishing System<br />
_<br />
READER SERVICE NO. 129<br />
Marchi April 1992 29
Q & A (continued)<br />
cliSCOmfOlt. FOl1unately for most healthy inclividuals, d1ese symptoms<br />
show up well below d1e 0.4 ppm Threshold Limit Value (TIV), and<br />
steps can be taken to ventilate me area before me formaldehyde<br />
vapors become a healm dll-eat. A recent study by d1e Furniture<br />
Industry Research Association has shown mat me formaldehyde<br />
levels in furniture factories and warehouses were below d1e safety<br />
limits and posed no particular hazard to workers in d1e factories.<br />
In your customer's homes where patticleboard cabinets have<br />
been installed, me formaldehyde problem can be minimized by<br />
simply varnishing me exposed surfaces of me particleboard or IDF<br />
wim an alkyd varnish. 111is u'eatment does not eliminate me formaldehyde,<br />
but rad1er slows down d1e emission rate to a level<br />
where normal household ventilation will prevent me build up of<br />
vapors. An alternative would be to use eA1:erior-grade wood products<br />
when building furniture and cabinets. Exterior and waterproof<br />
wood products are manufactured wim a different adhesive system;<br />
d1US, u-apped formaldehyde is avoided. Adclitional information<br />
about formaldehyde in wood products can be obtained from d1e<br />
Hardwood Plywood Manufacturers Association, 1825 Faraday Dr.,<br />
Reston, Va. 22090.<br />
[elll'is Minick is a produa development chemist and an1ateur<br />
woodworker in Stillwater, Minn.]<br />
Damping noisy sheet-metal machinery stands<br />
Some of my machines that are on sheet-metal stands don't<br />
have that nice quiet sound like other similar machines I have<br />
seen elsewhere. My machines seem to rumble and boom to a<br />
distracting degree.<br />
-Herbert Weiner, Sarasota, Fl.<br />
Robert Vaughan replies: Assuming all d1e fasteners on me machine<br />
are tight, my first guess is mat d1e macl1ine may not be Sitting<br />
square on me floor. If a shim or two doesn't solve d1e problem,<br />
men I would look at d1e sheet-metal stand. While me machine is<br />
idling, feel d1e sides of me stand and press in on different places to<br />
see if d1ere are any du1.nges in me sound. If you feel one of me<br />
panels vibrating more man d1e omers, put a wood stiffener on it.<br />
To do thiS, cut a couple of 3-in.-wide (or wider) sU-ips of plywood<br />
and coat one side of each <strong>with</strong> COnSUl.lCtion adhesive. Now squish<br />
d1em in place on d1e inside of me stand wherever me panel was<br />
vibrating (space permitting). Wedge or tape d1e sU-ip in place wim<br />
sticks as necessaty, at1d let d1e adhesive dry for about a day. 111is<br />
ted1l1ique usually does d1e job for me.<br />
[Bob Vaughat1 is a conu-ibuting editor to Fine WOOdw01-king and a<br />
woodworking machinery rehabilitation specialist in Roanoke, Va.]<br />
Bending dowels<br />
I'd like to know how I can bend a 4-ft. -long, }-in.-dia. dowel<br />
into a U-shaped rod <strong>with</strong> a 6 in. inside diameter. I plan to<br />
reduce the diameter of the dowel in the middle prior to bending,<br />
as shown in the drawing below. What advice can you<br />
give me on doing the job, and do I need a jig to keep the rod<br />
in<br />
I<br />
shape after bending? -Jim Ward, Denham Springs, La.<br />
Direction of bend<br />
18 I<<br />
1-in.-dia.<br />
dowel<br />
This area is shaved down<br />
to in. thick.<br />
Drew Langsner replies: You have d10sen an ambitious woodbending<br />
task. 111e climensions of me material and me radius of me<br />
curve approach me limits mat wood Cat1 be bent. Here are several<br />
MODEL ,1 -' ,. -<br />
TS2S1U<br />
C· .,.-:<br />
RYOSI<br />
JPl55 618' VAR<br />
BI2500 10" TABLE<br />
I· -/(,\\ :;><br />
SPEED J:lI.TER S297<br />
RE600 ; HP PlUf.GE ROUTER VAR SPEED 100<br />
SAVi BENCH TJP 278<br />
BE424 .-X 2J' BEL T SA'IDER Vi BAG '.'AR SPD 164<br />
11323AlSK ; 1 J' LQI;G SHOE PLANER KIT 119<br />
IS251U 10 t.' TFR SA\', 159<br />
iJ'::''i:J<br />
10" liTER SAW<br />
OUR PRICE<br />
$159.00<br />
ACCESSORY KIT - IN<br />
CLUDES DUST BAG,<br />
EXTENSION WINGS, &<br />
VICE ASSEIIBL Y-$29.95<br />
READER SERVICE NO. 70<br />
Panasonic<br />
EY6:!l7BC 12V 12"KYLS CK2SPD VSR 2BAT lSMIN<br />
235<br />
EY6:lliBC 12'1 ; 8 CK KYLS 2 SPD ISR Vi 15 t.II'1 CHRG 165<br />
EY62ffiB2 SAME AS AEJJE BUT V/'TH 2 BAnER,ES'<br />
EYf:8ll3C 1?'.' a ..,.\I}H;n L 100<br />
R 15 '.1'.:; ?eAT CSE225<br />
30 Fine Woodworking
For that<br />
" SPECIAL"<br />
project<br />
COMPANY<br />
BUILD YOUR OWN CEDAR STRIP CANOE<br />
* 2'h HR STEP-BY -STEP VIDEO INCLUDES<br />
FREE FORM TEMPLATES AND ALL THE<br />
KNOW HOW TO GUIDE YOU FROM BEGINNING<br />
TO END. $39.95 plus $3.00 S&H.<br />
* DO-IT-YOURSELF KITS INCLUDE ALL<br />
MATERIALS NEEDED TO BUILD A 14' OR<br />
16' CANOE PLUS OUR STEP-BY-STEP VIDEO.<br />
FOR MORE INFO & PRICES CALL OR WRITE<br />
PALEO CANOE CO., P.O. BOX 491<br />
QUEEN ANNE LEGS<br />
Brochure <strong>Free</strong><br />
In stock No minimum<br />
oJ fP'U)Ju,cl:4.,<br />
COUNTRY KITCHEN LEGS<br />
Dr., 974 Forest Dept. 0-11<br />
Morristown, TN 37814· Phone (615) 587-2942<br />
NEW FROM JET<br />
W / BIESEMEYER<br />
FENCE<br />
$1099<br />
. 10" BLADE<br />
2 HP MOTOR<br />
• BIESEMEYER #50<br />
$998<br />
849<br />
898<br />
• HEAVY-DUTY<br />
CAST IRON LATHE<br />
• VARIABLE SPEED<br />
%HP, lPH<br />
• 550-3,000 RPM<br />
-6" JOINTER $428<br />
1 HP DUST COLLECTOR 228<br />
-<br />
JJ6CS<br />
DC610<br />
DC1182 -2 HP DUST COLLECTOR 438<br />
NEW FROM JET<br />
How Smooth Does Our<br />
Teflon:Coated Saw Blade Cut?<br />
The WIZARD ELiTET• cuts<br />
so smooth the wood has a<br />
baby-smooth finish.<br />
Coated <strong>with</strong> non-stick<br />
DuPont Teflon to keep the<br />
blade clean and free of<br />
build-up.<br />
WIZARD ELITE features<br />
specially sharpened carbide<br />
tips to provide smoother<br />
and easier cuts in hard or<br />
soft wood.<br />
Try WIZARD ELITE and<br />
"feel" what we mean.<br />
FREE SHARPENING<br />
Return to lactory <strong>with</strong>in<br />
'·year of date of purchase.<br />
Coupon enclosed <strong>with</strong> blade.<br />
Teflon is a registered trademark of the DuPont Corp.<br />
READER SERVICE NO. 123<br />
If you're not 100 percent<br />
satisfied, we'll refund your<br />
money <strong>with</strong> no questions<br />
asked. For more information<br />
and a dealer near<br />
you call: 800/828-9000<br />
or 716/778-8588.<br />
UNITED STATES SAW<br />
The Professional's Choice<br />
Burt, New York 14028<br />
<br />
A. JSG9613-20,000 RPM AIR SANDER $79.95<br />
B. JSM70S -3/8" REV. AIR DRILL, 1800 RPM 44.95<br />
C. JSM804 -POSITIVE CLUTCH SCREWDRIVER 64.95<br />
D. JDPN6072 -3/8"-1-1/4" BRAD NAILER 129.95<br />
OVER 100 NEW AIR TOOLS INCLUDING<br />
A COMPLETE LINE OF NAILERS & STAPLERS!<br />
COMPLETE LINE OF JO PRODUCTS AVAILABLE_<br />
CALL US FOR BEST SELECTION. BEST PRICE!<br />
SANTA ROSA TOOL & SUPPLY<br />
1651 PINER RD .• SANTA ROSA, CA 95403<br />
IN CALIF.<br />
OUTSIDE CALIF.<br />
800-464-8665 800-346-0387<br />
800-545-3705<br />
OR FAX US YOUR ORDER<br />
ALL OfFERS & PRICES SUBJECT TOCHANGE WITHOUT NOTICE.<br />
VISA' _D'_-_ElIPIIESS<br />
OFFER EXPIRESAPRIL30, t992<br />
READER SERVICE NO. 121<br />
March/April 1992 31
Q & A (continued)<br />
suggestions fo r going about dlis project: First, I would not use<br />
hardware-store dowels because mey are usually maple, wbich is<br />
sometimes used for bending, but is only a moderately good candidate.<br />
Better woods to use include white oak, red oak, bickOlY or<br />
ash. Second, commercially made dowels are produced wim little<br />
regard to alignment of dle wood's fibers. TIle result is dlat most<br />
dowels will bave a fair amount of grain runout. It would be best, if<br />
possible, to make your own dowels, starting wim rough blanks<br />
split widl a froe from su-aight-grai.n stock. If you saw me blanks out,<br />
use stock widl velY little grain runout. You can make me dowels by<br />
turning dlem between centers on a ladle or wim a router fixture as<br />
described in Ken Well's article in fWW" #90. If conunercially made<br />
dowels are your only choice, look througb dle available selection<br />
carefully, pick dle velY best and be ready fo r many bending failures.<br />
As widl conU1lercial wood bending, you will need a steamer and<br />
end su-aps to prevent fa ilure on me exterior of dle bends (see my<br />
article on bending green wood in fWW" #64). You may find dlat<br />
you'll bave to make me center bent section of each rod much dunner<br />
man your diagram illusu-ates -perhaps % in. duck. If your<br />
bends fail, consider lanunating me rods from several dUIUler sections.<br />
Once you do succeed, dle bends can be held in place by<br />
tying me ends wim wire or string for an hour after steaming.<br />
[Drew Langsner is an audlor, farmer and woodworker living in<br />
Marshall, N.C.]<br />
Gluing rosewood veneer<br />
I am having difficulty applying rosewood veneer to a particleboard<br />
substrate. I first wipe the rosewood <strong>with</strong> lacquer thinner<br />
and then coat both surfaces <strong>with</strong> three layers of Constantine's<br />
veneer glue. After several days, I had numerous bubbles develop<br />
where the rosewood veneer separated from the substrate. I have<br />
been told to treat the rosewood <strong>with</strong> two coats of veneer glue<br />
diluted <strong>with</strong> thinner so that the solution will soak into the<br />
pores and prevent leeching. Another suggestion I've heard is to<br />
size the rosewood <strong>with</strong> a 50150 mixture of wood glue and water.<br />
Wouldn't this cause severe buckling? Also, since the wood<br />
glue is water based and the veneer glue is thinner based, would<br />
the bond hold?<br />
-Brian Hayward, Huntington, N.Y.<br />
George Mustoe replies: Areas of delamination (bubbles) are a<br />
radler conU1lon problem when contact adhesives are used for veneering.<br />
These glues remain somewbat flexible after curing, and<br />
have relatively low strengm. In particular, contact adhesives are<br />
velY vulnerable to "creep." Under continual sU-ess, dle rubbelY<br />
glue layer su-etches and eventually gives way. Wim veneers, dle<br />
most conUTIon fo rm of stress is shrinkage or swelling due to hulTudity<br />
changes, but delamination problems can also occur when<br />
veneer has been bent to follow a curved surface. These problems<br />
tend to be greatest widl dUck veneers, which shrink and well<br />
more and contain greater stored sU-ess if dley are applied to a<br />
curved surface. In addition, oily woods like rosewood and teak are<br />
more susceptible to glue bond failure man less resinous species.<br />
The advice you received of using a solvent to remove excess<br />
oil from dle rosewood is a good one, but as you've discovered, it<br />
may not do dle u-ick. Similarly, treating me wood wim diluted<br />
adhesive or some other sealer can be helpful, but don't expect<br />
any miracles. Instead, consider using a different type of adhesive.<br />
You need a glue mat contains no water, since moisture is likely<br />
to cause me veneer to buckle during curing. You also want an<br />
adhesive mat sets to form a rigid, creep-free bond. The best dlOice<br />
would be one of me common woodworking epoxies mat sell for<br />
about 20 to 30 a quart. Some formulations are sold expressly for<br />
Shape a Career in Wood<br />
Looking for a career that rewards creativity<br />
and traditional skills? Investigate the _ .....<br />
School for Professional Craftsl We<br />
offer a two-year certificate program<br />
in W oodworking, Metals, Clay, or<br />
Fiber Arts. For more information,<br />
call or write for our Professional<br />
Crafts catalog.<br />
Worcester<br />
Center for Crafts<br />
Dept. FW<br />
25 Sagamore Rd.<br />
Worcester, MA<br />
01605<br />
5081753-8183<br />
[] RAISED<br />
PANEL<br />
DOORS<br />
READER SERVICE NO. 20<br />
Also Available:<br />
Ready To Assemble<br />
Cabinets For The<br />
Kitchen, Bath and<br />
Other Rooms.<br />
V' Check Out Our Features<br />
.. Superior Quality .. Great Prices<br />
.. Fast Delivery<br />
.. 25 Door Designs .. B Wood Species<br />
.. No Order Too Small .. Dratver Fronts<br />
Order our brochure. please enclose S 1.00 for shipping.<br />
c, --" SCHERR'S<br />
• ../ Minot.<br />
\CABINETS<br />
.. Made To Your Size<br />
ill<br />
E<br />
•<br />
" Hwy. 2 East, Rt. #5, Box # 12<br />
ND 58701<br />
(701) 839-3384 Fax (701) 85 2-6090<br />
READER SERVICE NO. 153<br />
Clayton Oscillating<br />
Spindle Sanders.<br />
For large or small<br />
shops. Ideal for contour<br />
sanding, Quick<br />
change drums. %"<br />
to 4". Satisfaction<br />
guaranteed. Covered<br />
by 1 yr. warrantee.<br />
4 models to<br />
choose from. For<br />
more information<br />
write:<br />
Clayton Machine Corp.<br />
p.o. Box 513, Clawson MI 48017<br />
313-548-2380<br />
Made In U.S.A.<br />
READER SERVICE NO. 102<br />
A good miter<br />
is hard to find.<br />
Made in<br />
New England<br />
Now you<br />
know where<br />
to look!<br />
POOTATUCK CORPORATION<br />
P.O. Box 24, Dept. FW923<br />
________________________<br />
Windsor, VT<br />
______________________ __<br />
05089 (802) 674-5984<br />
_<br />
Name<br />
Address<br />
City/State/zip<br />
READER SERVICE NO. 12<br />
The Dado World's Head Finest<br />
Your Clean Grooves! Cuts All<br />
"No tearout on all<br />
five woods tested"<br />
'See Fine Woodworking, Julyl<br />
August. 1991. p. 59<br />
SPLINTERING <br />
:,u;·mc:;.,f!.<br />
•<br />
NO PERFECT FLAT<br />
BOTTOM GROOVES -<br />
not staggered steps or round bottoms like a wobble-dado leaves!<br />
CUTS IN ALL DlRECTIONS -<br />
•<br />
rip. cross-cut. miter. any depth.<br />
CUTS ALL SIZEO GROOVESy,<br />
thru Vi," increments. .005" lft in (Set of plastic<br />
SUPER-HARD CARBIDE -<br />
I<br />
,aat<br />
gives up to 300%<br />
longer<br />
life. especially good<br />
on woods<br />
adjUSling<br />
and<br />
shims included).<br />
ply abrasive panicle-boards,<br />
Here is why this C-4 Carbide Tips- 24 ••<br />
Oa"o H d on each saw blade-<br />
r., U, ea<br />
twice as many as most<br />
as no equal! competitors.<br />
SPECIAL<br />
4 on each chipper. <strong>with</strong><br />
SALE!<br />
TeETH TEETH TEETH<br />
8"u{re TEETH TEETH<br />
special face hooks.<br />
1/1 .., 4 1/1 .., 4 1/1 >< 4 1/1 >< 4 1/1e >< 4<br />
1ftOlo v-Ie orF.' Bore<br />
SALE $269<br />
10"-1"<br />
rl<br />
List $362<br />
SALE $325<br />
Amex, Visa & FORREST MANUFACTURING COMPANY, INC. We honor Masttr<br />
461 River Road, Clifton, N.J. 07014<br />
TO ORDER<br />
Card. Money Orders, Personal<br />
In NJ:<br />
PHONE TOU FREE!<br />
Chetks and COO's,<br />
(201)473-5236 FAX: (201)471-3333 Dopl. FW ''''''"..<br />
C-4CarbideTips-<br />
l7'\biStSSI .QiQ<br />
1 (800)733-7111 :,\::::;;::.:';,::<br />
READER SERVICE NO. 143<br />
32 Fine Woodworking
I<br />
;.W"HOLE EARTH ACCESS<br />
822 ANTHONY STREET' BERKELEY' CA' 94710'*<br />
ERRORS SUBJECT TO CORRECTION'<br />
FOB BERKELEYCA TOLL FREE 7 DAYS<br />
FREE FREIGHT IN CONTINENTAL USA' I· 800· 829· 6300<br />
ViSA'DiSCOVER'MASTERCARD<br />
330<br />
Speed-Bloc<br />
Finishing<br />
Sander<br />
58,<br />
PORTER CABLE<br />
666 3/8" VSR T-Handle Drill 120.<br />
7511 3/8" VSR H.D. Drill 114.<br />
7514 1/2" VSR H.D. Drill 119.<br />
7515 1/2" VSR H.D. Drill W/<br />
Keyless Chuck 124.<br />
320 Abrasive Plane 119.<br />
367 3-1/4" Plane 149.<br />
91 18 Porta-Plane Kit 199.<br />
9652 Versa-Plane Kit 295.<br />
555 Plate Joiner Kit 165<br />
100 7/8 HP <strong>Router</strong> 99.<br />
690 1-1/2 HP <strong>Router</strong> 129.<br />
691 1-1/2 HP D-Handle <strong>Router</strong> 139.<br />
693 1-1/2 HP Plunge Base <strong>Router</strong> 169.<br />
7310 Laminate Trimmer 85.<br />
7312 Dffset Base Laminate Trimmer 119.<br />
7319 Tilt Base Laminate Trimmer 105.<br />
7399 Drywall Cut-DutTool 79.<br />
7518 3-1/4 HP 5-spd <strong>Router</strong> 269.<br />
7519 3-1/4 HP <strong>Router</strong> 225.<br />
7536 2-1/2 HP <strong>Router</strong> 204.<br />
7537 2-1/2 HP D-Handle <strong>Router</strong> 215.<br />
7538 3-1/4 HP Plunge <strong>Router</strong> 229.<br />
7539 3-1/4 HP VS Plunge <strong>Router</strong> 269.<br />
97310 Laminate Trimmer Kit 189.<br />
352 3"x21" Dustless Belt Sander 139.<br />
360 3"x24" Dustless Belt Sander 179.<br />
362 4"x24" Dustless Belt Sander 189.<br />
504 3"x24" Wormdrive Belt Sander 329.<br />
505 1/2 Sheet Finishing Sander 115.<br />
7334 5" Random Drbit Sander 119.<br />
7335 5" VS Random Orbit Sander 129.<br />
7336 6" VS Random Orbit Sander 135.<br />
314 4-1/2" Trim Saw 135.<br />
315-1 7-1/4" Top Handle Circular Saw 115.<br />
345 6" Saw Boss Circular Saw 99.<br />
7549 VS, Var-Orbit D-Handle Jigsaw 135.<br />
9345 Saw Boss Kit 124.<br />
9637 VS Tigersaw Kit 139.<br />
9647 Tiger Cub Reciprocating Saw 115.<br />
BOSCH<br />
.<br />
3050VSRK<br />
3/8" Cordless<br />
Driver/Drill,<br />
2bat. -<br />
L---- <br />
-<br />
3051 VSRK Cordless Driver/Drill<br />
w/keyless chuck 149.<br />
l000VSR 3/8" VSR Drill, 0-2100 RPM 79.<br />
1021VSR 3/8" H.D. VSR Drill,<br />
0-1100 RPM 99.<br />
1194VSR 1/2" VSR Hammer Drill 159.<br />
9164VSR 3/8" Mighty Midget<br />
VSR Drill 105.<br />
9166VSR 1/2" Mighty Midget<br />
VSR Drill 115.<br />
1347A 4-1/2" Mini Grinder 89.<br />
1348AE 5" EFC Mini Grinder 115.<br />
11202 1-1/2" Rotary Hammer 419.<br />
11212VSR 3/4" VSR SDS Bulldog<br />
Rotary Hammer 195.<br />
11215DVSR 3/4" Dustless Bulldog<br />
VSR SDS Hammer 289.<br />
11304 Brute Breaker Hammer 1205.<br />
11305 Demolition Hammer 689.<br />
3258 3-1/4" Planer 129.<br />
1942 Heavy Duty Heat Gun 72.<br />
1604 1-3/4 HP <strong>Router</strong> 129.<br />
1606 1-3/4 HP D-Handle <strong>Router</strong> 155.<br />
1608LX Laminate Trimmer w/<br />
Deluxe Guide 105.<br />
1608T Tilt Base Laminate Trimmer 105.<br />
1609 Offset Base Laminate Trimmer 125.<br />
1609K Installers Trimmer Kit 179.<br />
1609KX Deluxe Installers Trimmer Kit 229.<br />
1611EVS 3-1/4 HP EFC<br />
VS Plunge <strong>Router</strong><br />
239.<br />
12720 3"x24" Dustless Belt Sander 175.<br />
12730 4"x24" Dustless Belt Sander 185.<br />
1273DVS 4"x24" VS Dustless<br />
Belt Sander<br />
199.<br />
1370DEVS 6" VS Random<br />
Orbit Sander w/Access. 299.<br />
32700 3"x21" DustleSS Belt Sander 139.<br />
3283DVS 5" Dustless Random<br />
Orbit Sander 95.<br />
1581DVS<br />
1582VS<br />
1581VS<br />
VS, Var. Orbit Jigsaw, Dustless 159.<br />
VS, Var.Orbit Jigsaw w/CLIC 135.<br />
VS, Var.Orbit Jigsaw.<br />
D-Handle 135.<br />
1632VSK VS Panther Recip. Saw Kit 145.<br />
1654 7-1/4" Circular Saw 109.<br />
1420VSR VSR Drywall Driver,<br />
MILWAUKEE<br />
0-4000 RPM 85.<br />
0399-1 3/8" VSR 12v DriverIDrili Kit 159.<br />
0402-1<br />
VSR 12v Driver/<br />
Drill w/Keyless Chuck 163.<br />
6546-1 Cordless Screwdriver, 2-spd 75.<br />
0222-1 3/8" VSR Drill, 0-1000 RPM 104.<br />
0224-1 3/8" Magnum Holeshooter,<br />
0-1200 RPM 110.<br />
0234-1 1/2" Magnum Holeshooter,<br />
0-850 RPM 112.<br />
0239-1 VSR Keyless Chuck Drill 119.<br />
0244-1 1/2" Magnum Holeshooter,<br />
0-600 RPM 112.<br />
0375-1 3/8" Close Quarter Drill 125.<br />
0379-1 1/2" Close Quarter Drill 149.<br />
0567-1 Drain Cleaner Kit 229.<br />
1676-1 Hole Hawg Kit 235.<br />
3002-1 Electricians Rt. Angle Drill Kit 182.<br />
3102-1 Plumbers Rt. Angle Drill Kit 185.<br />
3107-1 VS Right Angle Drill Kit 190.<br />
5192 Die Grinder, 4.5 Amp 169.<br />
6140 4-1/2" Angle Grinder<br />
6141 5" Angle Grinder 109.<br />
1" TSCR Hawk Rotary Hammer 275.<br />
8975 Heat Gun 59.<br />
5680 2 HP <strong>Router</strong> 219.<br />
5925 3"x24" Dustless Belt Sander 219.<br />
5936 4"x24" Dustless Belt Sander 225.<br />
5362-1<br />
95.<br />
6012 1/3 Sheet Finishing Sander 114.<br />
6014 1/2 Sheet Finishing Sander 117.<br />
6016 1/4 Sheet Finishing Sander 49.<br />
6215 16" Electric Chainsaw 169,<br />
6232 4-3/4" Bandsaw w/Case 275.<br />
6365 7-1/4" Circular Saw 118.<br />
6377 7-1/4" Wormdrive Saw 169.<br />
6460 10-1/4" Circular Saw 249.<br />
6528 VS Super Sawzall 169.<br />
6750-1 VSR Drywall Driver 89.<br />
6754-1 VSR Magnum Drywa ll 119.<br />
6798-1 TEK Screwdriver 109.<br />
FREUD<br />
LM72MOO8 8" x 24T Rip 35.<br />
LM72M010 10" x 24T Rip 36.<br />
LU73M010 10" x 60T ATB 43.<br />
LU81M010 10" x 40T TCG 39.<br />
LU84M008 8" x 40T Combination 44.<br />
LU84MOl l 10" x 50T Combination 38.<br />
LU85M008 8" x 64T ATB Fine Cut Off 49.<br />
LU85M010 10" x 80T ATB Fine Cut Off 55.<br />
LU85M014 14" x 108T ATB Fine Cut Off 105.<br />
LU85M015 15"x l08T ATB Fine Cut Off l05.<br />
LU87M008 8" x 22T Thin Kerf 42.<br />
LU87M010 10" x 24T Thin Kerf 37.<br />
LU88MOO8 8" x 48T Thin Kerf 49.<br />
LU88M010 10" x 60T Thin Kerf 43.<br />
LU91MOO8 8-1/2" x 48T Miter Saw Blade 38.<br />
LU91 M010 10" x 60T Miter Saw Blade 49.<br />
LU98M010 10" x 80T TCG 68.<br />
TK203 7-1/4" x 24T Framing Blade 18.<br />
TK204 8-1/4" x 24T Framing Blade 21 .<br />
TK303 7-1/4" x 40T Finish Blade 21 .<br />
TK304 8-1/4" x 40T Finish Blade 27.<br />
SD308 8" Dado Set 117.<br />
WC106 6 Pc. Chisel Set 49.<br />
FT2000 3-1/4 HP Plunge <strong>Router</strong> 179.<br />
90-100 15 Pc. <strong>Router</strong> Bit Set 159.<br />
ADJUSTABLE CLAMP<br />
50 3/4' Pipe Clamp Fixture<br />
37060 Steel Bar Clamp<br />
3712 12' Steel Bar Clamp<br />
3711 18' Steel Bar Clamp<br />
3724 24' Steel Bar Clamp<br />
3730 :Jl" Steel Bar Clamp<br />
3736 36" Steel Bar Clamp<br />
o Wooden Handscrew,<br />
4-1/2' Open<br />
Wooden Handscrew,<br />
6' Open<br />
2 Wooden Handscrew,<br />
8' Open<br />
DELTA<br />
22-540<br />
12" Portable<br />
Planer 399.<br />
EA.<br />
7.115<br />
EA.<br />
1.48<br />
1.99<br />
7.15<br />
1.38<br />
9.55<br />
10.39<br />
11.95<br />
12.96<br />
15.95<br />
80X/12<br />
..<br />
80X/6<br />
36.55<br />
39.15<br />
42.99<br />
53.45<br />
47.15<br />
58.15<br />
62.95<br />
71.49<br />
81.89<br />
UNISA W. SHAPER,<br />
JOINTER & FINISHING MACHINE SALE!<br />
34-763 10", 3 HP Unisaw, 1 PH 1359.*<br />
34-781 10", 1-1/2 HP Unisaw/<br />
Unifence 1329.*<br />
34-782 10", 3 HP Unisaw/<br />
Unifence, 1 PH 1499.*<br />
31 -730 6" Belt/l2" Disc w/Electricals 939. *<br />
37-350 8" Long Bed<br />
Jointer w/Electricals 1239.*<br />
43-375 3 HP HD Two-Speed Shaper1459.*<br />
(Prices include $100. mfg. mail-in rebate,<br />
good thru 3/31/92)<br />
AM39HC4V<br />
3/4 HP Vertical<br />
Twin Tank<br />
289,<br />
MAKITA<br />
6095DW<br />
:-I<br />
3/8" VSR<br />
Cordless<br />
Driver/Drill w/<br />
K,yl,,, Ch"" 145.<br />
DA390D Cordless Angle Drill, 9.6v 85.<br />
5090DW 3-3/8" Saw Kit, 9.6v 139.<br />
6093DW 3/8" VSR DriverIDrili Kit, 9.6v 129.<br />
6200DW 3/8" VSR Hi-Torq Driver/Drill Kit155.<br />
6404 3/8" VSR Drill, 0-2100 RPM 58.<br />
9207SPC 7" Electronic Sander Polisher 148.<br />
1805B 6-1/8" Planer w/Case 355.<br />
READER SERVICE NO. 14<br />
MAKITA cont'd<br />
1900BW 3-1/4" Planer Kit 112.<br />
1911B 4-3/8" Planer Kit 145.<br />
B04510 1/4 Sheet Finishing Sander 52.<br />
B04550 1/4 Sheet<br />
Dustless Finishing Sander 57.<br />
9401 4"x24" Dustless Belt Sander 164.<br />
9900B 3"x21" Dustless Belt Sander 145.<br />
LS1011 10" Compound Miter Saw 449.<br />
LS1030 10" Miter Box 229.<br />
LSl440 14" Miter Saw 435.<br />
4200N 4-3/8" Trim Saw 129.<br />
5077B 7-1/4" Hypoid Framers Saw 139.<br />
5402A 16" Circular Saw 325.<br />
2012 12" Portable Planer 455.<br />
2708W 8-1/4" Table Saw 265.<br />
2711 10" Table Saw w/Brake 475.<br />
RSl15<br />
4-1/2" VS<br />
Random Orbit<br />
Sander<br />
75 ,<br />
RYOBI<br />
TFD220VRK 12v Cordless Drill Kit 165.<br />
L1323ALSK 3-1/4" Planer Kit,<br />
Long Base 119.<br />
JM100K Biscuit Joiner Kit 209.<br />
RE600 3 HP VS Plunge <strong>Router</strong> 205.<br />
TR30U Laminate Trimmer 88.<br />
BE321 3"x21" VS Belt Sander 129.<br />
BE424 4"x24" VS Belt Sander 168.<br />
TS254 10" Miter Saw 198.<br />
AP10 10" Portable Planer 359.<br />
BT2500 10" Table Saw 298.<br />
BT3000 10" Sliding Table Saw 569.<br />
JP155 6-1/8" VS Jointer 299.<br />
RA200 8" Radial Arm Saw 245.<br />
HITACHI<br />
M12V 3 HP VS Plunge <strong>Router</strong> 235.<br />
Cl0FA Deluxe 10" Miter Saw 275.<br />
C15FB 15" Miter Saw 379.<br />
C7BD 7-1/4" Circular Saw, Elect. Brake 135.<br />
W6V2 VSR Quiet Drywall Screwdriver 89.<br />
P12RA Portable 12" Planer/<br />
6" Jointer Combo 829.<br />
HITACHI NAIL GUNS<br />
NR83A Full Head Stick Nailer<br />
NV83A Full Head Coil Nailer<br />
N5008AA 1/2" Crown Stapler, 5/8" - 2"<br />
N3824AR 1" Crown Roofing Stapler<br />
NT65A 16 Ga. Finish Nailer 3/4'-2-1/2'<br />
2735-08<br />
77<br />
5860<br />
3810<br />
1605-02<br />
SKIL<br />
3/8" VSR 12v<br />
Cordless Drill Kit, w/2 Bat.<br />
7-1/4" Wormdrive Saw<br />
8-1/4" 600 Wormdrive Saw<br />
10" Miter Saw<br />
Plate Joiner Kit<br />
419.<br />
429.<br />
319.<br />
329.<br />
319.<br />
135.<br />
145.<br />
169.<br />
225.<br />
119.<br />
March/April 1992 33
Q & A (continued)<br />
use widl oily woods, but any of me standard brands should give<br />
good results for veneering, such as System lhree, West System,<br />
Suncure and Armstrong NB (check wim your local hardware store<br />
and building or boating supply for sources).<br />
However, epoxy is considerably less convenient to use man a<br />
contact adhesive. You'll need to devise a way to apply even<br />
clamping pressure and a defensive strategy for coping wim<br />
messy squeeze-out. It helps to apply dle epoxy dlinly and to<br />
have rubber gloves and lots of rags. Use denatured alcohol during<br />
cleanup, not acetone (which is extremely flat1Ul1able) or<br />
mematl01 (which has very toxic vapors mat pass right d1fough atl<br />
orgatlic-vapor respirator). As a reward, mough, you should get a<br />
glue bond mat lasts forever.<br />
[George Mustoe is a geochemistry research techniciatl at Western<br />
Washington University in Bellinghatn, Wash.]<br />
Identifying an old tenon maker<br />
Everyone loves a mystery, even woodworkers. Recently, I ran<br />
across an antique hand tool I can't identify. The tool is about<br />
lO in. tall <strong>with</strong> a square, tapered drive shank, obviously made<br />
to be chucked in a hand brace. The tool has an intricate camadjustment<br />
mechanism for increasing or decreasing the size<br />
of the opening on its bottom and a pencil-sharpener-like<br />
blade offset to the side, probably for the purpose of peeling off<br />
wood. The tool bears the trademark CN. Stearns and has a<br />
patent number stamped on it. Can anyone tell me what this<br />
tool was used for? -John A Macdonald, Los Osos, Cal.<br />
Richard Starr replies: It's a hollow auger, made for cutting a<br />
round tenon on dle end of a stick. They were used by wheelwrights,<br />
chairmakers, laddermakers and omer artiSatls who prefen-ed<br />
to cut tenons wim a tool mounted in a brace ramer man<br />
whinling mem out by hand or turning mem on a lame. The advantage<br />
of a hollow auger is mat once it is set up correctly, it can<br />
quickly and repeatedly chew out accurate-size tenons. A disadvantage<br />
is mat if you are careless while using me tool, you can<br />
cut a tenon tllat is not parallel to me axis of tlle part. But if you<br />
happen to want a tenon mat is off-axis, for example, to correct<br />
for an inaccurately bored rung hole in a chair leg, a hollow auger<br />
may be me only tool tllat can easily do me job.<br />
Your Stearns' adjustable hollow auger is one of me matlY clever<br />
designs mat Catl cut tenons atlywhere berween % in. to 11,14 in.<br />
atld lat.-ger. Fixed-size hollow augers, most of which carry rwo<br />
cuners, were also made around tlle same time. Though the<br />
fixed-size tool is designed to cut a specific diatl1eter, me blades<br />
Catl be moved to give a tighter or looser fitting tenon. Bom styles<br />
are easy to find at flea markets or mrough dealers of old tools.<br />
To use me tool, first prepare me part for tenoning by chamfering<br />
its end until it just fits in me mroat of me hollow auger. You<br />
can do mis wim a drawknife or spokeshave, but it's easier wim a<br />
spoke pOinter, which is a cone-shaped tool mat fits in a brace<br />
atld works like one of tllose pencil sharpeners kids carry in their<br />
notebooks. You Ca.t1 find detailed suggestions for using hollow<br />
augers in my book Woodworking <strong>with</strong> Your Kids published by<br />
The Taunton Press.<br />
[Richard StatT is a teacher and aumor living in Thetford Center, Vt.]<br />
Flattening a surface <strong>with</strong> a handplane<br />
Please explain how it is possible to obtain a flat surface <strong>with</strong><br />
a hand plane.<br />
-James L. Dunlap, Hartsville, S. C<br />
Lance Patterson replies: To accomplish mis task, me board<br />
or panel must be supported well enough so mat it doesn't flex<br />
or rock from me action of me handplane. Also, the tightening of<br />
Welve helped hold it together ... Since 1903<br />
II Joraenset'\ I<br />
"Pol\y':<br />
'Adjustable',·<br />
Quality in our products ...<br />
dedication in our service. We've held<br />
to these commitments just as you've<br />
held up our Clamps and Vises as<br />
your standards to each new<br />
generation since 1903. We'll<br />
continue to hold consistently<br />
to our traditions of excellence.<br />
Write for our Catalog SEND $1 .00<br />
Adjustable Clamp Company<br />
431 N. Ashland Avenue. Chicago. IL 60622<br />
READER SERVICE NO. 68<br />
34 Fine Woodworking
GO BACK<br />
to BAStCS<br />
... W\lHOUl lEAV\NG<br />
QUAlttl!<br />
BW-12P $ 399.<br />
BW-15P $ 895.<br />
BW-20P $1295.<br />
BW-200P' $2595.<br />
'U.S.A. motors.<br />
BW-16PV' $2495.<br />
BW-20PV' $3295.<br />
BW-508' $3995.<br />
BW-508G' $4595.<br />
BW-612PV' $6295.<br />
BW-612PVG' $6895.<br />
BW-1S BW-6S<br />
$ 329.95 $3795.<br />
SHAPERS<br />
(7 MODELS)<br />
BW-12JC'<br />
$2695.<br />
BWS-25 $ 6495.<br />
BWS-37 $ 9595.<br />
BWS-25VS $ 7095.<br />
BWS-37VS $10,295.<br />
BWS-13 $ 4995.<br />
BWS-25-2 $13,995.<br />
BWS-37-2 $17,100.<br />
SHIPPED F.O.B., YORK, PA.<br />
PRICES SUBJECT TO CHANGE WITHOUT NOTICE.<br />
READER SERVICE NO. 155<br />
March/April 1992 35
Q & A (continued)<br />
a vise or clamp can sometimes distort a board. If either of these<br />
conditions occur, your planing efforts will be futile. Therefore<br />
it's best to lay the piece on a bench positioned against stops in<br />
the direction you'll be planing. For rough lumber or glued-up<br />
panels that are cupped or twisted, I recommend you plane some<br />
stock off the offending corners or edges on the underside of the<br />
panel, to allow the work to sit well on the benchtop. I do not<br />
recommend the use of shims. I've seen many students fooling<br />
around <strong>with</strong> shims to keep a board from rocking, but they always<br />
seem to get poor results. It is much more efficient to spend<br />
a few minutes for localized planing on the reverse side.<br />
Generally, d1e priorities for flattening a surface are to first, get<br />
rid of wind (twist); second, cup (straighmess across d1e grain); and<br />
third, bow (straighmess along the grain). With the crowned surface<br />
up (cup downward) and the work well supported on the bench,<br />
correct any major twist <strong>with</strong> local planing on the high corners. Use<br />
a long plane, 22 in. or more, that's in good working order, <strong>with</strong> a<br />
flat sole and a sharp, su-aight cutting edge. The stiffness and length<br />
of the plane will not allow cutting in hollow areas. And d1e large<br />
sole of a plane that is held down well at the begilU1ing and end of<br />
each cut prevents dubbed or waning edges.<br />
Proceed <strong>with</strong> very systematic planing across the grain of the<br />
board to eliminate the crown and bow. Even the most difficult<br />
woods and grain patterns can be handplaned across the grain,<br />
and the motion and direction of the plane won't be dictated<br />
by any uneveness in the grain. Most often the plane should be<br />
lined-up perpendicular to the grain, but it may be skewed one<br />
way or another for a better cut in certain cases. If you have<br />
more than 31,6 in. of wood to remove, I recommend using a<br />
scrub plane across the grain. A scrub plane has a curved cutting<br />
edge that removes stock quickly; then it's easy to flatten<br />
d1e surface <strong>with</strong> your long plane.<br />
Systematic planing <strong>with</strong> overlapping passes will allow a 22-in.<br />
plane to read off of previous straight cuts to produce a flat surface.<br />
It is good to rurn d1e board and plane from the other edge<br />
after a few passes over the surface. Allow the plane to find d1e<br />
high spots by keeping the sole firmly on the surface.<br />
Normally boards are only planed wid1 the grain for d1e final<br />
smood1ing. You'll know the board is fairly flat if a large plane<br />
takes a fine shaving equally from everywhere on d1e entire surface.<br />
On some figured woods that have difficult grain patterns,<br />
the final smoothing wid1 d1e grain should be done wid1 a handheld<br />
scraper or scraper plane.<br />
You must remember that the surface you have flattened will<br />
not remain truly flat: It is the narure of wood to change <strong>with</strong><br />
humidity changes, so have realistic expectations. Perfection is a<br />
myth. Good joinery and construction practices, such as the use<br />
of frame-and-panel doors in cabinetry, are designed to hold<br />
boards flat.<br />
I take a lot of pride in my ability to plane even the most difficult<br />
woods flat. I truly enjoy the physical activity of planing large surfaces,<br />
and I agree wid1 Windsor chairmaker Mid1ael Dunbar d1at<br />
d1is is d1e best time to see d1e pristine beauty of the freshly sliced<br />
wood (a privilege of woodworkers). The handplane is an amazing<br />
tool. I hope you come to enjoy using it as much as I do.<br />
[Lance Patterson is the director of d1e furnirure and cabinetmaking<br />
program at d1e Ord1 Bennet SU-eet School in Boston, Mass.]<br />
Send queries, comments and sources of supply to Q&A, Fine<br />
Woodworking, PO Box 5506, Newtown, Conn. 06470-5506. We<br />
attempt to answer all questions, but due to tbe great number of<br />
requests received, tbe process can take several montbs .<br />
• WCUDCRAFT®<br />
UThe Leading Edge<br />
In Woodworking Tool.<br />
FREE Catalog Subscription<br />
features complete woodworking tool Our<br />
woodworking over of the finest<br />
_ " ...<br />
4,000<br />
supplies tools, books. and<br />
See the OJlleJU<br />
Some of your best tools are<br />
lost on your bookshelf ...<br />
. .. but now you can fmd them.<br />
III THE PC INDEX<br />
to<br />
Fine Woodworking'<br />
FWW is a reference work filled <strong>with</strong> information tools for your craft. Now<br />
use your PC to review the contents of all issues for titles, descriptions and<br />
authors of fe ature articles as well as for topics covered in the regular<br />
departments including Letters, Methods of Work, Questions and Answers and<br />
even Back Covers.<br />
Enter any keyword and in seconds search the entire index for a list of<br />
matching entries. For example, there are currently 52 entries found<br />
matching the keyword T ABLESA W and each entry describes the context<br />
and directs you to its corresponding issue and page. THE PC INDEX is<br />
arranged by issue and contains over 2400 entries covering more than 3500<br />
topics. You can also key in your new magazines to THE PC INDEX so that it<br />
is always up to date. No need to purchase updates. But if you don't type, you<br />
may purchase a complete update from us at any time for only $12.95.<br />
Special Bonus! The Taunton Press books containing articles reprinted<br />
from FWW are cross referenced in THE PC INDEX. From the magazine<br />
index, one keystroke directs you to the book and page of the reprint.<br />
READER SERVICE NO. 92<br />
Only $29.95 plus $3.50 P/H. Or mail check or money order (U.S. funds) to:<br />
(MA orders add $1.50 tax) THE PC INDEX, Meredith Associates<br />
Orders only call toll free 24 hrs., 7 days P.O. Box 792<br />
Westford, MA 01886-0792<br />
1-800-831-3200 r.;;;;;:;;;l1ZXSl e.J ffi FAX ORDERS (508) 392-0255<br />
Minimum system required: Any PC compatible computer <strong>with</strong> min. 512K memory. DOS 2.2 or later.<br />
Program enhanced <strong>with</strong> hard disk drive and/or color monitor. When ordering. please specify 5.25" or 3.5" diskettes.<br />
READER SERVICE NO. 128<br />
36 Fine Woodworking
Transform your angle grinder into a<br />
Random Orbit Sander.<br />
The Marshco Random Orbit Sanding Head lits onto any<br />
NORTHSTATE<br />
15" PLANERS<br />
a disc or<br />
This<br />
4"-5" angle grinder allowing you the speed 01<br />
belt sander and the control 01 an orbital sander.<br />
powertul sanding head combines orbital and spinning<br />
action at 10.000 orbits per minute leaving you <strong>with</strong> no<br />
cross grain scratch. swirl or hook marks and no corner<br />
$59.95<br />
edge round-oft. The exclusively patented Marshco Random<br />
Orbit Sanding Head has rugged ball-bearing construction<br />
and adapts to any surlace. Suggested retail:<br />
·53 Vrsa accePled<br />
stuPPlng and handling<br />
and MasterCard<br />
When plaCIng order Indicate<br />
make model or thread<br />
•<br />
size<br />
• RFD 2 Bx 490 Brooks. Maine 04921 (207) 722·3523<br />
''All my tools<br />
should liB this<br />
goodl"<br />
The Accu-Mite<br />
miter<br />
is a professional<br />
makes<br />
gauge<br />
perfect<br />
that<br />
Shot-pin<br />
angles<br />
action<br />
easily.<br />
assures<br />
accuracy<br />
dead-on<br />
common angles<br />
for<br />
plus a precise<br />
-<br />
protractor<br />
everything<br />
scale for<br />
between!<br />
in<br />
Optional accessories:<br />
manual clam<br />
pneumatic clam<br />
3/8" x 3/4" miter bar-<br />
Call or PI'ecision Woodwol'king Equipment<br />
800 Dutch Square Blvd., Suite 200, Columbia, SC 292 I 0<br />
1-800-382-2637 / SC 803-798-1600<br />
write for<br />
our free<br />
brochure.<br />
LENEAVE QUALITY-SINCE 1957<br />
READER SERVICE NO. 85<br />
NORTHSTATE<br />
WIDE BELT SANDER<br />
NORTHSTATE PLANERS NORTHSTATE<br />
MOULDERS<br />
8" CABINET<br />
SHOP JOINTER<br />
NORTHSTATE<br />
DUST COLLECTORS<br />
• Model 310: 5779<br />
• Powerful 3 hp motor<br />
• Cast iron construction<br />
•<br />
o<br />
Magnetic switch<br />
• 1 year warranty<br />
• Dust hood<br />
Anti-kickback<br />
• Stand included<br />
NORTHSTATE<br />
10", 11'. 14" CABINET<br />
SHOP SAWS<br />
• BIESEMEYER, VEGA,<br />
EXCALIBUR<br />
fences available<br />
•<br />
o<br />
3, 5, 7-112 hp motors<br />
• Magnetic controls<br />
• Cast iron top<br />
Uni-Iock fence<br />
o<br />
• VERY HIGH QUALITY<br />
$I,125w/std<br />
fence<br />
• $1,225<strong>with</strong> 50" rip fence<br />
• HTC MOBILE BASES<br />
o Model 315: $849<br />
• Same features as the<br />
Model 310 plus:<br />
• Table extension<br />
• 2 speeds<br />
NORTHSTATE CABINET<br />
SHOP SHAPER<br />
• 3 hp/1 ph, 5 hp/3 ph<br />
• 2 speed-reversible<br />
• 2 spindles: 3/4", 1-1/4·<br />
o<br />
• 1/2", 1" available<br />
<strong>Router</strong><br />
collets avail.<br />
• Cast iron table<br />
• Spring hold down &<br />
miter gauge<br />
• Extra heavy duty<br />
• 1 year warranty<br />
• $1.095<br />
• FREE FREIGHT<br />
• Tilt spindle model avail.<br />
*** FREEBORN***<br />
Shaper cutters available<br />
o 20", 5 hp: $1.350<br />
• 24·, $2.795<br />
• 5 hp & 7-1/2 hp<br />
NORTHSTATE<br />
BANDSAWS<br />
• 14·, 1 hp: $295<br />
• 18", 2 hp: $795<br />
• 20": $1.495<br />
• 24": $2.465<br />
• Heavy cast iron const.<br />
• 2 hp, single phase<br />
•<br />
o<br />
9· x 67" bed<br />
• 3 knife cutter head<br />
• Dual tilt fence<br />
Magnetic controls<br />
o<br />
• SALE: $795<br />
• 6" jointer: $375<br />
12" jointer. $1.895<br />
Delta 8" jointer. CALL!<br />
PORTER CABLE HITACHI<br />
555: Plate Jointer: $163<br />
CI5FB: Mitre Saw: $J68<br />
330: Sander: $53<br />
C8FB:<br />
360: Sander: $174<br />
C omp.Mltre: ' $439<br />
TR-12: PI. <strong>Router</strong>: $169<br />
505: Sander $108<br />
9505: Commemorative 505: $129 F20A: Plane: $97<br />
351: Sander: $124<br />
CCI4: Chop saw: $196<br />
0100:<br />
352: Sander: $128<br />
Cordless Drill: $114<br />
363: Sander: $174<br />
CB75F: Re/band-saw: CALL<br />
362: Sander: $179 MI2V: 3 1/4 hp, vs router: $228<br />
361: Sander: $166 DEWALT<br />
7549: VS jigsaw: $134<br />
9627: Rec. Saw: $127<br />
7519: <strong>Router</strong>: $224<br />
7538: <strong>Router</strong>: $224<br />
690: <strong>Router</strong>: 5124<br />
630:<br />
•<br />
<strong>Router</strong>: $118<br />
314: Saw: $124<br />
315: Saw: $114<br />
7749: Radial Arm Saw: $625<br />
7770-10: Radial Arm Saw: $865<br />
7790: Radial Arm Saw: 51147<br />
1765: Belt/Disc Sander: $427<br />
AU •<br />
Oewalt Ind. radial arm saws available<br />
<strong>Free</strong>born Shaper Cutters<br />
Mini-Max Machinery<br />
• Four and Five Head Models<br />
• Variable speed<br />
• All cast-iron construction<br />
• 2-1/4· x 6· capacity<br />
• Designed to make high<br />
quality moulding at the<br />
lowest possible cost<br />
RAISED PANEL<br />
DOOR MACHINE<br />
• Adjustable Clamps UNIOUE M h' II f<br />
9118: Plane Kit: $185<br />
. . ***PORTER CABlE*** components : ac one a Ive<br />
With only one<br />
97310: Lam. Trim KIt: $184<br />
7334: Orbital Sander: $117<br />
complete line available 0 erator<br />
5116: Omnijig $262 LENEA VE MACHINERY & SUPPL Y COMPANY<br />
305 West Morehead St., Charlotte, NC 28202 (704) 376-7421; Toll free outside NC 800-442-2302<br />
•<br />
p<br />
•<br />
o<br />
Best buy in the industry!<br />
• Variable speed<br />
• Platen head<br />
2 hp, 2 bag: S295<br />
Dual motors<br />
3 hp, 4 bag: S485<br />
• Heavy cast iron & steel SENCO<br />
• Plate construction<br />
• 10, 15, & 20 hp SN4 .....................<br />
o $475<br />
25· List: $8,650<br />
SN325 ................. $399<br />
• SALE: $5,895, 15 hp<br />
SFN2 ................... $386<br />
37" List: $1 2,900<br />
SFN1 ................... $264<br />
• SALE: $8,888 ,20 hp SKS ..................... $254<br />
: h!S ovr * aail LS2 ...................... $249<br />
MINI MAX LS5 $259<br />
MACHINERY* • PW ...................... $345<br />
* * * * * * * * * * * EMGL0 1-1/2 HP<br />
£ A e LTA<br />
compressor ..........<br />
£ C $298<br />
34-782: Unisaw & All models - Call for promo prices<br />
46-541 : Lathe: Call for promo price<br />
43-375: Shaper: Call for special<br />
40-560: 16· Scroll Saw NEW!: S185<br />
40-601: Scroll Saw - CALL!<br />
31-730: Belt/Disc Sander: - CALL!<br />
37-350: 8" Jointer w/sta nd: - CALL!<br />
34-444: 10· Contr. Saw: $595<br />
34-445: 10" w/Unifence - CALL!<br />
28-283: 14· Bandsaw - CALL!<br />
28-245: 14" Bandsaw w/a ccess:<br />
17-900: 16-1/2" Drill Press: - CALL!<br />
43-355: Shaper NEW!<br />
33-990: 10· Radial Arm Saw: $549<br />
36-755: Tilt arbor saw NEW!<br />
32-1 00: Plate Jointer - NEW! CALL!<br />
• BIESEMEYER<br />
• VEGA<br />
• EXCALIBUR<br />
• PARALOK<br />
• UNIFENCE<br />
fences available<br />
We try not to be undersold,<br />
tell us our competitors' prices.<br />
22-540: 12" planer NEW! - Call for promo price<br />
Stock feeders: 34-985, 34-994, 34-995 -Call for promo price<br />
**Complete Delta line available,**<br />
Marchi April 1992 37
NO MATTER HOW YOU CUT IT ••• YOU JUST CANIT BEAT THE SYSTEM.<br />
THE BT3000 IS MORE THAN JUST A TABLE SAW - IT'S AN ADVANCED CUTTING SYSTEM.<br />
AND THERE'S NOTHING LIKE IT ON THE MARKET. NOTH ING.<br />
PRECISELY WHAT<br />
YOU NEED<br />
THE BT3000 OFFERS<br />
UNMATCHED<br />
CISION IN A TABLE<br />
SAW. FOR INSTANCE,<br />
A<br />
UNIQUE SLIDING<br />
MITER TABLE<br />
PRE<br />
PRO<br />
VIDES THE CONTROL<br />
AND STABILITY YOU<br />
NEED TO MAKE PRE<br />
CISE CUTS. AN OVER<br />
SIZED MITER SCALE<br />
PERMITS PIN-POINT<br />
ACCURACY. AND AN<br />
ADJUSTABLE MITER<br />
FENCE ASSURES SMOOTH , EXACT CUTTING; CAN BE<br />
POSITIONED RIGHT NEXT TO THE BLADE. SPECIALLY<br />
DESIGNED LOCKER BRACKET MINIMIZES VIBRATION<br />
AND ENHANCES PRECISION.<br />
THE RIP FENCE HAS<br />
A UNIQUE LOCKING<br />
MECHANISM WHICH<br />
ASSURES PERFECT<br />
ALIGNMENT FOR<br />
PRECISION CUT<br />
TI NG. THE LOCK<br />
SECURES THE FRONT<br />
END OF THE FENCE<br />
INTO PLACE, AUTO<br />
MATICALLY BRING<br />
ING IT INTO ALIGNMENT, THEN CLAMPS THE BACK<br />
SECURELY ONTO THE REAR RAIL.<br />
POWERFUL<br />
PERFORMANCE<br />
A POWERFUL 13-AMP,<br />
2-HP MOTOR IS EN<br />
HANCED BY 1HE SMOOTH<br />
CUTTING CAPACITY OF<br />
A 3&TOOTH THIN-KERF<br />
CARBIDE TIPPED BLADE<br />
THAT WAS DESIGNED,<br />
TUNED AND BALANCED<br />
SPECIFICALLY FOR THE<br />
BT3000. THIS PREMIUM<br />
10' BLADE COMES STANDARD WITH THE BT3000 AND<br />
GLIDES EASILY THROUGH NOMINAL 4X4S.<br />
A MOVABLE BEAST<br />
THE BT3000 WORKS LIKE<br />
A BEAST ALL DAY. DIE<br />
CAST AND EXTRUDED<br />
ALUMINUM CONSTRUC<br />
TION MAKES TH IS TOOL<br />
TOUGH. AND IT WEIGHS<br />
ONLY<br />
SEVENTY -FIVE<br />
POUNDS, SO IT'S EASY TO<br />
MOVE AROUND THE SHOP<br />
OR JOB SITE, ESPE<br />
CIALLY WHEN EQUIPPED<br />
WITH THE OPTIONAL<br />
STAND AND CASTERS.<br />
LUMBER NOT INCLUDED<br />
SPECIAL DESIGN PERMITS MOVING THE MITER AND<br />
ACCESSORY TABLES TO EITHER SIDE OF THE BLADE,<br />
PROVI DING SUPPORT WHERE NEEDED FOR CUTTING<br />
LARGE BOARDS OR PA NELS. IN THIS CASE, THE<br />
MITER TABLE IS PLACED NEXT TO THE ACCESSORY<br />
TABLE, READY FOR RIPPING STOCK UP TO 30" WIDE.<br />
GREATER PRODUCTIVITY AND VERSATILITY<br />
THE B<br />
T3000 HAS A COMPLETE UNE OF OPTIONAL ACCES<br />
SORIES WHICH INCLUDE A WORK STAND, DUST COLLEC<br />
TION BAG, MITER CLAMPING KIT, DADO THROAT PLATE,<br />
WIDE TABLE KIT AND A LONG MITER/RIP rENCE KIT.<br />
ADAPTER KIT ACCOMMODATES MOUNTING A JIG SAW AND<br />
A ROUTER, TURNING THE SYSTEM INTO A COMPACT, SELF<br />
CONTAINED WooDSHOP THAT GOES WHERE YOU GO.<br />
SEE THE NEW<br />
NEAR YOU.<br />
BT3000 AT A QUALITY TOOL SUPPLIER<br />
RYOSI AMERICA CORPORATION, 1424 PEARMAN DAIRY RD., ANDERSON, SC 29625<br />
READER SERVICE NO. 105 © RYOBI AMERICA CORP. 1991
5"<br />
or<br />
6"<br />
'uAfiAj<br />
®<br />
Ra::C:t7s:'::DiSCS • 100<br />
5' N White Velcro discs 180 Grit $Zl.OO<br />
PREMIUM QUALITY BELTS: BEST RESIN OVER RESIN, "X" WEIGHT 10180x<br />
1112 I .70 ea. ea.<br />
4x 24 11.05<br />
3x 18 .71 4x li I.lJ<br />
3x21 .111 S.43 2.95<br />
S.89 1.1ll<br />
ADHESIVE CLOTH DISCS: BEST RESIN OVER RESIN, "X" WEIGHT<br />
5- . Diameter S ahc. 9" ea. SI.IIl<br />
• . 10" 2.111<br />
8" 1.40 12" 2.50<br />
Prices quoted II) grit. other grits available.<br />
GARNET PAPER - ORANGE WATERPROOF PAPER - BLACK<br />
AlO CABINET PAPER - BROWN 220 Ihm 1m! 1111 PK S23.111<br />
40 Gril 50PK IIS.III<br />
Gril 50PK It III NO LOAD PAPER - WHITE<br />
III Gril 50PK 13.111<br />
IlII lhrough 4Ill IIII PK S1lI.1II<br />
11II. 11lI.150 1111 PK 22.111 Also Sbop Rolls ' Cloth Sheets ' Drums<br />
1111.<br />
( 800)<br />
220<br />
822<br />
IIII P!(<br />
4003<br />
19.111<br />
CLEANING STICKS 13.50 Small 16.50 Large<br />
RED HILL CORP., P.O. BOX 4234, GETIYSBURG, PA 17325<br />
<strong>Free</strong> Freight to most areas<br />
-<br />
<strong>Free</strong> catalogue [II) <br />
READER SERVICE NO. 104<br />
3.24 .85<br />
QeurOptan 3Jmportdr<br />
arbWart<br />
<br />
"The setup is easy, adjustments<br />
minimal and the joints perfect.<br />
It's the easiest of all the jigs to<br />
use and great for production<br />
use ," - Woodworker's /oLimai<br />
"In a class by itself."<br />
- WOOD Magazine<br />
NEW VIDEO: $8.95 + $2 P /H<br />
No test cuts. Fast setup. Unlimited<br />
widths. Precision joinery. Classic and<br />
variable spacing. Compound angles.<br />
Curved dovetails. Box joints. 20 year<br />
warranty. Made in USA since 1976.<br />
To find out more, contact your Dealer or<br />
KELLER & CO.<br />
1327 I St., Dept. FW32<br />
Petaluma, CA 94952<br />
(707) 763-9336<br />
Keller Dovetail System<br />
Simply the best.<br />
Shop<br />
24" capacity<br />
Automatic Belt Tracking<br />
Quick Change 25x60 Belt<br />
Heavy Conveyor Feed<br />
Single Phase Standard<br />
Simple, Reliable, Fast<br />
Beautiful Finish<br />
A REAL AMERICAN MADE<br />
WIDE BEL T FOR A DRUM<br />
SANDER'S PRICE N.QW 3995,00<br />
... for the<br />
Small<br />
READER SERVICE NO. 205<br />
READER SERVICE NO. 108<br />
READER SERVICE NO. 15<br />
BEST PRICES ON SHAPER CUTTERS CALL TOOL FREE 1-800-243-0713<br />
<br />
By M MANNY'S WOODWORKER'S PLACE<br />
(gJ.. FREEBORN TOOL CO. FRO 602 South Broadway. Lexington. Kentucky 40508<br />
Hours: Mon.-Sat. 9·5:301VISA. MC. Disc .. Am. Exp .. Checks<br />
S po k ane, WA<br />
For Inquiries Call 606-255·5444<br />
FREE With any Cutter Order - Fine Diamond Sharpening Stick By Eze-Lap Diamond Com pany (Red Handle)<br />
. A. COPE AND PATTERN CUTTER SETS [6 Cutter Sel)<br />
For W' to 11/8" material; also for glass panel doors, T & G cutting<br />
Mini Pro Line 3/,' bore <strong>with</strong> '/," bushings<br />
Pro Line 1 '!. bore: bushing to I" available<br />
Carbide Tipped MC·50 series . . .. $269 per set Carbide Tipped PC·l0 series ... $345 per set<br />
Tantung Tipped MT·50 series ...... S2B5 per set Tantung Tipped PT·l0 series .. . S365 per set<br />
Bearing Rub Collar for the set ..... $38 Rub Collar Bearing for the set.. . . $45<br />
D. DOUBLE SIDEIT COPE AND PATTERN SETS (8 Cutter Sel)<br />
To cut 1'1," passage and PI ..' enlry doors<br />
Mini Pro Line 'I. bore<br />
Carbide Tipped MC·5' series .... $390 per set<br />
Tanlung Tipped MT·51 series .. ......... $410 per set<br />
Rub Collar Bearing . . $39<br />
Pro Line 1 'I. bore. bushings to 1" available<br />
Carbide Tipped PC·ll series . . ..... $520 per sel<br />
Tantung Tipped PT·ll series . . . . ........... $560 per set<br />
Rub Collar Bearing . . . $45<br />
8. RAISED PANEL SHAPER CUTTERS For 3(." Material<br />
Mini Pro Line · 3/,' bore <strong>with</strong> ,/{ bushings<br />
Carbide Tipped MC·54 series ........... S124 ea<br />
Tantung Tipped MT·54 series . .. S1 29 ea<br />
Rub Collar Bearing . . . . . . . . . . . S18<br />
Cutters available for 'Ie" material at prices same as above.<br />
Pro Line · 1'/,' bore: bushings to I" available<br />
Carbide Tipped PC·14 series ........... $152 ea<br />
Tantung Tipped PT- 14 series ........... S162 ea<br />
Rub Coll ar Bearing . . . . . . . . . . . S44<br />
C. DOOR EDGE DETAil SHAPER CUTTERS<br />
Mini Pro Line - 3/,' bore <strong>with</strong> '/," bushings<br />
Carbide Tipped MC·57 series . . ........ S99 ea<br />
Tantung Tipped MT·57 series .......... SI 05 ea<br />
Pro Line · 1'/,' bore. bushings to I" available<br />
Carbide Tipped PC·17 series ........... $140 ea<br />
Tantung Tipped PT- 17 series<br />
. $150 ea<br />
E. V·PANELING SHAPER CUTTER SET<br />
(5 cutters and one spacer sel to perlorm 4 lunclionsl<br />
Mini Pro Line · 'I." bore <strong>with</strong> 'f," bushings<br />
Carbide Tipped MC·59·010 . . ........ $235 per sel<br />
Tantun9 Tipped MT-59·010 ...... .. . . .... .. $248 per set<br />
Pro Line 1'/. bore. bushings to '" available<br />
Carbide Tipped PC·19·010 . .<br />
. ..... $300 per sel<br />
Tanlung TIpped PT·19·010 .<br />
. ..... $320 per sel<br />
F. FLOORING SET<br />
(6 cutters and one spacer to perform 5 functions)<br />
Mini Pro line 'I." bore wIth V," bushings<br />
Carbide Tipped MC·59·020 . .. $235 per set<br />
Tantung Tipped MT·59·020 .<br />
. .... $248 per sel<br />
Pro Line 1 'I. bore: bushings to 1" available<br />
Carbide Tipped PC'19-020 . . . . . . .... . .... $300 per set<br />
Tantung Tipped PT-19-020 .. .. .. . . ..... .... $320 per sel<br />
CAll SOS-255-5444 FOR INFORMATION AND PRICE QUOTES ON OTHER CUTTERS OR SEND 53.00 FOR FREEBORN CATALOG AND PRICES.<br />
READER SERVICE NO. 202<br />
40 Fine Woodworking
est built dust collector <strong>with</strong> six sizes to<br />
m. ,we bag pollution and do it quietly.<br />
Th t ahbice a the most affordable price. Call<br />
or wfite today. Prices F.O.B.lL.A.<br />
• inlet &<br />
The Wood Slicer<br />
Extra-Durable, Precision Resawing Blades for<br />
Delta, Sears, Shopsmith & Inca Bandsaws<br />
Slice through hardwoods up<br />
to 12' thick <strong>with</strong> the cleanest,<br />
easiest cuts your bandsaw has<br />
ever delivered. Wood SlicerN<br />
blades feature individually filed,<br />
precision set teeth which are<br />
bombarded <strong>with</strong> titanium carbide<br />
and impulse hardened to stay<br />
sharp 3 times longer than ordinary<br />
blades. Carbon-manganese<br />
spring steel blade stock is thinner<br />
and stronger, allowing high<br />
tension while wasting less wood<br />
Half-inch 3-tooth design is ideal<br />
$29.95*<br />
and requiring less power from your saw. State-of-the-art<br />
welds are unconditionally guaranteed against breakage.<br />
for resawing and ripping any<br />
w ood up to your saw's maximum capacity.<br />
Specify length: 72" (Shopsmith), 73' (Inca), SO'<br />
Woodcarver<br />
(Sears),<br />
93-112" (Delta 14'), or 104-3/4" (Delta 14' <strong>with</strong> riser block).<br />
RVOBI<br />
FAST Stock<br />
. Removal for <strong>Free</strong>hand <strong>Shaping</strong>,<br />
Carving and Chairmaklng<br />
Fit this 4' blade on your 4"<br />
/<br />
0, ""<br />
\,<br />
or 4-112' angle grinder and<br />
't<br />
enjoy the fastest roughing out<br />
you've ever done. Anti-kickback<br />
• chainsaw-shapad teeth cut<br />
fOlWard, up, down or sideways<br />
/<br />
<strong>with</strong>out binding to blow away<br />
even the hardest w oods over<br />
broad areas or in tight spaces.<br />
$39.95* 22mm arbor hole is supplied<br />
<strong>with</strong> 5/8' bushing to fit almost any angle grinder. 4" blade<br />
diameter lets you leave the guard in place for safety.<br />
MClVlsalDIscoViN users<br />
ORDER TOLL FREE<br />
(800) 241-6748<br />
*<br />
oNpping Add $3 per charge orrJM<br />
wittvn 50 stat86.<br />
READER SERVICE NO. II<br />
P II'tWV& TIIOlA<br />
TOLL FREE 1-800-247-7178<br />
,- - Model 6095DW Cordless Driver-Drill Kit<br />
With Metal Case<br />
2-Speed, Variable Speed, Rev.,<br />
Equipped With Double Voltage<br />
(9.6V & 7.2V), Keyless Chuck System,<br />
.<br />
Sale Price $11 8.95<br />
Model 6095DWE Cordless Driver-Drill Kit<br />
Plastic Case <strong>with</strong> Extra Battery<br />
Same features as above<br />
Sale Price $137.95<br />
Model 6404 3/8" Drill<br />
0-2100 RPM, Reversible, Sale Price $58.00<br />
Model 3612BR<br />
3 H.P. <strong>Router</strong>, Sale Price $168.00<br />
Model LS1030 10" Miter Saw<br />
Sale Price $224.00<br />
Model LS10ll 10" Slide Compound Saw<br />
Sale Price $439.00<br />
Model 4301 BV Jig Saw <strong>with</strong> Metal Case<br />
Orbital, Variable Speed<br />
Sale Price $1 39.00<br />
Model 3620 114 H.P. <strong>Router</strong> <strong>with</strong> Plastic Case<br />
Sale Price $1 09.00<br />
5'12% Sales Tax for Wisconsin Residents.<br />
HOURS: 7:30-5:00 Monday-Friday<br />
VISA · MasterCard · Money Order . Check . C.O.D.<br />
FREE FREIGHT<br />
On Ail Tools<br />
IN CONTINENTAL U.S.A.<br />
48 STATES<br />
PRICES CHANGE SUBJECT WITHOUT TO NOTICE<br />
LUMBER COMPANY<br />
P.O. BOX 7 668<br />
1801 EAST WASHINGTON AVE.<br />
MADISON, WI 53707<br />
READER SERVICE NO. 24<br />
RBI<br />
THE AMERICAN TOOLMAKER<br />
While the history of RBlndustries goes<br />
back 60 years, this is the first time we've<br />
brought together all our precision-made<br />
tools and accessories in one catalog.<br />
The Hawk Precision Scroll Saw, 4-in-1<br />
Woodplaner, Panel Master Door Machine,<br />
<strong>Router</strong> Mates, and much more. Quality<br />
equipment built here in the heart of<br />
America.<br />
RBlndustrles, Inc.<br />
1801 Vine, P.O. Box 369<br />
Harrisonville, MO 64701<br />
800-487-2623<br />
83<br />
READER SERVICE NO. 83<br />
Marchi April 1992 41
More<br />
BUILD,<br />
than 4,000 hard-to-find<br />
REPAIR,<br />
products to<br />
RESTORE, REFINISH<br />
anything made of wood !<br />
It's the catalog woodworkers rely on for fine woods, veneers,<br />
finishing supplies, tools, hardware, moldings, adhesives and<br />
more ... all top quality, reasonably priced, and covered by our<br />
60-day no-questions-asked guarantee. Just $1 .00 brings you<br />
the 116 page color catalog plus all supplements for two full<br />
years. Write for your subscription today!<br />
ROUSSEAU<br />
Miter Saw Superstand<br />
5.5. 2800<br />
For the dealer<br />
nearest you<br />
please call or<br />
write.<br />
Folded 5.5. 2800<br />
For finish carpenters, cabinet<br />
shops, picture framers, home<br />
hobbiests, etc.<br />
•<br />
FEATURES<br />
Designed to fit most 10"<br />
•<br />
and 14" miter saws<br />
Saw is held in place by bolt<br />
•<br />
and wing nul assembly<br />
Stock support arms automatically<br />
lock when lifted<br />
•<br />
<strong>with</strong> quick easy release<br />
Arms hold up to 100 Ibs.<br />
Fast and accurate stop<br />
•<br />
system<br />
Tape measure covers 12"<br />
- 84"<br />
Adjustable hairline indi<br />
•<br />
cators<br />
Mobile<br />
READER SERVICE NO. 96<br />
<strong>with</strong> locking casters<br />
ROUSSEAU CO.<br />
1712 13th S1.<br />
Clarkston, WA 99403<br />
1-509-758-3954<br />
1-800-635-3416<br />
TS ALIGNE<br />
For yeors. woodworkers have relied on a host<br />
of tools and methods for table sow<br />
alignment. Some require lots of patience.<br />
skill and lime. Others rely on<br />
trial and error <strong>with</strong> a bit of luck. Still<br />
others are merely over-priced molded<br />
plastic toys. TS-ALIGNER is the first tool<br />
to seriously address this problem <strong>with</strong><br />
scientific reliability. No more burned edges.<br />
wondering cuts. or dangerous kickback due<br />
to a mis-aligned sow. No more test<br />
cuts. No more guesswork. All adjustments<br />
can be mode quickly and<br />
easily <strong>with</strong> astounding precision and<br />
accuracy. You will be amazed at<br />
the difference it makes for you.<br />
READER SERVICE NO. 55<br />
Edword J. Bennett Co.<br />
Fair Oaks Industrial Pork<br />
1016 Morse Avenue Suite 21<br />
Sunnyvale. CA 94OB9<br />
fax: 408-744-0 179<br />
1-800-333-4994<br />
READER SERVICE NO. 78<br />
LTD.<br />
P.O. BOX: 126 FENG YUAN T/WoIAN<br />
PHONE: 04·5567105 FAX: 666-4-5567109 42099<br />
Conceal, reveal<br />
swivel <strong>with</strong> a<br />
touch of a finger.<br />
lm community<br />
OLD FASHIONED "SCISSOR" LIFT AumN'S SMoorH four racks I<br />
o<br />
YOU BUILD THE FURNITURE-WE'LL PROVIDE THE AUTOMATION<br />
NOT THIS •.. BUT THIS!<br />
Since 1955, the Auton Company<br />
has served the design<br />
<strong>with</strong> quality motorized<br />
systems that utilize remote<br />
controls and small, powerful<br />
motors. Motorized platforms<br />
glide smoothly and quietly on<br />
and Pi nions and<br />
t t h 0 f a<br />
RACK & PINION DRIVE even sWlve a a ouc<br />
button.<br />
AUTON POP UP COMPUTER LIFTS<br />
Lower your computer and keyboard into a cabinet<br />
at a touch of a button. Provides vital security while<br />
enhancing the appearance of any office. Helps keep<br />
computers dust free when not in use. Call or write<br />
today for free literature.<br />
_iI_: = _<br />
AUTON COMPANY Box 1129 · Sun Valley, CA 91353-1129 ·(818) 367-4340<br />
Beverly Hills (31 0) 659-1718 · Honolulu (808) 734-1260 · FAX (818) 362-9215<br />
_<br />
Auton does not make furniture. US & Foreign Pat. Pend. MADE IN THE USA.<br />
BED/FOOT POP-UP TV SWIVEL BASE PANEL LIFT POp-up TABLE PROJECTOR POP DOWN<br />
READER SERVICE NO. 71<br />
42 Fine Woodworking
The Woodworkers Source ID
44 Fine Woodworking Photo: Paul Schraub
<strong>Shaping</strong> <strong>with</strong> a <strong>Router</strong><br />
Jigs and bits for large joints and profiles<br />
by Jeff Dale<br />
A simple box jig that holds<br />
the workpiece and supports a<br />
router <strong>with</strong> a large subbase is<br />
the basis of the author's system<br />
for shaping large parts <strong>with</strong> a<br />
router. The parts for the post-andrail<br />
face frame on the 6-ft. -tali<br />
armoire on the facing page were<br />
trimmed, shaped and mortised<br />
<strong>with</strong> a router and box jigs.<br />
P<br />
roducing large contoured parts <strong>with</strong>out<br />
a shaper is a tough proposition.<br />
DOing so economically is even<br />
tougher because most clients won't pay for<br />
the long hours it takes to do the job <strong>with</strong><br />
hand tools. Fortunately, the shaping, rounding<br />
and mortising operations on large parts<br />
can be done efficiently <strong>with</strong> a router, templates<br />
and jigs. I say fortunately because<br />
much of the character of my furniture, such<br />
as the armoire in the photo on the facing<br />
page, comes from the subtle curvature of the<br />
parts that are template routed from heavy<br />
stock. For example, the crest rail and corner<br />
posts for the armoire are made from 12/4<br />
lumber and the top and bottom rails from 814<br />
stock. Additionally, I used jigs for routing the<br />
large mortise-and-tenon joints that join the armoire's<br />
frame members, for routing the dadoes<br />
d1at auach d1e frame to the carcase and<br />
for routing the large finger joints d1at join the<br />
armoire's solid-wood carcase. The ease and<br />
uniformity of performing d1ese operations<br />
wid1 router jigs is especially helpful when I<br />
need to make multiples of each part for several<br />
armoires, as I have done on occasion.<br />
The best pan of my large-member shaping<br />
and joinel)' methods is they require only<br />
shopbuilt plywood jigs and standard, off-d1eshelf<br />
router bits and ball-bearing pilots.<br />
(<strong>Router</strong> bits are available from most large<br />
tool stores and many mail-order catalogues,<br />
including Eagle America, PO Box 1099, Chardon,<br />
Ohio 44024). In the following pages, I'll<br />
describe my various router setups in detail,<br />
using the process of making d1e heavy face<br />
frame for my armoire as an example (the<br />
construction of my armoire is briefly discussed<br />
in the sidebar on p. 46). You can apply<br />
the same basic router methods when<br />
building other frame-and-carcase pieces,<br />
such as chests, desks and cabinets. I'll also<br />
share a few tricks I've learned about router<br />
jigs in general that should help you make<br />
better use of your router, in lieu of having a<br />
shaper in your shop.<br />
Template-routing parts<br />
in multiple passes<br />
Creating shaped parts <strong>with</strong> a template is a<br />
vel)' useful technique: simply attach a template<br />
to the workpiece, chuck a piloted flush-<br />
u-imming bit in the router, and run the bit's<br />
bearing around d1e template's edge while<br />
d1e cutter trims d1e piece to exact size. However,<br />
shaping vel)' thiek frame members,<br />
such as the 4-in.-thick crest rail on my armoire,<br />
easily exceeds the capacity of even<br />
my largest router. Therefore, I have developed<br />
a technique using several standard<br />
router bits (see d1e top photo on p. 46) and<br />
doing the routing in multiple passes.<br />
First, d1e templates for routing the curved<br />
frame members must be made. I start by<br />
making full-size drawings of d1e front elevation<br />
of the cabinet or furniture piece showing<br />
the profile of all frame members and<br />
joinery. On pieces that are mirror symmetrical<br />
(like my armoire), I only draw half of the<br />
piece. Next, I trace the outlines of each<br />
frame part onto I/s-in.-thick Italian-poplar<br />
plywood (I use 1 6 in. thick matte board for<br />
smaller drawings). This plywood is very soft,<br />
so I can cut out the patterns wid1 a knife. To<br />
make the actual router templates, I trace<br />
d1ese patterns Onto 12-in. or %-in.-thick Baltie-birch<br />
plywood and flip d1e half patterns<br />
as necessal1' to get a full template. After cut-<br />
March/April 1992 45
ting out the templates <strong>with</strong> a bandsaw, I<br />
clean up the edges and fair the curved areas<br />
using my stationary belt sander. Then I make<br />
sure that the templates for parts wid1 mating<br />
edges or joints fit together accurately, which<br />
is essential in fitting the top door rails, d1e<br />
top frame rail and d1e crest rail. I also check<br />
to see d1at templates align correctly where<br />
the frame member intersect at the joints.<br />
When all templates are precise, I trace<br />
their outlines onto the stock and cut out d1e<br />
parts on d1e bandsaw, sawing about '116 in.<br />
outside d1e lines. When all of the parts are<br />
rough cut, I position each template atop its<br />
corresponding blank and secure it wid1 double-faced<br />
tape and small finish nails, which<br />
should be short enough for easy removal.<br />
On parts that will receive plugged screws,<br />
like d1e poSts on my armoire, d1ese holes<br />
provide reference marks for the screw holes.<br />
Od1erwise, I put d1e nails near d1e edges so<br />
d1at d1e holes will be eliminated when d1e<br />
part is rounded over later. Before nailing<br />
down d1e template on long parts, I apply<br />
double-faced carpet tape to help prevent any<br />
un-nailed areas of d1e template from deflecting<br />
during routing. I also use double-faced<br />
tape to secure d1e blank to a plastic-laminate<br />
work surface to avoid clamps that would<br />
interfere wid1 routing.<br />
On heavy frame members, the first router<br />
pass is taken using a 1 'I2 -in.-Iong, 1 'Is-dia.<br />
straight bit <strong>with</strong> a 1 'Is-in.-oD pilot bearing<br />
Routing thick frame members, such as<br />
the crest rail shown here, requires multiple<br />
passes <strong>with</strong> standard straight bits and pilot<br />
bearings, both above and below the cutter.<br />
slipped over d1e shank, just above the currer.<br />
With d1e router riding atop the template and<br />
d1e bearing guided by the template, I take a<br />
light pass all d1e way around d1e blank in d1e<br />
direction the bit wants to pull (clockwise<br />
when d1e bearing is above the cutter). Then I<br />
make a second pass in d1e opposite direction.<br />
This results in a smood1 cut <strong>with</strong> vely little<br />
tearout or burning. I use a Porter Cable variable-speed<br />
router set to one of the midcllespeed<br />
seuings to get the best cut wid1 my relatively<br />
large-diameter bit. In spots where the<br />
currer must negotiate a corner, I often reverse<br />
routing direction momentarily to prevent d1e<br />
bit from curring direcdy against d1e grain.<br />
Next, I increase the bit's depd1 of cut and<br />
take a second pass, routing from d1e same<br />
side. For d1is pass, the bit's bearing rides<br />
against the surface of the blank, guided by<br />
d1e contour of the previous template-guided<br />
cut. These two passes will complete d1e<br />
shaping process on medium-thick parts,<br />
such as d1e posts. However, a d1ird pass is<br />
needed to shape d1e wide crest rail d1at tops<br />
off the front of d1e armoire. This final pass is<br />
made from the other side of the workpiece,<br />
using a bottom-piloted 2 'I2 -in.-Iong spiralcutting<br />
flush-trimming bit. This third pass<br />
references against d1e surface created by d1e<br />
second pass (see d1e photo at left).<br />
Rounding the frames<br />
To give d1e frames of my cabinets and furniture<br />
pieces a more sculpted look, most of<br />
the edges are partially rounded over wid1 a<br />
large-radius bit. For d1is operation, I use a<br />
special box-like router jig (as shown on p.<br />
45) made from hardwood and hardwood<br />
plywood. The jig consists of two rails (a little<br />
wider than the thickest part the jig will be<br />
used for) screwed to a base. The rails, which<br />
support a router firred witl1 an oversized<br />
Plexiglas base plate, stabilize the router during<br />
the cut. This is necess31Y because narrow<br />
parts don't offer a wide enough surface to<br />
directly support d1e router. The box should<br />
Armoire construction: frame and carcase<br />
To rout the carcase's strongfinger-joint<br />
corners, Dale uses a large finger template<br />
made from Ih-in. plywood. He saws out the<br />
waste first, routs using the template and a<br />
flush-trimming bit and squares up the corners<br />
<strong>with</strong> a sabersaw and chisel.<br />
The armoire in the photo on p. 44 and the drawing on the facing page is built <strong>with</strong> a<br />
hybrid construction: a sculpted face frame <strong>with</strong> corner posts, top and bottom rails, and a<br />
crest rail attached to a solid-wood carcase that's finger joined together. The heavily<br />
shaped posts extend below the bottom of the carcase and act as short legs to raise the<br />
armoire off the ground. All of the armoire's front face frame members are through<br />
mortised together. Because the large rounded ends of the members have no tenon<br />
shoulders to limit penetration, the joints are secured <strong>with</strong> screws. The wide crest rail<br />
is mortised to fit over each post and sits on the top rail. The face frame provides a<br />
strong, rigid place to mount the knife hinges for the armoire's fr31ne-and-panel doors,<br />
and the door's curved top rails match the soft curvature of the top frame rail. A dado<br />
routed in the back of each front post provides a mechanical joint <strong>with</strong> the edge of the<br />
carcase. The back frame is similar to the front frame, but its posts are rabbeted to fit<br />
over the carcase, and the rails aren't mortised into the rear posts-they are Simply<br />
glued and screwed to the carcase between the posts.<br />
I build the carcase from wide, solid-wood panels, joining the corners <strong>with</strong> large fmger<br />
joints that are left proud, rounded over and pinned (to be consistent <strong>with</strong> the exposed<br />
joinery in the frame). I rough out the finger joints <strong>with</strong> a sabersaw, and then<br />
rout them <strong>with</strong> templates, as shown in the photo at left. The cabinet's back is a piece of<br />
%-in. hardwood plywood (matching the primary wood used) set into a rabbet routed<br />
into the back of the carcase and overlapped <strong>with</strong> the back frame. A plywood insert built<br />
separately and slid into the carcase before the frame is attached creates the dividers<br />
inside the armoire. By using an insert, I can produce several outwardly identical armoires<br />
at once (saving time by producing like parts <strong>with</strong> the same setups) and fit<br />
them <strong>with</strong> various inserts to adapt the piece to suit the needs of different clients. In addition<br />
to the traditional use of an armoire to hold clothing, I've also used the same<br />
frame and carcase as an entertainment center by adding an insert that accommodates a<br />
television and stereo equipment.<br />
-J.D.<br />
46 Fine Woodworking
Frame-and-carcase armoire<br />
Post pierces through<br />
:::::-"""'---<br />
mortise in crest rail.<br />
Plywood back, 14 in. thick,<br />
is set into rabbet in edge<br />
of carcase.<br />
Large finger joints,<br />
screwed and plugged<br />
Rabbet<br />
mates post<br />
to carcase.<br />
Adjustable<br />
shelves<br />
i (<br />
I<br />
, Insert is set<br />
back to allow<br />
edge of<br />
carcase to<br />
mate <strong>with</strong><br />
face-frame<br />
dado.<br />
Front<br />
face<br />
frame<br />
Top and bottom rails of<br />
rear frame are applied<br />
to back of case,<br />
between posts.<br />
Ends of fingers are left proud<br />
and rounded over to enhance<br />
look of exposed joinery.<br />
;<br />
Ends of top and bottom<br />
frame rails extend through<br />
mortises in posts.<br />
Detail: Face frame dado and<br />
filler strip<br />
Separate insert built from edgebanded<br />
plywood provides shelves and dividers.<br />
Faces of frame members<br />
are partially rounded over <strong>with</strong> large<br />
radius bit, for more sculpted look.<br />
Dado, routed into<br />
inside faces of<br />
frame, houses<br />
edge of carcase.<br />
Drawing: David Dann<br />
Marchi April 1992 47
e wide enough so tiut two parts, such as<br />
two posts, can be screwed to tile base of tile<br />
jig side by side. Wi til mis setup, you can rout<br />
bOtil parts at tile same time. Parts like me armoire's<br />
posts are screwed to me jig mrough<br />
me holes mat mounted me templates earlier.<br />
For most of my large-frame shaping, I use<br />
a l'/2-in.-radius roundover bit fitted <strong>with</strong> a<br />
1 '/s-in.-oD pilot bearing. This choice of bearing<br />
allows only tile upper mird of tile cutter<br />
to make contact witil tile work, so the face of<br />
tile part isn't rounded over completely. This<br />
edge u'eatment has a crisper look than a regular<br />
piloted-roundover bit creates.<br />
Routing dadoes in shaped pieces<br />
I build my carcases by applying the heavy,<br />
shaped face frame to tile front of a solidwood<br />
carcase. To make this connection<br />
strong and positive, I rout dadoes in the back<br />
of me frame's posts tilat lock onto tile vertical<br />
edges of me carcase (see tile drawing on<br />
p. 47). Witil a few alterations, me same box<br />
jig I use for rounding me edges can also be<br />
used to support tile shaped workpiece and<br />
guide me router during dadoing. Two workpieces<br />
can be held in the jig at one time, just<br />
as during edge shaping; however, when dadoing,<br />
an additional plywood template is fitted<br />
between me parts, as shown in the photo<br />
at right. This piece is consu'ucted from two<br />
narrow su'ips of plywood tilat form a T shape.<br />
TIle T's vertical piece is clamped between tile<br />
two parts, whidl are secured in me box jig<br />
witil pairs of opposing wedges, driven against<br />
one anotiler between tile inside of tile jig and<br />
me edge of tile workpiece. The top of me T is<br />
me surface tilat me router rides on, and its<br />
edge is tile template tilat guides a tOp-piloted<br />
router bit all me way around its perimeter,<br />
routing dadoes in bOtil workpieces at the<br />
same time. The wedges provide a surprising<br />
amount of clamping force, but for eA-tra security<br />
you can also screw me parts to me jig or use<br />
double-faced tape to keep tilem in place.<br />
For dadoing tile posts, I use a<br />
pilot bearing wim tile same outside<br />
diameter as tile cutting radius<br />
of the bit. The bearing is<br />
slipped over the bit's shaft,<br />
just above tile cutter. When evelYming's<br />
ready, I rout me dado in<br />
several passes, lowering me bit<br />
each time, to reduce me possibility<br />
of blowing out grain at tile<br />
edges and to get a really clean<br />
cut. By changing bits and the<br />
shape of me template to suit your<br />
application, this setup can be<br />
used for routing dadoes, flutes or<br />
otiler grooves for many different<br />
kinds of jobs, such as routing me<br />
stiles for louvered doors.<br />
Routing mortises<br />
through heavy stock<br />
Besides me shaping, much of tile character<br />
of my armoire's frame comes from tile largescale<br />
mortise-and-tenon joinelY: Big til rough<br />
mortises in the crest rail allow me top ends<br />
of tile posts, which are shaped like tenons, to<br />
intersect. Also, the ends of me top and bottOm<br />
rails pass tilrough mortises in tile posts.<br />
I template routed all of tilese mortises using<br />
a couple of different box jigs in conjunction<br />
wim piloted straight-router bits. My setup<br />
The box jig, used for shaping the edges of<br />
the armoire's frame members, is also used<br />
for routing dadoes in the front posts for<br />
attaching the solid, wood carcase.<br />
Through mortising frame parts is done by routing from two<br />
sides using a box jig <strong>with</strong> a template cutout for the first cut and<br />
a removable platform to support the router for the finish cut.<br />
can easily be adapted to practically any largescale<br />
mortise-and-tenon joinely.<br />
I begin by marking me outline of each<br />
frame member's mortise, and tilen I drill out<br />
tile waste just inside the marked lines wim a<br />
l-in.-dia. bit. For my armoire's crest-rail mortises,<br />
I use me box jig shown in me bottom<br />
photo. The jig has cutOuts exactly matching<br />
tile profile of tile desired mortises at each<br />
end of me box. The workpiece is screwed<br />
into the plywood box mrough its bottom,<br />
and tilen me box i<br />
flipped upside down,<br />
and a %-in.-dia. straight bit (top piloted by a<br />
bearing the same diameter as the cutter for<br />
flush trimming) is plunged in to rout about<br />
half way mrough me mortise. The whole assembly<br />
is tilen flipped back over and a separate<br />
box template is centered directly above<br />
me mortise and screwed to tile sides of me<br />
box jig. This new template has a square hole<br />
about '/4 in. larger all around than tile desired<br />
mortise. (The exact size is not crucial<br />
here because mis box just provides a platform<br />
for tile router.) Now I use a 2'/2-in.<br />
long, %-in.-dia. spiral-cutting bit fitted wim a<br />
flush-trimming bearing below the cutter.<br />
The bearing now rides against me surface of<br />
the previous router cut as I take a pass to<br />
complete tile tilrough mortise.<br />
Labeling your jigs for next time<br />
After I finish a piece and put tile jigs away, it<br />
might be monms before I use them again.<br />
Therefore, I put notes and drawings directly<br />
on each jig mat remind me how tile jig was<br />
used and what procedures I fo llowed to get<br />
me job done. This lets me repeat these operations<br />
wimout having to figure Out evelYtiling<br />
all over again. I draw directly on me jig<br />
wim a pencil or marker pen. I write tile dimensions<br />
and name of me part tiut me template<br />
or jig was used to process and mark me<br />
location of mounting screws or pins. I also<br />
include a full-size drawing of each router bit<br />
(or bits) used and information about the bit,<br />
such as me depm of cut, me size<br />
of me pilot bearing and, for multiple<br />
bits, the order they were<br />
used. Finally, I mark the best<br />
routing direction and speed on<br />
template surfaces, often noting<br />
tile grain direction and marking<br />
places where I should reverse<br />
routing direction to avoid tearout.<br />
When I'm done, I lacquer<br />
over all my writing, bOtil to prevent<br />
it from being obscured or<br />
wearing off and to create a slicker<br />
surface to help me router glide<br />
more easily. 0<br />
Jeff Dale is a jumituremaker in<br />
Petaluma, Cal.<br />
48 Fine Woodworking
Paulownia<br />
A transplanted hardwood<br />
that grows like a weed<br />
and works like a dream<br />
by John H. Melhuish, Jr.<br />
P<br />
aulownia, a light-colored hardwood revered for centuries by<br />
Japanese craftsmen because of its workability and beauty,<br />
may someday be the wood of choice for many American<br />
woodworkers and an economic boon for loggers in the Southeast.<br />
Not bad for a u-ee that apparently slipped into the United States<br />
accidentally, in the form of seeds used for packing material.<br />
I fi rst became interested in paulownia wood while working for<br />
the U.S. Forest Service on projects to reclaim land that had been<br />
strip-mined. Loggers and environmentalists were enthusiastic<br />
about the paulownia development in mined-out areas. The trees<br />
grow at an astounding rate, from seed to 10-ft.-tall in six months<br />
(see the inset photo at right), and they grow best in areas <strong>with</strong><br />
poor-quality soil. I, along <strong>with</strong> other researchers, feel that it is impOl-tam<br />
to find good uses for the lumber once the trees have outgrown<br />
d1eir usefulness as soil stabilizers on the strip-mined lands.<br />
Because few American craftsmen have worked <strong>with</strong> d1e wood, I<br />
asked some local woodworkers to try it. You can see some of their<br />
results in the photos on p. 51. So far the results of our early woodworking<br />
experiments have been promising.<br />
A stable wood <strong>with</strong> a long tradition<br />
Paulownia is a lightweight but very strong, very stable wood d1at's<br />
easily worked <strong>with</strong> sharp tools. It has a satiny surface d1at stains<br />
and finishes very well and an open grain that resembles oak or ash<br />
(see the bottom left photo on p. 51). The color of the wood itself<br />
varies according to where d1e trees grow and when they are har-<br />
Paulownia trees are a miracle<br />
of growth. Even in areas<br />
<strong>with</strong> poor soi4 the trees can<br />
grow to be nearly 60 ft. tall,<br />
like the one shown in the<br />
photo above, in a relatively<br />
short time. You can gauge this<br />
growth by the inset photo,<br />
which shows a woman standing<br />
next to a one-year-old<br />
tree. Despite this rapid growth,<br />
the wood is easy to dry and<br />
can be worked <strong>with</strong>in a few<br />
weeks of harvesting.<br />
Dick Top photo: Burrows; insel photo: John Melhuish<br />
March/April 1992 49
The box above, made by Isaburo Wada, a sixth-generation<br />
Japanese craftsman, demonstrates paulownia's stability The precisely<br />
fitted top takes eight seconds to lower itself on a cushion of air.<br />
vested. Darker-colored stock is produced in the warmer southern<br />
states where d1e trees grow vely fast. The slower growth in the<br />
more northern states produces a lighter color and finer growth<br />
rings, which are preferred by wood buyers. The color of stock<br />
from both regions is better if d1e stock is harvested in Janualy or<br />
Februaty, when the sap is down.<br />
In addition to d1e local woodworkers' e}.'Periences, we have also<br />
been impressed <strong>with</strong> d1e beautiful paulownia objects crafted by<br />
the Japanese. Traditionally, paulownia was used to build kotos<br />
(harps) because the wood's specific gravity is about 0.28 (compared<br />
to 0.40 for yellow poplar and 0.60 for white oak), and d1is<br />
low density contributes to d1e wood's superior acoustical quality.<br />
Also paulownia has long been incorporated in high-quality furniture<br />
such as the tansu (a wedding chest). The wood for a bride's<br />
tansu often was harvested from a paulownia tree planted by d1e<br />
woman's father at the time of her birth.<br />
Because the wood is virtually unaffected by changes in humidity,<br />
d1e Japanese could build to velY tight tolerat1ces, which is especially<br />
important when making ceremonial containers at1d other special<br />
boxes. According to tradition, every important or sacred object<br />
in Japan is housed in a custom-built box. Some items are enclosed<br />
in a series of boxes, each one documenting when d1e object was<br />
passed from one generation to the next. Paulownia is preferred for<br />
the best boxes because the wood can absorb a great deal of water<br />
before any moisture soaks through, and it's so stable that the lid<br />
can be mated to the body of the box <strong>with</strong> a piston-like, virtually<br />
waterproof fit (see the photo above).<br />
Also, compared to od1er fast-growing hardwoods, paulownia is<br />
relatively easy for a craftsman to dry wid10ut elaborate equipment.<br />
The lumber air dries <strong>with</strong> a minimum of bow or twist and virtually<br />
no cupping, casehardening or honeycombing (although small surface<br />
checks occur occasionally). One recent study concluded that<br />
"the high dimensional stability and fast drying rate of paulownia<br />
lumber make this species the easiest-to-dry commercial wood Currently<br />
growing in the United States."<br />
A stowaway takes root<br />
But, it was d1e tree's easy-to-grow nature that was largely responsible<br />
for d1e species development in d1is countty. A native of China,<br />
paulownia probably came to the United States in the mid-1800s.<br />
One popular theory is that in the days before styrofoam peanuts,<br />
paulownia seeds, which are very tiny and light (1.75 million seeds<br />
per pound), were used as packing material to cushion dinnerware<br />
shipped from tl1e Orient. The wispy seeds escaped and took root<br />
when tl1e china was unpacked. The trees probably first appeared<br />
along d1e Potomac River in the Washington, D.C., area but have<br />
since spread as far as the Pacific coast. However, Kentucky, Tennessee,<br />
West Virginia and an area as far north as Ohio and as far west<br />
as Illinois are most likely to produce high-quality wood.<br />
The value of paulownia in d1e United States was not recognized<br />
until 1970 when Japanese wood buyers driving through Virginia<br />
noticed d1e trees growing wild. The trees had been nearly eradicated<br />
in Japan by a viral disease, so the buyers were especially<br />
excited to discover tl1e old-growth trees and began extensive<br />
searches by helicopter to locate all of them. Single trees sold for<br />
3,000 and uPi one prime specimen reportedly sold for $20,000.<br />
Because of d1e potential economic value, tree farmers have begun<br />
establishing paulownia plantations in the eastern United<br />
States. The seedlings d1rive in disturbed sites such as road cuts,<br />
surface mines and other poor or marginal land. The trees have<br />
deep taproots, prefer well-drained and south- or west-faCing locations<br />
and can grow to more dun 60-ft.-tall, witl1 tt-unks that are 1 ft.<br />
to 2 ft. dia. and larger. The leaves of juvenile trees are sometimes<br />
3 ft. wide, but they are somewhat smaller on adult examples. The<br />
showy trumpet-shaped flowers of the adult tree are usually violetcolored<br />
and appear in d1e spring, before the leaves emerge. The<br />
flowers form 10-in.-high stalks, which resemble delicate reindeer<br />
antlers. In the fall, seed pods resemble bunches of grapes.<br />
Much more research is needed to ensure d1at the trees produce<br />
good lumber. The fast-growing tops of d1e tree, for example, are<br />
susceptible to winter kill in the cooler growing zones. This can<br />
cause the tree to produce many spreading branches, which decreases<br />
the quality of lumber unless special pruning and other<br />
silvicultural techniques are used. High-grade paulownia lumber<br />
currently sells for about tl1e same price as walnut, but it's unclear<br />
if d10se prices will remain stable or if overseas buyers will consider<br />
d1e new trees as valuable as old-growth paulownia trees, nearly<br />
all of which have been harvested.<br />
My hope is that paulownia will grow in importance as wood<br />
technologists and craftsmen continue to use it for constt-uction,<br />
furniture, crafts and musical instruments. I encourage you to tty it.<br />
In some areas it may be known as Kiri, princess tt-ee, empress tree,<br />
royal paulownia (the species was named in honor of Alma Paulovna,<br />
daughter of Czar Paul I of Russia and wife of King Willem of<br />
the Ned1erlands), or elephant-ear tt-ee. The first time you see a<br />
young paulownia, you'll likely favor d1e elephant-ear title because<br />
of the tt-ee's floppy leaves.<br />
D<br />
John H. Melhuish is a retired researcher for the us. Forest Service,<br />
NOI'theastern Forest Experiment Station and lives in Berea, Ky. He<br />
would like to express his appreciation to Bj. Truett and M.E. Melhuish<br />
for their assistance in pl'eparing this article.<br />
Sources of supp/y ______ _<br />
Many mills and lumber companies in the South have paulownia lumber.<br />
Here are a few to contact.<br />
Parks Log Co., Inc., PO Box 403, Highway 64 E., Fayetteville, TN<br />
37334; (615) 433-5595.<br />
Bailey and Sons Timber Co., Route 1, Hornbeak, TN 38232i (901)<br />
538-2174.<br />
H and H Logging, 198 S. Fork Terrace, Glasgow, KY 42141; (502)<br />
646-2779.<br />
S. B. Hackney Lumber Co., Route 6, Lebanon, TN 37087; (615)<br />
444-3480.<br />
50 Fine Woodworking
u.s. crajtstnen discover pauloumia's virtues<br />
by Warren May<br />
My first experience working <strong>with</strong> paulownia<br />
was last year when I had several locally<br />
grqwn logs slab sawn at a nearby mill. Surprisingly,<br />
after air drying the green wood<br />
in i,ny shop for only three weeks, the pau-<br />
10v0Ua was dry, stable and ready to fashion<br />
into my speciality-Appalachian dulcimers<br />
(see the bottom photo at right).<br />
The small logs were given to me by U.S.<br />
Forest Service researcher John Melhuish,<br />
who proposed that my shop investigate the<br />
commercial possibilities of this local<br />
wood. I was intrigued from the start because<br />
I had been hearing rumors about<br />
Paulownia for some time. I first became<br />
aware that such a wood e:jdsted about 10<br />
years ago. I came across it on a price list<br />
from one of my suppliers of musical-instrument<br />
wood. One of my efnployees at the<br />
time was from a sawmill family here in<br />
central Kentucky, and he told me that every<br />
sawyer he knew was looking for these<br />
trees (presumed to be the male of the Catalpa)<br />
because the elusive golden wood<br />
would yield vast sums (by the pound) on<br />
the export market.<br />
Once we started working <strong>with</strong> paulownia,<br />
the excitement, curiosity and information<br />
about this strange wood grew daily.<br />
People brought us articles about paulownia<br />
from newspapers and magazines and<br />
our super light, good sounding dulcimers<br />
caught on. Every cut-off scrap was saved to<br />
give to visiting woodworkers, collectors<br />
and hobbyists. This wood had an almost<br />
magical quality surrounding it. No wonder<br />
it has been prized so highly for centuries<br />
in the Orient.<br />
In our shop we have found paulownia<br />
wood to be very light, but fum. It jOints,<br />
planes, scrapes and sands very well, <strong>with</strong>out<br />
the fuzzing or tearout that occurs in<br />
some pines or soft grades of mahogany<br />
(see the photo below). Carving and sculpting<br />
paulownia <strong>with</strong> sharp tools is a real joy.<br />
The grain patterll; of the smaller trees was<br />
very strong <strong>with</strong> some curl around select<br />
knots, which I maneuvered into sound<br />
holes on many of my dulcimers. When<br />
bending the %-in. strips for my dulcimer<br />
sides, I found that they needed to soak in<br />
water for only a few seconds before they<br />
practically melted around my forming jigs.<br />
Several dulcimers later, paulownia continues<br />
to be user friendly. A few of the dulcimers<br />
were given as gifts by the state of<br />
Kentucky to Japan and China. My father-inlaw<br />
has made sculpted-inlay jewelry boxes<br />
using the easily shaped small pieces for<br />
cOntrast <strong>with</strong> walnut and cherry. And one<br />
of;my woodworkers has built wonderfully<br />
functional, lightweight briefcases of paulownia,<br />
<strong>with</strong> a urethane finish for durability<br />
(see the top photo). We have also finished<br />
paulownia <strong>with</strong> lacquer and <strong>with</strong> a<br />
linseed oil/polyurethane mixture <strong>with</strong> topcoats<br />
of either lacquer or varnish. The first<br />
coat of finish fums the surface quite well<br />
for additional coats.<br />
Certainly paulownia is not the perfect<br />
wood for every project. It is very soft compared<br />
<strong>with</strong> other hardwoods, light in color<br />
and has a very strong grain pattern. Sanding<br />
<strong>with</strong>out a block may cause an uneven<br />
surface, and it lacks the weight of traditional<br />
hardwoods. But user satisfaction and<br />
high-public inte(est coupled <strong>with</strong> the fact<br />
that one can harvest this tree and use almost<br />
every inch of it <strong>with</strong>in a matter of weeks<br />
really does make paulownia worth its weight<br />
in golden color. 0<br />
Warren A. May owns and operates a<br />
woodworking shop in Berea, Ky.<br />
PhO[Q: Dick Burrows<br />
Paulownia's light weight makes it an<br />
ideal choice for a briefcase, like the one<br />
above, built by John Kennedy of Berea, Ky.<br />
And Warren May's paulownia dulcimer,<br />
below, takes advantage of the wood's excellent<br />
acoustical qualities.<br />
Paulownia can be easily worked <strong>with</strong> sharp tools, and can be planed to a satiny<br />
surface that needs little or no sanding before finish is applied.<br />
Photos except where nOled: WarrOl. Brunner<br />
March/April 1992 51
Double-Duty Tablesaws<br />
Four machines <strong>with</strong> special crosscutting features<br />
by Sandor Nagyszalanczy<br />
Ripping and crosscutting on the same machine can be accomplished<br />
easily and accurately on any of the four saws featured<br />
in this article. The top photo shows the Makita Model 2711 (left)<br />
and the Ryobi BT3000 (right); both are portable benchtop saws<br />
that crosscut using a sliding table. Additionally, the Ryobi fea-<br />
tures a movable table extension that accepts a router or sabersaw.<br />
The bottom photo shows the Shopsmith's Sawsmith 2000 (left)<br />
and the Mafell Erika (right) <strong>with</strong> its optional stand. These saws<br />
crosscut via a sliding carriage that moves the blade through the<br />
stationary workpiece like an inverted radial-arm saw.<br />
52 Fine Woodworking<br />
Photos: aUlhor
One of the pleasures of woodworking is buying new tools<br />
and machines. Who can resist d1e temptations offered by<br />
glossy machinery catalogs ? But mose dreams don't come<br />
cheap: A new tablesaw or jointer can cost as much as an annual<br />
family vacation, and your shop may not have me acreage for separate<br />
machines for each woodworking task. One solution is to<br />
choose machines mat will serve double duty. Combination machines,<br />
such as d1e jOinter/planer, have been fi lling mat role in<br />
small (and even not-so-small shops) for years. Now mere are four<br />
saws on me market, shown on d1e facing page, mat are designed<br />
not only for ripping, like a standard tablesaw, but also for<br />
crosscutting wide and long stock wim ease and accuracy, d1US<br />
eliminating d1e need for a separate chop saw or radial-arm saw.<br />
Two of d1ese saws, d1e Ryobi BT3000 and Shopsmim's Sawsmim<br />
2000, are relatively new to d1e market. The omer two saws, me<br />
Makita Model 2711 and me Mafell Erika have been on d1e market<br />
for several years. In terms of price, me saws span a wide range: d1e<br />
American-manufactured Ryobi sells for around 550, me Japanese<br />
Makita is less man $500, me American Shopsmim is about $700<br />
and me German-made Mafell is me Mercedes-Benz of me group, at<br />
around $1400. The machines furmer distinguish memselves by d1e<br />
way mey crosscut and miter. The Makita and Ryobi machines feature<br />
a sliding table dut supports me stock while it's fed past me<br />
blade. The Mafell and Shopsmim have an ingenious sliding carriage<br />
whereby d1e entire saw arbor and motor are pulled past me<br />
stationary workpiece. This article will examine me capacities and<br />
features (summarized in me chart on mis page) as well as me performance<br />
of all four saws. However, I'm not comparing equivalent<br />
machines, and differences in design and price will probably make<br />
one saw better suited to your needs d1an anod1er.<br />
Basic anatomy<br />
PhYSically, d1e Ryobi and Makita are designed as benchtop saws,<br />
which are compact, transportable and light enough for one person<br />
to carry. The Mafell is a bit heavier but can be used wim its optional<br />
folding stand as a stationary or job-site saw (an optional steel<br />
stand is also available for d1e Ryobi). The Shopsmid1 is designed to<br />
be a stationary machine, wim a screw-togemer sheet-metal stand.<br />
As mey came out of meir shipping cartons, me Mafell, Makita and<br />
Ryobi tablesaws required only minor assembly before mey were<br />
ready to cut, and me Ryobi came wim an excellent instructional<br />
video. Conversely, d1e Shopsmim required extensive assembly<br />
guided by a well-written but lengmy 67-page manual.<br />
The bases of d1e Shopsmim, Mafell and Ryobi are all made from<br />
pressed sheet metal, while me Makita's base is a large, high-impact-plastic<br />
casting. Almough I mought me plastic might prove less<br />
durable man sheet metal, me Makita held up well when I performed<br />
an informal dUl'ability test by bouncing d1e saw around<br />
while loading it in and out of the back of a pickup truck. All four<br />
saws have cast aluminum-alloy tabletops and extension tables, and<br />
me Makita and me Ryobi have aluminum sliding tables as well. The<br />
Ryobi features a removable table extension mat also functions as<br />
an accessory table wim a router or sabersaw (see me photo on<br />
p. 54). The Mafell's cast table has a male dovetail around its entire<br />
perimeter mat accepts guide rails to fit me saw's extension tables,<br />
crosscutting gauges and rip fence.<br />
All four saws have straightforward controls located on me front<br />
of d1e base. The Ryobi and Shopsmim have crankable handwheels<br />
for raising and lowering d1e blade and setting me bevel angle (one<br />
wheel serves bom purposes on me Ryobi). The Mafell and Makita<br />
have locking levers instead of handwheels for tilting me blade, but<br />
I still found mem easy to set. However, d1e Makita's blade-height<br />
handwheel lacked a crank handle, which made adjustments te-<br />
Capacities and features<br />
Shopsmith<br />
Ryobi Makita Sawsmith MafeII<br />
BT3000 2711 200Q ErIka<br />
Weight (lbs.) 75 71% 160 85<br />
Motor Amps 13 12 13 14<br />
Depth of cut, 90" 3'/,. 3'111 2% A<br />
Crosscut cap. @ 17 15% 12 11 (38)*<br />
Ripping cap. 24 (72)** 24 24 (60)** 24<br />
List Price $1,1 12+ $868 + $699 $1,395<br />
@ 4 in. stock at 90"<br />
* With optional sliding crosscut table<br />
** With optional guide rails .><br />
+ Actual selling prices 35% to 50% less. .",'"<br />
dious. All d1e saws have tilt-locking levers and large, tilt-angle<br />
gauges, making it possible to set bevel cuts accurately to wimin a<br />
degree; me pressed-in scale on me Mafell was hard to read, and its<br />
pointer couldn't be adjusted. All me saws have adjustable tilt stops<br />
for square and 45° cuts, except me Mafell, which has stops mat are<br />
a part of me pressed-steel carriage and not adjustable. While me<br />
Mafell's stops were dead accurate during my trial, I'm surprised<br />
such an expensive saw doesn't allow for adjustments. The Makita<br />
sports an easy-to-read blade-height scale, but Mafell and Shopsmim<br />
have scales on meir blade guards mat were only approxin1ate.<br />
None of mese tablesaws have blade-height locks, but mey seemed<br />
to keep meir settings anyway.<br />
The Shopsmith's motor controls have a toggle-style on/off<br />
switch, while me omer mree saws have on/off buttons wim large,<br />
raised off buttons, which I prefer because mey're easier to hit in<br />
case of an emergency. All me saws except me Mafell feature some<br />
kind of switch-locking key, which can be removed to prevent use<br />
by an unaumorized person. The switch box on me Ryobi has an<br />
external outlet mat allows me saw's motor to be unplugged. A<br />
router or sabersaw, mounted in me extension table, can men be<br />
plugged in and controlled by me saw's on/off switch-a great idea.<br />
Three of me saws, me Shopsmim, me Mafell and me Ryobi, provide<br />
for dust collection. The Shopsmim's dust port connects to a<br />
standard 2V2-in.-dia. shop vacuum hose, whereas me Ryobi and Mafell<br />
can be used wim eid1er a vacuum hose or wim an optional<br />
dust bag. These bags collected a surprising amount of sawdust and<br />
chips on each saw.<br />
Crosscutting: sliding tables vs. sliding carriages<br />
The important distinction among mese saws is meir memod of<br />
crosscutting, and each med10d takes some getting used to. As already<br />
mentioned, me Mafell and me Shopsmim crosscut by means<br />
of a sliding carriage d1at moves me blade. Bom saws have a knob<br />
on me front mat's directly connected to me carriage. Pulling me<br />
knob (a button in me center of Mafell's knob must be depressed<br />
first) slides me entire carriage and blade assembly fOlward to cut<br />
mrough me stationary workpiece (see me photos on pp. 54-55). A<br />
spring on each saw returns me carriage to me back of me saw after<br />
me cut. In my crosscutting u'ials, bom carriages slid smootl1ly on<br />
meir tubular ways, manks in part to felt wipers mat keep chips and<br />
sawdust from fouling me action. For ripping, each carriage pulls<br />
forward about halfway and locks in position. This leaves me pull<br />
rod knob on me Shopsmid1 protruding about 5 in. from me front<br />
of me saw at groin level, which could pose a painful hazard.<br />
To hold me stock stationary during crosscuts, me Shopsmim<br />
uses a miter-gauge device in a standard %-in. by %-in. table slot<br />
(it's me only saw of d1e four mat has a table slot). A separate lock-<br />
March/April 1992 53
The Ryobi's versatile sliding table (above) can be mounted to<br />
the right of the extension/accessory table and used for guiding the<br />
workpiece past the bit.<br />
To crosscut on the Mafell (right), you first pull the entire carriage<br />
and blade through the cut. Pushing a button in the center of<br />
the blade-height adjustment knob releases the sliding carriage.<br />
ing device holds the gauge in the slot, and a hand-trigger grip on<br />
the gauge clamps the workpiece securely to the saw table (see the<br />
photo at left on the facing page). While the gauge's compass has<br />
adjustable 90° and 45° stops, I didn't find the gauge's short fence<br />
(only 5% in.) long enough to crosscut longer boards accurately<br />
<strong>with</strong>out adding a longer auxiliary fence.<br />
The Mafell has an extensive crosscutting system, offering several<br />
different gauges and fences that can attach anywhere along the<br />
edge of the tabletop or guide rails. The basic gauge that holds the<br />
workpiece stationary has a 13%-in.-long fence and a compass <strong>with</strong><br />
detents that accurately stop at multiple settings between 0° and<br />
180°. For stabilizing extremely long boards, an optional 40-in.-long<br />
fence bar attaches to the gauge, and a flip-up stop slides on for repetitive<br />
crosscuts. After I set up a pair of gauges on the Mafell to different<br />
angles, I used them to do a number of complicated angled cuts<br />
and was able to attach or remove the gauges from the saw <strong>with</strong>out<br />
having to reset the angles. I found this to be very convenient For<br />
large panel work, Mafell also offers an optional sliding table.<br />
The Ryobi and Makita use sliding tables for crosscutting: The<br />
workpiece is held against a miter fence (adjustable for cuts to 45°<br />
in either direction) and slid past the sawblade (see the photo at<br />
right on the facing page). With the fence set at 90°, I could crosscut<br />
a %-in. panel up to 17 in. wide <strong>with</strong> the Ryobi and 1514 in. wide<br />
<strong>with</strong> the Makita. Both tables slid very smoothly on adjustable plastic<br />
glides; the Ryobi's table rides on extruded-aluminum rails,<br />
while the Makita's rides on steel rods. However, the Makita's table<br />
has felt wipers that need to be oiled occasionally, which I found to<br />
be messy. Both tables can be locked on their rails, and their miter<br />
fences can be removed fairly easily when changing over to the ripping<br />
mode. The Ryobi's 18-in.-long miter fence can be replaced by<br />
an optional 40-in.-long auxiliary fence (it can also be used for a rip<br />
fence) for cutting extra-long stock or large panels. Both sliding tables<br />
fearure large compasses for setting precise miter angles, but<br />
the Makita lacks a stop for square cuts. A Ryobi innovation is that<br />
their sliding table can be attached or removed from the guide rails<br />
in seconds via quick-release clamps. Further, this table attaches<br />
either to the left of the sawtable (normal for crosscutting) or to the<br />
right of the accessory table (see the photo at left above), which is<br />
great for jobs like routing tenons or coping. An optional accessory<br />
kit includes a router-table fence and a circle cutting jig.<br />
Rip fences<br />
Like many standard tablesaws, the Makita and the Shopsmith both<br />
have rubular steel rails to which their rip fences lock at the front<br />
and back of the saw. The Makita has a 281/2-in.-long pressed-steel<br />
fence bar, while the Shopsmith's 35-in.-long fence bar is an aluminum<br />
extrusion; both are pre-drilled so that auxiliary fences can be<br />
added. While both rip fences allow a 24-in. rip capacity and locked<br />
satisfactorily, the Shopsmith lacks any sort of scale-and-pointer assembly,<br />
and its fence needs to be locked front and back <strong>with</strong> separate<br />
controls, which made it time-consuming to set. Shopsmith's<br />
Pro model comes <strong>with</strong> longer rails, for ripping up to 50 in., and<br />
their more expensive models, the Deluxe and the Ultra, come <strong>with</strong><br />
the higher-quality Excalibur rip fence.<br />
Both Ryobi and Mafell use extruded-aluminum rails and fence<br />
bars and are capable of ripping up to 24 in. wide. The Ryobi's rails<br />
slide into the front and back of the saw and lock via built-in levers<br />
(extension rails are available to boost rip capacity to a whopping<br />
72 in.). The Ryobi's 23Y2-in.-Iong fence bar looks and locks somewhat<br />
like a pint-size Biesemeyer T-square fence, but unlike the T<br />
square, the Ryobi also locks to a rear rail. The Ryobi fence also has<br />
a precise-setting crosshair cursor, and the fence can be lifted from<br />
anywhere on the rails, not just at the ends. I liked the comfort of<br />
the Ryobi's fat foam-padded locking handle, but its best feature is<br />
the dual-numbered scale on its front rail. Once it's zeroed, the<br />
black scale is used for setting rip cuts, and the yellow scale is used<br />
<strong>with</strong> the accessory table.<br />
While it is accurate, the Mafell's rip fence is somewhat timeconsuming<br />
to use because you must walk around to the back of<br />
the saw to get to the small fitting on the underside of the fence<br />
bar that locks the fence at the rear. Further, the fence lacks a<br />
cursor assembly (the saw table does have an embedded scale,<br />
54 Fine Woodworking
The Shopsmith's miter gauge ([eft), <strong>with</strong> its hand-triggered<br />
hold-down clamp, secures the stock during a cut After pulling the<br />
blade through the cut, a spring returns the carriage.<br />
The Makita.'s sliding crosscut table (above) can accommodate %<br />
in -thick panels up to 15 % in wide. After the adjustable miter fence<br />
has been set, the table and workpiece slide past the blade for the cut<br />
which can be lined up <strong>with</strong> the fence for narrow rip cuts); therefore,<br />
wide rips must be set using a tape measure.<br />
Motors, sawblades and guards<br />
Cutting power requires a balance of motor size, speed and blade<br />
design and thickness; each of the four saws achieves this balance<br />
in a slightly different way. All four saws run on regular 110v power.<br />
The Shopsmith and Mafell saws have induction motors (typical<br />
for stationary machines) that drive their blades directly at 3450 RPM.<br />
After I noticed that the Shopsmith's motor had no protective housing,<br />
I called Shopsmith's product manager, Tim Silvers, who told<br />
me that this wouldn't damage the motor's working parts and that<br />
eliminating the housing allows a greater depth of cut-2% in. at<br />
900- Even though the direct-drive Mafell has a fully covered motor,<br />
it achieves a greater depth of cut (2% in.) by using a large-diameter,<br />
280mm blade (about 11 in.).<br />
The Makita and Ryobi tablesaws use universal motors, like the<br />
ones found in portable power tools. These motors run faster than<br />
induction motors-about 18,000 RPM, so they're geared down before<br />
the blade. Ryobi uses a pair of toothed belts, Makita has a gear<br />
drive. Offsetting the motor from the arbor allows for an impressive<br />
depth of cut (3 9 /'6 in. for both saws), enough to crosscut a 4x4 in<br />
one pass. But universal motors are noisier than their inductiondriven<br />
counterparts, so hearing protection is a must.<br />
To put their power to work more effectively, the Ryobi and<br />
Shopsmith come <strong>with</strong> thin-kerf carbide blades because the less<br />
material the blade must remove during the cut, the less power<br />
required to drive it. Further, the Ryobi's Freud blade has an antikickback<br />
design that also limits feed speed, which prevents the<br />
blade from stalling during a demanding cut. The Makita's chiseltooth<br />
steel blade removes a thin kerf as well, but the surface it<br />
leaves after the cut is relatively rough. The Mafell has a standardkerf<br />
(about 'Is in.) carbide blade, which performed well and left an<br />
extremely smooth finish. While the Makita and Ryobi use standard<br />
10-in.-dia. blades <strong>with</strong> %-in.-dia. bores (the Mafell's 280mm blade<br />
also has a % in. bore), Shopsmith's 10-in. blade has a l'kin. bore.<br />
The Shopsmitl1's blade is high-quality, but it'll probably be hard to<br />
find locally, which may be a problem if you need a replacement in<br />
a hurry. The arbors on the Makita and Ryobi are long enough to<br />
handle dado sets, but the Shopsmith's arbor is not. Because the<br />
Mafell doesn't have a throat plate, it can't accept cutters that are<br />
much wider than a regular sawblade. Both Shopsmith and Mafell<br />
motors have an electronic blade brake; the gearing slows the blade<br />
on the Makita and Ryobi after they're switched off.<br />
The conventional blade guards, <strong>with</strong> splitter and anti-kickback<br />
assemblies, on the Ryobi and Makita worked well for ripping but<br />
were awkward for crosscuts and miter work. Mafell has the most<br />
practical guard system: a self-aligning rip guard that's easy to install<br />
(one thumbscrew) and a second snap-on blade protector completely<br />
houses the blade for crosscuts. The Shopsmith's guard was<br />
difficult to align, and it often bound the workpiece during cutting.<br />
Cu tting perfo rmance<br />
While they may not gobble through wood like their cast-iron<br />
brethren, all four of these versatile tablesaws are capable of doing<br />
some impressive work. All were able to handle rips and crosscuts<br />
in 8/4 oak <strong>with</strong>out bogging down too much. In my trials, I found<br />
the Shopsmith to have the most cutting power of the four saws.<br />
However, the Mafell cut only slightly less aggreSSively, and I preferred<br />
its overall level of quality and precision. Contrasting the two<br />
lower-priced saws, the Ryobi seemed to labor more when cutting<br />
thick hardwood, despite its excellent blade, and tl1e Makita seemed<br />
to have more cutting zip (even <strong>with</strong> its lower-amperage motor).<br />
Still, compared to the Makita, I think the Ryobi offers higher quality<br />
and more features fo r the money.<br />
Sandor Nagyszalanczy is managing editor of FWW. For more information,<br />
contact: Mafell, 80 Earhart Drive, Unit 9, Williamsville,<br />
N.y. 14221, (716) 626-9303; Makita, 14930 Northam St., La Mirada,<br />
Cal. 90638, (714) 522-8088; Ryobi, 1424 Pearman DailY<br />
Road, Anderson, s.c. 29625, (800) 525-2579; Shopsmith, 3931 lmage<br />
Drive, Dayton, Ohio 45414, (800) 543-7586 ext. 12.<br />
D<br />
March/April 1992 55
Winkler uses fiber-optics to illuminate the interior of a<br />
vase, so he can judge its wall thickness from the outside. With his<br />
lathe spinning in reverse, he hollows the vessel (above) <strong>with</strong> his<br />
tool's cutter. An aluminum handle slides over the steel shaft to<br />
provide a T for more torque control and to vary the tool's balance.<br />
Winkler's fiber-optic system consists of a light source and<br />
guide (inset). The source is a 150-watt projector bulb <strong>with</strong> a<br />
parabOlic reflector, a rheostat and a 4-in. -dia. computer fan. The<br />
flexible light guide (%2-in. glass-fiber bundle) can fit any Of the<br />
%-in. - through I-in. -dia. slotted steel shafts shown.<br />
I<br />
enjoy watching people's reactions when<br />
they lift one of my semi-closed, hollow<br />
vases that weighs only a few ounces.<br />
They look startled when the piece seems to<br />
almost float away. Achieving lightweight<br />
work like this can be tricky because it requires<br />
turning very thin walls. So I devised a<br />
simple method for gauging wall thickness by<br />
shining a light through the wood from the<br />
inside out <strong>with</strong> a tool that utilizes fiber optics.<br />
I named my prototype tool "Tinkerbell,"<br />
after the pixie from Disney's version of Peter<br />
Pan, because in a darkened shop, the flickering<br />
light that emanates from a vase looks<br />
uncannily like Tinkerbell captured in her jar<br />
(see the large photo above).<br />
The idea of using light to determine wall<br />
thickness came from a fellow-Massachusetts<br />
woodturner, Paul FelU1ell (see the<br />
sidebar). I found Paul's early technique of<br />
shining a high-intensity light through a ves-<br />
sel from the outside effective, but a bit<br />
awkward. I had difficulty looking down the<br />
length of my turning tool inside the turning<br />
vessel. So I began to think about a new<br />
tool that could shine the light from the inside<br />
out. The tool needed to have a long<br />
steel shaft <strong>with</strong> a tool-steel cutting edge inserted<br />
at its end and an intense light that<br />
could shine near the cutter but be directed<br />
from the handle. A small, conventional<br />
light bulb was not an option because it<br />
would not be durable enough to ride on<br />
the end of the cutting tool.<br />
Fiber optics suited my needs exactly.<br />
These glass-fiber bundles, which carry undiffused<br />
light, have a polished end where<br />
the light is emitted. The rods have an aluminum<br />
or stainless-steel sheath at their<br />
ends, and the rest of the shaft is encased in<br />
PVc. I use a light generator (a ISO-watt<br />
projector bulb) to supply light to the<br />
guide, which is a %2-in.-dia. by 8-ft.-Iong<br />
fiber-optic bundle (see the inset photo<br />
above). My light guide fits tightly into a machined<br />
slot in the shaft of the tool, much<br />
like the closing of a Zip Lock bag. The<br />
guide's tip can be positioned down to<br />
about V2 in. from the cutter tip. By changing<br />
from a %2-in. to a o/I6-in.-dia. fiber cable,<br />
I can increase the light by a factor of<br />
four and alter the light's spread by using<br />
various lenses at the tip.<br />
Turning a "tighf' weight vessel<br />
I start by mounting a blank between centers<br />
and roughing the outside shape. Then<br />
I attach the blank to a faceplate and bring it<br />
to its final outside form. Next, I rough out<br />
the interior, stopping frequently to clean<br />
out the sawdust <strong>with</strong> a shop vac. The<br />
rough-hollowing is complete when the<br />
wall thickness is from 1/2_ to %-in. thick.<br />
56 Fine Woodworking<br />
Photos this page: Charley Robinson
Once a vase is rough-hollowed, I begin<br />
to thin out the wall at the top of the vessel.<br />
I set my lathe spinning in reverse, and then<br />
turn off the shop lights and turn on "Tinkerbell."<br />
When working blind in a deep,<br />
hollow form, it's easy to catch a tool tip<br />
and either hurt yourself or damage the<br />
work. Therefore, to be safe, practice using<br />
lighted tools on open turnings to get a<br />
clear notion of how they work before trying<br />
them on semi-closed forms. When a<br />
wall has been thiIU1ed to about 1/4 in., a<br />
smudge of light will appear from inside.<br />
The exact thickness varies from one species<br />
of wood to another. As the wall becomes<br />
thinner, the entire top surface of<br />
the vessel will begin to glow from <strong>with</strong>in<br />
(see the photo at left). For an 8-in.-dia. by<br />
lO-in.-tall vase, %2 in. is a good final wall<br />
thickness to strive for. To avoid distortion<br />
as the wood dries, I work as quickly as<br />
possible from start to finish. It's also helpful<br />
to turn a small piece or to turn a large<br />
piece of green wood to %-in.-thick, and then<br />
allow the piece to dry before final<br />
thinnin g<br />
of its walls. While keeping the glow from the<br />
light the same intenSity, I check thickness at<br />
the top <strong>with</strong> calipers and work down the<br />
sides to the bottom. To reveal my cuts at the<br />
vessel's bottom, I pull the light guide 6 in.<br />
back from the tip of the tool to get more<br />
light spread. When the interior of the vase is<br />
complete, I carefully part it from the faceplate<br />
and reverse-chuck the piece to finish<br />
the outside of the bottom.<br />
D<br />
Toby Winkler builds staircases in Grafton,<br />
Mass., and is founding president of the<br />
Central New England chapter of the American<br />
Association of Woodturners.<br />
Sources of supply<br />
The following companies manufacture<br />
components and accessories that can be<br />
used for lighted turning work.<br />
Industrial high-intensity lamps for an external<br />
light source:<br />
Sunnex, 87 Crescent Road, Needham,<br />
MA 02194; (800) 445-7869.<br />
Light generator* and fiber-optic cable<br />
for an internal light guide:<br />
Fiber Technology Inc., Prototype Department,<br />
1 Fiber Road, Pomfret, CT<br />
06258; (203) 928-0443.<br />
Binocular magnifier:<br />
Donegan Optical Co., 15549 W. 108th<br />
St., Lenexa, KS 66219; (913) 492-2500.<br />
*Many photo-supply shops also carry<br />
lamps, bulbs, rheostats, parabolic reflectors<br />
and muffin funs. Or try a local garage<br />
sale to pick up an old slide projector.<br />
A hand-held light guide<br />
by J. Paul Fennell<br />
Hollowing a thin-walled vessel through<br />
a small opening is essentially blind turning.<br />
Following David Ellsworth's lead,<br />
many experienced woodturners develop<br />
a feel for gauging wall thickness using<br />
calipers and sound. These mechanical and<br />
acoustical techniques didn't work well<br />
for me, so I began experimenting <strong>with</strong> an<br />
idea I saw in one of Richard Raffan's<br />
books-using wood's inherent translucency<br />
under a strong external light to<br />
gauge wall thickness. After much trial and<br />
error, I was able to adapt the idea to<br />
turning closed forms by shining a light<br />
from the backside of the lathe <strong>with</strong> my<br />
work spinning in reverse. Working from<br />
the opening to the bottom of the turning<br />
until the wall became translucent, I<br />
would compare the glow color to what<br />
had already been turned. I wore a pair of<br />
optical (binocular) magnifiers (see the<br />
Sources of supply box) to help me see<br />
what I was doing at close range and often<br />
resorted to muscle-tiring contortions<br />
to peer down the length of the tool to<br />
watch the wall being cut.<br />
There were other problems <strong>with</strong> this<br />
method too. The glare from the lamp was<br />
annoying and the heat accelerated the<br />
distortion of the wall as it got thinner.<br />
When I began using a fiber-optic cable<br />
as a "cold" light guide to illuminate the<br />
vessel's interior, these problems, as<br />
well as the contortions needed to look inside<br />
the turning; vanished. The fiberoptic<br />
concept was developed by my<br />
When lit from <strong>with</strong>in, the<br />
walls of Fennell's turnings<br />
(right) are thin enough to<br />
cause the entire vessel to glow<br />
like a Japanese paper lantern.<br />
In daylight (below) you<br />
can't tell that the 6-in.-dia<br />
masur-birch vessel has 1116-<br />
in. -thick walls and weighs<br />
only 4 oz.<br />
friend Toby Winkler, but my variation<br />
is to hold a light-emitting tip just inside<br />
the vessel's opening, unattached to a<br />
turning tool. My left hand holds both the<br />
cutting tool's shaft and the fiber-optic<br />
cable together on the tool rest. My right<br />
hand directs the handle of the cutting<br />
tool in a conventional fashion. When the<br />
wall is sufficiently thin, the entire vessel<br />
glows (see the photo below). Once<br />
there is an even glow color from the<br />
opening to the base, the wall is uniformly<br />
thin <strong>with</strong> no bumps or ridges.<br />
My intent is not to see how thin I<br />
can tum. Instead, there is a point when a<br />
vessel reaches a desirable lightness and<br />
delicacy <strong>with</strong>out jeopardizing its structural<br />
integrity. All but the darkest woods<br />
glow when turned thin enough. Generally,<br />
high moisture or resin content in a<br />
wood enhances this property. Gauging a<br />
wall's thickness requires knowing how<br />
much translucency to expect from a particular<br />
wood while it is spinning, so<br />
that color variations due to the grain or<br />
mix of heartwood and sapwood are<br />
blended. A highly translucent wood, like<br />
green maple, glows almost white,<br />
whereas cocobolo appears deep red. In the<br />
case of green maple, the problem is leaving<br />
the wall too thick; <strong>with</strong> cocobolo, the<br />
concern is cutting the wall too thin. 0<br />
J Paul Fennell is a profesSional woodturner<br />
from Topsfield, Mass. He sells his<br />
vessels througb galleries nationwide.<br />
Photos this page: J. Paul FenneU
W iring a<br />
Home Shop<br />
Additional circuits and outlets<br />
get your motors running<br />
by Grant Beck<br />
E<br />
lectricity is the lifeblood of power machinery, but if you work<br />
in a converted garage or basement shop, chances are that<br />
blood isn't flowing very well. It seems small shops never have<br />
enough power outlets, and no matter how well laid out the shop is,<br />
there's rarely an outlet <strong>with</strong>in reach of a powertool's cord when you<br />
need it. Fortunately, rewiring is a job almost any woodworker can<br />
handle, <strong>with</strong> a little knowledge and a good dose of caution.<br />
Although this article won't tell you exactly how to wire a shop<br />
from scratch, it will take you through the steps necessary to add<br />
new circuits and outlets to an existing electrical system. In addition,<br />
I will give you an overview of what to consider when determining<br />
your wiring needs, both for now and for the future. Even if<br />
you decide to hire an electrician to do the work, you'll still need to<br />
define your electrical needs and provide him <strong>with</strong> a layout drawing,<br />
so you'll get the job done correctly and economically.<br />
Before you begin, here's a sobering reminder: When improperly<br />
handled, electricity can kill you. Therefore, do not attempt any of<br />
the procedures described in this article unless you are completely<br />
sure of what you are dOing. Also, please read the sidebar on p. 60<br />
on electrical safety. If you have any doubts, hire an electrician; it<br />
may seem costly, but the price is negligible compared to what<br />
you'd pay if the worst happened. Another important point: Making<br />
just about any change to an existing electrical system requires a<br />
permit from your local government planning office, but most municipalities<br />
will let homeowners do their own work.<br />
How many circuits and outlets do I need?<br />
The first step in planning additional circuits and outlets for your<br />
shop is to figure out how much power you'll need. To start, make<br />
a list of how many amps each stationary machine in your shop<br />
uses, along <strong>with</strong> what voltage that machine runs on, nov or 220v<br />
single-phase (this article won't cover 3-phase power). The motor's<br />
size and voltage are found on its information plate. To calculate<br />
how many amps your breaker box must carry to run your shop, I<br />
follow this simple rule of thumb: add up the amperages of all the
machines and divide by two. If your shop is on the same electrical<br />
service as your home, you may have to hire an electrician to help<br />
determine if your existing service can handle your shop or if you<br />
need your service upgraded and a larger box installed.<br />
Once you've determined each tool's power requirements, you'll<br />
need to figure out where the stationary machines will be located<br />
or where power tools will be used, and make a drawing of your<br />
shop, like the typical shop sketch below. Draw in the location of<br />
the circuit breaker box, your workbench, doorways and windows,<br />
and label each machine <strong>with</strong> its amperage and voltage.<br />
Before locating the outlets, you must determine the number of<br />
separate circuits you'll need. I've found that because most small<br />
shop's circuits are wired <strong>with</strong> 12-gauge (ga) wire, the general rule<br />
to follow is that a circuit <strong>with</strong> a 20 amp breaker should not carry a<br />
load of more than about 15 amps. Without this buffer, normal operation<br />
might trip breakers, as motors can draw more than their<br />
specified amperage upon start-up. In one-man shops, where only<br />
one tool is to be used at a time, a single circuit may have outlets<br />
for several power tools or machines, even if their individual power<br />
requirements exceed 15 amps. In a multiple-person shop, machines<br />
that might be run simultaneously should have separate,<br />
dedicated circuits (only one outlet per circuit). If the machine<br />
doesn't use the full capacity of the circuit, a spare outlet on the<br />
same circuit can be handy. For instance, circuit #7 in the drawing<br />
powers the lathe and has an extra outlet that could be used for<br />
plugging in a right-angle sander for power sanding a spinning<br />
turning. Workbench areas should have several outlets to allow<br />
multiple handtools to remain plugged in. If there's a chance that<br />
several of these tools will be run at the same time, an outlet on a<br />
separate, dedicated circuit should be included (see circuit #10 in<br />
the drawing) and used <strong>with</strong> higher-amperage power tools, such as<br />
a plunge router, circular saw or a bench grinder.<br />
Large machines <strong>with</strong> more powerful motors in the I-HP to 3-HP<br />
range, such as tablesaws, planers and shapers, also require dedicated<br />
circuits. Most electrical codes require this as well. If a<br />
motor can be wired to run on either 1l0v or 220v, wire it for 220v<br />
operation. The reason is that doubling a motor's voltage causes its<br />
amperage requirements to drop in half. Therefore, you can use<br />
12-ga wire to run circuits to 220v motors in lieu of switching to<br />
heavier (and more expensive) 10-ga wire to satisfy a 1l0v motor's<br />
higher-amperage requirements.<br />
Location of outlets<br />
While you may be tempted to locate your outlets so that each is<br />
closest to the machine it services, it's a good idea to spread them<br />
out as uniformly as possible to accommodate future needs. A few<br />
extra llOv outlets, evenly spaced around the room will allow you<br />
to use portable tools away from the workbench or connect new<br />
machines in the future.<br />
As mentioned earlier, in the area near your workbench you will<br />
need more outlets placed closer together than in the rest of the<br />
shop. However, regular outlets cannot be moved if you decide to<br />
relocate your bench. But you can get around this problem by<br />
mounting an outlet strip on the workbench, as shown in the photo<br />
Typical shop electrical layout<br />
:',:<br />
. Radi'al-arr:n saw; :-.;;'<br />
.<br />
13 amps, 11av --r"..<br />
... <br />
. Extra outlet (now capped off)<br />
on dedicated radial-arm saw<br />
circuit allows for future shop<br />
layout changes.<br />
All circuits have 20-amp<br />
breakers and are wired<br />
<strong>with</strong> 12-gauge cable.<br />
II<br />
I I I<br />
I I<br />
I "<br />
r---f'<br />
I n n I<br />
I II I I I<br />
I I I<br />
I I<br />
L_J<br />
I I I<br />
I II I I I<br />
I I I I I I<br />
I II<br />
U I':<br />
Circuit #3 \<br />
Circuit # <br />
.' Extra 110v or 220v outlets,<br />
: lienly spaced, allow for<br />
the addition of new machines.<br />
. " , :'.", ' , ..<br />
qp indicates ,'Ov duplex outlets<br />
Higher-amperage<br />
mach,ines need separate,<br />
{ dedicated circuits.<br />
'1F::::r-22Ov<br />
. . . ..<br />
Tablesaw,<br />
12 amps, /<br />
/<br />
/<br />
I<br />
/ .<br />
/<br />
/<br />
I<br />
cp indicates 220v single outlets<br />
... " ': :.<br />
Extra outlet on dedicated<br />
lathe circuit permits plugging<br />
in grinder for power sanding.<br />
/<br />
I : /<br />
( ) / /<br />
<strong>with</strong> drop cords eliminate / /<br />
{running cords across floor.<br />
I / Sh I' hts l ed ' • •<br />
_.-:-:- '. .. I . /<br />
.. :-. :-:..<br />
7' .. : lights stay on.<br />
... . :. /<br />
Running circuit through ceiling joists<br />
Overhead outlet boxes . is shortest run and saves cable.<br />
: .' ./. 0P '9 are P ugg m.o separa.e<br />
circuit (11/8); if machine trips a breaker,<br />
.. . ; .., >c-in1y rnV<br />
Bandsaw,<br />
8.5 amps, 110v<br />
I I I I<br />
II I<br />
....:- ....... " II // J-':._u-t LJ<br />
...... . " . : . 13.5 amps, / litl l l I I I I I<br />
.e . '<br />
: ' : : . 220v . :1 il<br />
Jointer, /, , I<br />
/ .. VI I ' I ' I I I<br />
I' r--. I / I I I I I I I II II I<br />
. I . .' / -1 1 / I I I ·' I I I I I I<br />
. .
A multiple-outlet power strip is an economical way to add extra<br />
outlets to a workbench, and it speeds up work because you can<br />
leave several portable power tools plugged in at a time. Most power<br />
strips have a built-in circuit breaker, in case there's an overload.<br />
at left. Due to the large number of outlets on a power strip, it<br />
probably should be fed from a dedicated wall outlet (most strips<br />
have their own built-in circuit breaker). To increase the flexibility<br />
of your wiring plan in case you want to rearrange your shop, you<br />
can wire two or more outlets on the same dedicated Circuit, and<br />
then fit only the one in current use <strong>with</strong> an outlet; cap off bare<br />
wires <strong>with</strong> wire nuts and install a blank cover over unused outlet<br />
box(es), as illustrated in tl1e drawing of circuit #2. In case a new<br />
machine is brought in or the layout changes, the extra outlet can<br />
be made active and the currently active one capped off.<br />
Outlets in the ceiling are fine for machines like the planer and<br />
jointer, where the hanging cord doesn't get in the way. If you ever<br />
work <strong>with</strong> big sheets of plywood, avoid dropping an overhead line<br />
to the tablesaw, because sooner or later it'll be in the way. Don't<br />
place outlets in the floor, even if it seems most convenient. These<br />
outlets can fi ll up <strong>with</strong> sawdust and become a fire hazard. Locating<br />
outlets on the wall about 42 in. above the floor will keep them<br />
above most workbenches and accessible behind stationary tools.<br />
The lights in a shop should be on a dedicated circuit so that you<br />
won't be plunged into darkness if you overload a power tool and<br />
trip a breaker. So if you add new lights in your shop, wire the new<br />
lights on a separate dedicated circuit; don't tie them into the existing<br />
The shocking truth about electrical safety<br />
by D.L. Rogers<br />
Before crawling out on a tree limb,<br />
you can evaluate the potential risk: Is<br />
the height 6 ft. or 60 ? Is the limb<br />
alive or dead ? Is the ground below you<br />
soft turf or a pile of bricks ? However,<br />
no one can determine the risk of electrocution<br />
at any given moment when<br />
working on live electrical wiring. This<br />
household friend that lights your<br />
shop and powers your tools can kill according<br />
to an obscure set of rules<br />
that should be understood by anyone<br />
who uses or works <strong>with</strong> it.<br />
Electrocution is possible because<br />
electricity can pass between any two<br />
conductive objects: If you have your<br />
feet on the ground and touch an electrical<br />
part, you are offering the current<br />
a path through your own body.<br />
Normal skin oils and perspiration are<br />
good electrical paths through the pores<br />
and into your body, which is fuU of<br />
highly conductive fluids (electrolytes).<br />
These electrolytes are constantly<br />
changing; hence, you can't determine<br />
exactly how conductive your body is<br />
at any given moment.<br />
Electricity sometimes kills by severely<br />
damaging body tissues and altering<br />
the electrolytes, which your<br />
muscles (including your heart) depend<br />
on for operation. This type of electrocution<br />
can be caused by large doses<br />
of either AC or DC power. However,<br />
the most insidious and lethal conse-<br />
quences of electricity can arise from<br />
relatively low levels of AC current.<br />
A shock below 100 milliamps<br />
(rna) may cause no sensation at all or a<br />
very painful sensation, often resulting<br />
in a drained or nervous feeling. But an<br />
electrical current of about 100 to<br />
200ma (the amount of current it takes<br />
to power a dim nightlight) may override<br />
the heart's electrical signal. This<br />
can change the heart's normal rhythmic<br />
beating into a weak flutter known<br />
as ventricular fibrillation. In this<br />
state, your heart can't circulate your<br />
blood, and you may die unless emergency<br />
medical technicians arrive in time<br />
to restore your normal h eartbeat<br />
Ironically, receiving a larger shock<br />
isn't always fatal. Above 200ma one<br />
may experience paralysis, excruciating<br />
pain, unconsciousness and tissue<br />
dan1age. Obviously, the higher the<br />
current the greater the tissue damage<br />
(which can be the sole cause of<br />
death if extensive enough). Therefore,<br />
someone may survive a high-amperage<br />
electrical shock <strong>with</strong> the loss of a<br />
foot or an arm, while a much weaker<br />
shock may cause fatal heart failure.<br />
All of the above should convince<br />
you that working on electrical wiring is<br />
not a task to be taken lightly. Fortunately,<br />
a few precautions should keep<br />
you out of trouble: First, never work<br />
on live electrical wiring. Always turn<br />
off the electricity at its main distribution<br />
box, and as an added precaution,<br />
put a sign on the box telling others<br />
not to turn anything on <strong>with</strong>out checking<br />
<strong>with</strong> you. If you're unsure of how<br />
to turn the power off, you can't handle<br />
the rest of the job either, so consult<br />
a professional electrician. Some people<br />
will teU you, "Sure you can work on<br />
a llOv-electrical circuit while it's hotjust<br />
don't touch the black wire and<br />
the white wire at the same time."<br />
While you can get away <strong>with</strong> this<br />
most of the time, being careless only<br />
once can lead to disaster. Second,<br />
whenever you're wiring up a new tool<br />
or machine and must plug it into an<br />
old-fashioned two-prong receptacle,<br />
don't cut the ground pin off the plug.<br />
Instead, use a three-prong adapter and<br />
connect its ground screw according<br />
to directions. Finally, if you're installing<br />
new circuitry in your shop, consider<br />
Ground Fault Circuit Interrupter<br />
(GFCI) breakers or outlets. While<br />
considerably more expensive, GFCI devices<br />
will break an electrical circuit<br />
in a few milliseconds when a ground<br />
leak of less than 50ma-well below<br />
electrocution potential-is detected.<br />
You'll be mildly shocked, but you'U<br />
live to teU about it. 0<br />
Dan Rogers is an electrical engineering<br />
consultant in Sprin& Tex.<br />
60 Fine Woodworking
lights unless they are on a dedicated circuit (see circuit #8 in the<br />
drawing). As a rule, don't exceed 1600 watts on one 20 amp circuit.<br />
Wiring supplies<br />
Once you've arrived at a feasible layout, you may decide to do the<br />
wiring work yourself. After you've obtained a permit (check <strong>with</strong><br />
the building desk at your local city or county planning office),<br />
you'll need to purchase the following items: cable, circuit breakers,<br />
outlet boxes and outlets <strong>with</strong> corresponding outlet covers. In<br />
addition, you'll need wire nuts to splice wires together, cable staples<br />
and clamps to secure wiring to walls and studs, and cover<br />
plates to conceal unused outlets.<br />
The most convenient way to wire a non-commercial small shop<br />
is to use non-metallic sheathed cable (one popular brand is Romex).<br />
Such cable comes in a variety of gauges and configurations;<br />
12/2 AWG (American Wire Gauge) has two insulated 12-ga wires-a<br />
black and a white one-along <strong>with</strong> a bare ground wire, all enclosed<br />
in a plastic jacket. For 220v runs up to 15 amps, the same<br />
cable comes in 12/3 AWG. This has an additional red insulated<br />
wire because 220v circuits require an additional hot wire. For wiring<br />
circuits to handle even larger loads, you'll want to use 10/2<br />
AWG or 10/3 AWG, which contains higher-capacity lO-ga wire.<br />
When calculating the amount of wire you'll need, be generous.<br />
Allow enough at the breaker box to reach any area inside, and<br />
allow an extra 6 in. at each outlet (both going in and coming out if<br />
the wire will feed subsequent outlets). Finally, add a few feet to<br />
each circuit run because when installed, the cable will dip and sag<br />
and, therefore, the required length will be a little more than the<br />
measuring tape revealed earlier.<br />
Generally, when wiring <strong>with</strong> 12-ga cable, plan to buy a 20-amp<br />
breaker for each new circuit. To determine the type of circuit<br />
breakers you need, check your breaker box (breakers that fit one<br />
make of box won't fit another). Although they're considerably<br />
more expensive, you might wish to install special Ground Fault<br />
Circuit Interrupter (GFCI) breakers on circuits that take power<br />
outdoors or to damp areas. These have a special circuit that trips<br />
the breaker to prevent electrocution any time there's an improper<br />
leak of electricity to ground. If you have an older home that has a<br />
fuse box instead of circuit breakers, you'll probably have to hire an<br />
electrician to upgrade the entire system.<br />
The type of outlet box you choose will depend on the walls of<br />
your shop. If you have exposed studs, buy the boxes-either metal<br />
or plastic-that come <strong>with</strong> nails attached for hammering them onto<br />
the studs. If the walls are finished, you will need boxes that have<br />
What about<br />
extension cords?<br />
To gain a few extra feet of mobility<br />
while using a portable power tool, you<br />
might be tempted to use a short extension<br />
cord, like the one the bedroom<br />
lamp plugs into. But all extension<br />
cords are not created equal. If you use<br />
the wrong cord, you can damage your<br />
tool or even bum down your shop.<br />
There are two major things to remember<br />
when selecting an extension<br />
cord: wire size and cord type. The<br />
chart on this page shows common wire<br />
sizes and their current carrying capacity<br />
and cord types. The amount of<br />
current your tool uses will be noted<br />
on its specification plate. If it is<br />
listed in watts instead of amps, just<br />
divide the number of watts by the<br />
tool's voltage to determine the amps.<br />
Using a wire smaller than what is<br />
needed for your tool can cause the<br />
tool and cord to overheat. And if there<br />
is a worn spot in the cord, excess<br />
heat will find it fast. A burnout in the<br />
cord can start a shop fire while a<br />
burnout in the tool means costly repairs.<br />
The rating for cord typeheavy,<br />
medium or light duty-should<br />
be printed on the cord's jacket; if it<br />
is not, assume that the cord is an SPT -1<br />
or SPT-2. Cords not rated for exterior<br />
use should not be used in wet conditions<br />
or strong sunlight.<br />
Once you have selected the cord<br />
you need, buy the proper plugs and<br />
connectors. They should be rated for<br />
at least as much current and voltage as<br />
the cord and be sized to fit the cord.<br />
Twist-style connectors are often a good<br />
choice for g portable power<br />
runnin<br />
tools, especially if you work on a ladder<br />
where the tool coming unplugged<br />
is inconvenient or dangerous.<br />
Wire the plugs in the same configurations<br />
as the outlets that feed them.<br />
If you plan to run an extension<br />
cord to a bench or stationary tool, you<br />
must route it carefully and secure it<br />
to walls and ceilings properly. Avoid<br />
passing the cord over any sharp or<br />
narrow edges that could cut through<br />
the insulation. Keep the cord in<br />
place <strong>with</strong> either insulated cable staples<br />
or support loops made in sizes<br />
to fit most cords. Do not bend the cord<br />
over nails since this often results in<br />
broken wire strands <strong>with</strong>in the cord,<br />
which you cannot see.<br />
Extension cords are a common<br />
culprit for trips and falls in home<br />
shops. If you must pass an extension<br />
cord across a walkway at floor level,<br />
make a simple wooden bridge, as<br />
shown in the photo on this page, by<br />
ripping a 300 bevel in both edges of<br />
a board that's at least 4 in. wide. Then,<br />
plow a dado on the underside to act<br />
as a raceway for the cord. To make the<br />
bridge more Visible, paint it bright<br />
red or yellow.<br />
-G.B.<br />
UJ(H)4teJ'l .JIOC)1 hrtt:.ffU! protects an extension<br />
cord from damage while preventing<br />
shop occupants from tripping over it.<br />
Extension cord amperage ratings<br />
Wire gauge Amps @ Amps @<br />
50 ft. cord 100 ft. cord<br />
18<br />
16<br />
14<br />
12<br />
10<br />
10<br />
1 3<br />
15<br />
20<br />
30<br />
Extension cord types<br />
Cord type<br />
Applications<br />
7<br />
10<br />
1 3<br />
15<br />
20<br />
Duty<br />
rating<br />
SPT-1, SPT-2 lamps, small Light*<br />
appliances<br />
SPT-3, SJ, SJT, All purpose Mediumt<br />
SJEW-A, SJOW-A, All purpose<br />
SJ TW-A weatherproof<br />
S, SE, ST All purpose<br />
STW-A, SOW-A,<br />
SEW-A<br />
All purpose,<br />
weatherproof<br />
Mediumt<br />
Heavy*<br />
Heavy*<br />
* Cord should not be moved, stepped on or<br />
abused.<br />
t Cord can be moved around on smooth surfaces;<br />
it can <strong>with</strong>stand some abuse.<br />
* Cord can be dragged around, stepped on,<br />
etc.<br />
March/April 1992 61
pinch-type grabbers that lock into the paneling on dry wall. For<br />
cement or masonry walls wired <strong>with</strong> either a flexible or rigid conduit,<br />
you'll need metal boxes <strong>with</strong> Yz-in. knockouts. Some 220v<br />
outlets require special boxes, so make sure you get one that<br />
matches your outlet. And since there are many styles of outlets<br />
available, make sure they match the correct voltage and amperage<br />
for the application. Most HOv tools use standard three-prong outlets.<br />
Twist-style outlets that prevent plugs on overhead outlets from<br />
falling out are available for either HOv or 220v plugs.<br />
Wiring the circuits<br />
The best way to install and wire your outlets depends on the construction<br />
of your shop and variations in your local electrical codes.<br />
In a shop <strong>with</strong> unfinished walls (exposed studs), first nail the out<br />
let boxes according to your layout drawing. To rout the cables, you<br />
must drill a hole through each wall stud between the breaker box<br />
and the outlet (a '12-in. hole is about right for 12-ga cable). Routing<br />
cables across the ceiling, through the joists will save wire, because<br />
you can pick the shortest route to the desired outlet. When running<br />
tl1e wire through wall studs, place holes 4 in. to 6 in. above or<br />
below the outlet boxes, and center tl1em to prevent the cable from<br />
taking a screw or nail when the walls are sheetrocked. Wherever<br />
the cable must go around a corner, drill three holes: one into tl1e<br />
face of each of the corner studs on the adjacent walls, and a third<br />
drilled diagonally into the corner to intersect the other two. This<br />
last hole cleans up the inside corner created by the first two holes,<br />
allowing the cable to round the turn. When routing the cable<br />
down the length of a stud or joist, keep it centered and staple it<br />
about every 3 ft. Feed each circuit's cables through the holes and<br />
into the boxes. Secure each cable <strong>with</strong> a staple near the hole before<br />
going on to the next box. Leave at least 6 in. hanging out of<br />
each outlet box, and leave enough cable at the source end of each<br />
circuit to go into the breaker box, but don't put it in for now.<br />
If you have finished walls, you'll need to rout wires into the<br />
walls by drilling down from the attic through the top plate or up<br />
from the basement or crawl space through tl1e bottom plate. If you<br />
have concrete or masonry walls, you'll have to install conduit or<br />
some type of surface-mounted raceway for the wires. Raceway systems,<br />
such as the one in the photo at left, cost many times more<br />
than conventional wiring but are convenient and flexible. If you<br />
choose a raceway, be sure to check the system's current capacity:<br />
Many raceways are designed only for home or office use <strong>with</strong> lowamperage<br />
items like lamps or computers.<br />
A raceway is a practical way to run new outlets along a<br />
concrete wall. By removing the metal cover, as shown here, new<br />
circuits can be wired and outlets moved or added at any time.<br />
Ins tallin g the outlets<br />
With the cables in place, you are ready to strip the ends of the<br />
wires and install the outlets. Outlets normally have a strip gauge<br />
molded into the body to show how far back to strip the wires, but<br />
if not, strip the wire % in. Wire each outlet as specified on its<br />
package, or check a basic wiring guide. On a three-prong 220v<br />
system, the white wire may not be used; if not, fold it back out of<br />
the way as you install the outlet (do the same <strong>with</strong> that wire in the<br />
breaker box). After wrapping the wire around each screw and<br />
tightening it, install the outlet by folding the wires accordion style.<br />
Finally, install the outlet plates or covers. Cords dropped from<br />
overhead boxes require special strain-relief hardware, as shown in<br />
the photos at left.<br />
An overhead outlet brings power to a tool that's located<br />
away from a wall, and eliminates the need for the cord to run<br />
across the floor where it might be in the way. Special strain-relief<br />
hardware (see the detait) secures the drop cord, and tWist-fitting<br />
plugs and receptacles on the cords keep plugs from falling out.<br />
Installing the breakers<br />
The last step to completing your new circuits is to install the<br />
breakers. First, make absolutely certain the power to your box is<br />
off If you're uncertain about this (or any other step), delegate the<br />
job to a professional electrician. After removing the cover, snap<br />
the new breaker in place. Next, you'll need to punch out appropriately<br />
sized knockouts in the breaker box to allow the cables to be<br />
routed in. Feed the cables into the panel, pull them snug and tighten<br />
the cable clamps at the knockouts. Now strip the ends of the<br />
wires and connect each circuit: The black wire goes to each corresponding<br />
breaker (black and red on 220v circuits), all white wires<br />
attach to the neutral bar and ground wires normally go to a separate<br />
bar. Put the cover back on the breaker box, and turn off all the<br />
breakers. Then <strong>with</strong> the main power on, turn each circuit on one<br />
at a time. This will tell you immediately if tl1ere's a problem, such<br />
as a short, and which circuit it involves. Now you're ready to test<br />
the outlets, and get back to your woodworking projects. 0<br />
Grant Beck is an electrical engineer in West jordan, Utah.<br />
62 Fine Woodworking
Clamping <strong>with</strong> Wedges<br />
Tapered pieces can clasp or cleave<br />
by Percy W Blandford<br />
L<br />
ike many woodworkers, I have found myself needing more<br />
clamps than I owned. Because of that, I began to use wedges<br />
as clamps, much like medieval artisans and builders who<br />
didn't have any alternatives. Thanks to my early boatbuilding experience,<br />
I learned how useful clamping <strong>with</strong> wedges can be and<br />
have since been able to apply wedge-clamping techniques to all<br />
my woodworking. And of course, cutting wedges from scrapwood<br />
is cheaper, and in some cases simpler, than using expensive metal<br />
clamps. In this article, I will discuss the most useful wedgeclamping<br />
methods I have employed, but first, I'll explain some<br />
basic wedge principles.<br />
Wedge actions and properties<br />
Whether you realize it or not, every time you drive in a screw or<br />
thread a nut onto a bolt, you are using wedge action. The threads<br />
of a screw or bolt can be considered a wedge of considerable<br />
length wrapped around a cylinder (see figure 1). If the thread is<br />
unwound, you get a long wedge <strong>with</strong> a very shallow slope (angle).<br />
Because of this, screws and bolts rely on many revolutions to advance<br />
themselves. But due to its shorter length, a plain wedge requires<br />
a steep angle to advance an object appreciably.<br />
Optimum wedge angle is hard to calculate. A steep-angle wedge<br />
produces more movement, but requires more driving force. Plus,<br />
steep-angled wedges are more likely to slip than shallow-angled<br />
ones. Most of us rely on experience to choose a wedge's angle, but<br />
for most clamping operations, a wedge that rises about 1 in. in<br />
6 in. makes a good choice. Cabinetmakers might compare this <strong>with</strong><br />
the average dovetail pitch of 1 in 7.<br />
A wedge's surface is also an important consideration. On the<br />
one hand, a wedge <strong>with</strong> a saw-cut surface has friction to resist<br />
slipping, which is good for clamping applications, but it is not as<br />
easy to drive as a wedge <strong>with</strong> a planed surface. On the other hand,<br />
a wedge that is meant to be removed periodically, such as those<br />
that are used in knockdown joinery (see the sidebar on p. 65),<br />
should have a smooth surface. And for a very slippery surface, naturally<br />
oily woods, like teak or lignum vitae, can be used to make<br />
self-lubricating wedges.<br />
Single vs. folding wedges<br />
For most clamping operations, you can choose between two types<br />
of wedge arrangements: a single wedge or folding wedges. When<br />
you drive a single wedge, as shown in figure 2A on p. 64, the<br />
movement is mostly in one direction toward whatever the wedge<br />
bears against. But single wedges can cause problems because<br />
there can be some lateral movement as well. When you need to<br />
exert pressure perpendicular to a wedge's base <strong>with</strong>out causing<br />
lateral movement, you can use a pair of folding wedges (see figure<br />
2B) that have the same shallow slope, rather than using one steep<br />
wedge. By driving each wedge in turn, you get a good thrust (preferably<br />
against a pad to protect the workpiece), <strong>with</strong> much less<br />
sideways force exerted. Since the two bearing surfaces are parallel,<br />
the action is like a screw-action clamp, but <strong>with</strong> a little improvisation,<br />
you can get into places that won't allow for conventional<br />
clamps. Figure 2B shows how folding wedges are used to edgeglue<br />
boards. Just screw or nail a block down, put pads against the<br />
work and tighten <strong>with</strong> folding wedges. Place the pads so the<br />
wedges will start <strong>with</strong> an overlap of about 2 in. on the thin ends.<br />
The thickness of one or both pads can be altered to suit the<br />
wedges, and usually, 6-in.-long wedges are adequate. By using<br />
Fig. 1: Wedge principles<br />
One of the most common examples of<br />
wedge action is found on the threads<br />
of a screw or bolt. If the spiral<br />
threads are unwound, their shape<br />
resembles a long, thin wedge.<br />
The pitch (slope) of a screw's threads<br />
determines how far and how fast the<br />
screw advances itself.<br />
Similarly, the slope of a wedge governs<br />
the amount and rate that an object will<br />
be moved. The slope also influences how<br />
easily the wedge can be driven.<br />
- ,::::;: -<br />
I<br />
- - - - -_ -- - ---<br />
Drawings: author<br />
March! April 1992 63
wedges <strong>with</strong> blocks secured to deck framing, similar tightening can<br />
be achieved when laying down boat planking or house floorboards.<br />
Wedges as bar clamps<br />
The simple wedge action described previously will work for many<br />
clamping operations. However, when gluing up boards to make a<br />
tabletop, or other wide panel, there is a risk of the boards bowing<br />
or popping up. To remedy this, you can make a bar clamp <strong>with</strong><br />
battens on the top and bottom to obtain even pressure and to keep<br />
the boards flat, as shown in figure 2E. A series of holes in the<br />
battens allows them to be used on a variety of jobs. Pressure can<br />
come from a single wedge or a pair of wedges at one or both<br />
ends. Another type of bar clamp can be made by knotting a piece<br />
of rope around whatever has to be compressed and driving a<br />
wedge under the rope at each side (see figure 2F).<br />
Wedges in other clamping applications<br />
Because they can be sized and placed to fit the situation, wedges<br />
are particularly well suited for specialty-clamping jobs, such as<br />
large bent laminations. As shown in figure 2D, cauls can be cut to<br />
match the shape of the desired bend, and wedges can be used to<br />
force the laminates against a form that is mounted on a baseboard.<br />
With a little ingenuity, specialty clamps can be fashioned for other<br />
projects, too. For instance, in traditional clench-built or lapstrake<br />
boats, the overlapping planks need to be clamped a good distance<br />
in from an edge. For these clamping jobs, I make a simple, longreach<br />
clamp (see figure 2C) that consists of a couple of boards<br />
bolted together. A thick wedge driven into one end forces the other<br />
end tight. Usually, I locate the bolt at the center, but positioning<br />
it towards the wedge can increase the clamp's leverage.<br />
This is just a sampling of how wedges can be put to work<br />
around the shop. In addition to the more familiar wedge uses, like<br />
jacking structures, moving heavy objects, plumbing door casings or<br />
leveling machinery, there are many other wedge-action possibilities.<br />
So keep wedges in mind the next time you need an extra pair<br />
of hands, or you're confronted <strong>with</strong> a challenging clamping job. D<br />
Percy Blandford lives in Warwickshire county in the U.K and has<br />
been designing boats and writing about woodworking since the<br />
end of World War II. All the drawings are by the author.<br />
Fig. 2: Wedges in clamping applications<br />
C: Long-reach C-clamp<br />
A: Single wedge B: Folding wedges<br />
Clamped parts<br />
D: Steam-bending form (plug and caul),<br />
or bent-lamination clamp<br />
E: Adjustable batten as bar clamp<br />
F: Rope loop as bar clamp<br />
I<br />
I I<br />
/ I,<br />
' I<br />
/ I I<br />
I I I<br />
/ 1<br />
/ I I<br />
I I<br />
----'---;<br />
) I<br />
r I<br />
----.---(, '<br />
64 Fine Woodworking
Integral wedges enhance joinery and ease assembly<br />
Most woodworkers are familiar<br />
<strong>with</strong> wedges that lock<br />
tenons in mortises. The<br />
wedged through-tenon and<br />
the diagonally wedged<br />
square tenons, shown at right,<br />
are common examples.<br />
These drawings also show other<br />
types of wedges or tapered<br />
pins that are integral<br />
parts of a joint and that aid<br />
assembly (or disassembly) as<br />
well. I will briefly describe<br />
the wedged joints shown<br />
here and give you a few<br />
tips for applying them.<br />
The strength of a<br />
wedged through-tenon is<br />
increased by enlarging the<br />
outside of the mortise so the<br />
tenon can spread, as shown<br />
in the drawing. To reduce the<br />
risk of the tenon splitting,<br />
drill small holes at the ends of<br />
the wedge kerfs. When<br />
you're using diagonal<br />
wedges, locate the mortise<br />
away from a component's end<br />
to avoid splitting out the<br />
mortise stock's long grain.<br />
For joints that have to<br />
<strong>with</strong>stand considerable stress<br />
but do not need to be disassembled,<br />
blind wedges can<br />
be used <strong>with</strong>in a stopped<br />
mortise. Flair the mortise by<br />
undercutting the sides as<br />
shown, and use short wedges<br />
<strong>with</strong> a steep taper. Experiment<br />
<strong>with</strong> the mortise taper,<br />
the wedge size and the kerf<br />
width to ensure a tight joint.<br />
Timber framers and furnituremakers<br />
often use offset<br />
pegged tenons. On these<br />
jOints, wedge-shaped draw<br />
pins pull the tenons tightly<br />
into their mortises because of<br />
offset holes in the tenon and<br />
mortise stock. First, drill<br />
through the mortise stock.<br />
Next, mark a corresponding<br />
hole in the tenon, but offset<br />
it toward the shoulder; about<br />
Y16 in. for close-grained<br />
hardwoods, and % in. for<br />
softwoods. Now, taper one<br />
end of your dowel pin and<br />
drive it through the assembled<br />
jOint, as shown. The<br />
wedge action of the pin will<br />
draw the tenon shoulder tight.<br />
When the dowel's full crosssection<br />
is through the joint,<br />
cut off the surplus.<br />
Removable wedges (or<br />
pins) for knockdown joinery<br />
can be plain or decorative,<br />
and they can go through<br />
square or turned parts, as<br />
shown. Make sure there is<br />
plenty of extra tenon length<br />
beyond the wedge hole, since<br />
there can be considerable<br />
thrust on a small amount of<br />
short grain. Undercut the<br />
hole just enough so the wedge<br />
won't bottom out, but will<br />
push against the surrounding<br />
wood. When you make the<br />
wedge, allow for shrinkage<br />
Cyou can always plane a<br />
shaving off later), and leave it<br />
long as well. Removable<br />
wedges for wooden tools can<br />
be fashioned in a similar<br />
way. If you use a shallow slope<br />
(1 in 8 or 9), wedges can<br />
usually be tightened or loosened<br />
by hand.<br />
-P.B.<br />
Diagonal<br />
wedges<br />
Blind wedges<br />
Wedged through-tenon<br />
[--<br />
[---<br />
:::J<br />
Removable wedges for knockdown joinery<br />
,---'---il- - - -- -<br />
----- '---+--lI - .<br />
Offset pegged mortise<br />
and tenon<br />
1----.+ ------<br />
I<br />
-______<br />
I<br />
I<br />
1<br />
.. 1<br />
1---"""'<br />
Marchi April 1992 65
Accurate, consistent results are virtually guaranteed <strong>with</strong> this sliding tenoning jig. With the workpiece securely clamped to the<br />
face of the jig and the face perpendicular to the table, precisely parallel tenon cheeks are cut easily and safely.<br />
Cutting tenons on the tablesaw is a quick, efficient way to get<br />
the job done. However, trying to slide a long, narrow frame<br />
member on its end by the sawblade can be risky. And keeping<br />
the rail or stile perpendicular to the table, which is necessary if<br />
you're to obtain parallel cheeks, isn't a given either-even <strong>with</strong> a<br />
high auxiliary wooden fence.<br />
To address these problems, I decided to build a sliding tenoning<br />
jig, as shown in the photo and the drawing. Although it looks<br />
fancy, the jig is a simple affair. Besides, I see no reason why the<br />
jigs and fIxtures we create for our tools can't be heirloom<br />
half.<br />
quality,<br />
like the old planes we love to collect. The jig consists of two maple<br />
halves, <strong>with</strong> walnut strips glued into V-grooves in the top The<br />
top half slides on these ways against the bottom half to adjust the<br />
tenon's thickness. A butcher-block face, glued and doweled to the top<br />
half of the base and to triangular walnut brackets, provides support<br />
for the workpiece, and a clamping assembly holds the workpiece in<br />
place. This jig allows me to cut tenons safely, quickly and <strong>with</strong> a<br />
much greater degree of precision than I could freehand.<br />
What follows is a brief description of some of the key steps in<br />
building the jig. I'll focus on the more critical aspects of the construction<br />
and let the drawing provide basic information. If you<br />
build the jig, size it to accommodate the type of work you plan to<br />
do and to fIt your own saw. The placement of the bottom half of<br />
the jig <strong>with</strong> respect to the miter-gauge slot depends on the distance<br />
between slot and blade on your saw. On my tablesaw the<br />
blade is 4% in. from the miter-gauge slot, so I positioned the bottom<br />
half of the jig so that the face of the jig when fully retracted is<br />
2 Ys in. from the blade. This is the largest shoulder I can leave <strong>with</strong><br />
my jig. Since I'm mainly using it for frame-and-panel work, this is<br />
more than adequate.<br />
The heart of my jig is the %-16 threaded rod to which I epoxied<br />
a T-nut set into the center of a walnut handwheel. Because the<br />
threaded rod has 16 threads per inch, turning the handwheel advances<br />
or retracts the top half of the jig <strong>with</strong> micrometer-like precision,<br />
moving the clamped workpiece closer to or further from<br />
the blade at a rate of 1/64 in. per quarter turn. To make precise<br />
incremental adjustment possible, I cut four shallow notches in the<br />
handwheel. These notches, 90° apart on the wheel, capture the<br />
spring-loaded detent to the left of the wheel, indicating the l/64-in.<br />
increments. I could have cut eight notches into the handwheel, but<br />
it's easy enough to approximate position between notches if any<br />
slight adjustment is necessary.<br />
The threaded rod passes through a copper thrust plate that's<br />
screwed into the top half of the sliding portion of the jig. The<br />
threaded rod is held in place by the thrust plate, which is captured<br />
between the handle's T-nut and a %-in. nut. The nut is fItted snug<br />
against the back side of the thrust plate and pinned to the threaded<br />
rod. The fit of this nut against the thrust plate must be loose<br />
enough to allow the threaded rod to turn freely but <strong>with</strong>out any<br />
play that would compromise the accuracy of the movement.<br />
66 Fine Woodworking
Ways and means<br />
When the jig is properly adjusted and the locking knob is clamped<br />
tight, the sliding walnut ways keep the body of the jig from racking<br />
or twisting, thus ensuring alignment of the workpiece to the sawblade-assuming,<br />
of course, that both the face of the jig and the<br />
blade have been made parallel to the miter-gauge slot.<br />
The walnut ways must be exactly square, however, or the jig will<br />
rock back and forth. Achieving this squareness on such small stock<br />
proved a little tricky. Using a jointer or planer would have been<br />
dangerous, and the ways weren't dead-on coming off the tablesaw.<br />
To solve the problem, I made a small but effective vertical thickness<br />
sander by clamping an auxiliary fence to my drill-press table<br />
% in. from a 3-in. sanding drum. If you're trying to take off a good<br />
bit of wood, you should start <strong>with</strong> the fence set back from your<br />
final dimension, and move it in incrementally.<br />
I wanted the walnut ways attached to the jig rather than freefloating,<br />
so I glued them to the top half of the jig. To prevent the<br />
exposed portions of the ways (and the corresponding grooves)<br />
from being coated <strong>with</strong> finish when I sprayed the jig, I covered<br />
them <strong>with</strong> masking tape. Wood on wood generates far less friction<br />
than plastic on plastic.<br />
A couple of caveats, a bit of hindsight and a tip<br />
To achieve consistent, precise results, the face of the jig must be<br />
perpendicular to the saw's table; it's essential, therefore, that the<br />
two triangular walnut brackets that support the fence be cut at exactly<br />
90°. Care must also be taken during assembly to ensure that<br />
the lower half of the jig is mounted in such a way that the face of<br />
the jig is precisely parallel to the sawblade. And finally, though it<br />
may seem obvious, you should position the bottom T-nuts on the<br />
face of the jig (used to secure the workpiece clamping assembly)<br />
high enough so there's no danger of the blade hitting the threaded<br />
rod that passes through the clamping-assembly spindles.<br />
I constructed the top half of the body from one piece of I-in.<br />
thick stock. In retrospect, I realize that it would have been much<br />
easier to have made this part by gluing together two pieces of 1,12-<br />
in. stock after routing the mortises for the guide block and the<br />
spring-loaded detent. Instead, I had to bore the detent'S mortise<br />
on a drill press <strong>with</strong> a hollow-chisel mortising attachment and rout<br />
the guide-block mortise nearly I in. deep.<br />
You can expand the versatility of this tenoning jig by putting<br />
extra T-nuts in the back of the face for future add-ons. For example,<br />
by adding a 45° plate (a clear-acrylic drafting triangle, drilled<br />
and mounted on the jig's face <strong>with</strong> spacers), you can cut mitered<br />
tenons for picture frames and small boxes. If you have a mitergauge<br />
slot in your router table, you can also use the jig for mortising<br />
or for routing dovetail-splined corners. 0<br />
Lyle Kruger is a professional land surveyor and an amateur woodworker<br />
and metalworker in Effingham, Ill.<br />
Sliding tenoning jig<br />
Locking knob<br />
Drilled-out chair glides are<br />
tack-welded to ends of<br />
threaded rods.<br />
Wooden handles,<br />
epoxied to threaded rods<br />
Top half of sliding portion<br />
Spring-loaded<br />
detent<br />
Dogbane-shaped clamp back<br />
Brass acorn nuts, epoxied to<br />
ends of threaded rods<br />
Vertical reference piece<br />
Jig face is made from<br />
butcher-block cutout.<br />
Handle<br />
Wooden guide block<br />
<strong>with</strong> T-nut<br />
Steel-bar stock fits miter-gauge slot.<br />
Photo: Dick Burrows; drawing: Bob La Pointe<br />
March/April 1992 67
Convertible F<br />
Ta bles designed to lead dual lives<br />
urniture<br />
by Edward R. Monteith<br />
Some pieces of fu rniture literally<br />
work. The tambour of a rolltop desk,<br />
or even a rocking chair, allows-or<br />
perhaps even demands-human interaction.<br />
Similarly, but in a more subtle manner,<br />
the game table, shown in the photos<br />
on the facing page, and the spinet desk on<br />
p. 71 are hard workers. Both perform double<br />
duty and do so gracefully, but unlike a<br />
rocker or a rolltop, they hide their alter<br />
egos. Perhaps the element of surprise is<br />
partially responsible for my satisfaction in<br />
owning them; when visitors comment on<br />
my hall tables, they're fascinated and<br />
drawn in by the transformations that occur.<br />
Designing and building these tables was<br />
satisfying as well. In describing them, I'll<br />
provide you <strong>with</strong> the critical concepts and<br />
relationships that make these pieces of furniture<br />
work, so you can build similar<br />
pieces that suit your particular needs.<br />
An expanding game table<br />
Annoyed for years by a card table that<br />
swayed like a tall pine in a gale, I had<br />
often considered building a sturdier model.<br />
In addition, I was fed up <strong>with</strong> having to<br />
burrow through an overstuffed coat closet<br />
to drag out my oid folding table. And I<br />
wanted a table that provided more playing<br />
surface than standard models but didn't<br />
dominate my living room.<br />
During a visit <strong>with</strong> friends, an 18th-century<br />
Dutch game table caught my eye. Its<br />
rails folded on two sides, allowing it to<br />
transform from a full-size card table into<br />
an attractive side or occasional table that's<br />
only half as large. Even though the Dutch<br />
table was more than 200 years old and the<br />
hardware was somewhat worn and loose, it<br />
was still remarkably sturdy. I decided to try<br />
my hand at building a similar table. Rather<br />
than using reproduction hardware, I substituted<br />
contemporary, precision hardware<br />
(for a far sturdier table), and I adjusted the<br />
size to fit my needs. Since that first effort,<br />
I've built two more of these tables (see the<br />
photos on the facing page). The actual construction<br />
was relatively straightforward, but<br />
the design required a bit of thought.<br />
Dividing up the folding rails-The<br />
most critical aspect of the design was determining<br />
the lengths of the various pieces<br />
of the folding rails. Figure 1 (see the facing<br />
page) illustrates the requirements for the<br />
folding rails. I found it easiest to work<br />
backward from the desired final dimensions<br />
of the tabletop. On the basis of comparison<br />
<strong>with</strong> existing card tables, I decided<br />
to build my table 34 in. sq. when open and<br />
half that width closed. A 2 V4-in. overhang<br />
all around gave me a base that's 29V2 in. sq.<br />
when open and folds to 12V2 in. when<br />
closed. I arrived at these numbers unscientifically;<br />
the table's proportions when<br />
closed pleased my eye, and I knew it<br />
would provide plenty of space when open<br />
for cards, tea and such.<br />
Having established these dimensions, I<br />
simply subtracted 9 in., the distance between<br />
legs when the table is closed, from<br />
26 in., the length of the front and back rails<br />
between the legs. This gave me 17 in. as<br />
the correct overall length for tl1e exposed<br />
portions of the two remaining pieces of<br />
each folding rail when the table is open<br />
(see figure 1). However, this is only the exposed<br />
overall dimension. A half-lap notch<br />
cut into the back rail piece and the corresponding<br />
notch cut into the middle rail<br />
piece hide the folded rails when the table<br />
is closed up and help stiffen the back-tomiddle<br />
rail-piece joint when open. For the<br />
table to close properly, these notches must<br />
be long enough to accommodate the thickness<br />
of the two folding rail pieces and the<br />
front back flap hinge when folded (see figure<br />
1). For my table, I cut the notches<br />
2'14 in. long, which gave me a little play.<br />
Adding this 2 V4 in. to the 17 in. gave me a<br />
total of 19'14 in. for the middle and front<br />
rail pieces on each side.<br />
At this pOint, common sense might tell<br />
you simply to halve that number to give<br />
you the proper length for each of the remaining<br />
pieces of rail. You wouldn't be far<br />
off the mark. I've found, though, that cutting<br />
the front rail I/S in. longer than the<br />
middle piece prevents the folding rails<br />
from binding in the corner. This is because<br />
the back flap hinge isn't mortised into the<br />
front leg and spacer block, so tl1e end of<br />
the front rail piece must extend past the<br />
center point of the hinge pin, if the rail is<br />
to butt up snugly against the leg (see the<br />
drawing at right). Therefore, the front rail<br />
piece must be Vs in. longer (tl1e approximate<br />
width of a hinge leaf), if it and the<br />
middle rail piece are to fold parallel to the<br />
front rail and not bind.<br />
Milling the parts and installing the<br />
hinges-Once I'd worked out these relationships,<br />
I felt comfortable beginning construction.<br />
I cut the leg blanks to 1 % in. sq.<br />
by about 28 in. long, which left me an inch<br />
for trimming tl1e legs to final length and<br />
removing chuck marks from the top ends<br />
after I'd turned them. I turned the legs and<br />
trimmed them to length. Then I cut the<br />
-in. sliding-dovetail mortises for the fixed<br />
front and back rails (and for the fixed back<br />
end of the folding rails) on my router table<br />
using wooden stop blocks and running a<br />
test cut on a piece of scrap first.<br />
68 Fine Woodworking
A 200-year-old Dutch table was the<br />
model for the author's interpretation,<br />
shown above and at right. An ingenious<br />
fO lding-rail system allows the table to<br />
do double duty as a simple hall table<br />
most Of the time and as a game table<br />
when the need arises.<br />
Fig. 1: Folding card/side table<br />
Plywood spreader slides into dado near bottom of rails to lock folding rails open.<br />
Centerline<br />
Centerline<br />
Centerline<br />
t<br />
Solid-wood stiffener<br />
-=----..a--'--' <br />
12'12 1....--------1<br />
Offset-knife<br />
hinge<br />
r \<br />
Back<br />
flap hinge<br />
.\<br />
90/16<br />
19<br />
29'12<br />
Note that piece B is in. longer (approximately<br />
half the thickness of the back flap hinges) than<br />
piece A. This is to permit the leaves of the rail<br />
to fold nearly parallel to the front rail when<br />
the table is closed . You may have to make<br />
slight adjustments for optimal results.<br />
Spacer block --:a...o='=F!---.<br />
Back flap hinge<br />
Front-leg assembly<br />
Photos:<br />
Sandor Nagyszalan czy<br />
March! April 1992 69
When milling the rail stock, I left it<br />
slightly wide so that I could trim away any<br />
tearout along the edge that might result<br />
from routing the sliding dovetails. I then<br />
selected and routed the face side of all my<br />
sliding dovetails. I reset the fence for the<br />
other half of each dovetail, checked the cut<br />
on a piece of scrap and made some minor<br />
adjustments to get a good, snug fit in the<br />
dovetail mortises in the legs. Satisfied <strong>with</strong><br />
my cut, I routed the back side of the dovetails<br />
on all rails. Before cutting the two<br />
folding rails into three pieces each, I routed<br />
dadoes near their bottom inside edges to accommodate<br />
the 'l4-in. plywood spreader that<br />
slides forward and locks the rails open. I<br />
then cut each folding rail into three pieces,<br />
as described above, and marked them so<br />
that the grain on the rails of the assembled<br />
piece would be nearly continuous.<br />
Proper hinge installation is as essential<br />
as is determining the requisite lengths of<br />
the folding rail pieces. I routed mortises<br />
for the offset-knife hinges that join the<br />
front and middle section on my router table,<br />
and then I cut the half-lap notches on<br />
the back and middle rail pieces. After installing<br />
the offset-knife hinges into the<br />
mortises, I mounted the back flap hinges<br />
on the overlapping back and middle rail<br />
pieces. It is essential that this hinge is<br />
mounted <strong>with</strong> its pin perpendicular to the<br />
top edge of the rail, so the rail won't bind<br />
and so the tabletop will sit flat.<br />
Next, I glued and clamped the leg-to-rail<br />
dovetails. After they dried, I inserted the<br />
1 14-in. plywood spreader into the dado near<br />
the bottom of the rails and screwed the<br />
front pieces of rail to the front legs and to<br />
a spacer block. Again, it's very important<br />
that the hinge pins be perpendicular to the<br />
rails. After assembling the base, I cut and<br />
installed diagonal corner braces to keep<br />
the corners rigid.<br />
Because I've found it easier to work <strong>with</strong><br />
narrow boards when drilling deep mortises<br />
(like those required for the three Soss<br />
hinges I used to COlmect the two leaves of<br />
this tabletop), I ripped the innermost<br />
board of each leaf to about 3 in. wide and<br />
routed the mortises for the hinges before<br />
gluing up the leaves. Two hinges might<br />
have been adequate, but the third hinge<br />
should help prevent the leaves from warping.<br />
Once the hinges were installed, I glued<br />
up both leaves and finish-sanded them. The<br />
tabletop is attached to the base <strong>with</strong> a screw<br />
through each of the diagonal corner braces.<br />
The screw holes should be elongated to allow<br />
for cross-grain movement.<br />
A spinet desk goes undercover<br />
The first true spinet desks were made for<br />
school use in the 1830s by fitting cast-iron<br />
cab rio Ie legs to melodeon cabinets (boxes<br />
which contained the innards of an organlike<br />
instrument). The desk I used as a<br />
model was made at a later date, though,<br />
and is a simple box <strong>with</strong> a front panel<br />
hinged to a folding top. Turned wooden<br />
legs are attached to the box's bottom <strong>with</strong><br />
hanger bolts, and the interior of the box<br />
contains a slide-out writing surface and pigeonholes<br />
for paper storage. Time has taken<br />
its toll on this piece, leaving it a bit<br />
wobbly, but the desk's ability to transform<br />
from utilitarian writing desk to demure<br />
hall table captivated and inspired me (see<br />
the photos on the facing page).<br />
I wanted to build a similar piece that retained<br />
the style and character of the original,<br />
but was more stable. I accomplished<br />
this by using sliding dovetails (as on the<br />
game table) for all leg-to-rail joints except<br />
for the front fascia piece, which I tenoned<br />
into mortises in the front legs (shown in<br />
figure 2 on the facing page). I also wanted<br />
a larger writing surface that would be<br />
more suitable for adults, so I increased<br />
all dimensions of the piece proportionally.<br />
The resulting piece is a simple, yet<br />
elegant desk, and the writing surface (and<br />
any attendant mess) can be hidden in a<br />
moment by pushing it in and then folding<br />
the top down.<br />
Assembling the desk-The drawing on<br />
the facing page shows the desk's construction<br />
and the relationship of the parts. I first<br />
glued and clamped the back rail and legs<br />
and the front fascia and legs together; I let<br />
them dry, and then glued the front and<br />
back assemblies together <strong>with</strong> the side<br />
rails. Next, I screwed the cleats that support<br />
the writing surface all around the inside<br />
of the box. The cleats are flush <strong>with</strong><br />
the top surface of the front fascia and the<br />
side deats are notched to fit around the legs.<br />
To fi ll the gap between the side rails and<br />
the inner surface of the legs, I glued and<br />
screwed L-shaped guide pieces (one piece<br />
of wood routed out) to the side rails. The<br />
guide's vertical arm comes just flush <strong>with</strong><br />
the inside edge of the legs, and the horizontal<br />
arm extends beyond the legs to<br />
form a pocket between itself and the side<br />
cleats so that the writing surface can slide<br />
freely. These guides also support the removable<br />
pigeonhole assembly. I constructed the<br />
assembly from %-in. stock and designed it to<br />
accommodate standard writing paper and<br />
envelopes as well as to provide miscellaneous<br />
storage. With the pigeonhole assembly<br />
in place on the writing surface guides, I<br />
measured for filler blocks on either side and<br />
for the top cleats, through which I screwed<br />
the back leaf of the folding top. The filler<br />
blocks and top cleats were screwed to the<br />
side rails through elongated holes to allow<br />
for wood movement.<br />
I'd glued up the writing surface ahead of<br />
time so that it would be ready to trim to<br />
size when it<br />
carne time to assemble the<br />
desk. I used a glue joint tongue-and-groove<br />
bit to rout the ends of the boards and the<br />
end caps, but I only glued the end caps to<br />
the main field of the writing surface in the<br />
middle, to allow for expansion and contraction.<br />
Now, <strong>with</strong> the box assembled and<br />
the guide pieces installed, I trimmed the<br />
writing surface to fit neatly between the<br />
front legs and to set back far enough to allow<br />
the false drawer front to close flush<br />
<strong>with</strong> the fascia. Two short dowels glued<br />
into the bottom of the writing surface, as<br />
shown in tl1e drawing on the facing page,<br />
act as stops, and a brass sliding-door pull is<br />
mortised into the top. To fill the space between<br />
the pigeonhole assembly and the<br />
writing surface, I glued and screwed a narrow<br />
fi ller piece (about 11/2 in. wide) to tl1e<br />
writing surface so that it would protrude<br />
about an inch beyond the pigeonholes<br />
when fully open.<br />
The top consists of two equal-width<br />
leaves joined <strong>with</strong> Soss hinges, like the top<br />
of the game table. To mount the top, I ran<br />
screws up through the top cleats at either<br />
side of the box and into the back leaf.<br />
Then, <strong>with</strong> the top closed, I marked the underside<br />
of the front leaf for the false drawer<br />
front, cut the front panel to fit and attached it<br />
to the front leaf <strong>with</strong> a piano hinge.<br />
Ed Monteith is a hobbyist woodworker who<br />
lives in Pebble Beach, Cal. All the hardware<br />
used in the expanding game table and in<br />
the spinet desk was purcbased from Woodcraft,<br />
210 Wood County Industrial Park,<br />
PO Box 1686, Parkersburg, W Va. 26102-<br />
1686; (800) 225-1153.<br />
70 Fine Woodworking<br />
•
Fig. 2: Spinet desk/hall table<br />
Soss hinge<br />
False drawer front<br />
Cleat secures top to side rails.<br />
Top<br />
Guide piece<br />
Side ra il<br />
Piano<br />
hinge<br />
Filler piece<br />
Back rail<br />
Sliding-door pull<br />
Writing surface<br />
Fascia<br />
Dowels limit pullout.<br />
With the cover up, it's a work station;<br />
<strong>with</strong> the cover down, it's a simple and un·<br />
obtrusive table. This combination hall table/spinet<br />
desk helps to maintain order in<br />
the author's house. Although the design is<br />
based on an old school desk, Monteith<br />
sized the piece for himself, increasing all<br />
dimensions proportionally. The pigeon·<br />
holes, too, were adapted for modern use to<br />
fit standard envelopes and stationery.<br />
Marchi April 1992 71
More than 5,000 hours of labor went into this columbarium, designed by Gerald Harbinson<br />
and built by Century Guild of Durham, NC It's 91h ft. high by 16ft. long<br />
and contains 500 cremation urns. For this project,<br />
100,000 bd. ft. of oak were picked tbrough, and<br />
3,500 pieces of custom hardware were made.<br />
From<br />
Artiture to Architure<br />
Functional furniture <strong>with</strong> an architectural form<br />
by Vincent Laurence<br />
W<br />
hen Art Carpenter used the term artiture in 1983 (J'WW #38) to describe art that looked like<br />
furniture, but was nonfunctional, he didn't intend it to be wholly disparaging. The term gained<br />
that connotation, however, as woodworkers who valued craftsmanship over cleverness came to<br />
disdain objects that appeared to be furniture and commanded exorbitant prices, yet had no practical value.<br />
The four objects on these two pages (and the silver chest on the back cover) are all functional furniture<br />
and architecture as well. Furniture design has always borrowed from architecture: pediments, cornice<br />
and columns are as common on furniture as they are on buildings. But these pieces represent<br />
actual buildings, or portions of buildings-not merely details from those buildings. From Gothic to Modern,<br />
<strong>with</strong> a couple of stops along the way, here's a mini-tour of buildings as furniture-or is it architure? 0<br />
Vincent Laurence is an<br />
assis tant editor at FWW<br />
PhOto this page: Richard Faughn
"Hey mister, that's a pretty cool chair," was<br />
one 6-year-old's response to Stephen Perrin's<br />
Empire Chair. His first piece as a profeSSional<br />
furnituremaker (following 20 years as a<br />
graphic artist for television), the maple rocker<br />
has been featured in several magazine and<br />
newspaper articles and was on the cover Of the<br />
invitation for a group furniture show. The<br />
base of the back is s<br />
crewed through the seat, and<br />
four brackets of 614 stock are tenoned into mortises<br />
in both the seat and this base. The building'S<br />
mass was then mortised 1 % in. into the base.<br />
New York ? Chicago ? Los Angeles?<br />
No, just an imaginary city<br />
according to Dave Rudolph, its<br />
maker. This table is one of five in<br />
a series called 'E' Ticket (as in<br />
the kind you get at a carnival)<br />
that depict frozen moments in<br />
the evolution Of a city from the<br />
early 20th century (pictured<br />
here) to well into the 21st century.<br />
The 6-ft. -long tables, made of<br />
pine and finished in lacquer, now<br />
reside in a suite Of Offices in<br />
Beverly Hills, Cal.<br />
Photo; Lance Patterson<br />
North Bennet Street<br />
graduate Stephen<br />
Alexander wanted more<br />
of a memento of his<br />
school days than a sweatshirt<br />
<strong>with</strong> the school's<br />
name printed on it. The<br />
trompe l'oeil chest pictured<br />
here is the result. All<br />
first-year students make<br />
a tool box, but Alexander's<br />
goes considerably<br />
beyond the requisite<br />
norms of thoughtful<br />
design and impeccable<br />
joinery. Collecting stone<br />
chips and photographing<br />
a number of Boston edifices<br />
to obtain the right<br />
shade for his "sandstone"<br />
finish was a start. For the<br />
faux carving on the<br />
chest's side, Alexander<br />
made a clay model and<br />
placed lamps strategically<br />
to create shadows.
After-Market Miter Accessories<br />
In search of the perfect angle<br />
by Daniel Westberg<br />
The three miter gauges above use complementary angles to<br />
achieve accurate 90° joints. From left to right, Fas1Track, which is<br />
an assembly of optional parts; Perfect Miter, which requires adding<br />
a fence; and Right Angle Miter Gauge, which comes complete<br />
as shown in this photo.<br />
Sliding tables generally offer good control and help to reduce<br />
stock movement because of the large contact surface between the<br />
table and the stock. At right, T-Square is in the background,<br />
Dubby is front left and Perfect Miter is front right.<br />
Although similar to stock miter gauges, these units offer various<br />
improvements, such as quick-acting hold-down clamps, adjustable<br />
stop blocks and fences, and preset angle stops. From<br />
left to right, Performance Mitre Gauge, Multi-Purpose Mitre<br />
Gauge and Accu-Miter.<br />
74 Fine Woodworking
H<br />
Ow often have you fussed <strong>with</strong> your miter gauge when<br />
trying to make accurate angle cuts ? First you set it; then<br />
you check it; then you set it again. And after further fine<br />
tuning and trial cuts, you still find gaps at some of the joints during<br />
assembly. This all-too-common frustration in my custom-furniture<br />
shop led me to investigate why these problems persisted and what<br />
I could do about them.<br />
I found three primary areas that influence the accuracy of miter<br />
cuts: the tablesaw setup, the stock preparation and the miter gauge<br />
itself. In this article, I will concentrate on the after-market<br />
miter aids, like the gauge shown in the photo at right, and the<br />
sliding tables that the manufacturers promise will solve all your<br />
problems. The sidebar on this page introduces some points to<br />
consider for aligning the tablesaw, accurate stock preparation and<br />
tablesaw techniques that will make any miter gauge perform up to<br />
its full potential.<br />
The miter gauge<br />
A miter gauge is generally provided as standard equipment <strong>with</strong> a<br />
tablesaw and is a necessity for safely crosscutting and mitering on<br />
the tablesaw. The gauge consists of a bar that rides in a machined<br />
slot on the tablesaw top, a fence assembly that pivots right andJor<br />
left, a protractor-style scale for setting the gauge to various angles<br />
and a lock knob to hold the fence in position. Many of these<br />
gauges have built-in stops to allow quick setting to the more<br />
commonly used angles.<br />
Assuming that the tablesaw is properly aligned, a miter gauge's<br />
performance depends on how well the bar fits the machined slots<br />
in the tablesaw and how accurately the fence's angle can be set.<br />
Unfortunately, stock miter gauges usually fall short in both departments<br />
(see the sidebar on p. 77 for tips on fitting the bar to the<br />
slot). These inadequacies have resulted in a flood of after-market<br />
miter-gauge tools, accessories and tables.<br />
In my search for the perfect miter, I tried several replacement<br />
miter gauges, shown in the top and bottom photos at left, that<br />
promised to be better than a stock gauge. I also looked at .<br />
three<br />
sliding cutoff tables, shown in the middle photo at left, that ride<br />
on the tablesaw top. Although these miter gauges are similar in<br />
appearance to standard equipment, many incorporate innovative<br />
improvements. The chart on the next two pages provides an overview<br />
of the features of each gauge and of the sliding cutoff tables.<br />
The discussions of the specific features that follow, will help you to<br />
determine which of these devices best suits your needs.<br />
Complementary-angle miter gauges<br />
Three miter gauges, the Kity Right Angle Miter Gauge imported by<br />
Farris Machinery, the Perfect Miter Square II from Leichtung Workshops,<br />
and the FasTTrak by Rib Mountain Tool Works (shown in<br />
the top photo at left) use adjacent 90° fences for cutting complementary<br />
angles. (Two angles are complementary if they add up to<br />
90°.) When making a rectangle, as in a picture frame, using complementary<br />
angles will result in a true 90° corner. If the angle of<br />
the first fence is set at 46°, the adjacent fence will automatically be<br />
at 44°. This works very well <strong>with</strong>in a limited range of 1° or 2°.<br />
However, as one angle becomes smaller, the length of its mitered<br />
face becomes longer, and as the other angle becomes larger, its<br />
mitered face becomes shorter. This difference quickly becomes<br />
noticeable, particularly on wide stock or contoured moldings because<br />
the details on the face of the moldings won't line up.<br />
I found Kity's gauge to be the most versatile and complete of the<br />
complementary-angle miter gauges. As standard equipment, it includes<br />
a fully adjustable right- or left-angle protractor scale and a<br />
20-in. fence <strong>with</strong> a flip stop for repetitive length cuts. This tool<br />
A miter gauge is essential to safely crosscut and miter on<br />
tbe tablesaw. Here tbe autbor uses a FasITrack miter gauge,<br />
witb adjustable fence and micrO-adjustable flip stop.<br />
Keys to accurate<br />
tablesaw mitering<br />
The four keys to accurate miters on a tablesaw are a well<br />
adjusted saw; a high quality, sharp blade; proper stock preparation<br />
and good work techniques.<br />
Required adjustments: The first order of business for<br />
accurate cutting on any tablesaw is to fine-tune the adjustment<br />
of the sawblade in relation to the table and its<br />
machined miter-gauge slots. The blade should run true in<br />
three axes, all of which depend on the alignment of the sawblade's<br />
arbor to the tablesaw top. The blade must be parallel<br />
to the miter-gauge slots and square to the tabletop, and the<br />
arbor must rotate <strong>with</strong> no runout. (For more on making<br />
these adjustments see Mark Duginske's article "Tuning- Up<br />
Your Tablesaw," FWW #78, pp. 69-73.)<br />
The sawblade: Even if your tablesaw is aligned properly,<br />
blade runout can still occur if the blade plate is warped. I<br />
check for a warped blade by clamping a dial indicator to<br />
the tabletop <strong>with</strong> its tip against a smooth part of the blade.<br />
Then I rotate the blade past the indicator by pulling on the<br />
drive belt. Some blade manufacturers, such as Forrest Manufacturing<br />
Co. (461 River Road, Clifton, N.]. 07014), make<br />
precision ground plates called blade stiffeners-dampeners that<br />
mount on the arbor next to the blade and help reduce runout.<br />
For crisp, clean cuts, the blade must be sharp.<br />
Stock preparation: Preparing the stock so that it is flat<br />
and opposing faces are parallel to each other is critical. If<br />
the wood has a bow or twist, it will not rest flat against the<br />
miter-gauge fence or tablesaw top.<br />
Method of work: Though it may seem obvious, any<br />
wood chips or debris caught between the fence and the stock<br />
also will affect the accuracy of the cut. The compounding<br />
effect of even a small error adds up as each piece is machined.<br />
Another problem that can arise when mitering is a slight<br />
movement or creeping of the stock as it is fed through the<br />
blade, resulting in a cupped or bowed cut. This creeping<br />
can result from a change in hand position as the arm extends<br />
to feed the stock or from the force of the blade. When the<br />
miter gauge is used in the open position (tilted away from<br />
the blade, as shown in the photo above), the blade tends to<br />
push the stock away from it. I feel this is a safer option than<br />
using the miter gauge in the closed pOSition, where the<br />
blade tends to pull the stock into it. Also, in the open pOSition,<br />
a stop on the miter fence will counteract the force of the<br />
blade to eliminate creep. I combat creep when working <strong>with</strong>out<br />
a stop by gluing a strip of abrasive to the fence face. I<br />
leave % in. between the bottom of the abrasive and the bottom<br />
of the fence to aid in easy removal of sawdust and<br />
chips. For critical miters, I clamp the stock to the fence.-D. W<br />
March/April 1992 75
produces clean miter joints <strong>with</strong> no gaps in normal picture-frame<br />
size stock, and not incidentally, it comes <strong>with</strong> the best instructions<br />
for assembly and use.<br />
One problem <strong>with</strong> the complementary-angle design used by<br />
both Kity and Leichtung is that when mitering one end, the stock<br />
must be held against the trailing fence of the gauge. In addition to<br />
the normal tendencies for the stock to creep away from the blade<br />
when the workpiece is held at an obtuse angle to the blade (I call<br />
this the open position), the force of the blade also pushes the<br />
stock away from the rear face of the miter gauge. After making this<br />
first cut, the stock is flipped around the gauge to miter the other<br />
end <strong>with</strong> the workpiece held at an acute angle to the blade (the<br />
closed position). For smaller stock, these operations aren't a prob-<br />
lem, but for larger boards, it's more difficult to hold the stock<br />
<strong>with</strong>out creep, especially for the first cut.<br />
The FasTIrack from Rib Mountain Tool Works is a new concept<br />
in miter gauges: individual components can be combined to form<br />
a complete gauge or added to an existing miter gauge. The bar<br />
component comes <strong>with</strong> a fixed 90° angle, to which an adjustable<br />
fence can be attached, or <strong>with</strong> two fixed 45° angles, one at each<br />
end of the bar (see the photo on p. 74). By switching the adjustable<br />
fence from one end of the bar to the other and changing the gauge<br />
from the left to the right of the blade, both complementary cuts can<br />
be made <strong>with</strong> the gauge in the open position. The bar has adjustable<br />
Cool Blocks for fitting it to the slot (see the sidebar on p. 77). Mounting<br />
tracks and stop blocks are available to customize the unit.<br />
After-Market Miter Gauges and Sliding Tables<br />
Product nameiManufacturer Guide Bars Uses<br />
Number Complementary<br />
and Length Angles<br />
Angle Preset Fence Fence Length! Stop<br />
Adjustments Angle Position Extended Block<br />
Stops Adjustable Length<br />
Miter gauges<br />
Accu-Miter 1 No<br />
JDS Co., 800 Dutch Square Blvd., 20"<br />
Suite 200, Columbia, SC 29210<br />
(800) 382-2637, (803) 798-1 600<br />
Kity Right Angle Miter Gauge 1 Yes<br />
Farris Machinery, 320 N. 11th, 12"<br />
Blue Springs, MO 64015<br />
(800) 872-5489, (816) 229-3055<br />
Perfect Miter Square II 1 Yes<br />
Leichtung Workshops 12"<br />
4944 Commerce Parkway,<br />
Cleveland, OH 44128<br />
(800) 321-6840, (216) 831-6191<br />
Multi Purpose Mitre Gauge 1 No<br />
Penn State Ind., 2850 Comly Rd. 16"<br />
Dept. 68, Philadelphia, PA 19154<br />
(800) 288-7297, (215) 676-7609<br />
FasTTrack 1 Yes<br />
Rib Mountain Tool Works 17"<br />
1300 Cleveland Ave.,<br />
Wausau, WI 54401<br />
(715) 848-1 122<br />
Performance Mitre Gauge 1 No<br />
Vega Enterprises, Route 3, 20"<br />
PO Box 193, Decatur, IL 62526<br />
(800) 222-8342, (217) 963-2232<br />
Yes 15°,22%°, Yes 18 in.!34 in. 2 Flip<br />
30°,45°, 24 in.!46 in. stops<br />
90°<br />
Yes No Yes 20 in.!N/A Flip stop<br />
(39 in.!N/A<br />
optional)<br />
Yes No N/A N/A None<br />
Yes 45°,90° N/A N/A Sliding<br />
rod<br />
Fixed 45° N/A Optional 24 in.!N/A Optional<br />
or fence is flip stop<br />
fixed 90°<br />
adjustable<br />
Yes No Yes 16 in.!N/A Flip stop<br />
24 in.!N/A<br />
Sliding Tables<br />
T-Square Miter Sliding Table 2 Yes<br />
Biesemeyer, 216 S. Alma School 30W'<br />
Road, Mesa, AZ 85210<br />
(800) 782-1 831, (602) 835-9300<br />
Fixed 45° N/A N/A 40 in.!N/A Yes<br />
or<br />
36 in.!N/A<br />
Fixed 90°<br />
Dubby 1 No<br />
In-line Industries 24"<br />
661 S. Main St.<br />
Webster, MA 01570<br />
(800) 533-6709, (508) 949-2968<br />
Yes<br />
90°<br />
No 31 in.!N/A Sliding<br />
rod <strong>with</strong><br />
micro<br />
adjustment<br />
Perfect Miter 2 Yes<br />
Trend-Lines, 375 Beacham St., 5"<br />
Chelsea, MA 02150<br />
(800) 767-9999, (617) 884-8951<br />
Fixed 45° N/A No 7 in.!N/A None<br />
76 Fine Woodworking
Adjus1able vs. fixed fences<br />
The method of adjusting the fence to cut various angles is another<br />
consideration. Some of the units have a fence that is permanently<br />
ftxed at a preset angle, usually 45°. Although you can consistently<br />
cut one angle accurately <strong>with</strong> a ftxed fence, you would need a separate<br />
gauge or table for each different angle that you need to cut.<br />
An adjustable protractor head or fence is more versatile than a<br />
ftxed fence, and some of the adjustable units have preset stops so<br />
that frequently used angles can be quickly reset. Of course, adjusting<br />
the fence introduces another variable that can affect the accuracy<br />
of the cuts.<br />
In addition to being adjustable for any angle, many of the miter<br />
gauges' fences can be moved closer to the blade to fully support<br />
Stock Suggested Comments<br />
Clamp Retail<br />
Price<br />
Optional $149.00 Guide bar is optional. $14.95<br />
quick or<br />
release or $164.00 Guide bar is optional. $14.95<br />
pneumatic<br />
No $84.95 Finger joint attachment<br />
available -$59.95<br />
No $49.99 User must supply fence.<br />
Quick $45.00 User must supply fence.<br />
release<br />
No $40.00 Complete setup shown in<br />
photo on. p. 74 costs $121.95.<br />
$40.00 This is the only device that<br />
provides a means to adjust<br />
guide bar to tablesaw slot.<br />
Quick $135.00 Easy to read protractor scale,<br />
release $146.50 but degree indicator is<br />
imprecise.<br />
Adjusting the bar's fit<br />
While I've often felt that a better tool would enable me to<br />
do better work, financial reality usually dictates I make do<br />
<strong>with</strong> what I have. So before deciding to replace your miter<br />
gauge, take a look at how its perfonnance can be improved. The<br />
key to consistently accurate results is to fit the miter-gauge<br />
bar to the tablesaw's slot <strong>with</strong> no side-to-side play. The simplest<br />
solution is to use a longer bar, which will spread the play<br />
over a greater distance, reducing the overall side movement<br />
Home-and machine-shop remedies: A bar that is too<br />
tight, a rare occurrence, is easily fixed by lightly filing the<br />
sides until it fits or by having a machinist grind the bar<br />
about 0.002 in. narrower than the slot. The bar also may need<br />
to be straightened because the grinding process can bow<br />
the cold-rolled steel, from which most bars are made.<br />
A loose bar is more common and more difficult to overcome.<br />
You can use a center punch to expand the metal along<br />
the side of the bar for a tighter fit, but be careful, excessive<br />
force may stretch the bar and cause it to bow.<br />
Another option is to have a machinist mill 2-in.-long adjustment<br />
slots about % in. from one edge of the guide bar.<br />
Then a setscrew, tapped into a hole in the bar's other edge,<br />
can be used to expand the bar to fit the miter-gauge slot. This<br />
option provides a greater and more precise range of adjustment<br />
than the center-punch method and allows for readjustment<br />
if necessary. After any modification, file sharp edges<br />
or burrs to avoid premature wear of the slot. For a smooth<br />
sliding bar, clean and wax it <strong>with</strong> a good, non-silicone machine<br />
wax, such as Kity Speed ($4.95 for 2% oz. or $19.95 for<br />
18 oz.), imported by Farris Machinery.<br />
Commercial corrections: Bob Kressel of Rib Mountain<br />
Tool Works has an innovative and cost-effective method for<br />
fitting the bar to the slot. He first surface grinds one edge of<br />
the miter-gauge bar straight. Then he drills and taps four holes<br />
in the bar and places a graphite-impregnated plug (Garrett<br />
Wade's %6-in.-dia. Cool Blocks) <strong>with</strong> socket setscrews in these<br />
holes, as shown in the photo below. The setscrew adjusts<br />
the plug to remove any play between the miter bar and slot,<br />
and the graphite provides free and easy movement. Kressel<br />
charges $20 for these services, including return postage.<br />
The Incra Miter Slider by Taylor Design Group, Inc. (po<br />
Box 810262, Dallas, Tex., 75381) is an 18-in.-long, extruded<br />
aluminum bar, <strong>with</strong> two adjustment points that can expand<br />
the bar up to Y64 in. The Miter Slider retails for $12.95 and<br />
comes <strong>with</strong> plans for shopbuilt sliding-crosscut tables; it<br />
also can be adapted to fit some miter gauges. The major drawback<br />
of the Miter Slider is that if you need to cut a board<br />
wider than about 10 in., one of the two adjustment points will<br />
be <strong>with</strong>drawn from the miter-gauge slot, and the bar will<br />
pivot about the other pOint.<br />
-D. W.<br />
No $345 Good for large, heavy stock.<br />
$295.00 Good for large panels.<br />
No $1 1 9.95 Right and left hand models<br />
may be connected to form<br />
large table.<br />
Threaded $49.95 Potentially dangerous if metal<br />
clamp<br />
base contacts moving blade.<br />
macbined in tbe miter-gauge bar, as shown in tbis cutaway<br />
view, can eliminate play between the bar and tbe tablesaw<br />
slot, thus improving tbe performance of any miter gauge.<br />
Photos: Charley Robinson<br />
March/April 1992 77
the stock. This results in smoother cuts than if the stock were extended<br />
2 in. or 3 in. past the end of the fence. Most of these fences<br />
also include a stop block that can be set for cutting repetitive<br />
lengths. Of these, the flip-down stop blocks are the most convenient<br />
because they are easy to set and can be quickly moved out of<br />
the way for other cuts <strong>with</strong>out changing the setting. Multiple stops<br />
make for rapid cutting of picture frames, tenons or any work that<br />
requires repetitive cuts to different lengths. Stop blocks also help<br />
control stock creep when used <strong>with</strong> the miter gauge in the open<br />
pOSition. However, be aware that a mitered end can lift a stop<br />
block and affect the accuracy of the cut when the wedge-shaped<br />
end is butted against the stop. For difficult-to-control stock or<br />
when cutting critical miters, a stock clamp, like those on two of the<br />
units in the bottom photo on p. 74, not only helps control creep<br />
but also provides a margin of safety by keeping your fingers away<br />
from the blade. A quick-release clamp is ideal for this because it's<br />
easy to use and provides a convenient handle for guiding stock<br />
through the cut.<br />
The JDS CO. has combined many of these features in their wellmade<br />
Accu-Miter. The fence on this tool is adjustable 50° right<br />
or left and has a tapered, spring-loaded plunger that positively<br />
locks the fence at five commonly used angles. At first this tool appears<br />
quite bulky, but in use its mass helped to stabilize large<br />
workpieces, which results in clean cuts at any angle. The IS-in.<br />
fence, <strong>with</strong> scale and flip-up stop, has an additional I6-in. exten-<br />
sion stop that's housed internally. The large cast protractor scale<br />
and optional manual clamp make this tool a pleasure to use.<br />
Sliding tables<br />
Sliding tables consist of a platform that slides on the tablesaw top,<br />
a guide bar (or bars, depending on the platform's width) screwed<br />
to the bottom that rides in the miter slot, and a fence on top to<br />
locate the stock at the desired angle. The platform lifts the stock off<br />
the saw table, thereby reducing friction and creep, but the platform<br />
also reduces the depth of cut by its own thickness.<br />
For this review, I looked at three very different sliding tables:<br />
the T-Square Miter Sliding Table by Biesemeyer, the Perfect Miter<br />
by Trend-Lines and the Dubby by In-Line Industries. Biesemeyer's<br />
and Trend-Lines' models bod1 use two guide bars, which practically<br />
eliminate all side-to-side play. Biesemeyer's model is available<br />
<strong>with</strong> a 45° or 90° fixed fence; the large, heavy-duty table yields<br />
clean, precise cuts. The heft and dimensions of this tool make it<br />
the best for handling big stock, and the 90° model is excellent<br />
for panel work.<br />
The size of Trend-Lines' Perfect Miter is well suited to cutting<br />
stock up to about 2 in. wide. But due to the short fences and small<br />
table, the unit is clumsy when trying to cut long stock or wide<br />
pieces. And the threaded-rod hold-down clamp is much slower<br />
and not nearly as convenient as a quick-release clamp. I also feel<br />
this tool is potentially dangerous. The wooden wedges that clamp<br />
Cut-off table to handle small pieces<br />
by C. E. Rannefeld<br />
I like to turn polychromatic bowls that are<br />
made from a variety of different wood species.<br />
To make the blanks for one of these<br />
bowls requires gluing up hundreds of<br />
pieces of wood. But to produce invisible<br />
gluelines when assembling all these pieces,<br />
the angles must be preCisely duplicated<br />
and the cut surfaces absolutely flat. Of<br />
course, the first step is a well-tuned tablesaw<br />
and a blade that is sharp, balanced and<br />
free of vibration. But the key to obtaining<br />
consistently accurate miters is the preCision<br />
sliding table for the tablesaw, shown<br />
in the drawing at right. Although similar to<br />
other sliding tables, this one has a few<br />
unique features. The fence can be adjusted<br />
for stock position as well as a wide range of<br />
angles. Also, a toggle clamp holds both the<br />
stock and the cut-off for clean, accurate<br />
cuts. The sliding table is relatively easy to<br />
build, and most of the construction details<br />
are obvious from the drawing, but I'll discuss<br />
some of the not-so-obvious details<br />
and other special considerations in the<br />
building of this table.<br />
The sliding table is a large plywood jig<br />
that slides back and forth across the top of<br />
the tablesaw parallel to the blade. Two<br />
cleats screwed to the underside of the plywood<br />
slide in the miter slots of the saw table<br />
to guide the jig. The cleats must slide<br />
freely but, at the same time, fit snugly in<br />
the slots. I made my cleats from hard maple<br />
because it wears well and is fairly<br />
stable; however, they also could be made<br />
of steel, aluminum or even polyethylene, a<br />
hard, self-lubricating plastic.<br />
I prefer a base that's about the size of the<br />
saw top; anything smaller limits the type of<br />
cuts that can be made and a larger one becomes<br />
too bulky and cumbersome. A highgrade<br />
plywood platform that is between<br />
% in. and % in. thick keeps the weight<br />
down yet provides sufficient rigidity <strong>with</strong> a<br />
minimum reduction in depth of cut.<br />
I reinforced the front of the jig (the side<br />
that is pushed into the blade first)<br />
<strong>with</strong> a I-in.-thick maple fence that's about<br />
1 in. taller than the maximum cutting<br />
height of the sawblade. The arched opening<br />
in the fence allows the blade to be tilted<br />
for compound miters, while the cutout<br />
on the right side of the fence lets me miter<br />
long boards by passing them through this<br />
hole. A I-in.-sq. hollow aluminum tube,<br />
<strong>with</strong> Ys-in.-thick walls screwed to the top<br />
of the fence, and an aluminum angle,<br />
screwed to the back edge of the platform,<br />
further stiffen the jig.<br />
My original cut-off jig had fences nailed<br />
to the plywood base that I adjusted by tapping<br />
<strong>with</strong> a hammer. But I have found that<br />
the box-joined fe nce and stop block,<br />
shown in the drawing, are more accurate<br />
and much easier to set. The bolts that secure<br />
the box joints can be adjusted to<br />
eliminate any play in the fence. Extra<br />
mounting holes for the carriage bolts that<br />
hold the fence and stop block to the jig<br />
will increase its versatility.<br />
When cutting miters, hand pressure<br />
alone is inadequate to hold the stock because<br />
the slightest movement can affect<br />
the angle of the cut or leave blade marks<br />
that will show up later in the glueline. Also,<br />
because most of the pieces I cut are small<br />
segments, it is too dangerous to try to hold<br />
them by hand. Therefore, I added a toggle<br />
clamp to the jig to safely hold both the<br />
stock and the segment. To increase the capacity,<br />
I mounted the clamp on a I-in.<br />
thick base block, and then replaced the<br />
bolt that held the rubber pressure foot<br />
<strong>with</strong> a longer carriage bolt of the same diameter.<br />
I also replaced the rubber foot<br />
<strong>with</strong> a wooden pressure block, which bears<br />
on the stock directly over the sawblade. The<br />
pressure block is faced <strong>with</strong> a %-in.-thick<br />
wooden pad, secured <strong>with</strong> double-faced carpet<br />
tape, so it's easy to replace.<br />
To cut segments like those shown in the<br />
drawing, I prepare my stock flat and square<br />
and then miter the end to the desired angle.<br />
The flfSt cut-off is thrown away and<br />
the stock is flipped so that the front edge is<br />
now against the fence and the just-miteredend<br />
butts tightly against the stop fence. After<br />
making the cut, release the clamp and remove<br />
the segment. Flip and reposition the<br />
stock in the same manner, and clamp and<br />
cut again. Repeat this procedure until you<br />
have all the segments you need. 0<br />
C E Rannefeld is a hobbyist woodworker<br />
living in Decatur, Ala.<br />
78 Fine Woodworking
in the miter-gauge slot and act as a stop block to prevent the castmetal<br />
base from contacting the sawblade have a tendency to move<br />
each time the tool makes contact <strong>with</strong> them. An unwary user might<br />
find that the stop block had moved enough to allow contact <strong>with</strong><br />
the blade, which could damage the blade or injure the operator.<br />
Unlike the other two sliding tables, Dubby by In-Line Industries<br />
operates on one side of the blade only and, therefore, uses only<br />
one of the guide slots. However, the 24-in.-long guide bar spreads<br />
side movement over a greater distance to minimize side play. Because<br />
the cutoff is unsupported by the sliding table, d1e weight of a<br />
long cutoff could cause the wood to split just before d1e cut is<br />
complete. To avoid this and the possibility that the split piece<br />
could fall into the blade, I pull any cutoff longer than about 12 in.<br />
away from the blade when using this tool. Dubby's fence is easy to<br />
set accurately between 0° and more than 50°, due to the large,<br />
easy-to-see angle scale along the left edge of the table. Although<br />
the stop block built into the fence of the Dubby is somewhat clumsy,<br />
it has the greatest range of all the tools, and the micro-adjust<br />
mechanism makes it easy to make minute changes. Dubby is available<br />
in a right- or left-handed model.<br />
Conclusions<br />
Weighing all the features, I think Rib Mountain Tool Works' adjustable<br />
Cool Blocks in the bar (see the sidebar on p. 77) is the single<br />
most important advancement found in after-market miter gauges.<br />
The performance of many stock miter gauges and several aftermarket<br />
gauges could be improved <strong>with</strong> this one simple and<br />
inexpensive modification.<br />
Although none of the reviewed tools addressed all of the problems<br />
<strong>with</strong> cutting accurate angles, some of these products help tremendously<br />
for specific types of work. If most of my work involved<br />
cutting small stock for frames, the complementary-angle feature of<br />
the Kity makes it the fastest and most convenient. The FasTTrak is<br />
very accurate, but switching the fence and gauge around makes it<br />
slow and cumbersome. Although the sheer quantity of components<br />
can make d1e FasTTrak system confusing, this flexibility allows<br />
an innovative user to apply these components to a variety of<br />
shop tools, such as the drill press, chop saw or radial-arm saw. A<br />
user who requires full-range adjustability in a heavy-duty miter<br />
gauge would be most satisfied <strong>with</strong> d1e JDS Accu-Miter or the<br />
Dubby. For working <strong>with</strong> panel goods, Dubby is my tool of chOice.<br />
Before making any decisions on whether or not to buy one of<br />
these tools, list your own shop needs and rank them according to<br />
d1e type of work you do the most. Then refer to the features and<br />
options in the chart on pp. 76-77 to help determine which tool<br />
best fits your particular application.<br />
D<br />
Daniel Westberg is a custom !u rnituremaker and WOOdW01-k<br />
ing instructor. His company, Potomac Wildwoods, is located in<br />
Minneapolis, Minn.<br />
A cut-off table for small pieces Toggle clamp Aluminum tube, 1 in. sq.<br />
Replaceable pad, % in. thick, is attached<br />
<strong>with</strong> double-faced carpet tape.<br />
Hole in fence to pass<br />
long workpiece through<br />
Mounti ng block for clamp<br />
Adjustable stop<br />
Screw access hole<br />
Segments to be glued<br />
into turning blanks<br />
Maple front fence is<br />
1 in. thick. Height is<br />
1 in. greater than<br />
maximum cutting<br />
height of blade.<br />
Plywood platform is in. to % in. thick<br />
and should be about the same size as the tablesaw top.<br />
Maple guide bar<br />
Drawing: Bob LaPointe<br />
March/April 1992 79
A blend of machine work and handwork produces traditional-style quarter columns. After turning a blank down to a cylinder<br />
and adding a double· bead detail on each end, Mac Campbell reeds the column <strong>with</strong> a scratch stock while it's mounted on the lathe.<br />
Quarter Col<br />
umns Dress<br />
Up Boxy<br />
How to make and inset a traditional comer detail<br />
Cases<br />
by Mac Campbell
I<br />
nset quarter columns add interest to an otherwise plain or<br />
boxy carcase. In addition to providing decoration through<br />
reeding or other surface detailing, quarter columns, like pilasters<br />
on a building, supply a strong visual framework. From the<br />
front, a viewer sees an element <strong>with</strong> some mass, rather than just<br />
d1e edge of a side panel framing a piece's drawers or doors. And<br />
since these columns are inset into the corners, instead of the face<br />
of a piece, they also relieve the blank expanse of wood commonly<br />
found in casework sides.<br />
Best of all, quarter columns aren't difficult to make, and the procedures<br />
can easily apply to less traditional column forms for casework<br />
corners or even for architectural woodworking. To show<br />
how d1is corner u'eauuent can add a distinctly classical motif to an<br />
otherwise ordinalY period piece, I'll describe how I prepared and<br />
shaped a pair of reeded columns for a traditional-style chest of<br />
drawers (see the photo at right). Also, to underline the basic methods<br />
involved in insetting quarter columns, I'll explain how I<br />
framed and installed them in the chest.<br />
Quarter col umns as a whole<br />
The best way d1at I've found to make quarter columns is to form a<br />
full column blank by gluing up four identical pieces of square<br />
stock <strong>with</strong> newspaper between each joint. Then the blank is<br />
mounted on the lathe, and its central section is turned to a cylinder<br />
<strong>with</strong> a pair of beads at each end, which define the transition<br />
from the cylinder to the square ends. (These beads become the<br />
column's base and capital.) If the column is to be reeded or fluted,<br />
this work is done before removing the column from the lathe (see<br />
the photo on the opposite page). Finally, the column is separated<br />
into quarters and two of them are cut to lengtl1 and installed at the<br />
carcase's front corners.<br />
Choosing and gluing up four quarters<br />
Even d10ugh there are no strict rules for column size, I've found<br />
that 2-in.-dia. columns are the right proportion for a 30-in.- to 36-<br />
in.-high piece of furniture, like my hall chest. If you use a 2-in.-dia.<br />
column body, you'll need a 2%-in.-dia blank to allow for the top<br />
and bottom beads and for squaring up the blank after glue-up. To<br />
make up a column blank, surface four pieces of your chosen stock.<br />
For my chest, I selected mahogany stock that measures 15f16-in.-sq.<br />
by 4-in. longer than the finished column lengtl1. Select stock <strong>with</strong> a<br />
straight grain that's free from unusual grain patterns. Swirls and other<br />
striking figures won't show up well because of the column's vertical<br />
lines, and they will make hand-reeding much more difficult.<br />
Before gluing up the four pieces to form the column, make sure<br />
d1at each of the four corners to be glued together are exactly 90°.<br />
Then spread glue on both pieces of wood, and lay a single layer of<br />
newspaper between them before clamping. Since the glued surfaces<br />
will have to be scraped clean later, choose a glue that sands<br />
well when dry (I use High-Performance PVA from Lee Valley Tools<br />
Ltd., 1080 Morrison Dr., Ottawa, Ont., Canada, K2H-8K7). I like to<br />
glue up the stock in two pairs, joint one face of each glued-up pair,<br />
and then glue those faces together. Once the glue is fully dry<br />
(preferably overnight), dress all four sides so that the blank measures<br />
2% in. sq., and the gluelines are still centered.<br />
Ald10ugh it has never happened to me, it is possible that a turning<br />
tool's edge could dig into the spindle (column) and break<br />
apart its paper-and-glue joints, sending wood all over the shop.<br />
Therefore, as a safety measure and as some cheap insurance<br />
against having your work ruined, I recommend screwing the four<br />
clamped pieces together. I drive two screws each way near both<br />
ends, but well away from the ends of the usable column (see the<br />
photo on the facing page).<br />
Reeded quarter columns, inset<br />
in corner ledger strips, lend a<br />
bold, yet elegant touch to the<br />
front Of the author's 30-in. ·high<br />
chest of drawers (above). The carcase<br />
relies on period details, like the<br />
columns, cock beading, carved feet<br />
and brass pulls to offset its otherwise<br />
simple box form.<br />
Hand-scraped vertical lines are<br />
the effect that the author intended<br />
for this chest's corners (right).<br />
The beads at the top and bottom<br />
serve as the column's capital and<br />
base. To clean out the ends of the<br />
reeds that the scratch cutter won't<br />
reach, Campbell uses a Va-in. skew<br />
chise4 which further enhances the<br />
work's hand quality.<br />
Turning and shaping a full column<br />
Mount the turning blank on the lathe <strong>with</strong> both the headstock and<br />
tailstock centers aligned at the glue-joint intersection. Turn the column<br />
round (except for d1e ends); then turn the top and bottom<br />
beads. Although most of the cylinder's surface will be removed<br />
during the reeding process, sand the column at this stage to remove<br />
small irregularities that might deflect the reeding cutter. To<br />
reed the column, you'll need an indexing head for your lathe <strong>with</strong><br />
at least 24 divisions (48 is preferable). If your lathe doesn't have a<br />
built-in indexer, you can rig up one. (See the sidebar on p. 83 on<br />
reeding <strong>with</strong> a scratch stock.)<br />
Quartering a column<br />
After the column is reeded, remove it from the lad1e and <strong>with</strong>draw<br />
the safety screws from the ends of the blank. To divide the column<br />
back into quarters, hold the column upright on the floor, and tap a<br />
chisel into one of the gluelines (see the photo on p. 82). The<br />
seams part quite easily, leaving a layer of paper and glue on each<br />
surface, which can be cleaned <strong>with</strong> a scraper, sander or anything<br />
that removes the hardened glue.<br />
Photos this page: aulhor<br />
March/April 1992 81
Framing for quarter columns<br />
in a chest of drawers<br />
All stock is '%-in. thick,<br />
unless noted.<br />
Section through<br />
quarter column<br />
Carcase<br />
side<br />
Drawer<br />
guide<br />
(end cut<br />
from dust<br />
board)<br />
Sliding<br />
dovetail<br />
Ledger strip<br />
Ledger strip<br />
(rabbeted<br />
for quarter<br />
column)<br />
Radius of<br />
beads on top<br />
and bottom<br />
is 1 in.<br />
.r---f--<br />
Bottom,<br />
doweled to sides<br />
Campbell's quartering method<br />
resembles firewood splitting.<br />
The glueline is cleaved easily due<br />
to the layer of newspaper between.<br />
k-- Keep square portions of<br />
PI,<br />
16<br />
column oversized, and trim<br />
just before installing.<br />
Recess for<br />
quarter column<br />
Framing a carcase for quarter colwnns<br />
Because many carcases are constructed like a chest of drawers (see<br />
the drawing above), the framing provisions I made for tl1e chest's<br />
quarter columns should work for most casework furniture. You<br />
must lay out your carcase <strong>with</strong> a square recess in each front corner<br />
to accommodate the columns. I stopped my carcase sides 1 :Y16 in.<br />
short of the front of the cabinet so that the columns' 1 Ya-in.-radius<br />
beads would be set back slightly from the side and face of the<br />
chest. This is also the time to select the joinery for the drawer<br />
partitions or dust boards and the case's top and bottom. The dust<br />
boards on my chest are joined to the sides <strong>with</strong> sliding dovetails.<br />
The dovetail slots can be cut all the way through to tl1e front of the<br />
two sides since they are later covered by the columns. I attached<br />
the bottom to the sides <strong>with</strong> dowels and half-blind dovetailed a<br />
subtop to the tops of the two sides. The top is fastened <strong>with</strong> screws<br />
driven up through the subtop.<br />
To form the inset corners where the quarter columns sit, you'll<br />
need to make a recessed ledger strip for each column (see the<br />
drawing above). Each ledger strip must be rabbeted so that it will<br />
form a square inside corner of the appropriate size when glued to<br />
the case side. To form the 13/16-in. recesses in my chest, I cut a<br />
7/16-in.-deep by 1 :Y16-in.-wide notch in both %-in. by 2-in. ledger<br />
strips, and then glued them to the %-in.-tbick case sides. Be sure to<br />
align the rabbeted edge of each ledger strip <strong>with</strong> the front edge of<br />
each side. When the glue is dry, clean up any squeeze-out, and<br />
make sure the inside corners of the column recesses are square. If<br />
they're not, use a rabbet plane to adjust each corner as needed.<br />
Next, you'll need to notch the carcase bottom and the dust boards<br />
at their front corners to accommodate the ledger strips. This cutout<br />
should be smooth and square since the ledger joints will be<br />
exposed at the front of tl1e chest along the column. After the ledger<br />
strips are in place and the ledger notches are made, you are<br />
ready to assemble tl1e carcase.<br />
If you chose the same joinery as I used, begin by connecting the<br />
sides to the bottom. Once that dowel jOint is clamped tightly, insert<br />
the dust boards (from the back Side) until they stop against<br />
the ledger strips. The front edges should be flush <strong>with</strong> the front<br />
of the ledger strips. While it's possible to cut sliding dovetails<br />
along the inside edge of the ledger strips to join them <strong>with</strong> tl1e<br />
dust boards, I just drive a screw through tl1e ledger into the end of<br />
tl1e dust board. The screws draw the joints up well, and the quarter<br />
column covers them. The lower front trim is glued to the bottom's<br />
front edge (which stops % in. shy of the cabinet front) and<br />
screwed tl1rough the ledger strips at both ends. Since the ledger<br />
strips protrude inside the cabinet, you'll have to add drawer side<br />
guides to the inside of your carcase. I glued-and-screwed 2-in.-long<br />
dust-board offcuts across the width of tl1e sides, just behind each<br />
ledger strip and slightly above each dust board.<br />
Inse tting a quarter colwnn<br />
To fit the columns after the chest is framed, cut two quarters to<br />
length. After spreading glue on the column's two inside surfaces,<br />
clamp them to the ledgers. With proper padding, each column can<br />
be clamped from its reeded surface to the inside corner of tl1e<br />
ledger strip, which applies pressure to botl1 glued faces. Clean up<br />
any squeeze-out immediately <strong>with</strong> a wet rag or after the glue has<br />
dried witl1 a chisel and scraper.<br />
D<br />
Mac Campbell builds custom and l'eproduction furniture in Harvey<br />
Station, NB., Canada, and is a regular contributor to FWW.<br />
82 Fine Woodworking
Reeding <strong>with</strong> a scratch stock<br />
To reed (or flute) quarter columns, some<br />
woodworkers use a router mounted in a<br />
carriage that rides along the lathe. But 1<br />
prefer the look 1 get from reeding by hand<br />
<strong>with</strong> a scratch stock secured to a shopmade<br />
tool post. (See the photo below.)<br />
The setup: Before fashioning a tool post<br />
and cutter, you'll need a level platform parallel<br />
to the centerline of your workpiece<br />
when it's mounted between centers. On<br />
lathes <strong>with</strong> a split, flat bed, just remove the<br />
tool rest supports and bolt a piece of %-in.<br />
plywood to the bed (see the photo below).<br />
If your lathe has a single-tube bed, a piece<br />
of plywood supported from the lathe stand<br />
and held to the bed <strong>with</strong> U-bolts or pipe<br />
straps will probably work fine.<br />
The tool post to hold your scratch stock<br />
is simply a T-shaped block of hardwood a<br />
few inches longer than the distance from<br />
your lathe's center to the plywood work<br />
surface. (Rounding the tool post's corners<br />
isn't essential, but your hands will appreciate<br />
the extra effort.) To clamp the cutter,<br />
make a bandsaw cut down the center of<br />
the T and put a couple of bolts above and<br />
below the cutter. Allow enough space for<br />
the cutter to be precisely positioned when<br />
the column is mounted on the lathe.<br />
The cutter can be shaped from an old<br />
scraper blade. A prome that cuts a groove<br />
CampbeU cuts reeds <strong>with</strong> a scratch stock<br />
made from a scraper blade that's bolted in<br />
a saw kerf in a T-shaped tool post. The<br />
tool post slides on a plywood platform attached<br />
to the lathe bed.<br />
and two half reeds, rather" than one that<br />
makes a full bead at each pass, hides any<br />
irregularities in the diameter of the column<br />
or in the indexing divisions of the<br />
lathe. Determine the diameter of the reeds<br />
(mine are % in.) and divide that number<br />
into the column's circumference. Round<br />
this answer to the nearest whole number<br />
that is divisible by four; this is the total<br />
number of reeds around the column. Note<br />
that the total number of reeds has to be<br />
evenly divisible into the number of divisions<br />
on your lathe's indexing ring to give<br />
you the number of increments that you rotate<br />
the column for each reed. Now use a<br />
round me to make the two fillets (each fillet<br />
will form a half reed) in the cutter, and<br />
bolt the cutter to the post.<br />
The method: To begin scraping, first rotate<br />
the column until the endgrain glue<br />
seams are horizontal and vertical. Then rotate<br />
it to the nearest index mark, and lock<br />
the indexing head. Place the scratch-stock<br />
post on the plywood bed and align the cutter,<br />
so its point falls precisely on one of the<br />
column's gluelines. Tighten the bolts that<br />
secure the cutter to the post, and wax the<br />
bottom of the tool post and the top of the<br />
table. Now the post will slide back and forth<br />
smoothly as the cutter scrapes the column.<br />
For the first reed, release the indexing<br />
pin and rotate the column the proper number<br />
of increments so that you will have a<br />
half reed at the edge of the quarter section<br />
you're working on. Slide the scratch stock<br />
along the auxiliary table, dragging the<br />
point along the column, as shown in the<br />
photo on p. 80. Move in the direction that<br />
produces the smoothest cut; this usually<br />
varies as the column is rotated. If the cutter<br />
starts to chatter, use a rabbet plane to<br />
smooth the chatter marks from the surface,<br />
and then continue reeding. Also, if there is<br />
spiral in the grain, cut in the direction that<br />
tends to force the cutter down. As 1 have<br />
discovered, it is painfully easy to allow<br />
the cutter to ride up, which will leave a<br />
nasty spiral scar.<br />
Continue cutting until the full depth of<br />
the cutter is reached, and then rotate the<br />
column the number of increments you<br />
previously calculated. Repeat this process<br />
all the way around the column. You could<br />
reed just two quarters, but 1 do all four so<br />
that 1 can choose the best pair. When<br />
you've finished <strong>with</strong> the scratch stock,<br />
clean up the ends of the reeds <strong>with</strong> carving<br />
tools (1 found that a %-in. skew chisel does<br />
the job). Make sure that all the lathe work<br />
is completed, including any needed sanding,<br />
before removing the blank.<br />
A shop-built indexing plate: If your<br />
lathe doesn't have an integral indexing<br />
ring, you can make a plywood indexing<br />
plate, which is screwed to the headstock<br />
end of a spindle, independent from the<br />
lathe itself. To use the indexer, you'll need<br />
a rigid clamping arm (<strong>with</strong> a pointer) and a<br />
level surface next to the lathe. This can be<br />
a floor-standing tool rest, a piece of wood<br />
attached to the lathe stand or whatever<br />
works for your setup. You can make the<br />
plate by mounting a plywood disc as part<br />
of the spindle setup and by turning the plywood<br />
to a true circle at the same time you<br />
turn your spindle (see the photo below).<br />
The easiest way to mark off the plate'S<br />
rim in 48 or more equal segments is to<br />
wrap a piece of non-stretch tape or paper<br />
around the disc's rim, mark off the exact<br />
circumference, remove the tape and divide<br />
it into the desired number of segments.<br />
Then, wrap the tape around the plate<br />
again, and transfer the marks to the edge of<br />
the disc, drawing radius lines from each<br />
mark to the center.<br />
To use the indexer, simply line up a<br />
mark <strong>with</strong> the clamping-arm pOinter, as<br />
shown in the photo below, and C-clamp<br />
the two together.<br />
-M.e<br />
For lathes <strong>with</strong>out indexing rings, a<br />
shop-made indexing plate can be attached<br />
to the headstock end of a spindle, independent<br />
from the lathe itself. A rigid pointer<br />
arm is needed to use the indexer.<br />
PhOlOS except where noted: Alec Wa[ers; drdwing: Bob La Pointe<br />
March/April 1992 83
Removing<br />
an Old Finish<br />
A chemical stripper<br />
will do the work for you<br />
by Michael Dresdner<br />
R<br />
efinishing has developed a bad reputation over the years,<br />
and most people view it as a troublesome and messy task.<br />
But, there are times when it is the best, if not the only way<br />
to restore the beauty of a good but worn piece of furniture. Of<br />
course, if your table or chair is an antique and its rich patina and<br />
worn finish are part of its pedigree, you should never touch it<br />
<strong>with</strong>out first checking <strong>with</strong> a museum conservator or other expert.<br />
If you just want to spruce up the more ordinary furniture most<br />
of us live <strong>with</strong>, refinish away. Actually, the process is much less<br />
daunting than you might expect, if you remember that refinishing<br />
consists of two simple steps: stripping an old finish and putting on<br />
a new one. Once the old finish is off, you are merely at the first<br />
step of the finishing process, just as if you had built the piece yourself,<br />
and it is no harder to finish old wood than it is to work on<br />
new wood. In fact, it is often easier, since the sanding has already<br />
been done for you by the original finisher.<br />
Choosing a stripping method<br />
You have several options for removing a fi nish, but the three most<br />
common methods involve scraping it away <strong>with</strong> abrasives, melting<br />
it <strong>with</strong> heat or dissolving it <strong>with</strong> chemical solutions. For almost<br />
every case the average woodworker might encounter, I'd recommend<br />
removing the finish chemically, which is both the simplest<br />
and most controllable method and the one I'll discuss in detail.<br />
You might think it would be easy to remove a finish <strong>with</strong> sandpaper,<br />
a cabinet scraper or (heaven forbid) a piece of glass, but<br />
you'll regret it. Using glass is dangerous, and sanding or scraping<br />
makes hard work of a simple operation. In addition, sandpaper<br />
and scrapers don't know when to stop; they usually remove wood<br />
along <strong>with</strong> the offending finish.<br />
Melting a finish <strong>with</strong> a propane torch or heat gun is even less<br />
appealing. First of all, the heat is likely to release some very<br />
harmful vapors. In addition, heat, like sandpaper, is sadly non-se-<br />
lective and will cheerfully burn wood along <strong>with</strong> the finish. In<br />
some cases, industrial polyester finishes won't budge under any<br />
chemical remover, so heat may be your only resort. But be extra<br />
careful; wear an organic-vapor mask, goggles and heat-resistant<br />
welders' gloves. Work outdoors or <strong>with</strong> the windows open, a fan<br />
blowing and a fire extinguisher handy.<br />
In contrast, chemical removers only affect the finish and not the<br />
wood. Most commercial strippers won't harm even old veneered<br />
wood or destroy already weak glue bonds. And your local paint or<br />
hardware supplier can help you find a stripper that meets your<br />
needs fairly precisely and wit\:l a minimum of potential health hazards.<br />
I'll talk more about the different chemical removers in the<br />
sidebar on page 86.<br />
Tools for refinis hing<br />
In addition to a chemical stripper, you'll need some other equipment,<br />
most of which you probably already have around the shop.<br />
Those big, old splayed brushes you've been saving, <strong>with</strong>out quite<br />
knowing why, are perfect for applying the chemical solution. It<br />
doesn't matter if they are clean or crusty. You'll also need a scraper<br />
or putty knife for scooping off the goo. It's a good idea to round<br />
the corners of the putty knife, so they won't dig into the wood.<br />
Gather up some wood shavings from the planer or jointer, a<br />
wooden dowel sharpened to a point in a pencil sharpener and a<br />
few stiff, nylon-bristle scrub brushes. You'll also need some coarse<br />
(0 or 1) steel wool, or better yet, some 3M Scotch-Brite generalpurpose<br />
hand pads, a handful of rags or paper towels and a few<br />
containers-old steel or porcelain bowls, or even large tin cans.<br />
Then grab a stack of old newspapers, and put a drop cloth over the<br />
floor or anything else you want to keep clean.<br />
You'll also need some masking tape to cover any unfinished<br />
areas, like the insides and sides of drawers. Before you apply the<br />
stripper, remove any hardware from the furniture, and take<br />
84 Fine Woodworking
enough of the piece apart so that you can work on horizontal surfaces<br />
as much as possible. Be sure to cover the screw holes for<br />
drawer or door handles from the inside <strong>with</strong> masking tape to<br />
prevent drip through.<br />
Let the paint remover do the work<br />
The key to easily removing an old finish is to let the paint remover<br />
do the work while you take it easy. You'll need to keep the furniture<br />
surfaces wet <strong>with</strong> stripper until the old finish is completely<br />
off. With liquid strippers, that means immersing the wood in the<br />
solution or continually rewashing it to keep it wet. Unless the<br />
piece is small, or you have extra time to kill, you'll probably find a<br />
semi-paste su"ipper will lighten your work load. These thick solutions<br />
flow less quickly than the liquid strippers, so they are easier<br />
to control, especially on vertical surfaces. Also, the semi-paste removers<br />
contain either waxes or clays that rise to the top and form<br />
a crust that slows down the evaporation of the active solvents, thus<br />
keeping the remover wet and active longer. That means you don't<br />
have to keep going back to reb rush the remover. In fact, if you do<br />
rebrush, you'll break up the crust and defeat its purpose.<br />
To apply the semi-paste remover, shake the can a few times, lay<br />
a rag over the cap to block any spurts and open the cap slowly to<br />
release the pressure gradually. Pour some remover into one of<br />
your cans or bowls, and daub it all over the finish <strong>with</strong> your biggest,<br />
floppiest brush (see the photo at right). After applying a nice<br />
thick coat, leave it alone. Remember to take full advantage of the<br />
remover. Make sure the entire surface is wet; if you see any dry<br />
spots, go back and daub on some more paste.<br />
ow sit down and enjoy at least a 10- to 15-minute break, but<br />
keep an eye on the stripper. If any dry spots develop, re-wet them.<br />
If you let the mixture of finish and remover dry completely before<br />
taking it off, the resulting crust will be far more difficult to remove<br />
than the original finish. After 15 minutes, scrape a small area to see<br />
Photos: Susan Kahn<br />
Apply semi-paste strippers <strong>with</strong> a big, floppy brush. Lay a<br />
thick coat on but don't rebrush it, or you will break the crust and<br />
allow the active solvents to evaporate. Always wear good-quality<br />
neoprene gloves when handling strippers that contain methylene<br />
chloride or alcohol.<br />
Chemical strippers will remove paint or clear finishes <strong>with</strong>out<br />
harming the wood's surface. The large photo above reveals<br />
what the author fO Und after stripping several coats of paint from<br />
the chair in the inset photo-oak <strong>with</strong> only minor blemishes.<br />
March! April 1992 85
if the fi nish comes off to the bare wood (see the inset photo on<br />
the next page). If it doesn't, but the remover is still wet, leave it<br />
alone for a little while longer. When your test area shows bare<br />
wood or when your patience is exhausted, carefully scoop the goo<br />
off the wood and onto some of those old newspapers. If the wood<br />
is not completely clean in all areas-and don't be surprised if it<br />
isn't-re-wet the area <strong>with</strong> more remover immediately before it<br />
dries completely. For carved or fluted areas, grab a handful of<br />
wood shavings and scrub them into the softened finish to help<br />
absorb and dislodge it. Then take a stiff bristle brush and scrub out<br />
the loaded shavings, as shown in the top photo on the next page.<br />
In very tight corners, use the pointed dowel to clean out tl1e recesses<br />
(see the bottom right photo). If the paint refuses to come<br />
out of the pores of large-pore wood, like ash or oak, use the stiff<br />
bristle brush to scrub the pores while the remover is still wet. In<br />
severe cases you may have to resort to a fine brass-bristle brush to<br />
clean the pores. Re-apply the remover as often as needed to make<br />
sure everything is dislodged, and give the piece a final scrub <strong>with</strong> a<br />
Scotch-Brite pad soaked in remover just to be sure (see the bottom<br />
left photo). Then wipe off the surface <strong>with</strong> rags or paper towels.<br />
At this point the wood should look clean, but it probably contains<br />
wax, silicone or other oils that may impede the finishing process. The<br />
wood may also contain old filler and stains you'd be better off <strong>with</strong>out.<br />
The best way to remove these contaminants is <strong>with</strong> a series of<br />
solvent washes. Using a clean piece of Scotch-Brite, scrub down the<br />
wood <strong>with</strong> a liberal amount of lacquer thinner, followed by a scrub<br />
<strong>with</strong> alcohol and then one <strong>with</strong> mineral spirits or naphtha. It is not<br />
necessary to wipe off the wood in between washes. If you'd rather<br />
avoid working <strong>with</strong> these flan1ffiable solvents, scrub the surface <strong>with</strong><br />
a solution of water and trisodium phosphate (TSP), a degreaser<br />
found in most paint and hardware stores. Just mix the solution<br />
according to the directions on the box. It is not as effective as the<br />
solvent sequence, but it is better than nothing. Finally, scrub down<br />
the wood <strong>with</strong> a solution of an1l11onia in warm water (about 2 oz.<br />
of household ammonia per quart of water), and then wipe off any<br />
excess liquid. During this final wash, the wood should look clean<br />
Methylene chloride strips best, but there are other options<br />
Identifying an old finish is a lot like determining<br />
what species is what in a<br />
mixed pile of lumber-it's easy if you've<br />
had a lot of experience, but frustrating<br />
for a beginner. Most fmishes look pretty<br />
much alike to a neophyte, so rather than<br />
having anyone agonize over identifying a<br />
finish and selecting a stripper specifically<br />
for that finish, I recommend buying a<br />
good, wide-spectrum commercial remover<br />
that contains enough methylene<br />
chloride (a powerful stripping agent) to<br />
be classified as non-flammable.<br />
Generally, you'll find a wide variety of<br />
removers at any good paint or hardware<br />
store. Most of these products fall into<br />
one of four general categories.<br />
Paint and varnish removers: These<br />
strong solvent mixtures will remove a<br />
wide range of finishes and are the ones I<br />
recommend most often, especially if the<br />
identity of the old finish is not known.<br />
Some of these are flammable and most<br />
smell and produce annoying and harmful<br />
fumes. Most are poisonous if swallowed<br />
and contain solvents you should avoid<br />
getting on your skin. They're sold both as<br />
thin liquids and heavy-bodied semi-pastes,<br />
which I prefer because they cling better to<br />
vertical surfaces and stay wet longer.<br />
One common thread among these removers<br />
is methylene chloride, a very fast<br />
and effective solvent. An interesting feature<br />
of methylene chloride is that adding<br />
it to a flammable solvent mixture can<br />
make the mixture non-flammable. Another<br />
curious aspect of methylene chloride<br />
is that as a stripper, it works from<br />
the bottom up rather than from the top<br />
down. This means that once the remover<br />
is put onto the surface, it drops down<br />
through the coating and softens it at the<br />
wood line, allowing most finishes to peel<br />
off in sheets rather than turning into<br />
sticky gunk. That can translate into less<br />
material waste and easier disposal. When<br />
working <strong>with</strong> these materials, observe<br />
the safety precautions outlined in the<br />
sidebar on p. 88.<br />
Wood refinishers: A refinisher is a<br />
thin, watery mixture of common finish<br />
solvents, usually alcohol, toluene and acetone,<br />
which dissolves shellac, lacquer<br />
and some varnishes but has little effect<br />
on most paints and polyurethanes. To<br />
see if the material will work on your finish,<br />
apply some refinisher to a small, obscure<br />
spot, and see if it melts the finish. If<br />
the refinisher turns the old finish into a<br />
liquid, you have a few options: move the<br />
fmish around <strong>with</strong> rags or abrasive pads<br />
to "re- knit" an old checked or cracked<br />
surface, remove most of it and leave only<br />
the barest sealer coat, or keep washing<br />
down the wood until the old finish is<br />
completely gone. Admittedly, leaving<br />
only a partial finish that still looks good<br />
will take some practice. Because refinishers<br />
contain only solvents and no waxes,<br />
they leave the wood surface clean and<br />
ready to refinish. On the down side, refinishers<br />
are very flammable, create lots<br />
of solvent vapors, evaporate quickly and<br />
generally smell awful.<br />
"Safe" strippers: The new so-called<br />
safe strippers utilize solvents that are<br />
considered to be much safer than their<br />
predecessors, but they are not as effective<br />
on all types of fmishes. Some manufacturers<br />
specify that their material<br />
works on only one class of finish, such as<br />
oil-based materials; others offer two or<br />
more different formulations to cover all<br />
the bases. Generally, these strippers are<br />
thick, slow drying and non-flan1l11able;<br />
they have very little odor and won't burn<br />
or harm bare skin. (One company offers<br />
a product so gentle to the skin that it can<br />
be used as a hand cleaner,) The fumes<br />
that do come off are regarded as safe so<br />
that work can be done indoors. The tradeoff<br />
is that these strippers work slower than<br />
methylene chloride or harsh solvent mixtures<br />
and frequently cost more. But they<br />
are the ideal choice for people who are<br />
particularly sensitive to hard solvents or<br />
people who must work indoors.<br />
Caustics: Certain types of paint, such as<br />
milk paint, won't respond to most solvents<br />
but can be softened <strong>with</strong> strong<br />
acids or alkalies. Caustic strippers, like<br />
lye, were the most common type before<br />
methylene chloride mixtures were developed,<br />
but they have virtually died out<br />
along <strong>with</strong> the milk paints that necessitated<br />
them. Some people still like the<br />
idea of using lye to remove paint, but it<br />
can burn and discolor wood if it's left on<br />
too long, soften some glues and seriously<br />
raise the grain of old wood. More importantly,<br />
it will seriously burn skin and<br />
eyes, and the fumes are antagonistic to<br />
the nose, throat and eyes. Take precautions<br />
and, above all, keep your wits about<br />
you and watch where the lye splashes.<br />
Better yet, select another method. -M.D.<br />
86 Fine Woodworking
After waiting 10 or 15 minutes, use a<br />
plastic scraper to see if the finish will come<br />
off to the bare wood (inset photo above). If<br />
there are several coats of paint, as there<br />
are on the chair shown here, you may have<br />
to remove the goo, and apply another coat<br />
of the stripper.<br />
In hard-to-reach places on turned or<br />
carved parts, rub a handfu l Of wood shavings<br />
into the softened finish to help remove<br />
the residue. Then scrub out the shavings <strong>with</strong><br />
a stiff bristle brush (large photo above).<br />
Scotch-Brite pads are ideal for scrubbing<br />
down the wood <strong>with</strong> a final coat Of<br />
stripper, as shown at right, and for washing<br />
the sUrface clean <strong>with</strong> lacquer thinner after<br />
all the finish has been removed.<br />
A sharpened dowel is handy for cleaning<br />
stripper and finish residue from very tight<br />
corners, as shown in the far right photo.<br />
March/April 1992 87
and the color should be somewhat uniform. If the water wets the<br />
wood unevenly or leaves splotchy areas, not all the residue has<br />
been removed. Go back to the paint remover and repeat the stripping-<br />
and rinsing-solution sequence outlined above. When the<br />
wood is clean as a whistle, let it dry overnight.<br />
Cleaning up<br />
That sludge you've collected on the newspapers, rags, steel wool<br />
and paper towels is considered toxic by most communities, and<br />
shouldn't be treated as normal trash. Check your local regulations<br />
before disposing anything. Your community may have a special<br />
collection site for used oil, paint and solvents. If it's going to end<br />
up in a landfill, let the residue dry completely prior to disposal.<br />
The residue will become hard and crusty, which is less damaging<br />
than the solvent-laden sludge. Before the residue hardens, you can<br />
clean your brushes, putty knives and even the Scotch-Brite <strong>with</strong><br />
lacquer thinner, but disposing of the dirty lacquer thinner will be<br />
regulated just like the sludge.<br />
Removing stains<br />
Even though the wood is now free of finish, it may still be marred<br />
by both intentional and accidental stains, which you may want to<br />
remove. Intentional stains are whatever dyes or pigments the first<br />
finisher applied to the wood; accidental stains are the various water<br />
rings, ink spills, uneven sun fading and other marks of age and<br />
use. Many people feel that these accidental stains add character<br />
and history to furniture and should remain under the new finish,<br />
but for the most part, these are the same people who believe that<br />
old furniture should never be refinished. Though not all stains and<br />
discolorations can be removed, there are ways of dealing <strong>with</strong><br />
some. First, let's deal <strong>with</strong> the intentional stains.<br />
Wood stains are either pigments or dyes. Most, if not all, of the<br />
pigments should have been removed by the solvent scrubs; whatever<br />
is left now is likely to remain forever. But most aniline dyes<br />
can be denatured by using either commercial decolorant solutions<br />
or chlorine bleach, which is sold in grocery stores as laundry<br />
bleach. These bleaches are generally rather weak concentrations<br />
(usually a 5% solution), so they will work slowly and require several<br />
applications to remove the dye. You can make a sU'onger solution<br />
by mixing swimming-pool chlorine (sold under various<br />
names) into water. The label on the pool treatment will indicate<br />
the percentage of active ingredient, usually 65% to 85% of either<br />
calcium or sodium hypochlorite. Get the highest percentage available.<br />
Add the white crystals to a glass jar of hot water; let them sit a<br />
few minutes and stir occasionally. Keep adding the pool treatment<br />
until no more will dissolve and a layer of white residue settles to<br />
the bottom of the jar. Wear rubber, protective gloves, and use a<br />
synthetic sponge to flood the wood surface <strong>with</strong> the warm mixture;<br />
then let it dry overnight. In the morning, you'll see a layer of<br />
dried crystals on the wood, which should be washed off to remove<br />
the stain. A second wash will be even more effective.<br />
Oxalic acid (sometimes sold in liquid form as deck brightener)<br />
is often effective on water rings and ink stains and on "silvered"<br />
weathered wood. But it works best for quickly and completely removing<br />
the bluelblack iron stains often found when oak and other<br />
high-tannin woods contact iron hardware or nails. Make sure you<br />
remove the nails or hardware before bleaching, or you may create<br />
new stains as the wood dries. If you can't remove the nails, countersink<br />
them, and putty over the holes before you apply the oxalic acid.<br />
Both stain removal processes require a lot of water, which often<br />
raises the grain of the wood. Although it is usually not necessary to<br />
sand wood when refinishing, it will probably be necessary after<br />
stain removers are used. Use a very fme sandpaper (220-grit or fmer)<br />
and scuff-sand quickly and lightly. For turnings and carvings, use<br />
Scotch-Brite pads instead of sandpaper. 0<br />
Michael Dresdner is a finisher in Perkasie, Pa. This article was<br />
adapted from his forthcoming book, The Woodfinishing Book, to<br />
be published in the fall by The Taunton Press, 63 S. Main St., PO<br />
Box 5506, Newtown, Conn. 06470-5506<br />
Fresh air and common sense reduce refinishing hazards<br />
Every paint-remover manufacturer suggests<br />
that you work in a well· ventilated<br />
area, but few explain what that means. I<br />
think the ideal situation is a shady area<br />
outside in 75° weather <strong>with</strong> a light<br />
breeze, but ordering good weather is difficult.<br />
If you can't strip outdoors, open<br />
the windows, and turn on a fan to bring<br />
in fresh air and to carry off any contaminated<br />
air. Unless you've chosen a socalled<br />
safe remover, stripping furniture is<br />
not a wintertime activity. Ventilation is<br />
particularly important <strong>with</strong> methylene<br />
chloride. When you inhale the fumes,<br />
your body metabolizes them to carbon<br />
monoxide. This is not good for anyone,<br />
but it can be particularly dangerous to<br />
heart patients who should avoid the<br />
chemical totally. Goggles are good to protect<br />
your eyes from splashes, and goodquality<br />
neoprene gloves are essential to<br />
protect your skin. Both alcohol and methylene<br />
chloride can be absorbed through<br />
the skin, and methylene chloride in particular<br />
will carry <strong>with</strong> it heavy metals,<br />
such as the lead often found in old paints.<br />
Also, if you're working <strong>with</strong> flammable<br />
compounds, avoid sparks and flames.<br />
Even if you're working outdoors on an<br />
ideal spring day, I'd suggest closed shoes<br />
(not sandals), long pants, long sleeves<br />
and a plastic apron to protect against<br />
splashes. Buy extra-long gloves, and turn<br />
the ends up into a cuff when you put<br />
them on. That way, when you lift your<br />
hands, the paint remover will run into the<br />
cuff and not down your arm. (Remember,<br />
some of these chemicals can b urn sensitive<br />
skin.) Finally, use common sense; if<br />
the smell of the stripper starts to sicken<br />
you or makes you dizzy, stop, get some<br />
fresh air and a new game plan.<br />
When working <strong>with</strong> dry bleach crystals,<br />
wear a nuisance-type dust mask<br />
when you handle the irritant and when<br />
you subsequently sand the wood.<br />
Though neither chlorine nor oxalic<br />
bleaches are severe caustics in solution,<br />
gloves and goggles are always in order.<br />
Most bleaches will "eat" natural fiber<br />
brushes and rags, so use synthetic spong·<br />
es and brushes (nylon or polyester).<br />
If these warnings have you wondering<br />
whether refinishing is really worth all<br />
the trouble, you have one other alternative.<br />
Look in the yellow pages and find<br />
a commercial furniture stripper to handle<br />
the job. But make sure the company<br />
specializes in wood stripping because<br />
outfits that work mostly <strong>with</strong> metals frequently<br />
use caustic strippers, and these<br />
may loosen glue joints and play havoc<br />
<strong>with</strong> the wood grain.<br />
-M.D.<br />
88 Fine Woodworking
The author inlays a separate piece of veneer for each group of holes on his cribbage boards. He glues a photocopy of the pattern<br />
onto the board as a guide for mortising and to align the inlays in the S pattern. An identical photocopy is cut up, glued to small pieces of<br />
veneer and used for trimming the inlays. The moment of truth comes when the paper patterns are sanded off to reveal the finished board.<br />
M<br />
ost people are very impressed when they see perfectly<br />
fitted inlay on a piece of antique furniture. It's natural to<br />
assume that the craftsman who inset these small pieces of<br />
colorful veneer into a solid-wood surface had years of experience<br />
and labored over the final fit. But the truth is <strong>with</strong> the proper technique,<br />
a steady hand and a little practice, just about anyone can<br />
succeed at freehand inlay.<br />
The cribbage board in the photo on p. 91 is a good first project<br />
for learning freehand inlay. By the time you've mortised the game<br />
board and cut and fitted the 24 separate pieces of veneer that<br />
make up the S-pattern, you'll either be quite accomplished at inlay<br />
or you'll know that it's not for you. The skills that you acquire on<br />
this practice piece can then be used to inlay any shape you wish.<br />
My methods are simple: Glue identical patterns onto both the<br />
piece to be mortised and the inlay veneer; remove the waste from<br />
the mortise <strong>with</strong> a router and work to the edges <strong>with</strong> a chisel; cut<br />
out the inlays <strong>with</strong> a razor knife and glue them into the mortises;<br />
sand off the paper patterns and sand the inlays flush <strong>with</strong> the surface.<br />
For the cribbage board, drill the holes before sanding off the<br />
paper so that any tearout caused by the drill bit can be sanded<br />
away when flushing up the inlays. (Cribbage aficionados will note<br />
that the board in the photo has 120 holes, so a player only has to<br />
go from start to finish once to win.)<br />
Preparations<br />
I begin by making three or four copies of a pattern I've drawn,<br />
preferably using 20-lb. bond paper (the heavier paper handles better).<br />
It's important to make all copies at the same time and on the<br />
same machine because photocopies can vary slightly in size from<br />
machine to machine and from day to day and even from different<br />
times of day on the same machine. The advantage of doing it this<br />
way (over cutting the inlays and then scribing around them for the<br />
mortises) is that <strong>with</strong> a pattern such as I use, it's much easier to<br />
align the individual pieces. It's also a substantially faster technique.<br />
The extra copy or copies are backups. In the unfortunate event<br />
that you sand through a piece of veneer, you can still save the<br />
project from the firewood pile by remortising and recutting the<br />
inlay, as long as you have an accurate pattern.<br />
March! April 1992 89
Routing the mortises rather than cleaning<br />
them out by hand saves time but more importantly,<br />
produces mortises of consistent depth<br />
<strong>with</strong> much less effort. The author takes the bit<br />
up to, but does not touch the incised line.<br />
Trimming the veneer inlays to fit won't<br />
take long if the pattern lines are very fine<br />
and the cuts are accurate. Some will fit perfectly<br />
<strong>with</strong>out any trimming; some will<br />
need just a little sanding; and some will require<br />
hairline cuts. A steady hand will save<br />
a lot Of frustration later.<br />
A fence clamped to the the drill-press table ensures alignment of the holes along<br />
the straight sections of the pattern. About two-thirds of the holes can be drilled using the<br />
fence; the remaining holes along the curves must be done freehand.<br />
Once you've made your photocopies, the next step is to glue<br />
one of tl1em to your previously thicknessed stock. I use a homemade<br />
PVC roller to get a thin, even coat of glue on the wood. After<br />
placing the paper pattern on the stock, use a dry roller to flatten<br />
the pattern. Make sure you've eliminated any air bubbles, and be<br />
careful not to roll the pattern excessively because that can stretch<br />
tl1e paper. When the glue has dried, number each of the 24 segments<br />
on all photocopies. The numbers 6 and 9 should be underlined<br />
to alleviate confusion later.<br />
Now, cut out each of the 24 paper segments-slightly oversizefrom<br />
the second photocopy. Then glue each paper segment to a<br />
piece of veneer, also slightly oversize. I use veneers that are<br />
/'28 in. thick. I don't recommend using thinner veneers because<br />
they are more difficult to work <strong>with</strong> than thicker veneers, and<br />
you're much more liable to sand through them. Again, use a thin<br />
coat of glue between the paper pattern and the wood veneer.<br />
Allow overnight drying of glued patterns before proceeding.<br />
Cu tting mortises and fi tting inlays<br />
I use a sharp, #11 X-Acto blade to cut the outline of each playingboard<br />
section to be mortised. To ensure accurate cuts, I make the<br />
first cut <strong>with</strong> just enough pressure to cut through the paper and<br />
lightly score the wood, taking care to keep my cuts at 90° to the<br />
surface of the board. This creates a groove that will guide successive<br />
cuts of increasing pressure. I also cut each line from both<br />
ends to produce sharp corners. Cutting the lines deeper than the<br />
thickness of the veneer will make the removal of waste wood easier.<br />
The fit of each inlay will depend on how closely you followed<br />
the layout lines on the patterns, so go slowly and use care. Also,<br />
keep the knife blade sharp, and work <strong>with</strong> good lighting.<br />
90 Fine Woodworking
I clean out the majority of the mortise <strong>with</strong> a router and a single-<br />
or double-flute Ya-in. up-spiral bit, adjusted to a depth just a<br />
hair thinner d1an the veneer. It's a bit risky having to sand or plane<br />
the veneers down to the stock, but it's a lot less time-consuming<br />
than d1e reverse. And though it's possible to use a larger diameter<br />
router bit, the Ya-in. bit affords better control and allows a closer<br />
approach to the corners (see d1e top left photo on the facing<br />
page). Press one hand (or wrist) down tightly on the board, and<br />
use it as a pivot or anchor point for the router. This greatly reduces<br />
the risk of cutting beyond the lines. Let the router bit come<br />
as close to the lines as you're comfortable wid1, but don't touch<br />
the line. I first outline the perimeter of a section <strong>with</strong> the router<br />
bit, then move the router back and ford1 to clean the section out.<br />
It's important to go slowly at this stage, because a slip here will<br />
ruin the whole piece. Complete the final trimming of each mortise<br />
<strong>with</strong> a sharp paring chisel. (I use a Ya-in. paring chisel because of<br />
the curves in the S-pattern, but a wider chisel could be used for<br />
the straight Sides.) After you complete each section, pencil in its<br />
number for reference when inserting veneers later.<br />
Trim each veneer inlay to size using an X-Acto knife (see the<br />
bottom left photo on p. 90). Cut the edges that run crossgrain first,<br />
and then cut <strong>with</strong> the grain. Pay close attention to grain direction,<br />
especially when cutting curves, and try not to cut diagonally into<br />
the grain or the veneer will split. As each inlay veneer is cut, test<br />
its fit to the mortise. Light sanding may be required to make the<br />
veneer fit properly. You're looking for a tight fit, not a forced fit.<br />
Pu tting it all together<br />
Once you've cut all 24 mortises and fitted the corresponding veneer<br />
sections, it's time to glue the sections in place. Any polyvinyl<br />
acetate (PVA) glue will work, but I like Elmer's Brown Carpenter's<br />
Glue because it blends better <strong>with</strong> darker woods. Brush a thin coat<br />
of glue into each mortise, and then insert the proper piece of veneer.<br />
When all 24 pieces are glued in place, set a sheet of wax<br />
paper over the game board, place anod1er board on top and clamp<br />
the two together. Let d1e glue set overnight.<br />
The next step is drilling the holes. For those that fall in a straight<br />
line, I clamp a guide board to the drill table (see the photo at left).<br />
For holes on curves, I bore freehand using the pattern holes. It's<br />
considerably more difficult for the human eye to discern misalignment<br />
on curves than on a straight line. I use a %2-in. bit and set me<br />
depd1 stop on my drill press to Y16 in. less than d1e thickness of my<br />
stock. Using a sharp bit at a high speed produces crisp, clean holes.<br />
Until now, all you've been looking at has been white paper <strong>with</strong><br />
black lines-kind of like looking at the back of a tapestry and seeing<br />
only knots and loose wead. Now comes my favorite part of<br />
me project, as well as the moment of truth: sanding off the photocopied<br />
patterns (see the photo on p. 89). As me wood is gradually<br />
exposed, d1e beauty of the contrasting woods is revealed, along<br />
wim the accuracy of your inlay work. I use a random-orbit or palm<br />
sander and begin wim 60-grit sandpaper and work my way to 240-<br />
grit. I switch from me 60-grit to 120 as soon as I'm wough d1e photocopy<br />
since the coarse sandpaper is quite aggressive in removing<br />
material. I try to sand only as much as is necessary to clean up me<br />
board. I also finish-sand me bottom of me playing board at this time.<br />
Now mat you have two finished surfaces, you can cut me playing<br />
board to size and rout a decorative edge bead if you like. At mis<br />
pOint, me playing board is complete, but I prefer to use the board<br />
as a hinged top to a box. This provides storage space for me scoring<br />
pins as well as for a deck of playing cards (see d1e photo below).<br />
I finish me boards and boxes wim one coat of clear-lacquer<br />
sanding sealer brushed on. Tung oil makes a good substitute. After<br />
me lacquer or tung oil has dried, take 400- or 600-grit wet/dry paper<br />
and sand the finish to a silky state. A coat of hard wax (such as<br />
carnauba) can men be rubbed on and buffed to a glossy finish. 0<br />
Salvatore Pontecorvo is a retired engineer and has been an amateur<br />
woodworker since 1959. He lives in Fort Wayne, Ind.<br />
this Kahn; aU Photo page: Susan other photos: Vincent Laurence
The Anaheim<br />
Woodworking Fair '91<br />
A glimpse of the year's largest trade show<br />
by Charley Robinson<br />
The sheer volume of exhibits at the biennial Woodworking<br />
Machinery and Furniture Supply Fair (WMFSF) held last fall<br />
in Anaheim, Cal., was almost overwhelming. Nearly every<br />
woodworking device you could imagine was on display. And there<br />
was something of interest for woodworkers at all levels, from the<br />
basement craftsman all the way up to huge commercial operations.<br />
Fortunately, I had three days to visit all the booths, because it<br />
would have been impossible to see everything in one day.<br />
The WMFSF, held at the Anaheim Convention Center (see the<br />
top photo on the facing page) was the largest U.S. woodworking<br />
show of the year. An estimated 18,000 people strolled through the<br />
14 acres of exhibits assembled by more than 700 companies from<br />
20 different countries. Although the show was held in the midst of<br />
an economic recession, the exhibitors were universally pleased<br />
and surprised by their volume of sales. With two days still remaining<br />
in the show, Robin Gavoor of Shop carts said that sales were<br />
already three times what the company had expected for their new<br />
pivoting-carriage cart that handles sheet goods (See the product<br />
review of Shopcart in FWW #91, p. 130.) Karen Cody, of Professional<br />
Tools, Inc., said, "the visitors to our booth were non-stop."<br />
She was also excited by the enthusiastic reception received by her<br />
company's new product, the Blade Runner II. Like a panel saw, the<br />
setup uses a circular saw for cross-cutting, mitering or ripping.<br />
And a router can replace the saw for dadoing or edge-molding<br />
dimensional stock and sheet goods.<br />
Although the show had numerous booths displaying mammoth<br />
pieces of industrial equipment, I was more interested in the exhibits<br />
that showed products sized and priced for home craftsmen or<br />
small-production shops. I found three products in this category<br />
that I felt were particularly innovative: the <strong>Router</strong>Master, the Modulus<br />
scoring-saw attachment and the Tucker vise.<br />
The <strong>Router</strong>Master, a router in a radial-arm format, shown in the<br />
middle photo, received a great deal of attention from show-goers.<br />
The <strong>Router</strong>Master (distributed by Garrett Wade Company, Inc. and<br />
Injecta MachinerylEagle Tools), has adjustments to hold a plunge<br />
router in almost any pOSition, thus allowing a variety of profiles to<br />
be cut <strong>with</strong> a single router bit. The machine works well for<br />
straight-line work, and because it can be used as an overarm,<br />
plunging-pin router, it is also excellent for pattern work. Jerry<br />
Stone of Kent's Custom Cabinets, in Oxnard, Cal., said that the<br />
<strong>Router</strong>Master is "spectacular. Because of all the operations it can<br />
perform, the tool is just right for the small shop that doesn't have<br />
room for multiple machines." The $1400 price tag is indicative of<br />
the <strong>Router</strong>Master's quality construction.<br />
Representatives of Sisco Supply Inc. were showing off a new tablesaw<br />
accessory, the Modulus scoring-saw attachment, that the<br />
company is distributing in the United States for Modulus 2000<br />
Machinery Inc. of Montreal, Canada. The attachment, shown in the<br />
bottom right photo, is a two-blade unit designed to make clean<br />
cuts on almost any laminated board, up to 1 Ys in. thick. The tablesaw<br />
arbor drives the larger main blade, which, through a series of<br />
pulleys and a belt, drives the small front blade. The front blade,<br />
raised just a few thousandths of an inch above the table, scores the<br />
down face of a panel to prevent splintering when the larger second<br />
blade cuts through the material. The Modulus attachment<br />
makes scoring-saw technology available at a modest price (about<br />
$350) <strong>with</strong>out the need to replace an old, favorite tablesaw. It<br />
mounts on most lO-in. tablesaws by using the standard arbor nut, so<br />
it's easy to switch back to a standard blade for normal operations.<br />
Leonard Lee of Veritas Tools Inc. demonstrated the Tucker vise<br />
(as shown in the bottom left photo). Based on the old Emmert<br />
patternmaker's vise <strong>with</strong> jaws that rotated 360°, tilted from vertical<br />
to horizontal and adjusted to clamp non-parallel objects, the<br />
Tucker extends that concept <strong>with</strong> a quick-release feature that can<br />
be foot activated and vise faces that can be adjusted to automatically<br />
accommodate tapered pieces. The old Emmert was cast iron,<br />
but this new vise is made of a cast alloy that is stronger, yet<br />
much lighter. The Tucker sells for about $500, and the vise is<br />
guaranteed against breaking.<br />
I haven't been able to cover all the myriad products designed to<br />
make it easier and safer to work in the one-man shop, so I suggest<br />
you plan to attend the 1993 WMFSF so that you can see first-hand<br />
all of the new equipment. For more information on future shows,<br />
contact Ellen Schwartz, exhibit manager, Marketing Association<br />
Services, Inc., 1516 South Pontius Ave., Los Angeles, Cal. 90025;<br />
(213) 478-0215. If you can't wait until 1993, or if you live on the<br />
East Coast, visit the International Woodworking Fair (IWF), a<br />
similiar biennial show conducted on an alternating basis <strong>with</strong><br />
WMFSF. The next IWF will be this August in Atlanta, Ga. For more<br />
information, contact the IWF offices at 8931 Shady Grove Court,<br />
Gaithersburg, Md. 20877; (301) 948-5730.<br />
D<br />
Charley Robinson is an assistant editor at fWW<br />
Sources of supply ______ _<br />
For more information, contact the manufacturers or distributors.<br />
Garrett Wade Co., 161 Avenue of the Americas, New York, NY 10013<br />
Injecta Machinery/Eagle Tools, 2217 El Sol Ave., Altadena, CA 91001<br />
Veritas Tools Inc., 12 E. River St., Ogdensburg, NY 13669<br />
Professional Tools, Inc., PO Box 672525, Houston, TX 77267-2525<br />
Shopcarts, 145 Bluxome St., San Francisco, CA 94107<br />
Sisco Supply Inc., PO Box 9499, So. Burlington, VT 05407<br />
92 Fine Woodworking<br />
Photos except whece noted: Sandor Nagyszalanczy
Four halls, the size of the one shown above, overflowed <strong>with</strong> equipment and potential<br />
customers during last fall's Woodworking Machinery and Furniture Supply<br />
Fair held in Anaheim, Cal.<br />
The <strong>Router</strong>Master, at left, operated by Garry Chinn of Garret Wade, can rabbet,<br />
groove, pin rout, plunge rout and edge rout because of its ability to hold the router<br />
in almost any position.<br />
The Tucker vise, (shown in the bottom left photo) operated by Leonard Lee of<br />
Veritas Tools Inc., rotates a full 3600 and tilts from vertical to horizontal. It also<br />
has integral dogs, a pivoting front jaw and a quick-release mechanism.<br />
The Modulus scoring-saw attachment (shown in the photo below) being demonstrated<br />
by Michele Letendre Of Modulus 2000 Machinery Inc., eliminates tearout<br />
when cutting laminated panels.
it Doesn 't Get<br />
Handscrew<br />
$12 'Iii<br />
1 10" handscrew 13<br />
2 12" handscrew 15<br />
14" handscrew 19<br />
25<br />
17<br />
18<br />
2D<br />
random oribtal sander<br />
5" VS random sander<br />
6" VS random sander<br />
NEW sander dust kit<br />
P1 2RANEW 12" planer/6" jOinter<br />
P12R NEW 12" portable planer<br />
Dl0DFK 9.6v VSR dr kitw/2 bat<br />
C15FB<br />
C12FA<br />
Cl0FA<br />
C7BD<br />
M12V<br />
2<br />
CB75F<br />
Fl000A<br />
9852NEWl 2v, 3/8"VSR, 2sp. kit<br />
9854NEWl2v, 1/2"VSR, drill kit<br />
7511 3/8" VSR 5 amp drill<br />
7514 1/2" VSR 5 amp drill<br />
7515 1/2" VSR 5 amp, keyless<br />
§17545 drywall 0-2500 VSR drvr<br />
555<br />
EY6005BC<br />
12 V, 1 Hour,<br />
Keyless Drill Kit<br />
w/2 Balleries<br />
$179<br />
260100 #26 shaper 3hp<br />
2701 00NEW 127 shpr3hp 1 ph 1929<br />
000099 1100 planer/12"l2hp 2149<br />
800205 5hp, 18" pI. wlknife gr 4999<br />
500040 6" jointer 3/4hp 1 ph 1199<br />
610050 8" jointer 1.5 hp lph 1549<br />
300134 6x48 be1V12" disc sdr 1199<br />
152825 15"VS dr. press 3/4hp 1429<br />
410040 14" bndsw 3/4hp lph 1329<br />
790808 25" wide bel ndr 8399<br />
6368<br />
7- 1/4" Saw W/C.<br />
Blade, Case<br />
and Fence<br />
$135<br />
6305<br />
1-1/2 HP router<br />
1-1/2 hp D hdl router<br />
router-shaper table<br />
router table w/router<br />
3-114 hp 5speed router<br />
3 hp production router<br />
3-1/4 hp plunge router<br />
791001 63 Artisan w/50' ega 799<br />
1791020 3/4' wood shaper lhp 479<br />
1791010 15" scroll s. w/blower 159<br />
1791030 14' bench drill press 329 6145<br />
1791040 14" floor drill press 369 5455<br />
1791050 6" jointer <strong>with</strong> stand 499 6256<br />
1791060 14' bandsaw w/stand 599<br />
1791070 NEW dust coli 399<br />
READER SERVICE NO. 203<br />
94 Fine Woodworking
1-112' rolary hammer kil<br />
SDS hamm.k1<br />
2' rolary hammer kil<br />
chipping hammer kil<br />
demolilion hammer kil<br />
3/4' D-Hdl.<br />
Nailer<br />
$278<br />
SN-4<br />
SFN-II<br />
SN32S+<br />
SKS 1/4' crown finish slapler<br />
M-II 1-3/S' to 2' HD stapler<br />
LS-2 S/S' to I' brad tacker<br />
LS-S l'to 1-1/2' brad tacker<br />
PW<br />
SPS-RFR<br />
1-800-358-3096<br />
CALL U, S,OR CANAOA FOR MIKE, TOM, ERIC, LORI, OR BRENOA!<br />
5' random orbilal<br />
NEW plate jointer<br />
7-1/4' worm drive saw<br />
NEW 7-1/4' circular saw<br />
7-114' 13 amp circ. saw<br />
S-I14' 60· pro bevel saw<br />
S-II4' 60· rafter master<br />
•<br />
••<br />
Box 1716 . Grand Forks,<br />
••<br />
NO 58206<br />
•• ••<br />
FWW .92<br />
March-April Send $3.00 For 208 Page Catalog<br />
FUll LINE DISTRIBUTOR FREE FREIGHT IN 48 CONTIGUOUS USA FACTORY AUTHORIZED SERVICE<br />
READER SERVICE NO. 203<br />
• Any comparable National<br />
ERRORS<br />
AND PRICES SUBJECT TO CHANGE ••<br />
March! April 1992 95
Signature<br />
Zip<br />
FrolTI Back Cover<br />
to Poster<br />
+ BLUME SUPPLY,<br />
.•<br />
INC.<br />
3316 South Blvd Charlotte, NC 28209<br />
704-523-781 1 or 1-800-288-9200<br />
STEP POWDiMAIJC<br />
UP TO ••• '",,8<br />
$1 199<br />
$1 450<br />
#26 SHAPER 2 HP #66 10" SAW 2 HP<br />
W/50" VEGA FENCE<br />
TOOL CHEST<br />
LEGACY<br />
If II the ,.-orkmam,hlp In<br />
1001 chHc Is maker's :Ill)' Indinlion oC the<br />
lalem, dw<br />
ltw:!n<br />
SI(lI1CI1\UOn 11.0. Srudlq' ha,'e bcal csrmonshlp of master ca nter and must<br />
:t\O'c.in§plrinIJ_ In an<br />
'yory. Srudlcy Mpt<br />
",:Ide prior 10<br />
1900. i'KludUig<br />
both<br />
wols hr made<br />
oak cbmshdl<br />
00" adorned ,.-Ith<br />
. romp&cu: SCI<br />
1'0_-000:1. ebony.<br />
• colton .nd of<br />
dw finn!<br />
as ..<br />
of "'oodworkJng loois<br />
pari .nd<br />
lund tools<br />
II 01:1_<br />
OIX'rn;dOI'l.r), loob C'MC' 19 '"<br />
llardwkk<br />
chlniSl lllOO Jl loois.. To p3ck the' jOO .pllU Into :l onl)' In.<br />
arch .. ':IIY<br />
:.c:qulred the ('rom brother his gr:mdbthcr by Studley. dldl hi s by lndl<br />
plane hou$Cd in the ebony In the upper.IIef'! pllrt or the che!ll-.. ;l!I<br />
",ide, 39<br />
long 9'A In. and in.<br />
flip-up lnYS. rokS-OUl<br />
laycr$<br />
... ick now Q""'fl-" dlC ct. which<br />
:I 19J.i<br />
ford l<br />
appral5cd<br />
til<br />
ICCb n for it. A pxS<br />
• d«p. SnulJcy dcylkd jlgsaw-pun1c<br />
has been<br />
J700. 11 ,lOI, ..<br />
lIard",1ck.<br />
lr.Idc It "'"()lIld!ICftU one !IO:JUSI<br />
...<br />
·ood<br />
and hidden comp:anntenl5. l:Iinc<br />
in his bmUy since il ...<br />
P("le Ib.rd<br />
n:l1l_<br />
;IS MqUe2I 10<br />
tool-the Stanlq' "<br />
the chet.<br />
·orkcr, pi:.", to $ell<br />
.rr.I"3t'n1Cn' of<br />
Now available from<br />
Fine Woodworking magazine<br />
The response to Fine Woodworki11£'s July/August back cover<br />
was overwhelming. So many of you called or wrote asking<br />
for a poster reproduction of the exquisite tool chest by H.O.<br />
Studley, that we decided to go ahead and print one up.<br />
We rephotographed the chest and enlarged the photo to fill<br />
the 18" x 26" poster shown above. Seen at this size, Studley's<br />
ingenuity and workmanship is even more apparent.<br />
The poster is printed in full color on the same book-quality<br />
stock as the Fine Woodworking covers. And we'll mail it to<br />
you carefully rolled to keep it suitable for framing.<br />
#1 80 18" PLANER 5 HP<br />
WI KNIFE GRINDER $4395<br />
ex RB-25 SINGLE PHASE 10 H.P. WIDE BELT SANDER $7499<br />
#100 12" PLANER 2 HP $1 825 #60 8" JOINTER<br />
CALL FOR OUR LOW PRICES ON OTHER POWERMATIC MACHINES NOT LISTED, AS<br />
WELL AS PRICES ON THE NEW ARTISANS LINE OF MACHINERY.<br />
FINE WOODWORKING CUSTOMER SERVICE<br />
WE'RE HERE TO SERVE YOU!<br />
We want you to be a satisfied customer. If you ever have a problem,<br />
question or a complaint about your magazine subscription or<br />
a book or video purchase, please call us - toll·free.<br />
We \vill be happy to help you in any way we can. We gladly:<br />
•·Confirm Shipments<br />
Resolve Complaints<br />
•<br />
Answer Your Questions<br />
Handle Refunds & Returns<br />
FOR CUSTOMER SERVICE, CALL: 800-477-8727<br />
(8AM -- 5PM EST, MON.-FRI.)<br />
FAX: 203-270-9373<br />
To PLACE AN ORDER, CALL: 800-888-8286 (24 HOURS A DAY)<br />
We accept MasterCard, Visa and American Express<br />
(Please have your credit card handy when placing your order.)<br />
THE TAUNTON PRESS<br />
63 S. Main St., P.O. Box 5506, Newtown, CT 06470·5506<br />
It makes a great gift for you or a friend.<br />
To order, use the coupon<br />
__<br />
below or call 1-800-888-8286.<br />
D Please<br />
______________________________________________<br />
send me copies of The Tool Chest poster at<br />
$9.95 each, plus .$2.50 postage and handling (#180).<br />
_________________________________________<br />
Narne<br />
__ ________ ___ _<br />
Address<br />
City State<br />
D<br />
__________________________________<br />
Payment enclosed D MasterCard D VISA DAm. Ex.<br />
___ __________________________ ___<br />
Charge card #<br />
Exp. Date<br />
TAUNTON<br />
The Taunton Press<br />
MAGAZINES<br />
'--____<br />
63 South Main Street<br />
Box 355P WAM<br />
... by IClJolV cnchusi:!sts ---' Newtown, CT 06470<br />
Popular,<br />
Pocket-size<br />
MINI-LiGNO<br />
$110<br />
Only<br />
Incl. C ase,<br />
Batleries<br />
and Pins<br />
for ¥,." and 7/16"<br />
Measuring Depth.<br />
READER SERVICE NO. 84<br />
moisture defects are irreversible.<br />
Therefore don't waste money and<br />
time on wet wood. Use a moisture<br />
meter to be sure you work<br />
only <strong>with</strong> dry wood.
WE ARE YOUR "STOCKING" INDUSTRIAL<br />
DISTRIBUTOR IN VIRGINIA FOR:<br />
BOSCH Elli<br />
READER SERVICE NO. 18<br />
SHAKER FURNITURE<br />
An exciting collection of Shaker dining<br />
chairs, tables, beds and other furniture<br />
available in Kits or completely finished.<br />
All exemplify the simplicity and versatile<br />
beauty of Shaker design. Pegs, pegboard,<br />
Shaker baskets, oval boxes, dolls and<br />
needlework kits. Large selection of<br />
replacement chair tape.<br />
FREE 56 page color<br />
catalog<br />
-New<br />
and 12 tape samples<br />
SHAKER WORKSHOPS<br />
Box 1028-FW32, Concord, MA 01742<br />
(617) 646-8985<br />
READER SERVICE NO. 13<br />
1712 E. Broad Street (18th & Broad)<br />
Richmond, VA 23223<br />
POWERAfAfJC "<br />
Penofin,<br />
In Historic Shockoe Valley<br />
"Serving the Craftsman ,fi"u 1898 <strong>with</strong> Specialty Tools OIuJ Supplies"<br />
Penofin® penetrating oil finish<br />
for all wood projects ...<br />
large or small.<br />
<strong>with</strong> its Brazilian rosewood oil base,<br />
is perfect for wood paneling, fine furniture or<br />
even sculpture like this mahogany frog by<br />
Jesse Jones. In transparent colors or natural.<br />
For information call Customer Service:<br />
outside California 1.800.468.8820;<br />
in California 1.800.468.8817.<br />
., PERFORMANCE COATINGS INC.<br />
;iiiF" PO BOX 1569, UKIAH, (A 95482<br />
Pink Ivory<br />
Dagame<br />
Brazilian Rosewood<br />
Pear<br />
Plum<br />
Burls<br />
Snakewood<br />
Bubinga<br />
Koa<br />
Satinwood<br />
Cocobolo<br />
Padauk<br />
Rosewood<br />
Bloodwood<br />
Ziricote<br />
Purple heart<br />
C.Ebony<br />
Pau Rosa<br />
Camphor<br />
It '> d mailer 01<br />
prode for both 01 u
Pine Woodworking Video Workshops:<br />
great infonnation and great ente rtainment.<br />
Fine Woodworking video workshops are:<br />
• Learning tools. You see, firsthand, exactly how to do the work - the<br />
tools, techniques, and subtle rhythms that make for skillful woodworking.<br />
• Based on the real woodworking world. Fine Woodworking videos show<br />
actual woodworkers, not actors. You see exactly how other craftsmen<br />
solve the tough problems you're up against.<br />
• Designed for repeated viewing. You'll see deeper into woodworking<br />
lore every time you watch these tapes.<br />
Great savings! Now in this special offer you'll save off the individual video<br />
prices by purchasing the sets outlined here.<br />
The Taunton Press guarantee:<br />
If you're not happy <strong>with</strong> your<br />
purchase, return it and we'll<br />
immediately refund your money<br />
or credit your charge account.<br />
t\o questions. No delay.<br />
Restoration Set<br />
Repairing Furniture<br />
<strong>with</strong> Bob Flexner<br />
You don't need extensive experience or an<br />
elaborate shop to repair your own furniture.<br />
Here are straightforward techniques you<br />
can use to achieve profeSSional results.<br />
70 MINUTES. $29.95<br />
Reimishing Furniture<br />
<strong>with</strong> Bob Flex-ner<br />
Discover when to rejuvenate an old finish,<br />
how to remove a finish that's failed, and<br />
how to refinish all of your fine furniture.<br />
60 MINUTES. $29.95<br />
SAVE ON FINE WOOD WORKING VIDEO SETS<br />
BOUGHT INDIVIDUALLY THESE VIDEOS ARE $59.90.<br />
SAVE $4.90 ON THE 2-VlDEO SET<br />
PRICE $55, ITEM 06Al05<br />
Yes, please send me the video sets I've checked below for the prices indicated plus<br />
$5.00 postage and handling (CT residents add 6% sales tax; Canadian residents add 7% GST).<br />
If I'm not completely satisfied, I may return the videos <strong>with</strong>in 14 days for a complete refund.<br />
o Furniture Making set 0 Shop Techniques set 0 Furniture Restoration Set<br />
$80.00, 06A059 $80.00, 06A053 $55.00, 06A105<br />
NAME<br />
CITY<br />
ADDRESS<br />
STATE<br />
o My payment is enclosed. 0 MC 0 VISA 0 AmEx<br />
CHARGE-CARD #<br />
TAUNTON<br />
BOOKS&VlDEOS<br />
... by fellow cmJlUsiascs<br />
EXP. DATE<br />
SIGNATURE<br />
ZIP<br />
100783<br />
The Taunton Press, 63 South Main Street, P.O. Box 5506, Newtown, CT 06470·5506<br />
Furniture Making Set<br />
Dovetail a Drawer<br />
<strong>with</strong> Prank Klausz<br />
Frank Klausz shows you how to cut neat,<br />
precise dovetails, then how to glue up and<br />
fit the finished drawer. 60 MINUTES. $29.95<br />
Malrlng Mortise-and-Tenon<br />
Joints<br />
<strong>with</strong> Prank Klausz<br />
Learn how to make the mortise-and-tenon<br />
joint eleanly and qUickly, using hand tools or<br />
basic woodshop machines. 60 MINUTES. $29.95<br />
Build A Shal{er Table<br />
<strong>with</strong> KeUy Mehler<br />
Wa nt to build your own dining table? Yo u<br />
can -once you've watched how furniture<br />
maker Kelly Mehler handles the task.<br />
60 MINUTES. $29.95<br />
BOUGHT INDIVIDUALLY THESE VIDEOS ARE $89.85.<br />
SAVE $9.85 ON THE 3-VlDEO SET<br />
PRICE $80, ITEM 06A059<br />
Shop Techniques Set<br />
Small Shop Tips and<br />
Techniques<br />
<strong>with</strong> Jim Cummins<br />
Jim Cummins shares a score of ingenious<br />
woodworking tips, jigs and techniques. Your<br />
work will be more accurate, faster and safer.<br />
60 MINUTES. $29.95<br />
<strong>Router</strong> Jigs and Techniques<br />
<strong>with</strong> Bernie Maas and Michael Fortune<br />
Increase your productivity-and creativityin<br />
the shop. Yo u'll learn basic router joinery<br />
and how to rout the subtle shapes necessary<br />
to create a handsome hand mirror.<br />
60 MINUTES. $29.95<br />
Small Shop Projects: Boxes<br />
<strong>with</strong> Jim Cummins<br />
Transform small scraps of wood into a variety<br />
of beautiful little boxes. Yo u'll also discover<br />
ingenious table-saw and bandsaw techniques.<br />
60 MINUTES. $29.95<br />
BOUGHT INDIVIDUALLY THESE VIDEOS ARE $89.85.<br />
SAVE $9.85 ON THE 3-VlDEO SET<br />
PRICE $80, ITEM 06A053<br />
98 Fine Woodworking
CLASSIFIED<br />
are<br />
ad 15 words. All payments must accompa<br />
The Cl<br />
ny orders; all noncommissionable. The WOOD & TOOL EXCHANGE and SrruATIONS<br />
W ANfED are for private use by individuals only; the rate is $8.00 per line. Minimum 3 lines,<br />
max. 6 lines, limit 2 insertions per year. DISPLAY ClASSIFIED rates on request. Send to:<br />
ASSIFIED rate is 55.75 per word, minimum<br />
Fine Woodworking, AdvertiSing Dept., Box 5506, Newtown, CT 06470-5506. Deadline for<br />
(BOO) 283-7252 or FAX (203) 426-3434.<br />
the May!lune issue is February 25, 1992. Phone<br />
Business Opportunities<br />
SHOP SPACE TO SHARE. Industrial grade<br />
machinery, 10-ft. panel saw, dust colIeaion,<br />
etc. 1200 of total 6000 sq. ft. (718) 499-2954.<br />
WANTED: FlNELY MADE UNIQUE wood<br />
products for mail order firm. (establised 12<br />
years.) Graphic Design, Inc. 897 North Bend<br />
Rd., Cincinnati, OH 45224. (513) 242-0242.<br />
INVENTION SINEW PRODUCTS/ideas wanted.<br />
Call 11.CI for free informationlInvemors<br />
Newsletter. 1-800-468-7200, 24 hours per<br />
day. USA and Canada.<br />
BROOKLYN WOODWORKERS CO-OP<br />
seeks new members. Sharing fully-equipped<br />
shop; private space; du·iving aunosphere. 61<br />
Greenpoint Ave., Brooklyn, NY 11222. Bill<br />
(718) 349-3614.<br />
WELL-EQUIPPED WOODWORKlNG SHOP<br />
20 ft. by 40 ft., Southern, Vermont. On \1', acre<br />
<strong>with</strong> four-bedroom 1840's house. Insulated.<br />
Oil heat. 168,000. Must See. (508) 632-4060.<br />
LEGAL litGUA IVORY<br />
45 pieces (3 lb. approx.) $25 PPD<br />
1000 pieces (66 lb. approx.) $199 PPD<br />
GIANT 2" Tagua, 10 pieces $25 PPD<br />
Makers of diamond tools, and<br />
distributors of reconstructed natural<br />
gemstones and mother-of pearl for<br />
turning, musical instruments, inlay.<br />
checkerboard, pool sticks and fine<br />
furniture. 1 lb. blocks<br />
(approx.) 1 "xl "x5" $70 PPD.<br />
ORDERS ONLY<br />
1 -800-8 72-5283 I.4SA<br />
SASE $2. for more information and<br />
brochure. For resale information,<br />
call 602-994-1630<br />
7117 3rd. Ave.<br />
TJTT r ll.J..J.l fT'A D'Y Scottsdale, AZ 85251<br />
Situations Wanted<br />
GERMAN-AUSTRALIAN WOODWORKERcarver<br />
is looking for opportunities to work in<br />
the SA and to l earn about the country and<br />
its fine w oodwork. Holger Kroeger, PO Box<br />
1279, Launceston, Tasm., 7250, Australia.<br />
Help Wanted<br />
SKILLED WOODWORKER WAl\'TED. High<br />
quality, precise execution and appreciation<br />
of modern design required for Brooklyn<br />
shop. Salary commensurate <strong>with</strong> experience.<br />
Send resume to PO Box 342, Prince Su·eet<br />
Sta., NY, NY, 10012.<br />
FURNITURE MANUFACIURING<br />
INSTRUCTOR<br />
F If tenure track position Fall 1992<br />
Teaching furn. mfg. courses incl.: Intro.<br />
Wood, Wood Fin., 32mm System of Cabinetmaking,<br />
IntTo. to Computer Oper. for Fum.<br />
Mfg., Adv. Wood Tech., Cabinet & Furn.<br />
making. Fum. making & mfg., Chair deSign,<br />
Fum. Mfg. 5pedalty, & other reI. courses.<br />
Salary. $29,049-$52,233 ann. based on Ed. &<br />
exp., (lOrna. contract). Full benefits pkg.<br />
Teaching expo at comm. college level prer.<br />
Min. AA/deg. + 6 yr. reI. FIT exp.: or Bach. deg.<br />
+ 2 yr. reI. FIT exp.; or fully satisfied CA cornm.<br />
call. teacher's credentials. in the field or equiv.<br />
The following must be received by the closing<br />
dace: DisC. App. form, transcripts, resume,<br />
letters of rec. on recent pertinent expo<br />
Oosing date: May 29, 1992<br />
For application and additional info. contact:<br />
CERRITOS COllEGE, Personnel Services<br />
11110 A10ndra Blvd, Norwalk, CA 90650<br />
(310) 860-2451, x269 (EOE/AA<br />
THE WEKEELA CAMPS a cooed camp in<br />
Camon, Maine, seeks experienced woodworking<br />
instructors (age 20 + ) June 21 -<br />
August 22. S pectacular facilities, room/board,<br />
top pay based on qualifications. Contact:<br />
Eric/I..auren Scoblionko, 130 S. Merkle Rd.,<br />
Columbus, OH 43209. (614) 235·3177.<br />
HUDSON RNER 100 MILES NYc. Skilled<br />
fumirure maker to work <strong>with</strong> experimental<br />
designer. Terms flexible; includes apartment<br />
in country setting. Please write Art & Science,<br />
PO Box 345, Tivoli, NY 12583.<br />
EXPERlENCED CABINETMAKER, CUStom<br />
furniture, salary negotiable, located Mt.<br />
Kisco, ew York. Designs For Leisure, Ltd.,<br />
41 Kensico Dr., Mt. Kisco, NY 10549. (914)<br />
241-4504<br />
W ooDWORKlNG INSTRUCTOR to teach<br />
and live-in at summer camp for teenagers in<br />
New Milford, CT. July - Aug. 1992. Buck's<br />
Rock, 193 N. Detroit Ave., N. Massapequa, NY<br />
11758. (516) 293-871 1.<br />
Instruction<br />
CHICAGO AREA APPRENTICESHIP: prestigous,<br />
high-end studio. Work widl all hand<br />
and maclline tecluliques. Some experience<br />
widl power tools necessary. No ruition, no<br />
salary. Exchange 4 days of shop work for 1<br />
day of own learning project <strong>with</strong> help in<br />
techniques and design. Write David Orth,<br />
1107 Chicago Ave., Oak Park, n. 60302.<br />
HNICAL COLLEGE<br />
DAKOTA COUNTY TEC<br />
OFFERS a furniture restoration major. Call<br />
(612) 423-8301, or write 1300 145th St. E.,<br />
Rosemount, MN 55068.<br />
ONE YEAR apprenticeship program in<br />
woodworking. Intensive training encompassing<br />
design, production, and marketing<br />
of fine furnirure and cabineuy. Tuition. Maxwell<br />
& KeUy Fumiture Co., Philadelphia, PA<br />
(215) 988-9065.<br />
ItUTHiftliEI<br />
String The Instrument Foremost Making Magazine and of Repair<br />
Guild<br />
Send $30 annual membershIp dues<br />
of<br />
8222 American luthiers<br />
South<br />
Tacoma. WA 98408 Park . (206) Avenue 472-7853<br />
LEARN<br />
The<br />
WOODEN<br />
Landing<br />
BOAT BUILDING<br />
School<br />
& DESIGN.<br />
Two full·time reSidential programs that offer<br />
or wnte lor inlormation on our back issues. lull scale plans.<br />
books, and nalional conventions.<br />
intensive training in a creative but disciplined<br />
environment. V A. approved. Accredited member,<br />
CCA. Financial aid available for qualified<br />
students. The Landing School, Box 1490F,<br />
Kennebunkport, ME 04046. (207) 985-7976.<br />
TilE IIDIIHEn SCIIOOl, ot'<br />
H'E fl."SII"(; & II.l\1J .101.,nil<br />
One and two-week intensive in-shop<br />
training will give you all the necessary<br />
knowledge to start your own business.<br />
3rd genemtion craftsman John Hymiller.<br />
Send $5 for complete info package.<br />
P.O. Box 3260, Crossville, TN 38557<br />
(615) 484·9309<br />
GElTING STARTED IN STAINED GLM5.<br />
Instructions, bonus coupons, $2. Whittemore,<br />
Box 2065MS, Hanover, MA 02339.<br />
RED WlNG TECHNICAL COLLEGE offers<br />
Guitar Building & Repair, and Violin-Family<br />
Repair majors. For infonnation on these majors<br />
or shoo oourses call (BOO) 657-4849. EOE.<br />
APPRENTICE WlTH MASTER CRAFTSMEN.<br />
Unique in-shop experience. Woodworking<br />
and other crafts. Year round program. Baulines<br />
Craftsman's Guild-F\V, Schoonmaker<br />
POint, Sausalito, CA 94965. (415) 331-8520.<br />
LEARN TO TURN<br />
WOOD. Precision lathe<br />
work for fun and fine products taught by<br />
JAMES L. COX WOODWORKING SCHOOL.<br />
<strong>Free</strong> brochure. RD 2, Box 126 Beaver Dam<br />
Rd., Honey Brook, PA 19344. (215) 273-3840.<br />
WOODWORKING, DESIGN, BUSlNESS,<br />
marketing, Associate<br />
fa<br />
degree. Haywood<br />
Community College, <strong>Free</strong>dlander, Clyde,<br />
NC 28721. (704) 627-2821.<br />
19 Kuhn Oood<br />
,<br />
, ¥- II. . 201946·5200 N J 07851<br />
Layton,<br />
craft lr Wille or<br />
center<br />
COli 'or<br />
peters<br />
valley<br />
• ." brocllure<br />
... ,;.;.;.<br />
Woodworking Workshops<br />
June, July and August<br />
Two to Eight Days<br />
WOODTURNERS<br />
Since 1976, I've been teaching beginners<br />
to turn, and experienced turners to<br />
hone their skills. I also stock Myford<br />
Myslro lathes, Sorby tools, & other turning<br />
essentials. or wrtte for free brochure:<br />
Call<br />
RUSS ZIMMERMAN<br />
RFD 3, Box 242<br />
Putney, Vermont 05346<br />
802-387-4337<br />
- May<br />
ANDERSON RANCH ARTS CENTER<br />
Box 5598, Snowmass Village. CO 81615<br />
Anderson Ranch's Studio Residency Program<br />
offers a supportive, interactive environment<br />
for furniture makers, sculptors. painters, photographers.<br />
amd ceramists from Oct. I<br />
15. For information concacr:<br />
303.923.3181 fax: 303.923.3871<br />
<br />
C ARPENTRY - 9 month course. All facets<br />
of basic carpentry rough and finish work in#<br />
eludes hand tool use and hand woodworking.<br />
#<br />
PRESERVATION C ARPENTRY · 2 years.<br />
Preserve and restore pre#20th century build#<br />
mgs. CABINET & fURNlTURE MAKING<br />
2 y ears, custom furniture construction. T ra ..<br />
ditional styles; hand joinery and embellish ..<br />
ment. PIANO TECHNOLOGY - Two yea".<br />
LIN MAKING & RESTORATION<br />
Tuning, action repairs, and rebuilding. VIO ..<br />
- 3 years<br />
for making; optional 4th year for repair/resto ..<br />
ration. Financial aid for qualified students.<br />
Accreditied member NA TTS.<br />
NORTH·BENNETSfREET·SCHCDL<br />
(617) 227-0155<br />
39 N. Bennet St., Box A, Boston, MA<br />
Glues/Adhesives<br />
02113<br />
HIDE GLUE-ALL GRADES, including glass<br />
chipping, 5# and up. Bjorn Industries, Inc.,<br />
551 King Edward, Charlotte, NC 28211.<br />
Phone (704) 364-1186.<br />
Building? Restoring? Repairing?<br />
use CHEM-TECH T-88 the epoxy<br />
professionals use! Strength and reliability<br />
proven in boats and aircraft over 15 years.<br />
Introductory offer 1/2 pI. of T-88 $9.95.<br />
Technical staff on call to answer your<br />
questions. Call or write.<br />
Finishes<br />
CHern P.O. Box 70148<br />
T e C H<br />
Seattle, WA 98107<br />
(206) 783-2243<br />
POLYESTER WOOD FINISH. A complete<br />
line of professional products for prodUCing<br />
dle ultimate pianolhigh tech finish. Clears,<br />
custom colors. Information kit $3. Donald M.<br />
Steinert Co., Dept. F\V, 800 Messinger Rd.,<br />
Grants Pass, OR 97527. (503) 846-6835.<br />
SPRAY-ON-SUEDE. <strong>Free</strong> brochure (sample<br />
enclosed). Donjer Products, Ilene Court<br />
Bldg. 8F, BeUe Mead, NJ 08502. (BOO) 3366537.<br />
OZ POLISH<br />
"All in one" furniture cream polish. Easy<br />
one-step operation. Does more, goes further.<br />
Cleans. polishes, protects. Good on any<br />
smooth surface furniture, marble, tiJe, etc ..<br />
quick drying, no silicones.<br />
Send $4.95 for 2 oz. sample & finishing<br />
catalog. Keystone Millwork & Supply Co.,<br />
1109 Saunders Ct., West Chester, PA 19380.<br />
VELVIT PRODUCTS<br />
Chemgard Wood Treatments: anti-mold &<br />
mildew treatment ideal for logs that won't be sealed<br />
for months after they're milled. Velvit Oil: an<br />
interior wood finish that seals, fills, stains & protects<br />
wood in one application. Maintenance free. No need<br />
to varnish. Cabin & Deck Finish: exterior wood<br />
finish that is deep penetrating formula of oils,<br />
fungicides & resins,<br />
water proofing compounds.<br />
VELVIT PRODUCTS COMPANY. P.O. Box<br />
FW,<br />
1741,<br />
Dept Appleton, WI 549t3, (4t4) 722·8355<br />
Accessories/Miscellaneous<br />
BRANDING IRONS. Names, Signatures, logos,<br />
any size, design. Norcraft Custom<br />
Brands, Box 277F, So. Easton, MA 02375.<br />
Telephone (508) 238-2 163 anytime.<br />
FREE WOODWORKERS CATALOG. Specialty<br />
hardware, patterns, tools and more. Armor,<br />
Box 445, Dept. T, E. onhpon, NY 11731.<br />
TIfF. nNE GOLD LIM PEOPL[TM<br />
• Sheets & Rolls Brushes<br />
Genuine, mitation & Variegated<br />
& Supplies<br />
T ech1ical Books & Videos<br />
In USA: lhreeQ""Street. Suffern,N.V. IOIUI..l601<br />
1283-5J23 / Fax: 914·368-1535<br />
In Canada: SOl<br />
Toronto Douglas Ave.<br />
(Ont.) 116M 1H5. Voce/Fox: 416-787-7331<br />
"Worlc With The 8&t 11 The Bum9$S'<br />
VACUUM BAG PRESSES<br />
MERCURY<br />
VACUUM<br />
PRESSES<br />
Use the atmosphere as a<br />
press. Evenly distributed<br />
pressure creates perfectly<br />
veneered panels and bent<br />
laminations. Compact &<br />
affordable. Call or write:<br />
(707) 964-7557<br />
BOX 2232· FORT BRAGG,CA 95437<br />
Miter<br />
as<br />
Bar Tune-Up<br />
described in this issue<br />
Screws<br />
(4) Set_ C:::=::J<br />
(4)<br />
Blocks Cool 1m<br />
Send Your BarTo:<br />
1300 Rib Cleveland Mountain Tool Wausau, Works, WI Inc. 54401<br />
Ave.<br />
WILl.<br />
BL}£::KSM<br />
1AMSBURG<br />
rIHS<br />
Wrought-Iron<br />
Hardware<br />
'1". OnfaC"'""'a,S"'{SS'1".;<br />
P.O. Box 1776, Dept. FW<br />
Williamsburg, MA 01096<br />
Pbooe: (800) 24S-1 776<br />
Moisture Meter<br />
END WOOD WARPING<br />
METER MT90 4%-16% ONL V $69 U.s.<br />
ONE YE4R UNCONDITION4L GU4R4NTEE<br />
MODELS 3%-·100% 4V41LAILE<br />
4SK fOR fREE C4T4LOG (519) 43731<br />
ELECTROPHYSICS, lOX 1143 ST 4 lION I<br />
LONDON, ONT 4RIO N64 51(2, C4N4D4<br />
Marchi April 1992 99
STAINLESS STEEL NAILS<br />
PLUS STAINLESS<br />
• STAPLES • BOLTS • NUTS · SCREWS •<br />
Call or write for our free catalog!<br />
CALL: 1-401-782-3760<br />
ANCHOR<br />
P.O. BOX STAP'I...E & NAJ L co.<br />
570<br />
· WAKEFIELD, RI ·02880<br />
Musical Supplies<br />
G ITAR, BANJO, MANDOLIN and violin<br />
kits. Repair tools, replacement parts, tone<br />
woods and finishing supplies. <strong>Free</strong> 96-page<br />
catalog. Guitar Shop Supply, Box 9OOF, Athens,<br />
OH 45701. 800-848-2273.<br />
HAMMERED DULCIMER PLANS! By noted<br />
builder Charlie Aim. Best book on subject.<br />
19.95. Woodworks, Box 428, Dept. FW,<br />
Brookston, IN 47923. (317) 563-3504, 800-<br />
526-4791.<br />
VlOLIN, GUITAR, banjo, mandolin-making<br />
materials, accessories, books. Catalog, 1. International<br />
Luthiers Supply, Box 580397, Tulsa,<br />
OK 74158.<br />
GUITARMAKING SUPPliES: Send 2 for our<br />
catalog of quality tonewoods, kits, accessories,<br />
books, tools, and finishing supplies.<br />
Guitannaker's Connect.ion, Mallin Guitar<br />
Company, Box 329, Nazareth, PA 18064.<br />
(800) 247-6931.<br />
Plans & Kits<br />
CLOCK PLANS (CAD) Grandfather, Grandmother,<br />
mantel, wall. Cat. $3. Mike Flanigan's<br />
Clock S hop, 1706 B rcooway , Graham, NC 27253.<br />
VlOLIN PLANS, 16 fu ll-scale drawings for<br />
making regular 4/4 violin. $27. C. I. S.<br />
Crafts, PO Box 8176, Toledo, OH 43605.<br />
YOU CAN MAKE IT CATALOG <strong>with</strong> hundreds<br />
of woodworking patterns, $3. Craft<br />
Patterns, Dept. F\'(/, St. Charles, IL 60174-<br />
5598. (800) 747-1429.<br />
MAKE WOODEN TOYS, whirligigs, door<br />
harps, doll houses, clocks, music boxes,<br />
weather instruments, crafts, furniture <strong>with</strong><br />
our plans, parts, kits, supplies - Catalog<br />
1. (800) 848-4363 - Cherry Tree Toys,<br />
Belmont, OH 43718-0369.<br />
Publications/Catalogs<br />
BUILD, RESTORE, REPAIR, refinish! Calvings,<br />
moldings, brass, hardwoods, veneers,<br />
upholstery, caning, lamps. 1 for unique<br />
wholesale catalog. Van Dyke's, Dept. 71,<br />
Woonsocket, SD 57385.<br />
THE TOOL CHESTfZirN<br />
for both the professional and amateur<br />
• •<br />
1000's OF BOOKS COVERING<br />
Woodworking · All Aspects<br />
Home<br />
•<br />
&• Remodeling Maintenance<br />
Tools & Their<br />
& Recreation<br />
Uses Contracting<br />
Projects For Home<br />
To order your catalog To: THE TOOL CHEST Oept.T<br />
send $2.00 (refundable 45 Emerson Plaza East<br />
<strong>with</strong> first order Emerson, NJ 07630<br />
Software<br />
COMPUTER INDEX<br />
locates information in 9<br />
leading woodworking magazines. Yearly updates.<br />
IBM compatible, hard disk, 512K,<br />
DOS2.0 or newer. 49.95, plus 4.50 S/H.<br />
<strong>Free</strong> brochure. WOODFIND, PO<br />
Lynnwood, WA 98036.<br />
Hand Tools<br />
Box 2703F,<br />
JAPANESE TOOLS SINCE 1888. <strong>Free</strong> catalog.<br />
Tashiro's, 1024 S. Bailey St., Ste. B, Seattle,<br />
WA 98108. (206) 762-8242.<br />
Japanese Pull Saws<br />
We have the largest selection of Japanese<br />
Pull Saws In the United States. Send $1.00<br />
.•<br />
for a 2 year subscription to our 80 page<br />
catalog of fine woodworkIng tools.<br />
THE JAPAN WOODWORKER<br />
• 1731 Clement Ave Suite 100 Alameda, CA 94501<br />
Phone (415) 521·1810<br />
FINEST-QUALITY HAND-FORGED CARV<br />
ING TOOLS. Small scorps, drawknives,<br />
bentknives. <strong>Free</strong> catalog. North Bay Forge,<br />
Box F13, Waldron, Wa 98297.<br />
MATADOR CARVING TOOLS <strong>with</strong> a steel<br />
hardness of 61J-tRc. German made and guaranteed!<br />
Send SASE to The Peck Clamp Tool<br />
56, Boulder, CO 80306-0056 for<br />
Co., PO Box<br />
a free catalog.<br />
·O()(.S - \''iTIQI E & I SEn· ST\''iLE<br />
chisels, levels,<br />
rule:o>, unusual itcms,<br />
_<br />
ctc. Complcte,<br />
worldng (Ools. Satisfaction GuarlI1lccd.<br />
Prompt, postpaid service.<br />
\'1S,IC. Curclll illulr:ltcd list· <br />
S2.O. Sub. · SlOhT., lists.<br />
SflWS,<br />
Qualitv selection of scarce hand tools for<br />
collcctors and woodworkcrs-planes,<br />
scrnpcrs, spokeshavcs,<br />
<br />
non KAIJrI'Jo:, Dept. C92, 5J I IV. I I til,<br />
I't. Angeles, IVA 98362 (206) 452-2292<br />
Power Tools<br />
Stop rearing your<br />
pockets and fumbling<br />
for your (ape and<br />
pencil!<br />
The Cabinetmakers<br />
Sidekick'"<br />
keeps rhem both right<br />
on your belt.<br />
U.S. of<br />
Designed by a cabinet<br />
maker, made in the<br />
top grain<br />
learher<br />
$9.50 ppd.<br />
(Does not include tape<br />
or pencil. Allow 2-4<br />
weeks for delivery.)<br />
Rt. 3 427<br />
Box<br />
Decatur, At 35603<br />
To: Wood Studio<br />
RESTORED MACHINERY - Finest woodworking<br />
machines ever made. Oliver, Yates,<br />
I orthfield. Bandsaws, table saws, wood<br />
lathes, etc. Puget Sound Machinery. (206)<br />
857-5088<br />
BANDSA W -SAWMIll KIT. Affordable and<br />
portable. Write for free literature. Linn Lumber<br />
Co.,<br />
PO Box 326, Lebanon, OR 97355.<br />
WOODTURNING LATHES: bowl, spindle,<br />
large swing, long bed, slow speed. DeRose &<br />
Co , PO Box 150, Mechanicsville, VA 231 11.<br />
(804) 746-1705.<br />
WOODTURNlNG LATHES: bowl, spindle,<br />
large swing, long bed, slow speed, custom<br />
built. DeRose & Co., PO Box 150, MechaniCSville,<br />
VA 23111. (804) 746-1705.<br />
THE INVISIBLE CLAMP, (venturi-vacuum<br />
pump system.) Holds fast for un-obstructed<br />
routing, sanding and veneering. no marring.<br />
Write Vac-U-Clamp Systems: PO Box 114,<br />
American Fork, UT 84003.<br />
NEW DELTA SPECIALS<br />
Edge Sander #31 -380 $1 ,100; belt<br />
finisher #23-905 $1 ,000; scroll saw<br />
#40-419 $825; Unisaw #34-782 $1 ,499<br />
after rebate. Drill press #17-425 $2,250,<br />
also 3HP single phase special saw<br />
motor replaces #83-651 $288 post<br />
paid. Used machinery list also available.<br />
PLAZA MACHINERY • 802 234-9673<br />
LAMELLO MACHINES<br />
NEW COBRA MODEL<br />
LAMELLO QUALITY FOR UNDER $300.<br />
Special Introductory Price<br />
Select Machinery Inc.lHank Koelmel<br />
64-30 Ellwell Crescent,<br />
Rego Park, NY 11374<br />
(718) 897-3937<br />
CALL OR WRITE FOR FREE BROCHURE<br />
BELT SANDERS<br />
Edge Sanders, Stroke Sanders.<br />
14 models to choose from, quality built<br />
by "PROGRESS For your free brochure<br />
and price list write, phone or fax:<br />
Progress Machine Co., 729 Finley Ave.<br />
Ajax, Ontarro, Canada LIS 3T1<br />
Tel: 41 6-686-3305 Fax: 416-686-7004<br />
Safety Equipment<br />
B ILD YO R OWN DUST COLLECTOR<br />
Blue print, 14.70. 100% polyester fabric for<br />
collection bags, 58 in. wiele. 9.24 per yard<br />
ppd. eed custom made bags call: SIGERIST<br />
MFG. CO., 7141-126 St. Surrey, BC V3W 4A8<br />
Canada. Telephone (604) 596·4783, Facsimile<br />
(604) 5%-4982.<br />
Wood Parts<br />
&<br />
The ultimate wood threading device. Attaches to router<br />
makes perfect threads in 5 right hand sizes and 3 left.<br />
Write or call: Dept.FW, 541 Swans Rd., NE, Newark,<br />
OH 43055. 614·345·5045, 1-800·331-4718.<br />
DOWELS - PLUGS - PEGS<br />
Manufacturer Direct<br />
largest & Oak, finest selection Walnut, Hickory,<br />
Dowels.<br />
Maple, Cherry, Mahogany, Teak, even Treated<br />
Quantity discounts.<br />
MIDWEST DOWEL WORKS, INC.<br />
4631 Hutchinson Road<br />
(513) 574·8488<br />
Cincinnati, Ohio 45248<br />
Wood<br />
GENlJINE CUBAN MAHOGANY, ebony, cocobolo,<br />
bocote, Mexican kingwood, pink<br />
ivory, snakewood, tulipwood, zebr;rwood,<br />
padouk, bubinga, ziricore & more. Lumber,<br />
turning stock, logs, slabs. Direa importers of<br />
the finest quality exotic landwoods at reasonable<br />
prices. Send stamped envelope to:<br />
Tropical Exotic Hardwoods of latin America,<br />
Box 1806, Carlsbad, Q\ 92018. (619) 434-3030.<br />
TRUE Q ARTERSA WN LUMBER. Oak,<br />
cherry, pine, cut from prime logs. Airdried.<br />
Newman, Box 46, New Braintree, IVIA<br />
01531. (508) 867-3318.<br />
REDWOOD LACE B RL, other western<br />
species, squares, slabs, whole. Western<br />
lumber, figured lumber, rare woods, sam·<br />
pie kits. SASE list. Eureka Hdwd. Supply,<br />
3346 D St.,<br />
Eureka, Q\ 95501. (701) 445-3371.<br />
NATIVE TEXAS HARDWOODS. Mesquite,<br />
figured fiddleback oaks, pecan, many others.<br />
Burls, turning, carving blocks. Texas<br />
Kiln Produas. (800) 825-9158.<br />
FINE VENEER<br />
Highest Quality<br />
Retail or<br />
Low Prices<br />
Wholesale<br />
Full Length Veneers Area Code 716<br />
Large Selection 655-0206<br />
Exotic Lumbers Call or Write<br />
Custom<br />
for FREE<br />
f::=<br />
11753 Big Tree Rd" E, Aurora, N.Y, 14052<br />
Fax. No. (716) 655-3446<br />
Our wood certainly makes a difference.<br />
VENEER: FOR MARQUETRY AND RESTO·<br />
RA no . Write for cat.: Mail Order Marquetry,<br />
RR #6, Shelburne, Ont., Canada LON 159.<br />
WOOD FOR CARVERS, cut-outs, decoys,<br />
carousel horses, stalter kits, tools and books.<br />
Also for turning anel furniture. SASEilist. Wood,<br />
3505 32nel St. West., Brandenton, FL 34205.<br />
PRIVATE COLLECTION 10/4 - 1614 western<br />
black walnut. Dried 25 to 30 years.<br />
1500 bel. ft.<br />
$7500 , or best offer. 8/4 English<br />
walnut clears. Kiln-dried. 750 bd. ft. 2250.<br />
Stump wood, curly maple, burls, some<br />
trade for tools. (503) 935-1167, (OR).<br />
VE<br />
EER: BURLED, FIGURED, AND<br />
CROTCHES available in black ">alnut, redwood,<br />
madrone, mynle, maple. Also burl<br />
turning blocks and maple mUSical instrument<br />
wood. <strong>Free</strong> sample. Price list. Pacific<br />
Burl and Hardwood. 696 S.E. J Street,<br />
Grants Pass, OR 97526. (503) 479-1854.<br />
414 FA-S. WALNUT<br />
S2.95, 4/4 wormy chestnut<br />
1.50, 414 Honduras mahogany 2.75.<br />
H&B Hardwoods. (502) 425-1326.<br />
ARCHITECTURAL HARDWOODS & VE<br />
NEERS, INC The finest in materials. Custom<br />
blue print panels. Wholesale/retail.<br />
Call for samples. (415) 822-1423, FAX (415)<br />
822-1453.<br />
SELECT & BETTER 20/BD. FT. BULK<br />
PACKS: cherry 2/bd. ft.; red elm 1.47/bd.<br />
ft.; walnut S3.04/bd. ft.; 4 by 4 walnut calving<br />
stock. Additional species. Visa-Master<br />
Card. <strong>Free</strong> catalog. BADGER HARD<br />
WOODS, Rt. 1 Box 262, Walworth, WI,<br />
53184. (800) 252-2373<br />
RAREST CALlFORNIA BURLS direct from<br />
logger. Huge selection beautifully figured<br />
redwood, maple, manzanita, and madrone.<br />
Also guitar-quality squares or slabs. (707)<br />
442-1319.<br />
CUBAN MAHOGANY(.sw letenia ma/:Jogol1ij<br />
Direct from importer. Kiln dried 414 , 5/4, 81<br />
4, 12/4 squares and slabs. West Indies Resources.<br />
(813) 764-0936.<br />
PINK IVORY: Logs, log sections and dimensioned<br />
stock. Direct from logger, imponer,<br />
specializing in precious African hardwoods.<br />
Quality always guaranteed. M. S.<br />
Tisdale, 25000 S.W. 207th Ave., Homestead,<br />
FL 33031. (FAX) 305-246-0404, (phone)<br />
305-248-0593.<br />
GUARANTEED CLEAR COCO BOLO,<br />
squares, lumber, bocote, ebony, lignum,<br />
cirocote. Vacuum kiln-drying. Tropical<br />
Timber: (503) 621-3633.<br />
GOOD HOPE HARDWOODS· Curly cherry,<br />
walnut, figured mahogany, and tiger maple.<br />
Highly-figured Claro walnut in<br />
matched sets for fine furniture and in<br />
flitches up to 54 in. wide by 13 ft.<br />
long. Norman<br />
Hughes, 1627 New London Rd., landenberg,<br />
PA 19350. (215) 274-8842 .<br />
APPALACHIAN AND EXOTIC<br />
HARDWOODS VENEERS PL YWOOD<br />
TURNING AND CARVING BLOCKS<br />
teud·complete line of tools and accessories<br />
Call or write for free price list<br />
L\R,\WOOD I<br />
'(\\/)<br />
lB3<br />
EAST GOLDEN LANE, P.O. BOX 323, DEPT. 18<br />
NEW OX FORO, PA 17350<br />
PHONE FAX 1717)<br />
(717)<br />
624·4365<br />
624·4323<br />
? TIGER<br />
s Pod<br />
921-A Lancaster<br />
and BIRD'S-EYE<br />
.. . Curly Ash, Curly Oak<br />
";?I4<br />
Curly Cherry, Curly Birch<br />
LUMBER AND FLOORING<br />
Pike, Quarryville, PA 17566<br />
(717) 284-5030<br />
100 Fine Woodworking
MESQ ITE LUMBER. Kiln-dried and bowl<br />
blanks. IESQUITES NU IlTED, Rte. 4, Box<br />
(817) 544-2262.<br />
322, \VK:hita Falls, TX 76301.<br />
QUALITY BLACK LOCUST LUMER. 2.50/<br />
1xI. ft. plus shipping. Call or write: Better<br />
Trees, 7894 W. Iaple Rapids Rd., St. Johns,<br />
MI 48879. (517) 682-4637.<br />
,<br />
GILMER WOOD CO.<br />
503-274-1271<br />
Rare & Exotic Woods<br />
• in over logs, planks & squares<br />
50 species stock<br />
• also cutlery, turning &<br />
musical instrument woods<br />
221 1 NW SI. Helens Rd., Portland, OR 97210<br />
WESTERN PENNSYLVANIA<br />
WOODWORKERS<br />
50 Domestic & Imported Woods · Veneers<br />
Finishes · Mouldings · Hardware · Plans · Books<br />
Carving Stock · Magazines · Quality Tools<br />
Call or Visit Our Store<br />
WOODCRAFTERS SUPPLY<br />
7703 Perry Hwy (Rt 19) 2921 Buffalo Rd.<br />
Pittsburgh, PA 15237 Erie, PA 16510<br />
(412) 367-4330 (814)899-5466<br />
WINTERWOODS<br />
FIGURED HARDWOODS<br />
, & FOREST SPECIALTIES<br />
Tiger & Birdseye Maple<br />
Curly Cherry & Curly Aspen<br />
lilt'<br />
. Lumber 4/4 thru 20/4<br />
Turning Squares<br />
4 & Bowl Blanks<br />
DESERT IRONWOOD! Orange/gold, chocolate<br />
lines. Rough-hewn blocks. 5/pound,<br />
·25 minimum, includes shipping. Sample<br />
3. Woods of the Desert, Dept. F, PO Box<br />
7066, Aillambra, CA 91802.<br />
CHERRY TURNING STOCK. 814 to 1614, to<br />
48-in. lengths. Poplar precut, sanded drawer<br />
parts. SASE for prices and details. Randall<br />
Grace, 3110 Summers Rd., Franklin, TN<br />
37064. (615) 791-1832.<br />
HIGHLY-FIGURED WALNUT SLABS, and<br />
book-matched panels. California WahlUt Designs,<br />
12681 Wolf Rd., G rass Valley, Ca 95949.<br />
(916) 268-0203.<br />
HOMESTEAD HARDWOODS, (216) 889-<br />
3770. Kiln-dried ash, basswood, butternut,<br />
cherry, chestnut, curly maple, oak, poplar,<br />
sassafras, walnut.<br />
TURNING BLOCKS, BURLS, A D<br />
CROTCHES-exotic and domestic hardwoods-\wite<br />
or call for price list. Wood-ply<br />
Lumber, 100 BelUlington Ave., Dept. F, <strong>Free</strong>pott,<br />
NY 11520. (516) 378-2612.<br />
PINK<br />
GABON EBONY, SNAKEWOOD AND<br />
IVORY lumber, logs and billets. Quality<br />
guarameed. \Vholesale prices. Over 60 od,er<br />
species in stOck. <strong>Free</strong> catalog. (2 13) 542-<br />
3576. E,xotic Hardwoods, 4100-B Spencer St.,<br />
Torrance, CA 90503.<br />
ATTENTION WOODWORKERS-maple and<br />
redwood burl. Figured, quilted, bird's-eye,<br />
lace Any size or mickness available. Quality.<br />
Albany, OR. (503) 926-1123<br />
I ':..
STEVE WAll lUMBER CO.<br />
Quality Hardwoods and Woodworking Machinery For<br />
The Craftsmen and Educational Institutions<br />
UPS Specials<br />
Ash ...........................414 Select 1.90 ........................................ $59.00<br />
Basswood ................414 Select 1.30 ........................................ $47.00<br />
Birch ......................... 4/4 Select 1.60 ........................................ $53.00<br />
Butternut . .................414 Log Run 1.40 ........................................ $55.00<br />
Cherry .....................<br />
...<br />
.414 Select 2.45 ........................................ $68.00<br />
Cypress .................... 4/4 Select 1.60 ........................................ $49.00<br />
Hickory .....................<br />
..................<br />
4/4 Select 1.50 ........................................ $47.00<br />
Mahogany (Genuine) 414 Select 2.70 ........................................ $73.00<br />
Maple (Hard) 4/4 Select 1 .55 ........................................ $52.00<br />
Maple (soft) .4/4 Select 1.30 ........................................ $46.00<br />
Pecan ...................... .414 Select 1.50 ........................................ $47.00<br />
Poplar ...................... .414 Select 1.20 ........................................ $45.00<br />
White & Red Oak ..... 414 Select 1.80 ........................................ $57.00<br />
Walnut ...................... 4/4 Select 2.50 ........................................ $71.00<br />
Cedar (Aromatic Red) .... 4/4 1 C+Btr. 1.35 ........................................ $46.00<br />
White Pine ................ 4/4 F.G. .85 ........................................ $37.00<br />
Yellow Pine .............. 4/4 Clear 1.20 ........................................ $45.00<br />
Above prices are for 100' quantities of<br />
kilndried rou9h lumber sold by the bd. ft.<br />
FOB Mayodan, NC.<br />
Call for quantity discounts. Other sizes and<br />
grades available.<br />
Above prices are 20 bd. ft. bundles of<br />
clear kilndried lumber 3"-10" wide ·<br />
3'-7' long. (Random widths & lengths)<br />
Surfaced 2 sides or rough. Delivered<br />
UPS prepaid in the Continental U.S.<br />
LUMBER SPECIALS<br />
CHERRY 100 Bd. Ft. Bundle Log Run S2S 13/16<br />
WALNUT 100 Bd. Ft. Bundle #1 Common 4/4<br />
$ 90*<br />
$1 10*<br />
Everybody talks<br />
about the weather.<br />
Now you can do<br />
sometliing about it.<br />
1988 was one of the warmest years on<br />
record and global temperatures continue to rise. But<br />
instead of just talking about this environmental crisis,<br />
you can actually do something about it.<br />
Join other Americans across the country in<br />
planting trees. You'll be shading your community<br />
and reducing heat-trapping C02 build-up in the<br />
earth's atmosphere.<br />
For more information on how you can help,<br />
write Global ReLeaf, American Forestry Association,<br />
P.O. Box 2000, Dept. GR2, Washington, DC 20013.<br />
JT 1007 7 5309<br />
JT ·1008 8 5639<br />
JT'0012 12 51895<br />
TOOLS<br />
GJ)AL<br />
U:A1'<br />
YOli can make a world of difference.<br />
READER SERVICE NO. 45<br />
102 Fine Woodworking
3 HP <strong>Router</strong><br />
•<br />
14 AMP hi-tech<br />
motor; 3 HP for<br />
continuous operation<br />
23,000 RPM, for fast<br />
stock removal and<br />
•<br />
smooth, clean cuts<br />
All<br />
•<br />
ball bearing construction<br />
lor long tool life<br />
Multiple depth adjustments;<br />
presetting of 3 plunge<br />
•<br />
depths<br />
Shaft<br />
•<br />
one wrench<br />
Complete<br />
lock for easy<br />
changing of bits <strong>with</strong> just<br />
<strong>with</strong> %" collet<br />
cone, %" and y." collet<br />
sleeves<br />
LIST $347<br />
PBSRT <strong>Router</strong> Table<br />
This router table was designed <strong>with</strong> the<br />
craftsman in mind. Constructed <strong>with</strong> a<br />
hardwood frame, malamine top and poly<br />
cabonit mounting plate. this table will take<br />
many years of use. The hardwood fence<br />
makes use 01 additional clamps and jigs<br />
easy. The miler track fits any width of miter<br />
gauge. Tuffak guards make it sater to<br />
operate. 36 V. " high.<br />
$277.90 PBS RT2 00::0=_-::::..<br />
Remote variable speed attachment MLC RSC 15 makes any ordinary router Into a<br />
variable speed router $39.95<br />
Micro Fine Height Adjustment Knob:Our easy to Install knobs let you micro-tine tune to<br />
the preclsa bit height you want <strong>with</strong> jUlt a turn of the handle.<br />
Whether you're working Inverted In a router table or free handed, you'll love this item.<br />
Your saHllactlon guaranteed I 11 ONLY $18.95<br />
2525 KENSINGTON AVE., AMHERST, NY 14226-4999<br />
(716) 839-4800 CALL TOLL FREE 1-800-888-7271 FAX: 716/839-4051<br />
STORE HOURS: MON., TUES., WED .• FRI. 7:30 am-S:30 pm; <br />
THURS. 7:30 am-8:00 pm; SAT. 9:00 am-3:00 pm ...<br />
The 1IaIII .. X 31<br />
READER SERVICE NO. 31<br />
is designed to make maximum use of minimum space<br />
ideal for the small professional shop and the demanding<br />
hobbyist Change from one tool to another in 20 seconds<br />
or less! Solid, sturdy, reliable.<br />
CALL OR WRITE FOR MORE INFORMATION NOW!<br />
1 ·800·234-1 976 Dr 714-494-7006<br />
•<br />
catatlog sent upon order.<br />
Plastic caliper ($4.00 value) for any order.<br />
TUNGSTEN CARBIDE TIPPED TOOLS<br />
I_I CALL TOLL FREE<br />
TOOL CO_<br />
Precision tools for skillful woodworkers Z 1·800-782·6629 (NATIONWIOE)<br />
(CALIFORNIA)<br />
(619) 271 -9952<br />
cunER<br />
TOOL . CUT OIA. CUT L.<br />
U<br />
ST206 1/' 3/.<br />
ST208 5/16 3/.<br />
ST210 3/8 1<br />
ST211 1/2 1<br />
ST216 5/8 1<br />
ST219 3/. 3/'<br />
ST406<br />
1/.<br />
3/.<br />
ST408 5/16 1<br />
ST410 3/8 1<br />
ST4l) 1/2 1<br />
ST413L 1/2 1-1/16<br />
ST4l)E 1/2 2"<br />
ST4l6 5/8 1-]/16<br />
ST419<br />
3/.<br />
I-J/16<br />
• 'E:.. Complete<br />
f<br />
s.so<br />
I<br />
SNK<br />
II'<br />
O. PRICE<br />
S.SO<br />
1/.<br />
5.50<br />
1/' S.SO<br />
ST422 7/8 1-3/16 1/2 10.50<br />
iaht<br />
ST425 1 1-1/16 1/2 10.95<br />
I<br />
1/.<br />
1/'<br />
1/'<br />
6.25<br />
8.95<br />
1/2 5.50<br />
1/2 5.50<br />
1/2 5.50<br />
1/2 5.50<br />
1/2 6.95<br />
1/2 13,95<br />
1/2 7.50<br />
1/2 8.95<br />
Core 801<br />
CB416<br />
45 '<br />
Chamf e r<br />
CB419<br />
3/.<br />
1/'<br />
1/'<br />
1/.<br />
1/.<br />
4.95<br />
1/2 1/2 14 .00<br />
CB422 7/8 5/8 1/2 16.95<br />
C8425 1<br />
5/8<br />
1/2 17.95<br />
2 f'WTES SL210-2 1-1/4 3/8<br />
Rounding<br />
<br />
CR201<br />
TOOL ,<br />
1/16 3/8<br />
1/. 1/'<br />
1/'<br />
12.00<br />
RADIU CUT L. SNK D. PRICE<br />
CR203 1/8<br />
CR205 J/16 1/16<br />
CR206<br />
1/'<br />
1/'<br />
3/8 1/'<br />
1/.<br />
10.00<br />
10.00<br />
10.00<br />
2/1 1/' 11.00<br />
CR208 5/16 9/16 1/' 12.95<br />
CR210 3/8 5/8 1/' 14.00<br />
CR2 1l 1/2<br />
3/.<br />
1/' 16.00<br />
CR406 1/' 1/2 1/2 11.95<br />
CR410 3/8<br />
5/8<br />
1/2 14.00<br />
CR4 }) 1/2 3/. 1/2 16.00<br />
Over<br />
CR416 5/8 7/8 1/2 19.00<br />
CR419 3/' 1 1/2 20.00<br />
Roman<br />
R0206<br />
Dgee<br />
Cove<br />
ClaISical<br />
-.<br />
CV20J<br />
-<br />
CS20J<br />
oJi<br />
HALF ROUND<br />
314" BORE<br />
1-1/4" BORE<br />
CR425 1/2 1-1/4 1/2 32 .5:><br />
CR4)2 1-1/4 1-l/4 1/2 42.95<br />
R0204 5/32 1/2<br />
1/.<br />
3/'<br />
1/'<br />
1/'<br />
15.00<br />
16.00<br />
R0404 5/32 1/2 1/2 15.00<br />
R0406<br />
1/'<br />
3/' 1/2 16.00<br />
1/8 3/8 1/' 11.00<br />
CV205 l/16 1/16 1/' 11.00<br />
CV206<br />
1/.<br />
1/2 1/' 11.00<br />
CV208 5/16 1/2 1/' 12.00<br />
CV210 3/8 1/2<br />
CV21l 1/2<br />
CV406<br />
1/.<br />
5/8<br />
1/.<br />
12 .00<br />
1/' 13.00<br />
1/2 1/2 12.00<br />
CV4 10 3/8 1/2 1/2 12 .50<br />
CV4 13 1/2 1/2 1/2 13.50<br />
CVU9 3/. 7/8 1/2 27.00<br />
1/8 5/8<br />
7/8<br />
1/8 5/8<br />
1/' 7/8<br />
0 1/4<br />
J/8 11/16<br />
1/2 3/'<br />
5/8 1<br />
3/4 1-1/8<br />
1/. 18.00<br />
CS206<br />
1/' 19.00<br />
CS40J 1/2 18.00<br />
HR208<br />
CS406 1/2 19.00<br />
HR20) 12 .50<br />
HR205 1/. 13.50<br />
HR206 14.50<br />
1/. 16.00<br />
1/' 16.00<br />
HR210<br />
0 1-1/8 1/2 17.00<br />
HR410 3/4<br />
1/.<br />
5/8 1/.<br />
1/.<br />
HRUl 1 0 1-)/8 1/2 18.00<br />
HR416 1-1/4 0 1-5/8 1/2 J5.00<br />
HR419 1-1/2 0 1-7/8 1/2 40.00<br />
CARBIDE TIPPED<br />
Indu!tr1al Quality Grade<br />
• :I mm C3<br />
ThIckness Carbide orr.,<br />
.ACH<br />
HORIZONTAL PANEL RAISING $49<br />
C931<br />
Tung!ten Carbide TIpped<br />
Longer Uf •.<br />
C984 C985 C986 C987<br />
C1084 C1085 C1086 C1087<br />
$21 REDUCING BUSHING: PAIR<br />
NET 30 DAYS TO GOVERNMENT AGENCIES, SCHOOLS.<br />
SAME DAY SHIPPING Count on us!<br />
HOURS: MON thru FRI 7 AM to 6 PM<br />
NEW: SA T 8 AM - 2 PM<br />
READER SERVICE NO. 74<br />
Top of/h. lin. Mad<br />
.I,<br />
: S.A.<br />
Nicholson '" ::;;+" '.<br />
10' 60T<br />
10· 36T .60(
Events<br />
Listings oj gallery shows, major craft Ja irs, lectures,<br />
workshops and exhibitions are free, but restricted<br />
to happenings oj direct interest to woodworkers.<br />
We list events (including entry deadlines Jm'future<br />
juried shows) that are current <strong>with</strong> the time period<br />
indicated on the cover oj the magazine, <strong>with</strong> over·<br />
kip when space permits. We go to press three months<br />
beJore the issue date oj the magazine and must be<br />
notified well in advance. For example, the deadline<br />
Jar events to he held in March or April isJanuary 1;<br />
Jar July and August, it's May 1, and so on.<br />
ARIZONA: Classes-Carving a Cowboy· type Figure<br />
<strong>with</strong> Harold Enlow, March 5-7; Carving a HilIbilly·rype<br />
Figure <strong>with</strong> Harold Enlow, Mar. 9-1 1. Dave RusWo Wood<br />
Carvers Supply, 2530 SOth PI., Scottsdale. For more<br />
info contact Dave RusWo: (602) 994· 1233.<br />
CALIFORNIA.: Juried shOWS-Contemporary Crafts<br />
Market, Mar. 20-22, Fort Mason Center, Herbst and Festi·<br />
val Pavilions, Marina Blvd. at Buchanan St., San Francisco.<br />
For info, contact Roy Helms & Associates, 777 Kapiolani<br />
Blvd., Suite 2820, Honolulu, HI 968 13. (S08) 422·7362.<br />
Shows-Sacramento Woodworking Show, April 3-5.<br />
Communiry Convention Center, Exhibit Hall A, 1100<br />
14th St., Sacramento; VenturalSanta Barbara Woodworking<br />
Show, April 10-12. Venrura Counry Fairgrounds,<br />
Commercial Bldg., 10 W. Harbor Blvd., Venrura; orthern<br />
California Woodworking Show, April 24-26. San Jose Civic<br />
Auditorium, Exhibit Hall, Park Ave. & South Market St.,<br />
San Jose; San Bernardino Woodworking Show, May 1-3.<br />
Maruko Convention Center, 295 orth E St., San Be rnardino;<br />
Southern California Woodworking Show, May 15-<br />
17. Long Beach Convention Center, Exhibit Hall 3, 300<br />
Ocean Blvd., Long Beach. For more info. contact The<br />
Woodworking Shows, 1516 S. Pontius Ave., Los Angeles,<br />
90025. ( BOO ) 826-8257.<br />
Exhibition-International Lathe-Turned Objects: Olallenge<br />
lV, thru May 31. Craft & Folk Art Museum, fourth<br />
floor of the May Co., comer of Wilshire and Fairtitx, Los<br />
Angeles. Exhibition of SO objects by more than 60 artists.<br />
For more info, call the museum at (213) 937-5576.<br />
Wo rkshops-Woodworking for women. Furniruremaking<br />
<strong>with</strong> hand tools using traditional joinery, weekends.<br />
Call for schedule: Debey Zito, (415) 648-6861.<br />
Solicitation-New artists wanted for the Los Angeles<br />
Craft & Folk Museum Research Library. Used by collectors,<br />
curators, architects, deSigners. For info, contact<br />
Craft & Folk Art Museum Library, do dle May Co., 6067<br />
Wilshire Blvd., Los Angeles, 90036. (213) 934-7239.<br />
Workshops-Various workshops inel. Japanese woodworking,<br />
joinery and sharpening. Contact Hida Tool Co.,<br />
1333 San Pablo, Berkeley, 94702. (415) 524-3700.<br />
COLORADO: Workshops-One- and two-week<br />
woodworking and furniture design workshops June thru<br />
Aug. In
A FIXE VOO[)llDRIaXG BOOI(<br />
Fme Wqqd.working 0"'0 a<br />
-<br />
SUBSCRIBER<br />
SERVICE<br />
\\TC occlsionnllr make our subscriber list umihlblc<br />
to companies whose products \\"c lhinl< may be of<br />
interest to YOLI. If you prefer not to fin<br />
receive this<br />
mail, just send your mailing lahel (or CXflct copy)<br />
63 S. Main St ., 1'0.<br />
Nc\\'to\\TI, CT 06470-5506 Box 5506 -<br />
to the address below. We 'll talte c:lrc of the rest.<br />
CU$torncr Scnicc Dept., The lllunlon Press<br />
Sa",rnill!<br />
Start<br />
Business!<br />
a Profitable<br />
Save<br />
your own<br />
money<br />
lumber,<br />
cutting<br />
cutting<br />
make money<br />
others.<br />
for<br />
32 Page Full Color Catalo g - $2.00<br />
66-minute demonstration video-$lO.OO<br />
MasterCard or Visa accepted<br />
8180 West 10th Street · Dept Z50<br />
Indianapolis,Indiana 46214-2400<br />
READER SERVICE NO. 204<br />
SUNHILL MACHINERY<br />
Time Proven and Affordable SDM Series Wide Belt Sanders<br />
We Have Thousands of<br />
Satisfied Customers -<br />
We Would Be Happy to<br />
Provide a Reference in<br />
Your Area!<br />
( _"l1\p,.b"1_"""1>1"0\ o
Events (continued)<br />
Mar.<br />
NEW MEXICO: Show-Woodworking World Show,<br />
13-15. New Mexico State Fairgrounds, School Art!<br />
Flower Bldg., Albuquerque, 87198. For information, call<br />
(800) 521-7623.<br />
Seminar and juried exhibition- Seminar <strong>with</strong> master<br />
cabinetmaker James Krenov and an exhibition of fine<br />
woodworking, July 10-1 1. For more info, contact Santa<br />
Fe Communiey College, Communiey Services, PO Box<br />
4187, Santa Fe, 87502-4187.<br />
Classes-Woodworking classes. Northern New Mexico<br />
Communiey College, EI Rito, 87520. (505) 581-4501.<br />
Juried festival-20th annual Southwest Arts and Crafts<br />
Festival, Nov. 12-15. Application deadline Apr. 10. For<br />
prospectus write to: Southwest Arts and Crafts Festival,<br />
525 San Pedro, NE, Suite 107, Albuquerque, 87108.<br />
NEW YORK: Shows and fairs-New York Spring Tabletop<br />
Show, April 25-28, 69th Infantry Armory; International<br />
Contemporary F urniture Fair, May 17-20, Jacob K<br />
Javits Convention Center. Contact<br />
Mar.<br />
George Little Management,<br />
Inc., 2 Park Ave., Suite 1100, New York, 10016-<br />
5748. (212) 686-6070.<br />
Exhibits-Al bert Paley, thru 15; Timothy Philbrick,<br />
Jonathan Bonner, Mar. 15 thru Apr. 15, Rosanne Somerson,<br />
James Carpenter, Apr. 15 thru May 15,. Peter Joseph<br />
Gallery, 745 Fifth Ave., New York Ciey. (212) 751-5500.<br />
Symposium-W oodtuming by ErnieConover, Mar. 6--<br />
7. For registration information contact Constantine, 2050<br />
Eastchester Road, Bronx, 10461 (212) 792- 1 600 .<br />
Demonstrations-4th annual W ood and Tool Expo,<br />
Mar. 21-22. For more information contact Constantine,<br />
2050 Eastchester Road, Bronx, 10461 (212) 792- 1 600 .<br />
Show-Woodworking World Show, April 3-5. Erie<br />
Couney Fairgrounds, 5600 McKinley Parkway, Hamburg.<br />
For more information, call (800) 521-7623.<br />
Exposition and conference-Computer- Integrated<br />
Manufacturing & Engineering Design Exposition and<br />
Conference, Apr. 14-16. For infor, contact Sharon Price,<br />
ClMFJDesign, PO Box 310316, Newington, CT 06131-<br />
0316. ( BOO ) 451-1196.<br />
Juried show-Woodstock-New Paltz Arts & Crafts Fair,<br />
Spring Show, May 23-25, Ulster Couney Fairgrounds.<br />
Contact Scott or Neil Rubinstein, Quail Hollow Events,<br />
PO Box 825, Woodstock, 12498. (914) 679-8087 or<br />
(9 14) 246-3414.<br />
Classes-Various beginning and advanced woodworking<br />
classes. Constantine, 2050 Eastchester Road, Bronx,<br />
10461. (212) 792- 1600.<br />
Mee ting s-New York Wood turners AsSOCiation, first<br />
Tuesday of each month. W oodturning teclmiques exhibits,<br />
more. The Craft Student League, YWCA, 610 lexington<br />
Ave., New York Ciey.<br />
NORTH CAROLINA: Show-High Point Woodworking<br />
& F urniture Supply Show, Mar. 6--7, Market Square<br />
Tradeshow Center, High Point. For information, contact<br />
Trade Shows, Inc., PO Box 796, Conover, 28613. (704)<br />
459-9894.<br />
Exhibition-Splendors of the New World: Spanish Colonial<br />
Masterworks, thru Apr. 26. The Mint Museum of Art,<br />
2730 Randolph Road, Charlotte, 28207. For info, call<br />
(704) 337-2000.<br />
Workshops-Ladderback chairmaking, March 2--6;<br />
Windsor chairmaking, March 1 6--20. Drew Langsner, instructor.<br />
For info, contact Country Workshops, 90 Mill<br />
Creek Road, Marshall, 28753. (704) 656-2280.<br />
Video course-Wood Technology, six-lesson correspondence<br />
course on the wood industry. For info, contact<br />
Ms. Vann Moore, Dept. of W ood & Paper Science,<br />
North Carolina State Univ., PO Box B00 5, Raleigh, 27695-<br />
8005. (919) 737-3181.<br />
Workshops-Woodworking and woodcarving workshops,<br />
year-round. For info, contact John Campbell Folk<br />
School, Rte. 1, Box 14A, Brasstown, 28902. (800) 562-<br />
2440, (704) 837-2775.<br />
MeetingS-North Carolina W oodturners, second Saturday<br />
of every month. Also, woodtuming workshops for all<br />
levels. For info, contact Eric Hughes, Rte. 3, PO Box 300,<br />
Conover, 28613. (704) 464-5611.<br />
OHIO: Class-W ood finishing techniques, Marcll 28.<br />
Earl Ricl1ards, Instructor. The Hardwood Store, 1813 Dalton<br />
Drive, New Carlisle, 45344. (513) 849-9174.<br />
Workshop-Finishes, Mar. 7. Instructor: Earl Richards.<br />
Carriage Hill Farm, 7860 Shull Road, Dayton, 45424.<br />
(513) 879-0461.<br />
OREGON: Show-W ood turningII ladled turned vessels,<br />
Mar. 14-Apr. 26. Made in Jefferson Gallery, 3259 Jefferson<br />
Scio Drive S.E., Jefferson, 97352. (503) 327-2543.<br />
Seminars-Introduction to Bowl Turning, March 1;<br />
Sculptural Marquetry, Mar. 8. Contact Oregon School of<br />
Arts and Crafts, 8245 SW Barnes Rd, Portland, 97225.<br />
(503) 297-5544.<br />
Juried show-Nehalem Fine Woodworking Show, Aug.<br />
1-31. Artisans's Gallery, 12870 H St. (Highway 101).<br />
Slide deadline: June 1. Contact Deborall Kerner, Artisan's<br />
Gallery, PO Box 367, Nehalem, 97131. (503) 368-730 1.<br />
Mee tingS-Guild of Oregon Woodworkers, third Friday<br />
of every mondl. For location, contact dle Guild at PO<br />
Box 1866, Portland, 97207. (503) 293-571 1.<br />
Exhibition-Dennis Elliott, Mar. 4-28. CorvaUis Arts<br />
Center, CorvaUis (503) 754- 1551.<br />
PENNSYLVANIA: Seminar-W ood Teclmology <strong>with</strong><br />
Dr. Bruce Hoadley, Feb. 20 thru Mar. 1; Painted Furniture<br />
Techniques <strong>with</strong> Eli Rios, Mar. 21-22; Shellac Finishes<br />
<strong>with</strong> Don Williams, Mar. 28; Queen Anne F urniture Tecllniques<br />
widl Norm Vandal, Apr. 4-5; Traditional Gold Leaf<br />
Techniques <strong>with</strong> Bill Adair, Apr. 11-12. Olde Mill Cabinet<br />
Shoppe, 1660 Camp Betey Washington Road, York,<br />
17402. (717) 755-8884.<br />
Classes -Woodturning <strong>with</strong> David Ellsworth. 3-day<br />
weekend workshop in private studio. Limit 4 students.<br />
Spring schedule: Apr. 3-5, 24-26; May 1-3, 22-24, June<br />
5--7, 12-14. Contact David Ellsworth, Fox Creek, 1378<br />
Cobbler Rd., Quakertown, PA 18951 (215) 536-5288.<br />
Exhibition-Philadelphia Buyers Market, Philadelphia<br />
Civic Center, Feb. 21-24. For more info, call ( BOO ) 43-<br />
CRAFT, ext. 214 or 216.<br />
Market-20th annual Lancaster designer spring art and<br />
craft market, June 6--7. Application deadline Feb. 29. Juried.<br />
For application send SASE to Lancaster Designer<br />
Craftsmen, PO Box 552, Lancaster, 17603. For more info,<br />
call Pegge Shannon (71 7) 291- 1173 or Lancaster DeSigner<br />
Craftsmen (71 7) 295- 1 500.<br />
Juried exhibitions-Re-Awakening: A Celebration of<br />
Spring, May 2-June 7; Stories: TIle Narrative Art in Contemporary<br />
Crafts, Aug. 8--Sept. 20; deadline: March 2. For<br />
more info, contact Luckenbacll Mill Gallery, 459 Old<br />
York Road, Bedllel1em, 18018. (215) 691-0603.<br />
Competition and show- 1 5th annual Mid-Adantic<br />
Woodcarving show and competition, Apr. 4-5. Pennsylvania<br />
State Universiey-Abington, canlpus gymnasium,<br />
Woodland Road, Abington. For mQre info, contact dle<br />
Pennsylvania Del aware Valley W oodcarvers Association,<br />
PO Box 69, Willow Grove, 19090. (215) 663-9411.<br />
ShOW-Woodworking World Show, April 24-26. Montage<br />
Ski Area, 1000 Montage Mountain Road, Scranton.<br />
For more information, call ( BOO ) 521-7623.<br />
Juried festival-Central Pennsylvania Festival of the<br />
-:JCiinTECH Ultra • Precision Woodworking System<br />
A major engineering advancement for precision positioning has now come to Woodworking in the IPM-1<br />
IPM-l<br />
(patent pend.)<br />
INCREMENTAL POSITIONING MACHINE<br />
The Heart of the System, IPM-l has<br />
unparalleled accuracy and superiority in<br />
design and quality . Makes your router table<br />
an Ultra-Precise S y stem to accomplish<br />
perfect and beautiful joinery.<br />
IPM-l<br />
FOR YOUR TABLE SAW<br />
IPM-l combined <strong>with</strong> an IPM<br />
lence is an extremely rigid and<br />
accurate replacement set-up for<br />
your present table saw fence and<br />
at less than the cost 01 any other<br />
quality fence alone!<br />
Precision lead screw design provides the<br />
ultimate in accuracy and repeatability <strong>with</strong><br />
Zero backlash; Rehable accuracy<br />
unobtainable from sawtooth racks or gears.<br />
Rapid Positioning - less than<br />
two seconds to change any setting <strong>with</strong><br />
the push of a button<br />
Incremental Positioning in<br />
multiples of 1132" over a 10-1/2"<br />
•<br />
2'I?br1dl ;;;,g!lhI- 2 )<br />
micro adjustments in detented<br />
.002" increments.<br />
Optical Cursor for easy and<br />
continuous position readout of<br />
scale or template.<br />
Rugged, Rigid, and Durable_ All matal<br />
design of machined high-grade aluminum,<br />
brass and stainless steel. Precision roller<br />
bearing movement.<br />
Fully Assembled and Ready to Use_<br />
106 Fine Woodworking<br />
• Rugged and Solid Aluminum Fence has a dovetail slot for interlocking Stop Block and optional Vertical<br />
IPM FENCE SYSTEMS INCLUDE:<br />
• x-v Positionable Stop Block locks into fence dovetail. Patented design also adjusts for vertical height <br />
Push Fixture. No holes in fence surface.<br />
• Retractable Stop Extender stored inside fence can be extended and locked into any position. Swivel stop<br />
espeaally useful when making ha-blind joints.<br />
on end eliminates need for damps.<br />
Optional Vertical Push Fixture for end-grain cutting interlocks into fence dovetail and is impossible to tip<br />
over or kick out from fence during use. Safety of this patented fixture far ex ceed s any other design or method.<br />
TECH<br />
Made<br />
-::/ii;,.,<br />
READER SERVICE NO. 107<br />
in U_S_A_<br />
JoinTECH TEMPLATES<br />
Jointech, the inventor of preprinted<br />
templates, offers 38<br />
different patterns for making<br />
every size dovetail and box joint<br />
ble and<br />
h e<br />
u<br />
U.S. b: t i<br />
<br />
Patent No. 4,965,943<br />
For a <strong>Free</strong> Brochure<br />
and name of nearest<br />
dealer write to:<br />
JoinTECH Corporation<br />
P.O. Box 790727<br />
San Antonio, TX 78279
CARBIDE TIPPED ROUTER BITS<br />
PROFESSIONAL PRODUCTION QUALITY • SATISFACTION GUARANTEED<br />
MULTIPLANE PROFILE BITS<br />
Shank Carb.Hghl.<br />
865 (1/2) 1 314- $29.95<br />
875 (112) 1 5/8- $29.95<br />
a75 877 (1/2) 1 112" $31.95<br />
879 (1/2) 1 3/4- $31.95<br />
I<br />
(1/4) 1 314- $31.95<br />
BUY A SET OF 4 BITS<br />
879 579<br />
V · 579<br />
an SAVE - SUPER VALUE - $99.95<br />
CORIAN BITS for malerial<br />
Shank Ihickness<br />
920 (1/2) 112" $49.00<br />
921 (1/2) 3/4" $51.00<br />
CROWN MOLDING BIT<br />
Shank<br />
S69 (1/2) $3S.00<br />
MLCS<br />
THUMBNAIL BITS<br />
L.Dia.<br />
1 3/16" $18.50<br />
2 1/2" $35.00<br />
ROUND OVER<br />
Shank Radius<br />
350 (1/4) 118" $11.00<br />
230 114- $12.00<br />
209 (1/4) 318" $15.00<br />
355 (1/4) 112" $17.00<br />
655 (1/2) 112" $17.00<br />
#656 (1/2) 3/4- $21.00<br />
DRAWER LOCK BITS<br />
Shank Carbo Hghl.<br />
550 (1/4) 314- $29.00<br />
850 (1/2) 3/4- $29.00<br />
Shank Cut.Dia. Length<br />
#214 (1/4) 114- $ 6.50<br />
216 (1/4) 3/S" 1- $ 6.50<br />
474 (1/4) 112" 1- $ 7.00<br />
219 (1/4) 314- 1- $ 9.50<br />
774 (1/2) 112" 1- $10.00<br />
775 (1/2) 112" 2" $14.00<br />
779 (1/2) 314- 1 1/2" $10.00<br />
220 (1/2) I- I 112" $11.00<br />
3/4-<br />
MULTIFORM MOLDING MAKER BITS<br />
Shank Carbo Hght.<br />
199 (112) 2" $40.00<br />
When ordering any 3 or more, deduct $1.00 each (excluding sets).<br />
<strong>Free</strong> shipping in Continental U.S. PA residents add 6% for stale sales tax.<br />
To order<br />
FREE by MasterCard 32 PAG or E Visa CATA - Toll <strong>Free</strong> LOG<br />
24 Hour Order<br />
Ltd., Service Call I 1-800-S33-9298 I or send 7 Day<br />
P.o. Box 4053 FM, Rydal, PA check 19046<br />
to<br />
READER SERVICE NO. 126<br />
Fme<br />
qcMbrking<br />
SUBSCRIBER<br />
SERVICE<br />
Name<br />
Address<br />
Wc occasionally make OUf subscriber<br />
list available to com panics<br />
whose products we think may be of<br />
interest to you. If you prefer not to<br />
receive this mail, just fill out the<br />
form below and re turn it to our<br />
Customer Scrvice Dcpartment.<br />
We 'll take carc of the rest.<br />
Send this form to:<br />
Customer Servicc Dept.<br />
The Ta unton Press<br />
63 South Main Street,<br />
P.O. Box 5506<br />
1 cwtown, CT 06470-5506<br />
'J Please do not share my name<br />
and address <strong>with</strong> other companies.<br />
City State Zip<br />
I<br />
Send today<br />
for your FREE<br />
copy of our 68<br />
page full-color catalog.<br />
You'll find the best prices<br />
for over 3,000 brand-name<br />
products. Included are power<br />
tools and accessories, hand tools,<br />
screws, hardware, wood components,<br />
plans, how-to books, and much more.<br />
Trend·llnes<br />
Discount<br />
Woodworking Tools<br />
and Supplies<br />
To order your FREE<br />
catalog, just fill out<br />
the coupon below<br />
and mail it to:<br />
Trend-lines<br />
Dept. FW32<br />
375 Beacham St.<br />
Chelsea, MA 02150<br />
---<br />
EXP. DATE SIG.<br />
Name The Thunton Press<br />
_________ Address<br />
I ___________<br />
City<br />
I State<br />
Zip<br />
• ---.J<br />
DEPT. FW32<br />
..._ ----------<br />
READER SERVICE NO.73<br />
From the publishers ofFine<br />
qd.%rki<br />
Your foolproof<br />
system for<br />
making Eurostyle<br />
cabinets<br />
Making KItchen<br />
cabinets<br />
A foolproof system for<br />
the home workshop<br />
lFoIN:<br />
Making<br />
Kitchen<br />
Cabinets<br />
'Y\.n outstanding<br />
blend of print and<br />
video ... anyone that's got the<br />
tools can do this. "<br />
-Chicago Sun-Times<br />
No matter what the size of your<br />
shop or level of your expertise, you<br />
can make Eurostyle kitchen cabinets<br />
that are better-and less expensive <br />
than anything you can buy. Paul<br />
Levine's method doesn't call for any<br />
elaborate tools or special machines.<br />
All you need are a table saw, a router<br />
and a few hand tools. The techniques<br />
presented in the book become<br />
crystal-clear on video.<br />
100795<br />
Yes, please send me the book-video set<br />
Making Kitchen Cabinets, for a Risk-<strong>Free</strong> 14-<br />
day examination period. If I'm not completely<br />
satisfied, I may return it and owe nothing.<br />
Otherwise I will be billed $44.90 plus $4<br />
postage and handling (CT residents add 6% sales<br />
tax, Canadian residents add 7% GST). D7A1DO<br />
NAME<br />
ADDRESS<br />
CITY STATE ZIP<br />
I prefer to pay now: 0 Payment enclosed.<br />
o MC 0 VISA 0 AmEx<br />
CHARGE·CARD #<br />
63 South Main Street, p.o.<br />
TAUNTON<br />
Box 5506<br />
To order use this coupon<br />
or call toll free:<br />
Newtown, CT 06470-5506 .----<br />
BOOKS&V1DEOS<br />
... by fe/b.\' enthusiasts<br />
March/April 1992 107
Events (continued)<br />
Arts, July 9--12. Application deadline early March For application,<br />
call Katherine Talcott, Assistant Director, Central<br />
Pennsylvania Festival of the Arts, PO Box 1023, State<br />
College, 16804. (814) 237-3682.<br />
Oasses-Windsor chairmakin g, all levels, weekly and<br />
weekends. For more information, contact Jim Rendi,<br />
Philadelphia Windsor Chair Shop, PO Box 67, Earlville,<br />
19519. (215) 689-4717.<br />
Juried exhibition-Studio Days '92, Sept. 25-0ct. 4.<br />
9th annual invitional and juried exhibition of contemporary<br />
crafts. Open to mid-atlantic artists. Submit<br />
5 slides and fee. For details, send SASE to Studio Days<br />
'92, Chester Springs Studio, P.O. Box 329, Chester<br />
Springs 19425.<br />
SOUTH DAKOTA: Convention/exhibition-Guild<br />
of American Luthiers 13th national convention/exhibition,<br />
June 24-28, Shrine to Music Museum, Vermillion.<br />
For registration form write:Guild of American<br />
Luthiers, 8222 S. Park Ave., Tacoma, WA 98408-5226<br />
(206) 472-7853.<br />
TENNESSEE: Workshops-Woodturning: Personal<br />
Directions <strong>with</strong> Leo Doyle, March 2-; Bowl and Plate<br />
Turning and Carving <strong>with</strong> Alan Stirt, Marcll 9--13; Woodturning:<br />
Artistic and Functional <strong>with</strong> Ray Key, March 16-<br />
17; March 23-27; Cooperin g: Tools and Techniques <strong>with</strong><br />
Rick Stewart, March 16-20. For more information, contact<br />
Arrowmont School of Arts and Crafts, PO Box 567,<br />
556 Parkway, Gatlinburg, 37738-0567. (615) 436-5860.<br />
Workshops-W oodcarving, Jess Betschart; W oodruming,<br />
John Jordan. For more info contact Tennessee Technological<br />
Univ., Appalachian Center for Crafts, Box 430,<br />
Route 3, Smithville 37166 or TIU, Box 5106, Cookeville<br />
38505. Call (615) 597-6801/6802 or 372-305113052.<br />
TEXAS: Show-W oodworking World Show, Mar. 20-<br />
22. Villita Assembly Building, Navarro at Villica, San Antonio,<br />
78296. For more information, call (<br />
BOO ) 521-7623.<br />
Juried exhibition-17th annual Texas Crafts Exhibition,<br />
April 4-5. University of Texas at Austin, Winedale<br />
Historical Center. For more info, call (409) 278-3530.<br />
Juried competition and exhibition-2nd annual<br />
Furniture of the '90s, Aug. 28 thru Oct. 31. National art<br />
furniture competition co-sponsored by American Society<br />
of Furniture Artists (ASOFA) and ASOFA Institute. Entry<br />
deadline: May 2. For prospectus, send a SASE to ASOFA,<br />
Furniture of the '90s, PO Box 270188, Houston, 77277-<br />
0188. For more info, contact: Adam St. Jolm, executive<br />
director, at (713) 660-8855.<br />
VERMONT: Conference- Shaker Conference, Mar. 6.<br />
The Vermont State Craft Center at Frog Hollow. For more<br />
information or to register, please call the Frog Hollow<br />
Craft Center at (802) 388-3177 or write to Ayn Baldwin,<br />
Education Coordinator, Vermont State Craft Center at<br />
Frog Hollow, Middlebury, 05753.<br />
VlRGINLA: Exhibition-Spotligl1t '92, May 8-July 31.<br />
Sponsored by Southeast Region of the American Craft<br />
Council and Hand Workshop, Virginia Center for tile<br />
Craft Arts. For more information, contact Spotlight '92,<br />
Hand Workshop, 1812 W. Main St., Richmond, 23220.<br />
(804) 353-0094.<br />
WASHINGTON: Show-Rocking furniture, thru Feb.<br />
29. Show includes chairs, cradles and swings. Gilman Village<br />
Gallery, Seattle; 3rd Annual Goblet Show, call for entries:<br />
Feb. and March. For more info, contact Cheryl Peterson,<br />
Northwest Gallery of Fine Woodworking, 202<br />
First Ave. South #240, Seattle, 98104. (206) 625-0542.<br />
Juried show-6th annual show and sale, Kitsap<br />
County Woodcarvers Club, June 13-14. Kitsap Mall,<br />
Silverdale. Contact Chuck Malven, 60 15 Osprey Cr.,<br />
Bremerton, 98312.<br />
Meetings-Northwest Woodworkers Guild, last<br />
Wednesday of each month. Contact John Gruenewald<br />
622 9th Ave., Kirkland, 98033 (206) 827-8012.<br />
Seminars -Various woodworking seminars througl1<br />
May. For more info contact W oodcraft Supply, Georgetown<br />
Center, 5963 Corson Ave. S. Seattle, WA 98101<br />
(206) 767-6394.<br />
WISCONSIN: Festival-20th annual Festival of the<br />
Arls, Apr. 12, Interior courtyard of the Fine Arts<br />
Building at the University of Wisconsin-Stevens Point,<br />
Stevens Point. Juried. For info, call Nancy Whitmire at<br />
(71 5) 344-5661.<br />
TRALLt : Festival-Battle of the Coral Sea, May<br />
AUS<br />
1- 12. The Townsville Area Wood turners Association<br />
Inc., P.O. Box 692, Aitkenvale, 4814, Queensland,Australia.<br />
For more information contact Neville Hines<br />
(077) 73-556 or Mac Goodwin (077) 79 1932.<br />
CANADA: Show-Ontario Wood Show, Apr. 24-26,<br />
Kinsmen Auditorium & Memorial Arena, Chatham.<br />
Contact Cryderman Productions Inc., 136 Thames St.,<br />
Chatham, Ontario 7L 2Y8. (519) 351-8344.<br />
Show-Woodworking World Show, May 8-10. Atlantic<br />
Winter Fairgrounds, Prospect Road, Armdale, ova Scotia.<br />
For more info, call (800) 521-7623.<br />
Oasses-Furnituremaking, carving, lathe turning, router<br />
and more. Tools 'n Space Woodworking, 338 Catllerine<br />
St., Victoria, B.C., V9A 3S8. (604) 383-9600.<br />
Meetings-Canadian Wood turners Association meetings,<br />
throughout tile year. Second Tuesday of each<br />
month. Contact Patrick Chen, PO Box 8812, Ottawa,<br />
Ont., K1G 3J 1. (613) 739-7746.<br />
Meetings-Blue Mountain Woodworking Club meetings,<br />
throughout tile year. TIlird Wednesday of each<br />
month. Contact Glenn Carruthers, PO Box 795,<br />
Stayner, Ont., LOM ISO. (705) 444- 1752.<br />
MeetingS-West Island Woodturners Club meetings,<br />
second TueSday of each month. Also, wood turning<br />
courses. Contact Eric Webb, 61 Devon Road, Beaconsfield,<br />
Que., H9W 4K7. (514) 630-3629.<br />
MeetingS-Northern Alberta Woodcrafters Guild<br />
meetings, tllird Thursday, Sept. thru June. Contact<br />
Douglas Lobb, 121 Healy Road, Edmonton, Alberta,<br />
T6R 1W3. (403) 430·7391.<br />
Seminar-Duck Decoy Carving <strong>with</strong> Pat Godin, Apr.<br />
8-9. For info contact Tools'n Space Woodworking, 338<br />
Catherine St., Victoria, B.C. V9A 3S8, (604) 383-9600.<br />
Show-Open house and graduate show, Apr. 25-26.<br />
Sheridan College, School of Crafts and Design, 1460<br />
Trafalgar Rd., Oal..-ville, Ontario L6H 2Ll.<br />
Seminar-Wood turning Design and Technique III,<br />
Aug. 1-3, Kelsey Campus, Saskatoon. Instructors: Del<br />
Stubbs, Richard Raffan, Giles Gilson, Mark Sfirri. For<br />
more information, contact Saskatcllewan Craft Council,<br />
813 Broadway Ave., Saskatoon, Sask. S7N 1B5 (306)<br />
653-3616.<br />
ENGLAND: Oasses-Woodworking classes. Smith's<br />
Gallery, 56 Earlham St., WC2. Contact Laetitia Powell,<br />
Parnham, Beaminster, Dorset, DT8 3NA. (0308)<br />
862204.<br />
Juried show-Nottingllam Woodcarving Competition,<br />
May 1-2. Entry deadline: March 13. For more info, contact<br />
Mr. R. Flint, hon. secretary, Newark & District<br />
Woodcarvers AsSOCiation, (0636) 707020.<br />
Adjustable guide for<br />
all portable power<br />
saws, jig saws and<br />
routers. Right or left<br />
hand cutting.<br />
MODEL G2515<br />
ONLY $3495<br />
DOVETAIL JIG<br />
Create perfect<br />
half blind<br />
dovetails <strong>with</strong><br />
your router &<br />
dovetail bit!<br />
Completely<br />
adjustable<br />
<strong>with</strong> cam action<br />
clamping.<br />
MODEL G1660 $8495 -ONLY<br />
This pad eliminates<br />
holding<br />
and/or clamping<br />
work while<br />
routing_<br />
MODEL G1530 ONLY $795 EA.<br />
3 OR MORE ONLY $695 EA.<br />
ORDER OUR<br />
1992 CATALOG .••<br />
IT'S FREE!<br />
SANDING DRUM KITS<br />
Handy, low cost drum kits for use on the<br />
drill press,<br />
,:.<br />
hand drill or wood lathe.<br />
III<br />
Great<br />
buy!<br />
•• #,II<br />
. " .. SLEEVES AVAILABLE V<br />
<br />
15-PC_ REGULAR<br />
12-PC. LONG<br />
MODEL G2500 MODEL G2501<br />
ONLY $895 ONLY $895<br />
If you live WEST of the Mississippi:<br />
1-800-541-5537 ORDERS<br />
(206) 647·0801 CUSTOMER SERVICE<br />
MAGNETIC EYE SHIELDS<br />
Magnetic base make<br />
these easy to use. Ideal<br />
for extra face protection.<br />
MODEL G2540 (Sm.)<br />
ONLY $2295<br />
MODEL G2541 (Lg.)<br />
ONLY $2495<br />
If you live EAST of the Mississippi:<br />
1-800-523-4777 ORDERS<br />
(717) 326·3806 CUSTOMER SERVICE<br />
READER SERVICE NO. 109<br />
108 Fine Woodworking
Protect Your<br />
Back Issues<br />
SLIPCASES FOR YOUR BACK ISSUES.<br />
Bound in blue and embossed in gold, each case<br />
holds at least 7 issues of Pine W oodworking (a<br />
year's worth), and costs $7.95 ($21.95 for 3,<br />
$39.95 for 6). Add $1.00 per case for postage and<br />
handling. Outside the United States, add $2.50<br />
(U.S. funds only). PA residents add 7% sales tax.<br />
Send your order and payment to the address<br />
below, or call toll·free, 1-800-825-6690, and use<br />
your credit card (minimum $15). Jesse Jones Ind,<br />
Dept. FWW, 499 E. Erie Ave., Philadelphia, PA<br />
19134. (No P.O. boxes, pl ease).<br />
from New York State's<br />
largest POWERMATIC dealer.<br />
Call for special pricing.<br />
Over 50 different<br />
machines in stock.<br />
Northland Woodworking Supply<br />
65 Wurz Ave., Utica, NY 13502<br />
315-724-1299 FAX 315-724-1298<br />
R EADER SERVICE NO. 135<br />
rolew! Glide-Easy Saw<br />
The Ultimate 4x8 Cutting Panel Saw<br />
The Glide-Easy Saw acts like a<br />
10ft long radial arm saw. Align<br />
a 4x8 sheet to the cutting line.<br />
Then simply glide the saw.<br />
The Glide-Easy Saw is safe &<br />
precise. Build yours from easy<br />
assemble<br />
•<br />
kit. Only $185 + tax & SiH<br />
Use your 7 1/4" circular saw<br />
4 precise roller bearings<br />
• Use your 2" electrical conduits<br />
To order write to:<br />
1I/!1/ff 1556 Halford Avenue #363<br />
1I.1t1 Santa Clara. CA 95051<br />
Phone (408) 296-4066<br />
THE SCHOOL OF CLASSICAL WOODCARVING<br />
<br />
AC ANTHUSLEAF TRAINING VIDEO<br />
Seventy two minute demonstration on the flow<br />
and movement required to produce a more<br />
professional job. The project is typical of acanthus<br />
found on frames and heavily carved furniture.<br />
Twelve week courses on architectural and<br />
furniture carving. British Master Cnrver Ian Agrel/<br />
teaches a maximum of four students in his San<br />
Francisco workshop.<br />
One and two week Summer School<br />
includes hands on instruction on the acanthus<br />
leaf, Rococo, Gothic and letter carving.<br />
Video $49. plus $3.50 S/H<br />
12 week course $2,970.<br />
1 and 2 week courses $475. per week<br />
Send for free brochure:<br />
The School of Classical Woodcarving<br />
10 Liberty Ship Way #4116<br />
Sausalito, California 94965<br />
( TRANSPOWER)<br />
When<br />
SHAPER / ROUTER MACHINE<br />
Exlro large Table<br />
Only $698<br />
READER SERVICE NO. 82<br />
it comes to the finest quality at the most reasonable price<br />
TRANSPOWER is proud to say "WE STAND FOR Ill"<br />
READER SERVICE NO. 108<br />
1-800-654-7702<br />
For orders & catalogue call<br />
12" AUTO PLANER AUTO PLANER BAND SAW TABLE SAW AUTO FEEDER<br />
12' x 6' max capacity<br />
2HP 16 amps motor<br />
AP6SO 15'. 2 HP ." ....... $685 $B500 14' .31. HP ." ...... $285 MS2SO 10'. 1 \-2 HP ....... $3SO RF ISO II. HP ................. $365<br />
AP800 16'. 3 HP . "..... $725 SB600 16'. 1\-2 HP ... .... $495 T$200A 10'. 3 HP ......... $745 RF 180 \-2 HP ... .... . ... $395<br />
AP 125 10' planer ....... $298 AP200A 20'. 3 HP "... $1 195 SB800 18'. 2 HP ......"". $625 T$200HD 10'. 3 HP ...... $985 RF3SO 1 HP .................. $625<br />
AP ISO 12' planer ....... $328 AP400 24'. 7\-2 HP ..... $2690 SB800 20' . 3 HP .. ..... $1340 TS300HD 12'. 3 HP .. .. $1495<br />
EDGE SANDER JOINTER OUST COLLECTOR AIR DRUM SANDER<br />
WOOD LATHE<br />
1'. W & W spindles. 'I.' & \-2' router bit<br />
chucks. 3 HP moler. 25' x 22' milled lable.<br />
T-slot mltergauge. 8000 /11000reversible<br />
2 speeds. 3' spindle travel. independenl<br />
precision fence. 6' insert opening. side &<br />
top spring hold-downs.<br />
SD800 6' x 90' bell. JT650A 6·. lHP ..........,, $295 747 1 HP. 2 bags . .... .. $168 1 HP molor. 1725 RPM<br />
SP860 Tilling spindle shaper .......... $12SO 2 Hp .............. $435 JT860 8'. 2 HP ............. $595 2(XXJ 2 HP. 2 bags . ..... $285 6' x 9' sanding brush.<br />
HP600 3HP shapero 28' table ........." $825 SD1200 6' x 130' bell. JT980 8'. 2 HP ........ ..... $695 3O.Xl 3 HP. 2 bags ...... $385 4' x 9' air drum. l' shaft.<br />
DHlSO l\-2HP shaper ...................".... $45Q 2HP ........................ .... $980 JTl200 12·. 3HP .. ...... $1695 4l.XXl 3 HP. 4 bags ....... $48S 3Speeds ................... $285<br />
(TRANSPOWER) TeM Industrl"es, Inc"<br />
For inquiries & information call (714) 594-7099<br />
- - 322 Paseo Sonrisa Walnut CA 91789<br />
READER SERVICE NO. 154<br />
CPl000 40' copy talhe$365<br />
HD 1 500 40' Heavy duty lathe<br />
cast iron bed .............. $595<br />
March/April 1992 109
Books<br />
Desks and Bookcases by Nick Engler. Rodale Press, 33 E<br />
Minor St., Emmaus, Pa. 18098; 1990. 114.95, hardback; 123 pp.<br />
1his boo k contains a total of 13<br />
projects, all related to the office<br />
or study-area environment.<br />
TI1ey range in style from traditionally<br />
elegant to crudely functional,<br />
and, as you might expect,<br />
this diversity brings <strong>with</strong> it<br />
a wide span in the degree of<br />
difficulty in building them. At<br />
the simple end of the spectn.m1<br />
are a knife box diskette file<br />
<strong>with</strong> a sliding lid and a letter<br />
holder <strong>with</strong> a small drawer on<br />
the bottom, which is reminiscent<br />
of an Early American pipe<br />
box. A little more difficult are a<br />
no-<br />
frills , adjustable drafting table;<br />
a taboret -an end table<br />
type of storage caddy on casters; a plain-looking four-drawer oak file<br />
cabinet; and a hanging<br />
binges on its glass doors.<br />
boo kcase <strong>with</strong> easy-to-instal! swface mow1ted<br />
Among the projects that require advanced skills are a writing<br />
table <strong>with</strong> cabriole legs, computer workstation, child's rolltop desk,<br />
barrister's bookcase <strong>with</strong> lift-and-push glass doors, and a huge hutchlike<br />
boo k case/cabinet <strong>with</strong> multiple drawers and both panel and<br />
framed glass doors. The last plan in the boo k is an attractive, 19th<br />
century style schoohnann's desk <strong>with</strong> turned legs, a lift lid, pigeonholes<br />
and lap drawers.<br />
While all the plans are well illusu
............................................... ..........<br />
DELTA BENCH TOP TOOLS<br />
Model list Sale<br />
23-700 WeVDry Gnnder ..................... 234 159<br />
23-680 6' Bench Grinder 1/4 HP 86 75<br />
23-880 8' Bench Grinder 112 HP ........ 151 115<br />
11-9511 8' Drill Press .......................... 199 145<br />
28-1M 10' Hobby Band Saw ............. 2l0 145<br />
31-050 l' Belt sander 2.0 amp ........... l04 76<br />
31-4M 4' BelVDisc Sander ................ 198 145<br />
31-340 NEW l' BeIV8' Disc Sander .. 268 168<br />
31-080 NEW l' BeIV5' Disc Sander .. 134 94<br />
NEW TOOLS BY DELTA<br />
40-560 16' 2 speed Scroll Saw 266 '164<br />
23-560 .............<br />
5· Bench Gnnder l/5 HP 62 54<br />
11-990 12' Bench Dnll Press 276<br />
11-()90<br />
.....<br />
209<br />
32' Radial Bench Dnll Press 399 309<br />
43-355 314' Shaper 1 112 HP ............. 964 695<br />
43-5115 112' Bench <strong>Router</strong>/shaper 399 279<br />
22-540 12' Bench Top Planer ............. 595 398<br />
36-220 10' Compound Mitre Saw 350<br />
...........<br />
245<br />
28-1 M Bench Band Saw .................... 232 169<br />
40-640 NEW 20' Bench Scroll Saw 466 335<br />
23-675 NEW 6' Grndr13x24Belt Sndr.141 105<br />
14-600 Hollow Chisel Mortiser 668 465<br />
...............<br />
DELTA STATIONARY<br />
34-761 10' Unisaw 1-1/2 HP 1715 1295<br />
33-990 10' Radial Arm Saw 816 585<br />
37-260 6' Motonzed Jointer 488 389<br />
50-179 314 HP 2 stage Dust Collector 483 335<br />
50-181 2 HP Dust Collector 885 ................ 610<br />
7G-2OO NEW 20' Floor Drill Press .... 1049 n5<br />
37-154 DJ15 6'Jointer w/3/4 HPmotor142O 1079<br />
33-05 8-1I4·Sawbucl< comp wnegs.865 589<br />
34-330 NEW 8-1/4' Table Saw t3A ... 343 229<br />
34-985 116 HP Stock Feeder .............. 6S8 485<br />
34-670 10' Motonzed Table Saw ........ 511 395<br />
32-100 Station Plate Jointer ............... 645 285<br />
36-040 8·1/4' Compound Mrtre Saw .. 224 165<br />
34-91 5 30' Unifence ........................... 385 239<br />
34-897 511' Delta Unifenee ................. 525 295<br />
36-755 NEW 10' Tilt Arbor Saw<br />
.......... 1264 865<br />
34-445 34-444 Saw <strong>with</strong> 30' unifence1200 609<br />
MILWAUKEE TOOLS<br />
8527 NEW Sawzal <strong>with</strong> case 164<br />
6526 above Sawzall wlwired cord ... 299 164<br />
6125 NEW 5'Random Orbit Sander2OO 119<br />
6126 NEW 6' 0rbi1<br />
......<br />
Sander205 125<br />
0399-1 12V edlss Drill Kit complele 299 165<br />
0402-1 above Dnll wlkeyless chuck 304 169<br />
0395-1 9.6V cordless Dnll w/case 279 158<br />
0224-1 3/8' Drill 4.5 amp magnum ..... l99 115<br />
0234-1 tl2' Drill 4.5A mag ()-851) rpm 219 119<br />
0244-1 112' Drill 4.5A mag 0-600 rpm 219 122<br />
0222-1 3/8· DriIl 3.5 amp O-looo rpm l85 105<br />
0228-1 3/8' Drill 3.5 amp 0-1000 rpm 179 102<br />
0375-1 3/8' close quarter Dnll ............ 219 129<br />
0379-1 112' close quarter Dnll ............ 249 1 47<br />
6539-1 edls Screwdriver 190 rpm ....... 125 75<br />
6546-1 edls Scrwdvr 200 & 400 rpm 135 79<br />
3102-1 Plumbers right angle Drill Kit 3511 195<br />
5399 1/2' D-hdle Hammer Drill Kil..319 164<br />
1676-1 HD Hole Hawg <strong>with</strong> case ....... 449 244<br />
6511 2 speed Sawlall <strong>with</strong> case 234 134<br />
6750-1 Drywall Gun 0-4000 5 amp 159 93<br />
6507 Original SawZaIl wrth case 249 132<br />
6170 14· Chop Saw 15amp ........... 479 279<br />
M14 Orbital Sander 112 sheel.. ...... 209 116<br />
89n variable temp. Heat Gun ........ 114 75<br />
5397-1 3.6' var. spd Hammer Drill Krt 239 139<br />
5371 -1 tl2' var. spd Hammer Drill Kit 335 188<br />
3107-1 tl2· var. spdrtangIe Drill Krt 3M 199<br />
6754-1 Drywall Gun 0-4000 ...<br />
5.4 amp .l89 114<br />
3300-1 112· var_speed rt angle Drill 319 179<br />
5680 <strong>Router</strong> 2 HP -12 amp ............ 355 205<br />
6215 16' Chain Saw ....................... 299 174<br />
0235-1 112' Drill wlkyls chuck mag .... 219 125<br />
6145 4-112' Grinder 10,000 rpm ..... 159 95<br />
6142 6145 <strong>with</strong> case & acces ........ 197 129<br />
6749-1 Drywall Gun 0-2500 5.4 amp .209 117<br />
5353 Eagle 1·1/2" Rot. Hammer w/case895 499<br />
6365 7-1/4' Circular Saw 13 amp ... 120<br />
6367 above Saw - double insulated 205 122<br />
6366 6365 wnence & carbide blade 219 125<br />
6368 6365 wnnee,carb. bIde,& ese.239 134<br />
63n 7-1/4' Worm Drive Saw .......... 319 175<br />
y any - saw , , , ,<br />
receive an Extra Milw. Carbide Tip Saw Blade<br />
an $11.00 value - FREE<br />
FREUD CARBIDE TIPPED SAW BLADES<br />
5/6" Bore - Industrial Grade<br />
Item Description Teeth List Sale<br />
LU72M010 Gen Pur. ATB_l0' 40 67 31'<br />
LU62M010 Cut·off 10' 60 90 47<br />
LU64MOll Comb 10' 511 76 40<br />
LU85M010 Super Cut·offl0· 60 112 58<br />
LM72M010 Ripping 10' 24 66 38<br />
LU73M010 Cut off 10' 60 62 45<br />
LU87M010 Thin Kert 10' 24 70 39<br />
LU88M010 Thin Kert 10' 60 86 45<br />
LU98M010 Ultimate 10' 60 125 69<br />
TK206 10' Framing 24 38 25<br />
TK303 7-114' Finishing 37 22<br />
TK306 10' Finishing 40 46 27<br />
TK906 10' Combo 511 52 27<br />
SD306 6' Dado - Carbide ................... 215 109<br />
SD308 8' Dado - Carbide ................... 229 119<br />
FO 1-314' x 5/8' Biscuit tooo Clty ... 32 27<br />
FlO 2-t/8' x 314' Biscuit tooo CIty ... 32 27<br />
F20 2-314' x l·Biscuit tooo Clty ...... 34 29<br />
FA Assorted Biscuits 1000 CIty ....... 34 29<br />
FB100 16 piece Forstner Bit Set ........ 331 165<br />
94-100 5 pc. <strong>Router</strong> Bit Door System .319 159<br />
JS100 Biscuit Jointer <strong>with</strong> case ............... 159<br />
FT2000 3-1/4 HP <strong>Router</strong>................ 179<br />
ORDER 1-800-328-0457 MAIL ORDER HOURS M-F 7:00-5:30 C.S.T. SAT 8:00-1 :00<br />
MAKITA TOOLS<br />
...........<br />
Model .............................................. list Sale<br />
M70DW 3/8' v/spd Reverse Dn1l 7_2V 130 74<br />
6071 DWKabove Drill wlremovable batt. 199 105<br />
51190DW 3-3/S' Saw Kit 9.6 volt 256 137<br />
Ml0DWK3I8' cordless Drill Kit 7.2V ..... 170 97<br />
Ml0SDW3IS' cordless Drill Kit 7.2V ....... 99 59<br />
DA3000DW 318' Angle Drill 7.2 voll ....... 251 134<br />
4390DW 9.6 cordless Recip Saw Kit ... 230 127<br />
M12HDW 2 spd Drill w/dutch-comp ..... 236 125<br />
M92DW var. spd Drill Kit complete ...... 252 127<br />
M93DW v/spd Drill w/dutch-complete. 261 135<br />
6093DWL 6093DW Dnll Krt wlFlash Lt 299 169<br />
6095DWE M95DW Drill Krt wl2 batteries270 139<br />
632007-4 9.6 volt Battery ........................ 48 30<br />
632002-4 7.2 volt Battery ........................ 40 2S<br />
5IlO7NBA 7-1/4' Saw w/electric brake ... 238 127<br />
5008NBA 8-1/4' Saw w/electric brake ... 295 158<br />
804510 1/4 sheet Pad Sander ............. 93 54<br />
9900 B 3· x 21· BeItSander wAlag .... 278 144<br />
9924DB 3'x 24' Belt Sander wAlag 293 159<br />
9045N 112 sheet Fin_ Sander wibag .241 129<br />
4301BV Orb. var_ spd Jig Saw 3.5A 289 139<br />
JR3000V var. speed Recip Saw wlcse . 235 129<br />
LS1020 10' Mrtre Saw 3.5 amp .......... 560 295<br />
9820-2 Blade Sharpener ................... 387 195<br />
1900BW 3-3I4· Planer<strong>with</strong> case ......... 217 114<br />
1911B 4-3/8· Planer7.5 amp ........... 255 139<br />
1100 3-1/4· Planer<strong>with</strong> case ......... 426 225<br />
9207SPC r Sander/Polisher ................ 288 154<br />
256 139<br />
8045511 1/4 sheet Pad Sander wAlag ... 89 57<br />
DA3000R 3/8' Angle Dnll. ...................... 260 148<br />
HP2010N 3I4' var_ spd Hmr Drill wiese . 300 165<br />
2708W 8-1/4' Table Saw ................... 609 265<br />
2711 10' Table Saw <strong>with</strong> brake 851 489<br />
...... 1605B 6-1/8' Planer Kit <strong>with</strong> case .... 717 365<br />
5IlO5BA 5-112' Circular Saw ............... 234 135<br />
6404 3/8' Drill Rev. 0-2100 rpm 2 Al04 58<br />
6510LVR 318' Drill Rev. 0-1050 rpm ..... 149 83<br />
6820V 0-4000 rpm Drywall Gun 5.2 A1M 90<br />
6013BR 112' Drill Rev. 6 amp 258 139<br />
5402A 16' Circular Saw 12 amp ....... 662 345<br />
3612BR 3 HP Plunge <strong>Router</strong> .............. 3n 165<br />
9401 4' x 24' Belt Sander wAlag .... 337 175<br />
4302C var. speed Orbital Jig Saw .... 302 159<br />
5IInB 7-1/4' Hypoid Saw ................. 255 138<br />
LSl440 14' Mrtre Saw ........................ 744 435<br />
LS1030 NEW 10' Mitre Saw ............... 420 225<br />
5IlO7NB 7-1/4· Circutar Saw 13 amp .. 210 114<br />
3612B 3HP Plunge <strong>Router</strong>5q'base.3n 165<br />
445<br />
2012 12' Portable Planer ............... 895 455<br />
LS1 0ll to' Slide Compound Saw ..... 642<br />
3M1B 1-3/8 HP <strong>Router</strong> ....................<br />
..<br />
SENCO AIR NAILERS<br />
SFNl Finishing Nailer l' - 2· ........... 3n 275<br />
SFN2 Finish. Nailer 1-112' - 2-1/2' .. 571 395<br />
SN325 Nailer 1-7/8· ·3-1/4· 665 455<br />
SN4 General purpose 2' - 3-1/2· 685 475<br />
LS2 Pinner 5/8' - l' ...................... 351 255<br />
SKS Stapler 5/8' - 1-112· 351 255<br />
LSS Pinner l' - 1-112' 399 285<br />
....................<br />
.............<br />
BosmCH AIR NAILERS<br />
NB05-1 Stick Nailer Super Sale 389<br />
NBOC-l Utility Coil Nailer 645 409<br />
136-511 Shealth & Der:l
Notes and Comment<br />
Playground<br />
creatures test<br />
woodworkers'<br />
skills<br />
Woodworking students at the Rochester Institute<br />
of Technology (RIT) School for<br />
American Craftsmen face a tough exam at<br />
the end of their freshman year. It's then<br />
that their spring quarter projects are subjected<br />
to the scrutiny of the preschooler's<br />
at RIT's Horton Day Care Center. The playground<br />
creatures, shown in the photos at<br />
right and below, must be tough enough to<br />
<strong>with</strong>stand the normal playground abuse of<br />
about 30 kids. In addition, the animals<br />
must be able to support the weight of an<br />
adult, while meeting the design and craftsmanship<br />
requirements of four of RIT's<br />
woodworking faculty.<br />
Last spring marked the seventh year the<br />
freshmen have been challenged <strong>with</strong> the<br />
rocking-animal project. In addition to the<br />
musk ox, kangaroo and turtle shown in the<br />
photos, last year's menagerie included a<br />
mosquito, dolphin, shark and killer whale.<br />
These creatures were conceived on the<br />
drawing board, born as Styrofoam models<br />
and, finally, evolved into fully developed<br />
wooden animals. -Charley Robinson<br />
The huge feet on this stack-laminated kangaroo, created by Dave Garland, eliminated<br />
the need for separate rockers. The greatest challenge in building the SOlid-cherry<br />
animal was balancing it to stand and rock properly.<br />
The 'Atypical Tortise' that Bill Cochrane carved <strong>with</strong> a die grinder and rotary rasps<br />
required 150 hours to complete. Cochrane chose a turtle because its shape naturally lent<br />
itself to a rockerless design.<br />
This musk-ox, by Ben Hobbs, is stack-laminated soft maple covered <strong>with</strong> carpet<br />
padding and fake fur. The only visible wood items are the hard-maple horns, the blackwalnut<br />
hooves and nose, and the bent-laminated ash rockers.<br />
112 Fine Woodworking<br />
Photos: A. Sue WeisJer
From the Taunton Press<br />
Protect<br />
your wood<br />
from invasion.<br />
"I'm ln.d this body<br />
of work is finally<br />
oing to et out to a<br />
wider audience; it's<br />
long O'Verdue. "<br />
- Richard Nilsen,<br />
Whole Earth Review<br />
IIl00DPECKERS 'OD@@XQ)oY24D@7l24<br />
Call about. .. FREE SHIPPING and the best selection of quality<br />
<strong>Router</strong> Bits, Saw Blades, and much more!<br />
MASTERCARD ' VISA ' DISCOVER 1-800-752-0725<br />
Elegance<br />
•<br />
IS easy ...<br />
READER SERVICE NO. 72<br />
INCRA<br />
$44.95<br />
FENCE SYSTEM<br />
(LIST $54.95)<br />
Includes: Incra Fence, Incra<br />
f'iM. I Extender Bar<br />
$29.95 (LIST<br />
RIGHT ANGLE<br />
$39.95)<br />
FIXTURE<br />
$24.95 (LIST $29.9S)<br />
$150.00 SPECIAL<br />
ALL COMPONENTS:<br />
Includes: Incra Fence System,<br />
Incra Jig, Right Angle Fix/ure,<br />
Video, Handbook & Templates.<br />
Gauge and Push Block.<br />
216·888·6332/FAX 216-888-9463<br />
Now you can prevent bugs and fungi from destroying your<br />
woodpile. If you store and work <strong>with</strong> wood, sooner or later<br />
you'll have to deal <strong>with</strong> termites, wood fungi, carpenter ants<br />
and other bothersome pests.<br />
With an entire 63-page section devoted to wood pests,<br />
Common-Sense Pest Control helps you to control moisture that<br />
causes wood decay, and explore alternatives to chemicals.<br />
Specifically, you'll learn how to deal <strong>with</strong>:<br />
slime molds<br />
termites<br />
wood decay<br />
carpenter ants<br />
• •<br />
,,"hi te rot<br />
carpenter bees<br />
surface stainers wood-boring beetles<br />
But Common-Sense Pest Control covers much more than wood<br />
alone. From its 736 pages you'll learn how to control pests that<br />
plague your garden, community, pets and the inside of your<br />
home -like weeds, moths, cockroaches, rodents, ticks and<br />
more. Numerous dra\\ngs and helpful charts detail hundreds of<br />
insect, animal and plant pests. It's the kind of book you'll be<br />
reaching for time and time again.<br />
NOW PERFORMAX COMES BY PRECISION THE YARD<br />
a' "'P<br />
SUPER MAX 37<br />
Single Drum<br />
SUPER MAX 37X2<br />
Dual Drum<br />
HARDCOVER, 736 PAGES, 50 PHOTOS, 308 DRAWINGS, 100 CHARTS,<br />
ITEI 070110, PRICE $39.95 PLUS $4.00 POSTAGE AND HANDLING<br />
(Cf residents add 6% sales tax; Canadian residents add 7% GST)<br />
Made in<br />
U.S.A.<br />
To order, write:<br />
The Taunton Press, P.O. Box 5506,<br />
63 South Main Street, Newtown, CT 06470<br />
For precise and efficient sanding of wide stock select<br />
the Super Max 37. It will exceed your expectations.<br />
R£RFORMA V 1-800-334-4910<br />
For a free brochure and the dealer nearest you call:<br />
PRODUCTS, INC. A or<br />
READER SERVICE NO. 63<br />
(61 2) 895-9922<br />
Marchi April 1992 113
Notes and Comment (continued)<br />
Photo: Bud Latven<br />
Photo: Jack Ramsdale<br />
This 12-in.-high ebony box <strong>with</strong> brass<br />
accents is representative of Phil Weber's<br />
work, which won a first place award in<br />
last year's Philadelphia Craft Show.<br />
Sweet Dreams II, is a collaborative effort by painter and printmaker Kathy Halton, and<br />
furnituremaker Bob Ingram. The pickled white-oak frame is topped <strong>with</strong> a sand-blasted<br />
and clear-finished headboard and footboard. The piece is typical of the high-quality furniture<br />
found at the Philadelphia Museum of Art's best fund raiser.<br />
Announcements<br />
Philadelphia Craft Show<br />
The Philadelphia Museum of An is accepting<br />
applications until May 1 for the 16th annual<br />
Philadelphia Craft Show. Considered by<br />
some to be one of the best retail craft exhibitions<br />
and sales in the nation, last year's juried<br />
show drew 23,000 visitors to see the work of<br />
190 exhibitors. Although sales for d1e 20<br />
woodworkers in the show (see d1e photo<br />
above) were brisk, d1e exposure is even<br />
more valuable. As one exhibitor, Bob Ingram<br />
of Philadelphia, Pa., pointed out, the<br />
sales actually made at the show accounted<br />
for only about 10% of d1e total business he<br />
will write as a result of d1e exposure.<br />
The show, sponsored by d1e Women's Comminee<br />
for d1e benefit of d1e Philadelphia Museum<br />
of Art, is the single largest funciraising<br />
event held annually for the museum. For<br />
more information on this fall's show, which<br />
runs Nov. 5 - 8, comaa the Philadelphia Craft<br />
Show, Philadelphia Museum of Art, PO Box<br />
7646, Philadelphia, Pa. 19101; (215) 787-5448.<br />
The Guide to Art and Craft Workshops<br />
ShawGuides has released the second edition<br />
of The Guide to Art and Craft Workshops, a<br />
listing of shon-term educational programs<br />
throughout d1e world. The guide provides<br />
details on workshop content, duration, costs<br />
and contacts by state and country. A separate<br />
appendix lists workshops by interest group,<br />
including over 60 listings for wood. This will<br />
be a handy reference for people who want to<br />
further d1eir woodworking (or od1er craft)<br />
education but who have only weekends and<br />
week-long vacations for d1eir avocation. The<br />
guide is available from local booksellers, or<br />
it can be ordered directly from ShawGuides,<br />
Inc., 625 Biltmore Way, Dept. 1406A, Coral<br />
Gables, Fla. 33134; (305) 446-8888 ('18.95,<br />
including postage).<br />
The Wood Users Guide<br />
If you're wondering what you can do to help<br />
save tl1e tropical rainforest, The Wood Users<br />
Guide ($7.50 plus shipping and taxes where<br />
applicable) published by the Rainforest Action<br />
Network, has some suggestions. This<br />
book discusses uses, identification and alternatives<br />
to tropical woods. Also included is a<br />
limited listing of ecologically-minded<br />
sources for temperate and tropical woods<br />
(mostly California sources). For more information<br />
on the book or the organization, contact<br />
Rainforest Action Network, 301 Broadway,<br />
Suite A, San Francisco, Cal. 94133; (800) 989-<br />
RAIN, (415) 398-4404 -Charley Robinson<br />
Evil Spirits and the<br />
Barley Corn Rule<br />
England's Saint Bede, (673-735) was one of<br />
the first scholars to systematically collect all<br />
that was known on subjects ranging from<br />
gran1mar to physics. Although Bede spent<br />
his entire life in study and contemplation at<br />
tl1e monastelY at Jarrow, recently fragments<br />
of a manuscript aru-ibuted to Bede have surfaced<br />
that indicate tl1e cleric was a part time<br />
woodworker. The remnant is titled, "The<br />
Presence of Evil Spirits in the Art and Mystery<br />
of Woodworking."<br />
Bede's teA'! begins <strong>with</strong> a listing of events<br />
that happened in his woodworking shop that<br />
could not be explained by any "natural rea-<br />
son." For example, he cannot understand<br />
why, after measuring a piece of wood twice,<br />
the board was too short when cut. He also<br />
discusses the disappearance of small objects<br />
on his bench. "One is using a tool, it is put<br />
down, one looks away and it has disappeared."<br />
Of course Bede did not know about the<br />
normal physiological blind spot, but even<br />
this scientific reason does not explain his<br />
persistent frustration. Bede becomes so anglY<br />
at yet another "spontaneous disappearance,"<br />
tl1at he hurls a hammer at his bench<br />
where he suspects there is an evil spirit. As a<br />
result of his action, he records more evidence<br />
of "demons." The hammer misses tl1e<br />
bench and slides under a cabinet. In frustration<br />
he formulates his well-known Barley<br />
Corn Rule-if an object falls, it will always<br />
land one barley corn (about one-third of an<br />
inch) beyond read1. He experiments <strong>with</strong> other<br />
objects by dropping or throwing d1em to<br />
various parts of the room. The results bolster<br />
his belief that woodshops afford an "anractive<br />
and secure home for the forces of darkness."<br />
Bede also speculated that the evil spirits<br />
exist in the wood itself. As an exan1ple, he<br />
describes the experience of a woodcarver<br />
who had carefully chosen a billet of wood<br />
for a statue of a saint. All went well witl1 the<br />
carving until the final cut was made on tl1e<br />
face. The cut revealed a knot that ruined the<br />
work. This led Bede to wonder why the last<br />
tap on a chisel often causes a nearly finished<br />
board to split and how a dent appears <strong>with</strong>-<br />
114 Fine Woodworking
SYSTEM CX·5 SYSTEMCX·7 SYSTEM CX·8 SYSTEM CX·9 SYSTEM CX·10 SYSTEM CX·12 SYSTEM CX·20<br />
$462 $649 $835 $740 $879 $1099 $1299<br />
AUTHORIZED FACTORY SERVICE WITH ALL PARTS IN STOCK<br />
FREE DEUVERY IN CONTINENTAL USA<br />
\Ii TO ORDER APOLLO, CALL PA 15613<br />
412·733·7555<br />
LASER<br />
The Toothless<br />
Woodworker<br />
.. !!I:Mit3:(II31f1!f_<br />
READER SERVICE NO 46<br />
MADE IN USA<br />
I<br />
<br />
WE PROVIDE PROVEN LASER WOODWORKING<br />
AND EQUIPMENT<br />
CNC POSITIONING SYSTEMS FOR:<br />
ENGRAVING SYSTEMS FOR:<br />
Fretwork & Marquetry<br />
Recognition<br />
• Inlaying<br />
Ad Specialty<br />
Profiling &<br />
•<br />
Piercing<br />
Giftware Decor<br />
Odd Hole Production<br />
Sign age &<br />
V Laser lIahiRiRg IR.<br />
Platage<br />
Repeatability -Furniture Enhancement<br />
r- 500 Laser Drive. Somerset. WI 54025 • Tel: 71 5/247·3285 Fax: 71 5/247·5650<br />
A Decade of Laser Processing And Systems<br />
0<br />
Development<br />
La ••<br />
New Expanded Facilities<br />
... ,-a,.r.1 L , Job 0.11.,.,., 0 CHC Control. 0 Sertlee 0 Jl'Y rettle. 0 Cuttom $r" "'" 0 Shop'<br />
.. .. Db ,. 0 8<br />
",<br />
Design your dovetail pattern right on the jig.<br />
Calibrated settings for fit adjustment.<br />
Cuts any size of joint, in wood up to 11/4" thick.<br />
•<br />
Plus The Leigh<br />
"Hand cut" flexibility, <strong>with</strong> machine speed, precision and ease.<br />
Multiple Mortise &<br />
Tenon Attachment<br />
Model MMTA<br />
•<br />
Coffee table made <strong>with</strong> Leigh MMTA,<br />
using 1'/." finish walnut and maple.<br />
LEI:H<br />
This attachment for your Leigh Dovetail<br />
Jig lets you produce precise,<br />
snug fitting multiple mortise & tenon<br />
joints<br />
For<br />
and<br />
<strong>Free</strong><br />
finger<br />
Brochure<br />
joints-using nothing<br />
more than a plunge router.<br />
Call (Toll-<strong>Free</strong>,<br />
1-800-663-8932<br />
Hours) 24<br />
In Canada, call collect :<br />
(604)464.2700, 8am·4:30pm PST.<br />
Or mail in the coupon below to :<br />
Leigh Industries Ltd .,<br />
P. O. Box 357, Port Coquitlam,<br />
B.C., Canada, V3C 4K6<br />
] please send me your FREE brochure.<br />
[ ] I'm<br />
__________________________________________<br />
also interested in your video on The leigh Dovetail Jig.<br />
__<br />
Name<br />
________________________________________ Address<br />
__<br />
State ___<br />
__<br />
__________ __<br />
City<br />
Zip Code<br />
__FWW<br />
R EADER SERVICE NO. 119
Notes and Comment (continued)<br />
out apparent cause on a well-planed plank.<br />
Why does a choice piece of wood warp? Why<br />
does the bow on a lathe break when the finishing<br />
cut is almost completed?<br />
Bede found evidence of evil spirits at all<br />
phases of a woodworking project, which led<br />
him to ponder: Why do hairs from brushes<br />
appear in dried varnish? Why do crude dividers<br />
slip, wooden pegs break just below<br />
tile surface, and why does a gimlet slip and<br />
scratch a new altar table?<br />
What if Bede were living today? A longer<br />
catalog of strange and frustrating events<br />
would add to his list and support his tileory.<br />
As an example, consider the shop vacuum. Is<br />
there anything more worthy of tile designa-<br />
, ,
.............................................................................................. _ .......................... _ ............... .<br />
SERIOUS POWER TOOLS<br />
WE PAY ALL SHIPPING CHARGES ON TOOLS SHIPPEO WITHIN THE CONTINENTAL U.S.A. and ACCESSORY OROERS OVER $50.00!!!<br />
MIg. Sug. List: 5142.00<br />
TOT PRICt:: $83.00<br />
NO.<br />
OESCRIPTION<br />
1166 \;'0"11 5100 562<br />
4 amp motor variable speed reversmg<br />
$128<br />
2684 7'/. Ctrclesaw 5223<br />
13 amp motor<br />
2664 K Cordless Scru Drill Kit<br />
<strong>with</strong> case 9.6'0'<br />
2665K<br />
Cordless ScruOri1l Kit<br />
<strong>with</strong> case 12Y<br />
2750 4!f/' Angle Grinder<br />
10.000 rpm<br />
S238<br />
S147<br />
S281 $165<br />
5138 5<br />
3157·10 Jig Saw S220 5129<br />
4 5 amp vanable speed<br />
4011<br />
Palm GriP Sander<br />
17<br />
582 549<br />
79<br />
11ft. SuI. Ust 5125.00<br />
TOT PRICE: $73.00<br />
NO. DESCRIPTION<br />
0228·1 \;. Drill 5179 S 99<br />
3.5 amp variable speed reversing<br />
6145 4"," Grinder 10.DOOrpm 5159 5 94<br />
6527 SuperSawzall Kn 5299 5168<br />
<strong>with</strong> case, 8.0 amps, variable speed<br />
6507 Sawzall Ki1 wrth Case S249 5134<br />
4.0 amps, variable speed<br />
6365 7W' Circle Saw 13amps S209 5119<br />
5397 .. Hammer Drill Kit $239 513a<br />
5.0 amps variable speed reversing<br />
6753-1 Drywall Screwdriver $144 585<br />
Variable Speed Reversing, 3.5 amps<br />
1fo" HP ROUTER &;--\ -<br />
Model 100<br />
MIg. Sug. list 5175.00<br />
==:;<br />
' . .<br />
TOT PRICE: $99.00<br />
NO.<br />
330<br />
50S<br />
352<br />
7549<br />
555<br />
7334<br />
7335<br />
9647<br />
690<br />
9367<br />
FACTORY TOT<br />
DESCRIPTION LIST PRICE<br />
Block Sander S102 557<br />
1.2 amps<br />
$210 $11e<br />
orbital action 2.3 amps<br />
3x21 DusllessSaoder S255<br />
1.0 $139<br />
amps<br />
Bayonel Jig Saw S250 5144<br />
4.0 , amps variable speed stroke<br />
Rnishing Sander<br />
Plale Joiner $315 $169<br />
<strong>with</strong> carrying case, 5.0 amps<br />
Random Orbit Sander 5210 $119<br />
3.7 amp<br />
Random Orbit Sander 230 $129<br />
3.7 amps 5" vari-speed<br />
TigerCub Saw Kit 5195 $114<br />
4.5 amps<br />
OFF<br />
Bosch <strong>Router</strong> Bits<br />
40%<br />
FACTORY LIST<br />
NO. DESCRIPTION<br />
1023VS11 W'Orili<br />
SI99 5114<br />
4.8<br />
3000""<br />
amp variable speed reversmg<br />
\;'Orill Kilw/Case 5236 5125<br />
9.6 vo/t. 2 banenes<br />
3OSOVSRK ..<br />
1581YS<br />
ScruOrill wI case<br />
Top<br />
9.6 '0'0/1. 2 baneries<br />
5256<br />
HandleJig Saw S265 5149<br />
FACTORY TOT<br />
LIST PRICE<br />
5135<br />
4.8 amp variable speed orbital action<br />
1582YS 'elic' Jig Saw S265 5149<br />
4.8 amps variable speed orbital action<br />
12130 Dustless Belt Sander 5345 $189<br />
4 x 24 10.5 amps<br />
lS1 1EVS 3V hp Plunge Rouler $448 $2e9<br />
15.0 amps variable speed<br />
• • Ifyouarenol utidied <strong>with</strong>yourpurchase, illinois residents dd 7W%<br />
l 1f..H.P. <strong>Router</strong> $240 $13e 1604 1¥.H.P. <strong>Router</strong> $236 5132<br />
10 amps<br />
10 ams<br />
Plane Kit 3V." wI case 5250 $144<br />
return It prepaid <strong>with</strong>in 30 days for a We reserve the<br />
•<br />
right to correct printing<br />
fulJ refund.<br />
errors.<br />
No C.O.D. shipments.<br />
Prices sullject to change <strong>with</strong>out notice_<br />
$15.00 • FH·l-92<br />
Charge for neIt day air. Some quantities are limited.<br />
sales tn.<br />
................ _ ..... _ ............................ _ ............... _ ........ _ ........ _ .................... _ ........... .<br />
READER SERVICE NO. 134<br />
A&M Designs<br />
AAA Tool<br />
Abbey Machine<br />
Acme Electric Tools<br />
Adams Wood ProduclS<br />
Adjustable Clamp<br />
Airstream Oust Helmets<br />
Arumax Tools<br />
Anderson Ranch<br />
Arrowmont School<br />
Auton Co.<br />
Aviation Supply<br />
Ball & Ball<br />
Berea HardWoods<br />
Better Built<br />
Bill Bartz Mfg.<br />
Blume Supply<br />
Boulter PlyWood<br />
C & L International<br />
CMT Tool<br />
Carter Products<br />
Cascade Tool<br />
Classified<br />
Clayton Machine Corp.<br />
CoMatic Machinery<br />
Maurice L. Condon<br />
Constantine<br />
CW Crossen<br />
Davalco<br />
Davis & Wells Machinery<br />
Delmhorst<br />
Eagle America<br />
5<br />
10<br />
43<br />
94, 95<br />
31<br />
34<br />
12<br />
103<br />
20<br />
42<br />
12<br />
19, 97<br />
97<br />
5<br />
96<br />
10<br />
115<br />
15<br />
26<br />
23<br />
99 · 101<br />
42<br />
5<br />
28<br />
7<br />
37<br />
9<br />
28<br />
19<br />
23<br />
13<br />
32<br />
42<br />
Ebac Lumber Dryers<br />
Econ- Abrasives 8<br />
Raymond Enkeboll Designs 11<br />
Everlast Saw 9<br />
Fein Power Tools 23<br />
Floral Glass & Mirror<br />
Forrest Manufacturing<br />
Furniture Designs<br />
Garrett Wade<br />
Gil-Lift<br />
Glass & Mirror Craft<br />
Global ReLeaf<br />
Grizzly Imports<br />
]. A. Harchuck Sales<br />
Harper Hardware<br />
Hartville True Value<br />
Haystack Mountain<br />
Hida Tool<br />
Highland Hardware<br />
Home Lumber<br />
Horton Brasses<br />
Hubbard Harpsichords<br />
IPD-Glide Easy<br />
Imported Euro<br />
Industrial Abrasives<br />
Incra Jig<br />
Injecra Machinery<br />
Insty-Bit<br />
INDEX TO ADVERTISERS<br />
pean Hardware<br />
25<br />
18, 32<br />
20<br />
21, 27<br />
22<br />
101<br />
102<br />
2, 108<br />
115<br />
97<br />
26<br />
42<br />
10<br />
41<br />
19<br />
8<br />
109<br />
40<br />
43<br />
25, 27<br />
25<br />
20<br />
International Tool<br />
Corp. 30<br />
]DS Company 37<br />
Japan Woodworker 31<br />
Jesse Jones Ind. 109<br />
Jointedl 106<br />
Journeyman ProduclS 9<br />
Kasco 5<br />
Keller Dovetail System 40<br />
Klockit 20<br />
Laguna Tools 103<br />
Laser Machining Tech. 115<br />
Leigh Industries 115<br />
Le 'eave Supply 37<br />
Lie-Nielsen Toolworks<br />
Lignomat<br />
Lobo Power Tools<br />
MLCS<br />
Mafell<br />
Magnate<br />
Manny's Woodworker's PI.<br />
Marling Lumber<br />
Marshco ProduclS<br />
Michael Farr Custom<br />
Woodworking<br />
Miller Woodworking<br />
Moon's Saw & Tool<br />
Northland Wwkg.<br />
PC Index<br />
Paleo Canoe<br />
Paxton Hardware<br />
Pennsylvania Saw Co.<br />
Perfonnance Coatings<br />
Perfonnax ProduCIS<br />
H. H. Perkins<br />
Philipps Brothers<br />
Pooraruck Corporation<br />
Porta-Nails<br />
Quaker State<br />
RBlndustries<br />
Red Hill Corp.<br />
Rio Grande University<br />
Ross Drum Sanders<br />
Rousseau<br />
Ryobi Power Tools<br />
Sanra Rosa<br />
School of Classical<br />
W<br />
oodcarving<br />
Scherr's CabinelS<br />
Charles G. G. Schmidt<br />
SECO Investment Co.<br />
97<br />
96<br />
102<br />
19, 107<br />
7<br />
101<br />
40<br />
41<br />
37<br />
113<br />
40<br />
101<br />
109<br />
36<br />
31<br />
26<br />
28<br />
113<br />
5<br />
103<br />
32<br />
9, 27<br />
12<br />
41<br />
40<br />
97<br />
97<br />
8<br />
42<br />
38, 39<br />
31<br />
109<br />
5<br />
32<br />
41<br />
Seven Corners<br />
Shaker Workshops<br />
Silverton Millworks<br />
Sisco Supply<br />
TIle Source<br />
Star Bronze<br />
Suffolk Machinery<br />
Sunhill Enterpises<br />
111<br />
9<br />
22, 25<br />
97<br />
8<br />
27<br />
97<br />
13, 105<br />
42<br />
TS-Aligner<br />
TIle Taunton Press 16, 17, 96, 98,<br />
102A·D, 105, 107, 113<br />
Tepper Discount Tools 117<br />
Tool Crib of the North 94, 95<br />
Tools on Sale 111<br />
Transpower Industries 109<br />
Trendlines 107<br />
nited States Saw 31<br />
Vacuum Pressing Systems 19<br />
Vega W. K. Ladder 7<br />
Wagner Sprayers 29<br />
Steve Wall Lumber 102<br />
Whitechapel Brasses<br />
Whole Earth Access<br />
Wholesale Division<br />
Wilke Machinery<br />
Williams & Hussey<br />
Woodcraft<br />
Woodmaster<br />
W<br />
Wood· Mizer<br />
ood-Met Services<br />
Woodpeckers<br />
Woodworkers Source<br />
Woodworker'S Hardware<br />
TIle Woodworking Shows<br />
W oodworking World Shows<br />
Worcester Craft Center<br />
York Saw<br />
22<br />
33, 40<br />
119<br />
35<br />
19<br />
36<br />
26<br />
26<br />
105<br />
113<br />
43<br />
7<br />
22<br />
28<br />
32 5<br />
Marchi April 1992 117
Notes and Comment (continued)<br />
tish Woodware" by Edward Pinto that appeared<br />
in the May, 1955, issue of Woodworker<br />
magazine, (Argus Specialist Publications,<br />
Argus House, Boundary Way, Hemel Hempstead,<br />
Herts, England HP2 7ST). This single<br />
page promised dle whole story when it revealed<br />
dlat " .. .feadlering is me unusually<br />
clever operation in bicker construction. According<br />
to tradition, it was carried out wim a<br />
penknife: it consists of cutting tapering<br />
'feamers' in dle edges of me stave and right<br />
mrough meir mickness so that me light and<br />
dark woods interlock." Based on dle hint<br />
mat dlere were more details on me following<br />
pages, I contacted dle current editor of<br />
Woodworker, Nick Gibbs, who graciously<br />
fOlwarded me rest of dle article, but I was<br />
disappointed to find no furdler hints on how<br />
mese joints were cut.<br />
Richard Brockbank of Findhorn, Scodand,<br />
who knew dlat dle joints were cut wim a<br />
knife and laid out by eye, probably hit dle nail<br />
on dle head when he pointed out mat "In dlis<br />
machine age, we have forgotten me skills mat<br />
were developed as people worked mrough<br />
seven-year apprenticeships. Everyming was<br />
done by hand ... and dlere was no way to do<br />
someiliing omer man dle hard way."<br />
-Charley Robinson<br />
Product reviews<br />
Grip-Tite Magnetic Featherboard,<br />
Mesa Vista Design, 804 Tulip Rd., Rio Rancho,<br />
NM. 87124; (505) 892-0293.<br />
I was skeptical when a friend showed me an<br />
ad for me Grip-Tite magnetic feadlerboard,<br />
but after seeing it demonstrated I bought<br />
one. Almough it can't replace a fence-mounted<br />
hold-down device in all instances, it is<br />
quite useful for certain ripping operations.<br />
The Grip-Tite, shown in me photo below,<br />
is simply a block of oak widl a pair of powerful<br />
magnets set into its base. Bendable polycarbonate<br />
"wings" protrude from each side<br />
to force stock tightly against me rip fence<br />
Photo; Charley Robinson<br />
The Grip-Tite magnetic jeatherboard<br />
holds securely to any metal-machine surface.<br />
The Grip-Tite not only works well on<br />
the tablesaw but also on the jointer, shaper<br />
and drill press.<br />
and to help prevent kickback. An L-shaped<br />
piece of polycarbonate can be inserted<br />
mrough a slot in dle block's handle and used<br />
to hold down stock on dle saw table. On my<br />
cast iron tablesaw, dle magnets exert tremendous<br />
holding power. You don't have to<br />
worry about dle feamerboard coming loose;<br />
it stays in position securely until you sort of<br />
swipe at me handle to tip it loose. Because<br />
me Grip-Tite utilizes magnets, mis feadlerboard<br />
obviously will not work wim a saw<br />
dlat has a non-metallic top.<br />
Grip-Tite really shines when ripping dlin,<br />
narrow stock, such as edgebanding or molding.<br />
You just set me magnetic block on me<br />
saw table ahead of me blade, tap it over until<br />
me wings hold dle stock against me fence<br />
and center me L-shaped hold-down on dle<br />
stock. The setup is so easy mat you'll tend to<br />
use me Grip-Tite even if you're cutting only<br />
a few strips.<br />
Wim me L-shaped hold-down removed,<br />
Grip-Tite also works well for grooving the<br />
rails and stiles of cabinet doors. In addition,<br />
me block provides a physical barrier to keep<br />
hands away from dle blade (a nice feature<br />
when dle standard blade guard must be removed).<br />
Unlike typical %-in.-thick wood<br />
feamerboards, dle wings on me Grip-Tite<br />
are 1 Y2 in. high, which makes dlem much<br />
more effective for holding taller stock.<br />
For general ripping, I was less impressed<br />
by dle device. The stock had a tendency to<br />
spring suddenly when it cleared me polycarbonate<br />
wings. This was unsettling, to say<br />
dle least. However, I think placing a second<br />
Grip-Tite beyond the blade and using only<br />
its hold-down wing would probably alleviate<br />
the problem.<br />
Because the Grip-Tite holds so tenaciously,<br />
I also use it as a stop block for cutting<br />
tenon shoulders and for linliting dle lengm<br />
of cut for kerf-mounted hinges. Having had<br />
my Grip-Tite only a short time, I'm still sorting<br />
out its possibilities, but already it fi lls a<br />
niche, and I dunk it's reasonably priced at<br />
29.95 (plus shipping). Grip-Tite is available<br />
mrough several mail-order catalogs and directly<br />
from me manufacturer.<br />
-Richard Cauman, Washington, D.c.<br />
Throat Plate, Wood Dynamics, 15034<br />
NE. 172 Ave., Bru.sh Prairie, \'(Iash. 98606,<br />
(206) 896-9047.<br />
A tablesaw throat plate dlat fits tightly to tlle<br />
blade supports me stock being cut and prevents<br />
teat-out on me bottom face. This is especially<br />
helpful when cutting or dadoing plywood<br />
and coated sheet goods, such as<br />
melamine. Supporting dle stock close to me<br />
blade even improves tlle performance of<br />
dull blades or tllose <strong>with</strong> excessive runout.<br />
Also cutting off small pieces is safer because<br />
dlere is no room for chips to jam between<br />
tlle plate and me blade. As an added bonus,<br />
dle kerf line in a tight-fitting mroat plate can<br />
serve as an accurate guide for starting cuts.<br />
Photo: Charley Robinson<br />
The Wood Dynamics' throat plate, <strong>with</strong><br />
a removable oak insert, makes it easy to<br />
have a zero-clearance insert for each blade<br />
and dado setup. The throat plate greatly<br />
reduces tearout as well.<br />
Almough many woodworkers make dleir<br />
own plywood mroat plates, doing so can be<br />
time-consuming because me plates have to<br />
be accurately cut, and equipped wim a metllod<br />
for leveling mem to tlle table's surface.<br />
There at-e several after-market mroat plates<br />
available for about $10, but dlis e}"'Pense<br />
quickly adds up as you buy a new plate for<br />
each blade, angle cut and dado setup tllat<br />
you use.<br />
Wood Dynamics' answer to mese problems<br />
is a high-quality alununum plate wim a<br />
dovetailed cutout dlat holds a replaceable<br />
red-oak insert. The plate has adjustments to<br />
level it to the saw table and also to remove<br />
front-to-back and side-to-side play. Once me<br />
plate is adjusted to your saw, it's easy to slide<br />
in a new wood insert whenever necessaty<br />
Altllough dus tllroat plate is expensive<br />
($70 to $85, wim two oak inserts), dle replacement<br />
inserts are less man $2 each (or<br />
you could easily make your own). If you use<br />
a lot of different mroat plates, me time saved<br />
by not having to make mem may offset tlle<br />
initial cost. And me convenience of sliding in<br />
a new insert for each critical cut will improve<br />
me quality of your work. Overall,<br />
Wood DynamiCS' product is a cut above omer<br />
after-mat-ket tllroat plates. The Wood Dynamics'<br />
tllroat plate is available from Garrett<br />
Wade (161 Ave. of me Americas, New York,<br />
NY. 10013; 800-221-2942) or Barbo Machinery<br />
(4617 S. E. Milwaukee Ave., Portland,<br />
Oreg. 97202; 503-232-8158).<br />
-Jim Puterbaugh, Portland, Oreg.<br />
Notes and Comment<br />
Got an idea you'd like to get off your<br />
chest? Know about any woodworking<br />
shows, events or craftsmen of note? Just<br />
finished a great project? If so, we'd like<br />
to hear about them. How about writing<br />
to us? And, if possible, send photos<br />
(preferably <strong>with</strong> negatives) to Notes<br />
and Comment, Fine Woodworking, PO<br />
Box 5506, Newtown, Conn. 06470-5506<br />
118 Fine Woodworking
MODEL<br />
S500A<br />
RYOBI 81/4" RYOBI<br />
RADIAL ARM SAW LAMINATE<br />
TRIMMER "'lW====;;;I<br />
MODEL TR30U<br />
RELIANT<br />
1 HP 14"<br />
BAND SAW<br />
CLOSED BASE<br />
SHIPMENT TRUCK<br />
MODEL 0090<br />
21-16 3" X 21" $125<br />
21-17 4" X 24" $163<br />
RELIANT 6"<br />
JOINTER<br />
WITH<br />
STAND 110 Volt r-----.I..<br />
<br />
18"<br />
SCROLL<br />
SAW Ir<br />
MODEL'Al18<br />
$219<br />
With<br />
Stand<br />
21-25<br />
MORE RYOBI<br />
21-30 TS220 8" Sliding Compound Miter $41 9<br />
21-31 1323ALSK Long Shoe Planer 127<br />
21-32 331 2 HP <strong>Router</strong> 149<br />
21-33 W660 7 1/4" Circular Saw 79<br />
21-34 S45 1/3 Sheet Sander 59<br />
21-35 1605<br />
MORE SKIL<br />
Biscuit Joiner $129<br />
21-36 77 71/4" Worm Drive Saw 149<br />
21-37 7484 Random Orbit Sander 99<br />
WHOLESALE<br />
DIVISION<br />
DEPT. WFW32<br />
PO BOX 189<br />
MORE MAKITA<br />
21-38 62000W Extra Torque DriverlDrill<br />
21-39 61700W 7.2V DriverlDrill<br />
21-40 OA3900W 9.6V Cordless Angle Drill<br />
21-41 6402 3/8" VSR Drill 5.2 amp<br />
21-42 4200N 43/8" Circular Saw<br />
21-43 LS1011 10" Slide Compound Miter<br />
21-44 3612BR 3 HP <strong>Router</strong><br />
21-45 1900BW 3 1/4" Planer<br />
21-46 9401 4" x 24" Belt Sander<br />
21-47 99240B 3" x 24" Belt Sander<br />
; . ,<br />
$143<br />
67<br />
149<br />
97<br />
129<br />
439<br />
165<br />
112<br />
173<br />
153<br />
800· 736·6586<br />
GUARANTEE<br />
TRUCK SHIPMENTS $3000 ORDER TOI.l. FREE<br />
Additional for each<br />
truck item only.<br />
to correction.<br />
MORE BOSCH<br />
21-49 1581VS Top Handle Jig Saw $137<br />
21-50 1582VS Barrel Jig Saw 137<br />
21-51 1604 1 3/4 HP <strong>Router</strong> 135<br />
21-52 3272 31/4" Planer 99<br />
MORE RELIANT<br />
All<br />
Shipments Truck<br />
21-54 0055 17" Floor Drill Press $279<br />
21-55 EE30 3 HP Shaper 795<br />
21-56 NN100 40" Lathe WIStand 199<br />
21-57 0012 12" Table Saw 469<br />
II not fully satisfied.<br />
return unused in<br />
original package <strong>with</strong>i<br />
30 days for full refund<br />
or exchange.<br />
READER SERVICE NO. 132
Photos: Stephen Owen<br />
CARTHUSIAN<br />
CANTEEN<br />
Affection for one's alma mater knows<br />
almost no bounds in England. The cutlery canteen<br />
pictured here-what we'd call a silver chest in the Statesis<br />
modeled on the Memorial Chapel at the Charterhouse, one of<br />
England's oldest and most prestigious preparatory schools. The 3-ft.-Iong<br />
chest was made by Stephen Owen for a Carthusian (former Charterhouse pupil)<br />
client whose family has attended the school for four generations. Owen, a graduate of<br />
the John Makepeace School for Craftsmen in Wood, Dorset, England, built the chest of native yew<br />
felled by a hurricane and supplied by the client. The roof, base and details are ebony, and the chest<br />
is lined <strong>with</strong> burgundy-dyed suede. (For more examples of architecturally inspired furniture, see p. 72.)