Programming the Receiver - Radix
Programming the Receiver - Radix
Programming the Receiver - Radix

Create successful ePaper yourself
Turn your PDF publications into a flip-book with our unique Google optimized e-Paper software.
Of course, you can also search for newly created satellites,<br />
however you may <strong>the</strong>n only use <strong>the</strong> menu items 1 - 4.<br />
The spatial limits within which <strong>the</strong> parabolic antenna can<br />
move without touching a hindrance are specified in <strong>the</strong><br />
“1. Set-Up Limits “ sub-menu.<br />
To do this, <strong>the</strong> antenna is first moved as far as possible in<br />
<strong>the</strong> eastern direction and this position <strong>the</strong>n fixed with “Set<br />
East Limit “. Then, again using menu item 1, it is moved<br />
and <strong>the</strong> western direction and fixed with “Set West Limit“.<br />
If <strong>the</strong> structural circumstances change <strong>the</strong> set positions<br />
can be deleted using “Disable Limits“ and <strong>the</strong>n reset later.<br />
<strong>Programming</strong> <strong>the</strong> <strong>Receiver</strong><br />
The menu item “5. Go to Reference“ resets <strong>the</strong> antenna’s control motor to <strong>the</strong> delivered condition (zero position<br />
– middle).<br />
NOTE:<br />
If your antenna does not have a motor control, you can use <strong>the</strong> “Antenna Control“ menu to check <strong>the</strong><br />
signal strength.<br />
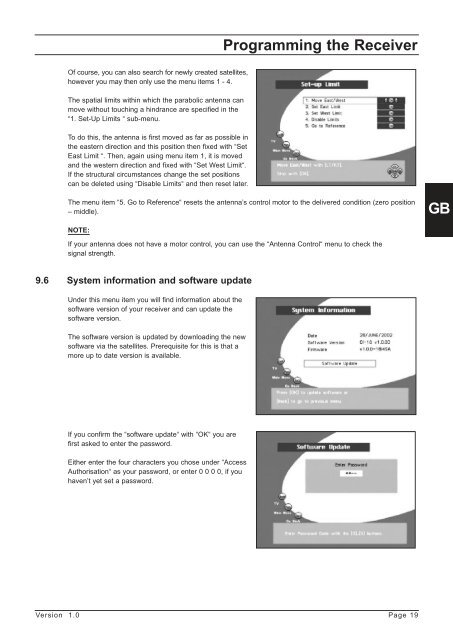
9.6 System information and software update<br />
Under this menu item you will find information about <strong>the</strong><br />
software version of your receiver and can update <strong>the</strong><br />
software version.<br />
The software version is updated by downloading <strong>the</strong> new<br />
software via <strong>the</strong> satellites. Prerequisite for this is that a<br />
more up to date version is available.<br />
If you confirm <strong>the</strong> “software update“ with “OK“ you are<br />
first asked to enter <strong>the</strong> password.<br />
Ei<strong>the</strong>r enter <strong>the</strong> four characters you chose under “Access<br />
Authorisation“ as your password, or enter 0 0 0 0, if you<br />
haven’t yet set a password.<br />
Version 1.0 Page 19<br />
GB