Acer Aspire X1700 and Veriton X270 Service Guide - Warranty Life
Acer Aspire X1700 and Veriton X270 Service Guide - Warranty Life
Acer Aspire X1700 and Veriton X270 Service Guide - Warranty Life
Create successful ePaper yourself
Turn your PDF publications into a flip-book with our unique Google optimized e-Paper software.
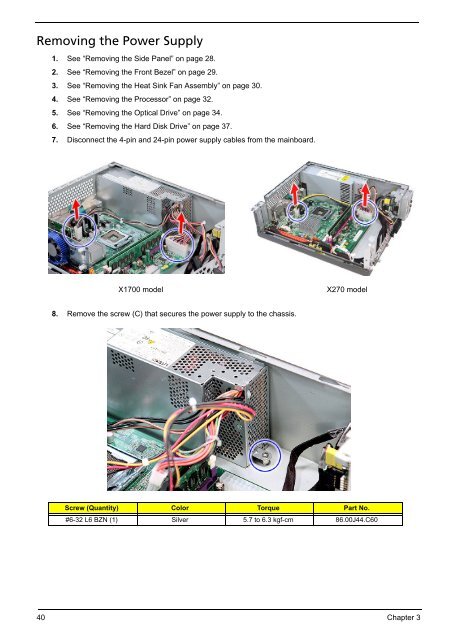
Removing the Power Supply1. See “Removing the Side Panel” on page 28.2. See “Removing the Front Bezel” on page 29.3. See “Removing the Heat Sink Fan Assembly” on page 30.4. See “Removing the Processor” on page 32.5. See “Removing the Optical Drive” on page 34.6. See “Removing the Hard Disk Drive” on page 37.7. Disconnect the 4-pin <strong>and</strong> 24-pin power supply cables from the mainboard.<strong>X1700</strong> model<strong>X270</strong> model8. Remove the screw (C) that secures the power supply to the chassis.Screw (Quantity) Color Torque Part No.#6-32 L6 BZN (1) Silver 5.7 to 6.3 kgf-cm 86.00J44.C6040 Chapter 3


