
You also want an ePaper? Increase the reach of your titles
YUMPU automatically turns print PDFs into web optimized ePapers that Google loves.
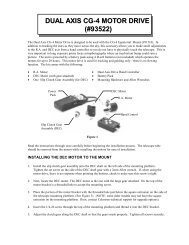
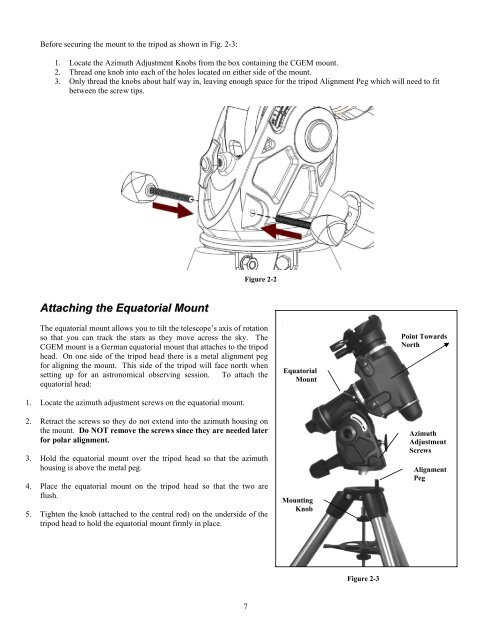
Before securing the mount to the tripod as shown in Fig. 2-3:1. Locate the Azimuth Adjustment Knobs from the box containing the <strong>CGEM</strong> mount.2. Thread one knob into each of the holes located on either side of the mount.3. Only thread the knobs about half way in, leaving enough space for the tripod Alignment Peg which will need to fitbetween the screw tips.Figure 2-2Attaching the Equatorial MountThe equatorial mount allows you to tilt the telescope’s axis of rotationso that you can track the stars as they move across the sky. The<strong>CGEM</strong> mount is a German equatorial mount that attaches to the tripodhead. On one side of the tripod head there is a metal alignment pegfor aligning the mount. This side of the tripod will face north whensetting up for an astronomical observing session. To attach theequatorial head:1. Locate the azimuth adjustment screws on the equatorial mount.2. Retract the screws so they do not extend into the azimuth housing onthe mount. Do NOT remove the screws since they are needed laterfor polar alignment.3. Hold the equatorial mount over the tripod head so that the azimuthhousing is above the metal peg.4. Place the equatorial mount on the tripod head so that the two areflush.5. Tighten the knob (attached to the central rod) on the underside of thetripod head to hold the equatorial mount firmly in place.EquatorialMountMountingKnobPoint TowardsNorthAzimuthAdjustmentScrewsAlignmentPegFigure 2-37