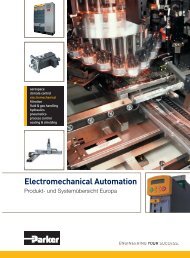
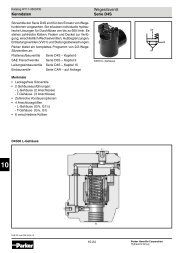
L50 Injection Lubricator - Parker
L50 Injection Lubricator - Parker
L50 Injection Lubricator - Parker

You also want an ePaper? Increase the reach of your titles
YUMPU automatically turns print PDFs into web optimized ePapers that Google loves.
Multi-Point <strong>Injection</strong> <strong>Lubricator</strong> IS-P<strong>L50</strong><br />
Injector Modules<br />
The injector modules are basically air operated, positive displacement,<br />
adjustable delivery oil pumps. The oil feed rate is adjustable from 0-1<br />
drop (0-.03 cc’s) per pulse. Air signal and oil supply passes through each<br />
injector module to the next one in the stack. Sight glass, tamperproof<br />
oil feed adjustment and manual override pump are provided for ease of<br />
operation. (see Fig. 3)<br />
Adjusting Knob / Screw Oil Piston Oil Supply Red Indicator<br />
Air Piston<br />
Reservoir<br />
Any reservoir may be used to store and supply oil to the P<strong>L50</strong> injector<br />
module stack. It can be gravity fed or pressurized (up to 100 PSI)*.<br />
Normally, the 9 ounce (BLK50A)**, one quart (BK<strong>L50</strong>B)** or two quart<br />
(BK<strong>L50</strong>C)** reservoir is used. Where there are many P<strong>L50</strong>’s, oil can be<br />
supplied from a central fill system which is supplied by a 55-gallon drum<br />
as the reservoir.<br />
*With “R” option only 30 PSI<br />
**Must be remote mount, and can not be pressurized<br />
Installation<br />
Install P<strong>L50</strong> Injector Module stack in a convenient location on or close to<br />
operating equipment. It is preferable that machine operator can observe<br />
movement of red indicator inside sight glass (see Fig. 3) and be able to<br />
make changes to oil feed adjustment as may be desired.<br />
Normally the stack is installed in a vertical position primarily so that air<br />
bubbles in the oil will rise to the top. Mount P<strong>L50</strong> rigidly to equipment or<br />
to separate support via two mounting holes in pilot sensor (see Fig. 1).<br />
Connect oil feed capillary tubing to each injector sight glass outlet,<br />
utilizing 1/8” NPT male to 1/8” O.D. tube compression fitting adapter<br />
(Part No. SA<strong>L50</strong>Y139). Grip wrench flats on outer sight glass housing to<br />
prevent it from rotating when installing tubing adapter (see Fig. 4).<br />
Indicator<br />
Piston<br />
Pilot Air Inlet<br />
Figure 3<br />
Figure 4<br />
Sight Glass<br />
Next, run capillary tubing to point of use, appropriately securing tubing<br />
to supporting member (pipeline, column, machine frame, etc.) along the<br />
way. Since the injector is a positive displacement device, capillary may<br />
be run for hundreds of feet, uphill, downhill without jeopardizing P<strong>L50</strong>’s<br />
performance. Do not pass tubing next to extremely hot (steam lines) or<br />
cold (refrigeration units) points for it will impair capillary’s strength and<br />
change oil’s viscosity. At point of use, which is as close to inlet port of<br />
air operated equipment as possible, cut capillary and install ball check<br />
connector (Part No. SA606Z26) (see Fig. 5).<br />
Next, place oil reservoir in location where it will be convenient to observe<br />
oil level and refill when necessary. (Do not let reservoir run dry.) It is<br />
preferable to locate reservoir so the oil may flow by gravity to the top or<br />
bottom (or both) supply connection in the support plate of the stack. If<br />
reservoir must be located below the top of injector module stack, provide<br />
means for delivering oil (via pump or pressurized reservoir - up to 100 psi<br />
max) to P<strong>L50</strong>. It is preferable to install a shut-off valve in oil supply line<br />
between reservoir and injector so that maintenance may be performed<br />
on one without having to disturb the other.<br />
Page 2<br />
Air<br />
Inlet<br />
3 Way<br />
Valve<br />
10<br />
1<br />
12<br />
2<br />
Pilot Sensor<br />
Model P<strong>L50</strong>M5VR<br />
Figure 5<br />
Priming Systems<br />
Once system is completely piped in, the next step is to fill the reservoir,<br />
purge air from system and fill capillary tubing. The simplest way is to<br />
install a button head fill fitting (Part No. SA606Y107) on one of the<br />
oil supply ports in the support plate or pressure plate. Open vent on<br />
reservoir, then, with the aid of a bucket pump, pump oil back up into the<br />
reservoir (see Fig. 6). Once reservoir is full, close vent and continue to<br />
pump. (If reservoir is not pressure type, close shut off valve in supply<br />
line.) The bucket pump will overcome check valve in injector and oil will<br />
be forced down each injector’s capillary tube. Once longest tube is filled,<br />
disconnect bucket pump and open reservoir vent (open oil supply shutoff<br />
valve if previously closed).<br />
Manual filling is more time-consuming. Reservoir is first filled, and air<br />
is purged from stack by removing lower-most plug. Then, each injector<br />
is adjusted to maximum setting (see “Oil Feed Adjustment”) and<br />
cycled manually be repeatedly pushing and releasing manual pump or<br />
automatically by cycling equipment. Approximately 50 cycles are required<br />
to pure each foot of capillary tube.<br />
Air<br />
Inlet<br />
Oil Reservoir<br />
3 Way<br />
Valve<br />
10<br />
1<br />
12<br />
2<br />
Oil Reservoir<br />
Figure 6<br />
Ball Check Connector<br />
at Each Oil Inlet<br />
Air Cylinders<br />
Oil<br />
Bucket<br />
Pump<br />
Oil Feed Adjustment<br />
Push in red adjustment knob (see Fig. 7) to unlock. Turn knob clockwise to<br />
stop. The injector is now adjusted for maximum oil output - approximately<br />
1 drop per cycle (.03 cc).<br />
Operate downstream equipment until all wetted surfaces are coated<br />
with oil and excessive oil mist is discharging from operating equipment<br />
exhaust ports. Next, reduce oil adjustment by turning red knob counterclockwise.<br />
Each counter-clockwise turn reduces oil rate by 0.1 drop/<br />
cycle. A normal setting is 2-1/2 to 3-1/2 turns counter-clockwise (i.e.<br />
0.3-0.2 drops/cycle). Operate equipment for a few cycles and re-adjust<br />
to a higher (clockwise) or lower (counter-clockwise) oil delivery setting<br />
as may be required. When set, pull knob out one click to lock setting.