


You also want an ePaper? Increase the reach of your titles
YUMPU automatically turns print PDFs into web optimized ePapers that Google loves.
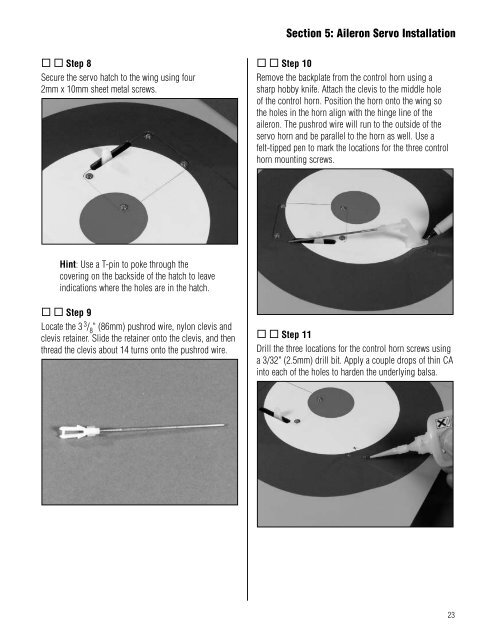
Section 5: Aileron Servo Installation Step 8Secure the servo hatch to the wing using four .2mm x 10mm sheet metal screws. Step 10Remove the backplate from the control horn using a .sharp hobby knife. Attach the clevis to the middle hole .of the control horn. Position the horn onto the wing so .the holes in the horn align with the hinge line of theaileron. The pushrod wire will run to the outside of theservo horn and be parallel to the horn as well. Use a .felt-tipped pen to mark the locations for the three controlhorn mounting screws.Hint: Use a T-pin to poke through thecovering on the backside of the hatch to leaveindications where the holes are in the hatch. Step 9Locate the 3 3 / 8" (86mm) pushrod wire, nylon clevis andclevis retainer. Slide the retainer onto the clevis, and thenthread the clevis about 14 turns onto the pushrod wire. Step 11Drill the three locations for the control horn screws usinga 3/32" (2.5mm) drill bit. Apply a couple drops of thin CAinto each of the holes to harden the underlying balsa.23


