Vision audio_ref_4.5_1.pdf - Free Pro Audio Schematics
Vision audio_ref_4.5_1.pdf - Free Pro Audio Schematics
Vision audio_ref_4.5_1.pdf - Free Pro Audio Schematics
- No tags were found...

Create successful ePaper yourself
Turn your PDF publications into a flip-book with our unique Google optimized e-Paper software.
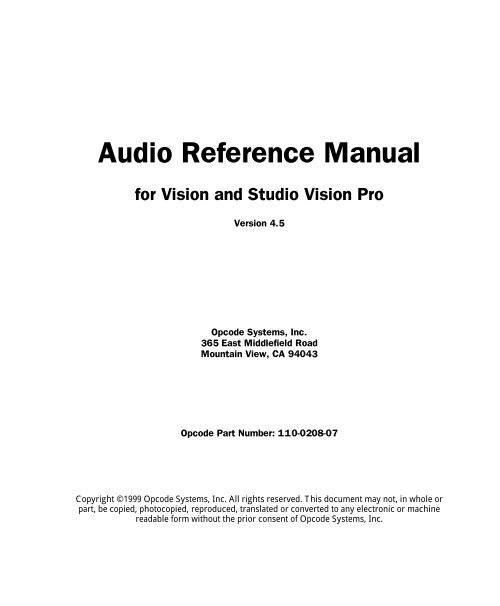
<strong>Audio</strong> Reference Manualfor <strong>Vision</strong> and Studio <strong>Vision</strong> <strong>Pro</strong>Version <strong>4.5</strong>Opcode Systems, Inc.365 East Middlefield RoadMountain View, CA 94043Opcode Part Number: 110-0208-07Copyright ©1999 Opcode Systems, Inc. All rights reserved. This document may not, in whole orpart, be copied, photocopied, reproduced, translated or converted to any electronic or machinereadable form without the prior consent of Opcode Systems, Inc.
OPCODE SYSTEMS, INC. MAKES NO WAR-RANTIES, EXPRESS OR IMPLIED,INCLUDING WITHOUT LIMITATION THEIMPLIED WARRANTIES OF MERCHANT-ABILITY AND FITNESS FOR APARTICULAR PURPOSE, REGARDING THISSOFTWARE. OPCODE DOES NOT WAR-RANT, GUARANTEE OR MAKE ANYREPRESENTATIONS REGARDING THEUSE OR THE RESULTS OF THE USE OFTHIS SOFTWARE IN TERMS OF ITS COR-RECTNESS, ACCURACY, RELIABILITY,CURRENTNESS OR OTHERWISE. THEENTIRE RISK AS TO THE RESULTS ANDPERFORMANCE OF THIS SOFTWARE ISASSUMED BY YOU. THE EXCLUSION OFIMPLIED WARRANTIES IS NOT PERMIT-TED BY SOME STATES. THE ABOVEEXCLUSION MAY NOT APPLY TO YOU.IN NO EVENT WILL OPCODE, ITS DIREC-TORS, OFFICERS, EMPLOYEES ORAGENTS BE LIABLE TO YOU FOR ANYCONSEQUENTIAL, INCIDENTAL OR INDI-RECT DAMAGES (INCLUDING DAMAGESFOR LOSS OF BUSINESS PROFITS, BUSI-NESS INTERRUPTION, LOSS OF BUSINESSINFORMATION, AND THE LIKE) ARISINGOUT OF THE USE OR INABILITY TO USETHIS SOFTWARE EVEN IF OPCODE HASBEEN ADVISED OF THE POSSIBILITY OFSUCH DAMAGES. BECAUSE SOMESTATES DO NOT ALLOW THE EXCLUSIONOR LIMITATION OF LIABILITY FOR CON-SEQUENTIAL OR INCIDENTAL DAMAGES,THE ABOVE LIMITATIONS MAY NOTAPPLY TO YOU.ACKNOWLEDGMENTS<strong>Pro</strong>gram byDave OppenheimRay SpearsDan TimisAron NelsonDavid WillenbrinkAndy WolpertDoug WyattDaniel SteinbergDave ScogginLarry GerndtTom PadulaHarvey ThornburgSpecial thanks to Muscle FishQuality AssuranceMike RogersJames LivingstonDarin Marshall<strong>Pro</strong>duct ManagementJonnie GillhamDocumentationGregory A. SimpsonTimothy SelfGreg ThomasBoris PopkoffAngela HillManual DesignGregory A. SimpsonTechnical EditingDan TimisGreg Thomas
Table of ContentsTABLE OF CONTENTSPART ONE: Introduction to Digital <strong>Audio</strong> 1CHAPTER 1: Introduction 3Using Your <strong>Vision</strong> Manuals .................................................................3Versions of <strong>Vision</strong> .................................................................................3Introduction to Digital <strong>Audio</strong> ...............................................................3About the <strong>Audio</strong> Reference Manual....................................................4CHAPTER 2: Basic Terminology 7Outputs, Voices, and <strong>Audio</strong> Instruments............................................7<strong>Audio</strong> Files and <strong>Audio</strong> Events..............................................................7A Picture’s Worth..................................................................................8PART TWO: Acadia 11CHAPTER 3: Acadia: Hardware Setup 13The Acadia <strong>Audio</strong> System ..................................................................13System Requirements.........................................................................14Set <strong>Vision</strong> to the Acadia <strong>Audio</strong> System.............................................14Hardware Setup...................................................................................14The Session Sample Rate ...................................................................18Active in Background .........................................................................19CHAPTER 4: Acadia: Record Monitor Window 21Opening the Record Monitor Window..............................................21Opcode Manual Templatei
Table of ContentsAnatomy of the Record Monitor Window........................................ 22Using 24 Bits....................................................................................... 24CHAPTER 5: Acadia: Recording <strong>Audio</strong> 25Recording: Power User Overview .................................................... 25Recording: Step-By-Step .................................................................... 26Designate a Record File ............................................................. 26Disabling a Record File .............................................................. 27Set Record Levels........................................................................ 27Assign an <strong>Audio</strong> Instrument ...................................................... 29Record a Track ............................................................................ 29Advanced Recording Techniques..................................................... 31Stereo Recording......................................................................... 31Recording Multiple Takes.......................................................... 33Recording <strong>Audio</strong> While Monitoring Existing <strong>Audio</strong> Events .. 33CHAPTER 6: Acadia: <strong>Audio</strong> Instruments & Routings Window 35Setting the Number of <strong>Audio</strong> Instruments ...................................... 36Voice Allocation and <strong>Audio</strong> Playback............................................... 37Columns in the <strong>Audio</strong> Instruments & Routings Window............... 37Saving Instrument Setups.................................................................. 44CHAPTER 7: Acadia: <strong>Audio</strong> Channels in Consoles 45<strong>Audio</strong> in Consoles .............................................................................. 45Assigning Plug-Ins ............................................................................. 47Assigning EQ...................................................................................... 53Phase ................................................................................................... 55<strong>Audio</strong> Sends ........................................................................................ 56Clipping LEDs .................................................................................... 60Console Outputs................................................................................. 60Clearing Consoles .............................................................................. 62iiOpcode Systems, Inc.
Table of ContentsCHAPTER 8: Acadia: Plug-In Edit Window 63Plug-In Edit Window...........................................................................63Saving and Recalling Plug-In <strong>Pro</strong>grams and Banks ........................65CHAPTER 9: Acadia: EQ Window 69Editing EQ Settings ............................................................................69EQ Panel ..............................................................................................71Saving and Recalling EQ Settings .....................................................72CHAPTER 10: Acadia: Bussing, Routing, & Bouncing to Disk 75Using Busses and Sends ....................................................................75Routing to Shared Plug-Ins (Creating Effects Sends)..............75Creating a Submix .......................................................................76Signal Routing and Monitoring .........................................................78Virtual Consoles...........................................................................78Recording from <strong>Audio</strong> Instruments, Busses, and Outputs.............79CHAPTER 11: Acadia: Optimizing for Digital <strong>Audio</strong> 83Number of <strong>Audio</strong> Tracks....................................................................83The Performance Window .................................................................83The Buffer Size Dialog .......................................................................87<strong>Audio</strong> P<strong>ref</strong>erences...............................................................................88PART THREE: Digidesign DAE: 95CHAPTER 12: DAE: Hardware Setup 97About DAE...........................................................................................97System Requirements.........................................................................97<strong>Pro</strong> Tools 24 Mix and Mix PLus........................................................98<strong>Pro</strong> Tools 24.........................................................................................98Opcode Manual Templateiii
Table of Contents<strong>Pro</strong> Tools III (NuBus & PCI) ............................................................ 98Session 8/<strong>Pro</strong>ject ............................................................................... 98<strong>Audio</strong>media II/III ............................................................................... 99Set <strong>Vision</strong> to DAE Mode.................................................................... 99Allocating RAM to the Digital <strong>Audio</strong> RAM Buffer .......................... 99Hardware Setup................................................................................ 101Set a Session Sample Rate and size................................................ 105Checking Disk Allocation................................................................ 106CHAPTER 13: DAE: Record Monitor Window 109Chapter Organization....................................................................... 109Opening the Record Monitor Window........................................... 109Anatomy of the Record Monitor Window...................................... 110Hardware Specific Variations.......................................................... 112CHAPTER 14: DAE: Recording <strong>Audio</strong> 115Power User Overview ...................................................................... 115Recording: Step-by-Step................................................................... 116Designate a Record File ........................................................... 116Set Record Levels...................................................................... 118Assign an <strong>Audio</strong> Instrument .................................................... 119Record a Track .......................................................................... 120Advanced Recording Techniques................................................... 121Stereo Recording....................................................................... 122Recording Multiple Takes........................................................ 123Recording <strong>Audio</strong> While Monitoring Existing <strong>Audio</strong> Events 124Other Recording Actions................................................................. 126Recording <strong>Audio</strong> from Other Points in the TDM Chain .............. 127Punching in on-the-fly with “QuickPunch”.................................... 127Setting the Buffer Size ..................................................................... 130CHAPTER 15: DAE: <strong>Audio</strong> Instruments 131Opening The <strong>Audio</strong> Instruments Window..................................... 131Setting tHe Number of <strong>Audio</strong> Instruments ................................... 132Naming <strong>Audio</strong> Instruments............................................................. 133ivOpcode Systems, Inc.
Table of ContentsSetting <strong>Audio</strong> Instrument Colors.....................................................134Muting or Soloing an <strong>Audio</strong> Instrument.........................................135Voice Column ....................................................................................136Voice Allocation Modes.............................................................136Stereo/Poly Column .........................................................................138Output Assignment...........................................................................142Sends and Plug-Ins Columns ...........................................................145The <strong>Audio</strong> Instruments Menu .........................................................146TDM Systems.............................................................................146Saving Instrument Setups ................................................................146CHAPTER 16: TDM Bussing, Routing & Plug-Ins 147Who Should Read This Chapter? ....................................................147Console use with TDM Equipped systems ....................................147Creating a Console with TDM Plug-Ins..........................................148Assigning TDM Plug-Ins..................................................................150Mono and Stereo TDM Plug-Ins .....................................................151Plug-In Edit Window.........................................................................153Bypassing Plug-Ins............................................................................155<strong>Audio</strong> Outputs ...................................................................................155<strong>Audio</strong> Sends.......................................................................................158Creating Groups—Real- World Example........................................163SampleCell Support...........................................................................165Signal Routing and Monitoring .......................................................166Recording from Alternate Sources in the TDM Chain..................169CHAPTER 17: DAE: <strong>Audio</strong> P<strong>ref</strong>erences 173Maximum Fader Position.................................................................173Smooth <strong>Audio</strong> Controllers................................................................174Import Multiple Files........................................................................174Opcode Manual Templatev
Table of ContentsPART FOUR: Basic <strong>Audio</strong> Editing & Playback 175CHAPTER 18: Working with <strong>Audio</strong> Events 177<strong>Audio</strong> Events in Different Windows ............................................... 177Viewing <strong>Audio</strong> Events as Waveforms ............................................ 179Zooming In................................................................................. 179Zero Crossings .......................................................................... 180Waveform Display Options ...................................................... 182Waveform Height Options ....................................................... 182Individual Canceling of Waveform Builds ..................................... 183<strong>Audio</strong> Event Names ......................................................................... 183Selecting <strong>Audio</strong> Events.................................................................... 184Changing <strong>Audio</strong> Event Start Times................................................ 190Changing <strong>Audio</strong>................................................................................ 191Changing <strong>Audio</strong> Event Lengths...................................................... 194Cutting, Copying, and Pasting <strong>Audio</strong> Events ................................ 197CHAPTER 19: Basic Digital <strong>Audio</strong> Playback 199What to Read in this Chapter .......................................................... 199<strong>Audio</strong> Playback with Dynamic Allocation...................................... 199<strong>Audio</strong> Playback with Fixed Voice Allocation................................. 202CHAPTER 20: Import/Export Cornucopia 205Who Should Read This Chapter?.................................................... 205Importing <strong>Audio</strong> ............................................................................... 207Import Shortcuts .............................................................................. 212Other Import Options ...................................................................... 212Export Options ................................................................................. 221Anatomy of the <strong>Audio</strong> Format Dialog Box .................................... 228viOpcode Systems, Inc.
Table of ContentsPART FIVE: Advanced <strong>Audio</strong> Techniques 235CHAPTER 21: Advanced Recording Techniques 237Who Should Read This Chapter? ....................................................237Designating Separate Files for Different Takes.............................237Other Recording Actions..................................................................238<strong>Audio</strong> Recording P<strong>ref</strong>erences..........................................................240CHAPTER 22: Auditioning <strong>Audio</strong> 245Who Should Read This Chapter? ....................................................245Auditioning Individual <strong>Audio</strong> Instruments.....................................245Auditioning Individual <strong>Audio</strong> Events ..............................................247Breaking Up <strong>Audio</strong> Events .......................................................247Muting <strong>Audio</strong> Events.................................................................248CHAPTER 23: Adjusting Volume and Pan 253Who Should Read This Chapter? ....................................................253The Difference Between Velocity and Volume..............................253panning <strong>audio</strong> instruments ..............................................................254Setting an Individual <strong>Audio</strong> Event Level (Velocity).......................254Creating Volume and Pan Levels For <strong>Audio</strong> Instruments ............254Creating Faders to Control Volume and Pan .................................257Smoothing Volume and Pan Changes ............................................261CHAPTER 24: Automation 263Who Should Read This Chapter? ....................................................263How Automation Events Work ........................................................263Recording Automation Events.........................................................264Viewing and Inserting Automation Events.....................................265Changes in the Way <strong>Vision</strong> Handles Faders..................................271Copy Faders and <strong>Audio</strong> Channels...................................................272Types of Automation Events ............................................................275Opcode Manual Templatevii
Table of ContentsCHAPTER 25: File Management 283Who Should Read This Chapter?.................................................... 283<strong>Audio</strong> Files ........................................................................................ 283Overview of the File Management Dialog Box............................. 283Viewing <strong>Audio</strong> File Information...................................................... 284playing <strong>audio</strong> files............................................................................. 286Organizing <strong>Audio</strong> Files.................................................................... 286CHAPTER 26: Sample Rate Conversion and Deinterleaving 301Who Should Read This Chapter?.................................................... 301About Sample Rate Conversion ...................................................... 301About Sample Size Conversion....................................................... 302About Deinterleaving....................................................................... 303Converting Sample Rates/Sizes and Deinterleaving.................... 303The Conversion Overview Dialog Box........................................... 304CHAPTER 27: Strip Silence and Slice <strong>Audio</strong> 307Who Should Read This Chapter?.................................................... 307Strip Silence ...................................................................................... 307Slice <strong>Audio</strong> ........................................................................................ 307Gating <strong>Audio</strong> with Strip Silence...................................................... 308Auto-Separating with Slice <strong>Audio</strong> ................................................... 309Strip Silence vs. Slice <strong>Audio</strong> ............................................................ 310Strip Silence Dialog Box.................................................................. 311Attack Time Example....................................................................... 314Use Zero Crossings.......................................................................... 314CHAPTER 28: Mixing Digital <strong>Audio</strong> (Bouncing) 315Who Should Read This Chapter?.................................................... 316Direct <strong>Audio</strong> Mixing ........................................................................ 316Mixing in Acadia (“Bounce to Disk”)............................................. 316Mixing in DAE.................................................................................. 319viiiOpcode Systems, Inc.
Table of ContentsCapturing a Mix ................................................................................320The Mixed <strong>Audio</strong> on Your Hard Disk.............................................322Mixing “Silence”................................................................................322CHAPTER 29: Synchronizing <strong>Audio</strong> Playback 325Who Should Read This Chapter? ....................................................325Sync Modes .......................................................................................325Acadia: Syncing <strong>Audio</strong> to SMPTE ...................................................326DAE: Syncing <strong>Audio</strong> to SMPTE ......................................................327CHAPTER 30: ReWire 329Who Should Read This Chapter? ....................................................329About ReWire ....................................................................................329Configuring your System for ReWire..............................................330Example 1: Using <strong>Vision</strong> with ReBirth ...........................................331Example 2: Using <strong>Vision</strong> with Retro AS-1.......................................333Additional ReWire Notes..................................................................335CHAPTER 31: <strong>Audio</strong> Scrubbing 337Who Should Read This Chapter? ....................................................337<strong>Audio</strong> Scrubbing in the Graphic Window.......................................337<strong>Audio</strong> Scrubbing in the Track Overview Area ...............................339PART SIX: Menus 341CHAPTER 32: The <strong>Audio</strong> Menu 343Retain..................................................................................................343Separate..............................................................................................344Strip Silence/Slice <strong>Audio</strong> .................................................................346Get Event Info....................................................................................347Edit Event Soundfile .........................................................................348Opcode Manual Templateix
Table of ContentsLink Events ....................................................................................... 350Unlink Events ................................................................................... 350File Management ............................................................................. 350Conversion Overview....................................................................... 351Buffer Size......................................................................................... 351Sample Rate/Size ............................................................................. 352Hardware Setup................................................................................ 352<strong>Audio</strong> System.................................................................................... 353Waveform Height ............................................................................. 353Waveform Display ............................................................................ 354Show <strong>Audio</strong> Event Names............................................................... 355Mix <strong>Audio</strong> on Capture...................................................................... 356Active in Background....................................................................... 356<strong>Audio</strong> P<strong>ref</strong>erences............................................................................ 356CHAPTER 33:DSP Menu: Mix, Normalize, Reverse, Invert Phase, andConvert Sample Rate357Mix..................................................................................................... 358Normalize.......................................................................................... 358Reverse.............................................................................................. 359Invert Phase ...................................................................................... 361Convert Sample Rate........................................................................ 362CHAPTER 34:DSP Menu: EQ andFade/Crossfade365EQ ...................................................................................................... 366Fade/Crossfade................................................................................ 369Creating Fade-Ins and Fade-Outs............................................ 370Creating Crossfades.................................................................. 374CHAPTER 35:DSP Menu: Pitch Shift, Formant Shift, Time Scale, andAdjust <strong>Audio</strong> Tempo379Pitch Shift.......................................................................................... 380Formant Shift.................................................................................... 383xOpcode Systems, Inc.
Table of ContentsTime Scale..........................................................................................386Adjust <strong>Audio</strong> Tempo ......................................................................389CHAPTER 36: DSP Menu: <strong>Audio</strong>-to-MIDI and MIDI-to-<strong>Audio</strong> 395Who Should Read This Chapter? ....................................................395<strong>Audio</strong>-to-MIDI ................................................................................396How <strong>Vision</strong> Converts <strong>Audio</strong> Data to MIDI Data.....................396<strong>Audio</strong>-To-MIDI Uses ..............................................................396Using the <strong>Audio</strong>-to-MIDI Command.....................................397The Basic <strong>Audio</strong>-to-MIDI Dialog Box......................................398The Expanded <strong>Audio</strong>-to-MIDI Dialog Box..............................400Creating Custom <strong>Audio</strong> Templates..........................................405Re-Analyze <strong>Audio</strong> .......................................................................406MIDI-to-<strong>Audio</strong> ................................................................................406The MIDI-to-<strong>Audio</strong> Dialog Box ................................................407Using the MIDI-to-<strong>Audio</strong> Command.....................................408Using the “<strong>Pro</strong>cess Note Until” Options .................................415CHAPTER 37:DSP Menu: Premiere Plug-Ins and DSP P<strong>ref</strong>erences419Premiere Plug-Ins .............................................................................420DSP P<strong>ref</strong>erences ...............................................................................423PART SEVEN: Index 431Opcode Manual Templatexi
Table of ContentsxiiOpcode Systems, Inc.
Introduction to Digital <strong>Audio</strong> 1234567<strong>Vision</strong> & Studio <strong>Vision</strong> <strong>Pro</strong> — <strong>Audio</strong> Reference Manual 1
PART 1: Introduction to Digital <strong>Audio</strong>2 Opcode Systems, Inc.
CHAPTER 1:Introduction<strong>Vision</strong> is recording and sequencing softwarethat combines MIDI sequencingwith direct-to-disk digital <strong>audio</strong>sequencing.USING YOUR VISION MANUALS<strong>Vision</strong> ships with two manuals:• MIDI Reference Manual: Thismanual provides detailed informationabout MIDI sequencing and all othernon-<strong>audio</strong> aspects of <strong>Vision</strong>. Youshould be familiar with many of theconcepts presented in this manualbefore learning <strong>audio</strong> sequencing.• <strong>Audio</strong> Reference Manual: Thismanual, which you’re now reading,provides detailed information about<strong>audio</strong> sequencing. You should have afundamental understanding of <strong>Vision</strong>and MIDI sequencing before readingthis manual.IMPORTANT: The MIDI and <strong>Audio</strong> ReferenceManuals are identical for both <strong>Vision</strong>and Studio <strong>Vision</strong> <strong>Pro</strong>. For the sake of consistency,however, both manuals <strong>ref</strong>er to thediscussed application as “<strong>Vision</strong>” (except, ofcourse, when <strong>ref</strong>erring to topics and featuresspecific to Studio <strong>Vision</strong>).VERSIONS OF VISION<strong>Vision</strong> comes in two models:• <strong>Vision</strong>—This version supports <strong>audio</strong>recording and playback using ASIOcompatible<strong>audio</strong> hardware (includingApple’s Sound Managerhardware) and Digidesign’s <strong>Audio</strong>mediaII/III on any Power Macintoshwith built-in 16 bit sound capabilities.• Studio <strong>Vision</strong> <strong>Pro</strong>—This versionadds support for other Digidesign<strong>audio</strong> hardware (including supportfor TDM).Also, the <strong>Audio</strong>-to-MIDI and MIDI-to-<strong>Audio</strong> DSP commands are onlyincluded with Studio <strong>Vision</strong> <strong>Pro</strong>. SeeChapter 36: DSP Menu: <strong>Audio</strong>-to-MIDI and MIDI-to-<strong>Audio</strong> fordetails.INTRODUCTION TO DIGITALAUDIOYou can record both MIDI data and digital<strong>audio</strong> into <strong>Vision</strong>, listen to all datasimultaneously, and edit it using manyflexible editing procedures. Most MIDIsequencing techniques apply equally to<strong>audio</strong>.<strong>Vision</strong> & Studio <strong>Vision</strong> <strong>Pro</strong> — <strong>Audio</strong> Reference Manual 3
PART 1: Introduction to Digital <strong>Audio</strong><strong>Vision</strong> performs many <strong>audio</strong> recording,editing, and playback functions,including:• Multitrack <strong>audio</strong> recording;• Multitrack <strong>audio</strong> playback—eitheralone, in conjunction with internalMIDI tracks, or synchronized to anexternal timing source;• Visual display of <strong>audio</strong>—all <strong>audio</strong>events are displayed visually for easyediting;• Random-access <strong>audio</strong> editing—cut,copy, and paste <strong>audio</strong> between tracksor between different start times. Forexample you can record a single vocalchorus, then copy and paste it into allother chorus regions;• <strong>Audio</strong> mixing—you can create virtual<strong>audio</strong> mixes along with your MIDImixes, or you can “bounce” numerous<strong>audio</strong> tracks to disk to create anew, digitally perfect <strong>audio</strong> track;• Signal processing (DSP)—you canadd many studio quality effects andother processing functions includingAdobe Premiere compatible <strong>audio</strong>plug-ins.ABOUT THE AUDIO REFERENCEMANUALThis manual assumes you’re familiar withbasic Macintosh operations, <strong>Vision</strong>’s windowsand MIDI sequencing techniques,and OMS.Navigating this ManualGood news! This manual isn’t as thick asit appears. The <strong>Audio</strong> Reference Manualis divided into seven parts, not all of whichneed to be read by all users. Specifically:• PART 1: IntroductionAll <strong>Vision</strong> users should read thesechapters. They introduce you to basic<strong>audio</strong> features & terminology.• PART 2: Acadia: Configuration &RecordingRead this only if you’re using <strong>Vision</strong>with Acadia, <strong>Vision</strong>’s ASIO-compatiblesystem. If you’re working withyour computer’s built-in Sound Managerhardware, this is the optionyou’ll probably be using. This sectionteaches you how to configure <strong>Vision</strong>4 Opcode Systems, Inc.
CHAPTER 1: Introductionand record <strong>audio</strong> using Acadia. Youdo not need to read this part if you’reusing Digidesign hardware in DAEmode.• PART 3: Digidesign DAE: Configuration& RecordingRead this only if you’re using <strong>Vision</strong>with Digidesign digital <strong>audio</strong> hardwarein DAE mode; it teaches youhow to configure <strong>Vision</strong> and record<strong>audio</strong> using Digidesign’s DAE <strong>audio</strong>system. You do not need to read thispart if you’re using Acadia.• PART 4: Basic <strong>Audio</strong> Editing &PlaybackAll <strong>Vision</strong> users should read this part.It teaches you how to perform basic<strong>audio</strong> editing and playback.• PART 5: Advanced <strong>Audio</strong>TechniquesAll <strong>Vision</strong> users should read this part,though not all chapters apply to allusers. It teaches you advanced methodsfor editing, mixing, andorganizing <strong>audio</strong>.• PART 6: MenusAll <strong>Vision</strong> users should read this part.It discusses items in the <strong>Audio</strong> andDSP menus.• PART 7: IndexManual ConventionsThe <strong>Vision</strong> manuals use a number of conventionsthat make it easier to discuss andunderstand the program.Mouse ActionsThe following terms are used to describevarious mouse actions:• Click: When the manual instructsyou to click, position the mousewhere you’re told and press once onthe mouse button, then immediatelyrelease it.• Double-click: When the manualinstructs you to double-click, positionthe mouse where you’re told and rapidlypress and release the mousebutton twice.• Press and hold: When the manualinstructs you to press and hold, positionthe mouse where you’re told,press the mouse button and hold itdown until instructed to release it.• Release: When the manual instructsyou to release, let up on the mousebutton (which you were probablyholding down because of an earlierpress and hold instruction).• Drag: When the manual instructs youto drag, position the mouse whereyou’re told, then press the mousebutton and hold it down as you movethe mouse.• Move: When the manual instructsyou to move the mouse, simply moveit to another location on the screenwithout pressing its button.<strong>Vision</strong> & Studio <strong>Vision</strong> <strong>Pro</strong> — <strong>Audio</strong> Reference Manual 5
PART 1: Introduction to Digital <strong>Audio</strong>Choose vs. SelectThe words “choose” and “select” are ofteninterchangeable in conversationalenglish. In this manual, however, there isa distinction between the two terms.• Select: When the manual tells you toselect something, it stays selected.This is the case with menu optionsthat turn something on/off.• Choose: When the manual tells youto choose something, a one-timeaction is performed. This is the casewith most commands; they performtheir chosen action only once.Menu ItemsThis manual uses a shorthand techniqueto invoke various menu items. Forinstance, this manual might say:“Select <strong>Audio</strong>>WaveformDisplay>Fast.”What this means in plain English is“select the Fast option from the <strong>Audio</strong>menu’s Waveform Display submenu.”Although the shorthand technique resultsin sub-standard grammar, it’s easier toread and decipher than a complete sentencebecause it displays the menu’shierarchical structure plainly and simply.Figure 1.1: Shorthand Invocation of Menu Items6 Opcode Systems, Inc.
CHAPTER 2:Basic TerminologyOUTPUTS, VOICES, AND AUDIOINSTRUMENTSDifferent <strong>audio</strong> hardware has differentplayback capabilities. Your <strong>audio</strong> hardwaredetermines:• the number of physical <strong>audio</strong> inputsand outputs• the maximum number of <strong>audio</strong> voicesthat can play at one timeFrequently, there are more internalvoices available than physical outputs. Forexample, your hardware may have onlytwo <strong>audio</strong> outputs, but it may be able toplay up to eight simultaneous <strong>audio</strong>voices. Obviously, <strong>Vision</strong> needs some wayto route voices to specific outputs. <strong>Vision</strong>handles such routing with <strong>Audio</strong> Instruments.<strong>Vision</strong> can use up to 128 <strong>Audio</strong>Instruments, which control voicing andoutput assignments.<strong>Audio</strong> Instruments are similar to MIDIInstruments, which map groups of MIDIevents to a specific MIDI device and channel.<strong>Audio</strong> Instruments and MIDIInstruments appear in the same place in<strong>Vision</strong> windows.Figure 2.1: <strong>Audio</strong> Instruments and MIDI Instrumentsin the Tracks WindowAUDIO FILES AND AUDIOEVENTSMIDI Instruments<strong>Audio</strong> InstrumentsEvery time you record <strong>audio</strong>, <strong>Vision</strong>stores it in a designated <strong>audio</strong> file (sometimescalled a record file or a sound file).When <strong>Vision</strong> plays digital <strong>audio</strong>, it “reads”the data directly from the <strong>audio</strong> file andsends it to your <strong>audio</strong> hardware. Since theactual digital <strong>audio</strong> is in the <strong>audio</strong> files,<strong>Vision</strong> contains only pointers to the <strong>audio</strong>files. These pointers tell the <strong>audio</strong> systemwhich portion of the <strong>audio</strong> file you want toplay. Each portion of digital <strong>audio</strong> <strong>ref</strong>erencedby <strong>Vision</strong> is called an <strong>audio</strong> event.<strong>Vision</strong> & Studio <strong>Vision</strong> <strong>Pro</strong> — <strong>Audio</strong> Reference Manual 7
PART 1: Introduction to Digital <strong>Audio</strong><strong>Audio</strong> File<strong>Audio</strong> Events<strong>Audio</strong> EventsFigure 2.2: <strong>Audio</strong> events in the Graphic Window<strong>Vision</strong> can display <strong>audio</strong> events graphicallyas shown in Figure 2.2. Each <strong>audio</strong>event is a graphic representation of theactual <strong>audio</strong> waveform.A PICTURE’S WORTH...This section graphically describes therelationship between <strong>audio</strong> files, <strong>audio</strong>events, <strong>Audio</strong> Instruments, voices, andoutputs.Event 1Event 2Figure 2.3: <strong>Audio</strong> events point to <strong>audio</strong> filesEach <strong>audio</strong> event is assigned to an <strong>Audio</strong>Instrument. <strong>Vision</strong> can use up to 128<strong>Audio</strong> Instruments (although this exampleshows only three of them).An <strong>Audio</strong> File contains the actual digital<strong>audio</strong> data used by <strong>Vision</strong>.<strong>Vision</strong> files contain “pointers” to <strong>audio</strong>files. These “pointers” are called <strong>audio</strong>events. <strong>Vision</strong> can contain any number of<strong>audio</strong> events.Figure 2.4: <strong>Audio</strong> Event 1 is assigned to <strong>Audio</strong>Instrument 1; <strong>Audio</strong> Event 2 is assigned to <strong>Audio</strong>Instrument 38 Opcode Systems, Inc.
CHAPTER 2: Basic TerminologyEach <strong>Audio</strong> Instrument is assigned to ahardware output. Your <strong>audio</strong> hardwaredetermines the number of outputs.Optimizing for Digital <strong>Audio</strong> for moreinformation.<strong>Vision</strong> assigns playback voicesto <strong>Audio</strong> InstrumentsFigure 2.5: <strong>Audio</strong> Instrument 1 is assigned toOutput #1; <strong>Audio</strong> Instrument 3 is assigned toOutput #2In addition, <strong>Vision</strong> assigns a playbackvoice to each <strong>Audio</strong> Instrument.NOTE: In DAE mode, your <strong>audio</strong> hardwaredetermines the number of availablevoices (the number of <strong>audio</strong> events that canplay simultaneously). In Acadia mode, thenumber of available voices is dependent onmany factors, including your computer’sspeed and RAM. See Chapter 11: Acadia:Figure 2.6: <strong>Audio</strong> Instrument 1 uses Voice #4 forplayback; <strong>Audio</strong> Instrument 3 uses Voice #1 forplaybackThe relationship between <strong>audio</strong> files,<strong>audio</strong> events, <strong>Audio</strong> Instruments, Outputs,and Voices is shown below.<strong>Vision</strong> & Studio <strong>Vision</strong> <strong>Pro</strong> — <strong>Audio</strong> Reference Manual 9
PART 1: Introduction to Digital <strong>Audio</strong>10 Opcode Systems, Inc.
1Acadia234567<strong>Vision</strong> & Studio <strong>Vision</strong> <strong>Pro</strong> — <strong>Audio</strong> Reference Manual 11
PART 5: Basic <strong>Audio</strong> Editing & Playback12 Opcode Systems, Inc.
CHAPTER 3:Acadia: Hardware SetupThis chapter discusses how to configureyour <strong>audio</strong> hardware for use with theAcadia <strong>audio</strong> system. For other relatedinformation on taking advantage of yourhardware, see Chapter 11: Acadia: Optimizingfor Digital <strong>Audio</strong>.THE ACADIA AUDIO SYSTEMFigure 3.1: <strong>Audio</strong> SystemsThe Acadia <strong>audio</strong> system providesadvanced processing and routing capabilitiesfor ASIO-compatible <strong>audio</strong> hardware.These capabilities include:• 4 automatable bands of real-time EQper <strong>audio</strong> channel;• 4 automatable VST plug-ins per <strong>audio</strong>channel;• 4 sends per <strong>audio</strong> channel, routeableto outputs or busses;• 16 nameable <strong>audio</strong> busses for submixesand routings.When using the Acadia <strong>audio</strong> system,<strong>Vision</strong> uses the ASIO driver specification(developed originally by Steinberg SoftundHardware GmbH) for inputting andoutputting digital <strong>audio</strong>.Included with <strong>Vision</strong> are Opcode ASIOdrivers for Sound Manager (taking advantageof the built-in sound capabilities ofyour PowerMac), and Digidesign’sDirectIO (supporting the <strong>Audio</strong>media IIIand other Digidesign PCI <strong>audio</strong> cards).There are ASIO drivers available for anumber of Macintosh <strong>audio</strong> cards such asthe Korg 1212 I/O and the SonorusSTUDI/O. For the availability of theseand other ASIO drivers, contact themanufacturer.NOTE: <strong>Vision</strong> looks for ASIO drivers in afolder called “ASIO Drivers.” This foldermust reside in the same folder as the <strong>Vision</strong>application.<strong>Vision</strong> & Studio <strong>Vision</strong> <strong>Pro</strong> — <strong>Audio</strong> Reference Manual 13
PART 3: The Acadia <strong>Audio</strong> SystemSYSTEM REQUIREMENTSTo run <strong>Vision</strong> with the Acadia <strong>audio</strong> system,you must meet the followingcomputer requirements:• A PowerMac (603 or faster recommended)with Level 2 cache.ASIO-compatible digital <strong>audio</strong> cardrecommended but not required.Consult the QuickStart card includedwith your package for information onRAM and System softwarerequirements.• A “fast” and defragmented hard disk.The faster your hard disk, the moresimultaneous voices <strong>Vision</strong> can play.For optimum performance, Opcoderecommends using a SCSI hard diskdriver that supports asynchronousdisk I/O.You will achieve improved <strong>audio</strong> performanceif you frequentlydefragment your hard disk. Opcodestrongly encourages you to usedefragmentation software beforerecording <strong>audio</strong>.SET VISION TO THE ACADIAAUDIO SYSTEMTo use <strong>Vision</strong> with your ASIO-compatiblehardware, select <strong>Audio</strong>><strong>Audio</strong> System>Acadiato place a check mark nextto the option.Figure 3.2: Selecting the Acadia <strong>audio</strong> systemHARDWARE SETUPBefore you can record and play digital<strong>audio</strong>, you must tell <strong>Vision</strong> which ASIOdriver you’re using.When selecting the Acadia <strong>audio</strong> systemfor the first time, the default ASIO driveris Opcode’s “Sound Manager” driver.For the very latest system requirementsand recommendations, check the OpcodeWeb site:http://www.opcode.com14 Opcode Systems, Inc.
CHAPTER 3: Acadia: Hardware SetupTo specify a different ASIO driver: Choose <strong>Audio</strong>>Hardware Setup.The Hardware Setup dialog opens.About the Hardware Setup DialogBoxAs shown in Figure 3.3, the HardwareSetup dialog box contains numerous elementsfor configuring your <strong>audio</strong>hardware. Using this dialog, you canchoose your ASIO driver, set the hardwaresample rate, and specify a digitalclock source. In addition, you can clickthe Open Control Panel button to configureadditional hardware-specific settings.Figure 3.3: Hardware Setup dialog for theAcadia <strong>audio</strong> systemFrom the Device pop-up, select theappropriate ASIO driver for your<strong>audio</strong> hardware.If youÕre using your PowerMacÕs built-insound capabilities, choose the SoundManager driver.If using compatible Digidesign hardware,choose Digidesign DirectIO.If your ASIO driver is not listed in theDevice pop-up, make sure the driver is inthe ÒASIO DriversÓ folder, which mustreside in the same folder as the <strong>Vision</strong>application.Sample RateFrom this pop-up menu, choose thedesired hardware sample rate, whichdetermines the rate at which <strong>audio</strong> isrecorded and played.Session sample rates of up to 96 kHz aresupported for the Acadia <strong>audio</strong> system(and DAE). Check the manufacturer’sdocumentation for your <strong>audio</strong> hardwareto see if it supports this rate.NOTE: The sample rate in the HardwareSetup dialog can also be specified in theSample Rate/Size dialog (as discussed onpage 18). Changing it in either locationupdates it in the other.Clock SourceIn most cases, as when recording from ananalog input, you will leave the ClockSource pop-up set to “Internal.”<strong>Vision</strong> & Studio <strong>Vision</strong> <strong>Pro</strong> — <strong>Audio</strong> Reference Manual 15
PART 3: The Acadia <strong>Audio</strong> SystemIf, however, you are recording from a digitalsource (like a DAT machine or digitalmultitrack), you’ll want to switch this popupto the appropriate digital setting. Fordetails, consult the manufacturer’s documentationfor your hardware.Sound ManagerIf using the Sound Manager driver, clickthe Open Control Panel button in theHardware Setup dialog to access additionalsound input options, see Figure 3.4.• The Gain faders (left and right)boost the input signal. Hold down theShift or Option key to adjust bothfaders at the same time.Use the accompanying L and R inputLEDs to monitor for an optimuminput signal.• Check Play through to echo theinput source to your computer’soutput.You’ll usually want this is option disabledwhen using <strong>Vision</strong>, which hasit’s own “Thru” option in the RecordMonitor.• Check Automatic gain control forinput levels to be adjusted automaticallywhen recording (recommendedwhen using Apple’s PlainTalkmicrophone).Digidesign <strong>Audio</strong> CardsIf using the Digidesign DirectIO driver,click the Open Control Panel button toaccess the Digidesign Hardware Setupdialog, as seen in Figure 3.5.Figure 3.4: Sound Manager Input OptionsIn the Sound Manager Input Options dialog,configure the following:• The Input pop-up determines theinput source (microphone, internalCD, etc.) for recorded material.16 Opcode Systems, Inc.
CHAPTER 3: Acadia: Hardware SetupFor details on configuring your <strong>audio</strong>card, consult the Digidesigndocumentation.NOTE: In order to use the DigidesignDirect IO driver, you must have version 3.4or later of the DigiSystem INIT installed.Other ASIO HardwareOther ASIO-compatible hardware, suchas the Korg 1212 I/O, may provide thebulk of its configuration controls in a separateapplication or control panel (notdirectly accessed from <strong>Vision</strong>). Fordetails, consult the manufacturer’sdocumentation.Figure 3.5: Digidesign Hardware Setup for<strong>Audio</strong>media IIIClick the Other Options button to configurevarious input and output optionsspecific to your Digidesign <strong>audio</strong> card.NOTE: In order to use your ASIO-compatible<strong>audio</strong> card, its driver must be in the“ASIO Drivers” folder, and this folder mustreside in the same folder as the <strong>Vision</strong>application.Figure 3.6: Other Options for <strong>Audio</strong>media IIIIf using an <strong>Audio</strong>media III, for instance,the “other options” include settings forInput and Output Gains, and the type ofS/PDIF I/O you will use.<strong>Vision</strong> & Studio <strong>Vision</strong> <strong>Pro</strong> — <strong>Audio</strong> Reference Manual 17
PART 3: The Acadia <strong>Audio</strong> SystemTHE SESSION SAMPLE RATEThe session sample rate is the sample ratethat <strong>Vision</strong> uses to record and play back<strong>audio</strong>.To set <strong>Vision</strong>’s session sample rate:Choose <strong>Audio</strong>>Sample Rate/Size.<strong>Vision</strong> opens the Sample Rate/Sizedialog.The term “sample rate” <strong>ref</strong>ers to thenumber of <strong>audio</strong> samples that comprise1 second worth of <strong>audio</strong>. Higher samplerates produce better <strong>audio</strong> fidelity, butuse more disk space (because there aremore sample points per second). You cansave disk space by using lower samplerates, but this degrades the <strong>audio</strong> fidelity.The session sample rate is the samplerate that is common to all <strong>audio</strong> files <strong>ref</strong>erencedby the sequences in a <strong>Vision</strong> file. Ifyou attempt to import an <strong>audio</strong> file whoserate does not match the session samplerate, you will be prompted to convert thefile.Figure 3.7: Set Session Sample Rate/Sizedialog boxFrom the Session Sample Ratepop-up menu, select the desiredsession sample rate.This pop-up menu lists the sample ratessupported by your <strong>audio</strong> hardware andits associated ASIO driver.When using the Acadia <strong>audio</strong> system, thesession sample rate should always be thesame as the hardware sample rate (asspecified in the Hardware Setup dialog).Changing the Sample Rate pop-up in theHardware Setup dialog automaticallychanges <strong>Vision</strong>’s session sample rate.When using the Acadia <strong>audio</strong> system, thesession sample rate must always matchthe rate used by your <strong>audio</strong> files. If youthe<strong>ref</strong>ore switch the session sample rate,you will be prompted to convert any existing<strong>audio</strong> files to the new rate—otherwisethey will not play back at the correct pitchand tempo.Click the OK button.The session sample rate is changed(along with the rate specified in theHardware Setup dialog). If necessary,you are prompted to convert existing<strong>audio</strong> files to the new rate.NOTE: Attempting to play <strong>audio</strong> files withsample rates that differ from the sessionsample rate results in their original pitchand tempo being altered.18 Opcode Systems, Inc.
CHAPTER 3: Acadia: Hardware SetupACTIVE IN BACKGROUNDIf you want <strong>Vision</strong>’s playback of MIDI and<strong>audio</strong> to continue uninterrupted when it isnot the current application, make surethat “Run MIDI in the Background” ischecked in the OMS MIDI Setup dialog.When <strong>Vision</strong> is stopped, and no longerthe current application, <strong>audio</strong> processingof inputs will continue as long as<strong>Audio</strong>>Active in Background ischecked.<strong>Vision</strong> & Studio <strong>Vision</strong> <strong>Pro</strong> — <strong>Audio</strong> Reference Manual 19
PART 3: The Acadia <strong>Audio</strong> System20 Opcode Systems, Inc.
CHAPTER 4:Acadia: Record Monitor WindowUse the Record Monitor Window to controlsuch recording operations as:• record-enabling an input• record level monitoring• file and option selection• <strong>Audio</strong> Instrument selectionRead this chapter to learn what’s in theRecord Monitor Window. You’ll apply thisknowledge when you learn how to actuallyrecord <strong>audio</strong> in Chapter 5: Acadia:Recording <strong>Audio</strong>.OPENING THE RECORDMONITOR WINDOWTo open the Record Monitor Window:Choose Windows>RecordMonitor.<strong>Vision</strong> opens a Record Monitor Windowsimilar to the one shown on page 22.TIP: You can also open the Record MonitorWindow directly from the Control Bar byclicking the Record Indicator button ( ).NOTE: The appearance of the Record MonitorWindow changes slightly depending onthe type of hardware specified in the HardwareSetup dialog. Please seeChapter 3: Acadia: Hardware Setup fordetails on configuring your <strong>audio</strong>hardware.<strong>Vision</strong> & Studio <strong>Vision</strong> <strong>Pro</strong> — <strong>Audio</strong> Reference Manual 21
PART 3: The Acadia <strong>Audio</strong> System Typical Record Monitor Window with two input linesANATOMY OF THE RECORDMONITOR WINDOWThe following items discuss each elementin the Record Monitor Window shown onpage 22. Record Monitor menu: Contains thepop-up menu item for <strong>Audio</strong> RecordP<strong>ref</strong>erences. SeeChapter 21: Advanced Recording Techniquesin your <strong>Audio</strong> ReferenceManual for details. Record Enable Indicators: Click aRecord Enable Indicator to enablerecording from the specified recordsource. The Record Enable Indicatorhas three states:—Solid Red: When an input line isrecord-enabled, this indicator is solidred.—Flashing Red: The indicator flashesred if <strong>Vision</strong> is in play mode and hasthe possibility of recording (such aswith punch-in)—it then turns solidred when <strong>Vision</strong> begins to actuallyrecord.—No Color: The input line is notenabled and will not record <strong>audio</strong>.Record Source: Choose from thispop-up menu the record source fromwhich you will record. Recordsources include hardware inputs andoutputs, busses, and <strong>Audio</strong>Instruments.When “Link Pairs” is checked, inputand output pairs are available fromthis pop-up—otherwise, hardwareinputs and outputs are listed as monosources.Record Levels: Use these LEDs tomonitor the <strong>audio</strong> level from the specifiedrecord source.22 Opcode Systems, Inc.
CHAPTER 4: Acadia: Record Monitor WindowClipping Indicators: This indicatorlights when an <strong>audio</strong> level reaches0 dB and stays lit until you reset it byclicking anywhere within the RecordLevel indicator for the offendingchannel.Record File pop-up: Press and holdthis icon to open a pop-up menu ofrecord file options. These options letyou enable a new record file, appendnew <strong>audio</strong> to an existing file, or closean existing record file.Record File: This column displaysthe name of the files to which <strong>audio</strong>data is recorded.Available Recording Time: Thiscolumn displays the amount ofrecording time available (based onthe amount of free disk space andother recording parameters).<strong>Audio</strong> Instruments: Use this pop-upmenu to assign an <strong>Audio</strong> Instrumentfor each record source (or linkedpair). Use <strong>Audio</strong> Instruments togroup related <strong>audio</strong> events, to associatecontroller data with specificevents, and to associate <strong>audio</strong> eventswith particular outputs.Thru: Use this pop-up menu to selectone of three <strong>audio</strong> thru options:On: Select On if the signal you’rerecording is patched directly intoyour computer without first goingthrough a mixing console. When theOn option is selected, <strong>Vision</strong> sendsthe <strong>audio</strong> signal arriving at the inputdirectly to the output of an <strong>audio</strong>channel so that you can hear thesignal you’re recording.Off: Select Off if you’re using amixing console to route <strong>audio</strong> signalsto and from your <strong>audio</strong> interface.When the Off option is selected,<strong>Vision</strong> does not send the <strong>audio</strong> inputsignal directly thru to the output.Auto: Select this option if you want<strong>Vision</strong> to make “intelligent” thruingdecisions based on recording/playbackmodes. Specifically:• <strong>Vision</strong> turns Thru On during idletimes.• <strong>Vision</strong> turns Thru Off duringplayback.• <strong>Vision</strong> turns Thru On only for theinput lines that are recordenabledwhile recording, whichallows you to hear what you arerecording as you record it.NOTE: Some ASIO drivers mayexhibit a noticeable latency in thruing<strong>audio</strong>. If at all possible, disable Thruand monitor record sources externally.Auto Compact: Choose this optionto automatically compact <strong>audio</strong>during recording. Compacting freesdisk space by throwing out <strong>audio</strong> datathat is not <strong>ref</strong>erenced by the current<strong>Vision</strong> file (such as data from discarded“takes”).Link Pairs: Choose this option tolink two input lines together to createa single stereo <strong>audio</strong> event. In addition,the input pair is assigned to asingle <strong>Audio</strong> Instrument.Sample Size: Use this pop-up menuto specify the sample bit depth for therecord file. Choices for the Acadia<strong>audio</strong> system include 16 or 24 bits.See Using 24 Bits (pg. 24) for details.<strong>Vision</strong> & Studio <strong>Vision</strong> <strong>Pro</strong> — <strong>Audio</strong> Reference Manual 23
PART 3: The Acadia <strong>Audio</strong> SystemVariations in the Record MonitorWindowThe number of input lines that appear inthe Record Monitor Window depends onyour particular <strong>audio</strong> hardware. If you areusing a Korg 1212, for instance, you willsee 12 input lines, as shown in Figure 4.1.Figure 4.1: Record Monitor Window for Korg 1212Generally, the number of input linesappearing in the Record Monitor Windowcorresponds to the number of hardwareinputs your <strong>audio</strong> interface has.USING 24 BITSIf your digital <strong>audio</strong> hardware supports 20or 24 bits, set the Sample Size pop-up inthe Record Monitor to 24 bits. This willlet you take full advantage of your hardware’scapabilities.The Acadia <strong>audio</strong> system can import andplay 8, 16 or 24 bit <strong>audio</strong> files—these formatscan even be used at the same time.If you have a 20 bit sound card and record24 bit files, the resolution is maintained(though the extra 4 bits are ignored) andwill be present during playback. 24 bit<strong>audio</strong> files are no larger than 20 bit filesand the<strong>ref</strong>ore don’t take any more diskspace.NOTE: Even if your <strong>audio</strong> hardware supports20 or 24 bits on input, the extraresolution is only communicated to <strong>Vision</strong>if it is supported in the ASIO driver.Contact the manufacturer for informationon the supported sample sizes for your<strong>audio</strong> hardware and its associated ASIOdriver.24 Opcode Systems, Inc.
CHAPTER 5:Acadia: Recording <strong>Audio</strong>This chapter discusses how to record digital<strong>audio</strong> using the Acadia <strong>Audio</strong> System.For more details on recording, please seeChapter 21: Advanced RecordingTechniques.For details on importing <strong>audio</strong>, please seeChapter 20: Import/Export Cornucopia.RECORDING: POWER USEROVERVIEWFollowing are the basic steps required torecord a mono <strong>audio</strong> file from a hardwareinput:Choose Windows>RecordMonitor.<strong>Vision</strong> opens the Record MonitorWindow.With the Record Monitor Window active:For the desired input line, specify amono hardware input from theRecord Source pop-up.Record-enable the input line byclicking its Record Enable Indicator.<strong>Vision</strong> produces a standard Save Asdialog box.For the record file, enter a name,folder destination, and file type (AIFFor Sound Designer II).Send an <strong>audio</strong> signal to your digital<strong>audio</strong> interface (or to the sound inputjack of your Macintosh) and watch theon-screen LEDs to set an optimalinput level.Enable any other desired options.Options include <strong>audio</strong> thruing, auto compacting,and designating the sample sizein bits.Assign a mono <strong>Audio</strong> Instrument tothe <strong>audio</strong> youÕre about to record.Leave the Record Monitor Windowopen, then go to the Tracks Window.The Record Monitor Window must beopen in order to record <strong>audio</strong>.With the Tracks Window active: Record-enable a track. In the Control Bar, select the desiredrecord mode.If you are about to record an <strong>audio</strong>event, the Record Mode display containsa small digital <strong>audio</strong> icon. In the Control Bar, either set aCountoff or select Wait for Note.<strong>Vision</strong> & Studio <strong>Vision</strong> <strong>Pro</strong> — <strong>Audio</strong> Reference Manual 25
PART 3: The Acadia <strong>Audio</strong> SystemClick the Record button in <strong>Vision</strong>ÕsControl Bar.If you chose Wait for Note, either playa MIDI note, click the Play button, orpress the Spacebar to start recording.Begin playing or singing the materialyou wish to record.When finished, click the Stop buttonto stop recording.For the desired input line, specify amono hardware input from theRecord Source pop-up.Record-enable the input by clickingits Record Enable Indicator.The remainder of this chapter discussesthe previous steps in detail.RECORDING: STEP-BY-STEPThe following sections discuss in detailhow to set up and record a single, mono<strong>audio</strong> track in <strong>Vision</strong>.Designate a Record FileTo record <strong>audio</strong>, you must first designatewhere to store it on your hard disk. Thisis called the record file.To designate a record file for a monophonicinput:<strong>Vision</strong> opens a Save As dialog.For the record file, enter a name,folder destination, and file type (AIFFor Sound Designer II).Click the Save button.The name of your record file is displayedin the ÒRecord FileÓ column, the RecordEnable Indicator is lit (indicating recordingon that input is enabled), and theamount of available recording time is displayedin the ÒAvailableÓ column (asdetermined by the amount of free spaceon your hard disk).Choose Windows>RecordMonitor.<strong>Vision</strong> opens the Record MonitorWindow.If the selected <strong>Audio</strong> Instrument is stereo(and Link Pairs is not checked) when youenable an input, <strong>Vision</strong> will prompt youwill the following dialog.Figure 5.1: Typical Record Monitor Window26 Opcode Systems, Inc.
PART 3: The Acadia <strong>Audio</strong> System0 dB. In digital recording, you cannotrecord above 0 dB without clipping the<strong>audio</strong>.Avoiding ClippingIf the amplitude of the <strong>audio</strong> signalexceeds 0 dB, the waveform becomeschopped off and flat (like a square wave),and the <strong>audio</strong> will sound buzzy and distorted.This is called “clipping,” whichyou will most always want to avoid. Ifyou’re accustomed to analog recording,you’ll soon notice that digital clipping isharsher and much less tolerable thananalog clipping.If you clip the input level so the amplitudeexceeds 0 dB, the Record Monitor’s ClippingIndicator lights at that moment. Afterthe level recedes, the clipping indicatorremains lit to remind you that you clippedthe input level and you should go backand adjust it.Clipping IndicatorMonitoring the InputIf you’re recording directly into your computerwithout running the signal througha mixing console, you will need to turn onthe Thru option in order to hear thesignal you’re recording.When you turn on Thru, <strong>Vision</strong> sends the<strong>audio</strong> input signal directly to the selected<strong>Audio</strong> Instrument so you can monitor it.If you’re using an external mixing console,use it to route the <strong>audio</strong> signals andturn the Thru option off. For more information,see Anatomy of the RecordMonitor Window (pg. 22).NOTE: Some ASIO drivers may exhibit anoticeable latency in thruing <strong>audio</strong>. Inthese instances, if at all possible, disableThru and monitor record sourcesexternally.When you’re ready to try a different inputlevel, you can clear the clip light by clickinganywhere in the record level bargraphfor that input line.28 Opcode Systems, Inc.
CHAPTER 5: Acadia: Recording <strong>Audio</strong>Assign an <strong>Audio</strong> Instrument<strong>Vision</strong> initially assigns each record file toone of your <strong>Audio</strong> Instruments. <strong>Audio</strong>Instruments are discussed inChapter 6: Acadia: <strong>Audio</strong> Instruments &Routings Window. For now, you need onlyknow that <strong>Vision</strong> uses <strong>Audio</strong> Instrumentsto determine <strong>audio</strong> output assignments.For this reason, it’s convenient to selectan <strong>Audio</strong> Instrument when you firstrecord a file. This lets you:• Audition files after you record them.• Monitor a recording as you make it (ifyou use the Record Monitor Window’sThru option).To assign a record file to a specific <strong>Audio</strong>Instrument:Press and hold the mouse in theInstruments column for the desiredinput line.<strong>Vision</strong> opens a pop-up menu of <strong>Audio</strong>Instruments. Each instrumentÕs mono/stereo status is indicated in parenthesis.Since this recording is from a monosource, choose a mono <strong>audio</strong>instrument.While still holding the mouse button,drag the cursor over the desired<strong>Audio</strong> Instrument to select it(highlighting it).Since we are not recording from a stereorecord source (Link Pairs is notchecked), make sure you specify a mono<strong>Audio</strong> Instrument.Release the mouse button.<strong>Vision</strong> will assign the recorded <strong>audio</strong> tothe selected <strong>Audio</strong> Instrument.You can change <strong>Audio</strong> Instrument assignmentsany time in the future.To learn how to assign outputs to an<strong>Audio</strong> Instrument, see Output Assignments(pg. 42).Record a TrackNow that you’ve set a record level anddesignated a record file into which youwill record the <strong>audio</strong>, you’re ready torecord a track.TEMPO TIP: If you have any MIDI datarecorded, make sure you’re happy with thesequence’s tempo. Although you can changethe <strong>audio</strong>’s playback tempo with theDSP>Adjust <strong>Audio</strong> Tempo command,it’s always easier to “do it right the firsttime” rather than “fixing it in the mix.”<strong>Vision</strong> & Studio <strong>Vision</strong> <strong>Pro</strong> — <strong>Audio</strong> Reference Manual 29
PART 3: The Acadia <strong>Audio</strong> SystemTo record an <strong>audio</strong> track:Leave the Record Monitor Windowopen.The Record Monitor Window must beopen in order to record <strong>audio</strong>.In the Tracks Window, click the ÒRÓcolumn to record-enable a track (justas you do when you record MIDI).If <strong>Vision</strong> is properly configured to record<strong>audio</strong>, then the Record Mode displaycontains a small digital <strong>audio</strong> icon.Digital <strong>audio</strong> icon indicates thatyou will be recording <strong>audio</strong> eventsIf desired, enter a new track name.Select the desired record mode fromthe Record Mode pop-up menu in theControl Bar.Record modes are discussed in yourMIDI Reference Manual.Record-enabled tracks can alwaysrecord MIDI data, but to record <strong>audio</strong> theRecord Monitor Window must be openand one or more input lines must berecord-enabled.In the Control Bar, either set aCountoff or select Wait for Note.Click the Record button in <strong>Vision</strong>ÕsControl Bar.If you chose Wait for Note, either playa MIDI note, click the Play button, orpress the Spacebar to start recording.Begin playing or singing the materialyou wish to record.<strong>Vision</strong> records the <strong>audio</strong> along with anyMIDI you perform.When finished, click the Stop buttonto stop recording.The recorded <strong>audio</strong> is stored in the currentrecord file (or files) listed in theRecord Monitor Window. Remember, ifyou want to record into another file, youneed to first designate it as the record file.If you have the Graphic Window openyou’ll see a graphic representation of yourwaveform appear below the Piano Roll.Figure 5.2: Waveform Displayed30 Opcode Systems, Inc.
CHAPTER 5: Acadia: Recording <strong>Audio</strong>The appearance of the waveform is determinedby the <strong>Audio</strong>>Waveform Displaysubmenu. Specifically:• Off: This display option completelydisables the waveform display. Whenyou select this option, <strong>Vision</strong> displayswaveforms as a straight line andwastes no time calculating theirappearance.• Fast: This display option allows<strong>Vision</strong> to redraw waveform displaysquickly because it draws them at alow resolution. This may be desirablewhen you’re recording or playingback <strong>audio</strong>, but the lower resolutionis not as good for detailed <strong>audio</strong>editing.• High Resolution: This displayoption allows <strong>Vision</strong> to display theactual texture of waveforms. This isdesirable when you’re editing andneed to clearly see all peaks and valleys,but it takes the longest amountof time to recalculate and draw.For more information, seeChapter 30: The <strong>Audio</strong> Menu in your<strong>Audio</strong> Reference Manual.ADVANCED RECORDINGTECHNIQUESThe following sections discuss other<strong>audio</strong> recording techniques for <strong>Vision</strong>.Stereo RecordingThis section discusses how to set up<strong>Vision</strong> to record stereo <strong>audio</strong> events usingthe Acadia <strong>audio</strong> system.To record a stereo track:In the Record Monitor Window, clickthe Link Pairs option to check it.<strong>Vision</strong> automatically switches the monohardware inputs to a stereo input pair(see Figure 5.3).NOTE: Remember, if you want to turn<strong>audio</strong> recording off so <strong>Vision</strong> records onlyMIDI, disable the Record Enable Indicatorin the Record Monitor Window, or simplyclose the window. You can see if <strong>audio</strong>recording is enabled by looking for the littledigital <strong>audio</strong> waveform in the Record Modepop-up.Figure 5.3: Link Pairs enabledIn the Record Source pop-up, makesure you have the desired input pairselected.Figure 5.4: Choosing a hardware input pair<strong>Vision</strong> & Studio <strong>Vision</strong> <strong>Pro</strong> — <strong>Audio</strong> Reference Manual 31
CHAPTER 5: Acadia: Recording <strong>Audio</strong>Recording Multiple TakesIt’s common to record a particular performancenumerous times. Eachperformance is called a take. By recordingnumerous takes, you can later choosethe best performance or, perhaps, assemblea new performance from the varioustakes.There are two different techniques forstoring multiple takes:• You can record all <strong>audio</strong> takes into asingle record file.This method keeps all <strong>audio</strong> informationtogether in one place, making iteasy to find and back up <strong>audio</strong>performances.• You can record each <strong>audio</strong> take into aseparate record file.This method keeps different takes indifferent files so, if you lose ordamage a file, you lose only one takeand not all of them.Recording <strong>Audio</strong> WhileMonitoring Existing <strong>Audio</strong> EventsYou can record new <strong>audio</strong> files while monitoringexisting ones. For example, youmight want to record a backup vocal whilelistening to your lead vocal.To do so, simply record into a new track,assigned to a different <strong>Audio</strong> Instrumentwhile the other <strong>audio</strong> tracks play.When using the Acadia <strong>audio</strong> system,each <strong>Audio</strong> Instrument can play one <strong>audio</strong>event at a time. This means that thenumber of <strong>Audio</strong> Instruments you’vespecified determines the theoreticalnumber of tracks (<strong>audio</strong> events) that canconcurrently play. See Setting the Numberof <strong>Audio</strong> Instruments (pg. 36) for details.The method you choose affects only how<strong>audio</strong> is stored on your hard disk—it doesnot affect playback. Each method can beautomated using the <strong>Audio</strong> RecordingP<strong>ref</strong>erences dialog. SeeChapter 21: Advanced Recording Techniquesin your <strong>Audio</strong> Reference Manualfor more details on recording multipletakes.You can save disk space by using Undoafter an unsatisfactory take—when youdo so, <strong>Vision</strong> erases the previouslyrecorded take.<strong>Vision</strong> & Studio <strong>Vision</strong> <strong>Pro</strong> — <strong>Audio</strong> Reference Manual 33
PART 3: The Acadia <strong>Audio</strong> System34 Opcode Systems, Inc.
CHAPTER 6:Acadia: <strong>Audio</strong> Instruments &Routings WindowThis chapter discusses the items containedin the <strong>Audio</strong> Instruments &Routings Window. To open this window,choose Windows><strong>Audio</strong> Instruments.Figure 6.1: <strong>Audio</strong> Instruments & Routings WIndowTIP: If a track contains only <strong>audio</strong> data,you can open the <strong>Audio</strong> Instruments &Routings Window directly from either theList or Graphic Window by clicking theInstruments button ( ).As can be seen in Figure 6.1, the <strong>Audio</strong>Instruments & Routings Window containssections for the following items:• <strong>Audio</strong> Instruments are assigned to<strong>audio</strong> events (residing in tracks), anddetermine how the events areoutputted.• Inputs correspond to the physicalinputs of your <strong>audio</strong> hardware. Inputsappear as input sources in the ConsoleWindow and record sources inthe Record Monitor.• Outputs correspond to the physicaloutputs of your <strong>audio</strong> hardware. Outputsare assigned as destinations for<strong>Audio</strong> Instruments, <strong>Audio</strong> Sends, busses,and even hardware inputs.Outputs can also be used as inputsources in the Console Window orrecord sources in the RecordMonitor.The Acadia <strong>audio</strong> system supports amaximum of 24 hardware outputs.• Busses (up to 16) act as mono orstereo destinations for groups of consolechannels (via sends), they canalso be assigned as outputs. Bussesare useful for creating auxiliary sendsto shared plug-ins, submixes, andmaster faders.Any of these items (which we will often<strong>ref</strong>er to as <strong>audio</strong> channels) can act asinput sources in the Console Window orRecord Monitor.<strong>Vision</strong> & Studio <strong>Vision</strong> <strong>Pro</strong> — <strong>Audio</strong> Reference Manual 35
PART 3: The Acadia <strong>Audio</strong> SystemEach of the four sections in the <strong>Audio</strong>Instruments & Routings Window can beclosed or opened by clicking the appropriateopen/close triangle, see Figure 6.2.SETTING THE NUMBER OFAUDIO INSTRUMENTSNOTE: This section applies to all <strong>Vision</strong>and Studio <strong>Vision</strong> users but is most applicableto TDM and Acadia users.<strong>Vision</strong> can use as many <strong>Audio</strong> Instrumentsas your memory and CPUresources allow, up to a maximum of 128.<strong>Vision</strong> initially defaults to 16 <strong>Audio</strong> Instruments,but you can request a greaternumber if you like. <strong>Vision</strong> stores therequested number of <strong>Audio</strong> Instrumentsin both its Setup file and in each <strong>Vision</strong>file.Figure 6.2: Busses section, opened and closed<strong>Vision</strong> offers a great amount of flexibilityin routing and processing <strong>audio</strong>. Whilethe following sections in this chapterexplain the various controls in the <strong>Audio</strong>Instruments & Routings Window,Chapter 7: Acadia: <strong>Audio</strong> Channels inConsoles explains how to assign plug-ins,sends, and EQs. In addition,Chapter 10: Acadia: Bussing, Routing, &Bouncing to Disk explores some realworldexamples for bussing, routing, andrecording <strong>audio</strong> channels.When using the Acadia <strong>audio</strong> system, thenumber of <strong>Audio</strong> Instruments you specifydetermines the number of possible <strong>audio</strong>events that can sound at any one time,and the amount of RAM used for <strong>audio</strong>buffers.IMPORTANT: The number of <strong>Audio</strong>Instruments you specify determines only thetheoretical number of possible <strong>audio</strong> eventsthat can play back simultaneously.There are many other factors that affect theactual number of simultaneous <strong>audio</strong>tracks you can expect <strong>Vision</strong> to play. Theseinclude: the speed of your CPU; the speed ofyour hard disk (and the speed of its IDE/SCSI connection); the number of EQ bandsin use; and the number and type of VSTplug-ins employed. For more information,see “Chapter 11: Acadia: Optimizing forDigital <strong>Audio</strong>.”36 Opcode Systems, Inc.
CHAPTER 6: Acadia: <strong>Audio</strong> Instruments & Routings WindowTo select the desired number of <strong>Audio</strong>Instruments:Press and hold the mouse onthe menu in the <strong>Audio</strong>Instruments & RoutingsWindow.Move the cursor over theNumber of Instruments item.<strong>Vision</strong> produces a pop-up menu fromwhich you can select the desired numberof <strong>Audio</strong> Instruments.Figure 6.3: Selecting the number of <strong>Audio</strong>InstrumentsHighlight the desired number of<strong>Audio</strong> Instruments, then releasethe mouse button.To specify a number of <strong>Audio</strong> Instrumentsnot listed in the submenu, choosethe Other option. From the dialog thatappears, you can specify any number of<strong>Audio</strong> Instruments (up to 128).VOICE ALLOCATION ANDAUDIO PLAYBACKWhen using the Acadia <strong>audio</strong> system,<strong>Vision</strong> uses “fixed” voice allocation fordigital <strong>audio</strong> playback. This means thateach <strong>Audio</strong> Instrument can play just one<strong>audio</strong> event at a time.For instance, if <strong>Audio</strong>-1 is playing an <strong>audio</strong>event and a second <strong>audio</strong> event is encountered(also assigned to <strong>Audio</strong>-1, either inthe same track or in another), the secondevent will interrupt the first event.The<strong>ref</strong>ore, if you want overlapping <strong>audio</strong>events to be played concurrently, theymust be assigned to different <strong>Audio</strong>Instruments—which can reside in thesame or separate tracks.COLUMNS IN THE AUDIOINSTRUMENTS & ROUTINGSWINDOWThe following sections discuss eachcolumn in the <strong>Audio</strong> Instruments & RoutingsWindow. Please note that not allcolumns apply to all four sections (<strong>Audio</strong>Instruments, inputs, outputs, and busses).The configuration of the <strong>Audio</strong> Instruments& Routings Window is saved witheach <strong>Vision</strong> file, and can be saved with the<strong>Vision</strong> Setup file.<strong>Vision</strong> & Studio <strong>Vision</strong> <strong>Pro</strong> — <strong>Audio</strong> Reference Manual 37
PART 3: The Acadia <strong>Audio</strong> SystemNameThis column displays the name for each<strong>Audio</strong> Instrument, input, output, and bus.Custom names can be typed in for eachitem—for instance, “vocals” for an <strong>Audio</strong>Instrument or “Master L-R” for a bus.ColorLike MIDI Instruments, each <strong>Audio</strong>Instrument can have its own color, whichis used for displaying track data. Tochange an <strong>Audio</strong> Instrument’s assignedcolor:To rename an <strong>Audio</strong> Instrument, input,output, or bus:Click in the Name column for thedesired <strong>audio</strong> channel.Choose Windows><strong>Audio</strong>Instruments.<strong>Vision</strong> opens the <strong>Audio</strong> Instruments &Routings Window.Press and hold the mouse in theColor column (locatedimmediately to the right of the<strong>Audio</strong> InstrumentÕs name).<strong>Vision</strong> opens a color selection pop-upmenu.The name becomes highlighted.Type in the new name and thentype Return.Press and hold the mouseon a color to open a colorselection pop-up menu.Changes to the names are automaticallyupdated in other windows, dialogs, andpop-up menus.To return a name to its default, highlightthe desired name and type the Delete key.Figure 6.4: Setting an <strong>Audio</strong> Instrument’scolor38 Opcode Systems, Inc.
CHAPTER 6: Acadia: <strong>Audio</strong> Instruments & Routings WindowHighlight the desired color fromthe pop-up menu and releasethe mouse button.You can change the colors available in thecolor selection pop-up menu. To do so:Choose Setups>Colors.<strong>Vision</strong> opens a dialog box containing alldefined colors.Click the color you wish tochange.<strong>Vision</strong> opens a standard Macintosh colorpicker dialog box.Pick a new color and click theOK button.Change other colors as desired,then click the OK button toclose the Colors dialog box.Figure 6.5: Enabling/disabling inputsBy default, only the first two of your hardwareinputs are enabled. To enable more,simply place a checkmark next to thedesired items. All hardware outputs areenabled by default.To disable an input or output, click on acheckmark to remove it. Disabled itemsare unavailable (grayed out) in the popupsin the Record Monitor and ConsoleWindows.You can reset any modified colors toOpcode’s default colors. To do so: Choose Windows>Instruments.<strong>Vision</strong> opens the MIDI InstrumentsWindow. Choose Initialize Colors from theInstruments Window menu.<strong>Vision</strong> resets its colors to their defaultvalues.Enabling Inputs and OutputsInputs and outputs are unique in that theyhave an option for being enabled and disabledfrom the <strong>Audio</strong> Instruments &Routings Window. To enable an input oroutput place a checkmark next to it in theName column.Inputs and outputs are always enabled ordisabled in pairs. For instance, placing acheckmark next to “Input 1” also automaticallyplaces a checkmark next to“Input 2.”NOTE: Enabled inputs and outputs consumevaluable CPU resources. The<strong>ref</strong>ore, topreserve CPU resources, disable any inputsand outputs not in use.IMPORTANT: Enabling a digital inputmay change the Clock Source in the HardwareSetup dialog from “Analog” to“Digital.” If you wish to record from onlyyour analog inputs, make sure all digitalinputs are disabled.<strong>Vision</strong> & Studio <strong>Vision</strong> <strong>Pro</strong> — <strong>Audio</strong> Reference Manual 39
PART 3: The Acadia <strong>Audio</strong> SystemMutes and SolosThese columns let you mute and solo theitems in the <strong>Audio</strong> Instruments & RoutingsWindow. Muting and soloing occursacross MIDI and <strong>Audio</strong> Instruments,hardware inputs and outputs, and busses.If you the<strong>ref</strong>ore solo a hardware input,playback of MIDI and <strong>Audio</strong> Instrumentswill be muted, along with busses.NOTE: Hardware outputs cannot be soloedand the<strong>ref</strong>ore do not have a Solo column.Buttons for mute and solo also appear for<strong>audio</strong> channels in the Console Window,and for <strong>Audio</strong> Instruments in the GraphicWindow. Clicking a Mute or Solo buttonin any location echoes it to the others.When anything is soloed, the Global SoloIndicator button appears in the ControlBar, which is helpful if you’ve forgottenabout a clicked Solo button and suddenlyrealize that nothing is playing back.To mute or solo an <strong>Audio</strong> Instrument,input, output, or bus:Click the Mute or Solo columnnext to the desired <strong>audio</strong>channel.This places an ÒMÓ or ÒSÓ in the columnto indicate whether the <strong>audio</strong> channel ismuted or soloed.Click Global Solo Indicatorto find soloed Instruments and channels.Click the Global Solo Indicator button toautomatically open the window with thesoloed Instrument or <strong>audio</strong> channel.For information about the differencesbetween muting or soloing tracks andmuting or soloing instruments, please seeyour MIDI Reference Manual.Soloing occurs across MIDI and <strong>Audio</strong>Instruments, inputs, and busses. Soloingan <strong>audio</strong> channel mutes all unsoloed<strong>Audio</strong> and MIDI Instruments (and inputsand busses).Click again to disable an <strong>audio</strong>channelÕs mute or solo.Soloing BussesSoloing an <strong>audio</strong> bus automatically resultsin all pre sends routed to that bus beingheard (post sends are muted). Previously,it was required that each of the routedconsole channels be soloed as well.40 Opcode Systems, Inc.
CHAPTER 6: Acadia: <strong>Audio</strong> Instruments & Routings WindowStereoThe Stereo column determines whetheran <strong>Audio</strong> Instrument, hardware input oroutput, or bus is stereo or mono. To makean <strong>audio</strong> channel “stereo,” place a checkmark in the column for that channel.Clicking in the Stereo column works alittle differently for inputs and outputs (asopposed to <strong>Audio</strong> Instruments andbusses).In order to play back stereo <strong>audio</strong> events,they must be assigned to a stereo <strong>Audio</strong>Instrument.Click in Stereo column to turnmono input pairs into asingle stereo input pair.Place a checkmark in theStereo column to make an<strong>Audio</strong> Instrument ÒstereoÓFigure 6.6: Stereo <strong>Audio</strong> InstrumentWhether a channel is mono or stereo alsodetermines how it can be used as an inputsource in a console channel, or as arecord source in the Record Monitor. Forinstance, stereo <strong>Audio</strong> Instruments canonly stereo plug-ins, and should beassigned to stereo outputs; also, if you’rerouting stereo <strong>audio</strong> channels to a bus,make sure it is a stereo bus; and, if you’reattempting to record with Link Pairschecked, you’ll need to record from astereo source (<strong>Audio</strong> Instrument, input oroutput, or bus) to a stereo <strong>Audio</strong>Instrument.Figure 6.7: Stereo input pairHardware inputs and outputs can appearin the <strong>Audio</strong> Instruments & RoutingsWindow as either mono or stereo pairs.For instance, if your <strong>audio</strong> interface hasjust two outputs (1-2), they can act as individualmono outputs, or they can act as anoutput pair—not both. The<strong>ref</strong>ore, placinga checkmark in the stereo column forOutput 1 or Output 2 turns them into anoutput pair (“Output 1-2”), and, in the process,makes them unavailable as monooutputs.<strong>Vision</strong> & Studio <strong>Vision</strong> <strong>Pro</strong> — <strong>Audio</strong> Reference Manual 41
PART 3: The Acadia <strong>Audio</strong> SystemStereo Interleaved FilesThe Acadia <strong>audio</strong> system now supportsimporting and playing stereo interleavedfiles. Once a stereo <strong>Audio</strong> Instrumentencounters an interleaved file, it will playit as a stereo <strong>audio</strong> event. If, however, thatsame <strong>Audio</strong> Instrument encounters astereo linked event later in the samesequence, only one channel of the linkedevent will be played. The important thingto remember is that stereo eventsassigned to the same <strong>Audio</strong> Instrumentshould be of the same type: either stereointerleaved or stereo linked.A pop-up menu of Outputs appears.Highlight the appropriate output type(Bus, single Output, or Output Pair),then select from the submenu thedesired destination.Output AssignmentsUse the Output column to assign anoutput for <strong>Audio</strong> Instruments, hardwareinputs, and busses. This lets you easilymonitor any of these <strong>audio</strong> channels withoutusing the Console Window or RecordMonitor.To assign an output for an <strong>audio</strong> channel:Click in the Output column for thedesired <strong>audio</strong> channel.The items appearing in the Output pop-upcorrespond directly to your hardware outputsand busses. If you have renamed anyof these items, it is <strong>ref</strong>lected in the Outputpop-up.Interestingly enough, busses can beassigned to either outputs, or to otherbusses (you can send submixes to amaster mix, for instance). You cannot,however, route an individual bus to itself,or assign a bus if the routing will result ina loop. Clicking in the Output column forBus 1, for instance, reveals that “Bus 1” isunavailable.The Output column’s pop-up menu isduplicated in the Console Window foreach <strong>audio</strong> channel. Changing an outputassignment in the <strong>Audio</strong> Instruments &Routings Window automatically updates itin the Console Window, and vice versa.42 Opcode Systems, Inc.
CHAPTER 6: Acadia: <strong>Audio</strong> Instruments & Routings WindowNOTE: The Input and Output sections inthe <strong>Audio</strong> Instruments & Routings Windowonly displays items as either mono orstereo—not both. And, only these displayeditems show up as sources in the InstrumentSelector pop-up for console channels in theConsole Window.However, all outputs, mono and stereopairs, are available in the Output columnpop-up (and in the Output Selector pop-upfor console channels).IMPORTANT: Bus outputs must beassigned to an actual hardware outputbefore any of the <strong>audio</strong> channels routed tothem will be heard.Sends, Plug-Ins, and EQsThese columns let you monitor thenumber of assigned sends, plug-ins, andEQ bands for <strong>Audio</strong> Instruments, inputs,outputs, and busses. The individual fieldsfor each column are for display purposesonly, you cannot click in them to makechanges—they indicate the processingand routing resources assigned in all offour Console Windows.Figure 6.8: Viewing Sends, Plug-Ins, and EQsIn Figure 6.8, for instance, <strong>Audio</strong>-1 isrouted to one send, is assigned to twoplug-ins, and has no of EQ bands enabled.Since it is possible for <strong>audio</strong> channels tobe removed from a Console Window withoutclearing their sends, plug-ins, and EQsettings, these columns can be used tomonitor these assignments—regardlessof the state of the Console Windows.And, if the Performance Window (seepage 83 for a description) indicates youare low on CPU resources, you can usethe <strong>Audio</strong> Instruments & RoutingsWindow for a global overview of wherethose resources are being used.NOTE: Since <strong>Audio</strong> Sends are not availablefor outputs in the Console Window, theSends column is grayed out for outputs inthe <strong>Audio</strong> Instruments & RoutingsWindow.Clearing RoutingsFigure 6.9: Reset All Routings commandFrom the menu in the <strong>Audio</strong> Instruments& Routings Window, choose Reset AllRoutings to:• Clear all plug-in and sendassignments;• Reset and disable all EQ settings;• Reset all output assignments for<strong>Audio</strong> Instruments to their defaultfirst two outputs.• Set all output assignments for inputsand busses to “none”;<strong>Vision</strong> & Studio <strong>Vision</strong> <strong>Pro</strong> — <strong>Audio</strong> Reference Manual 43
PART 3: The Acadia <strong>Audio</strong> SystemYou can, of course, manually remove pluginand send assignments and disable EQsin the Console Window. In addition, youcan choose Clear Console from themenu in the Console Window to cleareverything in that console, including plugins,sends, and EQ settings.SAVING INSTRUMENT SETUPSThe configuration of the <strong>Audio</strong> Instruments& Routings Window is saved witheach <strong>Vision</strong> file, along with MIDIInstruments.You may also save this information in the<strong>Vision</strong> Setup file by using the File>Saveas Setup command. See your MIDI ReferenceManual for more informationabout the <strong>Vision</strong> Setup file.44 Opcode Systems, Inc.
CHAPTER 7:Acadia: <strong>Audio</strong> Channels inConsolesAUDIO IN CONSOLESBefore reading this chapter, you shouldbe familiar with <strong>Vision</strong>s’s Console Windows.If you haven’t done so, please readChapter 38: The Console Windows in yourMIDI Reference Manual.In addition to controls for volume, pan,mute, and solo, Console Windows provideadditional processing and routing capabilitiesfor <strong>audio</strong> channels. These include:• 4 Plug-In inserts assignable toVST-compatible plug-ins;• EQ with up to 4 independent bands,along with Phase control;• 4 Sends routeable to either hardwareoutputs, or to any of 16 busses;• 16 Busses for creating submixesand master faders, and for routing toshared plug-ins.• Outputs assignable to hardware outputsor any of 16 busses.Figure 7.1 illustrates a console channelwith most of its processing and routingcapabilities displayed. These individualcomponents (sends, plug-ins, EQs, andoutputs) will each be discussed in detaillater in this chapter. For now, it’s importantto grasp the basic signal flow for an<strong>audio</strong> channel within a console.4 Sends, routeable tooutputs or bussesFigure 7.1: Console channel for <strong>audio</strong>4 Plug-Ins, routeableto VST-compatible plug-insPhase toggle4 discrete bands of EQVolume, pan, mute, and soloOutput assignment (to hardwareoutput or bus)Input source (<strong>Audio</strong> Instrument,input, output, or bus)<strong>Vision</strong> & Studio <strong>Vision</strong> <strong>Pro</strong> — <strong>Audio</strong> Reference Manual 45
PART 3: The Acadia <strong>Audio</strong> SystemWhile Figure 7.1 illustrates an actual consolechannel as it might appear in <strong>Vision</strong>,Figure 7.2 illustrates the theoreticalsignal flow for an <strong>audio</strong> console channel.Notice that the signal flow begins with aninput source (which can be an <strong>Audio</strong>Instrument, input, output, or bus) andends with an output assignment (whichcan be a hardware output or a bus).InputSourceMute, SoloPlug-InsPhaseEQs<strong>Audio</strong> Send, PreLEGENDmain <strong>audio</strong> signal path<strong>audio</strong> send signal pathIn between the source and the output, thesignal can be processed by plug-ins andEQ, and the signal can be routed tobusses via sends.Pay particular attention to the order of thecomponents in Figure 7.2. While mute,solo, and volume affect signals sent tobusses via sends (pre and post), pan onlyaffects what is sent to the output.While EQs affect the signal after beingprocessed by the plug-ins, a channel’sPhase mode (enabled in the EQ Area)occurs before sends.Sends to busses can be pre or post, takingadvantage of, or ignoring the plug-in modules,EQ settings, and volume fader.Plug-ins are always applied in ascendingnumerical order (1, 2, 3, and then 4).Mono vs. Stereo SignalsThe various components in an <strong>audio</strong> channelinteract differently depending onwhether the signal is mono or stereo.VolumeFaderPanFader<strong>Audio</strong> Send, PostOutput Assignment<strong>Audio</strong> Instruments, inputs, outputs, andbusses can be either mono or stereo asspecified in the <strong>Audio</strong> Instruments &Routings Window.However, routing a mono source to astereo destination, and vice versa, hasimportant ramifications for what happensto the <strong>audio</strong> signal. When relevant, thesepoints will be discussed in the remainingsections of this chapter.Figure 7.2: <strong>Audio</strong> signal flow in a console channel46 Opcode Systems, Inc.
CHAPTER 7: Acadia: <strong>Audio</strong> Channels in ConsolesASSIGNING PLUG-INSThe Acadia <strong>audio</strong> system supports VSTcompatibleplug-ins. These plug-ins offerreal-time processing of <strong>audio</strong> in <strong>Vision</strong>.<strong>Vision</strong> ships with a large number of usefulplug-ins developed by Opcode. Theseplug-ins are installed into a folder called“VSTPlugins,” which must reside in thesame folder as the <strong>Vision</strong> application.If you have other VST plug-ins you’d liketo use with <strong>Vision</strong>, just drag a copy ofthem (or an alias) into the VSTPluginsfolder.Up to four plug-ins can be used for each<strong>audio</strong> channel—the output of each plug-inconnecting to the next (in series).NOTE: Although you can assign up to fourplug-ins for each console channel, you probablyshouldn’t do this for every channel.This can take up a lot of CPU resources andlimit the number of tracks you can successfullyplay in <strong>Vision</strong>. For more details, see“Chapter 11: Acadia: Optimizing forDigital <strong>Audio</strong>.”Following is an example of how to assignplug-ins in the Console Window. Fordetails on using the Plug-In Edit Windowto edit, store, and recall plug-in programs,please see Chapter 8: Acadia: Plug-In EditWindow.To assign a plug-in to an <strong>audio</strong> consolechannel:TIP: For easy access to any of the sixteenConsole Windows, use theCommands Window to assign a keyequivalent to open them.From the Console Windowmenu, choose Build ConsoleFrom><strong>Audio</strong> Instruments.Each of your <strong>Audio</strong> Instruments is automaticallyassigned to a console channel.NOTE: You could manually assign individualchannels to only those <strong>Audio</strong>Instruments used in your sequence, butthis method provides a quick way tocreate a single console that controls allof your <strong>Audio</strong> Instruments.From the Console Window menu,press and hold the mouse on thePlug-Ins item.<strong>Vision</strong> produces a submenu of plug-inchoices.Choose Windows>Consoles>Console 1.The Console Window opens.<strong>Vision</strong> & Studio <strong>Vision</strong> <strong>Pro</strong> — <strong>Audio</strong> Reference Manual 47
PART 3: The Acadia <strong>Audio</strong> SystemFrom the submenu, highlight thedesired number of plug-ins andrelease the mouse.<strong>Vision</strong> adds a Plug-In area to each <strong>audio</strong>channel in the console.While still holding the mouse button,move the cursor over the desiredplug-in to highlight it.Plug-In areaRelease the mouse button.<strong>Vision</strong> assigns the selected plug-in to theconsole channelÕs <strong>Audio</strong> Instrument.Figure 7.3: Console Window, 2 plug-insdisplayedFor the desired console channel, clickon the Plug-In Selector pop-up.A list of installed plug-ins is displayed.The <strong>Audio</strong> Instrument in thischannel uses the ÒV-EchoÓplug-in.48 Opcode Systems, Inc.
CHAPTER 7: Acadia: <strong>Audio</strong> Channels in ConsolesRemoving Plug-InsTo remove a plug-in, simply set theplug-in selector pop-up to none.If automation data for a plug-in exists andthe plug-in is removed from a Console(the plug-in selector pop-up is set tonone), a warning dialog will appear.Rearranging Plug-Ins by VerticalDraggingIt is now possible to re-order plug-ins bydragging them vertically. To do so:Click and hold in the Plug-In Typearea of the plug-in you wish to move.Clicking Cancel will leave the plug-in inthe Console. Clicking OK will remove theplug-in and all automation data assignedto it.Drag to the plug-inÕs desired location.In this example weÕre moving the thirdplug-in so that it will be first.<strong>Vision</strong> & Studio <strong>Vision</strong> <strong>Pro</strong> — <strong>Audio</strong> Reference Manual 49
PART 3: The Acadia <strong>Audio</strong> SystemRelease the mouse.The plug-ins are rearranged.Anatomy of the Plug-In Area Plug-In Edit button Plug-In Type Bypass button Plug-In Selector pop-upFigure 7.4: Plug-In areaNOTE: It is not possible to drag plug-ins toincompatible locations. For example, youcannot drag a mono plug-in to occur after astereo plug-in or a mono in/stereo out plugin.For more information about mono andstereo plug-ins, see page 51.The Plug-In area, once enabled, consistsof the following items: Plug-In Edit button: Click thisbutton to open the Plug-In Edit Window,where you can edit, store, andrecall plug-in programs.When a plug-in is vertically dragged, itsautomation data remains intact. However,if you attempt to re-order plug-ins by reassigning(choosing a different plug-in), allautomation data for the selected plugin(s)will be lost.Figure 7.5: Plug-In Edit WindowThe Plug-In Edit button also displaysthe console channel’s plug-innumber (1-4).For a complete explanation of thecomponents in the Plug-In Edit Window,please see Chapter 8: Acadia:Plug-In Edit Window.50 Opcode Systems, Inc.
CHAPTER 7: Acadia: <strong>Audio</strong> Channels in ConsolesPlug-In Selector pop-up: Choose aplug-in from this pop-up menu toassign it to the console channel, orchoose “no plug-in” to remove thecurrent one.Only those plug-ins that will work forthe selected <strong>audio</strong> channel and slotare displayed in the Plug-In Selectorpop-up.Plug-In Type: Indicates whether theplug-in’s input and output are monoor stereo—which, in turn, determinesthe type of plug-in that can be used(see Mono and Stereo Plug-Ins(pg. 51)).mono in/mono outmono in/stereo outstereo in/stereo outWhen there is no plug-in assigned,the indicator is grayed out.Bypass button: Click this button tobypass the associated plug-in. Any ofthe four plug-ins for a console channelcan be independently “bypassed”by clicking its Bypass button.The Bypass button is duplicated inthe Plug-In Edit Window. Changing itin either location updates the other.Mono and Stereo Plug-InsThere are basically three types ofplug-ins:• mono in/mono outThese plug-ins can only be assignedto a mono <strong>Audio</strong> Instrument (ormono input, output, or bus), and theiroutput can only be connected toanother “mono in” plug-in.• mono in/stereo outThese plug-ins can only be assignedto a mono <strong>Audio</strong> Instrument (ormono input, output, or bus), and theiroutput is generally connected to a“stereo in” plug-in.<strong>Vision</strong> can, however, use this plug-intype as a mono in/mono out plug-inby only outputting its left channel.When viewing mono in/stereo outplug-ins in the Plug-In Selector popup,a duplicate of each plug-in(labeled as “mono”) is displayed inthe left column of the menu.• stereo in/stereo outThese plug-ins can only be assignedto a stereo <strong>Audio</strong> Instrument (orstereo input, output, or bus), andtheir output can only be connected toanother “stereo in” plug-in.Some VST plug-ins can be used in just onemode. Still others can be used in twomodes—mono in/stereo out or stereo in/stereo out.<strong>Vision</strong> & Studio <strong>Vision</strong> <strong>Pro</strong> — <strong>Audio</strong> Reference Manual 51
PART 3: The Acadia <strong>Audio</strong> SystemSome manufactures, on the other hand,provide two different versions of theirplug-ins for connecting to either mono orstereo. Usually, these plug-ins are namedaccordingly (for instance, “DeNoiserM”and “DeNoiserS”).Using Stereo Plug-InsWhen assigning plug-ins to a stereo <strong>Audio</strong>Instrument, only stereo plug-ins appear inthe Plug-In Selector pop-up.<strong>Vision</strong> represents plug-in routings graphicallyin the Console Window, as shown inFigure 7.6.<strong>Audio</strong> Instr: MONOPlug-In: NONE<strong>Audio</strong> Instr: MONOPlug-In: MONO<strong>Audio</strong> Instr: MONOPlug-In: MONO IN/STEREO OUT<strong>Audio</strong> Instr: STEREO or MONO(See NOTE 1)Plug-In: STEREO<strong>Audio</strong> Instr: STEREO orMONO (See NOTE 1)Plug-In: NONEFigure 7.7: Stereo plug-insUsing Mono Plug-InsWhen assigning plug-ins to a mono <strong>Audio</strong>Instrument, mono in/mono out andmono in/stereo out plug-ins are availablein separate columns from the Plug-InSelector pop-up.Figure 7.6: Graphic indication of stereo statusNOTE: A mono <strong>Audio</strong> Instrument canhave stereo plug-in inputs if the plug-inabove it contains a mono in/stereo outplug-in. For more information, see “UsingMono Plug-Ins (pg. 52).”Figure 7.8: Two types of “mono in” plug-ins52 Opcode Systems, Inc.
CHAPTER 7: Acadia: <strong>Audio</strong> Channels in ConsolesIf you select a mono in/mono outplug-in, it processes the mono input signaland outputs a mono signal.NOTE: <strong>Vision</strong> lets you use mono in/stereoout plug-ins as mono in/mono outplug-ins—thereby preserving a mono signal.These plug-ins are displayed in the leftside of the Plug-In Selector pop-up and arelabeled “mono,” see Figure 7.8.Keep in mind that these are not true “monoout” plug-ins and only the left channel isrouted.If you select a mono in/stereo outplug-in, it processes the mono input signaland outputs a stereo signal, which meansthat:• Since the plug-in’s output is stereo,any plug-in placed after it in the chaincan only be a stereo plug-in.• In order to hear the stereo signal, youmust send that signal to an outputpair.ASSIGNING EQThe Acadia <strong>audio</strong> system lets you assignup to 4 bands of EQ for each <strong>audio</strong> channel.The four bands (connected in series)can each be independently set to EQtypes of Low Cut, Low Shelf, Parametric,High Shelf, or High Cut.To enable display of the EQ area for your<strong>audio</strong> channels in the Console Window:Choose Windows>Consoles>Console 1.The Console Window opens.From the Console Window menu,choose Build ConsoleFrom><strong>Audio</strong> Instruments.Each of your <strong>Audio</strong> Instruments is automaticallyassigned to a console channel.A mono-in/stereo-out plug-in......can only be followedby a stereo plug-inNOTE: You could manually assign individualchannels to only those <strong>Audio</strong>Instruments used in your sequence, butthis method provides a quick way tocreate a single console that controls allof your <strong>Audio</strong> Instruments.<strong>Vision</strong> & Studio <strong>Vision</strong> <strong>Pro</strong> — <strong>Audio</strong> Reference Manual 53
PART 3: The Acadia <strong>Audio</strong> SystemFrom the Console Window menu,choose EQs>Gain Faders.Anatomy of the EQ Area EQ Edit button EQ toggle Phase toggle Gain faders EQ TypeFigure 7.10: EQ area in the Console Window<strong>Vision</strong> adds an EQ area with Gain fadersto each <strong>audio</strong> channel in the console.EQ areaThe EQ area, once enabled, includes thefollowing items: EQ Edit button: Click this button toopen the EQ Window, where you candisable and enable individual EQbands, specify the EQ type for eachband, and view the EQ curve.Figure 7.9: EQ area with Gain fadersTo enable a channelÕs EQ, click the Onbutton in the EQ area. Then move theÒminiÓ Gain faders to audition differentEQ settings.NOTE: You can also display the EQ areawithout the Gain faders by choosingEQs>Basic. To hide the EQ area in theConsole Window, choose EQs>Hidden.Figure 7.11: EQ WindowFor a complete explanation of thecomponents in the EQ Window,please see Chapter 9: Acadia: EQWindow.54 Opcode Systems, Inc.
CHAPTER 7: Acadia: <strong>Audio</strong> Channels in ConsolesEQ Toggle button: Turns on and offthe EQ for the <strong>audio</strong> channel.The EQ toggle is duplicated in theEQ Window, changing it in eitherlocation updates the other. The EQWindow also has independent togglesfor each EQ band.Phase Toggle button: When clicked,this button inverts the “phase” for the<strong>audio</strong> channel. For an explanation,please see Phase (pg. 55).Gain faders: These faders adjust theGain for each of the four EQ bands.Gain faders are only displayed if theEQ band is enabled and set to LowShelf, Parametric, or High Shelf. Gainfaders are not available if an EQ bandis set to either Low Cut or High Cut.The Gain faders are also displayed inthe EQ Window. Changing the Gainvalue in either location, updates theother.EQ Type: These graphics indicatethe type of EQ used for each band,which include...PHASEPressing the Phase button in the EQ areaof a console channel inverts the phase forthe assigned <strong>audio</strong> channel. This 180degree shift makes positive signals negative,and negative signals positive. Thephase switch is used to prevent signalcancellation that occurs when two signalsare out of phase with each other.In general, if your mix seems “weaker”when you play a particular <strong>audio</strong> channel,that <strong>audio</strong> is probably out of phase withthe rest of your mix—try inverting itsphase to “strengthen” it in the mix.IMPORTANT: Within the signal flow of an<strong>audio</strong> channel, Phase occurs before sends(both pre and post). Phase is not availablefor console channels assigned to hardwareoutputs.NOTE: You can permanently affect thephase of an <strong>audio</strong> file with the InvertPhase command in the DSP menu. Fordetails, see Chapter 31: DSP Menu in your<strong>Audio</strong> Reference manual.To invert the phase for an <strong>audio</strong> channel:A band’s EQ type can only bechanged from the EQ Window.Open a Console Window and assignthe desired <strong>audio</strong> channel to aconsole channel.<strong>Vision</strong> & Studio <strong>Vision</strong> <strong>Pro</strong> — <strong>Audio</strong> Reference Manual 55
PART 3: The Acadia <strong>Audio</strong> SystemFrom the Console Window menuchoose, EQs>Gain Faders.The EQ area is added to the <strong>audio</strong> channelsin the Console Window.EQ area (with Phase toggle)In the EQ area, for the desiredchannel, click the Phase button soitÕs highlighted.AUDIO SENDSEach console channel supports up to four<strong>Audio</strong> Sends. These work very much likean effects send on a regular mixing console.Destinations for sends can behardware outputs or any of 16 busses.Some possible uses for sends include:• Route <strong>Audio</strong> Instruments to a hardwareoutput for external processing;• Route groups of <strong>Audio</strong> Instruments toa bus for sub and master mixes;• Route groups of <strong>Audio</strong> Instruments toa bus for sharing plug-ins;• Route <strong>Audio</strong> Instruments to busses torecord a mix of the group.Displaying <strong>Audio</strong> SendsTo display <strong>Audio</strong> Sends for <strong>audio</strong> channelsin the Console Window:Figure 7.12: Phase inverted<strong>Vision</strong> inverts the phase for the <strong>audio</strong>channel.Audition the mix to see if the problemhas been fixed. If desired, click thePhase toggle again to return the channelto normal.From the Console WindowÕs menu,press and hold the mouse on the<strong>Audio</strong> Sends item.<strong>Vision</strong> produces a submenu of sendoptions.56 Opcode Systems, Inc.
CHAPTER 7: Acadia: <strong>Audio</strong> Channels in ConsolesFrom the submenu, select the numberof <strong>Audio</strong> Sends you want to displayper channel.Anatomy of the Send AreaFigure 7.13: Anatomy of the Send area<strong>Vision</strong> adds a Send area to each <strong>audio</strong>channel in the console.Two new, undeÞned<strong>Audio</strong> Sends perchannelThe Send area, once enabled, contains thefollowing items: Send Selector pop-up Pre/Post Fader button Send LevelNOTE: The Pre/Post Fader button andSend Level numerical are disabled andinvisible until you specify a send destinationusing the Send Selector pop-up. Thisprovides a visual way to quickly locateactive channel sends on a busy mixingconsole.The following sections discuss each of the<strong>Audio</strong> Send parameters in detail.<strong>Vision</strong> & Studio <strong>Vision</strong> <strong>Pro</strong> — <strong>Audio</strong> Reference Manual 57
PART 3: The Acadia <strong>Audio</strong> SystemSend SelectorUse the Send Selector to tell <strong>Vision</strong> whereto send the <strong>audio</strong> signal:Press and hold the mouse on theSend Selector.<strong>Vision</strong> opens a pop-up menu of routingoptions.You can choose between the following<strong>audio</strong> send destinations:• No sendThe <strong>audio</strong> signal is not sent to anexternal output or bus.• BusChoose “Bus” to open a submenu of16 busses.Sending <strong>audio</strong> to a bus is a great wayto create submixes (see page 76) orto share a single plug-in with numerous<strong>audio</strong> channels (see page 75).<strong>Audio</strong> channels sent to busses willnot be routed until the bus output isassigned to an actual hardwareoutput.Busses can be mono or stereo asspecified in the <strong>Audio</strong> Instruments &Routings Window. For more information,see Mono & Stereo Busses(pg. 59).• OutputChoose “Output” to open a submenuof monophonic outputs for your digital<strong>audio</strong> hardware.The available outputs is determinedby your <strong>audio</strong> hardware, and whetherthey are enabled in the <strong>Audio</strong> Instruments& Routings Window.Sending <strong>audio</strong> to a mono outputallows you to use external signal processingto modify the <strong>audio</strong> signal.• Output PairChoose “Output Pair” to open a submenuof stereo output pairs for yourdigital <strong>audio</strong> hardware.The available output pairs is determinedby your <strong>audio</strong> hardware, andwhether they are enabled in the<strong>Audio</strong> Instruments & RoutingsWindow.Sending <strong>audio</strong> to a stereo outputallows you to use external stereosignal processors to modify the <strong>audio</strong>signal.58 Opcode Systems, Inc.
CHAPTER 7: Acadia: <strong>Audio</strong> Channels in ConsolesPre/Post Fader ButtonClick this button to toggle the <strong>Audio</strong> Sendbetween two states: pre fader and postfader.The button always displays the <strong>Audio</strong>Send’s current state—clicking it changesboth the state and the label of the button.Specifically:• Pre FaderWhen the button looks like this,<strong>Vision</strong> sends the <strong>audio</strong> signal to theselected destination before it passesthrough the channel’s plug-in modules,EQ settings, and volume fader.The send signal is, however, affectedby the velocity of <strong>audio</strong> events, and bythe status of the channel’s Phasemode.• Post FaderWhen the button looks like this,<strong>Vision</strong> sends the <strong>audio</strong> signal to theselected destination after it passesthrough the channel’s plug-in modules,EQ settings, and volume fader.IMPORTANT: Regardless of whether pre orpost is used, the channel’s pan fader (ifactive) has no effect on the <strong>Audio</strong> Send.For an illustration of the signal flow forpre and post sends, see Figure 7.2 onpage 46.Send LevelUse this numerical to set the level of the<strong>audio</strong> signal sent to the destination specifiedin the Send Selector.Values range between 0 and 127, where:• 0 = no <strong>audio</strong> signal is sent to the senddestination.• 127 = 100% of the <strong>audio</strong> signal level issent to the send destination.To adjust the Send Level, click in the fieldand type in a new value, or click and dragwith the mouse.Mono & Stereo BussesBusses can be mono or stereo as specifiedin the <strong>Audio</strong> Instruments & RoutingsWindow. This means that if you have astereo <strong>Audio</strong> Instrument and want it sentto a bus, you should make sure that thedestination is a stereo bus.You can, however, mix and match stereoand mono signals when routing to busses.In doing so, the following rules apply:• When sending a stereo console channelto a mono bus, the signal issummed.• When sending a mono console channelto a stereo bus, the signal is sentto both the left and right channels ofthe bus.<strong>Vision</strong> & Studio <strong>Vision</strong> <strong>Pro</strong> — <strong>Audio</strong> Reference Manual 59
PART 3: The Acadia <strong>Audio</strong> SystemIn addition, the following rules apply forbusses when used as record sources:• When recording from a stereo bus,without Link Pairs enabled, to a mono<strong>Audio</strong> Instrument, only the left signalis recorded.• When recording from a mono bus,with Link Pairs enabled, to a stereo<strong>Audio</strong> Instrument, the mono signal isrecorded to the left channel with theright channel being silent.CLIPPING LEDSWhen using the Acadia <strong>audio</strong> system,console channels assigned to <strong>Audio</strong>Instruments, hardware inputs, and bussesnever clip. This is because Acadia usesfloating point in its computations, andwith floating point there is practically nolimit to the dynamic range for these <strong>audio</strong>signals. Boost them as much as youwant—either with plug-ins, EQ, or withthe Maximum Fader Position setting—and the console channel won’t clip withthe red Clipping LED.However, the assigned hardware outputsfor your <strong>audio</strong> channels can clip if theirlevel reaches 0 dB. It is the<strong>ref</strong>ore veryimportant to always assign your hardwareoutputs to console channels so you canmonitor their Clipping LEDs. If one ofthese red LEDs does light, simply turndown the volume fader for that output’sconsole channel.CONSOLE OUTPUTS<strong>Audio</strong> console channels have an OutputSelector pop-up specifying the channel’soutput assignment.This pop-up is duplicated in the Outputcolumn of the <strong>Audio</strong> Instruments & RoutingsWindow. Changing an <strong>audio</strong>channel’s output assignment in eitherwindow updates it in the other.For information on using the Outputcolumn in the <strong>Audio</strong> Instruments & RoutingsWindow, see Output Assignments(pg. 42).To assign an output to an <strong>audio</strong> channel inthe Console Window:For the desired <strong>audio</strong> channel, pressand hold the mouse on the OutputSelector pop-up.<strong>Vision</strong> produces a submenu of Outputrouting options.... to produce a submenuof outputrouting options.Press and hold mouse onOutput selector...60 Opcode Systems, Inc.
CHAPTER 7: Acadia: <strong>Audio</strong> Channels in ConsolesFrom the submenu, select an outputassignment for the <strong>audio</strong> channel.For information about the various outputoptions, see Output Assignments(pg. 61).NOTE: <strong>Audio</strong> outputs are only provided for<strong>audio</strong> console channels—not those assignedto MIDI Instruments.Output AssignmentsThe items in the Output pop-up include:• No output: Select this option to disablethe output assignment for thechannel.• Bus: Select one of sixteen internalbusses. By outputting numerouschannels to the same bus, you cancreate a submix (or “group”)—controllingall grouped channels with onefader and a shared collection of sendsand plug-ins.<strong>Audio</strong> channels assigned to busseswill not be heard until the bus outputis assigned to an actual hardwareoutput.• Output: Select a single, mono outputfrom this submenu. The number ofoutputs is determined by your <strong>audio</strong>hardware.• Output Pair: Select a pair of <strong>audio</strong>outputs from this submenu. If your<strong>audio</strong> signal is mono, use the panfader to position the signal within thestereo field. See Outputs and Panning(pg. 62).If you have entered custom names for anyof your outputs or busses (from the <strong>Audio</strong>Instruments & Routings Window), theyare <strong>ref</strong>lected in the Output pop-up.The Output and Output Pair routingsare hardware-based. They let you route<strong>audio</strong> signals to devices that are externalto your computer (such as signal processors,mixers, or power amps).The Bus routings are software-based outputs.They let you route <strong>audio</strong> signals toother software-based components withinyour computer (such as plug-ins andother console channels).To preserve the stereo signal for stereo<strong>audio</strong> channels, you must assign their outputsto a stereo bus or stereo hardwareoutput.As when routing signals to busses viasends, the following rules apply:• When outputting a stereo consolechannel to a mono bus or output, thesignal is summed.• When outputting a mono consolechannel to a stereo bus or output, thesignal is sent to both the left and rightchannels.<strong>Vision</strong> & Studio <strong>Vision</strong> <strong>Pro</strong> — <strong>Audio</strong> Reference Manual 61
PART 3: The Acadia <strong>Audio</strong> SystemOutputs and PanningWhen Master Instrument is checked inthe Console Window’s menu, the verticaland horizontal faders are hard-wired tovolume and pan, and always assigned tothe same Instrument. However, withregards to <strong>audio</strong> console channels, thepan (horizontal) fader is only displayed if:• A mono <strong>audio</strong> channel’s output isassigned to an output pair or stereobus.Use the pan fader to position the monosignal in the stereo field.NOTE: The pan fader is not available if thesource for the <strong>audio</strong> console channel is stereo,or if a mono signal is assigned to amono output.Console channels with stereo inputsources (<strong>Audio</strong> Instruments, inputs, outputs,or busses), are not affected by pandata (controller #10).CLEARING CONSOLESTo return a console to its default statewith Instrument Selectors set to “none,”choose Clear Console from the ConsoleWindow menu.Figure 7.14: Clear Console dialogThis dialog also gives you a checkboxoption for clearing plug-ins, sends, andEQs that were assigned in that ConsoleWindow. If this option is checked, all automationdata for any assigned plug-ins willbe cleared as well.When you uncheck Master Instrument,pan faders are always visible since, in thismode, pan faders can control any Instrumentand any type of controller data (notjust controller #10).62 Opcode Systems, Inc.
CHAPTER 8:Acadia: Plug-In Edit WindowPLUG-IN EDIT WINDOWThis chapter discusses the componentsfound in the Plug-In Edit Window, whichis used to display and edit plug-in parameters,and store and recall plug-inprograms. For details on assigning VSTplug-ins from the Console Window, pleasesee Assigning Plug-Ins (pg. 47).To open an Edit Window for a VST plug-infrom the Console Window:Click the Plug-In Edit buttonthat contains the desired pluginnumber.<strong>Vision</strong> opens an Edit Window for theselected plug-in.Figure 8.1: Typical Plug-In Edit WindowYou can have multiple Plug-In Edit Windowsopen at the same time. If an existingPlug-In Edit Window is open, Option-clicka plug-in number from the ConsoleWindow to display that plug-in in the currentPlug-In Edit Window—this helps youcut down on the proliferation of openwindows.<strong>Vision</strong> & Studio <strong>Vision</strong> <strong>Pro</strong> — <strong>Audio</strong> Reference Manual 63
PART 3: The Acadia <strong>Audio</strong> SystemThe title bar of each Plug-In Edit Windowis based on the name of the plug-in andthe <strong>audio</strong> channel it affects. For instance,the name of the window in Figure 8.1 is“opFLANGE for <strong>Audio</strong>-1,” which meansthat window is displaying the plug-inopFLANGE for <strong>Audio</strong> Instrument<strong>Audio</strong>-1.In addition to the plug-in’s display ofparameters, <strong>Vision</strong> adds some additionalcontrols at the top (as shown inFigure 8.3) or bottom of the window.You can leave Plug-In Edit Windows openwhile <strong>Vision</strong> plays, auditioning differentplug-in presets and tweaking plug-inparameters as necessary. You can evenswitch the plug-in type during playback.Some VST plug-ins, commonly <strong>ref</strong>erred toas “faceless” plug-ins, display and edittheir parameters with basic sliders (seeFigure 8.1), while others have more elaborategraphic controls for theirparameters (see Figure 8.2).Figure 8.2: Opcode’s Vinyl plug-inFigure 8.3: Plug-In Edit WindowSpecifically: Plug-In Selector: Choose a plug-infrom this pop-up menu to assign it tothe console channel, or choose “noplug-in” to remove the current one.This pop-up menu, which is duplicatedin the Console Window,displays your installed VST plug-ins.Only those plug-ins that will work forthe selected <strong>audio</strong> channel and slotare displayed in the Plug-In Selectorpop-up. For instance, if using a stereo<strong>Audio</strong> Instrument, only stereo pluginsare available (see page 51 fordetails). Template: These two pop-ups let youstore and recall programs and programbanks. See Saving and RecallingPlug-In <strong>Pro</strong>grams and Banks (pg. 65)for more information.64 Opcode Systems, Inc.
CHAPTER 8: Acadia: Plug-In Edit Window<strong>Pro</strong>gram: This pop-up menu choosesfrom the current bank of programsfor the plug-in. See Saving and RecallingPlug-In <strong>Pro</strong>grams and Banks(pg. 65) for more information.Channel: Specifies the <strong>audio</strong> channel(<strong>Audio</strong> Instrument, hardware input oroutput, or bus) being processed bythe plug-in.Slot: Displays the plug-in number(1-4) and stereo mode for the plug-in.Mute: Mutes the <strong>Audio</strong> Instrumentthat the plug-in is assigned to.Solo: Solos the <strong>Audio</strong> Instrument thatthe plug-in is assigned to.Flip button: Click this button to flipthe display of the Plug-In EditWindow—placing the plug-in controlseither on the top or the bottom of thewindow.Some third-party VST plug-ins maynot display properly in one position orthe other. In these cases, use the flipbutton.Bypass button: Click this button tobypass the plug-in. Other plug-inswithin that console channel are notaffected—each has its own Bypassbutton.The Bypass button is duplicated inthe Plug-In area of the Console Window.Clicking it in either locationupdates it in the other.Plug-In parameters: This area displaysthe parameters for the assignedplug-in. For a description of eachparameter, see the manufacturer’sdocumentation.To get a finer range of values for“faceless” plug-in parameters, holddown the Option key while adjustingits sliders.SAVING AND RECALLINGPLUG-IN PROGRAMS ANDBANKSIn <strong>Vision</strong>, any changes made to plug-inparameters can be saved and recalled asprogram templates.Figure 8.4: Plug-In controls at bottom ofwindow<strong>Vision</strong>’s plug-in controls are displayedat the top of the Plug-In Edit Windowby default. To display them at the bottom,simply click the flip button.Groups of programs can be saved andrecalled as bank templates. The actualnumber of programs contained within abank varies from plug-in to plug-in.<strong>Pro</strong>gram and bank templates are stored inthe <strong>Vision</strong> Effects Templates file, whichmust reside in the same folder as the<strong>Vision</strong> application.<strong>Vision</strong> & Studio <strong>Vision</strong> <strong>Pro</strong> — <strong>Audio</strong> Reference Manual 65
PART 3: The Acadia <strong>Audio</strong> SystemTemplate Pop-up<strong>Pro</strong>gram Pop-upFigure 8.5: Template pop-upBoth programs (at top of menu) andbanks (at bottom of menu) are recalledfrom the Template pop-up menu.• Recalling a bank template replaces allof the programs in the <strong>Pro</strong>gram popup.• Recalling a program templatereplaces the currently selected programlocation (for the current bank).When a bank template is chosen, its nameis displayed in this pop-up.Figure 8.6: <strong>Pro</strong>gram pop-upClick on <strong>Pro</strong>gram pop-upto select from a list ofprograms in the currentbank.Individual programs, within the currentbank, are selected from the <strong>Pro</strong>grampop-up. Doing so recalls the storedplug-in parameters for that program.Click in <strong>Pro</strong>gram fieldto rename the current program.Figure 8.7: <strong>Pro</strong>gram fieldTo rename the currently selected program,simply click in the <strong>Pro</strong>gram fieldand type in the new name. The newlynamed program can then be saved as anindividual program template, or as part ofthe current bank template. See the followingsection, Template Functions Pop-up(pg. 67), for details.66 Opcode Systems, Inc.
CHAPTER 8: Acadia: Plug-In Edit WindowTemplate Functions Pop-upThe Template Functions pop-up containscommands for saving, importing, exporting,copying and pasting templates forprograms and banks.Figure 8.8: Template Functions pop-upFollowing is a description of each of thecommands in the Template Functionspop-up:• Save <strong>Pro</strong>gram: Saves the currentparameter settings as a program template,using the current programname.If the program already exists as atemplate, this command overwrites itwith the current (displayed) set ofplug-in parameters.• Save <strong>Pro</strong>gram As: Saves the currentparameter settings to a new programtemplate.With this command you areprompted to name the new programtemplate.• Delete <strong>Pro</strong>gram Template: Deletesthe currently selected programtemplate.• Copy <strong>Pro</strong>gram: Copies the currentset of plug-in parameters to the Clipboard,which is handy for pastingprograms between banks, or toanother program location within thesame bank—or to another plug-in slotor console channel using the sameplug-in.• Paste <strong>Pro</strong>gram: Pastes the programfrom the Clipboard to the current programlocation for the current bank.• Import <strong>Pro</strong>gram: Imports individualplug-in programs saved in otherVST-compatible applications.• Save Bank: Saves the current bankof programs as a bank template.If the bank already exists as a template,this command overwrites itwith the current set of programs.• Save Bank As: Saves the currentbank of programs as a new banktemplate.With this command you areprompted to name the new banktemplate.• Delete Bank Template: Deletes thecurrent program bank template.• Copy Bank: Copies the current bankof programs to the Clipboard for pastingto another Plug-In Edit Window.• Paste Bank: Pastes the bank of programsfrom the Clipboard into thecurrent Plug-In Edit Window.<strong>Vision</strong> & Studio <strong>Vision</strong> <strong>Pro</strong> — <strong>Audio</strong> Reference Manual 67
PART 3: The Acadia <strong>Audio</strong> System• Import Bank: Imports programbanks saved in other VST-compatibleapplications.This command does not automaticallysave the imported bank as a<strong>Vision</strong> bank template. To do so,choose “Save Bank.”• Save Bank as Default: Saves thecurrent bank of programs as defaultfor the plug-in.Each time the plug-in is laterassigned to an <strong>audio</strong> channel, thisbank of programs is automaticallymade current.• Load Templates From: Loads allprogram and bank templates for thisplug-in from a <strong>Vision</strong> Effects Templatesfile that is not current. The loadedtemplates are merged with the currentset.68 Opcode Systems, Inc.
CHAPTER 9:Acadia: EQ WindowEDITING EQ SETTINGSThis chapter discusses the componentsfound in the EQ Window, where you candisable and enable individual EQ bands,specify the EQ type for each band, andview the EQ curve.For details on displaying EQs for <strong>audio</strong>channels in the Console Window, pleasesee Assigning EQ (pg. 53).To open an <strong>audio</strong> channel’s EQ Windowfrom the Console Window:Click the small EQ Edit buttonfor the desired console channel.<strong>Vision</strong> opens an EQ Window for the consolechannel.Figure 9.1: EQ Window<strong>Vision</strong> & Studio <strong>Vision</strong> <strong>Pro</strong> — <strong>Audio</strong> Reference Manual 69
PART 3: The Acadia <strong>Audio</strong> SystemYou can have multiple EQ Windows openat the same time. Option-click anotherEQ Edit button from the Console Windowto display that channel’s EQ settings inthe current EQ Window—this helps youcut down on the proliferation of openwindows.The title bar of each EQ Window displaysthe name of the assigned <strong>audio</strong> channel.For instance, the name of the window inFigure 9.2 is “EQ for <strong>Audio</strong>-1.”You can leave EQ Windows open while<strong>Vision</strong> plays, auditioning different EQtemplates and tweaking EQ parameters asdesired.Figure 9.2: EQ Window Following is a description of the componentsin the EQ Window: EQ toggle (main): Click on thisbutton to turn the EQ on and off forthe displayed <strong>audio</strong> channel. Thistoggle button is duplicated in the EQarea of the Console Window.In addition to the main EQ toggle,each of the four EQ bands have theirown toggle. In order for an individualEQ band to be heard, both its toggleand the main toggle must be on. Template Functions pop-up: Usethis pop-up menu to save, copy, andpaste EQ settings (see page 73 fordetails). Template pop-up: Use this pop-upmenu to select from your list of savedEQ templates (see page 72 fordetails). Channel: Specifies the <strong>audio</strong> channel(<strong>Audio</strong> Instrument, hardware input oroutput, or bus) being processed bythe EQ. Mute: Mutes the <strong>Audio</strong> Instrumentthat the EQ is assigned to. Solo: Solos the <strong>Audio</strong> Instrument thatthe EQ is assigned to. EQ Panel (1-4): Determines the EQtype and parameter settings for eachEQ band, and whether the band is onor off. For a complete explanation,see EQ Panel (pg. 71). EQ Curve: Displays the frequencyresponse for all four bands of EQ forthe assigned <strong>audio</strong> channel.Frequency is plotted on the x (horizontal)axis and amplitude on the y(vertical) axis.70 Opcode Systems, Inc.
CHAPTER 9: Acadia: EQ WindowEQ PANELEQ ToggleEQ ParametersEQ Type pop-upFigure 9.3: EQ Panel, toggled On with ParametricThe EQ Window has four panels displayingthe settings for each EQ band. Any ofthe four EQ bands can be turned on or offindependently of the others with their EQtoggle.IMPORTANT: Make sure to turn off anyunused EQ bands. This preserves valuableCPU resources, which means you’ll be ableto get more simultaneous <strong>audio</strong> tracks anduse more plug-ins and sends.NOTE: Turning off an EQ band in the EQWindow removes that band’s Gain faderfrom the EQ Area of the Console Windowfor that <strong>audio</strong> channel.The EQ Type pop-up determines the typeof EQ used for the band, which, in turn,determines the available EQ parameters.Following is a description of each EQtype, along with its accompanyingparameters:• Low Cut uses a high pass filter,which eliminates frequencies belowthe specified cutoff frequency.This EQ type has just one fader(labeled Frequency) controlling thecutoff frequency, below which frequenciesare removed.When using Low Cut, there is noaccompanying Gain fader displayedin the EQ area of the ConsoleWindow.• Low Shelf boosts or reduces all frequenciesbelow the specified cutofffrequency.The Frequency fader for this EQ typedetermines the cutoff frequency,below which all frequencies are attenuatedwith the Gain fader.When using Low Shelf, the Gain faderis also displayed in the EQ area of theConsole Window.• Parametric (sometimes <strong>ref</strong>erred toas “Peak”) boosts or reduces a certainrange of frequencies.The Frequency fader specifies thecenter frequency and the Width faderdetermines the range of surroundingfrequencies (bandwidth) affected—both of which are attenuated by theGain fader.When using Parametric, the Gainfader is also displayed in the EQ areaof the Console Window.<strong>Vision</strong> & Studio <strong>Vision</strong> <strong>Pro</strong> — <strong>Audio</strong> Reference Manual 71
PART 3: The Acadia <strong>Audio</strong> System• High Shelf boosts or reduces all frequenciesabove the specified cutofffrequency.The Frequency fader for this EQ typedetermines the cutoff frequency,above which all frequencies are attenuatedwith the Gain fader.• High Cut uses a low pass filter,which eliminates frequencies abovethe specified cutoff frequency.IMPORTANT: An <strong>audio</strong> channel’s Phasestatus (on or off) is not saved as part of anEQ template.EQ templates (along with plug-in programsand banks) are stored in the<strong>Vision</strong> Effects Templates file, which mustreside in the same folder as the <strong>Vision</strong>application.Template Pop-upThis EQ type has just one fader(labeled Frequency) controlling thecutoff frequency, above which frequenciesare removed.When using High Cut, there is noaccompanying Gain fader displayedin the EQ area of the ConsoleWindow.SAVING AND RECALLING EQSETTINGSIn <strong>Vision</strong>, any configuration of EQ settingscan be saved and recalled as atemplate. This lets you save your favoriteEQ settings for a wide range of applications(male vocals, 6-string guitar, kickdrum, etc.). EQ settings can also becopied and pasted between <strong>audio</strong>channels.Figure 9.4: EQ Template pop-upClick on Template pop-upto select from a list ofEQ templates.EQ templates are recalled from the Templatepop-up in the EQ Window, seeFigure 9.4.Simply click on the pop-up and choosefrom the list of EQ templates stored in the<strong>Vision</strong> Effects Templates file. Choosing atemplate automatically reconfigures theEQ Window for the displayed <strong>audio</strong>channel.72 Opcode Systems, Inc.
CHAPTER 9: Acadia: EQ WindowTemplate Functions Pop-upThe Template Functions pop-up containscommands for saving, copying, and pastingEQ settings.Figure 9.5: Template Functions pop-up for EQFollowing is a description of the commandsfound in the EQ TemplateFunctions pop-up:• Save Settings: Saves the current EQsettings as a template.If the template already exists, thiscommand overwrites it with the currentlydisplayed EQ settings.• Save Settings As: Saves the currentEQ settings to a new template.With this command you areprompted to enter a name for the newEQ template.• Delete Template: Deletes the currentlyselected EQ template.• Load From: Loads a set of EQ templatesfrom a <strong>Vision</strong> Effects Templatesfile that is not current. The loadedtemplates are merged with the currentset.• Copy Settings: Copies the currentEQ settings to the Clipboard, which ishandy for pasting EQ settings toanother <strong>audio</strong> channel.• Paste Settings: Pastes the EQ settingsfrom the Clipboard to thecurrent EQ Window for the displayed<strong>audio</strong> channel.• Save as Default: Saves as default thecurrent EQ settings. Then, each timea new file is created in <strong>Vision</strong>, <strong>audio</strong>channels will use those settings bydefault.<strong>Vision</strong> & Studio <strong>Vision</strong> <strong>Pro</strong> — <strong>Audio</strong> Reference Manual 73
PART 3: The Acadia <strong>Audio</strong> System74 Opcode Systems, Inc.
CHAPTER 10: Acadia: Bussing, Routing, &Bouncing to DiskUSING BUSSES AND SENDSThe following sections illustrate someuses for busses and sends with the Acadia<strong>audio</strong> system.Routing to Shared Plug-Ins(Creating Effects Sends)This example illustrates how to configurea Console Window with two sends routedto two shared VST plug-ins (seeFigure 10.1).Figure 10.1: <strong>Audio</strong> Instruments routed to sharedplug-insThis particular scenario conserves CPUresources by allowing <strong>audio</strong> channels toshare plug-ins. While this example usesjust two sends, you could use up to fourper channel.In the <strong>Audio</strong> Instruments &Routings Window, set two ofyour busses to stereo and namethem as ÒEffect 1Ó and ÒEffect2.ÓOpen a Console Window andassign the desired <strong>Audio</strong>Instruments to consolechannels.You can automatically assign the <strong>Audio</strong>Instruments in use by your sequences bychoosing Build Console From><strong>Audio</strong> Instruments in Use in theConsole Window menu.Assign the busses Effect 1 andEffect 2 to their own consolechannel.Make sure these console channels areassigned to an output pair so you canhear them in stereo.From the Console Windowmenu, choose <strong>Audio</strong>Sends>2 Sends.<strong>Vision</strong> adds two Send areas for each<strong>audio</strong> channel in the console.For the <strong>Audio</strong> Instrumentchannels, assign <strong>Audio</strong> Send 1to the Effect 1 bus, and assign<strong>Audio</strong> Send 2 to the Effect 2bus.<strong>Vision</strong> & Studio <strong>Vision</strong> <strong>Pro</strong> — <strong>Audio</strong> Reference Manual 75
PART 3: The Acadia <strong>Audio</strong> SystemFrom the Console Windowmenu, choose Plug-Ins>1 Plug-In.<strong>Vision</strong> adds one Plug-In area for each<strong>audio</strong> channel in the console.Assign a plug-in to the consolechannels assigned to Effect 1and Effect 2.Each bus assignedto a separate, singleplug-inCreating a SubmixYou can use busses and sends to createsubmixes or “groups” within <strong>Vision</strong>. Forexample, assume you’ve recorded threebackup singers—each on a different<strong>Audio</strong> Instrument (Macella, Maida, andMarion).In one of <strong>Vision</strong>Õs consoles,assign three console channelsto the three backup singers.Use the volume faders in these threechannels to mix the singers so that theirvoices blend together nicely.Relative volumes setAdjust the Send levels for each<strong>Audio</strong> Instrument.If you want a channelÕs signal to be sentto the busses without being processedby its EQ, or its own plug-ins, set thePre/Post button Pre.Figure 10.2: Setting an <strong>Audio</strong> Send to PreSince weÕll be using a stereo bus, youcan also use the pan faders for eachchannel to adjust the stereo field of themix.Once you are satisfied with the balance ofthe three voices, you’ll want that “mix” towork as a single unit within the context ofthe entire song. To do so:76 Opcode Systems, Inc.
CHAPTER 10: Acadia: Bussing, Routing, & Bouncing to DiskAssign a bus to an undefinedconsole channel.In order to preserve the pan informationfor the individual <strong>audio</strong> tracks, make surethe bus youÕre using is set to ÒstereoÓ inthe <strong>Audio</strong> Instruments & RoutingsWindow.Assign the outputs of all threesingersÕ channels to the newlycreated bus.From the Console Windowmenu, enable display of someplug-ins, and the EQ Gainfaders.Assign any desired plug-ins tothe bus channel; enable thechannelÕs EQ and adjust the EQgain faders as needed.Plug-in assignmentEQ enabledOutputs assigned to a busAssign the output of the bus toyour main L-R outputs.Notice that by processing all three singersas a single group, youÕre savingvaluable CPU resources by affecting allthree singers with a single set ofplug-ins.Use the bus channelÕs volumefader to mix the volume of theprocessed backup singers intothe final mix.Bus output assignment<strong>Vision</strong> & Studio <strong>Vision</strong> <strong>Pro</strong> — <strong>Audio</strong> Reference Manual 77
PART 3: The Acadia <strong>Audio</strong> SystemSIGNAL ROUTING ANDMONITORINGAs discussed in Monitoring the Input(pg. 28), <strong>Vision</strong> lets you monitor hardwareinputs from the Record MonitorWindow.As illustrated in Figure 10.3, notice that:• In the Record Monitor Window,Input 1 is assigned to <strong>Audio</strong>-5.• In the <strong>Audio</strong> Instruments & RoutingsWindow, <strong>Audio</strong>-5 is assigned toOutput pair 5-6.The<strong>ref</strong>ore, when Input 1 is recordenabledand the Thru mode is set toeither On or Auto, then:• The signal present at Input 1 is heardthrough Output 5-6.If you want to change the outputsused to monitor the signal, simplyassign different outputs to <strong>Audio</strong>-5 (orchoose a different <strong>Audio</strong> Instrument).• The monitored signal is affected bythe console’s volume and pan faders,as well as by any <strong>Audio</strong> Sends, plugins,or EQs that might be in use.The recorded signal, however, is notaffected by the console’s volume, pan,sends, plug-ins, or EQs—it’s recordedto your hard disk exactly as received.Virtual ConsolesSince <strong>Vision</strong> can route hardware inputsthrough its consoles, you can monitorinputs without record-enabling them. Forexample, for the scenario illustrated inFigure 10.3, assume you change your consoleto look as follows:Figure 10.3: Typical <strong>audio</strong> recording setupFigure 10.4: Sample console78 Opcode Systems, Inc.
CHAPTER 10: Acadia: Bussing, Routing, & Bouncing to DiskBased on what you learned earlier, youknow that when Input 1 is record-enabledand the Thru mode is set to either On orAuto, then:• The monitored signal from Input 1 issent to Output 5-6.• The monitored signal from Input 1 isalso sent to Bus 1 where reverb isadded. Bus 1’s volume fader controlsthe amount of reverb that’s mixedwith the signal.Here’s where things get interesting.Notice that console channel 3 sends thesignal present at Input 1 to Output 8. Thismeans that the signal present at Input 1always appears at Output 8, even when...• ...Input 1 is not record-enabled.• ...the Thru selector pop-up menu isset to Off.• ...you change the <strong>Audio</strong> Instrumentassigned to Input 1 in the RecordMonitor Window.• ...<strong>Vision</strong> is playing, recording, orsimply idle.Also, if you use any <strong>Audio</strong> Sends or plugins,they too operate on the input signal.This gives you a way to create a “virtualmixing board” within <strong>Vision</strong>.As discussed in Output Assignments(pg. 42), you can assign outputs to <strong>audio</strong>channels from either the <strong>Audio</strong> Instruments& Routings Window or a ConsoleWindow.NOTE: Some ASIO drivers may exhibit anoticeable latency in thruing <strong>audio</strong>. Inthese cases, if at all possible, disable Thruand monitor record sources externally.RECORDING FROM AUDIOINSTRUMENTS, BUSSES, ANDOUTPUTSYou can choose practically any place inthe <strong>audio</strong> signal path as a recordingsource. This allows you to record digitallyand “bounce to disk” without having topatch a single cable. With the Acadia<strong>audio</strong> system, <strong>Vision</strong> allows recordingfrom hardware inputs and outputs, <strong>Audio</strong>Instruments, and busses. For instance,you can:• Record a master mix of all your trackswith effects and EQ. To do this, routeall channels to a single stereo bus andrecord from it.• Bounce groups of tracks, with orwithout effects, to a bus for recordinga submix.• “Print the effects” from a track.Record from the output of an <strong>Audio</strong>Instrument to record its <strong>audio</strong> eventsalong with any assigned plug-ins andEQ.Before reading this section you should befamiliar with all recording techniques asdiscussed in Chapter 5: Acadia: Recording<strong>Audio</strong>, and all the bussing conceptsdescribed previously in this chapter.In general to record from any place in thesignal path:Configure your console withplug-ins, sends, EQs, andbusses.In the Record Monitor Window,specify the record source from<strong>Vision</strong> & Studio <strong>Vision</strong> <strong>Pro</strong> — <strong>Audio</strong> Reference Manual 79
PART 3: The Acadia <strong>Audio</strong> Systemthe Record Source pop-upmenu.To record from a mono <strong>Audio</strong> Instrument:Make sure Linked Pairs isunchecked in the RecordMonitor.Set up the <strong>Audio</strong> Instrumentdestination and then record.For general recording information, consultRecording: Step-By-Step (pg. 26).What follows are specific instructions foreach type of record source for recording.Linked Pairs checkboxSelect the desired (mono) <strong>Audio</strong>Instrument from the RecordSource pop-up.Recording from InputsRecording from hardware inputs is themost common way you will record in<strong>Vision</strong>. The signal coming into one or apair of the inputs from your <strong>audio</strong> interfaceis recorded to a hard disk track andassigned to an <strong>Audio</strong> Instrument. Whenrecording from an input, no effects orvolume fader information is recorded. Adescription of recording from inputs isfound in Recording: Step-By-Step (pg. 26).Recording from <strong>Audio</strong>InstrumentsYou may want to record your effects andvolume information directly to a new<strong>Audio</strong> Instrument in real time. This isdone by recording from an <strong>Audio</strong> Instrumentassigned to existing <strong>audio</strong> tracks.Make sure that you arerecording to an unused (mono)<strong>Audio</strong> Instrument.Record as you would any <strong>audio</strong>track.When recording from a mono <strong>Audio</strong>Instrument, and a series of mono-tomonoplug-ins, the signal goes to thevolume fader, then is recorded in mono.80 Opcode Systems, Inc.
CHAPTER 10: Acadia: Bussing, Routing, & Bouncing to DiskTo record from a stereo <strong>Audio</strong> Instrument,or if you have a mono <strong>Audio</strong>Instrument using mono-to-stereo plug-ins:Check Linked Pairs in theRecord Monitor.Recording from BussesYou may want to record a master mix, orsubmix, from the output of a bus that hasseveral plug-ins on it. In this case youwould select a bus as your record sourcein the Record Monitor. Recording frombusses is similar to recording from <strong>Audio</strong>Instruments as previously described. Youcannot record from a bus if its output isnot assigned to a hardware output.Select the desired (stereo)<strong>Audio</strong> Instrument from theRecord Source pop-up.To record a submix:In a Console Window, assign theoutput of each <strong>audio</strong> channel inyour mix to a stereo bus.This can even include hardware inputsand even other busses.Make sure that you arerecording to an unused (stereo)<strong>Audio</strong> Instrument.Record as you would any <strong>audio</strong>track.When you record from <strong>Audio</strong> Instrumentsand busses, your volume fadermovements affect the volume of therecording (the actual amplitude of therecorded signal). Any plug-ins EQs thatare assigned to those Instruments arealso recorded. <strong>Vision</strong> records the signalfrom <strong>Audio</strong> Instruments and busses postvolume fader but pre pan fader (unlikehardware inputs). Any real-time changesyou make to plug-ins are also recorded. Inall cases, you cannot record from an<strong>Audio</strong> Instrument if its output is notassigned to a hardware output.Then assign the output of that bus to ahardware output pair. This channel willact as your ÒsubmasterÓ fader.Assign any desired plug-ins andEQs to your console channels(including the submix bus),Check Linked Pairs in theRecord Monitor Window.<strong>Vision</strong> & Studio <strong>Vision</strong> <strong>Pro</strong> — <strong>Audio</strong> Reference Manual 81
PART 3: The Acadia <strong>Audio</strong> SystemFrom the Record Source pop-upin the Record Monitor, selectthe ÒsubmasterÓ bus.Record to an unused (stereo)<strong>Audio</strong> Instrument as you wouldnormally record any <strong>audio</strong> rack.All <strong>audio</strong> and effects with fader movementsfor all bussed Instruments arerecorded.While recording, move any of the volumeand pan faders for dynamic, real-timechanges in your mix.NOTE: In order for pan automation to berecorded, you must assign the output of amono <strong>Audio</strong> Instrument to a stereo bus.Then specify the stereo bus as the recordsource in the Record Monitor Window.IMPORTANT: When recording from astereo bus, you must check Link Pairs in theRecord Monitor Window.There really is no advantage to recordingfrom busses as opposed to outputs—either can be assigned to console channelswith their own plug-ins and EQs.However, it is very common for mostusers to start off by assigning the outputsof <strong>Audio</strong> Instruments to hardware outputs.In these cases, if you don’t want togo to the trouble of reassigning everythingto a bus, simply use the assigned(hardware) output as a record source.Busses are more important with regardsto grouping <strong>Audio</strong> Instruments for submixes.For instance, you could have a setof drum channels routed to Bus-1, and aset of vocal channels routed to Bus-2—each acting as a submix fader. Thenassign the output of these busses to eitheranother bus (Master) or a hardwareoutput pair.When recording from a mono bus, youshould uncheck Link Pairs in the RecordMonitor Window.Recording from OutputsThe example covered in Recording fromBusses (pg. 81) illustrates assigning <strong>Audio</strong>Instruments to a single bus, and then subsequentlyusing that bus as a recordsource.However, you could just as easily haveassigned the <strong>Audio</strong> Instruments to thesame (hardware) output pair, which couldthen act as the record source.82 Opcode Systems, Inc.
CHAPTER 11: Acadia: Optimizing forDigital <strong>Audio</strong>NUMBER OF AUDIO TRACKSThe number of simultaneous <strong>audio</strong> tracksyou can play varies from system to system.In general, you’ll get more tracks ifyou have a fast CPU and hard disk andlots of RAM. However, the more sends,plug-ins, and EQ bands you use, the fewertracks you’ll get.To open the Performance Window, clickthe Performance Window button in theControl Bar, see Figure 11.1So how many tracks can you expect? Well,this could be anywhere from 4 to 64tracks—some users may get less, othersmay get more.As you will soon see in the following sectionson The Performance Window(pg. 83) and The Buffer Size Dialog(pg. 87), there are many factors that canaffect the number of possible <strong>audio</strong>tracks.THE PERFORMANCE WINDOW<strong>Vision</strong>’s Performance Window, which isonly available when using the Acadia<strong>audio</strong> system, lets you monitor yourresources for CPU, hard disk, and RAM.Figure 11.1: Performance WindowThe bars in the Performance Windowindicate the status of the resources foreach item. The larger a bar grows, thefewer the resources there are available.The numbers in the right margin indicatethe percentage of resources used.If you run out of CPU or disk resources,the corresponding alert light becomes litindicating an <strong>audio</strong> performance error(the window automatically opens if notalready open). Performance errors generallyinterrupt <strong>audio</strong> playback for aninstant, and in some instances stop itentirely. Encountering a performanceerror while recording, will interruptrecording.<strong>Vision</strong> & Studio <strong>Vision</strong> <strong>Pro</strong> — <strong>Audio</strong> Reference Manual 83
PART 3: The Acadia <strong>Audio</strong> SystemCPU ResourcesThe yellow CPU bar in the PerformanceWindow indicates the percentage of processingresources in use by <strong>Vision</strong>. If youare running low on CPU resources, thereare a number of things you should keep inmind.First off, make sure you are using aPowerMac with Level 2 cache. With olderPowerMacs, this option was an actualcard; more recent PowerMacs usuallyhave this option” built in” to themotherboardIf you are using lots of plug-ins and EQs(you can check this in the <strong>Audio</strong> Instruments& Routings Window), try using theeffects more economically. For instance,instead of assigning up to 4 plug-ins foreach console channel, try bussing groupsof console channels to shared plug-ins(see Chapter 10: Acadia: Bussing, Routing,& Bouncing to Disk). And, although itis tempting to use lots of EQ bands foryour <strong>audio</strong> channels, see if you can get bywith one or two bands per channel—oreven try disabling EQ on some channels(this might just improve your mix).One very effective way to preserveresources is to “bounce” <strong>audio</strong> channelsto disk. If you have plug-ins and EQs onyour channels and are happy with themix, simply record the output of these<strong>Audio</strong> Instruments (or groups of <strong>Audio</strong>Instruments via busses). Once the <strong>audio</strong>is recorded with the effects, there is noneed to process these channels further(you should, however, probably keep abackup of the original unprocessed <strong>audio</strong>files). For details on bouncing <strong>audio</strong> channelsto disk, see Recording from <strong>Audio</strong>Instruments, Busses, and Outputs (pg. 79).Following are just a few more things youcan try to free up more CPU resources:• Cut down on the number of controlpanels and extensions that areenabled—these can eat up memoryand CPU resources. Use the ExtensionsManager control panel to createa “lean” start-up configuration for usewith <strong>Vision</strong>.• If using a PowerBook, disable(uncheck) the option for “Allow processorcycling.”• Reduce the number of colors you aredisplaying in the Finder (<strong>Vision</strong> onlyuses 256 colors). Do this from theMonitors & Sound control panel.• Make sure you aren’t running anyother programs in the backgroundwhile using <strong>Vision</strong>.• In OMS Setup, make sure QuickTimeMusical Instruments are disabled.• In <strong>Vision</strong>, close unnecessarywindows.84 Opcode Systems, Inc.
CHAPTER 11: Acadia: Optimizing for Digital <strong>Audio</strong>• In <strong>Vision</strong>, uncheck Detailed TrackOverview in the Tracks Windowmenu.• In <strong>Vision</strong>, set <strong>Audio</strong>>Waveform Displayto either “Fast” or “Off.”• In <strong>Vision</strong>, disable any unused hardwareinputs and outputs in the <strong>Audio</strong>Instruments & Routings Window.Graphics CardWhile most Macs have built-in RGB ports,you can achieve better screen resolutionand faster screen redraws by using aninternal graphics card with dedicatedvideo RAM.Disk ResourcesThe green Disk bar in the PerformanceWindow indicates the percentage of diskresources in use by <strong>Vision</strong>. There are anumber of factors that affect diskresources.Most importantly, make sure you have a“fast” or “wide” SCSI hard disk. Whenshopping for a hard disk, always look fordrives with the fastest speeds for the followingparameters:• Average Seek Time• Average Access Time• Rotation Speed• Sustained Data Transfer RateYour hard disk should have an “asynchronous”driver. In addition, avoid hard disksthat use automatic “thermal calibration.”If unsure, consult with your computerdealer.When purchasing a hard disk, get thelargest you can. Digital <strong>audio</strong> can take upa lot of space (for each minute of stereo<strong>audio</strong> at 44.1 kHz, you will use 10 MB ofdisk space). It’s also smart to have anexternal hard disk dedicated solely foryour <strong>Vision</strong> files and <strong>audio</strong> files, withanother hard disk reserved for yoursystem software and applications.When your disk resources become low,check the following:• If your hard disk becomes defragmented,as is often the case withwriting and deleting large amounts offiles, use “defragmenting” software tomake your disk more efficient (insome cases, it may even be necessaryto <strong>ref</strong>ormat).• You can ease the burden of diskaccess for digital <strong>audio</strong> by adjusting<strong>Vision</strong>’s Buffer Size dialog (seepage 87 for details).Make sure your computer has lots ofmemory—64 MB or more is notunreasonable. The more memory youhave, the more you can allocate fordigital <strong>audio</strong> buffers.NOTE: Some manufacturers sell hard disksdesigned specifically for <strong>audio</strong> and videoapplications. These hard disks are commonly<strong>ref</strong>erred to as “AV” disks.<strong>Vision</strong> & Studio <strong>Vision</strong> <strong>Pro</strong> — <strong>Audio</strong> Reference Manual 85
PART 3: The Acadia <strong>Audio</strong> System• Avoid trying to play lots of small<strong>audio</strong> events across many tracks, thismakes disk access much lessefficient.If a track has lots of <strong>audio</strong> events andyou are happy with the way it sounds,use the DSP>Mix command to writea single, contiguous <strong>audio</strong> event.In addition, use <strong>Vision</strong>’s File ManagementWindow to consolidate <strong>audio</strong> files anddelete unused <strong>audio</strong> files. And, as always,make sure to regularly back up your data.RAM ResourcesThe blue RAM bar in the PerformanceWindow indicates the percentage of<strong>Vision</strong>’s allocated memory that is in use.<strong>Vision</strong>’s available RAM determines thenumber of notes and <strong>audio</strong> events thatcan be recorded, and how <strong>Vision</strong> allocatesmemory for the digital <strong>audio</strong>’s Buffer Size(see page 87).To find out the number of available notes(events), click on the RAM bar for a popupmenu.SCSI InterfacesFor optimum disk performance, use a“fast” or “wide” SCSI hard disk connecteddirectly to a dedicated SCSI controllercard installed inside your computer.Using a separate SCSI bus for <strong>audio</strong> (asopposed to using your Mac’s internalhard disk, or connecting to its built-inSCSI port) is an excellent way to optimizesystem performance.Figure 11.2: Performance Window, Memory pop-upThe “Largest free block” shows the largestcontiguous amount of availablememory. If the “Total free space” is substantiallylarger than the “Largest freeblock,” you may have fragmented memory.You can sometimes correct this byquitting and re-launching <strong>Vision</strong>.To increase the available memory for<strong>Vision</strong>, Get Info on the application fromthe Finder and increase the “P<strong>ref</strong>erredSize.” This must be done while <strong>Vision</strong> isnot launched.IMPORTANT: Before allocating morememory to <strong>Vision</strong>, make sure your computerhas enough installed RAM. See yourMacintosh operating manuals for moreinformation.86 Opcode Systems, Inc.
CHAPTER 11: Acadia: Optimizing for Digital <strong>Audio</strong>THE BUFFER SIZE DIALOGFile BuffersThere are two pop-ups that determine thesize and number of file buffers.The File Buffer Size pop-up determinesthe buffer size (256k, 512k, 768k,or1024k) used for each <strong>Audio</strong> Instrumentchannel. When using larger buffer sizes,your Macintosh will store more digital<strong>audio</strong> in RAM and will not need to accessyour hard disk as often.Figure 11.3: Buffer Size dialogIn addition to the RAM required to runthe <strong>Vision</strong> application, the Acadia <strong>audio</strong>system also needs to set aside memoryfor use as a RAM buffer. This buffer isused to store digital <strong>audio</strong> temporarilybefore recording it to your hard disk, orbefore playing it.IMPORTANT: Don’t confuse the digital<strong>audio</strong> buffers with the <strong>Vision</strong>’s applicationRAM. The <strong>audio</strong> buffers determine theamount of RAM dedicated to temporarilystoring digital <strong>audio</strong>—the application sizedetermines the amount of memory dedicatedto <strong>Vision</strong>.When you configure the Buffer Size dialog,<strong>Vision</strong> attempts to use your System RAM forthe digital <strong>audio</strong> buffers, but if you ask formore RAM than is available, it will use theRAM allocated to <strong>Vision</strong>.The File Buffers pop-up determines thenumber of file buffers (2, 3, or 4) used foreach <strong>Audio</strong> Instrument channel. Again,the more file buffers you use, the less frequentlythe disk is accessed.If you are running out of CPU or diskresources, as determined by the PerformanceWindow (see page 83), tryincreasing the File Buffer Size. If afterreaching a buffer size of 1024k you arestill encountering performance errors, trythen increasing the number of FileBuffers.Still other users may find that they getbetter results with a smaller Buffer Sizeand more File Buffers. In these cases, youmight start out with a a Buffer Size of256k and gradually increase the numberof File Buffers until an optimum performancelevel is achieved.You may even have to experiment withchanging the number of File Buffers foreach of the File Buffer sizes until you findthe combination that works best for you.<strong>Vision</strong> & Studio <strong>Vision</strong> <strong>Pro</strong> — <strong>Audio</strong> Reference Manual 87
PART 3: The Acadia <strong>Audio</strong> SystemIncreasing either the File Buffers or theFile Buffer Size is likely to increase thenumber of simultaneous <strong>audio</strong> tracks youcan play, as well as the number ofplug-ins, sends, and EQ bands you canuse. As a result, however, you may noticethat it takes longer to start and stop playingdigital <strong>audio</strong>. This is because yourMacintosh needs to fill the buffer withdigital <strong>audio</strong> from your hard disk.The amount of RAM required for the filebuffers (displayed as MemoryRequired) is determined by the FileBuffer Size, File Buffers, and the numberof specified <strong>Audio</strong> Instruments. Theamount of Memory Available in yoursystem is also displayed. In general,Memory Required should never behigher than the Memory Available (thiscan lead to performance errors). Toreduce the amount of memory required,reduce the size or number of File Buffers.<strong>Pro</strong>cess AheadWhen <strong>Pro</strong>cess Ahead is checked, generalprocessing of <strong>audio</strong> for <strong>Vision</strong> ismore efficient, thereby allowing you touse more <strong>audio</strong> tracks, sends, plug-insand EQ bands without encountering performanceerrors.However, when <strong>Pro</strong>cess Ahead ischecked, <strong>Vision</strong> is less efficient in otherways. The latency for “thruing” of <strong>audio</strong> ismore evident; using mute, solo, andfaders in Console Windows is less responsive;and initial playback of <strong>audio</strong> takes alittle longer after clicking the Play button.For general recording and editing, youwill probably want to disable <strong>Pro</strong>cessAhead. However, when you are ready todo your final mix down, you shouldenable <strong>Pro</strong>cess Ahead.AUDIO PREFERENCESUse the <strong>Audio</strong> P<strong>ref</strong>erences dialog to setvarious record and playback options forthe Acadia <strong>audio</strong> system. To open the<strong>Audio</strong> P<strong>ref</strong>erences dialog, choose<strong>Audio</strong>><strong>Audio</strong> P<strong>ref</strong>erences.Figure 11.4: <strong>Audio</strong> P<strong>ref</strong>erences for the Acadia<strong>audio</strong> systemThe components in the <strong>Audio</strong> P<strong>ref</strong>erencedialog include the following: Maximum Fader Position Smooth <strong>Audio</strong> Controllers Dither Outputs <strong>Pro</strong>cess While Stopped88 Opcode Systems, Inc.
CHAPTER 11: Acadia: Optimizing for Digital <strong>Audio</strong>Play and Record OffsetsAll settings in the <strong>Audio</strong> P<strong>ref</strong>erencesdialog are saved in your <strong>Vision</strong> P<strong>ref</strong>s file.In addition, the settings for MaximumFader Position, Smooth <strong>Audio</strong> Controllers,and Dither Outputs are saved witheach <strong>Vision</strong> file.If the Maximum Fader Position is thenchanged to +18 dB (and the fader’s valueis not changed), you will see this:Maximum Fader PositionNumeric valueFigure 11.5: <strong>Audio</strong> P<strong>ref</strong>erences, Maximum FaderPosition settingsUse the Maximum Fader Position pop-upto boost output volumes by up to 18 dB.Adjusting the Maximum Fader Positiondoes not recalibrate volume events automatically,but it does allow you torecalibrate them manually if you wish.If a Console channel is assigned to <strong>audio</strong>volume, the Maximum Fader Position isset to +6 dB, and the fader value is 0 dB,the channel will look like this:Notice that while the visual position of thefader is different, the fader’s numericvalue (in dB) is the same. If you pressplay now, the mix will sound exactly as itdid before the Maximum Fader Positionwas adjusted. However, you now have theheadroom to boost <strong>audio</strong> volumes anextra 12 dB (the difference between 6 dBand 18 db).NOTE: When boosting <strong>audio</strong> signals, youshould assign your outputs to console channelsand monitor their LEDs. If anyclipping occurs, make the necessary adjustmentsfor the channels routed to theseoutputs.In extreme cases where you are dealingwith very low amplitudes, you should usethe DSP>Normalize command on individual<strong>audio</strong> files as needed (for details,see Chapter 31: DSP Menu in your <strong>Audio</strong>Reference Manual).<strong>Vision</strong> & Studio <strong>Vision</strong> <strong>Pro</strong> — <strong>Audio</strong> Reference Manual 89
PART 3: The Acadia <strong>Audio</strong> SystemSetting the Maximum Fader Position to0 dB doesn’t offer any extra “head room”for boosting <strong>audio</strong> signals with lowamplitudes.Smooth <strong>Audio</strong> ControllersWhen to Set the Maximum FaderPositionIn general, it’s best to set the MaximumFader Position at the beginning of a sessionand retain that setting throughoutthe session. The Maximum Fader Positionis saved with each <strong>Vision</strong> file, so itwill be set accordingly each time youopen a different file.There may be times when working with a<strong>Vision</strong> file that you’ll notice that your<strong>audio</strong> files were recorded too low. Inthese cases you can go to the <strong>Audio</strong> P<strong>ref</strong>erencesdialog and set the MaximumFader Position to +12 dB or +18 dB.Thiswill allow the headroom boost your <strong>audio</strong>output volumes to the desired levels.Whenever launching <strong>Vision</strong>, or opening anew file, <strong>audio</strong> volumes are automaticallyset to 0 dB—and, the visual fader positionwill vary depending on your MaximumFader Position setting. The MaximumFader Position is set to +6 dB by default.Figure 11.6: <strong>Audio</strong> P<strong>ref</strong>erences, Smooth <strong>Audio</strong>ControllersThe Smooth <strong>Audio</strong> Controllers sectionlets you smooth out rapid changes involume and pan for <strong>audio</strong>, thereby eliminatingunwanted clicks and pops.The Fade duration value sets the lengthof the smoothing ramp used whenencountering abrupt changes in volumeand pan. You can manually enter a valuebetween 0-200 msecs, or you can click onone of the four preset buttons, whichinclude None (0), Sharp (50), Medium(100), or Smooth (200).For instance, Figure 11.7 displays an<strong>audio</strong> signal with abrupt changes inamplitude:646678100 ms68100 ms 50 msSharp Changes is amplitudecan cause unwanted clicks and popsFigure 11.7: Abrupt amplitude changes for original<strong>audio</strong> envelope.90 Opcode Systems, Inc.
CHAPTER 11: Acadia: Optimizing for Digital <strong>Audio</strong>If we set the Fade Duration to 100 ms byclicking the “Medium” button, <strong>Vision</strong> willautomatically smooth the signal within100 ms of the amplitude change.646678Figure 11.8: Smoother amplitude changes afterapplying Smooth <strong>Audio</strong> ControllersDither OutputsSmoothing ramps created by aFade duration of 100 msFigure 11.9: <strong>Audio</strong> P<strong>ref</strong>erences, Dither OutputsOnce <strong>audio</strong> has been recorded orimported into <strong>Vision</strong>, it is processed androuted using floating-point calculations,which is more flexible and precise thanusing 16 or 24 bits.68<strong>Pro</strong>cess While StoppedFigure 11.10: <strong>Pro</strong>cess while stopped, <strong>Audio</strong>P<strong>ref</strong>erences dialogWhen <strong>Pro</strong>cess while stopped isunchecked, <strong>Vision</strong> will not route or process<strong>audio</strong> when playback is stopped. Oneexception to this rule is when an inputline is record-enabled in the Record MonitorWindow.If you are using an older Power Macintosh,you can turn off this option to speedup general computer performance. Indoing so, however, you will not be able tomonitor hardware inputs (by using Thruin the Record Monitor) whenever <strong>Vision</strong>is stopped. In addition, any processing on<strong>audio</strong> tracks will cease immediately at theend of a sequence, resulting in reverbtails and delay echoes being cut off. Toget around this, simply change the lengthof the sequence accordingly.However, when the <strong>audio</strong> is output, or“bounced to disk,” it is first converted toeither 16 or 24 bits (depending on yourASIO driver). In doing so, some amountof digital quantizing occurs, which canlead to unwanted digital artifacts in the<strong>audio</strong> signal (noticeable as a certain“grainy” quality when fading a sound out).When you click Dither Outputs, a verysmall amount of random noise is added tothe signal in order to mask the digitalquantizing, resulting in cleaner fades.<strong>Vision</strong> & Studio <strong>Vision</strong> <strong>Pro</strong> — <strong>Audio</strong> Reference Manual 91
PART 3: The Acadia <strong>Audio</strong> SystemPlay and Record OffsetsFigure 11.11: <strong>Audio</strong> P<strong>ref</strong>erences, Play and RecordOffsetsThe Play and Record Offsets are used toimprove the synchronization of <strong>audio</strong> andMIDI.The following sections discuss the purposeof these two controls, their defaultvalues, why you might need to modifythem, and how to do so.Play OffsetUse the Play Offset to “shift” <strong>audio</strong> playbacktime relative to the sequence’s MIDIplayback time. The shift is expressed as anumber of <strong>audio</strong> samples, and can beeither positive or negative.• Positive numbers make <strong>Vision</strong> startprocessing <strong>audio</strong> playback before itsdesignated start time. This is desirablebecause your computer requiresa certain amount of processing timeto play the <strong>audio</strong>. By adding a positiveoffset equal to the time required toprocess the <strong>audio</strong>, your MIDI and<strong>audio</strong> tracks sound synchronized.• Negative numbers make <strong>Vision</strong> startprocessing <strong>audio</strong> playback after itsdesignated start time.Record OffsetUse the Record Offset to “shift” <strong>audio</strong>recording time relative to the sequence’sMIDI recording time. The shift isexpressed as a number of <strong>audio</strong> samples,and can be either positive or negative.• Positive numbers make <strong>Vision</strong> startrecording <strong>audio</strong> before its designatedstart time (shifting recorded materialto the left in the Graphic Window).• Negative numbers make <strong>Vision</strong> startrecording <strong>audio</strong> playback after itsdesignated start time (shiftingrecorded material to the right in theGraphic Window).NOTE: In general, you can set RecordOffset values as big (positive) as you want.However, there is a limit to the amount ofnegative offset that you can set.Default Offset ValuesOffset values for all ASIO hardwaredefault to “0.” The next section discusseshow to determine optimum offset valuesfor your <strong>audio</strong> hardware.92 Opcode Systems, Inc.
CHAPTER 11: Acadia: Optimizing for Digital <strong>Audio</strong>Modifying the Offset ValuesTo determine an optimum Record Offsetfor your <strong>audio</strong> hardware:Make sure <strong>Vision</strong>Õs session samplerate is set to 44.1, and the SMPTEframe rate is 30 ND. In addition, setthe sequenceÕs tempo to 120.In the <strong>Audio</strong> P<strong>ref</strong>erences dialog, setboth the Record and Play Offsets to0.Step record four quarter notes into aMIDI track and set the track to loop forone measure. In addition, set thesequence length to infinity.Make sure to use a sound with a sharpattack and quick release, like a hihat.Route the <strong>audio</strong> output of your MIDIdevice into your <strong>audio</strong> interface andrecord four measures of <strong>audio</strong>.Assign this material to <strong>Audio</strong>-1 andname the record file Òrecord offset.ÓHighlight the recorded <strong>audio</strong> eventand choose <strong>Audio</strong>>Strip Silence.Configure the Strip Silence dialog withthe following values and click OK.Combine the MIDI track and <strong>audio</strong>track into a single track and then viewits contents in the List Window.Make sure Absolute SMPTE ischecked in the List Window menu.Make note of the difference in SMPTEbits between the MIDI events (hihatnote) and <strong>audio</strong> events (record offset<strong>audio</strong>). In the above example, the distancebetween the first two events is 55bits. If this number varies throughout therecorded measures, try to find an averagevalue.NOTE: There are 80 bits to a singleSMPTE frame.Use the following formula to calculatean appropriate record offset value (insamples). ÒNÓ is the number ofSMPTE bits arrived at in the previousstep.record offset = 44100 * N / 2400If we use 55 (bits) for N, your optimumrecord offset would be around 1011samples.Figure 11.12: Strip Silence dialogMake sure the Attack and Releasetimes are both set to 0 msecs.<strong>Vision</strong> & Studio <strong>Vision</strong> <strong>Pro</strong> — <strong>Audio</strong> Reference Manual 93
PART 3: The Acadia <strong>Audio</strong> SystemAfter entering the Record Offset in the<strong>Audio</strong> P<strong>ref</strong>erences dialog, as determinedby the previous procedure, you are readyto determine an optimum Play Offset foryour <strong>audio</strong> hardware:Route the output of your <strong>audio</strong>hardware back into one of its inputs.Record a copy of the Òrecord offsetÓfile from the previous steps.Assign this material to <strong>Audio</strong>-2 andname the record file Òplay offset.ÓAs done previously, perform StripSilence on the newly recorded file.Combine the newly recorded ÒplayoffsetÓ track with the previous trackcontaining the MIDI notes and ÒrecordoffsetÓ <strong>audio</strong> events.View the contents of the combinedtrack in the List Window.Again, make sure Absolute SMPTE ischecked in the List Window menu.Use the following formula to calculatean appropriate play offset value (insamples). ÒNÓ is the number ofSMPTE bits arrived at in the previousstep.play offset = 44100 * N / 2400If we use 30 (bits) for N, your optimumplay offset would be around 551samples.NOTE: Some users may find after recordingwith an accurate Record Offset that aPlay Offset is not needed.NOTE: If you intend to do most of your<strong>audio</strong> work at 48k, you can perform theprevious examples with that rate. Just makesure to use a value of “48000” (instead of44100) in the equation at the end of eachprocedure.Make note of the difference in SMPTEbits between the <strong>audio</strong> events for<strong>Audio</strong>-1 (record offset <strong>audio</strong>) and<strong>Audio</strong>-2 (play offset <strong>audio</strong>). In the aboveexample, the distance between the firsttwo events is 30 bits. If this numbervaries throughout the recorded measures,try to find an average value.(Remember, there are 80 bits to aSMPTE frame.)94 Opcode Systems, Inc.
1Digidesign DAE:Configuration & Recording234567<strong>Vision</strong> & Studio <strong>Vision</strong> <strong>Pro</strong> — <strong>Audio</strong> Reference Manual 95
PART 4: Digidesign DAE: Configuration & Recording96 Opcode Systems, Inc.
CHAPTER 12: DAE: Hardware SetupRead this chapter to learn how to set up<strong>Vision</strong> to work with your Digidesign <strong>audio</strong>hardware (including <strong>Pro</strong> Tools, <strong>Pro</strong> Tools<strong>Pro</strong>ject, Session 8, Sound Tools II, and<strong>Audio</strong>media II/III).ABOUT DAEDigidesign hardware uses DAE softwareto control it. DAE stands for Digidesign<strong>Audio</strong> Engine. DAE was created byDigidesign and provides a method forplaying and recording multiple tracks ofdigital <strong>audio</strong> using Digidesign hardware.<strong>Vision</strong> controls DAE, and DAE, in turn,controls the <strong>audio</strong> hardware.SOME MACINTOSH MODELS AREINCOMPATIBLE: The Digidesign <strong>Audio</strong>Engine does not work with some soundcard/Macintosh model combinations. Fordetails, please see the compatibility chartincluded with your Digidesigndocumentation.When you install <strong>Vision</strong>, DAE is automaticallyinstalled in your System Folder.Whenever you launch <strong>Vision</strong>, the DAEapplication will automatically launch.Whenever you quit <strong>Vision</strong>, DAE will alsoquit unless it’s being used by some otherapplication.Using DAE is automatic and transparent.But it is important to realize that it isthere, running “behind the scenes” tocontrol the digital <strong>audio</strong> signals.SYSTEM REQUIREMENTSTo run <strong>Vision</strong> with your Digidesign hardware,you must meet the followingadditional system requirements:• A compatible Macintosh (see theDAE compatibility chart fromDigidesign).Consult your QuickStart guide forRAM and System requirements.• DAE-compatible digital <strong>audio</strong> hardware(such as <strong>Pro</strong> Tools, <strong>Pro</strong> Tools<strong>Pro</strong>ject, Session 8, Sound Tools II, or<strong>Audio</strong>media II/III).• A hard disk that’s fast enough torecord and play back digital <strong>audio</strong>and is reasonably defragmented(defragmenting software isencouraged).• For more than four tracks with<strong>Pro</strong> Tools I & II, you’ll also need theA/ROSE extension (provided).<strong>Vision</strong> & Studio <strong>Vision</strong> <strong>Pro</strong> — <strong>Audio</strong> Reference Manual 97
PART 4: Digidesign DAE: Configuration & RecordingPRO TOOLS 24 MIX AND MIXPLUSStudio <strong>Vision</strong> <strong>Pro</strong> supports the <strong>Pro</strong> Tools24 Mix and 24 Mix Plus systems. To usethis hardware with Studio <strong>Vision</strong> <strong>Pro</strong>, youmust have:• DAE 3.4 or later• DSI 3.4 or laterPRO TOOLS 24Studio <strong>Vision</strong> <strong>Pro</strong> supports the 24 bitMacintosh PCI version of <strong>Pro</strong> Tools. Touse a <strong>Pro</strong> Tools 24 system with Studio<strong>Vision</strong> <strong>Pro</strong>, you must have:• DAE 3.1 or later• DSI 3.1 or laterPRO TOOLS III (NUBUS & PCI)Studio <strong>Vision</strong> <strong>Pro</strong> supports theMacintosh PCI and Nubus versions of <strong>Pro</strong>Tools.To use the PCI version of <strong>Pro</strong> Tools III/24, you must have:• DAE 3.0 or later• DSI 3.0 or laterTo use the NuBus versions of <strong>Pro</strong> ToolsIII , you must use:• DAE 2.95 or later• DSI 2.95 or laterSESSION 8/PROJECTSession 8 and <strong>Pro</strong> Tools <strong>Pro</strong>ject cards areidentical. They appear as “<strong>Pro</strong> Tools<strong>Pro</strong>ject” with all the capabilities listed inUsing <strong>Pro</strong> Tools <strong>Pro</strong>ject with Studio <strong>Vision</strong>(pg. 98).Studio <strong>Vision</strong> <strong>Pro</strong> supports <strong>Pro</strong> Tools<strong>Pro</strong>ject (both PCI and NuBus versions).To use the PCI version of <strong>Pro</strong> Tools<strong>Pro</strong>ject, you must have:• DAE 3.0 or later• DSI 3.0 or laterTo use the NuBus versions of <strong>Pro</strong> Tools<strong>Pro</strong>ject, you must use:• DAE 2.95• DSI 2.95Using <strong>Pro</strong> Tools <strong>Pro</strong>ject withStudio <strong>Vision</strong><strong>Pro</strong> Tools <strong>Pro</strong>ject supports the followingStudio <strong>Vision</strong> features:• Scrubbing;• Sample accurate volume and panevents.Anomalies to consider:• <strong>Audio</strong> Instrument assignments mustbelong to either group 1-4 orgroup 5-8. For example, you couldhave an <strong>Audio</strong> Instrument assigned tooutputs 1, 2, and 4, but you cannothave a 1 and 5 assignment.98 Opcode Systems, Inc.
CHAPTER 12: DAE: Hardware SetupAUDIOMEDIA II/III<strong>Vision</strong> supports the Macintosh NuBusand PCI version of <strong>Audio</strong>media.To use the PCI version of <strong>Audio</strong>media III,you must have:• DAE 3.0 or later• DSI 3.0 or laterTo use the NuBus version of<strong>Audio</strong>media II, you must use:• DAE 2.95 or later• DSI 2.95 or laterSET VISION TO DAE MODEbuffer. DAE uses the RAM buffer to storedigital <strong>audio</strong> temporarily before sending itto your hard disk, or before playing it.IMPORTANT: Don’t confuse the RAMbuffer with the application RAM size. TheRAM buffer determines the amount of RAMdedicated to temporarily storing digital<strong>audio</strong>—the application size determines theamount of memory dedicated to <strong>Vision</strong>.NOTE: Because <strong>Vision</strong> addresses Digidesign’sDAE software, some of theseillustrations and instructions may changeas DAE and DSI update. Please <strong>ref</strong>erenceyour Digidesign documentation for thelatest information about setting up yourhardware and software.To use <strong>Vision</strong> with DAE, select<strong>Audio</strong>><strong>Audio</strong> System>DAE to place acheck mark next to the option.Figure 12.1: Selecting the DAE <strong>Audio</strong> SystemALLOCATING RAM TO THEDIGITAL AUDIO RAM BUFFERPRO TOOLS III/<strong>Pro</strong>ject: Owners of thesesystems can skip this section since <strong>Vision</strong>uses a special RAM buffer included on thedigital <strong>audio</strong> card.In addition to the RAM required to runthe <strong>Vision</strong> application, you’ll need to setaside more memory for use as a RAM<strong>Vision</strong> & Studio <strong>Vision</strong> <strong>Pro</strong> — <strong>Audio</strong> Reference Manual 99
PART 4: Digidesign DAE: Configuration & RecordingSetting the RAM BufferTo allocate RAM to the RAM buffer:In <strong>Vision</strong>, choose <strong>Audio</strong>>BufferSize.<strong>Vision</strong> opens the Buffer Size dialog box.Determining the Best RAM Buffer SizePRO TOOLS III/<strong>Pro</strong>ject: Owners of thesesystems can skip this section since <strong>Vision</strong>uses a special RAM buffer included on thedigital <strong>audio</strong> card.As you can see in Figure 12.2, there a<strong>ref</strong>ive different RAM Buffer sizes available.Figure 12.2: Buffer Size Dialog Box for DAEPRO TOOLS III/<strong>Pro</strong>ject: These systemsuse RAM thatÕs on the <strong>audio</strong> card, ratherthan Macintosh RAM. The<strong>ref</strong>ore, allchoices say 4000K, the amount of RAMincluded with these systems.Select the largest RAM size that isappropriate for your system.See Determining the Best RAM BufferSize (pg. 100) to help you choose whichsetting is most appropriate.Click the OK button.The selected amount of RAM is setaside for use as a digital <strong>audio</strong> RAMbuffer.If you have a slow hard disk, you shouldset the buffer size to the largest amountyour system will allow. If you have a fasthard disk, you may want to use a smallerbuffer.When the RAM buffer is small, your Macintoshwill need to access the hard diskfrequently. If you do not have a fast harddisk, this may cause problems. The solutionis to increase the RAM buffer size.When the RAM buffer is large, your Macintoshwill store more digital <strong>audio</strong> inRAM, and will not need to access yourhard disk as often. However, you maynotice that it takes longer to start and stopplaying digital <strong>audio</strong>. This is because yourMacintosh needs to fill the buffer withdigital <strong>audio</strong> from your hard disk. If youhave a large RAM buffer, this will takelonger.In general, you should set the RAM bufferto the largest size your system allows. Ifyou notice a time drag, then try a smallersetting. If you get errors such as “HardDisk Too Slow” or fragmented <strong>audio</strong>,increase the buffer size.100 Opcode Systems, Inc.
CHAPTER 12: DAE: Hardware SetupHARDWARE SETUPNOTE: In general Opcode recommendsthat you consult your Digidesign manualfor specifics on setting up DAE and Digidesignhardware. The setup instructions anddialog boxes are identical to those used inall DAE compatible applications.Before you can record and play digital<strong>audio</strong>, you must tell DAE which digital<strong>audio</strong> hardware you’re using. To do so:Choose <strong>Audio</strong>>Hardware Setup.The Hardware Setup dialog box opens.The appearance of the dialog boxchanges depending on your particular<strong>audio</strong> hardware, and your version ofDAE.Figure 12.4: DAE Hardware Setup forSession 8As seen in Figure 12.3 and Figure 12.4,the Hardware Setup dialog box contains anumber of options for using your DAEhardware. Each of these is discussed inthe following sections.NOTE: Depending on your particularhardware, some of the following optionsmay not be available. See your Digidesigndocumentation for details.Card TypeThis option is relevant only if you havemore than one type of digital <strong>audio</strong> cardinstalled. It lets you select the type of cardyou wish to use.Figure 12.3: DAE Hardware Setup for<strong>Pro</strong> Tools 24If your Macintosh contains more than onetype of DAE-supported digital <strong>audio</strong> card,there will be more than one availablechoice. Use the radio buttons or pop-upmenu to tell DAE which <strong>audio</strong> card youwish to use. You can use only one type of<strong>audio</strong> card at a time.<strong>Vision</strong> & Studio <strong>Vision</strong> <strong>Pro</strong> — <strong>Audio</strong> Reference Manual 101
PART 4: Digidesign DAE: Configuration & Recording<strong>Pro</strong> Tools III SpecificsIf you own <strong>Pro</strong> Tools III, the Select CardType option will contain the following twochoices.Figure 12.5: Card Types available for <strong>Pro</strong> Tools III• Session 8—If you select this option,your hardware acts like a standardSession 8 system, and you will nothave access to TDM plug-ins.• Disk I/O—If you select this option,your hardware acts like a fully configured<strong>Pro</strong> Tools III system, completewith TDM support.<strong>Pro</strong> Tools I & II SpecificsIf you’re using a System Accelerator card,it’s represented in this section of thedialog box by a check box. If you haveinstalled multiple <strong>Pro</strong> Tools cards, you’llneed to check the System Acceleratorcheck box if you want to record or playmore than four tracks of simultaneous<strong>audio</strong>.Figure 12.6: Card Types available for <strong>Pro</strong> Tools I or<strong>Pro</strong> Tools II and a System AcceleratorIn the rare case that you have only one<strong>Pro</strong> Tools <strong>audio</strong> card and a System Accelerator,you should still check the SystemAccelerator check box because you’ll getmuch better performance due to theSystem Accelerator’s dedicated SCSI port(though you will be able to record andplay only from the disk connected to thatSCSI port).When using multiple <strong>Pro</strong> Tools cards,you’ll see a Card to Use pop-up menudisplaying the slot number for each card.Figure 12.7: Card to Use pop-up for Multiple<strong>Pro</strong> Tools cards• If you have multiple <strong>Pro</strong> Tools cardsand no System Accelerator (or if theSystem Accelerator option isunchecked in the Select Card Typearea), use this pop-up menu to selectwhich <strong>Pro</strong> Tools card you’ll use with<strong>Vision</strong>. You cannot record and playback more than four tracks of <strong>audio</strong>unless you have the System Acceleratorcard and have enabled that option.• If you have multiple <strong>Pro</strong> Tools cards,a System Accelerator, and havechecked the System Acceleratoroption in the Select Card Type area,this pop-up menu will let you eitherselect between cards, or select multiplecards. Selecting multiple cardsincreases the number of simultaneouschannels supported by <strong>Vision</strong>.102 Opcode Systems, Inc.
CHAPTER 12: DAE: Hardware SetupInterfaceThis pop-up menu determines which typeof <strong>audio</strong> interface you are using.888 I/O Interface SpecificsIf you have an 888 I/O Interface, click theOther Options button to open an InputSelect dialog box.Sample RateUse this pop-up menu to specify the hardwaresample rate.Sync ModeFrom this pop-up menu, select Digital ifyou’re syncing to a digital <strong>audio</strong> tape deckor other digital master clock source; otherwise,leave this setting on Internal.Digital FormatUse the Digital Format pop-up menu toselect either AES/EBU or S/PDIF,depending on which digital format you’rerecording.Figure 12.8: 888 I/O Interface OptionsUse this dialog box to choose whetheryou want each 888 I/O input pair to useanalog or digital inputs.882 Studio SpecificsIf you have an 882 Studio Interface, clickthe Other Options button to open a Routingdialog box for the 882 Studio.Channel 1-2 InputThis pop-up menu specifies whether theinputs into Channels 1 & 2 are Analog orDigital.Other OptionsThe Other Options button opens a dialogfor configuring your <strong>audio</strong> interface.Figure 12.9: 882 Studio Routing Dialog Box<strong>Vision</strong> & Studio <strong>Vision</strong> <strong>Pro</strong> — <strong>Audio</strong> Reference Manual 103
CHAPTER 12: DAE: Hardware SetupSET A SESSION SAMPLE RATEAND SIZENext, you need to set a session samplerate. The session sample rate is thesample rate <strong>Vision</strong> uses to record and play<strong>audio</strong>.The term “sample rate” <strong>ref</strong>ers to thenumber of <strong>audio</strong> samples that comprise1 second worth of <strong>audio</strong>. Higher sessionsample rates produce better <strong>audio</strong> fidelity,but use more disk space (because thereare more sample points per second). Youcan save disk space by using a low samplerate, but this degrades the <strong>audio</strong> fidelity.Hardware Sample Rate Vs.Session Sample Ratesample rates of up to 96 kHz are supportedfor DAE (and Acadia). Seeyour hardware manual to learn whichsample rates it supports.To get the best <strong>audio</strong> quality, you shouldrecord all of your sound files at the samerate as your hardware sample rate. Whenyou do this, the sample rates of your fileswill always match the hardware samplerate, and sample rate conversion will notbe necessary. Sample rate conversion isdiscussed in Chapter 26: Sample RateConversion and Deinterleaving.To set a session sample rate:Choose <strong>Audio</strong>>Sample Rate/Size.<strong>Vision</strong> opens the Set Session SampleRate/Size dialog box.It’s important to recognize that there is adifference between the hardware samplerate as discussed in Hardware Setup(pg. 101), and the session sample rate.Specifically:The Hardware Sample Rate is thesample rate that your hardware uses toplay back <strong>audio</strong> files. Your <strong>audio</strong> hardwareworks at only one of a few presetsample rates. Most professional systemswork at either 44100 Hz (CD-quality) or48000 Hz.• The Session Sample Rate is thesample rate that is common to all<strong>audio</strong> files <strong>ref</strong>erenced by a sequence.All <strong>audio</strong> events in a <strong>Vision</strong> file musthave the same sample rate. SessionFigure 12.11: Set Session Sample Rate/SizeDialog BoxFrom the Session Sample Ratepop-up menu, select the desiredsession sample rate.The hardware sample rate is indicatedby a small Macintosh icon to its left. Theother sample rates (if any) represent anyunique sample rates of <strong>audio</strong> files <strong>ref</strong>erencedby the sequence file.<strong>Vision</strong> & Studio <strong>Vision</strong> <strong>Pro</strong> — <strong>Audio</strong> Reference Manual 105
PART 4: Digidesign DAE: Configuration & RecordingIf you wish to change the hardwaresample rate, click the HardwareSetup button.<strong>Vision</strong> opens the Hardware Setup dialogbox. Use it to set a new hardwaresample rate as discussed in HardwareSetup (pg. 101).From the Sample Size pop-up,select a sample size.The sample size for most Digidesignhardware is 16 bits. If using <strong>Pro</strong>Tools 24,you can set this to 24 bits. All files mustbe at the session sample size forplayback.You can, if desired, set a session samplerate other than one of the ones listed inthe pop-up menu. To do so, choose“Other” from the pop-up menu; <strong>Vision</strong>opens the Set Other Rate dialog box.Figure 12.12: Set Other Rate Dialog BoxNOTE: DAE requires that the SessionSample Rate be greater than half, and lessthan 1.5 times as large as the HardwareSample Rate.To set a session sample size:Automatic Sample Rate Settingfor Existing SequencesWhen you open an existing <strong>Vision</strong> file,<strong>Vision</strong> will automatically set both thesession sample rate and the hardwaresample rate if both of the following conditionsare met:• All <strong>audio</strong> files <strong>ref</strong>erenced by thesequence have the same sample rate;AND• This sample rate matches one of theavailable hardware sample rates.If both of these conditions are met, <strong>Vision</strong>automatically sets the session sample rateand hardware sample rate to match thesample rate of the <strong>audio</strong> files.Choose <strong>Audio</strong>>Sample Rate/Size.<strong>Vision</strong> opens the Set Session SampleRate/Size dialog box.Figure 12.13: Set Session Sample Rate/Sizedialog boxCHECKING DISK ALLOCATIONThe following DAE users will need to usea program called Checking DiskAllocation:• <strong>Pro</strong> Tools III/24• Session 8/<strong>Pro</strong>ject• System Accelerator (<strong>Pro</strong> Tools I & IIwith more than four voices)106 Opcode Systems, Inc.
CHAPTER 12: DAE: Hardware SetupIf you installed <strong>Vision</strong> correctly, theChecking Disk Allocation program isautomatically installed in the StartupItems folder in your System Folder.When you record digital <strong>audio</strong> with one ofthese systems, <strong>Vision</strong> automatically allocatesone or more files that fill the entirehard disk. If the application crashes whilerecording, you’re stuck with files that takeup your entire hard drive! You could justthrow them away, but if they contain datathat you want to save, you’re in trouble.This is where the Checking Disk Allocationprogram comes in. When you restartyour computer, Checking Disk Allocationruns (since it’s in the Startup Itemsfolder) and takes a look at the lastrecorded <strong>audio</strong> files. If they fill the entiredisk, Checking Disk Allocation will truncatethe unused portions for you, savingonly the <strong>audio</strong> data <strong>ref</strong>erenced by yoursequence.If Checking Disk Allocation doesn’t truncatethe files automatically, you can dragthem on top of its icon to invoke the operationmanually.<strong>Vision</strong> & Studio <strong>Vision</strong> <strong>Pro</strong> — <strong>Audio</strong> Reference Manual 107
PART 4: Digidesign DAE: Configuration & Recording108 Opcode Systems, Inc.
CHAPTER 13: DAE: Record Monitor WindowUse the Record Monitor Window to controlsuch recording operations as:• record enabling• level monitoring• input source selection• file and option selection• <strong>Audio</strong> Instrument selectionRead this chapter to learn what’s in theRecord Monitor Window. You’ll apply thisknowledge when you learn how to actuallyrecord <strong>audio</strong> in Chapter 14: DAE:Recording <strong>Audio</strong>.CHAPTER ORGANIZATIONThe appearance of the Record MonitorWindow changes slightly depending onthe type of <strong>audio</strong> hardware you use.At the time of this manual’s publication,<strong>Vision</strong> supports the following Digidesignhardware:• <strong>Pro</strong> Tools III/24• <strong>Pro</strong> Tools II• <strong>Pro</strong> Tools I• Session 8/<strong>Pro</strong>ject• Sound Tools II• <strong>Audio</strong>media II/IIIMake sure to read any supplements(either printed or on-line) to learn aboutany additional Digidesign hardwaresupport.OPENING THE RECORDMONITOR WINDOWTo open the Record Monitor Window:Choose Windows>RecordMonitor.<strong>Vision</strong> opens a Record Monitor Windowsimilar to the one shown on page 110.NOTE: Your Record Monitor Windowmay appear different depending on thetype of Digidesign hardware you use.TIP: You can also open the Record MonitorWindow directly from the Control Bar byclicking the Record Indicator button ( ).<strong>Vision</strong> & Studio <strong>Vision</strong> <strong>Pro</strong> — <strong>Audio</strong> Reference Manual 109
PART 4: Digidesign DAE: Configuration & Recording Typical Digidesign Record Monitor Window (this one for <strong>Pro</strong> Tools <strong>Pro</strong>ject)ANATOMY OF THE RECORDMONITOR WINDOWThe following items discuss each elementof the generic Record Monitor Windowshown above. Record Levels: Use this area to viewthe <strong>audio</strong> input level when recording<strong>audio</strong>. Clipping Indicators: This indicatorlights when an <strong>audio</strong> level exceeds0 dB and stays lit until you reset it byclicking anywhere within the RecordLevel indicator for the offendingchannel. Input Source: This column showsthe name of each <strong>audio</strong> input for yourdigital <strong>audio</strong> interface. With TDMsystems, you have a pop-up ofchoices.Record Monitor Pop-up Menu:Use this to select <strong>Audio</strong> Recordingp<strong>ref</strong>erences. See <strong>Audio</strong> RecordingP<strong>ref</strong>erences (pg. 240)Record Enable Indicators: Click aRecord Enable Indicator to record the<strong>audio</strong> arriving at the correspondinginput. The Record Enable Indicatorhas three states:—Solid Red: When an input channelis record-enabled, this indicator issolid red.—Flashing Red: The indicator flashesred if <strong>Vision</strong> is in play mode and hasthe possibility of recording (such aswith punch-in)—it then turns solidred when <strong>Vision</strong> begins to actuallyrecord.—No Color: The input channel is notenabled and will not record <strong>audio</strong>.110 Opcode Systems, Inc.
CHAPTER 13: DAE: Record Monitor WindowRecord File Options: Press andhold this icon to open a pop-up menuof record file options. These optionslet you create new record files,append to existing files, or close arecord file.Record Files: This column showsthe name of the file to which <strong>audio</strong>data is recorded.Available Recording Time: Thiscolumn displays the amount ofrecording time available (based onthe amount of free disk space andother recording parameters).<strong>Audio</strong> Instruments: Use thiscolumn to select an <strong>Audio</strong> Instrumentfor each channel (or linked pair). Use<strong>Audio</strong> Instruments to group related<strong>audio</strong> events, to associate controllerdata with specific events, to assignplayback voices so that multiple <strong>audio</strong>events can play simultaneously, andto associate <strong>audio</strong> events with particularoutputs.Thru: Use this pop-up menu to selectone of three <strong>audio</strong> thru options:On: Select On if the signal you’rerecording is patched directly intoyour <strong>audio</strong> hardware without firstgoing through a mixing console.When the On option is selected,<strong>Vision</strong> sends the <strong>audio</strong> signal arrivingat the input directly to the output ofan <strong>audio</strong> channel so that you can hearthe signal you’re recording.Off: Select Off if you’re using amixing console to route <strong>audio</strong> signalsto and from your <strong>audio</strong> interface.When the Off option is selected,<strong>Vision</strong> does not send the <strong>audio</strong> inputsignal directly thru to the output.Auto: Select this option if you want<strong>Vision</strong> to make “intelligent” thruingdecisions based on recording/playbackmodes. Specifically:• <strong>Vision</strong> turns Thru On during idletimes.• <strong>Vision</strong> turns Thru Off duringplayback.• During recording, <strong>Vision</strong> turnsThru On only for the input channelsthat are record enabled. Thislets you hear what you’re recordingwhile you record it.QuickPunch: Choose this option toenable on-the-fly punching in and out(available only to Studio <strong>Vision</strong> <strong>Pro</strong>owners with TDM-equippedhardware). See Punching in on-the-flywith “QuickPunch” (pg. 127) fordetails.Auto Compact: Choose this optionto automatically compact <strong>audio</strong>during recording. Compacting freesdisk space by throwing out <strong>audio</strong> datathat is not <strong>ref</strong>erenced by the currentsequence file (such as data from discarded“takes”).Link Pairs: Choose this option tolink two channels together into asingle stereo <strong>audio</strong> event.<strong>Vision</strong> & Studio <strong>Vision</strong> <strong>Pro</strong> — <strong>Audio</strong> Reference Manual 111
PART 4: Digidesign DAE: Configuration & RecordingHARDWARE SPECIFICVARIATIONSThe following sections discuss the RecordMonitor Window for each type of Digidesignhardware supported by <strong>Vision</strong>.<strong>Pro</strong> Tools III/24Figure 13.1: Typical Record Monitor Window for<strong>Pro</strong> Tools IIIThe Record Monitor Window used by abasic <strong>Pro</strong> Tools III and <strong>Pro</strong> Tools 24 systemsis similar to the window discussed inAnatomy of the Record Monitor Window(pg. 110), but has the following operationaldifference:• You must enable an input before youcan monitor its record level. You canchoose from a pop-up menu of hardwareinputs, <strong>Audio</strong> Instruments,Sample Cell TDM (if installed), andBusses.Studio <strong>Vision</strong>, when used with <strong>Pro</strong>Tools III and 24, will not display inputlevels for any disabled <strong>audio</strong> inputs.<strong>Pro</strong> Tools I and <strong>Pro</strong> Tools IIFigure 13.2: Typical Record Monitor Window for<strong>Pro</strong> Tools I & IIThe Record Monitor Window used by abasic <strong>Pro</strong> Tools I and <strong>Pro</strong> Tools II systemis similar to the window discussed inAnatomy of the Record Monitor Window(pg. 110), except:• There are only four inputs becausethe basic <strong>Pro</strong> Tools I and <strong>Pro</strong> Tools IIsystems are capable of recording onlyfour simultaneous channels of digital<strong>audio</strong>.<strong>Pro</strong> Tools I or II with 8 or More ChannelsThe Record Monitor Window for multiple<strong>Pro</strong> Tools cards (when used with theSystem Accelerator card) is similar to the4-channel window, except it containsmore rows for the additional inputchannels.112 Opcode Systems, Inc.
CHAPTER 13: DAE: Record Monitor WindowSound Tools IIFigure 13.5: Typical Record Monitor Window forSound Tools IIFigure 13.3: Typical Record Monitor Window for a16 Channel <strong>Pro</strong> Tools I or <strong>Pro</strong> Tools II SystemFor example, if you have 2 <strong>Pro</strong> Toolscards, you’ll see 8 input channels; 3 cardswill result in 12 input channels; and 4cards yields 16 input channels.The Record Monitor Window used bySound Tools II is similar to the windowdiscussed in Anatomy of the Record MonitorWindow (pg. 110), except:• There are only four inputs becausethe Sound Tools II systems are capableof recording only foursimultaneous channels of digital<strong>audio</strong>.Session 8/<strong>Pro</strong>ject<strong>Audio</strong>media II/IIIFigure 13.6: Typical Record Monitor Window for<strong>Audio</strong>media II & IIIFigure 13.4: Typical Record Monitor Window forSession 8/<strong>Pro</strong>jectThe Record Monitor Window used by aSession 8/<strong>Pro</strong>ject system is identical tothe window discussed in Anatomy of theRecord Monitor Window (pg. 110).The Record Monitor Window used by<strong>Audio</strong>media II and III is similar to thewindow discussed in Anatomy of theRecord Monitor Window (pg. 110), withthe following exceptions:• There are only two inputs becausethe <strong>Audio</strong>media systems are capableof recording only two simultaneouschannels of digital <strong>audio</strong>.<strong>Vision</strong> & Studio <strong>Vision</strong> <strong>Pro</strong> — <strong>Audio</strong> Reference Manual 113
PART 4: Digidesign DAE: Configuration & Recording• There is an additional Levelnumerical.Since the <strong>Audio</strong>media card has noknobs for adjusting input levels, youcan use this numerical to adjust theinput volume within a range of 0-7.114 Opcode Systems, Inc.
CHAPTER 14: DAE: Recording <strong>Audio</strong>This chapter discusses how to record digital<strong>audio</strong> with <strong>Vision</strong>. You should alreadybe familiar with the Record Monitor Window,discussed in the previous chapter.To import <strong>audio</strong> for use with DAE seeImporting <strong>Audio</strong> with DAE (pg. 209).When you have finished this Chapter, youmay want to look at Chapter 21: AdvancedRecording Techniques for more details pertainingto recording.POWER USER OVERVIEWThe following are the steps required torecord <strong>audio</strong>:Choose Windows>RecordMonitor.<strong>Vision</strong> opens the Record MonitorWindow.With the Record Monitor Window active: Record-enable an input channel.<strong>Vision</strong> produces a standard Save Asdialog box. Use the dialog box to create a newrecord file for the <strong>audio</strong>.Play or sing into your digital <strong>audio</strong>interface and watch the on-screenLEDs to set an optimal input level.PRO TOOLS III/24: You cannot setrecord levels until youÕve record-enabledan input. Enable any other desired options.Options include <strong>audio</strong> thruing, linkingfiles, and auto compacting. Assign a default <strong>Audio</strong> Instrument tothe <strong>audio</strong> youÕre about to record. Leave the Record Monitor Windowopen, then go to the Tracks Window.IMPORTANT: The Record MonitorWindow must be open in order to record<strong>audio</strong>.With the Tracks Window active: Record-enable a track. In the Control Bar, select the desiredrecord mode.If you are about to record an <strong>audio</strong>event, the Record Mode display containsa small digital <strong>audio</strong> icon. In the Control Bar, either set aCountoff or select Wait for Note.<strong>Vision</strong> & Studio <strong>Vision</strong> <strong>Pro</strong> — <strong>Audio</strong> Reference Manual 115
PART 4: Digidesign DAE: Configuration & RecordingClick the Record button in <strong>Vision</strong>ÕsControl bar.If you chose Wait for Note, either playa MIDI note, click the Play button, orpress the Spacebar to start recording.Play or sing into your digital <strong>audio</strong>interface.Click the Stop button when you wantto stop recording.<strong>Vision</strong> opens a Record Monitor Window.Figure 14.1: Record Monitor Window forSession 8/<strong>Pro</strong>jectThe remainder of this chapter discussesthese steps in detail.Click the Record Enable Indicatornext to the appropriate input channel.RECORDING: STEP-BY-STEPThe following sections discuss how tosetup and record a single <strong>audio</strong> track in<strong>Vision</strong>.Designate a Record FileTo record <strong>audio</strong>, you must first designatewhere to store it on your hard disk. Thisis called the record file.To designate a record file for a monophonicinput:Choose Windows>RecordMonitor.<strong>Vision</strong> opens a standard Macintosh SaveAs dialog box.Type a name for your new record filein the Save As dialog box, or use thename <strong>Vision</strong> suggests.PRO TOOLS III/24, PRO TOOLSPROJECT, SESSION 8, SYSTEMACCELERATOR: Be sure to select ahard drive thatÕs connected directly toyour <strong>audio</strong> card, not to your MacÕs SCSIport.Click the Save button.The name of your record file is displayedin the ÒRecord FileÓ column, the RecordEnable Indicator is lit (indicating recordingon that input is enabled), and theamount of available recording time is dis-116 Opcode Systems, Inc.
PART 4: Digidesign DAE: Configuration & RecordingSet Record LevelsThe bargraph in the Record MonitorWindow functions like an LED display—itdisplays the amplitude of an incomingsignal.PRO TOOLS III/24: An input must be recordenabledbefore it can display an incomingsignal.To set your input levels:Play or sing into your digital <strong>audio</strong>interface.Look at the bargraph for the inputwhose volume you wish to set.Avoid ClippingIf the amplitude of the <strong>audio</strong> signalexceeds 0 dB, the waveform becomeschopped off and flat (like a square wave),and the <strong>audio</strong> will sound buzzy and distorted.This is called “clipping,” which youwill most always want to avoid. If you’reaccustomed to analog recording, you’llsoon notice that digital clipping is harsherand much less tolerable than analogclipping.If you clip the volume so the amplitudeexceeds 0 dB, the Record Monitor’s clippingindicator lights at that moment. Afterthe level recedes, the clipping indicatorremains lit to remind you that you clippedthe input level and you should go backand adjust it.Clipping IndicatorAdjust the level of the signal youÕresending to <strong>Vision</strong>.To obtain the best signal-to-noise ratio,adjust the signal so that its peak amplitudeis as high as possible, but below0 dB. In digital recording, you cannotrecord above 0 dB without clipping the<strong>audio</strong>.Generally, youÕll adjust the input level onyour mixing console.When you’re ready to try a different inputlevel, you can clear the clip light by clickinganywhere in the record levelindicator.AUDIOMEDIA: If youÕre using an <strong>Audio</strong>mediacard, the Record Monitor Window has anadditional input level control that you can useto set input levels.118 Opcode Systems, Inc.
CHAPTER 14: DAE: Recording <strong>Audio</strong>Monitor the InputIf you’re recording directly into your<strong>audio</strong> hardware without running thesignal through a mixing console, you willneed to turn on the Thru option in orderto hear the signal you’re recording.For now, you need only know that <strong>Vision</strong>uses <strong>Audio</strong> Instruments to determinewhich output to route recorded <strong>audio</strong> to.This makes it easy to audition files afteryou record them.To assign a record file to a specific <strong>Audio</strong>Instrument:Press and hold the mouse in thedesired inputÕs Instruments column.<strong>Vision</strong> opens a pop-up menu of <strong>Audio</strong>Instruments.When you turn on the Thru option, <strong>Vision</strong>sends the <strong>audio</strong> input signal directly tothe selected <strong>Audio</strong> Instrument.The <strong>audio</strong> input will be routed to theoutput assigned to that <strong>Audio</strong> Instrumentin the <strong>Audio</strong> Instruments Window as discussedin Chapter 15: DAE: <strong>Audio</strong>Instruments.If you’re using a mixing console, use it toroute the <strong>audio</strong> signals and turn the Thruoption off.For more information about the variousThru options, see Anatomy of the RecordMonitor Window (pg. 110).Assign an <strong>Audio</strong> Instrument<strong>Vision</strong> initially assigns each record file toone of its <strong>Audio</strong> Instruments. <strong>Audio</strong>Instruments are discussed inChapter 15: DAE: <strong>Audio</strong> Instruments.While still holding the mouse button,drag the cursor over the desired<strong>Audio</strong> Instrument to select it(highlighting it).In this example, recording is from amono source. The<strong>ref</strong>ore, youÕll want toselect a mono instrument. For moreinformation about mono and stereoinstruments, see Stereo <strong>Audio</strong> Channels(pg. 139).Release the mouse button.<strong>Vision</strong> will assign the <strong>audio</strong> event thatyou record to the selected <strong>Audio</strong>Instrument.You can change <strong>Audio</strong> Instrument assignmentsany time in the future.<strong>Vision</strong> & Studio <strong>Vision</strong> <strong>Pro</strong> — <strong>Audio</strong> Reference Manual 119
PART 4: Digidesign DAE: Configuration & RecordingTo learn how to assign outputs to an<strong>Audio</strong> Instrument, see Output Assignment(pg. 142).Record a TrackNow that you’ve set a record level anddesignated one or more files into whichyou want to record the <strong>audio</strong>, you’re readyto record a track.TEMPO TIP: If you have any MIDI datarecorded, make sure you’re happy with thesequence’s tempo. Although you can changethe <strong>audio</strong>’s playback tempo using theDSP>Adjust <strong>Audio</strong> Tempo command,it’s always easier to “do it right the firsttime” rather than “fixing it in the mix.”To record an <strong>audio</strong> track:Leave the Record Monitor Windowopen.The Record Monitor Window must beopen in order to record <strong>audio</strong> into <strong>Vision</strong>.In the Tracks Window, click the ÒRÓcolumn to record-enable a track (justas you do when you record MIDI).Select the desired record mode fromthe Record Mode pop-up menu (in theControl Bar).Record modes are discussed in yourMIDI Reference Manual.Record-enabled tracks can alwaysrecord MIDI data, but to record <strong>audio</strong>,the Record Monitor Window must beopen and one or more <strong>audio</strong> inputs mustbe record-enabled.If <strong>Vision</strong> is properly configured to record<strong>audio</strong> data, then the Record Mode displaycontains a small digital <strong>audio</strong> icon.Digital <strong>audio</strong> icon indicates thatyou will be recording <strong>audio</strong> eventsIn the Control Bar, either set aCountoff or select Wait for Note.Click the Record button in <strong>Vision</strong>ÕsControl bar.If you chose Wait for Note, eitherplay a MIDI note, click the Play button,or press the Spacebar to startrecording.If desired, type a new track name.120 Opcode Systems, Inc.
CHAPTER 14: DAE: Recording <strong>Audio</strong>Play or sing into your digital <strong>audio</strong>input device. <strong>Vision</strong> will also recordany MIDI you perform.Click the Stop button when you wantto stop recording.The <strong>audio</strong> you record is stored in the currentrecord file (or files) listed in theRecord Monitor Window. Remember, ifyou want to record into another file, youneed to first designate it as the record file.If you have the Graphic Window openyou’ll see a graphic representation of yourwaveform appear below the Piano Roll.Figure 14.2: Waveform DisplayedThe appearance of the waveform is determinedby the <strong>Audio</strong>>Waveform Displaysubmenu. Specifically:• Off: This display option completelydisables the waveform display. Whenyou select this option, <strong>Vision</strong> displayswaveforms as a straight line andwastes no time calculating theirappearance.• Fast: This display option allows<strong>Vision</strong> to redraw waveform displaysquickly because it draws them at alow resolution. This may be desirablewhen you’re recording or playingback <strong>audio</strong>, but the lower resolutionis not as good for detailed <strong>audio</strong>editing.• High Resolution: This displayoption allows <strong>Vision</strong> to display theactual texture of waveforms. This isdesirable when you’re editing andneed to clearly see all peaks and valleys,but it takes the longest amountof time to recalculate and draw.See Waveform Display (pg. 354) for moreinformation.NOTE: Remember, if you want to turn<strong>audio</strong> recording off so you can record onlyMIDI, disable the Record Enable Indicatorin the Record Monitor Window or simplyclose the window. You can see if <strong>audio</strong>recording is enabled by looking for the littledigital <strong>audio</strong> waveform in the Record Modedisplay.ADVANCED RECORDINGTECHNIQUESThe following sections discuss other<strong>audio</strong> recording techniques for <strong>Vision</strong>.Please see Chapter 21: Advanced RecordingTechniques for more details andtechniques involving recording.<strong>Vision</strong> & Studio <strong>Vision</strong> <strong>Pro</strong> — <strong>Audio</strong> Reference Manual 121
CHAPTER 14: DAE: Recording <strong>Audio</strong>If you later decide to unlink events thatyou recorded with the Link Pairs optionenabled, you can do so by selecting themand choosing <strong>Audio</strong>>Unlink Events.For more information, see Unlink Events(pg. 350).You can record as many simultaneoustracks as your hardware allows. Forexample, if you have a four track recordingsystem, you can record up to fourmono tracks simultaneously, or twostereo tracks (equalling four channels).Each simultaneously recorded input musthave its own record file. In addition, youshould assign a different <strong>Audio</strong> Instrumentsto each input or linked input pair asdiscussed in Assign an <strong>Audio</strong> Instrument(pg. 119).When recording with Link Pairs checkedyou should use stereo <strong>audio</strong> instruments.Figure 14.4: Choosing a stereo instrumentFor more information about mono andstereo instruments, see Stereo <strong>Audio</strong>Channels (pg. 139).Recording Multiple TakesIt’s common to record a particular performancenumerous times. Eachperformance is called a take. By recordingnumerous takes, you can later choose thebest performance or, perhaps, assemble anew performance from the various takes.There are a two different techniques forstoring multiple takes:• You can record all <strong>audio</strong> takes into asingle record file.This method keeps all <strong>audio</strong> informationtogether in one place, making iteasy to find and backup <strong>audio</strong>performances.• You can record each <strong>audio</strong> take into aseparate record file.This method keeps different takes indifferent files so, if you lose ordamage a file, you lose only one takeand not all of them.The method you choose affects only how<strong>audio</strong> is stored on your hard disk—it doesnot affect playback. Each method can beautomated using the <strong>Audio</strong> RecordingP<strong>ref</strong>erences dialog. SeeChapter 21: Advanced Recording Techniquesfor more details on recordingmultiple takes.NOTE: For all DAE users with hard diskvolumes greater than 2GB, Opcode recommendsusing a separate file for each take—rather than appending.<strong>Vision</strong> & Studio <strong>Vision</strong> <strong>Pro</strong> — <strong>Audio</strong> Reference Manual 123
PART 4: Digidesign DAE: Configuration & RecordingIf you are recording successive takes intoone file, you can save disk space by usingUndo after an unsatisfactory take—whenyou do so, <strong>Vision</strong> records over the previouslyrecorded take.Recording <strong>Audio</strong> WhileMonitoring Existing <strong>Audio</strong> EventsThis section discusses how to record new<strong>audio</strong> files while monitoring existingones. For example, you might want torecord a backup vocal while listening toyour lead vocal.Before you can fully understand this section,you need to have a thoroughunderstanding of <strong>Audio</strong> Instruments.The<strong>ref</strong>ore, Opcode recommends that youskip this section for now and return to itAFTER you read Chapter 15: DAE: <strong>Audio</strong>Instruments.Dynamic Voice Allocation MethodThis section applies only to those who use<strong>Vision</strong> in dynamic voice allocation mode.Dynamic voice allocation, as discussed inVoice Allocation Modes (pg. 136), is thedefault mode used by:• <strong>Pro</strong> Tools I & II• Sound Tools II• <strong>Audio</strong>media II/IIITo record <strong>audio</strong> while monitoring existing<strong>audio</strong> events, simply record into a newtrack while the other <strong>audio</strong> tracks play.Because of dynamic voice allocation, youwill always be able to hear the <strong>audio</strong>you’re recording as well as any existing<strong>audio</strong> tracks.Fixed Voice Allocation MethodThis section applies only to those who use<strong>Vision</strong> in fixed voice allocation mode.Fixed voice allocation, as discussed inVoice Allocation Modes (pg. 136), is thedefault mode used by:• <strong>Pro</strong> Tools III/24/Mix/Mix Plus• Session 8/<strong>Pro</strong>jectIf you own one of these systems, or if youuse other Digidesign hardware in fixedvoice allocation mode, you must plan howto assign the available <strong>audio</strong> voices. Ifmultiple <strong>audio</strong> events use the same voicenumber, then only one of them can play ata time. For this reason, it’s important toalways know how you’re allocating yourvoices.Voices get assigned in two places:• <strong>Audio</strong> Instruments Window—youmanually assign a voice to each <strong>Audio</strong>Instrument in the Voice column.• Record Monitor Window—whenyou record <strong>audio</strong>, <strong>Vision</strong> automaticallyassigns an input to the voice ofthe same number. For example,Input 1 always uses voice 1, Input 6always uses voice 6, etc.124 Opcode Systems, Inc.
CHAPTER 14: DAE: Recording <strong>Audio</strong>Any voice that <strong>Vision</strong> uses for recording isnot available for playback. For example, ifyou record <strong>audio</strong> on Input 1, it will useVoice 1 and you will NOT be able to hearany existing <strong>audio</strong> events that areassigned to an <strong>Audio</strong> Instrument that usesplayback Voice 1.<strong>Audio</strong> InstrumentsFollow through this example to learn howto record new <strong>audio</strong> events while monitoringexisting ones:Enable an input in the Record MonitorWindow and assign it to an <strong>Audio</strong>Instrument.For this example, assume youÕveenabled Input 2 and assigned it to <strong>Audio</strong>Instrument 3.Look to see which <strong>Audio</strong> Instrumentsare used by the existing <strong>audio</strong> events.For this example, assume your <strong>audio</strong>events are assigned to <strong>Audio</strong>Instruments 1 & 2.<strong>Audio</strong> EventsFigure 1<strong>4.5</strong>: Existing <strong>Audio</strong> Events assignedto <strong>Audio</strong> Instruments 1 & 2 as shown in thisGraphic WindowOpen the <strong>Audio</strong> Instruments Windowto view the voice assignments.The <strong>Audio</strong> Instruments Window is discussedcompletely in Chapter 15: DAE:<strong>Audio</strong> Instruments.In this example, <strong>Audio</strong>-1 is assigned toVoice 1 and <strong>Audio</strong>-2 is assigned toVoice 2.Voice assignmentsIf you were to record now, you wouldonly hear your live <strong>audio</strong> and the <strong>audio</strong>events assigned to <strong>Audio</strong> Instrument 1.ThatÕs because <strong>Audio</strong> Instrument 2 is<strong>Vision</strong> & Studio <strong>Vision</strong> <strong>Pro</strong> — <strong>Audio</strong> Reference Manual 125
PART 4: Digidesign DAE: Configuration & Recordingassigned to Voice 2, which is being usedby the live <strong>audio</strong> (since the live <strong>audio</strong> isrouted to Input 2).If you want to hear all the existing <strong>Audio</strong>Events and the live <strong>audio</strong>...Change <strong>Audio</strong> Instrument 2Õs voiceassignment to a voice other thanVoice 1 or Voice 2.In this example, weÕve changed <strong>Audio</strong>-2to use Voice 6.Now when you record on Input 2, youÕllhear THAT <strong>audio</strong> PLUS the existing<strong>audio</strong> assigned to <strong>Audio</strong>Instruments 1 & 2.OTHER RECORDING ACTIONSThe following sections discuss other miscellaneousrecord features.Automatically Thinning Volumeand Pan Datato playback the sequence, <strong>Vision</strong> maywarn you that these <strong>audio</strong>, volume, or panevents are too dense.<strong>Vision</strong> uses the Smooth <strong>Audio</strong> Controllersin the <strong>Audio</strong> P<strong>ref</strong>erences dialog boxto automatically “thin out” any overlydense data streams.Specifically: Choose <strong>Audio</strong>><strong>Audio</strong> P<strong>ref</strong>erences.<strong>Vision</strong> opens the <strong>Audio</strong> P<strong>ref</strong>erencesdialog box. Select the desired amount ofsmoothing. For a description of eachoption, see below:None: No <strong>audio</strong> smoothing is appliedand no data thinning occurs.Sharp: Only minimal smoothing anddata thinning occurs.Medium: An average amount of smoothingand data thinning occurs.Smooth: A great deal of smoothing anddata thinning occurs.You may wish to try the different presetsuntil your <strong>audio</strong> file starts to play, thenmanually “fine tune” the smoothing controlsto your taste.NOTE: This information applies to allDAE users.In some instances, if you record numerousreal-time volume and pan events andapply them to <strong>Audio</strong> Instruments, then try126 Opcode Systems, Inc.
CHAPTER 14: DAE: Recording <strong>Audio</strong>RECORDING AUDIO FROMOTHER POINTS IN THE TDMCHAINNOTE: This information applies only tousers with TDM systems.You can choose practically any place inthe TDM chain for recording. Some of theuses for this are:• Recording a master mix with all TDMeffects in real time for a “bounce todisk” mix. To do this, route all channelsto a single bus and record fromit.• Record the output of Sample Celldirectly as <strong>audio</strong> into <strong>Vision</strong>.• “Print the effects” from a track. Youcan record from the output of an<strong>Audio</strong> Instrument to record its TDMinsert effects.• Create multiple submixes from busses.For example you could useOpcode’s fusion:VOCODE TDM andrecord the vocoded signal in realtime.For more information see Recording fromAlternate Sources in the TDM Chain(pg. 169)PUNCHING IN ON-THE-FLYWITH “QUICKPUNCH”TDM users can now record <strong>audio</strong> bypunching in on-the-fly. In fact, you caneven punch in and out multiple timeswithout stopping and restarting playback.To use this new capability, enable theQuickPunch checkbox in the RecordMonitor Window, see Figure 14.6.Figure 14.6: Record Monitor Window (DAE),QuickPunch enabledWhen using QuickPunch, each recordenabledinput line uses one voice for playbackand a second voice for recording.Voices are available for QuickPunch onlyif they are not assigned to an <strong>Audio</strong>Instrument.For instance, if you want to use Quick-Punch with two mono input channels, itwill require 2 free voices. And, if your<strong>audio</strong> hardware supports 16 voices andStudio <strong>Vision</strong> has assigned each voice toan <strong>Audio</strong> Instrument, you must reassignthe voices for two of the Instruments sothat the required voices are made available(i.e. reassign <strong>Audio</strong>-15 to voice 1 and<strong>Audio</strong>-16 to voice 2, thereby freeing upvoices 15 and 16)—or you could simply<strong>Vision</strong> & Studio <strong>Vision</strong> <strong>Pro</strong> — <strong>Audio</strong> Reference Manual 127
PART 4: Digidesign DAE: Configuration & Recordingreduce the number of <strong>Audio</strong> Instrumentsby two (choose Number of Instruments>Other...from the menu in the<strong>Audio</strong> Instruments & Routings Window,see Figure 14.7).For the desired input line, specify amono hardware input from theRecord Source pop-up. Then recordenablethe input by clicking itsRecord Enable Indicator.Figure 14.7: Changing the number of <strong>Audio</strong>InstrumentsThe following procedure illustrates usingQuickPunch (with a single mono input) topunch in on a track with existing material:When prompted, enter a name andfolder destination for the record file.Assign the desired mono <strong>Audio</strong>Instrument to the record-enabledinput line (use the same Instrumentassigned to the track that is recordenabled).In the Record MonitorÕs Thru pop-up,select Auto.Record-enable the track you want topunch in on.Enable punch mode by clicking thePunch toggle in the Control Bar.Enable QuickPunch by clicking itscheckbox in the Record MonitorWindow.Leave the Punch In point set to 1¥1¥0and the Punch Out point set to infinity.In the Control BarÕs Record Modepop-up, select Replace.Open the Record Monitor Window byclicking the Record Indicator button( ) in the Control Bar.If prompted with a message indicatingthat QuickPunch is unavailable, go to the<strong>Audio</strong> Instruments Window and free upthe necessary number of <strong>audio</strong> voices(corresponding to the number of inputsrecord-enabled). For instance, if your<strong>audio</strong> hardware has 16 voices and each128 Opcode Systems, Inc.
CHAPTER 14: DAE: Recording <strong>Audio</strong>of your <strong>Audio</strong> Instruments is assigned toa different voice (1-16), simply reassign<strong>Audio</strong>-16 to voice 1.Figure 14.8: Changing the voice assignment for an<strong>Audio</strong> InstrumentOnce the required number of <strong>audio</strong>voices are available, try enabling Quick-Punch again by clicking its checkbox inthe Record Monitor Window.Click the Play button in the ControlBar, or press the Spacebar.<strong>Vision</strong> begins playing from the Punch Inpoint, with the existing track materialbeing heard. The ÒAvailableÓ fields in theRecord Monitor Window begin countingdown.When the desired location is reachedwhere you want to punch in, press theTab key or click the Control BarÕsRecord button.<strong>Vision</strong> begins recording <strong>audio</strong>. The existingtrack material is muted and therecord source material becomes audible.When you wish to punch out, pressthe Tab key or click the Recordbutton.<strong>Vision</strong> stops recording <strong>audio</strong> but continuesplaying. The existing track materialis again heard and the record sourcematerial becomes muted.Repeat the previous two steps asdesired for each region you wish topunch in on. When finished, click theStop button in the Control Bar.QuickPunch Record FilesWhen QuickPunch is enabled, <strong>audio</strong>recording begins each time play mode isentered. If punch mode is never actuallyentered after playback is initiated, therecord files are discarded. If punch modeis entered, however, the length of therecord files will encompass the durationof the playback. Obviously, this can resultin large portions of files accumulating onyour hard disk that won’t necessarilypoint to actual <strong>audio</strong> events in your tracks.The upside to this is that the punchedregions can be extended after recording(since the data resides in the record file).So if you punch in too late or punch outtoo early, you can correct it later bysimply resizing the recorded <strong>audio</strong> eventswith the Trim cursor.To free up hard disk space, Compact yourpunch files from the File ManagementWindow. And, in general, make sure todisable QuickPunch if you don’t intend todo any on-the-fly punches.<strong>Vision</strong> & Studio <strong>Vision</strong> <strong>Pro</strong> — <strong>Audio</strong> Reference Manual 129
PART 4: Digidesign DAE: Configuration & RecordingSETTING THE BUFFER SIZEIt is no longer possible to change DAE’sbuffer size from Studio <strong>Vision</strong> if you haveTDM plug-ins assigned. If you try to dothis you will get an error message indicating“there is another application usingDAE.”You can, however, change the buffer sizefrom the DAE application. Simply switchto DAE (you can even leave Studio <strong>Vision</strong>open while doing this) and chooseFile>Set Playback Buffer Size.130 Opcode Systems, Inc.
CHAPTER 15: DAE: <strong>Audio</strong> InstrumentsThis chapter discusses <strong>Audio</strong> Instruments(as defined in Chapter 2: BasicTerminology). In it, you’ll learn:• How to assign the number of <strong>Audio</strong>Instruments;• How to name <strong>Audio</strong> Instruments;• How to set <strong>Audio</strong> Instrument colors;• How to mute and/or solo <strong>Audio</strong>Instruments;• How to assign voices, if necessary;• How to use poly mode with an <strong>Audio</strong>Instrument, if necessary;• How to assign <strong>Audio</strong> Instruments tohardware outputs.OPENING THE AUDIOINSTRUMENTS WINDOWTo open the <strong>Audio</strong> Instruments Window:Choose Windows><strong>Audio</strong>Instruments.<strong>Vision</strong> opens the <strong>Audio</strong> InstrumentsWindow.TIP: If a track contains only <strong>audio</strong>data, you can open the <strong>Audio</strong> InstrumentsWindow directly from the List orGraphic Window or Control Bar byclicking the Instruments icon ( ).Figure 15.1: Typical <strong>Audio</strong> Instruments Windowfor Digidesign Session 8/<strong>Pro</strong>ject<strong>Vision</strong> & Studio <strong>Vision</strong> <strong>Pro</strong> — <strong>Audio</strong> Reference Manual 131
PART 4: Digidesign DAE: Configuration & RecordingYour <strong>Audio</strong> Instruments Window maylook different depending on which DAEhardware you’re using. For example:• You may have fewer (or more) outputs,depending on your digital <strong>audio</strong>interface.• Your Voice column may display theword “any” rather than numbers.• You may have a Poly column in placeof the Stereo column.• You may have more Instruments ifyou have chosen more.Each of the sections in the <strong>Audio</strong> Instruments& Routings Window can be closedor opened by clicking the appropriateopen/close triangle, see Figure 15.2.All of these differences are explained inthe course of this chapter.The <strong>Audio</strong> Instruments Window for TDMusers now displays <strong>Audio</strong> Instruments,hardware inputs, hardware outputs, busses,and even SampleCell channels. Anyof these items can be independentlymuted, soloed, renamed, and defined asstereo. In addition, there are now columnsfor monitoring the number ofassigned sends and plug-ins for each<strong>audio</strong> channelFigure 15.2: Inputs, Outputs, and Busses pop-upsSETTING THE NUMBER OFAUDIO INSTRUMENTSNOTE: This discussion applies to all <strong>Vision</strong>and Studio <strong>Vision</strong> <strong>Pro</strong> users but is mostapplicable to high-end TDM users.<strong>Vision</strong> can contain up to 128 <strong>Audio</strong> Instruments,providing advanced support forhigh-end digital <strong>audio</strong> systems.<strong>Vision</strong> initially defaults to 16 <strong>Audio</strong> Instruments,but you can request a greaternumber, if you desire. <strong>Vision</strong> stores therequested number of <strong>Audio</strong> Instrumentsin both its Setup file and in each <strong>Vision</strong>file.132 Opcode Systems, Inc.
CHAPTER 15: DAE: <strong>Audio</strong> InstrumentsIMPORTANT: The total number of simultaneous<strong>audio</strong> voices that <strong>Vision</strong> can play isdetermined by your <strong>audio</strong> hardware—notthe number of <strong>Audio</strong> Instruments.To select the desired number of <strong>Audio</strong>Instruments:Press and hold the mouse onthe <strong>Audio</strong> Instruments Windowmenu.Move the cursor over theNumber of Instruments option.<strong>Vision</strong> produces a pop-up menu fromwhich you can select the desired numberof <strong>Audio</strong> Instruments.It is now possible tospecify any number of <strong>Audio</strong> Instruments(up to 128) by choosing Number ofInstruments>Other from the menuin the <strong>Audio</strong> Instruments Window.NAMING AUDIO INSTRUMENTSYou can name <strong>Audio</strong> Instruments (forinstance “vocals” or “bass”) to easily identifythem in a sequence. To do so:Click the name of the <strong>Audio</strong>Instrument you wish to change.Type a new name for the <strong>Audio</strong>Instrument.Use the <strong>Audio</strong> Instruments Window toname up to 64 <strong>Audio</strong> Instruments, whichwill appear in any other windows ordialog boxes that contain Instrumentmenus.Figure 15.3: Selecting the number of <strong>Audio</strong>InstrumentsSelect the desired number of<strong>Audio</strong> Instruments, then releasethe mouse button.<strong>Vision</strong> & Studio <strong>Vision</strong> <strong>Pro</strong> — <strong>Audio</strong> Reference Manual 133
PART 4: Digidesign DAE: Configuration & RecordingNaming Busses, Inputs, andOutputsIn addition to <strong>Audio</strong> Instruments, customnames can be typed in for each item in the<strong>Audio</strong> Instruments and RoutingsWindow—for instance, “vocals” for an<strong>Audio</strong> Instrument or “Stereo Send 1” for abus.Figure 15.4: Renaming a busTo rename an <strong>Audio</strong> Instrument, input oroutput, SampleCell channel, or bus, clickin the Name column for the desired item,type in the new name, and then typeReturn. Changes to the names are automaticallyupdated in other windows,dialogs, and pop-up menus.SETTING AUDIO INSTRUMENTCOLORSIf you have a Macintosh with a color monitor,you can display different <strong>Audio</strong>Instruments in different colors. To do so:Choose Windows><strong>Audio</strong>Instruments.<strong>Vision</strong> opens the <strong>Audio</strong> InstrumentsWindow.Press and hold the mouse in theColor column (locatedimmediately to the right of the<strong>Audio</strong> InstrumentÕs name).<strong>Vision</strong> opens a color selection pop-upmenu.NOTE: You will not see a Color column ifyou have a black & white monitor.Select the desired color fromthe pop-up menu.To return a name to its default, highlightthe desired name and type the Delete key.Since inputs, outputs, and SampleCellchannels can be defined as stereo pairs,or as individual mono channels, differentnames can be given for either instance.For instance, your first two hardwareinputs could be named either “StereoInput” as a stereo pair, or “Input 1” and“Input 2” for individual mono channels.NOTE: Custom names for inputs, outputs,and busses are stored in the “Studio <strong>Vision</strong>P<strong>ref</strong>s” file, which is written to the P<strong>ref</strong>erencesfolder inside your System Folder.Custom names for busses are also stored in<strong>Vision</strong> files and the <strong>Vision</strong> Setup file, asthey may differ from project to project.Press and hold the mouseon a color to open a colorselection pop-up menu.Figure 15.5: Setting an <strong>Audio</strong> Instrument’sColor134 Opcode Systems, Inc.
CHAPTER 15: DAE: <strong>Audio</strong> InstrumentsYou can change the colors available in thecolor selection pop-up menu. To do so: Choose Setups>Colors.<strong>Vision</strong> opens a dialog box containing alldefined colors. Click the color you wish tochange.<strong>Vision</strong> opens a standard Macintosh colorpicker dialog box. Pick a new color and click theOK button. Change other colors as desired,then click the OK button toclose the Colors dialog box.You can reset any modified colors toOpcode’s default colors. To do so:MUTING OR SOLOING ANAUDIO INSTRUMENTTo mute or solo an <strong>Audio</strong> Instrument:Click the Mute or Solo columnnext to the desired <strong>Audio</strong>Instrument.This places an ÒMÓ or ÒSÓ in the columnto indicate whether the <strong>Audio</strong> Instrumentis muted or soloed.Soloing occurs across all Instruments,both MIDI Instruments and <strong>Audio</strong> Instruments.Soloing an <strong>Audio</strong> Instrumentmutes all unsoloed <strong>Audio</strong> and MIDIInstruments.Choose Windows>Instruments.<strong>Vision</strong> opens the MIDI InstrumentsWindow.Choose Initialize Colors from theInstruments Window menu.<strong>Vision</strong> resets its colors to their defaultvalues.Click again to disable an <strong>Audio</strong>InstrumentÕs mute or solo.For information about the differencesbetween muting or soloing tracks andmuting or soloing instruments, please seeyour MIDI Reference Manual.<strong>Vision</strong> & Studio <strong>Vision</strong> <strong>Pro</strong> — <strong>Audio</strong> Reference Manual 135
PART 4: Digidesign DAE: Configuration & RecordingVOICE COLUMNThe function of the Voice columnchanges depending on which voice allocationmode <strong>Vision</strong> uses. Before learningabout this column, you need to understand<strong>Vision</strong>’s voice allocation modes.Voice Allocation Modes<strong>Vision</strong> can play as many simultaneous<strong>audio</strong> events as your hardware has voices(up to a maximum of 16). For example, ifyou have a 4 voice system, <strong>Vision</strong> can play4 different <strong>audio</strong> events simultaneously.<strong>Vision</strong> supports two types of voice allocation(dynamic and fixed), which you canselect from the <strong>Audio</strong> InstrumentsWindow menu.Figure 15.6: <strong>Audio</strong> Instruments Window MenuPRO TOOLS III: Dynamic Allocation is notavailable with <strong>Pro</strong> Tools III/24 or any otherTDM-equipped hardware.The following sections discuss the differencesbetween the two voice allocationschemes.Dynamic Voice AllocationWhen you use dynamic voice allocationmode, <strong>Vision</strong> automatically “steals” voicesfrom other <strong>Audio</strong> Instruments as needed.This mode is particularly useful whenyour hardware supports only a limitednumber of simultaneous playback voices.PRO TOOLS III: You cannot use dynamicvoice allocation with <strong>Pro</strong> Tools III or any otherTDM-based <strong>audio</strong> system. This is becauseTDM plug-ins are Òhard-wiredÓ to specificvoices. If <strong>Audio</strong> Instrument voice assignmentswere to change, the plug-ins affectingthat <strong>Audio</strong> Instrument would also change,resulting in undesirable sonic changes.Fixed Voice AllocationWhen you use fixed voice allocationmode, <strong>Vision</strong> always uses an assignedvoice to play each <strong>Audio</strong> Instrument. Youassign voices to <strong>Audio</strong> Instruments in theVoice column. This is the best mode touse with Session 8 or any other <strong>audio</strong>system with a lot of playback voices. It’salso the only mode available for<strong>Pro</strong> Tools III or TDM-equipped systems.NOTE: If you assign the same playbackvoice to two or more <strong>Audio</strong> Instruments,they will “steal” that voice from one anotheras needed.IMPORTANT: Whenever <strong>Vision</strong> uses fixedvoice allocation, you MUST use theSession 8/<strong>Pro</strong> Tools III recording methodas discussed in Fixed Voice AllocationMethod (pg. 124).136 Opcode Systems, Inc.
CHAPTER 15: DAE: <strong>Audio</strong> InstrumentsDefault Voice Allocations<strong>Vision</strong> defaults to the following voice allocationmodes:• <strong>Pro</strong> Tools III/24—fixedDynamic voice allocation is not availablewith <strong>Pro</strong> Tools III.• Session 8/<strong>Pro</strong>ject—fixedDynamic voice allocation is an availableoption, though you may hear<strong>audio</strong> “bleed” between outputs due tothe Session 8’s internal architecture.Opcode strongly recommends keepingSession 8 in fixed voice allocationmode.• <strong>Pro</strong> Tools I & II—dynamicIf you use an entry-level, 4-voice versionof <strong>Pro</strong> Tools, you’ll find it mostconvenient to allow <strong>Vision</strong> to operatein dynamic mode. However, if youhave 8 or more voices, you mightp<strong>ref</strong>er using fixed voice allocation—this will give you more control overyour voice assignments.• Sound Tools II—dynamicMost users will find it easiest to let<strong>Vision</strong> dynamically allocate the fourvoices in this <strong>audio</strong> system.• <strong>Audio</strong>media—dynamicMost users will find it easiest to let<strong>Vision</strong> dynamically allocate the fourvoices in this <strong>audio</strong> system.Using the Voice ColumnThe Voice column behaves differentlydepending on whether you use dynamicor fixed voice allocation. Specifically:• Dynamic Allocation: If you usedynamic voice allocation, then anyvoice can be used to play any <strong>Audio</strong>Instrument. This fact is <strong>ref</strong>lected bythe word “any” in the Voice column.You cannot change the voice assignmentin dynamic allocation mode.• Fixed Allocation: If you use fixedvoice allocation, then you can use theVoice column to assign any voice toany <strong>Audio</strong> Instrument. This isdescribed in Assigning Voices in FixedAllocation Mode (pg. 137).Assigning Voices in Fixed AllocationModeTo assign a playback voice to an <strong>Audio</strong>Instrument:Make certain <strong>Vision</strong> is in FixedAllocation mode (as seen in the<strong>Audio</strong> Instruments Window popupmenu).Press and hold the mouse in theVoice column next to thedesired <strong>Audio</strong> Instrument.<strong>Vision</strong> & Studio <strong>Vision</strong> <strong>Pro</strong> — <strong>Audio</strong> Reference Manual 137
PART 4: Digidesign DAE: Configuration & Recording<strong>Vision</strong> opens a pop-up menu listing allpossible playback voices.Select the desired playbackvoice, and release the mousebutton.NOTE: If an <strong>Audio</strong> Instruments is set tostereo mode, you will only be able to assignvoices in pairs. For information, see thenext section.STEREO/POLY COLUMNThe name and function of this columnchanges depending on whether <strong>Vision</strong>uses fixed or dynamic voice allocation.Voice allocation modes are defined inVoice Allocation Modes (pg. 136).Specifically:• Dynamic Allocation: If you usedynamic voice allocation, this columnis labelled “Poly” and works asdescribed in Using The Poly Column(pg. 138).• Fixed Allocation: If you use fixedvoice allocation, this column islabelled “Stereo” and works asdescribed in Using the Stereo Column(pg. 139).Using The Poly ColumnUse the Poly column to enable or disablepoly mode for each <strong>Audio</strong> Instrument.With poly mode enabled, an <strong>Audio</strong> Instrumentcan play multiple <strong>audio</strong> eventssimultaneously (provided the <strong>audio</strong>events are on separate tracks).To fully comprehend poly mode, youshould have an understanding of suchbasic terminology as “<strong>audio</strong> events” and“voices.” See Chapter 2: Basic Terminologyfor more information.The following sections describe polymode in greater detail.Poly Mode OnIf an <strong>Audio</strong> Instrument’s Poly column ischecked, then poly mode is enabled forthat <strong>Audio</strong> Instrument.With poly mode enabled, an <strong>Audio</strong> Instrumentcan play as many simultaneous<strong>audio</strong> events as your <strong>audio</strong> hardwareallows:Max Number Of <strong>Audio</strong> Events = Number Of VoicesSupported By Your <strong>Audio</strong> HardwareFor example, if you have a four-voicesystem (such as Digidesign’s SoundTools II) and you check the Poly columnfor <strong>Audio</strong> Instrument 1, then <strong>Audio</strong>Instrument 1 can play up to four <strong>audio</strong>events simultaneously (provided they areon separate tracks).138 Opcode Systems, Inc.
CHAPTER 15: DAE: <strong>Audio</strong> InstrumentsPoly Mode OffIf an <strong>Audio</strong> Instrument’s Poly column isnot checked, the poly mode is disabled forthat <strong>Audio</strong> Instrument.With poly mode disabled, an <strong>Audio</strong> Instrumentcan play only a single <strong>audio</strong> event,no matter how many <strong>audio</strong> events areassigned to the <strong>Audio</strong> Instrument.Using the Stereo ColumnStereo <strong>Audio</strong> ChannelsThe Stereo column determines whetheran <strong>Audio</strong> Instrument, hardware input oroutput, or bus is stereo or mono. To makean <strong>audio</strong> channel “stereo,” place a checkmark in the column for that channel.In order to play back stereo <strong>audio</strong> events,they must be assigned to a stereo <strong>Audio</strong>Instrument. Whether a channel is monoor stereo also determines how it can beused as an input source in a console channel,or as a record source in the RecordMonitor. For instance, stereo <strong>Audio</strong>Instruments can only use stereo plug-ins,and should be assigned to stereo outputs;also, if you’re routing stereo <strong>audio</strong> channelsto a bus, make sure it is a stereo bus;and, if you’re attempting to record withLink Pairs checked, you’ll need to recordfrom a stereo source (<strong>Audio</strong> Instrument,output, or bus) to a stereo <strong>Audio</strong>Instrument.Stereo BussesTDM busses can now be specified as “stereo”in the <strong>Audio</strong> Instruments & RoutingsWindow. Whether a bus is stereo determineshow <strong>audio</strong> channels are routed toit, and how the bus is recorded.Figure 15.7: Making a bus “stereo”For instance, if you have a stereo <strong>Audio</strong>Instrument and want it sent to a bus, youshould make sure that the destination is astereo bus.You can, however, mix and match stereoand mono signals when routing to busses.In doing so, the following rules apply:• When sending a stereo console channelto a mono bus, only the leftchannel is sent.• When sending a mono console channelto a stereo bus, the signal is sentto both the left and right channels ofthe bus.You cannot, however, mix and matchstereo and mono signals when recording.If you attempt to record from a stereo busto a mono <strong>Audio</strong> Instrument, or from amono bus to a stereo <strong>Audio</strong> Instrument,you will be prompted to make the necessarychanges.<strong>Vision</strong> & Studio <strong>Vision</strong> <strong>Pro</strong> — <strong>Audio</strong> Reference Manual 139
PART 4: Digidesign DAE: Configuration & RecordingStereo Inputs and OutputsClicking in the Stereo column works alittle differently for inputs and outputs,and SampleCell channels (as opposed to<strong>Audio</strong> Instruments and busses).Click in the Stereo columnto turn mono Outputs intoa stereo Output pairFigure 15.8: Stereo output pairHardware inputs and outputs can appearin the <strong>Audio</strong> Instruments & RoutingsWindow as either mono or stereo pairs.For instance, if your <strong>audio</strong> interface hasjust two outputs (1-2), they can act as individualmono outputs, or they can act as anoutput pair. The Stereo column determineshow inputs and outputs can beused as input sources for console channelsin the Console Window.Regardless of the state of the Stereo column,inputs are always available asindividual mono inputs and stereo inputpairs in the Record Monitor’s Source popup;and outputs are always available asindividual mono outputs and stereooutput pairs in the Output pop-up for consolechannels.If <strong>Vision</strong> is set to fixed allocation mode,the <strong>Audio</strong> Instruments Window contains aStereo column.Click the Stereo column in an <strong>Audio</strong>Instrument row to make that <strong>Audio</strong>Instrument stereo.Stereo <strong>Audio</strong> Instruments require twovoices for playback (one for each channel).<strong>Vision</strong> pairs voices sequentially. Thatis, it pairs Voice 1 with Voice 2; Voice 3with Voice 4, and so on.The Stereo column functions differentlydepending on which Digidesign hardwareyou own:• <strong>Pro</strong> Tools III/24—see Stereo Voicing—<strong>Pro</strong>Tools III/24 Only (pg. 141).• All other DAE hardware—seeStereo Voicing—Except <strong>Pro</strong> Tools III/24 (pg. 140).Stereo Voicing—Except <strong>Pro</strong> Tools III/24NOTE: This section applies to all Digidesignhardware except <strong>Pro</strong> Tools III/24.These users should read Stereo Voicing—<strong>Pro</strong> Tools III/24 Only (pg. 141) instead ofthis section.Click the Stereo column for an <strong>Audio</strong>Instrument to make that <strong>Audio</strong> Instrumentstereo. Assume, for example, thatyour <strong>Audio</strong> Instruments Window lookslike Figure 15.9.Figure 15.9: Sample <strong>Audio</strong> Instrument Window140 Opcode Systems, Inc.
CHAPTER 15: DAE: <strong>Audio</strong> InstrumentsClick the Stereo column next toany <strong>Audio</strong> Instrument you wantto use for stereo playback.Stereo Voicing—<strong>Pro</strong> Tools III/24 OnlyAssume, for example, that your <strong>Audio</strong>Instruments Window looks likeFigure 15.10.<strong>Vision</strong> places a check mark in the Stereocolumn and changes the Voice columnto show that stereo <strong>Audio</strong> Instrumentsuse 2 voices.To change the voice pair used by a stereo<strong>Audio</strong> Instrument:Press and hold the mouse in theVoice column next to one of thestereo <strong>Audio</strong> Instruments.<strong>Vision</strong> opens a pop-up menu listing allpossible voice pairs.Figure 15.10: Sample <strong>Audio</strong> Instrument WindowIn Figure 15.10, notice the voiceassignments.Specifically, Voice 4 is assigned to <strong>Audio</strong>Instrument 1; Voice 8 to <strong>Audio</strong>Instrument 2; and so on.Click the Stereo column next to any<strong>Audio</strong> Instrument you want to use forstereo playback.In this example, click in the Stereocolumn for <strong>Audio</strong> Instrument 1.Select the desired voice pair,and release the mouse button.Notice that <strong>Vision</strong> also enablesstereo mode for <strong>Audio</strong> Instrument 3.Reason: <strong>Audio</strong> Instrument 3 usesVoice 3, which is part of a stereo pair.(Recall that <strong>Vision</strong> groups stereo voicessequentially: 1&2, 3&4, 5&6, and so on).Also notice that the Voice columnchanges to show that <strong>Audio</strong><strong>Vision</strong> & Studio <strong>Vision</strong> <strong>Pro</strong> — <strong>Audio</strong> Reference Manual 141
PART 4: Digidesign DAE: Configuration & RecordingInstruments 1 & 3 now use a pair ofvoices for stereo playback.To change the voice pair used by a stereo<strong>Audio</strong> Instrument:Press and hold the mouse in theVoice column next to one of thestereo <strong>Audio</strong> Instruments.OUTPUT ASSIGNMENTThe <strong>Audio</strong> Instruments Window has anOutput column for each physical <strong>audio</strong>output on your digital <strong>audio</strong> interface.For example, Sound Tools II has four<strong>audio</strong> outputs. The Session 8 has eight<strong>audio</strong> outputs as shown in Figure 15.1 onpage 131.To assign <strong>Audio</strong> Instruments to outputs:<strong>Vision</strong> opens a pop-up menu listing allpossible playback voices.Choose Windows><strong>Audio</strong>Instruments.<strong>Vision</strong> opens the <strong>Audio</strong> InstrumentsWindow.Enable or disable outputs for each<strong>Audio</strong> Instrument by clicking thedesired output dots.A disabled output has an empty Outputdot. An enabled output has a highlighteddot (green on a color monitor).Select the desired voice pair,and release the mouse button.There are a number of methods forenabling/disabling outputs:• Click an output dot to turn that outputon and off.NOTE: If you turn off stereo mode for an<strong>Audio</strong> Instrument, <strong>Vision</strong> will automaticallyturn stereo mode off for any other<strong>Audio</strong> Instruments to which one of thosevoices is assigned.142 Opcode Systems, Inc.
CHAPTER 15: DAE: <strong>Audio</strong> Instruments• Click the line between a pair of outputdots to turn both outputs on and off.Typical Output AssignmentsYou should assign <strong>Audio</strong> Instrumentsonly to the outputs where you want tohear them.Hardware Specific Variations• Click an output number at the top ofthe column to turn on or off all outputsof that number.• Click the line between a pair of outputnumbers at the top of the column toturn on or off all like-numberedoutput pairs.The following sections discuss specificoutput routing requirements for differenttypes of <strong>audio</strong> hardware.<strong>Pro</strong> Tools III/24/Mix/Mix Plus<strong>Pro</strong> Tools III and <strong>Pro</strong> Tools 24 have animmense amount of flexibility in how the<strong>audio</strong> can be routed. For this chapter wewill only examine physical outputs. Howeverthere are many more options. Pleaseread Chapter 16: TDM Bussing, Routing &Plug-Ins for a complete rundown of allbussing and routing.Figure 15.11 shows a typical <strong>Audio</strong> InstrumentsWindow for <strong>Pro</strong> Tools III.Figure 15.11: Typical <strong>Pro</strong> Tools III <strong>Audio</strong>Instruments Window<strong>Vision</strong> & Studio <strong>Vision</strong> <strong>Pro</strong> — <strong>Audio</strong> Reference Manual 143
PART 4: Digidesign DAE: Configuration & RecordingOnly one stereo output pair can beenabled for each <strong>Audio</strong> Instrument. Also,since each <strong>Audio</strong> Instrument is assignedto a specific voice, any other <strong>Audio</strong> Instrumentsthat use that voice must have thesame output assignments.Session 8/<strong>Pro</strong>jectFigure 15.12 shows a typical <strong>Audio</strong> InstrumentsWindow for Session 8.Figure 15.12: Typical Session 8 <strong>Audio</strong> InstrumentsWindowFor each <strong>Audio</strong> Instrument, the outputsmust either be all left, all right, or all stereo.Specifically:• If you assign an <strong>Audio</strong> Instrument toan odd numbered output, then allother output assignments for that<strong>Audio</strong> Instrument must also beassigned to odd outputs.For example, look at Figure 15.12.Since <strong>Audio</strong>-1 is already assigned toOutputs 1 and 3 (odd numbers), additionalassignments can only be toOutputs 5 and/or 7. In this example,you cannot assign <strong>Audio</strong>-1 to Outputs2, 4, 6, or 8 without disablingOutputs 1 and 3.• If you assign an <strong>Audio</strong> Instrument toan even numbered output, then allother output assignments for that<strong>Audio</strong> Instrument must be assignedto even outputs.For example, look at Figure 15.12.Since <strong>Audio</strong>-2 is already assigned toOutputs 2 and 4 (even numbers),additional assignments can only be toOutputs 6 and 8. In this example, youcannot assign <strong>Audio</strong>-2 to Outputs 1, 3,5, or 7 without disablingOutputs 2 and 4.• If you assign an <strong>Audio</strong> Instrument toa stereo pair, then all other outputassignments for that <strong>Audio</strong> Instrumentmust be assigned to stereopairs.For example, look at Figure 15.12.Since <strong>Audio</strong>-3 is already assigned tostereo pair 5 & 6, additional assignmentscan only be to stereo pairs1 & 2, 3 & 4, or 7 & 8. In this example,you cannot assign <strong>Audio</strong>-3 toindividual left or right outputs withoutdisabling stereo pair 5 & 6.If you’ve added TDM support to yourSession 8, you essentially have a<strong>Pro</strong> Tools III system. For more information,see <strong>Pro</strong> Tools III/24/Mix/Mix Plus(pg. 143).144 Opcode Systems, Inc.
CHAPTER 15: DAE: <strong>Audio</strong> Instruments<strong>Pro</strong> Tools I & <strong>Pro</strong> Tools IIIf you’re using multiple <strong>Pro</strong> Tools cardsand a System Accelerator card, you willsee outputs displayed in groups of four(each group represents a 4-channel<strong>Pro</strong> Tools system).If you have an 8-track <strong>Pro</strong> Tools system,an <strong>Audio</strong> Instrument can only be assignedto outputs that are in the same group offour. For example, if <strong>Audio</strong>-1 is assignedto Output 1, it can also be assigned toOutput 2, Output 3, and Output 4. Itcannot be assigned to Outputs 5through 8.If you have a 12-track or 16-track<strong>Pro</strong> Tools system, then an <strong>Audio</strong> Instrumentcan only be assigned to outputs thatare part of the same pair. For example, If<strong>Audio</strong>-1 is assigned to Output 5, it can alsobe assigned to Output 6; it cannot beassigned to any other output without disablingOutput 5.If, in an 8+ track system, you enable anoutput for an <strong>Audio</strong> Instrument that’s currentlyassigned to a different outputgrouping, <strong>Vision</strong> will automatically disableany output assignments in thatoriginal grouping.SENDS AND PLUG-INSCOLUMNSThese columns let you monitor thenumber of assigned sends and plug-insfor <strong>Audio</strong> Instruments, inputs, outputs,and busses. The individual fields for eachcolumn are for display purposes only, youcannot click in them to make changes—they indicate the processing and routingresources assigned in all of four ConsoleWindows.Figure 15.13: Viewing Sends and Plug-InsIn Figure 15.13, for instance, <strong>Audio</strong>-1 isrouted to one send and is assigned to twoplug-ins. <strong>Audio</strong>-2, on the other hand, isassigned to no sends and no plug-ins.Since it is possible for <strong>audio</strong> channels tobe removed from a Console Window withoutclearing their sends and plug-ins,these columns can be used to monitorthese assignments—regardless of thestate of the Console Windows.<strong>Vision</strong> & Studio <strong>Vision</strong> <strong>Pro</strong> — <strong>Audio</strong> Reference Manual 145
PART 4: Digidesign DAE: Configuration & RecordingTHE AUDIO INSTRUMENTSMENUThe <strong>Audio</strong> Instruments Window containsa small pop-up menu with two options:• Dynamic Allocation• Fixed AllocationUse this pop-up menu to change thedefault voice assignment method for yourDAE hardware.IMPORTANT: Changing voice allocationmethods greatly alters <strong>Vision</strong>’s recordingand playback functions. Make sure youunderstand the difference between the twooptions before changing the default.NOTE: Some Digidesign hardware doesnot support both voice allocation methods.TDM SystemsFrom the menu in the <strong>Audio</strong> Instruments& Routings Window, choose Reset AllRoutings to:• Clear all plug-in and sendassignments;• Reset all output assignments for<strong>Audio</strong> Instruments to their defaultstate;• Set all output assignments for inputsand busses to “none.”You can, of course, manually remove pluginand send assignments in the ConsoleWindow. In addition, you can chooseClear Console from the menu in theConsole Window to clear everything inthat console, including plug-ins andsends.SAVING INSTRUMENT SETUPS<strong>Audio</strong> Instrument assignments are savedin each <strong>Vision</strong> file, along with MIDIInstruments. You may also save <strong>Audio</strong>Instruments in the <strong>Vision</strong> Setup file byusing the File>Save as Setup command.See your MIDI Reference Manual formore information about the Setup file.Clearing RoutingsFigure 15.14: Reset All Routings command146 Opcode Systems, Inc.
CHAPTER 16: TDM Bussing, Routing &Plug-InsWHO SHOULD READ THISCHAPTER?This chapter applies only to those whouse DAE and own a TDM-equipped system,such as Digidesign’s <strong>Pro</strong> Tools III,<strong>Pro</strong> Tools 24, or <strong>Pro</strong> Tools 24 Mix/MixPlus.Studio <strong>Vision</strong> gives TDM users completerouting access to all of their internal TDMplug-ins, external signal processors, andSampleCell cards. This chapter discussesusing the TDM bus in Studio <strong>Vision</strong>.Before reading this chapter, you shouldbe familiar with material in Part 5: Basic<strong>Audio</strong> Editing & Playback and Part 6:Advanced <strong>Audio</strong> Techniques.NOTE: TDM plug-ins from Opcode,Digidesign, and other developers are discussedin the documentation included withthe plug-ins.CONSOLE USE WITH TDMEQUIPPED SYSTEMSUse the Console Window to route <strong>audio</strong>to busses, outputs, and TDM plug-ins.Specifically, this chapter discusses thefollowing:• Mono and Stereo TDM supportStudio <strong>Vision</strong> can use all three typesof TDM modules: mono, stereo, andmono-in/stereo-out. See Mono andStereo TDM Plug-Ins (pg. 151).• Output routing in consolesYou can route <strong>Audio</strong> Instruments tohardware outputs (or <strong>audio</strong> busses)either from the <strong>Audio</strong> InstrumentsWindow or directly from the ConsoleWindow. See <strong>Audio</strong> Outputs(pg. 155).• <strong>Audio</strong> Send modulesEach Console channel supports up tofour separate sends (mono or stereodepending on the type of <strong>Audio</strong>Instrument). See <strong>Audio</strong> Sends(pg. 158).<strong>Vision</strong> & Studio <strong>Vision</strong> <strong>Pro</strong> — <strong>Audio</strong> Reference Manual 147
PART 4: Digidesign DAE: Configuration & Recording• 16 <strong>audio</strong> bussesStudio <strong>Vision</strong> contains 16 internal<strong>audio</strong> busses for TDM users. Thesebusses can be used either as <strong>Audio</strong>Instrument outputs, as discussed in<strong>Audio</strong> Outputs (pg. 155), or as <strong>Audio</strong>Send destinations, as discussed in<strong>Audio</strong> Sends (pg. 158).• SampleCell supportIf you own a TDM-based SampleCellcard, you can route its outputs intothe console, processing and mixingSampleCell the same as any other<strong>Audio</strong> Instrument in Studio <strong>Vision</strong>.See SampleCell Support (pg. 165).• Console support for hardwareinputsTDM-users can route hardwareinputs into a console, providing twodistinct advantages: 1) you can patchexternal signal processors into a console,and 2) you can use Studio<strong>Vision</strong>’s consoles as a virtual mixingconsole.NOTE: A general discussion of <strong>Vision</strong>’sConsole Windows is contained in yourMIDI Reference Manual.CREATING A CONSOLE WITHTDM PLUG-INSUse one of Studio <strong>Vision</strong>’s Console Windowsto access TDM plug-ins. To do so:Press and hold the mouse over theWindows>Console command.Studio <strong>Vision</strong> produces a submenu ofconsole choices.Figure 16.1: Console SubmenuSelect one of the sixteen consolesfrom the submenu.Studio <strong>Vision</strong> opens that ConsoleWindow.Figure 16.2: Typical Console Window148 Opcode Systems, Inc.
CHAPTER 16: TDM Bussing, Routing & Plug-InsFrom the Console Window menu,choose Build Console From><strong>Audio</strong> Instruments.Studio <strong>Vision</strong> produces a submenu ofTDM choices.Studio <strong>Vision</strong> assigns each of your <strong>Audio</strong>Instruments to a corresponding consolechannel.From the submenu, select the numberof plug-ins you want to access perchannel.Studio <strong>Vision</strong> adds a plug-in area toeach console channel.Plug-in areaTDM Plug-InSelectorsFrom the Console Window menu,press and hold the mouse on thePlug-Ins command.Figure 16.3: Console Window with 2 Plug-Insshown for each Console Channel<strong>Vision</strong> & Studio <strong>Vision</strong> <strong>Pro</strong> — <strong>Audio</strong> Reference Manual 149
PART 4: Digidesign DAE: Configuration & RecordingASSIGNING TDM PLUG-INSUse Studio <strong>Vision</strong>’s consoles to assignTDM plug-ins to specific <strong>Audio</strong> Instruments.To do so:Press and hold the mouse on thePlug-in Selector pop-up menu.Studio <strong>Vision</strong> opens a pop-up menu ofyour installed TDM plug-ins.pop-up menushowing all ofyour installedTDM plug-insRelease the mouse button.Studio <strong>Vision</strong> assigns the selected TDMplug-in to the <strong>Audio</strong> Instrument displayedin that console channel.While still holding the mouse button,move the cursor over the desiredplug-in to select it.The <strong>Audio</strong> Instrument representedin this channel uses the ÒShortDelayÓ TDM plug-in.150 Opcode Systems, Inc.
CHAPTER 16: TDM Bussing, Routing & Plug-InsMONO AND STEREO TDMPLUG-INSStudio <strong>Vision</strong> supports the following TDMrouting options:• mono in/mono out• mono in/stereo out• stereo in/stereo outStudio <strong>Vision</strong> represents these routingsgraphically in the Console Window, asshown in Figure 16.4.Using Stereo TDM Plug-InsAssume you've created a stereo <strong>Audio</strong>Instrument voicing (as set in the <strong>Audio</strong>Instruments Window).<strong>Audio</strong> Instruments are STEREO, as indicated bythe checkmark and the dual Voice assignment<strong>Audio</strong> Instr: MONOPlug-In: NONE<strong>Audio</strong> Instr: MONOPlug-In: MONOSince you’re using stereo <strong>Audio</strong> Instruments,you can access ONLY stereo TDMplug-ins from the Console Window:<strong>Audio</strong> Instr: MONOPlug-In: MONO IN/STEREOOUT<strong>Audio</strong> Instr: STEREO orMONO (See NOTE 1)Plug-In: STEREO<strong>Audio</strong> Instr: STEREO orMONO (See NOTE 1)Plug-In: NONEFigure 16.4: Graphic Indication of Stereo StatusNOTE 1: A mono <strong>Audio</strong> Instrument willhave stereo plug-in inputs if the TDM pluginabove it contains a mono in/stereo outplug-in. For more information, see “UsingMono TDM Plug-Ins (pg. 152).”Notice that the plug-in area in the ConsoleWindow now indicates that the <strong>Audio</strong>Instruments are stereo.<strong>Vision</strong> & Studio <strong>Vision</strong> <strong>Pro</strong> — <strong>Audio</strong> Reference Manual 151
PART 4: Digidesign DAE: Configuration & RecordingUsing Mono TDM Plug-InsAssume you’ve assigned a single, monovoice to an <strong>Audio</strong> Instrument (as set inthe <strong>Audio</strong> Instruments Window).<strong>Audio</strong> Instruments are MONO, as indicated by the lackof a checkmark and the single Voice assignmentAs shown in Figure 16.5, you can accesstwo types of TDM plug-ins from the ConsoleWindow:• mono in/mono out• mono in/stereo outIf you select a mono TDM plug-in, it processesthe mono input signal and outputsa mono signal.If you select a mono in/stereo out TDMplug-in, it processes the mono input signaland outputs a stereo signal. This results inthree important points:• In order to hear the stereo signal, youmust send that signal to an outputpair.• The digital <strong>audio</strong> is now a stereo signal,yet Studio <strong>Vision</strong> continues to useonly one voice—the “extra” voice isprovided by your TDM plug-in usingresources from the DSP Farm.• Since the plug-in’s output is stereo,any plug-in placed after it in the chaincan only be a stereo TDM plug-in.A mono-in/stereo-outplug-in......can only be followedby a stereo plug-inFigure 16.5: Two Types of Mono-In Plug-Ins152 Opcode Systems, Inc.
CHAPTER 16: TDM Bussing, Routing & Plug-InsPLUG-IN EDIT WINDOWOpening the Plug-In Edit WindowYou can now have multiple Plug-In EditWindows open at the same time. Clickinga plug-in edit button for each consolechannel opens a new, distinct Plug-In EditWindow.Plug-In ControlsThe Plug-In Edit Window for TDM pluginsnow has a different set of controls atthe top of the window, each of which isdescribed below. Figure 16.6: Plug-In Edit Window (TDM)If an existing Plug-In Edit Window isopen, you can Option-click a plug-innumber from the Console Window to displaythat plug-in in the current Plug-InEdit Window—which helps you cut downon the proliferation of open windows.Title Bar NameThe title bar of each Plug-In Edit Windowis based on the name of the plug-in andthe <strong>audio</strong> channel it affects. For instance,the name of the window in Figure 16.6 is“TC|CHORUS for <strong>Audio</strong>-1,” which meansthat window is displaying the plug-inTC|CHORUS for <strong>Audio</strong> Instrument<strong>Audio</strong>-1.Plug-In Selector: Choose a plug-infrom this pop-up menu to assign it tothe console channel, or choose “noplug-in” to remove the current one.This pop-up menu, which is duplicatedin the Console Window,displays your installed TDM plug-ins.Changing a plug-in assignment is notpossible during playback.Only those plug-ins that will work forthe selected <strong>audio</strong> channel and slotare displayed in the Plug-In Selectorpop-up. For instance, if using a stereo<strong>Audio</strong> Instrument, only stereo pluginsare available.Channel: Specifies the <strong>audio</strong> channel(<strong>Audio</strong> Instrument, hardware input oroutput, or bus) being processed bythe plug-in.Slot: Displays the plug-in number(1-4) and stereo mode for the plug-in.Templates: These two pop-ups letyou store and recall plug-in parametersettings. See Plug-In Templates(pg. 154) for more information.<strong>Vision</strong> & Studio <strong>Vision</strong> <strong>Pro</strong> — <strong>Audio</strong> Reference Manual 153
PART 4: Digidesign DAE: Configuration & RecordingBypass button: Click this button tobypass the plug-in. Other plug-inswithin that console channel are notaffected—each has its own Bypassbutton.The Bypass button is duplicated inthe Plug-In area of the Console Window.Clicking it in either locationupdates it in the other.Mute and Solo buttons: Click oneof these buttons to mute or solo the<strong>audio</strong> instrument that the plug-in isassigned to, respectively.NOTE: Selecting a plug-in templatereplaces the current plug-in settings. Ifdesired, you can save the current settings bychoosing Save Settings As from the TemplateFunctions pop-up. For details, see therest of this section.The Template Functions pop-up containscommands for saving, importing,exporting, copying, and pasting templatesfor plug-in parameter settings.Plug-In TemplatesParameter settings for TDM plug-ins arerecalled from the Template pop-up in thePlug-In Edit Window.Figure 16.8: Template Functions pop-upFigure 16.7: Plug-In Template pop-upSimply click on the pop-up and choosefrom the list of plug-in templates stored inthe <strong>Vision</strong> Effects Templates file (whichmust reside in the same folder as the<strong>Vision</strong> application). Choosing a templateautomatically reconfigures the Plug-InEdit Window for the displayed <strong>audio</strong>channel.Following is a description of each of thecommands in the Template Functionspop-up:• Save Settings: Saves the currentparameter settings as a plug-in template,using the current templatename.If the name already exists as a template,this command overwrites itwith the current (displayed) set ofplug-in parameters.• Save Settings As: Saves the currentparameter settings to a new plug-intemplate.With this command you areprompted to name the new template.154 Opcode Systems, Inc.
CHAPTER 16: TDM Bussing, Routing & Plug-Ins• Delete Template: Deletes the currentlyselected plug-in template.• Copy Settings: Copies the currentset of plug-in parameters to the Clipboard,which is handy for pastingprograms to another plug-in slot orconsole channel using the same plugin.• Paste Settings: Pastes the parametersettings from the Clipboard to thecurrent Plug-In Edit Window for thedisplayed <strong>audio</strong> channel.• Save as Default: Saves the currentparameter settings as default for theplug-in.Each time the plug-in is laterassigned to an <strong>audio</strong> channel, thesesettings are automatically madecurrent.• Import Settings: Opens individualplug-in programs saved in otherTDM-compatible applications (like<strong>Pro</strong> Tools).• Export Settings: Saves the currentparameter settings as a plug-in programthat can be opened in otherTDM-compatible applications (like<strong>Pro</strong> Tools).• Load Templates From: Loads allplug-in templates for this plug-in froma <strong>Vision</strong> Effects Templates file that isnot current. The loaded templates aremerged with the current set.BYPASSING PLUG-INSYou can bypass any plug-in from withinthe Console Window. To do so:Click the B button for the TDMInsert you wish to bypass.ÒBÓ stands for Òbypass.ÓFigure 16.9: Bypassing a TDM Plug-InStudio <strong>Vision</strong> bypasses the TDM plug-in,removing it from the digital <strong>audio</strong> signalchain.NOTE: This is the same as opening a plugin’sEdit Window and clicking it’s Bypassbutton.AUDIO OUTPUTSStudio <strong>Vision</strong> works with up to 64 hardwareinputs and outputs, providingsupport for large Digidesign TDMsystems.In addition, TDM users can use either theConsole Window or the <strong>Audio</strong> InstrumentsWindow to assign outputs to <strong>Audio</strong>Instruments.<strong>Vision</strong> & Studio <strong>Vision</strong> <strong>Pro</strong> — <strong>Audio</strong> Reference Manual 155
PART 4: Digidesign DAE: Configuration & RecordingAssigning <strong>Audio</strong> Outputs in aConsole WindowTo assign an output to an <strong>Audio</strong> Instrumentin a Console Window:For an <strong>Audio</strong> Instrument channel,press and hold the mouse on theOutput selector.Studio <strong>Vision</strong> produces a submenu ofOutput routing options.Assigning <strong>Audio</strong> Outputs in the<strong>Audio</strong> Instruments WindowThe Outputs column in the <strong>Audio</strong> InstrumentsWindow for TDM users is differentfrom others. It contains a selector pop-upmenu for assigning outputs. TDM userscan route outputs to several places.Press and hold mouse onOutput selector...... to produce a submenuof outputrouting options.Figure 16.10: <strong>Audio</strong> Instruments Window withOutputs pop-upTo assign an output to an <strong>Audio</strong> Instrumentin the <strong>Audio</strong> Instruments Window:From the submenu, select an outputdestination for the <strong>Audio</strong> Instrument.For more information about the variousoutput options, see Output RoutingOptions (pg. 157).Press and hold the mouse in theOutputs column for an <strong>Audio</strong>Instrument.Studio <strong>Vision</strong> produces a submenu ofOutput routing options.NOTE: <strong>Audio</strong> outputs are not provided forMIDI Instrument channels or non-TDM<strong>Audio</strong> Instrument channels.156 Opcode Systems, Inc.
CHAPTER 16: TDM Bussing, Routing & Plug-InsFrom the submenu, select an outputdestination for the <strong>Audio</strong> Instrument.For more information about the variousoutput options, see Output RoutingOptions (pg. 157).RESET SHORTCUT: You can quickly setall <strong>Audio</strong> Instruments to the same output ifyou press and hold the mouse on the word“Outputs” at the top of the Outputscolumn.1. Press and hold mouse here2. Select an output fromthe pop-up menu3. All <strong>Audio</strong> Instruments areset to the selected outputFigure 16.11: Setting all <strong>Audio</strong> Instruments to theSame OutputOutput Routing OptionsTDM users can select one of four outputroutings for each <strong>Audio</strong> Instrument:• No output: Select this option to disableall <strong>audio</strong> outputs.• Bus: Select one of sixteen internalbusses. By sending numerous channelsto the same bus, you can create asubmix (or “group”)—controlling allgrouped channels with one fader anda single collection of <strong>Audio</strong> Sends orTDM Inserts.• Output: Select a single, mono outputfrom this submenu. The number ofoutputs is determined by your <strong>audio</strong>hardware.• Output Pair: Select a pair of <strong>audio</strong>outputs from this submenu. If you’re<strong>audio</strong> signal is mono, use the panfader to position the signal within thestereo field. See Output Routings andPanning (pg. 158).The Output and Output Pair routingsare hardware-based. They let you route<strong>audio</strong> signals to devices that are externalto your computer (such as signal processors,mixers, or power amps).The Bus routings are software-based outputs.They let you route <strong>audio</strong> signals toother software-based components withinyour computer (such as TDM plug-insand other console channels).NOTE: Whenever you route a channel’soutput to a bus, that bus will always be stereo,regardless of whether the routed <strong>audio</strong>signal is mono or stereo. If the <strong>audio</strong> signalis mono, its pan control will determine the<strong>Vision</strong> & Studio <strong>Vision</strong> <strong>Pro</strong> — <strong>Audio</strong> Reference Manual 157
PART 4: Digidesign DAE: Configuration & RecordingL-R placement of the <strong>audio</strong> signal withinthe resulting bus. If you want to create amono bus, use an <strong>Audio</strong> Send, as describedin “<strong>Audio</strong> Sends (pg. 158).”Output Routings and PanningIf you check the Master Instrumentoption in the Console Window’s menu,then the pan fader appears in an <strong>audio</strong>channel only if you send a mono <strong>audio</strong>signal to either:• an output pair, or• a stereo bus.In this situation, use the pan fader to positionthe mono signal in the stereo field.Obviously, there is no need for a panfader if:• you send a mono <strong>audio</strong> signal to asingle output, or• you send a stereo <strong>audio</strong> signal to anoutput pair.AUDIO SENDSEach console channel supports up to four<strong>Audio</strong> Sends. These work very much likean effects send on a regular mixing console—youcan send <strong>audio</strong> signals toeither:• external signal processors, or• internal <strong>audio</strong> busses.NOTE: <strong>Audio</strong> Sends work only with TDMbaseddigital <strong>audio</strong>. Bussing is not availablefor other <strong>audio</strong> systems or for MIDIInstruments.Displaying <strong>Audio</strong> SendsTo display <strong>Audio</strong> Sends:From the Console WindowÕsmenu, press and hold the mouseon the <strong>Audio</strong> Sends command.Studio <strong>Vision</strong> produces a submenu ofSend options.NOTE: Mono <strong>Audio</strong> Instruments canbecome stereo if you use a mono-in/stereo-outTDM plug-in to process the <strong>audio</strong>signal. For more information, see UsingMono TDM Plug-Ins (pg. 152).If you uncheck the Master Instrumentoption in the Console Window’s menu,then “pan” faders will always be visiblesince, in this mode, pan faders can controlany Instrument and any type of MIDI data(not just pan).158 Opcode Systems, Inc.
CHAPTER 16: TDM Bussing, Routing & Plug-InsFrom the submenu, select the numberof <strong>Audio</strong> Sends you want to accessper channel.Anatomy of the Send AreaFigure 16.12: Anatomy of the Send AreaStudio <strong>Vision</strong> adds a Send area to each<strong>audio</strong>-related console channel.As you can see in Figure 16.12, there arethree main elements in the <strong>Audio</strong> Sendarea: Send Selector Pre/Post Fader button Send LevelNOTE: The Pre/Post Fader button andSend Level numerical are disabled andinvisible until you select a send destinationusing the Send Selector. This provides avisual way to quickly locate active channelsends on a busy mixing console.Two new, undeÞned<strong>Audio</strong> Sends perchannelThe following sections discuss each of the<strong>Audio</strong> Send parameters in detail.<strong>Vision</strong> & Studio <strong>Vision</strong> <strong>Pro</strong> — <strong>Audio</strong> Reference Manual 159
PART 4: Digidesign DAE: Configuration & RecordingSend SelectorUse the Send Selector to tell Studio <strong>Vision</strong>where to send the <strong>audio</strong> signal:Press and hold the mouse on theSend Selector.Studio <strong>Vision</strong> opens a pop-up menu ofrouting options.You can choose between the following<strong>audio</strong> send destinations:• No sendThe <strong>audio</strong> signal is not sent to anexternal output or bus.• BusChoosing this option opens a submenufrom which you select one of 16busses to which you want to send the<strong>audio</strong> signal.Sending <strong>audio</strong> to a bus is a great wayto create submixes or to share asingle TDM plug-in with numerous<strong>Audio</strong> Instruments. For more information,see Sending <strong>Audio</strong> to anInternal TDM Plug-In (pg. 162).Busses can be mono or stereo. Formore information, see page 139.• OutputChoosing this option opens a submenufrom which you select themonophonic output to which youwant to send the <strong>audio</strong> signal. Thenumber of outputs shown in the submenuis determined by your <strong>audio</strong>hardware.Sending <strong>audio</strong> to a mono outputallows you to use external signal processorto modify the <strong>audio</strong> signal.You can then return the processedsignal back into a different consolechannel. For more information, seeSending <strong>Audio</strong> to an External Signal<strong>Pro</strong>cessor (pg. 162).• Output PairChoosing this option opens a submenufrom which you select thestereo output pair to which you wantto send the <strong>audio</strong> signal. The numberof outputs shown in the submenu isdetermined by your <strong>audio</strong> hardware.Sending <strong>audio</strong> to a stereo outputallows you to use external stereosignal processors to modify the <strong>audio</strong>signal. For more information, seeSending <strong>Audio</strong> to an External Signal<strong>Pro</strong>cessor (pg. 162).160 Opcode Systems, Inc.
CHAPTER 16: TDM Bussing, Routing & Plug-InsPre/Post Fader ButtonClick this button to toggle the <strong>Audio</strong> Sendbetween two states: pre fader and postfader.The button always displays the Send’scurrent state—clicking it changes boththe state and the label of the button.Specifically:• Pre FaderWhen the button looks like this,Studio <strong>Vision</strong> sends the <strong>audio</strong> signalto the selected destination before itpasses through anything else in thechannel. This means the signal thatyou send is not affected by the channel’sTDM Inserts, volume, or panfaders. The volume level is, however,still affected by the <strong>audio</strong> event’snote-on velocity.• Post FaderWhen the button looks like this,Studio <strong>Vision</strong> sends the <strong>audio</strong> signalto the selected destination after itpasses through any of the channel’sTDM Inserts and the volume fader.The channel’s pan fader (if active) hasno effect on the <strong>Audio</strong> Send.For example, Figure 16.13 shows a typicalconsole channel with a TDM plug-in andtwo <strong>Audio</strong> Sends (one pre fader, one postfader).Figure 16.13: Typical Console Channel StripFigure 16.14 illustrates the actual <strong>audio</strong>signal flow through the console channelshown in Figure 16.13.LEGENDmain <strong>audio</strong> signal path<strong>audio</strong> send signal pathFigure 16.14: Actual <strong>Audio</strong> Signal Flow ofFigure 16.13<strong>Vision</strong> & Studio <strong>Vision</strong> <strong>Pro</strong> — <strong>Audio</strong> Reference Manual 161
PART 4: Digidesign DAE: Configuration & RecordingSend LevelUse this numerical to set the level of<strong>audio</strong> signal to send to the destinationshown in the Send Selector.Values range between 0 and 127, where:• 0 = no <strong>audio</strong> signal is sent to the senddestination.• 127 = 100% of the <strong>audio</strong> signal level issent to the send destination.Sending <strong>Audio</strong> to an ExternalSignal <strong>Pro</strong>cessorUse a Send to route one or more <strong>Audio</strong>Instruments to a hardware output, whichis connected to a signal processor in yourrecording studio. Bring the processedsignal back into the console on anotherchannel that’s fed from the signal processor’soutput.As shown in Figure 16.15, this worksexactly like an effects send on a regularmixing console.Digital I/OHardwareFX <strong>Pro</strong>cessorIns: LOuts: 7 8RIns: 7 8Outs: LFigure 16.15: Sending <strong>Audio</strong> to an External Signal<strong>Pro</strong>cessorSending <strong>Audio</strong> to an Internal TDMPlug-InRUse an <strong>Audio</strong> Send to route numerous<strong>Audio</strong> Instruments to a single bus. Thenuse the TDM Inserts on that bus to processall the <strong>Audio</strong> Instrumentssimultaneously.This minimizes the strain on your TDMresources since multiple <strong>Audio</strong> Instrumentscan share a single TDM plug-in.162 Opcode Systems, Inc.
CHAPTER 16: TDM Bussing, Routing & Plug-InsFor example, Figure 16.16 shows a consolein which <strong>Audio</strong>-1, <strong>Audio</strong>-2, and<strong>Audio</strong>-3 are all sent to “Bus 1,” which hasa single TDM plug-in assigned to it. As aresult, all three <strong>Audio</strong> Instruments areprocessed by that same TDM plug-in.CREATING GROUPS—REAL-WORLD EXAMPLEBusses let you create submixes or“groups” within Studio <strong>Vision</strong>. For example,assume you recorded three backupsingers—each on a different <strong>Audio</strong>Instrument.In one of Studio <strong>Vision</strong>Õs consoles,assign three console channels to thethree backup singers.Figure 16.16: Sharing a TDM Plug-InAdditionally, in the figure above, theShow Masking Tape option (under theConsole Window menu) has beenenabled, and names have been added tothe Console strips.For details about Show Masking Tape,please see the Console Window chapter ofyour MIDI Reference Manual.Use the volume faders in these threechannels to mix the singers so thattheir voices blend together nicely.Relative volumes set<strong>Vision</strong> & Studio <strong>Vision</strong> <strong>Pro</strong> — <strong>Audio</strong> Reference Manual 163
PART 4: Digidesign DAE: Configuration & RecordingNow that the voices sound good with eachother, you’ll want that mix to work as asingle unit within the context of the entiresong. To do so: In an undefined consolechannel, select a bus from thebottom Input selector.Assign the output of the bus to yourmain L-R outputs.bus output assignmentNewly created busFrom the Console Window menu,choose to display some TDM Insertsor <strong>Audio</strong> Sends.Assign the outputs of all threesingersÕ channels to the newlycreated bus.Outputs assigned to a bus164 Opcode Systems, Inc.
CHAPTER 16: TDM Bussing, Routing & Plug-InsAssign any desired TDM Insertsor <strong>Audio</strong> Sends to the buschannel.In this example, some TDM equalizationand a TDM reverb is added to the bus.TDM plug-in assignmentsSAMPLECELL SUPPORTTDM users with a TDM-equipped SampleCellcard can now use Studio <strong>Vision</strong>’sconsoles to mix, route, and process SampleCelloutputs.In a Console Window press and holdthe mouse on the InstrumentSelector.If you have a Digidesign SampleCell IIcard plugged into the TDM bus, youÕllsee two SampleCell submenus at thebottom of the list.Notice that by processing all three singersas a single group, youÕre savingvaluable TDM resources by affecting allthree singers with a single set of plugins.Use the bus channelÕs volumefader to mix the volume of theprocessed backup singers intothe final mix.Routing a monoSampleCell outputinto a Console channelRouting a stereoSampleCell outputpair into aConsole channelFigure 16.17: SampleCell Instrument Options<strong>Vision</strong> & Studio <strong>Vision</strong> <strong>Pro</strong> — <strong>Audio</strong> Reference Manual 165
PART 4: Digidesign DAE: Configuration & RecordingSelect either a mono output from theSC II submenu, or a stereo outputfrom the SC II Pair submenu.The console channel now uses the SampleCellas its input.can use the <strong>Audio</strong> Instruments & RoutingsWindow to mute and solo SampleCell<strong>audio</strong> channels, route to TDM outputs orbusses, and monitor the number ofassigned sends and plug-ins.Figure 16.18: TDM <strong>audio</strong> channels for SampleCellYou can use all of Studio <strong>Vision</strong>Õs standardbussing, TDM Inserts, pan, andvolume events to create a virtual mix thatincludes any or all of your SampleCelloutputs.SampleCell TDM in the <strong>Audio</strong>Instruments windowTDM <strong>audio</strong> channels for SampleCell nowappear in the <strong>Audio</strong> Instruments & RoutingsWindow. This means yourSampleCell channels can be renamed,and set to mono or stereo. In addition, youSIGNAL ROUTING ANDMONITORINGStudio <strong>Vision</strong> monitors your input usingwhichever voice number and output isassigned to the selected input’s <strong>Audio</strong>Instrument.For example, look at Figure 16.19. Noticethat:• In the Record Monitor Window,Input 1 is assigned to <strong>Audio</strong>-5.• In the <strong>Audio</strong> Instruments Window,Voice 5 is assigned to <strong>Audio</strong>-5, whichin turn, is assigned to Output pair 5-6.166 Opcode Systems, Inc.
CHAPTER 16: TDM Bussing, Routing & Plug-Ins• The monitored signal is affected bythe console’s volume and pan faders,as well as by any <strong>Audio</strong> Sends orTDM Inserts that it might use.• The recorded signal is not affected bythe console’s volume, pan, sends, orinserts—it’s recorded to your harddisk exactly as it’s received.Voice AllocationIf an input is record-enabled, Studio<strong>Vision</strong> looks to see which voice is used bythe <strong>Audio</strong> Instrument assigned to thatinput. It then reserves that voice forrecording and/or monitoring the inputsignal.This means that if an <strong>audio</strong> event uses an<strong>Audio</strong> Instrument that’s assigned to thereserved voice, you will not hear it whilerecording.Figure 16.19: Typical <strong>Audio</strong> Recording SetupThe<strong>ref</strong>ore, when Input 1 is recordenabledand the Thru mode is set toeither On or Auto, then:• The signal present at Input 1 is heardthrough Output 5-6.If you want to change the outputsused to monitor the signal, simplyassign different outputs to <strong>Audio</strong>-5.• Voice 5 is used to monitor the signalpresent at Input 1.Voice allocation works slightly differentlydepending on whether the Thru mode isOn, Off, or Auto, as described below.ExampleLook at Figure 16.19. Notice that both<strong>Audio</strong>-5 and <strong>Audio</strong>-6 use Voice 5.As long as Input 1 is record-enabled and<strong>Audio</strong>-5 is assigned to Input 1 then, ifThru mode is On or Off, you will not hearany <strong>audio</strong> events that are assigned toeither <strong>Audio</strong>-5 or <strong>Audio</strong>-6, regardless ofwhether Studio <strong>Vision</strong> is recording, playing,or idle.<strong>Vision</strong> & Studio <strong>Vision</strong> <strong>Pro</strong> — <strong>Audio</strong> Reference Manual 167
PART 4: Digidesign DAE: Configuration & RecordingHowever, if you set the Thru mode toAuto, then...• ...when Studio <strong>Vision</strong> is recording oridle, you will hear the signal presentat Input 1, but not any <strong>audio</strong> eventsassigned to either <strong>Audio</strong>-5 or <strong>Audio</strong>-6.• ...when Studio <strong>Vision</strong> is playing, youwill hear <strong>audio</strong> events assigned to<strong>Audio</strong>-5 or <strong>Audio</strong>-6 (though not simultaneousevents, of course), but notthe signal present at Input 1.Virtual ConsolesNow that Studio <strong>Vision</strong> can route <strong>audio</strong>inputs through its consoles, you can monitorinputs without record-enabling them.For example, for the configuration shownin Figure 16.19, assume you change yourconsole to look as follows:Based on what you learned earlier, youknow that when Input 1 is record-enabledand the Thru mode is set to either On orAuto, then:• The monitored signal from Input 1 issent to Outputs 5-6.• The monitored signal from Input 1 isalso sent to Bus 1 where reverb isadded. Bus 1’s volume fader controlsthe amount of reverb that’s mixedwith the signal.Here’s where things get interesting.Notice that console channel 3 sends thesignal present at Input 1 to Output 8. Thismeans that the signal present at Input 1always appears at Output 8, even when...• ...Input 1 is not record-enabled.• ...the Thru selector pop-up menu isset to Off.• ...you change the <strong>Audio</strong> Instrumentassigned to Input 1 in the RecordMonitor Window.• ...Studio <strong>Vision</strong> is playing, recording,or simply idle.Also, if you create any <strong>Audio</strong> Sends orTDM Inserts, they too operate on theinput signal. This gives you a way tocreate a “virtual mixing board” withinStudio <strong>Vision</strong>.Figure 16.20: Sample Console168 Opcode Systems, Inc.
CHAPTER 16: TDM Bussing, Routing & Plug-InsRECORDING FROM ALTERNATESOURCES IN THE TDM CHAINYou can choose practically any place inthe TDM chain as recording source. Thisallows you to record digitally across theTDM bus without having to patch a singlecable. Using a TDM system, Studio <strong>Vision</strong>allows recording from physical inputs,SampleCell TDM, <strong>Audio</strong> Instruments, orbusses. Some of the uses for this are:• Recording a master mix with all TDMeffects in real time for a “bounce todisk” mix. To do this, route all channelsto a single bus and record fromit.• Record the output of SampleCelldirectly as <strong>audio</strong> into Studio <strong>Vision</strong>.• “Print the effects” from a track. Youcan record from the output of an<strong>Audio</strong> Instrument to record its TDMInsert effects.• Create multiple submixes from busses.For example you could useOpcode’s fusion:VOCODE TDM andrecord the vocoded signal in realtime.Before reading this you should be familiarwith all recording techniques as discussedin Chapter 14: DAE: Recording<strong>Audio</strong>, and all the bussing conceptsdescribed previously in this chapter.In general, to record from an alternateplace in the TDM chain:Configure your console with inserts,buses, SampleCell, etc.In the Record Monitor Window, selectthe input source from the Input popupmenu.Set up the <strong>Audio</strong> Instrumentdestination and record.For general recording information withDAE, consult Recording: Step-by-Step(pg. 116).What follows are specific instructions foreach type of input source for recording.Recording from Hardware InputsRecording from hardware inputs is themost common way you will record inStudio <strong>Vision</strong>. The signal coming into oneor a pair of the inputs from your <strong>audio</strong>interface is recorded to a hard disk track(<strong>Audio</strong> Instrument). When recordingfrom an input, no effects or volume faderinformation is recorded. A description ofrecording from inputs is found in Recording:Step-by-Step (pg. 116)<strong>Vision</strong> & Studio <strong>Vision</strong> <strong>Pro</strong> — <strong>Audio</strong> Reference Manual 169
PART 4: Digidesign DAE: Configuration & RecordingRecording from SampleCell TDMRecording from a TDM equipped Sample-Cell is similar to using hardware inputs.Use this to record a digital <strong>audio</strong> versionof your MIDI performance on a Sample-Cell card. Studio <strong>Vision</strong> records directlythrough the TDM bus, completely in the“digital domain.” As is true with hardwareinputs, Studio <strong>Vision</strong> records directlyfrom the source and does not record anyinserts (plug-ins).To record a SampleCell performancedirectly, choose a SampleCell output inthe Input pop-up of the Record Monitor. Ifyou have linked pairs unchecked, individualinputs will be available. If you havelinked pairs enabled, you will see onlySampleCell pairs in the Input pop-up. Noeffects or panning information arerecorded. To record that information youcan either record your SampleCell tracksinto <strong>Audio</strong> Instrument tracks or bus themand record from busses. Discussion ofthose techniques follows.Recording from <strong>Audio</strong>Instruments and BussesTo record from the output of a mono<strong>Audio</strong> Instrument:Uncheck Linked Pairs in the RecordMonitor Window.Linked Pairs CheckboxSelect the mono <strong>Audio</strong> Instrument asthe record source from the Input popup.Make sure that you are recording toan unused <strong>Audio</strong> Instrument.Record as you would any <strong>audio</strong> track.When recording from a mono Instrument,and a series of mono-to-monoplug-ins, the signal goes to the volumefader, then is recorded mono.You may want to record your effects andvolume information directly to a newInstrument in real time. To do that youcan record from an <strong>Audio</strong> Instrument.170 Opcode Systems, Inc.
CHAPTER 16: TDM Bussing, Routing & Plug-InsTo record from a stereo <strong>Audio</strong> Instrument,or if you have a mono <strong>Audio</strong>Instrument with a mono-to-stereo plug-in:Check Linked Pairs in the RecordMonitor Window.More on Recording from BussesYou may want to record a master mix,submix, or from the output of a bus thathas several TDM effects on it. In this caseyou would select a bus as your recordsource in the Record Monitor. Recordingfrom busses is similar to recording from<strong>Audio</strong> Instruments as described above.You cannot record from a bus if the signaldoesn't also go to a physical output.Select a stereo Instrument as therecord source from the Input pop-up.To record a submix:In a Console, assign the main outputsof the Instruments in the mix to a bus.This can include hardware inputs aswell, which can also be bussed to a bus.Make sure that you are recording toan unused <strong>Audio</strong> Instrument.Record as you would any <strong>audio</strong> track.The pan fader has no effect because bythe time the signal reaches the volumefader it is already stereo.When you record from <strong>Audio</strong> Instrumentsand busses, your volume fader movementsaffect the volume of the recording(the actual amplitude of signal). Any pluginsthat are assigned to those Instrumentswill also be recorded. Studio <strong>Vision</strong>records the signal from <strong>Audio</strong> Instrumentsand busses post volume fader butpre pan fader (unlike hardware inputs andSampleCell TDM). Any real-time changesyou make to plug-ins will also berecorded. In all cases, you cannot recordfrom an <strong>Audio</strong> Instrument if the signaldoesn't also go to a physical output.Assign the output of that bus to anoutput pair.This will become your ÒsubmasterÓ fader.Assign any TDM effects to yourInstruments and main output busCheck Linked Pairs in the RecordMonitor Window.Enable recording on a stereo pair.<strong>Vision</strong> & Studio <strong>Vision</strong> <strong>Pro</strong> — <strong>Audio</strong> Reference Manual 171
PART 4: Digidesign DAE: Configuration & RecordingSelect the ÒsubmasterÓ bus as yourrecord source from the Input pop-up.In this example, it is Bus 1.Record to an unused <strong>Audio</strong>Instrument as you would normallyrecord any track.All <strong>audio</strong> and effects with fader movementsfor all bussed Instruments arerecorded.To record pan on a single instrument:Send the main outputs of the <strong>Audio</strong>Instrument to a bus.The bus becomes stereo. (Rememberyou cannot record pan or pan automationfrom an <strong>Audio</strong> Instrument.) Makesure no other instruments are sent to thisbus.Record from the bus.When you move the <strong>Audio</strong> Instrument'span fader left and right, the effect isrecorded.A couple of potentially confusing situationsand their causes:• <strong>Audio</strong>-1 is mono, but it has a mono-tostereoplug-in assigned. You try torecord with Linked Pairs uncheckedand Studio <strong>Vision</strong> tells you that youcan’t. In this case you will need torecord the <strong>Audio</strong> Instrument to alinked pair or disable the mono-tostereoplug-in.• <strong>Audio</strong>-1 is mono and its main outputis set to Bus 1. You try to record fromBus 1 with Linked Pairs unchecked.As a result, Studio <strong>Vision</strong> gives anerror message of, “since <strong>Audio</strong>-1 ismono, so Bus 1 should also be mono.”Remember that when the main outputgoes to a bus, it goes post pan faderand the bus becomes stereo. If youassign a send to Bus 1 instead, thebus will be mono and you can recordit as a mono track.• <strong>Audio</strong>-1 is mono and its Send isassigned to Bus-1 and is set to Pre.<strong>Audio</strong>-1 also has a mono-to-stereoplug-in. If there were no plug-ins oronly mono-to-mono plug-ins, Bus-1would be mono. However, the bus isstereo because of the mono-to-stereoplug-in.For more information on TDM bussingand determining when one is stereo ormono, see <strong>Audio</strong> Sends (pg. 158).TIP: To determine if a bus is stereo, enablea few TDM plug-ins (from the Console popupmenu) and the gray arrows will tell you.See Mono and Stereo TDM Plug-Ins(pg. 151).TIP: If you want to record from a bus usingcomplex routing, first start by setting upeverything in the consoles with the recordchannels disabled. Enable the record channelslast. As long as the channels are notrecord-enabled you can have the “wrong”input (the pop-up on the left) or the wrongdestination (the <strong>Audio</strong> Instrument pop-upon the right) and no error messages will bedisplayed.172 Opcode Systems, Inc.
CHAPTER 17: DAE: <strong>Audio</strong> P<strong>ref</strong>erencesUse the <strong>Audio</strong> P<strong>ref</strong>erences dialog box toset various record/playback options forthe Digidesign hardware.NOTE: The <strong>Audio</strong> P<strong>ref</strong>erences dialog boxmay look slightly different depending onyour <strong>audio</strong> hardware. These differences willbe noted throughout this chapter.To open the <strong>Audio</strong> P<strong>ref</strong>erences dialogbox, choose <strong>Audio</strong>><strong>Audio</strong> P<strong>ref</strong>erences.Figure 17.1: <strong>Audio</strong> P<strong>ref</strong>erences Dialog Box forDAEAs seen in Figure 17.1, there are manyelements to the <strong>Audio</strong> P<strong>ref</strong>erences dialogbox. These are discussed in the followingsections.MAXIMUM FADER POSITIONDAE allows you to boost output volumesby 6 dB if desired. If your <strong>audio</strong> files wererecorded at a very low amplitude, you canset this value to +6 dB and then increasethe position of your volume faders to maximum;this will give all your <strong>audio</strong> files a+6 dB volume boost.The problem with boosting the output ofall your <strong>audio</strong> files is that any <strong>audio</strong> eventsthat contain signals close to the maximumamplitude will get boosted to the point ofdistortion. The<strong>ref</strong>ore, you should probablyuse the +6 dB boost only as atemporary solution to low <strong>audio</strong> volumes.The best way to achieve the loudest possiblevolume without distortion is to use theDSP>Normalize option, as discussed inNormalize (pg. 358). Then, if you wantplayback to be at a lower volume, useeither a lower velocity value for an event,or use <strong>audio</strong> volume events to adjust volume.For more information about setting<strong>audio</strong> event volumes, seeChapter 23: Adjusting Volume and Pan.To obtain the best <strong>audio</strong> quality, youshould leave the Maximum Fader Positionsetting at 0 dB and record your <strong>audio</strong>as high as possible without clipping.<strong>Vision</strong> & Studio <strong>Vision</strong> <strong>Pro</strong> — <strong>Audio</strong> Reference Manual 173
PART 4: Digidesign DAE: Configuration & RecordingSMOOTH AUDIO CONTROLLERSSESSION 8: Smooth <strong>Audio</strong> Controllers arenot available with Session 8 and, the<strong>ref</strong>ore,do not appear in the <strong>Audio</strong> P<strong>ref</strong>erencesdialog box.Sudden changes in volume and pan canproduce unwanted noise, such as clicks,pops, or “zips.” This dialog box gives youa set of parameters to smooth out rapidchanges in volume or pan, the<strong>ref</strong>ore eliminatingthese unwanted noises.The Fade duration is the amount of timethe smoothing “ramp” will be generatedduring fast amplitude changes or pans.Fade durations can be set between 0 and200 ms.The None, Sharp, Medium, andSmooth buttons each provide defaultvolume and pan fade times.In the example below, consider an <strong>audio</strong>signal that changes amplitude abruptly:6466100 ms 50 ms78100 msSharp Changes is amplitudecan cause unwanted clicks and popsFigure 17.2: Abrupt Amplitude Changes of Original<strong>Audio</strong> Envelope.68If we set the Fade Duration to 100 ms byclicking the Medium button, <strong>Vision</strong> willautomatically smooth the signal within100 ms of the amplitude change.646678Smoothing ramps created by aFade duration of 100 msFigure 17.3: Smoother Amplitude Changes AfterApplying Smooth <strong>Audio</strong> ControllersIMPORT MULTIPLE FILES...This option determines how <strong>audio</strong> filesare placed when multiple files areimported.When end-to-end onto one track is chosen,multiple files imported at the sametime will be placed end-to-end on theselected track.When onto multiple empty tracks ischosen, multiple files imported at thesame time will be placed onto separateempty tracks (with one event per track).For more information about importing<strong>audio</strong>, see Chapter 20: Import/ExportCornucopia.68174 Opcode Systems, Inc.
12Basic <strong>Audio</strong> Editing &Playback344567<strong>Vision</strong> & Studio <strong>Vision</strong> <strong>Pro</strong> — <strong>Audio</strong> Reference Manual 175
PART 5: Basic <strong>Audio</strong> Editing & Playback176 Opcode Systems, Inc.
CHAPTER 18: Working with <strong>Audio</strong> EventsEvery time you record digital <strong>audio</strong>,<strong>Vision</strong> creates an <strong>audio</strong> event. This chapterdiscusses how to view, select, andmove <strong>audio</strong> events.NOTE: <strong>Audio</strong> events are defined inChapter 2: Basic Terminology.Graphic Window<strong>Audio</strong> events are displayed as waveformsin the Graphic Window (between thePiano Roll and the Strip Chart).Figure 18.1 shows a typical GraphicWindow and the <strong>audio</strong> information containedwithin it.AUDIO EVENTS IN DIFFERENTWINDOWSYou can select <strong>audio</strong> events for editingeither in:• the Graphic Window (in the areabetween the Piano Roll and the StripChart)• the Tracks Window’s Track Overviewarea• the List WindowEvents you select in one window are automaticallyselected in the other, and eachwindow updates to display changes afterediting.Figure 18.1: Typical <strong>Audio</strong> Graphic Window withMultiple <strong>Audio</strong> Events & InstrumentsLabeled in the Graphic Window are: <strong>Audio</strong> Instruments <strong>Audio</strong> Events <strong>Audio</strong> Event Names<strong>Vision</strong> & Studio <strong>Vision</strong> <strong>Pro</strong> — <strong>Audio</strong> Reference Manual 177
PART 5: Basic <strong>Audio</strong> Editing & PlaybackTracks Window<strong>Audio</strong> events are displayed as waveformsin the Track Overview area of the TracksWindow. Figure 18.2 shows a typicalTracks Window and the <strong>audio</strong> informationcontained within it.List Window<strong>Audio</strong> events are displayed in a chronologicallist (along with MIDI and textevents) in <strong>Vision</strong>’s List Window.Figure 18.3 shows a typical List Windowand the <strong>audio</strong> information containedwithin it. Figure 18.2: Typical Tracks Window with <strong>Audio</strong>TracksLabeled in the Tracks Window are: <strong>Audio</strong> Instruments <strong>Audio</strong> EventsIf a track contains multiple <strong>Audio</strong> Instruments,the Track Overview area shows<strong>Audio</strong> Instruments with overlapping timesas though they were a single <strong>Audio</strong>Instrument. For more information, seeTracks Window Selection (pg. 185).Figure 18.3: The List Window Displaying <strong>Audio</strong>EventsLabeled in the List Window are: <strong>Audio</strong> Instruments <strong>Audio</strong> Events <strong>Audio</strong> Event Names <strong>Audio</strong> Event Velocities <strong>Audio</strong> Event Mutes178 Opcode Systems, Inc.
CHAPTER 18: Working with <strong>Audio</strong> EventsVIEWING AUDIO EVENTS ASWAVEFORMSIn the Graphic Window and Tracks Window,<strong>Vision</strong> displays each <strong>audio</strong> event as awaveform.Figure 18.6: <strong>Audio</strong> Event from Figure 18.4 afterDividing into 3 Separate EventsZooming InFigure 18.4: Waveform <strong>Audio</strong> EventSound can be visually interpreted by placingits data on a graph as a waveform. Thevertical axis represents amplitude and thehorizontal axis represents time.Figure 18.5 shows a waveform zoomed into show two cycles of a simple sine wave.Figure 18.5: Simple Waveform (Sine Wave)You can separate <strong>audio</strong> event waveformsinto sections so that you can manipulateranges of sound. For instance, if yourecorded someone speaking you couldrearrange the words in any order, cuttingand pasting sections of the waveform.Ranges you separate during edit operationsbecome new <strong>audio</strong> events with newbegin times and durations.When editing a waveform, it is oftenuseful to zoom in as far as possible to seea specific portion of the <strong>audio</strong> event.<strong>Vision</strong>’s Tracks and Graphic windows areboth bar/beat/unit based (rather thansample-based), and you cannot zoom in tomore than one unit per pixel. (There are480 units in one quarter note.)<strong>Audio</strong> density changes with tempo. Ifyou’re editing an <strong>audio</strong> event in asequence whose tempo is set to 60 bpm,raising the tempo of the sequence to240 bpm will allow you to zoom in fourtimes as far (in relation to the <strong>audio</strong>). Thishappens because a faster tempo results infewer samples per bar/beat/unit, whichmeans fewer samples per pixel. The samplesappear to be more “spread out” onthe screen when you zoom in.If you find yourself in a situation whereyou can’t zoom in as far as you’d like, trytemporarily increasing the tempo of thesequence. The maximum tempo is500 bpm, and resolution is quite high atthis tempo. After editing, return thetempo to its original setting.<strong>Vision</strong> & Studio <strong>Vision</strong> <strong>Pro</strong> — <strong>Audio</strong> Reference Manual 179
PART 5: Basic <strong>Audio</strong> Editing & PlaybackZero CrossingsWhen you edit <strong>audio</strong> events, you willprobably want your edit points to beginand end in low amplitude levels of thewaveform. Edit points that occur in amplitudelevels higher than zero can produceaudible clicks and pops on playback; thehigher the amplitude, the more likely it isthat there will be clicks.<strong>Vision</strong> attempts to avoid unwanted clicksby automatically playing from the closestpoint where the waveform crosses thezero amplitude level (called the zerocrossing). No matter what type of waveformyou’re working with, the distancebetween zero crossings is short enoughthat when <strong>Vision</strong> plays from the closestzero crossing, the change is notnoticeable.Editing with Zero Crossings<strong>Vision</strong> also automatically puts all editpoints at zero crossings. For example,when you select a portion of an <strong>audio</strong>event and use the <strong>Audio</strong>>Separate command,the beginning and end of theseparated region will always be at zerocrossings. Although edits in the Graphicwindow always happen at exact bar/beat/unit boundaries, that is only what you see.The <strong>audio</strong> that you hear will play from azero crossing.Suppose you zoom in as far as you canand make a cut in the middle of an <strong>audio</strong>region. You try to edit at a zero crossingbut you are bound by bar/beat/units.Your edit may look like this:EditpointZeroCrossingFigure 18.7: <strong>Vision</strong> Moves the Playback Point tothe Closest Zero CrossingA transition that sharp would result in aloud pop. A pop or click is caused by asharp transition in a waveform, and thetransition pictured above is about as sharpas possible.The good news is that <strong>Vision</strong> automaticallyavoids this problematic situation.Although the Graphic window is constrainedto these bar/beat/unitboundaries, Acadia and DAE work at thesample level. When <strong>Vision</strong> triggers an<strong>audio</strong> event in Acadia or DAE, the timing180 Opcode Systems, Inc.
CHAPTER 18: Working with <strong>Audio</strong> Eventsis expressed in samples, not bars/beats/units. Because of this capability, <strong>Vision</strong>will tell Acadia or DAE to play the soundstarting at the next zero crossing. This isthe result:If you edit it at its peak you get this:What youseeFigure 18.8: Edit at a peakThat is a very sharp transition, and it willproduce a very loud pop. It you edit at thezero crossing you get this:What youhearFigure 18.9: Edit at a zero crossingThe DSP>Mix and Export <strong>Audio</strong> Mixprocesses also work at the sample level,and will ignore the first samples until theyreach the first zero crossing.Pops and ClicksEditing at zero crossings dramaticallyreduces the pop at the beginning of asound, but it cannot completely eliminateit. A pop is caused by a sharp transition ina waveform. Imagine a waveform like this:That is less sharp, but the waveform stillrises up suddenly. That will still producean audible pop, although it will be softerthan the one in Figure 18.8. So, eventhough <strong>Vision</strong> automatically uses zerocrossings,you may still hear a pop orclick at the beginning of an <strong>audio</strong> event.The only failproof way to get rid of such apop is to do a fade in. For details, see CreatingFade-Ins and Fade-Outs (pg. 370).NOTE: Use a sample editing program suchas Peak or Sound Designer II if you want toedit actual wave data. If you own Peak orSound Designer II, you can open it directlyfrom <strong>Vision</strong> by choosing <strong>Audio</strong>>EditEvent SoundFile. For more information,see Edit Event Soundfile (pg. 348).<strong>Vision</strong> & Studio <strong>Vision</strong> <strong>Pro</strong> — <strong>Audio</strong> Reference Manual 181
PART 5: Basic <strong>Audio</strong> Editing & PlaybackWaveform Display Options<strong>Vision</strong> gives you three display choices forwaveforms. These choices are available inthe <strong>Audio</strong>>Waveform Displaysubmenu.Waveform Height Options<strong>Vision</strong> gives you the ability to auto sizewaveforms and grow or shrink them.These choices are available in the<strong>Audio</strong>>Waveform Height submenu.Figure 18.10: Waveform Display OptionsThe three waveform display options are:• Fast, which allows <strong>Vision</strong> to redrawwaveforms fairly quickly, a useful featureduring recording sessions.• High Resolution, which—if you arezoomed in enough—displays waveformsin greater detail than Fastmode, showing clearly the peaks andvalleys of the waveform, a useful featureduring editing procedures.• Off, which displays a waveform as arectangular bar. This takes <strong>Vision</strong> virtuallyno time to draw and is useful ifyou want to work extremely quicklyand viewing the waveform is not aconcern.For details about each of these displayoptions, see Waveform Display (pg. 354).Figure 18.11: Waveform Display OptionsThe three waveform height options are:• Automatic, which directs <strong>Vision</strong> todraw waveforms to the height that<strong>Vision</strong> thinks best fit based on howmany <strong>Audio</strong> Instruments areshowing.• Grow, which increases the verticalheight of a waveform.• Shrink, which reduces the verticalheight of a waveform.For details about each of these displayoptions, see Waveform Height (pg. 353).Tip: you can assign key equivalents to theGrow and Shrink commands in the CommandsWindow. See the MID ReferenceManual description of key commands formore detail.182 Opcode Systems, Inc.
CHAPTER 18: Working with <strong>Audio</strong> EventsINDIVIDUAL CANCELING OFWAVEFORM BUILDSCancelling a waveform build affects onlythat waveform.Cancelling a waveform build affects only thatwaveform, as shown hereCancelled WaveformAUDIO EVENT NAMESViewing <strong>Audio</strong> Event NamesIf the <strong>Audio</strong>>Display Names option isenabled, <strong>audio</strong> event names are displayedin the lower left corner of the event in theGraphic Window. This option does notaffect <strong>audio</strong> event names in the ListWindow (where names are always displayedand can be edited) or the TracksWindow (where the waveform is too smallto contain any text).Figure 18.12: Individual Cancelling of WaveformBuildsIf you cancel a waveform build and laterdecide that you want to see it:Choose <strong>Audio</strong>>File Management.In the File Management Window,select the <strong>audio</strong> file for which youwish to view the waveform.From the File Management WindowMenu, choose Rebuild Waveform.<strong>Audio</strong>>Display Names enabled<strong>Audio</strong>>Display Names disabledFigure 18.13: Displaying <strong>Audio</strong> Event Names in aGraphic WindowFigure 18.14: <strong>Audio</strong> Event Name Displayed in aList Window<strong>Vision</strong> & Studio <strong>Vision</strong> <strong>Pro</strong> — <strong>Audio</strong> Reference Manual 183
PART 5: Basic <strong>Audio</strong> Editing & PlaybackRenaming <strong>Audio</strong> Events<strong>Audio</strong> event names initially default to thename of the associated <strong>audio</strong> file orregion. However, you can rename <strong>audio</strong>events for easier identification.When you’re working in a List Window,simply click the <strong>audio</strong> event name in thelist and type a new name.When you’re working in the Graphic Window,you name <strong>audio</strong> events in the <strong>Audio</strong>Event Info dialog box. To do so: Click an <strong>audio</strong> event to select it.The waveform becomes hollow. Choose <strong>Audio</strong>>Get Event Info.<strong>Vision</strong> opens the <strong>Audio</strong> Event Info dialogbox.SELECTING AUDIO EVENTSSelecting Entire <strong>Audio</strong> EventsYou can select entire <strong>audio</strong> events in:• the Graphic Window• the List Window• the Tracks Window (Track Overviewarea)The following sections discuss themethod used for each window.Graphic Window SelectionTo select an entire <strong>audio</strong> event in aGraphic Window:Move the cursor into the top third ofthe waveform (the upper selectregion).Figure 18.15: <strong>Audio</strong> Event Info Dialog BoxAlternately, if Display Event Names isenabled, you can open the <strong>Audio</strong> EventInfo dialog box by positioning the cursorover the <strong>audio</strong> event name (it becomes aquestion mark) and clicking.Click in the Name field and type anew name for the <strong>audio</strong> event.The rest of this dialog box displays informationabout the particular <strong>audio</strong> event.Click the OK button<strong>Vision</strong> renames the <strong>audio</strong> event.Upper Select RegionFigure 18.16: The Upper Select Region is theTop Third of the <strong>Audio</strong> Event’s WaveformIf your cursor is positioned in the centerof this select region, it will become a VerticalMove cursor; if your cursor is in theleft of the select region, it will become aHorizontal Move cursor; if itÕs in the right,184 Opcode Systems, Inc.
CHAPTER 18: Working with <strong>Audio</strong> Eventsit will become a Right Trim cursor (discussedin Changing <strong>Audio</strong> EventLengths (pg. 194)).Tracks Window SelectionTo select an entire <strong>audio</strong> event in a TracksWindow:Horizontal Move CursorVertical Move CursorIn the Tracks Window, select theArrow cursor.In the Track Overview, click thedesired <strong>audio</strong> event to select it.Right Trim CursorFigure 18.17: The Three Editing CursorsClick the mouse.The entire waveform becomes hollow toindicate itÕs selected.Figure 18.18: Selected <strong>Audio</strong> Event inGraphic WindowList Window SelectionTo select an entire <strong>audio</strong> event in the ListWindow, simply click its selector dot.Selected <strong>audio</strong> eventFigure 18.20: Selected <strong>Audio</strong> Event in TracksWindowIf the Track contains more than one<strong>Audio</strong> Instrument, selecting an <strong>audio</strong>event in the Track Overview area actuallyselects all <strong>audio</strong> events that occur withinthe same range of time.Selected <strong>audio</strong> eventFigure 18.19: Selected <strong>Audio</strong> Event in ListWindow<strong>Vision</strong> & Studio <strong>Vision</strong> <strong>Pro</strong> — <strong>Audio</strong> Reference Manual 185
PART 5: Basic <strong>Audio</strong> Editing & PlaybackFor example, if the Graphic Windowlooks as follows:When you select a phrase in the TrackOverview area, you’re actually selectingall <strong>audio</strong> events that the Tracks Windowdisplays as part of that single phrase.Figure 18.21: <strong>Audio</strong> Events in Graphic Window...then the Tracks Window looks likeFigure 18.22:Selecting a singlephrase in a multi-Instrument track......selects allevents in thattime range.Figure 18.22: <strong>Audio</strong> Events in Tracks WindowNotice, in Figure 18.22, that the TracksWindow shows only one phrase eventhough there are many <strong>audio</strong> events. Thisis because the Three <strong>Audio</strong> Instruments’events overlap in time, creating a singlephrase in the Tracks Window. To helpclue you into this situation, <strong>Vision</strong> displaysthe multi Instrument <strong>audio</strong> track inblack in the Tracks Window (unlikesingle Instrument tracks that display ineach Instrument’s color).TIP: Selecting <strong>audio</strong> events in the TrackOverview area is particularly useful whenyou want to apply the same edit to multiple<strong>audio</strong> events. For example, if your trackcontains both lead vocals and harmonyvocals, selecting a single phrase in theTrack Overview area selects all vocals thatoccur at the same time, allowing you to editthem simultaneously.186 Opcode Systems, Inc.
CHAPTER 18: Working with <strong>Audio</strong> EventsSelecting all <strong>Audio</strong> EventsAssigned to the Same <strong>Audio</strong>InstrumentTo select all <strong>audio</strong> events that areassigned to the same <strong>Audio</strong> Instrument:Move the cursor into the left marginof the Graphic Window so it becomesa horizontal I-beam.Selecting Portions of <strong>Audio</strong>EventsYou can select portions of <strong>audio</strong> events toedit.Selecting a Portion of a Single <strong>Audio</strong>EventTo select a portion of a single <strong>audio</strong> event:Horizontal I-beam CursorSelect the Marquee tool by clicking itsicon in the Graphic Window.Click to select all the <strong>audio</strong> eventsassigned to that <strong>Audio</strong> Instrument.Move the cursor into the lower twothirds of the waveform (the lowerselect region).Drag over the range you want toselect.All <strong>audio</strong> events assigned to <strong>Audio</strong>Instrument 1 are selectedFigure 18.23: Click in left margin to select all<strong>Audio</strong> Events assigned to a single <strong>Audio</strong>InstrumentSelected RegionFigure 18.24: Selected Portion of a Single<strong>Audio</strong> EventTIP: To select <strong>audio</strong> events on multiple<strong>Audio</strong> Instruments, drag the I-beamcursor across them.<strong>Vision</strong> & Studio <strong>Vision</strong> <strong>Pro</strong> — <strong>Audio</strong> Reference Manual 187
PART 5: Basic <strong>Audio</strong> Editing & PlaybackYou’ll notice that when you select a portionof an <strong>audio</strong> event, the entire eventbecomes hollow and the range you dragacross becomes highlighted (as shown inFigure 18.24. Some editing commands(such as Copy, Cut, etc.) affect only thehighlighted range. Other commands(such as Quantize or Set Instrument)operate on the entire (hollow) <strong>audio</strong>event. Various editing operations are discussedthroughout this manual.Selecting Portions of All <strong>Audio</strong> Events ina Time RangeTo select portions of all <strong>audio</strong> events in atime range:Cursor Quantize ButtonCursor Quantize Valuepop-up MenuMove the cursor into the lower selectregion of an <strong>audio</strong> event.Drag across the range you want toselect.Notice that <strong>Vision</strong> selects portions of all<strong>audio</strong> events in the specified time range.Select the I-beam cursor by clickingits icon in the Graphic Window.The I-beam selects <strong>audio</strong> events on all<strong>Audio</strong> Instrument in the selected track.If you wish to constrain cursormovement to a specific metric value,turn on Cursor Quantize and select aquantize amount from the pop-upmenu.Selected Region spansall <strong>Audio</strong> InstrumentsFigure 18.25: Selecting a time rangespanning all <strong>Audio</strong> EventsNOTE: <strong>Audio</strong> events assigned to different<strong>Audio</strong> Instruments appear in different rowsin a Graphic Window. See Changing <strong>Audio</strong>(pg. 191) to learn how to move <strong>audio</strong>events between <strong>Audio</strong> Instruments.188 Opcode Systems, Inc.
CHAPTER 18: Working with <strong>Audio</strong> EventsSimultaneously Selecting MIDI,<strong>Audio</strong>, and Strip Chart EventsTo simultaneously select MIDI notes,<strong>audio</strong> events, and Strip Chart data:In the Graphic Window, select theI-Beam cursor by clicking its icon.Simultaneously Selecting Eventsin Multiple TracksYou can use many of the previously discussedtechniques to select <strong>audio</strong> eventsin the Tracks Window. The TracksWindow is especially useful when youwish to select events in multiple tracks.To do so:In the Tracks Window, select theArrow cursor.Press and hold the mouse in the rulerarea in the upper portion of theGraphic Window (where the barnumbers are displayed) and dragacross the time range you want toselect.<strong>Vision</strong> selects all events in the timerange.In the Track Overview, Shift-click thedesired <strong>audio</strong> events or phrases toselect them.Shift-click to select multiple<strong>audio</strong> eventsDrag in the ruler area (at the top of thewindow) to select all events in aselected time range.Figure 18.27: Shift-Click Multiple <strong>Audio</strong>EventsFigure 18.26: Select All Information in aVertical Path<strong>Vision</strong> & Studio <strong>Vision</strong> <strong>Pro</strong> — <strong>Audio</strong> Reference Manual 189
PART 5: Basic <strong>Audio</strong> Editing & PlaybackAs discussed previously, if a track containsmultiple Instruments, then theTrack Overview area merges all Instrumentsin a common time range togetherinto a single phrase. This is discussed indetail in Tracks Window Selection(pg. 185).You can use the Tracks Window and theI-beam tool to select all events (of alltypes) in all tracks in a specified timerange, and you can use the Marquee toolto select ranges of multiple events in multipletracks.CHANGING AUDIO EVENTSTART TIMESDrag the event horizontally (left orright) to a new start time.<strong>audio</strong> event dragged toan earlier start timeFigure 18.29: Event After Dragging Earlier inTimeAs you drag, the new start time will bedisplayed in the Cursor Display field inthe upper section of the GraphicWindow.You can move <strong>audio</strong> events to new starttimes using the List Window numerical orby dragging events in the Graphic orTracks Windows.To move <strong>audio</strong> events in a GraphicWindow:Move the cursor into the upper selectregion in the left side of the event.The cursor turns into a Horizontal Movecursor.Figure 18.28: Horizontal Move CursorPositioned over <strong>Audio</strong> EventHorizontalMove CursorCursor Display FieldPlay back the track to hear the resultof your edit.You can use a similar technique in theTracks Window. Simply drag an eventwith the Arrow cursor to change its starttime.NOTE: As with MIDI data, you can constraincursor movement to specific metricamounts by quantizing the cursor movements.For example, if you wanted to movean <strong>audio</strong> event exactly three measures earlier,you would quantize the cursormovement to whole notes, then drag the<strong>audio</strong> event three measures to the left. Youcan also use the Nudge command to moveevents.190 Opcode Systems, Inc.
CHAPTER 18: Working with <strong>Audio</strong> EventsTo change the start time of <strong>audio</strong> eventsin the List Window, click the event’s starttime (bar, beat, unit, or SMPTE) and usethe numerical to scroll the values up ordown (or type in the desired location).Graphic WindowTo assign a different <strong>Audio</strong> Instrument toan <strong>audio</strong> event:Move the cursor into the center of an<strong>audio</strong> eventÕs upper select region.The cursor becomes a Vertical Movecursor.Change the start time numerical to changethe starting time of an <strong>audio</strong> event in the List Window.Vertical Move CursorFigure 18.30: Changing <strong>Audio</strong> Event Start Times inthe List WindowCHANGING AUDIOFigure 18.31: Vertical Move CursorPositioned over <strong>Audio</strong> EventDrag the event up or down to thedesired <strong>Audio</strong> Instrument.<strong>audio</strong> event dragged toa new <strong>Audio</strong> InstrumentInstrument AssignmentsIf a track contains multiple <strong>Audio</strong> Instruments,you can move <strong>audio</strong> eventsbetween them. The method you usedepends on which edit window youp<strong>ref</strong>er.Figure 18.32: Event After Moving to AnotherInstrument<strong>Vision</strong> & Studio <strong>Vision</strong> <strong>Pro</strong> — <strong>Audio</strong> Reference Manual 191
PART 5: Basic <strong>Audio</strong> Editing & PlaybackIf a track contains only a single <strong>Audio</strong>Instrument, use the Do>Set Instrumentcommand as described below:Select a new <strong>Audio</strong> Instrument fromthe pop-up menu.Click the <strong>audio</strong> event that you want tomove to another <strong>Audio</strong> Instrument.Click an <strong>audio</strong> event to select itChoose Do>Set Instrument.<strong>Vision</strong> opens the Set Instrument dialogbox.Click the Set button.Notice that assigning an <strong>audio</strong> event to adifferent <strong>Audio</strong> Instrument creates a new<strong>Audio</strong> Instrument in the Graphic Window(if it didnÕt already exist).Press and hold the mouse on thename of the <strong>Audio</strong> Instrument.<strong>Vision</strong> opens a pop-up menu of Instrumentchoices.New <strong>Audio</strong> Instrument<strong>audio</strong> event assigned to new Instrument192 Opcode Systems, Inc.
CHAPTER 18: Working with <strong>Audio</strong> EventsList WindowWhen you have more than one <strong>Audio</strong>Instrument assigned to a track, the ListWindow displays a new column—the<strong>Audio</strong> Instruments column. Use thiscolumn to assign <strong>Audio</strong> Instruments todifferent <strong>audio</strong> events.Press and hold the mouse on an<strong>Audio</strong> Instrument name in the ListWindow.<strong>Vision</strong> opens a pop-up menu of <strong>Audio</strong>Instruments.From the pop-up menu, select the<strong>Audio</strong> Instrument that you want touse.Tracks WindowIf a track only uses one <strong>Audio</strong> Instrumentand you want to change that <strong>Audio</strong> Instrument,you can do this from the TracksWindow:Press and hold the mouse on the<strong>Audio</strong> Instrument name.<strong>Vision</strong> opens a pop-up menu listing all<strong>Audio</strong> Instruments.From the pop-up menu, choose the<strong>Audio</strong> Instrument you wish to use forall <strong>audio</strong> events in that track.Press and hold mouse here...... to open an <strong>Audio</strong> Instrumentspop-up menu.<strong>Vision</strong> & Studio <strong>Vision</strong> <strong>Pro</strong> — <strong>Audio</strong> Reference Manual 193
PART 5: Basic <strong>Audio</strong> Editing & PlaybackWhen you have more than one <strong>Audio</strong>Instrument assigned to a track, theTracks Window Instrument column“Multi”. You can remap all <strong>audio</strong> eventsassigned to one <strong>Audio</strong> Instrument to a different<strong>Audio</strong> Instrument. To do so:Press and hold the mouse on thename of the Instrument you wish toreassign.<strong>Vision</strong> opens a pop-up menu of Instrumentchoices.Press and hold the mouse in theInstrument column for the desiredtrack.<strong>Vision</strong> opens a pop-up list of Instrumentsused by that track. This list also containsa Remap Instruments command.Select a new Instrument assignmentfrom the pop-up menu.CHANGING AUDIO EVENTLENGTHSSelect Remap Instruments fromthe pop-up menu.<strong>Vision</strong> opens the Remap Instrumentsdialog box. This dialog box lists allInstruments currently in use by theTrack.<strong>Audio</strong> Events and Track LengthIf the beginning of an <strong>audio</strong> event fallswithin the track length, but any portion ofit falls beyond the end of the track, thatportion will not be played by <strong>Vision</strong>. If thetrack loops, then the portion of the <strong>audio</strong>event that’s past the end of the sequencewill play.If you check the Sustain <strong>audio</strong> acrosssegments options in the Settings Window,an <strong>audio</strong> event that’s played from asequence event will continue to play afterits parent sequence has ended. See your194 Opcode Systems, Inc.
CHAPTER 18: Working with <strong>Audio</strong> EventsMIDI Reference Manual for more informationabout the Sustain <strong>audio</strong> acrosssegments option.TrimmingTo trim the right edge of an <strong>audio</strong> event:In order to always hear the entire event,you need to manually adjust the tracklength to accommodate its end point, justlike you need to adjust the track length toaccommodate MIDI note events thatextend beyond the end of the track. Use atrack length numerical in any window tochange a track length.Move the cursor into the upper orlower right corner of the <strong>audio</strong> event.The cursor turns into a Right TrimCursor.Trimming or Lengthening <strong>Audio</strong>EventsYou can trim or lengthen <strong>audio</strong> events bysimply dragging inward from the side youwant to trim or outward from the side youwant to lengthen.The remainder of the <strong>audio</strong> event youtrim, or the increased portion of the eventyou lengthen, remains at the event’s originallocation in time relative to other <strong>audio</strong>events and MIDI data in the track.You cannot lengthen <strong>audio</strong> events beyondtheir original lengths (as determined byrecording, mixing, or importing). Forexample, if the original <strong>audio</strong> event wastwo bars long, trimmed <strong>audio</strong> events thatderive from that original event cannot belengthened beyond two bars.HINT: If you have recorded multiple takesinto a single <strong>audio</strong> file and you wish toextend an event beyond the limits of theoriginal take, simply import the entire<strong>audio</strong> file into <strong>Vision</strong>.Right Trim CursorDrag the mouse to the left.<strong>Vision</strong> trims off the ending of the <strong>audio</strong>event.Event ending trimmedafter dragging to the left<strong>Vision</strong> & Studio <strong>Vision</strong> <strong>Pro</strong> — <strong>Audio</strong> Reference Manual 195
PART 5: Basic <strong>Audio</strong> Editing & PlaybackTo trim the left edge of an <strong>audio</strong> event:LengtheningMove the cursor into the lower leftcorner of the <strong>audio</strong> event.The cursor turns into a Left Trim Cursor.To lengthen an <strong>audio</strong> event:Move the cursor over the lower rightcorner of the <strong>audio</strong> event.Left Trim CursorDrag the mouse to the right.<strong>Vision</strong> trims off the beginning of the<strong>audio</strong> event.Drag outward from the event tolengthen it.Event ending lengthened afterdragging it to the rightEvent beginning trimmedafter dragging to the right196 Opcode Systems, Inc.
CHAPTER 18: Working with <strong>Audio</strong> EventsCUTTING, COPYING, ANDPASTING AUDIO EVENTSYou can cut, copy, and paste <strong>audio</strong> events(or portions of events) in much the sameway as MIDI data.For example, the easiest way to duplicatean <strong>audio</strong> event is to Option-drag it to a differenttime or a different <strong>Audio</strong>Instrument—this creates an exact duplicateof the <strong>audio</strong> event, while leaving theoriginal event untouched.For more information about the variouscopy and paste procedures, see yourMIDI Reference Manual.<strong>Vision</strong> & Studio <strong>Vision</strong> <strong>Pro</strong> — <strong>Audio</strong> Reference Manual 197
PART 5: Basic <strong>Audio</strong> Editing & Playback198 Opcode Systems, Inc.
CHAPTER 19: Basic Digital <strong>Audio</strong> PlaybackThis chapter discusses how to play backdigital <strong>audio</strong> from within <strong>Vision</strong>.Generally, when you click <strong>Vision</strong>’s playbutton, all MIDI Instruments and <strong>Audio</strong>Instruments play back in unison. Thereare, however, a couple of points to considerwhen you play digital <strong>audio</strong>.WHAT TO READ IN THISCHAPTERIf <strong>Vision</strong> is using dynamic voice allocation,read <strong>Audio</strong> Playback with Dynamic Allocation(pg. 199). Dynamic voice allocation isthe default mode for:• Acadia• <strong>Audio</strong>media• Sound Tools II• <strong>Pro</strong> Tools I & IIIf <strong>Vision</strong> is using fixed voice allocation,read <strong>Audio</strong> Playback with Fixed Voice Allocation(pg. 202). Fixed voice allocation isthe default mode for:• Digidesign Session 8/<strong>Pro</strong>ject• Digidesign <strong>Pro</strong> Tools III/24/Mix/Mix PlusAUDIO PLAYBACK WITHDYNAMIC ALLOCATIONIf <strong>Vision</strong> uses dynamic voice allocation (asset in the <strong>Audio</strong> Instruments Menu in the<strong>Audio</strong> Instruments Window), <strong>audio</strong>events will play back as discussed in thissection.PRO TOOLS III/24/Mix/Mix Plus, SESSION8/<strong>Pro</strong>ject: if youÕre using one of these Digidesignproducts, skip ahead to <strong>Audio</strong> Playbackwith Fixed Voice Allocation (pg. 202).Voice Allocation and <strong>Audio</strong>EventsIf multiple <strong>audio</strong> events overlap in thesame track and are assigned to the same<strong>Audio</strong> Instrument, playback defaults tothe <strong>audio</strong> event with the later start time.For example:<strong>Vision</strong> & Studio <strong>Vision</strong> <strong>Pro</strong> — <strong>Audio</strong> Reference Manual 199
PART 5: Basic <strong>Audio</strong> Editing & PlaybackAssume you have two overlapping<strong>audio</strong> events in a track (as shown inFigure 19.1).Figure 19.1: Overlapping <strong>Audio</strong> Events in aTrackClick <strong>Vision</strong>Õs Play button.<strong>Vision</strong> plays the first <strong>audio</strong> event beginningat measure 2¥1, but abruptly stopsplaying that event and starts playing thesecond <strong>audio</strong> event when the Counterreaches 2¥3¥240.NOTE: This situation occurs only if youhave overlapping <strong>audio</strong> events assigned tothe same <strong>Audio</strong> Instrument in the sametrack. If the same two overlapping <strong>audio</strong>events are in separate tracks, they will bothplay back unless you disable Poly mode.Poly Mode for DAE is discussed in UsingThe Poly Column (pg. 138).If you want <strong>Vision</strong> to play multiple <strong>audio</strong>events simultaneously, use one of thetechniques discussed in Playing Multiple<strong>Audio</strong> Events Simultaneously (pg. 200).Viewing Overlapped EventsIf an <strong>audio</strong> event is partially hiddenbehind another <strong>audio</strong> event, you can viewit by clicking it.Figure 19.3: Viewing the Overlapped EventFigure 19.2: The Event with the later starttime has playback precedence when multiple<strong>audio</strong> events on the same <strong>Audio</strong> Instrumentoverlap in the same trackThe reason for this is that <strong>Vision</strong> automaticallyand dynamically assigns a singleplayback voice to each <strong>Audio</strong> Instrumentin a track.Playing Multiple <strong>Audio</strong> EventsSimultaneouslyThere are a couple of different ways tomake <strong>Vision</strong> play simultaneous <strong>audio</strong>events:200 Opcode Systems, Inc.
CHAPTER 19: Basic Digital <strong>Audio</strong> Playback• Assign each overlapping <strong>audio</strong> eventin a track to a different <strong>Audio</strong>Instrument.• Place overlapping <strong>audio</strong> events in separatetracks.The following sections detail each ofthese methods.<strong>Audio</strong> Events on Separate <strong>Audio</strong>InstrumentsAs discussed previously, if multiple <strong>audio</strong>events share the same track, <strong>Audio</strong>Instrument, and time range, <strong>Vision</strong> canplay only one of the <strong>audio</strong> events at a time.One way to make <strong>Vision</strong> play multiple<strong>audio</strong> events simultaneously is to assignthem to different <strong>Audio</strong> Instruments (asdiscussed in Changing <strong>Audio</strong> (pg. 191)).NOTE: Your <strong>audio</strong> hardware determinesthe maximum number of voices—and,the<strong>ref</strong>ore, the maximum number of <strong>audio</strong>events that can play simultaneously.<strong>Audio</strong> Events in Separate TracksAs discussed previously, if multiple <strong>audio</strong>events share the same track, <strong>Audio</strong>Instrument, and time range, <strong>Vision</strong> canplay only one of the <strong>audio</strong> events at a time.Another way to make <strong>Vision</strong> play multiple<strong>audio</strong> events simultaneously is to assignthem to different Tracks.Even though these <strong>audio</strong> events areassigned to the same <strong>Audio</strong> Instrument,theyÕre on different tracksÑmeaningtheyÕll play back simultaneouslyEven though these <strong>audio</strong> events overlap intime, they will both play simultaneously sincetheyÕre assigned to separate <strong>Audio</strong> InstrumentsFigure 19.5: <strong>Audio</strong> Events in Different Tracks (asshown in the Tracks Window)As always, your <strong>audio</strong> hardware determinesthe maximum number of voices—and, the<strong>ref</strong>ore, the maximum number of<strong>audio</strong> events that can play simultaneously.Figure 19.4: <strong>Audio</strong> Events in the same track, buton different <strong>Audio</strong> Instruments (as shown in theGraphic Window)<strong>Vision</strong> & Studio <strong>Vision</strong> <strong>Pro</strong> — <strong>Audio</strong> Reference Manual 201
PART 5: Basic <strong>Audio</strong> Editing & PlaybackAUDIO PLAYBACK WITH FIXEDVOICE ALLOCATIONIf <strong>Vision</strong> uses fixed voice allocation (as setin the <strong>Audio</strong> Instruments Menu in the<strong>Audio</strong> Instruments Window), <strong>audio</strong>events will play back as discussed in thissection.Click <strong>Vision</strong>Õs Play button.<strong>Vision</strong> plays the first <strong>audio</strong> event beginningat measure 2¥1, but abruptly stopsplaying that event and starts playing thesecond <strong>audio</strong> event when the Counterreaches 2¥3¥240.NOTE: If you’re using <strong>Vision</strong> with aDigidesign <strong>Audio</strong>media II or III, SoundTools II, or <strong>Pro</strong> Tools I or II, read <strong>Audio</strong>Playback with Dynamic Allocation(pg. 199) instead of this section.Voice Allocation and <strong>Audio</strong>EventsIf multiple <strong>audio</strong> events are assigned tothe same <strong>Audio</strong> Instrument and overlap ina region of time, then playback defaults tothe <strong>audio</strong> event with the later start time.For example:Assume you have two overlapping<strong>audio</strong> events assigned to the same<strong>Audio</strong> Instrument (as shown inFigure 19.6).This <strong>audio</strong> eventwill play......until this overlapping<strong>audio</strong> event silences itand plays instead.Figure 19.7: The event with the later starttime has playback precedence when multiple<strong>audio</strong> events on the same <strong>Audio</strong> InstrumentoverlapThe reason for this is that, in fixed voiceallocation mode, you can assign only oneplayback voice to an <strong>Audio</strong> Instrument(unless it’s a linked, stereo event).Figure 19.6: Overlapping <strong>Audio</strong> Events202 Opcode Systems, Inc.
CHAPTER 19: Basic Digital <strong>Audio</strong> PlaybackThis situation occurs across tracks. Forexample, look at Figure 19.8.<strong>audio</strong> events on separate tracks...Viewing Overlapped Events in the SameTrackIf an <strong>audio</strong> event is partially hiddenbehind another <strong>audio</strong> event, you can viewit by clicking it.... but assigned to the same<strong>Audio</strong> InstrumentFigure 19.8: Overlapping <strong>audio</strong> events use thesame <strong>Audio</strong> Instrument on different tracksNotice that the sequence contains two<strong>audio</strong> events on separate tracks butassigned to the same <strong>Audio</strong> Instrument.In this example, the <strong>audio</strong> event inTrack 1 plays for the first two bars, butstops abruptly at the beginning of Bar 3,when the <strong>audio</strong> event on Track 2 beginsto play instead.IMPORTANT TIP: This is an importantpoint to remember for troubleshooting. Ifyou’re looking at a Graphic Window andyou hear one <strong>audio</strong> event “step” on another,yet you don’t see any overlapping events—it’s probably because the offending <strong>audio</strong>event is in a different track.Figure 19.9: Viewing the Overlapped EventPlaying Multiple <strong>Audio</strong> EventsSimultaneouslyIf you want <strong>Vision</strong> to play multiple, simultaneous<strong>audio</strong> events, you must:• Assign each overlapping <strong>audio</strong> eventto a different <strong>Audio</strong> Instrument.• Use the <strong>Audio</strong> Instruments Windowto assign a a different voice to each<strong>Audio</strong> Instrument.If you want <strong>Vision</strong> to play multiple <strong>audio</strong>events simultaneously, see Playing Multiple<strong>Audio</strong> Events Simultaneously(pg. 203).<strong>Vision</strong> & Studio <strong>Vision</strong> <strong>Pro</strong> — <strong>Audio</strong> Reference Manual 203
PART 5: Basic <strong>Audio</strong> Editing & Playback204 Opcode Systems, Inc.
CHAPTER 20: Import/Export Cornucopia<strong>Vision</strong> offers a plethora of import, export,mixing, and saving options for both MIDIand <strong>audio</strong>.This chapter begins with an overview ofthese options, and concludes withdetailed discussions about how to importor export numerous types of MIDI and<strong>audio</strong> files.File Menu—Import/ExportCommandsImport/export commands are all containedin a central location under the Filemenu.WHO SHOULD READ THISCHAPTER?This chapter applies to all of the <strong>audio</strong>systems supported by <strong>Vision</strong>.Figure 20.1: File MenuCentrally located collectionof Import and Export options<strong>Vision</strong> & Studio <strong>Vision</strong> <strong>Pro</strong> — <strong>Audio</strong> Reference Manual 205
PART 5: Basic <strong>Audio</strong> Editing & PlaybackThe following list provides a brief overviewof the File menu’s import/exportcommands:• Export as QuickTime MovieThis command has two mainfunctions:1) exporting MIDI as a QuickTimemovie.2) exporting <strong>audio</strong> as a QuickTimemovie.Both of these operations are discussedin Exporting <strong>Audio</strong> and/orMIDI as a QuickTime Movie(pg. 221).• Import <strong>Audio</strong>The Import <strong>Audio</strong> command operatesdifferently depending on which<strong>audio</strong> hardware you use. See Importing<strong>Audio</strong> with Acadia or MIDI Only(pg. 207) or Importing <strong>Audio</strong> withDAE (pg. 209), depending on which<strong>audio</strong> system you use.• Import <strong>Audio</strong> Using QuickTimeThis command has numerousfunctions:1) importing <strong>audio</strong> tracks from aQuickTime movie. See Importing<strong>Audio</strong> from a QuickTime Movie(pg. 213).2) importing <strong>audio</strong> directly from astandard <strong>audio</strong> CD. See Importing<strong>Audio</strong> from a Standard Red Book<strong>Audio</strong> CD (pg. 217).3) importing various industry-standard<strong>audio</strong> formats that are not nativeto <strong>Vision</strong> (such as .au and .wav). SeeImporting Foreign <strong>Audio</strong> File Formats(pg. 219).• Export <strong>Audio</strong> MixUse it to create stand-alone <strong>audio</strong> filesfor multimedia or web applications.See Exporting an <strong>Audio</strong> Mix(pg. 223).• Export <strong>Audio</strong> EventsUse it to export each selected <strong>audio</strong>event into its own <strong>audio</strong> file. This isparticularly useful for creating soundsor loops for triggering with a sampler.See Exporting Individual <strong>Audio</strong>Events (pg. 225).Additionally, you can import MIDI datafrom a QuickTime movie, as discussed inImporting MIDI from a QuickTime Movie(pg. 212).206 Opcode Systems, Inc.
CHAPTER 20: Import/Export CornucopiaIMPORTING AUDIO<strong>Vision</strong> uses two techniques to import<strong>audio</strong> directly, depending on which <strong>audio</strong>hardware you are using. Both aredescribed below. <strong>Audio</strong> imported with theimport <strong>audio</strong> command can be directlyplayed and manipulated.Importing <strong>Audio</strong> with Acadia orMIDI OnlyImport <strong>Audio</strong> DialogAcadia’s new Import <strong>Audio</strong> dialog lets youselect and import multiple files. File formatsthat can be auditioned and importedfrom the dialog include AIFF and SoundDesigner II. To import one or more <strong>audio</strong>files, place your cursor at the desiredmeasure location for the desired track,then choose File>Import <strong>Audio</strong>.Following is a description of the differentcomponents in the Import <strong>Audio</strong> dialog: File List: Displays the available filesfor the current directory. To place an<strong>audio</strong> file in the Import List simplydouble-click it, or highlight thedesired file and click the Add button. File Info: Displays for the selectedfile its File Path, File Type, and FileLength. Information is only displayedin this area when an AIFF or SoundDesigner II file is highlighted.Files in either the File List (top) orImport List (bottom) can be selectedfor info. Import List: Displays the list of<strong>audio</strong> files that will be imported whenthe Done button is clicked. Add/Open: When labeled as Open,this button opens the highlightedfolder or volume (in the File List).When labeled as Add, this buttonadds the highlighted file to theImport List.If you hold down the Option key andclick Add, the highlighted file isimported and the dialog automaticallyclosed. Add All: Adds all <strong>audio</strong> files in thecurrent folder to the Import List.Figure 20.2: Import <strong>Audio</strong> dialog for the Acadia<strong>audio</strong> system<strong>Vision</strong> & Studio <strong>Vision</strong> <strong>Pro</strong> — <strong>Audio</strong> Reference Manual 207
PART 5: Basic <strong>Audio</strong> Editing & Playback Play/Stop: Click this button to playthe highlighted file. While the fileplays the button becomes a Stop button.Click Stop to stop playback of thefile; otherwise, it will play in itsentirety.Files in either the File List (top) orImport List (bottom) can be selectedand auditioned with the Play button.Only files that match the current SessionSample Rate can be auditioned.Auditioned files play through the first(enabled) output pair of your <strong>audio</strong>hardware. If any plug-ins are assignedto these outputs, they’ll affect theplayback for the auditioned files. Remove: Removes the highlightedfile from the Import List. Done: Imports the <strong>audio</strong> files displayedin the Import List and closesthe dialog. To trigger the Donebutton without using the mouse, holddown the Option key and type Returnor Enter. Cancel: Closes the Import <strong>Audio</strong>dialog without importing any files. Import multiple files: This pop-updetermines where and how the specified<strong>audio</strong> files are imported.• Choose “end to end onto one track” toplace the files one after another ontoa single track, assigned to a single<strong>Audio</strong> Instrument.• Choose “onto multiple empty tracks”to place the files on separate tracks,each at the same measure location. Inthis case, each imported file isassigned to a different <strong>Audio</strong>Instrument.Importing <strong>Audio</strong> in MIDI OnlyThe new Import <strong>Audio</strong> dialog just discussedis available when the specified<strong>audio</strong> system is Acadia or MIDI Only.When using MIDI Only, however, filescannot be auditioned.Importing Stereo Linked FilesWhen importing linked stereo files, it isnot necessary to import both the left andright files. Simply import one, and bothwill be imported as a single stereo <strong>audio</strong>event.For this to happen, both files must residein the same folder, they must be the samelength and <strong>audio</strong> format, and they musthave identical names with appropriate L/R extensions (for instance, vocals L andvocals R, or vocals.L and vocals.R).Stereo <strong>Audio</strong> Events and <strong>Audio</strong>InstrumentsWhen importing stereo <strong>audio</strong> events fromeither linked stereo files or stereo interleavedfiles, the next available stereo<strong>Audio</strong> Instrument (not in use) is assigned.If none are available, the next availablemono <strong>Audio</strong> Instrument is assigned.Importing <strong>Audio</strong> from CD-ROMsWhen importing <strong>audio</strong> files from CD-ROMs you are prompted to save theimported files to a folder on your harddisk. This allows the files to be destructivelyedited, if desired, and it allows theirwaveforms to be displayed.208 Opcode Systems, Inc.
CHAPTER 20: Import/Export CornucopiaImporting <strong>Audio</strong> with DAEIf you use DAE, you can import <strong>audio</strong> filesstored in any of the following file formats:• Sound Designer• Sound Designer II• AIFF• Dyaxis<strong>Vision</strong> can play and manipulate these filesdirectly without having to convert themfirst. You can import <strong>audio</strong> recorded atany sample rate. Eight bit files cannot beimported with DAE. If you want to workwith 8 bit files, use <strong>Vision</strong> with Acadia.To import <strong>audio</strong>:Choose <strong>Audio</strong>>Import <strong>Audio</strong>.<strong>Vision</strong> opens the Import <strong>Audio</strong> dialogbox. This is the standard DigidesignImport <strong>Audio</strong> dialog box found in allDAE-compatible applications.Figure 20.3: Import <strong>Audio</strong> Dialog Box for DAEOpen a Graphic or List Window andset an Edit In Point.Alternately, you could click in the TrackOverview area of the Tracks Window toautomatically set an Edit In Point for thedesired track.About the DAE Import <strong>Audio</strong>Dialog BoxAs shown in Figure 20.3, the Import<strong>Audio</strong> dialog box contains many elements.Specifically: File and Item lists Action buttons Sound File information <strong>Audio</strong> preview controlsEach of these items is discussed in the followingsections.<strong>Vision</strong> & Studio <strong>Vision</strong> <strong>Pro</strong> — <strong>Audio</strong> Reference Manual 209
PART 5: Basic <strong>Audio</strong> Editing & PlaybackFile and Item ListsThe Import <strong>Audio</strong> dialog contains threescrolling lists:• Left list: This is a standard list of foldersand files on your hard disk. Usethis to find the <strong>audio</strong> files on yourhard disk.• Middle list: This list shows the itemsavailable for import in the selectedfile.• Right list: This list shows the itemsthat will be imported when you clickthe Done button.NOTE: <strong>Vision</strong> does not recognize SoundDesigner II cross fade settings.Action ButtonsUse the action buttons to navigate yourhard disk and select items to import intoyour <strong>Vision</strong> document.• Done button: Click this button toimport all items in the right list intothe current <strong>Vision</strong> document. You canimport several sound files, regions, orplaylists at the same time, from severaldifferent sources.• Add button: Click this button to movethe selected item in the middle list tothe right list, making it ready toimport.• Remove button: Click this button toremove the selected item from theright list.Sound File InformationThis area contains information about thecurrently selected item in any of the lists.Click the pop-up menu to view the locationof the item on your hard disk.There are six action buttons:• Eject button: Click this button toeject a floppy disk or other removablemedia.• Desktop button: Click this button tomove the first scrolling list to thedesktop level.• Cancel button: Click this button tocancel the import operation; no <strong>audio</strong>will be imported.210 Opcode Systems, Inc.
CHAPTER 20: Import/Export Cornucopia<strong>Audio</strong> Preview ControlsUse these controls to listen to an item ineither the middle or right list.Import Multiple Files (DAE <strong>Audio</strong>P<strong>ref</strong>erences)DAE users can specify how multiple filesare imported. The Import multiple filespop-up in the <strong>Audio</strong> P<strong>ref</strong>erences dialog(under the <strong>Audio</strong> menu) determineswhether the files are imported onto asingle track or multiple tracks.The timer will show the time while playing.You can skip to any location in an<strong>audio</strong> file by clicking along the length ofthe counter. If you click toward the rightof the counter, you’ll skip to the end of thesong. If you click toward the left of thecounter, you’ll skip to the beginning of thesong. If you click toward the middle of thecounter, you’ll skip to the middle of thesong. This is helpful when you are previewinga long file. For more information,see the hint in Appending <strong>Audio</strong> to Files(pg. 239).Figure 20.4: <strong>Audio</strong> P<strong>ref</strong>erences for DAEChoose “end to end onto one track” toplace the files one after another onto asingle track, assigned to a single <strong>Audio</strong>Instrument.Choose “onto multiple empty tracks” toplace the files on separate tracks, each atthe same measure location. In this case,each imported file is assigned to a different<strong>Audio</strong> Instrument.<strong>Vision</strong> & Studio <strong>Vision</strong> <strong>Pro</strong> — <strong>Audio</strong> Reference Manual 211
PART 5: Basic <strong>Audio</strong> Editing & PlaybackIMPORT SHORTCUTSGraphic WindowYou can easily import files by clickingwith the Pencil tool anywhere in theGraphic Window’s <strong>Audio</strong> Pane at the locationwhere you want to enter the file. Thiswill open the Import <strong>Audio</strong> dialog box.List WindowOTHER IMPORT OPTIONSThe following sections discuss all theother import options available in <strong>Vision</strong>.Importing MIDI from a QuickTimeMovieYou can import MIDI data contained in aQuickTime movie directly into a new<strong>Vision</strong> sequence. To do so:In a List Window, there’s an additionalway to open the Import <strong>Audio</strong> dialog box:Set an input edit point in the ListWindow.Press and hold the Insert Eventsbutton.<strong>Vision</strong> opens a pop-up menu.Select File>Open.An Open dialog box appears.Select <strong>Audio</strong> Event from the pop-upmenu.<strong>Vision</strong> opens the Import <strong>Audio</strong> dialogbox.Locate the QuickTime file you wish toopen, select it, and click Open.What happens next depends on whattype of data is contained in the Quick-Time movie. Specifically:1) If the movie contains only MIDI data,then <strong>Vision</strong> imports the MIDI into a newsequence.2) If the movie contains both MIDI and<strong>audio</strong>, <strong>Vision</strong> will import both the MIDIand <strong>audio</strong> into a new sequence (afterfirst asking your to define an <strong>audio</strong> fileformat for the imported <strong>audio</strong>).212 Opcode Systems, Inc.
CHAPTER 20: Import/Export Cornucopia3) If the movie contains BOTH VideoAND <strong>audio</strong> (and/or MIDI), youÕll see analert box asking you what, exactly, youwant to do with the QuickTime file.Import causes <strong>Vision</strong> to import themovieÕs MIDI and <strong>audio</strong> tracks into<strong>Vision</strong> tracks.View causes <strong>Vision</strong> to open the movie inthe QuickTime Movie Window. The MIDIdata is not imported into <strong>Vision</strong>, but willplay back using the standard QuickTimeelements contained in the QuickTimeMovie Window.Import & View causes <strong>Vision</strong> to importthe MIDI as described above, plus itopens the movie into the QuickTimeMovie Window.Since this tutorial is concerned withimporting MIDI data from QuickTimemovies, click Import.<strong>Vision</strong> imports the MIDI data, creating anew sequence, and places each MIDIchannel on a different track. It will alsoimport <strong>audio</strong> (after asking you to definean <strong>audio</strong> file format) if <strong>audio</strong> data is containedin the QuickTime file.NOTE: As of QuickTime version 2.5, thereis no way to import tempo track informationfrom a QuickTime movie. Althoughthe file will play back at the correct speed,that speed is not indicated properly within<strong>Vision</strong>’s Tempo track (which always displays60 bps). If you wish to performextensive editing on MIDI data that’s beenimported from a QuickTime movie, youmay want to establish a tempo track using<strong>Vision</strong>’s Reclock command described inyour MIDI Reference Manual.Importing <strong>Audio</strong> from aQuickTime MovieThere are two ways to import <strong>audio</strong> froma standard QuickTime 2.5 (or later)movie:• You can import <strong>audio</strong> into a specifictrack by using the File>Import<strong>Audio</strong> Using Quicktime command.• You can import <strong>audio</strong> into a newsequence by using the File>Opencommand.In both cases QuickTime <strong>audio</strong> and musicfiles are not directly accessed. Unlike theImport <strong>Audio</strong> command, Import <strong>Audio</strong>Using QuickTime must extract and convertthe files into a format that <strong>Vision</strong> canmanipulate and write them to your harddrive.<strong>Vision</strong> & Studio <strong>Vision</strong> <strong>Pro</strong> — <strong>Audio</strong> Reference Manual 213
PART 5: Basic <strong>Audio</strong> Editing & PlaybackImporting QuickTime <strong>Audio</strong> into a TrackTo import QuickTime <strong>audio</strong> into a trackfrom a standard QuickTime 2.5 (or later)file:Open a Graphic or List Window andset an Edit In Point.Alternately, you could click in the TrackOverview area of the Tracks Window toautomatically set an Edit In Point for thedesired track.Choose File>Import <strong>Audio</strong> UsingQuickTime.An Open dialog box appears.NOTE: If your movie contains video, youcan see its poster frame in the Previewarea by 1) checking the Show Previewoption, then 2) clicking the Createbutton.Locate the QuickTime file you wish toopen, select it, and click Open.If the file contains <strong>audio</strong> data, <strong>Vision</strong>opens a Save As dialog box.Figure 20.5: Save As Dialog Box for Imported<strong>Audio</strong>Navigate to the folder or volume inwhich you want to save the file, andtype the desired name.NOTE: If youÕre using digital <strong>audio</strong> hardwarethat requires its own dedicatedhard disk (such as <strong>Pro</strong> Tools III/IV), youshould import the <strong>audio</strong> onto the diskthatÕs connected directly to your <strong>audio</strong>hardwareÑnot the disk thatÕs connectedto your computerÕs SCSI port. If youdonÕt, you wonÕt be able to play theimported <strong>audio</strong>.Look at the Format information at thebottom of the dialog box.This shows the type of <strong>audio</strong> file that theimport operation will create. In general,you should create an <strong>audio</strong> file that canbe played back by your <strong>audio</strong> system.For example, if youÕre using<strong>Pro</strong> Tools III/IV, you should create a44.1 kHz or 48 kHz, 16 bit <strong>audio</strong> file.214 Opcode Systems, Inc.
PART 5: Basic <strong>Audio</strong> Editing & Playback3) If the movie contains BOTH VideoAND <strong>audio</strong> (and/or MIDI), youÕll see analert box asking you what, exactly, youwant to do with the QuickTime file.<strong>Vision</strong> opens a Save As dialog box.Import causes <strong>Vision</strong> to import themovieÕs MIDI and/or <strong>audio</strong> tracks into<strong>Vision</strong> tracks.View causes <strong>Vision</strong> to open the movie inthe QuickTime Movie Window. The<strong>audio</strong> data is not imported into <strong>Vision</strong>,but will play back using the standardQuickTime elements contained in theQuickTime Movie Window.Import & View causes <strong>Vision</strong> to importthe <strong>audio</strong> as described above, plus itopens the movie into the QuickTimeMovie Window.Since this tutorial is concerned withimporting <strong>audio</strong> data from QuickTimemovies, click Import.Figure 20.7: Save As Dialog Box for Imported<strong>Audio</strong>Navigate to the folder or volume inwhich you want to save the file, andtype the desired name.NOTE: If youÕre using digital <strong>audio</strong> hardwarethat requires its own dedicatedhard disk (such as <strong>Pro</strong> Tools III/IV), youshould import the <strong>audio</strong> onto the diskthatÕs connected directly to your <strong>audio</strong>hardwareÑnot the disk thatÕs connectedto your computerÕs SCSI port. If youdonÕt, you wonÕt be able to play theimported <strong>audio</strong>.Look at the Format information at thebottom of the dialog box.This shows the type of <strong>audio</strong> file that theimport operation will create. In general,you should create an <strong>audio</strong> file that canbe played back by your <strong>audio</strong> system.For example, if youÕre using<strong>Pro</strong> Tools III/IV, you should create a44.1 kHz or 48 kHz, 16 bit <strong>audio</strong> file.216 Opcode Systems, Inc.
CHAPTER 20: Import/Export CornucopiaClick the Format button if you needto change the format of the <strong>audio</strong> file.<strong>Vision</strong> opens a subset of the standard<strong>Audio</strong> Format dialog box.Importing <strong>Audio</strong> from a StandardRed Book <strong>Audio</strong> CDYou can import <strong>audio</strong> from standard redbook <strong>audio</strong> CDs. This is particularlyuseful for importing samples from thirdparty <strong>audio</strong> sample CDs.Figure 20.8: <strong>Audio</strong> Format Dialog BoxUse the various pop-up menus todefine the desired <strong>audio</strong> format.The <strong>Audio</strong> Format dialog box parametersare discussed in Anatomy of the<strong>Audio</strong> Format Dialog Box (pg. 228).Click OK.<strong>Vision</strong> returns you to the Save As dialogbox.Click Save.<strong>Vision</strong> saves the <strong>audio</strong> file in therequested format, creates a newsequence, and imports each imported<strong>audio</strong> file into its own track within thatsequence.If the imported QuickTime file containedMIDI data, it too would be placed in thenew sequence, with each MIDI channelassigned to its own track.NOTE: If, at this point, <strong>Vision</strong> opens theConversion Overview dialog box, see ÒIfthe Conversion Overview Dialog BoxAppears When You Import <strong>Audio</strong>(pg. 220).ÓOpen a Graphic or List Window andset an Edit In Point.Alternately, you could click in the TrackOverview area of the Tracks Window toautomatically set an Edit In Point for thedesired track.In <strong>Vision</strong>, select the track into whichyou wish to import the <strong>audio</strong> andopen its Graphic or List Window.Choose File>Import <strong>Audio</strong> UsingQuickTime.An Import dialog box appears.In the dialog box, navigate to the CD,select the track number you wish toimport, and click Convert.A Save As dialog box appears.<strong>Vision</strong> & Studio <strong>Vision</strong> <strong>Pro</strong> — <strong>Audio</strong> Reference Manual 217
CHAPTER 20: Import/Export CornucopiaTo import <strong>audio</strong> in a supported format:Always glance at the formatinformation at the bottom of an <strong>audio</strong>fileÕs Save As dialog box.EXPORT OPTIONSThe following sections discuss all of the<strong>audio</strong> export options available in <strong>Vision</strong>.<strong>Audio</strong> format informationin a typical Save As dialog boxIf the format shown there is notsupported by your <strong>audio</strong> hardware,click the Format button.Use the resulting <strong>Audio</strong> Format dialogbox to specify a format thatÕscompatible with your hardware.Exporting <strong>Audio</strong> and/or MIDI as aQuickTime MovieYou can export selected <strong>audio</strong>, MIDI, orboth as a standard QuickTime movie filefor web or CD-ROM distribution.IMPORTANT: Although QuickTime is anexcellent final output medium for musicdistribution, it is not an ideal MIDI interchangeformat. This is because, as ofQuickTime 2.5, MIDI tempo track informationcan not be extracted from a MIDIsequence saved in QuickTime format. Ifyou need to share MIDI files for collaboration,use the industry-standard MIDI Fileformat.To export a sequence as a QuickTimemovie:In you’re importing <strong>audio</strong> from a standardRed Book <strong>audio</strong> CD, use the <strong>Audio</strong> CDImport Options dialog box to specify an<strong>audio</strong> format.NOTE: If you need to convert the samplerates of some files, PowerMac users willachieve higher quality results using theDSP>Convert Sample Rate command.Users of 680x0 computers may also use theDSP command, but processing times will beextremely long on these machines.In the Sequences Window, select thesequence you wish to export.Choose File>Export as QuickTimeMovie.The ÒExport as QuickTime MovieÓ dialogbox appears.<strong>Vision</strong> & Studio <strong>Vision</strong> <strong>Pro</strong> — <strong>Audio</strong> Reference Manual 221
PART 5: Basic <strong>Audio</strong> Editing & PlaybackThe Export as QuickTime Movie DialogBoxFigure 20.12 illustrates a typical “Exportas QuickTime Movie” dialog box. As youcan see, it contains numerous elements.These are: Export selectorFigure 20.12: Typical Export QuickTimeMovie Dialog BoxConfigure the dialog box asdiscussed in The Export asQuickTime Movie Dialog Box(pg. 222), then click OK.<strong>Vision</strong> creates a single, flattened Quick-Time movie.NOTE: When you compose a MIDI scorethat you plan to export as a QuickTimemovie, Opcode recommends that youalways score the movie using a GeneralMIDI Module rather than Apple’s Quick-Time Musical Instruments. For moreinformation, see the MIDI ReferenceManual for details on General MIDI.Figure 20.13: Export SelectorFrom the pop-up menu, select...Create new movie if you want theexport operation to create a completelynew QuickTime movie.Add tracks to existing movie if youwant to add the exported <strong>audio</strong> and/or MIDI to an existing movie.Replace tracks in existing movie ifyou want to replace all the <strong>audio</strong> and/or MIDI tracks in an existing moviewith the exported data. This optionreplaces data only of the type beingexported. For example, if an existingQuickTime movie contains both<strong>audio</strong> and MIDI, but you export only<strong>audio</strong> data, then all the existing file’s<strong>audio</strong> tracks are replaced by theexported <strong>audio</strong>. The existing MIDItrack, however, remains untouched.222 Opcode Systems, Inc.
CHAPTER 20: Import/Export CornucopiaExport MIDI optionUncheck this option if you wish toexclude MIDI data from the exportoperation.Check this option to export all MIDIdata in the selected sequence to aQuickTime movie’s “Music Track.”When you export MIDI data, yourQuickTime file contains a single newMusic Track. Internally, that trackcontains separate MIDI channels foreach channel you exported.Export <strong>Audio</strong> optionUncheck this option if you wish toexclude digital <strong>audio</strong> data from theexport operation.Check this option to mix and exportall the <strong>audio</strong> events in the selectedtrack(s) to a QuickTime movie’s“Sound Track.”When you export <strong>audio</strong>, all theselected <strong>audio</strong> events are mixed intoa single QuickTime Sound Track.The export process also applies theeffects of any selected <strong>audio</strong> volumeand pan events. This means that allthe nuances that you built into yoursequence is captured when youexport <strong>audio</strong> to a QuickTime movie.The following elements all affect theexporting of <strong>audio</strong> data only. Since thesefeatures are a subset of those included inthe <strong>Audio</strong> Format dialog box, they aredescribed in depth in Anatomy of the<strong>Audio</strong> Format Dialog Box (pg. 228):Compression selectorSee Compression (pg. 229).Sample rate selectorSee Sample Rate (pg. 229).Sample size selectorSee Sample Size (pg. 230).Channels selectorSee Channels (pg. 231).Normalize selectorSee Normalize (pg. 232).Exporting an <strong>Audio</strong> MixYou can mix numerous <strong>audio</strong> eventstogether and export them as a single<strong>audio</strong> file using many industry-standard<strong>audio</strong> formats.This is accomplished with the File>Export <strong>Audio</strong> Mix command.If you select a region of time to export(rather than Shift-clicking individual<strong>audio</strong> events), then the Export <strong>Audio</strong>Mix command incorporates the effect ofany volume or pan events that fall withinthe selected time range. This is an idealway to create final, mixed <strong>audio</strong> files forweb distribution, CD-ROM games, etc.<strong>Vision</strong> & Studio <strong>Vision</strong> <strong>Pro</strong> — <strong>Audio</strong> Reference Manual 223
CHAPTER 20: Import/Export CornucopiaWhen this option is checked, all EQs,plug-ins, and bussing applied to the <strong>audio</strong>signal (including all selected automationdata) will be included in the mixed file.The popup menu to the right of thisoption determines which outputs will beincluded in the mix and any processingassigned to those outputs will beincluded.These options are identical to the onespresented when using the DSP>Mix command.For detailed information, seeMixing in Acadia (“Bounce to Disk”)(pg. 316).“Export <strong>Audio</strong> Mix” vs. “DSP>Mix”Although <strong>Vision</strong>’s Export <strong>Audio</strong> Mixcommand and the DSP>Mix commandmay seem similar at first, they are actuallyquite different. Specifically:• Mix creates a file only in formats that<strong>Vision</strong>, itself, can play. It is meant asan interim step in creating a sequencebecause it replaces your sequence’soriginal <strong>audio</strong> events with the newlymixed event. For details, seeChapter 28: Mixing Digital <strong>Audio</strong>(Bouncing).• Export <strong>Audio</strong> Mix is capable of creatingfile formats that <strong>Vision</strong> cannotplay directly. It is meant to create afinal <strong>audio</strong> mix for distribution (viaweb, CD, or any other media). It doesnot replace any existing files in yourcurrent sequence.Exporting Individual <strong>Audio</strong> EventsYou can select individual <strong>audio</strong> events andexport each of them as a separate, individual<strong>audio</strong> file. This has numerous uses,including:• Creating files for a sampler.You can import a track from an <strong>audio</strong>CD, separate it into different <strong>audio</strong>events, and save each of those eventsto its own file. Then, in a dedicatedsample editing program you can sendthose files to an external sampler.• Creating <strong>audio</strong> for the web, CD-ROM,QuickTime, etc.You can create sequences that containshort <strong>audio</strong> segments (dialog,sound effects, and so on), then selectany one of those segments to exportas an <strong>audio</strong> file for use in web pages,CD ROM games, QuickTime movies,etc.<strong>Vision</strong> & Studio <strong>Vision</strong> <strong>Pro</strong> — <strong>Audio</strong> Reference Manual 225
CHAPTER 20: Import/Export CornucopiaExample—Creating Files for a SamplerMany third-party <strong>audio</strong> sampling CDscontain multiple samples in a single track.For example, a single track might containnumerous different, but related, drumloops.You can use the Export <strong>Audio</strong> Eventscommand in conjunction with other<strong>Vision</strong> commands to assemble individualdigital versions of each drum loop.Import a track from the <strong>audio</strong>sampling CD.This operation was discussed in Importing<strong>Audio</strong> from a Standard Red Book<strong>Audio</strong> CD (pg. 217).Use <strong>Vision</strong>Õs <strong>Audio</strong>>Strip Silencecommand to separate the file intoindividual <strong>audio</strong> events.This is discussed in Chapter 27: StripSilence and Slice <strong>Audio</strong>.Select the individual <strong>audio</strong> eventscreated as a result of the StripSilence operation.If you wish, you can use the List Windowto assign a unique name to each of thenewly created <strong>audio</strong> events.Choose File>Export <strong>Audio</strong> Eventsto create a separate <strong>audio</strong> file foreach drum loop.Your hard disk now contains a separatedigital <strong>audio</strong> file for each individual drumloop captured from your <strong>audio</strong> CD.You can use these files in numerous ways.For example:• You can use a sample editing programto send them to an externalsampler.• You can import them into <strong>Vision</strong> andsequence them as is.• If you own Studio <strong>Vision</strong> <strong>Pro</strong>, you canuse its DSP menu to time stretch orpitch-shift the samples to “fit” yoursequence’s tempo or pitch.“Export <strong>Audio</strong> Events” vs. “Export <strong>Audio</strong>Mix”Although <strong>Vision</strong>’s Export <strong>Audio</strong> Eventscommand and Export <strong>Audio</strong> Mix commandmay seem similar at first, they areactually quite different. Specifically:• Export <strong>Audio</strong> Mix mixes all yourselected <strong>audio</strong> events together andcreates a single new <strong>audio</strong> file. Itsmain purpose is to create a “final<strong>audio</strong> mix” of a song (or part of asong) for distribution.• Export <strong>Audio</strong> Events creates a new,separate <strong>audio</strong> file for each selected<strong>audio</strong> event. Its main uses are to 1)create separate files for samplers, or2) create short musical snippets orsound effects for web pages, games,etc.<strong>Vision</strong> & Studio <strong>Vision</strong> <strong>Pro</strong> — <strong>Audio</strong> Reference Manual 227
PART 5: Basic <strong>Audio</strong> Editing & PlaybackANATOMY OF THE AUDIOFORMAT DIALOG BOXVariations of the <strong>Audio</strong> Format dialog boxare used by many of <strong>Vision</strong>’s Export andSave As operations.File FormatYou can export <strong>audio</strong> in any of the followingfile formats:Figure 20.14: <strong>Audio</strong> Format Dialog BoxThe following sections discuss, in detail,all the various elements in a generic<strong>Audio</strong> Format dialog box. Not all optionsappear in all <strong>Audio</strong> Format dialog boxes.NOTE: <strong>Vision</strong> remembers two different setsof <strong>Audio</strong> Format parameters—Mix formatsand Export formats. This is because,in practice, your exported files will generallybe in a different file format than yourwork-in-progress (Mix) files. Exported fileswill usually use some <strong>audio</strong> format suitablefor general distribution, as required byQuickTime, the internet, CD-ROM, etc.Mixed files will usually use a formatrequired by the <strong>audio</strong> hardware employedin its development.• AIFF: <strong>Audio</strong> Interchange File Format.This popular format is supportedby both the Macintosh and Windowsplatforms.• Sound Designer II: This is Digidesign’sstandard <strong>audio</strong> file format usedby most of its various <strong>audio</strong> systems.It’s also a fairly common format forprofessional-level sample editing orfile exchange.• WAVE: This is a standard (.wav)<strong>audio</strong> format used by the Windowsplatform.• Sun .au: This is a standard formatused by both the Sun and NeXT platforms,and is also a popular internetdistribution format.228 Opcode Systems, Inc.
CHAPTER 20: Import/Export CornucopiaCompressionYou can export <strong>audio</strong> using any of the followingcompression types:• µ-law 2:1: This is a non-linear, 8 bitencoding method that yields a greaterdynamic range than standard linear8-bit encoding. It was originally developedfor telephony applications, butyields passable results on music files.NOTE: Depending on your version ofQuickTime, you may have other availableconversion formats. Check your QuickTimedocumentation for details.<strong>Audio</strong> compression can seriously affectthe file’s fidelity. In general, you shoulduse <strong>audio</strong> compression only when absolutelynecessary. With that caveat inmind, you can use <strong>Vision</strong> to export compressedAIFF <strong>audio</strong> files using any ofthese standard QuickTime compressionCODECs:• None: Select this option to exportuncompressed <strong>audio</strong>.• MACE 3:1: MACE stands for Macintosh<strong>Audio</strong> Compression andExpansion. This version creates an8-bit file with a maximum upper frequencyresponse of 11 kHz, barelyacceptable for music reproduction.• MACE 6:1: This version creates an8-bit file with a maximum upper frequencyresponse of 5.5 kHz,acceptable only for speech files.• IMA 4:1: IMA stands for InteractiveMultimedia Association. Use it tocompress CD-quality (16 bit) fileswith a 4:1 compression ratio. In general,it produces a much higherfidelity file than MACE.Sample RateYou can export <strong>audio</strong> using any of the followingstandard sample rates:• 5,564: This rate is one-fourth the22.255 kHz sampling rate of old Macintoshcomputers. It is very lowfidelity and should be used only forspeech and only if file size must beabsolutely minimized.<strong>Vision</strong> & Studio <strong>Vision</strong> <strong>Pro</strong> — <strong>Audio</strong> Reference Manual 229
PART 5: Basic <strong>Audio</strong> Editing & Playback• 7,418: This rate is one-third the22.255 kHz sampling rate of old Macintoshcomputers. It produces a lowfidelity file that, in general, is usefulonly for speech.• 8,000: This rate is one-fourth thestandard 32 kHz broadcast rate. Itproduces a low fidelity file that, ingeneral, is useful only for speech.• 11,025: This rate is one-fourth thestandard 44.1 kHz CD sampling rate.It produces a file suitable for very lowfidelitymusic playback or higherfidelityspeech.• 11,127: This rate is one-half the22.255 kHz sampling rate of old Macintoshcomputers. It produces a filesuitable for very low-fidelity musicplayback or high-fidelity speech.• 16,000: This rate is one-half thestandard 32 kHz broadcast rate. Itproduces a file suitable for low-tomediumfidelity music playback.• 22,050: This rate is one-half thestandard 44.1 kHz CD sampling rate.It produces a file suitable for mediumfidelitymusic playback.• 22,255: This is the sampling rateused by older Macintosh computers(most machines now work at44.1 kHz). It produces a file suitablefor medium-fidelity music playback.• 32,000: This is the standard rateused in broadcast.• 44,100: This is the standard samplingrate used by <strong>audio</strong> CD players.• 48,000: This is the sampling rateused by consumer DAT (Digital<strong>Audio</strong> Tape) machines.In addition to all these options, you cantype any rate (standard or non-standard)into the Sample rate field.NOTE: Generally, you should use multiplesof the Macintosh sample rate (22.255 kHz)if your finished product is to be played onlyon Macintosh computers. Otherwise, youshould use sample rates that are multiplesof the 44.1 kHz CD sampling rate.Sample SizeYou can export <strong>audio</strong> at any of these bitdepths:• 8 bits: <strong>Pro</strong>duces smaller files, but ata greatly reduced resolution. 8-bitfiles are generally noisy and “grainy”sounding.230 Opcode Systems, Inc.
CHAPTER 20: Import/Export Cornucopia• 8 bits dithered: Also produces an8 bit file, but if your original <strong>audio</strong> fileis 16 bit and you export it as an 8 bitdithered file, <strong>Vision</strong> dithers the fileproducing somewhat “cleaner”sounding <strong>audio</strong>.TERMINOLOGY: “Dithering” is a processin which a tiny amount of randomnoise is added to the signal to reducethe very audible and undesirable distortionthat results whenever digital <strong>audio</strong>is re-quantized (such as when a file isreduced from 16 bits to 8 bits).• 16 bits: <strong>Pro</strong>duces clean CD-qualityfiles that occupy more disk spacethan 8-bit files.• 16 bits dithered: Also produces a 16bit file, but if your original file is 24 bitand you export it with this option,<strong>Vision</strong> dithers the file. If you use thisoption in conjunction with theDSP>Mix, or the File>Export <strong>Audio</strong>Mix commands, <strong>Vision</strong> will use ahigher bit resolution in its internalcalculations and will dither the finalresult before saving it as 16 bit.• 24 bits: <strong>Pro</strong>duces very high qualityresults if you are exporting 24 bit filesor if you are mixing 16 bit or 24 bitfiles. Currently, only users of <strong>Pro</strong>Tools 24 systems will be able to auditionthese files.ChannelsYou can export <strong>audio</strong> in any of the followingmono/stereo configurations:• Mono: Creates a single channel,mono <strong>audio</strong> file.• Stereo - 2 mono files: Creates twoseparate, but linked, mono files forstereo playback with some <strong>audio</strong>hardware.Specifically, Digidesign’s DAE-basedsystems require that stereo files be ofthis format.• Stereo - 1 interleaved file: Createsa single, interleaved stereo file forstereo playback with some <strong>audio</strong>hardware.Specifically, Apple’s Sound Managercan play files of this format (meaningQuickTime supports it), as canDigidesign’s Sound Designer IIprogram.<strong>Vision</strong> & Studio <strong>Vision</strong> <strong>Pro</strong> — <strong>Audio</strong> Reference Manual 231
PART 5: Basic <strong>Audio</strong> Editing & PlaybackIf the <strong>Audio</strong> Format dialog box opens asthe result of using the File>Export<strong>Audio</strong> Events command, the Channelsselector works a bit differently.Specifically:• If you selected only a single <strong>audio</strong>event, the Channels selector worksas described above except that 1) ifthe event is mono, the stereo optionsare disabled, and 2) if the event is stereo,the mono option is disabled.• If you select multiple <strong>audio</strong> events,the Channels selector looks asfollows:Since your selected <strong>audio</strong> eventsmight all use different channel formats,these options give you theability to save all the <strong>audio</strong> events inthe same channel format. The followingmatrix shows the results ofapplying each option to each type of<strong>audio</strong> event.ORIGINALEVENTLinkedOPTIONSNo Change Deinterleave InterleaveMono 1 mono file 1 mono file 1 mono file2 mono files2 mono files1 stereo fileNormalizeThis pop-up menu replaces (and expandsupon) the old <strong>Audio</strong>>Normalize on Mixoption in previous versions of <strong>Vision</strong>.• Off: <strong>Vision</strong> does not adjust the gain ofthe exported, mixed, or saved <strong>audio</strong>file.This is a good choice if the file you’recreating needs to be further mixedwith other <strong>audio</strong> files and you want tomaintain its volume relative to otherfiles in the sequence.Important: If you turn off normalization,then it’s possible to create a filewith clipped <strong>audio</strong>. This could happenif, for example, you mixed two drumtracks—both of which had <strong>audio</strong> peaksthat occurred simultaneously.• On: <strong>Vision</strong> automatically changes theoverall gain of the exported, mixed,or saved <strong>audio</strong> file so that its maximumamplitude is 0 dB. This yields afile with maximum volume and noinduced clipping.This is a good choice if the file you’recreating is meant as a final master fordistribution (such as files createdwith <strong>Vision</strong>’s File>Export <strong>Audio</strong>Mix command).Interleaved1 stereo file2 mono files 1 stereo fileFigure 20.15: Export <strong>Audio</strong> Events ChannelMatrix232 Opcode Systems, Inc.
CHAPTER 20: Import/Export Cornucopia• Prevent Clipping: <strong>Vision</strong> adjusts theoverall gain of the exported, mixed,or saved <strong>audio</strong> file only if that filewould contain clipped <strong>audio</strong>.This is a good choice for all the samereasons that Off is a good choice.However, it gives you the added securityof knowing that you will notproduce a clipped <strong>audio</strong> file.If <strong>Vision</strong> is forced to reduce the overallgain of a file to avoid clipping, itwill alert you before processing thefile.“Bypass this dialog next time” OptionBy default, the <strong>Audio</strong> Format dialog boxappears whenever you export an <strong>audio</strong>mix. You can, however, bypass this dialogbox and go straight to the standardSave As dialog box by clicking theBypass this dialog next time option.If Bypass this dialog next time ischecked, then choosing an Export commandalways opens a standard Save Asdialog box.This lets you know that you may needto make volume adjustments in yoursequence to compensate for thevolume reduction of the new <strong>audio</strong>file.“Output file size” DisplayThe Output file size display alwaysshows the estimated amount of disk spacethat the requested file type will occupy.This display is very useful when you needto optimize a file to fit within a certainamount of disk space (such as for web orCD game development).The bottom of the Save As dialog box listsall your current <strong>audio</strong> format settings. Ifyou need to change them, simply click theFormat button to open the <strong>Audio</strong> Formatdialog box.<strong>Vision</strong> & Studio <strong>Vision</strong> <strong>Pro</strong> — <strong>Audio</strong> Reference Manual 233
PART 5: Basic <strong>Audio</strong> Editing & Playback234 Opcode Systems, Inc.
1234Advanced <strong>Audio</strong> Techniques567<strong>Vision</strong> & Studio <strong>Vision</strong> <strong>Pro</strong> — <strong>Audio</strong> Reference Manual 235
PART 6: Advanced <strong>Audio</strong> Techniques236 Opcode Systems, Inc.
CHAPTER 21: Advanced Recording TechniquesThis chapter expands on the basic recordinginformation discussed previously inParts 2-4. It explains recording multiple“takes” of <strong>audio</strong> and also offers tips onmanaging those files.The following sections discuss how tobest manage files while recording.WHO SHOULD READ THISCHAPTER?This chapter applies to all of the <strong>audio</strong>systems supported by <strong>Vision</strong>.There are two methods of creating multiplerecord files: automatic and manual. Ithelps to understand what <strong>Vision</strong> is doingbefore using the <strong>Audio</strong> Recording P<strong>ref</strong>erencesto automate the process. Todesignate a new file for each takemanually:Press and hold the mouse on theRecord File options icon in theRecord Monitor Window.<strong>Vision</strong> opens a pop-up menu of RecordFile options.DESIGNATING SEPARATE FILESFOR DIFFERENT TAKESIf you want to store each take in a separatefile, then you need to designate a newrecord file every time you record a take.TIP: If you are using large hard drives(over 2 GB), you will have the best resultsby designating a new file for each take.Choose New Record File from thepop-up menu.<strong>Vision</strong> opens a standard Save As dialogbox.<strong>Vision</strong> & Studio <strong>Vision</strong> <strong>Pro</strong> — <strong>Audio</strong> Reference Manual 237
PART 6: Advanced <strong>Audio</strong> TechniquesUse the dialog box to name a newrecord file, then click the Savebutton.<strong>Vision</strong> creates a new record file and calculatesthe available recording timebased on the amount of disk spaceavailable.Make sure the input is recordenabled.To release a file from use as the recordfile:Press and hold the mouse on theRecord File options icon.<strong>Vision</strong> opens a pop-up menu of RecordFile options.To automate this process jump ahead to<strong>Audio</strong> Recording P<strong>ref</strong>erences (pg. 240)OTHER RECORDING ACTIONSThe following sections discuss other miscellaneousrecord features.Releasing a Record File From UseYou can’t perform certain operations on arecord file when it’s enabled. Forinstance, you can’t delete a file from<strong>Vision</strong>’s file list until it’s released in theRecord Monitor Window (see Chapter 25:File Management for more information).Choose Close ÒÓ fromthe pop-up menu.<strong>Vision</strong> releases the record file and showsthe name of the inputÕs record file asÒ(none).Ó If desired, you can now designatea new record file by selecting NewRecord File from the pop-up Record Fileoptions menu.The released file is still stored on yourhard disk and, if you have <strong>audio</strong> events inyour current sequence that <strong>ref</strong>erence datain the file, it will still be listed in the FileManagement dialog box. For more informationabout file management, seeChapter 25: File Management.238 Opcode Systems, Inc.
CHAPTER 21: Advanced Recording TechniquesAppending <strong>Audio</strong> to Files<strong>Audio</strong> files can contain as much <strong>audio</strong>data as your hard disk allows. <strong>Vision</strong> containsnumerous “pointers” to differentsections of <strong>audio</strong> within a file. Thesepointers tell <strong>Vision</strong> which portions of an<strong>audio</strong> file to play back and when.To record more “takes” into an existing<strong>audio</strong> file (rather than creating a new onefor each take):Press and hold the mouse on theRecord File options icon.<strong>Vision</strong> opens a pop-up menu of RecordFile options.Using the scrolling list, find the fileonto which you want to append thenew <strong>audio</strong>, then click it to select it.Click the Import button to open theselected record file.<strong>Vision</strong> will now append any newlyrecorded <strong>audio</strong> to the selected file.Alternately, you can open the Append toFile dialog box as follows:Select New Record File from theRecord File pop-up menu.Choose Append to File from thepop-up menu.<strong>Vision</strong> opens the Append to File dialogbox, which is basically a standard MacintoshOpen dialog box.<strong>Vision</strong> opens the Save As dialog box.Click the Append to File button.<strong>Vision</strong> opens the Append to File dialogbox.NOTE: If you have a DAE based system,Opcode does not recommend appendingfiles as it may cause problems later inplayback.Figure 21.1: Append to File Dialog Box<strong>Vision</strong> & Studio <strong>Vision</strong> <strong>Pro</strong> — <strong>Audio</strong> Reference Manual 239
PART 6: Advanced <strong>Audio</strong> TechniquesAUDIO RECORDINGPREFERENCESFor each record take you can specify:• How the files are written to disk.• Where the files are saved, and in whatformat.• How the files are automaticallynamed.For example, you can tell <strong>Vision</strong> to save anew file for each take and designate howit will be named and where it will besaved.These settings can even be different foreach input of your digital <strong>audio</strong> hardware—orthey can apply to “all inputs.”In addition, you can also make theseselections globally, or save them withindividual sequence files.To open the <strong>Audio</strong> Recording P<strong>ref</strong>erencesdialog box, choose <strong>Audio</strong> RecordingP<strong>ref</strong>erences from the pop-up menu in theRecord Monitor Window.Figure 21.2: <strong>Audio</strong> Recording P<strong>ref</strong>erences DialogAs you can see in Figure 21.2, there arenumerous elements in the <strong>Audio</strong> RecordingP<strong>ref</strong>erence dialog. Specifically: Apply toThe settings in the <strong>Audio</strong> RecordingP<strong>ref</strong>erences dialog can be differentfor each hardware input. This pop-upmenu determines the input to whichthe settings will apply.If you choose “All Inputs,” the settingswill be used for all hardwareinputs. File Saving OptionIf you record multiple <strong>audio</strong> takes,this option determines how <strong>Vision</strong>saves the recorded file(s).Specifically:If you record with the “Save All newtakes in a single file” p<strong>ref</strong>erence, then<strong>Vision</strong> writes all the recorded datainto a single new <strong>audio</strong> file and allnew <strong>audio</strong> events point to this singlefile. This option creates fewer <strong>audio</strong>files, but each <strong>audio</strong> file is <strong>ref</strong>erencedby numerous <strong>audio</strong> events, as illustratedin Figure 21.3.240 Opcode Systems, Inc.
CHAPTER 21: Advanced Recording Techniques1. With the All option selected in the pop-upmenu...1. With the Each option selected in the pop-upmenu...2. Record several takes in the same track.2. Record several takes.3. All recorded events are written to the hard driveas a single <strong>audio</strong> Þle (as shown below).3. Each recorded event is written to the hard driveas its own <strong>audio</strong> Þle (as shown below).My Song-001Hard DriveMy Song_<strong>Audio</strong>-1-001My Song_<strong>Audio</strong>-1-002Hard DriveMy Song_<strong>Audio</strong>-1-003My Song_<strong>Audio</strong>-1-0044. And each new <strong>audio</strong> event <strong>ref</strong>erences its ownindividual <strong>audio</strong> Þle.4. And each new <strong>audio</strong> event <strong>ref</strong>erences a portionof this new <strong>audio</strong> Þle (as shown above).Figure 21.3: Using the “Save All new takes ina single file” OptionIf you record numerous <strong>audio</strong> takeswith the “Save each new take in aseparate file” p<strong>ref</strong>erence, then <strong>Vision</strong>writes each of the recorded take intoits own file and assigns them a new<strong>audio</strong> event. This option creates more<strong>audio</strong> files, but each <strong>audio</strong> file is <strong>ref</strong>erencedby a single <strong>audio</strong> event, asillustrated below:Figure 21.4: Using the “Save Each new eventin a separate file” OptionIf you type a name other than thedefault, that name will be used only forthe first recording. Subsequent files willreturn to using the automatic namesdiscussed in Auto Naming Options onpage 242.<strong>Vision</strong> & Studio <strong>Vision</strong> <strong>Pro</strong> — <strong>Audio</strong> Reference Manual 241
PART 6: Advanced <strong>Audio</strong> TechniquesDefault FolderThis button opens a standard Save Asdialog box, in which you specify thedefault file format and the defaultfolder in which all recorded files (ofthe specified type) are stored.Auto-Naming OptionsUse these two pop-up menus to specifyexactly how you want recordoperation to automatically name thenew files that it creates.You can specify both a default p<strong>ref</strong>ixand a default suffix. <strong>Vision</strong> combines(or concatenates) the p<strong>ref</strong>ix, suffixand adds a sequential number tocreate the file name. To specify thep<strong>ref</strong>ix, select it from the left-most popupmenu, as shown below.You can select to save all files ineither AIFF or Sound Designer IIformat.When you’ve navigated to the desiredfolder, click the Select “foldername” button to make it the default --its name will appear under theDefault Folder button in the <strong>Audio</strong>Recording P<strong>ref</strong>erences dialog box.To specify a default suffix, select itfrom the right-most pop-up menu, asshown below.Name of current default folder242 Opcode Systems, Inc.
CHAPTER 21: Advanced Recording TechniquesYou can enter a custom p<strong>ref</strong>ix and/orsuffix by selecting the Custom optionfrom either pop-up menu.The area below the pop-up menusalways shows an example of how yourdefault file names will appear.Example of how file names will appearSave with sequence filesCheck this option if you want each<strong>Vision</strong> file to remember its own <strong>Audio</strong>Recording P<strong>ref</strong>erence. This lets youset completely different sets of p<strong>ref</strong>erencesfor different files, keeping yourhard disk and separate recordingprojects more organized.If this option is unchecked, allsequence files will use your mostrecent p<strong>ref</strong>erence selections.Auto Compacting a FileCompacting is a process that frees diskspace. It retains the <strong>audio</strong> data that’s usedin the current sequence, and throws away<strong>audio</strong> that the current sequence doesn’tuse. This frees up disk space for futurerecordings.If you check the Auto Compact option inthe Record Monitor Window, <strong>Vision</strong> compactsthe current record file, if necessary,at the end of each record take. It’s thesame as if you opened the File Managementdialog box and used its Compactcommand as discussed in Compact(pg. 286).If you compact your record file, andyou’ve named your sequence file, compactingwill re-save your sequence file.This ensures that the files remain consistent.The<strong>ref</strong>ore, don’t compact if you don’twant your sequence file saved—savingthe file means you cannot revert later.Keep in mind that you can always undorecording, even after your record file hasbeen compacted unless you use the ClearClip and Undo command discussed inClear Clip and Undo (pg. 299).<strong>Vision</strong> & Studio <strong>Vision</strong> <strong>Pro</strong> — <strong>Audio</strong> Reference Manual 243
PART 6: Advanced <strong>Audio</strong> TechniquesSave the SequenceSave your sequence file when you’re donerecording. To do so:Choose File>Save.<strong>Vision</strong> saves the file.If you havenÕt yet named the sequencefile, <strong>Vision</strong> opens a standard MacintoshSave As dialog box. Use the dialog boxto name and save the sequence file.If you can’t locate the file and still want toopen the sequence, click Cancel. All dataexcept that file will open in the sequence.TIP for Acadia users: If there is more thanone <strong>audio</strong> file missing and you wish toavoid locating all of them, hold down theOption key when you click Cancel in thefirst dialog box.<strong>Vision</strong> saves all your <strong>audio</strong> events with thecurrent sequence file. The next time youopen the sequence file, <strong>Vision</strong> will locatethe <strong>audio</strong> files <strong>ref</strong>erenced by thatsequence file, and will alert you if any aremissing.Locating Missing <strong>Audio</strong> FilesIn many cases, if you change the name ofan <strong>audio</strong> file or move it into a differentfolder, <strong>Vision</strong>’s aliasing system will stillfind and recognize the file. However, insome cases, <strong>Vision</strong> may not be able tolocate the <strong>audio</strong> data necessary to playback the sequence. When you attempt toopen a sequence that <strong>ref</strong>erences such afile, a dialog box will prompt you to locatethe missing file. This dialog box is thesame as the Import dialog box, discussedin Importing <strong>Audio</strong> (pg. 207)).NOTE: You can audition files from thisdialog box to make sure you are selectingthe correct one. Just select the file by clickingon it and click the Play button.244 Opcode Systems, Inc.
CHAPTER 22: Auditioning <strong>Audio</strong>This chapter discusses how to use <strong>Vision</strong>to audition multiple “takes” of <strong>audio</strong>. Basically,there are two ways to audition“takes”:• Audition individual <strong>audio</strong> events.• Audition individual <strong>Audio</strong>Instruments.The following sections discuss how toaudition <strong>audio</strong> using these two methods.The following method discusses how toaudition multiple takes by assigning eachtake to a separate <strong>Audio</strong> Instruments.Assign each recorded ÒtakeÓ to adifferent <strong>Audio</strong> Instrument in thesame track.In this example, three different takes areassigned to three different <strong>Audio</strong>Instruments.WHO SHOULD READ THISCHAPTER?This chapter applies to all of the <strong>audio</strong>systems supported by <strong>Vision</strong>.AUDITIONING INDIVIDUALAUDIO INSTRUMENTSNOTE: This method works best for auditioninglarge sections of continuous <strong>audio</strong>(such as an entire verse or chorus). If youwish to separate a take into smaller <strong>audio</strong>events (such as individual words orphrases), use the <strong>audio</strong> event auditioningmethod discussed in Auditioning Individual<strong>Audio</strong> Events (pg. 247).Figure 22.1: Assign multiple takes todifferent <strong>Audio</strong> InstrumentsUse the Mute (M) or Solo (S) buttonsfor each <strong>Audio</strong> Instrument to find thetakes you want.Auditioning with the Mute or Solo buttonsis discussed further in Auditioning withthe Mute Buttons (pg. 246) and Auditioningwith the Solo Buttons (pg. 246).<strong>Vision</strong> & Studio <strong>Vision</strong> <strong>Pro</strong> — <strong>Audio</strong> Reference Manual 245
PART 6: Advanced <strong>Audio</strong> TechniquesOnce youÕve identified the best take,you can get rid of the remaining takesby selecting the unwanted <strong>Audio</strong>Instruments and typing the Deletekey.Selecting <strong>Audio</strong> Instruments is discussedin Selecting all <strong>Audio</strong> EventsAssigned to the Same <strong>Audio</strong> Instrument(pg. 187).Auditioning with the MuteButtonsTo audition an <strong>audio</strong> take in context withother tracks (either <strong>audio</strong> or MIDI), clickthe Mute button for all <strong>Audio</strong> Instrumentsexcept the one you want to audition.In the following example, <strong>Vision</strong> playsback any <strong>audio</strong> events assigned to <strong>Audio</strong>-2as well as any <strong>audio</strong> or MIDI data containedin other tracks.IMPORTANT: Muting an <strong>Audio</strong> Instrumentin the Graphic Window affects all<strong>audio</strong> events assigned to that <strong>Audio</strong> Instrumentfor the entire sequence file (even thosein other tracks).Auditioning with the Solo ButtonsTo audition an <strong>audio</strong> take without hearingany other concurrent tracks (either <strong>audio</strong>or MIDI), click the Solo button for the<strong>Audio</strong> Instrument you wish to audition.In the following example, <strong>Vision</strong> playsback only <strong>Audio</strong>-2 since it is soloed.This <strong>Audio</strong> Instrument issoloed (as indicated bythe highlighted S button):These <strong>Audio</strong> Instrument aremuted (as indicatedby the highlighted Mbutton):The <strong>audio</strong> events assigned to<strong>Audio</strong> Instruments 1 & 3 do notplay because <strong>Audio</strong>-2 is soloed.Only <strong>audio</strong> events assigned to <strong>Audio</strong>-2will play back (since itÕs the only <strong>Audio</strong>Instrument that isnÕt muted)IMPORTANT: Soloing an <strong>Audio</strong> Instrumentin the Graphic Window affects allInstruments (MIDI and <strong>audio</strong>) playingback for the entire sequence.246 Opcode Systems, Inc.
CHAPTER 22: Auditioning <strong>Audio</strong>Auditioning with the <strong>Audio</strong>Instruments WindowThe Mute and Solo buttons in the GraphicWindow are duplicates of the Mute andSolo columns in the <strong>Audio</strong> InstrumentsWindow.AUDITIONING INDIVIDUALAUDIO EVENTSNOTE: This method works best for smallsections of <strong>audio</strong> (such as individual wordsor phrases). If you wish to audition largesections of continuous <strong>audio</strong> (such as anentire verse or chorus), use the <strong>Audio</strong>Instrument auditioning method discussedin Auditioning Individual <strong>Audio</strong> Instruments(pg. 245).The following sections discuss how toaudition multiple <strong>audio</strong> events in a track.Breaking Up <strong>Audio</strong> EventsGenerally, when you record <strong>audio</strong>, yourecord long sections (such as an entireverse or chorus). When you do this,<strong>Vision</strong> creates a single <strong>audio</strong> event andassigns it to an <strong>Audio</strong> Instrument.If you wish, you can use the <strong>Audio</strong> InstrumentsWindow to mute and solo <strong>Audio</strong>Instruments. For more information aboutthe <strong>Audio</strong> Instruments Window, see oneof the following chapters:• Acadia: See Chapter 6: Acadia: <strong>Audio</strong>Instruments & Routings Window.• DAE: See Chapter 15: DAE: <strong>Audio</strong>Instruments.Often, you can break these events intoshorter “phrases” (such as individuallines in a verse). By doing this, you canselect the best parts of multiple takes toassemble an entirely new take.<strong>Vision</strong> & Studio <strong>Vision</strong> <strong>Pro</strong> — <strong>Audio</strong> Reference Manual 247
PART 6: Advanced <strong>Audio</strong> Techniques<strong>Vision</strong> offers a couple of ways to breaklarge <strong>audio</strong> events into smaller events.You can:• Use the <strong>Audio</strong>>Strip Silence/Slice<strong>Audio</strong> command to automaticallyeliminate “silent” <strong>audio</strong> passagesand/or auto-separate into smallerregions. This is discussed inChapter 27: Strip Silence and Slice<strong>Audio</strong>.• Use the <strong>Audio</strong>>Separate commandto manually separate <strong>audio</strong> eventsinto multiple events. This is discussedin Separate (pg. 344).Separate each take into smaller <strong>audio</strong>events.In this example, each original take isassigned to a single <strong>Audio</strong> Instrumentand is broken into multiple <strong>audio</strong> eventsusing one of the techniques discussed inBreaking Up <strong>Audio</strong> Events (pg. 247).Muting <strong>Audio</strong> EventsOnce you’ve broken your <strong>audio</strong> eventsinto smaller phrases, you can auditionthem individually. To do so:Each take is broken intoindividual ÒphrasesÓSelect the <strong>audio</strong> events you wish tomute by Shift-clicking them.Selected <strong>audio</strong> events appear ÒhollowÓ.All <strong>Audio</strong> events except forthese three are selected248 Opcode Systems, Inc.
CHAPTER 22: Auditioning <strong>Audio</strong>Select Do>Mute>Mute Seq &<strong>Audio</strong> events.<strong>Vision</strong> mutes the selected <strong>audio</strong> events.Muted <strong>audio</strong> events appear Ògrayed outÓin <strong>Vision</strong>Unmuting <strong>Audio</strong> EventsTo unmute <strong>audio</strong> events:Select one or more currently muted<strong>audio</strong> events.In this example, we select two <strong>audio</strong>events that are currently muted (as seenin Figure 22.2).Selected <strong>audio</strong> eventsFigure 22.2: Muted <strong>Audio</strong> EventsMuted <strong>audio</strong> events will not play backwhen you play a sequence. In the exampleshown in Figure 22.2, only ÒLine 1TAKE 1,Ó ÒLine 2 TAKE 3,Ó and ÒLine 3TAKE 2Ó will play.Select Do>Mute>Unmute Seq &<strong>Audio</strong> Events.<strong>Vision</strong> unmutes the selected <strong>audio</strong>events.Previously muted <strong>audio</strong> eventsare now unmutedFigure 22.3: Unmuted Events<strong>Vision</strong> & Studio <strong>Vision</strong> <strong>Pro</strong> — <strong>Audio</strong> Reference Manual 249
PART 6: Advanced <strong>Audio</strong> TechniquesMuting <strong>Audio</strong> Events in the List WindowTo mute <strong>audio</strong> events in the List Window:Click the Mute button located next toeach <strong>audio</strong> event in the List Window.Follow through the next example to seehow to use the Toggle Mutes command.Create the ÒAÓ set of <strong>audio</strong> events bymuting all those events you donÕtwant to hear.This technique was discussed in Muting<strong>Audio</strong> Events (pg. 248).Muted EventsTo unmute, click the Mute button again totoggle its state.Comparing <strong>Audio</strong> EventsOften, you’ll want to make A-B comparisonsbetween <strong>audio</strong> events (or sets of<strong>audio</strong> events). To do this, use theDo>Mute Events>Toggle Mutes command,which performs the followingactions:• It unmutes any selected events thatare currently muted.• It mutes any selected events that arecurrently unmuted.Unmuted EventsFigure 22.4: <strong>Audio</strong> Event Set “A”Play the sequence and listen to yourÒAÓ set of <strong>audio</strong> events.Select both the <strong>audio</strong> events you wishto unmute and the ones you wish tomute.250 Opcode Systems, Inc.
CHAPTER 22: Auditioning <strong>Audio</strong>In this example, all <strong>audio</strong> events wereselected.Assembling a New TakeOnce you’ve selected the <strong>audio</strong> eventsyou want to use, you can assemble theminto a new “take.” To do so:Select the <strong>audio</strong> events you want tokeep by Shift-clicking them in theGraphic Window.If you want, you can audition all theselected <strong>audio</strong> events by choosingDo>Play Selection. <strong>Vision</strong> plays onlythe selected events.Select Do>Mute>Toggle Mutes.<strong>Vision</strong> mutes the ÒAÓ set of <strong>audio</strong> eventsand unmutes the ÒBÓ set.Select the <strong>audio</strong> eventsyou wish to keepFigure 22.5: <strong>Audio</strong> Event Set “B”Play the sequence and listen to yourÒBÓ set of <strong>audio</strong> events.Copy the selected <strong>audio</strong> events to anew track using standard copy/pastetechniques.Figure 22.6: “Good” <strong>audio</strong> events pasted intoa new track<strong>Vision</strong> & Studio <strong>Vision</strong> <strong>Pro</strong> — <strong>Audio</strong> Reference Manual 251
PART 6: Advanced <strong>Audio</strong> TechniquesMove all <strong>audio</strong> events to the same<strong>Audio</strong> Instrument by dragging them inthe Graphic Window.Figure 22.7: New track after assigning all<strong>audio</strong> events to the same <strong>Audio</strong> InstrumentDelete the original track containing allyour <strong>audio</strong> events.IMPORTANT: DonÕt do this if the trackcontains other <strong>audio</strong> events or MIDIevents you wish to keep!252 Opcode Systems, Inc.
CHAPTER 23: Adjusting Volume and PanYou can adjust the volume and pan settingsfor <strong>audio</strong> in many different ways.You can:• Use the List Window to insert volumeor pan controller events at specifiedtimes, or• Use the Strip Chart to draw controllerevents over time, or• Use either the Console or FadersWindows to record automation for<strong>audio</strong> volume and pan.This chapter begins with a discussion ofvelocity, volume, and pan. It then teachesyou each of the different methods for controlling<strong>audio</strong> volume and panning.WHO SHOULD READ THISCHAPTER?This chapter applies to all of the <strong>audio</strong>systems supported by <strong>Vision</strong>.For details about the information discussedin this chapter, please seeChapter 24: Automation.THE DIFFERENCE BETWEENVELOCITY AND VOLUMEYou can assign <strong>audio</strong> volume events to<strong>Audio</strong> Instruments. <strong>Audio</strong> volume eventsaffect every <strong>audio</strong> event that’s assigned tothe same <strong>Audio</strong> Instrument.You can also adjust the velocity values for<strong>audio</strong> events. Changing the velocity valueaffects only the <strong>audio</strong> event to which it’sassigned—it does not affect any other<strong>audio</strong> events, even if they’re assigned tothe same <strong>Audio</strong> Instrument.Because of this distinction, velocity (for<strong>audio</strong> events) and volume events have differentuses. Specifically:• Use velocity to set static output levelsfor each <strong>audio</strong> event.• Use <strong>audio</strong> volume events to createdynamic volume changes for entire<strong>Audio</strong> Instruments.For example, assume you have a track ofmultiple drum kit <strong>audio</strong> events, allassigned to the same <strong>Audio</strong> Instrument.Set a velocity for each drum <strong>audio</strong> eventto create the accenting you want. Then,use the <strong>Audio</strong> Instrument’s volume eventsas an overall volume control for the entiredrum set.<strong>Vision</strong> & Studio <strong>Vision</strong> <strong>Pro</strong> — <strong>Audio</strong> Reference Manual 253
PART 6: Advanced <strong>Audio</strong> TechniquesPANNING AUDIOINSTRUMENTSThe panning events discussed in thischapter <strong>ref</strong>er to mono <strong>audio</strong> instrumentswhich are assigned to stereo outputs.Stereo <strong>audio</strong> instruments, or mono <strong>audio</strong>instruments which are assigned to monooutputs, cannot be panned. This is<strong>ref</strong>lected in two ways:• Pan events assigned to stereo <strong>Audio</strong>Instruments (or mono <strong>audio</strong> instrumentsassigned to mono outputs) areignored.• Stereo <strong>Audio</strong> Instruments (or mono<strong>audio</strong> instruments assigned to monooutputs) in Consoles do not have Panfaders.SETTING AN INDIVIDUAL AUDIOEVENT LEVEL (VELOCITY)To adjust the relative volumes of individual<strong>audio</strong> events:Open a List Window for the desiredtrack.Drag each <strong>audio</strong> eventÕs velocitynumerical to the desired value.NOTE: You can also adjust <strong>audio</strong> eventvelocities in the Tracks and Graphic windows’Strip Chart using the same procedurethat you’d use to adjust MIDI notevelocities.CREATING VOLUME AND PANLEVELS FOR AUDIOINSTRUMENTSTo adjust the overall volume and pan ofmultiple, related <strong>audio</strong> events:Assign the related <strong>audio</strong> events to thesame <strong>Audio</strong> Instrument.Create <strong>audio</strong> volume events and<strong>audio</strong> pan events on that <strong>Audio</strong>Instrument.All <strong>audio</strong> events assigned to that <strong>Audio</strong>Instrument will be affected by adjustmentsto the volume and pan controllers.You can create <strong>audio</strong> volume and panevents in either the List Window or theStrip Chart, as discussed in the followingsections.SESSION 8/<strong>Pro</strong>ject: These systems do notprocess volume and pan data as efficiently asother DAE hardwareÑthe<strong>ref</strong>ore, volume andpan changes may occur at slightly different(probably inaudible) times each time you playa sequence file.Figure 23.1: Individual <strong>Audio</strong> Event Velocityin the List Window254 Opcode Systems, Inc.
CHAPTER 23: Adjusting Volume and PanUsing the List WindowTo insert <strong>audio</strong> volume or pan events inthe List Window:From the pop-up menu, select eitherÒ<strong>Audio</strong> VolumeÓ or Ò<strong>Audio</strong> PanÓ fromthe Automation submenu.Open a List Window for the desiredtrack.Use the Edit In Point numerical to setthe start time of the controller event.Enter controller event timehereAlternately, you could click the selectordot of an existing event if you want thecontroller to be entered at the same startpoint.Press and hold the mouse on theInsert Event pop-up menu icon.<strong>Vision</strong> opens a pop-up menu of eventtypes.If this track contains multiple Instrumentsand itÕs the first controller event youÕveentered into it, youÕll see a Set Instrumentdialog box asking you to assign itto an Instrument. If this is the case,select an Instrument from the dialog boxand click the OK button.If you already have a controller in yourtrack, the new controller event will automaticallybe set to the Instrument thatcontroller is set to.Newly insertedcontroller event<strong>Vision</strong> & Studio <strong>Vision</strong> <strong>Pro</strong> — <strong>Audio</strong> Reference Manual 255
PART 6: Advanced <strong>Audio</strong> TechniquesChanging Automation Event InstrumentAssignmentsIf, after inserting an automation event,you wish to change its Instrument assignment,simply press and hold the mouse inthe event’s Instrument column and selecta new Instrument from the pop-up menu.Press here to open a pop-up menu ofother InstrumentsChanging Automation Event ValuesAfter inserting an automation event, youcan adjust its value by dragging thenumerical, which is to the right of theevent name.Drag to change controller valueUsing the Strip ChartYou can enter automation events in theGraphic or Track Windows’ Strip Chart byusing the Pencil tool to draw informationthat changes over time and affects multipleevents. To do so:Open a Graphic or Tracks window forthe desired track.Open a Strip Chart showing eithervolume or pan.<strong>Audio</strong> volumes are displayed from-¥ tothe Maximum Fader Position setting.(Acadia users, see page 89; DAE users,see page 173.)<strong>Audio</strong> pan events are displayed from. Pan is displayedwith pan center at zero, pan left belowzero, and pan right above zero. The fartheryou draw data from pan center thefarther left or right youÕll pan theInstrument.IMPORTANT: To avoid overflow problems,draw volume and pan controllerswith a low density settingÑas low aspossible without hearing individual steps.For details about setting controller densityin the Strip Chart, see your MIDIReference Manual.Click the Pencil icon in the lower leftof the Strip Chart to turn the cursorinto the Pencil tool.256 Opcode Systems, Inc.
CHAPTER 23: Adjusting Volume and PanChoose an operation type from thepop-up menu in the lower left of theStrip Chart.Choose <strong>audio</strong> volume or <strong>audio</strong> panfrom the strip chart contents pop-up.Drag through the Strip Chart to drawautomation events that change overtime.Figure 23.2: Draw Controller Eventsis the case, select an Instrument from thedialog box and click the OK button.Thereafter when you draw data it willautomatically get set to the Instrumentinitially named.For more information on using the StripChart, consult the MIDI ReferenceManual.If you want to change the Instrument, youcan use the List Window’s Instrumentpop-up menu (as discussed in ChangingAutomation Event Instrument Assignments(pg. 256)), or you can select the event inthe Strip Chart or List Window andchoose Do>Set Instrument.The automation data you draw is also displayedin the List Window.CREATING FADERS TOCONTROL VOLUME AND PANYou can control an <strong>Audio</strong> Instrument’svolume and pan in real time by assigningfaders to control them.You can do this using either the Consoleor Faders Windows.If this track contains multiple Instrumentsand it’s the first automation event you’veentered into it, you’ll see a Set Instrumentdialog box asking you to assign the newcontroller events to an Instrument. If this<strong>Vision</strong> & Studio <strong>Vision</strong> <strong>Pro</strong> — <strong>Audio</strong> Reference Manual 257
PART 6: Advanced <strong>Audio</strong> TechniquesUsing the Console WindowsThe example that follows shows how toautomatically create a console specificallyfor <strong>Audio</strong> Instruments.NOTE: You can automatically create consolesthat control only the Instruments usedin your sequence, or you can create consolesmanually.To automatically create a console specificallyfor <strong>Audio</strong> Instruments:From the Console Window Menu,choose Build Console From><strong>Audio</strong> Instruments.Press and hold the mouse over theWindows>Console command.<strong>Vision</strong> produces a submenu of consolechoices.<strong>Vision</strong> creates a console with a volumeand pan fader for each of the <strong>Audio</strong>Instruments (residing in your <strong>Audio</strong>Instruments Window).Figure 23.3: Console SubmenuSelect one of the sixteen consolesfrom the submenu.<strong>Vision</strong> opens that Console Window.Drag any volume fader up or down.<strong>Vision</strong> changes the volume for all <strong>audio</strong>events assigned to that <strong>Audio</strong>Instrument.Similarly, drag any pan fader left orright.<strong>Vision</strong> changes the panning of any <strong>audio</strong>event assigned to that <strong>Audio</strong> Instrument.Figure 23.4: Typical Console Window258 Opcode Systems, Inc.
CHAPTER 23: Adjusting Volume and PanTIP: You don’t have to DRAG faders. If youclick anywhere in the length of a fader, thethumb will automatically jump to thatlocation.Recording Console Fader MovementsUsing the Faders WindowYou can also use the Faders Window tocontrol volume and pan for <strong>Audio</strong>Instruments.You can create dynamic mixes by recordingfader movements in real time. To doso:Record-enable a track, then select aRecord Mode and Countoff option.Begin recording.Drag some faders in the ConsoleWindow.Stop recording.Open a List Window and notice that<strong>Vision</strong> recorded your movements.Movements to volume faders are writtenas (<strong>audio</strong>) Volume events, and movementsto pan faders are written as(<strong>audio</strong>) Pan events. Each event is alsoassigned to the appropriate instrument.Figure 23.6: Typical Faders WindowIMPORTANT: The Faders window numericalsalways display a range of values from0 to 127. This does not directly correspondto values for <strong>audio</strong> volume (-¥ to the MaximumFader Position setting) or <strong>audio</strong> pan(-100.00 to 100.00). The 0 to 127 scale ismapped onto the appropriate scale for theautomation type when recording, and correctvalues are written into the track.To see the appropriate range of values for<strong>audio</strong> volume and pan, use the Consoleswindow rather than the Fader window.Figure 23.5: Automation events in the List windowNOTE: Any automation events you recordin the Console Window are displayed inList Windows as shown in Figure 23.5.You can adjust <strong>audio</strong> volume and panlevels by dragging the graphic faders orby controlling them with a remote device.<strong>Vision</strong> records fader movements as automationevents assigned to specificInstruments and automation types (MIDIcontrollers, velocity scale, <strong>audio</strong> volume,and <strong>audio</strong> pan). Your MIDI ReferenceManual contains a complete descriptionof how to use faders.<strong>Vision</strong> & Studio <strong>Vision</strong> <strong>Pro</strong> — <strong>Audio</strong> Reference Manual 259
PART 6: Advanced <strong>Audio</strong> TechniquesThe following sections discuss thoseareas that apply specifically to digital<strong>audio</strong>.Mapping Volume and Pan to FadersTo assign an automation event to a fader:Press and hold the mouse on theInstrument name and select thedesired <strong>Audio</strong> Instrument from thepop-up Instrument menu.Choose Windows>Faders.<strong>Vision</strong> opens the Faders Window.Make sure the Fader Window is set toSend mode.Select the desired Instrumentfrom the pop-up menuNOTE: You can also choose MIDI instruments,busses, inputs, and outputs.Click on the controller name to togglebetween pan and volume.Click to toggle betweenSend and Receive modesClick the selector dot of a fader youwant to assign to an <strong>Audio</strong>Instrument.Click to toggle between two choices:1. assigning the fader to Volume, or2. assigning the fader to PanTo record volume or pan events as youlisten to your track:By default, <strong>Vision</strong> assigns the correspondinglynumbered Instrument to thefader. It also assigns a Volume controllerto the fader. To change these settings...Record-enable the track you want theautomation events in.Do this by clicking in the Record columnof the Tracks Window, placing an ÒRÓthere.NOTE: You may want to record the fadermovement onto a separate track whileyouÕre experimentingÑitÕs easier todelete your edit, and you can mute andunmute the track to see how it sounds.260 Opcode Systems, Inc.
CHAPTER 23: Adjusting Volume and PanItÕs also useful to record different mixeson different tracks, since you can latercompare and choose between them.Set the desired Record mode.Replace will wipe out any existingevents (including <strong>audio</strong> events and noteevents) and replace them with the faderevents. Overdub merges automationevents with existing events on the track.In the Control Bar, set a Countoff orchoose Wait for Note mode.Click the Record button.If using Wait for Note, youÕll have toclick the Start button, press the Spacebar,or play a MIDI note to beginrecording.YouÕll hear previously recorded tracksplay back as youÕre recording onto therecord-enabled track.Drag the appropriate fader to the leftand right.<strong>Vision</strong> records all fader movements inthe record-enabled track.SMOOTHING VOLUME AND PANCHANGESSudden changes in volume and pan canproduce unwanted noise, such as clicks,pops, or “zips.” You can use the <strong>Audio</strong>P<strong>ref</strong>erences dialog box to set parametersthat will smooth out rapid changes involume or pan, the<strong>ref</strong>ore eliminatingthese unwanted noises. See page 174 forDAE users or page 90 for Acadia users.Figure 23.7: Moving a FaderIf youÕre altering volume, the range from0 to 127 represents -¥ to the MaximumFader Position setting. If youÕre alteringpan, the range from 0 to 127 representspan from -100.00 to +100.00, with 64representing 0 (center).NOTE: For more on using the FadersWindow, see your MIDI ReferenceManual.<strong>Vision</strong> & Studio <strong>Vision</strong> <strong>Pro</strong> — <strong>Audio</strong> Reference Manual 261
PART 6: Advanced <strong>Audio</strong> Techniques262 Opcode Systems, Inc.
CHAPTER 24: AutomationThis chapter discusses <strong>Vision</strong>’s automationcapabilities. In this chapter you willlearn about:• how automation events work;• recording automation events;• viewing and inserting automationevents;• using the Copy Faders command;• types of automation events.WHO SHOULD READ THISCHAPTER?Everything in this chapter applies toAcadia users.The Mutes and Solos, <strong>Audio</strong> Volume, and<strong>Audio</strong> Pan sections apply to DAE users. Inaddition, the Send Levels and Plug-InBypass sections apply to Studio <strong>Vision</strong><strong>Pro</strong> owners with TDM hardware.HOW AUTOMATION EVENTSWORKIf you’re familiar with the way <strong>Vision</strong> hastreated MIDI controller data and faderevents in the past, then automation eventsshould seem familiar. In fact, controllerevents themselves are automation events,and the handling of the new types of automationevents is modeled after thehandling of controller events in previousversions of <strong>Vision</strong>.When <strong>Vision</strong> sends MIDI controller datato a MIDI instrument, the parameters ofthat instrument are being “automated”.When <strong>Vision</strong> sends any of the new typesof automation events to an <strong>Audio</strong> Instrument,send, plug-in, or EQ, it isautomating those parameters.This chapter also contains some informationabout MIDI events, which apply to all<strong>audio</strong> systems.<strong>Vision</strong> & Studio <strong>Vision</strong> <strong>Pro</strong> — <strong>Audio</strong> Reference Manual 263
RECORDING AUTOMATIONEVENTSBasic RecordingAutomation is recorded just as MIDI controllerinformation is recorded. There arethree basic steps.Record enable a track.• You can now automate many, manymore parameters. For example, EQand plug-in parameters can be automated.For a complete list, see Typesof Automation Events (pg. 275).• Moving a fader assigned to a MIDIcontroller used to generate faderevents (in versions of <strong>Vision</strong> prior to<strong>4.5</strong>). This action now generates controllerevents (or other automationevents) directly. For details, seeChanges in the Way <strong>Vision</strong> HandlesFaders (pg. 271).Press Record.Move a fader.Tip for Recording Plug-InAutomationTo get a finer range of values for “faceless”plug-in parameters, hold down theOption key while adjusting its sliders.When the option key is not held down,moving the mouse by one pixel alsomoves the parameter slider one pixel.Parameter sliders (for faceless plug-ins)are 88 pixels wide, so there are 88 possiblevalues for the parameter.Alternately, you can drag or type in thenumeric field of an automatableparameter.The two main differences between recordingautomation data now and recordingcontroller data in previous versions are:264 Opcode Systems, Inc.
CHAPTER 24: AutomationVIEWING AND INSERTINGAUTOMATION EVENTSFigure 24.1: Strip Chart contents menuWhen the option key is held down,moving the mouse ten pixels movesparameter slider one pixel. This increasesthe number of available values for theparameter to 880.Figure 24.2: List window Insert menuFigure 24.3: Automation-type submenusOf course, you can type any numberwithin the parameter’s range into itsnumeric field.The Strip Chart contents menu and theList window Insert menu both include thesubmenus shown in Figure 24.3. All of thetypes of automation discussed in thischapter are in these menus.<strong>Vision</strong> & Studio <strong>Vision</strong> <strong>Pro</strong> — <strong>Audio</strong> Reference Manual 265
The Plug-in Parameter submenu appearsonly if there are plug-ins assigned in thecurrent sequence file. You must assign aplug-in (in a Console) before you caninsert or view automation events for thatplug-in. For information about how toassign plug-ins, please see Assigning Plug-Ins (pg. 47).Figure 24.4: MIDI submenuAutomation Events in the ListWindowFor information about automation eventsin the List Window, see your MIDI ReferenceManual.Automation Events in the StripChartFigure 2<strong>4.5</strong>: Automation submenuFor more information about automationevents in the Strip Chart, see your MIDIReference Manual.Tracks and Pulse Window Strip ChartsFigure 24.6: EQ Band Parameter submenuFigure 24.7: Plug-in Parameter submenuIn the Tracks and Pulse windows, theStrip chart intelligently allows you toinsert only appropriate automation events.For example, if you're inserting plug-inparameter events, at least one instrumentin a selected track must have that plug-inassigned to it in order to get a pencil.266 Opcode Systems, Inc.
CHAPTER 24: AutomationIf your Console looks like this:Selected TrackStrip Chart contentsFigure 24.9: Plugin 1 Bypass on a MIDI trackThe pencil tool is not displayed when aMIDI track is selected and an <strong>audio</strong> automationparameter is displayed.Figure 24.8: Console setup...and your Tracks window looks like this:Figure 24.10: MIDI controller on a MIDI trackThe pencil tool is displayed when a MIDItrack is selected and a MIDI controller isdisplayed....you’ll have the following results.Figure 24.11: Plug-in parameter on an <strong>audio</strong>channel with no plug-in assignedAs shown in Figure 24.8 on page 267,there is no plug-in assigned to Bus 1 (theselected track’s instrument). So, the<strong>Vision</strong> & Studio <strong>Vision</strong> <strong>Pro</strong> — <strong>Audio</strong> Reference Manual 267
pencil tool is not displayed when Track 3is selected and a plug-in parameter ischosen in the Strip Chart.Figure 24.12: Plug-in parameter on an <strong>audio</strong>channel with a plug-in assignedIn Figure 24.13 and Figure 24.14, twotracks are selected: one MIDI track, andone <strong>audio</strong> track (assigned to <strong>Audio</strong> 1,which does have opCHORUS assigned).The pencil tool does appear in the StripChart.However, when you draw information intothe Strip Chart in this type of scenario,information is only inserted on the appropriateinstrument. In this example, plug-inparameter events are inserted only on<strong>Audio</strong> 1.As shown in Figure 24.8 on page 267,there is a plug-in assigned to the selectedtrack’s instrument (<strong>Audio</strong> 1). So, thepencil tool is displayed when Track 1 isselected and a plug-in parameter ischosen in the Strip Chart.When more than one track is selected andthe Strip Chart contents displays a valuethat is only appropriate for one (or more)of the instruments on the selected tracks,the pencil tool is displayed.Figure 24.14: Drawing Plug-In Parameter eventswith multiple instruments selectedGraphic window Strip ChartThe Strip Chart in the Graphic windowworks slightly differently.In the Graphic Window, the Strip chartwill always show a pencil. If you attemptto insert an event that is inappropriate forthe selected track, or if the track is multiand more than one of the instruments inFigure 24.13: Strip Chart with multipleinstruments selected268 Opcode Systems, Inc.
CHAPTER 24: Automationthe track would be appropriate, a dialogwill appear asking you which instrumentyou’d like the events to be inserted on.This dialog will display only appropriateinstruments.After inserting events assigned to<strong>Audio</strong>-1, the track becomes a multi track.Track is now ÒmultiÓStrip Chart contentsSelected trackÕs instrumentFigure 24.15: Graphic window Strip Chart withinappropriate contentsIn the above case, the track’s instrumentdoes not have the specified plug-inassigned to it. As soon as you draw in theStrip Chart, the following dialog appears.Figure 24.16: Set Insert Instrument windowFor more information about viewing andinserting events in the Strip Chart, seeyour MIDI Reference Manual.Notes about <strong>Audio</strong> VolumeThe Maximum Fader Position setting(see page 89 for Acadia users, page 173for DAE users) determines the uppermostvalue of an <strong>audio</strong> volume fader in theConsole window.It also determines the uppermost valuefor <strong>audio</strong> volume displayed in the StripChart.The only instrument available in the popupis <strong>Audio</strong>-1, because it is the only instrumentwith opCHORUS assigned to it (asshown in Figure 24.8 on page 267).NOTE: If a MIDI controller had beenselected in the Strip Chart Contents pop-up,the instrument pop-up in Figure 24.16would have shown all MIDI Instruments.<strong>Vision</strong> & Studio <strong>Vision</strong> <strong>Pro</strong> — <strong>Audio</strong> Reference Manual 269
For example, when the Maximum FaderPosition is set to +6 dB and <strong>Audio</strong> Volumeis selected in the Strip Chart Contentspop-up, the Strip Chart looks like this.The range is from -¥ to +6 dB. A horizontalline is also drawn (for your <strong>ref</strong>erence)at 0 dB.However, regardless of the MaximumFader Position setting, <strong>Audio</strong> Volumeevents in the List window can always havevalues up to +24 dB in Acadia mode or+6 dB in DAE mode. Values above thecurrent Maximum Fader Position settingcan never be recorded; they can only beinserted in the List window.The Maximum Fader Position settingshould be made at the beginning of yoursession and left at that setting for theduration of the session.The Maximum Fader Position settingdoes not directly affect <strong>audio</strong> volumeevents or the perceived volume of any<strong>audio</strong> events. Instead, it allows you tomanually adjust <strong>audio</strong> volume more flexibly.This setting can be considered“cosmetic”, because it affects only theappearance of the Consoles, Faders window,and Strip Chart.If you lower the Maximum Fader Positionduring a session, visual settings in theConsoles, Faders window, and Strip Chartmay appear misleading as a result. However,the <strong>audio</strong> volume events themselveswill not be affected, and <strong>audio</strong> will soundas it did before the change. The Listwindow always displays numeric valuesaccurately, so <strong>audio</strong> volume events in theList window will appear as they did beforethe Maximum Fader Position wasadjusted.<strong>Audio</strong> Volume and Pan in the FadersWindowAs in previous versions of <strong>Vision</strong>, <strong>audio</strong>volume and pan can be displayed in theFaders window and controlled by itssliders.<strong>Audio</strong> pan now has a range of -100.00 to100.00, and <strong>audio</strong> volume now has a rangeof -¥ to the Maximum Fader Position (asset in the <strong>Audio</strong> P<strong>ref</strong>erences dialog box).However, displayed numeric values in theFaders window are still 0-127.These values are mapped to the appropriaterange of values for the selectedparameter. In the case of <strong>audio</strong> pan, 0 correspondsto -100.00 (left) and 127corresponds to 100.00 (right). For <strong>audio</strong>volume, 0 corresponds to -¥ and 127 correspondsto the Maximum FaderPosition.If you wish to see the correct numericvalues for these parameters, use the Consolesrather than the Faders window.270 Opcode Systems, Inc.
CHAPTER 24: AutomationCHANGES IN THE WAY VISIONHANDLES FADERSRemoval of “Fader Events”In previous versions of <strong>Vision</strong>, faderswere a type of interface between you andyour MIDI controller data.A fader set up like this...Visual and Audible EffectIn most cases, the visual and audibleeffects of recorded fader movements willnot change. In fact, faders themselveshave become much more flexible. Forexample:Open the Faders window and assignthe first fader to control pan for aninstrument.This example uses JD-800-1....used to generate an event like this(in the List Window).Figure 24.17: The old wayFaders still act as an interface, but nowthey generate data directly. Instead of creatinga fader event assigned to anotherparameter (such as a controller), fadersnow create automation events.Record enable a track.Press the Record button.A fader set up like this...Click on the fader and drag it backand forth to record pan information....will now generate an event like this(in the List Window).Figure 24.18: The new wayIn short, we’ve “eliminated the middleman”by completely removing “faderevents”.<strong>Vision</strong> & Studio <strong>Vision</strong> <strong>Pro</strong> — <strong>Audio</strong> Reference Manual 271
Press the Stop button and open theList window.You can see the pan events in the Listwindow.You could also assign a Console channelto JD-800-1 and the pan fader in that consolewould move in unison as well.Although this example uses a MIDIinstrument, the same principles applywhen dealing with <strong>audio</strong> instruments.See your MIDI Reference Manual formore details.Notice that these are not fader eventsassigned to pan; they are pan events.Press PlayWatch the first fader move just as yourecorded it.Disable the first fader by clicking onits selector dot.Enable a different fader and set it toJD-800-1 Pan.Press Play.Now the new fader moves to therecorded pan events.COPY FADERS AND AUDIOCHANNELSThe Copy Faders command is an excellentway to create a “fader snapshot” toput at the beginning of your sequence.Inserting an initial setting for each fader isvery important, but it is often overlooked.For example, you might use volumefaders to create a “fade out” at the end of asong, with each instrument’s volume settingending at 0. The first time thesequence is played, it sounds correct.After the sequence ends, you press playagain, but can’t hear anything. If you letthe sequence play long enough, you’llhear only the fade out.This happens because, at the end of thesong, each instrument receives a volumesetting of 0. If there’s no volume data atthe beginning of the sequence, the instrumentdoesn’t know to change its volumeuntil the first volume event of the fade out.Creating a set of initial volume settings (a“snapshot” of the Console and Faderswindows) will alleviate this problem.272 Opcode Systems, Inc.
CHAPTER 24: Automationin previous versions are opened into<strong>Vision</strong> <strong>4.5</strong> (or later), <strong>audio</strong> pan datawill be remapped to take advantage ofthe full -100 to +100 range.In addition to the increased sensitivity,having <strong>audio</strong> pan displayed withthis range makes it easy to distinguishat a glance whether you’redealing with <strong>audio</strong> or MIDI pan data.<strong>Audio</strong> pan events are displayed withtwo decimal points in the Consoleswindow and with three decimal pointsin the List window.• Mute and SoloMute and Solo events control the on/off status of the chosen Instrument’sMute and Solo settings.Unlike most of the other commandsin this menu, Mute and Solo canaffect <strong>Audio</strong> or MIDI Instruments.Keep in mind that these events affectInstruments rather than tracks.For more information about the similaritiesand differences betweentracks and instruments when mutingand soloing, please see your MIDIReference Manual.• Send LevelsSend level events control the level of<strong>audio</strong> sent to a specific send. Sendsare addressed by number, so even ifyou change the output of a send, theautomation data will remain.Send level events can have valuesranging from -¥ to +24 dB.• Plug-In BypassPlug-in bypass events control thestatus of the chosen plug-in’s bypassbutton.These events can have values of Offor On. When set to off, the plug-in’sbypass button is out, and the plug-ineffects the <strong>audio</strong> that passes throughit. When set to on, the plug-in bypassbutton is in, and the plug-in isbypassed (and does not effect the<strong>audio</strong>).For more information about bypassingplug-ins, see page 51.<strong>Vision</strong> & Studio <strong>Vision</strong> <strong>Pro</strong> — <strong>Audio</strong> Reference Manual 277
• Phase InvertPhase Invert events control the statusof the chosen <strong>audio</strong> channel’s phaseinvert button.These events can have Off or On values.When set to off, the <strong>audio</strong>channel’s phase invert button is out.When set to on, the <strong>audio</strong> channel’sphase invert button is in.For information about the function ofthe phase invert button, see Phase(pg. 55).• EQ EnableEQ Enable events control the On/Off status of the selected <strong>audio</strong> channel’sEQ, so their values can be On orOff. When set to On, the <strong>audio</strong> channel’sEQ toggle button is in. When setto Off, the <strong>audio</strong> channel’s EQ togglebutton is out.EQ Enable events control this buttonEQ Band (1 and 2) Enable events controlthese buttonsEQ Enable Off events override EQBand Enable events. In order for anindividual EQ band to be heard, bothits toggle and the main toggle mustbe on. However, writing an EQEnable Off event does not actuallywrite EQ Band Enable Off eventsfor the EQ bands; it simply overridesthe current setting for each band.EQ Band ParametersEach of the five EQ band parameters canbe applied to each of the four EQ bandsdiscretely. The types of EQ band parametersare:• FrequencyControls the frequency of the specifiedEQ band. Values can range from20.00 Hz to 20000.00 Hz.• GainControls the gain of the specified EQband. Values can range from -18.00 dB to +18.00 dB.• WidthControls the width of the specifiedEQ band. Values can range from 0 to4.00 octaves.• TypeAllows you to change the EQ type forthe specified band. Clicking on theEQ Type setting opens a pop-upmenu with all five EQ types.For an explanation of the various EQtypes, see page 71.278 Opcode Systems, Inc.
CHAPTER 24: Automation• EnableEnables and disables the chosen EQband. EQ Band Enable events canhave values of Off and On.Each of these EQ Band Parameters canbe written for any EQ Band, regardless ofthe band’s type. However, it is importantto recognize that not all parameters canactually effect each EQ type. EQ types canbe effected as follows:Low and High CutParametricThe Parametric EQ type can be effectedby all parameter types. In the EQ EditWindow, parametric EQ bands have allthree possible sliders.NOTE: All EQ bands, regardless of theirtype, can be effected by EQ Band Type, EQBand Enable, and EQ Band Frequencyevents.Plug-In ParametersLow Cut and High Cut cannot beeffected by the Gain or Width parameters.In the EQ Edit Window, bandsassigned to either of these types do nothave Gain or Width sliders.Low and High ShelfThe Plug-in Parameter submenu listsall plug-ins that are assigned (to any <strong>audio</strong>channel) in the sequence. For example:If the Console looks like this...Low Shelf and High Shelf cannot beeffected by the Width parameter. In theEQ Edit Window, bands assigned toeither of these types do not have a Widthslider....then the Plug-in Parametersubmenu looks like this.Figure 24.24: Source of Plug-in Parametersubmenu<strong>Vision</strong> & Studio <strong>Vision</strong> <strong>Pro</strong> — <strong>Audio</strong> Reference Manual 279
After you select a plug-in in the Listwindow or Strip Chart, another pop-upmenu appears to the right. This menu displaysthe selected plug-in’s parameters.For example, if you select opECHO, youmight see the following (in the Listwindow):If you open the opECHO plug-in edit window,you will see that the parameterslisted in the pop-up menu correspond tothe parameters of the opECHO plug-in.“Dry/Wet” is the default parameterbecause it is the first parameter of theselected plug-in. Clicking on “Dry/Wet”will produce a pop-up menu that containsthe selected plug-in’s parameters.Plug-inparametersFigure 24.27: opECHO plug-in edit window<strong>Vision</strong> can automate up to 1024 parametersper VST plug-in.Figure 24.25: Plug-in parameter event in the ListWindowFigure 24.26: Plug-in parameters in the Strip ChartMoving (and Copying) Plug-InAutomation Data Between SequencesPlug-in automation data can be copiedfrom one <strong>Vision</strong> file to another as long asthe specified plug-in is in both files. Pluginautomation data can also be copied to anew file if. the specified plug-in is in your<strong>Vision</strong> Setup file. To include a plug-in inyour <strong>Vision</strong> Setup file, simply assign theplug-in to the appropriate <strong>audio</strong> channel(in a Console) and choose File>Save asSetup. For more information about the<strong>Vision</strong> Setup file, see your MIDI ReferenceManual.280 Opcode Systems, Inc.
CHAPTER 24: AutomationPlug-In Parameter ValuesAll plug-in parameters, regardless of theirranges in the plug-in edit window, willhave values between 0.0000 and 100.0000in the List window. The plug-in parameter’srange of possible values in the pluginedit window is mapped onto this scale.When the plug-in parameter automationevents are played back, they are mappedback to the appropriate range of values inthe plug-in edit window.For example, the opECHO Feedbackparameter can have values ranging from0.000000 to 1.000000. A value of 0.696067in the opECHO edit window correspondsto a value of 69.6067 in the List window.This system can be confusing for parameterswith other value ranges. Forexample, the opECHO Rhythm parameteruses a note size as its setting. If yourecord a value of 5/16, the list window displays55.6818. During playback, this ismapped correctly back to the original 5/16 value, but the value is hard to understandin the List window. In this case, it’sprobably best to either record your datareal-time or draw it in the Strip Chartrather than inserting events in the Listwindow.Plug-In Parameter NamesFigure 24.28 shows the plug-in editwindow for opRING, which is a “faceless”plug-in. Faceless plug-ins have verysimple user interfaces. The names ofparameters for faceless plug-ins areshown in the List Window and the StripChart.Figure 24.28: opRING plug-in edit windowFigure 24.29 shows the plug-in editwindow for fusion: VINYL, a “faced” plugin.Faced plug-ins have much visually customizeduser interfaces.Figure 24.29: Fusion: VINYL plug-in edit windowNames of parameters for faced plug-insare not shown in the List Window or StripChart. Instead, parameters for these pluginsare <strong>ref</strong>erred to by number. All availableparameters, from 1 to 1024, areaccessible.<strong>Vision</strong> & Studio <strong>Vision</strong> <strong>Pro</strong> — <strong>Audio</strong> Reference Manual 281
In addition, the Copy Faders commandincludes values for all 1024 parameters ofany faced plug-ins. Of course, you candelete the values for any parameters thatare not actually in use by the specifiedplug-in. Parameters that are not in useusually have values of 0.Using the Same Plug-In Multiple TimesA single plug-in can be used more thanonce (in the same sequence file). Itsappearance in the Plug-in Parameter submenuvaries depending on how it is used.#1 applies to the first plug-in assigned to<strong>Audio</strong>-1 and opALIGN #2 applies to thethird plug-in assigned to <strong>Audio</strong>-1.OpECHO is used once on each of the two<strong>audio</strong> channels, so the two separateinstantiations are not given differentnames.MIDIIf the Console looks like this......then the Plug-in Parametersubmenu looks like this.Figure 24.30: Source of Plug-in ParametersubmenuBoth the opALIGN and opECHO plug-insare used twice in this configuration.OpALIGN is used twice in the same <strong>audio</strong>channel, so its two separate instantiationsare given two different names: opALIGN#1 and opALIGN #2. OpALIGN #1 <strong>ref</strong>ersto the lowest-numbered “slot” whereopALIGN is used. In this case, opALIGNMIDI Controller DataAll 128 MIDI Controllers can be automated,just as they could in previousversions of <strong>Vision</strong>. MIDI Controllers, likeother automation parameters, are usuallycontrolled using the Faders or Consolewindow.For more information about MIDI Controllers,see your MIDI Reference Manual.Other MIDI EventsVelocity scale, pitch bend, aftertouch, andpoly aftertouch can also be automated.For more information about these events,see your MIDI Reference Manual.282 Opcode Systems, Inc.
CHAPTER 25: File ManagementWHO SHOULD READ THISCHAPTER?This chapter applies to all of the <strong>audio</strong>systems supported by <strong>Vision</strong>.AUDIO FILES<strong>Audio</strong> files contain data stored as a seriesof samples (numbers) that create a digitalrepresentation of an <strong>audio</strong> waveform.You can see which <strong>audio</strong> files are used bythe current <strong>Vision</strong> file, information aboutthose <strong>audio</strong> files, and how much of the<strong>audio</strong> file is actually used by the sequencefile.All of this information is available in theFile Management dialog box. To openthis dialog box, choose <strong>Audio</strong>>FileManagement.Figure 25.1: <strong>Audio</strong> Files as they Appear in theFinderIn most instances, you will not use all the<strong>audio</strong> you initially record. This may bebecause you have eliminated certain“takes,” or because you have deleted portionsof some <strong>audio</strong> events (such as withthe <strong>Audio</strong>>Strip Silence command).Even though you have deleted the pointersto the unwanted digital <strong>audio</strong>, theactual <strong>audio</strong> remains on your hard disk.Figure 25.2: Typical File Management Dialog BoxOVERVIEW OF THE FILEMANAGEMENT DIALOG BOXThe File Management dialog box containsinformation about each <strong>audio</strong> file used bythe active <strong>Vision</strong> file. Since each file mayuse a unique group of <strong>audio</strong> files, the FileManagement dialog box displays only the<strong>audio</strong> files relating to the active <strong>Vision</strong> file.<strong>Vision</strong> & Studio <strong>Vision</strong> <strong>Pro</strong> — <strong>Audio</strong> Reference Manual 283
PART 6: Advanced <strong>Audio</strong> TechniquesIn addition, the File Management dialogbox allows you to see how much of an<strong>audio</strong> file is unused by the <strong>Vision</strong> file and,if desired, delete the unused data fromyour disk by compacting the file.It’s up to you to keep track of <strong>audio</strong> filesyou’ve recorded to your hard disk that areno longer <strong>ref</strong>erenced by any other <strong>Vision</strong>files—<strong>Vision</strong> does not display these files,even though they are actually on yourhard disk. <strong>Vision</strong> displays <strong>audio</strong> files inthe File Management dialog box only forthe active <strong>Vision</strong> file. Several of theoptions in the File Management menu aredesigned to help you keep track of your<strong>audio</strong> files.Much information and many options areavailable in the File Management dialogbox. The following sections discuss all thefeatures and functions of that dialog box.VIEWING AUDIO FILEINFORMATIONThe File Management dialog box containsa line entry for each <strong>audio</strong> file <strong>ref</strong>erencedby the active <strong>Vision</strong> file.The Bar DisplayThe long rectangular bar displays graphicallyhow <strong>audio</strong> data is used in eachparticular <strong>audio</strong> file. Areas where the<strong>audio</strong> waveform is black indicate areas ofthe <strong>audio</strong> file that are used by the active<strong>Vision</strong> file. Areas where the <strong>audio</strong> waveformis grey indicate unused data. Themore “pockets” of unused data you see ina file, the more likely it is that you maywant to compact or consolidate it (as discussedin Organizing <strong>Audio</strong> Files(pg. 286)).File ColumnThis column displays the name of each<strong>audio</strong> file <strong>ref</strong>erenced by the active <strong>Vision</strong>file.Viewing the file pathTo see the entire file path of an <strong>audio</strong> file,hold down the Command key and click onthe file. You can command- click anywhereon the waveform or the file name.Column Headings<strong>Audio</strong> FilesBar Display284 Opcode Systems, Inc.
CHAPTER 25: File ManagementEvents ColumnThis column shows the number of <strong>audio</strong>events in the active <strong>Vision</strong> file that “point”to <strong>audio</strong> data within each <strong>audio</strong> file. Thisincludes events on the Clipboard and inthe Undo buffer—the<strong>ref</strong>ore, if you havecut some <strong>audio</strong> or undone an edit operation,you may want to clear it from thiscolumn by using the Clear Clip andUndo command (as discussed in ClearClip and Undo (pg. 299)).Size ColumnThis column shows (in megabytes) thetotal amount of data in the <strong>audio</strong> file,which includes both used and unuseddata.Unused ColumnThis column shows (in megabytes) theamount of data in the <strong>audio</strong> file that is not<strong>ref</strong>erenced by any <strong>audio</strong> event in theactive <strong>Vision</strong> file.When you first record <strong>audio</strong> you’ll seethat the <strong>audio</strong> waveform is completelyblack, which means all data in the file isbeing used.If you edit your recording—strippingsilence, cutting, or clearing <strong>audio</strong>events—portions of data in the <strong>audio</strong> filewill no longer be used since the <strong>Vision</strong> fileno longer contains <strong>audio</strong> events pointingto them.NOTE: This column shows data that’sunused by the active sequence file. <strong>Audio</strong>data that is unused in one sequence filemay still be used in another sequence file.It’s up to you to remember which <strong>audio</strong> filesare shared by different sequence files.Type ColumnThis column tells you the <strong>audio</strong> file’sformat and what possible program the fileoriginated in. There are four file typesthat <strong>Vision</strong> can read:• SD II: Sound Designer II file formatused by Sound Designer II and by<strong>Vision</strong> when recording with DAE.• AIFF: <strong>Audio</strong> Interchange File Formatused by <strong>Audio</strong>shop, <strong>Vision</strong> and manyother programs.• SD I: Sound Designer file formatused by the original version of SoundDesigner.• MSND: This format was used by theMacMix program for the Dyaxis.Sample Rate ColumnThis column shows the sample rate(in Hz) for each <strong>audio</strong> file.Channels ColumnThis column tells you whether the respective<strong>audio</strong> file is mono or interleavedstereo. Linked stereo files (such as thoserecorded when using <strong>Vision</strong> with DAE)appear as two mono files. Interleavedstereo files appear as a single stereo file.<strong>Vision</strong> & Studio <strong>Vision</strong> <strong>Pro</strong> — <strong>Audio</strong> Reference Manual 285
PART 6: Advanced <strong>Audio</strong> TechniquesBits ColumnThis column shows the sample size (inbits) for each <strong>audio</strong> file. This setting isoften <strong>ref</strong>erred to as “bit depth.”PLAYING AUDIO FILESORGANIZING AUDIO FILESThere are a number of commands availablefrom the File Management menu. Toaccess them, press and hold the small,downward pointing triangle in the dialogbox’s title bar.NOTE: This feature is only available inAcadia mode. DAE does not support playbackin the File Management window.<strong>Audio</strong> files can now be played directlyfrom the File Management window. Toplay an <strong>audio</strong> file in the File Managementwindow:Select the file you wish to play (byclicking on it).Click the Play button.Figure 25.3: File Management MenuCompactListen to the <strong>audio</strong> file. A small verticalline follows playback in the <strong>audio</strong>waveform.When you are finished, click the Stopbutton.You can also make playback skip to a differentpoint in the <strong>audio</strong> file by clickingwhere you’d like playback to continue.Compact throws away <strong>audio</strong> data that isnot <strong>ref</strong>erenced by any <strong>audio</strong> events in theactive <strong>Vision</strong> file. The remaining <strong>audio</strong> filedata that the <strong>Vision</strong> file is using movestogether to save disk space.Keep in mind that <strong>Vision</strong> has no way ofknowing if hard disk data is being used bya <strong>Vision</strong> file that is not currently open.When you decide to compact an <strong>audio</strong> file,make sure you don’t have another <strong>Vision</strong>file sharing data in the <strong>audio</strong> file becausethat <strong>Vision</strong> file’s <strong>audio</strong> may be deleted orchanged.286 Opcode Systems, Inc.
CHAPTER 25: File ManagementBefore using this command, you shoulduse the Clear Clip and Undo commandso that you see an accurate display in theFile Management dialog box. See ClearClip and Undo (pg. 299).IMPORTANT: Compacting is a destructiveoperation and cannot be undone—that is,you cannot recover your original data onceyou use this command.Notice the amount of unused space isnow zero and the waveform is entirelyblack.The unused data is no longer on yourhard disk.To compact a file:Select the file by clicking its selectordot in the File Management dialogbox.You can compact multiple files by Shiftclickingtheir selector dots.Choose Compact from the FileManagement menu.For each selected file, youÕll be warnedthat compacting cannot be undone.Click Compact & Save to continue.If the file has been previously saved itwill be resaved.<strong>Vision</strong> compacts the file by removing theunused data, then rebuilds the waveform.The more data that is beingcompacted, the longer the compact willtake.ConsolidateConsolidate copies <strong>audio</strong> data from oneor more <strong>audio</strong> files <strong>ref</strong>erenced by theactive <strong>Vision</strong> file and places themtogether into a single <strong>audio</strong> file. The originalfiles remain untouched, and the newfile contains only data actually used by theactive <strong>Vision</strong> file. The consolidated data isplaced side by side in the new file; thiscommand does not mix <strong>audio</strong> events.All events in the active <strong>Vision</strong> file that <strong>ref</strong>erencedthe files you consolidated willnow point only to the data in the new file.When you consolidate files, you’ll see thenew file displayed in the File Managementdialog box; the waveform displaywill be completely black, showing that alldata in the <strong>audio</strong> file is in use by the active<strong>Vision</strong> file. You will also see the originalfiles displayed, but the waveform displaywill be completely grayed out, indicatingthat no data in those files is being <strong>ref</strong>erencedby the active <strong>Vision</strong> file.<strong>Vision</strong> & Studio <strong>Vision</strong> <strong>Pro</strong> — <strong>Audio</strong> Reference Manual 287
PART 6: Advanced <strong>Audio</strong> TechniquesConsolidating files is useful in a couple ofcases:• You’ve finished editing a song and,for simplicity, you want one <strong>Vision</strong> filethat <strong>ref</strong>erences one consolidated<strong>audio</strong> file.• Your song uses <strong>audio</strong> files that arealso <strong>ref</strong>erenced by other <strong>Vision</strong> filesand you want to create an <strong>audio</strong> fileused only by the active <strong>Vision</strong> file.Choose Consolidate from the FileManagement menu.<strong>Vision</strong> opens a standard Save As dialogbox. Since consolidating files creates anew <strong>audio</strong> file, you must name it andsave it before <strong>Vision</strong> can create the datafor the new file.Name and Save the new <strong>Audio</strong> File.<strong>Vision</strong> creates a single consolidated<strong>audio</strong> file.Once you have a consolidated file, youcan delete the original files to clear updisk space (if they don’t contain any dataneeded by other <strong>Vision</strong> files).After consolidating, you may want to usethe Remove From List command so thatthe File Management window displaysonly the new, consolidated file (seeRemove from List (pg. 299)).IMPORTANT: <strong>Vision</strong> cannot consolidatefiles with different sample rates and itcannot consolidate interleaved stereo fileswith mono files.LabelLabel allows you to apply one of theFinder’s labels to the file. If a single file isselected when you choose the Label command,the following dialog box appears.To consolidate files:Select a file by clicking its selectordot in the File Management dialogbox.Shift-click on the selector dots ofadditional files to select or deselectthem.Figure 25.4: Label dialog box with a single fileselectedFile name: The name of the file isdisplayed here. This information isread-only; the file’s name cannot bechanged in this window. For informationabout renaming <strong>audio</strong> files fromthe File Management window, seeRename (pg. 295).288 Opcode Systems, Inc.
CHAPTER 25: File ManagementLabel: The file’s current label is displayedhere. Click on the label popupto see the your options:If more than one file is selected when theLabel command is chosen, the dialog boxlooks like this.Figure 25.5: Label Pop-upThe options in the Label popup echothe Finder’s Label options. Choosinga Label here will label the file in theFinder.Comments: The file’s current commentsare displayed in this field. Youcan also type here to add commentsto the file in the Finder’s Get Infowindow.Figure 25.6: Label dialog box with more than onefile selectedIf the file doesn’t already have alabel: If the file does not yet have alabel in the Finder, it will be given thelabel assigned here. This pop-up isthe same as the one shown inFigure 25.5.<strong>Vision</strong> & Studio <strong>Vision</strong> <strong>Pro</strong> — <strong>Audio</strong> Reference Manual 289
PART 6: Advanced <strong>Audio</strong> TechniquesIf the file already has a label:Example: Labeling FilesImagine you have a folder that has many<strong>audio</strong> files and three <strong>Vision</strong> documents,each <strong>ref</strong>erring to several of the <strong>audio</strong> files.Some <strong>audio</strong> files are used by one, two, orthree sequence files, and some are notused. No files have labels or comments,and you need a way to easily distinguishwhich <strong>audio</strong> files are used by whichsequences.If the file already has a label, its labelwill either experience no change orbe changed to the label selected inthis pop-up (as specified).Replace/Append:Open the first sequence file.Go to the File Management windowand choose ÒSelect AllÓ from the popupmenu.Choose ÒLabelÓ from the pop-upmenu.Make the following settings.This pop-up <strong>ref</strong>ers to the file’s comments.Selecting Replace will deletethe old comments for all selected filesand replace them with the commentstyped in this window. Append willadd the comments typed in thiswindow to the comments alreadyassociated with the file.Comments: Type in this field to addcomments to the file in the Finder.How these comments are treated isaffected by the Replace/Appendsetting.It can become very difficult to keep trackof <strong>audio</strong> files that are used in multiplesequences. The following example showshow to use the Label command to helpkeep track of your files.Click OK.Now all the files used by the firstsequence are orange in the finder.Open the second sequence file.290 Opcode Systems, Inc.
CHAPTER 25: File ManagementRepeat steps 2-4 with the followingsettings.the files used only by the third sequenceare blue. All files used by more than onesequence are red.In the Finder, select a red file andchoose File>Get Info.You might see the following..Now the files used only by the firstsequence are orange, the files used onlyby the second sequence are brown, andthe files used by both sequences arered.Open the third sequence file.Repeat steps 2-4 with the thirdsequence file, making the followingsettingsNow the files used only by the firstsequence are orange, the files used onlyby the second sequence are brown, andThe Comments field tells you exactlywhich sequences use the file.In addition, if a file is not used in anysequence, it will appear with no label.Copy to FolderCopy to Folder puts a copy of theselected <strong>audio</strong> file(s) into the specifiedfolder. Like the Copy command in theFinder, Copy to Folder leaves the originalfiles untouched.The Copy to Folder command can beused to easily “round up” all of the filesused in a sequence and put them in onefolder.If one file is selected, you will see thefollowing.<strong>Vision</strong> & Studio <strong>Vision</strong> <strong>Pro</strong> — <strong>Audio</strong> Reference Manual 291
PART 6: Advanced <strong>Audio</strong> TechniquesFor the first file, the dialog looks like this.Figure 25.7: Copy to Folder dialog box<strong>Pro</strong>vided that there is enough space onthe selected volume and there are no fileswith the same name in the destinationfolder, the selected files will be copied.You will then see a dialog prompting youto replace all <strong>audio</strong> event <strong>ref</strong>erences tothe original file with <strong>ref</strong>erences to the newfile.Click Replace to change the sequence’s<strong>ref</strong>erences to that (single) <strong>audio</strong> file sothat they point to the new (copied) file.Click Replace All to change the <strong>ref</strong>erencesto all selected <strong>audio</strong> files so thatthey point to the new (copied) files. ClickCancel to leave <strong>ref</strong>erences to that (single)<strong>audio</strong> file untouched. Click CancelAll to leave all <strong>ref</strong>erences untouched.If you respond with Cancel or Replace,the <strong>ref</strong>erences for that file are adjusted(or not adjusted) as you specified. A similardialog box, <strong>ref</strong>erring to the next file onthe list, appears.Clicking Replace will change thesequence’s <strong>audio</strong> event <strong>ref</strong>erences so thatthey point to the new (copied) file. ClickingCancel will leave them untouched.The process is slightly different if youselect more than one file. First you will beprompted with the dialog box shown inFigure 25.7. Then <strong>Vision</strong> asks youwhether or not you want to replace event<strong>ref</strong>erences for each of the files you copied(individually).Figure 25.8: Copy to Folder dialog boxClick Replace to change the sequence’s<strong>ref</strong>erences to that (single) <strong>audio</strong> file sothat they point to the new (copied) file.Click Replace Remaining to change the<strong>ref</strong>erences to all remaining selected <strong>audio</strong>files so that they point to the new (copied)292 Opcode Systems, Inc.
CHAPTER 25: File Managementfiles. Click Cancel to leave <strong>ref</strong>erences tothat (single) <strong>audio</strong> file untouched. ClickCancel Remaining to leave all <strong>ref</strong>erencesto remaining selected filesuntouched.NOTE: Once you respond to the dialog boxfor a specific file, that file’s <strong>ref</strong>erences areupdated immediately. The file will not beaffected by choosing Replace Remainingor Cancel Remaining in subsequent dialogs.Replace Remaining or CancelRemaining affect only the currently listed<strong>audio</strong> file and all files that have not yetbeen <strong>ref</strong>erred to specifically.Figure 25.9: File Management window beforeusing Copy to FolderEach file will show the dialog box inFigure 25.8 until you reach the lastselected file in the list. At that point thedialog box looks like this.Click Cancel to leave <strong>ref</strong>erences to the<strong>audio</strong> file untouched.Click Replace tochange the sequence’s <strong>ref</strong>erences to the<strong>audio</strong> file so that they point to the new(copied) file.Tip for Using Copy to FolderFigure 25.10: File Management window afterusing Copy to FolderThe number of files has doubled becausethe window includes the original files andthe newly copied files. In most cases, thisis undesirable from an organizationalstandpoint.After using the Copy to Folder command,your File Management window willcontain twice the number of <strong>audio</strong> files itdid before using the command.<strong>Vision</strong> & Studio <strong>Vision</strong> <strong>Pro</strong> — <strong>Audio</strong> Reference Manual 293
PART 6: Advanced <strong>Audio</strong> TechniquesYou can easily “clean up” the File Managementwindow by choosing SelectUnused followed by Remove from List(both in the File Management windowmenu).Choose Select Unused, and any <strong>audio</strong>files which are not <strong>ref</strong>erenced by thecurrent sequence file are selected.Move to FolderMove to Folder moves the selected<strong>audio</strong> file(s) into the specified folder.Unlike Copy to Folder, Move to Folderdoes affect the original files.Move to Folder automatically updates all<strong>ref</strong>erences to the <strong>audio</strong> file so that theypoint to the file in its new location.After selecting one or more <strong>audio</strong> filesand choosing Move to Folder, the followingdialog box appears.Figure 25.11: After choosing Select UnusedChoose Remove from List, and those filesare removed from the File Managementwindow.Figure 25.12: After choosing Remove from ListIf all the selected files and the destinationfolder are on the same volume, the filesare moved to the selected folder.You cannot move files across volumes.This is a function of the Macintosh operatingsystem. If you select a folder on adifferent volume when using Move toFolder, you will be prompted with the followingdialog.For more information about SelectUnused, see page 299. For more informationabout Remove from List, seepage 299.294 Opcode Systems, Inc.
CHAPTER 25: File ManagementRenameThe Rename command changes thename(s) of the selected <strong>audio</strong> file(s) inthe Finder, as well as in the FileManagement window.Click Cancel to abandon the procedure.Click OK to copy the file(s) to theselected folder. After the copy procedureis complete, you will be prompted toreplace <strong>ref</strong>erences to the original file with<strong>ref</strong>erences to the new file. See Copy toFolder (pg. 291) for details.The name of the file(s) will be changed,but files remain in the same folder. All <strong>ref</strong>erencesin the sequence are updated to<strong>ref</strong>er to the file’s new name.If only one file is selected when youchoose Rename, you will see the followingdialog box.After using Copy to Folder or Move toFolder, you may want to command-clickon the file name to see the entire file path(for verification). See page 284 for details.Type the new name for the file. The nameis updated in the File Managementwindow (as shown in Figure 25.13). Thename of the file is also updated in theFinder.Figure 25.13: “Flashy Loop” in File Management<strong>Vision</strong> & Studio <strong>Vision</strong> <strong>Pro</strong> — <strong>Audio</strong> Reference Manual 295
PART 6: Advanced <strong>Audio</strong> TechniquesIf you select more than one file beforechoosing Rename, you will see thefollowing.Click OK to update the name of the file inboth the Finder and the File Managementwindow and proceed to the next file.NOTE: Remember, once you respond to thedialog box for a specific file, that file’s nameis updated immediately. The file will not beaffected by choosing Cancel Remaining insubsequent dialogs. Cancel Remainingaffects only the currently listed <strong>audio</strong> fileand all files that have not yet been <strong>ref</strong>erredto specifically.The file’s new name can be typed into thisdialog box.Click Cancel All to leave the names of allselected files untouched. Click Cancel toleave the name of the current file (the filenamed in the dialog box) untouched, butproceed to the next file for renaming.Click OK to update the name of the file inboth the Finder and the File Managementwindow and proceed to the next file.If you click Cancel or OK, you will see thisdialog box.All files will show the dialog box inFigure 25.14 until you reach the lastselected file in the list. At that point thedialog box looks like this.Figure 25.14: Rename dialog boxClick Cancel to leave the name of the currentfile untouched. Click OK to updatethe name of the file in both the Finder andthe File Management window.Click Cancel Remaining to leave thenames of this file and all remainingselected files untouched. Click Cancel toleave the name of the current file (the filenamed in the dialog box) untouched, butproceed to the next file for renaming.Figure 25.15: File names updated in the FileManagement window296 Opcode Systems, Inc.
CHAPTER 25: File ManagementDeleteDelete does affect hard disk data, deletingthe actual <strong>audio</strong> file, and it cannot beundone. Before the file is deleted you’ll bewarned that <strong>audio</strong> events in the active<strong>Vision</strong> file are <strong>ref</strong>erencing data in that<strong>audio</strong> file, and they’ll be deleted from thesequences if you delete the file.Sample Rate ConvertIf some of your <strong>audio</strong> files have samplerates that are different than the sessionsample rate, you can use the Sample RateConvert command to convert their samplerates to the session sample rate. SampleRate conversion creates a new <strong>audio</strong> fileon your hard disk. Sample rate conversionand theory is discussed in moredetail in Chapter 26: Sample Rate Conversionand Deinterleaving.To convert a file’s sample rate:Select an <strong>audio</strong> file by clicking itsselector dot in the File Managementdialog box.Choose Sample Rate Convert fromthe File Management menu.<strong>Vision</strong> opens the Sample Rate Conversiondialog box.From the pop-up menu, select thedesired sample rate.If you need to change your hardwaresample rate, click the Hardware Setupbutton to open the hardware setup dialogbox.Click the Convert button.<strong>Vision</strong> opens a dialog box asking if youreally want to perform the sample rateconversion.Click the Convert button.If you have an <strong>audio</strong> file that you sharebetween multiple <strong>Vision</strong> files, you needonly convert it once. Any time you opena <strong>Vision</strong> file that still <strong>ref</strong>erences the old,unconverted <strong>audio</strong> file, you can click theFind converted button to tell <strong>Vision</strong>where to find the <strong>audio</strong> file that you convertedpreviously.<strong>Vision</strong> opens a standard Save Asdialog box.<strong>Vision</strong> & Studio <strong>Vision</strong> <strong>Pro</strong> — <strong>Audio</strong> Reference Manual 297
PART 6: Advanced <strong>Audio</strong> TechniquesUse the dialog box to name and savethe new file youÕre about to create.Since the active <strong>Vision</strong> file will now pointto the newly created <strong>audio</strong> file, <strong>Vision</strong> willask if you want to delete the original<strong>audio</strong> file from your hard disk.IMPORTANT NOTE: If you export <strong>audio</strong>from <strong>Vision</strong> to another program, edit it,then import the <strong>audio</strong> back into <strong>Vision</strong> youmay have to use the Rebuild Waveformcommand so that <strong>Vision</strong> can display thewaveform accurately.Find FileClick the DonÕt Delete button if youwant to save your original file, or clickthe Delete button if you donÕt needthe original file any longer.DeinterleaveChoose this command to deinterleave theselected <strong>audio</strong> file. DAE does not supportplayback of interleaved files, so you mayfind it necessary to deinterleave any filesthat were imported from Sound DesignerII or recorded in stereo with otherapplications.Normally, if you rename an <strong>audio</strong> file ormove it to a new location, <strong>Vision</strong> is smartenough to find it. But if an <strong>audio</strong> file getslost for some reason, choose Find File todisplay a dialog box asking you to locatethe missing <strong>audio</strong> file.Once you locate a lost <strong>audio</strong> file, you mustsave the <strong>Vision</strong> file to update its pointer tothe <strong>audio</strong> file’s new name or location.If you cancel the Find File dialog box, the<strong>Vision</strong> file won’t update its pointer to the<strong>audio</strong> file and you’ll be asked to find iteach time you open the sequence file.In previous versions of <strong>Vision</strong> Find Filewas called Where Is.Deinterleaving will convert the file intotwo linked mono files.Rebuild WaveformRebuild Waveform rebuilds the waveformsummary for an <strong>audio</strong> file. <strong>Vision</strong>stores the waveform summary in RAMand uses it to display waveforms quicklywithout reading the actual data from thehard disk.298 Opcode Systems, Inc.
CHAPTER 25: File ManagementRemove from ListRemove from List removes the name ofan <strong>audio</strong> file from the File Managementlist, and also removes any <strong>audio</strong> eventsfrom the active <strong>Vision</strong> file that <strong>ref</strong>erencethe file. It does not affect hard diskstorage.Select Unused selects all files listed inthe File Management dialog box that arenot <strong>ref</strong>erenced by the current sequencefile. This command is particularly useful ifyou have recorded several “takes” in separatefiles and only use some of them in thesequence. After choosing SelectUnused, you may want to use the Deleteor Remove From List command to organizethe File Management Window.Select AllSelect All selects all the files listed in theFile Management dialog box.Clear Clip and UndoThis is useful if, for example, you dislike aparticular take used by multiple tracks inyour sequence; instead of opening all thetracks and deleting the <strong>audio</strong> events, youcould just remove the file from the list.Remove from List is also useful if youconsolidated a file into a new file and theoriginal—now unused—file is still listedin the File Management list. Since your<strong>Vision</strong> file is no longer <strong>ref</strong>erencing data init, you might want to remove it from thelist.Remove from List is not undoable.Select UnusedClear Clip and Undo clears everythingstored in the Macintosh Clipboard andthe Undo buffer.Although you can see in the File Managementdialog box how much of your harddisk data is being used in a sequence, thedisplay also takes into account <strong>audio</strong>events that are stored on the Clipboard orin the Undo buffer. It regards data ineither of these two holding areas as stillbeing used by the <strong>Vision</strong> file. If you wantto see an accurate, current display in theFile Management dialog box you shouldclear the Clipboard and the Undo Buffer.You shouldn’t perform this operation ifyou have any information in the Clipboardor the Undo Buffer that you still want.<strong>Vision</strong> & Studio <strong>Vision</strong> <strong>Pro</strong> — <strong>Audio</strong> Reference Manual 299
PART 6: Advanced <strong>Audio</strong> Techniques300 Opcode Systems, Inc.
CHAPTER 26: Sample Rate Conversion andDeinterleavingWHO SHOULD READ THISCHAPTER?This chapter applies to all of the <strong>audio</strong>systems supported by <strong>Vision</strong>, but not allusers may find reason to perform thesetasks.You may sometimes find it necessary toeither convert the sample rates of existingdigital <strong>audio</strong> files or deinterleave them.There are a couple reasons for this:• If you used an earlier version ofStudio <strong>Vision</strong>, you may need to convert<strong>audio</strong> files created it under adifferent <strong>audio</strong> playback mechanism.• You are importing <strong>audio</strong> files thathave different sample rates than the<strong>audio</strong> files already <strong>ref</strong>erenced by your<strong>Vision</strong> file.• You may want to convert from DATsample rates (48 kHz) to CD rate(44.1 kHz).• You may have applications thatrequire different sample rates such asmultimedia use, Web use, creatingfiles for CD mastering, etc.ABOUT SAMPLE RATECONVERSIONThe sample rate of an <strong>audio</strong> file is thenumber of samples that make up 1 secondworth of <strong>audio</strong>. Higher sample rates producebetter <strong>audio</strong> quality, but use moredisk space (because there are moresample points per second). Sample Size<strong>ref</strong>ers to the number of bits used to representthe dynamic range. In most musicaluses this is 16 bits. You can save diskspace by using a low sample rate or bitdepth, but this degrades the sound quality.Some <strong>audio</strong> hardware requires aspecific sample rate and size. Refer toyour <strong>audio</strong> hardware documentation fordetails.In <strong>Vision</strong>, all <strong>audio</strong> events in the sequencemust use the same sample rate. Thissample rate is called the session samplerate.<strong>Vision</strong> & Studio <strong>Vision</strong> <strong>Pro</strong> — <strong>Audio</strong> Reference Manual 301
PART 6: Advanced <strong>Audio</strong> TechniquesHardware Sample Rate vs.Session Sample RateBefore you can understand sample rateconversion, you must be aware of the differencesbetween the hardware samplerate and the session sample rate.Specifically:• Hardware Sample Rate: Most professionalhardware will play <strong>audio</strong> atone of only a few standard samplerates, such as 44100 Hz (CD quality)or 48000 Hz. (See your hardwaremanual to learn which sample rates itsupports). You can see what rate yourhardware is set to by looking in<strong>Vision</strong>’s <strong>Audio</strong>>Hardware Setupdialog box.• Session Sample Rate: <strong>Vision</strong>requires that all of your <strong>audio</strong> fileshave the same sample rate, which iscalled the session sample rate. Thisrate generally should be the same asthe hardware sample rate or you mayhear fluctuations in pitch or quality.Conversion <strong>Pro</strong>cesses<strong>Vision</strong> supports a non real-time Off-lineconversion. Off-line conversion occurswhen you ask <strong>Vision</strong> to convert a particular<strong>audio</strong> file from one sample rate toanother.About Off-line Conversion<strong>Vision</strong> offers two methods of performingsample rate conversion:• DSP>Convert Sample Rate is thehighest quality means of convertingthe sample rate. However, it is relativelyslow compared to other means.See Convert Sample Rate (pg. 362)fordetails on using this method.• <strong>Audio</strong>>Conversion Overview is thefastest way to convert files. It is usedto open the Conversion Overviewdialog box. For more information, seethe following sections.Performing an off-line conversion willcreate a new <strong>audio</strong> file on your hard disk.You can then choose to delete the old versionof the file.ABOUT SAMPLE SIZECONVERSIONIf you are using <strong>Pro</strong> Tools 24, you canchoose between files with sample sizes of16 or 24 bit. However, all files have to bethe same sample size. You can use theConversion Overview dialog to convert allfiles to the same sample size.Users of other hardware systems shouldalways use 16 bit files.302 Opcode Systems, Inc.
CHAPTER 26: Sample Rate Conversion and DeinterleavingABOUT DEINTERLEAVING<strong>Vision</strong>, when used with DAE, does notplay back interleaved stereo files. If youhave interleaved stereo <strong>audio</strong> files youwish to use with this version of <strong>Vision</strong>(and DAE), you must deinterleave them.This process turns your single interleavedstereo file into two linked mono files. Itdoes not change the sound quality.Deinterleaving creates two files, each halfthe size of the original file.You don’t need to deinterleave files ifyou’re working with Acadia.CONVERTING SAMPLE RATES/SIZES AND DEINTERLEAVINGIf you need to convert <strong>audio</strong> files, followthese steps:Open the desired <strong>Vision</strong> file that<strong>ref</strong>erences the <strong>audio</strong> files you wish toconvert.If you open a <strong>Vision</strong> file with <strong>ref</strong>erencesto <strong>audio</strong> files that need conversion, theConversion Overview dialog opens automatically.If the Conversion Overviewdialog doesnÕt open, then the <strong>Vision</strong> filedoes not <strong>ref</strong>erence <strong>audio</strong> files that needconversion.Figure 26.1: Conversion Overview Dialog BoxChoose the target sample rate fromthe Session Sample Rate pop-upSet the session sample rate to the samevalue as the hardware sample rate.If necessary, convert the targetsample size from the Sample Sizepop-up.This 24 bit option should only beselected for <strong>Pro</strong> Tools 24 users (all otherusers should always use 16 bits).Click Convert All.The files will be converted according tothe Sample Rate/Size and Deinterleavesettings in the file list. For more informationon the Conversion Overview dialogbox, see The Conversion OverviewDialog Box (pg. 304).You will be asked to confirm theconversion of each <strong>audio</strong> file.You will see a dialog box for each fileyou wish to deinterleave or whoÕssample rate or sample size you wish toconvert.<strong>Vision</strong> & Studio <strong>Vision</strong> <strong>Pro</strong> — <strong>Audio</strong> Reference Manual 303
PART 6: Advanced <strong>Audio</strong> TechniquesClick the Convert or Deinterleavebuttons in each fileÕs dialog box.<strong>Vision</strong> opens a standard Save As dialogbox.Save the converted file.If you are converting a sample rate, thenew sample rate will automatically beadded as a suffix.If you are converting a sample size, thenew sample size is used as a suffix.If you are deinterleaving a file, you willneed to save two new files: Left andRight. The ÒLÓ and ÒRÓ will automaticallybe added as a suffix to the new filenames.After conversion, <strong>Vision</strong> will ask youif you want to delete the old file.If you choose to Delete the file, youwill be asked one more time, then theold file will be deleted from your harddisk.You perform file conversions by using theConversion Overview dialog box. Thisdialog appears whenever you:• Open a <strong>Vision</strong> file that uses <strong>audio</strong> fileswith different sample rates (as couldbe created in versions ofStudio <strong>Vision</strong> prior to 2.0).• Import an <strong>audio</strong> file that is not usingthe current Sample Size.• Open a <strong>Vision</strong> file that uses interleavedstereo <strong>audio</strong> files and DAE.• Attempt to import an interleavedstereo <strong>audio</strong> file using DAE.• Choose <strong>Audio</strong>>ConversionOverview.The File ListTHE CONVERSION OVERVIEWDIALOG BOXFigure 26.2: Anatomy of the Conversion OverviewDialog BoxFigure 26.3: File List Columns, ConversionOverviewAll <strong>audio</strong> files that are <strong>ref</strong>erenced by thecurrent <strong>Vision</strong> file appear in a scrolling listin this dialog box. The four columns displaythe following information for each<strong>audio</strong> file:• file name• sample rate in Hz• sample size in bits• whether the file is stereo or mono304 Opcode Systems, Inc.
CHAPTER 26: Sample Rate Conversion and DeinterleavingYou can sort the list by any of theseparameters by clicking on the parametername. Clicking the word Filename willsort the list by filename. Clicking SR (Hz)will sort the list by sample rate, clickingSS (Bits) will sort the list by sample size,and clicking the word Chans will sort thelist into stereo and mono files. Thecolumn being sorted is underlined (inFigure 26.3, the Filename is underlined).You can select a file in this list by clickingit, or by typing the first letter of thefilename.<strong>Audio</strong> files that require conversion willhave checks next to their names. You canalso see which type of conversion theyrequire—a check in the SR (Hz) columnmeans that the file must be converted tothe Session Sample Rate. A check in theChans column means the file must bedeinterleaved.Session Sample Rate & SizePop-upsIf you change the values in these pop-ups,the <strong>audio</strong> files may require different conversions,indicated by the check marks inthe list (see The File List (pg. 304)).If you’re using DAE, the current hardwaresample rate is marked by a Macintoshicon in the pop-up menu. Generally, youshould choose this setting.You can, if desired, set a session samplerate other than one of the ones listed inthe pop-up menu. To do so, choose Otherfrom the pop-up menu; <strong>Vision</strong> opens theSet Other Rate Dialog box.Figure 26.4: Set Other Rate Dialog BoxButton DescriptionsThe following sections discuss eachbutton in the conversion overview dialogbox.Hardware Setup ButtonThe Session Sample Rate and Sample Sizepop-up menus display the current sessionsample rate and size. You can change thesession sample rate and size by choosinga new value from each pop-up menu. Thepop-up menus contain other sample ratesand depths supported by your particular<strong>audio</strong> hardware, as well as any uniquesample rates <strong>ref</strong>erenced by the <strong>Vision</strong> file.Click this button to open the HardwareSetup dialog box, where you can changethe hardware sample rate. Clicking thisbutton is the same as choosing<strong>Audio</strong>>Hardware Setup.<strong>Vision</strong> & Studio <strong>Vision</strong> <strong>Pro</strong> — <strong>Audio</strong> Reference Manual 305
PART 6: Advanced <strong>Audio</strong> TechniquesDone ButtonClicking the Done button will cause theConversion Overview dialog box to disappear.Any conversions you made prior toclicking the Done button are kept, butany unconverted files remainunconverted.Convert and Convert All ButtonsIf the Conversion Overview dialog boxhas appeared because you have tried toopen a file that requires conversion, theConvert button will appear, and the ConvertAll button will appear next to it.If there are no files that require conversionand you have called the ConversionOverview dialog box manually, only theDone button will be in this area.Clicking Convert will cause the currentlyselected <strong>audio</strong> file to be converted. ClickingConvert All will cause all the <strong>audio</strong>files that require conversion to be converted,one at a time.306 Opcode Systems, Inc.
CHAPTER 27: Strip Silence and Slice <strong>Audio</strong>WHO SHOULD READ THISCHAPTER?This chapter applies to all of the <strong>audio</strong>systems supported by <strong>Vision</strong>.STRIP SILENCE<strong>Vision</strong> can automatically gate digital <strong>audio</strong>using the <strong>Audio</strong>>Strip Silence command.When <strong>Vision</strong> “gates” <strong>audio</strong>, itremoves all <strong>audio</strong> in a selected range thatfalls below a specified amplitude threshold(which also results in several short<strong>audio</strong> events). This is useful for severalreasons, including:• You can remove unwanted noise thatoccurs below the lowest threshold ofrecorded <strong>audio</strong> (for example, analogtape hiss).• It’s a fast way to clear silent passagesfrom your <strong>audio</strong> events.If you wish, you can permanently removeany gated data from the <strong>audio</strong> file by compactingthe <strong>audio</strong> file. This conserves diskspace. For more information, see Compact(pg. 286).SLICE AUDIO<strong>Vision</strong> can automatically separate digital<strong>audio</strong> into useful regions using the Slice<strong>Audio</strong> command. When <strong>Vision</strong> “separates”<strong>audio</strong>, it breaks a long <strong>audio</strong> fileinto several small events based on the criteriain the Strip Silence dialog box. Thisis useful for several reasons:• You can easily copy and paste smallsections of <strong>audio</strong> (such as a particulardrum sound, or an oft-repeated vocalline).• You can quantize individual events(such as separate drum hits in arecorded drum track) to be used assamples.• If you’re syncing to tape and are playingback digital <strong>audio</strong> using only thesession sample rate, breaking <strong>audio</strong>into smaller events means there isless likelihood of digital <strong>audio</strong> drifting“out of sync” with <strong>audio</strong> on tape.To auto-separate, select Slice <strong>Audio</strong> in theSlice <strong>Audio</strong>/Strip Silence pop-up menu.To gate <strong>audio</strong>, select Strip Silence in theSlice <strong>Audio</strong>/Strip Silence pop-up menu.<strong>Vision</strong> & Studio <strong>Vision</strong> <strong>Pro</strong> — <strong>Audio</strong> Reference Manual 307
PART 6: Advanced <strong>Audio</strong> TechniquesGATING AUDIO WITH STRIPSILENCEIn digital recording, as in analog recording,some noise is always present. Usuallyit’s too slight to hear, but sometimes it’sapparent during silent passages.To remove silent passages, first determinewhat amplitude level recorded <strong>audio</strong>lies above, then define that level as thesilence threshold. Anything beneath thethreshold will be defined as silence.When you click Strip Silence, all <strong>audio</strong>that’s below the threshold, and whichlasts for a specified period, will be cleared.You might also want to raise the silencethreshold slightly to remove low amplitudenoise that you can hear along withrecorded <strong>audio</strong>. The higher you raise thesilence threshold, though, the morerecorded <strong>audio</strong> will get removed.To gate <strong>audio</strong> using Strip Silence:Make sure either ÒFastÓ or ÒHighResolutionÓ is checked in the<strong>Audio</strong>>Waveform Displaysubmenu.The Strip Silence procedure will notfunction if the waveform display is turnedoff.Select the desired event(s) or range ofevents you wish to affect.In this example, weÕve selected a single,long <strong>audio</strong> event.Choose <strong>Audio</strong>>Strip Silence/Slice<strong>Audio</strong>.<strong>Vision</strong> opens the Strip Silence dialogbox.Figure 27.1: Strip Silence Dialog BoxSet the desired Strip Silenceparameters.Make sure that Strip Silence is selectedin the pop-up menu.The Strip Silence dialog box is discussedin detail in Strip Silence Dialog Box(pg. 311).308 Opcode Systems, Inc.
CHAPTER 27: Strip Silence and Slice <strong>Audio</strong>Click the Strip Silence button.<strong>Vision</strong> removes all <strong>audio</strong> that staysbelow the chosen threshold for as longor longer than the chosen duration.Figure 27.2: <strong>Audio</strong> After Performing a StripSilenceAudition the gated <strong>audio</strong>.If youÕre not happy with the results,choose Edit>Undo Strip Silence anduse a different set of Strip Silenceparameters.Make sure either ÒFastÓ or ÒHighResolutionÓ is checked in the<strong>Audio</strong>>Waveform Displaysubmenu.The Slice <strong>Audio</strong> procedure will not functionif the waveform display is turned off.Select the desired event(s) or range ofevents you wish to affect.In this example, weÕve selected a vocalpart. WeÕll split this part into individualwords.Figure 27.3: <strong>Audio</strong> before slicingLike other edit operations, the StripSilence command is non-destructive. Thesilence data remains on your hard diskunless you use the Compact command.Choose <strong>Audio</strong>>Strip Silence/Slice<strong>Audio</strong>.<strong>Vision</strong> opens the Strip Silence dialogbox.AUTO-SEPARATING WITH SLICEAUDIOThe Slice <strong>Audio</strong> command can be used toseparate one long <strong>audio</strong> event into severalshort events (based on the silence in the<strong>audio</strong> file).To slice <strong>audio</strong>, first determine what amplitudelevel should trigger the beginning ofan event. Then, determine how long theamplitude must stay below this level for anew event to be generated. Finally, determinethe desired attack time for the newevents.To auto-separate an <strong>audio</strong> event:Figure 27.4: Strip Silence Dialog BoxSet the desired Slice <strong>Audio</strong>parameters.Make sure that Slice <strong>Audio</strong> is selected inthe pop-up menu.The Strip Silence dialog box is discussedin detail in Strip Silence Dialog Box(pg. 311).<strong>Vision</strong> & Studio <strong>Vision</strong> <strong>Pro</strong> — <strong>Audio</strong> Reference Manual 309
PART 6: Advanced <strong>Audio</strong> TechniquesClick the Slice <strong>Audio</strong> button.<strong>Vision</strong> ÒslicesÓ the <strong>audio</strong> into severalsmall pieces.Figure 27.5: <strong>Audio</strong> after slicingAudition the <strong>audio</strong> ÒslicesÓ.To audition an individual slice, first selectthe slice you want to hear.STRIP SILENCE VS. SLICEAUDIOTry making some settings in the StripSilence dialog box and applying them toan <strong>audio</strong> file with Strip Silence selected inthe pop-up menu.Then choose Edit>Unde Strip Silence andselect Slice <strong>Audio</strong> in the Strip Silence popupmenu. Don’t change any othersettings; click Slice <strong>Audio</strong>.You should see results like these:Starting with one long event like this...Then, press option-spacebar (Œ+ú)to hear your selection.If youÕre not happy with the results,choose Edit>Undo Slice <strong>Audio</strong> and usea different set of Slice <strong>Audio</strong> parameters....gives this result if Strip Silence is chosen...When the <strong>audio</strong> signal goes above thethreshold, <strong>Vision</strong> begins a new event. Assoon as “silence” (as defined in the StripSilence dialog box) is recognized, <strong>Vision</strong>waits for the next point when the <strong>audio</strong>’svolume goes above the threshold. At thatpoint, the first event ends and anotherevent begins.IMPORTANT NOTE: Slice <strong>Audio</strong> willstrip any silence at the beginning of theselected <strong>audio</strong> away. Compare Figure 27.3on page 309 and Figure 27.5 on page 310to see an example....or this result if Slice <strong>Audio</strong> is chosen.Figure 27.6: Using Strip Silence and Slice <strong>Audio</strong>As you can see, slicing <strong>audio</strong> results in thesame beginning points for events, buteach event continues until the beginningof the following event. When strippingsilence, each <strong>audio</strong> event ends as soon asits volume falls below the silencethreshold.310 Opcode Systems, Inc.
CHAPTER 27: Strip Silence and Slice <strong>Audio</strong>STRIP SILENCE DIALOG BOXWhen you select one or more <strong>audio</strong>events and choose <strong>Audio</strong>>Strip Silence/Slice <strong>Audio</strong>, <strong>Vision</strong> opens the StripSilence dialog box.When using Slice <strong>Audio</strong>, values close to0 dB or -96 dB will generate few events. Inmost cases, values between -40 dB and-20 dB will generate many short events.As shown in Figure 27.8, when youchange the Silence Threshold, <strong>Vision</strong>illustrates it graphically in the <strong>audio</strong> waveformdisplay.1. A Silence Threshold of -12 dB is indicatedgraphically by the horizontal lines in theGraphic WindowÕs waveform display.Figure 27.7: Strip Silence Dialog BoxAs can be seen in Figure 27.7, the StripSilence dialog box contains many elements.These are discussed in thefollowing sections.Silence ThresholdUse the Silence Threshold numerical toset the “noise floor” for the Strip Silence/Slice <strong>Audio</strong> operation (in decibels). Youcan set this number between -96 dB and 0dB.When using Strip Silence, values close to-96 dB will strip away very little if any<strong>audio</strong>, since even the slightest amount ofnoise will be above the noise floor. Valuesclose to 0 dB will strip away nearly all ofthe <strong>audio</strong>. Generally, a value between-40 dB and -20 dB is appropriate for mostapplications.2. <strong>Audio</strong> that stays in this region for atleast the amount of time specified by theMinimum Duration parameter will be silenced.Figure 27.8: Graphic Feedback of Threshold LevelAs an experiment, enter a different valuein the Silence Threshold numerical andpreview the effect in the Graphic Window’swaveform display. Feel free toexperiment with different thresholds.Once you gate or auto-separate <strong>audio</strong> withthe Strip Silence/Slice <strong>Audio</strong> command,you can audition it—if you’re nothappy with the results, undo the commandand try a different Threshold Level.<strong>Vision</strong> & Studio <strong>Vision</strong> <strong>Pro</strong> — <strong>Audio</strong> Reference Manual 311
PART 6: Advanced <strong>Audio</strong> TechniquesMinimum DurationBesides setting a threshold level, youmust also tell <strong>Vision</strong> how long a signalmust remain below that threshold beforestripping it away or allowing the generationof a new event. Use the MinimumDuration numerical to set the amount oftime the signal must stay below thethreshold level before it’s recognized assilence. You can set this number between10ms and 1,000ms.When working with Strip Silence, longsettings will strip areas between phrases,but not the brief pauses between words ordrum beats (for example). Short settingswill strip areas between words or even syllables.Of course Slice <strong>Audio</strong> will not stripaway the silence, but it will generate asimilar number of events. Values around100 milliseconds make a good startingpoint.As shown in Figure 27.9, setting a smallerduration results in more (but shorter)<strong>audio</strong> events than setting a longerduration.1. Original <strong>audio</strong> event2. Stripping with 1/2 sec minimum duration3. Stripping with 1/10 sec minimum duration(all other parameters equal)Figure 27.9: Effect of Different Minimum DurationSettingsFeel free to experiment with differentminimum durations. Once you gate orauto-separate <strong>audio</strong> with the StripSilence/Slice <strong>Audio</strong> command, you canaudition it—if you’re not happy with theresults, undo the command and try a differentMinimum Duration.312 Opcode Systems, Inc.
CHAPTER 27: Strip Silence and Slice <strong>Audio</strong>Attack TimeUse the Attack Time numerical to set theamount of time it takes for the <strong>audio</strong>signal immediately following a strippedsection to regain its full volume. Allowablevalues are between 0 ms and 1,000 ms (1second). The length of the attack timeyou choose will depend on the sonic characteristicsof your <strong>audio</strong> file (for example,you would probably want to use a shortvalue with a drum track due to the shortattack most percussion sounds have).Setting an attack time can make the afte<strong>ref</strong>fectsof strip silencing sound more natural.In a similar way, it can make <strong>audio</strong>slices sound more natural when playedindividually (not in the context of thesurrounding slices).With both Strip Silence and Slice<strong>Audio</strong>, Attack Time determines wheneach event will begin. The Attack Time(in milliseconds) is subtracted from themoment that the <strong>audio</strong> signal crosses theSilence Threshold to set the beginningpoint of the event. With a longer AttackTime, the separation will occur longbefore the <strong>audio</strong> signal crosses thethreshold.Feel free to experiment with differentattack times. Once you gate or auto-separate<strong>audio</strong> with the Strip Silence/Slice<strong>Audio</strong> command, you can audition it—ifyou’re not happy with the results, undothe command and try a different AttackTime. For an example of how to use theAttack Time parameter, see Attack TimeExample (pg. 314).Release TimeUse the Release Time numerical to setthe amount of time it takes for the <strong>audio</strong>signal immediately preceding a strippedsection to fade out. As with the AttackTime numerical, setting a release timecan often sound more natural than aninstantaneous change in volume. Thelength of the release time you choose willdepend on the sonic characteristics ofyour <strong>audio</strong> file. Allowable values arebetween 0 ms and 1,000 ms (1 second).Feel free to experiment with differentrelease times. Once you gate <strong>audio</strong> withthe Strip Silence command, you canaudition it—if you’re not happy with theresults, undo the Strip Silence commandand try using a different Release Time.For an example of how to use the ReleaseTime parameter, see Attack Time Example(pg. 314).Release Time is not available (grayedout) when working with Slice <strong>Audio</strong>.Slice <strong>Audio</strong> is much like as StripSilence with an infinite release time.When silence is detected, the currentevent continues all the way to the beginningof the next event or to the end of theoriginal event (the event selected beforechoosing Strip Silence/Slice <strong>Audio</strong>).<strong>Vision</strong> & Studio <strong>Vision</strong> <strong>Pro</strong> — <strong>Audio</strong> Reference Manual 313
PART 6: Advanced <strong>Audio</strong> TechniquesATTACK TIME EXAMPLEIn following example, we’ve used StripSilence with a Silence Threshold of -20 dBand Minimum Duration of 100 ms.We can correct this problem by using aRelease Time of 100 ms and an AttackTime of 20 ms. With these settings, theevents from the Strip Silence commandwill have more gradual attack and releasetimes (see Figure 27.11).This portion of thesignal is below thesilence threshold butshorter than theminimum silence. Itwill not be stripped.This portion of thesignal is below thesilence threshold andlonger than theminimum silence. Itwill be stripped.An extra 100 ms wasleft at the end ofthis eventAn extra 20 ms wasleft at the beginningof this eventThese portions of the signal are abovethe silence threshold. They will not be stripped.After stripping the silence, we are left withtwo separate <strong>audio</strong> events, as show inFigure 27.10.Natural sounding cut-offsdue to Attack and Release settingsFigure 27.11: Strip Silence EventsSetting Attack (and Release) times canresult in more natural-sounding eventswhen you use the Strip Silence andSlice <strong>Audio</strong> commands.Abrupt cut-offs due to Strip SilenceFigure 27.10: Strip Silence EventsAs seen in Figure 27.10, the first <strong>audio</strong>event cuts off too early and the second<strong>audio</strong> event starts too abruptly.USE ZERO CROSSINGSThe Use Zero Crossings option, availablein earlier versions of <strong>Vision</strong>, no longerexists. <strong>Vision</strong> always uses zero crossingswith all applicable <strong>audio</strong> commands.Automatically using zero crossings convenientlyavoids pops and clicks at thebeginnings and ends of <strong>audio</strong> events.314 Opcode Systems, Inc.
CHAPTER 28: Mixing Digital <strong>Audio</strong> (Bouncing)If you’re familiar with mixing down orbouncing tracks in analog recording,you’ll be familiar with the basic idea of<strong>Vision</strong>’s mix procedures.<strong>Vision</strong> offers several methods of mixing<strong>audio</strong>:• Direct <strong>Audio</strong> Mixing: Use theDSP>Mix command to mix togethermultiple <strong>audio</strong> events into a single fileon a single <strong>Audio</strong> Instrument. InAcadia mode, you can even includeEQs, plug-ins, bussing, etc.• Capturing a Mix: Check the<strong>Audio</strong>>Mix <strong>Audio</strong> on Captureoption and use the Edit>Capturecommands to mix together all <strong>audio</strong>and MIDI events into a single track orsequence.• Mixing using TDM bussing (for<strong>Pro</strong> Tools owners only): By recordingfrom a bus, you can mix all your <strong>audio</strong>and print TDM effects in real time toa single <strong>audio</strong> track or pair. Fordetails see Recording <strong>Audio</strong> fromOther Points in the TDM Chain(pg. 127).• Exporting individual <strong>audio</strong> eventsor mixes: Use any of the options discussedin Chapter 20: Import/ExportCornucopia.The first two of these methods, which mixthe selected <strong>audio</strong> data together into anew composite file, are discussed in depthin this chapter.“Export <strong>Audio</strong> Mix” vs. “DSP>Mix”Although <strong>Vision</strong>’s DSP>Mix commandand Export <strong>Audio</strong> Mix may seem similarat first, they are actually quite different.Specifically:• Mix, discussed in this chapter, createsa file only in formats that <strong>Vision</strong>,itself, can play. It is meant as aninterim step in creating a sequencebecause it replaces your sequence’soriginal <strong>audio</strong> events with the newlymixed event.• Export <strong>Audio</strong> Mix is capable of creatingfile formats that <strong>Vision</strong> cannotplay directly. It is meant to create afinal <strong>audio</strong> mix for distribution (viaweb, CD, or any other media). It doesnot replace any existing files in yourcurrent sequence. For details, seeChapter 20: Import/ExportCornucopia.<strong>Vision</strong> & Studio <strong>Vision</strong> <strong>Pro</strong> — <strong>Audio</strong> Reference Manual 315
PART 6: Advanced <strong>Audio</strong> TechniquesWHO SHOULD READ THISCHAPTER?This chapter applies to all of the <strong>audio</strong>systems supported by <strong>Vision</strong>.DIRECT AUDIO MIXINGDirect <strong>audio</strong> mixing is the process ofmixing together digital <strong>audio</strong> from anywherewithin a sequence without actuallyplaying it—<strong>Vision</strong> examines the selected<strong>audio</strong> files and calculates a new, mixedfile. Direct <strong>audio</strong> mixing is performed bythe DSP>Mix command. This commandmixes together selected <strong>audio</strong> events andtheir velocity settings. Also, if you selectvolume and pan controllers assigned to<strong>Audio</strong> Instruments, they will be integratedinto the new mixed <strong>audio</strong> file.NOTE: If you mix to a mono file, <strong>Vision</strong>ignores all pan events.The Mix command lets you mix thefollowing:• <strong>audio</strong> from multiple tracks• <strong>audio</strong> on multiple Instruments withintracks• entire <strong>audio</strong> events• sections of <strong>audio</strong> events• volume and panThe Mix command mixes down stereo ormono <strong>audio</strong> events into the current trackand they become a single mono or stereo<strong>audio</strong> event assigned to one <strong>Audio</strong>Instrument.The Mix command can mix a mixture ofevents. Each event can be a differentformat—any combination of 8, 16, and 24bit, as well as any combination of mono,interleaved, or linked. Mix ignores differingsample rates however, and all eventsare mixed as if they had the same samplerate.MIXING IN ACADIA (“BOUNCETO DISK”)It’s possible to perform a “bounce to disk”with <strong>Vision</strong>’s Mix command in Acadiamode, taking full advantage of anyassigned plug-ins, EQs, and sends. Usethis command to perform non real-timemixes of your tracks with processing; oruse it to bounce a track’s <strong>audio</strong> along withits assigned EQs and plug-ins—therebypreserving valuable CPU resources.To “bounce to disk” a track’s <strong>audio</strong> datawith its assigned processing:In the Console Window, assign pluginsand EQs to the <strong>Audio</strong> Instrumentyou will mix.There is virtually no limit to the amount of<strong>audio</strong> that you can mix or the number oftracks from which you can choose <strong>audio</strong>to mix. You are limited only by the availablespace on your hard disk.316 Opcode Systems, Inc.
CHAPTER 28: Mixing Digital <strong>Audio</strong> (Bouncing)In the Track Overview, select thedesired <strong>audio</strong> region.Make sure to check the option for UseEQs, plug-ins, etc. Choose DSP>Mix.The Mix dialog opens.In addition, from the Output options popup,make sure to enable the desiredoutput destination for the mix, andwhether the mix occurs pre or post-outputs.See Mix and Output Destinations(pg. 318) for an explanation.When this option is checked, all selectedautomation data for EQs, plug-ins, etc. isalso included in the mix.Specify a name and folder destinationfor the new <strong>audio</strong> file.If necessary, click the Format button tospecify the file format, sample size,whether the file is mixed as stereo, andwhether the file is normalized.Click the Save button.The new <strong>audio</strong> file (or files) is written toyour hard disk and the new <strong>audio</strong>replaces the original track data.When prompted, select the <strong>Audio</strong>Instrument that will play the new<strong>audio</strong>.If you use the same <strong>Audio</strong> Instrument,make sure to remove or bypass the previouslyassigned plug-ins and EQs,since theyÕve already been ÒprintedÓ tothe new <strong>audio</strong> data.<strong>Vision</strong> & Studio <strong>Vision</strong> <strong>Pro</strong> — <strong>Audio</strong> Reference Manual 317
PART 6: Advanced <strong>Audio</strong> TechniquesMix and Output DestinationsIt’s important to realize that all processingpresent in the signal chain may affect themixed data. In addition to EQs and pluginsassigned to the actual <strong>Audio</strong> Instrument(in the Console Window), anyprocessing present on send destinationsand output channels can also affect theMix operation.The two options listed at the bottom of theOutput options menu determine whetherprocessing assigned to the output pairs isbypassed. Since you can assign EQs andplug-ins to output pairs, they too canaffect the mixed signal. If Capture Pre-Outputs is checked, the processingassigned to the output pairs is bypassedfor the mix. If Capture Post-Outputs ischecked, all processing assigned to theoutput pairs is used.To ensure that the mixed <strong>audio</strong> <strong>ref</strong>lectsprecisely what you are hearing on playback,specify All Enabled Outputs andCapture Post-Outputs in the Mix dialog’sOutput options pop-up.Figure 27.12: Output options pop-up, Mix dialogThe Output options pop-up in the Mixdialog determines which outputs will beused for the mix, and whether the mix ispre or post-outputs. For instance, supposeyou wish to mix some <strong>audio</strong> assigned to<strong>Audio</strong>-1, which is assigned to Outputs 1-2,but also has a send routed to Bus-1, whichis assigned to Outputs 3-4. If you wantedthe signal mixed through both <strong>Audio</strong>-1and Bus-1 (and their respective EQs andplug-ins), you would need to choose AllEnabled Outputs from the pop-up. Touse just the processing on <strong>Audio</strong>-1,choose Outputs 1-2.If your particular <strong>audio</strong> hardware has justone output pair, or if you generally usejust a single output pair, this is less of anissue.NOTE: If Dither Outputs is enabled in the<strong>Audio</strong> P<strong>ref</strong>erences dialog, it too will affectmixed events. For information on DitherOutputs, see “Chapter 11: Acadia: Optimizingfor Digital <strong>Audio</strong>” in the 4.1 ManualSupplement.Export <strong>Audio</strong> MixThe checkbox option for Use EQs, plugins,etc. is also available for the Export<strong>Audio</strong> Mix command. Enable this optionto use any assigned processing (includingall selected automation data) for theexported <strong>audio</strong> mix. For details, see thetwo previous sections Mixing in Acadia(“Bounce to Disk”) (pg. 316) and Mix andOutput Destinations (pg. 318).For information on the differencesbetween File>Export <strong>Audio</strong> Mix andDSP>Mix, see “Export <strong>Audio</strong> Mix” vs.“DSP>Mix” (pg. 315).318 Opcode Systems, Inc.
CHAPTER 28: Mixing Digital <strong>Audio</strong> (Bouncing)MIXING IN DAEIf you’re mixing anything except entiretracks, you’ll probably find the easiestway to select <strong>audio</strong> is by placing everythingin the same track—then you canuse the Graphic Window to see the timeranges of all <strong>Audio</strong> Instruments andsimply drag across what you want to mix.To mix <strong>audio</strong> in the Graphic Window:Select the <strong>audio</strong> events (or sectionsof events) youÕd like to mix.In this example, you will mix all <strong>audio</strong>events that fall within a specified timerange.Figure 28.2: Save As Dialog Box for DSP>MixCommandIf you want to store the mixed <strong>audio</strong> ina different format than indicated, clickthe Format button.The <strong>Audio</strong> Format dialog box appears.Figure 28.1: Select <strong>Audio</strong> to MixIMPORTANT: If you want to includevolume and pan information in the mix,you must include those events in yourselection.Choose DSP>Mix.The Save As dialog box appears.As shown in Figure 28.2, the bottom ofthe dialog box shows the format in which<strong>Vision</strong> will save the new <strong>audio</strong> file.Figure 28.3: <strong>Audio</strong> Format Dialog BoxUse this dialog box to tell <strong>Vision</strong> whattype of <strong>audio</strong> file to create.This is a subset of the full <strong>Audio</strong> Formatdialog box described in Anatomy of the<strong>Audio</strong> Format Dialog Box (pg. 228)Click OK.The Save As dialog box reappears<strong>Vision</strong> & Studio <strong>Vision</strong> <strong>Pro</strong> — <strong>Audio</strong> Reference Manual 319
PART 6: Advanced <strong>Audio</strong> TechniquesClick the Save button.<strong>Vision</strong> computes the mix of the wavedataitÕs mixing.If you chose to mix <strong>audio</strong> to Stereo-twomono files, clicking the Save buttonopens a second dialog box in which youname and save the right channel file.files those events pointed to remainunaltered in their original files on yourhard disk.The newly created <strong>audio</strong> event will nowpoint to the new <strong>audio</strong> file that containsthe mixed <strong>audio</strong> data.NOTE: The number of seconds<strong>ref</strong>ers to the length of the <strong>audio</strong>file, not the amount of time requiredby the mix operation.After mixing and normalizing the waveform,<strong>Vision</strong> computes a new waveformdisplay based on the selected<strong>Audio</strong>>Display Waveform option asdiscussed in Viewing <strong>Audio</strong> Events asWaveforms (pg. 179).Next, youÕll be prompted to choose an<strong>Audio</strong> Instrument to assign to themixed <strong>audio</strong> event.Figure 28.4: Mixed Event on a New <strong>Audio</strong>InstrumentSelect the mixed event by clicking inits select region, then play it back bychoosing Do>Play Selection.If youÕre not satisfied, you can undo themix operation by choosing Edit>Undo.TIP: If you recorded an event too softly, youcan normalize it by selecting the event, thenchoosing DSP>Mix and enable Normalizein the formats dialog. This creates a newfile that, if desired, you can use in place ofthe one you recorded originally. The old fileremains on the hard disk and you canchoose to delete it if desired.Press and hold the mouse on the<strong>Audio</strong> Instrument name displayed inthe dialog box and select a new <strong>Audio</strong>Instrument from the pop-up menu.As shown in Figure 28.4, the new, mixedevent is assigned to the specified <strong>Audio</strong>Instrument. The <strong>audio</strong> events youselected for the mix are removed fromthe track in the sequence, but the <strong>audio</strong>CAPTURING A MIXCapturing a mix is the process of mixingtogether entire sequences into a newtrack or sequence by having <strong>Vision</strong> actuallyinternally “play” all the data you wantmixed. To capture digital <strong>audio</strong> in themix, you must use one of the Edit>Capturecommands in conjunction with the<strong>Audio</strong>>Mix <strong>Audio</strong> on Capture option.320 Opcode Systems, Inc.
CHAPTER 28: Mixing Digital <strong>Audio</strong> (Bouncing)Unlike the Mix command, capturing willmix all <strong>audio</strong> and MIDI data into a newtrack or sequence. Capturing is a processthat redefines your sequence as a serialstream of events. It “plays” data from youroriginal sequence into a destinationsequence or track and reinterprets thetiming of data in real time so that data isstored as a chronological stream ofevents. Capturing is discussed in detail inyour MIDI Reference Manual.You can either capture a sequence to atrack (using Edit>Capture Seq->Track)or you can capture a sequence to anothersequence (using Edit>CaptureSeq->Seq). If you capture to a track, asingle stereo or mono <strong>audio</strong> event will gointo that track, along with any other non<strong>audio</strong>events. If you capture to asequence, the single <strong>audio</strong> event is placedin the first track and any other MIDI ortext events are placed in other tracks (oneMIDI Instrument to a track).Mixing with the CaptureCommandIMPORTANT: When you mix digital <strong>audio</strong>by capturing, make sure you have appropriateautomation (specifically, volume andpan) events at the very beginning of yoursequence. Otherwise, your <strong>Audio</strong> Instrumentswill use the volume and pan valuesmost recently sent to them.To mix <strong>audio</strong> using the Capturecommand:Select a sequence by clicking itsselector dot in the SequencesWindow.Alternately, if you want to capture onlycertain tracks or events, simply selectone or more tracks in the Tracks Window,or select individual <strong>audio</strong> andcontroller events in a Graphic or ListWindow.Choose Edit>Copy.<strong>Vision</strong> copies your selection to theClipboard.Select a destination for the captured<strong>audio</strong> (either a track or a sequence).Make sure <strong>Audio</strong>>Mix <strong>Audio</strong> onCapture is checked.Choose eitherEdit>Capture Seq->Seq orEdit>Capture Seq->Track.The Save As dialog box appears.At this point, <strong>Vision</strong> works with the Mixcommand according to your <strong>audio</strong> system.If you’re using Acadia, see page 317.If you’re using DAE, see page 319.<strong>Vision</strong> & Studio <strong>Vision</strong> <strong>Pro</strong> — <strong>Audio</strong> Reference Manual 321
PART 6: Advanced <strong>Audio</strong> TechniquesTHE MIXED AUDIO ON YOURHARD DISKMixing <strong>audio</strong> always copies the original,selected <strong>audio</strong> into a new mixed <strong>audio</strong> fileon your hard disk. The original <strong>audio</strong> fileschosen for the mix remain untouched onyour hard disk and, if you used the Mixcommand (not Capture), <strong>Vision</strong> removesthe original <strong>audio</strong> events from yoursequence. After doing a mix, you mightwant to remove the original files from theFile Management Window’s list, or deletethem as discussed in Compact (pg. 286).Original <strong>Audio</strong> EventsMix Range(grey area)When you mix the <strong>audio</strong> events shown inthe mix range, <strong>Vision</strong> creates a single<strong>audio</strong> event equal in length to thelength of the mix range.This may result in the mixed <strong>audio</strong> eventcontaining ÒsilenceÓ as part of the data file.In this case, ÒsilenceÓ exists as a series ofzeros on the hard disk that actuallyoccupy hard disk space.MIXING “SILENCE”The blank regions that exist between<strong>audio</strong> events contain no <strong>audio</strong> data and,the<strong>ref</strong>ore, require no disk space (asshown in Figure 28.5).NOTE: Notice that <strong>audio</strong> was normalizedduring this mix operation. ThatÕs becausethe Normalize pop-up was set to ÒOnÓin the <strong>Audio</strong> Format dialogFigure 28.6: Blank Area Mixed As “Silent” DataGetting Rid of Mixed Silence<strong>Audio</strong> EventsFigure 28.5: Blank RegionsBlank Regions(silent, since there isno digital <strong>audio</strong>)When you mix a range of <strong>audio</strong>, <strong>Vision</strong>creates “silent” digital <strong>audio</strong> for the blankregions that exist between <strong>audio</strong> events.This can result in a mixed <strong>audio</strong> file that’slarger than the combined length of theoriginal <strong>audio</strong> files (as shown inFigure 28.6).Normally, you’ll want to remove significantareas of “silent” <strong>audio</strong> data since itoccupies hard disk space unnecessarily.You can delete the silent areas manually,or you can use the <strong>Audio</strong>>Strip Silencecommand to remove them automatically(as discussed in Chapter 27: Strip Silenceand Slice <strong>Audio</strong>). Once you delete thesilent regions, you can compact the file asdiscussed in Compact (pg. 286) to regainthe space on your hard disk.322 Opcode Systems, Inc.
CHAPTER 28: Mixing Digital <strong>Audio</strong> (Bouncing)Using Mixed SilenceThere are times when you might need tocreate and use “silent” <strong>audio</strong> data. Silentdata is often necessary when you want tocreate <strong>Vision</strong> <strong>audio</strong> files that are compatiblewith other programs, such as SoundDesigner. When exporting <strong>audio</strong> files intoa program other than <strong>Vision</strong>, you need toadd silent data between <strong>audio</strong> events inorder to maintain the timing relationshipbetween them.If you’re using the Mix command or theCapture command, you may mix silenceinto the sound file as shown in Figure 28.6on page 322.<strong>Vision</strong> & Studio <strong>Vision</strong> <strong>Pro</strong> — <strong>Audio</strong> Reference Manual 323
PART 6: Advanced <strong>Audio</strong> Techniques324 Opcode Systems, Inc.
CHAPTER 29: Synchronizing <strong>Audio</strong> PlaybackWHO SHOULD READ THISCHAPTER?While most modern digital multitracks(such as the Alesis ADAT) can deliver arelatively stable source of SMPTE timecode, many other tape sources (analogmultitracks and video decks) do not.SMPTE time code that fluctuates in speedwill likely cause drift between digital<strong>audio</strong> (playing in <strong>Vision</strong>) and materialplaying back from the tape source.This chapter discusses ways to addressthe drift that occurs when syncing digital<strong>audio</strong> to material on tape.It applies to all of the <strong>audio</strong> systems supportedby <strong>Vision</strong>, but is separated intodifferent sections depending on the typeof <strong>audio</strong> system you use. Specifically:• Acadia Users: Read Sync Modes(pg. 325), then skip to Acadia: Syncing<strong>Audio</strong> to SMPTE (pg. 326).• DAE Users: Read Sync Modes(pg. 325), then skip to DAE: Syncing<strong>Audio</strong> to SMPTE (pg. 327).SYNC MODESAs discussed in the MIDI Reference Manual,<strong>Vision</strong> offers four sync modes:• Internal Clock: Use this to syncMIDI and/or digital <strong>audio</strong> to the Macintosh’sinternal clock. InternalClock does not sync to SMPTE.• External Beat Clock: Use this tosync MIDI only (not <strong>audio</strong>) to anexternal clock source that sends 24pulses per quarter note. Beat clocksare tempo dependent; they are notreal time. External Beat Clock isused primarily for syncing to a drummachine, sequencer, or another softwareapplication.• MIDI Time Code: Use this to syncMIDI and digital <strong>audio</strong> to an externalSMPTE clock source (such as an<strong>audio</strong> tape, a video deck, or asynchronizer).• MTC/Machine Control: Use this tocontrol a MMC compatible devicesfrom <strong>Vision</strong>. For detailed instructionson MMC configuration, please seeyour MIDI Reference Manual.<strong>Vision</strong> & Studio <strong>Vision</strong> <strong>Pro</strong> — <strong>Audio</strong> Reference Manual 325
PART 6: Advanced <strong>Audio</strong> TechniquesYou can set <strong>Vision</strong>’s Sync Mode fromeither the Sync Options dialog, or fromthe Control Bar.ACADIA: SYNCING AUDIO TOSMPTEIMPORTANT: This section applies only ifyou’re using <strong>Vision</strong> with Acadia.When you use <strong>Vision</strong> with Acadia, itcannot compensate for varying tapespeeds during SMPTE synchronization—<strong>audio</strong> always plays at the session samplerate.Select sync options either from theSync Optionsdialog box, or...Figure 29.1: Setting the Sync Modes... from the Control BarÕsMaster Sync Modepop-up menu.For a complete explanation of the SyncOptions dialog, please see the MIDI ReferenceManual.The<strong>ref</strong>ore, <strong>audio</strong> events will start at thecorrect SMPTE times but the sound maydrift out of sync if the tape speed starts todeviate from its nominal speed.When using Acadia, the best way to synchronizedigital <strong>audio</strong> to tape is to either:• record short <strong>audio</strong> events, or• break up existing long <strong>audio</strong> eventsinto smaller pieces.This minimizes any timing discrepanciesthat may occur when playing back digital<strong>audio</strong> that’s synchronized via SMPTE.NOTE: Because Acadia can only play back<strong>audio</strong> files at the session sample rate, theLock <strong>Audio</strong> to Tape option is disabled inthe Sync Options dialog.326 Opcode Systems, Inc.
CHAPTER 29: Synchronizing <strong>Audio</strong> PlaybackDAE: SYNCING AUDIO TOSMPTEIMPORTANT: This section applies only ifyou’re using <strong>Vision</strong> with DAE.There are two methods you can use tosync digital <strong>audio</strong> to tape:• Hardware SyncThis is the most expensive option, butis the only way to achieve tight syncwith minimal <strong>audio</strong> distortion. Forhardware sync, you’ll need a syncconverter box like Opcode’sStudio 64 XTC, or a Blackburstgenerator.• Lock <strong>Audio</strong> to TapeThis option uses DAE’s on-the-flysample rate conversion (in software)to adjust <strong>audio</strong> playback to compensatefor the fluctuations in theSMPTE speed. Unfortunately, thisoption can introduce audible distortionand pitch fluctuations of the<strong>audio</strong> signal.The following sections discuss each ofthese synchronization methods in detail.Hardware SyncBy far the best way to sync <strong>audio</strong> to tape iswith hardware synchronization. Unfortunately,it’s much more expensive, but it’scompletely accurate and high-quality.This scenario works by adjusting digital<strong>audio</strong> playback via hardware. A synchronizationbox (like Opcode’sStudio 64 XTC) is connected to yourDigidesign <strong>audio</strong> interface and sends it a“SuperClock” signal.The sync box reads the SMPTE sourceand adjusts the SuperClock signal, as necessary,to compensate for any fluctuationsin the speed of the time code. As a result,the pitch and speed of the digital <strong>audio</strong>playback is adjusted accordingly (andwith minimal distortion) to stay in syncwith the SMPTE source.For specifics on using hardware sync withyour Digidesign hardware, consult theappropriate manufacturer’s manuals.NOTE: You may wish to contact Opcode forproduct information on the Studio 64 XTC.Lock <strong>Audio</strong> to TapeLock <strong>Audio</strong> to Tape uses DAE’s on-theflysample rate conversion capability insoftware to match the <strong>audio</strong> playback tothe received SMPTE. Unfortunately, thereal-time sample rate conversion isn’t perfectbecause of latencies in the Macintoshhardware itself and some amount of distortionis introduced in the process. Also,<strong>Vision</strong> & Studio <strong>Vision</strong> <strong>Pro</strong> — <strong>Audio</strong> Reference Manual 327
PART 6: Advanced <strong>Audio</strong> Techniquesthe pitch of the <strong>audio</strong> varies with thespeed of the tape, and if your <strong>audio</strong> haslong, sustained tones, this pitch variationis sometimes noticeable. Of course, thepitch of MIDI data never varies.PRO TOOLS & SESSION 8: Because <strong>Pro</strong>Tools and Session 8 hardware containsSuperclock support and doesnÕt support onthe-flysample rate conversion, you cannotuse this method to lock <strong>audio</strong> to tape. TheLock <strong>Audio</strong> to Tape command is disabledand SMPTE synchronization is performed asdescribed in Acadia: Syncing <strong>Audio</strong> toSMPTE (pg. 326).To enable Lock <strong>Audio</strong> to Tape:Choose Options>Sync Options.Set the Receive Sync mode to MIDITime Code, and set the ReceiveSync source to the desired device(usually your MIDI interface).For details on using the Sync Optionsdialog, see you MIDI Reference Manual.If your hardware is supported, clickthe option for Lock <strong>Audio</strong> to Tapeso it becomes checked.Click the OK button to close the SyncOptions dialog.Initiate playback of your SMPTEsource, then click the Play button in<strong>Vision</strong>Õs Control Bar.<strong>Vision</strong> constantly monitors the speed ofyour tape and adjusts the sample rate tomatch the speed of the tape. This resultsin on-the-fly conversion. On-the-fly conversionis discussed in more detail inAbout Sample Rate Conversion(pg. 301).Using this method will lock the digital<strong>audio</strong> tightly with the tape, but becauseon-the-fly conversion is being applied tothe <strong>audio</strong> signal during both recordingand playback, the signal is distorted twice.In this case, you’re trading <strong>audio</strong> purityfor tight sync. If tight sync is a must, tryrunning a few experiments on your own—you may find the conversion distortionhardly noticeable.NOTE: If using a digital multitrack like theAlesis ADAT, you might want to try disablingLock <strong>Audio</strong> to Tape.Many of the digital multitracks offer verystable playback and, the<strong>ref</strong>ore, can deliver areliable SMPTE time code source—making the use of Lock <strong>Audio</strong> to Tapeunnecessary.328 Opcode Systems, Inc.
CHAPTER 30: ReWire<strong>Vision</strong> now includes ReWire support. Thispowerful feature allows <strong>audio</strong> signalsfrom ReWire compatible applications tobe routed directly through <strong>Vision</strong>’s consoles,providing the same sends, plug-ins,and EQs you have access to with anyother <strong>audio</strong> signal in <strong>Vision</strong>.WHO SHOULD READ THISCHAPTER?This chapter applies to Acadia users withReWire-compatible applications.ABOUT REWIRE<strong>Vision</strong>’s implementation of ReWire allowsthree very important functions.• <strong>Audio</strong> StreamingReWire allows up to 64 channels of<strong>audio</strong> to be routed (real-time) fromone application to another.• Sample Accurate SynchronizationAfter <strong>Vision</strong> and your ReWire-compatiblesoft synth detect each other,sample-accurate sync happensautomatically.• Transport FunctionalityThe transport controls of all ReWirecompatible applications in yoursystem are automatically linked. Youcan press play, stop, etc. in any applicationand all will perform in sync.<strong>Vision</strong> & Studio <strong>Vision</strong> <strong>Pro</strong> — <strong>Audio</strong> Reference Manual 329
CONFIGURING YOUR SYSTEMFOR REWIREFollow these simple steps to configureyour system to work with ReWire.Put the ReWire extension in yourSystem Folder>Extensions folder.Install a ReWire compatibleapplication for use with <strong>Vision</strong>.This could include ReBirth, a ReWirecompatible software synthesizer, or anyother ReWire compatible application.See the following sections for examplesof how to use <strong>Vision</strong> with Rebirth andRetro AS-1 via ReWire.Allocate more RAM to <strong>Vision</strong>.ReWire requires that additional memorybe allocated to <strong>Vision</strong> before it islaunched. <strong>Vision</strong> may crash or hang if itdoesn't have enough memory to loadwhen launched with ReWire installed.With several VST plug-ins in your pluginsfolder, allocating 30,000 to 35,000Kfor <strong>Vision</strong> is usually sufficient.To increase the amount of allocatedmemory, quit <strong>Vision</strong> (if it is open) andsingle-click on its icon in the Finder.Choose File>Get Info and enter a highernumber into the P<strong>ref</strong>erred Size field (inthe Memory section of the Window).Close the window and launch <strong>Vision</strong>again.For more information about RAM andAcadia mode, see page 86.After launching <strong>Vision</strong>, open the <strong>Audio</strong>Instruments window. Scroll to the bottomof the window. Following the Instruments,Inputs, Outputs, and Bussessections is a fifth section for your ReWirecompatible application(s). Enable the ReWire channels you wantto use in <strong>Vision</strong>.For more information about enablinginputs and outputs in Acadia mode, seeEnabling Inputs and Outputs (pg. 39).NOTE: Enabled inputs and outputs consumevaluable CPU resources.The<strong>ref</strong>ore, to preserve CPU resources,enable only the inputs you plan to use.330 Opcode Systems, Inc.
CHAPTER 30: ReWireEXAMPLE 1: USING VISIONWITH REBIRTHWhen using <strong>Vision</strong> and ReBirth togethervia ReWire, the two applications are automaticallysynced. ReWire takes care ofthis for you; you don’t need to set <strong>Vision</strong>or ReBirth to send or receive MIDI BeatClock or MIDI Time Code when workingwith ReWire. All necessary information istransmitted via the ReWire extension.ReBirth 2.01 is recommended when usingthe ReWire extension with <strong>Vision</strong> <strong>4.5</strong>.Also, as previously discussed, make surethat you have enough memory allocatedto <strong>Vision</strong>.In <strong>Vision</strong>, choose Windows><strong>Audio</strong>Instruments.Scroll to the bottom of the window, andyou will see something like this:Launch <strong>Vision</strong>.For ReWire to work properly, <strong>Vision</strong>must be launched before Rebirth.Under Options>Sync Options, put acheck next to Remote Start.This will enable you to play and stop<strong>Vision</strong> from ReBirthÕs transport controls.You can control ReBirth from <strong>Vision</strong>Õstransport controls even if Remote Startis not checked.<strong>Vision</strong>Õs play button begins to flash.Launch ReBirth.Open the ReBirth file that you wish towork with, or begin a new file.Enable any ReBirth channels (inputs)you wish to use. Remember, eachenabled input requires RAM, so itÕs bestto enable only the inputs you plan onusing. These inputs usually correspondto the ReBirth sounds you are using.Open a Console.Choose Build Console From>EnabledReWire Channels from the Consolewindow pop-up menu.<strong>Vision</strong> & Studio <strong>Vision</strong> <strong>Pro</strong> — <strong>Audio</strong> Reference Manual 331
Press Play in either <strong>Vision</strong> or ReBirth.<strong>Vision</strong> and ReBirth begin to play in sync.Look at the Console you set up instep 7.ReBirthÕs <strong>audio</strong> appears in the appropriateConsole channels.While listening to the song, set upyour mix and assign any sends, plugins,EQs, etc., that youÕd like.If this dialog appears, quit both applicationsand then launch them in the correctorder.Quitting <strong>Vision</strong> and ReBirth<strong>Vision</strong> cannot be quit while ReBirth isopen when using the ReWire Extension.If you try to quit <strong>Vision</strong> while ReBirth isopen, the following error message willappear:Launching <strong>Vision</strong> and ReBirthIt's important to launch <strong>Vision</strong> beforelaunching ReBirth 2.0 (or higher) withReWire installed. If you launch the applicationsin the incorrect order, you’ll seethis dialog:Click the OK button and then quitReBirth before quitting <strong>Vision</strong>.332 Opcode Systems, Inc.
CHAPTER 30: ReWireEXAMPLE 2: USING VISIONWITH RETRO AS-1Using <strong>Vision</strong> with Retro is somewhat differentthan using <strong>Vision</strong> with ReBirth,because Retro is a software synthesizerthat must be triggered with MIDI. To triggerRetro with MIDI, you must have theRetro AS-1 OMS Driver in your SystemFolder>OMS Folder.After installing the Retro OMS driver,choose Studio>MIDI Cards and Interfacesin OMS, which will update yourOMS setup to include Retro AS-1.After Retro AS-1 is included in your OMSStudio Setup, save your setup and go toWindows>Instruments in <strong>Vision</strong>. Openthe Instruments Window popup menu andchoose Make from Studio Setup. ClickMake to include Retro in your list ofMIDI instruments.For more information about configuringRetro AS-1 with OMS, please see yourRetro AS-1 manual.The following example shows how to useRetro with <strong>Vision</strong> via ReWire (when Retrois installed and configured in OMS).In Retro AS-1Õs control panel, selectPlug-In from the <strong>Audio</strong> Output pop-upmenu.Figure 30.1: Retro Control PanelSelecting Plug-In enables RetroÕs outputsto work with ReWire. If any otheroption is selected in this pop-up,Retro AS-1Õs <strong>audio</strong> output will not berouted through <strong>Vision</strong>.Plug-In does not <strong>ref</strong>er specifically toVST plug-ins; you must choose thisoption whether or not you plan to useVST plug-ins.In <strong>Vision</strong>, assign your MIDI tracks toRetro instruments.In this example, weÕre assuming that youalready have MIDI notes assigned toRetro AS-1.<strong>Vision</strong> & Studio <strong>Vision</strong> <strong>Pro</strong> — <strong>Audio</strong> Reference Manual 333
Open the <strong>Audio</strong> Instruments window,and scroll to the bottom to see yourRetro inputs.Press Play, and youÕll hear your MIDItracks.Look at the Console you set up instep 4.RetroÕs <strong>audio</strong> appears in the appropriateConsole channels.While listening, set up your mix andassign any sends, plug-ins, EQs, etc.,that youÕd like.Enable any Retro channels you wish touse. These inputs should match theRetro MIDI channels that youÕre using (instep 1).Remember, each enabled input requiresRAM, so itÕs best to enable only theinputs you plan on using.Open a Console.Choose Build Console From>EnabledReWire Channels from the Consolewindow pop-up menu.Setting Retro AS-1’s <strong>Audio</strong>OutputIf Retro’s <strong>Audio</strong> Output is set to somethingother than Plug-in when youlaunch <strong>Vision</strong> (with ReWire installed),you will see this dialog box.See step 1 on page 333 for an explanation.334 Opcode Systems, Inc.
CHAPTER 30: ReWireADDITIONAL REWIRE NOTESReWire InputsReWire channels are <strong>ref</strong>erred to as“inputs” in <strong>Vision</strong>. An <strong>audio</strong> signal “output”in another application (like ReBirth)is sent via ReWire to an input in <strong>Vision</strong>.For documentation purposes, “input” and“channel” are synonymous whendiscussing ReWire.Enabled ReWire Channels in the<strong>Audio</strong> Instruments WindowBy default, the only enabled ReBirth orRetro input (in the <strong>Audio</strong> Instrumentswindow) is the “Mix” (or “Main”) input.The Mix input includes all <strong>audio</strong> from theapplication. Other ReWire applicationsmay or may not have a “Mix” channel; it isup to the manufacturer to decide.You can also enable individual ReWireinputs. This is useful if you want to mixeach channel separately, but it doesrequire more RAM.NOTE for ReBirth Users: In addition toindividual inputs and a general Mix input,ReBirth also includes an 808 Mix and a909 Mix input.If you enable an individual input while the“Mix” input is enabled, you may hear theindividual channel on its own input andthe Mix input. This could cause an undesirable“doubling” effect. However,ReBirth and Retro automatically removeall enabled individual inputs from the Mixinput. Other ReWire applications maybehave differently; again, it is up to themanufacturer to decide.For example, if Retro AS-1 Main andRetro AS-1 Ch 1 are enabled, theRetro AS-1 Main input will contain onlythe signal from Retro channels 2-15.Enabling and Disabling ReWireChannelsYou cannot enable or disable ReWirechannels while playing. If you need toenable or diable a ReWire channel, stopplayback before making the change.Mono/Stereo Status of ReWireChannelsYou cannot change ReWire channels’mono/stereo status. Each channel’smono/stereo status is determined by themanufacturer and cannot be modified.ReWire and SynchronizationWhen the ReWire extension is located inthe System Folder>Extensions Folder,<strong>Vision</strong>’s Send Sync option does not needto be enabled to sync <strong>Vision</strong> with otherReWire compatible applications. Allrequired synchronization information iscommunicated between applications viathe ReWire extension.<strong>Vision</strong> & Studio <strong>Vision</strong> <strong>Pro</strong> — <strong>Audio</strong> Reference Manual 335
However, if you wish to control <strong>Vision</strong>from the transport controls of anotherapplication (such as ReBirth), you mustcheck Remote Start under Options>SyncOptions.When Remote Start is checked, <strong>Vision</strong>’splay or record button starts to flash, indicatingthat it can be controlled from anexternal source. For more informationabout Remote Start, see your MIDI ReferenceManual.Active in BackgroundActive in Background is required whenusing <strong>Vision</strong> with ReBirth via ReWire, andit is automatically checked whenever the“ReBirth Engine” extension is enabled.336 Opcode Systems, Inc.
CHAPTER 31: <strong>Audio</strong> ScrubbingWHO SHOULD READ THISCHAPTER?This chapter applies only to those whouse DAE.<strong>Audio</strong> Scrubbing is not supported byAcadia.Press and hold the Command key.The cursor changes into the Speakercursor.Speaker cursor indicatesscrubbing is enabledAUDIO SCRUBBING IN THEGRAPHIC WINDOW<strong>Vision</strong>, when used with DAE, allows youto audibly find precise locations in an<strong>audio</strong> event by “scrubbing.” By holdingdown the Command key while draggingthe mouse, <strong>Vision</strong> lets you “scrub” the<strong>audio</strong> event either forward or backwardand at varying speeds.To use scrubbing:Move the cursor over the <strong>audio</strong> eventyou wish to scrub.While continuing to hold theCommand key, click and drag to theright to hear the event played forward,or drag to the left to hear the eventplayed backward.The playback speed is determined byhow far the Speaker cursor is from theactual playback pointÑthe further theSpeaker cursor is from the playbackpoint, the faster the <strong>audio</strong> plays back.The closer the Speaker cursor is to theplayback point, the slower the <strong>audio</strong>plays back. Normal playback speed isobtained when the cursor is draggedabout 2-3 seconds ahead of the playbackpoint. The maximum scrubbingspeed of DAE is 1.5 times the normalplayback speed.<strong>Vision</strong> & Studio <strong>Vision</strong> <strong>Pro</strong> — <strong>Audio</strong> Reference Manual 337
PART 6: Advanced <strong>Audio</strong> TechniquesScrubbing and <strong>Audio</strong> OutputsWhen you drag the Speakercursor well in front of thecurrent playback point (greaterthan 2-3 seconds ahead),the <strong>audio</strong> plays at anaccelerated speed (up to amaximum of 1.5 times thenormal playback speed).When you drag the Speakercursor just barely ahead ofthe current playback point(less than 2-3 seconds ahead),the <strong>audio</strong> plays at a slowerspeed. This lets you audiblyfind a precise edit point.You can scrub both mono and stereoevents. For <strong>Pro</strong> Tools systems that are notequipped with the TDM bus, the playbackof scrubbed <strong>audio</strong> events always appearsat Outputs 1 & 2 of your DAE <strong>audio</strong> hardware,no matter what output its <strong>Audio</strong>Instrument is assigned to.For example, if you’re scrubbing an <strong>audio</strong>event that’s assigned to an <strong>Audio</strong> Instrumentthat uses Output #4, the scrubbed<strong>audio</strong> will be sent to Outputs 1 & 2. Whenyou play the <strong>audio</strong> event normally (that is,any way other than scrubbing), the <strong>audio</strong>will be sent to Output #4.NOTE: This is the same output reassignmentthat occurs when you audition <strong>audio</strong>from the Import dialog box.Figure 31.1: Scrubbing SpeedsWhen you drag the Speakercursor around 2-3 secondsahead of the current playbackpoint, the <strong>audio</strong> plays at itsnormal playback speed.CURRENT PLAYBACK POINTNOTE: <strong>Vision</strong> allows you to scrub only one<strong>audio</strong> event at a time. In order to “skip” toanother <strong>audio</strong> event, you must release themouse button, then Command-drag on theevent you wish to hear.TDM USERS: TDM systems (such as <strong>Pro</strong>Tools III) behave differently. TDM systemslook to see which output the scrubbed <strong>Audio</strong>Instrument is assigned to and then plays thescrubbed <strong>audio</strong> event using that output pair.For example, if you scrub an <strong>audio</strong> eventthatÕs assigned to an <strong>Audio</strong> Instrument usingOutput #4, then the scrubbed <strong>audio</strong> will besent to both Outputs 3 & 4. When you playnormally, the scrubbed output will be sent toOutput #4 only.338 Opcode Systems, Inc.
CHAPTER 31: <strong>Audio</strong> ScrubbingScrubbing and Output VolumeScrubbed <strong>audio</strong> always plays at the maximumoutput level. This is either 0 dB or+6 dB depending on your choice in the<strong>Audio</strong> P<strong>ref</strong>erences dialog box as discussedin Maximum Fader Position(pg. 173). Scrubbing ignores both thevelocity of the event and any associatedMIDI volume commands.AUDIO SCRUBBING IN THETRACK OVERVIEW AREAYou can scrub <strong>audio</strong> in the Track Window’sTrack Overview area in much thesame way as in the Graphic Window. Todo so:In the Track Overview area, move thecursor over the <strong>audio</strong> event you wishto scrub.Press the Command key on yourMacintosh.The cursor changes into the Speakercursor ( ).Click and drag to the right to hear theevent played forward, or drag to theleft to hear the event playedbackward.There are a few additional rules you needto be aware of when scrubbing in theTracks Window:• If you scrub over a phrase that containsonly MIDI events, <strong>Vision</strong> playsall the MIDI events in all tracks. No<strong>audio</strong> events will play.• If you scrub over a phrase that containsonly a single <strong>audio</strong> event, <strong>Vision</strong>plays back that <strong>audio</strong> event. No MIDIevents will play.• If you scrub over a phrase that containsmultiple <strong>audio</strong> events, one oftwo things happens:CASE 1: If you begin scrubbing at atime where only one <strong>audio</strong> event ispresent, <strong>Vision</strong> will play back that<strong>audio</strong> event. It will not play other<strong>audio</strong> events in the phrase, nor will itplay MIDI events.CASE 2: If you begin scrubbing at atime where there is more than one<strong>audio</strong> event present, <strong>Vision</strong> will notplay anything. <strong>Vision</strong> cannot scrubmultiple <strong>audio</strong> events.• If you scrub over a phrase that containsa single <strong>audio</strong> event along withMIDI events, <strong>Vision</strong> will play the<strong>audio</strong> events only. No MIDI eventswill play.• If you start scrubbing betweenphrases, <strong>Vision</strong> will play all the MIDIevents in all tracks. No <strong>audio</strong> eventswill play.<strong>Vision</strong> & Studio <strong>Vision</strong> <strong>Pro</strong> — <strong>Audio</strong> Reference Manual 339
PART 6: Advanced <strong>Audio</strong> Techniques340 Opcode Systems, Inc.
12345Menus67<strong>Vision</strong> & Studio <strong>Vision</strong> <strong>Pro</strong> — <strong>Audio</strong> Reference Manual 341
PART 7: Menus342 Opcode Systems, Inc.
CHAPTER 32: The <strong>Audio</strong> MenuThis chapter discusses each of the <strong>Audio</strong>menu commands. Many of these commandsare covered in detail by earlierchapters, though this chapter will giveyou a general overview of each commandbefore cross-<strong>ref</strong>erencing a relatedchapter.RETAINWhen you choose this command, <strong>Vision</strong>retains only the <strong>audio</strong> in the selectedregion and clears all data comprising therest of the selected <strong>audio</strong> event(s). Likeall edit operations, if you have multipleevents in the track, only the eventsselected will be affected. To use thecommand:Select a region of <strong>audio</strong> you wish toretain.You can select across all <strong>audio</strong> eventsfor a time region (as shown in this example),or you can select a region of timeFigure 32.1: <strong>Audio</strong> Menu<strong>Vision</strong> & Studio <strong>Vision</strong> <strong>Pro</strong> — <strong>Audio</strong> Reference Manual 343
PART 7: Menuswithin a single <strong>Audio</strong> Instrument. <strong>Audio</strong>selection techniques are discussed inSelecting <strong>Audio</strong> Events (pg. 184).<strong>Audio</strong> in thisregion will be retainedNOTE: As with other edit operations, you’llmost likely want to display the waveform inHigh Resolution mode when you use theRetain command—this lets you see moreclearly the peaks and valleys of the waveform.For more information, see WaveformDisplay (pg. 354).<strong>Audio</strong> in thisregion will be trimmedFigure 32.2: Selecting a Region of <strong>Audio</strong>Events to RetainChoose <strong>Audio</strong>>Retain.<strong>Vision</strong> clears the data in any selected<strong>audio</strong> events that appear outside theselection region.SEPARATEYou can separate a single <strong>audio</strong> event intomany separate <strong>audio</strong> events. For example,suppose you have a speech track and youwant to rearrange the words. You can separatethe single <strong>audio</strong> event into manyseparate <strong>audio</strong> events (one for eachword), then shuffle them around to createentirely new sentences.You can separate an <strong>audio</strong> event into multipleevents in one of two ways.• You can split an <strong>audio</strong> event at theedit point.• You can separate a section of an <strong>audio</strong>event from the rest of the event.To split an <strong>audio</strong> event:Figure 32.3: Retained <strong>Audio</strong>The Retain command can be undonesince it does not actually remove datafrom your hard disk; rather it simplyremoves the track’s pointer to that data.Also, you can lengthen any <strong>audio</strong> eventsthat were automatically trimmed by theRetain command as discussed in Trimmingor Lengthening <strong>Audio</strong> Events(pg. 195).In the Graphic Window, select eitherthe Marquee or I-beam tool.Figure 32.4: Marquee and I-beam Tools344 Opcode Systems, Inc.
CHAPTER 32: The <strong>Audio</strong> MenuMove the cursor over the eventÕslower select region and click at thedesired split point.The cursor becomes a cross-hair. If youclick the cursor over the top region of an<strong>audio</strong> event, youÕll select the entireeventÑthis is not what you want to do.Make sure you click in the bottom regionof the event.To separate a section of an <strong>audio</strong> eventfrom the rest of the event:In the Graphic Window, select eitherthe Marquee or I-beam tool.Drag across the portion of the <strong>audio</strong>event that you want to separate fromthe rest of the event.Click in lower portion of<strong>audio</strong> event to definethe split pointChoose <strong>Audio</strong>>Separate.<strong>Vision</strong> separates the original <strong>audio</strong> eventinto two <strong>audio</strong> events (separated at theedit point).Drag across the lower thirdof an <strong>audio</strong> event to selecta portion of that event.Choose <strong>Audio</strong>>Separate.<strong>Vision</strong> divides the event into individualevents.Three separate <strong>audio</strong> events arecreated by this application of theSeparate commandTwo separate <strong>audio</strong> events arecreated by using theSeparate commandFigure 32.5: <strong>Audio</strong> Event SeparatedNotice that no <strong>audio</strong> event information isdeleted. You can play back the track andit will sound just as it did before you performedthe separation.<strong>Vision</strong> & Studio <strong>Vision</strong> <strong>Pro</strong> — <strong>Audio</strong> Reference Manual 345
PART 7: MenusNOTE: As with other edit operations, you’llmost likely want to display the waveform inHigh Resolution mode when you use theSeparate command—this lets you seemore clearly the peaks and valleys of thewaveform. For more information, seeWaveform Display (pg. 354).STRIP SILENCE/SLICE AUDIOUse the Strip Silence command to remove(“gate”) any selected <strong>audio</strong> that fallsbelow a specified amplitude for a specifiedamount of time. Use the Slice <strong>Audio</strong> commandto break a long <strong>audio</strong> file intosmaller <strong>audio</strong> events (using the StripSilence parameters) without removingsilence. When you choose this command,<strong>Vision</strong> opens the Strip Silence dialog box.Figure 32.6: Strip Silence Dialog BoxUse the pop-up menu to select either StripSilence or Slice <strong>Audio</strong>.• You can remove unwanted noise thatoccurs below the lowest threshold ofrecorded <strong>audio</strong> (for example, analogtape hiss).• It’s a fast way to clear silent passagesfrom your <strong>audio</strong> events, saving diskspace.• You can break up one long <strong>audio</strong>event into separate short <strong>audio</strong> eventsin order to work with the <strong>audio</strong> moreeasily.Doing this has many benefits,including:a) You can easily copy and pastesmall sections of <strong>audio</strong> (such as a particulardrum sound, or an oft-repeatedvocal line).b) You can quantize individual events(such as separate drum hits in arecorded drum track).c) If you’re syncing to tape and areplaying back digital <strong>audio</strong> using onlythe session sample rate (as isrequired with Acadia), breaking<strong>audio</strong> into smaller events means thereis less likelihood of digital <strong>audio</strong> drifting“out of sync” with <strong>audio</strong> on tape.To learn about Strip Silence dialog box,how to gate <strong>audio</strong> with the Strip Silencecommand, and how to separate auto-separate<strong>audio</strong> using the Slice <strong>Audio</strong>command, see Chapter 27: Strip Silenceand Slice <strong>Audio</strong>.Use the Strip Silence dialog box to definewhat <strong>Vision</strong> sees as “silence.” The StripSilence and Slice <strong>Audio</strong> commands arevery useful features for a number ofreasons:346 Opcode Systems, Inc.
CHAPTER 32: The <strong>Audio</strong> MenuGET EVENT INFOChoose this command to get informationabout an <strong>audio</strong> event. When you choose<strong>Audio</strong>>Get Event Info, <strong>Vision</strong> opens the<strong>Audio</strong> Event Info dialog box.• Sample Size is the bit depth of thedynamic range of the <strong>audio</strong> event.Sample Size can also be thought ofas the resolution of the file in bits.• Channels shows you whether theevent’s file is mono or stereo. If the<strong>audio</strong> event is part of a linked stereofile, then the dialog box displaysinformation about both the left andright channels of the <strong>audio</strong> event.Figure 32.7: <strong>Audio</strong> Event Info Dialog BoxThe <strong>Audio</strong> Event Info dialog box is a convenient,quick way to look up specificinformation about any <strong>audio</strong> event. It’salso an easy way to rename an event fromwithin the Graphic Window.The <strong>Audio</strong> Event Info Dialog box containsthe following information:• Event Name displays the name ofthe selected <strong>audio</strong> event. You can usethis field to change the name of theevent, if desired.• Duration shows the duration of the<strong>audio</strong> event.• <strong>Audio</strong> File displays the name of the<strong>audio</strong> file that the event <strong>ref</strong>erences.• File Volume displays the hard diskon which the <strong>audio</strong> file resides.• File Format is the file format inwhich the <strong>audio</strong> file is stored.• Sample Rate is the sample rate atwhich the <strong>audio</strong> in the file wasrecorded.Figure 32.8: <strong>Audio</strong> Event Info Dialog for aLinked Stereo Event• Sample Start and Sample End displaythe sample number at which the<strong>audio</strong> event begins and ends in thewave data portion of the <strong>audio</strong> file.SHORTCUT: You can open the <strong>Audio</strong>Event Info dialog box directly from theGraphic Window by clicking the eventname in the lower left corner of any <strong>audio</strong>event (<strong>Audio</strong>>Show <strong>Audio</strong> EventNames must be enabled). When you movethe cursor over an event name in theGraphic Window, it turns into a questionmark. Click with the question mark cursorand the <strong>Audio</strong> Event Info dialog box opensfor that event.<strong>Vision</strong> & Studio <strong>Vision</strong> <strong>Pro</strong> — <strong>Audio</strong> Reference Manual 347
PART 7: MenusEDIT EVENT SOUNDFILEChoose this command to launch a sampleediting program that opens to display theselected <strong>audio</strong> file. The program thatopens depends on which <strong>audio</strong> systemyou’re using.TIP: If you hold down the Option key whenyou choose this command, you can open asample editing program that’s differentthan the last program you used.AcadiaNOTE: This section discusses the EditEvent Soundfile command when usedwith Acadia. If you’re using <strong>Vision</strong> withDAE, see DAE (pg. 348).Choose this command to open Opcode’s<strong>Audio</strong>shop so you can process the actual<strong>audio</strong> data you recorded in <strong>Vision</strong>. It’s upto you to know how to use <strong>Audio</strong>shop.Read your <strong>Audio</strong>shop manual if youhaven’t done so.To use the Edit Soundfile command:Select an <strong>audio</strong> event in <strong>Vision</strong> byclicking anywhere in its upper selectregion.Choose <strong>Audio</strong>>Edit Soundfile.If this is the first time youÕre using thiscommand, you will be prompted with adialog box to locate <strong>Audio</strong>shop. In thefuture, <strong>Vision</strong> will remember where it is,unless you move it. If, at some later time,you want to open a different sample editingprogram with this command, holddown the Option key when you chooseit.<strong>Audio</strong>shop will open allowing you to editthe entire <strong>audio</strong> file that contains theselected <strong>audio</strong> event.If <strong>Audio</strong>shop is already running, it willbecome the active application, but nonew file is openedÑyour selection is notcommunicated to <strong>Audio</strong>shop.IMPORTANT: If you don’t see the changesyou made in <strong>Audio</strong>shop <strong>ref</strong>lected in <strong>Vision</strong>(or if you are unsure these changes are<strong>ref</strong>lected), use the Rebuild Waveformcommand in <strong>Vision</strong>’s File Managementdialog box.DAENOTE: This section discusses the EditEvent Soundfile command when usedwith DAE. If you’re using <strong>Vision</strong> with Acadia,see Acadia (pg. 348).Choose this command to open SoundDesigner II so you can process the actualsound data you recorded using <strong>Vision</strong>. All<strong>audio</strong> in the selected event’s <strong>audio</strong> file willbe displayed in Sound Designer II’s WaveformEditing window, and the event, orportion of it that you selected in <strong>Vision</strong>,will be highlighted (if you’re using SoundDesigner II version 2.6 or better).IMPORTANT: It is up to you to know howto use Sound Designer II. If you’re unfamiliarwith sound processing, it is very possiblethat you will disrupt your wave data—andyour sequence—by shifting wavedata in348 Opcode Systems, Inc.
CHAPTER 32: The <strong>Audio</strong> Menutime or by editing outside of the selectionregion. Read the user’s manual that camewith Sound Designer II if you haven’t doneso.All <strong>Vision</strong> editing operations (exceptCompact and Delete File) are nondestructive.Editing sound files in SoundDesigner II, however, is a destructive process.If you edit a soundfile and you don’tlike your edit, you’ll have lost your originaldata unless you made a backup copyof the original file.You can select an entire <strong>audio</strong> event forediting, or just a portion of one.Select an entire <strong>audio</strong> event in <strong>Vision</strong>by clicking anywhere in its upperselect region.Alternately, you could select a portion ofan <strong>audio</strong> event by clicking in its lowerselect region and dragging with the Marqueeor I-beam.Choose <strong>Audio</strong>>Edit Soundfile.If this is the first time youÕre using thiscommand, you will be prompted with adialog box to locate Sound Designer II.In the future, <strong>Vision</strong> will remember whereit is, unless you move it. If, at some latertime, you want to open a differentsample editing program with this command,hold down the Option key whenyou choose it.If Sound Designer II is already running, itwill become the active application.Sound Designer IIÕs Waveform Editingwindow opens to display all <strong>audio</strong> in theselected eventÕs <strong>audio</strong> file.If youÕre editing a linked stereo <strong>audio</strong>event, Sound Designer II will open twoWaveform Editing windows, one for theleft and one for the right channel.IMPORTANT: With other programs or earlierversions of Sound Designer II, <strong>Vision</strong>may not be informed of the changes and,the<strong>ref</strong>ore, be unable to automaticallyrecompute the waveform summary. If youdo not see the changes you made in SoundDesigner II <strong>ref</strong>lected in <strong>Vision</strong> (or if you areunsure these changes are <strong>ref</strong>lected), use theRebuild Waveform command in the FileManagement dialog box.All <strong>audio</strong> in the selected <strong>audio</strong> event’s<strong>audio</strong> file will be displayed as one longwaveform, since the concept of “<strong>audio</strong>events” is unique to <strong>Vision</strong>.The only way you have of determiningfrom this waveform where the boundariesof your selected <strong>audio</strong> event are is thehighlighted area in the Waveform Editingwindow.Do not edit outside this highlighted area;if you do you’ll cross over the boundariesof the <strong>audio</strong> event (or portion of it) thatyou wanted to edit.NOTE: In order to avoid accidental loss ofthe current selection range, you can save itin Sound Designer II as a Region. As soonas you enter Sound Designer, use the CaptureRegion command.<strong>Vision</strong> & Studio <strong>Vision</strong> <strong>Pro</strong> — <strong>Audio</strong> Reference Manual 349
PART 7: MenusDon’t perform any operations that movewave data, such as a cut or paste. If youcut out a portion of <strong>audio</strong> from the file, forexample, then everything in the file that’sto the right of the cut will shift to fill thegap. The <strong>ref</strong>erences in the <strong>Vision</strong>sequence file of where on the hard disk itshould play back from will be inaccurate.As a result, <strong>audio</strong> events that reside in thisfile may not play back correctly.You can safely perform these operationsin Sound Designer II:• Fade in• Fade out• Normalize• Revert• EQ (Equalize)LINK EVENTSChoose this command to link twoselected mono events into a single linkedstereo event. The two events being linkedmust share the same Start and End times.You should select the two events that youwant to link from within the GraphicWindow—this way you can see the twoevents and easily tell whether they sharethe same Start and End times. If the Startand End times are not exactly the sameand you still wish to link the two events,you can make them the same by using theRetain or Cut commands. If you try tolink events with different Start and Endtimes, <strong>Vision</strong> will warn you that they arenot the same.NOTE: Link Events works only on the firsttwo selected <strong>audio</strong> events in the currentlyselected track. This is different than theUnlink Events command (discussedbelow), which works on all selected eventsin all selected tracks.UNLINK EVENTSChoose this command to unlink allselected events that are currently linked.This is particularly useful if you’verecorded a linked stereo event, thendecide later that it doesn’t need to be stereo.After a stereo event has beenunlinked, you may wish to delete one ofthe two resulting <strong>audio</strong> events in order tofree up an additional playback channel.Deleting the <strong>audio</strong> event does not deletethe disk space that was used by it—forthat you must use the File Managementdialog box.FILE MANAGEMENTChoose this command to open the FileManagement dialog box.Figure 32.9: Typical File Management Dialog Box350 Opcode Systems, Inc.
CHAPTER 32: The <strong>Audio</strong> MenuThis dialog box contains informationabout each <strong>audio</strong> file used by the active<strong>Vision</strong> file. Since each <strong>Vision</strong> file may usea different group of <strong>audio</strong> files, the FileManagement dialog box displays only the<strong>audio</strong> files used by the <strong>Vision</strong> file that’scurrently open.In addition, the File Management dialogbox allows you to see how much of an<strong>audio</strong> file is unused by the active <strong>Vision</strong>file and, if desired, delete the unused datafrom your disk by compacting the file.There are many useful operations that canbe performed from within the File Managementdialog box. To learn about filesand the File Management dialog box, seeChapter 25: File Management.CONVERSION OVERVIEWChoose this command to open the ConversionOverview dialog box.Use this dialog box to convert <strong>audio</strong> filesto a common session sample rate orsample size and to convert interleavedstereo files to DAE-compatible linkedmono files. Generally, you will not needthis command (or dialog box) unless youare converting Studio <strong>Vision</strong> 1.4 or earlierfiles for use with this version of <strong>Vision</strong>.This dialog box appears whenever you:• Open a <strong>Vision</strong> file that uses <strong>audio</strong> fileswith different sample rates (as couldbe created in Studio <strong>Vision</strong> 1.4 andearlier);• Import an <strong>audio</strong> file that is not usingthe current session sample rate;• Open a <strong>Vision</strong> file that uses interleavedstereo <strong>audio</strong> files and DAE;• Attempt to import an interleavedstereo <strong>audio</strong> file using DAE;• Choose <strong>Audio</strong>>ConversionOverview.The Conversion Overview dialog box isdiscussed in detail in Chapter 26: SampleRate Conversion and Deinterleaving.BUFFER SIZEChoose this command to open the BufferSize dialog box. The appearance of thedialog box changes depending on which<strong>audio</strong> system you use.Figure 32.10: Typical Conversion Overview DialogUse the Buffer Size dialog box to tell<strong>Vision</strong> how much memory to set aside foruse as a digital <strong>audio</strong> RAM buffer. <strong>Vision</strong>uses the RAM buffer to store digital <strong>audio</strong>temporarily before sending it to your harddisk, or before playing it.<strong>Vision</strong> & Studio <strong>Vision</strong> <strong>Pro</strong> — <strong>Audio</strong> Reference Manual 351
PART 7: MenusTo learn more about setting a buffer sizeand using the RAM Buffer Size dialogbox, see one of the following chapters(depending on the <strong>audio</strong> system you’reusing):• Acadia—see The Buffer Size Dialog(pg. 87).• DAE—see Allocating RAM to the Digital<strong>Audio</strong> RAM Buffer (pg. 99).SAMPLE RATE/SIZEChoose this command to open the SetSession Sample Rate dialog box.Figure 32.11: Set Session Sample Rate DialogBoxUse the dialog box to set a session samplerate before you record. The sessionsample rate is the sample rate that <strong>Vision</strong>uses to both record and play back <strong>audio</strong>.NOTE: Users of <strong>Pro</strong> Tools 24 can choosebetween 16 and 24 bits; however, all filesshould have the same bit depth. Users ofother <strong>audio</strong> systems should always use 16bits.Higher session sample rates producebetter <strong>audio</strong> quality, but use more diskspace (because there are more samplepoints per second). You can save diskspace by using a low sample rate, but thisdegrades the sound quality.To get the best <strong>audio</strong> quality, you shouldrecord all of your sound files at the samerate as your hardware sample rate. Whenyou do this, the sample rates of your fileswill always match the hardware samplerate, and sample rate conversion on playbackwill not be necessary.To learn more about sample rates and theSet Session Sample Rate dialog box, seeone of the following chapters (dependingon the digital <strong>audio</strong> management systemyou’re using):• Acadia—see The Session SampleRate (pg. 18).• DAE—see Set a Session Sample Rateand size (pg. 105).HARDWARE SETUPChoose this command to open the HardwareSetup dialog box, which you use totell <strong>Vision</strong> about the <strong>audio</strong> hardwareyou’re using.The appearance and function of the dialogbox changes depending on which <strong>audio</strong>system you use. Specifically:352 Opcode Systems, Inc.
CHAPTER 32: The <strong>Audio</strong> Menu• Acadia—When in Acadia mode,<strong>Vision</strong> uses an Acadia HardwareSetup dialog box. For information,see Hardware Setup (pg. 14).• DAE—<strong>Vision</strong>, when used with DAE,uses a DAE Hardware Setup dialogbox, as discussed in Hardware Setup(pg. 101).WAVEFORM HEIGHTUse this submenu to select the height ofthe <strong>audio</strong> events displayed in the GraphicWindow.AUDIO SYSTEMChoose this command to open a submenuof <strong>Audio</strong> System choices.Figure 32.12: <strong>Audio</strong> System SubmenuThe <strong>audio</strong> system you choose depends onyour <strong>audio</strong> hardware.• DAE: Select this option to use <strong>Vision</strong>with any professional Digidesign digital<strong>audio</strong> hardware. Digidesignhardware uses an <strong>audio</strong> system calledthe Digidesign <strong>Audio</strong> System (DAE).If you select this system and DAE isnot available, <strong>Vision</strong> will use MIDIOnly instead.• Acadia: Select this option to use<strong>Vision</strong> with the Macintosh’s built-in<strong>audio</strong> hardware or with any otherASIO-compatible <strong>audio</strong> hardware.• MIDI only: Select this option if youare using <strong>Vision</strong> strictly as a MIDIsequencer and are not recording orplaying digital <strong>audio</strong> files.Figure 32.13: Waveform Height SubmenuChoose one of the following options in the<strong>Audio</strong>>Waveform Height submenu toset the waveform height. Your choicesare:• Automatic: <strong>Vision</strong> selects an eventheight based on the number of <strong>audio</strong>events in the window.• Grow: Increases the vertical size ofthe waveforms.• Shrink: Reduces the vertical size ofthe waveforms.TIP: You can add key equivalents to theShrink and Grow commands for quickincreasing and reducing of waveform sizes.See the MIDI Reference Manual for detailson setting key equivalents for commands.<strong>Vision</strong> & Studio <strong>Vision</strong> <strong>Pro</strong> — <strong>Audio</strong> Reference Manual 353
PART 7: MenusWAVEFORM DISPLAYUse this submenu to select the displayresolution of waveforms as displayed inthe Graphic Window.Figure 32.14: Waveform Display SubmenuChoose one of the three options in the<strong>Audio</strong>>Waveform Display submenu toset a waveform display resolution. Thethree waveform display options are:• Fast: Allows <strong>Vision</strong> to redraw waveformsfairly quickly, a useful featureduring recording sessions.• High Resolution: If you are zoomedin enough, displays waveforms ingreater detail than Fast mode, showingclearly the peaks and valleys ofthe waveform, a useful feature duringediting procedures.• Off: Displays a waveform as a rectangularbar. This takes <strong>Vision</strong> virtuallyno time to draw and is useful if youwant to work extremely quickly andviewing the waveform is not aconcern.OffYou’ll notice immediately after recordingthat it takes time for <strong>Vision</strong> to computethe wave data summary. If you want tosave time during recording sessions, youcan disable all computation of the summaryby disabling the waveform display.To do this, check Off in the <strong>Audio</strong>>DisplayWaveform submenu. <strong>Audio</strong> will berepresented as rectangular bars in the<strong>Audio</strong> Instrument’s color, which takes<strong>Vision</strong> virtually no time to draw.Figure 32.15: Waveform Display OffYou can perform editing operations on<strong>audio</strong> bars if you don’t care about viewingthe waveform. However, Strip Silence isnot possible.FastChecking Fast allows <strong>Vision</strong> to redrawwaveform displays fairly quickly, which isespecially desirable when you’re recordingor playing back <strong>audio</strong>.Each of the options is discussed in detailin the following sections.Figure 32.16: Fast Waveform Display354 Opcode Systems, Inc.
CHAPTER 32: The <strong>Audio</strong> MenuThe waveform display has a blockierappearance than in High Resolution mode(discussed in the following section).<strong>Vision</strong> creates a summary for all <strong>audio</strong>data and displays waveforms based onthis summary. The summary consists ofthe minimum and maximum of everygroup of 256 samples in the <strong>audio</strong> file,truncated to 8 bits. The summary isstored as a resource with the <strong>audio</strong> file. InFast mode, <strong>Vision</strong> displays a summary of<strong>audio</strong> data rather than the actual datastored on your hard disk.High ResolutionChecking High Resolution allows <strong>Vision</strong>to display the actual waveforms, which isdesirable when you’re editing and need toclearly see all peaks and valleys.Figure 32.17: High Resolution Waveform DisplayYou must be zoomed in a lot—displayingless than 256 samples per pixel (the resolutionof the <strong>audio</strong> summary)—in orderfor the High Resolution option to display awaveform more detailed than the Fastmode waveform. Since tempo is barbased, the greater the tempo, the moreyou’ll be able to zoom in; so tempo worksin conjunction with the amount you’rezoomed in to affect the High Resolutiondisplay.When zoomed in far enough, <strong>Vision</strong> readsthe actual <strong>audio</strong> data on your hard disk. Ifyou’re not zoomed in enough, <strong>Vision</strong>reads the summary it created of the waveformand displays the waveform the sameas it appears in Fast mode.Redrawing in High Resolution mode isslower than in Fast mode when zoomedin.IMPORTANT: You may want to raise thetempo in order to be able to zoom in morewhile using the High Resolution display.However, before you perform any edit operations,make sure you revert the tempo tothe desired playback tempo.SHOW AUDIO EVENT NAMESIf the <strong>Audio</strong>>Show <strong>Audio</strong> EventNames option is enabled (checked),<strong>audio</strong> event names are displayed in thelower left corner of the event in theGraphic Window. This option does notaffect <strong>audio</strong> event names in the ListWindow (where names are always displayedand can be edited), or the TracksWindow (where the waveform is too smallto contain any text).<strong>Vision</strong> & Studio <strong>Vision</strong> <strong>Pro</strong> — <strong>Audio</strong> Reference Manual 355
PART 7: MenusMIXUse this command to mix together anyselected <strong>audio</strong> events or regions fromanywhere within a sequence -- <strong>Vision</strong>examines the selected <strong>audio</strong> files and calculatesa new, mixed <strong>audio</strong> file.This command mixes together selected<strong>audio</strong> events and their velocity settings. Ifyou select to mix over a range of time,then any volume and pan controllersassigned to <strong>Audio</strong> Instruments within thattime region will be incorporated into thenew mixed <strong>audio</strong> file.The Mix command lets you mix thefollowing:• <strong>audio</strong> from multiple tracks• <strong>audio</strong> on multiple Instruments withintracks• entire <strong>audio</strong> events• sections of <strong>audio</strong> eventsUnlike other DSP commands, Mix workson selections that include <strong>audio</strong> files ofdifferent types (mono, interleaved,linked) and different bit depths (8, 16, 24).To learn all the details about mixing <strong>audio</strong>and the DSP>Mix command, seeChapter 28: Mixing Digital <strong>Audio</strong>(Bouncing).NORMALIZEChoose this command to scale the amplitudeof the selected <strong>audio</strong> so that its peakvalue is set to 0db. This process, knownas normalizing, is particularly useful forincreasing the <strong>audio</strong> level of sounds thatwere recorded too quietly.Figure 33.2: Example of Normalizing <strong>Audio</strong>To use the Normalize command:<strong>Audio</strong> prior to normalizing<strong>Audio</strong> after normalizingSelect the <strong>audio</strong> event(s), or portionof events, you wish to normalize.Choose DSP>Normalize.Unless you disabled its display in theDSP P<strong>ref</strong>erences dialog (discussed onpage 423), <strong>Vision</strong> opens a Save Asdialog box.358 Opcode Systems, Inc.
CHAPTER 33: DSP Menu: Mix, Normalize, Reverse, Invert Phase, and Convert Sample RateClick Save.<strong>Vision</strong> creates a new <strong>audio</strong> file (or files)for the normalized <strong>audio</strong>. It creates oneor more new <strong>audio</strong> events to play that<strong>audio</strong>, replacing the original <strong>audio</strong>event(s) in your sequence.Figure 33.3: Save As Dialog for NormalizeWhen you normalize <strong>audio</strong>, <strong>Vision</strong> constructsone or more new <strong>audio</strong> files(depending on the file saving option youselect in the DSP P<strong>ref</strong>erences dialogbox, discussed on page 423). It leavesyour original <strong>audio</strong> file (or files)unaffected.Use the File Format pop-up menu tospecify the desired file format (AIFFor Sound Designer II).Navigate to the folder in which youwant to save the file.By default, <strong>Vision</strong> selects the folder youspecify in the DSP P<strong>ref</strong>erences dialog(discussed on page 423).Type a name for the normalized <strong>audio</strong>file.By default, <strong>Vision</strong> suggests a namebased on the auto-naming options youspecify in the DSP P<strong>ref</strong>erences dialog(discussed on page 423).NOTE: If you never want to see thisSave As dialog box again (that is, youalways accept the default name and folder),click the Bypass this dialog next timeoption in the Save As dialog box.Should you wish to make the Save As dialogre-appear, choose DSP>DSP P<strong>ref</strong>erences,select “Normalize” from itsApply to pop-up menu, then uncheck theBypass Save As Dialog option.REVERSEChoose this command to reverse the playbackorder of samples in the selected<strong>audio</strong>. This is exactly the same as playingan analog tape “backwards.”<strong>Audio</strong> prior to reversing<strong>Audio</strong> after reversingFigure 33.4: Example of Reversing <strong>Audio</strong><strong>Vision</strong> & Studio <strong>Vision</strong> <strong>Pro</strong> — <strong>Audio</strong> Reference Manual 359
PART 7: MenusTo use the Reverse command:Select the <strong>audio</strong> event(s), or portionof events, you wish to reverse.Choose DSP>Reverse.Unless you disabled its display in theDSP P<strong>ref</strong>erences dialog (discussed onpage 423), <strong>Vision</strong> opens a Save Asdialog box.Type a name for the reversed <strong>audio</strong>file.By default, <strong>Vision</strong> suggests a namebased on the auto-naming options youspecify in the DSP P<strong>ref</strong>erences dialog(discussed on page 423).Click Save.<strong>Vision</strong> creates a new <strong>audio</strong> file (or files)for the reversed <strong>audio</strong>. It creates one ormore new <strong>audio</strong> events to play that<strong>audio</strong>, replacing the original <strong>audio</strong>event(s) in your sequence.Figure 33.5: Save As Dialog for ReverseWhen you reverse <strong>audio</strong>, <strong>Vision</strong> constructsone or more new <strong>audio</strong> files(depending on the file saving option youselect in the DSP P<strong>ref</strong>erences dialogbox, discussed on page 423). It leavesyour original <strong>audio</strong> file (or files)unaffected.Use the File Format pop-up menu tospecify the desired file format (AIFFor Sound Designer II).Navigate to the folder in which youwant to save the file.By default, <strong>Vision</strong> selects the folder youspecify in the DSP P<strong>ref</strong>erences dialog(discussed on page 423).NOTE: If you never want to see thisSave As dialog box again (that is, youalways accept the default name and folder),click the Bypass this dialog next timeoption in the Save As dialog box.Should you wish to make the Save As dialogre-appear, choose DSP>DSP P<strong>ref</strong>erences,select “Reverse” from its Apply topop-up menu, then uncheck the BypassSave As Dialog option.360 Opcode Systems, Inc.
CHAPTER 33: DSP Menu: Mix, Normalize, Reverse, Invert Phase, and Convert Sample RateINVERT PHASEChoose this command to switch all thepositive and negative values of theselected <strong>audio</strong>, essentially turning it“upside down.” This process doesn’tchange the sound of the <strong>audio</strong> by itself,but it may have an affect on how the <strong>audio</strong>“fits in” when mixed with other Instrumentsin a song.Figure 33.7: Save As Dialog for Invert PhaseFigure 33.6: Example of Inverting the <strong>Audio</strong> PhaseTo use the Invert Phase command:<strong>Audio</strong> prior to inverting phase<strong>Audio</strong> after inverting phaseSelect the <strong>audio</strong> event(s), or portionof events, you wish to invert.Choose DSP>Invert Phase.Unless you disabled its display in theDSP P<strong>ref</strong>erences dialog (discussed onpage 423), <strong>Vision</strong> opens a Save Asdialog box.When you invert <strong>audio</strong>, <strong>Vision</strong> constructsone or more new <strong>audio</strong> files (dependingon the file saving option you select in theDSP P<strong>ref</strong>erences dialog box, discussedon page 423). It leaves your original<strong>audio</strong> file (or files) unaffected.Use the File Format pop-up menu tospecify the desired file format (AIFFor Sound Designer II).Navigate to the folder in which youwant to save the file.By default, <strong>Vision</strong> selects the folder youspecify in the DSP P<strong>ref</strong>erences dialog(discussed on page 423).Type a name for the inverted <strong>audio</strong>file.By default, <strong>Vision</strong> suggests a namebased on the auto-naming options youspecify in the DSP P<strong>ref</strong>erences dialog(discussed on page 423).<strong>Vision</strong> & Studio <strong>Vision</strong> <strong>Pro</strong> — <strong>Audio</strong> Reference Manual 361
PART 7: MenusClick Save.<strong>Vision</strong> creates a new <strong>audio</strong> file (or files)for the inverted <strong>audio</strong>. It creates one ormore new <strong>audio</strong> events to play that<strong>audio</strong>, replacing the original <strong>audio</strong>event(s) in your sequence.The Phase Invert button (in Acadiamode) has the same effect that InvertPhase creates. However, the PhaseInvert button modifies the <strong>audio</strong> signalreal-time without generating a new <strong>audio</strong>file. For information about the PhaseInvert button, see Phase (pg. 55).NOTE: If you never want to see thisSave As dialog box again (that is, youalways accept the default name and folder),click the Bypass this dialog next timeoption in the Save As dialog box.Should you wish to make the Save As dialogre-appear, choose DSP>DSP P<strong>ref</strong>erences,select “Invert Phase” from itsApply to pop-up menu, then uncheck theBypass Save As Dialog option.CONVERT SAMPLE RATEChoose this command to change thesample rate of the selected <strong>audio</strong> event.To use the Convert Sample Ratecommand:Choose DSP>Convert SampleRate.Unless you disabled its display in theDSP P<strong>ref</strong>erences dialog (discussed onpage 423), <strong>Vision</strong> opens the ConvertSample Rate dialog box.The dialog box displays the sample rateof the existing <strong>audio</strong> and contains a fieldfor entering the new sample rate.Figure 33.8: Convert Sample Rate Dialog BoxEnter the desired sample rate in theNew Sample Rate numerical.Click OK.Unless you disabled its display in theDSP P<strong>ref</strong>erences dialog (discussed onpage 423), <strong>Vision</strong> opens a Save Asdialog box.Select the <strong>audio</strong> event(s) you wish toconvert.You cannot convert a portion of an <strong>audio</strong>event -- you must convert entire events.362 Opcode Systems, Inc.
CHAPTER 33: DSP Menu: Mix, Normalize, Reverse, Invert Phase, and Convert Sample RateClick Save.<strong>Vision</strong> creates a new <strong>audio</strong> file (or files)for the converted <strong>audio</strong>. It creates one ormore new <strong>audio</strong> events to play that<strong>audio</strong>, replacing the original <strong>audio</strong>event(s) in your sequence.Figure 33.9: Save As Dialog for ConvertSample RateWhen you convert the <strong>audio</strong>Õs samplerate, <strong>Vision</strong> constructs one or more new<strong>audio</strong> files (depending on the file savingoption you select in the DSP P<strong>ref</strong>erencesdialog box, discussed onpage 423). It leaves your original <strong>audio</strong>file (or files) unaffected.Use the File Format pop-up menu tospecify the desired file format (AIFFor Sound Designer II).Navigate to the folder in which youwant to save the file.By default, <strong>Vision</strong> selects the folder youspecify in the DSP P<strong>ref</strong>erences dialog(discussed on page 423).Type a name for the converted <strong>audio</strong>file.By default, <strong>Vision</strong> suggests a namebased on the auto-naming options youspecify in the DSP P<strong>ref</strong>erences dialog(discussed on page 423).NOTE: If you never want to see thisSave As dialog box again (that is, youalways accept the default name and folder),click the Bypass this dialog next timeoption in the Save As dialog box.Should you wish to make the Save As dialogre-appear, choose DSP>DSP P<strong>ref</strong>erences,select “Convert Sample Rate” fromits Apply to pop-up menu, then uncheckthe Bypass Save As Dialog option.Doesn’t <strong>Vision</strong> Already OfferSample Rate Conversion?Yes, <strong>Vision</strong> does have another method ofoff-line sample rate conversion (as discussedin Chapter 26: Sample RateConversion and Deinterleaving), but itsmethods and purposes are somewhat different.Specifically:• Choosing DSP>Convert SampleRate does not change <strong>Vision</strong>’s sessionsample rate. The<strong>ref</strong>ore, if yoursession sample rate is different thanthe rate you convert to, the newlyconverted file will play at the wrongspeed.<strong>Vision</strong> & Studio <strong>Vision</strong> <strong>Pro</strong> — <strong>Audio</strong> Reference Manual 363
PART 7: Menus• <strong>Audio</strong>>Conversion Overview convertsentire <strong>audio</strong> files (and all <strong>audio</strong>events contained within those <strong>audio</strong>files). DSP>Convert Sample Rateconverts only the selected <strong>audio</strong>events.• DSP>Convert Sample Rate uses ahigher quality (but slower) samplerate conversion algorithm.364 Opcode Systems, Inc.
CHAPTER 34: DSP Menu: EQ andFade/CrossfadeThe DSP menu contains numerous algorithmsdesigned to process <strong>audio</strong>completely within the digital domain.This chapter deals with the EQ and Fade/Crossfade commands.Figure 34.1: DSP MenuDSP commands are constructive—meaningthey create new <strong>audio</strong> files withoutaltering your original <strong>audio</strong> data.DSP commands work on mono, stereointerleaved, or linked <strong>audio</strong> files with bitdepths of 8, 16, or 24.If you select multiple <strong>audio</strong> files on whichto perform a DSP operation, all selected<strong>audio</strong> files must be the same type (mono,interleaved, or linked) and the same bitdepth (8, 16, or 24). The only exception tothis rule is the Mix command.You can undo any DSP command. Thisprovides a convenient way to do an “A-Bcomparison” between the processed andunprocessed <strong>audio</strong>.The following sections describe the EQand Fade/Crossfade algorithms in detail.<strong>Vision</strong> & Studio <strong>Vision</strong> <strong>Pro</strong> — <strong>Audio</strong> Reference Manual 365
PART 7: MenusEQChoose this command to alter the tonalcharacteristics of the selected <strong>audio</strong>.To use the EQ command:Click OK.Unless you disabled its display in theDSP P<strong>ref</strong>erences dialog (discussed onpage 423), <strong>Vision</strong> opens a Save Asdialog box.Select the <strong>audio</strong> event(s), or portionof events, you wish to equalize.Choose DSP>EQ.Unless you disabled its display in theDSP P<strong>ref</strong>erences dialog (discussed onpage 423), <strong>Vision</strong> opens the EQ dialogbox.Figure 34.2: EQ Dialog BoxSet the EQ parameters as desired.All EQ parameters are discussed in TheEQ Dialog Box (pg. 367).Figure 35.1: Save As Dialog for ConvertSample RateWhen you equalize <strong>audio</strong>, <strong>Vision</strong> constructsone or more new <strong>audio</strong> files(depending on the file saving option youselect in the DSP P<strong>ref</strong>erences dialogbox, discussed on page 423). It leavesyour original <strong>audio</strong> file (or files)unaffected.Use the File Format pop-up menu tospecify the desired file format (AIFFor Sound Designer II).Navigate to the folder in which youwant to save the file.By default, <strong>Vision</strong> selects the folder youspecify in the DSP P<strong>ref</strong>erences dialog(discussed on page 423).366 Opcode Systems, Inc.
CHAPTER 34: DSP Menu: EQ and Fade/CrossfadeType a name for the equalized <strong>audio</strong>file.By default, <strong>Vision</strong> suggests a namebased on the auto-naming options youspecify in the DSP P<strong>ref</strong>erences dialog(discussed on page 423).Click Save.<strong>Vision</strong> creates a new <strong>audio</strong> file (or files)for the equalized <strong>audio</strong>. It creates one ormore new <strong>audio</strong> events to play that<strong>audio</strong>, replacing the original <strong>audio</strong>event(s) in your sequence.The EQ Dialog BoxAs you can see in Figure 34.2 onpage 366, there are four elements in theEQ dialog box. These are: Filter Type—use this pop-up menuto select the type of filtering you wantto apply.NOTE: If you never want to see thisSave As dialog box again (that is, youalways accept the default name and folder),click the Bypass this dialog next timeoption in the Save As dialog box.Should you wish to make the Save As dialogre-appear, choose DSP>DSP P<strong>ref</strong>erences,select “EQ” from its Apply topop-up menu, then uncheck the BypassSave As Dialog option.A Low Pass filter removes high frequenciesfrom the <strong>audio</strong> (frequencieshigher than the value set in the Frequencynumerical).A High Pass filter removes low frequenciesfrom the <strong>audio</strong> (frequencieslower than the value set in the Frequencynumerical).A Band Pass filter removes frequenciesboth above and below thespecified Frequency, allowing only anarrow “band” of frequencies to in theprocessed sound.<strong>Vision</strong> & Studio <strong>Vision</strong> <strong>Pro</strong> — <strong>Audio</strong> Reference Manual 367
PART 7: MenusSlope—Use this pop-up menu toselect how steeply the filter is appliedonce the selected Frequency isreached.Q Factor—Use this numerical to setthe amount of “resonance” applied atthe selected Frequency. Resonanceemphasizes the harmonics that areclosest to the filter’s specified Frequency,as shown in Figure 35.3.The four Slope choices are shown ingraphically in Figure 35.2.AMPLITUDEHigh ÒQ FactorÓemphasizes harmonicsnear thecorner FrequencyAMPLITUDEFREQUENCYFilter frequency (as setin the Frequencynumerical)Steep MediumVery SteepGradualFREQUENCYFigure 35.3: Effects of Q Factor ParameterNOTE: Q Factor and Slope arerelated—increasing the Q Factor alsoincreases the Slope. If you apply a highQ Factor and a steep slope, you mayhear unwanted <strong>audio</strong> resonances.Figure 35.2: Filter Slopes (shown on a Low-Pass Filter)NOTE: Slope and Q Factor arerelated—increasing the slope alsoincreases the Q Factor. If you apply ahigh Q Factor and a steep slope, youmay hear unwanted <strong>audio</strong> resonances.Frequency—Use this numerical toset the filter’s corner frequency. Thisis the frequency at which the selectedfilter type “kicks in” (as shown inFigure 35.2).368 Opcode Systems, Inc.
CHAPTER 34: DSP Menu: EQ and Fade/CrossfadeFADE/CROSSFADEUse this command to crossfade overlapping<strong>audio</strong> events and/or to fade-in orfade-out one or more <strong>audio</strong> events. Crossfadescan help provide seamlesstransitions between disparate <strong>audio</strong>events.The Fade/Crossfade SettingsDialog Box<strong>Vision</strong> supports numerous fade and crossfadeoptions, all of which are available inthe Fade/Crossfade Settings dialog box.This dialog appears when you select thedesired <strong>audio</strong> events (or portions of <strong>audio</strong>events) and choose DSP>Fade/Crossfade.As you can see in the previous illustration,there are four separate areas in the dialogbox: Fade/Crossfade length modeFrom the pop-up menu, selectwhether you want to manually setfade and/or crossfade lengths, orhave <strong>Vision</strong> automatically set thembased on your selection. Crossfade parametersThese parameters determine thelength of the crossfade, its shape, andits position relative to the splice point.You can completely disable the crossfadefeature should you only wish tocreate fade-ins or fade-outs.The various crossfade techniques arediscussed in Creating Crossfades(pg. 374). Fade In/Out parametersThese parameters separately determinethe length of fade-ins andfade-outs, as well as the shape of eachfade. You can completely disableeither fade feature independently.The various fade-in and fade-out techniquesare discussed in CreatingFade-Ins and Fade-Outs (pg. 370). File Length optionUse this option to choose how <strong>Vision</strong>creates new files based on the Fade/Crossfade settings. The following sectiondiscusses this in detail.Figure 35.4: Basic Fade/Crossfade SettingsDialog Box<strong>Vision</strong> & Studio <strong>Vision</strong> <strong>Pro</strong> — <strong>Audio</strong> Reference Manual 369
PART 7: MenusFile Length OptionIf the File Length option at the bottom ofthe dialog box is set to “fewer events,larger file size”, <strong>Vision</strong> creates new <strong>audio</strong>events that contain date both inside andoutside the fade/crossfade regionsdefined in this dialog box. In other words,if you select a pair of 30 second <strong>audio</strong>events and crossfade them over a lengthof 50ms, <strong>Vision</strong> would generate a singlenew <strong>audio</strong> event that was 1 minute long. Itwould replace the two original events withthis new, single event.If the File Length option at the bottom ofthe dialog box is set to “more events,smaller file size”, <strong>Vision</strong> creates new<strong>audio</strong> events that are only as long as thefade/crossfade lengths. In other words, ifyou select a pair of 30 second <strong>audio</strong>events and crossfade them over a lengthof 50ms, <strong>Vision</strong> would generate a singlenew <strong>audio</strong> event that was 50ms long. Itwould replace portions of the original twoevents with this new crossfade event andleave the unaffected portions of the originalevents intact.Obviously, the top option means you havefewer <strong>audio</strong> events to keep track of, butyou consume a lot more hard disk spaceby duplicating unchanged <strong>audio</strong>. The biggestadvantages to this option are: 1) youcan change the sequence tempo withoutmessing up your fades/crossfades, and 2)you can easily open the new file in a separatesound editing program (like Peak orSound Designer II) for further editing.The bottom option means you conservehard disk space and shorten processingtimes, but it complicates your file managementand editing efforts by creating more<strong>audio</strong> events. You should use this optiononly if you don’t plan to perform any additionalediting of events (or move themaround within the sequence).It’s up to you to decide which file writingmethod works best for you.Creating Fade-Ins and Fade-OutsFade-ins and Fade-outs use the followingportion of the Fade/Crossfade Settingsdialog box:Figure 35.5: Fade-in, Fade-out Parameters inFade/Crossfade Dialog BoxFade-in LengthEnter the desired fade-in length. Ifthe “set fade/crossfade lengths” popupat the top of the dialog box is set touse selection range, then this fieldis disabled (since it’s set automaticallyto the length of your <strong>audio</strong>selection).370 Opcode Systems, Inc.
CHAPTER 34: DSP Menu: EQ and Fade/CrossfadeFade-in ShapeSelect the desired fade-in shape (linearor exponential) from this pop-upmenu. The choice you make is indicatedgraphically in region .Fade-in IllustrationIllustrates the fade-in shape chosenby pop-up menu .Minimum Length fade-in option andlength settingIf <strong>Vision</strong> is unable to create a fade-inof the length entered in , (perhapsbecause the <strong>audio</strong> event is shorterthan the fade-in length), enable thisoption to allow shorter fade lengths(down to the specified minimum).Fade-in Enable/Disable optionIf you don’t want <strong>Vision</strong> to generateany fade-ins when you process the<strong>audio</strong>, uncheck this box. For example,if you may want to create onlycrossfades or fade-outs, then disablethe fade-in option.Fade-Out LengthEnter the desired fade-out length. Ifthe Set fade/crossfade lengths popupat the top of the dialog box is set touse selection range, then this field isdisabled (since it’s set automaticallyto the length of your <strong>audio</strong> selection).Fade-out ShapeSelect the desired fade-out shape(linear or exponential) from thispop-up menu. The choice you make isindicated graphically in region .Fade-out IllustrationIllustrates the fade-in shape chosenby pop-up menu .Minimum Length fade-out option andlength settingIf <strong>Vision</strong> is unable to create a fade-outof the length entered in , (perhapsbecause the <strong>audio</strong> event is shorterthan the fade-out length), enable thisoption to allow shorter fade lengths(down to the specified minimum).Fade-out Enable/Disable optionIf you don’t want <strong>Vision</strong> to generateany fade-outs when you process the<strong>audio</strong>, uncheck this box. For example,if you want to create onlycrossfades or fade-ins, then disablethe fade-out option.There are many ways to create fade-insand fade-outs. The following sections discussjust some of the possible techniques.Creating Automatic Fade-outsTo create a fade-out whose length isbased on your selection:Select the last part of an <strong>audio</strong> event(or events).Choose DSP>Fade/Crossfade.Unless you disabled its display in theDSP P<strong>ref</strong>erences dialog (discussed onpage 423), <strong>Vision</strong> opens the Fade/Crossfade Settings dialog box.<strong>Vision</strong> & Studio <strong>Vision</strong> <strong>Pro</strong> — <strong>Audio</strong> Reference Manual 371
PART 7: MenusFrom the top pop-up menu, selectuse selection range.When you do this, <strong>Vision</strong> automaticallyassumes your selection is the desiredfade-in length and fills in the Fade-inlength automatically.Select the desired fade-out shapefrom the pop-up menu.Make sure the fade-in and crossfadeoptions are disabled.Choose the desired file length optionas discussed in File Length Option(pg. 370), then click OK.Unless you disabled its display in theDSP P<strong>ref</strong>erences dialog (discussed onpage 423), <strong>Vision</strong> opens a Save Asdialog box.Use the File Format pop-up menu tospecify the desired file format (AIFFor Sound Designer II).Navigate to the folder in which youwant to save the file.By default, <strong>Vision</strong> selects the folder youspecify in the DSP P<strong>ref</strong>erences dialog(discussed on page 423).Type a name for the faded <strong>audio</strong> file.By default, <strong>Vision</strong> suggests a namebased on the auto-naming options youspecify in the DSP P<strong>ref</strong>erences dialog(discussed on page 423).Click Save.<strong>Vision</strong> creates a new <strong>audio</strong> file (or files)for the faded <strong>audio</strong>. It creates one ormore new <strong>audio</strong> events to play that<strong>audio</strong>, replacing the original <strong>audio</strong>event(s) in your sequence.NOTE: If you never want to see thisSave As dialog box again (that is, youalways accept the default name and folder),click the Bypass this dialog next timeoption in the Save As dialog box.Should you wish to make the Save As dialogre-appear, choose DSP>DSP P<strong>ref</strong>erences,select “Fade/Crossfade” from itsApply to pop-up menu, then uncheck theBypass Save As Dialog option.Figure 35.6: Save As Dialog for ConvertSample RateWhen you fade <strong>audio</strong>, <strong>Vision</strong> constructsa new <strong>audio</strong> file. It leaves your original<strong>audio</strong> file (or files) unaffected.372 Opcode Systems, Inc.
CHAPTER 34: DSP Menu: EQ and Fade/CrossfadeCreating Automatic Fade-insTo create a fade-in whose length is basedon your selection, apply a technique similarto the one discussed previously,except you should select the first part ofan <strong>audio</strong> event (or events) before choosingDSP>Fade/Crossfade.Creating Manual FadesTo create fade-ins and/or fade-outs of anylength: Select some <strong>audio</strong>. Choose DSP>Fades/Crossfades.Unless you disabled its display in theDSP P<strong>ref</strong>erences dialog (discussed onpage 423), <strong>Vision</strong> opens the Fade/Crossfade Settings dialog box. From the top pop-up menu, selectManually.Choose the desired file length optionas discussed in File Length Option(pg. 370), then click OK.Unless you disabled its display in theDSP P<strong>ref</strong>erences dialog (discussed onpage 423), <strong>Vision</strong> opens a Save Asdialog box.Configure the Save As dialog box asdiscussed in Creating AutomaticFade-outs (pg. 371), then click Save.<strong>Vision</strong> creates a new <strong>audio</strong> file for thefaded <strong>audio</strong>. It creates one or more new<strong>audio</strong> events to play that <strong>audio</strong> file,replacing the original <strong>audio</strong> event(s) inyour sequence.NOTE: When you process multiple, whole<strong>audio</strong> events, <strong>Vision</strong> applies the same fadetimes to all the selected events.All events will be processed with thesame fade-in and/or fade-out times.Type the desired fade lengths into theFade/Crossfade Settings dialog.Select the desired fade-in and/orfade-out shapes from their pop-upmenus.Make sure the crossfade option isdisabled.If you want each <strong>audio</strong> event to have a differentfade time, use the Fade/Crossfadecommand on only one <strong>audio</strong> event at atime.<strong>Vision</strong> & Studio <strong>Vision</strong> <strong>Pro</strong> — <strong>Audio</strong> Reference Manual 373
PART 7: MenusCreating CrossfadesCrossfades let you create seamless transitionsbetween “spliced” <strong>audio</strong> events, aslong as you remember a few simple rules:• The <strong>audio</strong> events you wish to crossfademust reside in the same trackand be assigned to the same <strong>Audio</strong>Instrument.• Crossfades cannot be created if the<strong>audio</strong> files <strong>ref</strong>erenced by the <strong>audio</strong>events do not contain any overlappingdata.Crossfades use the following portion ofthe Fade/Crossfade Settings dialog box: Figure 35.7: Crossfade Parameters in Fade/Crossfade Dialog BoxCrossfade LengthEnter the desired crossfade length. Ifthe Set fade/crossfade lengths popupat the top of the dialog box is set to“use selection range,” then this fieldis disabled (since it’s set automaticallyto the length of your <strong>audio</strong>selection).Crossfade shapeSelect the desired crossfade shape(linear or equal power) from this popupmenu. The choice you make isindicated graphically in region .Linear: This type of crossfade fadesout one file linearly while the otherfades in linearly.Equal Power: This type of crossfadeuses non linear fades and is usefulwhen linear crossfades exhibit adecrease in volume.Crossfade PositionSelect the location of the splice pointfrom this pop-up menu. The choiceyou make is indicated graphically inregion .Crossfade Enable/Disable optionCheck this box to enable the creationof crossfades.If you don’t want <strong>Vision</strong> to generateany crossfades when you process theselected <strong>audio</strong>, uncheck this box. Forexample, if you may want to createonly fade-ins or fade-outs, then disablethe crossfade option.374 Opcode Systems, Inc.
CHAPTER 34: DSP Menu: EQ and Fade/CrossfadeSplice PointBEFORE: places the crossfaderegion before the splice point.CENTERED: places the crossfaderegion centered over aboutsplice point.AFTER: places the crossfaderegion after the splice point.NOTE: This option is disabled if youselect “use selection range” from theSet fade/crossfade lengths pop-upmenu at the top of the dialog box.Crossfade IllustrationIllustrates the crossfade shapechosen in pop-up menu and thecrossfade position chosen in pop-upmenu . It also illustrates whetherthe crossfade is being set manually,or is using the selection range (as setin the Set fade/crossfade lengthspop-up menu).For manually set crossfades,the graphic illustrates thesplice point.Minimum Length crossfade optionand length settingIf <strong>Vision</strong> is unable to create a crossfadeof the length entered in ,enable this option to allow shortercrossfade lengths (down to the specifiedminimum).For example, if the files <strong>ref</strong>erenced bythe selected <strong>audio</strong> events don’t containenough data around the splicepoint (or inside the selection range)to create the crossfade, checking thisoption allows <strong>Vision</strong> to create smallercrossfades.Automatic Crossfade RepositioningoptionIf <strong>Vision</strong> is unable to create a crossfadeof the desired length in thespecified position, enable this optionto allow the crossfade to shift aroundthe splice point as necessary.For example, if the file <strong>ref</strong>erenced byone <strong>audio</strong> event contains enough dataaround its splice point to create acrossfade, but the other file doesn’t,checking this option allows <strong>Vision</strong> tomove the splice point as necessary toachieve the specified crossfadelength.NOTE: This option is disabled if youselect “use selection range” from theSet fade/crossfade lengths pop-upmenu at the top of the dialog box.For crossfades set by selectionrange, the graphic illustratesthe selection range.<strong>Vision</strong> & Studio <strong>Vision</strong> <strong>Pro</strong> — <strong>Audio</strong> Reference Manual 375
PART 7: MenusCreating Crossfades - an ExampleThere are many ways to create crossfades.This example illustrates just one ofthe many possible techniques. In it, you’llsee how to create a simple crossfade inwhich you replace a section of one takewith another.Select a range of <strong>audio</strong> that includesall the takes.Assume you have two takes (asshown below), and want to use aportion of Take 2 in place of Take 1.Choose DSP>Fade/Crossfade.Unless you disabled its display in theDSP P<strong>ref</strong>erences dialog (discussed onpage 423), <strong>Vision</strong> opens the Fade/Crossfade Settings dialog box.Drag Take 1 over Take 2, so that theyshare the same <strong>Audio</strong> Instrument.Crossfades work only with <strong>audio</strong> filesthat are assigned to the same <strong>Audio</strong>Instrument in the same track.Drag Take 2 onto the same<strong>Audio</strong> Instrument as Take 1Figure 35.8: Completely configured Fade/Crossfade Settings dialog boxConfigure the dialog box as needed.Specifically:Set the Set fade/crossfade lengths tomanually.Enable Crossfades by checking theCreate box.Disable Fade ins and Fade outs!376 Opcode Systems, Inc.
CHAPTER 34: DSP Menu: EQ and Fade/CrossfadeSet the desired crossfade length (wechose 150 ms), shape (we chose equalpower), and position (we chose centeredat).If desired, set the options that allow<strong>Vision</strong> to shorten or shift your crossfadesif needed.Choose whether you want to create alarge single new file, or smaller files thelength of the crossfades (we chose smallfiles).Click OK.Unless you disabled its display in theDSP P<strong>ref</strong>erences dialog (discussed onpage 423), <strong>Vision</strong> opens a Save Asdialog box.Navigate to the folder in which youwant to save the file.By default, <strong>Vision</strong> selects the folder youspecify in the DSP P<strong>ref</strong>erences dialog(discussed on page 423).Type a name for the crossfaded <strong>audio</strong>file.By default, <strong>Vision</strong> suggests a namebased on the auto-naming options youspecify in the DSP P<strong>ref</strong>erences dialog(discussed on page 423).Click Save.<strong>Vision</strong> creates a new <strong>audio</strong> file (or files)for the crossfaded <strong>audio</strong>. It creates oneor more new <strong>audio</strong> events to play that<strong>audio</strong>, replacing the original <strong>audio</strong>event(s) in your sequence.New, crossfaded eventsFigure 35.9: Save As Dialog Box forCrossfadesWhen you crossfade <strong>audio</strong>, <strong>Vision</strong> constructsa new <strong>audio</strong> file. It leaves youroriginal <strong>audio</strong> file (or files) unaffected.Use the File Format pop-up menu tospecify the desired file format (AIFFor Sound Designer II).NOTE: If you never want to see thisSave As dialog box again (that is, youalways accept the default name and folder),click the Bypass this dialog next timeoption in the Save As dialog box.Should you wish to make the Save As dialogre-appear, choose DSP>DSP P<strong>ref</strong>erences,select “Fade/Crossfade” from itsApply to pop-up menu, then uncheck theBypass Save As Dialog option.<strong>Vision</strong> & Studio <strong>Vision</strong> <strong>Pro</strong> — <strong>Audio</strong> Reference Manual 377
PART 7: Menus378 Opcode Systems, Inc.
CHAPTER 35: DSP Menu: Pitch Shift,Formant Shift, Time Scale, andAdjust <strong>Audio</strong> TempoThe DSP menu contains numerous algorithmsdesigned to process <strong>audio</strong>completely within the digital domain.This chapter deals with the Pitch Shift,Formant Shift, Time Scale, andAdjust <strong>Audio</strong> Tempo commands.Figure 36.1: DSP MenuDSP commands are constructive—meaningthey create new <strong>audio</strong> files withoutaltering your original <strong>audio</strong> data.DSP commands work on mono, stereointerleaved, or linked <strong>audio</strong> files with bitdepths of 8, 16, or 24.If you select multiple <strong>audio</strong> files on whichto perform a DSP operation, all selected<strong>audio</strong> files must be the same type (mono,interleaved, or linked) and the same bitdepth (8, 16, or 24). The only exception tothis rule is the Mix command.You can undo any DSP command. Thisprovides a convenient way to do an “A-Bcomparison” between the processed andunprocessed <strong>audio</strong>.The following sections describe thePitch Shift, Formant Shift, Time Scale,and Adjust <strong>Audio</strong> Tempo algorithms indetail.<strong>Vision</strong> & Studio <strong>Vision</strong> <strong>Pro</strong> — <strong>Audio</strong> Reference Manual 379
PART 7: MenusPITCH SHIFTUse this command to change the pitch ofany <strong>audio</strong> event(s) without changing theplayback duration. You can pitch-shift<strong>audio</strong> up or down as much as one octave.TIP: If you wish to shift pitch more than anoctave, use the Pitch Shift command morethan once. Keep in mind that the <strong>audio</strong>quality will suffer the further you shift thepitch from its natural frequency.To use the Pitch Shift command:Select the <strong>audio</strong> event(s) you wish topitch shift.If you select a portion of an <strong>audio</strong> event,the entire event will be pitch shifted.The<strong>ref</strong>ore, if you want to pitch shift only aportion of an event, you must first separatethat portion into a new event usingthe <strong>Audio</strong>>Separate command.Choose DSP>Pitch Shift.Unless you disabled its display in theDSP P<strong>ref</strong>erences dialog (discussed onpage 423), <strong>Vision</strong> opens the Pitch Shiftdialog box.Figure 37.1: Pitch Shift Dialog BoxEnter the number of half-steps thatyou want to shift the <strong>audio</strong>.Positive values result in an upward pitchshift; negative values result in a downwardpitch shift.For example, to raise the pitch a minorthird, enter a value of +3.If desired, set a fine tune value for theshift (+/- 50 cents).From the pop-up menu, select a PitchShift Quality.<strong>Vision</strong> offers two types of pitch shiftingalgorithms: Faster and Best.380 Opcode Systems, Inc.
CHAPTER 35: DSP Menu: Pitch Shift, Formant Shift, Time Scale, and Adjust <strong>Audio</strong> TempoFaster takes less time to calculate thepitch shift, and it produces a somewhatlower fidelity <strong>audio</strong> file. In most cases,however, Faster quality will produce satisfactory<strong>audio</strong> results.Users with high end PowerMac computerswill probably want to start with Best,unless the processing times become toolong.If desired, check Maintain voicecharacter.This option lets you pitch-shift an <strong>audio</strong>event without inducing ÒDarth VaderÓ orÒChipmunkÓ effects -- the pitch-shiftedsignal retains all the vocal characteristicsof the original performance, so it soundsas if the same singer is simply singing ina different key.Enabling this option requires more computationand, the<strong>ref</strong>ore, more processingtime.You can use this option with any type of<strong>audio</strong> (not just vocals), but the resultsmay be less noticeable because formantsare less pronounced in non-vocalinstruments.Click OK.Unless you disabled its display in theDSP P<strong>ref</strong>erences dialog (discussed onpage 423), <strong>Vision</strong> opens a Save Asdialog box.Figure 37.2: Save As Dialog for Pitch ShiftWhen you pitch-shift <strong>audio</strong>, <strong>Vision</strong> constructsone or more new <strong>audio</strong> files(depending on the file saving option youselect in the DSP P<strong>ref</strong>erences dialogbox, discussed on page 423). It leavesyour original <strong>audio</strong> file (or files)unaffected.Use the File Format pop-up menu tospecify the desired file format (AIFFor Sound Designer II).Navigate to the folder in which youwant to save the file.By default, <strong>Vision</strong> selects the folder youspecify in the DSP P<strong>ref</strong>erences dialog(discussed on page 423).Type a name for the shifted <strong>audio</strong> file.By default, <strong>Vision</strong> suggests a namebased on the auto-naming options youspecify in the DSP P<strong>ref</strong>erences dialog(discussed on page 423).<strong>Vision</strong> & Studio <strong>Vision</strong> <strong>Pro</strong> — <strong>Audio</strong> Reference Manual 381
PART 7: MenusClick Save.<strong>Vision</strong> creates a new <strong>audio</strong> file (or files)for the shifted <strong>audio</strong>. It creates one ormore new <strong>audio</strong> events to play that<strong>audio</strong>, replacing the original <strong>audio</strong>event(s) in your sequence.Click the to numerical to highlight it.Play a note on your MIDI controller.In this example, we played a D3.NOTE: If you never want to see thisSave As dialog box again (that is, youalways accept the default name and folder),click the Bypass this dialog next timeoption in the Save As dialog box.Should you wish to make the Save As dialogre-appear, choose DSP>DSP P<strong>ref</strong>erences,select “Pitch Shift” from itsApply to pop-up menu, then uncheck theBypass Save As Dialog option.Using a MIDI Controller to Enter aPitch ShiftYou can enter a pitch shift interval fromyour MIDI controller. To do so:In the Pitch Shift dialog box, click thefrom numerical to highlight it.Play a note on your MIDI controller.In this example, we played an F#3.Notice that <strong>Vision</strong> automatically sets theInterval numerical to <strong>ref</strong>lect the range (inthis case, -4 half-steps to indicate adownward pitch shift of a major third).NOTE: <strong>Vision</strong> uses the from and tonumericals only as an input method forentering pitch shift intervals—you do nothave to enter notes in the actual key of the<strong>audio</strong>.NOTE: The controller must be enabled in<strong>Vision</strong>Õs Settings>Enable Input Devicesdialog box.382 Opcode Systems, Inc.
CHAPTER 35: DSP Menu: Pitch Shift, Formant Shift, Time Scale, and Adjust <strong>Audio</strong> TempoFORMANT SHIFTUse this command to change the formantsof any <strong>audio</strong> event(s) with orwithout changing the playback pitch.Formants are what define a sound’s resonantenvironment -- for example, a maleand female might sing the same note, butthe tonal characteristics of that note arecompletely different. This is because ofthe differences in their head and chestsize, their bone and throat structure, andso on.By shifting only a sound’s formants, youcan subtly or radically alter its resonantcharacteristics, effectively altering the listener’sperception of the singer’s age, sex,or personality.For example,• If you select a female vocal and shiftthe formants lower, then the resulting<strong>audio</strong> sounds as if it were sung by aman. The pitch is the same, but byaltering the formants, you have effectivelychanged the character of thevoice.• Similarly, if you select the samefemale vocal and shift the formantshigher, then the resulting <strong>audio</strong>sounds as if it were sung by a child.Again, the pitch is unaltered -- onlythe formants, which describe thesound’s resonant environment, havechanged.• Subtle formant shifts could slightlyage a singer, or make him/her soundmore youthful.• Formant shifting can also affect nonvocal<strong>audio</strong> selections, though theeffect is generally less pronounced.Still you might want to experiment --you never know when you’ll accidentallystumble on that perfect sound!Using the Formant ShiftCommandTo use the Formant Shift command:Select the <strong>audio</strong> event(s) you wish toformant shift.If you select a portion of an <strong>audio</strong> event,the entire event will be formant shifted.The<strong>ref</strong>ore, if you want to shift only a portionof an event, you must first separatethat portion into a new event using the<strong>Audio</strong>>Separate command.Choose DSP>Formant Shift.Unless you disabled its display in theDSP P<strong>ref</strong>erences dialog (discussed onpage 423), <strong>Vision</strong> opens the FormantShift dialog box.Figure 37.3: Formant Shift Dialog Box<strong>Vision</strong> & Studio <strong>Vision</strong> <strong>Pro</strong> — <strong>Audio</strong> Reference Manual 383
PART 7: MenusEnter the number of half-steps thatyou want to shift the formants.Positive values shift the formants up,which produces the effect of decreasingthe size of the singerÕs resonant headand chest cavities -- making it sound asif the <strong>audio</strong> were sung by a smallerindividual.Negative values shift the formants down,creating the sensation that the <strong>audio</strong>emanated from a larger singer.If desired, set a fine tune amount forthe formant shift (+/- 50 cents).Click OK.Unless you disabled its display in theDSP P<strong>ref</strong>erences dialog (discussed onpage 423), <strong>Vision</strong> opens a Save Asdialog box.Use the File Format pop-up menu tospecify the desired file format (AIFFor Sound Designer II).Navigate to the folder in which youwant to save the file.By default, <strong>Vision</strong> selects the folder youspecify in the DSP P<strong>ref</strong>erences dialog(discussed on page 423).Type a name for the shifted <strong>audio</strong> file.By default, <strong>Vision</strong> suggests a namebased on the auto-naming options youspecify in the DSP P<strong>ref</strong>erences dialog(discussed on page 423).Click Save.<strong>Vision</strong> creates a new <strong>audio</strong> file (or files)for the shifted <strong>audio</strong>. It creates one ormore new <strong>audio</strong> events to play that<strong>audio</strong>, replacing the original <strong>audio</strong>event(s) in your sequence.NOTE: If you never want to see thisSave As dialog box again (that is, youalways accept the default name and folder),click the Bypass this dialog next timeoption in the Save As dialog box.Figure 37.4: Save As Dialog for Formant ShiftShould you wish to make the Save As dialogre-appear, choose DSP>DSP P<strong>ref</strong>erences,select “Formant Shift” from itsApply to pop-up menu, then uncheck theBypass Save As Dialog option.When you formant-shift <strong>audio</strong>, <strong>Vision</strong>constructs one or more new <strong>audio</strong> files(depending on the file saving option youselect in the DSP P<strong>ref</strong>erences dialogbox, discussed on page 423). It leavesyour original <strong>audio</strong> file (or files)unaffected.384 Opcode Systems, Inc.
CHAPTER 35: DSP Menu: Pitch Shift, Formant Shift, Time Scale, and Adjust <strong>Audio</strong> TempoChanging a Singer’s GenderPerhaps this title is misleading. Obviously,<strong>Vision</strong> can’t change a singer’sgender, but it can change the listener’sperception of the singer’s gender.You probably noticed that, in Figure 37.3,the right half of the Formant Shift dialogbox contains some disabled pitch shiftnumericals. To activate the pitch shiftnumericals, check the Pitch checkbox.The Pitch numericals enable you tomodify an <strong>audio</strong> event’s pitch as well as itsformants. This becomes particularlyintriguing when you realize that, in asingle action, you can shift both pitch andformants -- but by different amounts andin the same or different directions! Usingthis technique, you can change the listenersperception of a singer’s age or gender,or create radical vocal effects.For example, to change a female vocalinto a male vocal:In the Pitch side of the dialog box,enter the desired amount of pitchshift.In this example, we selected -5semitones.NOTE: Obviously, the amount of pitchshift you choose depends on the contextof your sequence and whether or not thevocal is spoken or sung. This numberwas chosen only for sake of example.In the Formants side of the dialogbox, enter some lesser amount offormant shift.In this example, we selected -3semitones.NOTE: Generally, a little bit of formantshifting goes a long way. If you want tomaintain natural sounding vocal characteristics,you probably wonÕt want to shiftformants by a large number of semitones.Of course, you can experiment allyou want with unnatural soundingeffects!In a Graphic Window, select the <strong>audio</strong>event you wish to process.Choose DSP>Formant Shift.Unless you disabled its display in theDSP P<strong>ref</strong>erences dialog (discussed onpage 423), <strong>Vision</strong> opens the FormantShift dialog box.Check the Pitch option.Select the desired Pitch ShiftQuality from the pop-up menu.<strong>Vision</strong> offers two types of pitch shiftingalgorithms: Faster and Best.<strong>Vision</strong> & Studio <strong>Vision</strong> <strong>Pro</strong> — <strong>Audio</strong> Reference Manual 385
PART 7: MenusFaster takes less time to calculate thepitch shift, and it produces a somewhatlower fidelity <strong>audio</strong> file. In most cases,however, Faster quality will produce satisfactory<strong>audio</strong> results.Users with high end PowerMac computerswill probably want to start with Best,unless the processing times become toolong.Click OK.Unless you disabled its display in theDSP P<strong>ref</strong>erences dialog (discussed onpage 423), <strong>Vision</strong> opens a Save Asdialog box.Configure the dialog as discussedpreviously, then click Save.<strong>Vision</strong> creates a new <strong>audio</strong> file (or files)for the shifted <strong>audio</strong>. It creates one ormore new <strong>audio</strong> events to play that<strong>audio</strong>, replacing the original <strong>audio</strong>event(s) in your sequence.TIME SCALEUse this command to either stretch orshrink the selected <strong>audio</strong>’s length to fit anew time duration. <strong>Vision</strong> performs thisoperation without affecting the pitch ofthe original <strong>audio</strong> data.The Time Scale Dialog BoxTo open the Time Scale dialog box:Select the <strong>audio</strong> event(s) you wish totime scale.Choose DSP>Time Scale.Unless you disabled its display in theDSP P<strong>ref</strong>erences dialog (discussed onpage 423), <strong>Vision</strong> opens the Time Scaledialog box.Figure 37.5: Time Scale Dialog Box (shown inSMPTE Mode)Figure 37.5 shows a typical Time Scaledialog box, which is discussed in the followingsections.386 Opcode Systems, Inc.
CHAPTER 35: DSP Menu: Pitch Shift, Formant Shift, Time Scale, and Adjust <strong>Audio</strong> TempoSelecting the Viewing ModeYou can use the Time Scale dialog box inone of two time modes: SMPTE or Bars/Beats.• From the Display pop-up menu, selectSMPTE to display all times inSMPTE, for film scoring and othertime-based composing (as shown inFigure 37.5).• From the Display pop-up menu, selectBars/Beats to display all times inmusical bars and beats, for traditionalmusical compositions (as shown inFigure 37.6).Setting a New Time Range<strong>Vision</strong> gives you three different ways toset a new time range:• Set a Scale FactorEnter a value in the Scale Factornumerical to automatically scale theselected <strong>audio</strong> by that amount.For example, if you know you wantthe selected <strong>audio</strong> to be twice as long,enter a Scale Factor of 2.0. <strong>Vision</strong>automatically fills in the End Timeand Duration numericals.• Set an End TimeEnter a new End Time and <strong>Vision</strong>lengthens or shortens the selected<strong>audio</strong> data to end at that time.For example, if you know the selected<strong>audio</strong> has to end at Bar 5, Beat 1,enter that value in the End Timenumerical. <strong>Vision</strong> automatically fillsin the Duration and Scale Factornumericals.• Set a DurationEnter a new Duration and <strong>Vision</strong>scales the selected <strong>audio</strong> to last forthat amount of time.For example, if you know the selected<strong>audio</strong> has to be exactly 6 Bars long,enter that value in the Durationnumerical. <strong>Vision</strong> automatically fillsin the End Time and Scale Factornumericals.IMPORTANT: You cannot lengthen an<strong>audio</strong> event by more than double, nor canyou shorten it by more than half. If you wishto do so, you’ll need to make multiple applicationsof the Time Scale command. Keepin mind that the more you scale <strong>audio</strong>, themore its sound quality will suffer.Using the Time Scale CommandSelect the <strong>audio</strong> event(s) you wish totime scale.If you select a portion of an <strong>audio</strong> event,the entire event will be time scaled.The<strong>ref</strong>ore, if you want to scale only aportion of an event, you must first separatethat portion into a new event usingthe <strong>Audio</strong>>Separate command.Choose DSP>Time Scale.Unless you disabled its display in theDSP P<strong>ref</strong>erences dialog (discussed onpage 423), <strong>Vision</strong> opens the Time Scaledialog box.<strong>Vision</strong> & Studio <strong>Vision</strong> <strong>Pro</strong> — <strong>Audio</strong> Reference Manual 387
PART 7: MenusFrom the Display pop-up menu,select the mode in which you wish toview sequence times.In this example, weÕve selected Bars/Beats mode.Figure 37.6: Time Scale Dialog Box (shown inBars/Beats Mode)Enter a new time scale factor in theTime Scale dialog box.Use one of the three methods discussedin Setting a New Time Range (pg. 387).Click Scale.Unless you disabled its display in theDSP P<strong>ref</strong>erences dialog (discussed onpage 423), <strong>Vision</strong> opens a Save Asdialog box.When you time-scale <strong>audio</strong>, <strong>Vision</strong> constructsone or more new <strong>audio</strong> files(depending on the file saving option youselect in the DSP P<strong>ref</strong>erences dialogbox, discussed on page 423). It leavesyour original <strong>audio</strong> file (or files)unaffected.Use the File Format pop-up menu tospecify the desired file format (AIFFor Sound Designer II).Navigate to the folder in which youwant to save the file.By default, <strong>Vision</strong> selects the folder youspecify in the DSP P<strong>ref</strong>erences dialog(discussed on page 423).Type a name for the scaled <strong>audio</strong> file.By default, <strong>Vision</strong> suggests a namebased on the auto-naming options youspecify in the DSP P<strong>ref</strong>erences dialog(discussed on page 423).Click Save.<strong>Vision</strong> creates a new <strong>audio</strong> file (or files)for the scaled <strong>audio</strong>. It creates one ormore new <strong>audio</strong> events to play that<strong>audio</strong>, replacing the original <strong>audio</strong>event(s) in your sequence.NOTE: If you never want to see thisSave As dialog box again (that is, youalways accept the default name and folder),click the Bypass this dialog next timeoption in the Save As dialog box.Should you wish to make the Save As dialogre-appear, choose DSP>DSP P<strong>ref</strong>erences,select “Time Scale” from itsApply to pop-up menu, then uncheck theBypass Save As Dialog option.Figure 37.7: Save As Dialog for Time Scale388 Opcode Systems, Inc.
CHAPTER 35: DSP Menu: Pitch Shift, Formant Shift, Time Scale, and Adjust <strong>Audio</strong> TempoADJUST AUDIO TEMPOUse this command to “mold” your <strong>audio</strong>data to a sequence tempo. This commandcauses your <strong>audio</strong> to stretch and compressto fit either the existing Tempo Mapor an entirely new, static tempo.<strong>Vision</strong> molds the <strong>audio</strong> to a sequencetempo by time scaling it—always makingsure that your <strong>audio</strong> plays at its originalpitch, no matter what the tempo.There are two ways to use the Adjust<strong>Audio</strong> Tempo command:• You can adjust the selected <strong>audio</strong> tomatch the tempo of an existingTempo Map.• You can adjust the selected <strong>audio</strong> tomatch a new, static tempo.The following sections illustrate examplesof both processes.Adjusting <strong>Audio</strong> to a Tempo MapFollow through this example to see whythis process is useful and how to performit.SCENARIO:Assume you’ve already recorded yourMIDI and <strong>audio</strong> tracks, and you’reputting the final touches on thesequence. You decide that the songneeds a more energetic ending, soyou add an accelerando to the lastfour bars.PROBLEM:MIDI tracks easily follow the accelerando,speeding up but staying onpitch. Unfortunately, <strong>audio</strong> tracksmaintain their original playbackspeed, and now lag behind the beat.SOLUTION:Use the Adjust <strong>Audio</strong> Tempocommand to automatically time compressthe existing <strong>audio</strong> so that itfollows the new accelerando tempomap, while staying in perfect pitch.PROCESS:Perform the following steps:Create an accelerando in the final fourmeasures of your sequence usingany standard tempo editingtechniques.In this example, weÕll gradually increasethe tempo from 110 bpm to 140 bpmduring the final four bars.<strong>Vision</strong> & Studio <strong>Vision</strong> <strong>Pro</strong> — <strong>Audio</strong> Reference Manual 389
PART 7: MenusDraw an accelerando inthe Tempo Strip ChartChoose DSP>Adjust <strong>Audio</strong>Tempoª.Unless you disabled its display in theDSP P<strong>ref</strong>erences dialog (discussed onpage 423), <strong>Vision</strong> opens the Adjust<strong>Audio</strong> Tempo dialog box.Make sure ÒTempo MapÓ appears inthe top pop-up menu.Choose ÒTempo MapÓ fromthe pop-up menuSelect the final four measures of your<strong>audio</strong> track(s).Selecting the region of <strong>audio</strong> youneed to adjustFigure 37.8: Adjust <strong>Audio</strong> Tempo Dialog Box(for molding <strong>audio</strong> to an existing TempoMap).Choose <strong>Audio</strong>>Separate to create aseparate <strong>audio</strong> event for the regionyou wish to accelerate and select that<strong>audio</strong> event.You donÕt have to separate the <strong>audio</strong> inorder to use the Adjust <strong>Audio</strong> Tempocommand. However, since you onlyneed to process the final four bars, youcan save hard disk space and processingtime by processing only the regionthat needs to change.If ÒNew TempoÓ appears, simply selectÒTempo MapÓ from the pop-up menu asshown in Figure 37.8.Enter the tempo at which the <strong>audio</strong>was originally recorded.In this example, the <strong>audio</strong> was originallyrecorded at 110 bpm.390 Opcode Systems, Inc.
CHAPTER 35: DSP Menu: Pitch Shift, Formant Shift, Time Scale, and Adjust <strong>Audio</strong> TempoClick OK.Unless you disabled its display in theDSP P<strong>ref</strong>erences dialog (discussed onpage 423), <strong>Vision</strong> opens a Save Asdialog box.Type a name for the tempo-adjusted<strong>audio</strong> file.By default, <strong>Vision</strong> suggests a namebased on the auto-naming options youspecify in the DSP P<strong>ref</strong>erences dialog(discussed on page 423).Click Save.<strong>Vision</strong> creates a new <strong>audio</strong> file (or files)for the tempo-adjusted <strong>audio</strong>. It createsone or more new <strong>audio</strong> events to playthat <strong>audio</strong>, replacing the original <strong>audio</strong>event(s) in your sequence.Figure 37.9: Save As Dialog for Adjust <strong>Audio</strong>TempoWhen you adjust <strong>audio</strong> tempo, <strong>Vision</strong>constructs one or more new <strong>audio</strong> files(depending on the file saving option youselect in the DSP P<strong>ref</strong>erences dialogbox, discussed on page 423). It leavesyour original <strong>audio</strong> file (or files)unaffected.Use the File Format pop-up menu tospecify the desired file format (AIFFor Sound Designer II).Navigate to the folder in which youwant to save the file.By default, <strong>Vision</strong> selects the folder youspecify in the DSP P<strong>ref</strong>erences dialog(discussed on page 423).NOTE: If you never want to see thisSave As dialog box again (that is, youalways accept the default name and folder),click the Bypass this dialog next timeoption in the Save As dialog box.Should you wish to make the Save As dialogre-appear, choose DSP>DSP P<strong>ref</strong>erences,select “Adjust <strong>Audio</strong> Tempo” fromits Apply to pop-up menu, then uncheckthe Bypass Save As Dialog option.<strong>Vision</strong> & Studio <strong>Vision</strong> <strong>Pro</strong> — <strong>Audio</strong> Reference Manual 391
PART 7: MenusAdjusting <strong>Audio</strong> To A New, StaticTempoFollow through this example to see whythis process is useful and how toperform it.SCENARIO:Assume you’ve added a perfect vocaltrack to your MIDI sequence, butyou’d like the whole song to be a bitfaster.PROBLEM:MIDI tracks can easily play at a fastertempo, but <strong>audio</strong> tracks maintaintheir original playback speed, andnow lag behind the beat.SOLUTION:Use the Adjust <strong>Audio</strong> Tempo commandto create a new, static tempoand automatically time compress theexisting <strong>audio</strong> to match it.PROCESS:Perform the following steps:Select the <strong>audio</strong> event(s) you want toadjust to a new, static tempo.If you select a portion of an <strong>audio</strong> event,the entire event will be adjusted. The<strong>ref</strong>ore,if you want to adjust only a portionof an event, you must first separate thatportion into a new event using the<strong>Audio</strong>>Separate command.Choose DSP>Adjust <strong>Audio</strong>Tempoª.Unless you disabled its display in theDSP P<strong>ref</strong>erences dialog (discussed onpage 423), <strong>Vision</strong> opens the Adjust<strong>Audio</strong> Tempo dialog box.Make sure ÒNew TempoÓ appears inthe top pop-up menu.Choose ÒNew TempoÓ fromthe pop-up menuFigure 37.10: Adjust <strong>Audio</strong> Tempo Dialog Box(for molding <strong>audio</strong> to a new, static tempo)If ÒTempo MapÓ appears, simply selectÒNew TempoÓ from the pop-up menu asshown in Figure 37.10.Enter the tempo at which you wantthe entire sequence to play.In this example, weÕre increasing thetempo to 125 bpm.Click OK.Unless you disabled its display in theDSP P<strong>ref</strong>erences dialog (discussed onpage 423), <strong>Vision</strong> opens a Save Asdialog box.392 Opcode Systems, Inc.
CHAPTER 35: DSP Menu: Pitch Shift, Formant Shift, Time Scale, and Adjust <strong>Audio</strong> TempoConfigure the dialog as discussedpreviously, then click Save.<strong>Vision</strong> creates a new <strong>audio</strong> file (or files)for the tempo-adjusted <strong>audio</strong>. It createsone or more new <strong>audio</strong> events to playthat <strong>audio</strong>, replacing the original <strong>audio</strong>event(s) in your sequence.IMPORTANT: This process replaces theentire sequence’s Tempo Map with the new,static tempo you entered.<strong>Vision</strong> & Studio <strong>Vision</strong> <strong>Pro</strong> — <strong>Audio</strong> Reference Manual 393
PART 7: Menus394 Opcode Systems, Inc.
CHAPTER 36: DSP Menu: <strong>Audio</strong>-to-MIDI andMIDI-to-<strong>Audio</strong>The DSP menu contains numerous algorithmsdesigned to process <strong>audio</strong>completely within the digital domain.This chapter deals with the <strong>Audio</strong>-to-MIDI and MIDI-to-<strong>Audio</strong> commands.You can undo any DSP command. Thisprovides a convenient way to do an “A-Bcomparison” between the processed andunprocessed <strong>audio</strong>.The following sections describe the<strong>Audio</strong>-to-MIDI and MIDI-to-<strong>Audio</strong>algorithms in detail.Figure 38.1: DSP MenuDSP commands are constructive—meaningthey create new <strong>audio</strong> files withoutaltering your original <strong>audio</strong> data.WHO SHOULD READ THISCHAPTER?This chapter applies only to owners ofStudio <strong>Vision</strong> <strong>Pro</strong>.DSP commands work on mono, stereointerleaved, or linked <strong>audio</strong> files with bitdepths of 8, 16, or 24.If you select multiple <strong>audio</strong> files on whichto perform a DSP operation, all selected<strong>audio</strong> files must be the same type (mono,interleaved, or linked) and the same bitdepth (8, 16, or 24). The only exception tothis rule is the Mix command.<strong>Vision</strong> & Studio <strong>Vision</strong> <strong>Pro</strong> — <strong>Audio</strong> Reference Manual 395
PART 7: MenusAUDIO-TO-MIDINOTE: This command is available only toowners of Studio <strong>Vision</strong> <strong>Pro</strong>.Choose this command to create MIDIdata that replicates the selected <strong>audio</strong>data.You can convert single <strong>audio</strong> events, butyou cannot perform <strong>audio</strong> to MIDI conversionif your selection spans more thanone <strong>audio</strong> event.IMPORTANT: <strong>Vision</strong> can only convert<strong>audio</strong> data that contains monophonic performances.It cannot recognize chords—only single notes.How <strong>Vision</strong> Converts <strong>Audio</strong> Datato MIDI Data<strong>Vision</strong> analyzes the <strong>audio</strong> data and createsMIDI data of the following types:• Notes—<strong>Vision</strong> analyzes <strong>audio</strong> pitchand creates MIDI notes based on theanalysis.• Velocity—<strong>Vision</strong> analyzes the loudnessof each <strong>audio</strong> note’s attack anduses the analysis to assign a MIDIvelocity to each MIDI note.• Volume—<strong>Vision</strong> analyzes how thevolume of an <strong>audio</strong> note changes overtime. It then generates MIDI volumechanges based on the analysis. Byanalyzing both volume and velocity,<strong>Vision</strong> creates an accurate MIDI representationof the dynamicscontained in your <strong>audio</strong> file.• Brightness—<strong>Vision</strong> analyzes thetonal characteristics of your <strong>audio</strong> fileand generates MIDI brightness controllerdata to match. You can thenmap the brightness data to a similarparameter in your MIDI device tomake its timbral changes match the<strong>audio</strong>’s.• Pitch bend—<strong>Vision</strong> analyzes anypitch fluctuations that occur in the<strong>audio</strong> file and generates MIDI pitchbend data to match.NOTE: You can enable or disable any ofthese MIDI conversion options. For example,you can convert <strong>audio</strong> to MIDI byanalyzing only the notes and their velocities,while ignoring volume, brightness, andpitch bend characteristics. For more information,see Using the <strong>Audio</strong>-to-MIDICommand (pg. 397).<strong>Audio</strong>-To-MIDI UsesThe following are just some of the manyuses for Opcode’s <strong>Audio</strong>-to-MIDIcommand:• Create MIDI sequences withoutplaying a MIDI keyboardSing each track and convert it toMIDI data. Play a track on the guitar,bass, saxophone, or whatever otherinstrument you like, then convert it toa MIDI track.396 Opcode Systems, Inc.
CHAPTER 36: DSP Menu: <strong>Audio</strong>-to-MIDI and MIDI-to-<strong>Audio</strong>• Edit <strong>audio</strong> files in the MIDIdomainYou can convert <strong>audio</strong> data intoMIDI, edit the MIDI data, then applyyour MIDI edits to your original<strong>audio</strong> file (using the MIDI-to-<strong>Audio</strong> command). In this way youcan:• fix wrong notes in your <strong>audio</strong>performance• add harmony parts to your <strong>audio</strong>performance• create completely differentdynamics, timbres, and “feels”• Change the timing of your <strong>audio</strong>performance• create bizarre new effects• Add “feel” to your MIDIperformanceYou can sing along with your MIDInotes and apply the volume, brightness,and pitch bend changes derivedfrom your voice to your MIDIperformance.Using the <strong>Audio</strong>-to-MIDICommandFollow through this example to learn howto use <strong>Vision</strong>’s <strong>Audio</strong>-to-MIDIcommand:Figure 39.1: Basic <strong>Audio</strong>-to-MIDI Dialog BoxFrom the pop-up <strong>Audio</strong> Templatemenu, select the type of <strong>audio</strong>contained in the file you wish toconvert.For example, if you recorded a pickedelectric bass guitar and want to generatea MIDI duplicate of the performance,select the Bass (Electric) template.From the pop-up MIDI Instrumentmenu, select the MIDI Instrument thatwill play the MIDI data youÕre about togenerate.Select an <strong>audio</strong> event.Choose DSP><strong>Audio</strong>-to-MIDIª.<strong>Vision</strong> opens the <strong>Audio</strong>-to-MIDI dialogbox. This dialog box is discussed completelyin The Basic <strong>Audio</strong>-to-MIDIDialog Box (pg. 398).If the template you choose isgenerating pitch bend data (asindicated by a checked Pitch Bendoption), then you must tell <strong>Vision</strong> to<strong>Vision</strong> & Studio <strong>Vision</strong> <strong>Pro</strong> — <strong>Audio</strong> Reference Manual 397
PART 7: Menusmatch the pitch bend range of yourMIDI Instrument.NOTE: If youÕre not satisfied with theoutcome of your <strong>Audio</strong>-to-MIDIª conversion,modify some of these basicparameters and try again. If youÕre stillnot satisfied with the conversion, clickthe More Choices button to access allthe <strong>Audio</strong>-to-MIDIª parameters (as discussedin The Expanded <strong>Audio</strong>-to-MIDIDialog Box (pg. 400).IMPORTANT: You must do this beforeyou convert the <strong>audio</strong> because <strong>Vision</strong>needs this information to generate theproper pitch bend data.IMPORTANT: Make sure your synthesizerÕspitch bend range is equal to orgreater than the maximum pitch bendcontained in the <strong>audio</strong> file. For example,if your <strong>audio</strong> data contains pitch glides ofa major third (4 semitones), you mustprogram your synthesizerÕs pitch bendrange to 4 semitones or greater.If you know the pitch range of youroriginal <strong>audio</strong> file, enter that rangeinto the Input Range numericals.For example, a standard electric bassguitar has a pitch range from E1 to G4.But, if you only played notes between E1to A2, you can help the <strong>Audio</strong>-to-MIDIconversion by entering ÒE1Ó and ÒA2Óinto the Input Range numericals.NOTE: You can enter these numbersfrom a MIDI keyboard, if that keyboard isenabled in <strong>Vision</strong>Õs Enable Input Devicesdialog box.Click OK.<strong>Vision</strong> analyzes the <strong>audio</strong> data and generatesMIDI data, which it places in thesame track as the original <strong>audio</strong> file.The Basic <strong>Audio</strong>-to-MIDI DialogBoxFigure 39.2 shows a typical <strong>Audio</strong>-to-MIDI dialog box. Notice that it’s split inhalf—<strong>Audio</strong> parameters are in the left halfand MIDI parameters are in the right half.Figure 39.2: Basic <strong>Audio</strong>-to-MIDI Dialog BoxThe following is a list of parameters containedin the basic <strong>Audio</strong>-to-MIDI dialogbox: <strong>Audio</strong> Template pop-up menu—From this pop-up menu, select thetemplate that most closely matchesyour <strong>audio</strong>’s characteristics. The templateyou select determines thedefault setting of every <strong>Audio</strong>-to-MIDI parameter (with the excep-398 Opcode Systems, Inc.
CHAPTER 36: DSP Menu: <strong>Audio</strong>-to-MIDI and MIDI-to-<strong>Audio</strong>tion of MIDI Instrument selection).You can create your own <strong>audio</strong> templatesas described in CreatingCustom <strong>Audio</strong> Templates (pg. 405).<strong>Audio</strong> Instrument (fixed)—Thisfield shows the name of the <strong>Audio</strong>Instrument containing the <strong>audio</strong> datayou wish to convert. You cannotchange this field—it appears hereonly as a reminder.Input Range numericals—This setof numericals tells <strong>Vision</strong> what your<strong>audio</strong> file’s pitch range is.When you select an <strong>Audio</strong> Template,<strong>Vision</strong> automatically sets the rangenumericals to a reasonable default(based on the overall pitch range ofthe characteristic instrument). If youhave a rough idea of the pitch rangeactually used by your <strong>audio</strong> file, youcan improve <strong>Audio</strong>-to-MIDI performanceby manually adjusting therange numericals.Pitch Bend Exceeds numerical—This numerical tells the conversionalgorithm how much <strong>audio</strong> pitchbending to accept before generating anew MIDI note. This is furtherdescribed in the following examples:Example #1: An electric guitar playeroften bends a string to raise the pitchone semitone. The<strong>ref</strong>ore, this numericalshould be set to 1 half-step forelectric guitar (since it’s unlikely anypitch bends greater than this willoccur).Example #2: A trombone player oftencreates glissandos over a wide pitchrange. To accurately capture suchpitch bends as glissandos (and not asa series of individual notes), thisnumerical should be set to a largenumber of half-steps.MIDI Instrument pop-up menu—From this pop-up menu, select theMIDI Instrument that will play theMIDI data <strong>Vision</strong> creates.Generate options—Use these checkboxes to tell <strong>Vision</strong> what types ofMIDI data you want it to generate.There are four options:Notes option (fixed)—This option isalways checked in the basic <strong>Audio</strong>-to-MIDI dialog box—you cannot disableit. <strong>Vision</strong> always generates MIDInotes and MIDI velocity values fromthe <strong>audio</strong> it analyzes.Volume option—If you select thisoption, <strong>Vision</strong> creates MIDI volumedata (controller #7) to insure that relativeMIDI volume levels match thosecontained in your original <strong>audio</strong> file.<strong>Vision</strong> & Studio <strong>Vision</strong> <strong>Pro</strong> — <strong>Audio</strong> Reference Manual 399
PART 7: MenusPitch Bend option—If you selectthis option, <strong>Vision</strong> creates pitch benddata to accurately <strong>ref</strong>lect every subtle(or not so subtle) pitch fluctuationcontained in your original <strong>audio</strong> file.The amount of pitch bend created bya MIDI device is based on thatdevice’s pitch bend range parameter.Some devices globally apply a pitchbend range to all patches—otherMIDI devices apply different pitchbend ranges to each patch.<strong>Vision</strong> must know the pitch bendrange of your MIDI device beforegenerating MIDI pitch bend data—this insures that <strong>Vision</strong> creates theproper pitch bend values. Enter thepitch bend range of your MIDI deviceinto the Pitch Bend Range numerical.Always make sure that this valueis greater than or equal to the PitchBend Exceeds numerical (asdescribed in Item ).Brightness—If you select thisoption, <strong>Vision</strong> creates MIDI brightnessdata to insure that your MIDIdata matches the relative timbralvalues in your original <strong>audio</strong> file. Generally,MIDI brightness is mapped tocontroller #73, but you can select anycontroller value from the correspondingpop-up menu.More Choices button—Click thisbutton to expand the <strong>Audio</strong>-to-MIDIdialog box to see the entire parameterset. Use the entire parameter set tofine-tune the conversion process or tocreate your own <strong>Audio</strong>-to-MIDItemplates. For more information, seeThe Expanded <strong>Audio</strong>-to-MIDI DialogBox (pg. 400).The Expanded <strong>Audio</strong>-to-MIDIDialog BoxIf you click the More Choices button in abasic <strong>Audio</strong>-to-MIDI dialog box, the boxexpands to show all the <strong>Audio</strong>-to-MIDIparameters.Figure 39.3: Expanded <strong>Audio</strong>-to-MIDI Dialog BoxFigure 39.3 shows a typical expanded<strong>Audio</strong>-to-MIDI dialog box and its extraparameters. These are: Create new note if parameters—Use these parameters to help <strong>Vision</strong>decide when to generate new MIDInotes. There are three parametersinvolved in this process (as indicatedby the border around them):Pitch Bend exceeds numerical—This was described in Item of TheBasic <strong>Audio</strong>-to-MIDI Dialog Box(pg. 398).Note length exceeds pop-upmenu—Use this pop-up menu to finetuneyour conversion algorithm byremoving spurious notes created by400 Opcode Systems, Inc.
CHAPTER 36: DSP Menu: <strong>Audio</strong>-to-MIDI and MIDI-to-<strong>Audio</strong>the <strong>Audio</strong>-to-MIDI algorithm. Thisparameter is discussed in detail inUsing the “Note Length Exceeds”Parameter (pg. 402).Pitch is stable for pop-up menu—This pop-up menu tells the conversionalgorithm to generate a MIDInote if the <strong>audio</strong>’s fluctuating pitchremains stable for a set amount oftime.For example, if the <strong>audio</strong> slowly glissandosfrom C4 up to G4 but lingersat E4 for longer than the Pitch isstable for value, then <strong>Vision</strong> createsa MIDI note at E4.If you don’t want <strong>Vision</strong> to create newnotes from a wavering or gliding<strong>audio</strong> input, select higher values fromthe pop-up menu.Conversion Speed pop-up menu—Use this pop-up menu to tell <strong>Vision</strong>how quickly to perform the <strong>Audio</strong>-to-MIDI conversion.“Slower” does not necessarily mean“better.” In fact, “Fast” will work formost conversions. Basically, thisparameter tells <strong>Vision</strong> how much ofthe <strong>audio</strong>’s upper-harmonic spectrumto consider when performing an<strong>Audio</strong>-to-MIDI conversion. Sourcematerial that’s rich in harmonic contentmay require slower conversions.Concert ‘A’ numerical—Use thisnumerical to tell <strong>Vision</strong> how yoursource <strong>audio</strong> is tuned. Most Americaninstruments are tuned to A=440 Hz,though different countries or styles ofmusic sometimes use slightly differentvalues.Unpitched <strong>Audio</strong> option and AssignTo numerical—Check this option ifyour <strong>audio</strong> source is unpitched (suchas a percussion track) or if you want<strong>Vision</strong> to only extract rhythmic informationfrom the <strong>audio</strong> file. Use theAssign To numerical to tell <strong>Vision</strong>which single MIDI note to createwhen performing the <strong>Audio</strong>-to-MIDI conversion.Volume pop-up menu—From thispop-up menu, select how you want<strong>Vision</strong> to generate MIDI volume data.There are two choices:Relative—If you select this option,<strong>Vision</strong> generates a different MIDIvelocity value for each note, then generatesMIDI volume levels based onthe changes in volume relative to thenote’s velocity.Absolute—If you select this option,<strong>Vision</strong> gives all MIDI notes a velocityvalue of 100, and uses only MIDIvolume data to mirror the dynamicscontained in your <strong>audio</strong> performance.NOTE: If you un-check the GenerateVolume option, then <strong>Vision</strong> always generatesdynamic MIDI velocity data.Brightness controller pop-upmenu—From this pop-up menu,select which MIDI controller will playthe extracted brightness data (if theBrightness option is checked).NOTE: If your MIDI device doesn’trespond to the standard MIDI brightnesscontroller messages, you can usethis pop-up menu to assign brightnessdata to any MIDI controller, then con-<strong>Vision</strong> & Studio <strong>Vision</strong> <strong>Pro</strong> — <strong>Audio</strong> Reference Manual 401
PART 7: Menusfigure your synthesizer so that theselected controller modulates its VCFfrequency or another similarparameter.Use selected notes option—Checkthis option to extract “feel” characteristics(pitch bend, volume,brightness) from the <strong>audio</strong> data andapply them to user-specified MIDInotes. For more information, seeUsing the “Use Selected Notes” Options(pg. 403).Fewer Choices button—Click thisbutton to collapse the <strong>Audio</strong>-to-MIDIdialog box to see only its basic parametersas described in The Basic <strong>Audio</strong>to-MIDIDialog Box (pg. 398).eliminate the double note, select a Notelength exceeds value that’s longer thanthe duration of the first (spurious) note.This parameter works differently dependingon whether the pitch of the spuriousnote is the same or different than thepitch of the “real” note:• Spurious note is the same pitchas the “real” note:Spurious note of same pitch (createdby ÒdirtyÓ attack)Using the “Note Length Exceeds”ParameterSometimes the MIDI data generated bythe conversion can contain extra notes ofvery short duration. This may occur if:• your attacks aren’t clean (such as aslight catch in the throat of a vocalistor some fret noise from a guitar), or...• your <strong>audio</strong> contains some attack blurring(such as from early <strong>ref</strong>lections orreverb), or...• your <strong>audio</strong> recording is noisy.For example, if you convert an electricguitar performance to MIDI, the algorithmmight sometimes create two noteson the attack—one when the pick hits thestring and another immediately afterwardwhen the string reaches full vibration. ToFigure 39.4: MIDI conversion w/spuriousnote of same pitchIf the spurious note is the same pitchas the second “real” note, and youselect a Note length exceeds valuegreater than the length of the spuriousnote, then <strong>Vision</strong> creates a singleMIDI note that begins with the firstattack (where the spurious notewould normally be created) and endswhere the “real” note ends.Figure 39.5: MIDI conversion w/spuriousnote removed402 Opcode Systems, Inc.
CHAPTER 36: DSP Menu: <strong>Audio</strong>-to-MIDI and MIDI-to-<strong>Audio</strong>• Spurious note is a different pitchthan the “real” note:Spurious note of different pitch(created by ÒdirtyÓ attack)Using the “Use Selected Notes” OptionsIf you check the Use selected notesoption, <strong>Vision</strong> will not extract MIDI notevalues from the <strong>audio</strong> data—instead,<strong>Vision</strong> uses existing MIDI notes, and itcreates other types of MIDI data, which itapplies to those existing notes.Figure 39.6: MIDI conversion w/spuriousnote of different pitchIf the spurious note is a different pitchthan the second “real” note, and youselect a Note length exceeds valuegreater than the length of the spuriousnote, then <strong>Vision</strong> ignores thespurious note and creates a singleMIDI note that begins and ends at thetimes dictated by the “real” note.Figure 39.7: MIDI conversion w/spuriousnote removedIf you check the Use selected notesoption, <strong>Vision</strong> produces a second optioncalled Generate new velocities.• If you check this option, <strong>Vision</strong> analyzesthe dynamics of the <strong>audio</strong> andreplace the velocities of your existingMIDI notes with those it derives fromthe <strong>audio</strong> data.• If you un-check this option, <strong>Vision</strong>uses the velocity values of your existingMIDI notes instead of those itderives from the <strong>audio</strong> data.The following examples illustrate whythese parameters are helpful and how touse them.EXAMPLE 1: “Wailing”Assume you have a recording of a flowing,passionate, coloratura vocal performed ina non-western scale (such as somemiddle-eastern vocals). If you’d like toconvert that vocal to MIDI data and play iton a synthesizer, you’ll need to forgetabout generating MIDI notes—there basicallyaren’t any.<strong>Vision</strong> & Studio <strong>Vision</strong> <strong>Pro</strong> — <strong>Audio</strong> Reference Manual 403
PART 7: MenusTo convert this type of <strong>audio</strong> performanceinto MIDI:In the Graphic Window, draw a singleMIDI note that runs the duration of the<strong>audio</strong> event you wish to convert.Draw that MIDI note roughly in themiddle of the range of pitches beingsung.Shift-click the MIDI note and the <strong>audio</strong>event to select both.Choose DSP><strong>Audio</strong>-to-MIDIª.<strong>Vision</strong> opens the basic <strong>Audio</strong>-to-MIDIdialog box.Click the More Choices button tosee the expanded dialog box.Check the Use generated notesoption.Un-check the Generate newvelocities option.Check those values you want togenerate (such as pitch bend,volume, and brightness).Make sure to set a very wide pitchbend range (such as +/- 12 semitones)on both the <strong>Audio</strong> and MIDI sides ofthe dialog box.Click OK.<strong>Vision</strong> generates the requested MIDIdata (such as volume, pitch bend, orbrightness), using the single MIDI noteas the baseline for the data it generates.EXAMPLE 2: “Vocoding”Assume you’d like to use your voice toadd character to a MIDI performance. Todo so:Record the MIDI notes whosecharacter you want to modify.In the same track, overdub your voicesinging the same thing as the MIDInotes.Select both the MIDI notes and the<strong>audio</strong> data.Choose DSP><strong>Audio</strong>-to-MIDIª.<strong>Vision</strong> opens the basic <strong>Audio</strong>-to-MIDIdialog box.Click the More Choices button tosee the expanded dialog box.Check the Use generated notesoption.Check the Generate newvelocities option.This lets your MIDI notes take on additionaldynamic characteristics from yourvocal.Check those values you want togenerate (such as pitch bend,volume, and brightness).Click OK.<strong>Vision</strong> generates the requested MIDIdata, using your original MIDI notes, butextrapolating new MIDI controller informationfrom your vocal recording.404 Opcode Systems, Inc.
CHAPTER 36: DSP Menu: <strong>Audio</strong>-to-MIDI and MIDI-to-<strong>Audio</strong>Creating Custom <strong>Audio</strong>TemplatesYou can create your own <strong>Audio</strong> Templatesusing the expanded <strong>Audio</strong>-to-MIDIdialog box. <strong>Audio</strong> Templates retain thevalue of all parameters in the <strong>Audio</strong>-to-MIDI dialog box, except:• MIDI Instrument selection• Absolute vs. Relative volume• MIDI Pitch Bend range• Brightness controller selection• Status of the Use Selected Notescheck box.Creating a New <strong>Audio</strong> TemplateChoose Add Template from thepop-up menu.<strong>Vision</strong> opens a dialog box.Type a name for your template, thenclick OK.<strong>Vision</strong> saves the template in the ÒSV<strong>Audio</strong>-to-MIDI TemplateÓ file, located inthe same folder as the Studio <strong>Vision</strong>application.To save a custom <strong>Audio</strong> Template.Set all the <strong>Audio</strong>-to-MIDI parametersas desired.Press and hold the mouse on the<strong>Audio</strong>-to-MIDI dialogÕs pop-up menu.Updating an Existing <strong>Audio</strong> TemplateYou can modify an existing <strong>Audio</strong> Templateby selecting it in the <strong>Audio</strong> Templatepop-up menu, changing the desiredparameters, then choosing Update Templatefrom the <strong>Audio</strong>-to-MIDI dialog’spop-up menu.Renaming an <strong>Audio</strong> TemplateYou can rename an existing <strong>Audio</strong> Templateby selecting it in the <strong>Audio</strong> Templatepop-up menu, then choosing RenameTemplate from the <strong>Audio</strong>-to-MIDI dialog’spop-up menu.<strong>Vision</strong> & Studio <strong>Vision</strong> <strong>Pro</strong> — <strong>Audio</strong> Reference Manual 405
PART 7: MenusDeleting an <strong>Audio</strong> TemplateYou can also delete <strong>Audio</strong> Templates. Todo so:Choose Delete Template from the<strong>Audio</strong>-to-MIDI dialogÕs pop-up menu.<strong>Vision</strong> opens a dialog box asking ifyouÕre sure you want to delete theselected template.Click OK.<strong>Vision</strong> deletes the template.NOTE: You cannot delete the factory templatesthat ship with <strong>Vision</strong>.Re-Analyze <strong>Audio</strong>The <strong>Audio</strong>-to-MIDI dialog’s pop-up menucontains one additional option called Reanalyze<strong>Audio</strong>.You will only need to use this command if,after performing an <strong>Audio</strong>-to-MIDI conversion,you edit the original <strong>audio</strong> data inan external editing program (such as<strong>Audio</strong>Shop, Sound Designer II, or Peak)and then want to use that same <strong>audio</strong> fileto perform another <strong>Audio</strong>-to-MIDIconversion.INSIDER’S NOTE: When you process<strong>audio</strong> data externally, <strong>Vision</strong> has no way ofknowing what changes occurred. ChoosingRe-analyze <strong>Audio</strong> forces <strong>Vision</strong> to re-performall its advanced <strong>audio</strong>-to-MIDIcomputations on the <strong>audio</strong> file.MIDI-TO-AUDIONOTE: This command is available only toowners of Studio <strong>Vision</strong> <strong>Pro</strong>.Choose this command to apply MIDIedits to the selected <strong>audio</strong> data.MIDI-to-<strong>Audio</strong> conversion provides anintuitive way to edit <strong>audio</strong> data usinguser-friendly MIDI editing techniques.You can edit the MIDI data created by an<strong>Audio</strong>-to-MIDI conversion, then applythose edits to your original <strong>audio</strong> file. Thislets you:• fix wrong notes in your <strong>audio</strong>performance• add harmony parts to your <strong>audio</strong>performance• Change the timing of your <strong>audio</strong>performance• stabilize a “wobbling” pitch• create completely different dynamics,timbres, and “feels”• create bizarre new effectsThe following section discusses the individualcomponents of the MIDI-to-<strong>Audio</strong>dialog box. Using the MIDI-to-<strong>Audio</strong>Command (pg. 408) provides severalstep-by-step examples of how to useMIDI-to-<strong>Audio</strong> conversion.406 Opcode Systems, Inc.
CHAPTER 36: DSP Menu: <strong>Audio</strong>-to-MIDI and MIDI-to-<strong>Audio</strong>The MIDI-to-<strong>Audio</strong> Dialog BoxWhen you select a time region that containsboth MIDI and <strong>Audio</strong> data, thenchoose DSP>MIDI-to-<strong>Audio</strong>, <strong>Vision</strong>opens a MIDI-to-<strong>Audio</strong> dialog box asshown in Figure 39.8 (unless disabled inthe DSP P<strong>ref</strong>erences dialog).Use Selected MIDI Pitch Bendoption—Check this option if you want<strong>Vision</strong> to apply changes in MIDI pitchbend to your original <strong>audio</strong>performance.<strong>Pro</strong>cess Note Until pop-up menu—This is one of those “tweaky” parametersthat can have a drastic affect onthe modified <strong>audio</strong> file. You have twoprocessing options.Figure 39.8: MIDI-to-<strong>Audio</strong> Dialog BoxThe following is a list parameters containedin the MIDI-to-<strong>Audio</strong> dialog box: Use Selected MIDI Notes option—Check this option if you want <strong>Vision</strong>to apply MIDI note changes to youroriginal <strong>audio</strong> performance. Use Selected MIDI Velocityoption—Check this option if you want<strong>Vision</strong> to apply changes in MIDIvelocity to your original <strong>audio</strong>performance. Use Selected MIDI Volumeoption—Check this option if you want<strong>Vision</strong> to apply changes in MIDIvolume to your original <strong>audio</strong>performance.End of note: Choose this option ifyour original <strong>audio</strong> file is very legato,or was recorded with reverb or in anambient space.Next note: Choose this option if youroriginal <strong>audio</strong> file contains notes thatbegin with a breath sound or othersimilarly characteristic attackattribute.For more information, see Using the“<strong>Pro</strong>cess Note Until” Options(pg. 415).<strong>Vision</strong> & Studio <strong>Vision</strong> <strong>Pro</strong> — <strong>Audio</strong> Reference Manual 407
PART 7: MenusPitch Shift Quality pop-up menu—<strong>Vision</strong> offers two types of pitch shiftingalgorithms: Faster and Best.Using the MIDI-to-<strong>Audio</strong>CommandThe following sections discuss a few ofthe many uses for the MIDI-to-<strong>Audio</strong>command.Whenever your applied MIDI editswill affect the pitch of your <strong>audio</strong> performance,you need to tell <strong>Vision</strong>which pitch shift algorithm to apply.Faster takes less time to calculate thepitch shift, and it produces a somewhatlower fidelity <strong>audio</strong> file. In mostcases, however, Faster quality willproduce satisfactory <strong>audio</strong> results.Users with high end PowerMac computerswill probably want to start withBest, unless the processing timesbecome too long.Maintain voice character optionThis option lets you pitch-shift an <strong>audio</strong>event without inducing ÒDarth VaderÓ orÒChipmunkÓ effects -- the pitch-shiftedsignal retains all the vocal characteristicsof the original performance, so it soundsas if the same singer is simply singing ina different key.Enabling this option requires more computationand, the<strong>ref</strong>ore, more processingtime.You can use this option with any type of<strong>audio</strong> (not just vocals), but the resultsmay be less noticeable because formantsare less pronounced in non-vocalinstruments.Fixing Wrong NotesOne of the simplest and most useful featuresof MIDI-to-<strong>Audio</strong> conversion isusing MIDI data to correct mistakes in an<strong>audio</strong> performance. To do so:Select an <strong>audio</strong> event and convert itto MIDI data.<strong>Audio</strong>-to-MIDIª conversion is discussedin detail in <strong>Audio</strong>-to-MIDIª (pg. 396).408 Opcode Systems, Inc.
CHAPTER 36: DSP Menu: <strong>Audio</strong>-to-MIDI and MIDI-to-<strong>Audio</strong>In the MIDI track that <strong>Vision</strong>generates, use standard MIDI editingtechniques to correct the wrong note.Check the Notes option and leavethe other options unchecked.Since you only edited the pitch of a MIDInote, youÕll speed up the MIDI-to-<strong>Audio</strong>analysis by un-checking the other,unchanged types of MIDI data.You could either drag the note to the correctpitch or modify the pitch bend datain the Strip Chart, depending on howÒwrongÓ the note is.In the Graphic WindowÕs Ruler, dragto select the time range you want toconvert.This selects all MIDI data (notes andcontrollers) plus all <strong>Audio</strong> data in therange.Drag a range in the ruler to selectboth MIDI and <strong>Audio</strong> dataClick OK.Unless you disabled its display in theDSP P<strong>ref</strong>erences dialog (discussed onpage 423), <strong>Vision</strong> opens a Save Asdialog box.Select the type of <strong>audio</strong> file you wishto create, name it, and select avolume or folder in which to store it.Click Save.<strong>Vision</strong> creates a new <strong>audio</strong> file andplaces a new <strong>audio</strong> event in yoursequence. This new <strong>audio</strong> event soundsexactly like your original <strong>audio</strong> event, butwith all the notes played at the correctpitch.Choose DSP>MIDI-to-<strong>Audio</strong>ª.Unless you disabled its display in theDSP P<strong>ref</strong>erences dialog (discussed onpage 423), <strong>Vision</strong> opens the MIDI-to-<strong>Audio</strong> dialog box.<strong>Vision</strong> & Studio <strong>Vision</strong> <strong>Pro</strong> — <strong>Audio</strong> Reference Manual 409
PART 7: MenusStabilizing Pitch FluctuationsYou can stabilize a “wobbling” vocalist byconverting the vocal to MIDI, removingthe pitch bend data, then applying theedits to the vocal performance. To do so:Using the Pencil tool and a flat curveshape, draw a new pitch bend ofvalue = 0.Select an <strong>audio</strong> event and convert itto MIDI data.<strong>Audio</strong>-to-MIDIª conversion is discussedin detail in <strong>Audio</strong>-to-MIDIª (pg. 396).In the MIDI track that <strong>Vision</strong>generates, open a Strip Chart forpitch bend.ÒDrawÓ a new, ßat pitch bend ofvalue = 0.Figure 39.9: Pitch Bend data generated by<strong>Audio</strong>-to-MIDI conversionIn the Graphic WindowÕs Ruler, dragto select the time range you want toconvert.This selects all MIDI data (notes andcontrollers) plus all <strong>Audio</strong> data in therange.Choose DSP>MIDI-to-<strong>Audio</strong>ª.Unless you disabled its display in theDSP P<strong>ref</strong>erences dialog (discussed onpage 423), <strong>Vision</strong> opens the MIDI-to-<strong>Audio</strong> dialog box.410 Opcode Systems, Inc.
CHAPTER 36: DSP Menu: <strong>Audio</strong>-to-MIDI and MIDI-to-<strong>Audio</strong>Check the Pitch Bend option andleave the other options unchecked.Since you only edited pitch bend, youÕllspeed up the MIDI-to-<strong>Audio</strong> analysis byun-checking the other, unchanged typesof MIDI data.Click OK.Unless you disabled its display in theDSP P<strong>ref</strong>erences dialog (discussed onpage 423), <strong>Vision</strong> opens a Save Asdialog box.Select the type of <strong>audio</strong> file you wishto create, name it, and select avolume or folder in which to store it.Click Save.<strong>Vision</strong> creates a new <strong>audio</strong> file andplaces a new <strong>audio</strong> event in yoursequence. This new <strong>audio</strong> event soundsexactly like your original <strong>audio</strong> event, butwith all the pitch bend ÒwobbleÓ removedfrom the vocal.Creating <strong>Audio</strong> HarmoniesYou can create custom harmonies usingstandard MIDI editing techniques, thenapply those harmonies to your <strong>audio</strong> data.To do so:Select an <strong>audio</strong> event and copy it toanother track.In the new track, select the copied<strong>audio</strong> event and convert it to MIDIdata.<strong>Audio</strong>-to-MIDIª conversion is discussedin detail in <strong>Audio</strong>-to-MIDIª (pg. 396).<strong>Vision</strong> & Studio <strong>Vision</strong> <strong>Pro</strong> — <strong>Audio</strong> Reference Manual 411
PART 7: MenusIn the MIDI track that <strong>Vision</strong>generates, use standard MIDI editingtechniques to create a harmony part.Choose DSP>MIDI-to-<strong>Audio</strong>ª.Unless you disabled its display in theDSP P<strong>ref</strong>erences dialog (discussed onpage 423), <strong>Vision</strong> opens the MIDI-to-<strong>Audio</strong> dialog box.Check the Notes option and leavethe other options unchecked.Since you only created new MIDI notes,thereÕs no reason to apply any othertypes of MIDI data to the <strong>audio</strong> edit.Delete the original MIDI notes, leavingonly the newly-created harmonynotes.In the Graphic WindowÕs Ruler, dragto select the time range you want toconvert.This selects all MIDI data (notes andcontrollers) plus all <strong>Audio</strong> data in therange.Click OK.Unless you disabled its display in theDSP P<strong>ref</strong>erences dialog (discussed onpage 423), <strong>Vision</strong> opens a Save Asdialog box.Select the type of <strong>audio</strong> file you wishto create, name it, and select avolume or folder in which to store it.Click Save.<strong>Vision</strong> creates a new <strong>audio</strong> file andplaces a new <strong>audio</strong> event in yoursequence. This new <strong>audio</strong> event soundsexactly like your original <strong>audio</strong> event, butuses the harmonizing notes.Copy the newly created <strong>audio</strong> eventback into the original track and412 Opcode Systems, Inc.
CHAPTER 36: DSP Menu: <strong>Audio</strong>-to-MIDI and MIDI-to-<strong>Audio</strong>assign it to a different <strong>Audio</strong>Instrument.In the MIDI track that <strong>Vision</strong>generates, click the note you wish tolengthen.When you play the sequence, both <strong>audio</strong>events play, creating a perfectly harmonizedperformance.Changing <strong>Audio</strong> TimingYou can lengthen or shorten MIDI notes,then apply the changes to the <strong>audio</strong>data—creating an entirely different rhythmicfeel to your <strong>audio</strong> performance. To doso:Choose Do>Scale Time.<strong>Vision</strong> opens the Scale Time dialog box.Select an <strong>audio</strong> event and convert itto MIDI data.<strong>Audio</strong>-to-MIDIª conversion is discussedin detail in <strong>Audio</strong>-to-MIDIª (pg. 396).<strong>Vision</strong> & Studio <strong>Vision</strong> <strong>Pro</strong> — <strong>Audio</strong> Reference Manual 413
PART 7: MenusEnter a new length for the MIDI note.In this example, weÕve changed thelength of the note to 360.NOTE: You cannot lengthen or shorten anote by a factor of more than 2, nor canyou pitch-shift <strong>audio</strong> greater than oneoctave up or down.Click OK.<strong>Vision</strong> lengthens the selected MIDI note(also scaling any pitch bend, volume, orbrightness data) and, to accommodate it,shifts all the other notes later in time.Choose DSP>MIDI-to-<strong>Audio</strong>ª.Unless you disabled its display in theDSP P<strong>ref</strong>erences dialog (discussed onpage 423), <strong>Vision</strong> opens the MIDI-to-<strong>Audio</strong> dialog box.Check the Notes options and leavethe others unchecked.Since you only edited a MIDI note,thereÕs no reason to apply any othertypes of MIDI data back to the <strong>audio</strong>,although other kinds of MIDI data can beedited and used to modify the <strong>audio</strong>event if you desire.Click OK.Unless you disabled its display in theDSP P<strong>ref</strong>erences dialog (discussed onpage 423), <strong>Vision</strong> opens a Save Asdialog box.Select the type of <strong>audio</strong> file you wishto create, name it, and select avolume or folder in which to store it.Click Save.<strong>Vision</strong> creates a new <strong>audio</strong> file andplaces a new <strong>audio</strong> event in yoursequence.Notice that the <strong>Audio</strong> data no longeraligns with the MIDI data.In the ruler at the top of the GraphicWindow, drag to select all MIDI and<strong>audio</strong> data.414 Opcode Systems, Inc.
CHAPTER 36: DSP Menu: <strong>Audio</strong>-to-MIDI and MIDI-to-<strong>Audio</strong>This new <strong>audio</strong> event sounds exactly likeyour original <strong>audio</strong> event, but with thesecond note extended in duration.You can scale time automatically, withoutopening the Scale Time dialog box. To doso:Using the “<strong>Pro</strong>cess Note Until”OptionsThe easiest way to understand this optionis by example.EXAMPLE 1:Select a MIDI note.Hold down the Option and Shift keys,then move the cursor over one of theedit points in the Graphic WindowÕsruler.The cursor becomes a Scale TimeCursor.Scale Time cursor positioned overedit pointSuppose you recorded your original <strong>audio</strong>with reverberation, then performed an<strong>Audio</strong>-to-MIDI conversion as shown inFigure 39.10.Gap between MIDI notes occurswhen reverberation level falls to avery low levelReverberant tailOption-Shift-drag the edit point tolengthen or shorten the selected note,scaling time as you do so.Figure 39.10: <strong>Audio</strong>-to-MIDI conversion ofreverberant notesIf you change the pitch of the first MIDInote, your Graphic Window looks asfollows:<strong>Vision</strong> & Studio <strong>Vision</strong> <strong>Pro</strong> — <strong>Audio</strong> Reference Manual 415
PART 7: MenusNow, if you perform a MIDI-to-<strong>Audio</strong> conversion,<strong>Vision</strong> changes the pitch of thefirst <strong>audio</strong> note from “A” to “C”.This <strong>audio</strong> is pitch-shiftedto ÒCÓ.This <strong>audio</strong> is unchanged.What happens to the<strong>audio</strong> in THIS range?Figure 39.11: Pitch Shifted <strong>Audio</strong> Quandary #1Look at Figure 39.11. What does <strong>Vision</strong>do with the area in question? This is thepurpose of the <strong>Pro</strong>cess Note Until popupmenu.If you select the Next note option, <strong>Vision</strong>pitch-shifts the first <strong>audio</strong> note ALL THEWAY to the beginning of the secondMIDI note, regardless of how long thefirst MIDI note is. This means the finallittle reverb tail (contained in the rectangulararea shown in Figure 39.11) wouldalso be pitch-shifted—providing theproper <strong>audio</strong> result.Velocity changes work in a similar way.For example, if you reduce the velocity ofthe first note, then select the End of noteoption, <strong>Vision</strong> attenuates only the <strong>audio</strong>enveloped by the first note. This wouldcause the reverb tail between the end ofthe first note and the beginning of thesecond note to be too loud. If you selectthe Next note option, <strong>Vision</strong> attenuatesthe first <strong>audio</strong> note all the way to thebeginning of the second MIDI note,resulting in a more “natural” soundingreverb.If you select the End of note option,<strong>Vision</strong> pitch-shifts only the <strong>audio</strong> dataenveloped by the duration of the MIDInote. In this example, the pitch of the firstnote would shift from “A” to “C”, but thefinal little reverb tail (contained in therectangular area shown in Figure 39.11)would not be pitch-shifted. This wouldcause a disconcerting jump in pitch at thetail of the note.416 Opcode Systems, Inc.
CHAPTER 36: DSP Menu: <strong>Audio</strong>-to-MIDI and MIDI-to-<strong>Audio</strong>EXAMPLE 2:Suppose you recorded a vocal performancewithout any reverberation, thenperformed an <strong>Audio</strong>-to-MIDI conversionas shown in Figure 39.12.Now, if you perform a MIDI-to-<strong>Audio</strong>conversion, <strong>Vision</strong> changes the pitch ofthe first <strong>audio</strong> note from “A” to “C”.This <strong>audio</strong> isunchanged.Gap between MIDI notes occurswhen <strong>audio</strong> level is lowSingerÕs ÒbreathÓ soundThis <strong>audio</strong> ispitch-shifted toÒCÓ.What happens to the<strong>audio</strong> in THIS range?Figure 39.12: <strong>Audio</strong>-to-MIDI conversion of“breathy” vocalistIf you change the pitch of the first MIDInote, your Graphic Window looks asfollows:Figure 39.13: Pitch Shifted <strong>Audio</strong> Quandary #2Look at Figure 39.13. What does <strong>Vision</strong>do with the area in question?If you select the Next note option, <strong>Vision</strong>pitch-shifts the first <strong>audio</strong> note ALL THEWAY to the beginning of the secondMIDI note, regardless of how long thefirst MIDI note is. This means the littlebreath that the singer takes before thesecond note (contained in the rectangulararea shown in Figure 39.13) would also bepitch-shifted. This would result in anunnatural sounding <strong>audio</strong> performance.If you select the End of note option,<strong>Vision</strong> pitch-shifts only the <strong>audio</strong> dataenveloped by the duration of the MIDInote. In this example, the pitch of the firstnote would shift from “A” to “C”, but the<strong>Vision</strong> & Studio <strong>Vision</strong> <strong>Pro</strong> — <strong>Audio</strong> Reference Manual 417
PART 7: Menuslittle breath that the singer takes beforethe second note (contained in the rectangulararea shown in Figure 39.13) wouldnot be pitch-shifted—providing theproper <strong>audio</strong> result.Velocity changes work in a similar way.For example, if you increase the velocityof the first note, then select the Next noteoption, <strong>Vision</strong> boosts the volume of thefirst <strong>audio</strong> note ALL THE WAY to thebeginning of the second MIDI note. Thelittle breath that the singer takes beforethe second note will become unnaturallyloud. If you select the End of note option,<strong>Vision</strong> boosts only <strong>audio</strong> enveloped by thefirst note. The little breath that the singertakes before the second note isunchanged, providing a more “natural”sound.418 Opcode Systems, Inc.
CHAPTER 37: DSP Menu: Premiere Plug-Insand DSP P<strong>ref</strong>erencesThe DSP menu contains numerous algorithmsdesigned to process <strong>audio</strong>completely within the digital domain.This chapter deals with the PremierePlug-Ins and DSP P<strong>ref</strong>erences options.Figure 40.1: DSP MenuDSP commands are constructive—meaningthey create new <strong>audio</strong> files withoutaltering your original <strong>audio</strong> data.DSP commands work on mono, stereointerleaved, or linked <strong>audio</strong> files with bitdepths of 8, 16, or 24.If you select multiple <strong>audio</strong> files on whichto perform a DSP operation, all selected<strong>audio</strong> files must be the same type (mono,interleaved, or linked) and the same bitdepth (8, 16, or 24). The only exception tothis rule is the Mix command.You can undo any DSP command. Thisprovides a convenient way to do an “A-Bcomparison” between the processed andunprocessed <strong>audio</strong>.The following sections describe PremierePlug-Ins and DSP P<strong>ref</strong>erences.<strong>Vision</strong> & Studio <strong>Vision</strong> <strong>Pro</strong> — <strong>Audio</strong> Reference Manual 419
PART 7: MenusPREMIERE PLUG-INS<strong>Vision</strong> supports <strong>audio</strong> plug-ins designedto work with Adobe Premiere. There arenumerous third-party <strong>audio</strong> processingplug-ins available from many companies,including Opcode.Figure 41.1: Typical Premiere Plug-Ins SubmenuThese plug-ins are hardware-independentand, as such, can be used with any <strong>audio</strong>system supported by either <strong>Vision</strong> orStudio <strong>Vision</strong> <strong>Pro</strong>.Installing Premiere Plug-ins<strong>Vision</strong> looks for plug-ins in a folder named“<strong>Audio</strong> Plug-ins” that resides in theOpcode Folder in your System’s Extensionsfolder.Figure 41.2: Location of Premiere Plug-insThe<strong>ref</strong>ore, you have two installationchoices:• You may install your Premiere pluginsdirectly into the “<strong>Audio</strong> Plug-ins”folder, or...• You may install your Premiere pluginsin any folder you wish, but youneed to create an alias to those plugins.Put the alias into the “<strong>Audio</strong>Plug-ins” folder.If you have a lot of plug-ins stored in afolder somewhere else on your harddisk, you can create an alias to thatfolder, then put the folder’s alias inyour “<strong>Audio</strong> Plug-ins” folder.NOTE: Some plug-ins may not be able touse the alias method of installation. If youfollow these instructions and the plug-indoesn’t appear in the DSP>PremierePlug-Ins submenu, copy the actual plug-ininto the “<strong>Audio</strong> Plug-ins” folder.Premiere Plug-In BasicsAlthough every plug-in operates differently,the following guidelines apply tousing <strong>Vision</strong> with all Adobe Premiereplug-ins.STUDIO VISION PRO USERS: Premiereplug-ins use Apple’s Sound Manager to previewthe effect of any edits. Once you use theplug-in to generate a new <strong>audio</strong> file, youcan play that file using your <strong>audio</strong> system ofchoice (DAE or Acadia). DAE users canuse Digidesign’s latest version of DigiSound Drivers or Digi Output Drivers tomake their Digidesign hardware play backthe Sound Manager <strong>audio</strong> preview of Premiereplug-ins.420 Opcode Systems, Inc.
CHAPTER 37: DSP Menu: Premiere Plug-Ins and DSP P<strong>ref</strong>erencesTo apply a Premiere plug-in to an <strong>audio</strong>event:Select the <strong>audio</strong> event(s), or portionof events, you wish to modify.Choose DSP>Premiere Plug-Ins.<strong>Vision</strong> produces a submenu showing thename of every plug-in installed in the<strong>Audio</strong> Plug-ins folder, located as shownin Figure 41.2 on page 420.Select the desired plug-in from thissubmenu.Unless you disabled its display in theDSP P<strong>ref</strong>erences dialog (discussed onpage 423), <strong>Vision</strong> opens an edit windowfor the selected plug-in. Each plug-in hasits own unique edit window.The following example shows the editwindow for OpcodeÕs fusion:VOCODE.Edit the parameters within theplug-ins edit window.Most Premiere plug-ins (including allOpcode plug-ins) include their own documentation,which will teach you aboutthe various features within that plug-in.To preview your edits, click theplug-insÕ Preview button.NOTE: All Opcode plug-ins support<strong>audio</strong> preview, but some 3rd party pluginsmay not.Previewing the <strong>audio</strong> effect is discussedin ÒPreviewing Effects (pg. 422).ÓClick OK.NOTE: Different plug-ins use differentnames for the button that applies thechanges to your <strong>audio</strong> event. Some mayuse a <strong>Pro</strong>cess or an Apply button. Seeyour plug-insÕ documentation for moreinformation.Unless you disabled its display in theDSP P<strong>ref</strong>erences dialog (discussed onpage 423), <strong>Vision</strong> opens a Save Asdialog box.Figure 41.3: Edit Window for Opcode’sfusion:VOCODE Plug-inFigure 41.4: Save As Dialog for PremierePlug-In<strong>Vision</strong> & Studio <strong>Vision</strong> <strong>Pro</strong> — <strong>Audio</strong> Reference Manual 421
PART 7: MenusWhen you modify <strong>audio</strong>, <strong>Vision</strong> constructsone or more new <strong>audio</strong> files(depending on the file saving option youselect in the DSP P<strong>ref</strong>erences dialogbox, discussed on page 423). It leavesyour original <strong>audio</strong> file (or files)unaffected.Use the File Format pop-up menu tospecify the desired file format (AIFFor Sound Designer II).Navigate to the folder in which youwant to save the file.By default, <strong>Vision</strong> selects the folder youspecify in the DSP P<strong>ref</strong>erences dialog(discussed on page 423).Type a name for the modified <strong>audio</strong>file.By default, <strong>Vision</strong> suggests a namebased on the auto-naming options youspecify in the DSP P<strong>ref</strong>erences dialog(discussed on page 423).Click Save.<strong>Vision</strong> creates a new <strong>audio</strong> file (or files)for the modified <strong>audio</strong>. It creates one ormore new <strong>audio</strong> events to play that<strong>audio</strong>, replacing the original <strong>audio</strong>event(s) in your sequence.NOTE: If you never want to see thisSave As dialog box again (that is, youalways accept the default name and folder),click the Bypass this dialog next timeoption in the Save As dialog box.Should you wish to make the Save As dialogre-appear, choose DSP>DSP P<strong>ref</strong>erences,select “Premiere Plug-Ins” from itsApply to pop-up menu, then uncheck theBypass Save As Dialog option.Previewing EffectsYou can preview the effect that a Premiereplug-in has on your <strong>audio</strong> file.The preview is the first 10 seconds of thefirst selected <strong>audio</strong> event, played from itsbeginning and looped continuously. If the<strong>audio</strong> event is less than 10 seconds, thenthe entire <strong>audio</strong> event is used and it, too,loops continuously.If you select a portion of an <strong>audio</strong> event,then <strong>Vision</strong> uses the first 10 seconds ofthe selected range, or the entire range ifthe selection is shorter than 10 seconds.NOTE: <strong>Audio</strong> preview uses RAM that’sexternal to the RAM partition set aside for<strong>Vision</strong>. If there’s not enough RAM left inyour system, then the <strong>audio</strong> preview “borrows”RAM from <strong>Vision</strong>. If <strong>Vision</strong> cannotspare all the RAM required for the <strong>audio</strong>preview, it will simply shorten the length ofthe preview.Recalling Parameter SettingsSome higher quality plug-ins (such asOpcode’s fusion:EFFECTS series) let yousave parameter settings under a specificname. By creating and storing a numberof different parameter sets (frequentlycalled “patches”), you can create yourown library of specialized effects, whichyou can apply to any <strong>audio</strong> file in <strong>Vision</strong>.Allocate More RAM to <strong>Vision</strong>Some Premiere plug-ins may use a sizeableportion of <strong>Vision</strong>’s RAM allocation torun.422 Opcode Systems, Inc.
CHAPTER 37: DSP Menu: Premiere Plug-Ins and DSP P<strong>ref</strong>erencesFor this reason, you should alwaysincrease the amount of RAM allocated to<strong>Vision</strong> if you wish to run Premiere plugins.Different plug-ins require differentamounts of RAM. Some may require anallocation increase of only 1 or 2MB --others may require as much as 8 MB.BOTTOM LINE: Always increase <strong>Vision</strong>’sRAM allocation as much as possible if youplan to use Premiere plug-ins.To open the DSP P<strong>ref</strong>erences dialog box,choose DSP>P<strong>ref</strong>erences.DSP PREFERENCESChoose this command to open a dialogbox in which you tell <strong>Vision</strong> how tomanage all the <strong>audio</strong> events and <strong>audio</strong>files created by the various DSPcommands.For each (or every) DSP command youcan specify:• Whether or not to display the DSPmenu’s settings dialog box (if it hasone).• Whether or not to display a Save Asdialog box each time you perform aDSP function.• How the files are written to disk.• Where the files are saved, and in whatformat.• How files are automatically named.You can make these selections globally,or save them with individual <strong>Vision</strong> files.Figure 41.5: DSP P<strong>ref</strong>erences MenuAs you can see in Figure 41.5, there arenumerous elements in the DSP P<strong>ref</strong>erencedialog. Specifically: Apply toUse this pop-up menu to select theDSP command for which you wish toset the P<strong>ref</strong>erences. You can set P<strong>ref</strong>erencesfor each individual DSPcommand, or you can set them globallyby choosing “All DSPCommands.”<strong>Vision</strong> & Studio <strong>Vision</strong> <strong>Pro</strong> — <strong>Audio</strong> Reference Manual 423
PART 7: MenusDialogsThese options let you disable the displayof one, or both, of the dialogboxes that sequentially appear followingyour invoking of a DSP command.Select any ofthese items toassign uniquep<strong>ref</strong>erences tothe correspondingDSP menucommand.Select this item to assign the samep<strong>ref</strong>erences to all DSP menucommands.In general, you’ll probably set p<strong>ref</strong>erencesusing the “All DSP Commands”option. However, it may be advantageousto specify different default savelocations, auto-naming techniques,and so on for individual DSP commands.The flexibility is there for youto use as you wish.TIP: Start by setting the desired p<strong>ref</strong>erencesfor “All DSP Commands,” then set anydesired differences for specific DSPcommands.The first dialog that normally appearswhen you invoke a DSP command isthe Settings dialog box, in which youset all the parameters for that particularDSP operation.The second dialog that normallyappears is a Save As dialog box thatasks you to name the file, select asave location, and confirm or setsome additional file type options.If you check the Bypass SettingsDialog option, then the Settingsdialog box never appears. This is convenientif, for example, you alwaysapply the same parameters every timeyou choose a DSP command.IMPORTANT: If you check theBypass Settings Dialog option, theonly way you’ll ever see the Settingsdialog again is to choose the DSPP<strong>ref</strong>erences command and uncheckthis option. The<strong>ref</strong>ore it’s importantthat you check this option only if youdon’t intend to alter your DSP settingsvery frequently.424 Opcode Systems, Inc.
PART 7: MenusIf you select One Event, <strong>Vision</strong> createsa new <strong>audio</strong> event the samelength as the one you’re processing.DSP operations are performed on theselected time range and any <strong>audio</strong>outside that range is copied to thenew <strong>audio</strong> event, creating a singlenew event.If you select a region of an <strong>audio</strong> event,then apply a DSP command to it (Reverse,in this example), the resulting <strong>audio</strong> eventlooks as follows:File Saving OptionIf you select multiple <strong>audio</strong> events toprocess, this option determines how<strong>Vision</strong> saves the processed file(s).Specifically:If you select numerous <strong>audio</strong> events,then invoke a DSP operation thatuses the “Save All new events in asingle file” p<strong>ref</strong>erence, then <strong>Vision</strong>writes all the processed data into asingle new <strong>audio</strong> file and all new<strong>audio</strong> events point to this single file.This option creates fewer <strong>audio</strong> files,but each <strong>audio</strong> file is <strong>ref</strong>erenced bynumerous <strong>audio</strong> events, as illustratedin Figure 41.6.New <strong>audio</strong> event createdby DSP operationis as long as the originalevent -- the newÞle contains both thereversed <strong>audio</strong> and acopy of the unaffected,non-reversed <strong>audio</strong>.Reversed <strong>audio</strong>This option creates larger files ondisk, but results in easier editing,since there are fewer <strong>audio</strong> events tokeep track of. It also lets you freelymove or copy the event -- even toplaces with different tempos, and itmakes it easier to edit the event in anexternal sample editing programsuch as Peak or Sound Designer II.NOTE: This option is disabled for themany DSP operations for which it doesnot apply -- in these instances, all savesuse the One Event method.426 Opcode Systems, Inc.
CHAPTER 37: DSP Menu: Premiere Plug-Ins and DSP P<strong>ref</strong>erences1. With the All option selected in the pop-upmenu...2. Select numerous events.<strong>audio</strong> files, but each <strong>audio</strong> file issmaller and is initially <strong>ref</strong>erenced by asingle <strong>audio</strong> event, as illustratedbelow:1. With the Each option selected in the pop-upmenu...2. Select numerous events.3. Invoke a DSP operation (this example usersInvert Phase).4. All processed events are written to the hard driveas a single <strong>audio</strong> Þle (as shown below).My Song-001.InvHard Drive3. Invoke a DSP operation (this example usesInvert Phase).4. Each processed event is written to the hard driveas its own <strong>audio</strong> Þle (as shown below).My Song-001.InvHard DriveMy Song-002.InvMy Song-003.InvMy Song-004.Inv5. And each new <strong>audio</strong> event <strong>ref</strong>erences a portionof this new <strong>audio</strong> Þle (as shown above).Figure 41.6: Using the “Save All new eventsin a single file” OptionIf you select numerous <strong>audio</strong> events,then invoke a DSP operation thatuses the “Save each new events in aseparate file” p<strong>ref</strong>erence, then <strong>Vision</strong>writes each of the processed files intoits own file and assigns them a new<strong>audio</strong> event. This option creates more5. And each new <strong>audio</strong> event <strong>ref</strong>erencesits own individual <strong>audio</strong> Þle.Figure 41.7: Using the “Save Each new eventin a separate file” Option<strong>Vision</strong> & Studio <strong>Vision</strong> <strong>Pro</strong> — <strong>Audio</strong> Reference Manual 427
PART 7: MenusNOTE: If you select the Each optionwithout enabling the Bypass Save AsDialog option, <strong>Vision</strong> will only displaya Save As dialog box for the FIRST filethat needs saved. Subsequent files willbe saved in the same folder you selectedin that first Save As dialog.If you type a name other than thedefault, that name will be used only forthe first file. Subsequent files willreturn to using the automatic namesdiscussed in item .Default FolderThis button opens a standard Save Asdialog box, in which you specify thedefault file format and the defaultfolder in which all processed files (ofthe specified type) are stored.When you’ve navigated to the desiredfolder, click the Select “foldername” button to make it the default --its name will appear under theDefault Folder button in the DSPP<strong>ref</strong>erences dialog box.Name of current default folderTIP: This feature (along with the autonamingoptions discussed in item ) isparticularly useful if you check BypassSave As Dialog (discussed in item), since it lets you define a defaultstorage location and file type, eliminatingthe need to constantly see Save Asdialog boxes after invoking DSPoperations.Auto-naming optionsUse these two pop-up menus to specifyexactly how you want each DSPoperation to automatically name thenew files that it creates.You can select to save all files ineither AIFF or Sound Designer IIformat.428 Opcode Systems, Inc.
CHAPTER 37: DSP Menu: Premiere Plug-Ins and DSP P<strong>ref</strong>erencesYou can specify both a default p<strong>ref</strong>ixand a default suffix. To specify thep<strong>ref</strong>ix, select it from the left-most popupmenu, as shown below.The area below the pop-up menusalways shows an example of how yourdefault file names will appear.Example of how file names will appearTo specify a default suffix, select itfrom the right-most pop-up menu, asshown below.You can enter a custom p<strong>ref</strong>ix and/orsuffix by selecting the Custom optionfrom either pop-up menu.TIP: This feature (along with thedefault folder options discussed in item) is particularly useful if you checkBypass Save As Dialog (discussedin item ), since it lets you define adefault file name, eliminating the needto constantly see Save As dialog boxesafter invoking DSP operations.NOTE: If you don’t check the BypassSave As Dialog option, you canalways overwrite the naming defaultswhenever a Save As dialog appearsafter you invoke and configure a DSPoperation.Save with sequence filesCheck this option if you want each<strong>Vision</strong> file to remember its own DSPP<strong>ref</strong>erences. This lets you set completelydifferent sets of p<strong>ref</strong>erencesfor different files, keeping your harddisk and separate recording projectsmore organized.If this option is unchecked, all <strong>Vision</strong>files will use your most recent p<strong>ref</strong>erenceselections.<strong>Vision</strong> & Studio <strong>Vision</strong> <strong>Pro</strong> — <strong>Audio</strong> Reference Manual 429
PART 7: Menus430 Opcode Systems, Inc.
123456Index7<strong>Vision</strong> & Studio <strong>Vision</strong> <strong>Pro</strong> — <strong>Audio</strong> Reference Manual 431
Index432 Opcode Systems, Inc.
IndexINDEXSymbolsµ-law 2-1in <strong>Audio</strong> Format dialog 229Numerics24 Bit 24AAcadia<strong>Audio</strong> P<strong>ref</strong>erences 88Disk resources 85fixed allocation 37importing <strong>audio</strong> 207Mix command 316playing stereo files 42recording a track 29recording overview 25recording step-by-step 26–31ReWire 329selecting 14syncing 326system requirements 14Acadia <strong>audio</strong> system 353Action buttonsImport <strong>Audio</strong> dialog (DAE) 210Active in Background 19, 356Add AllImport <strong>Audio</strong> dialog (Acadia) 207Add buttonImport <strong>Audio</strong> dialog (DAE) 210Add tracks to existing movieExport as QuickTime Movie dialog 222Add/OpenImport <strong>Audio</strong> dialog (Acadia) 207Adjust <strong>Audio</strong> Tempo 389to a new, static tempo 392–393to a tempo map 389–391advanced recording techniques 31AIFFin <strong>Audio</strong> Format dialog 228All Enabled OutputsMix (Acadia) 318appending to files 239Apply toDSP P<strong>ref</strong>erences 423in <strong>Audio</strong> Recording P<strong>ref</strong>erences 240ASIO 13using 3rd-party hardware 17ASIO driverselecting 15ASIO Drivers folder 13assigningan <strong>Audio</strong> Instrument 29, 119EQ (Acadia) 53plug-ins 47plug-ins (example) 47–48Attack timeexample 314in Strip Silence dialog 313<strong>Audio</strong>Display Names 183Introduction 3Show <strong>Audio</strong> Event Names 355<strong>audio</strong> channelsdefinition 35<strong>audio</strong> event 8names 183vs. <strong>audio</strong> file 7<strong>Audio</strong> EventsDSP P<strong>ref</strong>erences 425<strong>audio</strong> eventsbreaking into phrases 247changing Instrument assignments 191changing length 194changing start times 190comparing 250copying 197cutting 197in Graphic window 177Opcode Manual Template 433
Indexin List window 178in Tracks window 178lengthening 196muting (Graphic window) 248muting (List window) 250pasting 197renaming 184selecting 177, 184, 187selecting portions of 187selecting time range 188trimming 195unmuting 249velocity 254viewing as waveforms 179<strong>Audio</strong> Filein Get Event Info 347<strong>audio</strong> filevs. <strong>audio</strong> event 7<strong>Audio</strong> Format dialog 228µ-law 2-1 229AIFF 228anatomy 228Bypass this dialog next time 233Channels 231, 232Compression 229Deinterleave 232dithered 231File format 228IMA 4-1 229Interleave 232MACE 3-1 229MACE 6-1 229Mono 231No Change 232Normalize on Mix 232Off (Normalize) 232On (Normalize) 232Output file size 233Prevent Clipping (Normalize) 233Sample Rate 229Sample Size 230Sound Designer II 228Stereo - 1 interleaved file 231Stereo - 2 mono files 231Sun .au 228WAVE 228<strong>Audio</strong> Instrumentsassigning 29, 119assignment in Graphic Window 191assignment in List Window 193assignment in Tracks Window 193basics 8colors 134panning 254recording from 80recording from (TDM) 170setting number of 36<strong>Audio</strong> Instruments & Routingssee <strong>Audio</strong> Instruments window 37<strong>Audio</strong> Instruments (DAE)Mute 135naming 133number of 133Output 142Plug-Ins column 145Poly 138Sends 145Solo 135stereo 138, 139Voice 136, 137<strong>Audio</strong> Instruments window 35<strong>audio</strong> channels 35<strong>Audio</strong> Instruments 35Busses 35Color 38EQs column 43Inputs 35Mute 40Name 38number of Instruments 36Output column 42Outputs 35picture 35Plug-Ins column 43434 Opcode Systems, Inc.
IndexSampleCell TDM 166Sends column 43Solo 40Stereo column 41<strong>Audio</strong> Instruments window (DAE) 131<strong>Audio</strong> Instruments window menuclearing routings 146Reset All Routings 43, 146<strong>Audio</strong> Instruments window menu (DAE) 146<strong>Audio</strong> menuActive in Background 19, 356<strong>Audio</strong> P<strong>ref</strong>erences 356<strong>Audio</strong> System 353Buffer Size 351Conversion Overview 351Edit Event Soundfile 348File Management 350Get Event Info 184, 347Hardware Setup 352Link Events 350Mix <strong>Audio</strong> on Capture 320, 321, 356Retain 343Sample Rate/Size 352Separate 344Session Sample Rate 18Strip Silence/Slice <strong>Audio</strong> 346Unlink Events 350Waveform Display 182, 354Waveform Height 182, 353<strong>audio</strong> pan 276fader 257, 260Faders window 270in List window 255in Strip Chart 256<strong>Audio</strong> P<strong>ref</strong>erences 356<strong>Audio</strong> P<strong>ref</strong>erences (Acadia) 88Dither Outputs 91Fade duration 90Maximum Fader Position 89Medium 90None 90Play Offset 92<strong>Pro</strong>cess While Stopped 91Sharp 90Smooth 90Smooth <strong>Audio</strong> Controllers 90<strong>Audio</strong> P<strong>ref</strong>erences (DAE) 173end-to-end onto one track 174Fade duration 174Import Multiple Files... 174Maximum Fader Position 173Medium 174None 174onto multiple empty tracks 174Sharp 174Smooth 174Smooth <strong>Audio</strong> Controllers 174<strong>Audio</strong> Recording P<strong>ref</strong>erences 240Apply to 240Create unique filenames by concatenating242Default Folder 242Save All new takes in a single file 240Save each new take in a separate file 241Save with sequence files 243<strong>audio</strong> signal flow (in Consoles) 46<strong>Audio</strong> System 353A 353<strong>Audio</strong> Templates (<strong>Audio</strong>-to-MIDI dialog box)405<strong>audio</strong> tracksnumber of 83<strong>audio</strong> volume 276fader 260faders 257Faders window 270in List window 255in Strip Chart 256in the Strip Chart 270<strong>Audio</strong>media II/III 99Record Monitor 113<strong>Audio</strong>-to-MIDI dialog box<strong>Audio</strong> Templates 405basic 398–400Opcode Manual Template 435
Indexexpanded 400–402Generate new velocities 403Note Length Exceeds 402Re-analyze <strong>Audio</strong> 406Use Selected Notes 403<strong>Audio</strong>-to-MIDI command 396uses 396using 397auditioning 245assembling a new take 251by muting events 248by muting events (List window) 250comparing <strong>audio</strong> events 250individual <strong>audio</strong> events 247with Mute buttons 246with Solo buttons 246with the <strong>Audio</strong> Instruments window 247Auto (Record Monitor)Acadia 23DAE 111Auto Compact 23, 243Record Monitor (DAE) 111Automatic (Waveform Height) 182, 353automation<strong>Audio</strong> Pan 276<strong>Audio</strong> Volume 276<strong>audio</strong> volume in the Strip Chart 270<strong>audio</strong> volume/pan in Faders window 270Automation submenu 276DAE/TDM 263EQ Band Parameter submenu 278EQ Enable 278inserting events in the Strip Chart 267, 268menus 265MIDI submenu 282Mute 277Phase Invert 278Plug-In Bypass 277plug-in parameter names 281Plug-in Parameter submenu 279plug-in parameter values 281plug-in recording tip 264recording 264removing plug-ins 49, 275Send Levels 277Solo 277types of events 275viewing events in Strip Chart 266Automation submenu 276Auto-namingDSP P<strong>ref</strong>erences 428auto-separating (with Slice <strong>Audio</strong>) 309AvailableRecord Monitor (DAE) 111Available Recording Time 23BB (plug-in bypass) 51Band Passin EQ dialog box (DSP menu) 367bank templates (plug-ins) 65Bars/BeatsTime Scale dialog box 387bit depthsee Sample SizeBits columnin File Management window 286Bouncingsee MixingBuffer Size 351Acadia 87DAE 100with TDM plug-ins 130Buffer Size dialogFile Buffer Size 87File Buffers 87Memory Available 88Memory Required 88<strong>Pro</strong>cess Ahead 88Bus (Send area) 58Bussescreating a submix 76mono & stereo 59naming 134436 Opcode Systems, Inc.
Indexrecording from 81recording from (TDM) 170–172soloing 40stereo (in DAE) 139Bypass buttonPlug-In area 51Plug-In Edit window 65Plug-In Edit window (TDM) 154Bypass Save As Dialog (DSP P<strong>ref</strong>erences) 425Bypass Settings Dialog (DSP P<strong>ref</strong>erences) 424Bypass this dialog next timein <strong>Audio</strong> Format dialog 233CCancel buttonImport <strong>Audio</strong> dialog (Acadia) 208Import <strong>Audio</strong> dialog (DAE) 210Capture 320, 321Capture Post-OutputsMix (Acadia) 318Capture Pre-OutputsMix (Acadia) 318Capture Seq->Seq 321Capture Seq->Track 321Card to UseHardware Setup (DAE) 102Card TypeHardware Setup (DAE) 101CDimporting <strong>audio</strong> from 208, 217–218ChannelEQ window 70Plug-In Edit window (Acadia) 65Plug-In Edit window (TDM) 153Channel 1-2 InputHardware Setup (DAE) 103Channelsin <strong>Audio</strong> Format dialog 231, 232in File Management window 285in Get Event Info 347Checking Disk Allocation (DAE) 106Choose 6Clear Clip and Undo 287File Management menu 299clearing Consoles 62Click 5clippingavoiding 28, 118Instruments, Inputs, Busses 60Outputs 60Clipping Indicators 23Console 60Record Monitor (DAE) 110Clock SourceHardware Setup 15Color<strong>Audio</strong> Instruments window 38CompactFile Management menu 286Compressionin <strong>Audio</strong> Format dialog 229Consoleassigning Outputs 60<strong>audio</strong> signal flow 46clearing 62clipping LEDs 60mono vs. stereo signal 46recording fader movements 259using (example) 258virtual consoles (Acadia) 78virtual Consoles (TDM) 168with TDM Plug-Ins 148ConsolidateFile Management menu 287Conversion Overview 220, 304, 351Convert All button 306Convert button 306Done button 306File List 304Hardware Setup button 305Session Sample Rate 305Session Sample Size 305vs. DSP>Convert Sample Rate 363–364Convert All buttonOpcode Manual Template 437
Indexin Conversion Overview 306Convert buttonin Conversion Overview 306Convert Sample Rate command 362vs. Conversion Overview 363–364Copy BankTemplate pop-up 67Copy Faders 272and "faced" plug-ins 282examples 273–275number of parameters 275Copy <strong>Pro</strong>gramTemplate pop-up 67Copy SettingsTemplate pop-up 73Template pop-up (TDM) 155Copy to FolderFile Management menu 291tip 293copying<strong>audio</strong> events 197CPU Resources 84Create new movieExport as QuickTime Movie dialog 222Create unique filenames by concatenatingDSP P<strong>ref</strong>erences 428in <strong>Audio</strong> Recording P<strong>ref</strong>erences 242Crossfade (Fade/Crossfade) 374crossfadessee Fade/Crossfadecreating (example) 376–377Cut command 350cutting<strong>audio</strong> events 197DDAE 97allocating RAM 99automation 263Buffer Size (setting) 100importing <strong>audio</strong> 209mixing 319recording a track 120recording overview 115recording step-by-step 116–121scrubbing 337syncing 327system requirements 97DAE <strong>audio</strong> system 353Default FolderDSP P<strong>ref</strong>erences 428in <strong>Audio</strong> Recording P<strong>ref</strong>erences 242DeinterleaveFile Management menu 298in <strong>Audio</strong> Format dialog 232Deinterleaving 303steps 303Delete Bank TemplateTemplate pop-up 67Delete buttonFile Management menu 297Delete <strong>Pro</strong>gram TemplateTemplate pop-up 67Delete TemplateTemplate pop-up 73Template pop-up (TDM) 155DeviceHardware Setup 15DialogsDSP P<strong>ref</strong>erences 424Digidesign DirectIO 13, 15control panel 16Digital FormatHardware Setup (DAE) 103Disk I/OHardware Setup (DAE) 102Disk Resources 85Display Names command 183Dither Outputs<strong>Audio</strong> P<strong>ref</strong>erences (Acadia) 91ditheredin <strong>Audio</strong> Format dialog 231Do menuToggle Mutes 250438 Opcode Systems, Inc.
IndexDone buttonImport <strong>Audio</strong> dialog (Acadia) 208Import <strong>Audio</strong> dialog (DAE) 210in Conversion Overview 306Double-click 5Drag 5dragging plug-ins 49DSP menuAdjust <strong>Audio</strong> Tempo 389<strong>Audio</strong>-to-MIDI 396Convert Sample Rate 362DSP P<strong>ref</strong>erences 423EQ 366Fade/Crossfade 369Formant Shift 383Invert Phase 55, 361MIDI-to-<strong>Audio</strong> 406Mix 316, 358Normalize 89, 173, 358Pitch Shift 380Premiere Plug-Ins 420Reverse 359Time Scale 386DSP P<strong>ref</strong>erences 423Apply to 423<strong>Audio</strong> Events 425auto-naming 428Create unique filenames by concatenating428Default Folder 428Dialogs 424One Event 426Save All new events in a single file 426Save each new events in a separate file 427Save with sequence files 429Separate 425DSP>Mixvs. Export <strong>Audio</strong> Mix 225, 315Durationin Get Event Info 347Time Scale dialog box 387Dynamic Voice Allocation 124, 136dynamic voice allocationand <strong>audio</strong> playback 199–201EEdit Event Soundfile command 348with Acadia 348with DAE 348Edit menuCapture 320, 321Capture Seq->Seq 321Capture Seq->Track 321effects (Premiere Plug-Ins)previewing 422Eject buttonImport <strong>Audio</strong> dialog (DAE) 210Enable (EQ Band parameter) 279enablinginputs and outputs 39End of note (MIDI-to-<strong>Audio</strong> dialog box) 407End of note (<strong>Pro</strong>cess Note Until) 416, 417, 418End TimeTime Scale dialog box 387end-to-end onto one track<strong>Audio</strong> P<strong>ref</strong>erences (DAE) 174, 211EQassigning (Acadia) 53EQ areaanatomy 54EQ Edit button 54EQ Toggle button 55EQ type 55gain faders 55Phase Toggle button 55EQ Band Enableoverriding 278EQ Band Parameter submenu 278EQ command 366EQ Curve (EQ window) 70EQ dialog box (DSP menu) 367EQ Edit button (EQ area) 54EQ Enable 278EQ Panel (1-4)Opcode Manual Template 439
IndexEQ window 70EQ toggle (main)EQ window 70EQ Toggle button (EQ area) 55EQ types 71EQ area 55High Cut 72High Shelf 72Low Cut 71Low Shelf 71Parametric 71EQ window 69Channel 70EQ Curve 70EQ Panel (1-4) 70EQ toggle (main) 70Mute 70Solo 70Template Functions pop-up 70Template pop-up 70EQs column<strong>Audio</strong> Instruments window 43Equal Power (Fade/Crossfade) 374Event Namein Get Event Info 347Events columnin File Management window 285Export as QuickTime Movie (File menu) 206Export as QuickTime Movie dialog 222Add tracks to existing movie 222Create new movie 222Export <strong>Audio</strong> option 223Export MIDI option 223Export selector 222Replace tracks in existing movie 222Export <strong>Audio</strong> Eventsin File menu 206vs. Export <strong>Audio</strong> Mix 227Export <strong>Audio</strong> Mix 223in File menu 206Use EQs, plug-ins, etc. 318vs. DSP>Mix 225, 315vs. Export <strong>Audio</strong> Events 227Export <strong>Audio</strong> optionExport as QuickTime Movie dialog 223Export MIDI optionExport as QuickTime Movie dialog 223Export selectorExport as QuickTime Movie dialog 222Export SettingsTemplate pop-up (TDM) 155exporting<strong>audio</strong> mix 223individual <strong>audio</strong> events 225individual <strong>audio</strong> events (example) 227exporting <strong>audio</strong>as QuickTime movie 221exporting MIDIas QuickTime movie 221External Beat ClockSync mode 325Ffaceless (plug-ins) 64Fade duration<strong>Audio</strong> P<strong>ref</strong>erences (Acadia) 90<strong>Audio</strong> P<strong>ref</strong>erences (DAE) 174fade in 181Fade In/Out (Fade/Crossfade) 370fade insautomatic 373manual 373fade outsautomatic 371manual 373Fade/Crossfade command 369fadermapping to volume/pan 260fader events 271faderschanges from previous versions of <strong>Vision</strong>271explanation 271–272volume and pan 257440 Opcode Systems, Inc.
IndexFaders window 259<strong>audio</strong> volume and pan 270Fast (Waveform Display) 182, 354File and Item ListsImport <strong>Audio</strong> dialog (DAE) 210File Buffersnumber (Acadia) 87Size (Acadia) 87File columnin File Management window 284File Formatin <strong>Audio</strong> Format dialog 228in Get Event Info 347File InfoImport <strong>Audio</strong> dialog (Acadia) 207File Length (Fade/Crossfade) 370File ListImport <strong>Audio</strong> dialog (Acadia) 207in Conversion Overview 304File Management 350File Management menu 286Clear Clip and Undo 299Compact 286Consolidate 287Copy to Folder 291Copy to Folder tip 293Deinterleave 298Delete 297Find File 298Label 288Label (example) 290–291Move to Folder 294Rebuild Waveform 183, 298Remove from List 299Rename 295Sample Rate Convert 297Select All 299Select Unused 299File Management window 283Bar Display 284Bits column 286Channels column 285Events column 285File column 284organizing <strong>audio</strong> files 286playing files 286Sample Rate column 285Size column 285Type column 285Unused column 285viewing the file path 284File menuExport as QuickTime Movie 206Export <strong>Audio</strong> Events 206Export <strong>Audio</strong> Mix 206, 223Import <strong>Audio</strong> 206Import <strong>Audio</strong> Using QuickTime 206File Volumein Get Event Info 347Filter Typein EQ dialog box (DSP menu) 367Find FileFile Management menu 298Fine tune (Pitch Shift) 380Fixed Voice Allocation 124, 136and <strong>audio</strong> playback 202–203assigning voices 124, 137fixing wrong noteswith MIDI-to-<strong>Audio</strong> 408Flip button (Plug-In Edit window) 65Formant Shiftchanging a singer’s gender 385Formant Shift command 383Format button 233FrequencyEQ Band parameter 278in EQ dialog box (DSP menu) 367, 368GGain (EQ Band parameter) 278gain faders (EQ area) 55gating <strong>audio</strong> (with Strip Silence) 308Generate new velocities (<strong>Audio</strong>-to-MIDI dialogbox) 403Opcode Manual Template 441
IndexGet Event Info command 184, 347shortcut 347Graphic window<strong>audio</strong> events 177<strong>Audio</strong> Instrument assignment 191importing <strong>audio</strong> 212selecting <strong>audio</strong> events 184Grow (Waveform Height) 182, 353HHardware Sample Ratevs. Session Sample Rate 302Hardware SetupDevice 15Hardware Setup (Acadia) 352Clock Source 15Open Control Panel 16Sample Rate 15Hardware Setup (DAE) 101Card to Use 102Card Type 101Channel 1-2 Input 103Digital Format 103Disk I/O 102Interface 103Other Options 103Sample Rate 103Select Card Type 102Session 8 102Slot 102Sync Mode 103Hardware Setup buttonin Conversion Overview 305harmonycreating using MIDI-to-<strong>Audio</strong> 411High Cutautomation 279EQ type 72High Passin EQ dialog box (DSP menu) 367High Resolution (Waveform Display) 182, 355High ShelfIautomation 279EQ type 72IMA 4-1in <strong>Audio</strong> Format dialog 229Import <strong>Audio</strong>in File menu 206Import <strong>Audio</strong> dialog (Acadia) 207Add All 207Add/Open 207Cancel 208Done 208File Info 207File List 207Import 207Import multiple files 208Play/Stop 208Remove 208Import <strong>Audio</strong> dialog (DAE)Action buttons 210Add button 210Cancel button 210Desktop button 210Done button 210Eject button 210File and Item Lists 210Remove button 210Sound File Information 210Import <strong>Audio</strong> Using QuickTimein File menu 206Import BankTemplate pop-up 68Import ListImport <strong>Audio</strong> dialog (Acadia) 207Import Multiple Files...<strong>Audio</strong> P<strong>ref</strong>erences (DAE) 174Import <strong>Audio</strong> dialog (Acadia) 208Import <strong>Pro</strong>gramTemplate pop-up 67Import SettingsTemplate pop-up (TDM) 155442 Opcode Systems, Inc.
Indeximporting <strong>audio</strong>Acadia 207DAE 209foreign file formats 219from a CD 208, 217–218from QuickTime movies 213Graphic window 212if Conversion Overview appears 220List window 212multiple files (DAE) 211shortcuts 212stereo linked files (Acadia) 208importing MIDIfrom a QuickTime movie 212individual <strong>audio</strong> eventsexporting 225exporting (example) 227Inputsenabling 39monitoring (Record Monitor) 28, 119naming 134recording from 80recording from (TDM) 169stereo (DAE) 140InstrumentRecord Monitor (Acadia) 23Record Monitor (DAE) 111Instrument setupssaving 44, 146InterfaceHardware Setup (DAE) 103Interleavein <strong>Audio</strong> Format dialog 232interleaved filessee stereo filesInternal ClockSync mode 325Invert PhaseDSP menu 55with Phase button 55Invert Phase command 361LLabelFile Management (example) 290–291File Management menu 288length (of <strong>audio</strong> events)changing 194lengthening <strong>audio</strong> events 196Linear (Fade/Crossfade) 374Link Events command 350Link Pairs 23Record Monitor (DAE) 111List window<strong>audio</strong> events 178<strong>Audio</strong> Instrument assignment 193<strong>audio</strong> volume/pan 255importing <strong>audio</strong> 212selecting <strong>audio</strong> events 185Load FromTemplate pop-up 73Load Templates FromTemplate pop-up 68Template pop-up (TDM) 155Lock <strong>Audio</strong> to Tape 327enabling 328Low Cutautomation 279EQ type 71Low Passin EQ dialog box (DSP menu) 367Low Shelfautomation 279EQ type 71MMACE 3-1 (compression)in <strong>Audio</strong> Format dialog 229MACE 6-1 (compression)in <strong>Audio</strong> Format dialog 229Maintain voice characterMIDI-to-<strong>Audio</strong> dialog box 408Pitch Shift 381Opcode Manual Template 443
IndexManual ConventionsChoose 6Click 5Double-click 5Drag 5menu items 6Move 5Press and hold 5Release 5Select 6Maximum Fader Position 269, 276Acadia 89DAE 173when to set 90Medium<strong>Audio</strong> P<strong>ref</strong>erences (Acadia) 90<strong>Audio</strong> P<strong>ref</strong>erences (DAE) 174Memory Available (Buffer Size dialog) 88Memory Required (Buffer Size dialog) 88Menu Items 6MIDI only <strong>audio</strong> system 353MIDI submenu 282MIDI Time CodeSync mode 325MIDI-to-<strong>Audio</strong> dialog box 407MIDI-to-<strong>Audio</strong> command 406changing <strong>audio</strong> timing 413creating <strong>audio</strong> harmonies 411fixing wrong notes 408stabilizing pitch fluctuations 410using 408Minimum durationin Strip Silence dialog 312mixgetting rid of silence 322Mix command 316, 358resulting <strong>audio</strong> files 322silence 322using silence 323zero crossings 181Mix (Acadia) 316All Enabled Outputs 318Capture Post-Outputs 318Capture Pre-Outputs 318Output destinations 318Mix (DAE) 319Mix <strong>Audio</strong> on Capture 320, 321, 356monitoring 78example (TDM) 167input in Record Monitor 28, 119TDM 166thru mode 167voice allocation 167while recording 33, 124Monoin <strong>Audio</strong> Format dialog 231mono in/mono outAcadia 51TDM 152mono in/stereo outAcadia 51TDM 152mono plug-insusing (Acadia) 52using (TDM) 152mono vs. stereoin Console 46Move (Manual Conventions) 5Move to FolderFile Management menu 294MTC/Machine ControlSync mode 325multiple takes 33, 123Mute 277<strong>Audio</strong> Instruments (DAE) 135<strong>Audio</strong> Instruments window 40EQ window 70Plug-In Edit window (Acadia) 65Plug-In Edit window (TDM) 154muting <strong>audio</strong> eventsGraphic window 248List window 250444 Opcode Systems, Inc.
IndexNName<strong>Audio</strong> Instruments window 38namesof <strong>audio</strong> events 183Next noteMIDI-to-<strong>Audio</strong> dialog box 407<strong>Pro</strong>cess Note Until 416, 417, 418No Changein <strong>Audio</strong> Format dialog 232no send (Send area) 58None<strong>Audio</strong> P<strong>ref</strong>erences (Acadia) 90<strong>Audio</strong> P<strong>ref</strong>erences (DAE) 174Normalize 89, 358in <strong>Audio</strong> Format dialog 232Note Length Exceeds (<strong>Audio</strong>-to-MIDI) 402number of <strong>audio</strong> tracks 83OOff 23Normalize (in <strong>Audio</strong> Format dialog) 232Record Monitor (DAE) 111Waveform Display 182, 354On 23Normalize (in <strong>Audio</strong> Format dialog) 232Record Monitor (DAE) 111One EventDSP P<strong>ref</strong>erences 426on-the-fly punching (DAE)see QuickPunch 127onto multiple empty tracks<strong>Audio</strong> P<strong>ref</strong>erences (DAE) 174, 211Open Control PanelHardware Setup 16organizing <strong>audio</strong> filesin File Management window 286Other OptionsHardware Setup (DAE) 103Output<strong>Audio</strong> Instruments (DAE) 142<strong>Pro</strong> Tools I & <strong>Pro</strong> Tools II 145<strong>Pro</strong> Tools III/24/Mix/Mix Plus 143Send area 58Session 8/<strong>Pro</strong>ject 144outputvs. voice 7Output column<strong>Audio</strong> Instruments window 42Output destinationsMix (Acadia) 318Output file sizein <strong>Audio</strong> Format dialog 233Output Pair (Send area) 58Outputsassigning in Consoles 60enabling 39naming 134recording from 82stereo (DAE) 140Outputs (TDM)and panning 158assigning in <strong>Audio</strong> Instruments window156assigning in Console 156routing options 157Ppanfader 257, 260Faders window 270in List window 255in Strip Chart 256pan faderavailable/unavailble 62panningand Outputs 158<strong>Audio</strong> Instruments 254in Consoles 62Parametricautomation 279EQ type 71Paste BankOpcode Manual Template 445
IndexTemplate pop-up 67Paste <strong>Pro</strong>gramTemplate pop-up 67Paste SettingsTemplate pop-up 73Template pop-up (TDM) 155pasting<strong>audio</strong> events 197Peak 181Performance window 83CPU 84RAM resources 86Phase Invert 278Phase Toggle button (EQ area) 55inverting phase with 55pitch fluctuationsstabilizing with MIDI-to-<strong>Audio</strong> 410Pitch Shift command 380Pitch Shift Quality 380MIDI-to-<strong>Audio</strong> dialog box 408Play Offset<strong>Audio</strong> P<strong>ref</strong>erences (Acadia) 92determining 94Play/StopImport <strong>Audio</strong> dialog (Acadia) 208playingin File Management window 286Plug-In area 50Bypass button 51Edit button 50Plug-In Selector 51Plug-In Type 51Plug-In Bypass 277Plug-In Edit window 63anatomy 64Bypass button 65Channel 65Flip button 65Mute 65Plug-In parameters 65Plug-In Selector 64<strong>Pro</strong>gram 65, 66Slot 65Solo 65TDM 153Template 64, 66Plug-In Edit window (TDM)Bypass button 154Channel 153Mute 154Plug-In Selector 153Slot 153Solo 154Templates 153Plug-In parameters 279Plug-In Edit window 65Plug-In SelectorPlug-In Edit window (Acadia) 64Plug-In Edit window (TDM) 153plug-insassigning 47assigning (example) 47–48assigning (TDM) 150bypassing (TDM) 155mono in/mono out 51mono in/stereo out 51mono/stereo (TDM) 151multiple instantiations 282parameter names 281parameter values 281rearranging 49removing 49, 275saving/recalling templates 65sharing plug-ins 75stereo in/stereo out 51tip for recording automation 264using mono 52using mono (TDM) 152using stereo 52using stereo (TDM) 151Plug-Ins column<strong>Audio</strong> Instruments (Acadia) 43<strong>Audio</strong> Instruments (TDM) 145Poly446 Opcode Systems, Inc.
Index<strong>Audio</strong> Instruments (DAE) 138pops and clicks 180, 181Post Fader 59Pre Fader 59Pre/Post Fader Button (Send area) 59, 161Premiere Plug-Ins 420allocating RAM 422basics 420installing 420location 420previewing effects 422recalling parameter settings 422Press and hold 5Prevent Clipping (Normalize)in <strong>Audio</strong> Format dialog 233printing effectsreal-time 79<strong>Pro</strong> Tools 24 98Record Monitor 112<strong>Pro</strong> Tools 24 Mix/Mix PLus 98<strong>Pro</strong> Tools I/IIRecord Monitor 112<strong>Pro</strong> Tools IIINuBus & PCI 98Record Monitor 112<strong>Pro</strong> Tools <strong>Pro</strong>ject 98Record Monitor 113<strong>Pro</strong>cess Ahead 88<strong>Pro</strong>cess Note Until 415End of note 416, 417, 418MIDI-to-<strong>Audio</strong> dialog box 407Next note 416, 417, 418<strong>Pro</strong>cess While Stopped<strong>Audio</strong> P<strong>ref</strong>erences (Acadia) 91<strong>Pro</strong>gram (Plug-In Edit window) 65, 66program templates (plug-ins) 65QQ Factorin EQ dialog box (DSP menu) 368QuickPunch 127files 129Record Monitor (DAE) 111using (example) 128–129QuickTime movieexporting <strong>audio</strong>/MIDI 221importing <strong>audio</strong> 213importing <strong>audio</strong> to a sequence 215importing <strong>audio</strong> to a track 214importing MIDI 212RRAM(DAE) determining amount 100allocating to DAE buffer 99Buffer Size dialog 87resources 86Re-analyze <strong>Audio</strong> (<strong>Audio</strong>-to-MIDI dialog box)406rearrangingplug-ins 49ReBirthlaunching with <strong>Vision</strong> 332quitting with <strong>Vision</strong> 332Remote Start 336using via ReWire (example) 331Rebuild Waveform 183File Management menu 298Record Enable IndicatorsRecord Monitor (Acadia) 22Record Monitor (DAE) 110record filedesignating 26, 116disabling 27, 117Record Monitor 23, 111Record File OptionsRecord Monitor (DAE) 111record levelsRecord Monitor 22, 110setting 27, 118Record Monitoranatomy of 22Auto 23Auto Compact 23, 243Opcode Manual Template 447
Indexavailable recording time 23clipping indicators 23Instrument 23Link Pairs 23Off 23On 23opening 21record enable indicators 22Record File 23record levels 22record source 22Sample Size 23Thru 23variations in appearance 24Record Monitor (DAE)Auto 111Auto Compact 111Available 111Clipping Indicators 110Instrument 111Link Pairs 111Off 111On 111QuickPunch 111Record Enable Indicators 110Record File 111Record File Options 111Record Levels 110Record Monitor menu 110Source 110Thru 111Record Monitor menu 22<strong>Audio</strong> Recording P<strong>ref</strong>erences 240in Record Monitor (DAE) 110Record Offsetdetermining 93record source 22recordinga track in Acadia 29a track in DAE 120appending to files 239automation 264closing/releasing a file 238Console/fader movements 259different takes 237from <strong>Audio</strong> Instruments (Acadia) 80from <strong>Audio</strong> Instruments (TDM) 170from <strong>Audio</strong> Instruments, Busses, and Outputs79from Busses 81from Busses (TDM) 170–172from Inputs 80from inputs (TDM) 169from Outputs 82from SampleCell 169from SampleCell TDM 170multiple takes 33, 123overview (Acadia) 25overview (DAE) 115plug-in automation tip 264step-by-step (Acadia) 26–31step-by-step (DAE) 116–121stereo (Acadia) 31stereo (DAE) 122stereo/mono instruments 27, 32, 117, 122while monitoring 33, 124recording techniquesadvanced 31Release (mouse) 5Release timein Strip Silence dialog 313Remote Startwith ReBirth (via ReWire) 336Remove buttonImport <strong>Audio</strong> dialog (Acadia) 208Import <strong>Audio</strong> dialog (DAE) 210Remove From List 288, 294File Management menu 299RenameFile Management menu 295renaming<strong>audio</strong> events 184Replace tracks in existing movieExport as QuickTime Movie dialog 222448 Opcode Systems, Inc.
IndexReset All Routings<strong>Audio</strong> Instruments window menu 43, 146Retain command 343, 350Retro AS-1<strong>Audio</strong> Output setting 334using via ReWire (example) 333Retro AS-1 OMS Driver 333Reverse command 359ReWire 329about 329<strong>audio</strong> streaming 329configuration 330default enabled inputs 335Mix/Main input 335ReBirth example 331Remote Start 336Retro AS-1 example 333sample accurate synchronization 329Send Sync 335transport functionality 329Routingsreseting/clearing 43SSample Endin Get Event Info 347Sample RateHardware Setup 15Hardware Setup (DAE) 103in <strong>Audio</strong> Format dialog 229in Get Event Info 347Sample Rate columnin File Management window 285Sample Rate Conversion 301steps 303two methods 302Sample Rate ConvertFile Management menu 297Sample Rate/Size 352Sample Size 23in <strong>Audio</strong> Format dialog 230in Get Event Info 347Sample Size Conversion 302steps 303Sample Startin Get Event Info 347SampleCell 165in <strong>Audio</strong> Instruments window (TDM) 166recording from 169SampleCell TDMrecording from 170samplercreating files for (example) 227Save All new events in a single fileDSP P<strong>ref</strong>erences 426Save All new takes in a single file 240Save as DefaultTemplate pop-up 73Template pop-up (TDM) 155Save Bank (Template pop-up) 67Save Bank As (Template pop-up) 67Save Bank as Default (Template pop-up) 68Save each new event in a separate fileDSP P<strong>ref</strong>erences 427Save each new take in a separate file 241Save <strong>Pro</strong>gram (Template pop-up) 67Save <strong>Pro</strong>gram As (Template pop-up) 67Save SettingsTemplate pop-up 73Template pop-up (TDM) 154Save Settings AsTemplate pop-up 73Template pop-up (TDM) 154Save with sequence filesDSP P<strong>ref</strong>erences 429in <strong>Audio</strong> Recording P<strong>ref</strong>erences 243savingInstrument setups 44, 146Scale FactorTime Scale dialog box 387scrubbing 337and <strong>audio</strong> Outputs 338and Output volume 339in the Track Overview 339Opcode Manual Template 449
IndexSelect 6Select All (File Management menu) 299Select Card TypeHardware Setup (DAE) 102Select Unused 294File Management menu 299selecting<strong>audio</strong> events 184MIDI/<strong>Audio</strong>/Strip Chart simultaneously189multiple tracks 189Sendmono/stereo Busses 59post fader 59pre fader 59Send areaanatomy 57Bus 58no send 58Output 58Output Pair 58Pre/Post Fader Button 59Send Level 59Send Selector 58Send area (TDM) 159Pre/Post Fader Button 161Send Level 162Send Level 277Acadia 59TDM 162Send Selector (Send area) 58Send Syncand ReWire 335Sends<strong>Audio</strong> Instruments (DAE) 145destinations 56displaying 56displaying (TDM) 158uses 56Sends column<strong>Audio</strong> Instruments window 43SeparateDSP P<strong>ref</strong>erences 425Separate command 344separating <strong>audio</strong>automatically (with Slice <strong>Audio</strong>) 309Session 8 98Hardware Setup (DAE) 102Record Monitor 113Session Sample Rate 18in Conversion Overview 305setting 105vs. Hardware Sample Rate 105, 302Session Sample Sizein Conversion Overview 305setting record levels 27, 118Sharp<strong>Audio</strong> P<strong>ref</strong>erences (Acadia) 90<strong>Audio</strong> P<strong>ref</strong>erences (DAE) 174Show <strong>Audio</strong> Event Names 355Show Masking Tape 163Shrink (Waveform Height) 182, 353signal flow in consoles 46silenceincluding in a mix 322removing from a mix 322using mixed silence 323Silence thresholdin Strip Silence dialog 311Size columnin File Management window 285Slice <strong>Audio</strong> 307auto-separating 309vs. Strip Silence 310Slopein EQ dialog box (DSP menu) 368SlotHardware Setup (DAE) 102Plug-In Edit window (Acadia) 65Plug-In Edit window (TDM) 153Smooth<strong>Audio</strong> P<strong>ref</strong>erences (Acadia) 90<strong>Audio</strong> P<strong>ref</strong>erences (DAE) 174Smooth <strong>Audio</strong> Controllers 126450 Opcode Systems, Inc.
IndexAcadia 90DAE 174SMPTETime Scale dialog box 387Solo 277<strong>Audio</strong> Instruments (DAE) 135<strong>Audio</strong> Instruments window 40EQ window 70Plug-In Edit window (Acadia) 65Plug-In Edit window (TDM) 154soloingBusses 40Sound Designer II 210in <strong>Audio</strong> Format dialog 228operations 350with Edit Event Soundfile (DAE) 349Sound File InformationImport <strong>Audio</strong> dialog (DAE) 210Sound ManagerASIO driver 13, 15control panel 16Sound Manager Input Options 16Sound Tools IIRecord Monitor 113SourceRecord Monitor (Acadia) 22Record Monitor (DAE) 110start times (<strong>audio</strong> events)changing 190stereo<strong>Audio</strong> Instruments (DAE) 138, 139Busses (DAE) 139Inputs (DAE) 140Outputs (DAE) 140Stereo - 1 interleaved filein <strong>Audio</strong> Format dialog 231Stereo - 2 mono filesin <strong>Audio</strong> Format dialog 231stereo <strong>Audio</strong> Instrumentsand importing <strong>audio</strong> (Acadia) 208Stereo column<strong>Audio</strong> Instruments window 41stereo filesimporting (Acadia) 208playing (Acadia) 42stereo in/stereo out (plug-ins) 51stereo plug-insusing 52using (TDM) 151stereo recordingAcadia 31DAE 122stereo voicing<strong>Pro</strong> Tools III/24 141stereo vs. monoin Console 46Strip Chartand Maximum Fader Position 270<strong>audio</strong> volume/pan 256automation events 266Strip Silence 307gating <strong>audio</strong> 308vs. Slice <strong>Audio</strong> 310Strip Silence dialog 311Attack time 313Minimum duration 312Release time 313Silence threshold 311Strip Silence/Slice <strong>Audio</strong> command 346submixcreating 76example 163Sun .auin <strong>Audio</strong> Format dialog 228SuperClock 327Sustain <strong>audio</strong> across segments 194Sync ModeHardware Setup (DAE) 103Sync modeExternal Beat Clock 325Internal 325MIDI Time Code 325MTC/Machine Control 325syncing (Acadia) 326Opcode Manual Template 451
IndexLock <strong>Audio</strong> to Tape 326syncing (DAE) 327hardware sync 327Lock <strong>Audio</strong> to Tape 327SuperClock 327system requirementsDAE 97Ttakesmultiple (Acadia) 33multiple (DAE) 123recording in different files 237TDM 147assigning plug-ins 150creating a Console 148–149mono/stereo plug-ins 151using mono plug-ins 152using stereo plug-ins 151TemplatePlug-In Edit window (Acadia) 64, 66Template Functions pop-upEQ window 70Template pop-upCopy Bank 67Copy <strong>Pro</strong>gram 67Copy Settings 73Delete Bank Template 67Delete <strong>Pro</strong>gram Template 67Delete Template 73EQ window 70Import Bank 68Import <strong>Pro</strong>gram 67Load From 73Load Templates From 68Paste Bank 67Paste <strong>Pro</strong>gram 67Paste Settings 73Save as Default 73Save Bank 67Save Bank As 67Save Bank as Default 68Save <strong>Pro</strong>gram 67Save <strong>Pro</strong>gram As 67Save Settings 73Save Settings As 73Template pop-up (TDM)Copy Settings 155Delete Template 155Export Settings 155Import Settings 155Load Templates From 155Paste Settings 155Save as Default 155Save Settings 154Save Settings As 154TemplatesPlug-In Edit window (TDM) 153tempoand <strong>audio</strong> event resolution 179Thinning Volume and Pan Data (DAE) 126ThruRecord Monitor (Acadia) 23Record Monitor (DAE) 111Time Scale command 386using 387timingchanging with MIDI-to-<strong>Audio</strong> 413Toggle Mutes command 250Tracks window<strong>audio</strong> evnets 178<strong>Audio</strong> Instrument assignment 193selecting <strong>audio</strong> events 185trimming (<strong>audio</strong> events) 195Type (EQ Band parameter) 278Type columnin File Management window 285UUnlink Events command 350unmuting<strong>audio</strong> events 249Unused columnin File Management window 285452 Opcode Systems, Inc.
IndexUse Selected MIDI Notes 407Use Selected MIDI Pitch Bend 407Use Selected MIDI Velocity 407Use Selected MIDI Volume 407Use Selected Notes 403Use Zero Crossings 314Vvelocityof <strong>audio</strong> events 254vs. volume 253viewing the file pathin File Management window 284virtual ConsolesAcadia 78TDM 168<strong>Vision</strong>using your manuals 3<strong>Vision</strong> Effects Templates file 65Vocodingwith <strong>Audio</strong>-to-MIDI 404Voice<strong>Audio</strong> Instruments (DAE) 136, 137voicevs. output 7voice allocationAcadia 37<strong>Audio</strong>media 137dynamic 124fixed 124<strong>Pro</strong> Tools I & II 137<strong>Pro</strong> Tools III/24 137Session 8/<strong>Pro</strong>ject 137Sound Tools II 137volumefader 260faders 257Faders window 270in List window 255in Strip Chart 256volume vs. velocity 253WWAVEin <strong>Audio</strong> Format dialog 228Waveform Display 182, 354and Slice <strong>Audio</strong> 309and Strip Silence 308Fast 182High Resolution 182Off 182Waveform Height 182, 353Automatic 182Grow 182key equivalents 353Shrink 182Where Issee Find FileWidth (EQ Band parameter) 278ZZero Crossings 180zero crossingsand the Mix command 181Use Zero Crossings option 314using while editing 180zooming<strong>audio</strong> events 179Opcode Manual Template 453