VoIP Acoustic Design - VLSI Solution
VoIP Acoustic Design - VLSI Solution
VoIP Acoustic Design - VLSI Solution

You also want an ePaper? Increase the reach of your titles
YUMPU automatically turns print PDFs into web optimized ePapers that Google loves.
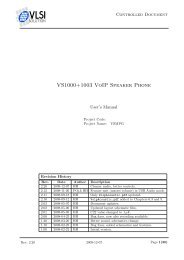
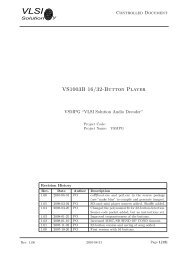
<strong>VLSI</strong><strong>Solution</strong>yUncontrolled Document<strong>VoIP</strong> <strong>Acoustic</strong> <strong>Design</strong>Hints on How to Get Better <strong>Acoustic</strong> Performance on a <strong>VoIP</strong> PhoneProject Code:Project Name:VSMPGRevision HistoryRev. Date Author Description2.11 2008-09-18 HH Added Chapter 2.3.10.2.10 2008-09-12 HH Initial version.Rev. 2.11 2008-09-18 Page 1(22)
<strong>VLSI</strong><strong>Solution</strong>y<strong>VoIP</strong> <strong>Acoustic</strong> <strong>Design</strong>VSMPGHHTable of Contents1 Introduction 42 How to Combat Feedback 52.1 What Feedback Is . . . . . . . . . . . . . . . . . . . . . . . . . . . . . . . 52.2 Feedback Mechanisms in <strong>VoIP</strong> Speaker Phone Demonstration Unit . . . . 62.3 Case Study: Feedback in an Actual Product . . . . . . . . . . . . . . . . . 72.3.1 The Product . . . . . . . . . . . . . . . . . . . . . . . . . . . . . . 72.3.2 Measurement Methodology . . . . . . . . . . . . . . . . . . . . . . 82.3.3 Reference 0.0 dB: <strong>VLSI</strong> <strong>Solution</strong>’s Demonstration Board . . . . . . 92.3.4 Meas +30.5 dB: As Is . . . . . . . . . . . . . . . . . . . . . . . . . 102.3.5 Meas +16.0 dB: No Chassis . . . . . . . . . . . . . . . . . . . . . . 112.3.6 Meas +28.5 dB: Speaker Padding . . . . . . . . . . . . . . . . . . . 122.3.7 Meas +27.6 dB: Padding around Microphone Circuit Board . . . . 132.3.8 Meas +21.8 dB: Mic Removed from Circuit Board . . . . . . . . . 142.3.9 Meas +16.2 dB: Mic Removed from Circ. Board + Chassis Hole . 152.3.10 Meas +15.8 dB: Microphone Glued to Chassis . . . . . . . . . . . . 162.3.11 Conclusions . . . . . . . . . . . . . . . . . . . . . . . . . . . . . . . 173 Pass-Through <strong>VoIP</strong> Software 183.1 What the Software Does . . . . . . . . . . . . . . . . . . . . . . . . . . . . 183.2 How to Load the Software . . . . . . . . . . . . . . . . . . . . . . . . . . . 194 Document Version History 215 Contact Information 22Rev. 2.11 2008-09-18 Page 2(22)
<strong>VLSI</strong><strong>Solution</strong>y<strong>VoIP</strong> <strong>Acoustic</strong> <strong>Design</strong>VSMPGHHList of Figures2.1 Speaker Phone Signals . . . . . . . . . . . . . . . . . . . . . . . . . . . . . 52.2 <strong>VoIP</strong> Speaker Phone Demonstration Unit . . . . . . . . . . . . . . . . . . 62.3 Speaker Phone Chassis . . . . . . . . . . . . . . . . . . . . . . . . . . . . . 72.4 Speaker Phone Microphone Encapsulation (Figure 2.13 Is Better) . . . . . 72.5 Actual Speaker Phone Loudspeaker Encapsulation . . . . . . . . . . . . . 82.6 0.0 dB: <strong>VLSI</strong> <strong>Solution</strong>’s Demonstration Board . . . . . . . . . . . . . . . . 92.7 +30.5 dB: As Is . . . . . . . . . . . . . . . . . . . . . . . . . . . . . . . . . 102.8 +16.0 dB: No Chassis . . . . . . . . . . . . . . . . . . . . . . . . . . . . . . 112.9 +28.5 dB: Speaker Padding . . . . . . . . . . . . . . . . . . . . . . . . . . 122.10 Speaker Phone Loudspeaker Encapsulation with Thicker Back Wall . . . . 122.11 +27.6 dB: Blu Tack around Microphone Board . . . . . . . . . . . . . . . 132.12 +21.8 dB: Free-Hanging Microphone, Closed Chassis . . . . . . . . . . . . 142.13 Better Speaker Phone Microphone Encapsulation . . . . . . . . . . . . . . 142.14 +16.2 dB: Free-Hanging Microphone, Open Chassis . . . . . . . . . . . . . 152.15 +15.8 dB: Microphone Glued to Chassis . . . . . . . . . . . . . . . . . . . 162.16 Microphone Board Glued to Chassis . . . . . . . . . . . . . . . . . . . . . 163.1 PC Setup for Audio Feedback Measurement . . . . . . . . . . . . . . . . . 183.2 How to Connect an RS232 Adapter to <strong>VLSI</strong>’s <strong>VoIP</strong> Board . . . . . . . . . 193.3 Two Possible RS232 Converter Jumper Configurations . . . . . . . . . . . 19Rev. 2.11 2008-09-18 Page 3(22)
<strong>VLSI</strong><strong>Solution</strong>y<strong>VoIP</strong> <strong>Acoustic</strong> <strong>Design</strong>VSMPGHH1. INTRODUCTION1 IntroductionThe intent of this document is to present suggestions on how to increase sound qualityof <strong>VoIP</strong> Speaker Phones built upon the basic design of <strong>VLSI</strong> <strong>Solution</strong>’s VS1000+1003<strong>VoIP</strong> Speaker Phone demonstration units. This is done by analyzing acoustic feedbackthat can have an adverse effect on sound quality. The document also gives some hintson how to minimize the effect of acoustic feedback.Chapter 2 presents what acoustic feedback is and describes the various ways of how it canmanifest itself. Then it shows a case study of how acoustic feedback can be minimized.Chapter 3 describes the Pass-Through <strong>VoIP</strong> Software that is needed for analyzing acousticfeedback and gives instructions on how to load it to a unit.Finally, contact information is given in Chapter 5.Rev. 2.11 2008-09-18 Page 4(22)
<strong>VLSI</strong><strong>Solution</strong>HHy<strong>VoIP</strong> <strong>Acoustic</strong> <strong>Design</strong>VSMPG2. HOW TO COMBAT FEEDBACK2 How to Combat FeedbackThis chapter aims to answer to the question: What is feedback and what can you do tocombat it?2.1 What Feedback IsReflective surface (e.g. wall)Reflected FESDirectFESFar−EndSignalLoudspeakerEquipmentVibrationFESMicrophone<strong>VoIP</strong>PhoneInternalAirspaceFESNear−EndSignalFigure 2.1: Speaker Phone SignalsIn the context of speaker phones, feedback is considered to be audio that is by somemeans transmitted from the of a phone loudspeaker back to its microphone and thusback to the speaker phone and potentionally to the other party.Speaker phone audio signals, including four mechanisms for feedback are shown in Figure2.1.• The Near-End Signal (NES) is that part of the audio signal that the microphoneactually is supposed to capture and pass on.• Direct FES (Far-End Signal) is the part of the speaker signal that is transmitteddirectly from the loudspeaker through the air to the microphone. This can beminimized by designing the device with directional loudspeaker faced away fromRev. 2.11 2008-09-18 Page 5(22)
<strong>VLSI</strong><strong>Solution</strong>HHy<strong>VoIP</strong> <strong>Acoustic</strong> <strong>Design</strong>VSMPG2. HOW TO COMBAT FEEDBACKthe microphone, a directional microphone and by putting the loudspeaker andmicrophone as far away from each other as possible.• Equipment Vibration FES is usually caused by the main chassis, which vibratesalong with the speaker. This vibration may be transmitted to the microphone andcause very high microphone signal levels.• Internal Airspace FES is sound that occur inside a unit chassis. There may bestructures which boost sound levels and may cause very high microphone signallevels.• Reflected FES (Far-End Signal) is the part of the loudspeaker signal that getsreflected from different surfaces and get transmitted back to the microphone. Thisis the signal that adaptive echo cancellation has been designed to combat.2.2 Feedback Mechanisms in <strong>VoIP</strong> Speaker Phone DemonstrationUnitFigure 2.2: <strong>VoIP</strong> Speaker Phone Demonstration UnitThis Chapter will discuss the relevance of the four feedback mechanisms to the VS1000+1003<strong>VoIP</strong> Speaker Phone (VVSP) demonstration unit, depicted in Figure 2.2.The loudspeaker and microphone of the VVSP are omnidirectional, so Direct FES couldbe a real problem. This has been solved by putting the microphone and loudspeaker asfar as possible from each other.Equipment Vibration FES is not an issue as there is no chassis to conduct vibrations.The same goes for Internal Airspace FES. Thus, the only remaining feedback method isReflected FES.All in all, VVSP works very well even without a directional microphone and loudspeaker.Note, however, that this wouldn’t probably be as easy if the unit actually had a chassis.Rev. 2.11 2008-09-18 Page 6(22)
<strong>VLSI</strong><strong>Solution</strong>HHy<strong>VoIP</strong> <strong>Acoustic</strong> <strong>Design</strong>VSMPG2. HOW TO COMBAT FEEDBACK2.3 Case Study: Feedback in an Actual ProductWhen a product is built, there has to be a chassis containing the electronics, and audiodesign gets that much harder. This chapter will discuss one example product and willshow some suggestions on how to solve the problem.2.3.1 The ProductFrontBackButtonsLoudspeakerUSBSDMicLEDsFigure 2.3: Speaker Phone ChassisThe product is a speaker phone, which is in principle as depicted in Figure 2.3. The userinterface (buttons and LEDs) and the microphone are on the front side. USB and SDconnectors live on the back side.Main chassisRubber protector/directorMicrophoneMic pins + solderCircuit boardFigure 2.4: Speaker Phone Microphone Encapsulation (Figure 2.13 Is Better)Figure 2.4 shows how the microphone is been connected. On the other side the microphonehas been soldered to a circuit board, and on the other side it has been connectedto the main chassis through a rubber protection / director cap. It will later be shownwhy the microphone shouldn’t be connected in this way in a real product. (If you wantto see the better setup immediately, see Figure 2.13 at Page 14.)Rev. 2.11 2008-09-18 Page 7(22)
<strong>VLSI</strong><strong>Solution</strong>HHy<strong>VoIP</strong> <strong>Acoustic</strong> <strong>Design</strong>VSMPG2. HOW TO COMBAT FEEDBACKMain chassisLoudspeaker chassisLoudspeakerFigure 2.5: Actual Speaker Phone Loudspeaker EncapsulationFigure 2.5 shows that the loudspeaker has been installed in a separate, plastic chassisof its own. The chassis has relatively thin walls and two holes: one for allowing speakerwires to come through, and another for other purposes.The reported problem with the product was that echo cancellation didn’t work properly.The reasons and solution are discussed in this Chapter.2.3.2 Measurement MethodologyTo determine the amount of speaker sound picked up by the microphone, the followingmeasurement methodology was used:1. A special pass-through version of the <strong>VoIP</strong> software was loaded to the unit. Thissoftware version does not perform echo cancellation or any other post-processingto the input signal except for a DC removal filter. Thus it will accurately representwhat was actually recorded by the microphone. This software version is providedin the same package as this document. See Chapter 3 for details.2. Wideband white noise sampled at 32 kHz and recorded with an amplitude of −20 dBof maximum amplitude was played to the speakers using full volume on the operatingsystem.3. Microphone input was recorded for ≈10. . . 20 seconds to an 16-bit, 8 kHz monoWAV file.4. The power and spectrum of the WAV file was measured.Rev. 2.11 2008-09-18 Page 8(22)
<strong>VLSI</strong><strong>Solution</strong>HHy<strong>VoIP</strong> <strong>Acoustic</strong> <strong>Design</strong>VSMPG2. HOW TO COMBAT FEEDBACK2.3.3 Reference 0.0 dB: <strong>VLSI</strong> <strong>Solution</strong>’s Demonstration Board0−10−20F=39.0625HzLevel=−9.8734dBS/(N+THD)=−11.5573dBS/N=−11.5637dBHD=21.282dBAmplitude (dB)−30−40−50−60−700 500 1000 1500 2000 2500 3000 3500 4000Frequency (Hz)Figure 2.6: 0.0 dB: <strong>VLSI</strong> <strong>Solution</strong>’s Demonstration BoardAs a reference, <strong>VLSI</strong> <strong>Solution</strong>’s own demonstration board setup (seen in Figure 2.2 atPage 6) was measured. The frequency spectrum of this measurement is presented inFigure 2.6. The feedback floor is very low between 200. . . 2500 Hz, though it rises over10 dB for frequences between 2700 and 3400 Hz.Overall, this is performance that ensures that echo cancellation works exactly as intended,although getting the same performance from a device that actually has a chassis mayprove problematic.Rev. 2.11 2008-09-18 Page 9(22)
<strong>VLSI</strong><strong>Solution</strong>HHy<strong>VoIP</strong> <strong>Acoustic</strong> <strong>Design</strong>VSMPG2. HOW TO COMBAT FEEDBACK2.3.4 Meas +30.5 dB: As Is0−10−20F=831.4209HzLevel=5.4292dBS/(N+THD)=−19.033dBS/N=−19.0415dBHD=26.9613dBAmplitude (dB)−30−40−50−60−700 500 1000 1500 2000 2500 3000 3500 4000Frequency (Hz)Figure 2.7: +30.5 dB: As IsFirst the unit was tested as is, without any modifications except for loading the passthroughsoftware. The spectrum is presented in Figure 2.7. As can be seen, frequenciesbetweem 200. . . 1400 Hz are greatly boosted.The overall signal power was a whopping 30.5 dB stronger than the reference so it is notwonder why echo cancellation wouldn’t perform properly.Rev. 2.11 2008-09-18 Page 10(22)
<strong>VLSI</strong><strong>Solution</strong>HHy<strong>VoIP</strong> <strong>Acoustic</strong> <strong>Design</strong>VSMPG2. HOW TO COMBAT FEEDBACK2.3.5 Meas +16.0 dB: No Chassis0−10−20F=1.3428HzLevel=−1.5676dBS/(N+THD)=−11.2087dBS/N=−11.1296dBHD=5.7821dBAmplitude (dB)−30−40−50−60−700 500 1000 1500 2000 2500 3000 3500 4000Frequency (Hz)Figure 2.8: +16.0 dB: No ChassisThe main chassis was removed in such a way that the speakers and microphone still wereat the same relative positions as before. This resulted in a much enhanced performanceas seen in Figure 2.8. All the peaks are gone and the resulting frequency response isrelatively straight.The signal’s power has decreased to +16.0 dB. Although it still is much greater thanwhat was with <strong>VLSI</strong> <strong>Solution</strong>’s Demonstration Unit, the difference is big enough that<strong>VoIP</strong> functionality works with the official <strong>VoIP</strong> firmware.This solution was of course not practical in itself, because a product needs to have achassis. Nevertheless, now it was clear that the main chassis somehow acted as a soundconductor, because removing it decreased FES so significantly.The chassis was put together again for the next tests.Rev. 2.11 2008-09-18 Page 11(22)
<strong>VLSI</strong><strong>Solution</strong>HHy<strong>VoIP</strong> <strong>Acoustic</strong> <strong>Design</strong>VSMPG2. HOW TO COMBAT FEEDBACK2.3.6 Meas +28.5 dB: Speaker Padding0−10−20F=788.208HzLevel=2.0339dBS/(N+THD)=−20.3816dBS/N=−20.3901dBHD=24.5065dBAmplitude (dB)−30−40−50−60−700 500 1000 1500 2000 2500 3000 3500 4000Frequency (Hz)Figure 2.9: +28.5 dB: Speaker PaddingIt was felt that the back wall of the speaker element might be vibrating too much, sosome mass was added to the back of the inside of the speaker chassis to make it a littlebit heavier. Also the speaker chassis holes were filled so that the speaker would be alittle bit more like what is shown in Figure 2.10.This resulted in noticeable attenuation at frequences over 2300 Hz and a signal level of+28.5 dB as shown in Figure 2.9. Unfortunately the main problem, the peak between200. . . 1200 Hz, was unaffected.Main chassisLoudspeaker chassisLoudspeakerFigure 2.10: Speaker Phone Loudspeaker Encapsulation with Thicker Back WallRev. 2.11 2008-09-18 Page 12(22)
<strong>VLSI</strong><strong>Solution</strong>HHy<strong>VoIP</strong> <strong>Acoustic</strong> <strong>Design</strong>VSMPG2. HOW TO COMBAT FEEDBACK2.3.7 Meas +27.6 dB: Padding around Microphone Circuit Board0−10−20F=898.3154HzLevel=3.0917dBS/(N+THD)=−18.4497dBS/N=−18.4582dBHD=29.7958dBAmplitude (dB)−30−40−50−60−700 500 1000 1500 2000 2500 3000 3500 4000Frequency (Hz)Figure 2.11: +27.6 dB: Blu Tack around Microphone BoardLow-frequency boost could be caused by Equipment Vibration FES through the microphonecircuit board. Thus, padding material was put both above and below themicrophone board to decrease vibrations.As can be seen in Figure 2.11, the difference between this and the previous case wasinsignificant.Rev. 2.11 2008-09-18 Page 13(22)
<strong>VLSI</strong><strong>Solution</strong>HHy<strong>VoIP</strong> <strong>Acoustic</strong> <strong>Design</strong>VSMPG2. HOW TO COMBAT FEEDBACK2.3.8 Meas +21.8 dB: Mic Removed from Circuit Board0−10−20F=466.1865HzLevel=−1.9277dBS/(N+THD)=−17.8183dBS/N=−17.8252dBHD=16.1388dBAmplitude (dB)−30−40−50−60−700 500 1000 1500 2000 2500 3000 3500 4000Frequency (Hz)Figure 2.12: +21.8 dB: Free-Hanging Microphone, Closed ChassisTo further combat potential Equipment Vibration FES, the microphone was disconnectedfrom the microphone circuit board. Then it was connected back with thin electrical wiresas shown in Figure 2.13. The microphone was secured to the main chassis with adhesivematerial.As can be seen in Figure 2.12, preventing Equipment Vibration FES from the circuitboard helped: while it didn’t affect frequencies below 500 Hz, it greatly reduced frequenciesin the most problematic area at 800. . . 1300 Hz. Now signal level was +21.8 dB.Main chassisRubber protector/directorMicrophoneMic pins + solderCircuit boardThin electrical wiresFigure 2.13: Better Speaker Phone Microphone EncapsulationRev. 2.11 2008-09-18 Page 14(22)
<strong>VLSI</strong><strong>Solution</strong>HHy<strong>VoIP</strong> <strong>Acoustic</strong> <strong>Design</strong>VSMPG2. HOW TO COMBAT FEEDBACK2.3.9 Meas +16.2 dB: Mic Removed from Circ. Board + Chassis Hole0−10−20F=39.0625HzLevel=−9.6489dBS/(N+THD)=−19.8129dBS/N=−19.8133dBHD=7.4257dBAmplitude (dB)−30−40−50−60−700 500 1000 1500 2000 2500 3000 3500 4000Frequency (Hz)Figure 2.14: +16.2 dB: Free-Hanging Microphone, Open ChassisRemoving the microphone from the main circuit board helped a lot, but there was stillmuch room from improvement.An extra hole, roughly the size of the SD port hole, was added to the main chassis. Ascan be seen in Figure 2.14, this moved the high peak frequency range from 300. . . 600 Hzto 700. . . 1000 Hz, but above all it lowered signal level. Now the total signal level was+16.2 dB above the reference level. At frequencies 2800. . . 3400 Hz it is in fact better thanthe reference unit in Chapter 2.3.3, although at lower frequencies it still is significantlyworse. The signal level was now as low as it was in Chapter 2.3.5 where no chassis wasused. This was low enough for the <strong>VoIP</strong> speaker phone to work, although even lowerlevels would be preferable.Rev. 2.11 2008-09-18 Page 15(22)
<strong>VLSI</strong><strong>Solution</strong>HHy<strong>VoIP</strong> <strong>Acoustic</strong> <strong>Design</strong>VSMPG2. HOW TO COMBAT FEEDBACK2.3.10 Meas +15.8 dB: Microphone Glued to Chassis0−10−20F=887.9395HzLevel=−13.7548dBS/(N+THD)=−23.4818dBS/N=−23.4853dBHD=5.7227dBAmplitude (dB)−30−40−50−60−700 500 1000 1500 2000 2500 3000 3500 4000Frequency (Hz)Figure 2.15: +15.8 dB: Microphone Glued to ChassisAnother solution to separate the microphone from the vibrations of the main board andplastics was to solder the microphone to a smaller board and glue them tightly to themain chassis, as shown in Figure 2.16. This unit was then connected to the main boardand plastics with a 15 cm thin ribbon cable.Figure 2.15 shows that this gave the best results: a uniform frequency response andthe lowest signal amplitude, and all of this without drilling extra holes to the chassis.Opening the chassis could potentially give even better results, but this was not tested.Main chassisRubber protector/directorMicrophoneMic pins + solderSmall circuit boardRibbon cableGlueMain board and plasticsFigure 2.16: Microphone Board Glued to ChassisRev. 2.11 2008-09-18 Page 16(22)
<strong>VLSI</strong><strong>Solution</strong>HHy<strong>VoIP</strong> <strong>Acoustic</strong> <strong>Design</strong>VSMPG2. HOW TO COMBAT FEEDBACK2.3.11 ConclusionsThe basic problem with the original product was that it transmitted too much audiosignal from the speaker to the microphone (Figure 2.7 on page 10), which prevented echocancellation from working efficiently. The main mechanisms appeared to be EquipmentVibration FES and Internal Airspace FES (see Chapter 2.1 for different types of FESfeedback).The research done to the product was not exhaustive, and further experiment wouldalmost certainly result in lower FES feedback levels, which in turn would lead to evenbetter sound quality. It must be remembered that echo cancellation is not a miracle curefor everything: the device that intends to use echo cancellation muste have good acousticdesign to begin with. Only when these things are in order can echo cancellation do thething it is designed for: filtering out Reflected FES and traces of the other FES types.Rev. 2.11 2008-09-18 Page 17(22)
<strong>VLSI</strong><strong>Solution</strong>HHy<strong>VoIP</strong> <strong>Acoustic</strong> <strong>Design</strong>VSMPG3. PASS-THROUGH VOIP SOFTWARE3 Pass-Through <strong>VoIP</strong> Software3.1 What the Software DoesThe Pass-Through <strong>VoIP</strong> Software is an alternative firmware to the default <strong>VoIP</strong> phonefirmware. It doesn’t have automatic gain control, echo cancellation or extraneous filteringexcept for a DC removal filter. The software has been intended for testing acousticfeedback as presented in Figure 3.1.PC<strong>VoIP</strong> deviceUSB cableSpeakerMic<strong>Acoustic</strong>feedbackFigure 3.1: PC Setup for Audio Feedback MeasurementA test signal sampled at the <strong>VoIP</strong> application’s native output sample rate of 32 kHz isplayed back from the PC to the <strong>VoIP</strong> device’s speaker. At the same time the signalfrom the microphone is recorded with a PC recorder application. The resulting file isan 16-bit 8 kHz mono file, that consists of the microphone input. Note that some PCrecording applications record at a default of mono 8 bits. Remember to set your PCrecording application to save 8 kHz mono with 16 bits!The file can be used for feedback analysis. As an example, if the test signal is widebandwhite noise the input can be analyzed with any good spectral analyzer program that canalso display total signal power.In this package there is a file called <strong>Acoustic</strong>/Noise32k.wav, which consists of 10 secondsof wideband white noise sampled at 32 kHz and encoded with 8 bits at a signal level of-20 dB of maximum amplitude. By recording 5. . . 10 seconds of this signal, both speakerto-micfeedback spectrum and power can be resolved.Rev. 2.11 2008-09-18 Page 18(22)
<strong>VLSI</strong><strong>Solution</strong>HHy<strong>VoIP</strong> <strong>Acoustic</strong> <strong>Design</strong>VSMPG3. PASS-THROUGH VOIP SOFTWARE3.2 How to Load the SoftwareTo update to a new software version, you need a PC/Windows computer with an RS232port, an RS232 cable and an RS232 adapter. If you don’t have an RS232 adapter, youcan order one from <strong>VLSI</strong> <strong>Solution</strong> or build it yourself: the adapter consists of one singleMAX3232 compatible RS232 signal converter.Figure 3.2: How to Connect an RS232 Adapter to <strong>VLSI</strong>’s <strong>VoIP</strong> BoardIf loading a program to <strong>VLSI</strong> <strong>Solution</strong>’s example boards, connect the adaptor cable tothe main board as shown in Figure 3.2. The black thread should go to pin 1. If you usea custom board like the Fujitsu unit, you will have to use your own adapter.Figure 3.3: Two Possible RS232 Converter Jumper ConfigurationsRev. 2.11 2008-09-18 Page 19(22)
<strong>VLSI</strong><strong>Solution</strong>HHy<strong>VoIP</strong> <strong>Acoustic</strong> <strong>Design</strong>VSMPG3. PASS-THROUGH VOIP SOFTWAREThis package includes command files named prom1.bat through prom4.bat. They areintended to be used from serial ports COM1 through COM4, respectively.To load the new code to the board, perform the following steps:1. Open the .zip package that contains the files. As you are reading this document,you have probably already done that.2. Open a command prompt, and use the CD command to go to the <strong>Acoustic</strong>/directory where the files are.3. Connect a serial cable between the PC and the <strong>VoIP</strong> Speaker Phone.4. Turn the <strong>VoIP</strong> phone on. It doesn’t matter what mode it is in.5. Check which COM port it is on.6. If COM1, run prom1.bat by typing prom1 and pressing the Enter key. For COM2,run prom2.bat etc.7. You should see roughy the following text appearing on the screen:VSEMU 2.1 Nov 28 2007 11:50:01(c)1995-2007 <strong>VLSI</strong> <strong>Solution</strong> OyClock 11999 kHzUsing serial port 1, COM speed 115200Waiting for a connection to the board...Caused interruptChip version "1000"Stack pointer 0x19e0, bpTable 0x7d4dUser program entry address 0x4083eeprom.bin: includes optional header, 16 sections, 539 symbolsSection 1: code page:0 start:80 size:3 relocs:1 fixed[... many similar lines deleted ...]Section 16: VS_stdiolib$0 page:0 start:689 size:134 relocs:370000status................................................................Finished!!Never interrupt programming!8. Sometimes you may only seeVSEMU 2.1 Nov 28 2007 11:50:01(c)1995-2007 <strong>VLSI</strong> <strong>Solution</strong> OyClock 11999 kHzUsing serial port 1, COM speed 115200Waiting for a connection to the board...In such a case you have either used a wrong COM port in your script or you mustchange the jumper configuration as shown in Figure 3.3.Rev. 2.11 2008-09-18 Page 20(22)
<strong>VLSI</strong><strong>Solution</strong>HHy<strong>VoIP</strong> <strong>Acoustic</strong> <strong>Design</strong>VSMPG4. DOCUMENT VERSION HISTORY4 Document Version HistoryThis chapter includes a detailed document and <strong>VoIP</strong> package version history.2008-09-18 Version 2.11• Added Chapter 2.3.10, +15.8 dB: Microphone Glued to Chassis. This alternativeto just glueing the microphone to the main chassis gave the best results for theexample product.2008-09-12 Version 2.10• First release.Rev. 2.11 2008-09-18 Page 21(22)
<strong>VLSI</strong><strong>Solution</strong>HHy<strong>VoIP</strong> <strong>Acoustic</strong> <strong>Design</strong>VSMPG5. CONTACT INFORMATION5 Contact Information<strong>VLSI</strong> <strong>Solution</strong> OyEntrance G, 2nd floorHermiankatu 8FIN-33720 TampereFINLANDFax: +358-3-3140-8288Phone: +358-3-3140-8200Email: sales@vlsi.fiURL: http://www.vlsi.fi/For support, ask:support@vlsi.fiRev. 2.11 2008-09-18 Page 22(22)