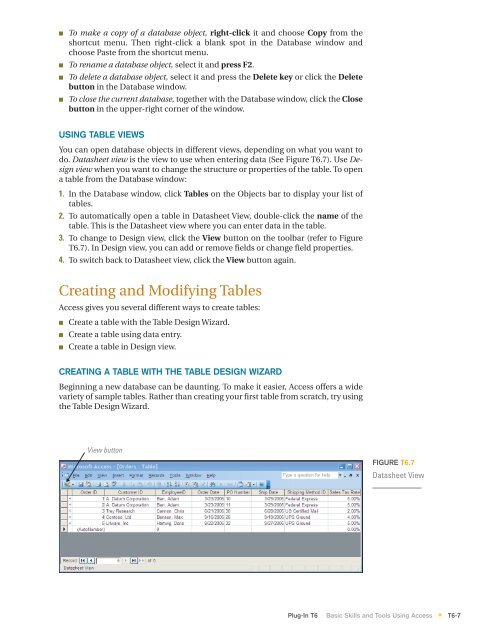
■ To make a copy of a database object, right-click it <strong>and</strong> choose Copy from theshortcut menu. Then right-click a blank spot in the Database window <strong>and</strong>choose Paste from the shortcut menu.■ To rename a database object, select it <strong>and</strong> press F2.■ To delete a database object, select it <strong>and</strong> press the Delete key or click the Deletebutton in the Database window.■ To close the current database, together with the Database window, click the Closebutton in the upper-right corner of the window.USING TABLE VIEWSYou can open database objects in different views, depending on what you want todo. Datasheet view is the view to use when entering data (See Figure <strong>T6</strong>.7). Use Designview when you want to change the structure or properties of the table. To opena table from the Database window:1. In the Database window, click Tables on the Objects bar to display your list oftables.2. To automatically open a table in Datasheet View, double-click the name of thetable. This is the Datasheet view where you can enter data in the table.3. To change to Design view, click the View button on the toolbar (refer to Figure<strong>T6</strong>.7). In Design view, you can add or remove fields or change field properties.4. To switch back to Datasheet view, click the View button again.Creating <strong>and</strong> Modifying Tables<strong>Access</strong> gives you several different ways to create tables:■■■Create a table with the Table Design Wizard.Create a table using data entry.Create a table in Design view.CREATING A TABLE WITH THE TABLE DESIGN WIZARDBeginning a new database can be daunting. To make it easier, <strong>Access</strong> offers a widevariety of sample tables. Rather than creating your first table from scratch, try usingthe Table Design Wizard.View buttonFIGURE <strong>T6</strong>.7Datasheet ViewPlug-In <strong>T6</strong> <strong>Basic</strong> <strong>Skills</strong> <strong>and</strong> <strong>Tools</strong> <strong>Using</strong> <strong>Access</strong> <strong>T6</strong>-7*
Select the typeof table.Select a sampletable from thelist.FIGURE <strong>T6</strong>.8Create a TableBy <strong>Using</strong> WizardFIGURE <strong>T6</strong>.9Create a TableBy Entering DataSelect the fields to beincluded in thetable.Fields in newtable.CREATING A TABLE USING DATA ENTRYTo create a table using the Table Design Wizard(see Figure <strong>T6</strong>.8):1. Double-click Create table by using wizard in theTables window.2. Select the type of table you need: business or personal.3. Select the Sample Table that best fits your needs.4. Select the fields from the sample that you want toinclude in your table.5. Give your Table a meaningful name, such asCUSTOMER.6. Allow <strong>Access</strong> to set the Primary Key.7. Select what you want to do next: modify the tabledesign, enter data in Datasheet view, or create adata entry form based on the table you just created.8. Click the Finish button to end the wizard <strong>and</strong> finalizeyour table.Sometimes you need to create a very simple table. In this case, the data entrymethod might be easiest. A new table created with the data entry method appearsas a plain datasheet. Fields are named Field1, Field2, Field3, etc., until you renamethem. To create a table using the data entry method (refer to Figure <strong>T6</strong>.9):1. If necessary, click Tables in the Objects bar.2. Double-click Create table by entering data.3. The new table appears <strong>and</strong> is ready for data entry.4. Rename the fields that you are going to use by double-clicking the column name(Field1, Field2, etc.) <strong>and</strong> typing the new name (First Name, Last Name, etc.).CREATING A TABLE IN DESIGN VIEWSometimes the Table Design Wizard does not offer a sample that fits your needs. Inthis case, you might want to design your table using Design view. In this next step,you will be using the Slopeside Bikes database that you created in the “Creating aNew Blank Database” section to use for many of the remaining steps in this plug-in.To create a table using Design view, follow these steps:1. In the left column of the Database window, make sure that the Tables object isselected.2. Click Design on the Database dialog box.3. Create fields for the following (see Figure <strong>T6</strong>.10):a. Field Name = BikeID, Data Type = Number, FieldSize = Long Integer, <strong>and</strong> make the BikeID thePrimary Keyb. Field Name = Description, Data Type = Text, FieldSize = 25, Required = Yesc. Field Name = CostPerHour, Data Type = Currency,Required = YesNote: Designate a primary key. The primary key consistsof one or more fields that <strong>Access</strong> can use to uniquely<strong>T6</strong>-8 Plug-In <strong>T6</strong> <strong>Basic</strong> <strong>Skills</strong> <strong>and</strong> <strong>Tools</strong> <strong>Using</strong> <strong>Access</strong>*