
You also want an ePaper? Increase the reach of your titles
YUMPU automatically turns print PDFs into web optimized ePapers that Google loves.
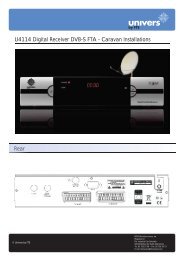
Digital Receiver U4103- U4104Please, read this manual carefully,before installing the digital receiver.It contains important informationsconcerning your safety and the correctinstallation and use of your new receiver.
0ForewordEnglishCONTENTSFOREWORD ...................................................................................................................2CONTENTS.....................................................................................................................3FOR YOUR SAFETY.......................................................................................................4PACKAGE CONTENTS...................................................................................................6CONNECTIONS AND CONTROLS.................................................................................7Installation Wizard......................................................................................................13BASIC OPERATIONS ...................................................................................................17MAIN MENU ..................................................................................................................22TV Channels ..............................................................................................................24Installation Menu ........................................................................................................27Installation Menu > Antenna Config........................................................................28Installation Menu > TP List .....................................................................................35Installation Menu > Antenna Direction ....................................................................41Installation Menu > Motorised System....................................................................43System Menu .............................................................................................................46System > System Setting .......................................................................................46System > Timer ......................................................................................................48System > Calendar .................................................................................................50System > Factory Default .......................................................................................51System > User Save & Load ..................................................................................52System > About IRD ...............................................................................................53Parental Control .........................................................................................................54OSD ...........................................................................................................................56TROUBLESHOOTING...................................................................................................57TECHNICAL SPECIFICATION ......................................................................................593 Version 1.0 © UNIVERS
1For your SafetyEnglishFOR YOUR SAFETY...Please read the manual carefully before installing the receiver.Caution, never open the device <strong>by</strong> yourself. Dangerously highvoltages are present inside the unit. Refer servicing to qualifiedstaff only.When installing the receiver, always unplug the receiverfrom the mains voltage.Unplug the receiver from the mains in case of long periodswithout operating the receiver (for example, during holidays!)To prevent shock hazard, do not touch the power plug with wethands.Always unplug the receiver before cleaning it or working on theconnections.Do not install the receiver close to strong heat sources, andensure a good aeration if you plan to install the receiver in asmall cabinet.4 Version 1.0 © UNIVERS
1For your SafetyEnglishBefore you start operating the receiver, make sure that thesatellite antenna is properly built up, optimally connected andaligned.The correct place to install the receiver is, of course, near yourTV set and any other A/V signal sources (DVD, VCR, CD,game console, etc.).Choose a stable support, in which you can easily lay thenecessary connecting cables without stumbling-danger.The receiver should be installed near an easily accessibleoutlet.Do not install the receiver in a place where it can be reached <strong>by</strong>liquid spills.Do not put any heavy objects as, for example, a TV-device overthe receiver; the receiver could be damaged.Do not install the receiver:- On an unstable surface- Subject to direct sunlight- In high humidity environment- Outside the receiver’s temperature range (+5°...+40°C)If the receiver is subject to severe temperature changes, it cansuffer from water condensation inside. Switch off the receiver inthese cases for at least 2 hours before resuming operation.5 Version 1.0 © UNIVERS
2Package ContentsEnglishPACKAGE CONTENTS<strong>Manual</strong>:Remote Control (Batteries included):Do not forget to install the batteries!6 Version 1.0 © UNIVERS
3Connections and controlsEnglishCONNECTIONS AND CONTROLS!This manual makes reference to the U4103-U4104 receivers1 2 3 4 5 61. POWER: Switches the receiver on, or enters stand<strong>by</strong> mode. To completely switch offthe receiver, you have to use the switch on the back of the receiver.2. POWER LED: Indicates that the mains voltage (90-230 VAC) is available.3. SIGNAL LED: Indicates a sufficient signal level at the IF IN input4. DISPLAY: 4 Digits to display the program numbers.5. IR-SENSOR: Reception sensor for the IR remote control signals6. BUTTONS: These buttons allow controlling the main functions of the receiver, andprovide the same functionality as the remote control ones.7 Version 1.0 © UNIVERS
3Connections and controlsEnglishSATVCR1 3 5 6 9 10 11 122 4 7 8PCTVHiFiSAT analog1. LNC IN: Satellite input2. LNC OUT: Satellite output for cascading to other devicesCaution: Please note that you can only operate one receiver at a time3. 5 VDC4. RS-232: Serial Port allowing software upgrades5. ANT IN: Antenna input for the terrestrial antenna6. TO TV: Modulator output for the connection to a TV set7. TV SCART: Output SCART for the connection to a TV set8. VCR SCART: Output SCART for the connection to a VCR9. S/PDIF: Coaxial output for digital audio (AC3)10. VIDEO / AUDIO: HiFi Outputs for stereo set or monitor11. AC IN: Mains input cable12. POWER ON/OFF: Allows to completely switch off the receiver8 Version 1.0 © UNIVERS
3Connections and controlsEnglishYou can control the following functions with the remote control:1. POWER:Switches the receiver on or enters stand <strong>by</strong> mode.2. MUTE:1The Audio will be muted3. INFO:Shows information about the current receptionIn the EPG: Shows detailed information4. TV/RADIO:Switches between TV or Radio channels5. FAV:Opens the favourite channel list6. CH:18Changes the program, and On / Off inside a menu7. VOL:Volume level8. PAUSE:Freezes the picture9. SAT:Opens the satellite / program overview10. PGUP & PGDN:Moves the cursor in a page <strong>by</strong> page basis inside themenus. Switches picture ratio between 4:3,16:9 orAUTO11. OK :Confirmation of the menu itemsOpens the program listing12. AUDIO:Allows the selection of the AUDIO edition13. EXIT:Exits menus14. MENU:Starts the main menu15. Number keys:For direct input of values16. RECALL:Goes to the previous program.In the EPG: Programming event for timers17. EPG:Shows the EPG program information18. Zoom:Picture zooming-function.913145161567 76101784Backside: Battery holder211121039 Version 1.0 © UNIVERS
4InstallationEnglishThe following steps assume, that ...... the receiver is properly set up and the satellite antenna is correctly installed and aligned.In case of eventual problems with the direction of the SAT-antenna, please read the page42 about the antenna direction menu.Important:Unplug the receiver if you wish to carry out connection tasks.Connection ...... for connecting your receiver to the satellite antenna (or to the antenna socket at aSMATV installation) you need a sufficiently long Sat coaxial cable suitable for digitalreception. If the F connectors are not mounted into the connecting cables yet, pleaseproceed to mount the connector as follows:Finally screw the F connector carefully into the cable until the epoxy insulation reachesthe connector’s thread end.Important:Pay special attention not to cause a short circuit in the connector (it is a very commonmistake to leave a shield’s wire touching the inner conductor). This short circuit will makethe reception impossible.Finally connect the cable (properly mounted) into the receiver’s IF IN connector (1)located in the back panel.Connecting to a TV set and a video tape recorderIn order to obtain an optimal picture quality you should use Scart connectors for both theTV set and VCR.10 Version 1.0 © UNIVERS
4InstallationEnglisha) Use a scart cableA single Scart-cable is enough for the connection to the TV set.b) RCA connectorsThe Video and audio signals are also available through the RCA connectors. It can beinteresting to connect an additional monitor or stereo set.Make the appropriate connections: The 7 RCA -video with the corresponding input atyour monitor and the 7 RCA -audio with the input at your stereo set.c) Terrestrial antenna cableThe U4103-U4104 also includes an UHF modulator, allowing connecting a TV set or VCR.However the picture quality will be a little poorer. The modulator has an antenna input andthe output range is from channel 21 to 69. This will allow you to mix the existing antennasignals with the output channel generated <strong>by</strong> the receiver.The modulator output is factory preset to channel 35. You can change the output channelin the system menu.You will also have to tune your TV set accordingly, in order to receive the picture from thereceiver. Please read your TV-set user manual for this operation.Digital receiver and HiFi set,The audio outputs of your receiver can be connected to any HiFi equipment, through theRCA connectors.11 Version 1.0 © UNIVERS
4InstallationEnglishConnection to the 90-230V mainsThe power cord is built into the receiver. Be careful when working with the power cord andplease, pay attention to the following guidelines:... never put objects over the power cord... never use the power cord over sharp objects... be sure that the power outlet is easily reachable, in order to be able to unplug thedevice in case of dangerNever pull at the power cord !… if you plan to unplug the cord, pull directly the plug, not the cord… be sure the power plug is securely and firmly connected… do not use wobbly plug adapters to avoid fire risks12 Version 1.0 © UNIVERS
4InstallationEnglishInstallation WizardThe receiver includes a setup wizard that will help you configure the different parameters.The first time the receiver is turned on (using the power switch in the receiver’s back panel)the following menu will be displayed:Menu LanguageEnglishPlease select your LanguageDeutschBitte wählen Sie Ihre Sprache ausFrancaisSelectionnez votre LangueSpanishSeleccione su idiomaPortuguêsSeleccione o seu idiomaItalianoSelezioneare linguaTurkishBir dil SecinizArabPlease select your LanguageWith the CH press buttons you can choose the desired language and confirmyour selection with the OK press button on the remote control.!Once you select a language / country, the receiverautomatically sets the typical settings for your country.13 Version 1.0 © UNIVERS
4InstallationEnglishInstallation wizard: Audio outputWith the CH press buttons you can chooseyour favourite audio language for TV and Radiochannels.With the VOL button you can change betweenBACK and NEXT.Language01 English02 Deutsch03 Francais04 Spanish05 PortuguêsChoose NEXT and press OK to go into thenext menu.06 Italiano08 Turkish09 ArabBACKNEXTInstallation wizard: Time zoneTime zoneThe receiver needs to know for the EPG(Electronic program guide), the precise time zone.The displayed delay is referenced tothe Greenwich time (GMT).For Central Europe, for example:Summer time = GMT + 02Winter time = GMT + 01Time zone01 GMT +0002 GMT +0103 GMT +0204 GMT +0305 GMT +0406 GMT +0507 GMT +0608 GMT +07BACKNEXTWith the CH press buttons you can choose your time zone. Once selectedchoose NEXT and press OK.!If you plan to use the EPG (Electronic program guide), you willhave to keep the time zone information up to date, speciallybetween winter and summer time periods.14 Version 1.0 © UNIVERS
4InstallationEnglishInstallation wizard: Set up DiSEqCIf you receive more than one satellite through a DISEqC switch, you will need to assignevery satellite to the corresponding DISEqC output.BACKA typical setup for Spain is:DiSEqC A = HOTBIRDDiSEqC B = ASTRAWith the CH and VOL press buttons you can change between theindividual satellite and the LNC settings.To change a selection, press the OK button. If you only need one satellite, change theothers to Deactivated in the DISEqC column.Choose NEXT and press OK to go to the next menu.!If you have a DiSEqC-polarmount, select DiSEqC 1.2 in the columntype.Load in the next step the pre programmed channel list.To make the motor adjustments look to the Motorised System menu.15 Version 1.0 © UNIVERS
4InstallationEnglishInstallation wizard: Search or LoadThere are three possibilities to complete theinstallation of your receiver.1. Load saved program.Choose this menu item, to load thesaved programs.Search or LoadLoad saved programSearch DiSEqCCancel2. With Search DiSEqC you can make an individualsearch for the selected satellites in theprevious menu.BACKNEXT3. The Cancel item will allow you to reach the receiver’s main menu.!You should decide here on the pre-installed programs if you areinterested in the programs of ASTRA, HOTBIRD, HISPASAT andTuerk- /Eurasiersat mainly. These are already sorted.Search or Load: Load Saved ProgramSelect with the buttons CH Load Saved Programand press the OK button on the remote control.A short message on the screen announcesthat the program list is being loaded.Loading Data please wait.....The receiver setup is now ready.Search or Load: Search DiSEqCThe receiver starts a search run.Search or Load: CancelThis menu entry will cancel the wizard, and the receiver will switch to the receiver mainmenu.16 Version 1.0 © UNIVERS
5Basic operationsEnglishBASIC OPERATIONSSelecting a ProgramYou have three different ways to select a program:1. The OK button will open the program list.You can choose with the CH buttonsthe program you want to watch and, in about twoseconds, the program will be automatically displayed.With the PGUP / PGDN buttons you can browse page<strong>by</strong> page through the programme listing.If you wish to leave the program list, you canpress the OK button with your selection and then EXIT.2. If you know the number of the program you wish,you can enter the program number directly with thenumber keys in the remote control.All TV ChannelTotal: 452 F F0003 ProSieben F0004 RTL F0005 RTL2 F0006 SAT.1 F0007 Super RTL F0008 NTV F0009 Kabel 1 F0010 Viva FSat Name: AstraTP: 12480 , 27500, VER3. You can also zap with the CH buttons the program numbers up and down,until you find the program you wish.RECALL ButtonWith the remote control RECALL button you have the possibility to go back to theprevious program. Thus, you can change between two programs alternately, for exampleduring an advertising-interruption.Favourite Program ListsPressing the FAV button you will access the favourite program lists.You can select among eight different lists <strong>by</strong> pressing FAV+ and FAV- buttons.If you wish a program to appear in a specific favourite list, it is necessary to add thatprogram to the favourite list.Follow on page 24, how to create your own favourite lists.!If you want to change between TV- and Radio programs, it is necessaryto exit all menus. Press then the TV/Radio button to switch from TV toRadio or vice versa.17 Version 1.0 © UNIVERS
5SAT ButtonBasic operationsEnglishTo get a better view of your stored programs, you can view the programs on a satellite persatellite basis. The advantage of this method is that the existing sorting is maintained.Press the SAT button on the remote control and the following window will be shown:With the VOL buttons you canmake selections on the left or rightside.The installed satellites are displayedon the left, whereas on the right sideyou will find the stored channelscorresponding to the selected satellite.SatelliteAll SatelliteTV Channel0001 Das Erste 0002 ZDF 0003 ProSieben 0004 RTL 0005 RTL2 0006 SAT.1 0007 Super RTL With the CH buttons you can browse through the different programs or satellites.Choose All Satellites on the left half and press the OK button.All installed satellites will be displayed.When you see a “checked” sign ()to the left of the satellite name,it means that the satellite is currentlyselected and its programs displayedin the list on the right side.Satellite01 All Satellite02 HotbridASTRA04 Hispasat05 Turk / EurasTV Channel0001 Das Erste 0002 ZDF 0003 ProSieben 0004 RTL 0005 RTL2 0006 SAT.1 0007 Super RTL You can now change your satellite selection with the CH buttons. Press OK toselect it. The program list in the right of the screen only shows the programscorresponding to the selected satellite.You can also open a main program list window <strong>by</strong> pressing the OK button once you haveclosed all menus.!If there are no programs displayed in the program list, it could bebecause no satellites are selected.18 Version 1.0 © UNIVERS
5Basic operationsEnglishEPG buttonYou can access the EPG menu ( Electronic Program Guide ) if you are outside all othermenus and press the EPG button on the remote control.EPG List02/12 Tue 14:19TV programArabella13:55 – 14:57NO. CH Name13:00 --02/12 Di-- 14:300002 ZDF F ◄►0003 ProSieben F ◄ SAM Arabella ►0004 RTL F ◄►0005 RTL2 F ◄►0006 SAT.1 F ◄►0007 Viva F ◄ No EPG►Help Set Timer View EPGIf you want to change the programs, use the CH buttons.With the VOL buttons you can select among the individual programs of a channel.If you press the Info button on the remote control, you get access to detailed informationon the respective programs.!EPG information is only available when the broadcastersends it.If you switch off the receiver with the Power button putting it inStand By Mode, the EPG information remains stored.The program information is thus available much faster.MUTE button (Audio muting)Pressing the MUTE button on the remote control you will switch the audio output ON andOFF.CAUTION: Do not employ the Mute button during a recording, because all video outconnections are affected <strong>by</strong> the OSD controls.19 Version 1.0 © UNIVERS
5Basic operationsEnglishZOOM buttonPress the Zoom button on the remote control to get a picture zooming-function.When you press the Zoom button, a magnifier icon will show up in the centre of thescreen.You can move the magnifier position on the screen using the CH and VOLbuttons.The first zooming-stage (2x) is activated <strong>by</strong> pressing the OK button.One further zooming stage (4x) can be achieved <strong>by</strong> pressing a second time the OK button.If you press again the OK button the picture on the screen will be brought back to theoriginal size.Press the EXIT button to leave the picture zooming function.PAUSEPress the Pause button on the remote control to freeze the picture on the screen.Pressing again will bring back the normal picture status.You can combine the Pause and ZOOM functions.INFOThe info menu displays relevant information about the currently selected program.Press the INFO button and you will see the following window:You will see the relevant LNC and DiSEqCinformation, as well as the transponder frequencyand symbol rate.A bar graph showing the signal quality and signallevel are also shown.TVSat Name<strong>Univers</strong>alLNC (Low)LNC (High)PRO SiebenAstraOn09750 Mhz10600 MHzSteuerung LNB 1Frequenz12480 MHzSymbolrate 27500Polarisation VERVid:0255 Aud:0256 Pcr:0255 Ttx:0032Audio Stereo FTA FEC=3/4Qualität 93%Stärke 73%20 Version 1.0 © UNIVERS
5Basic operationsEnglishAUDIO buttonPress the AUDIO button on the remote control to change the audio mode for a program.The following window will appear:Audio menu: AudioIf the program provides different languages you canchange these with the VOL buttons.TVAudioCANAL CANARIAS►1/1-Spanish◄Audio menu: ModeYou can choose the audio mode available.Audio menu: When stereoIn this option you can select during a Stereo-program if you want only the left or rightchannel or the full stereo.Audio menu: When DualIn this option you can select whether to hear left or right channel during a dual program.ModeWhen stereoWhen DualKey: ▲ ▼ ◄ ► EXIT OKStereoStereoLeft21 Version 1.0 © UNIVERS
6Menus and OSDEnglishMAIN MENUTo display the main menu press the MENU button on the remote control.The receiver’s menu system is organized in a tree fashion. With the Main menu you canreach the following items:TV Channels menuThis menu allows you to access, edit, move, deleteor lock a program. It also lets you add favouritechannels to one of the favourite channels lists.Radio Channel menuThis menu has the same functions as TV Channels,but is only for Radio programs.Main MenuTV ChannelsRadio ChannelsInstallation MenuSystemParental ControlOSDKey: ▲▼◄► EXIT OKInstallation menuThe installation menu has the following items:Antenna ConfigLNB, Satellite, search programs.TP-ListAll the information concerning stored transponders.Antenna DirectionDefinition of the satellite position with reference to your site.Motorised SystemReceiver adjustment using a DiSEqC1.2 positioner.System menuThe system menu has the following items:22 Version 1.0 © UNIVERS
6Menus and OSDSystem SettingRF-System, TV-Screen format, TV-System, Time zone.EnglishTimerRecord timer configuration.CalendarDisplays a perpetual calendar.Factory DefaultSystem reset with the factory default values.User Save & LoadLoad and store from the user settings and program list.About IRDInformation about the currently loaded software version.Parental Control menuActivation of the password protection for menus and programs.OSDChanges colours and language in the menus.How to navigate through the menus:!The navigation through the menus is mainly donewith the CH buttons for up and down,while selections are made with the VOL or OKbuttons.To leave a menu press the EXIT button.23 Version 1.0 © UNIVERS
6Menus and OSDEnglishTV ChannelsIf you wish to edit the stored TV or Radio programs, select TV Channels entry in the mainmenu. The TV channels and Radio channels menu entries in the main menu are identical.Choose, with the VOL buttons, between the different functions, which are:SelectWith the CH buttons youselect a program, and the receiverautomatically switches to it.FAV 1With this function selected, you canadd or remove programs from one ofthe favourite programs list.With the FAV+ and FAV- buttons onyour remote control you can changefrom the favourite list 1 up to the 8.All programs included in the selectedfavourite list are marked with a heartsymbol ().TV Channel Total TV channel: 1427Select FAV1 Lock Delete Move Modify Rename SortNO. Name Status0001 Das Erste F0002 ZDF F TV Channel0003 ProSieben F0004 RTL F0005 RTL2 F0006 SAT.1 FAstra0007 Super RTL F12480, 27500, VER, 3/4Select a Channel to playKey ▲▼◄►EXIT OK PGUP PGDNIn order to add or remove programs from the list, highlight the program using theCH buttons and press the OK button.LockIn order to block a program, choose the program you wish to lock with thebuttons and press the OK button.CHThe locked programs include a lock symbol ().Caution:The locking becomes only active if the Parental Control was previously activated in theMain menu.DeleteIn order to delete a program, choose the program with thepress the OK button.CH buttons and24 Version 1.0 © UNIVERS
6Menus and OSDEnglishThe program to be deleted will include a cross symbol ().You can mark several programs to be deleted. They will be deleted as soon as you leavethe TV programs menu.MoveIn order to move a program within the program list, choose the program to be moved withthe CH buttons and press the OK button.Select the new location for the program in the pop upwindow and press the OK button.Press EXIT to cancel.[ 7 ProSieben ] Move to020Modify PIDIn order to change the information of a given program, choose the program with theCH buttons and press the OK button.Modify PIDSelect the entries to be changed, and enter the newvalues with the number buttons in the remote control.Press OK to save changes or EXIT to cancel.Video PID 0255 (0—8191)Audio PID 0256 (0—8191)PCR PID 0255 (0—8191)Tele PID 0032 (0—8191)Caution:Usually no changes are necessary here.RenameIn order to change the name of a program, choose it with the CH buttons andpress the OK button.ProSiebenThe current name of the program standsProSiebenon the upper line.A B C D E F G H ExtendIn the second line you can change theexisting name.Choose now the individual charactersusing the VOL and CHbuttons and press OK to write each one ofthem.IQY2JRZ3KS4LT-5MU#6NV&7OW08PX19Caps OffBackOKCancelWith the Caps Off entry you can switch between under case and uppercase charactersand other additional characters.With the Extend entry you also get additional characters. A total of 15 characters can beemployed.25 Version 1.0 © UNIVERS
6Menus and OSDEnglishSortIf you want to sort your programs according to variouscriteria, select the wished sorting method with theCH buttons and press OK.The program list will be newly built up.Sort MenuSort <strong>by</strong> FTASort <strong>by</strong> SatelliteSort <strong>by</strong> TransponderSort <strong>by</strong> FavouriteSort <strong>by</strong> Alphabet!Caution:You can not undo the sorting, except if you load the pre-installedprograms. (The Sorting Menu is a good possibility after a completesearch for a satellite).You can sort your programs in several ways.26 Version 1.0 © UNIVERS
6Menus and OSDEnglishInstallation MenuThe receiver is equipped with a factory pre-installed program list:ASTRA 19,2°East on DiSEqC position AHotbird 13°East on DiSEqC position BHispasat 30°West on DiSEqC position CTuerk/Eurasiasat 42°East on DiSEqC position DSelect the Installation menu entry in the Main menu which has the following entries:Antenna ConfigLNB, Satellite, search programs.TP-ListAll transponder information stored.Antenna DirectionDefinition of the satellite position with reference toyour site.Motorised SystemReceiver adjustment using a DiSEqC1.2 positioner.Installation menuAntenna ConfigTP ListAntenna DirectionMotorised SystemKey: ▲▼◄► EXIT OK27 Version 1.0 © UNIVERS
6Menus and OSDEnglishInstallation Menu > Antenna ConfigIf you have chosen the Antenna Config menu item, the following menu appears:Antenna ConfigSetup Search Select Easy Tuning Add Delete Rename01 HotBird <strong>Univers</strong>al On02 AstraLNB(Low) 09750 MHz03 Eutelsat W2 LNB(High) 10600 MHz04 Eutelsat W105 Eutelsat W3LNB Power 13/18V06 Sirius2DiSEqCDiSEqC A07 Intelsat707Positioner DisableSetup the satellite parametersKey: ▲ ▼ ◄ ► EXIT OK PGUP PGDNSetupIn order to change a satellite’s LNB preferences, choose the satellite with theCH press buttons and then, with the VOL press buttons, select the Setup entry andpress OK.<strong>Univers</strong>alIn the case you use a universal LNB, please select with the VOL press buttons.The values for the LNB oscillator will be automatically set (a 22 Khz signal will begenerated).The values for an universal LNB are: LNB(Low) = 09750MHzLNB(High) = 10600MHzLNBHere you can enter the oscillator frequency of your LNB.With the VOL press buttons you can select from a list of different parameters.LNB PowerHere you can determine which voltages are valid for your LNB.13V = vertical,18V = horizontal, 0V = no voltage.The correct value for an universal LNB is 13/18V.If you wish to switch from one tension to another, just do it <strong>by</strong> pressingVOL.28 Version 1.0 © UNIVERS
6Menus and OSDEnglishDiSEqCWith the DiSEqC, the receiver has the possibility to use up to four universal LNB.The following possibilities are available:DiSEqC 1.0:Tone burst:A, B, C, DBurst A , Burst BWhat you need depends on your installation and your multi switches.Example of usual installation:ASTRA = DiSEqC B and HOTBIRD = DiSEqC ATheVOL press buttons will allow you to switch from one to another.PositionerWith selected (with the VOL buttons), the DiSEqC 1.2 commands willbecome active and start to control DiSEqC 1.2 engines.If the function is chosen, the DiSEqC menu item will fade out.!Once all preferences defined, press the OK press button in order toload the new values. If you wish to leave the menu withoutmodifications, press the EXIT button.SearchIn order to search all entries stored in the transponder list for programs from a givensatellite, choose the satellite with the CH press buttons, select Search with theVOL press buttons and press OK.You should decide now whether the programs of thechosen satellite are supposed to be eliminated orwhether you only wish to add the newly foundprograms to the list.Delete the existing programsbefore searching?YesNo29 Version 1.0 © UNIVERS
6Menus and OSDEnglish!If you decide to eliminate all existing programs, the sorting you havemade will be lost.This menu appears only when there are already some programs stored for a givensatellite.To change your selection, use theIf you want to cancel, press EXIT.VOL press buttons and press OK.The following message asks you if you want thereceiver to store only the free programs (FTA) orevery program found.Only FTA channels search?YesNoNote:Your new receiver is a Free to Air receiver. It has been designed for the reception of freeprograms.There are some programs which have a combination of free and encrypted TV; forexample, news bulletins are broadcasted without encryption.If you are interested in specific programs, please look up the menu TP list and search foryour favourite program.You can change your selection with theto cancel, press EXIT.VOL buttons and then, press OK. If you wishThe receiver starts searching for programs.30 Version 1.0 © UNIVERS
6Menus and OSDEnglishSearch: TV 0025Here the receiver indicates that 25TV-programs have been found.Search: SatelliteHere the receiver indicates whichentry from the transponder list (TP list)has just been processed.Search: Progress, upper displaybarHere you are informed about theprogress of the search. In this sameexample, the TP-list has 62 entriesand no. 34 has just been processed.Searching New ChannelsTV 0025 Radio 0055Satellite: ASTRA 34/62 TP 12452, VER, 27500,Progress 54%Quality 92%Strength 65%Search: Quality, middle display barThe middle display bar shows an indication of the signal quality.Please note that the receiver is not a measuring instrument, the values displayed justprovide some useful indications in case of problems with the reception.Search: Strength, lower display barThe lower display bar shows an indication of the signal level.Please note that the receiver is not a measuring instrument, the values displayed justprovide some useful indications in case of problems with the reception.!If the message “Full Memory” appears, we recommend you todelete old programs.31 Version 1.0 © UNIVERS
6Menus and OSDEnglishSelect and Easy TuningYou can mark with the Select menu item all satellites that the receiver is supposed tosearch during the search process.In order to mark a satellite, choose it with the VOL press buttons, Select andCH.When you press OK, the satellite number will be replaced <strong>by</strong> a hook ().Setup Search Select Easy Tuning Add Delete Rename HotBird Astra03 Eutelsat W204 Eutelsat W105 Eutelsat W306 Sirius207 Intelsat707<strong>Univers</strong>alOnLNB(Low) 09750 MHzLNB(High) 10600 MHzLNB Power 13/18VDiSEqCPositionerSetup the satellite parametersAntenna ConfigKey: ▲ ▼ ◄ ► EXIT OK PGUP PGDNDiSEqC ADisableIn this way you determine from the beginning all satellites that interest you and, once youhave made your choice, select Easy Tuning with the VOL press buttons.The search will then begin (please, look up the previous chapter “Search”), and allsatellites marked <strong>by</strong> you will be searched.!Since the search process may last for a while, we recommend you tostart the search during your absence. In this case, when you see themessage “Delete the existing program before searching”, select No.32 Version 1.0 © UNIVERS
6Menus and OSDEnglishAddIn order to add a satellite, choose, with the VOL buttons, the entry Add and press OK.The last entry: ???????? of the listof satellites will now be displayed(the question marks indicate thatthis is the entry to be added)Here you will need to enter all thenecessary Information.If you want any program to beassigned to the new satellite, it isalso necessary to enter thetransponder values.Antenna ConfigSetup Search Select Easy Tuning Add Delete Rename01 HotBird <strong>Univers</strong>al Ein02 AstraLNB(Low) 09750 MHz03 Eutelsat W2 LNB(High) 10600 MHz04 Eutelsat W105 Eutelsat W3LNB Power 13/18V06 Sirius2DiSEqCDiSEqC A28 ????????Positioner DisableSetup the satellite parametersKey: ▲ ▼ ◄ ► EXIT OK PGUP PGDNDeleteIf you wish to eliminate an existing satellite, choose the Delete option with thepress buttons and then press OK.By performing this steps, you will delete the storedsatellite and its relevant transponder andprogram information.This will delete all the channelsand transponders in this satellite.Do you want to continue?YesNoVOLThen, you will see a message on the screen asking you whether you really want to deleteall programs and transponders in the satellite or not. Select the Yes option with theVOL buttons and press OK.!Next time you install a new satellite and its transponder list, you will havetwo possibilities:1st Reset the factory default values (as described in the chapterSystem>Factory Default Values), and the program list will bedeleted.2nd Use the menu System>User Save&Load. In this case, your laststored information will be loaded.33 Version 1.0 © UNIVERS
6Menus and OSDEnglishRenameIf you want to change the name of a satellite or to name the entry ????????, select, withthe VOL buttons, the option Rename and press OK.The current name of the program stands on the upper line.In the second line you can change the existing name.????????????????ABCDEFGHExtendIJKLMNOPCaps OffQRSTUVWXBackY Z - # & 02 3 4 5 6 7 819OKCancelIn order to delete the current name, go to Back and press OK to delete it.Choose now each alphabetic character with the buttons: VOL and CHand press OK.With the function Caps Off, you can change between upper case and lower case lettersand have access to further additional characters.With the button Extend you have also access to additional characters.You can use up to 15 additional characters.!The function “Rename” gives you a complete freedom in the choiceof the name.For example, if you want to distinguish two satellites, you may namethem as follows: ASTRA 19.2°O and ASTRA 28.2°O34 Version 1.0 © UNIVERS
6Menus and OSDEnglishInstallation Menu > TP ListTP-list data is stored in the satellite’s transponder.This information is necessary for the receiver to find programs.ASTRA satellite remains quite regular with respect to its broadcasted programs and achange is seldom necessary in this case.In the case of other satellites, it may be necessary to do modifications or to add newentries if the programs usually change.When you wish to open the TP list (transponder list) press the MENU button and choosethe Installation menu option with the CH buttons in the Main menu, and pressOK. Then select the TP List option and press OK again.TP ListFirst select, in the field Satellite,and with the CH buttons,the satellite from which you want toprocess the transponderinformation or where you wish tosearch for programs.Satellite Search Add Edit Delete TP Network PID SignalNo. Satellite No. Freq Sym Pol FEC01 Hotbird 001 10719 27500 V Auto02 Astra 002 10723 29990 H Auto03 Eutelsat W2 003 10758 27500 H Auto04 Eutelsat W1 004 10775 28000 H Auto05 Eutelsat W3 005 10796 27500 V Auto06 Sirius2 006 10834 27500 V AutoSetup the satellite parametersKey: ▲ ▼ ◄ ► EXIT OK PGUP PGDNIf you want to process the satellite values, press OK to confirm, or EXIT to return to the TPList.35 Version 1.0 © UNIVERS
6Menus and OSDEnglishSearchThe option Search follows the same process as described in the chapter on InstallationMenu>Antenna Config>Search.The search will be carried out in the selected satellite.AddThis function allows you to add an entry to thetransponder list if you know the values.In order to add some information to the TP List,choose the Add option with the VOL pressbuttons and press OK.Enter now all the necessary information with the remotecontrol.Add TransponderSat NameASTRAFrequency 11837 MHzSymbol 27500Polarization HORIZFEC will be detected automaticallySatellite Infomation<strong>Univers</strong>alOnLNC(Low) 09750 MHzLNC(High) 10600 MHzDiSEqCDiSEqC AIn the lower half of the window are displayed the currently LNB- / antenna values.If you want to confirm, press OK and data will be stored.If you want to cancel, press EXIT.The new entry is added at the end of the list.For a new program search in the new transponder entry, use the Search option.!For further information, please refer to <strong>Univers</strong> site in the web:http://univers<strong>by</strong>fte.comTPWith the TP (transponder search) option, programs can be easily searched in thetransponder if the transmission frequency is known. Choose, with the VOL buttons,the TP entry.With the CH buttons you can go to the page corresponding to the correctfrequency; confirm with OK afterwards.Next message asks you whether the receiver issupposed to delete all existing programs from thechosen transponder or whether it is supposed to addDelete the existing programsbefore searching?only the newly found programs.Make your selection with VOL and press OK. If you want to cancel, press EXIT.YesNo36 Version 1.0 © UNIVERS
6Menus and OSDEnglishYou will also need to tell the receiver if you wish to storeonly the FTA (Free to Air) programs or not.Make your selection with VOL and press OK. If youwant to cancel, press EXIT.Only FTA channels search?YesNoThe receiver starts the search for new programs.At the end of the search, press EXIT.Take the following example:TV 0025The receiver indicates that 25TV-programs were found.Progress, upper display barHere you are informed about theprogress of the search. In thisexample, the TP-list has 62 entriesand no. 34 has just been processed.Searching New ChannelsTV 0003 Radio 0002Satellite: ASTRA 34/62 TP 12452, VER, 27500,Progress 54%Quality 92%Strength 65%Quality, middle display barThe middle display bar shows an indication of the signal quality.Please note that the receiver is not a measuring instrument, the values displayed justprovide some useful indications in case of problems with the reception.Strength, lower display barThe lower display bar shows an indication of the signal level.Please note that the receiver is not a measuring instrument, the values displayed justprovide some useful indications in case of problems with the reception.DeleteThe Delete function allows you to delete an entry in the transponder list if you do not needit anymore. This speeds up the satellite search process.Select the Delete option and press OK. If you aresure that you want to delete the entry, choose and press OK.All programs in this transponder will be deleted.If you want to cancel, press EXIT.Do you really want to delete ?03736000, 03000,HYes No37 Version 1.0 © UNIVERS
6Menus and OSDEnglishEditThe Edit function provides you with the possibility to change an entry from thetransponder list. Choose the Edit entry with VOL press button and open the menu <strong>by</strong>pressing OK.The following submenu appears on the screen:Enter now all necessary information with the remotecontrol’s buttons.In the lower half you will see the currently LNB- /antenna values.When you finish press OK and the new data will bestored.If you want to cancel, press EXIT.Edit TransponderSat NameASTRAFrequency 11837 MHzSymbol 27500Polarization HORIZFEC will be detected automaticallySatellite Information<strong>Univers</strong>alOnLNC(Low) 09750 MHzLNC(High) 10600 MHzDiSEqCDiSEqC AYou can now make use of the Search function for a new program search.38 Version 1.0 © UNIVERS
6Menus and OSDEnglishSignalThe signal function allows you to see the signal level of a transponder.TP ListSatellite Search Add Edit Delete TP Network PID SignalNo. Satellite No. Freq Sym Pol FEC01 Hotbird 001 10719 27500 V Auto02 Astra 002 10723 29990 H Auto03 Eutelsat W2 003 10758 27500 H Auto04 Eutelsat W1 004 10775 28000 H Auto05 Eutelsat W3 005 10796 27500 V Auto06 Sirius2 006 10834 27500 V AutoSignal 82%Key: ▲ ▼ ◄ ► EXIT OK PGUP PGDNChoose, with the VOL press buttons, the Signal entry and press OK button.If you wish to test another entry, choose it with the CH buttons and press OKagain.NetworkThe Network function makes a search for contiguous programs.Choose the Network entry with the VOL press buttons and, with the CHbuttons, the desired transponder entry.Press now OK and the receiver starts the search as described in the chapter InstallationMenu>Antenna Config>Search.The difference lies in the fact that, in this option, the receiver expands the search ontoother transponder entries.PIDThe PID function gives you the possibility to add directly a program, when the receivercannot find the needed information <strong>by</strong> itself.For that, it is important that you know the program information (the exact transpondervalue is not necessary in this case).This operation is useful only when the manual search (Search) has not been successfuland the wished program has not been found; for example, when the signal is very weak.Select, with the VOL buttons, the PID option and, with the CH buttons, thedesired entry from the transponder list. And press OK.39 Version 1.0 © UNIVERS
6Menus and OSDEnglishThe following submenu appears:Enter now all necessary information with the remotecontrol buttons.Once you finish, press OK for the data to bestored.Add PIDVideo PID 8191 (0—8191)Audio PID 8191 (0—8191)PCR PID 8191 (0—8191)Tele PID 8191 (0—8191)The new entry will be added at the end of the program list with the indication: TV CH.In order to change the program name, please refer to the chapter Rename in the TVChannel menu.!For further information, please refer to <strong>Univers</strong> site in the web:http://www.funivers<strong>by</strong>fte.com40 Version 1.0 © UNIVERS
6Menus and OSDEnglishInstallation Menu > Antenna DirectionThe menu Antenna Direction offers a valuable aid to you during the installation of yoursatellite antenna. Please, refer to the instructions manual of your antenna.To open the Antenna Direction function, press the MENU button and choose, with theCH buttons, the Installation menu entry in the Main menu. And press OK.Select now the entry Antenna Direction and press OK again.In order to be able to make use of this function, it is important for you to know relevantinformation concerning your site; specially that concerning the longitude and latitude.Example for Barcelona :Antenna DirectionSatellite Name►Astra ◄Satellite Angle 019.20 (0-180)Satellite DirectionEastLongitude Angle 002.00 (0-180)Longitude Direction EastLatitude Angle 40.50 (0-90)Latitude DirectionResultNorthOKResult Elevation = 39.92Azimuth = -25.48Key: ▲ ▼ ◄ ► EXIT OKSatellite NameSelect, with theVOL press buttons, the satellite you want to obtain.Satellite AngleOnce the satellite selected, its values will be automatically displayed. If this is not the case,please enter the values with the number keys.Satellite DirectionEnter the direction of the satellite here. Example: The satellite ASTRA on the orbitposition 19,2° East41 Version 1.0 © UNIVERS
6Menus and OSDEnglishLongitude AngleEnter the longitude degrees corresponding to your position with the number keys.Longitude DirectionIndicate here whether you are in the east or west directions with respect to the 0 °meridian.Degrees labelled with a “+” indicate EAST, and those with a “-“ indicate WEST.(Barcelona = east ). Change with the VOL press buttons.Latitude AngleEnter the degrees corresponding to your latitude with the number keys.Latitude DirectionHere you must indicate your latitude withreference to the equator.Are you to the north or to the south?(Great Britain = North)ResultOnce you have entered everything,select, with the CH pressbuttons, the OK field and press the OKpress button.Antenna DirectionYou will then receive the data corresponding to your position.If you wish to cancel, press EXIT.Satellite Name►Astra ◄Satellite Angle 019.20 (0-180)Satellite DirectionEastLongitude Angle 002.00 (0-180)Longitude Direction EastLatitude Angle 40.50 (0-90)Latitude DirectionResultNorthOKResult Elevation = 39.92Azimuth = -25.48Key: ▲ ▼ ◄ ► EXIT OKThe Elevation is the inclination of the satellite antenna.The azimuth value indicates the antenna direction with reference to the South.Azimuth = - 25.48180°- 25.48 = 154.5 ° at the compass rosePlease note that you need a big satellite antenna for the reception of some satellites andthat its size depends also on your position.Example: ASTRA 19.2° East; while a 60cm Ø reflector is enough in Germany, in Spainyou need, at least, a 90-130cm Ø reflector.42 Version 1.0 © UNIVERS
6Menus and OSDEnglishInstallation Menu > Motorised SystemIn some cases you may want to adapt your receiver to a DiSEqC 1.2 engine;Although today many products’ advertising read "Compatible to DiSEqC 1.0 and 1. 2",this is not always the case.In the Motorised System menu you can carry out the configuration for a DiSEqC 1.2engine. Please, refer first of all to the engine’s instructions manual.Please, ensure that the engine is correctly installed and that the reflector can movefreely.In order to open the Motorised System menu, press the MENU button and select theInstallation menu entry with the CH press buttons, in the Main menu.Press then the OK button.Choose the Motorised System entry and press OK.Motorised SystemSatellite nameTransponder◄ Astra ►◄ TP 5-11 ►DiSEqC1.212345PositionerContinuously MoveMove StepsStep SizeLimit Set◄ On ►◄ Stop ►◄ Stop ►◄ 1 ►◄ Disable ►QualityStrengthGo to satFactory defaultFreq. : 12405 Sym. : 30000 Pol. : HORKeys: ▲ ▼ ◄ ► EXIT OK [OK] Satellite SearchIn order to adjust the receiver and the engine to each other, please go to Go to sat menufirst with the CH buttons and press OK.The following submenu appears:00 Ref Position01 HotBird02 Astra43 Version 1.0 © UNIVERS
6Menus and OSDEnglishSelect now the 00 Ref Position entry with the CH buttons and press OK again.The receiver will then send a command to the engine to go to the “0 degree” position. Bothdevices will be thus adjusted to each other.Satellite nameSelect, with the VOL press buttons, the satellite you wish.Once the satellite has been found, you can start a search run directly from this entry, <strong>by</strong>pressing OK.TransponderSelect a transponder with the VOL buttons.This option provides information on frequency, symbol rate and polarity.Once you have found the satellite, you can start a transponder search directly from thisentry <strong>by</strong> pressing OK.Caution: Please test the usual satellites before trying the “exotic” ones!PositionerChoose < On > with theConfig > Setup option.VOL buttons if you still have not done it from the AntennaContinuously MoveThe VOL press buttons will allow you to send commands to the engine, for it to turnEast or West. If it is a command stored in the DiSEqC engine (Example: Astra 19,2° East),it will turn automatically <strong>by</strong> pressing VOL until the engine achieves the storedposition.However, if you press the VOL button for the engine to turn West, it will turncontinuously to the west until it reaches the west limit.Move StepsThis option makes you send the command for the engine to turn east or west in a step <strong>by</strong>step way <strong>by</strong> pressing the VOL buttons.The steps width is determined under Step size.You can adjust the step as you wish <strong>by</strong> making use of the Strength and Quality options.Press the OK button once you have made the modifications you want.Step SizeYou can indicate here how much the engine is supposed to turn in each movement underthe Move Steps option.Select the step width using the VOL press buttons, from step size 1 until 10.44 Version 1.0 © UNIVERS
6Menus and OSDEnglish!If you have problems during the search of a satellite, go into theInstallation Menu>Antenna Direction menu and make the engineturn until it reaches the value calculated on the scale of the engine.Limit SetIn the case that an engine installed in a DiSEqC 1.2 Sat antenna is not able to turnproperly due to the antenna’s size, you have the possibility to increment the turn fieldabove the software limits.For example, in order to adjust the western limit, go to the Continuously Move or MoveSteps options and make the engine turn with the VOL press button as far as thedesired western limit.However, estimate a small safety distance for the antenna. After that, go to the Limit Setoption with the CH buttons and select the West Limit option with VOL.Then, press the OK button in order to store this limit.00 Ref Position01 HotBird02 AstraGo to satThis function allows you to make the engine swivel round on purpose from a storedposition to the 0 ° position. This operation may be useful if you search for a satellite whichis very near from the stored position.Go to the Goes to Sat menu option with the CH buttons and press OK.Then make your selection with the CH buttons and press OK.The receiver will send next a command for the engine to turn to the selected position.In the case you leave the menu <strong>by</strong> pressing EXIT without having stored your changes yet,the following message will be displayed:You have changed the satellite position.Press “ YES “ to store the changed positionor press no to cancelYes NoSelect "Yes" with the VOL buttons and then press OK in order to store the changes.The EXIT button will cancel the operation and leave the menu.45 Version 1.0 © UNIVERS
6Menus and OSDEnglishSystem MenuTo open the System menu press the MENUpress button and choose the System menuentry with the CH buttons in the Mainmenu.Press the OK button.The following window will be displayed:If you want to go backwards, press EXIT.System MenuSystem SettingTimerCalendarFactory DefaultUser Save&LoadAbout IRDKey: ▲ ▼ ◄ ► EXIT OKSystem > System SettingYou have the following options in this window:TV SystemHere you are required to enter the TV system your television set supports.Selection: NTSC, PAL and Auto .Example for most countries in Europe: PALChange from one to another with the VOL press buttonsTV Screen FormatSelect here which TV Screen Format has yourTV set.Selection: 4:3, 16:9 and AUTOChange from one to another with the VOLpress buttonsYou can change the format at any time, <strong>by</strong>pressing the PGDW press button.System SettingTV System►AUTO ◄TV Screen Format ►AUTO ◄RF Channel 30 (21-69)RF SystemPal B/GTime Zone GMT+ 02Remote Control Switch Position 1SCART OutputCVBSKeys: ▲▼◄►EXIT OKRF ChannelThis option allows you to determine the initial channel that the built-in modulator issupposed to occupy.This is important in the case that you wish to connect the receiver to an existing network.Selection: From channel 21 to 69Change channels with the VOL buttons or with the number keys.46 Version 1.0 © UNIVERS
6Menus and OSDEnglishRF SystemIn the case that you have combined your TV or video device through an antenna cablewith the receiver, please indicate which TV system employ your device.Selection: M, B/G, I, D/K .As in the previous example, for Great Britain you will usually select: PAL B/GChange with the VOL buttons.Time ZoneThe receiver needs to know the precise time for the EPG (Electronic Program Guide).That is the reason why you are required to select the time zone corresponding to yourarea.The time zones displayed <strong>by</strong> the receiver correspond to the Greenwich time.For Spain, for example: Summer time = GMT + 02Winter time = GMT + 01Please take this in consideration, and always remember to adapt the time values to theseason’s changes in winter and summer time. Change with the VOL press buttons.Remote Control SwitchIn order to avoid interferences amongdifferent remote controls, you have thepossibility to change the code line.Change it with the VOL buttons.Remember to change the switch in theremote control’s battery chamber as well.Remote Control’s SwitchIf you change the remote control’s code only in the menu,a security message will appear when you leave the menu.Scart OutputIn order to get an optimal quality picture in your television set, please use the RGB option,if your television set supports it.This option means that the colours’ information is transmitted into separate componentsto the TV set, unlike in the CVBS option.Select between the CVBS or RGB options <strong>by</strong> pressing the VOL buttons.47 Version 1.0 © UNIVERS
6Menus and OSDEnglishSystem > TimerTimerThe receiver provides you with two possibilities to activate the recording timer:The most convenient way is through the EPG.Start the EPG and choose a program.Then, press the RECALL button. The following window will appear:ProgNameCANAL CANARIASStart Date 01/12 (DD/MM)Start Time 17:00 (HH/MM)Stop Date 01/12 (DD/MM)Stop Time 17:59 (HH/MM)RepeatStyle1xWith the VOL buttons you can select the repeat style.You have the following choices:1x = Only onceD = Every day1W = One week1-5 = From Monday to Friday6-7 = From Saturday to SundayOnce your choice has been made, press the OK button and that event recording will bestored. Press the EXIT button to leave this window.If you want to set the recording timer manually or to check the stored events, you can dothat as follows:Start the Timer menu pressing the MENU button and choose the System menu entrywith the CH buttons in the Main menu. Once in the System menu, select Timerand the following window will appear:01/12 Mo 10:57 TimerChannel Date Start Date Stop RptProSieben 01/12 17:00 01/12 17:59 1 xAddEditDeleteAdd a timer48 Version 1.0 © UNIVERS
6Menus and OSDEnglishWith theVOL buttons you can select among Add, Edit and Delete.Timer: AddSelect Add with theVOL buttons and press OK.SourceTVChannelProSiebenStart Date 01/12 (DD/MM)Start Time 17:00 (HH/MM)Stop Date 01/12 (DD/MM)Stop Time 17:59 (HH/MM)Rpt1xOnly one TimeUse the CH buttons to navigate through the fields and change the values withthe VOL buttons or with the number keys 0-9 in the remote control.Press the OK button to store, and the EXIT button to leave.Source:Select here if you want to record a TV or Radio channel.Channel: Press VOL to enter the program list and select your programusing the CH buttons. Confirm your selection <strong>by</strong> pressingOK.Start Date:Start Time:Stop Date:Stop Time:Write the start date with the 0-9 buttons.Write the start time with the 0-9 buttons.Write the stop date with the 0-9 buttons.Write the stop time with the 0-9 buttons.Timer: EditTo change an existing event, select the event with theOK. The menu will be the same that Add.Timer: DeleteTo delete an existing event select the event with thebe deleted <strong>by</strong> pressing the OK button.CH buttons and pressCH buttons. The event will49 Version 1.0 © UNIVERS
6Menus and OSDEnglishSystem > CalendarCalendarThe receiver includes a "perpetual" calendar.In order to open the calendar, press the MENU button and choose System with theCH buttons in the Main menu.Choose now the Calendar menu item and press again the OK button.The following window will appear:Month: Dezember Year: 2003Mon Tue Wen Thu Fri Sat SunWith the CH buttons youcan change the desired year andwith the VOL buttons, themonth.01 02 03 04 05 06 0708 09 10 11 12 13 1415 16 17 18 19 20 2122 23 24 25 26 27 2829 30 3150 Version 1.0 © UNIVERS
6Menus and OSDEnglishSystem > Factory DefaultThe Factory Default function in the System Menu offers the possibility to eliminate, atthe same time, all preferences and data, including the stored programs.You should only carry out this step if no function works properly anymore!All data will be deleted permanently !To carry out the factory reset press the MENU button and choose the System menuoption with the CH buttons.Choose now the Factory default option and press OK.The following message will be displayed:FACTORY DEFAULTIf you select , all channel dataand settings will be lost.Do you really want Factory Default?Yes NoYou can still select NO or press EXIT if you want to cancel.If you really want the factory reset, then press OK.!If the procedure does not succeed, switch off the receiver with the mainswitch located in the receiver’s back and repeat the previous steps.51 Version 1.0 © UNIVERS
6Menus and OSDEnglishSystem > User Save & LoadIn order to get the stored programs list, press the MENU button and choose the Systemmenu entry with the CH buttons.When you press OK, the system menu will be displayed.Choose now the User Save&Load option and press OK again.User Save&LoadSave Prog & ConfigLoad Prog & ConfigUser GuideKey: ▲ ▼ ◄ ► EXIT OKThe User Save&Load menu option from the System menu is very important, becausehere is where the security of your data lies.Save Prog & ConfigOnce you have customized your receiver and everything operates properly, you have thepossibility, with this option, to save the programs’ data.Select the option from the menu and press OK.A safety message will follow; if you answer , all programs’ data from the programslist will be saved.Load Prog & ConfigIf you wish to regenerate the stored program list with your own preferences, please selectthe option and press OK.A safety message will follow, when you answer the stored program list will beloaded.User GuideThe wizard will help you configure the receiver again as in an initial start up except for theprogram list modification.Select the option from the menu and press OK.Then the installation wizard process will take place.52 Version 1.0 © UNIVERS
6Menus and OSDEnglishSystem > About IRDIf you wish to know which software has been installed in your receiver, you can get theinformation you need in the About IRD option from the System menu.In order to open the System menu, press theMENU press button and choose theSystem menu entry in the Main menu with theCH press buttons.Press the OK button.System MenuSystem SettingTimerCalendarFactory DefaultNext, select About IRD with thepress buttons and press OK.CHUser Save&LoadAbout IRDKey: ▲ ▼ ◄ ► EXIT OKSystem InfoCompany<strong>FTE</strong> maximalModelIRD420SoftwareV5.0.9Software Last update 01 Dec 2003HardwareFsst16b70Ts0194Mv2170DsLoaderV1.0.4www.<strong>FTE</strong>maximal.comTake note of this information before asking for a new software update in the Internet orwhen you take it to the technical service.If you want to leave this menu, press the EXIT press button.53 Version 1.0 © UNIVERS
6Menus and OSDEnglishParental ControlIf you want to block the access to certain fields or programs of the receiver, you have thepossibility to activate the password protection in the Parental Control menu.To open the Parental Control menu, press the MENU press button and choose theParental Control option with the CH buttons in the Main menu. And press OK.The first time you open this menu, it looks likefollows:Password LockActivate or deactivate the complete passwordprotection.Change the entry to with the VOLpress buttons.Now all fields are visible and can be activated<strong>by</strong> you independently.Parental ControlPassword LockKey: ▲ ▼ ◄ ► EXIT OK►Off◄Edit Channel LockSwitch on the password protectionfor programs.If you want a program to be blocked, you mustmark it in the program list correspondingly.Please, refer to chapter TV/Radio Channels.Parental ControlPassword LockEdit Channel LockInstallation LockChange password►On◄OffOffOffSwitch between On and Off with thebuttons.VOLKey: ▲ ▼ ◄ ► EXIT OKInstallation LockSwitch on the password protection for the Installation menu.Switch between On and Off with theVOL buttons.Change passwordWhen you want to change the existing password (0000), change the entry to withthe VOL button.54 Version 1.0 © UNIVERS
6Menus and OSDEnglishInsert new passwordNow that all fields are visible for the password inputyou can enter the new password as a four-digitnumeric code with the number keys.Confirm passwordPlease enter your password a second time,in order to test whether it was correctly entered.Employ the number keys on the remote control.Parental ControlPassword Lock►On◄Edit Channel LockOffInstallation LockOffChange passwordOnInsert new password -------Confirm password -------Key: ▲ ▼ ◄ ► EXIT OK!The factory preset password is 0000.If you have forgotten yours, you can employ the master password:1976.55 Version 1.0 © UNIVERS
6Menus and OSDEnglishOSDIf you want to change the language, colour or transparency factor of the OSD display,select the OSD option from the Main menu.Press the MENU press button and choose the OSD option from the Main menu with theCH buttons and press OK.OSD SettingMenu Language►English◄Audio LanguageEnglishMenu Color C-01Transparency 08BackgroundEnableKey: ▲ ▼ ◄ ► EXIT OKMenu LanguageSelect your menu language with theVOL press buttons.Audio LanguageSelect your audio edition language with theVOL press buttons.Menu ColourChoose, with theVOL press buttons, your favourite colour profile.TransparencyIndicate here the transparency level of the OSD menu display, with thebuttons.VOL pressBackgroundIndicate whether the receiver is supposed to display a background picture if no pictureinformation is available, as in the case of radio programs.Switch between On and Off with the VOL buttons.If you want to leave the menu, please press the EXIT press button.56 Version 1.0 © UNIVERS
7TroubleshootingEnglishTROUBLESHOOTINGIn case of problems with the receiver, and before further search, check first that ...... the receiver’s set up has been carried out accordingly to the instructions of thismanual and that the connections are accurate.... the satellite antenna conforms to the requirements of the installation, is wellmounted and aligned.Without these two requisites, the following troubleshooting guide cannot lead to success.In the case that the problem persists, please refer to your authorized local dealer... He willhelp you with pleasure!The receiver’s leds do not light up, and there is a malfunction ...a) Is the power plug properly connected?Check that there is a good contact and that the plug is firmly seated in its socket.b) Is the main power switch on the receiver’s back in the position?c) Is the socket / house protection functional?Connect another device (for example, a radio) to the same socket and check itworks.d) Is the power cord damaged?Pull the power plug off the socket under the greatest caution !Only a specialist may repair this damage !There is no picture, no audio, or bad qualitya) Check that the combination between the receiver and the TV set and the satelliteantenna is correct. Check the connections to the TV set and to the satellite antennaas well.b) Is the satellite antenna optimally aligned?The receiver shows, at the INFO menu, whether the signal level is weak or enough.Please, refer also to the installation guide of your satellite antenna.In the case you use DiSEqC switches, please check that the information in theInstallation Menu >Antenna Config correspond to the actual components.If problems persist, please, ask a specialist.c) Does it rain or snow very strongly?If this happens, the satellite signals cannot easily reach your antenna.Once the weather conditions become better, the reception level will be restored.Please note that your reflector’s size may not be appropriate for your area or for acertain satellite.57 Version 1.0 © UNIVERS
7TroubleshootingEnglishd) Did you turn on the voltage supply for the LNB?Please, refer to the chapter Installation Menu >Antenna Config.e) Have you pressed the MUTE button?Please, press this same button in order to restore the audio.f) Does the picture flicker or colour is gone?Please, refer to chapter System Menu>System Setting and check the valuescorresponding to TV System, RF System and Scart output.The remote control does not work or works badly, the receiver turns on randomly...a) Are there any obstacles between the remote control and your Sat-receiver?b) Have you placed the receiver too far away from you?Make sure that the distance between the receiver and its remote control does notexceed eight meters, and that the angle is not wider than 15º.c) Are the batteries exhausted?Then, replace the batteries.Battery Type: AAA UM-4 1,5 VCaution: Batteries should always be thrown away in specially designated containers,for their disposal, not in the house waste bin!d) Does the receiver operate randomly due to another device’s remote control?This is possible since all remote controls must use the same frequency range.You can change the transmission code as described in chapter System>SystemSetting.58 Version 1.0 © UNIVERS
8Technical specificationEnglishTECHNICAL SPECIFICATIONVIDEODecodingMPEG-2 & MEPG-1Bit rateMax 15MbpsOutputNTSC/PALAspect ratio4:3 / 16:9 / AutoActive pixel720X480 @ 30fps; 720X576 @ 25fpsOutput connectorPéritel y RCAAUDIODecodingMPEG-2/MEPG-1 layer I & IIModeMono, Dual, Stereo, Joint stereoBit rateMax 384KbpsDEMODULATIONDemodulationQPSKSymbol rateSCPC / MCPCOuter codeRS (204,188,t=8)Inner Coding rateTous les supportés par la norme DVBINPUT SIGNALFrequency950MHz a 2150MHzInput level-25dBm à -65dBm / 82 dBµV à 42 dBµVChannel bandwidth 36MHzInput socketType FRF MODULATORBandUHFTV StandardPAL BG / I / DK, NTSC MOutput channel21 a 69(PAL), 14 a 83(NTSC)LNB CONTROLPower supply13/18V (500mA max.)DiSEqC DISEqC 1.2MISCELLANEOUSMemoryPower supply90~260VAC 50~60HzPower consumption Max. 30WDimension(W×D×H) 280×207×65mmWeight1.3Kg59 Version 1.0 © UNIVERS