

Visualiner Series - Snap-on Equipment
Visualiner Series - Snap-on Equipment
Visualiner Series - Snap-on Equipment
- No tags were found...

Create successful ePaper yourself
Turn your PDF publications into a flip-book with our unique Google optimized e-Paper software.
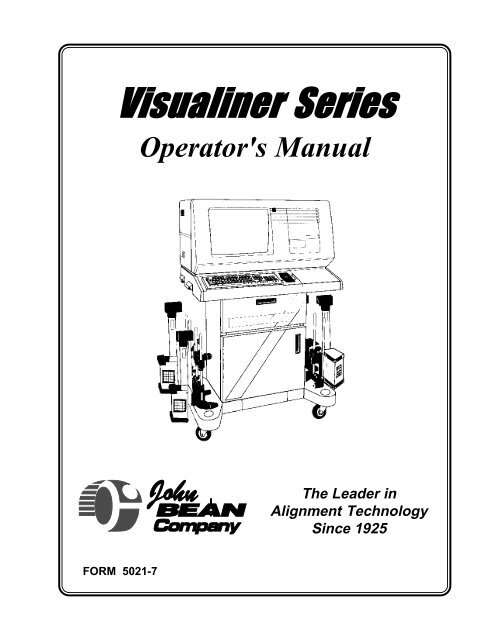
<str<strong>on</strong>g>Visualiner</str<strong>on</strong>g> <str<strong>on</strong>g>Series</str<strong>on</strong>g>Operator's ManualThe Leader inAlignment TechnologySince 1925FORM 5021-7
(Blank Page)
®309 Exchange AvenueC<strong>on</strong>way, AR 72032 USA(501) 450-1500<str<strong>on</strong>g>Visualiner</str<strong>on</strong>g> <str<strong>on</strong>g>Series</str<strong>on</strong>g>Wheel AlignerOperator's ManualPrint HistoryCurrent Editi<strong>on</strong> Form #5021-7 October 1997Copyright StatementThis manual and the materials c<strong>on</strong>tained within are the property ofJohn Bean Company, a divisi<strong>on</strong> of <str<strong>on</strong>g>Snap</str<strong>on</strong>g>-<strong>on</strong> Incorporated. Themanual, or any secti<strong>on</strong>, page, drawing, or screen capture, may notbe reproduced by any means without the written c<strong>on</strong>sent of JohnBean Company.File Informati<strong>on</strong>: jbc @ i:\pubs\aligners\v-opsman\v7opman.p65 ejs 10/97
(Blank Page)
SAFETY INFORMATIONFor your safety, read this manual thoroughlybefore operating the <str<strong>on</strong>g>Visualiner</str<strong>on</strong>g> <str<strong>on</strong>g>Series</str<strong>on</strong>g> AlignerThe <str<strong>on</strong>g>Visualiner</str<strong>on</strong>g> <str<strong>on</strong>g>Series</str<strong>on</strong>g> Aligner is intended for use by properly trained, skilled automotive technicians. The safetymessages presented in this secti<strong>on</strong> and throughout the manual are reminders to the operator to exerciseextreme care when performing wheel alignments with this product.There are many variati<strong>on</strong>s in procedures, techniques, tools, and parts for servicing vehicles, as well as the skillof the individual doing the work. Because of the vast number of vehicle applicati<strong>on</strong>s and potential uses of theproduct, the manufacturer cannot possibly anticipate or provide advice or safety messages to cover everysituati<strong>on</strong>. It is the automotive technician's resp<strong>on</strong>sibility to be knowledgeable of the vehicle to be aligned. Itis essential to use proper service methods and perform wheel alignments in an appropriate and acceptablemanner that does not endanger your safety, the safety of others in the work area or the equipment or vehiclebeing serviced.It is assumed that, prior to using the <str<strong>on</strong>g>Visualiner</str<strong>on</strong>g> <str<strong>on</strong>g>Series</str<strong>on</strong>g> Aligner, the operator has a thorough understanding ofthe vehicle systems being serviced. In additi<strong>on</strong>, it is assumed he has a thorough knowledge of the operati<strong>on</strong>and safety features of the alignment rack or lift, and has the proper hand and power tools necessary to performwheel alignments.When using your garage equipment, basic safety precauti<strong>on</strong>s should always be followed, including:1. Read all instructi<strong>on</strong>s.2. Care must be taken as burns can occur from touching hot parts.3. Do not operate equipment with a damaged power cord or if the equipment has been dropped or damageduntil it has been examined by a qualified serviceman.4. Do not let cord hang over edge of table, bench or counter or come in c<strong>on</strong>tact with hot manifolds or movingfan blades.5. If an extensi<strong>on</strong> cord is necessary, a cord with a current rating equal to or more than that of the equipmentshould be used. Cords rated for less than the equipment may overheat. Care should be taken to arrangethe cord so that it will not be tripped over or pulled.6. Always unplug equipment from electrical outlet when not in use. Never use the cord to pull the plug fromthe outlet. Grasp plug and pull to disc<strong>on</strong>nect.7. Let equipment cool completely before putting away. Loop cord loosely around equipment when storing.8. To reduce the risk of fire, do not operate equipment in the vicinity of open c<strong>on</strong>tainers of flammable liquids,such as gasoline.9. Adequate ventilati<strong>on</strong> should be provided when working <strong>on</strong> operating internal combusti<strong>on</strong> engines.10. Keep hair, loose clothing, fingers, and all parts of body away from moving parts.11. To reduce the risk of electrical shock, do not use <strong>on</strong> wet surfaces or expose to rain.12. Use <strong>on</strong>ly as described in this manual. Use <strong>on</strong>ly manufacturer's recommended attachments.13. ALWAYS WEAR SAFETY GLASSES. Everyday eyeglasses <strong>on</strong>ly have impact resistant lenses, they areNOT safety glasses.IMPORTANT !! SAVE THESE INSTRUCTION -- DO NOT DISCARD !!Page 5
SAFETY INSTRUCTIONSIMPORTANT!! SAVE THESE INSTRUCTIONSRisk of electrical shock.• Do not operate equipment with a damaged power cord or if the equipmenthas been dropped or damaged, until it has been examined by aqualified service pers<strong>on</strong>.• If an extensi<strong>on</strong> cord is necessary, a cord with a current rating equal toor greater than that of the equipment should be used. Cords ratedfor less current than the equipment can overheat.• Unplug equipment from electrical outlet when not in use. Never usethe cord to pull the plug from the outlet. Grasp plug and pull to disc<strong>on</strong>nect.• Do not expose the equipment to rain. Do not use <strong>on</strong> wet surfaces.• Plug unit into correct power supply.• Do not remove or bypass grounding pin.C<strong>on</strong>tact with high voltages can cause death or serious injury.Risk of electrical shock. High voltages are present within the c<strong>on</strong>sole unit.• There are no user serviceable items within the c<strong>on</strong>sole other thanthe keyboard and printer.• Service <strong>on</strong> the unit must be performed by qualified pers<strong>on</strong>nel.• Do not open any part of the c<strong>on</strong>sole other than noted areas.• Turn power switch off and unplug the unit before servicing.C<strong>on</strong>tact with high voltages can cause death or serious injury.Risk of eye injury. Debris, dirt, and fluids may drop from vehicles.• Knock off any loose debris. Clean surfaces as needed to avoid anymaterials from falling.• Wear approved safety glasses when servicing.Debris, dirt, and fluids can cause serious eye injury.Risk of crushing. Vehicles may roll off alignment lift if not secured.• Leave automatic transmissi<strong>on</strong> in park or manual transmissi<strong>on</strong> in gearunless equipment operati<strong>on</strong> steps require vehicle in neutral.• Apply parking brake unless equipment operati<strong>on</strong> steps require wheelmovement.• Use wheel chocks whenever vehicle is positi<strong>on</strong>ed <strong>on</strong> the lift.• Follow rack or lift manufacturer’s safety recommendati<strong>on</strong>s when liftinga vehicle.Vehicles rolling off lifts can cause death or serious injury.Page 6
Risk of entanglement or crushing. There are moving parts <strong>on</strong> vehicle lifts duringoperati<strong>on</strong>.• Keep all pers<strong>on</strong>s clear of lifts.• Read lift manufacturer’s operati<strong>on</strong> instructi<strong>on</strong>s carefully.• Follow lift manufacturer’s safety recommendati<strong>on</strong>s.C<strong>on</strong>tact with moving parts could cause injury.Risk of pinching or crushing body parts when jacking vehicles.• Keep hands and other body parts away from jacking surfaces.• Do not use unapproved adapters (i.e. wooden blocks) when jacking avehicle.• Do not bypass any jack manufacturer’s safety features.• Read jack manufacturer’s operati<strong>on</strong> instructi<strong>on</strong>s carefully.• Follow jack manufacturer’s safety recommendati<strong>on</strong>s.Improperly used or maintained jacks can cause injury.Risk of burns.• Do not touch hot exhaust systems, manifolds, engines, radiators, etc.• Wear gloves whenever performing a service near hot comp<strong>on</strong>ents.Hot comp<strong>on</strong>ents can cause burns.Risk of injury. Tools may break or slip if improperly used or maintained.• Use the correct tool for the task.• Frequently inspect, clean, and lubricate (if recommended) all tools.• Follow recommended procedures when performing vehicle services.Tools that break or slip can cause injury.Page 7
(Blank Page)
Table of C<strong>on</strong>tentsPage1. Getting StartedIntroducti<strong>on</strong> 15Assembly & Setup 17Aligner Locati<strong>on</strong> 17Power On 17Aligner Comp<strong>on</strong>ents 18C<strong>on</strong>sole 18Computer C<strong>on</strong>necti<strong>on</strong>s 19Measuring Heads 20Wheel Clamps 21Navigati<strong>on</strong> 222. Setup GuideSetup Menu 26Help ? 26Setup Flowchart 28Customizing Aligner 28Rack / Floor 28System C<strong>on</strong>figurati<strong>on</strong> 28Head Selecti<strong>on</strong> 29Keyboard 29Turntables 29Printer Selecti<strong>on</strong> 30Paper Selecti<strong>on</strong> 30Software C<strong>on</strong>figurati<strong>on</strong> 31Customize Interacti<strong>on</strong> 31Alignment Order 31Skip Allowed 32Displays 32Cross Values Selecti<strong>on</strong> 32Shim Manufacturer Select 33Advanced Driver Complaint 34Setback/Dimensi<strong>on</strong>s 34Calibrati<strong>on</strong> Check 34Threshold Setting 34Opti<strong>on</strong>al Alignment Styles 35Caster/Camber @ 0 Toe 35Thrust Alignment Only 35All Readings Positi<strong>on</strong> 36Language 37Vehicle Spec Selecti<strong>on</strong> 37Units of Measure 38Toe Units 38Angle Units 39Linear Units 39Resoluti<strong>on</strong> 39Date/Clock 403. Operati<strong>on</strong> Instructi<strong>on</strong>sIntroducti<strong>on</strong> 45Performing a 4 Wheel Alignment 47Attach Wheel Clamps 48Main Menu 49Begin Alignment Menu 49PageCustomer Data 50Vehicle Specificati<strong>on</strong>s Entry 51Illustrate Adjustment 52Edit Specificati<strong>on</strong>s 52Inspecti<strong>on</strong> Menus 53 - 55Runout Compensati<strong>on</strong> 56 - 57Caster Measurement 58 - 59Advanced Diagnostics - Bent Parts 60Rear Alignment Readings 61Soft-keys 61Zoom 62Fr<strong>on</strong>t Alignment Readings 63Illustrati<strong>on</strong>s & Animated Graphics 64All Readings 65Measuring Other Angles 66SAI Measurement 67Toe Out On Turns 68Maximum Turn Angle 69Toe Curve Change 694 Wheel Steering 69Setback / Vehicle Dimensi<strong>on</strong>s 70Adjustment Assistant 71A-Arm Adjust 71Live Caster and Camber 72Camber Elevated 72Drag Link 73Shim Informati<strong>on</strong> 74EZ Shim Program 74Cradle Alignment 75EZ Toe 76Driver Complaint Menu 77 - 79Printer Menu 79Glossary of Alignment Terms 81 - 834. Files and Customer DatabaseFiles Menu 87Customer Database 87View Customer Records 88Select Disk Drive 89Backup/Restore Database 89Using Database in Alignment 90 - 92Store Name 93Mitchell 935. Maintenance and ServiceMaintain Aligner 97Calibrati<strong>on</strong> 99Camber, SAI, Cross Toe 100Track Toe 101Calibrati<strong>on</strong> Factors & History 103Measurement Data Display 104Aligner Diagnostics 105User Serviceable Parts 106Troubleshooting Problems 107 - 109
(Blank Page)
Introducti<strong>on</strong>This manual is designed to give installati<strong>on</strong>, operati<strong>on</strong>al, and maintenance informati<strong>on</strong>for the <str<strong>on</strong>g>Visualiner</str<strong>on</strong>g> <str<strong>on</strong>g>Series</str<strong>on</strong>g> Alignment system.The <str<strong>on</strong>g>Visualiner</str<strong>on</strong>g> <str<strong>on</strong>g>Series</str<strong>on</strong>g> is the most advanced alignment system <strong>on</strong> the market todayand is designed to give many years of profitable service. As with any piece of equipment,proper maintenance of the system will help keep the <str<strong>on</strong>g>Visualiner</str<strong>on</strong>g> operating atpeak performance.The John Bean <str<strong>on</strong>g>Visualiner</str<strong>on</strong>g> is designed for easy operati<strong>on</strong> and maintenance. Threemajor comp<strong>on</strong>ents make up the system.The first, and the <strong>on</strong>e less obvious, is the computer microprocessor, electr<strong>on</strong>ics,and software used to provide the <str<strong>on</strong>g>Visualiner</str<strong>on</strong>g> with fast and accurate readings. Theseitems are located in the c<strong>on</strong>sole assembly and require very little operator interacti<strong>on</strong>or maintenance. The c<strong>on</strong>sole also provides storage for the measuring heads, adrawer for the opti<strong>on</strong>al printer, and storage in the lower cabinet.The sec<strong>on</strong>d comp<strong>on</strong>ent is the SVGA m<strong>on</strong>itor display and operator c<strong>on</strong>trol systems.Located in the c<strong>on</strong>sole assembly, the <str<strong>on</strong>g>Visualiner</str<strong>on</strong>g> is available with 19" or 14" m<strong>on</strong>itors.C<strong>on</strong>trol and operati<strong>on</strong> of the unit is d<strong>on</strong>e through interacti<strong>on</strong> with the software<strong>on</strong> the remote c<strong>on</strong>trol unit, the head keypads, or the opti<strong>on</strong>al c<strong>on</strong>sole keyboard.The third part of the system c<strong>on</strong>sists of the measuring heads and wheel clamps.The heads attach to the wheels and c<strong>on</strong>tain advanced electr<strong>on</strong>ic sensors for measuringall wheel alignment angles. The heads and clamps are designed to be versatile,durable, and easy to use. The heads require periodic maintenance and calibrati<strong>on</strong>to keep the <str<strong>on</strong>g>Visualiner</str<strong>on</strong>g> at peak operating c<strong>on</strong>diti<strong>on</strong>.Thank you for purchasing the <str<strong>on</strong>g>Visualiner</str<strong>on</strong>g> <str<strong>on</strong>g>Series</str<strong>on</strong>g> Alignment system. We at John BeanCompany are c<strong>on</strong>fident that you will enjoy the many years of profitable service andare available to serve your equipment needs. Refer to the back page of this manualfor John Bean Company facilities worldwide or c<strong>on</strong>tact your local John Bean CompanyDistributor or Representative.Page 11
(Blank Page)
TM<str<strong>on</strong>g>Visualiner</str<strong>on</strong>g> <str<strong>on</strong>g>Series</str<strong>on</strong>g>Getting Started
(Blank Page)
Introducti<strong>on</strong>This secti<strong>on</strong> is designed as a starting point for owners and operators of the <str<strong>on</strong>g>Visualiner</str<strong>on</strong>g> ModelV6 and V7 Aligners. The <str<strong>on</strong>g>Visualiner</str<strong>on</strong>g> software provides a powerful tool for service centers whooffer wheel alignment services. The setup, operati<strong>on</strong>, and maintenance of the <str<strong>on</strong>g>Visualiner</str<strong>on</strong>g> iscovered in secti<strong>on</strong>s 2 - 5. The first part of this secti<strong>on</strong> describes what is necessary to getstarted using the Aligner. The comp<strong>on</strong>ents of the system are described, and navigati<strong>on</strong>through the software is shown.The <str<strong>on</strong>g>Visualiner</str<strong>on</strong>g> requires a very specific set of computer hardware comp<strong>on</strong>ents. All thesecomp<strong>on</strong>ents are integrated together to optimize the speed and functi<strong>on</strong>ality of the software.Substituti<strong>on</strong> of these items, or the additi<strong>on</strong> of any other computer comp<strong>on</strong>ents to the aligner,could compromise proper operati<strong>on</strong> and is not recommended. C<strong>on</strong>sult John Bean CompanyTechnical Support prior to performing any changes to the hardware c<strong>on</strong>figurati<strong>on</strong>.The <str<strong>on</strong>g>Visualiner</str<strong>on</strong>g> program is DOS-based, with the bulk of the program residing <strong>on</strong> a CD-ROM.Do not manipulate, change, or copy any files or system c<strong>on</strong>figurati<strong>on</strong>s unless qualified to doso. The aligner may not operate properly if unauthorized changes have been made.Thank you for purchasing the John Bean <str<strong>on</strong>g>Visualiner</str<strong>on</strong>g> system. We at JBC are c<strong>on</strong>fident thisstate of the art alignment machine will provide many years of profitable service. Should anyadditi<strong>on</strong>al assistance or informati<strong>on</strong> be required, call the following number in the USA:1-800-362-8326or1-501-450-1500John Bean Company is a registered trademark of <str<strong>on</strong>g>Snap</str<strong>on</strong>g>-<strong>on</strong> Incorporated.Page 15
(Blank Page)
Getting StartedThe <str<strong>on</strong>g>Visualiner</str<strong>on</strong>g> offers extraordinary power and versatility.With proper setup, operati<strong>on</strong>, and maintenance,the system will provide many years of profitable service.This secti<strong>on</strong> of the manual describes how tobegin enjoying the many features and benefits of theAligner. References are often made to other secti<strong>on</strong>sof the <str<strong>on</strong>g>Visualiner</str<strong>on</strong>g> Operator's Manual .Assembly and SetupInstallati<strong>on</strong> and setup of a new <str<strong>on</strong>g>Visualiner</str<strong>on</strong>g> is besthandled by a qualified John Bean Company Representative.If unsure of who to c<strong>on</strong>tact, refer to theback of this manual.The aligner must be calibrated to at least <strong>on</strong>e rack,lift, or other surface where wheel alignments are tobe performed.The Compact Disc that c<strong>on</strong>tains the alignment softwareshould be placed into the CD-ROM drive priorto software loading. Leave the software CompactDisc in the CD-ROM drive unless the <strong>on</strong>-screen instructi<strong>on</strong>ssay otherwise.Instructi<strong>on</strong>s for operati<strong>on</strong>al setup of the <str<strong>on</strong>g>Visualiner</str<strong>on</strong>g>program are covered in detail in Secti<strong>on</strong> 2 of thisOwner's Manual. The setups for the PC hardware andMS-DOS are preset at the factory and should not bealtered.Power ONThe power switch for the <str<strong>on</strong>g>Visualiner</str<strong>on</strong>g> is located <strong>on</strong> therear of the unit (see Figure 3 <strong>on</strong> Page 18). This switchturns <strong>on</strong> all of the aligner's comp<strong>on</strong>ents. Make surethe m<strong>on</strong>itor's power switch and the computer's powerswitch (in lower cabinet) are left in the ON positi<strong>on</strong>at all times.When the power switch is turned <strong>on</strong>, the unit initiatesthe computer bootup. The m<strong>on</strong>itor flickers asthe video system is loaded. Text should appear <strong>on</strong>the screen as bootup begins and counting numbersare shown as the memory of the unit is checked andverified. Many additi<strong>on</strong>al lines of computer c<strong>on</strong>figurati<strong>on</strong>will appear <strong>on</strong> screen and scroll up as the computercompletes the system boot sequence. Thenext screen display will be a bar graph that indicatesthe loading of the <str<strong>on</strong>g>Visualiner</str<strong>on</strong>g> Alignment program.Finally, after the software has loaded, the JBC LogoScreen will appear, followed by the Main Menu (Figure1) when any key is pressed, indicating the Aligneris ready for operati<strong>on</strong>. This boot sequence shouldtake about two minutes. If any problems are encounteredduring the Power On bootup sequence,c<strong>on</strong>sult the Maintenance and Service secti<strong>on</strong> of thisOwner's Manual.All the software in the <str<strong>on</strong>g>Visualiner</str<strong>on</strong>g> <str<strong>on</strong>g>Series</str<strong>on</strong>g> is propertyof the respective companies who developed it. Unauthorizedcopies or distributi<strong>on</strong> of these software productsis strictly prohibited by federal law.Aligner Locati<strong>on</strong>Each shop is unique. Locate the aligner in a locati<strong>on</strong>in the spot that provides the most c<strong>on</strong>veniencefor the operator. Remember, visual c<strong>on</strong>tact with them<strong>on</strong>itor is necessary during most steps of a wheelalignment. Most shops positi<strong>on</strong> the aligner in fr<strong>on</strong>tof the alignment lift, offset to either the left or rightsides.Figure 1 - Main Menu ScreenPage 17
C<strong>on</strong>soleAligner Comp<strong>on</strong>entsThe c<strong>on</strong>sole houses many of the aligner comp<strong>on</strong>entsincluding the power supplies, the computer system,the head interface comp<strong>on</strong>ents, and provides placesfor the display m<strong>on</strong>itor, keyboard, and printer. Themeasuring heads are placed <strong>on</strong> the sides of the lowercabinet when not in use.The upper porti<strong>on</strong> of the c<strong>on</strong>sole provides a locati<strong>on</strong>for the display m<strong>on</strong>itor, computer system, and keyboard.The m<strong>on</strong>itor has no external adjustments. Thecomputer system is housed to the right side of them<strong>on</strong>itor. The fr<strong>on</strong>t of the computer is accessed by adoor that swings up and can be slid back. Thecomputer has a fr<strong>on</strong>t-mounted power switch thatc<strong>on</strong>trols power to the entire system. The computeralso c<strong>on</strong>tains a CD-ROM drive where the operatingsoftware is loaded, plus a floppy drive used for futureuse.The lower part of the c<strong>on</strong>sole has a printer drawer tokeep the printer away from shop elements. Thedrawer is mounted <strong>on</strong> a slide mechanism to easeusage and paper replacement. The storage cabinetis used to store extra fanfold computer paper, and hasother pockets for storing additi<strong>on</strong>al items.NOTE: Be careful not to expose the aligner ormeasuring heads to water, heavy dust envir<strong>on</strong>ments,or operati<strong>on</strong>s that produce metal chips.Do not block the rear of the computer or disablethe cooling fan.The main On/Off switch for the aligner is locatedbehind the computer access door <strong>on</strong> the fr<strong>on</strong>t of thealigner. The main power cable c<strong>on</strong>nects to the rear ofthe unit. Next to the plug are a series of protectivefuses. In the event of a power overload, <strong>on</strong>e or moreof these fuses may blow, rendering the aligner unusable.Check the fuses whenever the unit is n<strong>on</strong>operati<strong>on</strong>al.The head interc<strong>on</strong>nect cables plug into the back ofthe c<strong>on</strong>sole. There are 6 female c<strong>on</strong>nectors -- <strong>on</strong>e foreach of the 4 heads, <strong>on</strong>e for the opti<strong>on</strong>al remotedisplay unit, and <strong>on</strong>e spare. When the aligner isutilized with a rack wiring kit, all 6 c<strong>on</strong>nectors areused. The c<strong>on</strong>nectors are universal -- it does notmatter which head is plugged into any of the 6c<strong>on</strong>nectors.M<strong>on</strong>itorOn/Off SwitchCD/FloppyDrive AccessKeyboardRemoteC<strong>on</strong>trollerPrinter DrawerLower CabinetPaper StorageFigure 2. <str<strong>on</strong>g>Visualiner</str<strong>on</strong>g> Fr<strong>on</strong>t ViewPage 18
Computer C<strong>on</strong>necti<strong>on</strong>sInstallati<strong>on</strong> of the <str<strong>on</strong>g>Visualiner</str<strong>on</strong>g> includes c<strong>on</strong>necti<strong>on</strong> ofdevices to the computer. Should there be any reas<strong>on</strong>to examine those c<strong>on</strong>necti<strong>on</strong>s, or change a comp<strong>on</strong>entsuch as the printer, Figure 3 illustrates thelocati<strong>on</strong> <strong>on</strong> the back of the aligner for each c<strong>on</strong>necti<strong>on</strong>.CAUTION! There are no serviceable parts insidethe computer. DO NOT attempt to open thecomputer case for any reas<strong>on</strong>. Call for service ifa computer problem is suspected.Keyboard InputAC Power to Computer C<strong>on</strong>sole12 Volt DC Head Power SupplyCD Audio OutputCooling FanPrinter Cable C<strong>on</strong>necti<strong>on</strong>VGA M<strong>on</strong>itor Cable C<strong>on</strong>necti<strong>on</strong>Head Interface Cable115/220 Volt CPU Switch.Infrared Remote InputAudio output to Speaker115/220 Volt CRT SwitchComputer Power SupplyPrinter Power SupplyAC Input Power C<strong>on</strong>necti<strong>on</strong>Main 8 Amp Fuses12 Volt 3 Amp FuseHead Cable C<strong>on</strong>necti<strong>on</strong>sGround WireFigure 3. Rear C<strong>on</strong>necti<strong>on</strong>sWARNING ! DO NOT REMOVE THE REAR COVER UNLESS INSTRUCTED BY JOHN BEANPERSONNEL. Remove power from the aligner prior to removing cover. Call for a certifiedJohn Bean Co. technician if you are in doubt as to how to make any c<strong>on</strong>necti<strong>on</strong>. Making ac<strong>on</strong>necti<strong>on</strong> incorrectly could damage the unit and void the warranty.Page 19
Measuring HeadsThe operati<strong>on</strong> of the <str<strong>on</strong>g>Visualiner</str<strong>on</strong>g> can be c<strong>on</strong>trolled at any of the measuring heads. Study Figure 4 below tobecome familiar with the layout of the head keypads.Keypad Functi<strong>on</strong>sNumber Keys: Invoke soft-keyfuncti<strong>on</strong>s.Help: On screen assistance forany program functi<strong>on</strong>.Menu: Returns to the MainMenu instantlyRunout: Press this butt<strong>on</strong>during wheel runout procedureArrow Keys: Move selecti<strong>on</strong>bar and cursor c<strong>on</strong>trolPage Back: Returns to the lastscreen displayed.Page Forward: Advances to thenext page when there is morethan <strong>on</strong>e page availableEnter: Accepts a selecti<strong>on</strong> andadvances program to next step.No: Rejects an operati<strong>on</strong>Soft-key toggle: Selects desiredset of soft-keysFigure 4Figure 5 below shows some of the comp<strong>on</strong>ents of the <str<strong>on</strong>g>Visualiner</str<strong>on</strong>g> optical measuring heads.Head KeypadHead Locking KnobTrack ToeOptics ModuleLevel VialCross ToeOptics ModuleCable ReceptacleBoom TubeFigure 5 -- Head Comp<strong>on</strong>entsPage 20
Wheel ClampsThe wheel clamps allow for placement of the heads<strong>on</strong> a variety of vehicles. Figure 6 identifies the comp<strong>on</strong>entsof the wheel clamp. See page 48 of thismanual for instructi<strong>on</strong>s <strong>on</strong> how to attach the clampto various wheels.Notice the wheel clamps are adjustable to differentwheel sizes by moving the upper and lower brackets.The center slide bracket can be moved to anypositi<strong>on</strong> prior to wheel runout compensati<strong>on</strong>, allowingfor a clear line of site for the toe measurementsystem.Tightening Knoband ScrewSliding UpperBracketStub ShaftSlide Tensi<strong>on</strong>ersCenter SlideBracketWedge GripsExtensi<strong>on</strong> RodsAdjustableLower BracketWheel GrabbersFigure 6Page 21
Navigati<strong>on</strong>Before we begin to explore the many features of the<str<strong>on</strong>g>Visualiner</str<strong>on</strong>g> let's become familiar with the basic navigati<strong>on</strong>and operati<strong>on</strong> of the aligner.There are several ways to c<strong>on</strong>trol movement withinthe aligner program. All <str<strong>on</strong>g>Visualiner</str<strong>on</strong>g> <str<strong>on</strong>g>Series</str<strong>on</strong>g> models areequipped with a hand-held remote c<strong>on</strong>trol whosevarious butt<strong>on</strong>s permit full aligner functi<strong>on</strong>. In additi<strong>on</strong>,the measuring heads <strong>on</strong> all models are fitted witha keypad with the same butt<strong>on</strong> layout as the remote,allowing operati<strong>on</strong> from any wheel (see Page 20).Models equipped with the opti<strong>on</strong>al remote displayunit will also have a similar keypad. Study Figure 7carefully to become familiar with the functi<strong>on</strong>s of eachbutt<strong>on</strong>.In additi<strong>on</strong>, the opti<strong>on</strong>al keyboard has a "Print Screen"key. When this key is pressed the currently displayedscreen will be captured and printed. Theexcepti<strong>on</strong> to this print screen functi<strong>on</strong> is the animati<strong>on</strong>sequences <strong>on</strong> the CD-ROM software which cannotbe printed.Note: The numeric keypad located to the far right <strong>on</strong>the keyboard does not functi<strong>on</strong> in the <str<strong>on</strong>g>Visualiner</str<strong>on</strong>g>software.For <str<strong>on</strong>g>Visualiner</str<strong>on</strong>g> <str<strong>on</strong>g>Series</str<strong>on</strong>g> models equipped with the opti<strong>on</strong>alprinter package, an IBM-style keyboard isincluded. All aligner functi<strong>on</strong>s can be c<strong>on</strong>trolled fromthe keyboard as well as the remote and the measuringheads. The functi<strong>on</strong> keys located <strong>on</strong> the top rowof the keyboard are the equivalent of the remote andkeypad butt<strong>on</strong>s. Refer to the diagram for identificati<strong>on</strong>of the ic<strong>on</strong>s and their respective functi<strong>on</strong>s.Remote Functi<strong>on</strong>sNumber Keys: Invoke softkeyfuncti<strong>on</strong>s.Help: On screen assistancefor any program functi<strong>on</strong>.Menu: Returns to the MainMenu instantlyStar: Reserved for futuresoftware enhancementsArrow Keys: Move selecti<strong>on</strong>bar and cursor c<strong>on</strong>trolPage Back: Returns to the lastscreen displayed.Page Forward: Advances to thenext page when there is morethan <strong>on</strong>e page availableEnter: Accepts a selecti<strong>on</strong> andadvances program to next step.No/Cancel: Rejects or cancelsan operati<strong>on</strong>Soft-key toggle: Selects desiredset of soft-keysFigure 7 -- <str<strong>on</strong>g>Visualiner</str<strong>on</strong>g> Remote C<strong>on</strong>trolPage 22
The <str<strong>on</strong>g>Visualiner</str<strong>on</strong>g> <str<strong>on</strong>g>Series</str<strong>on</strong>g> software is "menu driven" forease of use. Most of the screens allow choices to bemade about which directi<strong>on</strong> to go to access variousfuncti<strong>on</strong>s. Menus with choices will always have awhite selecti<strong>on</strong> box <strong>on</strong> the screen. When the selecti<strong>on</strong>box is positi<strong>on</strong>ed over a menu item using the up/down arrow keys and the Enter butt<strong>on</strong> is pressed, thatitem is activated.Many areas of the software c<strong>on</strong>tain several layers ofsub-menus to give the operator maximum c<strong>on</strong>trol overthe aligner's functi<strong>on</strong>s. Up<strong>on</strong> entering a selecti<strong>on</strong> <strong>on</strong>a menu, there may be additi<strong>on</strong>al selecti<strong>on</strong>s <strong>on</strong> thesub-menu, and so <strong>on</strong>. When moving through thenetwork of sub-menus the "Enter" butt<strong>on</strong> movesforward and the "Page Back" butt<strong>on</strong> moves backwards<strong>on</strong>e page at a time. The "Menu" butt<strong>on</strong> can bepressed any time to return to the aligner's Main Menuscreen shown above.The <str<strong>on</strong>g>Visualiner</str<strong>on</strong>g> <str<strong>on</strong>g>Series</str<strong>on</strong>g> software also utilizes "softkeys"to streamline operati<strong>on</strong> and allow movement toadditi<strong>on</strong>al functi<strong>on</strong>s. The soft-keys are located al<strong>on</strong>gthe bottom of almost every screen in the aligner.Numbered 1 - 4, they corresp<strong>on</strong>d to the 1 - 4 keys <strong>on</strong>the remote and head keypad as well as the 1 - 4functi<strong>on</strong> keys <strong>on</strong> the opti<strong>on</strong>al c<strong>on</strong>sole keyboard.Press the keys <strong>on</strong> any locati<strong>on</strong> and the appropriatesoft-key operati<strong>on</strong> will begin.Page 23
(Blank Page)
TM<str<strong>on</strong>g>Visualiner</str<strong>on</strong>g> <str<strong>on</strong>g>Series</str<strong>on</strong>g>Setup Guide
SetupAfter the unit has successfully powered up it is necessary to give the computer some informati<strong>on</strong> about theway alignments will be performed. C<strong>on</strong>figurati<strong>on</strong> of the <str<strong>on</strong>g>Visualiner</str<strong>on</strong>g> <str<strong>on</strong>g>Series</str<strong>on</strong>g> takes <strong>on</strong>ly a few minutes. Many itemsare setup by the John Bean Representative who installs the aligner and will not need to be changed. Otheritems involve the flow of the alignment program and the access to certain functi<strong>on</strong>s that may need to be changedin the future depending <strong>on</strong> operator preference and the alignment and diagnostic routines necessary to properlyservice vehicles.All setup items are accessed through the Setup item <strong>on</strong> the Main Menu. Up<strong>on</strong> entering the Setup Menu, therewill be a series of additi<strong>on</strong>al menus and sub-menus for the various setup opti<strong>on</strong>s. C<strong>on</strong>sult the User Guide porti<strong>on</strong>of this manual for instructi<strong>on</strong>s <strong>on</strong> how to use the various functi<strong>on</strong>s that can be enabled during the aligner setup.C<strong>on</strong>sult the menu flow chart <strong>on</strong> Page 5 to locate the path for the desired functi<strong>on</strong>.Here is a list of some of the things to tell the <str<strong>on</strong>g>Visualiner</str<strong>on</strong>g>before beginning to do alignments:-- Type of wheel alignments normally performed.-- The routine the operator is most comfortable withwhen performing an alignment.-- Which alignment rack or surface is to be utilized-- The units of measurement for toe, caster, camber,and others measurements-- Which software features are a part of the alignmentprogram sequence-- The Language for the CRT display and the opti<strong>on</strong>alPrinter.To enter the Setup Menu, place the highlight boxaround Setup <strong>on</strong> the Main Menu and press the Enterbutt<strong>on</strong>.Setup Menu choices are:Rack/Floor -- which <strong>on</strong>e of 3 calibrated alignmentsurfaces will be utilizedSystem c<strong>on</strong>figurati<strong>on</strong> -- setup of hardware itemssuch as heads, keyboard, printer, etc.Customize interacti<strong>on</strong> -- allows the operator totailor the program sequence and opti<strong>on</strong>s as desiredLanguage -- certain software may allow the alignerto operate in languages other than EnglishUnits of measure -- selecti<strong>on</strong> of units when toe,camber, caster, and other angles are displayedDate/Clock -- for resetting the aligner's internal clockHELPUse the Help functi<strong>on</strong> should you require further assistance <strong>on</strong> Setup procedures.The <str<strong>on</strong>g>Visualiner</str<strong>on</strong>g> has a unique operator help system which is designed to provideinstant access to informati<strong>on</strong> relative to the functi<strong>on</strong> being used. Use this any timeyou require further assistance by simply pressing the Help key.Page 26
SetupMenuRack/FloorSystemC<strong>on</strong>figurati<strong>on</strong>CustomizeInteracti<strong>on</strong>LanguageUnits ofMeasureDate / ClockRackSelecti<strong>on</strong>AlignmentOrderSkip Allow edDisplaysOpt AlignFeaturesOpt AlignStylesSecurityCode WordHeads Keyboard Toe Range TurntablesPrinterSelecti<strong>on</strong>PaperPrinterRunoutCustomerData EntryVehicleInspecti<strong>on</strong>VehicleSpecificati<strong>on</strong>CasterSw ingHead LevelSet Clock Time Format Date Format Date OrderToe Units Angle Units Linear Units Resoluti<strong>on</strong>CrossValuesColorsLogoSelecti<strong>on</strong>Dealer Ph<strong>on</strong>eNumberVolumeBrightnessShim ManfctSelecti<strong>on</strong>Adv DriverComplaintSetback/VehDimensi<strong>on</strong>Calibrati<strong>on</strong>CheckThreshold SetForce Recalib.ScreenLanguagePrinterLanguageVehicle SpecSelecti<strong>on</strong>Caster/Cam@ 0 ToeThrust LineAlign OnlySpecs SelectMethodPrintout TypeAll ReadingsPositi<strong>on</strong>Setup Notes> Not all setup opti<strong>on</strong>s are available with all software c<strong>on</strong>figurati<strong>on</strong>s.> Some setup items require a password for entry and are reserved for John Bean service pers<strong>on</strong>nel.> Many setup items are d<strong>on</strong>e <strong>on</strong>ce at the time of aligner installati<strong>on</strong> and do not need to be changed. Othersare software, user-interface related and may be changed depending <strong>on</strong> operator preference. Here is a list ofsetup items typically found in each category:One Time, Up<strong>on</strong> Installati<strong>on</strong>Heads, Keyboard, Turntables, Printer,Skip items, Cross values, Colors, Logo,Dealer ph<strong>on</strong>e #, Calibrati<strong>on</strong> check,Specs select method, Printout type,Security code wordUser C<strong>on</strong>figurati<strong>on</strong> ChangesRack selecti<strong>on</strong>,Alignment order, Language,Units of Measure, Clock, Volume, Brightness,Shim man. select, Adv. driver complaint, Setback,Caster/Cam @ 0 toe, Thrust line <strong>on</strong>ly, All readings,Resoluti<strong>on</strong>Page 27
Customizing The <str<strong>on</strong>g>Visualiner</str<strong>on</strong>g>Once the <str<strong>on</strong>g>Visualiner</str<strong>on</strong>g> has powered up and the MainMenu is displayed an Alignment can be performedusing the standard default settings. The followingpages will assist in the setup and customizing of yournew <str<strong>on</strong>g>Visualiner</str<strong>on</strong>g> <str<strong>on</strong>g>Series</str<strong>on</strong>g> Aligner.1. Rack / FloorThe first item <strong>on</strong> the Setup Menu is used to selectwhich of three calibrated alignment work surfaces areto be utilized. In most shops the primary alignment liftis designated as "Rack A".Select the rack type used to perform most wheelalignments. Use the up/down arrow keys and pressEnter when the choice is the <strong>on</strong>e with the white boxdisplay around it. The rack choice may be changedwhenever using a different surface for performingalignments.Note: In order to perform accurate alignments, eachlift/rack surface must be properly calibrated.2. System c<strong>on</strong>figurati<strong>on</strong>The next item <strong>on</strong> the Setup Menu is used primarily tosetup various hardware and system opti<strong>on</strong>s. Placethe highlight box around System c<strong>on</strong>figurati<strong>on</strong> andpress Enter.The System C<strong>on</strong>figurati<strong>on</strong> Menu choices are:Heads -- selecti<strong>on</strong> of the various measuring headopti<strong>on</strong>s offered for the <str<strong>on</strong>g>Visualiner</str<strong>on</strong>g> <str<strong>on</strong>g>Series</str<strong>on</strong>g>.Keyboard -- which language will the opti<strong>on</strong>al IBMtypekeyboard be used with.Toe Range -- not utilized.Turntables -- the selecti<strong>on</strong> for standard mechanicaltypes or special opti<strong>on</strong>al electr<strong>on</strong>ic models.Printer -- selecti<strong>on</strong> for the type of opti<strong>on</strong>al printer tobe used with the <str<strong>on</strong>g>Visualiner</str<strong>on</strong>g>.Page 28
2a. Heads -- choose the measuring head c<strong>on</strong>figurati<strong>on</strong>for the <str<strong>on</strong>g>Visualiner</str<strong>on</strong>g> model being set up. JohnBean currently offers <strong>on</strong>ly optical measuring heads.Earlier models also offered toe-line (string) heads,with the difference being the type of technology usedto measure the vehicle toe angles.Optical <str<strong>on</strong>g>Visualiner</str<strong>on</strong>g> models are equipped with either 4heads or 2 heads plus 2 retros. The 4 head units mayhave 6 toe sensors (beams going fr<strong>on</strong>t/rear andacross fr<strong>on</strong>t) or 8 sensors (beams going fr<strong>on</strong>t/rear,across fr<strong>on</strong>t, and across rear).When using 4 heads or 2 heads with retros, the<str<strong>on</strong>g>Visualiner</str<strong>on</strong>g> can perform either centerline, thrust, orcomplete 4 wheel alignments. The 2 head setup canbe used to perform fr<strong>on</strong>t total toe settings with eitheroptical or string heads.2b. Keyboard -- the <str<strong>on</strong>g>Visualiner</str<strong>on</strong>g> software supportskeyboards designed for a variety of language applicati<strong>on</strong>s.If such a keyboard is used, this is the place togo to change the c<strong>on</strong>figurati<strong>on</strong>. Select the properkeyboard using the up/down arrow keys to scroll,then press Enter <strong>on</strong>ce the desired selecti<strong>on</strong> is checked.2c. Turntables -- from the System C<strong>on</strong>figurati<strong>on</strong>Menu, place the highlight box over "Turntables" andpress Enter. Most units will operate with standardmechanical-type turntables used <strong>on</strong> the fr<strong>on</strong>t of thealignment lift. John Bean Company also offers Electr<strong>on</strong>icTurntables to automate some measurements.Selecti<strong>on</strong>s are:Standard turntables -- mechanical-type utilized <strong>on</strong>most alignment lifts and racks (may be John BeanCompany or another manufacturer).Electr<strong>on</strong>ic turntables -- sophisticated specializedturntables c<strong>on</strong>taining electr<strong>on</strong>ic comp<strong>on</strong>ents to addadditi<strong>on</strong>al capabilities.Note: Do not select Electr<strong>on</strong>ic turntables unless liftis so equipped. Operati<strong>on</strong>al problems will be createdif err<strong>on</strong>eously chosen.Page 29
2d. Printer Selecti<strong>on</strong> -- if equipped with theopti<strong>on</strong>al Printer Package, from the System C<strong>on</strong>figurati<strong>on</strong>Menu choose "Printer selecti<strong>on</strong>". At this pointa Printer Menu screen appears with two setup choices:Paper type -- select the size of paper to be used inthe printer.Printer selecti<strong>on</strong> -- what type of printer drivers are tobe used by the program to generate printouts.2d-i. Paper Type Selecti<strong>on</strong> -- the <str<strong>on</strong>g>Visualiner</str<strong>on</strong>g> softwaresupports two different paper standards. The 11"size is the standard for the United States and NorthAmerica, while A4 paper is the standard in Europeand many other parts of the world. If incorrectly set,paper feed length and printout margins will be affected.2d-ii. Printer Selecti<strong>on</strong> Menu -- the <str<strong>on</strong>g>Visualiner</str<strong>on</strong>g>supports either generic IBM or Eps<strong>on</strong> 9-pin printeremulati<strong>on</strong>s plus the Eps<strong>on</strong> 24-pin emulati<strong>on</strong> for higherresoluti<strong>on</strong> printing. Most commercially available dotmatrixprinters support <strong>on</strong>e of these printer languages.If not, the printer will not functi<strong>on</strong> at all or willprint illegible informati<strong>on</strong>. John Bean Co. alwayssupplies a compatible printer with the opti<strong>on</strong>al printerkits. Select the proper printer based <strong>on</strong> the unitinstalled with the Printer Package.Page 30
2e. Software C<strong>on</strong>figurati<strong>on</strong> Menu -- the <str<strong>on</strong>g>Visualiner</str<strong>on</strong>g>CD-ROM software includes special programs designedto accommodate vehicle alignment proceduresof particular automotive manufacturers. Whenapplicable, these special routines can be enabledthrough the Software C<strong>on</strong>figurati<strong>on</strong> Menu:Standard opti<strong>on</strong>s <strong>on</strong>ly -- the alignment routines andfeatures are the standard <strong>on</strong>es recommended by themajority of auto manufacturers.Suspensi<strong>on</strong> Plus program -- this opti<strong>on</strong> enables aspecial routine for the newest Audi and Volkswag<strong>on</strong>vehicles (1996 Audi A4, A8 and 1998 VW Passat).Renault opti<strong>on</strong>s -- this opti<strong>on</strong> enables a specialroutine for Renault vehicles that includes ride heightmeasurements to generate camber specificati<strong>on</strong>s.3. Customize Interacti<strong>on</strong>The Customize Interacti<strong>on</strong> porti<strong>on</strong> of the Setup Menuallows the operator to tailor the alignment softwareprogram based <strong>on</strong> pers<strong>on</strong>al preferences and the needto include specialized procedures.The Customize Interacti<strong>on</strong> Menu choices are:Alignment order -- alters the order in which certainscreens appear during alignments.Skip allowed -- enables the operator to skip certainitems, or disables the ability to skip these items.Displays -- changes the look of some screens,includes volume and brightness c<strong>on</strong>trols.Opti<strong>on</strong>al alignment features -- select certain alignmentroutines as in the path or <strong>on</strong>-demand.Opti<strong>on</strong>al alignment styles -- further selecti<strong>on</strong> ofroutines and other special items.Security code word -- used by John Bean Companyto upgrade future software releases, update specificati<strong>on</strong>s,and enable certain software opti<strong>on</strong>s.3a. Alignment Order -- Use the up/down arrowkeys to select the Alignment functi<strong>on</strong> to be changedand press Enter. The instructi<strong>on</strong>s at the bottom of theMenu say to enter a number (1-6) to designate theorder the items appear during alignments. Use thearrow keys to scroll the number up or down or type thedesired number <strong>on</strong> the keyboard. Press Enter whensatisfied with the selecti<strong>on</strong>. A soft-key has beenprovided to return the <str<strong>on</strong>g>Visualiner</str<strong>on</strong>g> back to its factorydefault settings. Press soft-key #1 <strong>on</strong> the remote or<strong>on</strong> the keyboard to perform this functi<strong>on</strong>. After allselecti<strong>on</strong>s have been made, press Enter.Note: Some items such as Runout, cannot beremoved from the alignment program. Also, someitems cannot be moved behind others.Page 31
3b. Skip Allowed -- this menu allows certainfuncti<strong>on</strong>s to be skipped during the alignment programsequence by pressing the "NO" butt<strong>on</strong> <strong>on</strong> the remote,head keypad, or keyboard. If Skip "Not Allowed" isenabled for any item, the equipment operator will notbe allowed to bypass that step -- it must be performedto allow progressi<strong>on</strong> of the alignment program.Note: Skipping runout, caster sweep, and head level(Surround Sensor models <strong>on</strong>ly) is primarily for thec<strong>on</strong>venience of John Bean Company pers<strong>on</strong>nel. Skippingany of these items during actual wheel alignmentsmay result in incorrect angle measurementsand customer comebacks.3c. Displays -- Choose Displays from the CustomizeInteracti<strong>on</strong> Menu. The choices are:Cross values -- select whether to have Cross valuesshown <strong>on</strong> the Fr<strong>on</strong>t and Rear Readings screensColors -- choices are standard color or m<strong>on</strong>ochromeLogo selecti<strong>on</strong> -- opti<strong>on</strong> which allows the choice ofmany custom logos for the Logo screen. This selecti<strong>on</strong>is password protected -- for John Bean Companypers<strong>on</strong>nel <strong>on</strong>ly.John Bean Co. dealer ph<strong>on</strong>e number -- the numberfor the John Bean Company sales or servicerepresentative can be put in for display <strong>on</strong> the LogoscreenVolume/Brightness -- adjusts aligner sound volumeand screen brightness using the soft-keys #2 and #3.Test the sound using soft-key #1.3c-i. Cross Values Selecti<strong>on</strong> -- cross values is thedifference between the left and right readings for thecaster and camber angles. These values are useful fordiagnosing pull c<strong>on</strong>diti<strong>on</strong>s, and <strong>on</strong> some vehicles amaximum cross value is specified. We highly recommenddisplaying the cross values <strong>on</strong> screen.Page 32
3c-ii. Colors Selecti<strong>on</strong> -- the choices for colordisplays are standard colors or m<strong>on</strong>ochrome (grayscale). The m<strong>on</strong>itors offered <strong>on</strong> the <str<strong>on</strong>g>Visualiner</str<strong>on</strong>g> <str<strong>on</strong>g>Series</str<strong>on</strong>g>are VGA color so the best choice is standard.3d. Opti<strong>on</strong>al Alignment Features -- from here,additi<strong>on</strong>al setup items include:Shim manufacturer selecti<strong>on</strong> -- choose the brandof aftermarket rear shim utilized during the rearalignment process <strong>on</strong> many fr<strong>on</strong>t wheel drive cars.Advanced driver complaint -- activates a built-inhelp system based <strong>on</strong> vehicle drivability symptoms.Setback/Vehicle dimensi<strong>on</strong>s -- choose whether tohave this feature as a step in the alignment processor <strong>on</strong>-demand when needed.Calibrati<strong>on</strong> check -- utilized for 8 Sensor SurroundSensor Editi<strong>on</strong> models for setting pass/fail criteria.3d-i. Shim manufacturer selecti<strong>on</strong> -- used toselect a rear wheel alignment shim manufacturer.This enables a special program to determine thecorrect shim to use when aligning the rear wheels <strong>on</strong>many fr<strong>on</strong>t wheel drive vehicles. Any or all of the listedmanufacturers can be used.Note: Choosing more than <strong>on</strong>e shim manufacturerwill slow down the shim calculati<strong>on</strong> time. It is advisableto select <strong>on</strong>e primary and <strong>on</strong>e sec<strong>on</strong>dary shimsupplier.Page 33
3d-ii. Advanced Driver Complaint -- when placedin the "Automatic" mode, the <str<strong>on</strong>g>Visualiner</str<strong>on</strong>g> softwareexamines the caster, camber, SAI, and toe readingsand specificati<strong>on</strong>s during thealignment routine and displaysan analysis of typical driversymptoms or vehicle problems.This does add additi<strong>on</strong>al stepsto the alignment process. Thissame analysis can be obtainedfor any vehicle as desired by theoperator when the choice of "Byrequest <strong>on</strong>ly" is selected. Seepage 60 for more details.3d-iii. Setback/Vehicle Dimensi<strong>on</strong>s -- this setupdetermines whether the setback measurement ismade automatically by the <str<strong>on</strong>g>Visualiner</str<strong>on</strong>g> software as apart of the standard alignmentroutine. On 8-sensor SurroundSensor models, vehicle dimensi<strong>on</strong>ing(i.e. wheelbase &trackwidth) is a part of the setbackroutine. Even if these measurementsare not setup withinthe path they can be selectedduring the alignment of any vehicle.3d-iv. Calibrati<strong>on</strong> check -- this selecti<strong>on</strong> is <strong>on</strong>lypossible with 8-sensor Surround Sensor models.These units have the ability to perform automaticcalibrati<strong>on</strong> checks with each alignment performedand alert the operator to an outof-calibrati<strong>on</strong> c<strong>on</strong>diti<strong>on</strong>. Underthe Calibrati<strong>on</strong> Check Menu isthe "Threshold setting" whichselects the point where a warningmessage is displayed whenthe unit moves out of calibrati<strong>on</strong>.The "Force recalibrati<strong>on</strong> .." opti<strong>on</strong>requires a password to enable.For more details see theSurround Sensor Operati<strong>on</strong>Supplement included with the 8-sensor heads.Page 34
3e. Opti<strong>on</strong>al Alignment Styles -- additi<strong>on</strong>alalignment programming setups under the CustomizeInteracti<strong>on</strong> Menu. Choices are:Caster/Camber @ 0 toe -- some auto manufacturersspecify caster and camber be measured with eachwheel straight ahead (zero toe).Thrust line alignment <strong>on</strong>ly -- this opti<strong>on</strong> allows thealigner operator to <strong>on</strong>ly perform 4 wheel or thrust linealignments.Specificati<strong>on</strong> selecti<strong>on</strong> method -- standard orEuropean specificati<strong>on</strong>s.Printout type -- standard or European styles.All readings display positi<strong>on</strong> -- changes where inthe program the "All Readings" screen will appear.3e-i. Caster/Camber @ Zero Toe -- this opti<strong>on</strong>places additi<strong>on</strong>al steps in the alignment program thatforces caster and camber to be measured <strong>on</strong> eachside with the wheel pointed straight ahead. Thisprocedure is recommended by several European automanufacturers (i.e. Mercedes Benz) as the propermethod of measuring these angles (see vehicle servicemanual). The recommended setting for thisopti<strong>on</strong> for most vehicles is "Off".3e-ii. Thrust Line Alignment Only -- this item givesthe operator the ability to dictate which types of wheelalignment selecti<strong>on</strong>s are available during the alignmentprogram. Selecting "Allow thrust or geometricalignments" allows the operator to perform 2 wheel,thrust, or 4 wheel alignments. Selecting "Allow <strong>on</strong>lythrust alignments" allows <strong>on</strong>ly thrust or 4 wheelalignments -- 2 wheel alignments cannot be d<strong>on</strong>e.The majority of vehicles today require complete 4wheel alignments in order to restore proper handlingand insure l<strong>on</strong>g tire life.Page 35
3e-iii. Specificati<strong>on</strong> selecti<strong>on</strong> method -- thisopti<strong>on</strong> determines the format of the vehicle specificati<strong>on</strong>selecti<strong>on</strong>. The standard format,the default, uses the vehiclemanufacturer as a startingpoint for spec selecti<strong>on</strong>.3e-iv. Printout type -- there are several differentprintout format styles that are available, depending <strong>on</strong>preference dictated by certainlocati<strong>on</strong>s in the world. By default,the "Standard" printout typeis enabled, with opti<strong>on</strong>al Northernor Southern European formats.3e-v. All readings display positi<strong>on</strong> -- there arethree different alignment readings screens during thesoftware path -- Fr<strong>on</strong>t, Rear,and All Readings (fr<strong>on</strong>t & rear<strong>on</strong> the same screen). This selecti<strong>on</strong>allows the operator toestablish when the All Readingsscreen will appear, eitherfirst before the fr<strong>on</strong>t & rear meterscreens or last after the meterscreens.Page 36
4. LanguageA variety of different languagesare available for the <str<strong>on</strong>g>Visualiner</str<strong>on</strong>g><str<strong>on</strong>g>Series</str<strong>on</strong>g> CD-ROM software models.Place the highlight boxaround Language <strong>on</strong> the SetupMenu and press Enter.The Language and SpecMenu gives the following submenuselecti<strong>on</strong>s:Screen language -- choose the language <strong>on</strong>-screentext will be displayed.Printer language -- choose the language for customerprintouts.Vehicle spec selecti<strong>on</strong> -- choose the vehicle specificati<strong>on</strong>database for the country the aligner is used.4a. Language Selecti<strong>on</strong> -- To change the languagedisplayed <strong>on</strong> the screen or printout, select the item <strong>on</strong>the Language and Spec Menu. Press the up/downarrow keys until the desired language is encircled bythe highlight bar and press Enter. Notice the "scrollbar" <strong>on</strong> the right side of the screen, indicating additi<strong>on</strong>alchoices are available <strong>on</strong> a sec<strong>on</strong>d page. Usethe arrow keys or "Page Forward" key to move to pagetwo. All screens will now be in the chosen language.English is the first selecti<strong>on</strong> <strong>on</strong> the list, should itbecome necessary to change the unit back to thedefault setting. For Asian aligners, Chinese will bethe first language listed. On floppy software units,<strong>on</strong>ly two of the listed languages are available.4b. Vehicle spec selecti<strong>on</strong> -- the <str<strong>on</strong>g>Visualiner</str<strong>on</strong>g> CD-ROM software c<strong>on</strong>tains wheel alignment specificati<strong>on</strong>sfor the vehicles from many countries and markets.This setup opti<strong>on</strong> allows for changing the specdatabase to suit the country where the <str<strong>on</strong>g>Visualiner</str<strong>on</strong>g> isoperated.Note: some automotive markets not specificallyidentified <strong>on</strong> this screen have vehicles from a varietyof sources. It may be necessary to change databasesin order to locate specificati<strong>on</strong>s <strong>on</strong> somevehicles.Page 37
5. Units of Measure -- there are many different unitsof measurement for wheel alignment angles anddimensi<strong>on</strong>s depending <strong>on</strong> local practices, vehiclemanufacturer requirements, or operator preference.Choose Units of Measure from the Setup Menu toselect the units of measure as needed. Once aprescribed unit of measure has been chosen, allreadings and specificati<strong>on</strong>s will be stated in thoseunits.Units of Measure Menu -- the choices are:Toe units -- specify the units in which all toe anglemeasurements will be displayed.Angle units -- specify the units in which all angularmeasurements will be displayed (caster, camber,SAI, included angle, thrust angle, etc.).Linear units -- specify the units in which all linearmeasurements will be displayed (setback, vehicledimensi<strong>on</strong>s, etc.)Resoluti<strong>on</strong> -- specify what resoluti<strong>on</strong> all <strong>on</strong>-screendigital displays will have5a. Toe Units Selecti<strong>on</strong> -- move the highlight barover the toe units best suited to the operator's requirementsand press Enter. The choices are, with examples:Degrees, Decimal -- 0.5 degreesDegrees and Minutes -- 0' 30"Inch Fracti<strong>on</strong>al -- 1/4"Inch Decimal -- 0.25"mm, (14" rim) -- European metric display -- 20 mmmm, (28" tire) -- US metric display -- 20 mmInput tire diameter -- prior to bringing up toe specificati<strong>on</strong>sduring the alignment program, the <str<strong>on</strong>g>Visualiner</str<strong>on</strong>g>will ask for the actual vehicle tire diameter. The toespecs and readings will then be calculated based <strong>on</strong>that input value.Page 38
5b. Angle Units Selecti<strong>on</strong> -- move the highlight barover the angle units best suited to the operator'srequirements and press Enter. The choices are, withexamples:Degrees, Decimal -- 0.5 degreesDegrees and Minutes -- 0' 30"Degrees, Fracti<strong>on</strong>al -- 1/2 degreeAll specificati<strong>on</strong>s, <strong>on</strong> screen readings, and printoutswill be in the chosen units.5c. Linear Units -- select the units for any linearbasedmeasurements during the alignment program.Choices are English "Inches" or metric "MM" millimeters.5d. Resoluti<strong>on</strong> Selecti<strong>on</strong> -- use the Resoluti<strong>on</strong>Menu to choose how digital displays are to be readduring the alignment program. Choices are Normal( 0.10 degree or hundredths of a degree) or High ( 0.01degree or tenths of a degree) resoluti<strong>on</strong>. Regardlessof choice it w<strong>on</strong>'t effect the accuracy of the <str<strong>on</strong>g>Visualiner</str<strong>on</strong>g>.The selecti<strong>on</strong> will effect the way Alignment readingsare viewed. Adjustments using a 0.1 degree resoluti<strong>on</strong>will be easier to obtain than when using the 0.01degree setting. Aligning the car to within a hundredsof a degree requires a greater degree of precisi<strong>on</strong> toobtain exact readings.Page 39
6. Date / Clock -- The last item <strong>on</strong> the Setup Menusets the Date and Clock and the desired format fordisplaying them. The <str<strong>on</strong>g>Visualiner</str<strong>on</strong>g> <str<strong>on</strong>g>Series</str<strong>on</strong>g> c<strong>on</strong>tains aninternal clock, but it may be necessary to reset theclock after time z<strong>on</strong>e changes or if the computer hasbeen reset for some reas<strong>on</strong>. From the Setup Menu,place the highlight bar around the "Date / Clock" itemand press Enter.Date / Clock Menu -- the choices are:Set clock -- set the m<strong>on</strong>th, day, year, hour, andminute. Adjust the clock using soft-keys #2 [-] toadjust the time backwards and #3 [+] to advance thetime. Use the up/down arrow keys to highlight eachitem.Time format -- choose 24 hour or AM/PMDate format -- choose the desired style for the dateDate order -- choose the order in which the day,m<strong>on</strong>th, and year appear when the date is displayed.This completes the customizing of the <str<strong>on</strong>g>Visualiner</str<strong>on</strong>g> <str<strong>on</strong>g>Series</str<strong>on</strong>g> Aligner. Going through the Setup is an excellent wayto see how easy it is to navigate the <str<strong>on</strong>g>Visualiner</str<strong>on</strong>g> <str<strong>on</strong>g>Series</str<strong>on</strong>g>. Everything needed to operate the aligner is either <strong>on</strong>the menu or a further explanati<strong>on</strong> can be accessed with the use of the Help Key. Now that the <str<strong>on</strong>g>Visualiner</str<strong>on</strong>g> issetup and ready to operate, proceed to the User Guide porti<strong>on</strong> of this manual to learn how to complete a wheelalignment using the many powerful and easy-to-use software features.HELPUse the Help functi<strong>on</strong> should you require further assistance <strong>on</strong> Setup procedures.The <str<strong>on</strong>g>Visualiner</str<strong>on</strong>g> has a unique operator help system which is designed to provideinstant access to informati<strong>on</strong> relative to the functi<strong>on</strong> being used. Use this any timeyou require further assistance by simply pressing the Help key.Page 40
(Blank Page)
(Blank Page)
TM<str<strong>on</strong>g>Visualiner</str<strong>on</strong>g> <str<strong>on</strong>g>Series</str<strong>on</strong>g>Operati<strong>on</strong> Instructi<strong>on</strong>s
(Blank Page)
Introducti<strong>on</strong>The <str<strong>on</strong>g>Visualiner</str<strong>on</strong>g> <str<strong>on</strong>g>Series</str<strong>on</strong>g> Aligner assists the automotivetechnician through all aspects of thewheel alignment from gathering of customerinformati<strong>on</strong>, performing vehicle inspecti<strong>on</strong>s,measuring the important wheel alignmentangles, and assisting with vehicle adjustmentsif necessary to correct any out of specificati<strong>on</strong>c<strong>on</strong>diti<strong>on</strong>s.The <str<strong>on</strong>g>Visualiner</str<strong>on</strong>g> <str<strong>on</strong>g>Series</str<strong>on</strong>g> software is "menu driven",meaning that each screen c<strong>on</strong>tains severalopti<strong>on</strong>s or selecti<strong>on</strong>s to choose from. In mostcases the instructi<strong>on</strong>s <strong>on</strong> screen will describewhat acti<strong>on</strong>s to take next. Follow these instructi<strong>on</strong>scarefully to insure good results.The following pages outline the steps to performa complete wheel alignment. The first porti<strong>on</strong>details the "programmed steps" to gather allnecessary alignment readings. These stepsare c<strong>on</strong>sistent with accepted wheel alignmentpractices in the industry. In some cases thesesteps can be eliminated or skipped in order tospeed up the gathering of alignment readings(see Setup opti<strong>on</strong>s in secti<strong>on</strong> 2).The sec<strong>on</strong>d porti<strong>on</strong> describes the many featuresdesigned to assist the technician withdiagnosing and correcting any vehicle alignmentproblems. If at any time there is a questi<strong>on</strong>during the alignment process, press the Helpkey to access the operator help screens.Note: this manual covers all available softwarefeatures of the <str<strong>on</strong>g>Visualiner</str<strong>on</strong>g> up to CD-ROM release Versi<strong>on</strong> 4.1. Earlier versi<strong>on</strong>sand lower levels of software may not c<strong>on</strong>tainall the features found in this manual.C<strong>on</strong>sult John Bean Technical Support ifthere are questi<strong>on</strong>s regarding particularfeatures.Page 45
(Blank Page)
Steps To Performing A Quality 4 Wheel AlignmentThere are many reas<strong>on</strong>s why a wheel alignment maybe performed <strong>on</strong> a vehicle such as:Accelerated or uneven tire wearPulls, wandering, or other steering orhandling problemsReplacement of worn suspensi<strong>on</strong> orsteering system comp<strong>on</strong>entsAfter collisi<strong>on</strong> repairsRoutine vehicle maintenanceRegardless of the reas<strong>on</strong>s for alignment, it is importantthat the technician perform the steps necessaryto address and correct all problems.1. Gather informati<strong>on</strong> from the vehicle owner --ask about any drivability problems that may besymptoms of misalignment. Inquire if the vehicle hasbeen in a collisi<strong>on</strong> or has had any recent partsreplaced.2. Perform a test drive to verify owner's complaint -- try to recreate the problem. If unable to duplicate,have the vehicle owner explain further or have him/herdrive with you.3. Inspect the tires for any signs of abnormal wear -- the tires usually reflect any misalignment c<strong>on</strong>diti<strong>on</strong>s.4. Perform a thorough inspecti<strong>on</strong> of suspensi<strong>on</strong> andsteering system comp<strong>on</strong>ents -- many misalignmentproblems are created by worn or damaged comp<strong>on</strong>ents.Replace defective parts prior to performing thealignment. Always check tire pressure and rideheight. Refer to manufacturer recommendati<strong>on</strong>s andtolerances when checking suspensi<strong>on</strong> and steeringsystems.5. Make sure the wheel alignment equipment isaccurate -- periodic maintenance of alignment equipmentis essential -- regular instrumentati<strong>on</strong> calibrati<strong>on</strong>,a level lift surface, free moving turntables andrear slip plates, etc.6. Place vehicle <strong>on</strong> the alignment lift -- center thevehicle <strong>on</strong> the lift and turntables. Place the lift at asolid, level positi<strong>on</strong>.7. Choose the proper alignment type for the vehicle-- the best alignment for the majority of vehicles is a4 wheel alignment.8. Perform runout compensati<strong>on</strong> -- the purpose ofperforming runout is to eliminate any measurementerrors due to the wheel and clamp mounting. Take thetime necessary to perform runout correctly.9. Measure caster, camber, and toe -- follow theprocedures <strong>on</strong> the screen carefully. Refer to Operator'sManuals for further instructi<strong>on</strong>s.10. Determine what needs to be d<strong>on</strong>e -- study themeasured angles for the fr<strong>on</strong>t and rear prior to performingcorrecti<strong>on</strong>s to match misalignment with anysymptoms discovered earlier. If necessary, use the<str<strong>on</strong>g>Visualiner</str<strong>on</strong>g>'s advanced functi<strong>on</strong>s to diagnose furtherproblems (such as SAI / Included Angle, Toe out <strong>on</strong>Turns, Toe Curve Change, etc.). Examine the vehicleand any reference materials to determine the proceduresfor angle correcti<strong>on</strong>s. Determine what itemsare needed to correct any problems (i.e. aftermarketkits, special tools, etc.).11. Make any needed angle correcti<strong>on</strong>s -- center thesteering wheel carefully before adjusting toe. If thefr<strong>on</strong>t total toe is bey<strong>on</strong>d 1/2 o (1/4") in or out, firstadjust the fr<strong>on</strong>t toe to zero. Then, use this order ofadjustment:a. Rear camberb. Rear toec. Fr<strong>on</strong>t casterd. Fr<strong>on</strong>t cambere. Fr<strong>on</strong>t toeUse the many adjustment assistant features built intothe <str<strong>on</strong>g>Visualiner</str<strong>on</strong>g> to aid with proper angle correcti<strong>on</strong>.After performing any caster adjustments, re-measureusing the 20 o sweep to verify the results.12. Re-center the steering wheel and readjust fr<strong>on</strong>ttoe if needed -- crooked steering wheels are theleading cause of customer dissatisfacti<strong>on</strong> with wheelalignments. This simple step will minimize thenumber of comebacks.13. Print the results -- the printout is useful forshowing the customer before and after results. Manyshops keep a printout <strong>on</strong> file for future reference.14. Perform a test drive to verify proper alignmentHave all the owner's drivability complaints been solved?Does the vehicle drive straight? Is the steering wheelstraight? If necessary, bring the vehicle back <strong>on</strong> thealignment lift to correct any issues.Page 47
Wheel Clamps/Measuring HeadsPrior to beginning an alignment, attach each wheel clamp/head assembly to a vehicle wheel. The heads withthe extended booms are placed <strong>on</strong> the fr<strong>on</strong>t wheel with the booms pointing forward. Note there are several waysthe wheel clamps can be attached to accommodate various wheel c<strong>on</strong>figurati<strong>on</strong>s..Opti<strong>on</strong> 1This opti<strong>on</strong> is used <strong>on</strong> many standard stamped steel rims. Use the knife edgeas shown. Apply pressure to secure the clamp from the inside out by turningthe lock knob several turns clockwise.Opti<strong>on</strong> 2This opti<strong>on</strong> is used <strong>on</strong> many custom rims with painted or polished surfacesthat need extra care. Set the rubberized surface inside the wheel rim asshown. Apply pressure to secure the clamp from the inside out by turningthe lock knob several turns clockwise.Opti<strong>on</strong> 3This opti<strong>on</strong> is used <strong>on</strong> many standard and custom rims with no inside beadsurface. Use the adapters supplied with the wheel clamp to insert betweenthe wheel tire and the outside edge of the rim. Secure the clamp by turningthe lock knob several turns counter clockwise.Opti<strong>on</strong> 4This opti<strong>on</strong> is used <strong>on</strong> many standard and custom rims as above with lowprofile tires where a thin adapter is required between the wheels tire and rim.Use as opti<strong>on</strong> 3.Opti<strong>on</strong> 5This opti<strong>on</strong> is used <strong>on</strong> some standard and custom rims with no opportunityto clamp from the outside in and very narrow edges <strong>on</strong> the wheel rim. Clampfrom the inside out. Use as opti<strong>on</strong> 1.NOTE: Always secure the wheel clamps using the supplied safetystraps <strong>on</strong>to each wheel to insure the head does not fall off the vehicle.An opti<strong>on</strong>al Dual Wheel Offset Adapter is available for some pickups, motor homes and larger trucks toaccommodate the difference in track width in the rear due to the dual wheel c<strong>on</strong>figurati<strong>on</strong>. To use this adapter,remove the head assembly from the wheel clamp shaft. Place the Offset Adapter <strong>on</strong> the clamp shaft and tightenthe locking knob. Place the head <strong>on</strong> the adapter shaft, tighten the knob, and mount the clamp using <strong>on</strong>e ofthe methods above.Page 48
○ ○ ○ ○ ○ ○ ○ ○ ○ ○ ○ ○ ○ ○ ○ ○ ○ ○ ○ ○ ○ ○ ○ ○ ○ ○ ○ ○ ○ ○○ ○ ○ ○ ○ ○ ○ ○ ○ ○ ○ ○ ○ ○ ○ ○ ○ ○ ○ ○ ○ ○ ○ ○ ○ ○ ○ ○ ○ ○Performing a Wheel AlignmentStep 1. Main Menu -- Begin AlignmentPerforming a wheel alignment begins at the <str<strong>on</strong>g>Visualiner</str<strong>on</strong>g>Main Menu screen. Place the highlight boxaround "Begin Alignment" and press Enter.TIP: The fastest way to see live readings <strong>on</strong> a vehicleis by pressing soft-key #3, "Readings", <strong>on</strong> the MainMenu screen. This will proceed directly to runoutcompensati<strong>on</strong> and then directly to "All Readings" anddisplay camber, toe, and thrust angle. There is novehicle or customer informati<strong>on</strong> when Readings isused.Step 2. Clear Aligner MenuThis menu gives the choice to start a new alignmentor c<strong>on</strong>tinue with an alignment already in progress. If"Begin new alignment (RESET)” is selected the computermemory of the previous alignment is erasedallowing a new customer and vehicle to be setup.If "C<strong>on</strong>tinue current alignment" is selected, all customer,vehicle, and alignment measurements areretained and the software returns to the alignmentreadings screens.Step 3. Begin Alignment MenuThis menu is where the type of alignment is selected.The choices are:Premium 4 wheel (thrust line) -- this type ofalignment measures all angles <strong>on</strong> all 4 wheels andis preferred for most vehicles.Fr<strong>on</strong>t (steering may not be level) -- uses 4 headsbut does not measure rear wheel or thrust angles,creating the possibility of a crooked steering wheel.Quick readings -- goes to a sub-menu for selecti<strong>on</strong>of fr<strong>on</strong>t, rear or all readings and eliminates all prealignmentsetup steps.Driver complaints -- a symptom-based troubleshootingprogram as an aid to diagnosing drivabilityproblems.Page 49
○ ○ ○ ○ ○ ○ ○ ○ ○ ○ ○ ○ ○ ○ ○ ○ ○ ○ ○ ○ ○ ○ ○ ○ ○ ○ ○ ○ ○ ○○ ○ ○ ○ ○ ○ ○ ○ ○ ○ ○ ○ ○ ○ ○ ○ ○ ○ ○ ○ ○ ○ ○ ○ ○ ○ ○ ○ ○ ○Performing a Wheel Alignment ... c<strong>on</strong>tinuedTIP: Even if the customer is paying for a "Fr<strong>on</strong>tWheel Alignment" <strong>on</strong>ly, go ahead and measure theangles for all four wheels. It may reveal a problem inthe rear that can be pointed out and sold, andprovides the opportunity to get a straight steeringwheel.Step 4. Customer MenuThis menu gives the choice of setting up all newinformati<strong>on</strong> for a new customer or utilizing a previouslysetup customer that is stored in the aligner'sdatabase (opti<strong>on</strong>al feature <strong>on</strong> some models). To usethe customer database software, refer to secti<strong>on</strong> 5"Files -- Customer Database" of this manual. Also,the opti<strong>on</strong> to c<strong>on</strong>tinue the previous alignment is givenhere.Step 5. Customer DataIf the <str<strong>on</strong>g>Visualiner</str<strong>on</strong>g> is equipped with the printer package(opti<strong>on</strong>al <strong>on</strong> some models) or the Customer Databaseopti<strong>on</strong>, this screen will appear next. It allows entry ofall pertinent data about the customer and his vehicle.With the database software all this informati<strong>on</strong> can besaved for later recall. For the customer printout, <strong>on</strong>lythe fields in red are printed, so it is not necessary toenter the other informati<strong>on</strong> unless the informati<strong>on</strong> isto be saved in the Customer Database. Soft-keys #1and #3 are used with the database feature, while #2allows any typed informati<strong>on</strong> <strong>on</strong>-screen to be cleared.Once completed with this screen, press soft-key #4to c<strong>on</strong>tinue.Not Saved:When using a <str<strong>on</strong>g>Visualiner</str<strong>on</strong>g> with the customer databaseopti<strong>on</strong>, this message will appear when a new alignmentis selected and the current work has not beensaved. The selecti<strong>on</strong>s are to "Save" or to "Discard".Saving will secure the informati<strong>on</strong> into the disk database.Pressing discard will erase all previous alignmentinformati<strong>on</strong> in the system.Page 50
○ ○ ○ ○ ○ ○ ○ ○ ○ ○ ○ ○ ○ ○ ○ ○ ○ ○ ○ ○ ○ ○ ○ ○ ○ ○ ○ ○ ○ ○○ ○ ○ ○ ○ ○ ○ ○ ○ ○ ○ ○ ○ ○ ○ ○ ○ ○ ○ ○ ○ ○ ○ ○ ○ ○ ○ ○ ○ ○Performing a Wheel Alignment ... c<strong>on</strong>tinuedStep 6. Vehicle ManufacturerThis screen shows the vehicle manufacturers in the<str<strong>on</strong>g>Visualiner</str<strong>on</strong>g> specificati<strong>on</strong> database. Move the selecti<strong>on</strong>bar up, down or sideways with the arrow directi<strong>on</strong>keys to select the manufacturer and press the “Enter”key. The vertical bar <strong>on</strong> the right indicates there areadditi<strong>on</strong>al choices <strong>on</strong> a sec<strong>on</strong>d screen. Use the"Page Down" key <strong>on</strong> the keyboard or use the downarrow key <strong>on</strong> any keypad to scroll past the last entry<strong>on</strong> this screen. Selecting soft-key #1 accesses "custom"specificati<strong>on</strong>s setup by the technician for vehiclesnot in the database. Selecting soft-key #2allows access to "floppy stored custom" specs (opti<strong>on</strong>al).Soft-key #4 c<strong>on</strong>tinues past this screen withoutany entry.TIP: To move to the manufacturer selecti<strong>on</strong> quicker,using the keyboard, press the first letter of thecompany name. This causes the selecti<strong>on</strong> bar tomove directly to the first name starting with that letter(i.e. press "H" - moves to H<strong>on</strong>da).Step 7. Vehicle YearSelect the year of manufacture using soft-keys #2and #3 to move up or down to the desired year, thenpress the Enter key. Pressing the Up or Down arrowkey <strong>on</strong> the keyboard also moves the year choice.Step 8. Vehicle ModelMove the selecti<strong>on</strong> bar up or down with the directi<strong>on</strong>keys to select the model of the vehicle, then pressEnter.Custom Specificati<strong>on</strong>s -- alignment specificati<strong>on</strong>sthat have been added by the operator will reside in aspecial database. To retrieve these specificati<strong>on</strong>s goto the Vehicle Manufacturers selecti<strong>on</strong> screen andpress soft-key #1 “Custom”. A new set of customspecificati<strong>on</strong>s can be added to the custom databasefrom this screen and also by editing standard manufacturersspecificati<strong>on</strong>s.Page 51
○ ○ ○ ○ ○ ○ ○ ○ ○ ○ ○ ○ ○ ○ ○ ○ ○ ○ ○ ○ ○ ○ ○ ○ ○ ○ ○ ○ ○ ○○ ○ ○ ○ ○ ○ ○ ○ ○ ○ ○ ○ ○ ○ ○ ○ ○ ○ ○ ○ ○ ○ ○ ○ ○ ○ ○ ○ ○ ○Performing a Wheel Alignment ... c<strong>on</strong>tinuedStep 9. Vehicle Specificati<strong>on</strong>sThis screen displays the Year, Manufacturer, andModel of the selected vehicle with Minimum, Preferredand Maximum specificati<strong>on</strong>s for the fr<strong>on</strong>t andrear wheels. Dashes in any positi<strong>on</strong> indicate thereare no manufacturer specificati<strong>on</strong>s for that wheel orangle. For angles not displayed <strong>on</strong> this screen, referto the specificati<strong>on</strong> book included in the literaturepackage of the <str<strong>on</strong>g>Visualiner</str<strong>on</strong>g>. Soft-key #2 allows thetechnician to view an illustrati<strong>on</strong> of the vehicle'salignment angle correcti<strong>on</strong> method, while #3 allowsediting of the specificati<strong>on</strong>s prior to beginning themeasurements.Illustrate Adjustment -- illustrati<strong>on</strong>s of adjustmentpossibilities can be viewed by pressing soft-key #2“Illust”. If more than <strong>on</strong>e picture is available (separatecamber, caster and toe adjustments) the Enter key isused to move forward through the illustrati<strong>on</strong>s. Tomove back press the "Page Back" key, and to leavethe illustrati<strong>on</strong>s at any time use the "NO" key found<strong>on</strong> any keypad. With CD-ROM software, soft-key #2,"Animate", will bring up a computer animated sequencethat shows movement of the parts and suspensi<strong>on</strong>to better illustrate the alignment adjustment.Edit -- it is possible to modify or edit specificati<strong>on</strong>sby pressing the “Edit” soft-key. A selecti<strong>on</strong> box willappear <strong>on</strong> the first specificati<strong>on</strong> value. Using theappropriate + or - soft-keys, change the value until thedesired specificati<strong>on</strong> is displayed. Move to any additi<strong>on</strong>alvalues to be modified. After editing is complete,these specs can be saved as Custom specificati<strong>on</strong>sor utilized for <strong>on</strong>ly the current alignment. The vehiclespecificati<strong>on</strong>s can be restored to original by pressingthe soft-key “Restore” if they are edited by mistake.The “C<strong>on</strong>tinue” soft-key will advance to the programmednext step.TIP: Creating Custom Specificati<strong>on</strong>s -- OEM alignmentspecificati<strong>on</strong>s can change or may not be optimalfor certain vehicles based <strong>on</strong> your experience.Creating a custom entry for popular vehicles will savetime when customers come back for alignment.Page 52
Performing a Wheel Alignment ... c<strong>on</strong>tinuedStep 10. Inspecti<strong>on</strong> MenusThe Inspecti<strong>on</strong> Menu c<strong>on</strong>tains six choices of vehicleinspecti<strong>on</strong> lists. These lists allow the alignmenttechnician to perform and print the necessary prealignmentchecks. Select the appropriate list usingthe directi<strong>on</strong>al c<strong>on</strong>trol keys to move the selecti<strong>on</strong>box. Press “Enter” and the list will appear. If n<strong>on</strong>e ofthe inspecti<strong>on</strong>s are to be performed use soft-key #4“C<strong>on</strong>tinue” to advance in the program.These inspecti<strong>on</strong> reports are a valuable tool for alignmentspecific or n<strong>on</strong>-related reporting of vehicle problemareas. These reports can be retained for shopfiles or given to the customer as a service sales toolto reinforce his comprehensi<strong>on</strong> of the work performed,or the work necessary before an alignment can beperformed. In many cases worn or damaged comp<strong>on</strong>entswill affect the quality of the wheel alignment.Pre-alignment Inspecti<strong>on</strong> -- as an example, toenter informati<strong>on</strong> about the vehicle's suspensi<strong>on</strong> system,use the appropriate soft-key to indicate "Check","Service" or "Replace" for each item <strong>on</strong> the list.Soft-key #4 "Blank" is used to “skip” an item if itdoesn’t exist <strong>on</strong> the vehicle. The vertical bar <strong>on</strong> theright indicates there are additi<strong>on</strong>al items <strong>on</strong> a sec<strong>on</strong>dpage. A printout of the inspecti<strong>on</strong> results can beobtained by pressing the “Print” soft-key. Only theinspecti<strong>on</strong> lists selected and completed are includedin the final inspecti<strong>on</strong> list printout.Tire inspecti<strong>on</strong> -- the tire inspecti<strong>on</strong> c<strong>on</strong>tains aseries of checks for wear or damage. Tire problemsare usually a good indicator of alignment and maintenanceproblems. Look for excessive wear or unusualwear patterns. Complete the list for each individualtire, then use the appropriate soft-key to move <strong>on</strong> tothe next tire. Advance the program at any time usingthe #4 “C<strong>on</strong>tinue” soft-key. Tire pressure and size canbe entered for each tire, by the c<strong>on</strong>sole keyboard(opti<strong>on</strong>al).Page 53
Performing a Wheel Alignment ... c<strong>on</strong>tinuedBrake Inspecti<strong>on</strong> -- the Brake Inspecti<strong>on</strong> listc<strong>on</strong>tains a series of items to check for wear ordamage. Use the appropriate soft-key to indicate"Check", "Service" or "Replace" for each item <strong>on</strong>the list. Soft-key #4 "Blank" is used to “skip” an itemif it doesn’t exist <strong>on</strong> the vehicle. The vertical bar <strong>on</strong> theright indicates there are additi<strong>on</strong>al items <strong>on</strong> a sec<strong>on</strong>dpage.Under Car Inspecti<strong>on</strong> -- an under car inspecti<strong>on</strong>can offer many opportunities for the technician tofurther his services to the customer. Mufflers, catalyticc<strong>on</strong>vertors, U-joints, and transmissi<strong>on</strong> mountsare a few of many items under the vehicle that can beinspected and reported to the customer.Under Hood Inspecti<strong>on</strong> -- an additi<strong>on</strong>al area to bec<strong>on</strong>sidered is under the hood. A thorough vehicleinspecti<strong>on</strong> is a service to the customer to insurereliable and safe operati<strong>on</strong>, while giving the opportunityto generate additi<strong>on</strong>al revenues to the repairshop.Page 54
Performing a Wheel Alignment ... c<strong>on</strong>tinuedCourtesy Inspecti<strong>on</strong> -- this inspecti<strong>on</strong> menu allowsn<strong>on</strong>-alignment and safety related items to be inspectedas a courtesy to the vehicle's owner. Someof the items included are fuses, seat belts, jacks,mirrors, etc.Page 55
1Step 11. Runout Compensati<strong>on</strong>Compensating for the amount of runout of vehiclewheel assemblies is an important factor in the alignmentprocess. If not correctly determined, there willbe errors in the displayed camber and toe angles.John Bean utilizes a runout procedure that calculatesa true plane <strong>on</strong> the wheel assembly by measuringvariati<strong>on</strong>s in toe and camber planes during a 360 deg.rotati<strong>on</strong> of the wheel.2Attach each wheel clamp/head assembly to a vehiclewheel; the heads with the extendedbooms are placed <strong>on</strong>the fr<strong>on</strong>t wheel with the boomspointing forward.3RunoutkeyRunout ProcedureTo perform wheel runout, raise the vehicle wheels offthe alignment rack surface using air jacks or othermethod to allow the wheels to rotate freely. Followsteps 1 through 3 carefully.After the first time the runout butt<strong>on</strong> is pressed a lightwill appear <strong>on</strong> the "Runout" key <strong>on</strong> the head, indicatingthe aligner is in the runout mode. As the runoutkey is pressed at positi<strong>on</strong> 2, the light will blink. Atpositi<strong>on</strong> 3 the light will blink and then go off, indicatingthe runout process is complete for that wheel. If therunout indicator light does not go out after step 3,something has g<strong>on</strong>e wr<strong>on</strong>g. Press the runout keyuntil the light goes out, then repeat the complete 1-2-3 runout steps for that wheel.The computer screen <strong>on</strong> the aligner will indicate thestatus of the wheel runout. Repeat these steps for allwheels.1. As indicated <strong>on</strong> the drawing above , turn thewheel until the stamped-in number "1" is showing<strong>on</strong> the wheel-clamp center slide. Hold the wheelassembly here and press the "Runout" key <strong>on</strong> thehead keypad.2. Turn the wheel until the stamped-in number "2"is showing <strong>on</strong> the wheel-clamp center slide (180deg). Hold the wheel assembly here and press the"Runout" key <strong>on</strong> the head keypad.3. Turn the wheel until the stamped-in number "3"is showing <strong>on</strong> the wheel-clamp center slide (90deg). Hold the wheel assembly here and press the"Runout" key <strong>on</strong> the head keypad.Page 56
Performing a Wheel Alignment ... c<strong>on</strong>tinuedThe Runout Compensati<strong>on</strong> screen shows each wheelof the vehicle. As runout is successfully completedeach wheel turns to a green color. If a moderateamount of wheel runout is detected, but not enough toinfluence the alignment results, a "Marginal Runout"message will appear and the wheel will turn yellow. Itis acceptable to c<strong>on</strong>tinue at this point. If a highamount of runout is detected, an "Excessive Runout"message will appear <strong>on</strong>-screen and the wheel will turnred. This problem must be corrected prior toproceeding. Excessive runout can be caused byincorrect wheel clamp mounting, a bent clamp, a bentor loose wheel, or a problem inside the measuringhead. Once runout is completed <strong>on</strong> all wheels, lowerthe vehicle and press "Enter". On the CD-ROMsoftware versi<strong>on</strong>, soft-key #2 will provide visual instructi<strong>on</strong>sfor the runout procedure.Here are some important notes regarding runout compensati<strong>on</strong> <strong>on</strong> the <str<strong>on</strong>g>Visualiner</str<strong>on</strong>g> <str<strong>on</strong>g>Series</str<strong>on</strong>g>:> If "two heads" has been selected in the aligner Setup, <strong>on</strong>ly two wheels will be shown.> Runout can be completed or updated at any time and from any screen in the aligner. It is not necessaryto start over if runout needs to be taken again. Any time a wheel is removed from the vehicle, or the clampis removed from the wheel, runout compensati<strong>on</strong> must be repeated <strong>on</strong> that wheel <strong>on</strong>ly.> The wheel clamp must remain in the straight up positi<strong>on</strong> (#3) at the end of the runout procedure. Do notrotate the clamp away from straight up for any reas<strong>on</strong>. Be careful of many rear wheel and 4 wheel driveaxles where turning <strong>on</strong>e raised wheel causes another to move.> It is not possible to "fake" runout compensati<strong>on</strong>. An "Invalid!" display <strong>on</strong> the screen means a wheel hasnot been properly compensated.> Do not skip or shortcut the runout compensati<strong>on</strong> process in any way. It is an important part of obtainingaccurate alignment angles.After runout compensati<strong>on</strong> is completed the aligner is ready to measure the vehicle's wheel alignment angles,beginning with caster.Page 57
○ ○ ○ ○ ○ ○ ○ ○ ○ ○ ○ ○ ○ ○ ○ ○ ○ ○ ○ ○ ○ ○ ○ ○ ○ ○ ○ ○ ○ ○○ ○ ○ ○ ○ ○ ○ ○ ○ ○ ○ ○ ○ ○ ○ ○ ○ ○ ○ ○ ○ ○ ○ ○ ○ ○ ○ ○ ○ ○Performing a Wheel Alignment ... c<strong>on</strong>tinuedThe "Loss of Communicati<strong>on</strong>" ic<strong>on</strong> will appear <strong>on</strong>screenwhen a head interc<strong>on</strong>nect cable is disc<strong>on</strong>nectedor a head loses communicati<strong>on</strong> with the maincomputer. This situati<strong>on</strong> can occur at any time duringthe alignment program and must be corrected prior toproceeding. Runout values are retained and accuratereadings are restored as so<strong>on</strong> as valid communicati<strong>on</strong>sis established.Step 12. Measure CasterThe caster angle is measured by sweeping through a20 degree turn of the fr<strong>on</strong>t wheels. The softwareguides the operator through the steps <strong>on</strong>-screen. Thecaster sweep screens show a graphic of the wheelswith the directi<strong>on</strong> they should point, an arrow toindicate the turn directi<strong>on</strong>, and a "stop light" thatchanges from green to red, with yellow in the middle,as the turning angle is reached. Always follow thearrow directi<strong>on</strong> and hold the wheel steady until thewheel turns green and the screen advances.Steer Straight Ahead -- if the fr<strong>on</strong>t wheels are notfacing straight ahead, the first step of the castersweep directs them properly.Automatic or Manual Caster sweep -- the Automaticor the Manual caster sweep mode can beselected anytime during the caster swing procedureby pressing the soft-key #1. The mode presentlyselected will be indicated in the top center of thedisplay. The Automatic mode utilizes the opticalsensors to obtain the 10 degree turning angles andautomatically progresses in the program when thisangle is obtained. The Manual mode utilizes theturntable scales to indicate the appropriate 10 degreeturn and the "Enter" butt<strong>on</strong> has to be pressed toprogress in the program.TIP: Most vehicles step through the automatic casterswing mode without a hitch. If a problem is experienced,try switching to the manual mode - there is nodifference in accuracy. Also, even if the aligner toesystem is out of service the 10 0 turn point can beobtained from the rack turntables.Page 58
○ ○ ○ ○ ○ ○ ○ ○ ○ ○ ○ ○ ○ ○ ○ ○ ○ ○ ○ ○ ○ ○ ○ ○ ○ ○ ○ ○ ○ ○○ ○ ○ ○ ○ ○ ○ ○ ○ ○ ○ ○ ○ ○ ○ ○ ○ ○ ○ ○ ○ ○ ○ ○ ○ ○ ○ ○ ○ ○Performing a Wheel Alignment ... c<strong>on</strong>tinuedTurn 10 degrees left -- after starting out with thefr<strong>on</strong>t wheels facing straight ahead, the screen willchange to indicate a turn to 10 degrees left. As theturning angle nears 10 degrees the "stop light" willchange from green to yellow. When the wheels reachexactly 10 degrees the "stop light" indicator willchange to red and the wheel graphic will change togreen, meaning the measurement has been taken.Turn 10 degrees right -- the screen will change toindicate a turn past straight ahead to 10 degreesright. The "stop light" will behave as above as the 10degree angle is approached. The wheel graphics willchange to green as the measurement is taken.TIP: Improving caster measurement accuracy:> Operator variati<strong>on</strong>s during sweep -- some comm<strong>on</strong>things are pulling/pushing the wheel differentlyand failure to reach the 10 degree mark exactly andhold steady until the measurement is taken. Some ofthese variati<strong>on</strong>s can be minimized by utilizing abrake pedal depressor during the caster sweep toensure the wheels do not roll or rock during the turns.In additi<strong>on</strong>, utilizing the steering wheel to make theturns will take the operators hands and arms awayfrom the measurement process.> Vehicle suspensi<strong>on</strong> / steering variati<strong>on</strong>s -- if thevehicle has play or looseness in suspensi<strong>on</strong> and/orsteering comp<strong>on</strong>ents, this can affect the reacti<strong>on</strong> andtilt of the wheel during turns.> Turntable / Rack c<strong>on</strong>diti<strong>on</strong> -- the c<strong>on</strong>diti<strong>on</strong> of theturntables is critical. They must be free moving andflat with all bearing in place. Also, the vehicle wheelsmust be positi<strong>on</strong>ed in the center of the turntables toensure flatness during the turn.Steer Straight Ahead -- after the caster angle ismeasured through sweeping the wheels, it is necessaryto return to a straight ahead positi<strong>on</strong> for measuringthe camber and toe angles. Follow the arrowdirecti<strong>on</strong> until the "stop light" indicators and thereverse colors changing of the wheels graphic indicatesthe wheels are pointing straight ahead.Page 59
Performing a Wheel Alignment ... c<strong>on</strong>tinuedAdvanced DiagnosticsAdvanced diagnostics is a troubleshooting tool thattakes the alignment measurements, compares themto manufacturers specificati<strong>on</strong>, and describes potentialvehicle problems. The alignment computersamples all the readings and makes a c<strong>on</strong>clusi<strong>on</strong> ofa potential problem. This diagnostic screen for thefr<strong>on</strong>t and rear of the vehicle can be accessed bypressing soft-key #4 "Complaint" <strong>on</strong> any readingsscreen and the "Advanced diagnostics" from theDriver Complaint Menu. Press Enter to move throughthe diagnostics functi<strong>on</strong>s for the fr<strong>on</strong>t and rear of thevehicle. If desired, Advanced Diagnostics can becomepart of the "alignment path" by using the properSetup opti<strong>on</strong>s (see page 34).Bent PartsThe suspensi<strong>on</strong> angles SAI, Included Angle, andcamber have been used for years to diagnose bentparts. These angles were manually charted <strong>on</strong> paperwith the technician making the c<strong>on</strong>clusi<strong>on</strong> based <strong>on</strong>his measurements. This technique has been incorporatedinto the <str<strong>on</strong>g>Visualiner</str<strong>on</strong>g> to utilize the power of thecomputer system. Angles are measured and comparedwith vehicle specificati<strong>on</strong>s to determine if aproblem exists. An <strong>on</strong>-screen readout informs thetechnician which comp<strong>on</strong>ents are most likely bent ordamaged. While in the "Advanced diagnostics" secti<strong>on</strong>of the Driver Complaint Menu, keep pressingEnter to view the Bent Parts display for the left and theright sides.NOTE: Operator must perform an SAI/caster swingand specificati<strong>on</strong>s must be entered before an evaluati<strong>on</strong>can be made. If these Advanced Diagnosticsscreens are made part of the alignment path, it isrecommended to c<strong>on</strong>figure the "Alignment Order" tomeasure Caster/SAI simultaneously instead of caster<strong>on</strong>ly. See page 31 for details setup details.Page 60
Performing a Wheel Alignment ... c<strong>on</strong>tinuedStep 13. Rear ReadingsAfter the caster sweep procedure is completed, theRear Readings screen appears. This screen displays,both in meter and numerical format, the anglemeasurements and informati<strong>on</strong> needed to determineif correcti<strong>on</strong>s are necessary. The display is dividedinto three rows: Camber, Toe and Thrust Angle.The columns represent the left and right side of thevehicle. The Camber and Toe meters have minimum,preferred, and maximum specificati<strong>on</strong>s al<strong>on</strong>g the top,a digital readout of live readings, and a color coding toindicate the relati<strong>on</strong>ship of live values to specificati<strong>on</strong>.Grey meters indicate no specificati<strong>on</strong> has beenentered for this angle. Red meters indicate the angleis bey<strong>on</strong>d manufacturer's specificati<strong>on</strong>. Green metersindicate the live values are within the specificati<strong>on</strong>.Cross Value / Total Toe -- the digital readout inbetween the camber meters indicates cross values(side-to-side), the difference between left and rightreadings. This cross value is important <strong>on</strong>many vehicles for proper handling. The digitalreadout between the left and right toe metersindicates the Rear Total Toe (the sum ofindividual toe).CamberMetersGreen MeterIn SpecsCrossValuesSpecificati<strong>on</strong>sMin/Pref/MaxSoft-keys -- two sets of soft-keys are available<strong>on</strong> the Rear and Fr<strong>on</strong>t Readings screens. Toe MetersThese keys can be toggled by using the “ ”key.Thrust Angle#1 - “Measure” - menu for measuring additi<strong>on</strong>alanglesSoft-Keys#2 - “Illust” - to assist the technician, anillustrati<strong>on</strong> of each angle adjustment is displayed#3 - “Adjust” - accesses menus to assist thetechnician with angle correcti<strong>on</strong>s#4 - “Zoom” - brings a highlighted meter to fullscreenGray MeterNo SpecsRed MeterOut of SpecDigital ReadingToggle #1 - “Print” - accesses the print and savedata menuToggle #2 - “Edit” - allows editing of specificati<strong>on</strong>s,customer informati<strong>on</strong>, and inspecti<strong>on</strong>sToggle #3 - “Setup” - allows alterati<strong>on</strong> of any Setupitem during the alignment processToggle #4 - “Complaint” - accesses the DriverComplaint menu for additi<strong>on</strong>al diagnostic helpPage 61
Performing a Wheel Alignment ... c<strong>on</strong>tinuedRear Readings Meter Displays -- the camber, toe,and thrust angle readings are “live” and can bereferenced while making adjustments <strong>on</strong> the vehicle.As the adjustment is made, the meter needle willmove and the digital readout will change. Adjust thevehicle until the desired readings are obtained. As thereadings move from out of specificati<strong>on</strong> to withinspecificati<strong>on</strong>, the meter center color will change fromred to green. Additi<strong>on</strong>al adjustment assistance formany vehicles is obtained through the Adjust Menu(soft-key #3).Zoom -- for easier viewing of any individual metermove the white highlight box to the desired meter withthe arrow keys, then press Zoom. The meter willoccupy the whole screen. The zoom screen c<strong>on</strong>tainsthe specificati<strong>on</strong>s and shows a cross value for referenceto the other side. While zoomed, the arrow keyswill navigate the other meter displays. Press "Unzoom"to return to the complete Rear Readings screen.After viewing the rear readings and, if necessary,making any angle correcti<strong>on</strong>s press "Enter" to moveto the Fr<strong>on</strong>t Readings.Step 14. Prepare for Fr<strong>on</strong>t ReadingsBefore fr<strong>on</strong>t readings are displayed it is necessarythe level the steering wheel and lock it in place usingthe steering wheel holder supplied with the <str<strong>on</strong>g>Visualiner</str<strong>on</strong>g>.In additi<strong>on</strong>al, all measuring heads must beleveled and locked in place. Once these steps arecompleted press Enter to move forward.Page 62
Performing a Wheel Alignment ... c<strong>on</strong>tinuedStep 15. Fr<strong>on</strong>t Readings -- the look of the Fr<strong>on</strong>tReadings screen is similar to the rear. Measuredcaster is displayed with the top meters. Note thisreading is represented by an ic<strong>on</strong> showing the casterreading to be frozen since caster is not a live reading.Camber meters are located in the middle of thescreen and toe meters are at the bottom. Camber andtoe are “live” displays which can be referenced whilemaking adjustments. The left wheel is represented <strong>on</strong>the left meter and right wheel <strong>on</strong> the right. Whenmeasurements are within specificati<strong>on</strong>, the centerporti<strong>on</strong> of the meter will turn green. If red is displayed,the readings are outside of specificati<strong>on</strong>s. Crossvalues are displayed between the caster and cambermeters, while total toe is displayed between theindividual toe meters.Soft-keys -- two sets of soft-keys are available <strong>on</strong> theRear and Fr<strong>on</strong>t Readings screens. These keys can betoggled by using the “ ” key.Specificati<strong>on</strong>sMin/Pref/MaxCross ValueL/R DifferenceRed MeterOut of Specs#1 - “Measure” - menu for measuring additi<strong>on</strong>alangles#2 - “Illust” - to assist the technician, an illustrati<strong>on</strong>of each angle adjustment is displayed#3 - “Adjust” - accesses menus to assist thetechnician with angle correcti<strong>on</strong>s#4 - “Zoom” - brings a highlighted meter to fullscreenCaster MetersCamber MetersToggle #1 - “Print” accesses the print and savedata menuToggle #2 - “Edit” - allows editing of specificati<strong>on</strong>s,customer informati<strong>on</strong>, and inspecti<strong>on</strong>sToggle #3 - “Setup” - allows alterati<strong>on</strong> of anySetup item during the alignment processToggle #4 - “Complaint” - accesses the DriverComplaint menu for additi<strong>on</strong>al diagnostic helpGreen MeterIn SpecsTotal ToeSoftkeys 1-4Toe MetersFr<strong>on</strong>t Angle Adjustments -- the Camber and Toeangle values displayed <strong>on</strong> the meters are live and canbe viewed while making correcti<strong>on</strong>s <strong>on</strong> the vehicle.Caster is a "frozen" value. For assistance with casteradjustments, al<strong>on</strong>g with other functi<strong>on</strong>s that makecamber easier <strong>on</strong> many vehicles, press soft-key #3"Adjust". The Adjust Menu is covered in detail <strong>on</strong>page 71.Page 63
○ ○ ○ ○ ○ ○ ○ ○ ○ ○ ○ ○ ○ ○ ○ ○ ○ ○ ○ ○ ○ ○ ○ ○ ○ ○ ○ ○ ○ ○○ ○ ○ ○ ○ ○ ○ ○ ○ ○ ○ ○ ○ ○ ○ ○ ○ ○ ○ ○ ○ ○ ○ ○ ○ ○ ○ ○ ○ ○Performing a Wheel Alignment ... c<strong>on</strong>tinuedAdjustment Illustrati<strong>on</strong>s -- illustrati<strong>on</strong>s of angleadjustment possibilities can be viewed by pressingthe soft-key #2 “Illust”. If more than <strong>on</strong>e picture isavailable (separate camber, caster and toe adjustments)the “Enter” key can be used to page throughthe illustrati<strong>on</strong>s. The "Page Back" key is used tomove backwards. If an illustrati<strong>on</strong> for a particularangle does not appear, it is likely the vehicle has noprovisi<strong>on</strong> for adjustment. To return to the readingsscreen c<strong>on</strong>tinue to page back or press the "NO" key<strong>on</strong> the head, remote, or keyboard.The Adjustment Illustrati<strong>on</strong>s are a powerful tool toassist the alignment technician. In additi<strong>on</strong> to thepicture, written instructi<strong>on</strong>s are provided plus informati<strong>on</strong><strong>on</strong> any additi<strong>on</strong>al parts, special tools, ormodificati<strong>on</strong>s that may be required.Animated Graphics (CD-ROM <strong>on</strong>ly) -- use soft-key#2 "Animati<strong>on</strong>" to view an animated versi<strong>on</strong> of theadjustment procedure. This can be a further aide tounderstanding what needs to d<strong>on</strong>e <strong>on</strong> the vehicle tocorrect any alignment angle. Press "Enter" to returnto the illustrati<strong>on</strong>s or wait until the animati<strong>on</strong> stopsand automatically returns you to the illustrati<strong>on</strong>sdisplay.Zoom -- for a zoom image of <strong>on</strong>e meter move thehighlight box to the desired meter with the arrowkeys, then press soft-key #4 "Zoom" for a close uplook. Press #4 "Unzoom" to return to the full screendisplay.TIP: When adjusting the vehicle, particularly <strong>on</strong> therear, you can increase the size of the meter to fullscreen for easier viewing by pressing softkey #4 -"Zoom". Once any meter is zoomed, you can move toother meters using the up/down and left/right arrowkeys.Page 64
Performing a Wheel Alignment ... c<strong>on</strong>tinuedStep 16. All ReadingsThis is a summary display that will show both the rearand the fr<strong>on</strong>t readings at the same time. If vehiclespecificati<strong>on</strong>s have been entered, the digital displayswill be red (out of specificati<strong>on</strong>) or green (withinspecificati<strong>on</strong>). In additi<strong>on</strong>, this screen will show, ifmeasured, Included Angle, SAI, Toe Out <strong>on</strong> Turns,and Setback. Fr<strong>on</strong>t and rear camber and toe readingsare live from this screen. This display is <strong>on</strong>e of thethree "Readings" displays that are available. Thesethree displays will be in a "loop" at the end of theprogrammed alignment sequence. If the "Fr<strong>on</strong>t Readings"are displayed the "Rear Readings" and "AllReadings" can be displayed by pressing the "Enter"key. Available soft-keys are:#1 Print -- when selected will display the print/savemenu#4 veh_dims -- this is a feature <strong>on</strong>ly available with the<str<strong>on</strong>g>Visualiner</str<strong>on</strong>g> Surround Sensor SV8 model. See thesupplemental SV8 manual for details.If measurements or adjustments have to be made,use the "Enter" key to go to either the fr<strong>on</strong>t or the rearreadings display.The ic<strong>on</strong> in Figure 9 may appear <strong>on</strong> any of thereadings screens. This ic<strong>on</strong> indicates the measuringhead is not communicating with the main computer.If this ic<strong>on</strong> appears, check the cable c<strong>on</strong>necti<strong>on</strong>s andrefer to the service guide secti<strong>on</strong> of this manual.Figure 9The ic<strong>on</strong> in Figure 10 indicates a blockage of the toesignal <strong>on</strong> the optical measuring heads. Check for anyitem that may be obstructing the line of sight betweenall heads and refer to the service guide secti<strong>on</strong> of thismanual.This completes the Programmed Alignment procedureto obtain all basic alignment readings.Figure 10Page 65
○ ○ ○ ○ ○ ○ ○ ○ ○ ○ ○ ○ ○ ○ ○ ○ ○ ○ ○ ○ ○ ○ ○ ○ ○ ○ ○ ○ ○ ○○ ○ ○ ○ ○ ○ ○ ○ ○ ○ ○ ○ ○ ○ ○ ○ ○ ○ ○ ○ ○ ○ ○ ○ ○ ○ ○ ○ ○ ○Measuring Other AnglesOther Measurements MenuPress soft-key #1 “Measure” <strong>on</strong> the fr<strong>on</strong>t or rearreadings screens for additi<strong>on</strong>al angle and diagnosticmeasurements. The choices are Caster / SAI, Steeringangles, and Setback / Vehicle dimensi<strong>on</strong>s.Note: Vehicle dimensi<strong>on</strong>s capability is <strong>on</strong>ly availablewith the <str<strong>on</strong>g>Visualiner</str<strong>on</strong>g> Surround Sensor (SV8) modelc<strong>on</strong>figurati<strong>on</strong>.Caster / SAI Menu -- choices are:Caster measurement <strong>on</strong>ly -- to repeat the castersweep to obtain a new caster valueCaster and SAI <strong>on</strong> turntables -- allows measurementof caster and SAI in <strong>on</strong>e sweepSAI <strong>on</strong>ly, elevated -- measures SAI with the vehiclewheels elevatedSteering Axis Inclinati<strong>on</strong> (SAI) and Included Angle(IA) -- these angles are powerful tools in diagnosingbent or damaged suspensi<strong>on</strong> parts. A bent spindle,c<strong>on</strong>trol arm, strut, frame mounts, or a cradle shiftproblems can be identified. SAI is measured eithervehicle weight loaded <strong>on</strong> the turntables or with thefr<strong>on</strong>t wheels elevated. Included Angle is not actuallyan angle defined <strong>on</strong> the vehicle -- it is a mathematicalformula. By definiti<strong>on</strong>, IA = SAI + CAMBER. Mostlate model vehicles have a specificati<strong>on</strong> for IncludedAngle, and a few for SAI. Compare the measuredvalues to spec, but also compare side-to-side (cross)differences.TIP: Cross differences for Included Angle should notexceed 1 to 1.5 degrees for most vehicles. If a highcross value is discovered, it may be creating a pullc<strong>on</strong>diti<strong>on</strong>. Generally, the damaged part is <strong>on</strong> the sidewith the lower IA reading.Page 66
Measuring Other AnglesMeasuring Steering Axis Inclinati<strong>on</strong> (SAI) andIncluded Angle -- the measurement method for SAIand Included Angle is similar to the Caster measurement.The wheels are swung through a 20 degree turnand the change in wheel tilt is measured. SAI can bemeasured either <strong>on</strong> the turntables or with the fr<strong>on</strong>twheels elevated. For accurate results follow the <strong>on</strong>screeninstructi<strong>on</strong>s carefully.SAI and Included Angle, ElevatedCaster, SAI, Included Angle <strong>on</strong> TurntablesSAI / IA Display -- when SAI / Included Anglemeasurement is completed the results are displayed<strong>on</strong> the All Readings screen and are available forprintout. These angles are useful for diagnosing bentor damaged parts. The <str<strong>on</strong>g>Visualiner</str<strong>on</strong>g> c<strong>on</strong>tains an AdvancedDiagnostics feature that can assist with thisdiagnosis (see page 60).Page 67
○ ○ ○ ○ ○ ○ ○ ○ ○ ○ ○ ○ ○ ○ ○ ○ ○ ○ ○ ○ ○ ○ ○ ○ ○ ○ ○ ○ ○ ○○ ○ ○ ○ ○ ○ ○ ○ ○ ○ ○ ○ ○ ○ ○ ○ ○ ○ ○ ○ ○ ○ ○ ○ ○ ○ ○ ○ ○ ○Measuring Other AnglesSteering Angles Menu -- choices are:Toe out <strong>on</strong> turns -- used for diagnosing damagedsteering comp<strong>on</strong>entsMaximum turn angle -- used to measure and adjustmaximum turn <strong>on</strong> many vehiclesToe curve change -- used for diagnosis of steering andsuspensi<strong>on</strong> problems4 Wheel steering -- when a H<strong>on</strong>da or Mazda with 4wheel steering is selected this opti<strong>on</strong> outlines thesteps for proper alignmentToe Out <strong>on</strong> Turns (or Turning Radius)Toe out <strong>on</strong> turns is another diagnostic measurementthat is valuable in troubleshooting steering and handlingproblems.TOOT or Turning radius, as it is comm<strong>on</strong>ly called, isthe difference in the turning angle between the insideand the outside wheel.TOOT is measured using the turntable scales of thealignment lift. On many vehicles, the manufacturerspecifies the inside wheel to be turned 20 degrees.Other vehicles specify the wheel be turned to adifferent angle, usually "full lock". This is possiblewith the <str<strong>on</strong>g>Visualiner</str<strong>on</strong>g> by selecting "Other turn" <strong>on</strong> themenu.Note: the <str<strong>on</strong>g>Visualiner</str<strong>on</strong>g> vehicle database does notc<strong>on</strong>tain specificati<strong>on</strong>s for toe out <strong>on</strong> turns. Refer to analignment specificati<strong>on</strong> book or the vehicle's shopmanual.The Toe Out On Turns measurement is not automatic.Using the turntable scales, identify the inside wheelturn angle, then read the outside wheel turn angle andenter the informati<strong>on</strong> into the computer. For bestresults follow the <strong>on</strong>-screens carefully. TOOT resultswill appear <strong>on</strong>-screen and are available for printout.TIP: Toe Out <strong>on</strong> Turns problems always indicate abent or damaged steering arm, with the problemwheel being the <strong>on</strong>e <strong>on</strong> the outside of the turn.Page 68
○ ○ ○ ○ ○ ○ ○ ○ ○ ○ ○ ○ ○ ○ ○ ○ ○ ○ ○ ○ ○ ○ ○ ○ ○ ○ ○ ○ ○ ○○ ○ ○ ○ ○ ○ ○ ○ ○ ○ ○ ○ ○ ○ ○ ○ ○ ○ ○ ○ ○ ○ ○ ○ ○ ○ ○ ○ ○ ○Measuring Other AnglesMaximum turn angle -- this programallows the measurement of the "fulllock" or maximum turn in each directi<strong>on</strong>.It uses the turntable scales andprovides the ability to enter the resultsin the computer for viewing and printing.C<strong>on</strong>sult an alignment specificati<strong>on</strong>manual or shop service manual formanufacturers procedures and specificati<strong>on</strong>s.Toe Curve Change -- this featureallows measurement of individual wheeltoe change as the suspensi<strong>on</strong> systemgoes through jounce and rebound(spring compressi<strong>on</strong> and expansi<strong>on</strong>).An excessive amount of toe changecan cause premature tire wear. A largechange <strong>on</strong> <strong>on</strong>ly <strong>on</strong>e side can cause"bump steer", a dangerous c<strong>on</strong>diti<strong>on</strong>causing the vehicle to rapidly changedirecti<strong>on</strong>s when bumps are encountered.While there are no specificati<strong>on</strong>sfor the amount of change, acomparis<strong>on</strong> of left and right wheelscan assist in diagnosing defectivesteering system comp<strong>on</strong>ents. Followthe <strong>on</strong>-screen instructi<strong>on</strong>s carefully.TIP: On cars with rack and pini<strong>on</strong> steering, a bumpsteer c<strong>on</strong>diti<strong>on</strong> is usually created by worn rack mountingbushings that allow the entire rack to shift whenbumps are hit. Some GM cars (80's Camaro &Firebird) have slotted idler arm mounts to allowcorrecti<strong>on</strong> of toe curve change problems.4 Wheel steering -- this feature provides help forwheel alignment <strong>on</strong> H<strong>on</strong>da and Mazda with the 4WSopti<strong>on</strong>. If <strong>on</strong>e of these vehicles is selected duringentry of specificati<strong>on</strong>s, this help screen will appearfollowing the caster sweep to insure proper proceduresare followed.Page 69
Measuring Other AnglesSetback / Vehicle Dimensi<strong>on</strong>s -- setback occurswhen <strong>on</strong>e wheel <strong>on</strong> an axle is not even with the other.Setback problems are mostly associated with vehiclesinvolved in collisi<strong>on</strong>s.Note: The Vehicle Dimensi<strong>on</strong>s feature is available<strong>on</strong>ly with the <str<strong>on</strong>g>Visualiner</str<strong>on</strong>g> Surround Sensor SV8 model.See the supplemental manual for instructi<strong>on</strong>s <strong>on</strong> thisfeature.Fr<strong>on</strong>t SetbackSetback can be measured <strong>on</strong> eitherthe fr<strong>on</strong>t or rear of the vehicle. Onscreeninstructi<strong>on</strong>s must be followedcarefully. When rear setback is measured,the measuring heads must startout <strong>on</strong> the rear of the vehicle (not thecase with SV8 model), runout compensati<strong>on</strong> performed,then the heads are returned to their normalpositi<strong>on</strong>s and runout is repeated.The results of setback measurementsare displayed <strong>on</strong>ly <strong>on</strong> the All Readingsscreen and are printed during the alignmentresults printout. With the SV8models, setback is displayed <strong>on</strong> thevehicle dimensi<strong>on</strong>s screen which alsoshows wheelbase and track width dimensi<strong>on</strong>s.Setback can be displayedin inches or millimeters, selectable inthe Units of Measure setup.Page 70
Adjustment AssistantAdjustment Assistant Menu -- access this menufrom the fr<strong>on</strong>t or rear readings screen by pressingsoft-key #3. There are numerous features designed toimprove the efficiency and effectivity of the alignmenttechnician in performing vehicle adjustments. Menuchoices are:A-Arms -- for vehicles whose caster and camberadjustments are located <strong>on</strong> the suspensi<strong>on</strong> A-Arm,this selecti<strong>on</strong> allows both angles to be correctedsimultaneouslyCaster and/or camber -- several different opti<strong>on</strong>savailable to assist with these angles, including livecasterTotal toe (drag link) -- helps with vehicles having asingle toe adjusterShim informati<strong>on</strong> -- many fr<strong>on</strong>t wheel drive cars usea shim <strong>on</strong> the rear axle/spindle to adjust camber and/or toe. This program determines the proper shim touseCradle adjustment -- assist with the adjustment ofthe engine cradle <strong>on</strong> many fr<strong>on</strong>t wheel drive carsA-Arm Adjust -- many vehicles have adjustmentprovisi<strong>on</strong>s for caster and camber located <strong>on</strong> thesuspensi<strong>on</strong> A-Arm, either upper or lower. The adjustmentsmay be made with shims, eccentric cams, orslots in the frame. Both angles are easily corrected tospecificati<strong>on</strong> using this screen. The first step istelling the <str<strong>on</strong>g>Visualiner</str<strong>on</strong>g> the locati<strong>on</strong> of the adjustable A-Arm and whether the correcti<strong>on</strong>s will be made <strong>on</strong> theturntables or elevated. Next, apply the brake pedaldepressor (important)and follow the <strong>on</strong>screeninstructi<strong>on</strong>s.Adjustment pointscan be <strong>on</strong> upperor lower c<strong>on</strong>trolarmPage 71
Adjustment Assistant ... c<strong>on</strong>tinuedAdjust Caster / Camber Menu -- this menuc<strong>on</strong>tains items to assist with angle adjustments <strong>on</strong>all types of vehicles. Choices are:Live Caster and camber -- this item can be used <strong>on</strong>the turntables or elevated and gives live caster,camber and toe readingsCamber elevated -- usable <strong>on</strong> the fr<strong>on</strong>t or rear, thisfuncti<strong>on</strong> retains the camber value after the wheels areraisedLive Caster and Camber -- after selecting <strong>on</strong>turntables or elevated, a screen very similar to thestandard Fr<strong>on</strong>t Readings display appears. The majordifference is the caster reading - it is live instead offrozen. Caster and camber can be adjusted whileviewing this screen - for example, caster change willbe shown as a strutrod is lengthenedor shortened. Thetoe readingsshown are for reference.Up<strong>on</strong> leavingthis screen bypressing Enter, thestandard Fr<strong>on</strong>tReadings screen will reappear, allowing for the finaladjustment of fr<strong>on</strong>t toe.12 34Camber Elevated -- for either the fr<strong>on</strong>t or rearwheels, this feature allows the wheels to be elevatedwhile retaining the measuredcamber values. This allows accuratecorrecti<strong>on</strong> of camberwithout vehicle weight inhibitingthe adjustment process.This would be useful for tappingdown a wedge <strong>on</strong> a strutvehicle. The adjustment screenlooks very similar to the livecaster/camber screen above,with the excepti<strong>on</strong> of caster,which is frozen. When completedwith the adjustment, press Enter, and whenthe vehicle is lowered camber will be at specificati<strong>on</strong>.Pressing the "Back Page" key from the AdjustmentAssistant Menu will return the program to the fr<strong>on</strong>t orrear readings screen.Page 72
Adjustment Assistant ... c<strong>on</strong>tinuedTotal toe (drag link) -- the steering linkage <strong>on</strong> sometrucks has a single total toe adjuster al<strong>on</strong>g with a draglink adjuster to correct the steering directi<strong>on</strong> andstraighten the steering wheel. This menu item willallow simple and accurate adjustments to be made.From the Adjustment Assistant menu select Totaltoe (drag link). The technician will be prompted tochoose adjust with the tie rod or the drag link byselecting soft-keys 1 or 2.Drag LinkTotal ToeAdjusterFollow the <strong>on</strong>-screen instructi<strong>on</strong>s. First, steer thefr<strong>on</strong>t wheels to equalize toe, press Enter. Next adjustthe single tie rod to specificati<strong>on</strong>s while observing themeter, press Enter. Then, straighten and lock thesteering wheel and adjust the drag link sleeve untilthe steering directi<strong>on</strong> is straight ahead, as indicated<strong>on</strong> the meter display.Shim Adjustment -- many fr<strong>on</strong>t wheel drive vehiclesutilize aftermarket shims to correct rear camber and/or toe. This correcti<strong>on</strong> is achieved by placing the shimbetween the rear axle and the spindle. The <str<strong>on</strong>g>Visualiner</str<strong>on</strong>g>has several different aftermarket shim manufacturersavailable, each of which must be setup prior to useduring the alignment program (see page 33). C<strong>on</strong>sultthe shim manufacturer's catalog for detail applicati<strong>on</strong>informati<strong>on</strong>.When a vehicle that utilizes rear shims is accessedfrom the specificati<strong>on</strong> database, the technician canuse the <str<strong>on</strong>g>Visualiner</str<strong>on</strong>g> to determine the proper shim tocorrect a rear misalignment. From the AdjustmentAssistant Menu choose "Shim Adjustment". Thechoices are then "Shim informati<strong>on</strong>" and "EZ Shim",a program which features the rotating, single adjustmentshim manufactured by Specialty Products .Page 73
Adjustment Assistant ... c<strong>on</strong>tinuedShim Informati<strong>on</strong> -- At this point the computer willexamine the live rear camber and toe readings,compare them to preferred specificati<strong>on</strong>, and calculatethe amount of change needed. It will then recommendthe shim needed to make this correcti<strong>on</strong>.The first screen that appears is the "Rear ShimAdjustment Summary". All shim manufacturers thathave been selected in "Setup" are shown. The initialalignment reading, specificati<strong>on</strong> and the neededchange will be indicated al<strong>on</strong>g with the part number ofthe shim. To view more informati<strong>on</strong> about placementof the shim, place the highlight box around thedesired manufacturer and press Enter.The displays shown here are for Shimco and AlignTech.The screens show the part number, a graphicalpresentati<strong>on</strong> of proper installati<strong>on</strong> orientati<strong>on</strong>, andwritten instructi<strong>on</strong>s. After installati<strong>on</strong> of the shims iscompleted press Enter, follow the instructi<strong>on</strong>s, andpress the "Back Page" key to move from the AdjustmentAssistant Menu to the Rear Readings screen.EZ Shim -- This program is designed by SpecialtyProducts Co. as an assistant for properly using andinstalling their EZ Shim rear camber/toe angle correcti<strong>on</strong>product. The program automatically determineswhich <strong>on</strong>e of the three colored shims is used for thevehicle, the amount of camber toe correcti<strong>on</strong> required,and the proper indexing of the shim. Once thecalculati<strong>on</strong> is completed, a picture of the shim isdisplayed with instructi<strong>on</strong>s for installati<strong>on</strong>. On-screeninstructi<strong>on</strong>s guide the operator through the steps.Page 74
Adjustment Assistant ... c<strong>on</strong>tinuedCamber - DecreasedSAI - IncreasedIncl'd Ang - GoodCamber - IncreasedSAI - DecreasedIncl'd Ang - GoodCradle Adjust -- cradle adjustment isa growing necessity for many fr<strong>on</strong>t wheeldrive vehicles. Many fr<strong>on</strong>t wheel drivevehicles are designed where the enginecradle also serves as the attachmentpoint for the lower pivots of the suspensi<strong>on</strong>system. This assembly is boltedto the sub-frame as a unit from thebottom of the vehicle. The assemblymust be properly aligned with the subframeto assure that fr<strong>on</strong>t alignment ismaintained.Cradle Shifted TowardRight Fr<strong>on</strong>tA closer look at the assembly will showthat the lower c<strong>on</strong>trol arms are bolted tothe cradle assembly. The c<strong>on</strong>trol arm isattached to the spindle through the lowerball joint. The strut or upper pivot isattached to the upper end of the spindle and isattached to the upper body via the upper strut mountat the upper tower positi<strong>on</strong> to complete the suspensi<strong>on</strong>steering axis.The engine cradle can be moved side to side, changingthe camber and SAI angles. Prior to beginning acradle adjustment, examine the left and right cambervalues. If <strong>on</strong>e side has excessive positive camber andthe other side excessive negative, this vehicle is acandidate for cradle adjustment.Vehicles with cradle adjustment potential include:Ford Taurus / Mercury Sable, Lincoln C<strong>on</strong>tinentalGM "W" Body (Lumina, Grand Prix, Cutlass, Regal)Chrysler "LH" Body (Intrepid, Visi<strong>on</strong>, C<strong>on</strong>corde, LHS)H<strong>on</strong>da Accord, Acura Intregra, Mazda 929C<strong>on</strong>sult the vehicle service manual for details <strong>on</strong> howto loosen the engine cradle.The Cradle Adjust screen has a graphic of the cradlewith an arrow showing the directi<strong>on</strong> of needed movement.A meter display determines exact placement.In additi<strong>on</strong>, a live caster reading is shown for reference.Page 75
Adjustment Assistant ... c<strong>on</strong>tinuedEZ Toe -- The EZ Toe software routine is a new and improvedmethod of setting fr<strong>on</strong>t toe. The program calculates the amount oftoe change needed <strong>on</strong> each wheel. When toe is corrected <strong>on</strong> eitherwheel, the program <strong>on</strong>ly remembers the amount of change neededfor that wheel (similar to the Elevated Camber adjustment functi<strong>on</strong>),ignoring the current positi<strong>on</strong> of the wheel or the reacti<strong>on</strong> of theopposite wheel. This allows accurate toe adjustment with thewheels pointed in any directi<strong>on</strong> (within the range of toe signals)without the use of a steering wheel holder. It is even possible tocorrect toe with the wheels turned to 10 degrees left or right, whichis helpful <strong>on</strong> cars with firewall-mounted center-point rack and pini<strong>on</strong>steering linkages. Because of the toe-change method, EZ Toeminimizes comebacks due to crooked steering wheels.EZ Toe Procedure1. Perform all alignment steps normally used to obtain alignmentreadings. Correct any misalignment in the rear as well as fr<strong>on</strong>tcaster and/or camber.2. Select EZ Toe from the AdjustmentAssistance Menu. Note: DONOT use the Steering Wheel Clampduring the EZ Toe procedure.3. Level the vehicle steering wheeland the measuring heads. PressEnter.4. Steer the right wheel to adjust thepositi<strong>on</strong> until the meter is in thegreen. Press Enter.5. The next screen shows a meter indicating the amount of toechange needed for the right wheel.6. Adjust the right tie rod until the meter needle is in the green.Press Enter after completi<strong>on</strong>.7. Follow the same procedures forthe left wheel.8. Press Enter <strong>on</strong>ce the left toeadjustment is made.9. Return to the Fr<strong>on</strong>t Readingsscreen and recheck toe and steeringwheel positi<strong>on</strong>.Page 76
Other Soft-Key FeaturesDriver Complaints Menu -- this menu is accessedby toggling to the sec<strong>on</strong>d set of soft-keys <strong>on</strong> eitherthe fr<strong>on</strong>t or rear readings screens and pressing softkey#4.It c<strong>on</strong>tains a series of screens designed toassist the technician with diagnosing specificdrivability c<strong>on</strong>cerns. With the excepti<strong>on</strong> of "Advanceddiagnostic", a series of questi<strong>on</strong>s about the vehicle'sproblems or symptoms is presented. As the technicianfollows the steps, suggesti<strong>on</strong>s are made <strong>on</strong>probable causes. The following selecti<strong>on</strong>s are available:Advanced diagnosticsPullUnlevel steeringVibrati<strong>on</strong>TreadwearAdvanced diagnostics -- this choice brings up aroutine that compares the measured angle readingsto specificati<strong>on</strong>. If out of specificati<strong>on</strong>, the programwill identify probable results due to misalignmentand, if SAI and Included Angle have been measured,may identify possible bent parts. See page 52 foradditi<strong>on</strong>al details.Pull -- the program will ask a series of questi<strong>on</strong>sregarding the vehicle pull. Select the most appropriateanswer to move to the next test. The screen willagain ask for the most correct answer. Suggesti<strong>on</strong>swill be made throughout the test to attempt to identifythe problem.Page 77
Other Soft-Key FeaturesUnlevel Steering -- the program will ask a seriesof questi<strong>on</strong>s regarding the unlevel steering wheel.Select the most appropriate answer to move to thenext test. The screen will again ask for the mostcorrect answer. Suggesti<strong>on</strong>s will be made throughoutthe test to attempt to identify the problem.Vibrati<strong>on</strong> diagnosticsThis diagnostic segment assists in locating andcorrecting vehicle vibrati<strong>on</strong> problems. The methodused attempts to isolate the cause of the vibrati<strong>on</strong> to<strong>on</strong>e of three broad categories: Brakes, Engine andDrive Train.Page 78
Other Soft-Key FeaturesTreadwear -- there are many reas<strong>on</strong>s that tireswear unevenly and wear out prematurely. Becausethe effects of having more than <strong>on</strong>e problem can makeit difficult to exactly pinpoint the problem, this guidewill lead you through lists of possible causes. Use theup and down arrow keys and the "Enter" key to selectthe most applicable categories or answers.Printer Menu -- use toggle soft-key #1 "Print" <strong>on</strong>either the Fr<strong>on</strong>t or Rear readings display to go to thePrinter Menu. The opti<strong>on</strong>s are:Print alignment results -- prints <strong>on</strong>ly measuredalignment angles with specificati<strong>on</strong>sPrint results (no specs) -- prints all measured alignmentangles without specificati<strong>on</strong>sPrint inspecti<strong>on</strong> list -- prints <strong>on</strong>ly inspecti<strong>on</strong> liststhat have been filled out - no alignment angle resultsPrint all -- prints everything - alignment angles,specificati<strong>on</strong>s, inspecti<strong>on</strong> reportsSave current alignment -- usable <strong>on</strong>ly with opti<strong>on</strong>alCustomer Database feature. Saving the alignmentfrom this menu saves all alignment informati<strong>on</strong> to acomputer disk. For more details, see secti<strong>on</strong> 5, Files.This completes the instructi<strong>on</strong>s <strong>on</strong> how to use the <str<strong>on</strong>g>Visualiner</str<strong>on</strong>g> software to perform a wheel alignment anddiagnose alignment related drivability problems. Keep this manual readily available as a reference whenquesti<strong>on</strong>s are encountered. For additi<strong>on</strong>al assistance, c<strong>on</strong>tact the local John Bean Company Representative,or c<strong>on</strong>tact <strong>on</strong>e of the John Bean Company locati<strong>on</strong>s worldwide using the informati<strong>on</strong> <strong>on</strong> the back page of thismanual.Page 79
Glossary of Alignment Terms* Ackerman Principle: An alignment principle based <strong>on</strong>vehicle tread width and wheelbase up<strong>on</strong> which turningangle is computed.* Active Suspensi<strong>on</strong>: A suspensi<strong>on</strong> system in which hydraulicactuators add force to the suspensi<strong>on</strong> system to allowcompressi<strong>on</strong> (Jounce) and extensi<strong>on</strong> (Rebound).* Alignment: The process of measuring and positi<strong>on</strong>ing allwheels attached to a comm<strong>on</strong> chassis.* Angle: Two intersecting lines that are not parallel.* Arc: Any part of a circle or a curved line.* Axial Play: Vertical movement of the wheel and tire assemblywhen inspecting a ball-joint.* Balance: This term is used to describe having equal weightdistributi<strong>on</strong> about the circumference of a wheel and tireassembly.* Ball-Joint.: A chassis to knuckle c<strong>on</strong>nector c<strong>on</strong>sisting of aball and a socket. This c<strong>on</strong>figurati<strong>on</strong> allows for simultaneousangular and rotating moti<strong>on</strong>.* Bead: Steel wire forming an anchor for individual plies andrim attachment of a tire.* Bellows: a Rubber type seal which is folded to allow for atelescopic acti<strong>on</strong>. Normally referred to as a bellows boot.* Bias Belted: A tire c<strong>on</strong>structi<strong>on</strong> type with overlapping pliesat 90 degrees with additi<strong>on</strong>al belts formed around thecircumference of the tire.* Bias Ply: The same type of c<strong>on</strong>structi<strong>on</strong> is used <strong>on</strong> thisdesign as a bias belted, but without the reinforcement belt.* Body Roll: The leaning of the vehicle body while cornering.* Braking C<strong>on</strong>trol: Vehicle stability related to the reacti<strong>on</strong>under all stopping c<strong>on</strong>diti<strong>on</strong>s.* Bump Steer: A directi<strong>on</strong>al change in steering caused byroad irregularities. As the suspensi<strong>on</strong> moves throughjounce and rebound, changes in alignment at the fr<strong>on</strong>t orrear wheels may alter the vehicle’s directed path.* Bushing: A comp<strong>on</strong>ent made of metal or rubber-typematerial, used to isolate interc<strong>on</strong>nected moving parts.* Cam Bolt: A bolt and eccentric assembly which whenrotated will force comp<strong>on</strong>ents to change a positi<strong>on</strong>.* Camber: The inward or outward tilt of the wheel at the topand as viewed from the fr<strong>on</strong>t.* Camber Roll: A change in camber brought about bysuspensi<strong>on</strong> changes while cornering.* Caster: The forward or rearward tilt of the steering axis atthe top and as viewed from the side.* Center Bolt: A bolt that provides centering and attachmentof an axle and spring assembly.* Centerline Steering: A centered steering wheel while thevehicle is traveling in a straight ahead course.* Chassis: All major assemblies <strong>on</strong> a vehicle includingsuspensi<strong>on</strong>, steering, drivetrain and frame; everything exceptthe body.* Circumference: The total distance around a circle.* Coil Spring: Spring steel wire formed in the shape of a coil.* Compliance: The ability of an object to yield elasticallywhen a force is applied.* C<strong>on</strong>centric: Two or more comp<strong>on</strong>ents sharing a comm<strong>on</strong>center.* C<strong>on</strong>icity: The c<strong>on</strong>e shape that a tire takes through itsnormal life when inflated and loaded.* C<strong>on</strong>tact Area: The total amount of tread surface thatc<strong>on</strong>tacts the road.* C<strong>on</strong>trol Arm: An arm that is used to attach a spindle or axleto the chassis.* Cornering: The ease at which the vehicle travels a curvedpath.* Cradle: The framework of a fr<strong>on</strong>t wheel drive vehicle thatprovides the engine mounts as well as fr<strong>on</strong>t suspensi<strong>on</strong>pivot points for many vehicles.* Curb Weight: The overall weight of a vehicle less passengers,luggage, or load.* Degree: A unit of measurement to describe an angle.* Dial Indicator: An instrument used to measure and displaylinear displacement. Measurement is displayed <strong>on</strong> a dialface and the scale is comm<strong>on</strong>ly graduated in thousandths.* Directi<strong>on</strong>al Stability: The tendency of a vehicle to maintaina directed path.* Drag Link: A tube or rod used for interc<strong>on</strong>necti<strong>on</strong> betweena pitman arm and tie-rod assemblies.* Dry Park Check: Inspecti<strong>on</strong> of chassis and steering partswith the vehicle at normal ride height. Not in the raisedpositi<strong>on</strong>.* Dynamic Balance: This normally refers to the balancec<strong>on</strong>diti<strong>on</strong> of a wheel and tire assembly in moti<strong>on</strong>.* Eccentric: See cam bolt.* Feather Edge Wear Pattern: An abnormal tread wearpattern whereby <strong>on</strong>e side of an individual tread rib is wornmore than the other.* Flow C<strong>on</strong>trol Valve: Regulates flow output from the powersteering pump. This valve is necessary because of thevariati<strong>on</strong>s in engine RPM and a need for c<strong>on</strong>sistent steeringability in all ranges from idle to highway speeds.* Foot Pound: A unit of measurement used to describetorque force.* Four Wheel Steering: The ability of the rear wheels to aidin steering a vehicle for improved handling and drivingcharacteristics.* Frame Angle: Used to describe a n<strong>on</strong>-level frame.* Fricti<strong>on</strong> Ball Joint: Outer suspensi<strong>on</strong> pivot that does notsupport the weight of the vehicle.* Fr<strong>on</strong>t Steer Rack and Pini<strong>on</strong>: Steering system located infr<strong>on</strong>t of spindle centerline.* Geometric Centerline: A line drawn between the midpointof the fr<strong>on</strong>t axle and the midpoint of the rear axle.* Horiz<strong>on</strong>tal: Parallel or level with the plane of the horiz<strong>on</strong>.* Hub: The assembly that houses the bearings about whichthe wheel and tire assembly rotates.* Hydraulic Pump: A power driven device generating c<strong>on</strong>stantvolume and pressure.* Idler Arm: An arm and lever assembly used to support andmaintain a parallel positi<strong>on</strong> with a c<strong>on</strong>venti<strong>on</strong>al steeringsystem.* Included Angle: The sum of the angles camber and SAI.* Independent Suspensi<strong>on</strong>: A suspensi<strong>on</strong> system thatprovides an isolated mounting for each wheel to the chassis.Page 81
Glossary of Alignment Terms* Individual Toe: The angle formed by a horiz<strong>on</strong>tal line drawnthrough the plane of <strong>on</strong>e wheel versus a centerline.* Integral Power Assist: A power assist system where thec<strong>on</strong>trol valve and all major hydraulic comp<strong>on</strong>ents are selfc<strong>on</strong>tained.* Intersect: The crossing point of two lines.* Jounce Travel: A suspensi<strong>on</strong> moving up through its travel.* Kinetic Balance: The balance c<strong>on</strong>diti<strong>on</strong> of a rotating wheelrelated to force generated in a vertical plane.* King-Pin: A pin used to attach a spindle to an axle.* Lateral Run-Out: Side-to-side movement with a rotatingwheel or tire.* Lead: A slight tendency for a vehicle to lead away from itsdirected course.* Linkage: A series of rods or levers used to transmit moti<strong>on</strong>or force.* Load Carrying Ball Joint: Outer suspensi<strong>on</strong> pivot thatsupports the weight of the vehicle.* Load Range: A system used to describe the service orweight limitati<strong>on</strong>s of a tire.* MacPhers<strong>on</strong> Strut: A suspensi<strong>on</strong> design where spindle,shock, and spring are all <strong>on</strong>e assembly.* Memory Steer: A c<strong>on</strong>diti<strong>on</strong> where the wheels, rather thanreturning to straight ahead, tend to remember and seek aprevious positi<strong>on</strong>.* Millimeter: A unit of linear measurement. One millimeter isequivalent to 0.039 inches.* Minute: A unit of measurement used to describe an angle.One minute is equivalent to 1/60th of <strong>on</strong>e degree.* N<strong>on</strong>-Integral Power Assist: A power assist system wherethe c<strong>on</strong>trol valve and all major hydraulic comp<strong>on</strong>ents are notself-c<strong>on</strong>tained.* Offset: The lateral displacement of a wheel or axle inrespect to a centerline.* Oscillate: A moti<strong>on</strong> in two directi<strong>on</strong>s and at a specificfrequency.* Out-of-Round: A wheel and tire irregularity in which <strong>on</strong>e orboth are not c<strong>on</strong>centric with its axis of rotati<strong>on</strong>.* Overinflati<strong>on</strong>: Inflati<strong>on</strong> pressure bey<strong>on</strong>d what is recommended.* Oversteer: A characteristic in which a vehicle has a tendencyto turn sharper than the driver intends.* Parallelogram Steering Linkage: A steering linkage designwhere if all pivot points are c<strong>on</strong>nected by lines, theselines would be parallel.* Passive Suspensi<strong>on</strong>: A suspensi<strong>on</strong> system which usessprings al<strong>on</strong>g with shock absorbers to allow compressi<strong>on</strong>(Jounce) and extensi<strong>on</strong> (Rebound).* Perpendicular: Being at right angles.* Pitman Arm: A steering comp<strong>on</strong>ent that provides interc<strong>on</strong>necti<strong>on</strong>between the steering gear sector shaft and thesteering linkage.* Ply Rating: A method of rating tire strength; not necessarilyindicative of the actual number of plies used.* Power steering: A steering system which incorporateshydraulics to assist in the steering of the wheels.* Pre-load: A predetermined amount of load or force appliedduring assembly to prevent unwanted play during actualoperati<strong>on</strong>.* Pressure Relief Valve: Prevents power steering fluidpressure buildup bey<strong>on</strong>d a specified point. When fluid is atthe maximum desired pressure the excess is returned to thepump reservoir.* Pull: The tendency for a vehicle to steer away from itsdirected course.* Rack and Pini<strong>on</strong> Steering Gear: A steering system designthat utilizes a pini<strong>on</strong> gear meshed with a rack gear totransmit steering forces to the spindles.* Radial Play: Any lateral movement of the wheel and tireassembly when inspecting a ball-joint or king-pin.* Radial Ply Tire: A tire c<strong>on</strong>structi<strong>on</strong> type with alternating plies90 degrees to the tire bead.* Radius: The distance from the center to the outer edge ofa circle.* Rag Joint: A type of U joint c<strong>on</strong>structed from a rubberizedfabric type material.* Rear Steer Rack and Pini<strong>on</strong>: Steering system located infr<strong>on</strong>t of spindle centerline.* Rebound: A suspensi<strong>on</strong> moving down through its travel.* Recirculating Ball Steering Gear: A steering gear designthat is made up of a worm shaft, ball nut, and two recirculatingball circuits.* Returnability: The tendency of the fr<strong>on</strong>t wheels to returnback to a straight ahead positi<strong>on</strong>.* Road Crown: The slope of a road from its center.* Road Feel: Necessary feedback transmitted from the roadsurface up to the steering wheel.* Road Isolati<strong>on</strong>: The ability of a vehicle to better separateroad irregularities from the driver and passengers.* Road Shock: An excessive amount of force transmittedfrom the road surface up to the steering wheel.* Scrub Radius: The radius formed between wheel centerlineand steering axis projected load points at the road surface.* Setback: The angle formed between a centerline and a lineperpendicular to the fr<strong>on</strong>t axle.* Shim: Thin material of fiber or metallic makeup used to takeup clearance between two parts.* Shimmy: A violent shake or oscillati<strong>on</strong> of the fr<strong>on</strong>t wheelstransmitted up to the steering wheel.* Shock Absorber: A suspensi<strong>on</strong> comp<strong>on</strong>ent used to dampenspring oscillati<strong>on</strong>.* Solid Axle Suspensi<strong>on</strong>: A suspensi<strong>on</strong> system c<strong>on</strong>sistingof <strong>on</strong>e steel or aluminum I-beam extended the width of thevehicle.* Short Arm L<strong>on</strong>g Arm (SALA): An independent suspensi<strong>on</strong>design incorporating unequal length c<strong>on</strong>trol arm.* Spindle: A comp<strong>on</strong>ent <strong>on</strong> which a wheel and tire assemblyis mounted and rotates.* Stability: The tendency of a vehicle to maintain a directedcourse.* Stabilizer Bar: A steel bar used to minimize body roll.* Steering Arms: A steering comp<strong>on</strong>ent which providesinterc<strong>on</strong>necti<strong>on</strong> between the outer tie-rod and spindle.* Steering Axis Inclinati<strong>on</strong>: The angle formed by an imaginaryline drawn through the steering axis versus vertical. Viewedfrom the fr<strong>on</strong>t.Page 82
Glossary of Alignment Terms* Steering Gear: A mechanical device used to c<strong>on</strong>vert therotary moti<strong>on</strong> at the steering wheel to a lateral moti<strong>on</strong>.* Steering Geometry: See Alignment.* Steering Knuckle: A forged assembly which typically includes:the spindle, steering arm and steering axis pivotpoints.* Steering Shaft: A tube or rod which interc<strong>on</strong>nects thesteering wheel to the steering gear.* Steering Wheel Play: Any abnormal play or movement thatdoes not result in movement at the fr<strong>on</strong>t wheels.* Strut: Any support used between two parts.* Suspensi<strong>on</strong>: An assembly used to support weight, absorband dampen shock, help maintain tire c<strong>on</strong>tact, and properwheel to chassis relati<strong>on</strong>ship.* Suspensi<strong>on</strong> Height (Ride Height): The specified distancebetween <strong>on</strong>e or more points <strong>on</strong> a vehicle to the road surface.* Thrust Angle: The angle formed by thrustline and geometriccenterline.* Thrustline: Average rear toe added together and divided bytwo. The directi<strong>on</strong> the rear rolls.* Tie Rod Assembly: The outer most assemblies <strong>on</strong> aparallelogram steering linkage. These assemblies areattached to the drag link and steering arms.* Tie Rod End: The ball and socket assembly of a tie rod.* Tie Rod Sleeve: A threaded tube that provides c<strong>on</strong>necti<strong>on</strong>and adjustment of a tie rod assembly.* Tire Force Variati<strong>on</strong> (Radial Force Variati<strong>on</strong>): A tire irregularityin which there is a difference in radial stiffness aboutthe circumference of the tire.* Tire Wear Pattern: The design developed <strong>on</strong> the treadsurface from abnormal wear.* Toe: The comparis<strong>on</strong> of a horiz<strong>on</strong>tal line drawn throughboth wheels of the same axle.* Turning Angle: The difference in the turning angle of thefr<strong>on</strong>t wheels in a turn.* Torsi<strong>on</strong> Bar: A spring steel bar used in place of a coil spring.Suspensi<strong>on</strong> is provided through its resistance to a twistingor torque effort.* Torque Steer: The effect that accelerati<strong>on</strong> or decelerati<strong>on</strong>has <strong>on</strong> the steering of the fr<strong>on</strong>t wheels.* Tracking: The interrelated paths taken by the fr<strong>on</strong>t and rearwheels.* Treadwidth: The dimensi<strong>on</strong> as measured between thecenterlines of the wheels <strong>on</strong> the same axle.* Treadwear Indicators: Ridges molded between the ribs ofthe tread that visibly indicate a worn tire.* Underinflati<strong>on</strong>: Air pressure below that which is specified.* Understeer: A characteristic in which a vehicle has atendency to turn less than the driver intends.* Unit Body (Uni-Body): A design that incorporates both bodyand frame as a unit.* Vertical: Being exactly upright or plumb.* Vibrati<strong>on</strong>: To c<strong>on</strong>stantly oscillate at a specific frequency.* Waddle: The lateral movement of a vehicle usually causedby some type of tire or wheel imperfecti<strong>on</strong>.* Wander: The tendency of a vehicle to drift to either side ofits directed course.* Wheel Base: The dimensi<strong>on</strong> as measured between thecenter of the fr<strong>on</strong>t and rear axles.Page 83
(Blank Page)
TM<str<strong>on</strong>g>Visualiner</str<strong>on</strong>g> <str<strong>on</strong>g>Series</str<strong>on</strong>g>Files Menu andCustomer Database
(Blank Page)
Files MenuThe Files selecti<strong>on</strong> of the Main Menu allows accessto the Customer Database opti<strong>on</strong> and other <str<strong>on</strong>g>Visualiner</str<strong>on</strong>g>functi<strong>on</strong>s. Place the highlight box around Files andpress Enter.Files Menu -- from the Files Menu choices are:Customer files -- accesses Customer Databasefuncti<strong>on</strong>s such as view or print records and selecti<strong>on</strong>of storage drivesSpecial vehicle specificati<strong>on</strong>s -- allows the setupof external specificati<strong>on</strong> databasesStore name -- enter the store informati<strong>on</strong> to beincluded <strong>on</strong> all printoutsDemo program -- for John Bean Company pers<strong>on</strong>nel<strong>on</strong>lyMitchell -- allows access to Mitchell On-Demand(opti<strong>on</strong>al), a CD-ROM based auto repair shop manualsystemEZ Shim -- accesses a program designed by SpecialtyProducts Co. to determine the proper installati<strong>on</strong>of their EZ Shim productCustomer DatabaseCustomer Database is a <str<strong>on</strong>g>Visualiner</str<strong>on</strong>g> feature (standard<strong>on</strong> some models, not available <strong>on</strong> some , opti<strong>on</strong>al <strong>on</strong>others) that allows the aligner user to permanentlystore informati<strong>on</strong> about the customer, his vehicle, andthe results of the wheel alignment service. A "database"is a collecti<strong>on</strong> of informati<strong>on</strong> to be sorted andretrieved as needed for analysis. Available informati<strong>on</strong>includes the car owner's last name, address,ph<strong>on</strong>e number; the vehicle make/model/year, VINnumber, and mileage; plus the date of service al<strong>on</strong>gwith before and after alignment readings. This informati<strong>on</strong>is stored <strong>on</strong> a computer disk drive for laterretrieval. Once retrieved, the informati<strong>on</strong> can be reviewedand can become the starting point for a newalignment.Prior to saving the alignments, it is necessary tosetup the system and learn the steps to store andretrieve data during an alignment.Page 87
Customer Files MenuFrom the Files Menu, select "Customer Files".Choices are:View customer records -- allows sorting and viewingof customer database recordsPrint customer records -- this selecti<strong>on</strong> causes amemory dump of all records sorted by last name tothe printer. Only name and address are sent to theprinter.Select database disk drive -- specifies the drive inthe computer where customer records will be storedBackup database to floppy -- if records are stored<strong>on</strong> the computer's hard drive, this allows a backup tobe d<strong>on</strong>e as a data security measureRestore database from floppy -- any backup datafrom a floppy disk can be placed <strong>on</strong>to the hard driveSelect "View Customer Records" from the customerfiles menu. A blank data sheet will appear. Move theselector up or down the screen using the arrow keysto sort <strong>on</strong> a variety of topics. A search could be <strong>on</strong> lastname, ph<strong>on</strong>e number, or license plate number. At thedesired topic, type in the informati<strong>on</strong> to search for.Press Enter and the computer will sort by that datafield and bring up any available records. Pressing thesoft-key #1 "Next" goes to the next record in thedatabase, pressing soft-key #2 "Last" goes back <strong>on</strong>erecord. When viewing customer records under theFiles Menu, before and after alignment readingscannot be viewed.The process described above is also utilized whendoing a wheel alignment. When the Customer Datascreen appears, press soft-key #1 to open up a blanksheet to search for the desired records. This processis described in detail <strong>on</strong> page 90.Page 88
Selecting the Disk Drive -- to determine which diskdrive the computer will refer to when writing or retrievingdata, choose "Select database disk drive" fromthe Customer Files Menu. The selecti<strong>on</strong>s are A, B,or C. Disk drives A and B are Floppy drives. These aredisks which can be interchanged between machinesand computers. The "C" drive is a "Hard Disk Drive"permanently mounted inside the computer. The HardDrive c<strong>on</strong>tains much more storage capacity than afloppy disk. Select the appropriate drive letter for thecomputer c<strong>on</strong>figurati<strong>on</strong> of the <str<strong>on</strong>g>Visualiner</str<strong>on</strong>g>. If in doubt,c<strong>on</strong>tact a John Bean Representative.Backup Database -- the computer system will allowthe customer data to be stored <strong>on</strong>to a floppy disk drivefor safe keeping or for use at another locati<strong>on</strong>. Informati<strong>on</strong>which has been backed-up <strong>on</strong>to the floppy canbe reentered back into the computer. To backup thedatabase simply select "Backup database to Floppy"from the Customer Files Menu. The computer willthen ask you to insert a floppy disk into the drive slotand press Enter. The computer now takes over andcopies all the internal files to the floppy for storage.After backup, the computer will ask if the internal fileis to be erased to make room for more data. If "Yes"is selected all internal data will be erased! Selecting"No" will allow more data to be added.NOTE: Any existing customer files <strong>on</strong> the floppy willbe overwritten. If additi<strong>on</strong>al diskettes are required,c<strong>on</strong>tact your John Bean Company representative orrequest a pre-formatted 3.5" 1.44 MB diskette from alocal computer supplier.Data Retrieval, Restore -- if data is to be restoredto the internal hard drive, select "Restore from Floppy"at the Customer Files Menu. The screen asks you toinsert the floppy which c<strong>on</strong>tains the desired informati<strong>on</strong>into the floppy disk drive slot and press enter.The stored informati<strong>on</strong> is then read into the computerfor use. Please note that when the data is read intothe computer the existing file will be overwritten.Make sure that the data <strong>on</strong> the disk is that which isdesired <strong>on</strong> the computer.Page 89
Using Database During an AlignmentAfter choosing Begin Alignment the Customer Menuwill appear. If the <str<strong>on</strong>g>Visualiner</str<strong>on</strong>g> is equipped with theCustomer Database feature, select "New customer"to add a new record. To find an existing record select"Find customer data". If the <str<strong>on</strong>g>Visualiner</str<strong>on</strong>g> does not havethe database opti<strong>on</strong>, a message stating "This Featurenot Activated" will appear.Adding a New Customer Record -- when "Newcustomer" is selected, a blank Customer Data pagewill appear. Using the keyboard, type in all pertinentinformati<strong>on</strong> about the customer and his vehicle in thefields provided. Once completed, there are two opti<strong>on</strong>s:soft-key #3 "Save" will save <strong>on</strong>ly the customerinformati<strong>on</strong> that is <strong>on</strong> the screen or, if inspecti<strong>on</strong> andalignment data is desired to be saved, press soft-key#4 to c<strong>on</strong>tinue. The opportunity to save all informati<strong>on</strong>will come at the completi<strong>on</strong> of all alignment procedures.Finding a Customer Record -- when "Find customerdata" is selected (or soft-key #1 <strong>on</strong> the CustomerData screen), a blank data screen appears with a darkbox (white cursor in it) in the First Name field. Thisbox is the search criteria selector. Using the up/downarrow keys, choose the desired field to search for thecustomer record (i.e. last name, plate #, etc.). In thefield, type the customer informati<strong>on</strong> and press Enter.Any informati<strong>on</strong> in the <str<strong>on</strong>g>Visualiner</str<strong>on</strong>g> database that corresp<strong>on</strong>dsto the search criteria will appear. If there ismore than <strong>on</strong>e record for that criteria (i.e. two peoplewith same last name) press soft-key #1 "Next" or tomove backwards in the database press soft-key #2"Last". Notice the complete customer informati<strong>on</strong>including the date of service.To c<strong>on</strong>tinue reviewing all informati<strong>on</strong> associated withthis customer record, press soft-key #4, "Accept".Page 90
Vehicle Specificati<strong>on</strong> History -- the next screenthat appears shows the specificati<strong>on</strong>s from the storedalignment. This eliminates the need to reenter specificati<strong>on</strong>s,even if they were "Custom" specs. Thevehicle adjustments can be illustrated by pressingsoft-key #2. Press soft-key #4 to c<strong>on</strong>tinue.Inspecti<strong>on</strong> Menu History -- if any vehicle inspecti<strong>on</strong>swere performed and entered into the <str<strong>on</strong>g>Visualiner</str<strong>on</strong>g>database they can be recalled from this menu. Highlightthe desired area to examine the results. Anyitems that were checked, serviced, or recommendedfor replacement during this previous alignment servicewill be shown. Press soft-key #4 to c<strong>on</strong>tinue tothe alignment readings review.All Readings History -- this screen allows a reviewof the alignment readings as stored in the data record.Only the "All Readings" screen can be viewed (nometer displays). To view the initial alignment readings,press soft-key #2 "Initial" and press soft-key #3"Final" to see the ending results. The displayedvalues will be green or red indicating their statusversus manufacturers specificati<strong>on</strong>. Gray readingsindicate there was no specificati<strong>on</strong> for that angle. Thishistorical review can be printed by pressing soft-key#1 "Print".This completes the review of all informati<strong>on</strong> stored ina customer data record. To perform a new alignmentusing this customer and vehicle informati<strong>on</strong> presssoft-key #4 "Align". All customer informati<strong>on</strong> will beretained to streamline the alignment process.Page 91
Saving Complete AlignmentsAs noted <strong>on</strong> page 90, after entering new customerdata, pressing the "Save" softkey will save <strong>on</strong>ly thetyped informati<strong>on</strong>. If all informati<strong>on</strong> about the alignment,including inspecti<strong>on</strong>s and alignment readings,is to be saved, go to the "Print" softkey <strong>on</strong> either theFr<strong>on</strong>t or Rear Readings screen to enter the PrinterMenu. The final selecti<strong>on</strong> is "Save current alignment".After this is highlighted, press Enter. After approximately5 sec<strong>on</strong>ds a beep will be heard indicating thealignment has been saved. This alignment is nowstored in the database for future reference.Page 92
Other Files Menu Selecti<strong>on</strong>sVehicle Specificati<strong>on</strong>s -- many businesses now aregathering specific specificati<strong>on</strong>s for their fleet c<strong>on</strong>tractsor older vintage type vehicles. As the popularityof custom alignments rises, so does the need forretrieval of these specs to avoid needless reentry. TheJohn Bean <str<strong>on</strong>g>Visualiner</str<strong>on</strong>g> has a spec database opti<strong>on</strong>which allows the technician the opti<strong>on</strong> of readingspecs from a floppy disk. Those specs <strong>on</strong> floppiescan be shared from <strong>on</strong>e unit to another or even from<strong>on</strong>e site to another. The selecti<strong>on</strong> of Vehicle Specificati<strong>on</strong>sfrom the Files Menu will enable the aligner tochoose the locati<strong>on</strong> of externally available disks.Store Name -- the Store Name selecti<strong>on</strong> prompts ascreen which allows the user to enter his businessname and address to be printed <strong>on</strong> the resultsprintout.Demo -- this is a tool used by John Bean CompanySales and Service pers<strong>on</strong>nel and is not accessible tothe user. It simulates an wheel alignment withoutusing measuring heads and a vehicle.Mitchell -- John Bean Company USA is a reseller ofa product called On-Demand, which is a CD-ROMbased shop manual system produced By MitchellInternati<strong>on</strong>al. If the <str<strong>on</strong>g>Visualiner</str<strong>on</strong>g> is equipped withMitchell On-Demand DOS versi<strong>on</strong>, it is accessedhere. Please note that the DOS versi<strong>on</strong> is no l<strong>on</strong>geroffered for sale. The Windows versi<strong>on</strong> is available, butis not accessed from this menu. C<strong>on</strong>sult with yourJohn Bean Representative about Mitchell productofferings available <strong>on</strong> various models.EZ Shim -- this choice is a manual entry spot for theEZ Shim program by Specialty Products Co. Whenstarted under the Files Menu it is necessary tomanually enter all alignment and specificati<strong>on</strong> data.The best place to use the EZ Shim program is duringan alignment by choosing the Adjustment Assistantfuncti<strong>on</strong>s (see page 76).Page 93
(Blank Page)
TM<str<strong>on</strong>g>Visualiner</str<strong>on</strong>g> <str<strong>on</strong>g>Series</str<strong>on</strong>g>Maintenance andService
(Blank Page)
Maintaining the <str<strong>on</strong>g>Visualiner</str<strong>on</strong>g> <str<strong>on</strong>g>Series</str<strong>on</strong>g> AlignerMaintenance of the <str<strong>on</strong>g>Visualiner</str<strong>on</strong>g> is easy and in most cases can be performed by the operator of themachine. A daily cleaning with a mild amm<strong>on</strong>iated cleaner will maintain the exterior. Using a silic<strong>on</strong>based spray <strong>on</strong> the head keypads will keep them soft and pliable giving you years of use. This willhelp preserve the professi<strong>on</strong>al appearance desired in today's automotive shop.Periodic calibrati<strong>on</strong> of the measuring heads insures alignments are d<strong>on</strong>e with accuracy and c<strong>on</strong>fidence.Using the opti<strong>on</strong>al Customer Calibrati<strong>on</strong> Kit, John Bean makes basic calibrati<strong>on</strong> a simpleprocess allowing the equipment operator to quickly perform the steps whenever necessary. Thefollowing pages assist with use of this software and the calibrati<strong>on</strong> of the unit. When calibrati<strong>on</strong>software is not installed the unit will prompt entry of a "Security Code" for use <strong>on</strong>ly by an authorizedJohn Bean Company Service Technician. During the head calibrati<strong>on</strong>, if any of the sensorshas failed or moved bey<strong>on</strong>d acceptable limits the software will flag the situati<strong>on</strong> and recommendservice by a qualified John Bean Company Representative.In the back of this guide is a troubleshooting guide designed to assist you should a problem occur.Refer to this guide should the unit fail to operate normally.To access all equipment maintenance functi<strong>on</strong>s, use the arrow keys to place the highlight box over"Maintain Aligner" and press Enter.Page 97
(Blank Page)
Maintain Aligner MenuThis menu is the hub of all <str<strong>on</strong>g>Visualiner</str<strong>on</strong>g> service andmaintenance activities. Choices are:Calibrate -- the software that enables the measuringheads to be calibratedMeasurement data display -- primarily for JohnBean Company service pers<strong>on</strong>nel, this allows accessto measuring sensor direct outputAligner diagnostics -- a series of functi<strong>on</strong>s for JohnBean Company service pers<strong>on</strong>nelPreventative maintenance -- a software featurethat guides the equipment operator through recommendedperiodic aligner maintenanceAlignment Counter -- provides a count of the numberof alignments performed by the <str<strong>on</strong>g>Visualiner</str<strong>on</strong>g> sinceinitial installati<strong>on</strong> and since the last serviceHead voltages -- used <strong>on</strong>ly <strong>on</strong> the cordless versi<strong>on</strong>of the <str<strong>on</strong>g>Visualiner</str<strong>on</strong>g> measuring headsCustomer Calibrati<strong>on</strong> (with opti<strong>on</strong>al kit)Step 1. Calibrate Aligner -- select this item fromthe Maintain Aligner Menu and press Enter to accessthe calibrati<strong>on</strong> menus. If the <str<strong>on</strong>g>Visualiner</str<strong>on</strong>g> is equippedwith the opti<strong>on</strong>al Preventative Maintenance software,a technician identificati<strong>on</strong> screen appears. Any nameor ID number can be entered for later verificati<strong>on</strong> of thepers<strong>on</strong> performing the calibrati<strong>on</strong>.Step 2. Calibrati<strong>on</strong> Menu -- select which set ofmeasuring head sensors are to be calibrated. Choicesare:Camber, SAI, and cross toe -- camber sensors arein all heads, while SAI and cross toe sensors are <strong>on</strong>lyin the fr<strong>on</strong>t heads <strong>on</strong> 6 sensor systems and in the rearheads of 8 sensor systems. Cross toe measures thewheel angles across the fr<strong>on</strong>t or back of the vehicleTrack toe -- each head has a toe system thatmeasures angles from the fr<strong>on</strong>t to rear (or vice versa)of the vehicleCalibrati<strong>on</strong> factors -- shows a chart of the currentfactors that are stored in memoryClear calibrati<strong>on</strong> factors -- resets all factors to zeroPage 99
Customer Calibrati<strong>on</strong> ... c<strong>on</strong>tinuedStep 3. Camber, SAI, and Cross Toe Calibrati<strong>on</strong>A. Select whether the fr<strong>on</strong>t or rear heads are to becalibrated. Press Enter.B. The screen will prompt to identify which rack is tobe calibrated. Up to 3 alignment surfaces can beutilized with the <str<strong>on</strong>g>Visualiner</str<strong>on</strong>g> <str<strong>on</strong>g>Series</str<strong>on</strong>g>, and each must becalibrated independently. In most shops, Rack A isthe primary alignment surface. Press Enter. Followall <strong>on</strong>-screen instructi<strong>on</strong>s carefully.C. The Customer Calibrati<strong>on</strong> Kit includes a calibrati<strong>on</strong>bar, approximately 6 ft. (2.5m) l<strong>on</strong>g and twostands that sit <strong>on</strong> the alignment rack surface. Whenperforming calibrati<strong>on</strong> of the fr<strong>on</strong>t heads, place thestand <strong>on</strong> the turntables. When calibrating the rearheads, place the stands <strong>on</strong> the rear of the rack.Left Fr<strong>on</strong>t Head and numbered side ofcalibrati<strong>on</strong> bar.Figure 1. Calibrati<strong>on</strong> bar and standsset up <strong>on</strong> turntables . (Rear View)The bar is placed in the notches ofthe stands as shown in Figure 1.Make sure the numbered end of thebar (1, 2, 3) is <strong>on</strong> the left side.Remove the heads from the wheelclamps and mount them <strong>on</strong> the endsof the calibrati<strong>on</strong> bar as shown.D. The next step is to perform runout compensati<strong>on</strong>of the calibrati<strong>on</strong> bar. This is d<strong>on</strong>e by rotating the baruntil the #1 positi<strong>on</strong> is at 12:00, as shown by the flipindicator <strong>on</strong> the left stand.At the #1 positi<strong>on</strong>, press the"Runout" butt<strong>on</strong> <strong>on</strong> the left head<strong>on</strong>ly (Figure 2). It is not necessaryto take runout <strong>on</strong> the righthead. The light <strong>on</strong> the runout butt<strong>on</strong>will blink. Next rotate the baruntil positi<strong>on</strong> #2 is at 12:00, andpress the runout butt<strong>on</strong> <strong>on</strong> the lefthead. Repeat for positi<strong>on</strong> #3.E. After runout is completed thescreen will prompt to level andlock the heads. Carefully performthis step using the levels <strong>on</strong> theheads, then press Enter.Runout Butt<strong>on</strong>Figure 2. LeftHead KeypadPage 100
Customer Calibrati<strong>on</strong> ... c<strong>on</strong>tinuedF. Calibrati<strong>on</strong> Check / Recalibrati<strong>on</strong> -- After completingthe runout and level/lock procedure, a screenappears to verify calibrati<strong>on</strong>. The screen at the righthas three columns. The first column describes thec<strong>on</strong>diti<strong>on</strong> of the aligner prior to calibrati<strong>on</strong>. The nextcolumn is used to display the most recent calibrati<strong>on</strong>.The last column shows the total amount of changebetween calibrati<strong>on</strong>s. Should a factor exceed theusable limit, a warning will be displayed which indicatesa possible problem and will recommend that aservice technician be called. Pressing soft-key #4"Reject" will cancel the calibrati<strong>on</strong> procedure. Pressing#1 "Accept" will use the new calibrati<strong>on</strong> factors toperform alignments. Refer to the troubleshootingporti<strong>on</strong> of this guide should the unit fail to workcorrectly. Use the Calibrati<strong>on</strong> Factors Menu to seethe results of the calibrati<strong>on</strong>. The <str<strong>on</strong>g>Visualiner</str<strong>on</strong>g> will usethese calibrati<strong>on</strong> factors to perform alignments. Simplyput, this becomes the unit's "0" reference.G. The next screen to appear is "Calibrati<strong>on</strong> Notes".The reas<strong>on</strong> the calibrati<strong>on</strong> was performed is enteredhere for future reference. This informati<strong>on</strong> becomes apart of the calibrati<strong>on</strong> history that is retained by thecomputer's memory. Select the most logical entryand press Enter.This completes the calibrati<strong>on</strong> procedure for camber,SAI, and cross toe.Step 4. Track Toe Calibrati<strong>on</strong> -- track toe is usedto establish the vehicle's rear toe, geometric centerline, and thrust line. Track toe calibrati<strong>on</strong> must bed<strong>on</strong>e <strong>on</strong> a vehicle using the special Track Toe Fixturethat is part of the Customer Calibrati<strong>on</strong> Kit. Place allhead/clamp assemblies <strong>on</strong> the vehicle in preparati<strong>on</strong>for these steps. Each head must be d<strong>on</strong>e independently.The head to be calibrated must reside <strong>on</strong> afr<strong>on</strong>t wheel with the track toe system facing the rear.A. Select Track Toe from the Calibrati<strong>on</strong> Menu.Follow the <strong>on</strong> screen instructi<strong>on</strong>s which assist in thecalibrati<strong>on</strong> step by step.Page 101
Customer Calibrati<strong>on</strong> ... c<strong>on</strong>tinuedB. Choose the head to be calibrated. The head to becalibrated must be mounted to a fr<strong>on</strong>t wheel in orderto steer when directed.C. Choose the compani<strong>on</strong> head to be used <strong>on</strong> the rearwheel to act as a track toe signal receiver.Track Toe Fixture Setup -- this fixture is includedwith the Customer Calibrati<strong>on</strong> Kit. The kit includesthe Track Toe Fixture (L-shaped aluminum piece witha stub shaft), 2 standard head locking knobs, and <strong>on</strong>elocking knob with a l<strong>on</strong>ger threaded secti<strong>on</strong>. The twostandard locking knobs are placed in the threadedholes <strong>on</strong> the top, in both ends of the fixture. Removethe head to be calibrated from the wheel clamp.Mount the track toe fixture <strong>on</strong>to the wheel clamp shaftwith the larger end facing the wheel. Use the includedknob to snug the fixture to the clamp shaft.D. Remove the tightening knob from the head to becalibrated and place the head <strong>on</strong> the shaft of the TrackToe Fixture. Using the l<strong>on</strong>g screw locking knob goingdown through the top of the fixture, tighten the head<strong>on</strong>to the fixture.E. Mount the compani<strong>on</strong> head <strong>on</strong> the rear wheelopposite the head being calibrated. Make sure thereis a clear line of sight from the fr<strong>on</strong>t to the rear. Leveland lock the compani<strong>on</strong> head.F. Following the <strong>on</strong>-screen instructi<strong>on</strong>s, steer thefr<strong>on</strong>t wheel until the reading shown is close to zero.IMPORTANT NOTE: DO NOT move the wheel atall after this point! DO NOT remove the head fromthe fixture!G. The software will prompt to remount the head andTrack Toe Fixture upside down. This is d<strong>on</strong>e byloosening the knob holding the fixture to the wheelclamp and sliding the fixture off away from the wheel,while being careful not to move the vehicle wheel. Turnthe fixture with the head still securely mountedupside down (180 deg.) until the narrow end of thefixture is facing the wheel. Remount this narrow end<strong>on</strong> the clamp shaft and tighten down the knob/screw.A correct orientati<strong>on</strong> at this point will have the tracktoe system of the head pointing to the rear. Make surethere is a numerical reading <strong>on</strong> screen at this point.It may be necessary to point the fixture/head downwardsslightly towards the compani<strong>on</strong> receiver head.Page 102
Customer Calibrati<strong>on</strong> ... c<strong>on</strong>tinuedH. Once these steps are d<strong>on</strong>e, press Enter to viewthe Calibrati<strong>on</strong> Check / Recalibrati<strong>on</strong> screen to decidewhether to accept or reject the calibrati<strong>on</strong> of thishead. If the New Factor or Change values are excessive,a warning message will appear. In most casesthe calibrati<strong>on</strong> factors are good and it is proper topress soft-key 1, "Accept".I. The Calibrati<strong>on</strong> Notes screen will appear to allowentry and storage of the reas<strong>on</strong> for calibrati<strong>on</strong>.J. Repeat these steps for all heads in the system.The Left Fr<strong>on</strong>t and Right Rear heads are calibrated <strong>on</strong>the vehicle's left fr<strong>on</strong>t wheel. The Right Fr<strong>on</strong>t and LeftRear heads are calibrated <strong>on</strong> the vehicle's right fr<strong>on</strong>twheel. This completes the customer calibrati<strong>on</strong> procedure.Calibrati<strong>on</strong> FactorsThe calibrati<strong>on</strong> factors can be viewed at any time byselecting "Calibrati<strong>on</strong> factors" from the Calibrati<strong>on</strong>Menu. These factors are referenced each time analignment is performed. Notice there are three sets ofcamber factors for the three alignment surfaces.Calibrati<strong>on</strong> History MenuThe past 10 calibrati<strong>on</strong>s of the <str<strong>on</strong>g>Visualiner</str<strong>on</strong>g> can beviewed by selecting "Calibrati<strong>on</strong> history" from theCalibrati<strong>on</strong> Menu. It gives a graphical presentati<strong>on</strong> ofthe calibrati<strong>on</strong> factors al<strong>on</strong>g with dates the calibrati<strong>on</strong>swere performed. Reas<strong>on</strong> for calibrati<strong>on</strong> detail isaccessed by highlighting a date and pressing Enter.Page 103
Measurement Data DisplayThese screens are primarily used by John BeanService pers<strong>on</strong>nel in diagnosing equipment problems.This informati<strong>on</strong> displays the direct output ofthe various measurement sensors used to determinethe wheel alignment angles. As the operator of theequipment, it may be useful to have some knowledgeof the <str<strong>on</strong>g>Visualiner</str<strong>on</strong>g>'s built-in diagnostic capabilities.Data Display MenuThere are two screens to view sensor outputs:Display all sensor data -- shows a myriad of systeminformati<strong>on</strong> for advanced diagnostic capabilitiesDisplay raw values <strong>on</strong>ly -- a simple display of directoutput values from the measurement sensorsDisplay All Sensor DataThe informati<strong>on</strong> available <strong>on</strong> this screen includes:Displayed values -- the alignment angle numbersthat are displayed <strong>on</strong> the Fr<strong>on</strong>t/Rear Meter screens.Calibrati<strong>on</strong> and runout factors are includedRaw values -- direct sensor outputsGain -- amplifier values for toe system circuitsRunout factors -- these values werestored when runout compensati<strong>on</strong> wasperformed <strong>on</strong> each wheel. There is acamber and toe plane value givenCalibrati<strong>on</strong> factors -- these are thevalues stored in memory from the lasthead calibrati<strong>on</strong> performedHead communicati<strong>on</strong> -- a status indicatorof whether the head computer iscommunicating with the main computerin the c<strong>on</strong>soleData input -- as a key <strong>on</strong> the mainkeyboard or any head keypad is pressedit will appear here.Page 104
Raw Data DisplayThis screen shows <strong>on</strong>ly the direct sensor outputsfrom each head. The values themselves have verylittle meaning when viewed while the heads are <strong>on</strong> avehicle. All dashes showing for a head indicates aloss of communicati<strong>on</strong>s. A loss of any toe signal willresult in dashes appearing in the problem locati<strong>on</strong>.Aligner DiagnosticsC<strong>on</strong>tains the following tests:Printer test -- causes the printer (opti<strong>on</strong>al) to beginprinting its character set. Be sure the printer is turned<strong>on</strong> before beginning this test. The printer will stopprinting when it has completed its testing.CRT adjustment -- used to maintain the VGA M<strong>on</strong>itorat peak sharpness. Adjustments to the CRTshould be performed by qualified John Bean CompanyService Technicians <strong>on</strong>lyHead diagnostics -- reserved for John Bean Companyservice pers<strong>on</strong>nelAlignment Counter (active with Suspensi<strong>on</strong> Plusenabled <strong>on</strong>ly) -- provides a count of the number ofalignments performed by the <str<strong>on</strong>g>Visualiner</str<strong>on</strong>g> since initialinstallati<strong>on</strong> and since the last service was performed.Page 105
User Serviceable PartsMany parts of the <str<strong>on</strong>g>Visualiner</str<strong>on</strong>g> can be replaced withoutcalling for a Service Technician.Cable replacement (85617): Unplug the cable fromthe back of the aligner and from the head. Replacewith the new cable and check for proper operati<strong>on</strong>.Printer ribb<strong>on</strong> replacement: Remove the top coverof the printer and remove the old ribb<strong>on</strong> from itsreceptacle. Remove the protective cover from the newribb<strong>on</strong> and positi<strong>on</strong> in the receptacle. Use the printertest functi<strong>on</strong> under the Maintain aligner menu to testthe printer's operati<strong>on</strong>. Read the Printer's ownersmanual for more details.Membrane panel replacement (85605): Removethe four screws from the head cover. These screwsare accessed through the rubber bumpers <strong>on</strong> thehead cover. The membrane switch ribb<strong>on</strong> cable isattached to printed circuit board inside the head.DO NOT PULL ON THE HEAD COVER WHENREMOVING. DAMAGE TO THE RIBBON CABLECONNECTOR WILL OCCUR.Other Replacement Parts85718 Keyboard w/ decals85569 Keyboard, no decals85567 Remote c<strong>on</strong>troller85633 Clamp wedge grip85649 Clamp stub shaft63499 Bungi strap86477 Clamp rod extensi<strong>on</strong>83258 Head locking knob84467 Level - clear square86159 Level - black round85617 Head interc<strong>on</strong>nect cable - 33'85616 Head interc<strong>on</strong>nect cable - 65'69804 Rack to head cable - curly86278 Rack to head cable - straightJohn Bean Company would like to take this opportunityto Thank You for your purchase of a <str<strong>on</strong>g>Visualiner</str<strong>on</strong>g><str<strong>on</strong>g>Series</str<strong>on</strong>g> Alignment System and sincerely hope it willbring you many years of profitable service.Pinch the tabs <strong>on</strong> both sides of the cable c<strong>on</strong>nectorand pull back gently <strong>on</strong> them. Slide the cable from thec<strong>on</strong>nector. NOTE THE POSITION OF THE RIBBONCABLE WHEN REMOVING FOR EASIER INSTAL-LATION OF THE NEW MEMBRANE CABLE. Peelthe old membrane from the head cover. Clean thehead cover thoroughly with Isopropyl Alcohol. Whendry, peel backing off of the new membrane switch andplace <strong>on</strong> head cover being careful not to pinch theribb<strong>on</strong> cable as it passes through the hole in thecover. Place the ribb<strong>on</strong> cable back in the c<strong>on</strong>nectorand push the c<strong>on</strong>nector's tabs back in. Reinstall thehead cover and test the membrane for proper operati<strong>on</strong>.Page 106
Troubleshooting Operati<strong>on</strong>al ProblemsSymptomPossible CauseSuggested RepairUnit fails to turn <strong>on</strong>.Power Supply from wallPower cableBlown FuseCheck wall power supply by pluggingin a known working item.Check the power cable for correct c<strong>on</strong>necti<strong>on</strong>to machine.Check cable c<strong>on</strong>tinuity or substituteknown good cable.Check all three fuses located <strong>on</strong> back.If fuses are blown, check for propervoltage setting, replace.Call a qualified Technician if unit stillfails to turn <strong>on</strong>.Boot Up sequence not complete.Program start up failureDrive failureSwitch off and turn back <strong>on</strong>. On floppysoftware units try with backup disk. Ifproblem persists call a technician.Call for service.No screen display.Blown fuseVideo card or CRT problemUnplug unit. Check all fuses, replaceif necessary.Call for service.Error message displayed <strong>on</strong> bootUp.Program failureComputer hardware problemRestart unit. See above boot-up problem.If problem persists call for technician.Call for service.Program will not advance whenusing remote.Remote Batteries Dead or notinstalled properly.Dirt <strong>on</strong> face of remote or remotesensor lens dirty or covered.Check batteries.Clean remote or remote sensor lens.Call for technical support if problempersists.Page 107
Troubleshooting Operati<strong>on</strong>al ProblemsSymptomPossible CauseSuggested RepairProgram will not advance whenusing Head or c<strong>on</strong>sole remote.(Lock Up)Blown FuseProgram lockupComputer hardware failureCheck fuses <strong>on</strong> rear of unitRestart aligner and retry operati<strong>on</strong>.call for assistance if required.Call for service technicianDisplays Head Communicati<strong>on</strong>Loss.Bad Head CableToe PCB or computer failureSubstitute know good Head cable. UseMeasurement Data Display screen.Replace bad cable.Call for service technicianWill not perform Runout.Bad head keypadToe PCB or computer failureUse Measurement Data Display toread keyboard entry displays. Call forparts or for service to replace keypad.Call for service technicianWill not perform Caster Swing.Blocked Track Toe beamToo much total toe <strong>on</strong> fr<strong>on</strong>t wheelsUnequal head heights <strong>on</strong> clampProblem with vehicleHead comp<strong>on</strong>ent failureRemove obstructi<strong>on</strong> in toe beam path,clean lenses.Adjust total toe to straightahead.Adjust head heightsSwitch to Manual Caster mode to complete,try <strong>on</strong> another carCall for service technicianCamber reading does notchange and "0" Caster reading.Broken Camber sensorBad Toe PCB.Call for service to replace sensorCall for service technicianCaster Adjustment reads backwardfrom expected adjustment.Brake pedal depressor not usedor not holding brake secure.Turntables seizingCheck use of pedal depressor. Startvehicle to use power brake system.Clean, rebuild, or replace service turntablesPage 108
Troubleshooting Operati<strong>on</strong>al ProblemsSymptomPossible CauseSuggested Repair"0" SAI reading after swing andno live Caster or A-arm assistanceadjustment - frozen.Broken SAI SensorBad Toe PCBCall for service technicianCall for service technicianNo Toe Readings.Blocked Toe BeamBad LED TransmitterBad Toe ReceiverRemove obstructi<strong>on</strong> in toe beam path,clean lenses, check for missing/cracked lenses.Call for service technicianCall for service technicianNo Printer operati<strong>on</strong>Printer unplugged or not turned<strong>on</strong>.Printer data cable disc<strong>on</strong>nectedor failed.Program not c<strong>on</strong>figured correctlyfor printer or printer DIP switchesnot set properly.Check all printer power c<strong>on</strong>necti<strong>on</strong>s.Check <strong>on</strong>/off switch. Ensure Printer is"On Line" as indicated by LED.Check c<strong>on</strong>necti<strong>on</strong>s at printer and backof computer.Check system c<strong>on</strong>figurati<strong>on</strong> under SecurityCode Word. If printer not enabled,call for codes. Check Printersetup also for proper c<strong>on</strong>figurati<strong>on</strong>.Machine resets or changesmenus randomly.Remote c<strong>on</strong>troller problemComputer system problemCover the Infrared receiver <strong>on</strong> the c<strong>on</strong>solewith a cloth to see if the problemstops. If so call for check for alternateremote sources. Perhaps a TV or VCRis nearby.Call for service technicianPage 109
(Blank Page)
(Blank Page)
TMUSAJohn Bean Company309 Exchange AvenueC<strong>on</strong>way, Arkansas 72032Tel.: (800) 362-8326 or (501) 450-1500Fax: (501) 450-1585FRANCEJohn Bean Company<str<strong>on</strong>g>Snap</str<strong>on</strong>g>-On <strong>Equipment</strong> FranceZ.A. Du Vert Galant15, rue de la Guivern<strong>on</strong>eBP 717595310 Saint Ouen L’Aum<strong>on</strong>eTel: (33) 1-3448-5878Fax: (33) 1-3448-5879IRELAND<str<strong>on</strong>g>Snap</str<strong>on</strong>g>-On <strong>Equipment</strong> Europe Ltd.Bay 99Industrial Estate,Shann<strong>on</strong>Co. Claire, IrelandTel: (353) 6147-1300Fax: (353) 6147-2556CANADAJohn Bean Company6500 Millcreek DriveMississauga, OntarioCanada L5N 2W6Tel: (905) 814-0114Fax: (905) 814-0110GERMANYJohn Bean Auto Service GerateDivisi<strong>on</strong> to Sun Electric Deutschland GMbHGewerbepark SinnD-35764 Sinn Herborner Str. 7-9Tel: (49) 2772-9404-0Fax: (49) 2772-94042-23LATIN AMERICARua Apinages1268 cj. 605BPerdizes-Sao Paulo-S.P.Cep: 05017-0000BrazilTel: (55) 11-871-0713Fax: (55) 11-871-0713Notice: The informati<strong>on</strong> c<strong>on</strong>tained in this document is subject to change without notice. John BeanCompany makes no warranty with regard to this material. John Bean Company shall not be liable forerrors c<strong>on</strong>tained herein or for incidental c<strong>on</strong>sequential damages in c<strong>on</strong>necti<strong>on</strong> with furnishings,performance, or use of this material.This document c<strong>on</strong>tains proprietary informati<strong>on</strong> which is protected by copyright and patents. All rightsare reserved. No part of this document may be photocopied, reproduced, or translated without priorwritten c<strong>on</strong>sent of John Bean Company.is a registered trademark of the John Bean Company and <str<strong>on</strong>g>Snap</str<strong>on</strong>g>-<strong>on</strong> IncorporatedForm 5021-7...jbc copyright 1997-2002 wdcPrinted in the USA


