DRAFT 7/12/05 - MHz Electronics, Inc
DRAFT 7/12/05 - MHz Electronics, Inc
DRAFT 7/12/05 - MHz Electronics, Inc
- No tags were found...
Create successful ePaper yourself
Turn your PDF publications into a flip-book with our unique Google optimized e-Paper software.
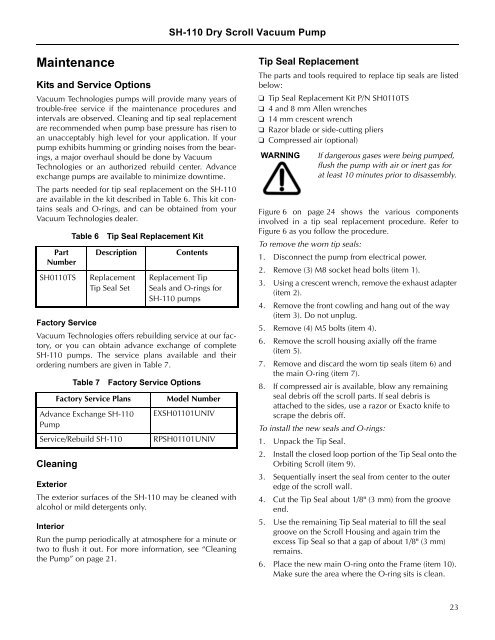
SH-110 Dry Scroll Vacuum PumpMaintenanceKits and Service OptionsVacuum Technologies pumps will provide many years oftrouble-free service if the maintenance procedures andintervals are observed. Cleaning and tip seal replacementare recommended when pump base pressure has risen toan unacceptably high level for your application. If yourpump exhibits humming or grinding noises from the bearings,a major overhaul should be done by VacuumTechnologies or an authorized rebuild center. Advanceexchange pumps are available to minimize downtime.The parts needed for tip seal replacement on the SH-110are available in the kit described in Table 6. This kit containsseals and O-rings, and can be obtained from yourVacuum Technologies dealer.PartNumberSH0110TSFactory ServiceVacuum Technologies offers rebuilding service at our factory,or you can obtain advance exchange of completeSH-110 pumps. The service plans available and theirordering numbers are given in Table 7.CleaningTable 6Table 7Tip Seal Replacement KitDescriptionReplacementTip Seal SetFactory Service PlansAdvance Exchange SH-110PumpService/Rebuild SH-110ContentsReplacement TipSeals and O-rings forSH-110 pumpsFactory Service OptionsModel NumberEXSH01101UNIVRPSH01101UNIVExteriorThe exterior surfaces of the SH-110 may be cleaned withalcohol or mild detergents only.InteriorRun the pump periodically at atmosphere for a minute ortwo to flush it out. For more information, see “Cleaningthe Pump” on page 21.Tip Seal ReplacementThe parts and tools required to replace tip seals are listedbelow:❑ Tip Seal Replacement Kit P/N SH0110TS❑ 4 and 8 mm Allen wrenches❑ 14 mm crescent wrench❑ Razor blade or side-cutting pliers❑ Compressed air (optional)WARNINGIf dangerous gases were being pumped,flush the pump with air or inert gas forat least 10 minutes prior to disassembly.Figure 6 on page 24 shows the various componentsinvolved in a tip seal replacement procedure. Refer toFigure 6 as you follow the procedure.To remove the worn tip seals:1. Disconnect the pump from electrical power.2. Remove (3) M8 socket head bolts (item 1).3. Using a crescent wrench, remove the exhaust adapter(item 2).4. Remove the front cowling and hang out of the way(item 3). Do not unplug.5. Remove (4) M5 bolts (item 4).6. Remove the scroll housing axially off the frame(item 5).7. Remove and discard the worn tip seals (item 6) andthe main O-ring (item 7).8. If compressed air is available, blow any remainingseal debris off the scroll parts. If seal debris isattached to the sides, use a razor or Exacto knife toscrape the debris off.To install the new seals and O-rings:1. Unpack the Tip Seal.2. Install the closed loop portion of the Tip Seal onto theOrbiting Scroll (item 9).3. Sequentially insert the seal from center to the outeredge of the scroll wall.4. Cut the Tip Seal about 1/8" (3 mm) from the grooveend.5. Use the remaining Tip Seal material to fill the sealgroove on the Scroll Housing and again trim theexcess Tip Seal so that a gap of about 1/8" (3 mm)remains.6. Place the new main O-ring onto the Frame (item 10).Make sure the area where the O-ring sits is clean.<strong>DRAFT</strong> 7/<strong>12</strong>/<strong>05</strong>23


