

Summerville Ft.pdf - Swing-N-Slide
Summerville Ft.pdf - Swing-N-Slide
Summerville Ft.pdf - Swing-N-Slide
- No tags were found...

You also want an ePaper? Increase the reach of your titles
YUMPU automatically turns print PDFs into web optimized ePapers that Google loves.
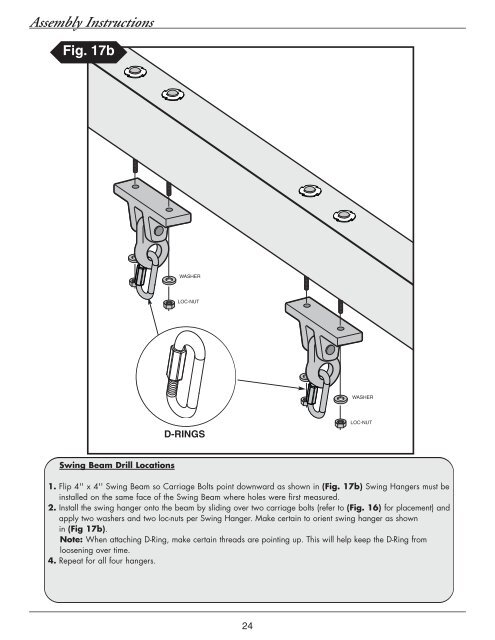
Assembly InstructionsFig. 17b4'' x 6'' <strong>Swing</strong> BeamWASHERLOC-NUTWASHERD-RINGSLOC-NUT<strong>Swing</strong> Beam Drill Locations1. Flip 4'' x 4'' <strong>Swing</strong> Beam so Carriage Bolts point downward as shown in (Fig. 17b) <strong>Swing</strong> Hangers must beinstalled on the same face of the <strong>Swing</strong> Beam where holes were first measured.2. Install the swing hanger onto the beam by sliding over two carriage bolts (refer to (Fig. 16) for placement) andapply two washers and two loc-nuts per <strong>Swing</strong> Hanger. Make certain to orient swing hanger as shownin (Fig 17b).Note: When attaching D-Ring, make certain threads are pointing up. This will help keep the D-Ring fromloosening over time.4. Repeat for all four hangers.24


