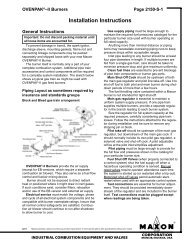
E110 FIREYE FLAME-MONITOR™ - Westmill Industries
E110 FIREYE FLAME-MONITOR™ - Westmill Industries
E110 FIREYE FLAME-MONITOR™ - Westmill Industries

You also want an ePaper? Increase the reach of your titles
YUMPU automatically turns print PDFs into web optimized ePapers that Google loves.
34<br />
3. During the pilot flame test, if flame is not detected for a continuous 30 seconds, the control will<br />
lockout. To re-establish the pilot flame trial for ignition (PTFI), manual reset of the lockout<br />
switch is required, and a complete prepurge accomplished.<br />
4. When UV flame detection is used, a test is required to verify that UV radiation from the ignition<br />
spark is not being detected. To accomplish this, manually shut off both pilot and main fuels. Initiate<br />
a normal start-up, and when the PTFI display comes on, observe the display which should<br />
read no signal more than 4. If more than 4 is observed, realign the UV scanner, and/or shield the<br />
spark from the scanner’s view.<br />
5. With all methods of flame detection, check pilot flame failure response by manually shutting off<br />
the pilot fuel and then initiate a normal start-up. With no pilot flame present, the control will deenergize<br />
the pilot assembly at the end of the trial for ignition interval, and the control will lockout.<br />
Also check to verify that the ignition spark does not “give” a flame signal on infrared or<br />
flame rod applications.<br />
Main Flame Test<br />
NOTE: This test requires an interrupted pilot (a pilot that shuts off after main flame has been established.<br />
1. Proceed through a normal startup. After the pilot flame is shut off, observe the reading on the<br />
display. If the signal reading is low, readjust main flame or realign detector.<br />
2. Check main flame failure protection by manually shutting off the main fuel supply. Within 4 seconds<br />
after main flame goes out, the fuel valve will be de-energized. The alarm circuit will be<br />
energized following safety lockout.<br />
Minimum Pilot Test<br />
CAUTION: The minimum pilot test must be accomplished by a trained and qualified burner<br />
technician.<br />
This test assures that the flame detector will not detect a pilot flame too small to reliably light off the<br />
main flame. The test should be made on every new installation and following any reapportioning of<br />
the flame detector. This procedure should not be used on a direct spark ignited burner.<br />
1. Turn off the main fuel supply manually.<br />
2. At the start of PTFI, place the Check-run switch in the check position.<br />
3. Reduce the fuel supply to the pilot until the display reads below 10.<br />
4. Slowly increase the fuel to the pilot until the display reads 10. This is minimum pilot flame that<br />
the flame detector will reliably detect.<br />
5. Place the Check-run switch in the Run position. When the main fuel safety shut-off valve is<br />
energized, slowly open the manual main fuel valve.<br />
6. Observe the light-off of the main flame. It must be smooth and normal.<br />
CAUTION: If the main flame does not ignite immediately, shut off the main fuel. Realign the<br />
detector to require larger minimum pilot flame.<br />
7. Repeat the test until a reliable and smooth light-off occurs with the minimum pilot.<br />
8. After this test is completed, increase the fuel to the pilot to its normal setting.<br />
®