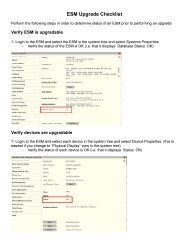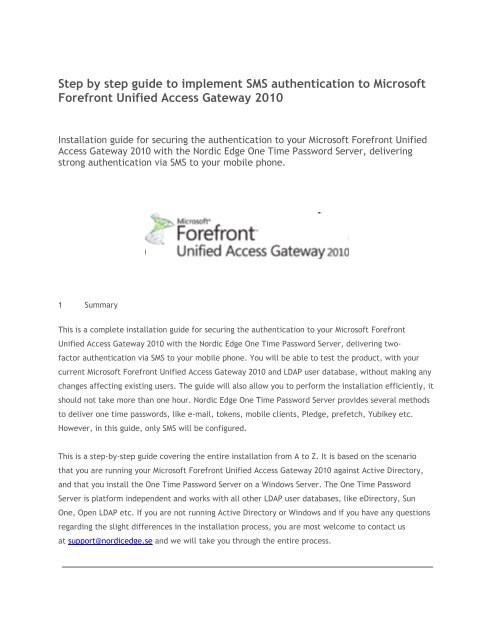
One Time Password/Microsoft Forefront UAG 2010 step by step guide
One Time Password/Microsoft Forefront UAG 2010 step by step guide
One Time Password/Microsoft Forefront UAG 2010 step by step guide

Create successful ePaper yourself
Turn your PDF publications into a flip-book with our unique Google optimized e-Paper software.
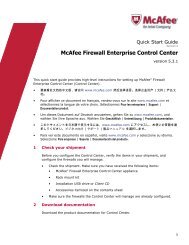
Table of Contents1 SummaryTable of Contents2 PrerequisitesImportant information regarding communication3 Getting started3.1 Register and download the software4 Installation4.1 Start the installation4.2 Installing license5 Configuring the <strong>One</strong> <strong>Time</strong> <strong>Password</strong> Server5.1 Start the OTP ConfiguratorStart the OTP Configurator <strong>by</strong> clicking on the left button - “Configuration”5.2 Configure the <strong>One</strong> <strong>Time</strong> <strong>Password</strong> Server5.3 Configure RADIUS5.4 Configure databases5.5 Configure LDAP Host Settings5.6 Configure the LDAP database settings5.7 Configure search filter5.8 Test LDAP Authentication6 Configure the <strong>UAG</strong>-<strong>2010</strong> client settings.7 Configure Delivery Method8 Restart the <strong>One</strong> <strong>Time</strong> <strong>Password</strong> Server as Windows Service9 Add mobile phone number with <strong>Microsoft</strong> Management Console10 Configuring <strong>Microsoft</strong> <strong>Forefront</strong> Unified Access Gateway <strong>2010</strong>10.1 Start <strong>Forefront</strong> <strong>UAG</strong> Management console10.2 On the Admin menu, click Authentication and Authorization Servers.10.3 On the Authentication and Authorization Servers dialog box, click Add.10.4 In the Server type list, click RADIUS.10.5 On the Add Authentication Server dialog box, configure the following server settings:10.6 Click on the portal. Then, click on the “Configure” button to change the authentication scheme.
10.7 Go to Authentication tab, select "Require users to authenticate at session logon". Under “SelectAuthentication Servers” click Add.10.8 Select OTP Server.10.9 Save and activate the configuration.11 Start testing11.1 Open a web browser and browse to your <strong>UAG</strong>-<strong>2010</strong>. Enter user name and password and clickthe "Log On" button.11.2 You will receive a one-time password to your mobile phone within a couple of seconds.12.3 Enter the one-time password and click the “Log On”.12 Purchase13 Technical questions
DefinitionsIn this Step <strong>by</strong> Step <strong>guide</strong> the <strong>Microsoft</strong> <strong>Forefront</strong> Unified Access Gateway <strong>2010</strong> is referred as "<strong>UAG</strong>-<strong>2010</strong>"2 PrerequisitesYou will need a server, for example a VMware virtual machine, with Windows Server 2003 or higherinstalled with Ethernet in bridge mode. The server must have a static ip-address configured and mustalso be able to reach your DNS-servers, your <strong>UAG</strong>-<strong>2010</strong> and Active Directory. Since the software is quitesmall (315 mb) and easy to remove, you can also use any existing server from your network.Important information regarding communicationThe <strong>One</strong> <strong>Time</strong> <strong>Password</strong> Server is a software that can be installed on any existing server in your network or DMZ.- The <strong>One</strong> <strong>Time</strong> <strong>Password</strong> Server must be able to communicate (Outbound traffic) with your LDAP or JDBC UserDatabase. Default port for LDAP and Secure LDAP are TCP port 389 / 636.- The <strong>UAG</strong>-<strong>2010</strong> must be able to communicate (Outbound traffic) with the <strong>One</strong> <strong>Time</strong> <strong>Password</strong> Server via Radius,UDP port 1812 or 1645 (Outbound traffic).- If you want to use the Nordic Edge SMS Gateway, the <strong>One</strong> <strong>Time</strong> <strong>Password</strong> Server must be able tocommunicate (Outbound traffic) with otp.nordicedge.net and otp.nordicedge.se with HTTPS on TCP port 443.In the following test-scenario you will need to communicate with RADIUS port 1812 or 1645 and use theNordic Edge SMS Gateway.
3 Getting started3.1 Register and download the softwareGo to www.nordicedge.net and click "PRODUCTS" and then "Downloads"
Type in your name and contact details to receive the software.
A link will be sent for downloading the software. A 30 days evaluation license will be sent via e-mail when you download the software.Download the 32 or 64 bit version depending on your platform.
4 Installation4.1 Start the installationStart the installation on the server where you want to install the <strong>One</strong> <strong>Time</strong> <strong>Password</strong> Server
Please note that if you are installing on a Windows 2008 Server you need to right click on the otp3install.exe usingexplorer and select “Run as Administrator”.
Click Next
Click Next
Click Next
Click Next
Click Next
Click Install
Click Next
Leave default on Yes and click “Done”Click Done5 Configuring the <strong>One</strong> <strong>Time</strong> <strong>Password</strong> Server5.1 Start the OTP Configurator
Start the OTP Configurator <strong>by</strong> clicking on the left button - “Configuration”5.2 Configure the <strong>One</strong> <strong>Time</strong> <strong>Password</strong> Server
On the Server page you can set the length of the one time password and for how long it should be valid. Default is5 minutes.You can also set a default country prefix, which means you will not need to set it in the mobile attributeFor more information regarding the optional setting please see <strong>One</strong> <strong>Time</strong> <strong>Password</strong> Server 3 – AdministrationmanualFor now, leave this page as default and go on to the next part – Configure RADIUS.5.3 Configure RADIUSChange to the RADIUS tab and configure the RADIUS port you want to use to communicate with your <strong>UAG</strong>-<strong>2010</strong>server. In this example we are using RADIUS port #1645.
Click Save config.5.4 Configure databasesIn this setup we are going to use the <strong>Microsoft</strong> Active Directory LDAP database.Change to the Databases tab and click on the LDAP Database button.
5.5 Configure LDAP Host SettingsFor this configuration we will use the active directory installed on the same server as the <strong>One</strong> <strong>Time</strong><strong>Password</strong> Server. We will use the internal IP-address (127.0.0.1) as host address.We will use the standard LDAP port No. 389 to communicate with Active Directory.Admin DN will be the Administrator user to search for user objects in the Active Directory database.For now this user only need read rights to the user objects attributes but be aware that later you mightwant to use options like disable accounts or the Pledge Enrollment concept from the Pledge MobileClient. In this event the Admin DN need write rights to modify the disable account attribute and tostore oath-keys into an optional user attribute.
Configure your LDAP host settings and click test. You should now get a messages saying “LDAPconnection success”Click OK and SaveNext <strong>step</strong> is to configure the LDAP database settings.5.6 Configure the LDAP database settingsThe BASE DN is the search base from where OTPServer will start looking for user objects.Click on the button with three dots at the right side of the Base DN field to browse your LDAPDatabase.Select an Organization Unit or Organization in Active Directory and click OK.
5.7 Configure search filterNext <strong>step</strong> is to configure the search filter for <strong>One</strong> <strong>Time</strong> <strong>Password</strong> to search users via selected object classes andattributes according to the <strong>Microsoft</strong> Active Directory schema.Click on the “Sample Button” and choose the filter template for MS Active Directory and click OK twice.
5.8 Test LDAP AuthenticationClick on the Test LDAP Authentication button and type in the userid of a user you know exist in the directory.
Type in the passwordIf configuration is correct you will see the following success message.
6 Configure the <strong>UAG</strong>-<strong>2010</strong> client settings.Since <strong>One</strong> <strong>Time</strong> <strong>Password</strong> Server is also a RADIUS-server, the <strong>Microsoft</strong> <strong>Forefront</strong> Unified Access Gateway<strong>2010</strong> is considered a client to the <strong>One</strong> <strong>Time</strong> <strong>Password</strong> Server.Next <strong>step</strong> is to configure the settings for this client.In the left pane click on ”Clients”
Choose a name for your <strong>UAG</strong>-<strong>2010</strong> and enter its ipaddress.Type in a RADIUS shared secret.Choose the Active Directory repository you configured earlier as User Database.Click Save
7 Configure Delivery MethodThe Delivery Methods category is meant for enabling and configuring one or more delivery methodsthat can be used <strong>by</strong> the OTP Server to send one-time passwords.<strong>One</strong> <strong>Time</strong> <strong>Password</strong> Server offers various methods like SMS, Oath Tokens, Instant Messaging, HTTP,Yubikey.In this example we will use SMS with the Nordic Edge SMS-service as the SMS-provider.During the evaluating phase we offer customers to use our Nordic Edge SMS-service free of charge for30 days from the activation of the Demo Account.In the left Pane, click “Delivery Methods” and then Nordic Edge SMS. In the right pane enable NordicEdge SMS Gateway.
To Request a demo account click “Request a demo account”.Click “Yes”
You should get a success message and the Username and <strong>Password</strong> for the Nordic Edge SMS-gateway hasautomatically been filled in. Click OK and Save Config.
8 Restart the <strong>One</strong> <strong>Time</strong> <strong>Password</strong> Server as Windows ServiceIn the server panel for click “Shutdown”
In Windows Control Panel, open Administrative Tools / ServicesFind the NordicEdge OTPServer Service, right click on that service and click “Start”.
9 Add mobile phone number with <strong>Microsoft</strong> Management ConsoleAdd a mobile phone number to your test user mobile phone attribute <strong>by</strong> starting the <strong>Microsoft</strong> MMC,select the test user and enter the mobile phone number into the Mobile attribute.
10 Configuring <strong>Microsoft</strong> <strong>Forefront</strong> Unified Access Gateway <strong>2010</strong>10.1 Start <strong>Forefront</strong> <strong>UAG</strong> Management console
10.2 On the Admin menu, click Authentication and AuthorizationServers.10.3 On the Authentication and Authorization Servers dialog box, clickAdd.10.4 In the Server type list, click RADIUS.
10.5 On the Add Authentication Server dialog box, configure the following server settings:● a. Server name - Name of the server or repository, e.g. OTPServer● b. IP address/host - IP address of your OTP Server● c. Port - 1645 (same as in the OTP Configuration)● d. Secret key - Same as the "Shared Secret" in the OTP Configuration.● e. Support challenge-response modes - Select this option
10.6 Click on the portal. Then, click on the “Configure” button to change the authenticationscheme.
10.7 Go to Authentication tab, select "Require users to authenticate at session logon".Under “Select Authentication Servers” click Add.
10.8 Select OTP Server.
10.9 Save and activate the configuration.11 Start testing11.1 Open a web browser and browse to your <strong>UAG</strong>-<strong>2010</strong>. Enter user name and password andclick the "Log On" button.
11.2 You will receive a one-time password to your mobile phone within a couple of seconds.
12.3 Enter the one-time password and click the “Log On”.