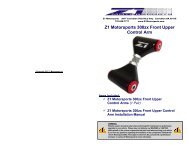
Z1 Motorsports 300zx Front Upper Control Arm - Z1Motorsports.com
Z1 Motorsports 300zx Front Upper Control Arm - Z1Motorsports.com
Z1 Motorsports 300zx Front Upper Control Arm - Z1Motorsports.com
- No tags were found...
Create successful ePaper yourself
Turn your PDF publications into a flip-book with our unique Google optimized e-Paper software.
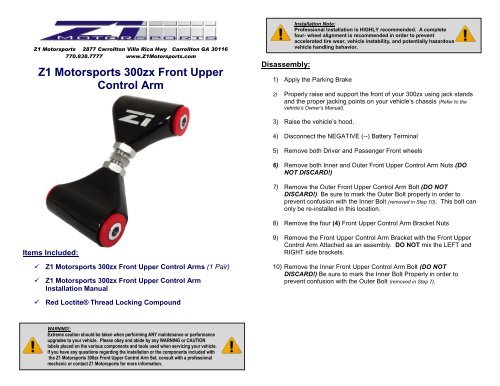
3) Hand tighten the jam nuts.4) Before re-attaching the <strong>Front</strong> <strong>Upper</strong> <strong>Control</strong> Brackets to the chassis.Install the new <strong>Front</strong> <strong>Upper</strong> <strong>Control</strong> <strong>Arm</strong>s as indicated in Figure #2using the Inner <strong>Front</strong> <strong>Upper</strong> <strong>Control</strong> <strong>Arm</strong> Bolt.It may be possible that the <strong>Front</strong> <strong>Upper</strong> <strong>Control</strong> <strong>Arm</strong> Bracket or the ThirdMember side of the control arm mounting bracket may be damaged fromprevious alignment/suspension servicing. If the arms will not fit properlydue to over-tightening of the Inner and Outer <strong>Front</strong> <strong>Upper</strong> <strong>Control</strong> <strong>Arm</strong> Bolts,additional work will be required to adjust the brackets to the original OEMspecifications. DOUBLE CHECK that you have inserted the correct side ofthe <strong>Z1</strong> <strong>Front</strong> <strong>Upper</strong> <strong>Control</strong> <strong>Arm</strong> into the brackets BEFORE attempting anyadjustments.Be sure to insert the INNER <strong>Front</strong> <strong>Upper</strong> <strong>Control</strong> <strong>Arm</strong> Bolt in theproper direction!1990 – 1999 Nissan <strong>300zx</strong> (Fairlady Z)<strong>Front</strong> Suspension TorqueSpecifications80-94 ft/lbs(108-127 N m)43-58 ft. lbs.(59-78 N m)65-80 ft. lbs.(88-108 N m)The ENGINE Side (WIDER end) of the <strong>Z1</strong> <strong>Front</strong> <strong>Upper</strong> <strong>Control</strong><strong>Arm</strong> should be inserted into the <strong>Front</strong> <strong>Upper</strong> <strong>Control</strong> <strong>Arm</strong>Bracket.* A Paint Mark found on the control arm will indicatethe ENGINE side (WIDER end).** The Race Version of the <strong>Z1</strong> <strong>Motorsports</strong> <strong>Front</strong> <strong>Upper</strong><strong>Control</strong> <strong>Arm</strong>s will have a bolt included for theENGINE side (WIDER end) of the arm. This bolt willreuse the OEM Nut and will replace the OEM bolt.Failure to use the supplied bolt will prevent properinstallation of the <strong>Z1</strong> <strong>Front</strong> <strong>Upper</strong> <strong>Control</strong> <strong>Arm</strong>s.Figure #35) Install and hand tighten a <strong>Front</strong> <strong>Upper</strong> <strong>Control</strong> <strong>Arm</strong> Nut onto theINNER bolt.6) Attach the <strong>Front</strong> <strong>Upper</strong> <strong>Control</strong> <strong>Arm</strong>/Bracket assembly onto thechassis using the previously removed <strong>Front</strong> <strong>Upper</strong> <strong>Control</strong> <strong>Arm</strong>Bracket Nuts. Torque the bolts as indicated in Figure #3.
7) Insert the OUTER <strong>Front</strong> <strong>Upper</strong> <strong>Control</strong> <strong>Arm</strong> Bolt into the ThirdMember/ King Pin. Again, be sure to insert the bolt in the properdirection.8) Install and hand tighten a <strong>Front</strong> <strong>Upper</strong> <strong>Control</strong> <strong>Arm</strong> Nut on the OuterBolt.9) Re-install any previously removed hardware and wheels.10) Torque the <strong>Front</strong> <strong>Upper</strong> <strong>Control</strong> <strong>Arm</strong> Jam Nuts to 80 ft. lbs. (108.5Nm) while the vehicle is at static height (with the weight of thevehicle resting on the suspension). The use of Loctite ® REDthread locking <strong>com</strong>pound is re<strong>com</strong>mended under the jam nutsonce the alignment is <strong>com</strong>plete. If thread locker is not usedthere is a possibility the jam nuts could loosen over time. Thisstep is easier to <strong>com</strong>plete after the arms have been bolted onto thevehicle.**A special 30mm adapter (Crowfoot Wrench) will be required to dothis**This is easier to achieve while the vehicle is on a 4-Post Lift orAlignment Rack. Access to the Inner and Outer <strong>Control</strong> <strong>Arm</strong>Bolts/Nuts can be made under the car by reaching around thefront suspension.11) Torque the Inner and Outer <strong>Control</strong> <strong>Arm</strong> Bolts/Nuts as indicated inFigure #3 while the vehicle is at static height (with the weight of thevehicle resting on the suspension).12) Perform a final test drive of the vehicle.13) Have a professional, four-wheel alignment performed by a certifiedshop.


