beaver
beaver
beaver
- No tags were found...

Create successful ePaper yourself
Turn your PDF publications into a flip-book with our unique Google optimized e-Paper software.
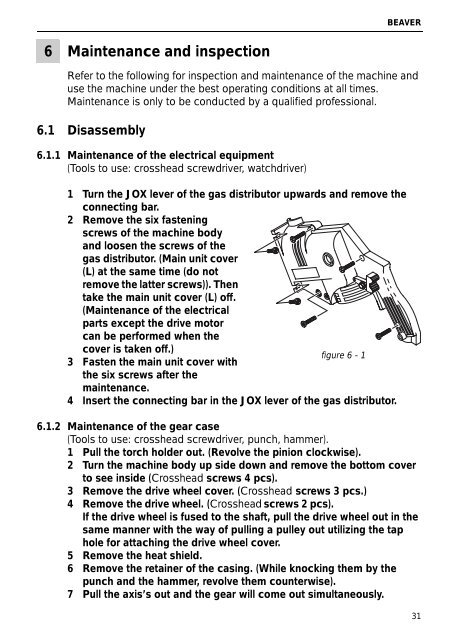
BEAVER6 Maintenance and inspectionRefer to the following for inspection and maintenance of the machine anduse the machine under the best operating conditions at all times.Maintenance is only to be conducted by a qualified professional.6.1 Disassembly6.1.1 Maintenance of the electrical equipment(Tools to use: crosshead screwdriver, watchdriver)1 Turn the JOX lever of the gas distributor upwards and remove theconnecting bar.2 Remove the six fasteningscrews of the machine bodyand loosen the screws of thegas distributor. (Main unit cover(L) at the same time (do notremove the latter screws)). Thentake the main unit cover (L) off.(Maintenance of the electricalparts except the drive motorcan be performed when thecover is taken off.)figure 6 - 13 Fasten the main unit cover withthe six screws after themaintenance.4 Insert the connecting bar in the JOX lever of the gas distributor.6.1.2 Maintenance of the gear case(Tools to use: crosshead screwdriver, punch, hammer).1 Pull the torch holder out. (Revolve the pinion clockwise).2 Turn the machine body up side down and remove the bottom coverto see inside (Crosshead screws 4 pcs).3 Remove the drive wheel cover. (Crosshead screws 3 pcs.)4 Remove the drive wheel. (Crosshead screws 2 pcs).If the drive wheel is fused to the shaft, pull the drive wheel out in thesame manner with the way of pulling a pulley out utilizing the taphole for attaching the drive wheel cover.5 Remove the heat shield.6 Remove the retainer of the casing. (While knocking them by thepunch and the hammer, revolve them counterwise).7 Pull the axis’s out and the gear will come out simultaneously.31