beaver
beaver
beaver
- No tags were found...
You also want an ePaper? Increase the reach of your titles
YUMPU automatically turns print PDFs into web optimized ePapers that Google loves.
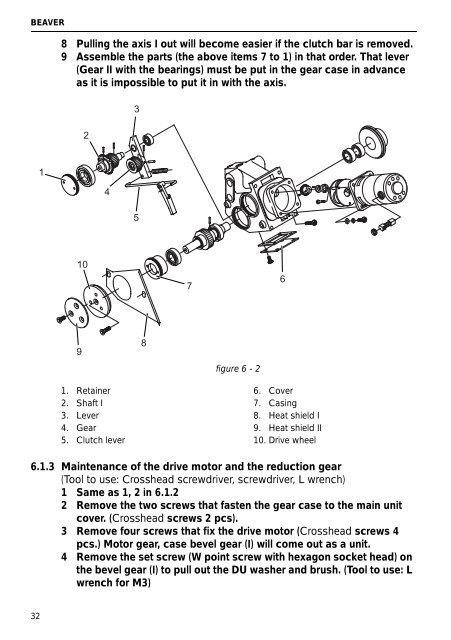
BEAVER8 Pulling the axis I out will become easier if the clutch bar is removed.9 Assemble the parts (the above items 7 to 1) in that order. That lever(Gear II with the bearings) must be put in the gear case in advanceas it is impossible to put it in with the axis.23145107691. Retainer2. Shaft I3. Lever4. Gear5. Clutch lever8figure 6 - 26. Cover7. Casing8. Heat shield I9. Heat shield II10. Drive wheel6.1.3 Maintenance of the drive motor and the reduction gear(Tool to use: Crosshead screwdriver, screwdriver, L wrench)1 Same as 1, 2 in 6.1.22 Remove the two screws that fasten the gear case to the main unitcover. (Crosshead screws 2 pcs).3 Remove four screws that fix the drive motor (Crosshead screws 4pcs.) Motor gear, case bevel gear (I) will come out as a unit.4 Remove the set screw (W point screw with hexagon socket head) onthe bevel gear (I) to pull out the DU washer and brush. (Tool to use: Lwrench for M3)32


