Models SG-WAC-15ESE SG-WAC-18ESE SG-WAC ... - Air & Water
Models SG-WAC-15ESE SG-WAC-18ESE SG-WAC ... - Air & Water
Models SG-WAC-15ESE SG-WAC-18ESE SG-WAC ... - Air & Water

You also want an ePaper? Increase the reach of your titles
YUMPU automatically turns print PDFs into web optimized ePapers that Google loves.
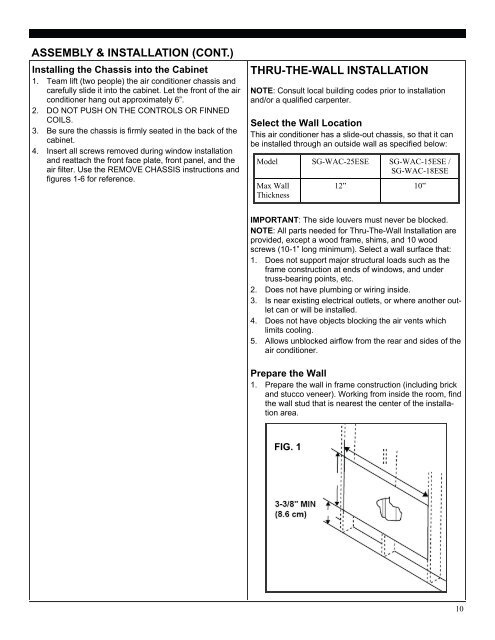
ASSEMBLY & INSTALLATION (CONT.)Installing the Chassis into the Cabinet1. Team lift (two people) the air conditioner chassis andcarefully slide it into the cabinet. Let the front of the airconditioner hang out approximately 6”.2. DO NOT PUSH ON THE CONTROLS OR FINNEDCOILS.3. Be sure the chassis is firmly seated in the back of thecabinet.4. Insert all screws removed during window installationand reattach the front face plate, front panel, and theair filter. Use the REMOVE CHASSIS instructions andfigures 1-6 for reference.THRU-THE-WALL INSTALLATIONNOTE: Consult local building codes prior to installationand/or a qualified carpenter.Select the Wall LocationThis air conditioner has a slide-out chassis, so that it canbe installed through an outside wall as specified below:Model <strong>SG</strong>-<strong>WAC</strong>-25ESE <strong>SG</strong>-<strong>WAC</strong>-<strong>15ESE</strong> /<strong>SG</strong>-<strong>WAC</strong>-<strong>18ESE</strong>Max WallThickness12” 10”IMPORTANT: The side louvers must never be blocked.NOTE: All parts needed for Thru-The-Wall Installation areprovided, except a wood frame, shims, and 10 woodscrews (10-1” long minimum). Select a wall surface that:1. Does not support major structural loads such as theframe construction at ends of windows, and undertruss-bearing points, etc.2. Does not have plumbing or wiring inside.3. Is near existing electrical outlets, or where another outletcan or will be installed.4. Does not have objects blocking the air vents whichlimits cooling.5. Allows unblocked airflow from the rear and sides of theair conditioner.Prepare the Wall1. Prepare the wall in frame construction (including brickand stucco veneer). Working from inside the room, findthe wall stud that is nearest the center of the installationarea.FIG. 110