DMS i1000 FleetConnectTM - Liquid Controls
DMS i1000 FleetConnectTM - Liquid Controls
DMS i1000 FleetConnectTM - Liquid Controls

You also want an ePaper? Increase the reach of your titles
YUMPU automatically turns print PDFs into web optimized ePapers that Google loves.
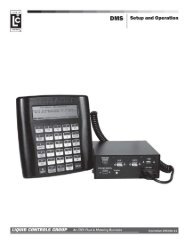
<strong>DMS</strong> <strong>i1000</strong> FleetConnect TMFleet Fueling SystemSetup and Operation<strong>Liquid</strong> <strong>Controls</strong> Group An IDEX Fluid & Metering Business Operation: EM200-14
Table of ContentsIntroductionSoftware License Agreement ................................... 3<strong>DMS</strong> <strong>i1000</strong> FleetConnect Overview ......................... 4FleetConnect System Components.......................... 5FleetConnect System Overview................................ 7FleetConnect Data Flow .......................................... 10EZConnect Button Reader....................................... 12SetupFleetConnect Setup Overview ................................ 13FleetConnect Security Summary............................. 13#1 Loading the FleetConnect Database................... 14#2 Launching <strong>DMS</strong> <strong>i1000</strong> FleetConnect ................. 15#3 Install FleetConnect Antenna for theEZConnect Button Reader....................................... 15Set EZConnect Radio Address ............................... 16OperationFueler Logon and Logoff.......................................... 17Data Transfer........................................................... 18Fill Vehicles (Fuel Delivery)...................................... 19Miscellaneous Commands (Fueler Logon).............. 20Miscellaneous Commands (Fill Vehicles)................. 21OperationSetup New Vehicles (Button Mapping)..................... 22FleetConnect Database Management..................... 24Add and Delete Records.......................................... 24Button File................................................................ 25Customer File........................................................... 25Fueler File................................................................ 26Product File.............................................................. 27System Definitions File............................................. 27Truck File.................................................................. 29Vehicle File............................................................... 29Machine Status........................................................ 30Printer Status........................................................... 31Delivery Status......................................................... 31Delivery Code........................................................... 33Bill of MaterialsBill of Materials......................................................... 34AppendixTicket Layouts.......................................................... 35! WARNING• Before using this product, read and understand the instructions.• Save these instructions for future reference.• All work must be performed by qualified personnel trained in the proper application, installation, andmaintenance of equipment and/or systems in accordance with all applicable codes and ordinances.• Failure to follow the instructions set forth in this publication could result in property damage, personal injury,or death from fire and/or explosion, or other hazards that may be associated with this type of equipment.2
Software License AgreementRead this license carefully. You agree that by using the itemized software package, you haveagreed to the software license terms and conditions. This agreement constitutes complete andentire agreement between you and <strong>Liquid</strong> <strong>Controls</strong> with respect to this product.1. <strong>Liquid</strong> <strong>Controls</strong> hereby grants to Licensee a nonexclusivelicense to use <strong>DMS</strong> Menu, LCP File Server, <strong>DMS</strong> <strong>i1000</strong>FleetConnect, FleetConnect Office, DB Manager andLCR Host Software (hereinafter referred to as “LicensedSoftware”)2. Under the License granted herein, Licensee may use thefieldized machine readable (executable code) copy of theSoftware, including any subsequent updates which maybe provided. Licensee shall not, without <strong>Liquid</strong> <strong>Controls</strong>’prior written consent, (a) rent, lease, lend, sublease orotherwise transfer the materials hereunder; (b) remove orobscure proprietary or copyright notices which may be setforth on the Licensed Software; or (c) alter, decompile, ordisassemble the program.3. One (1) copy of the Licensed Software, including anysoftware distributed on disks may be made for backuppurposes only. No other copies may be made or usedwithout the written consent of <strong>Liquid</strong> <strong>Controls</strong>.4. Title. No title to ownership of any Licensed Software istransferred to the Licensee.5. Upagerades. License upagerades may become availablefor the Licensed Software. Any cost associated with suchupagerades will solely be determined by <strong>Liquid</strong> <strong>Controls</strong>.6. Warranty. <strong>Liquid</strong> <strong>Controls</strong> makes and licensee receivesno warranty express or implied and there are expresslyexcluded all warranties of merchantability and fitness fora particular purpose.8. Termination. <strong>Liquid</strong> <strong>Controls</strong> may terminate this softwarelicense granted hereunder and require return of theLicensed Software if Licensee fails to comply with theselicense terms and conditions.9. Licensee acknowledges that it has read this agreement,understands it, and agrees to be bound by its terms, andfurther agrees that this is the complete and exclusivestatement of the agreement between <strong>Liquid</strong> <strong>Controls</strong>and Licensee, which supersedes and merges all priorproposals, understandings, and all other agreements, oralor written, between the parties relating to this agreement.This agreement may not be modified or altered except bywritten instrument duly executed by both parties.10. This Agreement and performance hereunder shall beconstrued and interpreted under the laws of the State ofIllinois.11. If any provision of this agreement is invalid under anyapplicable statute or rule of law, it is to that extent to bedeemed omitted.12. Licensee may not assign or sublicense, without the priorwritten consent of <strong>Liquid</strong> <strong>Controls</strong>, its rights, duties, orobligations under this Agreement to any person or entityin whole or in part.13. The waiver or failure of <strong>Liquid</strong> <strong>Controls</strong> to exercise in anyrespect any right provided herein shall not be deemed awaiver of any further right hereunder.7. Limitation of Liability. Licensee shall have the soleresponsibility for adequate protection and backup ofits data in connection with the Licensed Software. Inno event shall <strong>Liquid</strong> <strong>Controls</strong> be liable for (a) special,indirect or consequential damages; (b) any damageswhatsoever resulting from loss of use, data, or profits,product, inaccurate input or work delays, or any directproperty damage arising out of or in connection with thisagreement or the use or performance of the LicensedSoftware.Publication Updates and TranslationsThe most current English versions of all <strong>Liquid</strong> <strong>Controls</strong> publications are available on our web site, www.lcmeter.com. It is theresponsibility of the Local Distributor to provide the most current version of LC Manuals, Instructions, and Specification Sheets inthe required language of the country, or the language of the end user to which the products are shipping. If there are questionsabout the language of any LC Manuals, Instructions, or Specification Sheets, please contact your Local Distributor.3
IntroductionPurposeThe purpose of this document is to explain the setup and operation of <strong>DMS</strong> <strong>i1000</strong> FleetConnect.<strong>DMS</strong> <strong>i1000</strong> OverviewThe <strong>DMS</strong> <strong>i1000</strong> is an in-cab computer with a heavy-duty lap pad interface. The <strong>DMS</strong> <strong>i1000</strong> connects directlyto a LectroCount electronic register that is connected to a flow meter. The <strong>DMS</strong> <strong>i1000</strong> runs application specificsoftware programs, such as FleetConnent, designed for specific types of fuel delivery companies. These programscombine metrological data—received from a LectroCount register during fuel deliveries—with pricing, customer, andoperational data to provide detailed accounts of all fueling and shift activity. The collected data can be transferredfrom the <strong>DMS</strong> <strong>i1000</strong> to an office PC via a USB device, RF communication, or cellular transmission. Every <strong>DMS</strong><strong>i1000</strong> comes equipped with two support software programs, LCP File Server and LCR Host. LCP File Server is a filemanager program used to maintain and manage files. LCR Host is used to set up LectroCount register networks andcalibrate the metering system.<strong>DMS</strong> <strong>i1000</strong> and Lap Pad<strong>DMS</strong> <strong>i1000</strong> FleetConnect Overview<strong>DMS</strong> <strong>i1000</strong> FleetConnect is a software application program for the <strong>DMS</strong> <strong>i1000</strong>. It is designed for companies thatfuel customers with large fleets of vehicles and equipment or for companies that own a large fleet of vehicles andequipment. FleetConnect automatically captures fueling data and records all aspects of each fuel delivery. Thedelivery records are organized and saved into a database from where the data can be easily transferred into theaccounting software in your offices. <strong>DMS</strong> <strong>i1000</strong> FleetConnect has a number of capabilities and features including:fueler security settings, vehicle identification, delivery start and stop, recording and tracking deliveries, shift reports,and data transmission to FleetConnect Office via USB memory device, RF transmission, or cellular modem.4
IntroductionFleetConnect System ComponentsMetering SystemTypically mounted to the back or side of a deliveryvehicle, the metering system accurately measures,controls the flow, and preserves the purity of the product.A <strong>Liquid</strong> <strong>Controls</strong> metering system can include the meter,LectroCount electronic register, strainer, ETVC probe(temperature compensation), air eliminator, and controlvalve. In FleetConnect systems, in order to safeguardagainst misfuelings, the control valve is opened onlywhen vehicles are identified by the EZConnect buttonreader.LC PD MeterLectroCount RegisterLectroCount registers can be Weights & Measuresapproved and mounted onto the meter. LectroCountregisters provide metrological data during custodytransfers for the <strong>DMS</strong> <strong>i1000</strong> FleetConnect.LectroCount RegistersPrinterThe printer prints out a record (ticket) of the delivery.The Epson Roll Printer is ideal for the long ticketsFleetConnect prints at the end of fueler shifts.Epson Roll PrinterEZConnect Button Readerwith Button and FleetConnectAntennaEZConnect Button Reader and RFID ButtonsThe EZConnect button reader is a handheld device thatreads the ID number of uniquely-numbered stainlesssteel buttons called RFID buttons. During setup, avehicle record is created for every fuelable vehicle orpiece of equipment that you fuel. Then, each vehiclerecord is then programmed with a RFID button number.Finally, the RFID buttons are physically attached to thevehicle they represent in the FleetConnect database.Before fuel deliveries, fuelers attach the EZConnectto a vehicle’s RFID button. A RF transceiver inside theEZConnect transmits the ID number to the <strong>DMS</strong> <strong>i1000</strong>.<strong>DMS</strong> <strong>i1000</strong> FleetConnect pulls the vehicle file with theRFID button number and records the delivery informationtogether according to vehicle data.5
IntroductionFleetConnect System ComponentsFleetConnect OfficeThe FleetConnect Office contains four executableprograms FCRead.exe, FCEdit.exe, FCLoad.exe and aninstallation program for the USB button reader.FCEdit is a graphical user interface for office computerswhere users can manage operational data, validate anychanges made in the field (for example adding a newcustomer), configure print tickets, and change systemsettings. FCEdit also plays a large role in the setup of aFleetConnect System by helping map RFID buttons andpopulating the FleetConnect database. The USB buttonreader plugs into any office computer USB port andreads the ID number of the RFID buttons for FCEdit tomap the RFID buttons.FleetConnect OfficeFCRead converts transaction files, created by <strong>DMS</strong><strong>i1000</strong>s in the field, into ASCII text files for use in FCEditand third party software.USB Button ReaderDB ManagerDB Manager is used to setup and manage wirelesscommunication between <strong>DMS</strong> <strong>i1000</strong>s in the trucks andpersonal computers in your office. DB Manager containstwo programs LCPSetup.exe and DBManager.exe. Thefirst program, LCPSetup.exe, aligns communicationparameters and conducts testing to confirm wirelesscommunication between the office PC and the <strong>DMS</strong><strong>i1000</strong>. The second, DBManager.exe, specifies the <strong>DMS</strong><strong>i1000</strong>s in the field, sets the file paths to the office PC,sets a schedule to check for modified FleetConnectdatabase files and sends those files to the <strong>DMS</strong> <strong>i1000</strong>sin the field.DB ManagerCell ModemCell modems enable long distance wireless datatransmissions between <strong>DMS</strong> <strong>i1000</strong>s in the field andoffice PCs. Cell modems and service contracts arepurchased separately from a cellular service provider.Cell ModemRF TransceiversThe RF transceivers are designed for short, line-of-sightwireless transmissions between <strong>DMS</strong> <strong>i1000</strong>s in the fieldand the office PC. .RF TransceiversUSB Flash Memory DeviceThe USB Flash Memory Device is a data repository usedto transfer data between the <strong>DMS</strong> <strong>i1000</strong> Module and theoffice PC. A USB Flash Memory Device is included withthe purchase of a <strong>DMS</strong> <strong>i1000</strong>.6USB Flash Memory Device
Introduction8
IntroductionFleetConnect Fueling System OverviewFleetConnect is an in-cab fuel delivery and data collection application for the <strong>DMS</strong> <strong>i1000</strong> that spans from the point ofdelivery to the office PC. FleetConnect is specially designed for businesses who have or fuel customers with largefleets of vehicles and equipment or fuel their own fleet. Like other <strong>Liquid</strong> Control’s data management applications,FleetConnect runs in conjunction with flowmeters equipped with the LectroCount electronic registers.The main functions of a FleetConnect System include:• Account management• Operational data management• Delivery data tracking• Data entry interface• File conversions• Security settings for fueling access and system configuration• Print ticket configuration• Customer equipment identification• Delivery start and stopComponentsThere are five main components unique to a FleetConnect System: <strong>DMS</strong> <strong>i1000</strong> FleetConnect (<strong>DMS</strong> <strong>i1000</strong> software),FleetConnect Office (office PC software), the EZConnect button reader, the USB RFID button reader and the RFIDbuttons (stainless steel buttons with a unique identification number that can be read by a button reader).SetupDuring setup, each vehicle (or piece of equipment) to be fueled is assigned a RFID button number. The vehicleinformation (name, fuel type, etc.) and the RFID button number are saved together in the FleetConnect database(in this manual this is referred to as mapping). The RFID buttons are then taken into the field and fastened to theirrespective vehicles. <strong>DMS</strong> <strong>i1000</strong> FleetConnect uses the RFID button numbers to identify vehicles before making adelivery.DeliveriesTo make deliveries, fuelers simply push the EZConnect button reader over the RFID button of the vehicle. TheEZConnect button reader transmits the RFID button number to the <strong>DMS</strong> <strong>i1000</strong>. <strong>DMS</strong> <strong>i1000</strong> FleetConnect receives thetransmission from the EZConnect button reader and pulls the vehicle data programmed to the RFID button number.After FleetConnect confirms the identity of the vehicle, it opens the control valve on the appropriate meter systemallowing the fueler to make the delivery. FleetConnect records the metrological data of the delivery and saves it in arecord with the vehicle data. <strong>DMS</strong> <strong>i1000</strong> FleetConnect transmits all of the transaction data compiled throughout theshift to the office PC via cell modem, RF transmission, or USB memory device.OfficeIn the office, FleetConnect Office converts the data received from each <strong>DMS</strong> <strong>i1000</strong> into ASCII text files. ASCII textfiles can be easily transferred to third-party software. The FleetConnect database consists of operational data, likevehicle, customer, product and fueler data. FleetConnect office has a graphical user interface, FCEdit, for officecomputers where users can manage operational data, configure print tickets, and change system settings. FCEditalso allows users to verify or reject any changes made to the database by <strong>DMS</strong> <strong>i1000</strong>s in the field—such as newcustomers or vehicles—and send the changes, if verified, out to all other <strong>DMS</strong> <strong>i1000</strong> units.9
Introduction10
IntroductionFleetConnect Data Flow<strong>DMS</strong> <strong>i1000</strong> Applications to Fleetconnect office(Begins at the bottom of the chart on page 10—<strong>DMS</strong><strong>i1000</strong> FleetConnect—and ends at the middle top of thediagram—FleetConnect Office.)<strong>DMS</strong> <strong>i1000</strong>After each delivery, the <strong>DMS</strong> <strong>i1000</strong> compiles themetrological, transaction, customer, driver, and productdata into transaction files (.trn). The transaction filesare then sent to the office PC either wirelessly (RF orcellular), or they are downloaded to a USB memorydevice.Data Transmission (Wireless)If the transaction files are sent wirelessly (RF or cellular)using the Send Transactions to Officecommand, DB Manager receives the transaction files(.trn) and notifies FleetConnect Office that the files havebeen received. Transmissions can be setup to be sentautomatically to the officeData Transmission (USB Memory Device)If the transaction files are sent via USB memorydevice, when a shift is finished, the fuelers downloadthe transaction files created during their shift using theSend Transactions to Office command andreturn the USB device to the office after their shift.FleetConnect Office SoftwareFCRead converts the transaction files (.trn) into ASCIItext or XML files. The files can then be absorbed intothird party software.If the files are transferred via a USB memory device,they must be copied from the USB device and pastedinto the C:/<strong>DMS</strong> folder. From there, FCRead can convertthem into text or XML files.Third Party SoftwareThird-party software imports the ASCII text filesfrom FleetConnect Office for processing and reportgeneration. If any dispatch data is generated by thethird-party software, it can be converted into ASCII textfiles and imported into the FleetConnect database.fleetconnect office to <strong>DMS</strong> <strong>i1000</strong> Applications(Begins at the middle top of the chart on page 10—FleetConnect Office—and ends at the bottom of thediagram—<strong>DMS</strong> <strong>i1000</strong> FleetConnect.)FleetConnect OfficeFCEdit converts the text files (and any configurationchanges made in third-party software) into .502 and .slfdatabase files.Data Transmission (Wireless)DB Manager sends modified transaction files to the<strong>DMS</strong> <strong>i1000</strong>s wirelessly. By sending only modified “live”files, cellular service costs and transmission times arereduced. DBManager checks newly converted .502 and.slf database files against a set of “live” files. “Live” filesare the most recent set of database files created byFleetConnect Office. If a new database file is createdthat differs from the “live” file, it means the file has beenmodified since the last data transmission from the <strong>DMS</strong><strong>i1000</strong>s.Data Transmission (USB Memory Device)Transferring data via USB memory devices requires thefuelers to bring the USB devices to the delivery truckat the beginning of their shift, plug the USB device intothe <strong>DMS</strong> <strong>i1000</strong>, and load any new files onto the <strong>DMS</strong><strong>i1000</strong> by using the Retrieve Database Updatescommand. If the new .502 files have been copied tothe USB memory devices in the office, they will simplyrewrite the .502 files on the <strong>DMS</strong> <strong>i1000</strong>s when yourfuelers upload them.<strong>DMS</strong> <strong>i1000</strong>Modified .502 and .slf database files are loaded intothe LCP File Server of a <strong>DMS</strong> <strong>i1000</strong>. If a USB memorydevice is being used, the Retrieve DatabaseUpdates command must be used to load the databasefiles. RF and cellular transmissions can be setup toautomatically load database files every time the <strong>DMS</strong><strong>i1000</strong> sends data (this applies to logging on, logging off,completing a delivery, and editing the database). Anychanges made on the office PC and received by the<strong>DMS</strong> <strong>i1000</strong> are applied to all subsequent deliveries.11
IntroductionEZConnect Button ReaderThe EZConnect button reader is a handheld device thatreads the ID number of uniquely-numbered stainlesssteel buttons, called RFID buttons, and radios thenumber of the button back to the <strong>DMS</strong> <strong>i1000</strong>. Beforedelivery, the EZConnect button reader reads the button’sID number, and a RF transceiver in the button readerradios the ID number to an antenna connected to the<strong>DMS</strong> <strong>i1000</strong>. <strong>DMS</strong> <strong>i1000</strong> FleetConnect pulls up thevehicle data mapped to the RFID button number, recordsthe metrological data from the delivery, and savesthe vehicle data and delivery data together into theFleetConnect database.Time Between DeliveriesIf the button reader is pulled from the button, a ten secondwindow exists in which the button reader must be reattachedto continue the delivery on the same transaction record. Thisfeature is active only in the By Vehicle setting of the NewLCR Delivery: field. See FleetConnect Office EM200-15.OperationThe thin black button next to the status lights activatesthe EZConnect. Press it immediately before or afterattaching the EZConnect to a RFID button. Whenattaching the button reader to a RFID button, ensure thebutton reader socket completely covers the button andis not tilted in any manner. When the yellow light blinks,the RFID number has been received by the <strong>DMS</strong> <strong>i1000</strong>.Other status indications are explained on the right.LightsRed LightEZConnect Button ReaderStatus Light Key◦ OFF• ON FLASHSTATUSPower/Reset ButtonYellow LightRed Yellow◦ ◦ Off (press button to activate) ◦ Button disconnected or not in database◦ Button connected ready to fuel <strong>DMS</strong>/LCR/Printer Error or delivery initiation! WARNING• To prevent the ignition of a hazardous atmosphere,batteries must only be replaced with Panasonic6LR61XWA in a nonhazardous area.• Only use the EZConnect button reader with theprovided cable and RFID button, as pictured.Conforms to standards ANSI/ISA 82.02.12 (IEC 61010-1 MOD) (07/12/04) and ANSI/ISA-12.12.01-2007Class I, Div 2 Group D T4-20°C (-4°F) ≤ Tamb ≤ +50°C (122°F)12
SetupFleetConnect <strong>DMS</strong> <strong>i1000</strong> Setup OverviewThere are four steps that must be completed before fuelers can begin fuel delivery with FleetConnect. The firststep, Load FleetConnect Database onto the <strong>DMS</strong> <strong>i1000</strong>, entails moving data from the office PC to the <strong>DMS</strong> <strong>i1000</strong>.The second step, Launch <strong>DMS</strong> <strong>i1000</strong> FleetConnect, includes starting up the <strong>DMS</strong> <strong>i1000</strong> FleetConnect applicationsoftware. The third step, Install the FleetConnect Antenna for the EZConnect Button Reader, comprises of installingan antenna onto the roof of the truck cab and plugging it into the <strong>DMS</strong> <strong>i1000</strong> antenna port. The fourth and final step,Set EZConnect Radio Address, requires setting the EZConnects to a unique address so they can transmit withoutinterference.<strong>DMS</strong> <strong>i1000</strong> FleetConnect Setup PrerequisitesThis manual assumes that FleetConnect Office has been setup, the FleetConnect database is loaded onto the officePC, the RFID buttons have been mapped into the database and attached to the vehicles near the fueling point, andthe DB Manager software is installed (if using cellular or RF data transmissions).The following installation and setup must be completed prior to setup of the <strong>DMS</strong> <strong>i1000</strong> FleetConnect:1. Meter system installed2. LectroCount Register(s) Installation (EM100-10 or EM150-10)3. LectroCount Register(s) Setup (EM100-10 or EM150-11)4. <strong>DMS</strong> <strong>i1000</strong> Installation (EM200-10)5. <strong>DMS</strong> <strong>i1000</strong> Setup (EM200-11)6. DB Manager (EM200-21) optional7. FleetConnect Office Setup (EM200-14)<strong>DMS</strong> <strong>i1000</strong> FleetConnect SetupAfter all of the setup prerequisites are fulfilled, only four steps are required before FleetConnect <strong>DMS</strong> <strong>i1000</strong> is readyfor daily use.STEP 1STEP 2STEP 3STEP 4Load the FleetConnect database onto the <strong>DMS</strong> <strong>i1000</strong> (Retrieve Database from Office).This step is also documented in the FleetConnect Office Setup (EM200-14)Launch <strong>DMS</strong> <strong>i1000</strong> FleetConnect.Install the FleetConnect Antenna for the EZConnect Button Reader.Set the EZConnect button readers radio addresses so that they are all unique.This step is only required if more than one EZConnect button reader is operating in close proximity to another.<strong>DMS</strong> <strong>i1000</strong> FleetConnect SecurityFleetConnect provides three sets of security checks: the fueler logon password, the database management password,and the LCRHost and LCP File Server password. The fueler logon password protects access to FleetConnect’sfuel delivery functions (see FleetConnect Office manual EM200-15). The database management password protectsaccess to the FleetConnect database. The LCRHost and LCP File Server password protects access to network setup,calibration, and file management functions (see <strong>DMS</strong> Setup and Operation Manual EM200-12).13
Setup#1 -Load FleetConnect Databaseonto the <strong>DMS</strong> <strong>i1000</strong><strong>Liquid</strong> <strong>Controls</strong> recommends using a USB memorydevice for the initial loading of the FleetConnectdatabase because of the large amount of data to beuploaded. Transmitting a large amount of data wirelesslycan be time consuming and, for cellular transmissions,costly.To transfer the latest FleetConnect Officedatabase to the <strong>DMS</strong> <strong>i1000</strong>s via USB device:1. Using the office PC, name a USB memory device <strong>DMS</strong>_USB and create a folder named <strong>DMS</strong> in it. (USB memorydevices from <strong>Liquid</strong> <strong>Controls</strong> are preconfigured withthese settings.)2. Copy the .502 and .slf files from the C:\<strong>DMS</strong> folder intothe D:\<strong>DMS</strong>_USB\<strong>DMS</strong> folder on the USB memorydevice..502 and .slf files are created during FleetConnectOffice setup.Util (F1) opens System Utilities (1/3) See page 12 EM200-11Data (F5) opens Database Management screenWhile the <strong>DMS</strong> <strong>i1000</strong> displays the <strong>DMS</strong> Application Listscreen, it is disabled from the LectroCount register(s).When the <strong>DMS</strong> <strong>i1000</strong> is disabled, deliveries can be madewith the register’s RUN and PRINT settings.3. Remove the USB memory device from the officecomputer and plug it into a <strong>DMS</strong> <strong>i1000</strong>.4. On the <strong>DMS</strong> <strong>i1000</strong> lap pad, push ALT and ESCsimultaneously to open the <strong>DMS</strong> ApplicationList.5. Press F5 (Data) to open Database Management.6. Press F3 (USB) to boot the USB Drive.7. Move the pointer to Retrieve Entire Databaseand push Enter.8. Move the pointer to USB Memory Device asthe Receive Mechanism and press Enter. TheRetrieving Database screen will appear while thedatabase loads onto the <strong>DMS</strong> <strong>i1000</strong>.USB (F3) activates the USB memory deviceDone (F5) opens Fueler Logon or Fill Vehicles screen, or <strong>DMS</strong>Application List screen9. Press Enter upon successful retrieval of the databasefiles.10. Repeat steps 3-9 until all trucks equipped with <strong>DMS</strong><strong>i1000</strong>s are loaded with the FleetConnect database.These instructions are also included in theFleetConnect Office Setup (EM200-14) manual.Transfer Database WirelesslyAfter initial setup, choose Retrieve Database Updates toupdate only those files that have changed. Follow the sameprocedure as above, but for step 8, select the Radio option,instead of USB Memory Device, then press Enter.Every <strong>DMS</strong> <strong>i1000</strong> is supplied with a USB FlashMemory Device configured for immediate use.The Retrieve Database Updates command insidethe <strong>DMS</strong> <strong>i1000</strong> FleetConnect program will notupload the whole database, only .502 and .slf files.14
Setup#2 -Launch <strong>DMS</strong> <strong>i1000</strong>FleetConnectThe <strong>DMS</strong> Application List is the launch point for <strong>DMS</strong><strong>i1000</strong> FleetConnect software.To open FleetConnect:1. Press ALT+Esc.2. Move the pointer to select FleetConnect and pressEnter.#3 -Install the FleetConnectAntenna for the EZConnect ButtonReaderWhen the EZConnect button reader is attached to aRFID button, a RF transceiver inside the EZConnecttransmits the RFID button number to the <strong>DMS</strong> <strong>i1000</strong>.In order to receive the RF signal, the <strong>DMS</strong> <strong>i1000</strong> mustbe equipped with the FleetConnect antenna. TheFleetConnect antenna plugs into the back of the <strong>DMS</strong><strong>i1000</strong> and is easily affixed to the roof of the truck cab.FleetConnect AntennaTo install the FleetConnect antenna:1. There is a heavy magnet in the bottom of theFleetConnect antenna. Find a high spot on the deliverytruck, preferably the top of the truck cab, and set theantenna down so the magnet sticks securely to thesurface.2. Find a pathway for the antenna cable into the insideof the cab and the <strong>DMS</strong> <strong>i1000</strong> antenna port. If a moreconvenient option isn’t apparent, use the same hole asthe LCR-II cables.3. Run the antenna cord tight to the truck. Secure it so thereis no slack along the pathway. Tie off any excess cord inthe cab next to the <strong>DMS</strong> <strong>i1000</strong>.4. Screw the antenna cable into the <strong>DMS</strong> <strong>i1000</strong> antennaport.<strong>Liquid</strong> <strong>Controls</strong> recommends using split loom forthe antenna wire. It protects the wire and is easierto ziptie to the truck.<strong>DMS</strong> <strong>i1000</strong> Antenna Port15
Setup#4 -Set EZConnect Radio AddressIf you are running more than one <strong>DMS</strong> <strong>i1000</strong>FleetConnect in close proximity to another, theEZConnect button readers will not be able to transmitdata on the same radio address without interference.The Set EZConnect Radio Address functioncan set a unique address where the <strong>DMS</strong> <strong>i1000</strong> unit andthe EZConnect can communicate without interference.To change the radio address of an EZConnectdevice:1. Turn off all of the EZConnect devices except the one youwant to configure.2. From the <strong>DMS</strong> Application List, select FleetConnect.3. If the Fueler Logon screen does not appear, logoffthe fueler. See page 17.4. Press F4 (Misc) to open MiscellaneousCommands list box window.4. Move the pointer to Setup <strong>DMS</strong>/EZConnect Linkand press Enter.5. Select <strong>DMS</strong> Radio Address and enter a unique 1-4digit hexadecimal code in <strong>DMS</strong> Radio Address. Seebox to the right.6. Move the pointer to Set EZConnect RadioAddress and press Enter.7. Turn on the EZConnect. Wait until the red light stopsblinking.8. Take a small screwdriver and touch the small metal discand the metal around the inside the socket of the buttonreader extension at the same time until both EZConnectlights turn on.9. While both lights are on, press Enter on the lap pad. Asuccessful message will appear on the lap pad.Done (F5) opens Fueler Logon screenIf the <strong>DMS</strong> Radio Address is displayed asdashes, the <strong>DMS</strong> <strong>i1000</strong> is not responding toFleetConnect. Select Done (F5) and repeat thedirections from the beginning. If the problem persists,call the <strong>Liquid</strong> <strong>Controls</strong> Service Department.16
OperationFueler Logon and LogoffThe Fueler Logon screen allows operators to logonand logoff the <strong>DMS</strong> <strong>i1000</strong> FleetConnect system. If theprevious fueler has logged off, the Fueler Logonscreen is the first screen displayed when the <strong>DMS</strong> <strong>i1000</strong>is turned on. If the previous fueler has not logged off,the Fill Vehicles screen is the first screen displayed.To access the Fueler Logon screen from the FillVehicles screen, log off the previous fueler using theMiscellaneous Commands screen. See below.All (F2) opens each field on the screen in successionMisc (F4) opens Fueler Logon Miscellaneous listFwd (F5) opens Fill Vehicle screenTo logon and begin a shift:1. Move the pointer to Fueler #: and press Enter.2. Select your name from the list of fuelers and press Enter.3. Press F5 (Fwd) to open the Fill Vehicles screen.Before logging on, retrieve any files that have beensent from the office. See Send Transactions page 20.To logon with a RFID button:1. Attach the EZConnect button reader to your designatedRFID button. Press EZConnect’s power button. When the<strong>DMS</strong> <strong>i1000</strong> receives the RFID number, the yellow lightwill begin to blink and your Fueler information will appearon the lap pad display.2. Press F5 (Fwd) to open the Fill Vehicles screen.The Password: and Odometer: fields are optional.The Password: option can be activated in the FuelerFile of FleetConnect Office or <strong>DMS</strong> <strong>i1000</strong> FleetConnect,and the Odometer: option can be activated in theSystem Definitions File of FleetConnect Office or <strong>DMS</strong><strong>i1000</strong> FleetConnect.Fueler LogoffComplete the following procedure to logoff from any<strong>DMS</strong> <strong>i1000</strong> screen.Examples of the End-of-Shift tickets are on page 35.To logoff at the end of a shift:1. From the Fill Vehicles screen, press F4 (Misc)to open the Miscellaneous Commands list boxwindow.2. Select Logoff and press Enter to open the End-of-Shift Ticket list box.3. Select Detailed, None, or Summary and pressEnter. The lap pad will return to the Fueler Logon screen.17
OperationData TransferFleetConnect systems transfer data between the<strong>DMS</strong> <strong>i1000</strong> and your office PC via a USB memorydevice or wirelessly using a cell modem. FleetConnectsystems transferring data via USB devices require noadditional setup outside of <strong>DMS</strong> <strong>i1000</strong> FleetConnectand FleetConnect Office. Systems using cell modemsrequire additional configuration and <strong>Liquid</strong> <strong>Controls</strong>’ DBManager software. See DB Manager Installation andSetup Manual EM200-21.Cell ModemFleetConnect systems setup for cell modemtransmissions send and retrieve data each time a recordis created. Every time a fueler logs on, logs off, deliversfuel, edits the database, or enters a load truck commandfrom the <strong>DMS</strong> <strong>i1000</strong> lap pad, the <strong>DMS</strong> <strong>i1000</strong> sends newdata to and checks for new data from the office PC.USB Memory DeviceIf you have a FleetConnect system that relies on USBmemory devices to transfer data, the USB devicesmust be physically moved between the trucks’ <strong>DMS</strong><strong>i1000</strong>s and the office PC at the beginning and end ofeach shift. In the office, the transaction data from the<strong>DMS</strong> <strong>i1000</strong>s must be copied from each USB memorydevice and pasted into the C:\<strong>DMS</strong> folder on the officePC. Database updates for the <strong>DMS</strong> <strong>i1000</strong>s must becopied from the C:\<strong>DMS</strong> folder and pasted onto theUSB memory stick. In the field, fuelers can manuallyretrieve data from and manually save data to theUSB memory device before or after logon using theRetrieve Database Updates and the SendTransactions to Office commands.The Retrieve Database Updates and the SendTransactions to Office commands can be foundby pressing the Data (F5) button in the <strong>DMS</strong> ApplicationList screen, pressing the Misc (F5) button in the FuelerLogon screen, or pressing the Misc (F5) button in theFill Vehicles screen. The Send Transactions toOffice command is used to save data from the <strong>DMS</strong><strong>i1000</strong> onto the USB memory device for transfer to theoffice PC.<strong>DMS</strong> Application List ScreenA small up arrow appears in the top line to the left of thetime when there are transactions to send to the USBmemory stick or office PC via cellular transmission.Fueler Logon Miscellaneous Command ScreenFill Vehicles Miscellaneous Command ScreenThe Retrieve Entire Database command istypically used only when setting up the <strong>DMS</strong> <strong>i1000</strong> unit.It can be found in the the Database Management screen(the screen that opens with the Data (F5) button)retrieves the entire database from the USB memorydevice onto the <strong>DMS</strong> <strong>i1000</strong>.Database Management Screen18
OperationMiscellaneous Commands (FuelerLogon)In the Fueler Logon screen, the Misc (F4) opens aMiscellaneous Commands list box that includes accessto the Database Management menu, the ReprintShift Ticket command, two data transfercommands (Retrieve Database Updates andSend Transactions), and the Setup <strong>DMS</strong>/EZConnect Link screen.Fueler Logon Miscellaneous Command ScreenDatabase ManagementThe Database Management screen provides access tothe FleetConnect database files for viewing and editingpurposes. See page 24.Not to be confused with the Database Managementscreen on page 14Shift Ticket Date ScreenShift Ticket TypeReprint Shift TicketThe Reprint Shift Ticket command opensa list box, Shift Ticket Date, with a list ofpreviously printed shift tickets. To reprint a shift ticket,move the pointer to the date and time of the ticket youwant reprinted and press Enter. After selecting thespecific shift ticket, a Shift Ticket Type list boxwill open. Select Detailed or Summary. An exampleof a detailed and summary shift ticket is on page 35.Retrieve Database UpdatesThe Retrieve Database Updates command,when selected, brings up a list box to confirm thecommand. Select Yes to send retrieve updates to filesfrom the office. Click No to cancel the command.The Retrieve Database Updates commandmanually retrieves updates from the FleetConnectOffice database on the office computer. This commandrequires wireless communication through DB Manager.This option is especially helpful when wirelessconnection is intermittent or if the system is not set up tosend updates automatically.Retrieve Database Updates<strong>DMS</strong>/EZConnect LinkSend TransactionsThe Send Transactions command, whenselected, opens up a list box to confirm the SendTransactions command. Select Yes to sendtransaction files to the office. Click No to cancel thecommand.Setup <strong>DMS</strong>/EZConnect LinkThe Setup <strong>DMS</strong>/EZConnect Link commandopens a screen with the means to set the radio addressesof EZConnect button readers. See page 16.19
OperationFill Vehicles (Fuel Delivery)Fill Vehicles is the lap pad screen from which fuelers canactivate fuel deliveries. It appears on the lap pad displayimmediately after logging on. When the EZConnectreads an RFID button, the button ID, product type,delivery quantities, and account information will appearon in the Fill Vehicles screen. They will remain on thescreen until the EZConnect is removed from the button.To make a delivery:1. Attach the EZConnect button reader onto the RFIDbutton.2. Press the power button on the EZConnect.3. Open the nozzle and deliver the fuel3. Remove the button reader from the RFID button todeactivate the delivery.Status (F3) opens Machine Status (1/2) screenMisc (F4) opens Fill Vehicles Miscellaneous Commands listIf the button reader is pulled from the button, a ten secondwindow exists in which the button reader must be reattachedto continue the delivery on the same transaction record. Thisfeature is active only in the By Vehicle setting of the NewLCR Delivery: field in System Definitions.When the delivery is completed, the roll printer prints thetransaction information, the <strong>DMS</strong> <strong>i1000</strong> FleetConnectrecords the delivery information into the FleetConnectdatabase, and the Fill Vehicles screen displays theWaiting to start a new LCR delivery.message.Status (F3) opens Machine Status (1/2) screenMisc (F4) opens Fill Vehicles Miscellaneous Commands listFleetConnect can be set to save delivery files to theUSB device automatically. In the System DefinitionsFile, set the Transaction Target to “USB”. See page 28.20Fill Vehicles MessagesThere are certain conditions in which FleetConnect cannot or will not permit a delivery. FleetConnect will displaya message at the bottom of the <strong>DMS</strong> <strong>i1000</strong> screen whena delivery is prohibited. These include:No button ID is being read.The EZConnect button reader is not reading a RFIDbutton.Unkown button ID.The button ID is not in the FleetConnect database.The customer record for the button doesnot exist.The customer record assigned to the button is not inthe FleetConnect database.The vehicle record for the button doesnot exist.The vehicle record assigned to the button is not in theFleetConnect database.Vehicle xxxxxx does not have an assignedproduct code.A product code has not been specified for the vehicleThe Distallate product type is notavailable on the truck.The LCR(s) on the truck are not calibrated to deliver theproduct type.The LCR Red switch must be in the RUNposition before a new delivery can bestarted.The selector switch on the LectroCount LCR register(s) isnot in the RUN position. Fuel can not be delivered.
OperationFill Vehicles ScreenMiscellanous Commands (FillVehicles)The Fill Vehicles screen also has a MiscellaneousCommands menu. Press the Misc (F4) button on lappad to open the Miscellaneous Commands list box.The Duplicate Ticket command reprints thelast delivery ticket. The Print Account Summarycommand prints a summary of completed deliveriesto a specific customer’s account over the course ofthe current shift. And the Logoff command logs offthe current fueler and prints a shift ticket. To selecta command from the list, move the pointer to thecommand and press Enter on the <strong>DMS</strong> lap pad.Duplicate TicketTo print an exact copy of the last ticket printed, move thepointer to Duplicate Ticket and press Enter.Find (F3) search for filesPageDn (F4) opens second Miscellaneous Vehicles screenEnd (F5) opens Fill Vehicles screenLoad TruckThe Load Truck command opens a screen wherefuelers can manually enter loading information after thedelivery truck is loaded with fuel. The roll printer printsthe loading information after it is entered and later, at logoff, onto the shift ticket.LogoffTo logoff from a shift, move the pointer to Logoff andpress Enter. The End-of-Shift Ticket list boxwill open. Select Detailed, None, or Summaryand press Enter. The lap pad will then return to theFueler Logon screen.Print Account SummaryThe Print Account Summary prints a list of thedeliveries that have been made during the current shift.Back (F1) opens Fill Vehicles screenAll (F2) opens each field on the screen in successionSave (F5) saves entered data and opens Fill Vehicles screenRetrieve database updates/send transactionsSee page 20.Setup New VehicleThe Setup New Vehicle feature allows fuelers toadd new vehicles and customers to the FleetConnectdatabase and map them to a RFID button. Forinstructions, see page 22.Setup New Vehicle Screen21
OperationSetup New VehicleThe Setup New Vehicle screen allows fuelers to addnew vehicles to the FleetConnect database, so thatwhen fuelers encounter a vehicle that doesn’t exist inthe FleetConnect database, they can enter it into theFleetConnect database and fuel the vehicle on-the-spotin the field.The fueler will need a RFID button to map in the <strong>DMS</strong><strong>i1000</strong> and then attach to the new vehicle. It’s a goodpractice to carry a bag of RFID buttons in the deliverytruck so they are on hand. To attach a RFID button to avehicle, find a convenient spot near the fueling point onthe vehicle, clean it thoroughly, and stick the RFID buttononto the vehicle using double-sided tape.To map a button using a customer accountand vehicle file that exists in the FleetConnectdatabase:1. Press Misc (F4) in Fill Vehicles screen.2. Press PgDn (F4) to scroll the MiscellaneousCommands list down to the Setup New VehiclesCommand.3. Move the pointer to Setup New Vehicles and pressEnter.4. Attach the EZConnect button reader to the RFID buttonand press the power button. The RFID number willappear in the iButton field of the Setup New Vehiclesscreen.5. Select Account # to open the Customer File screen.6. Select Account # to open a list box of customeraccounts in the FleetConnect database.7. Move the pointer to a customer account and press Enter.8. Select Vehicle # to open the Vehicle File screen.9. Select Vehicle # to open a list box of vehiclesprogrammed to the selected customer.10. Move the pointer to a vehicle and press Enter.11. Press Add (F1).12. Press Done (F5).Add (F1) creates a Button File record of the displayed dataAll (F2) opens each field on the screen in successionNew (F3) opens Customer File (Account #:) or Vehicle File(Vehicle #:)Done (F5) opens Fill Vehicle screenDO NOT CREATE BUTTON RECORDS IN THE BUTTONFILE. <strong>Liquid</strong> <strong>Controls</strong> does not recommend creating orediting files in the Button File. It is for viewing only.Next (F1) opens Customer File (2/2)New (F3) creates new Customer File recordDel (F4) deletes displayed Customer File recordExit (F5) opens Database Management (1/2)Selecting a Vehicle22
OperationHome (F1) returns cursor to first space← (F2) moves cursor back one spaceIns (F3) allows text to be inserted above cursor→ (F4) moves cursor ahead one spaceEnd (F5) moves cursor to the end spaceTo map a button for a new customer and a newvehicle that does not exist in the FleetConnectdatabase:1. Press Misc (F4) in Fill Vehicles screen.2. Press PgDn (F4) to scroll the MiscellaneousCommands list down to the Setup New VehiclesCommand.3. Move the pointer to Setup New Vehicles andpress Enter.4. Attach the EZConnect button reader to the RFID buttonand press the power button. The RFID number willappear in the iButton field of the Setup New Vehiclesscreen.If the customer exists but the vehicle is new skip to step 9.If Customer File or Vehicle File records currently exist inthe database, choosing Account #: brings up a list boxwindow of existing records. Editing the options inside theexisting records will change that customer’s records.Home (F1) returns cursor to first space← (F2) moves cursor back one spaceIns (F3) allows text to be inserted above cursor→ (F4) moves cursor ahead one spaceEnd (F5) moves cursor to the end space5. In the Setup New Vehicles screen, move the pointer toAccount # and press New (F3) to open the CustomerFile screen.6. In the Customer File screen, move the pointer toAccount # and press New (F3). Enter the newaccount number into the field edit box.7. Enter the customer information for the new account intoboth screens of the Customer File.8. Press Exit (F5) to return to the Setup New Vehiclesscreen.9. In the Setup New Vehicles screen, move the pointerto Vehicle # and press New (F3). Enter the newaccount number.10. In the Vehicle File screen, move the pointer to Vehicle# and press New (F3).11. The Account # list box will open. Select a customeraccount for the vehicle.12. A Vehicle # field edit box will open next. Enter the newvehicle number and press Enter.13. Complete the remaining fields in the Vehicle File screen.14. Press Exit (F5) to return to the Setup New Vehiclesscreen.15. Press Add (F1).16. Press Done (F5).Next (F1) opens Vehicle File (2/2)New (F3) creates new Vehicle File recordDel (F4) deletes displayed Vehicle File recordExit (F5) opens Database Management (2/2)23
OperationFleetConnect DatabaseManagementFleetConnect’s Database Management is <strong>DMS</strong> <strong>i1000</strong>FleetConnect’s interface for managing customer andoperational data in the FleetConnect database. Usingfield edit and list box windows in one of the sevenDatabase Management files, fuelers can create newfiles and edit existing files. When the <strong>DMS</strong> <strong>i1000</strong>FleetConnect sends transactions to the office PC, anychanges to the database files made by the <strong>DMS</strong> <strong>i1000</strong>will be sent as well. Database changes can be validatedby office personnel in FleetConnect Office, added to theFleetConnect database, and transferred to other <strong>DMS</strong><strong>i1000</strong>s.To access the Database Management windowperform the following:1. From the Fueler Logon screen press Misc (F4).2. From the Miscellaneous Commands list box, movethe pointer to Database Manager and press Enter.Next (F1) opens Database Management (2/2)Vers (F4) opens About Screen (Software Version Information)Dlvy (F5) opens Fueler Logon screenA password can be created in the Systems Definition file tolimit access to the features in Database Management.Add and Delete RecordsWhen a file is open, records can be added or deleted.Add a new recordTo add a new record, perform the following:1. From the Database Management screen, move thepointer to one of the file types and press Enter.2. Press New (F3) to create a new record.3. Enter information for the new record into an edit or listbox for each field in the record4. Press Exit (F5) to save the new record.Prev (F2) opens Database Management (1/2)Dlvy (F5) opens Fueler Logon screenDelete a recordTo delete a record, perform the following:1. From the Database Management screen, move thepointer to one of the file types and press Enter.2. Open the record you would like to delete.3. Press Del (F4) to delete the record.4. From the Delete list box move the pointer to Yes andpress Enter.5. Press Exit (F5) to exit.Although data can be entered in the field with the lappad, it is much easier to enter large amounts of data usingFleetConnect Office.Customer File Screen24
OperationButton FileThe Button File allows you to view the account numberand vehicle number mapped to a RFID button and todelete a RFID button from the database.Please use the Setup New Vehicles commandto add a RFID button and a vehicle. Adding buttonsin the Button File is not recommended.New (F3) creates new Button File recordDel (F4) deletes displayed Button File recordExit (F5) opens Database Management (1/2)ID: (LB)The ID of the RFID button.Account #: (LB)The account associated with the RFID button.Vehicle: (LB)The vehicle associated with the RFID button.Customer FileThe Customer File allows you to view, create, edit ordelete customer accounts and contact information.If Customer File records exist in the database,choosing Account #: brings up a list box windowof existing records. Changing the options inside theexisting records will edit that customer’s records.Next (F1) opens Customer File (2/2)New (F3) creates new Customer File recordDel (F4) deletes displayed Customer File recordExit (F5) opens Database Management (1/2)Prev (F2) opens Customer File (1/2)New (F3) creates new Customer File recordAccount: (LB)The customer account number.Name: (FE)The customer name. 35 alphanumeric charactersmaximum.Phone: (FE)The customer phone number. 14 alphanumericcharacters maximum.Address 1: (FE)The first line of the customer address. 35alphanumeric characters maximum.Address 2: (FE)The second line of the customer address. 35alphanumeric characters maximum.Zip: (FE)The zip code of the customer address. 10alphanumeric characters maximum.City: (FE)The city of the customer address. 19 alphanumericcharacters maximum.State: (FE)The state of the customer address. Two alphanumericcharacters maximum.Del (F4) deletes displayed Customer File recordExit (F5) opens Database Management (1/2)Field TypeFE - Field Edit BoxLB - List Box25
OperationFueler FileThe Fueler File allows you to view, create, edit or deleteinformation for all drivers in the FleetConnect database.Fueler records can be created by manually enteringa Fueler # or with RFID buttons. Using a RFID buttonallows fuelers to logon by attaching the EZConnectbutton reader to a personally designated fueler RFIDbutton.To add a fueler with a RFID button:1. Attach the EZConnect button reader to a RFID buttonand press the power button. The button ID number willappear in the ID: field.2. Enter the fueler information in the remaining fields. PressAdd (F2) to save fueler to the FleetConnect database.Next (F1) opens Fueler File (2/2)New (F3) creates new Fueler File recordDel (F4) deletes displayed Fueler File recordExit (F5) opens Database Management (1/2)If Fueler File records exist in the database,choosing Fueler #: brings up a list box windowof existing records. Changing the options inside theexisting records will edit that customer’s records.Fueler #: (LB)The fueler number. 16 alphanumeric charactersmaximum.Password: (FE)The fueler password. 10 alphanumeric charactersmaximum.ID: (FE)The fueler ID. 16 alphanumeric characters maximum.Full Name: (FE)The fueler full name. 35 alphanumeric charactersmaximum.First Name: (FE)The fueler first name. 17 alphanumeric charactersmaximum.Last Name: (FE)The fueler last name. 17 alphanumeric charactersmaximum.Security: (FE)The security level of the fueler. Three numericcharacters maximum.Applications: (FE)The applications that can be run by the fueler. Fivenumeric characters maximum.Language: (LB)The language associated with the fueler <strong>DMS</strong> <strong>i1000</strong>Lap Pad display.Field TypeFE - Field Edit BoxLB - List BoxPrev (F2) opens Fueler File (1/2)New (F3) creates new Fueler File recordDel (F4) deletes displayed Fueler File recordExit (F5) opens Database Management (1/2)Product FileThe Product File allows you to view, create, edit ordelete information that maps the product back to theLCR, labels the product on the ticket, and designates aproduct code.New (F3) creates new Product File recordDel (F4) deletes displayed Product File record26Exit (F5) opens Database Management (1/2)
OperationProduct File (cont.)New (F3) creates new Product File recordDel (F4) deletes displayed Product File recordExit (F5) opens Database Management (1/2)If Product File records exist in the database, choosingProduct Code: brings up a list box window ofexisting records. Changing the options inside theexisting records will edit that customer’s records.Field TypeFE - Field Edit BoxLB - List BoxNext (F1) opens System Definitions File (2/6)Exit (F5) opens Database Management (1/2)Next (F1) opens System Definitions File (3/6)Prev (F2) opens System Definitions File (1/6)Exit (F5) opens Database Management (1/2)Product Code: (LB)The product number in the LectroCount register thatis calibrated for delivery of a product type.Name: (FE)The product names. 24 alphanumeric charactersmaximum.LCR Device Address: (FE)The node address of the LCR electronic register thatwill deliver the product. Value to match node addressprogrammed into the LectroCount register. Numericcharacters between 1 and 250.LCR Product Number: (LB)The calibration number in the LCR electronic registerof the product. The value can be changed using thedrop-down box.LCR Product Type: (LB)The product type. Must match product type on theLectroCount register. The value can be changedusing the drop-down box.System Definitions FileThe System Definitions file defines the contactinformation and system properties of your fuelingoperation.Name: (FE)The name of the fueling operation. 35 alphanumericcharacters maximum.Address 1: (FE)35 alphanumeric characters maximum.Address 2: (FE)35 alphanumeric characters maximum.Zip: (FE)10 alphanumeric characters maximum.City: (FE)19 alphanumeric characters maximum.State: (FE)Two alphanumeric characters maximum.Owner ID: (FE)Four alphanumeric characters maximum.Phone: (FE)The phone number of the fueling operation. 14alphanumeric characters maximum.Database Password: (FE)Password for Database Management access onthe <strong>DMS</strong> <strong>i1000</strong> unit. 10 alphanumeric charactersmaximum.New LCR Delivery: (LB)<strong>DMS</strong> <strong>i1000</strong> begins a new LCR Delivery begins ateach change of Account, Product, or Vehicle.Map Product by LCR Node: (LB)Product selected using the LCR by node address andcalibration # instead of by product type.27
OperationSystem Definitions FilePrint LCR Header? (LB)LCR Header printed onto delivery tickets.Print Account Header? (LB)Account Header printed onto delivery tickets.Print Vehicle Header? (LB)Vehicle Header printed onto delivery tickets.Print Vehicle Footer? (LB)Vehicle Footer printed onto delivery tickets.Print Account Footer? (LB)Account Footer printed onto delivery tickets.Print LCR Footer? (LB)LCR Footer printed onto delivery tickets.DOT Usage: (LB)Enables DOT check at logons and logoffsBoth • Logoff • Logon • NeverPrompt for Odometer: (LB)Asks for odometer reading at logon.Shared Printer Port: (LB)Allows <strong>DMS</strong> to communicate directly to printer withoutLCR.Print GPS Coordinates: (LB)GPS coordinate fields printed onto delivery tickets.GMT Offset: (FE)Location’s offset from Greenwich Mean Time. Threealphanumeric characters maximum.Transactions Format: (LB)The current file format of FCRead output. .CompTran • ASR • XMLTransactions Target: (LB)The current target of FCRead output. .Local • USB • OfficeTicket Footer 1: (FE)The footer comment option 1 for fields printedonto delivery tickets. 35 alphanumeric charactersmaximum.Ticket Footer 2: (FE)The footer comment option 2 for fields printedonto delivery tickets. 35 alphanumeric charactersmaximum.Automatic Updates: (LB)When the current transactions update method willoccur.Always • Both • Logoff • Logon • NeverDisable Truck DB Access: (LB)Truck access to database management on the <strong>DMS</strong><strong>i1000</strong> units.Preset by Tank Size: (LB)Tank size preset on the <strong>DMS</strong> <strong>i1000</strong> units.Next (F1) opens System Definitions File (4/6)Prev (F2) opens System Definitions File (2/6)Exit (F5) opens Database Management (1/2)Next (F1) opens System Definitions File (5/6)Prev (F2) opens System Definitions File (3/6)Exit (F5) opens Database Management (1/2)Next (F1) opens System Definitions File (6/6)Prev (F2) opens System Definitions File (4/6)Exit (F5) opens Database Management (1/2)Prev (F2) opens System Definitions File (5/6)28Exit (F5) opens Database Management (1/2)
OperationTruck FileThe Truck File is used for viewing, creating, editing, ordeleting truck ID information, aligning FleetConnect withthe LCR Unit ID, selecting the network number usedby the truck, and names and numbers of the truck. Allfueling trucks will have a unique ID. The Truck Unit IDmust match the value in the Unit ID of the LectroCountregister on the truck.New (F3) creates new Truck File recordDel (F4) deletes displayed Truck File recordExit (F5) opens Database Management (1/2)The LCR Unit ID: field in LCRHost’sGeneral Setup (1/5) screen must matchLCR Unit ID: field in the Truck File of theFleetConnect database. See manual EM200-11.Field TypeFE - Field Edit BoxLB - List BoxIf Truck File records exist in the database, choosingLCR Unit ID: brings up a list box window ofexisting records. Changing the options inside theexisting records will edit that customer’s records.LCR Unit ID: (LB)The LectroCount register unit ID code. 10alphanumeric characters maximum.Name: (FE)The truck name. 16 alphanumeric charactersmaximum.Number: (FE)The truck number. 10 numeric characters maximum.Network #: (LB)The truck network. Five numeric charactersmaximum.Vehicle FileThe Vehicle File specifies the customer account andproduct type for the vehicle mapped to a button.If Vehicle File records exist in the database, choosingAccount #: or Vehicle #: brings up a list boxwindow of existing records. Changing the options insidethe existing records will edit that customer’s records.Next (F1) opens Vehicle File (2/2)New (F3) creates new Vehicle File recordDel (F4) deletes displayed Vehicle File recordExit (F5) opens Database Management (2/2)Vehicle File (2/2)Account: (LB)The account number for the fuelable vehicle(customer).Vehicle: (LB)The number of the fuelable vehicle. 12 alphanumericcharacters maximum.Name: (FE)The name of the fuelable vehicle’s owner. 12alphanumeric characters maximum.Product Code: (LB)The code of the fueling product. 8 alphanumericcharacters maximum.Department: (FE)The department that will be billed for fueling thevehicle. 16 numeric characters maximum.Tank Size: (FE)The size of the fuelable vehicle’s tank. 10 numericcharacters maximum.On-Road: (LB)Whether or not the vehicle is an “on road” vehicle.29
OperationMachine StatusThe Machine Status screens display informationregarding system status. There are two Machine Statusscreens. The Status (F3) key on the Fill Vehiclesscreen opens the Machine Status (1/2) screen. From theMachine Status (2/2) screen, you can open the PrinterStatus, Delivery Status, and Delivery Code screens.These screens display the current conditions of theFleetConnect system. These status screens are helpfulfor troubleshooting and maintenance purposes. Formore information, see manual EM200-11.Security: Display OnlyA description of the active security level.Idle • Unlocked Idle • Delivery Paused• Delivery Active • W&M Idle • FactoryIdleSwitch: Display OnlyThe position of the selector switch.Run • Stop • Print • Shift Print •CalibrateState: Display OnlyThe current processing activity of the LCR 600.Run • Stop • End Delivery • Auxiliary •Shift • Calibrate • Waiting for No-Flow• UnknownPrinting? Display OnlyIs the printer currently printing?Other Errors? Display OnlyAre there any other errors being reported by theLCR?Printer StatusSelect this field to open the Printer Status screen..Delivery StatusSelect this field to open the Delivery Status screen.Delivery CodeSelect this field to open the Delivery Code screen.Next (F1) opens Machine Status (2/2)Diag (F3) opens list box to print a diagnostic ticketLCR# (F4) opens list box to switch to another active LCRExit (F5) opens Fill Vehicles screenPrev(F2) opens Machine Status (1/2)Diag (F3) opens list box to print a diagnostic ticketLCR# (F4) opens list box to switch to another active LCR30
OperationPrinter StatusThe Printer Status screen displays the current print/ticketconditions of the FleetConnect system. It is non-editable.The Printer Status screen is helpful for troubleshootingand maintenance purposes. There are two Printer Statusscreens. The Printer Status screens are accessiblethrough the Machine Status (2/2) screen.Next (F1) opens Printer Status screen 2/2Status (F3) opens Machine Status screen 1/2Delivery Ticket? Display OnlyHas a delivery ticket been requested?Shift Ticket? Display OnlyHas a shift ticket been requested?Diagnostic Ticket? Display OnlyHas a diagnostic ticket been requested?Pass-Through Print? Display OnlyIs text from the host in the LCR print buffer?Printer Error? Display OnlyHas an error been detected with the printer?Printer Busy? Display OnlyHas the print processor began to print a ticket?Prev (F2) opens Printer Status screen 1/2Status (F3) opens Machine Status screen 1/2Next (F1) opens Delivery Status screen 2/4Status (F3) opens Machine Status screen 2/2Delivery StatusThe Delivery Status screen displays the current deliveryconditions of the FleetConnect system. It is non-editable.The Delivery Status screen is helpful for troubleshootingand maintenance purposes. There are four DeliveryStatus screens. The Delivery Status screens areaccessible through the Machine Status (2/2) screen.Delivery Status (1/4)ROM Check Sum? Display OnlyHas a delivery not started due to the checksum of theLectroCount program code space failing?Temperature? Display OnlyHas the current delivery not started (or wasterminated) due to an error with the temperaturereading hardware?Watchdog? Display OnlyWas the processor reset due to a LectroCountwatchdog time out error?VCF Setup? Display OnlyWas there an error setting up the volumecompensation factor for the current product?31
OperationDelivery StatusDelivery Status (2/4)VCF Domain? Display OnlyDid the temperature of the product go outside thevalid range for the compensation type of the product?Meter Calibration? Display OnlyDid an error occur while setting up the metercalibration for the current delivery?Pulser Failure? Display OnlyDid the current delivery terminate due to too manypulser faults?Preset Stop? Display OnlyWas the gross or net preset volume reached?Delivery Status (3/4)No-Flow Stop? Display OnlyWas the current delivery stopped due to no-flow beingdetected through the meter for a specified amount oftime?Stop/Pause Request? Display OnlyWas a stop activated by the selector switch during anactive delivery?Print/End Request? Display OnlyWas a print activated by the selector switch during anactive delivery?Power Failure? Display OnlyDid a delivery end due to a power fail condition formore than 15 seconds?Delivery Status (4/4)Preset Error? Display OnlyDid a delivery end due to an error condition whileattempting to set up a gross or net preset?RS-232 Lap Pad? Display OnlyDid the last delivery end due to the Lap Pad beingremoved after the delivery started.Printer? Display OnlyDoes the current delivery require a printed ticket butthe printer is off-line or busy?Data Access? Display OnlyDid a data access error occur during the deliverywhich was critical to the delivery?Next (F1) opens Delivery Status screen 3/4Prev (F2) opens Delivery Status screen 1/4Status (F3) opens Machine Status screen 2/2Next (F1) opens Delivery Status screen 4/4Prev (F2) opens Delivery Status screen 2/4Status (F3) opens Machine Status screen 2/2Prev (F2) opens Delivery Status screen 3/4Status (F3) opens Machine Status screen 2/232
OperationNext (F1) opens Delivery Code screen 2/4Status (F3) opens Machine Status screen 2/2Next (F1) opens Delivery Code screen 3/4Prev (F2) opens Delivery Code screen 1/4Status (F3) opens Machine Status screen 2/2Next (F1) opens Delivery Code screen 4/4Prev (F2) opens Delivery Code screen 2/4Status (F3) opens Machine Status screen 2/2Prev (F2) opens Delivery Code screen 3/4Status (F3) opens Machine Status screen 2/2Delivery CodeThe Delivery Code screen allows operators to review theoperating status of the currently connected device. Thereare four Delivery Code screens. The Delivery Codescreens are accessible through the Machine Status (2/2)screen.Delivery Code (1/4)Delivery Ticket? Display OnlyIs a delivery ticket is pending? A new delivery cannotbe started until this field is cleared by successfullyprinting the last delivery ticket.Shift Ticket? Display OnlyHas a shift ticket been requested and waiting to beprinted?Flow Active? Display OnlyIs the flow active during a delivery? This fieldchanges with the Delivery Active? field, but italso turns off when a delivery is paused and turnedon when the delivery is resumed.Delivery Active? Display OnlyIs a delivery active?Delivery Code (2/4)Gross Preset Active? Display OnlyIs the current delivery a gross preset?Net Preset Active? Display OnlyIs the current delivery a net preset?Stop/Gross Preset? Display OnlyHas the current delivery been stopped by reaching agross preset value?Stop/Net Preset? Display OnlyHas the current delivery been stopped by reaching anet preset value?Delivery Code (3/4)VCF Active? Display OnlyIs the volume of the current delivery compensatedaccording to temperature?S1 Closed? Display OnlyIs the S1 solenoid closed? During preset deliveries,the S1 solenoid should be open at full product flowand closed at dwell flow.Delivery Beginning? Display OnlyIs a delivery in the process of being started?New Delivery Queued? Display OnlyHas a new delivery has been queued in the LCR600?Delivery Code (4/4)Init Warning? Display OnlyyDid a warning condition occur during the initializationof the current delivery.Config Event? Display OnlyDid a configuration event occur.Calib Event? Display OnlyDid a calibration event occur.33
Bill of MaterialsDescriptionPart NumberUSB Button Reader Adapter 71707USB Button Reader Cable 71395EZConnect Button Reader with RFID Button Reader CableE4363RFID Button and Mounting Kit (Qty. 10) 82696USB Flash Memory Device 82684FleetConnect Office CD ROMSG502CDDB Manager CD ROMSH252CDRoll Printer Kit without Cable, without RS232 & Power, without Reel E49005EZConnect Button Reader with RFID Button Reader CableUSB Button Reader Adapter with CableUSB Flash Memory DeviceDB Manager CD ROMEpson Roll PrinterFleetConnect Office CD ROM34
AppendixDelivery TicketTicket LayoutsDetailed Shift TicketLoad TicketSummary Shift TicketShift Ticket35
105 Albrecht DriveLake Bluff, IL 60044-22421.800.458.5262 • 847.295.1050Fax: 847.295.1057www.lcmeter.com© 2010 <strong>Liquid</strong> <strong>Controls</strong>Pub. No. 500351(06/2010)