7.5 clutch release cover - harley-davidson-sweden.se
7.5 clutch release cover - harley-davidson-sweden.se
7.5 clutch release cover - harley-davidson-sweden.se
- No tags were found...
You also want an ePaper? Increase the reach of your titles
YUMPU automatically turns print PDFs into web optimized ePapers that Google loves.
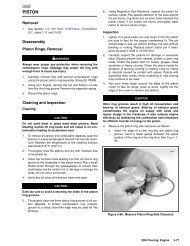
HOMEInnerRampRetainingRingCableFitting12. Remove the fork shaft from the hole on the right side ofthe transmission ca<strong>se</strong>. See Figure 7-5. Remove theshifter forks from the mainshaft and countershaft geargrooves.13. To replace the transmission gears or side door bearings,<strong>se</strong>e Section 7.6 MAINSHAFT/COUNTERSHAFT. Toreplace the main drive gear, <strong>se</strong>e Section 7.7 MAINDRIVE GEAR.CLEANING AND INSPECTION1WARNINGf1896x7xCouplingClutch CableFigure 7-4. Clutch Relea<strong>se</strong> Cover As<strong>se</strong>mblya. Retract detent arm and slide right support block offend of shifter cam. Remove pivot screw to <strong>relea<strong>se</strong></strong>detent arm, spring sleeve and spring. Remove anddiscard retaining ring. Press against inner race ofroller bearing to remove from support block. Discardroller bearing.b. Moving to opposite side, remove spiral lock ringfrom groove at left end of shifter cam. Using a smallknife, push on end of spiral lock ring working tip ofblade under edge of ring. Rai<strong>se</strong> end of ring until freeof ring groove. Work around circumference of ring toalternately pull spirals from ring groove. Discardring.c. Slide left support block off end of shifter cam.Remove and discard retaining ring. Press againstinner race of roller bearing to remove from supportblock. Discard roller bearing.Compres<strong>se</strong>d air can pierce the skin and cau<strong>se</strong> injury.Never u<strong>se</strong> your hand to check for leaks or to determineair flow rates. Wear safety glas<strong>se</strong>s to shield your eyesfrom flying dirt and debris. Failure to comply could resultin death or <strong>se</strong>rious injury.1. Clean all parts with solvent (except left and right supportblocks if roller bearings installed). Blow dry with lowpressure compres<strong>se</strong>d air.2. Inspect roller bearings. Verify that bearings rotate freelywithout sticking.3. Inspect the shifter cam for cracks or wear. Inspect theends for grooves or pitting. Install new roller bearingswhenever the shifter cam is replaced.4. Check the shifter fork shaft. Replace if bent or damaged.5. Using a small carpenter’s square, verify that the shifterfork shafts are square. If a fork does not rest directly onthe square, then it is bent and must be replaced. SeeFigure 7-6.f1892x7x8. Slide rubber boot off <strong>clutch</strong> cable adjuster. Holding cableadjuster with 1/2 inch wrench, loo<strong>se</strong>n jam nut using 9/16inch wrench. Back jam nut away from cable adjuster.Move adjuster toward jam nut to introduce a largeamount of free play at hand lever.9. Remove six socket head screws to free <strong>clutch</strong> <strong>relea<strong>se</strong></strong><strong>cover</strong> from transmission side door. Remove and discardgasket.10. Remove retaining ring and lift inner ramp out of <strong>clutch</strong><strong>relea<strong>se</strong></strong> <strong>cover</strong>. Turn the inner ramp over so that ball socketsare facing outboard. Remove hook of ramp from buttonon coupling. Remove coupling from <strong>clutch</strong> cable end.See Figure 7-4.11. Unscrew the cable fitting from the <strong>clutch</strong> <strong>relea<strong>se</strong></strong> <strong>cover</strong>.Remove <strong>clutch</strong> cable and fitting.ForkShaftFigure 7-5. Remove Fork Shaft/Shifter Forks(Right Side View)2004 Touring: Transmission 7-7


