FR-A701 INSTRUCTION MANUAL (Applied) - Automation Systems ...
FR-A701 INSTRUCTION MANUAL (Applied) - Automation Systems ...
FR-A701 INSTRUCTION MANUAL (Applied) - Automation Systems ...

You also want an ePaper? Increase the reach of your titles
YUMPU automatically turns print PDFs into web optimized ePapers that Google loves.
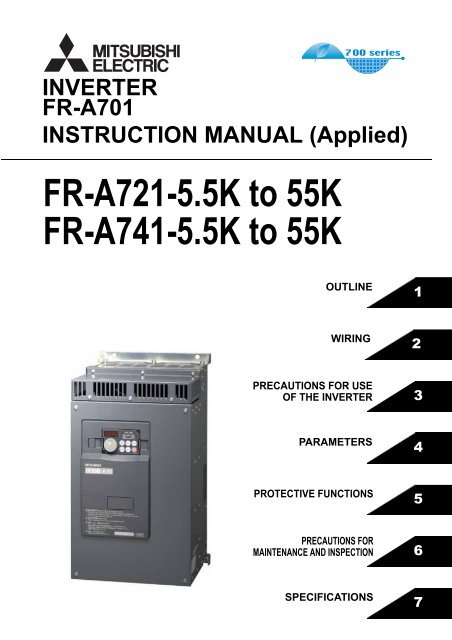
INVERTER<strong>FR</strong>-<strong>A701</strong><strong>INSTRUCTION</strong> <strong>MANUAL</strong> (<strong>Applied</strong>)<strong>FR</strong>-A721-5.5K to 55K<strong>FR</strong>-A741-5.5K to 55KOUTLINE1WIRING2PRECAUTIONS FOR USEOF THE INVERTER3PARAMETERS4PROTECTIVE FUNCTIONS5PRECAUTIONS FORMAINTENANCE AND INSPECTION6SPECIFICATIONS7
Thank you for choosing this Mitsubishi Inverter.This Instruction Manual (applied) provides instructions for advanced use of the <strong>FR</strong>-<strong>A701</strong> series inverters.Incorrect handling might cause an unexpected fault. Before using the inverter, always read this instruction manual and the instruction manual[IB-0600331ENG] packed with the product carefully to use the equipment to its optimum.This section is specifically about safety matters (2) Wiring CAUTIONDo not attempt to install, operate, maintain or inspect the inverter until you • Do not install a power factor correction capacitor or surge suppressor/radiohave read through instruction manual and appended documents carefully and noise filter (capacitor type filter) on the inverter output side. The device on thecan use the equipment correctly. Do not use the inverter until you have a full inverter output side may be overheated or burn out.knowledge of the equipment, safety information and instructions. In this • The connection orientation of the output cables U, V, W to the motor will affectinstruction manual, the safety instruction levels are classified intothe direction of rotation of the motor."WARNING" and "CAUTION".(3) Test operation and adjustmentWARNINGCAUTIONAssumes that incorrect handling may cause hazardousconditions, resulting in death or severe injury.Assumes that incorrect handling may causehazardous conditions, resulting in medium or slightinjury, or may cause physical damage only.Note that even the CAUTION level may lead to a serious consequenceaccording to conditions. Please follow strictly the instructions of both levelsbecause they are important to personnel safety.1. Electric Shock PreventionWARNING• While power is on or when the inverter is running, do not open the front cover.Otherwise you may get an electric shock.• Do not run the inverter with the front cover or wiring cover removed.Otherwise, you may access the exposed high-voltage terminals or the chargingpart of the circuitry and get an electric shock.• Even if power is off, do not remove the front cover except for wiring or periodicinspection.You may access the charged inverter circuits and get an electric shock.• Before starting wiring or inspection, check to make sure that the operation panelindicator is off, wait for at least 10 minutes after the power supply has beenswitched off, and check that there are no residual voltage using a tester or thelike. The capacitor is charged with high voltage for some time after power off andit is dangerous.• This inverter must be earthed (grounded). Earthing (Grounding) must conform tothe requirements of national and local safety regulations and electrical codes.(NEC section 250, IEC 536 class 1 and other applicable standards)Use a neutral-point earthed (grounded) power supply for 400V class inverter incompliance with EN standard.• Any person who is involved in the wiring or inspection of this equipment shouldbe fully competent to do the work.• Always install the inverter before wiring. Otherwise, you may get an electric shockor be injured.• Perform setting dial and key operations with dry hands to prevent an electricshock. Otherwise you may get an electric shock.• Do not subject the cables to scratches, excessive stress, heavy loads orpinching. Otherwise you may get an electric shock.• Do not replace the cooling fan while power is on. It is dangerous to replace thecooling fan while power is on.• Do not touch the printed circuit board with wet hands. You may get an electric shock.• When measuring the main circuit capacitor capacity, the DC voltage is applied tothe motor for 1s at powering off. Never touch the motor terminal, etc. right afterpowering off to prevent an electric shock.CAUTION2. Fire Prevention• Install the inverter on a nonflammable wall without holes (so that nobody cantouch the inverter heatsink on the rear side, etc.).Mounting it to or near combustible material can cause a fire.• If the inverter has become faulty, switch off the inverter power.A continuous flow of large current could cause a fire.CAUTION3. Injury Prevention• Apply only the voltage specified in the instruction manual to each terminal.Otherwise, burst, damage, etc. may occur.• Ensure that the cables are connected to the correct terminals. Otherwise, burst,damage, etc. may occur.• Always make sure that polarity is correct to prevent damage, etc. Otherwise,burst, damage, etc. may occur.• While power is on or for some time after power-off, do not touch the inverter as itis hot and you may get burnt.4. Additional InstructionsAlso note the following points to prevent an accidental failure, injury, electricshock, etc.(1) Transportation and installationCAUTION• When carrying products, use correct lifting gear to prevent injury.• Do not stack the inverter boxes higher than the number recommended.• Ensure that installation position and material can withstand the weight of theinverter. Install according to the information in the instruction manual.• Do not install or operate the inverter if it is damaged or has parts missing. This canresult in breakdowns.• When carrying the inverter, do not hold it by the front cover or setting dial; it mayfall off or fail.• Do not stand or rest heavy objects on the product.• Check the inverter mounting orientation is correct.• Prevent other conductive bodies such as screws and metal fragments or otherflammable substance such as oil from entering the inverter.• As the inverter is a precision instrument, do not drop or subject it to impact.• Use the inverter under the following environmental conditions. Otherwise, theinverter may be damaged.Surrounding air temperature -10°C to +50°C (non-freezing)Ambient humidity90% RH or less (non-condensing)Storage temperature -20°C to +65°C *1Indoors (free from corrosive gas,Atmosphereflammable gas, oil mist, dust and dirt)Maximum 1000m above sea level forAltitude, vibrationstandard operation. 5.9m/s 2 or less*1 Temperature applicable for a short time, e.g. in transit.Environment• Before starting operation, confirm and adjust the parameters. A failure to do somay cause some machines to make unexpected motions.(4) Operation• When you have chosen the retry function, stay away from the equipment as itwill restart suddenly after an alarm stop.• Since pressing key may not stop output depending on the function settingstatus (refer to page 278), provide a circuit and switch separately to make anemergency stop (power off, mechanical brake operation for emergency stop,etc).• Make sure that the start signal is off before resetting the inverter alarm. A failureto do so may restart the motor suddenly.• The load used should be a three-phase induction motor only. Connection of anyother electrical equipment to the inverter output may damage the inverter as well asequipment.• Performing pre-excitation (LX signal and X13 signal) under torque control (realsensorless vector control) may start the motor running at a low speed evenwhen the start command (STF or STR) is not input. The motor may run also at alow speed when the speed limit value = 0 with a start command input. Performpre-excitation after making sure that there will be no problem in safety if themotor runs.• Do not modify the equipment.• Do not perform parts removal which is not instructed in this manual. Doing somay lead to fault or damage of the inverter.• The electronic thermal relay function does not guarantee protection of the motorfrom overheating. It is recommended to install both an external thermal and PTCthermistor for overheat protection.• Do not use a magnetic contactor on the inverter input for frequent starting/stopping of the inverter. Otherwise, the life of the inverter decreases.• Use a noise filter to reduce the effect of electromagnetic interference. Otherwisenearby electronic equipment may be affected.• When a 400V class motor is inverter-driven, please use an insulation-enhancedmotor or measures taken to suppress surge voltages. Surge voltagesattributable to the wiring constants may occur at the motor terminals,deteriorating the insulation of the motor.• When parameter clear or all clear is performed, reset the required parametersbefore starting operations. Each parameter returns to the initial value.• The inverter can be easily set for high-speed operation. Before changing itssetting, fully examine the performances of the motor and machine.• In addition to the inverter's holding function, install a holding device to ensuresafety.• Before running an inverter which had been stored for a long period, alwaysperform inspection and test operation.• For prevention of damage due to static electricity, touch nearby metal beforetouching this product to eliminate static electricity from your body.(5) Emergency stop• Provide a safety backup such as an emergency brake which will prevent themachine and equipment from hazardous conditions if the inverter fails.• When the breaker on the inverter input side trips, check for the wiring fault (shortcircuit), damage to internal parts of the inverter, etc. Identify the cause of the trip,then remove the cause and power on the breaker.• When the protective function is activated, take the corresponding correctiveaction, then reset the inverter, and resume operation.(6) Maintenance, inspection and parts replacement• Do not carry out a megger (insulation resistance) test on the control circuit of theinverter. It will cause a failure.(7) Disposing of the inverter• Treat as industrial waste.CAUTIONWARNINGCAUTIONCAUTIONCAUTIONCAUTIONGeneral instructionsMany of the diagrams and drawings in this instruction manual show the inverterwithout a cover, or partially open. Never run the inverter in this status. Alwaysreplace the cover and follow this instruction manual when operating theinverter.A-1
CONTENTS1 OUTLINE 11.1 Product checking and parts identification ........................................................ 21.2 Inverter and peripheral devices.......................................................................... 31.2.1 Peripheral devices ..................................................................................................................... 41.3 Method of removal and reinstallation of the front cover.................................. 51.4 Installation of the inverter and enclosure design ............................................. 71.4.1 Inverter installation environment................................................................................................ 71.4.2 Cooling system types for inverter enclosure............................................................................ 101.4.3 Inverter placement................................................................................................................... 112 WIRING 132.1 Terminal connection diagram........................................................................... 142.2 Main circuit terminal specifications ................................................................. 152.2.1 Specification of main circuit terminal ....................................................................................... 152.2.2 Terminal arrangement of the main circuit terminal, power supply and the motor wiring. ........ 162.2.3 Cables and wiring length ......................................................................................................... 182.2.4 When connecting the control circuit and the main circuit separatelyto the power supply (separate power) ..................................................................................... 212.3 Control circuit specifications ........................................................................... 222.3.1 Control circuit terminals ........................................................................................................... 222.3.2 Changing the control logic ....................................................................................................... 252.3.3 Control circuit terminal layout .................................................................................................. 272.3.4 Wiring instructions ................................................................................................................... 282.3.5 When connecting the operation panel using a connection cable ............................................ 282.3.6 RS-485 terminal block ............................................................................................................. 292.3.7 Communication operation........................................................................................................ 292.4 Connection of motor with encoder (vector control) ....................................... 303 PRECAUTIONS FOR USE OF THE INVERTER 373.1 EMC and leakage currents ................................................................................ 383.1.1 Leakage currents and countermeasures ................................................................................. 383.1.2 EMC measures........................................................................................................................ 403.1.3 Power supply harmonics ......................................................................................................... 423.1.4 Harmonic suppression guideline .............................................................................................423.2 Power-off and magnetic contactor (MC).......................................................... 443.3 Inverter-driven 400V class motor ..................................................................... 45I
3.4 Precautions for use of the inverter .................................................................. 463.5 Failsafe of the system which uses the inverter .............................................. 484 PARAMETERS 514.1 Operation panel (<strong>FR</strong>-DU07) ............................................................................... 524.1.1 Parts of the operation panel (<strong>FR</strong>-DU07).................................................................................. 524.1.2 Basic operation (factory setting) .............................................................................................. 534.1.3 Change the parameter setting value ....................................................................................... 544.1.4 Setting dial push ...................................................................................................................... 54CONTENTS4.2 Parameter List .................................................................................................... 554.2.1 Parameter list .......................................................................................................................... 554.3 Control mode..................................................................................................... 714.3.1 What is vector control? ........................................................................................................... 724.3.2 Change the control method (Pr. 80, Pr. 81, Pr. 451, Pr. 800) ................................................ 754.4 Speed control by real sensorless vector control, vector control................. 794.4.1 Setting procedure of real sensorless vector control (speed control) ..................................... 814.4.2 Setting procedure of vector control (speed control) ............................................................... 824.4.3 Torque limit level setting for speed control(Pr. 22, Pr. 803, Pr. 810 to Pr. 817, Pr. 858, Pr. 868, Pr. 874) ............................................. 834.4.4 To perform high accuracy/fast response operation (gain adjustment of realsensorless vector control and vector control) (Pr. 818 to Pr. 821, Pr. 830,Pr. 831, Pr. 880) .................................................................................................................. 884.4.5 Speed feed forward control, model adaptive speed control (Pr. 828, Pr. 877 to Pr. 881) ..... 954.4.6 Torque biases (Pr. 840 to Pr. 848) ........................................................................................ 974.4.7 Prevent the motor from overrunning (Pr. 285, Pr. 853, Pr. 873) .......................................... 1004.4.8 Notch filter (Pr. 862, Pr. 863) ............................................................................................... 1014.5 Torque control by real sensorless vector control, vector control ............. 1024.5.1 Torque control ...................................................................................................................... 1024.5.2 Setting procedure of real sensorless vector control (torque control) ................................... 1064.5.3 Setting procedure of vector control (torque control) ............................................................ 1074.5.4 Torque command (Pr. 803 to Pr. 806).................................................................................. 1084.5.5 Speed limit (Pr. 807 to Pr. 809) ........................................................................................... 1104.5.6 Gain adjustment of torque control (Pr. 824, Pr. 825, Pr. 834, Pr. 835) ................................ 1134.6 Position control by vector control ................................................................ 1154.6.1 Position control .................................................................................................................... 1154.6.2 Conditional position feed function by contact input (Pr. 419, Pr. 464 to Pr. 494) ................ 1174.6.3 Position control (Pr. 419, Pr. 428 to Pr. 430) by inverter pulse train input ........................... 120II
4.6.4 Setting of the electronic gear (Pr. 420, Pr. 421, Pr. 424) .................................................... 1224.6.5 Setting of positioning adjustment parameter (Pr. 426, Pr. 427) ........................................... 1234.6.6 Gain adjustment of position control (Pr. 422, Pr. 423, Pr. 425) ........................................... 1244.6.7 Trouble shooting for when position control is not exercised normally ................................. 1264.7 Adjustment of real sensorless vector control, vector control.................... 1274.7.1 Speed detection filter and torque detection filter (Pr. 823, Pr. 827, Pr. 833, Pr. 837) ........ 1274.7.2 Excitation ratio (Pr. 854) ..................................................................................................... 1284.8 Adjust the output torque (current) of the motor .......................................... 1294.8.1 Manual torque boost (Pr. 0, Pr. 46, Pr. 112)......................................................................... 1294.8.2 Advanced magnetic flux vector control (Pr. 71, Pr. 80, Pr. 81, Pr. 89, Pr. 450,Pr. 451, Pr. 453, Pr. 454, Pr. 569, Pr. 800) ......................................................................... 1314.8.3 Slip compensation (Pr. 245 to Pr. 247)................................................................................. 1344.8.4 Stall prevention operation (Pr. 22, Pr. 23, Pr. 48, Pr. 49, Pr. 66, Pr. 114, Pr. 115,Pr. 148, Pr. 149, Pr. 154, Pr. 156, Pr. 157, Pr. 858, Pr. 868) ............................................... 1354.9 Limit the output frequency............................................................................. 1404.9.1 Maximum/minimum frequency (Pr. 1, Pr. 2, Pr. 18) ............................................................. 1404.9.2 Avoid mechanical resonance points (Frequency jump) (Pr. 31 to Pr. 36) ............................ 1414.10 Set V/F pattern................................................................................................. 1424.10.1 Base frequency, voltage (Pr. 3, Pr. 19, Pr. 47, Pr. 113) ....................................................... 1424.10.2 Load pattern selection (Pr. 14) ............................................................................................ 1444.10.3 Elevator mode (automatic acceleration/deceleration) (Pr. 61, Pr. 64, Pr. 292) ................... 1464.10.4 Adjustable 5 points V/F (Pr. 71, Pr. 100 to Pr. 109) ............................................................. 1474.11 Frequency setting by external terminals ...................................................... 1484.11.1 Multi-speed setting operation (Pr. 4 to Pr. 6, Pr. 24 to Pr. 27, Pr. 232 to Pr. 239) ............... 1484.11.2 Jog operation (Pr. 15, Pr. 16) ............................................................................................... 1504.11.3 Input compensation of multi-speed and remote setting (Pr. 28)........................................... 1524.11.4 Remote setting function (Pr. 59)........................................................................................... 1524.12 Setting of acceleration/deceleration time andacceleration/deceleration pattern.................................................................. 1554.12.1 Setting of the acceleration and deceleration time (Pr. 7, Pr. 8, Pr. 20, Pr. 21,Pr. 44, Pr. 45, Pr. 110, Pr. 111) ............................................................................................ 1554.12.2 Starting frequency and start-time hold function (Pr. 13, Pr. 571) ......................................... 1574.12.3 Acceleration/deceleration pattern (Pr. 29, Pr. 140 to Pr. 143, Pr. 380 to Pr. 383,Pr. 516 to Pr. 519) ................................................................................................................ 1584.12.4 Shortest acceleraiton/deceleration and optimum acceleration/deceleration(automatic acceleration/deceleration) (Pr. 61 to Pr. 63, Pr. 292, Pr. 293)............................ 1624.13 Selection and protection of a motor ............................................................. 1654.13.1 Motor protection from overheat (Electronic thermal relay function) (Pr. 9, Pr. 51) ............... 165III
4.13.2 <strong>Applied</strong> motor (Pr. 71, Pr. 450)............................................................................................. 1694.13.3 Offline auto tuning (Pr. 71, Pr. 80 to Pr. 84, Pr. 90 to Pr. 94, Pr. 96, Pr. 450,Pr. 453 to Pr. 463, Pr. 684, Pr. 859, Pr. 860) ................................................................... 1714.13.4 Online auto tuning (Pr. 95, Pr. 574) .................................................................................. 1814.14 Motor brake and stop operation .................................................................... 1854.14.1 DC injection brake and zero speed control, servo lock (LX signal, X13 signal,Pr. 10 to Pr. 12, Pr. 802, Pr. 850) ......................................................................................... 1854.14.2 Stop selection (Pr. 250) ........................................................................................................ 1884.14.3 Stop-on contact control function (Pr. 6, Pr. 48, Pr. 270, Pr. 275, Pr. 276) ........................... 1894.14.4 Brake sequence function (Pr. 278 to Pr. 285, Pr. 292)......................................................... 1924.14.5 Orientation control (Pr. 350 to Pr. 366, Pr. 369, Pr. 393, Pr. 396 to Pr. 399) .................... 195CONTENTS4.15 Function assignment of external terminal and control ............................... 2064.15.1 Input terminal function selection (Pr. 178 to Pr. 189) ........................................................... 2064.15.2 Inverter output shutoff signal (MRS signal, Pr. 17)............................................................... 2094.15.3 Condition selection of function validity by the second function selection signal (RT) andthird function selection signal (X9) (RT signal, X9 signal, Pr. 155)....................................... 2104.15.4 Start signal operation selection (STF, STR, STOP signal, Pr. 250) ..................................... 2114.15.5 Magnetic flux decay output shutoff signal (X74 signal) ........................................................ 2134.15.6 Output terminal function selection (Pr. 190 to Pr. 196)......................................................... 2144.15.7 Detection of output frequency (SU, FU, FU2 , FU3, FB, FB2, FB3, LS signal,Pr. 41 to Pr. 43, Pr. 50, Pr. 116, Pr. 865) ............................................................................. 2214.15.8 Output current detection function(Y12 signal, Y13 signal, Pr. 150 to Pr. 153, Pr. 166, Pr. 167) .............................................. 2234.15.9 Detection of output torque (TU signal, Pr. 864) .................................................................... 2244.15.10 Remote output function (REM signal, Pr. 495 to Pr. 497) .................................................... 2254.16 Monitor display and monitor output signal .................................................. 2264.16.1 Speed display and speed setting (Pr. 37, Pr. 144, Pr. 505, Pr. 811).................................... 2264.16.2 DU/PU, FM, AM terminal monitor display selection (Pr. 52, Pr. 54, Pr. 158, Pr. 170,Pr. 171, Pr. 268, Pr. 563, Pr. 564, Pr. 891) .......................................................................... 2284.16.3 Reference of the terminal FM (pulse train output) and AM (analog voltageoutput) (Pr. 55, Pr. 56, Pr. 291, Pr. 866, Pr. 867) ................................................................. 2334.16.4 Terminal FM, AM calibration (Calibration parameter C0 (Pr. 900), C1 (Pr. 901))................. 2364.17 Operation selection at power failure and instantaneous power failure..... 2394.17.1 Automatic restart after instantaneous power failure/flying start(Pr. 57, Pr. 58, Pr. 162 to Pr. 165, Pr. 299, Pr. 611)............................................................. 2394.17.2 Power failure-time deceleration-to-stop function (Pr. 261 to Pr. 266, Pr. 294 ) .................... 2434.18 Operation setting at fault occurrence ........................................................... 2464.18.1 Retry function (Pr. 65, Pr. 67 to Pr. 69) ................................................................................ 2464.18.2 Fault code output selection (Pr. 76)...................................................................................... 2484.18.3 Input/output phase loss protection selection (Pr. 251, Pr. 872)............................................ 249IV
4.18.4 Overspeed detection (Pr. 374) ............................................................................................. 2494.18.5 Encoder signal loss detection (Pr. 376) ............................................................................... 2494.18.6 Fault definition (Pr. 875) ....................................................................................................... 2504.19 Energy saving operation and energy saving monitor ................................. 2514.19.1 Energy saving control (Pr. 60) ............................................................................................. 2514.19.2 Energy saving monitor (Pr. 891 to Pr. 899) .......................................................................... 2524.20 Motor noise, EMI measures ........................................................................... 2574.20.1 PWM carrier frequency and Soft-PWM control (Pr. 72, Pr. 240) .......................................... 2574.21 Frequency/torque setting by analog input (terminal 1, 2, 4)....................... 2584.21.1 Function assignment of analog input terminal (Pr. 858, Pr. 868) ......................................... 2584.21.2 Analog input selection (Pr. 73, Pr. 267)................................................................................ 2594.21.3 Analog input compensation (Pr. 73, Pr. 242, Pr. 243, Pr. 252, Pr. 253)............................... 2634.21.4 Response level of analog input and noise elimination(Pr. 74, Pr. 822, Pr. 826, Pr. 832, Pr. 836, Pr. 849).............................................................. 2654.21.5 Bias and gain of frequency setting voltage (current)(Pr. 125, Pr. 126, Pr. 241, C2(Pr. 902) to C7(Pr. 905), C12(Pr. 917) to C15(Pr. 918)) ........ 2674.21.6 Bias and gain of torque (magnetic flux) setting voltage (current)(Pr. 241, C16(Pr. 919) to C19(Pr. 920), C38 (Pr. 932) to C41 (Pr. 933)) ........................... 2734.22 Misoperation prevention and parameter setting restriction ....................... 2784.22.1 Reset selection/disconnected PU detection/PU stop selection (Pr. 75) ............................... 2784.22.2 Parameter write selection (Pr. 77) ........................................................................................ 2804.22.3 Reverse rotation prevention selection (Pr. 78) ..................................................................... 2814.22.4 Display of applied parameters and user group function (Pr. 160, Pr. 172 to Pr. 174) .......... 2814.23 Selection of operation mode and operation location .................................. 2834.23.1 Operation mode selection (Pr. 79)........................................................................................ 2834.23.2 Operation mode at power on (Pr. 79, Pr. 340) ..................................................................... 2914.23.3 Start command source and frequency command source duringcommunication operation (Pr. 338, Pr. 339, Pr. 550, Pr. 551).............................................. 2924.24 Communication operation and setting ......................................................... 2974.24.1 Wiring and configuration of PU connector ............................................................................ 2974.24.2 Wiring and arrangement of RS-485 terminals ...................................................................... 2994.24.3 Initial settings and specifications of RS-485 communication(Pr. 117 to Pr. 124, Pr. 331 to Pr. 337, Pr. 341, Pr. 549)...................................................... 3024.24.4 Communication EEPROM write selection (Pr. 342) ............................................................. 3034.24.5 Mitsubishi inverter protocol (computer link communication)................................................. 3044.24.6 Modbus-RTU communication specifications (Pr. 331, Pr. 332, Pr. 334, Pr. 343,Pr. 539, Pr. 549) ................................................................................................................... 3164.25 Special operation and frequency control ..................................................... 329V
4.25.1 PID control (Pr. 127 to Pr. 134, Pr. 575 to Pr. 577) .............................................................. 3294.25.2 Bypass-inverter switchover function (Pr. 57, Pr. 58, Pr. 135 to Pr. 139, Pr. 159)................. 3374.25.3 Load torque high speed frequency control (Pr. 4, Pr. 5, Pr. 270 to Pr. 274) ........................ 3424.25.4 Droop control (Pr. 286 to Pr. 288) ..................................................................................... 3444.25.5 Frequency setting by pulse train input (Pr. 291, Pr. 384 to Pr. 386)..................................... 3464.25.6 Encoder feedback control (Pr. 144, Pr. 285, Pr. 359, Pr. 367 to Pr. 369) ........................... 3494.25.7 Regeneration avoidance function (Pr. 665, Pr. 882 to Pr. 886)............................................ 351CONTENTS4.26 Useful functions.............................................................................................. 3534.26.1 Cooling fan operation selection (Pr. 244) ............................................................................. 3534.26.2 Display of the life of the inverter parts (Pr. 255 to Pr. 259)................................................... 3544.26.3 Maintenance timer alarm (Pr. 503, Pr. 504) ......................................................................... 3574.26.4 Current average value monitor signal (Pr. 555 to Pr. 557) ................................................... 3584.26.5 Free parameter (Pr. 888, Pr. 889) ........................................................................................ 3604.27 Setting of the parameter unit and operation panel...................................... 3614.27.1 PU display language selection (Pr. 145) .............................................................................. 3614.27.2 Operation panel frequency setting/key lock operation selection (Pr. 161) ........................... 3614.27.3 Buzzer control (Pr. 990)........................................................................................................ 3634.27.4 PU contrast adjustment (Pr. 991) ......................................................................................... 3634.28 Parameter clear ............................................................................................... 3644.29 All parameter clear.......................................................................................... 3654.30 Parameter copy and parameter verification ................................................. 3664.30.1 Parameter copy .................................................................................................................... 3664.30.2 Parameter verification........................................................................................................... 3674.31 Check and clear of the faults history ............................................................ 3685 PROTECTIVE FUNCTIONS 3715.1 Reset method of protective function ............................................................. 3725.2 List of fault or alarm display ........................................................................... 3735.3 Causes and corrective actions ....................................................................... 3745.4 Correspondences between digital and actual characters ........................... 3895.5 Check first when you have troubles .............................................................. 3905.5.1 Motor will not start ................................................................................................................. 3905.5.2 Motor generates abnormal noise........................................................................................... 3905.5.3 Inverter generates abnormal noise........................................................................................ 3915.5.4 Motor generates heat abnormally.......................................................................................... 391VI
5.5.5 Motor rotates in opposite direction ........................................................................................3915.5.6 Speed greatly differs from the setting.................................................................................... 3915.5.7 Acceleration/deceleration is not smooth................................................................................ 3915.5.8 Motor current is large............................................................................................................. 3915.5.9 Speed does not increase....................................................................................................... 3915.5.10 The motor and machine vibrate.............................................................................................3915.5.11 Speed varies during operation............................................................................................... 3925.5.12 Operation mode is not changed properly .............................................................................. 3925.5.13 Operation panel (<strong>FR</strong>-DU07) display is not operating............................................................. 3925.5.14 POWER lamp is not lit ........................................................................................................... 3925.5.15 Parameter write cannot be performed ................................................................................... 3926 PRECAUTIONS FOR MAINTENANCE AND INSPECTION 3936.1 Inspection item................................................................................................. 3946.1.1 Daily inspection ..................................................................................................................... 3946.1.2 Periodic inspection ................................................................................................................ 3946.1.3 Daily and periodic inspection................................................................................................. 3956.1.4 Display of the life of the inverter parts ................................................................................... 3966.1.5 Checking the inverter and converter modules ....................................................................... 3966.1.6 Cleaning ................................................................................................................................ 3976.1.7 Replacement of parts ............................................................................................................ 3976.2 Measurement of main circuit voltages, currents and powers ..................... 4006.2.1 Measurement of powers ........................................................................................................ 4026.2.2 Measurement of voltages and use of PT............................................................................... 4026.2.3 Measurement of currents....................................................................................................... 4036.2.4 Use of CT and transducer ..................................................................................................... 4036.2.5 Measurement of inverter input power factor .......................................................................... 4036.2.6 Measurement of converter output voltage (across terminals P/+ - N/-) ................................. 4046.2.7 Measurement of inverter output frequency............................................................................ 4046.2.8 Insulation resistance test using megger ................................................................................ 4046.2.9 Pressure test ......................................................................................................................... 4047 SPECIFICATIONS 4057.1 Rating................................................................................................................ 4067.1.1 Inverter rating ........................................................................................................................ 4067.1.2 Motor rating ........................................................................................................................... 4087.2 Common specifications .................................................................................. 4097.3 Outline dimension drawings........................................................................... 410VII
7.3.1 Inverter outline dimension drawings ...................................................................................... 4107.3.2 Dedicated motor outline dimension drawings........................................................................ 4157.4 Installation of the heatsink portion outside the enclosure for use ............. 4197.4.1 Protrusion of heatsink............................................................................................................ 419APPENDICES 421Appendix 1 Main differences and compatibilities with the <strong>FR</strong>-A700 series...... 422CONTENTSAppendix 2Control mode-based parameter (function) correspondencetable and instruction code list .......................................................... 423VIII
MEMO
1 OUTLINEThis chapter describes the basic "OUTLINE" for use of thisproduct.Always read the instructions before using the equipment1.1 Product checking and parts identification................21.2 Inverter and peripheral devices...............................31.3 Method of removal and reinstallation of the frontcover .......................................................................51.4 Installation of the inverter and enclosure design.....712DU ..........................................Operation panel (<strong>FR</strong>-DU07)PU................................................Operation panel (<strong>FR</strong>-DU07) and parameter unit (<strong>FR</strong>-PU04/<strong>FR</strong>-PU07)Inverter ...................................Mitsubishi inverter <strong>FR</strong>-<strong>A701</strong> series<strong>FR</strong>-<strong>A701</strong> .................................Mitsubishi inverter <strong>FR</strong>-<strong>A701</strong> seriesPr. ...........................................Parameter NumberPU operation...........................Operation using the PU (<strong>FR</strong>-DU07/<strong>FR</strong>-PU04/<strong>FR</strong>-PU07).External operation ..................Operation using the control circuit signalsCombined operation ...............Combined operation using the PU (<strong>FR</strong>-DU07/<strong>FR</strong>-PU04/<strong>FR</strong>-PU07) and external operation.Mitsubishi standard motor ......SF-JRMitsubishi constant-torque motor.SF-HRCAVector dedicated motor...........SF-V5RU• Microsoft and Visual C++ are registered trademarks of Microsoft Corporation in theUnited States and/or other countries.• LONWORKS ® is a registered trademark of Echelon Corporation in the U.S.A and othercountries.• DeviceNet ® is a registered trademark of ODVA (Open DeviceNet Vender Association,Inc.).• Other company and product names herein are the trademarks and registeredtrademarks of their respective owners.345617
Product checking and parts identification1.1 Product checking and parts identificationUnpack the inverter and check the capacity plate on the front cover and the rating plate on the inverter side face toensure that the product agrees with your order and the inverter is intact.• Inverter Type<strong>FR</strong> - A721 - 5.5 KCooling fan (Refer to page 398)Symbol Voltage ClassA721 Three-phase 200V classA741 Three-phase 400V classIndicate invertercapacity (kW)Fan cover(Refer to page 398)Fan block(Refer to page 398)PU connector(Refer to page 24)Front cover(Refer to page 5)Operation panel(<strong>FR</strong>-DU07) (Refer to page 52)Power lampLit when the control circuit(R1/L11, S1/L21) is suppliedwith power.Alarm lampLit when the inverter isin the alarm status(major fault).Capacity plateCapacity plate<strong>FR</strong>-A721-5.5KInverter type• Accessory· Eyebolt for hanging the inverterSerial numberCapacity Eyebolt size Number11K, 15K M8 218.5K to 30K M10 237K to 55K M12 2* The 5.5K and 7.5K are not provided with eyebolts.RS-485 terminals(Refer to page 299)Connector for plug-inoption connection(Refer to the instruction manualof options.)There are three connectionconnectors and they are calledCON. 1, CON. 2, and CON. 3from above.Voltage/current input switch(Refer to page 14, 259)AU/PTC switchover switch(Refer to page 168)Control circuitterminal block (Refer to page 22)Main circuitterminal block (Refer to page 15)Charge lampLit when power is suppliedto the main circuit (Refer to page 15)Rating plateInverter type<strong>Applied</strong> motorcapacityInput ratingOutput ratingSerial numberRating plate<strong>FR</strong>-A721-5.5KREMARKSFor removal and reinstallation of covers, refer to page 5.Harmonic suppression guideline (when inverters are used in Japan)All models of general-purpose inverters used by specific consumers are covered by "Harmonic suppression guideline for consumerswho receive high voltage or special high voltage". (For details, refer to page 42.)2
1OUTLINEInverter and peripheral devices1.2 Inverter and peripheral devicesThree-phase AC power supplyUse within the permissible power supplyspecifications of the inverter.(Refer to page 406)Moulded case circuit breaker (MCCB) orearth leakage circuit breaker (ELB), fuseThe breaker must be selected carefullysince an in-rush current flows in the inverterat power on.Inverter (<strong>FR</strong>-<strong>A701</strong>)The life of the inverter is influenced by surrounding air temperature. The surrounding airtemperature should be as low as possible within the permissible range. This must be notedespecially when the inverter is installed in an enclosure. (Refer to page 7)Wrong wiring might lead to damage of the inverter. The control signal lines must be keptfully away from the main circuit to protect them from noise.(Refer to page 14)(Refer to page 4)Magnetic contactor (MC)Install the magnetic contactor to ensuresafety. Do not use this magnetic contactorto start and stop the inverter. Doing so willcause the inverter life to be shorten.(Refer to page 44)Noise filter(<strong>FR</strong>-BLF)Install a noise filter to reduce the electromagneticnoise generated from the inverter.Effective in the range from about 1MHz to 10MHz.When more wires are passed through, a moreeffective result can be obtained. The total number ofwires passed through should be 4T or more.Capacitor type filter(<strong>FR</strong>-BIF)Reduces the radio noise.R/L1 S/L2 T/L3Earth(Ground)U V WNoise filter (<strong>FR</strong>-BLF)Install a noise filter to reducethe electromagnetic noisegenerated from the inverter.Effective in the range fromabout 1MHz to 10MHz. A wireshould be wound four turns ata maximum.Devices connected to the outputDo not install a power factor correction capacitor, surge suppressor or radio noise filter on the outputside of the inverter. When installing a moulded case circuit breaker on the output side of the inverter,contact each manufacturer for selection of the moulded case circuit breaker.MotorEarth (Ground)To prevent an electric shock, always earth (ground) the motor and inverter.Earth (Ground)CAUTION· Do not install a power factor correction capacitor, surge suppressor or radio noise filter on the inverter output side. This will cause theinverter to trip or the capacitor, and surge suppressor to be damaged. If any of the above devices are connected, immediately remove them.· This inverter has a built-in AC reactor (<strong>FR</strong>-HAL) and a circuit type specified in Harmonic suppression guideline in Japan is threephasebridge (capacitor smoothed) and with reactor (AC side). (Refer to page 42) Do not use an AC reactor (<strong>FR</strong>-HAL) of a standaloneoption except following purpose. (Note that overload protection of the converter may operate when a thyristor load isconnected in the power supply system. To prevent this, always install an optional stand-alone AC reactor (<strong>FR</strong>-HAL).) A DCreactor (<strong>FR</strong>-HEL) can not be connected to the inverter.· Electromagnetic wave interferenceThe input/output (main circuit) of the inverter includes high frequency components, which may interfere with the communicationdevices (such as AM radios) used near the inverter. In this case, connecting a capacitor type filter will reduce electromagneticwave interference.· Refer to the instruction manual of each option and peripheral devices for details of peripheral devices.3
Inverter and peripheral devices1.2.1 Peripheral devicesCheck the inverter type of the inverter you purchased. Appropriate peripheral devices must be selected according tothe capacity. Refer to the following list and prepare appropriate peripheral devices:200V classMotor Output(kW)*1Applicable Inverter Type Breaker Selection*2 Input Side Magnetic Contactor*35.5 <strong>FR</strong>-A721-5.5K 50AF 40A S-N20, N217.5 <strong>FR</strong>-A721-7.5K 50AF 50A S-N2511 <strong>FR</strong>-A721-11K 100AF 75A S-N3515 <strong>FR</strong>-A721-15K 100AF 100A S-N5018.5 <strong>FR</strong>-A721-18.5K 225AF 125A S-N5022 <strong>FR</strong>-A721-22K 225AF 150A S-N6530 <strong>FR</strong>-A721-30K 225AF 175A S-N8037 <strong>FR</strong>-A721-37K 225AF 225A S-N12545 <strong>FR</strong>-A721-45K 400AF 300A S-N15055 <strong>FR</strong>-A721-55K 400AF 350A S-N180400V classMotor Output(kW)*1Applicable Inverter Type Breaker Selection*2 Input Side Magnetic Contactor*35.5 <strong>FR</strong>-A741-5.5K 30AF 20A S-N11, N127.5 <strong>FR</strong>-A741-7.5K 30AF 30A S-N2011 <strong>FR</strong>-A741-11K 50AF 40A S-N2015 <strong>FR</strong>-A741-15K 50AF 50A S-N2018.5 <strong>FR</strong>-A741-18.5K 100AF 60A S-N2522 <strong>FR</strong>-A741-22K 100AF 75A S-N2530 <strong>FR</strong>-A741-30K 100AF 100A S-N5037 <strong>FR</strong>-A741-37K 225AF 125A S-N5045 <strong>FR</strong>-A741-45K 225AF 150A S-N6555 <strong>FR</strong>-A741-55K 225AF 175A S-N80*1 Selections for use of the Mitsubishi 4-pole standard motor with power supply voltage of 200VAC/400VAC 50Hz.*2 Select the MCCB according to the inverter power supply capacity.Install one MCCB per inverter.For installations in the United States or Canada, use the appropriate UL and cUL listed class RK5, class Ttype fuse or UL489 molded case circuit breaker (MCCB).MCCBMCCBINVINVIMIM(Refer to instruction manual (basic).)*3 Magnetic contactor is selected based on the AC-1 class. The electrical durability of magnetic contactor is 500,000 times. When the magneticcontactor is used for emergency stop during motor driving, the electrical durability is 25 times.When using the MC for emergency stop during motor driving or using on the motor side during commercial-power supply operation, select the MCwith class AC-3 rated current for the motor rated current.REMARKSWhen the breaker on the inverter primary side trips, check for the wiring fault (short circuit), damage to internal parts of theinverter, etc. Identify the cause of the trip, then remove the cause and power on the breaker.4
1OUTLINEMethod of removal and reinstallation ofthe front cover1.3 Method of removal and reinstallation of the front cover•Removal of the operation panel1) Loosen the two screws on the operation panel.(These screws cannot be removed.)2) Push the left and right hooks of the operation paneland pull the operation panel toward you to remove.When reinstalling the operation panel, insert it straight to reinstall securely and tighten the fixed screws of theoperation panel.•Removal of the front cover1) Remove installation screws on the front cover1 to remove the front cover 1.2) Loosen the installation screws of thefront cover 2.Front cover 1Front cover 23) Pull the front cover 2 toward you to remove by pushing an installation hook on the right sideusing left fixed hooks as supports.Installation hook5
Method of removal and reinstallation ofthe front cover•Reinstallation of the front cover1) Insert the two fixed hooks on the left side of thefront cover 2 into the sockets of the inverter.2) Using the fixed hooks as supports, securely press thefront cover 2 against the inverter.(Although installation can be done with the operationpanel mounted, make sure that a connector issecurely fixed.)Front cover 2 Front cover 23) Fix the front cover 2 with the installation screws. 4) Fix the front cover 1 with the installationscrews.Front cover 2Front cover 1REMARKS· For the 55K, the front cover 1 is separated into two parts.CAUTION1. Fully make sure that the front cover has been reinstalled securely. Always tighten the installation screws of the front cover.2. The same serial number is printed on the capacity plate of the front cover and the rating plate of the inverter. Beforereinstalling the front cover, check the serial numbers to ensure that the cover removed is reinstalled to the inverter from whereit was removed.6
1OUTLINEInstallation of the inverter and enclosuredesign1.4 Installation of the inverter and enclosure designWhen an inverter enclosure is to be designed and manufactured, heat generated by contained equipment, etc., theenvironment of an operating place, and others must be fully considered to determine the enclosure structure, size andequipment layout. The inverter unit uses many semiconductor devices. To ensure higher reliability and long period ofoperation, operate the inverter in the ambient environment that completely satisfies the equipment specifications.1.4.1 Inverter installation environmentThe inverter consists of precision mechanical and electronic parts. Never install or handle it in any of the followingconditions as doing so could cause an operation fault or failure.Direct sunlightVibration (5.9m/s 2 or more)High temperature,high humidityHorizontal placementVertical mounting(When installing two ormore inverters, installthem in parallel.)Transportation byholding the front coverOil mist, flammablegas, corrosive gas,fluff, dust, etc.Mounting tocombustible materialAs the inverter installation environment should satisfiy the standard specifications indicated in the following table,operation in any place that does not meet these conditions not only deteriorates the performance and life of theinverter, but also causes a failure. Refer to the following points and take adequate measures.Environmental standard specifications of inverterItemDescriptionSurrounding air-10°C to +50°C (non-freezing)temperatureAmbient humidity 90% RH maximum (non-condensing)Atmosphere Free from corrosive and explosive gases, dust and dirtMaximum Altitude 1,000m or lessVibration 5.9m/s 2 or less7
Installation of the inverter and enclosuredesign(1) TemperatureThe permissible surrounding air temperature of the inverter is between -10°C and +50°C. Always operate the inverterwithin this temperature range. Operation outside this range will considerably shorten the service lives of thesemiconductors, parts, capacitors and others. Take the following measures so that the surrounding air temperature ofthe inverter falls within the specified range.1)Measures against high temperature• Use a forced ventilation system or similar cooling system. (Refer to page 10.)• Install the enclosure in an air-conditioned electrical chamber.• Block direct sunlight.• Provide a shield or similar plate to avoid direct exposure to the radiated heat and wind of a heat source.• Ventilate the area around the enclosure well.2)Measures against low temperature• Provide a space heater in the enclosure.• Do not power off the inverter. (Keep the start signal of the inverter off.)3)Sudden temperature changes• Select an installation place where temperature does not change suddenly.• Avoid installing the inverter near the air outlet of an air conditioner.• If temperature changes are caused by opening/closing of a door, install the inverter away from the door.(2) HumidityNormally operate the inverter within the 45 to 90% range of the ambient humidity. Too high humidity will pose problemsof reduced insulation and metal corrosion. On the other hand, too low humidity may produce a spatial electricalbreakdown. The insulation distance specified in JEM1103 "Control Equipment Insulator" is defined as humidity 45 to85%.1)Measures against high humidity• Make the enclosure enclosed, and provide it with a hygroscopic agent.• Take dry air into the enclosure from outside.• Provide a space heater in the enclosure.2)Measures against low humidityWhat is important in fitting or inspection of the unit in this status is to discharge your body (static electricity)beforehand and keep your body from contact with the parts and patterns, besides blowing air of proper humidity intothe enclosure from outside.3)Measures against condensationCondensation may occur if frequent operation stops change the in-enclosure temperature suddenly or if the outsideairtemperature changes suddenly.Condensation causes such faults as reduced insulation and corrosion.• Take the measures against high humidity in 1).• Do not power off the inverter. (Keep the start signal of the inverter off.)(3) Dust, dirt, oil mistDust and dirt will cause such faults as poor contact of contact points, reduced insulation or reduced cooling effect dueto moisture absorption of accumulated dust and dirt, and in-enclosure temperature rise due to clogged filter.In the atmosphere where conductive powder floats, dust and dirt will cause such faults as malfunction, deterioratedinsulation and short circuit in a short time.Since oil mist will cause similar conditions, it is necessary to take adequate measures.Countermeasures• Place in a totally enclosed enclosure.Take measures if the in-enclosure temperature rises. (Refer to page 10.)• Purge air.Pump clean air from outside to make the in-enclosure pressure higher than the outside-air pressure.8
1OUTLINE(4) Corrosive gas, salt damageInstallation of the inverter and enclosuredesignIf the inverter is exposed to corrosive gas or to salt near a beach, the printed board patterns and parts will corrode orthe relays and switches will result in poor contact.In such places, take the measures given in Section (3).(5) Explosive, flammable gasesAs the inverter is non-explosion proof, it must be contained in an explosion proof enclosure.In places where explosion may be caused by explosive gas, dust or dirt, an enclosure cannot be used unless itstructurally complies with the guidelines and has passed the specified tests. This makes the enclosure itself expensive(including the test charges).The best way is to avoid installation in such places and install the inverter in a non-hazardous place.(6) HighlandUse the inverter at the altitude of within 1000m.If it is used at a higher place, it is likely that thin air will reduce the cooling effect and low air pressure will deterioratedielectric strength.(7) Vibration, impactThe vibration resistance of the inverter is up to 5.9m/s 2 at 10 to 55Hz frequency and 1mm amplitude.Vibration or impact, if less than the specified value, applied for a long time may make the mechanism loose or causepoor contact to the connectors.Especially when impact is imposed repeatedly, caution must be taken as the part pins are likely to break.Countermeasures• Provide the enclosure with rubber vibration isolators.• Strengthen the structure to prevent the enclosure from resonance.• Install the enclosure away from sources of vibration.9
Installation of the inverter and enclosuredesign1.4.2 Cooling system types for inverter enclosureFrom the enclosure that contains the inverter, the heat of the inverter and other equipment (transformers, lamps,resistors, etc.) and the incoming heat such as direct sunlight must be dissipated to keep the in-enclosure temperaturelower than the permissible temperatures of the in-enclosure equipment including the inverter.The cooling systems are classified as follows in terms of the cooling calculation method.1) Cooling by natural heat dissipation from the enclosure surface (Totally enclosed type)2) Cooling by heat sink (Aluminum heatsink, etc.)3) Cooling by ventilation (Forced ventilation type, pipe ventilation type)4) Cooling by heat exchanger or cooler (Heat pipe, cooler, etc.)Cooling System Enclosure Structure CommentNatural ventilation(Enclosed, open type)INVLow in cost and generally used, but the enclosure sizeincreases as the inverter capacity increases. Forrelatively small capacities.NaturalcoolingNatural ventilation (Totallyenclosed type)INVBeing a totally enclosed type, the most appropriate forhostile environment having dust, dirt, oil mist, etc. Theenclosure size increases depending on the invertercapacity.Heatsink coolingHeatsinkINVHaving restrictions on the heatsink mounting positionand area, and designed for relative small capacities.ForcedcoolingForced ventilationINVFor general indoor installation. Appropriate for enclosuredownsizing and cost reduction, and often used.Heat pipeINVHeatpipeTotally enclosed type for enclosure downsizing.10
1OUTLINEInstallation of the inverter and enclosuredesign1.4.3 Inverter placement(1) Installation of the InverterInstallation on the enclosure⋅⋅CAUTIONWhen encasing multiple inverters, install them in parallel as a cooling measure.Install the inverter vertically.VerticalRefer to the clearances below.(2) Clearances around the inverterTo ensure ease of heat dissipation and maintenance, leave at least the shown clearances around the inverter. At least thefollowing clearances are required under the inverter as a wiring space, and above the inverter as a heat dissipation space.Surrounding air temperature and humidityMeasurementposition5cm Inverter 5cmMeasurement 5cmpositionTemperature: -10°C to 50°CAmbient humidity: 90% RHmaximumLeave enough clearances and takecooling measures.5cmor moreClearances (front)10cm or more5cmor more10cm or moreClearances (side)5cmormoreInverterREMARKSFor replacing the cooling fan, 30cm of space is necessary in front of the inverter. Refer to page 398 for fan replacement.(3) Inverter mounting orientationMount the inverter on a wall as specified. Do not mount it horizontally or any other way.11
Installation of the inverter and enclosuredesign(4) Above the inverterHeat is blown up from inside the inverter by the small fan built in the unit. Any equipment placed above the invertershould be heat resistant.(5) Arrangement of multiple invertersWhen multiple inverters are placed in the same enclosure, generally arrange them horizontally as shown in the figurebelow (a). When it is inevitable to arrange them vertically to minimize space, take such measures as to provide guidessince heat from the bottom inverters can increase the temperatures in the top inverters, causing inverter failures.When mounting multiple inverters, fully take caution not to make the surrounding air temperature of the inverter higherthan the permissible value by providing ventilation and increasing the enclosure size.InverterInverterInverterInverterGuideGuideGuideInverterInverterEnclosureEnclosure(a) Horizontal arrangement(b) Vertical arrangementArrangement of multiple inverters(6) Placement of ventilation fan and inverterHeat generated in the inverter is blown up from the bottom of the unit as warm air by the cooling fan. When intalling aventilation fan for that heat, determine the place of ventilation fan installation after fully considering an air flow. (Airpasses through areas of low resistance. Make an airway and airflow plates to expose the inverter to cool air.)InverterInverterPlacement of ventilation fan and inverter12
2 WIRINGThis chapter describes the basic "WIRING" for use of thisproduct.Always read the instructions before using the equipment2.1 Terminal connection diagram ..................................142.2 Main circuit terminal specifications..........................152.3 Control circuit specifications....................................222.4 Connection of motor with encoder (vector control) .30123456137
Terminal connection diagram2.1 Terminal connection diagramSink logicMain circuit terminalControl circuit terminalMCCBThree-phase ACpower supply*1. To supply power to thecontrol circuit separately,remove the jumper acrossR1/L11 and S1/L21.*2. JOG terminal can be usedas pulse train input terminal.Use Pr. 291 to selectJOG/pulse.321MCEarth(Ground)Control input signals (No voltage input allowed)ForwardTerminal functions vary withrotationthe input terminalstartassignment (Pr. 178 to Pr. 189) Reverse(Refer to page 206)rotationstartStart selfholdingselectionHigh speedMulti-speedselection*3. AU terminal can beused as PTC inputterminal.Frequency setting signal (Analog)Frequency settingpotentiometer1/2W1kΩ*5MiddlespeedLow speedJog modeSecond function selectionOutput stopResetTerminal 4 input selection(Current input selection)Selection of automatic restartafter instantaneouspower failureContact input common24VDC power supply(Common for external power supply transistor)*4. Terminal input specificationscan be changed by analoginput specificationsswitchover (Pr. 73, Pr. 267). Auxiliary (+)Set the voltage/current input input (-)switch in the OFF position to Terminalselect voltage input (0 to 5V/04 input (+)to10V) and ON to select(Current (-)current input (4 to 20mA).input)(Refer to page 259)*5. It is recommended to use 2W1kΩwhen the frequency setting signalis changed frequently.Connectorfor plug-in optionconnectionSTFSTRSTOPJOG *2RES *3AUAUCSPTCSDPC*4 Voltage/currentinput switch10E(+10V) 4 2ON10(+5V) OFF0 to 5VDC (Initial value)2 0 to 10VDC selected *40 to 20mADC5(Analog common)14RHRMRLRTMRSMain circuitControl circuitSOURCETXD+TXD-RXD+RXD-SGP/+N/-*6 *6R/L1Inrush currentS/L2limit circuitUT/L3MotorVIMR1/L11WJumper*1 S1/L21Earth (Ground)0 to ±10VDC (Initial value)0 to ±5VDC selected *44 to 20mADC (Initial value)0 to 5VDC selected *40 to 10VDCCAUTION· To prevent a malfunction due to noise, keep the signal cables more than 10cm away from the power cables. Also separate the main circuit wireof the input side and the output side.· After wiring, wire offcuts must not be left in the inverter.Wire offcuts can cause an alarm, failure or malfunction. Always keep the inverter clean.When drilling mounting holes in an enclosure etc., take care not to allow chips and other foreign matter to enter the inverter.· Set the voltage/current input switch correctly. Different setting may cause a fault, failure or malfunction.SINK24VOption connector 1Option connector 2Option connector 3PUconnectorUSBconnector*9C1B1A1C2B2A2RUNSUIPFOLFUSEFM*8SDAM5Terminatingresistor VCC*6. Do not connect any options to P/+ andN/-.Relay output 1(Fault output)Relay output 2RunningUp to frequencyInstantaneouspower failureOverloadFrequency detectionTerminal functionsvary with the outputterminal assignment(Pr. 195, Pr. 196)Open collector outputTerminal functionsvary with the outputterminal assignment(Pr. 190 to Pr. 194)Open collector output commonSink/source common*7. It is not necessary whencalibrating the indicatorfrom the operation panel.Data transmissionData receptionGND5VRelay output*9. Because the <strong>FR</strong> Configurator has notworked with the <strong>FR</strong>-<strong>A701</strong> series, a USBconnector can not be used.Calibrationresistor *7+ -(+)(-)(Refer to page 214)(Refer to page 214)*8. FM terminal can beused for pulse trainoutput of opencollector outputusing Pr.291.Indicator(Frequency meter, etc.)Moving-coil type1mA full-scaleAnalog signal output(0 to 10VDC)RS-485 terminals(Permissible loadcurrent 100mA)14
2WIRINGMain circuit terminal specifications2.2 Main circuit terminal specifications2.2.1 Specification of main circuit terminalTerminalSymbolTerminal NameDescriptionR/L1,S/L2, AC power input Connect to the commercial power supply.T/L3U, V, W Inverter output Connect a three-phase squirrel-cage motor.R1/L11,S1/L21Power supply forcontrol circuitConnected to the AC power supply terminals R/L1 and S/L2. To retain thefault display and fault output, remove the jumpers from terminals R/L1-R1/L11 and S/L2-S1/L21 and apply external power to these terminals.Do not turn off the power supply for control circuit (R1/L11, S1/L21) with themain circuit power (R/L1, S/L2, T/L3) on. Doing so may damage theinverter. The circuit should be configured so that the main circuit power (R/L1, S/L2, T/L3) is also turned off when the power supply for control circuit(R1/L11, S1/L21) is off.Power supply capacity for the 15K or less is 90VA and for the 18.5K ormore is 100VA.P/+, N/- DC terminal Do not connect any options.Earth (Ground)For earthing (grounding) the inverter chassis. Must be earthed(grounded).15
Main circuit terminal specifications2.2.2 Terminal arrangement of the main circuit terminal, power supply and the motorwiring.200V class<strong>FR</strong>-A721-5.5K, 7.5K<strong>FR</strong>-A721-11K, 15KScrew size(M4)R1/L11 S1/L21Charge lampJumperScrew size(M4)R1/L11 S1/L21Charge lampJumperScrew size (M5)Screw size (11K: M5, 15K: M6)R/L1 S/L2 T/L3 N/- P/+R/L1 S/L2 T/L3 N/- P/+IMIMPower supplyMotorPower supplyMotor<strong>FR</strong>-A721-18.5K to 45K<strong>FR</strong>-A721-55KScrew size (M4)R1/L11 S1/L21Screw size (M4)R1/L11 S1/L21ChargelampJumperChargelampJumperScrew size(18.5K/22K/30K: M8, 37K/45K: M10)Screw size (M12)R/L1 S/L2 T/L3 N/-P/+R/L1 S/L2 T/L3N/-P/+Power supplyIMMotorScrew size(18.5K/22K/30K: M6,37K/45K: M8)Power supplyIMMotorScrew size (M8)16
2WIRINGMain circuit terminal specifications400V class<strong>FR</strong>-A741-5.5K, 7.5K<strong>FR</strong>-A741-11K, 15KScrew size (M4)R1/L11 S1/L21R1/L11 S1/L21Charge lampJumperScrew size (M4)Charge lampJumperScrew size (M4)R/L1 S/L2 T/L3 N/- P/+Screw size (M5)Power supplyIMMotorR/L1 S/L2 T/L3 N/- P/+IMPower supply Motor<strong>FR</strong>-A741-18.5K to 45KScrew size (M4)S1/L21R1/L11<strong>FR</strong>-A741-55KR1/L11 S1/L21Screw size (M4)Charge lampCharge lampJumperJumperScrew size (18.5K to 30K : M6,37K/45K : M8)R/L1 S/L2 T/L3N/- P/+Screw size (M8)Power supplyIMMotorR/L1 S/L2 T/L3 N/- P/+IMPower supply MotorCAUTION· The power supply cables must be connected to R/L1, S/L2, T/L3. (Phase sequence needs not to be matched.) Never connectthe power cable to the U, V, W of the inverter. Doing so will damage the inverter.· Connect the motor to U, V, W. At this time, turning on the forward rotation switch (signal) rotates the motor in thecounterclockwise direction when viewed from the motor shaft.17
Main circuit terminal specifications2.2.3 Cables and wiring length(1) <strong>Applied</strong> cable sizeSelect the recommended cable size to ensure that a voltage drop will be 2% max.If the wiring distance is long between the inverter and motor, a main circuit cable voltage drop will cause the motortorque to decrease especially at the output of a low frequency.The following table indicates a selection example for the wiring length of 20m.200V class (when input power supply is 220V)Applicable InverterTypeTerminalScrewSize *4TighteningTorque N·mCrimpingTerminalR/L1,S/L2,T/L3U, V, W*1 The cable size is that of the cable (HIV cable (600V class 2 vinyl-insulated cable) etc.) with continuous maximum permissible temperature of75°C. Assumes that the surrounding air temperature is 50°C or less and the wiring distance is 20m or less.*2 The recommended cable size is that of the cable (THHW cable) with continuous maximum permissible temperature of 75°C. Assumes that thesurrounding air temperature is 40°C or less and the wiring distance is 20m or less.(Selection example for use mainly in the United States.)*3 For the 15K or less, the recommended cable size is that of the cable (PVC cable) with continuous maximum permissible temperature of 70°C.Assumes that the surrounding air temperature is 40°C or less and the wiring distance is 20m or less.For the 18.5K or more, the recommended cable size is that of the cable (XLPE cable) with continuous maximum permissible temperature of 90°C.Assumes that the surrounding air temperature is 40°C or less and wiring is performed in an enclosure.(Selection example for use mainly in Europe.)*4 The terminal screw size indicates the terminal size for R/L1, S/L2, T/L3, U, V, W, and a screw for earthing (grounding).A screw for earthing (grounding) of the 18.5K or more is indicated in ( ).400V class (when input power supply is 440V)Cable SizesHIV, etc. (mm 2 ) *1 AWG/MCM *2 PVC, etc. (mm 2 ) *3Earth R/L1,R/L1,U, V, W (Ground) S/L2, U, V, W S/L2, U, V, Wcable T/L3T/L3<strong>FR</strong>-A721-5.5K M5 2.5 5.5-5 5.5-5 5.5 5.5 5.5 10 10 6 6 6<strong>FR</strong>-A721-7.5K M5 2.5 14-5 8-5 14 8 14 6 8 16 10 16<strong>FR</strong>-A721-11K M5 2.5 14-5 14-5 14 14 14 6 6 16 16 16<strong>FR</strong>-A721-15K M6 4.4 22-6 22-6 22 22 14 4 4 25 25 16<strong>FR</strong>-A721-18.5K M8(M6) 7.8 38-8 38-8 38 38 22 2 2 35 35 25<strong>FR</strong>-A721-22K M8(M6) 7.8 38-8 38-8 38 38 22 2 2 35 35 25<strong>FR</strong>-A721-30K M8(M6) 7.8 60-8 60-8 60 60 38 1/0 1/0 50 50 25<strong>FR</strong>-A721-37K M10(M8) 14.7 80-10 80-10 80 80 38 3/0 3/0 70 70 35<strong>FR</strong>-A721-45K M10(M8) 14.7 100-10 100-10 100 100 60 4/0 4/0 95 95 50<strong>FR</strong>-A721-55K M12(M8) 24.5 100-12 100-12 100 100 60 4/0 4/0 95 95 50Applicable InverterTypeTerminalScrewSize *4TighteningTorque N·mCrimpingTerminalR/L1,S/L2,T/L3U, V, WR/L1,S/L2,T/L3R/L1,S/L2,T/L3Earth(Ground)cableCable SizesHIV, etc. (mm 2 ) *1 AWG/MCM *2 PVC, etc. (mm 2 ) *3Earth R/L1,R/L1,U, V, W (Ground)CableS/L2, U, V, W S/L2,T/L3T/L3U, V, W Earth(Ground)Cable<strong>FR</strong>-A741-5.5K M4 1.5 2-4 2-4 2 2 3.5 12 14 2.5 2.5 4<strong>FR</strong>-A741-7.5K M4 1.5 5.5-4 5.5-4 3.5 3.5 3.5 12 12 4 4 4<strong>FR</strong>-A741-11K M5 2.5 5.5-5 5.5-5 5.5 5.5 8 10 10 6 6 10<strong>FR</strong>-A741-15K M5 2.5 8-5 8-5 8 8 8 8 8 10 10 10<strong>FR</strong>-A741-18.5K M6 4.4 14-6 8-6 14 8 14 6 8 16 10 16<strong>FR</strong>-A741-22K M6 4.4 14-6 14-6 14 14 14 6 6 16 16 16<strong>FR</strong>-A741-30K M6 4.4 22-6 22-6 22 22 14 4 4 25 25 16<strong>FR</strong>-A741-37K M8 7.8 22-8 22-8 22 22 14 4 4 25 25 16<strong>FR</strong>-A741-45K M8 7.8 38-8 38-8 38 38 22 1 2 50 50 25<strong>FR</strong>-A741-55K M8 7.8 60-8 60-8 60 60 22 1/0 1/0 50 50 25*1 The cable size is that of the cable (HIV cable (600V class 2 vinyl-insulated cable) etc.) with continuous maximum permissible temperature of 75°C.Assumes that the surrounding air temperature is 50°C or less and the wiring distance is 20m or less.*2 For the 45K or less, the recommended cable size is that of the cable (THHW cable) with continuous maximum permissible temperature of 75°C.Assumes that the surrounding air temperature is 40°C or less and the wiring distance is 20m or less.For the 55K, the recommended cable size is that of the cable (THHN cable) with continuous maximum permissible temperature of 90°C. Assumes thatthe surrounding air temperature is 40°C or less and wiring is performed in an enclosure.(Selection example for use mainly in the United States.)*3 For the 45K or less, the recommended cable size is that of the cable (PVC cable) with continuous maximum permissible temperature of 70°C. Assumesthat the ambient temperature is 40°C or less and the wiring distance is 20m or less.For the 55K, the recommended cable size is that of the cable (XLPE cable) with continuous maximum permissible temperature of 90°C. Assumes thatthe ambient temperature is 40°C or less and wiring is performed in an enclosure.(Selection example for use mainly in Europe.)18
2WIRINGMain circuit terminal specificationsThe line voltage drop can be calculated by the following formula:3 × wire resistance[mΩ/m] × wiring distance[m] × current[A]line voltage drop [V]=1000Use a larger diameter cable when the wiring distance is long or when it is desired to decrease the voltage drop (torquereduction) in the low speed range.CAUTION· Tighten the terminal screw to the specified torque.A screw that has been tighten too loosely can cause a short circuit or malfunction.A screw that has been tighten too tightly can cause a short circuit or malfunction due to the unit breakage.· Use crimping terminals with insulation sleeve to wire the power supply and motor.(2) Notes on earthing (grounding)• Always earth (ground) the motor and inverter.1)Purpose of earthing (grounding)Generally, an electrical apparatus has an earth (ground) terminal, which must be connected to the ground beforeuse.An electrical circuit is usually insulated by an insulating material and encased. However, it is impossible tomanufacture an insulating material that can shut off a leakage current completely, and actually, a slight current flowinto the case. The purpose of earthing (grounding) the case of an electrical apparatus is to prevent operator fromgetting an electric shock from this leakage current when touching it.To avoid the influence of external noises, this earthing (grounding) is important to audio equipment, sensors,computers and other apparatuses that handle low-level signals or operate very fast.2)Earthing (grounding) methods and earthing (grounding) workAs described previously, earthing (grounding) is roughly classified into an electrical shock prevention type and anoise-affected malfunction prevention type. Therefore, these two types should be discriminated clearly, and thefollowing work must be done to prevent the leakage current having the inverter's high frequency components fromentering the malfunction prevention type earthing (grounding):(a) Where possible, use independent earthing (grounding) for the inverter. If independent earthing (grounding) (I)is impossible, use joint earthing (grounding) (II) where the inverter is connected with the other equipment at anearthing (grounding) point. Joint earthing (grounding) as in (III) must be avoided as the inverter is connectedwith the other equipment by a common earth (ground) cable.Also a leakage current including many high frequency components flows in the earth (ground) cables of theinverter and inverter-driven motor. Therefore, they must use the independent earthing (grounding) method andbe separated from the earthing (grounding) of equipment sensitive to the aforementioned noises.In a tall building, it will be a good policy to use the noise malfunction prevention type earthing (grounding) withsteel frames and carry out electric shock prevention type earthing (grounding) in the independent earthing(grounding) method.(b) This inverter must be earthed (grounded). Earthing (Grounding) must conform to the requirements of nationaland local safety regulations and electrical codes. (NEC section 250, IEC 536 class 1 and other applicablestandards).Use a neutral-point earthed (grounded) power supply for 400V class inverter in compliance with EN standard.(c) Use the thickest possible earth (ground) cable. The earth (ground) cable should be of not less than the sizeindicated in the table on the previous page.(d) The grounding point should be as near as possible to the inverter, and the ground wire length should be asshort as possible.(e) Run the earth (ground) cable as far away as possible from the I/O wiring of equipment sensitive to noises andrun them in parallel in the minimum distance.InverterOtherequipmentInverterOtherequipmentInverterOtherequipment(I) Independent earthing (grounding).......Good(II) Joint earthing (grounding).......Good(III) Joint earthing (grounding).......Not allowed19
Main circuit terminal specifications(3) Total wiring lengthThe overall wiring length for connection of a single motor or multiple motors should be within 500m.(The wiring length should be 100m maximum for vector control.)Total wiring length500m or less300mWhen driving a 400V class motor by the inverter, surge voltages attributable to the wiring constants may occur atthe motor terminals, deteriorating the insulation of the motor.Refer to page 45 for measures against deteriorated insulation.CAUTION· Especially for long-distance wiring, the inverter may be affected by a charging current caused by the stray capacitances of thewiring, leading to a malfunction of the overcurrent protective function or fast response current limit function or a malfunction or faultof the equipment connected on the inverter output side. If fast response current limit function malfunctions, disable this function.(For Pr. 156 Stall prevention operation selection, refer to page 135 .)(4) Cable size of the control circuit power supply (terminal R1/L11, S1/L21)· Terminal screw size: M4· Cable size: 0.75mm 2 to 2mm 2· Tightening torque: 1.5N·m300m300m + 300m = 600m20
2WIRINGMain circuit terminal specifications2.2.4 When connecting the control circuit and the main circuit separatelyto the power supply (separate power)MCR/L1 InverterS/L2T/L3R1/L11S1/L21When fault occurs, opening of the electromagnetic contactor (MC) on theinverter power supply side results in power loss in the control circuit,disabling the fault output signal retention. Terminals R1/L11 and S1/L21 areprovided to hold a fault signal. In this case, connect the power supplyterminals R1/L11 and S1/L21 of the control circuit to the primary side of theMC.Remove the jumper1)Remove the upper screws.2)Remove the lower screws.3)Pull the jumper toward you toremove.4) Connect the separate power supplycable for the control circuit to theupper terminals (R1/L11, S1/L21).Never connect the power cable tothe terminals in the lower stand.Doing so will damage the inverter.MCR/L1S/L2 T/L3R1/ S1/L11 L21 Power supplyterminal blockfor the control circuit3)Power supply terminal blockfor the control circuitR1/L11S1/L21Main power supply<strong>FR</strong>-A721-5.5K to 15K<strong>FR</strong>-A741-5.5K to 15K1)2)4)<strong>FR</strong>-A721-18.5K to 55K<strong>FR</strong>-A741-18.5K to 55KPower supplyterminal block forthe control circuitCAUTION· Do not turn off the control power (terminals R1/L11 and S1/L21) with the main circuit power (R/L1, S/L2, T/L3) on. Doing so maydamage the inverter. Make up a circuit which will switch off the main circuit power supply terminals R/L1, S/L2, T/L3 when thecontrol circuit power supply terminals R1/L11, S1/L21 are switched off.· Be sure to use the inverter with the jumpers across terminals R/L1-R1/L11 and S/L2-S1/L21 removed when supplying powerfrom other sources. The inverter may be damaged if you do not remove the jumper.· The voltage should be the same as that of the main control circuit when the control circuit power is supplied from other than theprimary side of the MC.· When separate power is supplied from R1/L11 and S1/L21, the power capacity necessary for the 15K or less is 90VA, for the18.5K or more is 100VA.· If the main circuit power is switched off (for 0.1s or more) then on again, the inverter resets and a fault output will not be held.21
Control circuit specifications2.3 Control circuit specifications2.3.1 Control circuit terminalsindicates that terminal functions can be selected using Pr. 178 to Pr. 196 (I/O terminal function selection) (Refer to page 206.)(1) Input signalsTypeTerminalSymbolTerminalNameDescriptionRatedSpecificationsRefer topageContact inputSTFSTRSTOPRH,RM, RLJOGRTMRSRESAUCSSDPCForwardrotation startReverserotation startStart selfholdingselectionMulti-speedselectionJog modeselectionPulse traininputSecondfunctionselectionOutput stopResetTerminal 4inputselectionPTC inputSelection ofautomaticrestart afterinstantaneouspower failureContact inputcommon (sink)(initial setting)Externaltransistorcommon(source)24VDC powersupplycommonExternaltransistorcommon (sink)(initial setting)Contact inputcommon(source)24VDC powersupplyTurn on the STF signal to start forwardrotation and turn it off to stop.Turn on the STR signal to start reverserotation and turn it off to stop.When the STF and STRsignals are turned onsimultaneously, the stopcommand is given.Input resistance4.7kΩVoltage at opening:Turn on the STOP signal to self-hold the start signal. 21 to 27VDCContacts at shortcircuited:2064 toMulti-speed can be selected according to the combination of RH,RM and RL signals.6mADC206Turn on the JOG signal to select Jog operation (initial setting) andturn on the start signal (STF or STR) to start Jog operation.JOG terminal can be used as pulse train input terminal. To use aspulse train input terminal, the Pr. 291 setting needs to be changed.(maximum input pulse: 100kpulses/s)Turn on the RT signal to select second function.When the second function such as "second torque boost" and"second V/F (base frequency)" are set, turning on the RT signalselects these functions.Turn on the MRS signal (20ms or more) to stop the inverter output.Use to shut off the inverter output when stopping the motor byelectromagnetic brake.Used to reset fault output provided when fault occurs.Turn on the RES signal for more than 0.1s, then turn it off.Initial setting is for reset always. By setting Pr. 75, reset can be setto enabled only at fault occurrence. Recover about 1s after resetis cancelled.Terminal 4 is made valid only when the AU signal is turned on. (Thefrequency setting signal can be set between 4 and 20mADC.)Turning the AU signal on makes terminal 2 (voltage input) invalid.AU terminal is used as PTC input terminal (thermal protection ofthe motor). When using it as PTC input terminal, set the AU/PTCswitch to PTC.When the CS signal is left on, the inverter restarts automatically atpower restoration. Note that restart setting is necessary for thisoperation. In the initial setting, a restart is disabled.(Refer to Pr. 57 Restart coasting time in page 239)Common terminal for contact input terminal (sink logic) and terminalFM.When connecting the transistor output (open collector output),such as a programmable controller, when source logic isselected, connect the external power supply common fortransistor output to this terminal to prevent a malfunction causedby undesirable currents.Common output terminal for 24VDC 0.1A power supply (PCterminal).Isolated from terminals 5 and SE.When connecting the transistor output (open collector output), suchas a programmable controller, when sink logic is selected, connectthe external power supply common for transistor output to thisterminal to prevent a malfunction caused by undesirable currents.Common terminal for contact input terminal (source logic).Can be used as 24VDC 0.1A power supply.Input resistance2kΩContacts at shortcircuited:8 to13mADCInput resistance4.7kΩVoltage at opening:21 to 27VDCContacts at shortcircuited:4 to6mADC206206206206206206259168206----------------- —Power supplyvoltage range 19.2to 28.8VDCPermissible loadcurrent 100mA2622
2WIRINGControl circuit specificationsTypeTerminalSymbolTerminalNameDescriptionRatedSpecificationsRefer topageFrequency setting10E1024Frequencysetting powersupplyFrequencysetting(voltage)Frequencysetting(current)When connecting the frequency setting potentiometer at an initialstatus, connect it to terminal 10.Change the input specifications of terminal 2 when connecting itto terminal 10E. (Refer to Pr. 73 Analog input selection.)Inputting 0 to 5VDC (or 0 to 10V, 0 to 20mA) provides themaximum output frequency at 5V (10V, 20mA) and makes inputand output proportional. Use Pr. 73 to switch from among input 0to 5VDC (initial setting), 0 to 10VDC, and 0 to 20mA.Set the voltage/current input switch in the ON position to selectcurrent input (0 to 20mA). *1Inputting 4 to 20mADC (or 0 to 5V, 0 to 10V) provides themaximum output frequency at 20mA makes input and outputproportional. This input signal is valid only when the AU signal ison (terminal 2 input is invalid).Use Pr. 267 to switch from among input 4 to 20mA (initial setting),0 to 5VDC, and 0 to 10VDC.Set the voltage/current input switch in the OFF position to selectvoltage input (0 to 5V/0 to 10V). *1Use Pr. 858 to switch terminal functions.10VDC±0.4VPermissible loadcurrent 10mA5.2VDC±0.2VPermissible loadcurrent 10mAVoltage input:Input resistance10kΩ ± 1kΩMaximumpermissible voltage20VDCCurrent input:Input resistance245Ω ± 5ΩMaximumpermissible current30mAVoltage/currentinput switchswitch142259259259259switch215FrequencysettingauxiliaryFrequencysettingcommonInputting 0 to ±5 VDC or 0 to ±10VDC adds this signal to terminal2 or 4 frequency setting signal. Use Pr. 73 to switch between theinput 0 to ±5VDC and 0 to ±10VDC (initial setting).Use Pr. 868 to switch terminal functions.Common terminal for frequency setting signal (terminal 2, 1 or 4)and analog output terminal AM. Do not earth (ground).Input resistance10kΩ ± 1kΩMaximumpermissible voltage± 20VDC*1 Set Pr. 73, Pr. 267, and a voltage/current input switch correctly, then input an analog signal in accordance with the setting.Applying a voltage signal with voltage/current input switch on (current input is selected) or a current signal with switch off (voltage input isselected) could cause component damage of the inverter or analog circuit of signal output devices. (For details, refer to page 259.)259----------------- 25923
Control circuit specifications(2) Output signalsTypeRelayOpen collectorPulseAnalogTerminalSymbolA1,B1,C1A2,B2,C2RUNSUOLIPFFUSEFMAMTerminalNameRelay output 1(alarm output)(3) CommunicationDescription1 changeover contact output indicates that the inverterprotective function has activated and the output stopped.Abnormal: No conduction across B-C (Across A-C Continuity),Normal: Across B-C Continuity (No conduction across A-C)RatedSpecificationsContact capacity:230VAC 0.3A(Power factor=0.4)30VDC 0.3ARefer topageRelay output 2 1 changeover contact output 214InverterrunningUp tofrequencyOverloadwarningInstantaneouspower failureFrequencydetectionOpen collectoroutput commonFor meterNPN opencollector outputAnalog signaloutputSwitched low when the inverter output frequency is equal to orhigher than the starting frequency (initial value 0.5Hz). Switchedhigh during stop or DC injection brake operation. *1Switched low when the outputfrequency reaches within the range of±10% (initial value) of the set frequency.Switched high during acceleration/deceleration and at a stop. *1Switched low when stall prevention isactivated by the stall preventionfunction. Switched high when stallprevention is cancelled. *1Switched low when an instantaneouspower failure and under voltageprotections are activated. *1Switched low when the inverter outputfrequency is equal to or higher than thepreset detected frequency and highwhen less than the preset detectedfrequency. *1Alarm code (4bit)output (Refer to page248)Permissible load24VDC (27VDCmaximum) 0.1A(A voltage drop is2.8V maximumwhen the signal ison.)*1 Low indicates thatthe open collectoroutput transistor ison (conducts).High indicates thatthe transistor is off(does notconduct).Common terminal for terminals RUN, SU, OL, IPF, FU ----------------- -----Select one e.g. output frequency frommonitor items. Not output duringinverter reset.The output signal is proportional to themagnitude of the correspondingmonitoring item.Output item:Output frequency(initial setting)Signals can be outputfrom the opencollector terminals bysetting Pr. 291.Output item:Output frequency(initial setting)Permissible loadcurrent 2mA1440pulses/s at60HzMaximum outputpulse: 50kpulses/sPermissible loadcurrent : 80mAOutput signal 0 to10VDCPermissible loadcurrent 1mA(load impedance10kΩ or more)Resolution 8 bit214214214214214214228346228TypeTerminalSymbolTerminalNameDescriptionRefer topageRS-485RS-485 terminals-----------------TXD+RXD+TXD-RXD-SGPUconnectorInvertertransmissionterminalInverterreceptionterminalEarth (Ground)With the PU connector, communication can be made through RS-485.(for connection on a 1:1 basis only). Conforming standard : EIA-485 (RS-485). Transmission format : Multidrop link. Communication speed : 4800 to 38400bps. Overall length : 500mWith the RS-485 terminals, communication can be made through RS-485.Conforming standard : EIA-485 (RS-485)Transmission format : Multidrop linkCommunication speed : 300 to 38400bpsOverall length : 500m29729924
2WIRINGControl circuit specifications2.3.2 Changing the control logicThe input signals are set to sink logic (SINK) when shipped from the factory.To change the control logic, the jumper connector on the back of the control circuit terminal block must be moved to theother position.(The output signals may be used in either the sink or source logic independently of the jumper connector position.)1)Loosen the two installation screws in both ends of the control circuit terminal block. (These screws cannot beremoved.)Pull down the terminal block from behind the control circuit terminals.2)Change the jumper connector set to the sink logic (SINK) on the rear panel of the control circuit terminal block tosource logic (SOURCE).Jumper connector3)Using care not to bend the pins of the inverter's control circuit connector, reinstall the control circuit terminal blockand fix it with the mounting screws.CAUTION1. Make sure that the control circuit connector is fitted correctly.2. While power is on, never disconnect the control circuit terminal block.25
Control circuit specifications4)Sink logic and source logic⋅ In sink logic, a signal switches on when a current flows from the corresponding signal input terminal.Terminal SD is common to the contact input signals. Terminal SE is common to the open collector output signals.⋅ In source logic, a signal switches on when a current flows into the corresponding signal input terminal.Terminal PC is common to the contact input signals. Terminal SE is common to the open collector output signals.Current flow concerning the input/output signalwhen sink logic is selectedSink logicCurrent flow concerning the input/output signalwhen source logic is selectedSource logicPCCurrentSinkSTF RconnectorCurrentSTFSTRRRSourceconnectorSDInverterDC input (sink type)InverterDC input (source type)RUNTB1RRUNTB1RRRSE-+TB17SE+ -TB18• When using an external power supply for transistor output⋅24VDCCurrent flowSink logic typeUse terminal PC as a common terminal, and performwiring as shown below. (Do not connect terminal SD ofthe inverter with terminal 0V of the external powersupply. When using terminals PC-SD as a 24VDCpower supply, do not install a power supply in parallel inthe outside of the inverter. Doing so may cause amalfunction due to undesirable current.)⋅24VDCCurrent flowSource logic typeUse terminal SD as a common terminal, and performwiring as shown below. (Do not connect terminal PC ofthe inverter with terminal +24V of the external powersupply. When using terminals PC-SD as a 24VDCpower supply, do not install an external power supply inparallel with the inverter. Doing so may cause amalfunction in the inverter due to undesirable currents.)QY40P type transistoroutput unitTB1TB2STFSTRInverter24VDC(SD)QY80 type transistoroutput unitTB1InverterPCSTF24VDC(SD)ConstantvoltagecircuitTB17PCTB1824VDC SDConstantvoltagecircuitFuseTB2TB17TB1824VDCSTRSDCurrent flowCurrent flow26
2WIRINGControl circuit specifications2.3.3 Control circuit terminal layoutTerminal screw size: M3.5Tightening torque: 1.2N·mA1 B1 C1 A2 B2 C2 10E 10 2 5 4RLRMRHRTAUSTOP MRS RESSDFMAM1SERUNSUIPFOLFUSDSDSTF STR JOGCSPC(1) Common terminals of the control circuit (SD, 5, SE)Terminals SD, 5, and SE are all common terminals (0V) for I/O signals and are isolated from each other. Do not earth(ground) these terminals.Avoid connecting the terminal SD and 5 and the terminal SE and 5.Terminal SD is a common terminal for the contact input terminals (STF, STR, STOP, RH, RM, RL, JOG, RT, MRS, RES,AU, CS) and frequency output signal (FM).The open collector circuit is isolated from the internal control circuit by photocoupler.Terminal 5 is a common terminal for frequency setting signal (terminal 2, 1 or 4) and analog output terminal AM.It should be protected from external noise using a shielded or twisted cable.Terminal SE is a common terminal for the open collector output terminal (RUN, SU, OL, IPF, FU).The contact input circuit is isolated from the internal control circuit by photocoupler.(2) Signal inputs by contactless switchesThe contacted input terminals of the inverter (STF, STR, STOP, RH,RM, RL, JOG, RT, MRS, RES, AU, CS) can be controlled using atransistor instead of a contacted switch as shown on the right.+24VSTF, etcInverterSDExternal signal input using transistor27
Control circuit specifications2.3.4 Wiring instructions1) Use shielded or twisted cables for connection to the control circuit terminals and run them away from the main andpower circuits (including the 200V relay sequence circuit).2) Use two or more parallel micro-signal contacts or twin contacts toprevent a contact faults when using contact inputs since thecontrol circuit input signals are micro-currents.Micro signal contactsTwin contacts3) Do not apply a voltage to the contact input terminals (e.g. STF) of the control circuit.4) Always apply a voltage to the fault output terminals (A, B, C) via a relay coil, lamp, etc.5) It is recommended to use the cables of 0.75mm 2 gauge for connection to the control circuit terminals.If the cable gauge used is 1.25mm 2 or more, the front cover may be lifted when there are many cables running orthe cables are run improperly, resulting in an operation panel contact fault.6) The wiring length should be 30m(200m for terminal FM) maximum.2.3.5 When connecting the operation panel using a connection cableWhen connecting the operation panel (<strong>FR</strong>-DU07) to the inverter using a cable, the operation panel can be mountedon the enclosure surface and operationality improves.Parameter unit connection cable(<strong>FR</strong>-CB2)(option)Operation panel(<strong>FR</strong>-DU07)Operation panel connection connector(<strong>FR</strong>-ADP)(option)CAUTIONDo not connect the PU connector to the computer's LAN port, FAX modem socket or telephone connector.The inverter and machine could be damaged due to differences in electrical specifications.REMARKS⋅ Refer to page 5 for removal method of the operation panel.· Overall wiring length when the operation panel is connected: 20m maximum· Refer to the following when fabricating the cable on the user side.Commercially available product examples (as of Feb., 2008)Product Type Maker1) 10BASE-T cable SGLPEV-T 0.5mm × 4P Mitsubishi Cable Industries, Ltd.2) RJ-45 connector 5-554720-3 Tyco Electronics Corporation⋅The inverter can be connected to the computer and <strong>FR</strong>-PU04/<strong>FR</strong>-PU07.28
2WIRING2.3.6 RS-485 terminal block⋅⋅⋅⋅⋅Conforming standard: EIA-485(RS-485)Transmission format: Multidrop linkCommunication speed: MAX 38400bpsOverall length: 500mConnection cable:Twisted pair cable(4 paires)OPEN100ΩControl circuit specificationsTerminating resistor switchFactory-set to "OPEN".Set only the terminating resistor switch of theremotest inverter to the "100Ω" position.RDA1(RXD1+)(RXD1-) RDB1(RXD2+) RDA2(RXD2-)RDB2RXDTXDSDA1(TXD1+)(TXD1-)SDB1 SDA2(TXD2+) (TXD2-)SDB2P5S(VCC)SG(GND)P5S(VCC)SG(GND)VCC2.3.7 Communication operationUsing the PU connector or RS-485 terminal, you can perform communication operation from a personal computer etc.When the PU connector is connected with a personal, FA or other computer by a communication cable, a userprogram can run and monitor the inverter or read and write to parameters.For the Mitsubishi inverter protocol (computer link operation), communication can be performed with the PUconnector and RS-485 terminal.For the Modbus RTU protocol, communication can be performed with the RS-485 terminal.For further details, refer to page 297.29
Connection of motor with encoder (vector control)2.4 Connection of motor with encoder (vector control)Orientation control and encoder feedback control, and speed control, torque control and position control by full-scalevector control operation can be performed using a motor with encoder and a plug-in option <strong>FR</strong>-A7AP.(1) Structure of the <strong>FR</strong>-A7APTerminalblockON1234SW2SW3ONFront view12LED1LED2LED3MountingholeRear viewSW1<strong>FR</strong>-A7APMountingholeSwitch for manufacturersetting (SW3)Do not change from initiallysetstatus (1, 2:OFF ).Terminating resistor selectionswitch (SW2)Switch ON/OFF of the internalterminating resistor.(Refer to page 31.)CON2 connectorNot used.Encoder specification selection switch (SW1)Used to change the specification of encoder(differential line driver/complementary).(Refer to page 31.)ON12ConnectorConnect to the inverteroption connector.Terminal layoutPA2PB2PZ2SDSDPOPA1PB1PZ1PGPGPINPIN and PO arenot used.Mountinghole(2) Terminals of the <strong>FR</strong>-A7APTerminal Terminal Name DescriptionPA1 Encoder A-phase signal input terminalPA2 Encoder A-phase inverse signal input terminalPB1 Encoder B-phase signal input terminalPB2 Encoder B-phase inverse signal input terminalA-, B- and Z-phase signals are input from the encoder.PZ1 Encoder Z-phase signal input terminalPZ2 Encoder Z-phase inversion signal input terminalPG Encoder power supply (positive side) input terminal Input terminal for the encoder power supply.SD Encoder power supply ground terminalConnect the external power supply (5V, 12V, 15V, 24V) and theencoder power cable.PINPONot used.30
2WIRINGConnection of motor with encoder (vector control)(3) Switches of the <strong>FR</strong>-A7AP• Encoder specification selection switch (SW1)Select either differential line driver or complementaryIt is initially set to the differential line driver. Switch its position accordingto output circuit.Differential linedriver (initial status)SW1ON1234SW2SW3ON12<strong>FR</strong>-A7APComplementary• Terminating resistor selection switch (SW2)Select ON/OFF of the internal terminating resistor. Set the switch to ON(initial status) when an encoder output type is differential line driver andset to OFF when complementary.ON : with internal terminating resistor (initial status)OFF : without internal terminating resistorInternal terminatingresistor-ON(initial status)SW1ON1234SW2SW3ON12<strong>FR</strong>-A7APREMARKS· Set all swithces to the same setting (ON/OFF).· If the encoder output type is differential line driver, set the terminating resistorswitch to the "OFF" position when sharing the same encoder with other unit (NC(numerical controller), etc) or a terminating resistor is connected to other unit.Internal terminating resistor-OFF• Motor used and switch settingMotorMitsubishi standard motor with encoderMitsubishi high efficiency motor withencoderEncoder SpecificationSelection Switch (SW1)Terminating ResistorSelection Switch (SW2)PowerSpecifications *2SF-JR Differential ON 5VSF-HR Differential ON 5VOthers *1 *1 *1SF-JRCA Differential ON 5VMitsubishi constant-torque motor withSF-HRCA Differential ON 5VencoderOthers *1 *1 *1Vector control dedicated motor SF-V5RU Complimentary OFF 12VOther manufacturer motor with encoder – *1 *1 *1*1 Set according to the motor (encoder) used.*2 Choose a power supply (5V/12V/15V/24V) for encoder according to the encoder used.CAUTIONSW3 switch is for manufacturer setting. Do not change the setting.• Encoder specificationItem Encoder for SF-JR/HR/JRCA/HRCA Encoder for SF-V5RUResolution 1024 Pulse/Rev 2048 Pulse/RevPower supplyvoltage5VDC±10%12VDC±10%Currentconsumption150mA150mAOutput signal formA, B phases (90° phase shift)A, B phases (90° phase shift)Z phase: 1 pulse/revZ phase: 1 pulse/revOutput circuit Differential line driver 74LS113 equivalent ComplimentaryOutput voltageH level: 2.4V or moreL level: 0.5V or lessCAUTIONEncoder with resolution of 1000 to 4096 pulse/rev is recommended.H level: "Power supply for encoder-3V" or moreL level: 3V or less31
Connection of motor with encoder (vector control)(4) Encoder CableSF-JR/HR/JRCA/HRCA Motor with EncoderSF-V5RU, SF-THYEarth cableF-DPEVSB 12P 0.2mm 2Approx. 140mmMS3057-12AInverter sideEarth cable F-DPEVSB 12P 0.2mm 2Encoder sideconnector MS3057-12A*60mmLType Length L (m)<strong>FR</strong>-JCBL5 5<strong>FR</strong>-JCBL15 15<strong>FR</strong>-JCBL30 30MS3106B20-29S11mm60mmL⋅ A P clip for earthing (grounding) ashielded cable is provided.MS3106B20-29SType Length L (m)<strong>FR</strong>-V7CBL5 5<strong>FR</strong>-V7CBL15 15<strong>FR</strong>-V7CBL30 30<strong>FR</strong>-<strong>A701</strong>(<strong>FR</strong>-A7AP)PA1PA2PB1PB2PZ1PZ2EncoderCRANBPPositioning keyway<strong>FR</strong>-<strong>A701</strong>(<strong>FR</strong>-A7AP)PA1PA2PB1PB2PZ1PZ2EncoderABCDFGPositioning keywayPGSDAM BH L N CDKT PKSEJ RH FGMS3106B20-29S(As viewed from wiring side)2mm 2PGSD2mm 2SRM A BL N C DT PKESJRH FGMS3106B20-29S(As viewed from wiring side)* As the terminal block of the <strong>FR</strong>-A7AP is an insertion type, earth cables need to be modified. (See below)• When using the dedicated encoder cable (<strong>FR</strong>-JCBL, <strong>FR</strong>-V5CBL, etc.) for the conventional motor, cut the crimplingterminal of the encoder cable and strip its sheath to make its cables loose.Also, protect the shielded cable of the twisted pair shielded cable to ensure that it will not make contact with theconductive area.Cable stripping sizeWire the stripped cable after twisting it to prevent it from becoming loose. In addition, do notsolder it.Use a bar terminal as necessary.5mmREMARKSInformation on bar terminalsCommercially available product examples (as of Mar., 2008)Terminal Screw Wire SizeBar Terminal ModelSize(mm 2 Maker) with insulation sleeve without insulation sleeveM2 0.3, 0.5 AI 0,5-6WH A 0,5-6 Phoenix Contact Co.,Ltd.⋅ Bar terminal crimping tool: CRIMPFOX ZA3 (Phoenix Contact Co., Ltd.)Connection terminal compatibility tableMotor SF-V5RU, SF-THY SF-JR/HR/JRCA/HRCA (with Encoder)Encoder cable <strong>FR</strong>-V7CBL <strong>FR</strong>-JCBL<strong>FR</strong>-A7AP terminal32When using the bar terminal (without insulation sleeve),use care so that the twisted wires do not come out.PA1 PA PAPA2 Keep this open. PARPB1 PB PBPB2 Keep this open. PBRPZ1 PZ PZPZ2 Keep this open. PZRPG PG 5ESD SD AG2
2WIRINGConnection of motor with encoder (vector control)(5) Wiring• Speed controlStandard motor with encoder (SF-JR), 5V differential line driverVector control dedicated motor(SF-V5RU, SF-THY),12V complementaryThree-phaseAC power supplyForward rotation startReverse rotation startContact input commonMCCBInverterR/L1S/L2T/L3STFSTRSD10Frequency command 3Frequency setting 2potentiometer21/2W1kΩ 15Torque limit(+)command(-)( 10V)1OFF*4UVW<strong>FR</strong>-A7APPA1PA2PB1PB2DifferentialPZ1PZ2ComplementaryPGTerminatingresistor ONSDPGSD*6SF-JR motorwith encoderUVIMWEEarth(Ground)C *1RANBPHKEncoder*2*35VDC power supply *5(+) (-)*7Three-phaseAC power supplyMCCBInverter UVWExternalthermalrelay input *8 PCCS(OH) 2W1kΩSD<strong>FR</strong>-A7APPA1PA2PB1PB2Differential PZ1PZ2Complementary PGTerminating SDresistorON PGSD*4 *6OFFSF-V5RU, SF-THYABFANCUVWEEarth(Ground)G1G2ABCDFGSRThermal relayprotector*1IMEncoder*2*312VDC power supply *5(+) (-)• Torque controlStandard motor with encoder (SF-JR), 5V differential line driverVector control dedicated motor(SF-V5RU, SF-THY),12V complementaryThree-phaseAC power supplyForward rotation startReverse rotation startContact input commonMCCBInverterR/L1S/L2T/L3STFSTRSD10Speed limit command 3Frequency setting 2potentiometer21/2W1kΩ 15Torque command(+)( 10V) (-)1OFF*4UVW<strong>FR</strong>-A7APPA1PA2PB1PB2DifferentialPZ1PZ2ComplementaryPGTerminatingresistor ONSDPGSD*6SF-JR motorwith encoderUVIMWEEarth(Ground)C *1RANBPHKEncoder*2*35VDC(+) (-) power supply *5*7Three-phaseAC power supplyMCCBInverter UVWExternalthermalrelay input *8 PCCS(OH) 2W1kΩSD<strong>FR</strong>-A7APPA1PA2PB1PB2Differential PZ1PZ2Complementary PGTerminating SDresistorON PGSD*4 *6OFFSF-V5RU, SF-THYABFANCUVWEEarth(Ground)G1G2ABCDFGSRThermal relayprotector*1IMEncoder*2*312VDC power supply *5(+) (-)*1 The pin number differs according to the encoder used.Speed control and torque control are properly performed even without connecting Z phase.*2 Connect the encoder so that there is no looseness between the motor and motor shaft. Speed ratio should be 1:1.*3 Earth (Ground) the shielded cable of the encoder cable to the enclosure with a P clip, etc. (Refer to page 35.)*4 For the complementary, set the terminating resistor selection switch to off position. (Refer to page 31.)*5 A separate power supply of 5V/12V/15V/24V is necessary according to the encoder power specification.*6 For terminal compatibility of the <strong>FR</strong>-JCBL, <strong>FR</strong>-V7CBL and <strong>FR</strong>-A7AP, refer to page 32.*7 For the fan of the 7.5kW or less dedicated motor, the power supply is single phase. (200V/50Hz, 200 to 230V/60Hz)*8 Assign OH (external thermal input) signal to the terminal CS. (Set "7" in Pr. 186 )Connect a 2W1kΩ resistor between the terminal PC and CS (OH). Install the resistor pushing against thebottom part of the terminal block so as to avoid a contact with other cables.Refer to page 206 for details of Pr. 186 CS terminal function selection.CS(OH)PCControl circuitterminal blockResistor (2W1kΩ)33
Connection of motor with encoder (vector control)• Position controlVector control dedicated motor (SF-V5RU, SF-THY), 12V complementaryPositioning unitMELSEQ-Q QD75P1FLSRLSDOGSTOPCLEARPULSE FPULSE RCLEAR COMPULSE COMRDY COMCOMREADYTorque limit command (+)(±10V) (-)Three-phase ACpower supplyMCCB*10Three-phase ACpower supplyR/L1S/L2T/L3InverterMCCBEarth(ground)SF-V5RU, SF-THYABFANCThermalprotectorExternal thermal PCrelay input *11 CS(OH) 2W1kΩ G1Forward stroke endSDG2ST<strong>FR</strong>everse stroke end<strong>FR</strong>-A7APSTRPA1APre-excitation/servo onLX *7PA2B*1Clear signalCLR *7PB1CPulse trainJOG *8PB2DSign signalDifferentialNP *7Encoder24VDC power supplyline driverPZ1FPCPZ2G*2SEComplementary PGSTerminating SDRresistorPreparation ready signalON PGRDY *9SD *3512VDC*4 *6 (+) (-) power supply *5OFF1UVWUVWEIM*1 The pin number differs according to the encoder used.Position control by pulse train input is properly performed even without connecting Z phase.*2 Connect the encoder so that there is no looseness between the motor and motor shaft. Speed ratio should be 1:1.*3 Earth (Ground) the shielded cable of the encoder cable to the enclosure with a P clip, etc. (Refer to page 35.)*4 For the complementary, set the terminating resistor selection switch to off position. (Refer to page 31.)*5 A separate power supply of 5V/12V/15V/24V is necessary according to the encoder power specification.*6 For terminal compatibility of the <strong>FR</strong>-JCBL, <strong>FR</strong>-V7CBL and <strong>FR</strong>-A7AP, refer to page 32.*7 Assign the function using Pr. 178 to Pr. 184, Pr. 187 to Pr. 189 (input terminal function selection).*8 When position control is selected, terminal JOG function is made invalid and conditional position pulse train inputterminal becomes valid.*9 Assign the function using Pr. 190 to Pr. 194 (output terminal function selection).*10 For the fan of the 7.5kW or less dedicated motor, the power supply is single phase. (200V/50Hz, 200 to 230V/60Hz)*11 Assign OH (external thermal input) signal to the terminal CS. (Set "7" in Pr. 186 )Connect a 2W1kΩ resistor between the terminal PC and CS (OH). Install theresistor pushing against the bottom part of the terminal block so as to avoid acontact with other cables.Refer to page 206 for details of Pr. 186 CS terminal function selection.CS(OH)PCControl circuitterminal blockResistor (2W1kΩ)34
2WIRINGConnection of motor with encoder (vector control)(6) Instructions for encoder cable wiring• Use twisted pair shield cables (0.2mm 2 or larger) to connect the <strong>FR</strong>-A7AP and position detector. Cables to terminals PGand SD should be connected in paralell or be larger in size according to the cable length.To protect the cables from noise, run them away from any source of noise (e.g. the main circuit and power supply voltage).Wiring Length Paralell Connection Larger-Size CableWithin 10m At least two cables in parallel0.4mm 2 or largerCable gaugeWithin 20m At least four cables in parallel0.2mm 20.75mm 2 or largerWithin 100m * At least six cables in parallel 1.25mm 2 or larger* When differential line driver is set and a wiring length is 30m or moreThe wiring length can be extended to 100m by slightly increasing the power by 5V (approx. 5.5V) using six or more cables with gauge size of 0.2mm 2in parallel or a cable with gauge size of 1.25mm 2 or more. Note that the voltage applied should be within power supply specifications of encoder.• To reduce noise of the encoder cable, earth (ground) the encoder Earthing (grounding) example using a P clipshielded cable to the enclosure (as near as the inverter) with a P clip orU clip made of metal.Encoder cableREMARKS· For details of the optional encoder dedicated cable (<strong>FR</strong>-JCBL/<strong>FR</strong>-V7CBL), referto page 32.· The <strong>FR</strong>-V7CBL is provided with a P clip for earthing (grounding) shielded cable.(7) Parameter for encoder (Pr. 359, Pr. 369)ParameterNumber359NameEncoder rotationdirectionInitialValue1SettingRange0EncoderDescriptionCCW1Forward rotation is counterclockwiseArotation when viewed from A.EncoderNumber of encoderSet the number of encoder pulses output.3691024 0 to 4096pulsesSet the number of pulses before it is multiplied by 4.The above parameters can be set when the <strong>FR</strong>-A7AP (option) is mounted.AShieldP clipCWForward rotation is clockwiserotation when viewed from A.(8) Motor for vector control and parameter settingMotor NameMitsubishi standardmotorMitsubishi constanttorquemotorMitsubishi vectorcontrol dedicatedmotorOther manufacturer'sstandard motorOther manufacturer'sconstant torque motorPr. 9Electronic thermalO/L relayPr. 71<strong>Applied</strong> motorPr. 80Motor capacityPr. 81Number of motorpolesPr. 359Encoder rotationdirectionPr. 369Number ofencoder pulsesSF-JR Motor rated current 0 Motor capacity Number of motor poles 1 1024SF-HR Motor rated current 40 Motor capacity Number of motor poles 1 1024Others Motor rated current 3 *1 Motor capacity Number of motor poles *2 *2SF-JRCA 4P Motor rated current 1 Motor capacity 4 1 1024SF-HRCA Motor rated current 50 Motor capacity Number of motor poles 1 1024Others Motor rated current 13 *1 Motor capacity Number of motor poles *2 *2SF-V5RU(1500r/min series)0 *3 30 Motor capacity 4 1 2048SF-V5RU(except for 1500r/ 0 *3 13 *1 Motor capacity 4 1 2048min series)SF-THY 0 *3 33 *1 Motor capacity 4 1 2048Values in the bolded frame are initial values.*1 Offline auto tuning is necessary. (Refer to page 171)*2 Set this parameter according to the motor (encoder) used.*3 Use thermal protector input provided with the motor.♦Parameters referred to♦• Vector control (speed control) Refer to page 81.• Vector control (torque control) Refer to page 107.• Vector control (position control) Refer to page 115.• Orientation control Refer to page 195.• Encoder feedback control Refer to page 349.— Motor rated current 3 *1 Motor capacity Number of motor poles *2 *2— Motor rated current 13 *1 Motor capacity Number of motor poles *2 *235
Connection of motor with encoder (vector control)(9) Combination with a vector control dedicated motorRefer to the table below when using with a vector control dedicated motor.• Combination with the SF-V5RUVoltage 200V class 400V classRated speed1500r/minBase frequency50HzMaximum speed3000r/minMotor capacityMotor framenumberMotor typeInverter typeMotor framenumber• Combination with the SF-V5RU1, 3, 4 and SF-THYSF-V5RU1 (1:2) SF-V5RU3 (1:3) SF-V5RU4 (1:4)Voltage200V classRated speed 1000r/min 1000r/min 500r/minBasefrequency33.33Hz 33.33Hz 16.6HzMaximumspeed2000r/min 3000r/min 2000r/minMotorcapacityModels surrounded by black borders and 400V class are developed upon receipt of order.*1 The maximum speed is 2400r/min.*2 80% output in the high-speed range. (The output is reduced when the speed is 2400r/min or more.)*3 90% output in the high-speed range. (The output is reduced when the speed is 1000r/min or more.)Motor typeInverter type3.7kW 112M SF-V5RU3K <strong>FR</strong>-A721-5.5K — — —5.5kW 132S SF-V5RU5K <strong>FR</strong>-A721-7.5K 132S SF-V5RUH5K <strong>FR</strong>-A741-7.5K7.5kW 132M SF-V5RU7K <strong>FR</strong>-A721-11K 132M SF-V5RUH7K <strong>FR</strong>-A741-11K11kW 160M SF-V5RU11K <strong>FR</strong>-A721-15K 160M SF-V5RUH11K <strong>FR</strong>-A741-15K15kW 160L SF-V5RU15K <strong>FR</strong>-A721-18.5K 160L SF-V5RUH15K <strong>FR</strong>-A741-18.5K18.5kW 180M SF-V5RU18K <strong>FR</strong>-A721-22K 180M SF-V5RUH18K <strong>FR</strong>-A741-22K22kW 180M SF-V5RU22K <strong>FR</strong>-A721-30K 180M SF-V5RUH22K <strong>FR</strong>-A741-30K30kW 200L *2 SF-V5RU30K <strong>FR</strong>-A721-37K 200L *2 SF-V5RUH30K <strong>FR</strong>-A741-37K37kW 200L *2 SF-V5RU37K <strong>FR</strong>-A721-45K 200L *2 SF-V5RUH37K <strong>FR</strong>-A741-45K45kW 200L *2 SF-V5RU45K <strong>FR</strong>-A721-55K 200L *2 SF-V5RUH45K <strong>FR</strong>-A741-55KMotorframenumberMotor typeInverter typeMotorframenumberMotor typeInverter typeMotorframenumberMotor typeInverter type3.7kW 132S SF-V5RU3K1 <strong>FR</strong>-A721-5.5K 132M SF-V5RU3K3 <strong>FR</strong>-A721-5.5K 160L SF-V5RU3K4 <strong>FR</strong>-A721-7.5K5.5kW 132M SF-V5RU5K1 <strong>FR</strong>-A721-7.5K 160M SF-V5RU5K3 <strong>FR</strong>-A721-7.5K 180L SF-V5RU5K4 <strong>FR</strong>-A721-7.5K7.5kW 160M SF-V5RU7K1 <strong>FR</strong>-A721-11K 160L SF-V5RU7K3 <strong>FR</strong>-A721-11K 200L SF-V5RU7K4 <strong>FR</strong>-A721-11K11kW 160L SF-V5RU11K1 <strong>FR</strong>-A721-15K 180M SF-V5RU11K3 <strong>FR</strong>-A721-15K 225S SF-V5RU11K4 <strong>FR</strong>-A721-15K15kW 180M SF-V5RU15K1 <strong>FR</strong>-A721-18.5K 180L SF-V5RU15K3 <strong>FR</strong>-A721-18.5K 225S SF-V5RU15K4 <strong>FR</strong>-A721-22K18.5kW 180L SF-V5RU18K1 <strong>FR</strong>-A721-22K 200L SF-V5RU18K3 <strong>FR</strong>-A721-22K 250MD SF-THY <strong>FR</strong>-A721-22K22kW 200L SF-V5RU22K1 <strong>FR</strong>-A721-30K 200L SF-V5RU22K3 <strong>FR</strong>-A721-30K 280MD SF-THY <strong>FR</strong>-A721-30K30kW 200L*3 SF-V5RU30K1 <strong>FR</strong>-A721-37K 225S*1 SF-V5RU30K3 <strong>FR</strong>-A721-37K 280MD SF-THY <strong>FR</strong>-A721-37K37kW 225S SF-V5RU37K1 <strong>FR</strong>-A721-45K 250MD*1 SF-THY <strong>FR</strong>-A721-45K 280MD SF-THY <strong>FR</strong>-A721-45K45kW 250MD SF-THY <strong>FR</strong>-A721-55K 250MD*1 SF-THY <strong>FR</strong>-A721-55K 280MD SF-THY <strong>FR</strong>-A721-55K36
3 PRECAUTIONS FOR USEOF THE INVERTERThis chapter explains the "PRECAUTIONS FOR USE OF THEINVERTER" for use of this product.Always read the instructions before using the equipment3.1 EMC and leakage currents......................................383.2 Power-off and magnetic contactor (MC)..................443.3 Inverter-driven 400V class motor ............................453.4 Precautions for use of the inverter ..........................463.5 Failsafe of the system which uses the inverter .......48123456377
EMC and leakage currents3.1 EMC and leakage currents3.1.1 Leakage currents and countermeasuresCapacitances exist between the inverter I/O cables, other cables and earth and in the motor, through which a leakagecurrent flows. Since its value depends on the static capacitances, carrier frequency, etc., low acoustic noise operationat the increased carrier frequency of the inverter will increase the leakage current. Therefore, take the followingmeasures. Select the earth leakage circuit breaker according to its rated sensitivity current, independently of the carrierfrequency setting.(1) To-earth (ground) leakage currentsLeakage currents may flow not only into the inverter's own line but also into the other lines through the earth (ground)cable, etc. These leakage currents may operate earth (ground) leakage circuit breakers and earth leakage relaysunnecessarily.• Suppression technique⋅ If the carrier frequency setting is high, decrease the Pr. 72 PWM frequency selection setting. Note that motor noiseincreases. Selecting Pr. 240 Soft-PWM operation selection makes the sound inoffensive.⋅ By using earth leakage circuit breakers designed for harmonic and surge suppression in the inverter's own line andother line, operation can be performed with the carrier frequency kept high (with low noise).• To-earth (ground) leakage currents⋅ Take caution as long wiring will increase the leakage current. Decreasing the carrier frequency of the inverterreduces the leakage current.⋅ Increasing the motor capacity increases the leakage current. The leakage current of the 400V class is larger thanthat of the 200V class.(2) Line-to-line leakage currentsHarmonics of leakage currents flowing in static capacitances between the inverter output cables may operate theexternal thermal relay unnecessarily. When the wiring length is long (50m or more) for the 400V class small-capacitymodel (7.5K or less), the external thermal relay is likely to operate unnecessarily because the ratio of the leakagecurrent to the rated motor current increases.• Line-to-line leakage current data example (200V class)Motor Capacity(kW)Rated MotorCurrent(A)Leakage Currents(mA)Wiring length 50m Wiring length 100m3.7 12.8 440 6305.5 19.4 490 6807.5 25.6 535 725⋅Motor SF-JR 4P⋅Carrier frequency: 14.5kHz⋅Used wire: 2mm 2 , 4coresCabtyre cable*The leakage currents of the 400V class are about twice as large.MCCBMCThermal relayMotorPowersupplyInverterIMLine-to-line staticcapacitancesLine-to-line leakage currents path• Measures⋅ Use Pr. 9 Electronic thermal O/L relay.⋅ If the carrier frequency setting is high, decrease the Pr. 72 PWM frequency selection setting. Note that motor noiseincreases. Selecting Pr. 240 Soft-PWM operation selection makes the sound inoffensive. To ensure that the motor isprotected against line-to-line leakage currents, it is recommended to use a temperature sensor to directly detectmotor temperature.• Installation and selection of moulded case circuit breakerInstall a moulded case circuit breaker (MCCB) on the power receiving side to protect the wiring of the inverter inputside. Select the MCCB according to the inverter input side power factor (which depends on the power supply voltage,output frequency and load). Especially for a completely electromagnetic MCCB, one of a slightly large capacity mustbe selected since its operation characteristic varies with harmonic currents. (Check it in the data of the correspondingbreaker.) As an earth leakage circuit breaker, use the Mitsubishi earth leakage circuit breaker designed forharmonics and surge suppression.38
3PRECAUTIONS FOR USE OF THE INVERTER(3) Selection of rated sensitivity current of earth leakage circuit breakerEMC and leakage currentsWhen using the earth leakage circuit breaker with the inverter circuit, select its rated sensitivity current as follows,independently of the PWM carrier frequency:⋅⋅Breaker designed for harmonic and surge suppressionRated sensitivity current:IΔn ≥ 10 × (Ig1 + Ign + Igi + Ig2 + Igm)Standard breakerRated sensitivity current:IΔn ≥ 10 × {Ig1 + Ign + Igi + 3 × (Ig2 + Igm)}ELBExample of leakage current of Leakage current example ofcable path per 1km during the three-phase induction motorcommercial power supply operation during the commercialwhen the CV cable is routed in power supply operationmetal conduit(200V 60Hz)(200V 60Hz)Leakage currents (mA)1201008060402005.5mm 2 × 5mIg1Noisefilter2 3.5 8142238801505.5 3060100Cable size (mm 2 )InverterIgnIgi5.5mm 2 × 40mIg2Leakage currents (mA)IM2. 01. 00. 70. 50. 30. 20. 11. 5 3. 7 7. 5 152237552. 2 5.5 1118. 53045Motor capacity (kW)3φ200V5.5kWIgmIg1, Ig2: Leakage currents in wire path during commercialpower supply operationIgn: Leakage current of inverter input side noise filterIgm: Leakage current of motor during commercial powersupply operationIgi: Leakage current of inverter unitExample of leakage current per 1km duringthe commercial power supply operationwhen the CV cable is routed in metal conduit(Three-phase three-wire deltaconnection 400V60Hz)120100806040200Leakage current Ig1 (mA) 33 ×Breaker Designedfor Harmonic andSurge Suppression5m1000mLeakage current Ign (mA)0 (without noise filter)Leakage current Igi (mA) 1Leakage current Ig2 (mA) 33 ×leakage currents (mA)2 3.5 8142238801505.5 3060100Cable size (mm 2 )Leakage current example of threephaseinduction motorduring thecommercial power supply operation(Totally-enclosed fan-cooledtype motor 400V60Hz)40m1000mMotor capacity (kW)For " " connection, the amount of leakage current is appox.1/3 of the above value.Standard BreakerMotor leakage current Igm (mA) 0.29Total leakage current (mA) 2.78 6.00Rated sensitivity current (mA) (≥ Ig × 10) 30 100leakage currents (mA)2. 01. 00. 70. 50. 30. 20. 11. 5 3. 7 7. 5 152237552. 2 5.5 1118. 53045= 0.17= 1.32CAUTION⋅ Install the earth leakage circuit breaker (ELB) on the input side of the inverter.⋅ In the connection earthed-neutral system, the sensitivity current is blunt against an earth (ground) fault in the inverter outputside. Earthing (Grounding) must conform to the requirements of national and local safety regulations and electrical codes. (NECsection 250, IEC 536 class 1 and other applicable standards)Use a neutral-point earthed (grounded) power supply for 400V class inverter in compliance with EN standard.⋅ When the breaker is installed on the output side of the inverter, it may be unnecessarily operated by harmonics even if theeffective value is less than the rating. In this case, do not install the breaker since the eddy current and hysteresis loss willincrease, leading to temperature rise.⋅ The following models are standard breakers....BV-C1, BC-V, NVB, NV-L, NV-G2N, NV-G3NA and NV-2F earth leakage relay(except NV-ZHA), NV with AA neutral wire open-phase protectionThe other models are designed for harmonic and surge suppression....NV-C/NV-S/MN series, NV30-FA, NV50-FA, BV-C2,earth leakage alarm breaker (NF-Z), NV-ZHA, NV-H39
EMC and leakage currents3.1.2 EMC measuresSome electromagnetic noises enter the inverter to malfunction it and others are radiated by the inverter to malfunctionperipheral devices. Though the inverter is designed to have high immunity performance, it handles low-level signals, soit requires the following basic techniques. Also, since the inverter chops outputs at high carrier frequency, that couldgenerate electromagnetic noises. If these electromagnetic noises cause peripheral devices to malfunction, EMImeasures should be taken to suppress noises. These techniques differ slightly depending on EMI paths.1)Basic techniques⋅ Do not run the power cables (I/O cables) and signal cables of the inverter in parallel with each other and do notbundle them.⋅ Use twisted shield cables for the detector connecting and control signal cables and connect the sheathes of theshield cables to terminal SD.⋅ Earth (Ground) the inverter, motor, etc. at one point.2)Techniques to reduce electromagnetic noises that enter and malfunction the inverter (Immunity measures))When devices that generate many electromagnetic noises (which use magnetic contactors, magnetic brakes, manyrelays, for example) are installed near the inverter and the inverter may be malfunctioned by electromagnetic noises,the following measures must be taken:⋅ Provide surge suppressors for devices that generate many electromagnetic noises to suppress electromagneticnoises.⋅ Fit data line filters (page 41) to signal cables.⋅ Earth (Ground) the shields of the detector connection and control signal cables with cable clamp metal.3)Techniques to reduce electromagnetic noises that are radiated by the inverter to malfunction peripheral devices (EMImeasures)Inverter-generated electromagnetic noises are largely classified into those radiated by the cables connected to theinverter and inverter main circuits (I/O), those electromagnetically and electrostatically induced to the signal cables ofthe peripheral devices close to the main circuit power supply, and those transmitted through the power supply cables.Inverter generatedelectromagneticnoiseAir propagatedelectromagneticnoiseNoise directlyradiated from inverterNoise radiated frompower supply cablePath 1)Path 2)5)TelephoneElectromagneticinduction noiseElectrostaticinduction noiseElectrical pathpropagated noiseNoise radiated frommotor connection cablePath 4), 5)Path 6)Noise propagated throughpower supply cableNoise from earth (ground)cable due to leakagecurrentPath 3)Path 7)Path 8)Instrument7)Receiver7)2)1)3) Inverter4)Motor IM6)Sensorpower supply1)3) Sensor8)40
3PRECAUTIONS FOR USE OF THE INVERTEREMC and leakage currentsPropagation Path1) 2) 3)4) 5) 6)7)8)MeasuresWhen devices that handle low-level signals and are liable to malfunction due to electromagnetic noises,e.g. instruments, receivers and sensors, are contained in the enclosure that contains the inverter or whentheir signal cables are run near the inverter, the devices may be malfunctioned by air-propagatedelectromagnetic noises. The following measures must be taken:(1) Install easily affected devices as far away as possible from the inverter.(2) Run easily affected signal cables as far away as possible from the inverter and its I/O cables.(3) Do not run the signal cables and power cables (inverter I/O cables) in parallel with each other and donot bundle them.(4) Insert common mode filters into I/O and capacitors between the input lines to suppress cableradiatednoises.(5) Use shield cables as signal cables and power cables and run them in individual metal conduits toproduce further effects.When the signal cables are run in parallel with or bundled with the power cables, magnetic and staticinduction noises may be propagated to the signal cables to malfunction the devices and the followingmeasures must be taken:(1) Install easily affected devices as far away as possible from the inverter.(2) Run easily affected signal cables as far away as possible from the I/O cables of the inverter.(3) Do not run the signal cables and power cables (inverter I/O cables) in parallel with each other and donot bundle them.(4) Use shield cables as signal cables and power cables and run them in individual metal conduits toproduce further effects.When the power supplies of the peripheral devices are connected to the power supply of the inverter inthe same line, inverter-generated noises may flow back through the power supply cables to malfunctionthe devices. In such a case, installing the common mode filter (<strong>FR</strong>-BLF) to the power cables (outputcable) of the inverter will prevent malfunction.When a closed loop circuit is formed by connecting the peripheral device wiring to the inverter, leakagecurrents may flow through the earth (ground) cable of the inverter to malfunction the device. In such acase, disconnection of the earth (ground) cable of the device may cause the device to operate properly.• Data line filterAs immunity measures it may effective, provide a data line filter for the detector cable etc.• EMC measuresInstall common mode filter (<strong>FR</strong>-BLF)on inverter input side.EnclosureDecreasecarrier frequencyInstall common mode filter (<strong>FR</strong>-BLF)on inverter output side.InverterpowersupplyInstall capacitor type <strong>FR</strong>-BIF filteron inverter input side.Separate inverter and powerline by more than 30cm (atleast 10cm) from sensor circuit.ControlpowersupplyDo not earth (ground)enclosure directly.<strong>FR</strong>-BLF<strong>FR</strong>-BIFPowersupplyfor sensorDo not earth (ground) control cable.Inverter<strong>FR</strong>-BLFIMUse 4-core cable for motorpower cable and use onecable as earth (ground) cable.Use a twisted pair shielded cableSensorDo not earth (ground) shield butconnect it to signal common cable.Motor41
EMC and leakage currents3.1.3 Power supply harmonicsThe inverter may generate power supply harmonics from its converter circuit to affect the power generator, powercapacitor etc. Power supply harmonics are different from noise and leakage currents in source, frequency band andtransmission path. Take the following countermeasure suppression techniques.This inverter has a built-in AC reactor (<strong>FR</strong>-HAL) and a circuit type specified in Harmonic suppression guideline in Japanis three-phase bridge (capacitor smoothed) and with reactor (AC side).3.1.4 Harmonic suppression guidelineHarmonic currents flow from the inverter to a power receiving point via a power transformer. The harmonic suppressionguideline was established to protect other consumers from these outgoing harmonic currents.The three-phase 200V input specifications 3.7kW or less are previously covered by "Harmonic suppression guidelinefor household appliances and general-purpose products" and other models are covered by "Harmonic suppressionguideline for consumers who receive high voltage or special high voltage". However, the general-purpose inverter hasbeen excluded from the target products covered by "Harmonic suppression guideline for household appliances andgeneral-purpose products" in January 2004. Later, this guideline was repealed on September 6, 2004. All capacities ofall models are now target products of "Harmonic suppression guideline for consumers who receive high voltage orspecial high voltage" (hereinafter referred to as "Guideline for specific consumers")."Guideline for specific consumers"This guideline sets forth the maximum values of harmonic currents outgoing from a high-voltage or especially highvoltageconsumer who will install, add or renew harmonic generating equipment. If any of the maximum values isexceeded, this guideline requires that consumer to take certain suppression measures.Table 1 Maximum Values of Outgoing Harmonic Currents per 1kW Contract PowerReceived PowerVoltage5th 7th 11th 13th 17th 19th 23rd Over 23rd6.6kV 3.5 2.5 1.6 1.3 1.0 0.9 0.76 0.7022kV 1.8 1.3 0.82 0.69 0.53 0.47 0.39 0.3633kV 1.2 0.86 0.55 0.46 0.35 0.32 0.26 0.24(1) Application of the harmonic suppression guideline for specific consumersInstall, add or renewequipmentEqual to or lessthan referencecapacityCalculation of equivalentcapacity totalAbove referencecapacityEquivalentcapacity totalCalculation of outgoingharmonic currentNot more thanharmonic current upperlimit?Equal to or lessthan upper limitHarmonic suppressionmeasures unnecessaryMore than upper limitHarmonic suppressionmeasures necessary42
EMC and leakage currentsTable 2 Conversion factors for <strong>FR</strong>-<strong>A701</strong> seriesClass Circuit Type Conversion Factor (Ki)3Three-phase bridge(Capacitor smoothing)With reactor (AC side) K32 = 1.8Table 3 Equivalent Capacity LimitsReceived Power Voltage6.6kV22/33kV66kV or moreReference Capacity50kVA300kVA2000kVATable 4 Harmonic content (Values of the fundamental current is 100%)Reactor 5th 7th 11th 13th 17th 19th 23rd 25thUsed (AC side) 38 14.5 7.4 3.4 3.2 1.9 1.7 1.31)Calculation of equivalent capacity P0 of harmonic generating equipmentThe "equivalent capacity" is the capacity of a 6-pulse converter converted from the capacity of consumer's harmonicgenerating equipment and is calculated with the following equation. If the sum of equivalent capacities is higher thanthe limit in Table 3, harmonics must be calculated with the following procedure:P0 = Σ (Ki × Pi) [kVA] * Rated capacity: Determined by the capacity of the appliedKi: Conversion factor(According to Table 2)Pi: Rated capacity of harmonic generating equipment* [kVA]i : Number indicating the conversion circuit typemotor and found in Table 5. It should be noted that the ratedcapacity used here is used to calculate generated harmonicamount and is different from the power supply capacityrequired for actual inverter drive.2)Calculation of outgoing harmonic currentOutgoing harmonic current = fundamental wave current (value converted from received power voltage) × operationratio × harmonic content⋅ Operation ratio: Operation ratio = actual load factor × operation time ratio during 30 minutes⋅ Harmonic content: Found in Table 4.Table 5 Rated capacities and outgoing harmonic currents of inverter-driven motors<strong>Applied</strong>Motor(kW)Rated Current(A)FundamentalWave Current RatedOutgoing Harmonic Current Converted from 6.6kV (mA)(With reactor, 100% operation ratio)Converted Capacity200V 400V from 6.6kV(mA)(kVA) 5th 7th 11th 13th 17th 19th 23rd 25th5.5 19.1 9.55 579 6.77 220.0 83.96 42.85 19.69 18.53 11.00 9.843 7.5277.5 25.6 12.8 776 9.07 294.9 112.5 57.42 26.38 24.83 14.74 13.19 10.0911 36.9 18.5 1121 13.1 426.0 162.5 82.95 38.11 35.87 21.30 19.06 14.5715 49.8 24.9 1509 17.6 573.4 218.8 111.7 51.31 48.29 28.67 25.65 19.6218.5 61.4 30.7 1860 21.8 706.8 269.7 137.6 63.24 59.52 35.34 31.62 24.1822 73.1 36.6 2220 25.9 843.6 321.9 164.3 75.48 71.04 42.18 37.74 28.8630 98.0 49.0 2970 34.7 1129 430.7 219.8 101.0 95.04 56.43 50.49 38.6137 121 60.4 3660 42.8 1391 530.7 270.8 124.4 117.1 69.54 62.22 47.5845 147 73.5 4450 52.1 1691 645.3 329.3 151.3 142.4 84.55 75.65 57.8555 180 89.9 5450 63.7 2071 790.3 403.3 185.3 174.4 103.6 92.65 70.853)Harmonic suppression technique requirementIf the outgoing harmonic current is higher than the maximum value per 1kW (contract power) × contract power, aharmonic suppression technique is required.4)Harmonic suppression techniquesNo. Item DescriptionInstallation of power factor When used with a series reactor, the power factor improving capacitor has an effect of1improving capacitor absorbing harmonic currents.23Transformer multi-phaseoperationPassive filter(AC filter)4 Active filterUse two transformers with a phase angle difference of 30° as in - , - combinationto provide an effect corresponding to 12 pulses, reducing low-degree harmonic currents.A capacitor and a reactor are used together to reduce impedances at specific frequencies,producing a great effect of absorbing harmonic currents.This filter detects the current of a circuit generating a harmonic current and generates aharmonic current equivalent to a difference between that current and a fundamental wavecurrent to suppress a harmonic current at a detection point, providing a great effect ofabsorbing harmonic currents.433PRECAUTIONS FOR USE OF THE INVERTER
Power-off and magnetic contactor (MC)3.2 Power-off and magnetic contactor (MC)(1) Inverter input side magnetic contactor (MC)On the inverter input side, it is recommended to provide an MC for the following purposes.( Refer to page 4 for selection.)1)To release the inverter from the power supply when the fault occurs or when the drive is not functioning (e.g.emergency stop operation).2)To prevent any accident due to an automatic restart at restoration of power after an inverter stop made by a power failure3)To reset the inverter for an extended period of timeThe control power supply for inverter is always running and consumes a little power. When stopping the inverter for anextended period of time, powering off the inverter will save power slightly.4)To separate the inverter from the power supply to ensure safe maintenance and inspection workThe inverter's input side MC is used for the above purpose, select class JEM1038-AC3MC for the inverter input sidecurrent when making an emergency stop during normal operation.REMARKSSince repeated inrush currents at power on will shorten the life of the converter circuit (switching life is about 500,000 times.),frequent starts and stops of the MC must be avoided. Turn on/off the inverter start controlling terminals (STF, STR) to run/stop theinverter.MCPowersupplyOperation preparationOFF ONMCStopMCStart/StopOperationRARAMCCBT *1MCRAR/L1 US/L2 VT/L3 WR1/L11*2S1/L21InverterC1B1A1STF(STR)SDTo themotor• Inverter start/stop circuit exampleAs shown on the left, always use the start signal (ON orOFF across terminals STF or STR-SD) to make a startor stop. (Refer to page 211)*1 When the power supply is 400V class, install a step-downtransformer.*2 Connect the power supply terminals R1/L11, S1/L21 of thecontrol circuit to the primary side of the MC to hold analarm signal when the inverter's protective circuit isactivated. At this time, remove jumpers across terminals R/L1-R1/L11 and S/L2-S1/L21. (Refer to page 21 for removalof the jumper.)(2) Handling of the inverter output side magnetic contactorSwitch the magnetic contactor between the inverter and motor only when both the inverter and motor are at a stop.When the magnetic contactor is turned on while the inverter is operating, overcurrent protection of the inverter andsuch will activate. When an MC is provided to switch to a commercial power supply, for example, it is recommended touse bypass-inverter switchover function Pr. 135 to Pr. 139 (Refer to page 337).44
3PRECAUTIONS FOR USE OF THE INVERTERInverter-driven 400V class motor3.3 Inverter-driven 400V class motorIn the PWM type inverter, a surge voltage attributable to wiring constants is generated at the motor terminals.Especially for a 400V class motor, the surge voltage may deteriorate the insulation. When the 400V class motor isdriven by the inverter, consider the following measures:•MeasuresIt is recommended to take either of the following measures:(1) Rectifying the motor insulation and limiting the PWM carrier frequency according to the wiring lengthFor the 400V class motor, use an insulation-enhanced motor.Specifically,1)Specify the "400V class inverter-driven insulation-enhanced motor".2)For the dedicated motor such as the constant-torque motor and low-vibration motor, use the "inverter-driven,dedicated motor".3)Set Pr. 72 PWM frequency selection as indicated below according to the wiring lengthWiring Length50m or less 50m to 100m exceeding 100mPr. 72 PWM frequency selection 15 (14.5kHz) or less 9 (9kHz) or less 4 (4kHz) or less(2) Suppressing the surge voltage on the inverter sideConnect the surge voltage suppression filter (<strong>FR</strong>-ASF-H) on the inverter output side.CAUTION· For details of Pr. 72 PWM frequency selection , refer to page 257.· For explanation of surge voltage suppression filter (<strong>FR</strong>-ASF-H), refer to the manual of each option.· Do not perform real sensorless vector control and vector control with a surge voltage suppression filter (<strong>FR</strong>-ASF-H) connected.45
Precautions for use of the inverter3.4 Precautions for use of the inverterThe <strong>FR</strong>-<strong>A701</strong> series is a highly reliable product, but incorrect peripheral circuit making or operation/handling methodmay shorten the product life or damage the product.Before starting operation, always recheck the following items.(1) Use crimping terminals with insulation sleeve to wire the power supply and motor.(2) Application of power to the output terminals (U, V, W) of the inverter will damage the inverter. Never perform such wiring.(3) After wiring, wire offcuts must not be left in the inverter.Wire offcuts can cause an alarm, failure or malfunction. Always keep the inverter clean. When drilling mounting holes inan enclosure etc., take care not to allow chips and other foreign matter to enter the inverter.(4) Use cables of the size to make a voltage drop 2% maximum.If the wiring distance is long between the inverter and motor, a main circuit cable voltage drop will cause the motor torqueto decrease especially at the output of a low frequency.Refer to page 18 for the recommended cable sizes.(5) The overall wiring length should be 500m maximum.(The wiring length should be 100m maximum for vector control.)Especially for long distance wiring, the fast-response current limit function may decrease or the equipment connected tothe secondary side may malfunction or become faulty under the influence of a charging current due to the stray capacityof the wiring. Therefore, note the overall wiring length. (Refer to page 20.)(6) Electromagnetic wave interferenceThe input/output (main circuit) of the inverter includes high frequency components, which may interfere with thecommunication devices (such as AM radios) used near the inverter. In this case, connecting a capacitor type filter willreduce electromagnetic wave interference.(7) Do not install a power factor correction capacitor, surge suppressor or capacitor type filter on the inverter output side.This will cause the inverter to trip or the capacitor, and surge suppressor to be damaged. If any of the above devices isinstalled, immediately remove it.(8) Before starting wiring or other work after the inverter is operated, wait for at least 10 minutes after the power supply hasbeen switched off, and check that there are no residual voltage using a tester or the like. The capacitor is charged with highvoltage for some time after power off and it is dangerous.(9) A short circuit or earth (ground) fault on the inverter output side may damage the inverter modules.· Fully check the insulation resistance of the circuit prior to inverter operation since repeated short circuits caused byperipheral circuit inadequacy or an earth (ground) fault caused by wiring inadequacy or reduced motor insulationresistance may damage the inverter modules.· Fully check the to-earth (ground) insulation and inter-phase insulation of the inverter output side before power-on.Especially for an old motor or use in hostile atmosphere, securely check the motor insulation resistance etc.(10) Do not use the inverter input side magnetic contactor to start/stop the inverter.Always use the start signal (ON/OFF of STF and STR signals) to start/stop the inverter.(Refer to page 44)(11) Do not apply a voltage higher than the permissible voltage to the inverter I/O signal circuits.Application of permissible voltage to the inverter I/O signal circuit and incorrect polarity may damage the I/O terminal.Especially check the wiring to prevent the speed setting potentiometer from being connected incorrectly to shortterminals 10E-5.(12) Provide electrical and mechanical interlocks for MC1 andMC2 which are used for bypass operation.When the wiring is incorrect or if there is an electronicbypass circuit as shown on the right, the inverter will bedamaged by leakage current from the power supply due toarcs generated at the time of switch-over or chatteringcaused by a sequence error.(Commercial operation can not be performed with the vectordedicated motor (SF-V5RU, SF-THY).)PowersupplyR/L1S/L2T/L3UVWInverterMC1InterlockMC2IMUndesirable current46
3PRECAUTIONS FOR USE OF THE INVERTERPrecautions for use of the inverter(13) If the machine must not be restarted when power is restored after a power failure, provide a magnetic contactor in theinverter's input side and also make up a sequence which will not switch on the start signal.If the start signal (start switch) remains on after a power failure, the inverter will automatically restart as soon as thepower is restored.(14) Instructions for overload operationWhen performing an operation of frequent start/stop with the inverter, rise/fall in the temperature of the transistor elementof the inverter will repeat due to a continuous flow of large current, shortening the life from thermal fatigue. Since thermalfatigue is related to the amount of current, the life can be increased by reducing current at locked condition, startingcurrent, etc. Decreasing current may increase the life. However, decreasing current will result in insufficient torque andthe inverter may not start. Therefore, choose the inverter which has enough allowance for current (up to 2 rank larger incapacity).(15) Make sure that the specifications and rating match the system requirements.(16) A motor with encoder is necessary for vector control. In addition, connect the encoder directly to the backlash-free motorshaft. (An encoder is not necessary for real sensorless vector control.)(17) When the motor speed is unstable, due to change in the frequency setting signal caused by electromagnetic noises fromthe inverter, take the following measures when applying the motor speed by the analog signal.· Do not run the signal cables and power cables (inverter I/O cables) in parallel with each other and do not bundle them.· Run signal cables as far away as possible from power cables (inverter I/O cables).· Use shield cables as signal cables.· Install a ferrite core on the signal cable (Example: ZCAT3035-1330 TDK).47
Failsafe of the system which uses theinverter3.5 Failsafe of the system which uses the inverterWhen a fault occurs, the inverter trips to output a fault signal. However, a fault output signal may not be output at an inverterfault occurrence when the detection circuit or output circuit fails, etc. Although Mitsubishi assures best quality products,provide an interlock which uses inverter status output signals to prevent accidents such as damage to machine when theinverter fails for some reason and at the same time consider the system configuration where failsafe from outside the inverter,without using the inverter, is enabled even if the inverter fails.(1) Interlock method which uses the inverter status output signalsBy combining the inverter status output signals to provide an interlock as shown below, an inverter alarm can bedetected.No Interlock Method Check Method Used Signals Refer to Page1)Inverter protectivefunction operationOperation check of an alarm contactCircuit error detection by negative logic2) Inverter running status Operation ready signal check3) Inverter running status4) Inverter running statusLogic check of the start signal andrunning signalLogic check of the start signal and outputcurrent2) Checking the inverter operating status by the inverteroperation ready completion signalOperation ready signal (RY signal) is output when theinverter power is on and the inverter becomes operative.Check if the RY signal is output after powering on theinverter.3) Checking the inverter operating status by the start signalinput to the inverter and inverter running signal.The inverter running signal (RUN signal) is output when theinverter is running (RUN signal is assigned to terminal RUNin the initial setting).Check if RUN signal is output when inputting the start signalto the inverter (forward signal is STF signal and reversesignal is STR signal). For logic check, note that RUN signalis output for the period from the inverter decelerates untiloutput to the motor is stopped, configure a sequenceconsidering the inverter deceleration timeFault output signal(ALM signal)Operation ready signal(RY signal)1) Check by the output of the inverter fault signalWhen the fault occurs and trips the inverter, the fault outputsignal (ALM signal) is output (ALM signal is assigned toterminal A1B1C1 in the initial setting).Check that the inverter functions properly.In addition, negative logic can be set (on when the inverter isALMnormal, off when the fault occurs).(when outputat NC contact)RESStart signal(STF signal, STR signal)Running signal (RUN signal)Start signal(STF signal, STR signal)Output current detection signal(Y12 signal)PowersupplySTFOutput frequencyRHOutput frequencyInverter fault occurrence(output shutoff)ONPr. 13 Starting frequencyResetprocessingONOFFONReset ONONON214214206206, 214OF<strong>FR</strong>eset processing(about 1s)OFFONRYRUN ON OFFOFFOFFTimeTimeDC injection brakeoperation pointDC injectionbrake operation48
3PRECAUTIONS FOR USE OF THE INVERTERFailsafe of the system which uses theinverter4) Checking the motor operating status by the start signal input to the inverter and inverter output current detection signal.The output current detection signal (Y12 signal) is output when the inverter operates and currents flows in the motor.Check if Y12 signal is output when inputting the start signal to the inverter (forward signal is STF signal and reversesignal is STR signal). Note that the current level at which Y12 signal is output is set to 150% of the inverter rated currentin the initial setting, it is necessary to adjust the level to around 20% using no load current of the motor as reference withPr. 150 Output current detection level.For logic check, as same as the inverter running signal (RUN signal), the inverter outputs for the period from the inverterdecelerates until output to the motor is stopped, configure a sequence considering the inverter deceleration time.Output Pr. 190 to Pr. 196 SettingSignal Positive logic Negative logicALM 99 199RY 11 111RUN 0 100Y12 12 112• When using various signals, assign functions to Pr.190 to Pr.196 (output terminal function selection) referring to the table onthe left.CAUTION• Changing the terminal assignment using Pr. 190 to Pr. 196 (output terminal function selection) may affect the other functions. Makesetting after confirming the function of each terminal.(2) Backup method outside the inverterEven if the interlock is provided by the inverter status signal, enough failsafe is not ensured depending on the failurestatus of the inverter iteself. For example, even if the interlock is provided using the inverter fault output signal, startsignal and RUN signal output, there is a case where a fault output signal is not output and RUN signal is kept outputeven if an inverter fault occurs.Provide a speed detector to detect the motor speed and current detector to detect the motor current and consider thebackup system such as cheking up as below according to the level of importance of the system.1) Start signal and actual operation checkCheck the motor running and motor current while the start signal is input to the inverter by comparing the start signal tothe inverter and detected speed of the speed detector or detected current of the current detector. Note that the motorcurrent runs as the motor is running for the period until the motor stops since the inverter starts decelerating even if thestart signal turns off. For the logic check, configure a sequence considering the inverter deceleration time. In addition, it isrecommended to check the three-phase current when using the current detector.2) Command speed and actual operation checkCheck if there is no gap between the actual speed and commanded speed by comparing the inverter speed commandand detected speed of the speed detector.ControllerSystem failureInverterSensor(speed, temperature,air volume, etc.)To the alarm detection sensor49
MEMO50
4 PARAMETERSThis chapter explains the "PARAMETERS" for use of thisproduct.Always read this instructions before use.1The abbreviations in the explanations below are asfollows:V/F ...V/F control,Magnetic fluxSensorlessVector...Advanced magnetic flux vector control,...Real sensorless vector control,...Vector control(Parameters without any indication are valid for allcontrol)23456517
Operation panel (<strong>FR</strong>-DU07)4.1 Operation panel (<strong>FR</strong>-DU07)4.1.1 Parts of the operation panel (<strong>FR</strong>-DU07)Operation mode indicationPU: Lit to indicate PU operation mode.EXT: Lit to indicate external operation mode.NET: Lit to indicate network operation mode.Unit indication· Hz: Lit to indicate frequency.· A: Lit to indicate current.· V: Lit to indicate voltage.(Flicker when the set frequency monitor isdisplayed.)Monitor (4-digit LED)Shows the frequency, parameternumber, etc.Setting dial(Setting dial: Mitsubishi inverterdial)Used to change thefrequency setting andparameter values.Rotation direction indicationFWD: Lit during forward rotationREV: Lit during reverse rotationOn: Forward/reverse operationFlickering: When the frequency command is notgiven even if the forward/reversecommand is given.When the MRS signal is input.Monitor indicationLit to indicate monitoring mode.No functionStart commandforward rotationStart commandreverse rotationStop operationUsed to stop Run command.Fault can be reset whenprotective function is activated(fault).ModeswitchoverUsed to changeeach setting mode.Used to set each setting.If pressed during operation, monitorchanges as below;RunningfrequencyOutputcurrentOutputvoltage* Energy saving monitor is displayed when theenergy saving monitor of Pr. 52 is set.*Operation mode switchoverUsed to switch between the PU and external operation mode.When using external operation mode (operation using a separately connectedfrequency setting potentiometer and start signal), press this key to light up theEXT indication. (Change the Pr.79 value to use the combined mode.)PU: PU operation modeEXT: External operation mode52
4PARAMETERSOperation panel (<strong>FR</strong>-DU07)4.1.2 Basic operation (factory setting)Operation mode switchoverAt powering on (external operation mode)PU Jog operation modeFaults history Parameter settingMonitor/frequency settingPU operation mode(output frequency monitor)Parameter setting mode(Refer to page 54)Parameter clearValue changeOutput current monitorValue changeParameterall clear[Operation for displaying faults history] (Refer to page 368)Past eight faults can be displayed.(The latest fault is ended by ".".)When no fault history exists, is displayed.Output voltage monitorDisplay the currentsettingParameter and a setting valueflicker alternately.Parameter write is completed!!Parameter copy(Example)and frequency flicker.Frequency setting has beenwritten and completed!!(Example)Fault clear53
Operation panel (<strong>FR</strong>-DU07)4.1.3 Change the parameter setting valueChanging example Change the Pr. 1 Maximum frequency .Operation1.Screen at powering onThe monitor display appears.2.Press to choose the PU operationmode.3.Press to choose the parametersetting mode.DisplayPU indication is lit.The parameternumber readpreviously appears.4. Pr. 1) appears.5.Press to read the currently set value." "(initial value) appears.6.Turn to change it to the setvalue " ".7.Press to set.Flicker ··· Parameter setting complete!!· By turning , you can read another parameter.· Press to show the setting again.· Press twice to show the next parameter.· Press twice to return the monitor to frequency monitor.toare displayed ... Why?appears. ...... Write disable errorappears. ...... Write error during operationappears. ...... Calibration errorappears. ..... Mode designation errorFor details refer to page 374.REMARKSThe number of digits displayed on the operation panel (<strong>FR</strong>-DU07) is four.If the values to be displayed have five digits or more including decimal places, the fifth or later numerals can not be displayed norset.(Example) When Pr. 1When 60Hz is set, 60.00 is displayed.When 120Hz is set, 120.0 is displayed and second decimal place is not displayed nor set.4.1.4 Setting dial pushPush the setting dial () to display the set frequency currently set.54
4PARAMETERSParameter list4.2 Parameter list4.2.1 Parameter listFor simple variable-speed operation of the inverter, the initial setting of the parameters may be used as they are. Set thenecessary parameters to meet the load and operational specifications. Parameter setting, change and check can be madefrom the operation panel (<strong>FR</strong>-DU07).REMARKS⋅ indicates simple mode parameters. (initially set to extended mode)⋅ The shaded parameters in the table allow its setting to be changed during operation even if "0" (initial value) is set in Pr. 77 Parameter writeselection.⋅ Refer to the appendix 4 (page 429) for instruction codes for communication and availability of parameter clear, all clear, and parametercopy of each parameter.Parameter ListFunctionBasic functionsDC injectionbrakeParameter Name Setting RangeMinimumSettingIncrementsInitial Value 0 Torque boost 0 to 30% 0.1% 3/2% *1 129 1 Maximum frequency 0 to 120Hz 0.01Hz 120Hz 140 2 Minimum frequency 0 to 120Hz 0.01Hz 0Hz 140 3 Base frequency 0 to 400Hz 0.01Hz 60Hz 142 4 Multi-speed setting (high speed) 0 to 400Hz 0.01Hz 60Hz 148 5 Multi-speed setting (middle speed) 0 to 400Hz 0.01Hz 30Hz 148 6 Multi-speed setting (low speed) 0 to 400Hz 0.01Hz 10Hz 148 7 Acceleration time 0 to 3600/360s 0.1/0.01s 5/15s *1 155 8 Deceleration time 0 to 3600/360s 0.1/0.01s 5/15s *1 155 9 Electronic thermal O/L relay 0 to 500A 0.01ARated invertercurrent16510 DC injection brake operation frequency 0 to 120Hz, 9999 0.01Hz 3Hz 18511 DC injection brake operation time 0 to 10s, 8888 0.1s 0.5s 18512 DC injection brake operation voltage 0 to 30% 0.1% 4/2% *1 185⎯ 13 Starting frequency 0 to 60Hz 0.01Hz 0.5Hz 157⎯ 14 Load pattern selection 0 to 5 1 0 144RefertoPageCustomerSettingJogoperation15 Jog frequency 0 to 400Hz 0.01Hz 5Hz 15016 Jog acceleration/deceleration time 0 to 3600/360s 0.1/0.01s 0.5s 150⎯ 17 MRS input selection 0, 2, 4 1 0 209⎯ 18 High speed maximum frequency 120 to 400Hz 0.01Hz 120Hz 140⎯ 19 Base frequency voltage 0 to 1000V, 8888, 9999 0.1V 9999 142Acceleration/decelerationtimesStallprevention20212223Acceleration/deceleration referencefrequencyAcceleration/deceleration timeincrementsStall prevention operation level(torque limit level )Stall prevention operation levelcompensation factor at double speed1 to 400Hz 0.01Hz 60Hz 1550, 1 1 0 1550 to 400% 0.1% 150% 1350 to 200%, 9999 0.1% 9999 135Multi-speedsetting24 to 27 Multi-speed setting (4 speed to 7 speed) 0 to 400Hz, 9999 0.01Hz 9999 148⎯ 28Multi-speed input compensationselection0, 1 1 0 152⎯ 29Acceleration/deceleration patternselection0 to 5 1 0 15831 Frequency jump 1A 0 to 400Hz, 9999 0.01Hz 9999 14132 Frequency jump 1B 0 to 400Hz, 9999 0.01Hz 9999 14133 Frequency jump 2A 0 to 400Hz, 9999 0.01Hz 9999 14134 Frequency jump 2B 0 to 400Hz, 9999 0.01Hz 9999 14135 Frequency jump 3A 0 to 400Hz, 9999 0.01Hz 9999 14136 Frequency jump 3B 0 to 400Hz, 9999 0.01Hz 9999 141⎯ 37 Speed display 0, 1 to 9998 1 0 226Frequencyjump55
Parameter listParameter ListFunctionFrequencydetectionSecond functionsMonitor functionsAutomatic restartParameter Name Setting RangeMinimumSettingInitial ValueIncrementsPage41 Up-to-frequency sensitivity 0 to 100% 0.1% 10% 22142 Output frequency detection 0 to 400Hz 0.01Hz 6Hz 22143Output frequency detection for reverserotation0 to 400Hz, 9999 0.01Hz 9999 22144 Second acceleration/deceleration time 0 to 3600/360s 0.1/0.01s 5s 15545 Second deceleration time 0 to 3600/360s, 9999 0.1/0.01s 9999 15546 Second torque boost 0 to 30%, 9999 0.1% 9999 12947 Second V/F (base frequency) 0 to 400Hz, 9999 0.01Hz 9999 142Second stall prevention operation48current0 to 220% 0.1% 150% 135Second stall prevention operation49frequency0 to 400Hz, 9999 0.01Hz 0Hz 13550 Second output frequency detection 0 to 400Hz 0.01Hz 30Hz 22151 Second electronic thermal O/L relay 0 to 500A, 9999 0.01A 9999 1650, 5 to 8, 10 to 14, 17 to52 DU/PU main display data selection 20, 22 to 25, 32 to 35,1 0 22850 to 57, 1001 to 3, 5 to 8, 10 to 14,54 FM terminal function selection17, 18, 21, 24, 32 to 34, 1 1 22850, 52, 5355 Frequency monitoring reference 0 to 400Hz 0.01Hz 60Hz 23356 Current monitoring reference 0 to 500A 0.01ARated invertercurrent23357 Restart coasting time 0, 0.1 to 5s, 9999 0.1s 9999 23958 Restart cushion time 0 to 60s 0.1s 1s 239RefertoCustomerSetting⎯ 59 Remote function selection 0, 1, 2, 3 1 0 152⎯ 60 Energy saving control selection 0, 4 1 0 251Automatic acceleration/deceleration61 Reference current 0 to 500A, 9999 0.01A 999962 Reference value at acceleration 0 to 220%, 9999 0.1% 9999 16263 Reference value at deceleration 0 to 220%, 9999 0.1% 9999 16264 Starting frequency for elevator mode 0 to 10Hz, 9999 0.01Hz 9999 146⎯ 65 Retry selection 0 to 5 1 0 246146,162⎯ 66Stall prevention operation reductionstarting frequency0 to 400Hz 0.01Hz 60Hz 135Retry67 Number of retries at fault occurrence 0 to 10, 101 to 110 1 0 24668 Retry waiting time 0 to 10s 0.1s 1s 24669 Retry count display erase 0 1 0 246⎯ 71 <strong>Applied</strong> motor0 to 8, 13 to 18, 30, 33,34, 40, 43, 44, 50, 53, 541 0⎯ 72 PWM frequency selection 0 to 15 1 2 257⎯ 73 Analog input selection 0 to 7, 10 to 17 1 1259,263⎯ 74 Input filter time constant 0 to 8 1 1 265⎯ 75Reset selection/disconnected PUdetection/PU stop selection0 to 3, 14 to 17 1 14 278⎯ 76 Alarm code output selection 0, 1, 2 1 0 248⎯ 77 Parameter write selection 0, 1, 2 1 0 280⎯ 78 Reverse rotation prevention selection 0, 1, 2 1 0 281⎯ 79 Operation mode selection 0, 1, 2, 3, 4, 6, 7 1 0131,169283,29156
4PARAMETERSParameter listFunctionMotor constantsAdjustable 5 points V/FThird functionsPU connectorcommunicationMinimumReferParameter Name Setting Range Setting Initial Value toIncrementsPage80 Motor capacity 0.4 to 55kW, 9999 0.01kW 9999131,17181 Number of motor poles2, 4, 6, 8, 10, 12, 14, 16,131,1 999918, 20, 999917182 Motor excitation current 0 to 500A, 9999 0.01A 9999 171⎯ 125⎯ 12683 Rated motor voltage 0 to 1000V 0.1V 200V/400V*4 17184 Rated motor frequency 10 to 120Hz 0.01Hz 60Hz 17189 Speed control gain (magnetic flux vector) 0 to 200%, 9999 0.1% 9999 13190 Motor constant (R1) 0 to 50Ω, 9999 0.001Ω 9999 17191 Motor constant (R2) 0 to 50Ω, 9999 0.001Ω 9999 17192 Motor constant (L1) 0 to 50Ω (0 to 1000mH), 9999 0.001Ω (0.1mH) 9999 17193 Motor constant (L2) 0 to 50Ω (0 to 1000mH), 9999 0.001Ω (0.1mH) 9999 17194 Motor constant (X) 0 to 500Ω (0 to 100%), 9999 0.01Ω (0.1%) 9999 17195 Online auto tuning selection 0 to 2 1 0 18196 Auto tuning setting/status 0, 1, 101 1 0 171100 V/F1(first frequency) 0 to 400Hz, 9999 0.01Hz 9999 147101 V/F1(first frequency voltage) 0 to 1,000V 0.1V 0V 147102 V/F2(second frequency) 0 to 400Hz, 9999 0.01Hz 9999 147103 V/F2(second frequency voltage) 0 to 1,000V 0.1V 0V 147104 V/F3(third frequency) 0 to 400Hz, 9999 0.01Hz 9999 147105 V/F3(third frequency voltage) 0 to 1,000V 0.1V 0V 147106 V/F4(fourth frequency) 0 to 400Hz, 9999 0.01Hz 9999 147107 V/F4(fourth frequency voltage) 0 to 1,000V 0.1V 0V 147108 V/F5(fifth frequency) 0 to 400Hz, 9999 0.01Hz 9999 147109 V/F5(fifth frequency voltage) 0 to 1,000V 0.1V 0V 147110 Third acceleration/deceleration time 0 to 3600/360s, 9999 0.1/0.01s 9999 155111 Third deceleration time 0 to 3600/360s, 9999 0.1/0.01s 9999 155112 Third torque boost 0 to 30%, 9999 0.1% 9999 129113 Third V/F (base frequency) 0 to 400Hz, 9999 0.01Hz 9999 142114 Third stall prevention operation current 0 to 220% 0.1% 150% 135115Third stall prevention operationfrequency0 to 400Hz 0.01Hz 0 135116 Third output frequency detection 0 to 400Hz 0.01Hz 60Hz 221117 PU communication station number 0 to 31 1 0 302118 PU communication speed 48, 96, 192, 384 1 192 302119 PU communication stop bit length 0, 1, 10, 11 1 1 302120 PU communication parity check 0, 1, 2 1 2 302121 Number of PU communication retries 0 to10, 9999 1 1 302122 PU communication check time interval 0, 0.1 to 999.8s, 9999 0.1s 9999 302123 PU communication waiting time setting 0 to 150ms, 9999 1 9999 302124 PU communication CR/LF selection 0, 1, 2 1 1 302Terminal 2 frequency setting gainfrequencyTerminal 4 frequency setting gainfrequency0 to 400Hz 0.01Hz 60Hz 2670 to 400Hz 0.01Hz 60Hz 267CustomerSettingParameter List57
Parameter listParameter ListFunctionPID operationParameter Name Setting RangeMinimumSettingIncrementsInitial Value127PID control automatic switchoverfrequency0 to 400Hz, 9999 0.01Hz 9999 329128 PID action selection10, 11, 20, 21, 50, 51, 60,611 10 329129 PID proportional band 0.1 to 1000%, 9999 0.1% 100% 329130 PID integral time 0.1 to 3600s, 9999 0.1s 1s 329131 PID upper limit 0 to 100%, 9999 0.1% 9999 329132 PID lower limit 0 to 100%, 9999 0.1% 9999 329133 PID action set point 0 to 100%, 9999 0.01% 9999 329134 PID differential time 0.01 to 10.00s, 9999 0.01s 9999 329RefertoPageCustomerSetting135 Electronic bypass sequence selection 0, 1 1 0 337BypassBacklashmeasures136 MC switchover interlock time 0 to 100s 0.1s 1s 337137 Start waiting time 0 to 100s 0.1s 0.5s 337138 Bypass selection at a fault 0, 1 1 0 337139Automatic switchover frequency frominverter to bypass operation0 to 60Hz, 9999 0.01Hz 9999 337140Backlash acceleration stoppingfrequency0 to 400Hz 0.01Hz 1Hz 158141 Backlash acceleration stopping time 0 to 360s 0.1s 0.5s 158142Backlash deceleration stoppingfrequency0 to 400Hz 0.01Hz 1Hz 158143 Backlash deceleration stopping time 0 to 360s 0.1s 0.5s 1580, 2, 4, 6, 8, 10, 102,104, 106, 108, 1101 4 226145 PU display language selection 0 to 7 1 0 361⎯ 144 Speed setting switchoverPUCurrent detection148 Stall prevention level at 0V input 0 to 220% 0.1% 150% 135149 Stall prevention level at 10V input 0 to 220% 0.1% 200% 135150 Output current detection level 0 to 220% 0.1% 150% 223151Output current detection signal delaytime0 to 10s 0.1s 0s 223152 Zero current detection level 0 to 220% 0.1% 5% 223153 Zero current detection time 0 to 1s 0.01s 0.5s 223⎯ 154Voltage reduction selection during stallprevention operation0, 1 1 1 135⎯ 155RT signal function validity conditionselection0, 10 1 0 210⎯ 156 Stall prevention operation selection 0 to 31, 100, 101 1 0 135⎯ 157 OL signal output timer 0 to 25s, 9999 0.1s 0s 135⎯ 158 AM terminal function selection1 to 3, 5 to 8, 10 to 14,17, 18, 21, 24, 32 to 34,50, 52, 531 1 228⎯ 159Automatic switchover frequency rangefrom bypass to inverter operation0 to 10Hz, 9999 0.01Hz 9999 337⎯ 160 User group read selection 0, 1, 9999 1 0 281⎯ 161Frequency setting/key lock operationselection0, 1, 10, 11 1 0 361Automatic restartfunctions162Automatic restart after instantaneouspower failure selection0, 1, 2, 10, 11, 12 1 0 239163 First cushion time for restart 0 to 20s 0.1s 0s 239164 First cushion voltage for restart 0 to 100% 0.1% 0% 239165Stall prevention operation level forrestart0 to 220% 0.1% 150% 239Current detection166167Output current detection signalretention timeOutput current detection operationselection0 to 10s, 9999 0.1s 0.1s 2230, 1 1 0 22358
4PARAMETERSParameter listFunctionParameter Name Setting Range⎯ 168⎯ 169Parameter for manufacturer setting. Do not set.MinimumSettingIncrementsInitial ValueRefertoPageCustomerSettingCumulative monitorclearUser groupInput terminal function assignmentOutput terminal function assignment170 Watt-hour meter clear 0, 10, 9999 1 9999 228171 Operation hour meter clear 0, 9999 1 9999 228172User group registered display/batchclear9999, (0 to 16) 1 0 281173 User group registration 0 to 999, 9999 1 9999 281174 User group clear 0 to 999, 9999 1 9999 2810 to 9, 12 to 20, 22 to 28,178 STF terminal function selection 42 to 44, 60, 62, 64 to 69, 1 60 20674, 99990 to 9, 12 to 20, 22 to 28,179 STR terminal function selection 42 to 44, 61, 62, 64 to 69, 1 61 20674, 9999180 RL terminal function selection1 0 206181 RM terminal function selection 0 to 9, 12 to 20, 22 to 28, 1 1 20642 to 44, 62, 64 to 69, 74,182 RH terminal function selection 99991 2 206183 RT terminal function selection 1 3 2060 to 9, 12 to 20, 22 to 28,184 AU terminal function selection42 to 44, 62 to 69, 74,1 4 2069999185 JOG terminal function selection1 5 206186 CS terminal function selection0 to 9, 12 to 20, 22 to 28,1 6 206187 MRS terminal function selection 42 to 44, 62, 64 to 69, 74, 1 24 206188 STOP terminal function selection99991 25 206189 RES terminal function selection 1 62 206190 RUN terminal function selection 0 to 6, 8, 10 to 20, 25 to 1 0 214191 SU terminal function selection28, 30 to 36, 39, 41 to 47,64, 70, 84, 90 to 99,1 1 214192 IPF terminal function selection 100 to 106, 108, 110 to 1 2 214193 OL terminal function selection116, 120, 125 to 128, 130to 136, 139, 141 to 147, 1 3 214194 FU terminal function selection164, 170, 184, 190 to199, 99991 4 2140 to 6, 8, 10 to 20, 25 to195 ABC1 terminal function selection28, 30 to 36, 39, 41 to 47,64, 70, 84, 90, 91, 94 to1 99 21499, 100 to 106, 108, 110to 116, 120, 125 to 128,196 ABC2 terminal function selection130 to 136, 139, 141 to147, 164, 170, 184, 190,1 9999 214191, 194 to 199, 9999Parameter ListMulti-speedsetting232 to 239Multi-speed setting (8 speed to 15speed)0 to 400Hz, 9999 0.01Hz 9999 148⎯ 240 Soft-PWM operation selection 0, 1 1 1 257⎯ 241 Analog input display unit switchover 0, 1 1 0 267⎯ 242Terminal 1 added compensationamount (terminal 2)0 to 100% 0.1% 100% 263⎯ 243Terminal 1 added compensationamount (terminal 4)0 to 100% 0.1% 75% 263⎯ 244 Cooling fan operation selection 0, 1 1 1 35359
Parameter listFunctionParameter Name Setting RangeMinimumSettingIncrementsInitial ValueRefertoPageCustomerSettingParameter ListSlip compensation245 Rated slip 0 to 50%, 9999 0.01% 9999 134246 Slip compensation time constant 0.01 to 10s 0.01s 0.5s 134247Constant-power range slipcompensation selection0, 9999 1 9999 134⎯ 250 Stop selection0 to 100s,1000 to 1100s8888, 99990.1s 9999 188⎯ 251 Output phase loss protection selection 0, 1 1 1 249Frequency compensationfunctionLife checkPower failure stop252 Override bias 0 to 200% 0.1% 50% 263253 Override gain 0 to 200% 0.1% 150% 263255 Life alarm status display (0 to 15) 1 0 354256 Inrush current limit circuit life display (0 to 100%) 1% 100% 354257 Control circuit capacitor life display (0 to 100%) 1% 100% 354258 Main circuit capacitor life display (0 to 100%) 1% 100% 354259 Main circuit capacitor life measuring 0, 1 1 0 354261 Power failure stop selection 0, 1, 2, 11, 12 1 0 243262Subtracted frequency at decelerationstart0 to 20Hz 0.01Hz 3Hz 243263 Subtraction starting frequency 0 to 120Hz, 9999 0.01Hz 60Hz 243264 Power-failure deceleration time 1 0 to 3600/360s 0.1/0.01s 5s 243265 Power-failure deceleration time 20 to 3600s/360s,99990.1/0.01s 9999 243266Power failure deceleration timeswitchover frequency0 to 400Hz 0.01Hz 60Hz 243⎯ 267 Terminal 4 input selection 0, 1, 2 1 0 259⎯ 268 Monitor decimal digits selection 0,1, 9999 1 9999 228⎯ 269 Parameter for manufacturer setting. Do not set.⎯ 270Stop-on contact/load torque highspeedfrequency control selection0, 1, 2, 3 1 0189,342Load torquehigh speed frequency control271 High-speed setting maximum current 0 to 220% 0.1% 50% 342272 Middle-speed setting minimum current 0 to 220% 0.1% 100% 342273 Current averaging range 0 to 400Hz, 9999 0.01Hz 9999 342274 Current averaging filter time constant 1 to 4000 1 16 342Stop-on contactcontrol275276Stop-on contact excitation current lowspeedmultiplying factorPWM carrier frequency at stop-oncontact0 to 1000%, 9999 0.1% 9999 1890 to 9, 9999 1 9999 18960
4PARAMETERSParameter listFunctionBrake sequence functionDroop controlParameter Name Setting Range278 Brake opening frequency 0 to 30Hz 0.01Hz 3Hz 192279 Brake opening current 0 to 220% 0.1% 130% 192280 Brake opening current detection time 0 to 2s 0.1s 0.3s 192281 Brake operation time at start 0 to 5s 0.1s 0.3s 192282 Brake operation frequency 0 to 30Hz 0.01Hz 6Hz 192283 Brake operation time at stop 0 to 5s 0.1s 0.3s 192284285Deceleration detection functionselectionOverspeed detection frequency(Speed deviation excess detection frequency)MinimumSettingIncrementsInitial Value0, 1 1 0 1920 to 30Hz, 9999 0.01Hz 9999286 Droop gain 0 to 100% 0.1% 0% 344287 Droop filter time constant 0 to 1s 0.01s 0.3s 344288 Droop function activation selection 0, 1, 2, 10, 11 1 0 344RefertoPage100,192CustomerSettingParameter List⎯ 291 Pulse train I/O selection 0, 1, 10, 11, 20, 21, 100 1 0233,346⎯ 292 Automatic acceleration/deceleration 0, 3, 5 to 8, 11 1 0146,162,192⎯ 293Acceleration/deceleration separateselection0 to 2 1 0 162⎯ 294 UV avoidance voltage gain 0 to 200% 0.1% 100% 243⎯ 299Rotation direction detection selectionat restarting0, 1, 9999 1 0 239331 RS-485 communication station number 0 to 31(0 to 247) 1 0 302332 RS-485 communication speed3, 6, 12, 24,48, 96, 192, 3841 96 302333 RS-485 communication stop bit length 0, 1, 10, 11 1 1 302RS-485 communication parity check334selection0, 1, 2 1 2 302335 RS-485 communication retry count 0 to 10, 9999 1 1 302RS-485 communication check time336interval0 to 999.8s, 9999 0.1s 0s 302RS-485 communication waiting time337setting0 to 150ms, 9999 1 9999 302Communication operation command338source0, 1 1 0 292Communication speed command339source0, 1, 2 1 0 292Communication startup mode340selection0, 1, 2, 10, 12 1 0 291RS-485 communication CR/LF341selection0, 1, 2 1 1 302Communication EEPROM write342selection0, 1 1 0 303343 Communication error count ⎯ 1 0 316RS-485 communication61
Parameter listParameter ListFunctionOrientation controlEncoderfeedbackParameter Name Setting RangeMinimumSettingInitial ValueIncrementsPage350 *2 Stop position command selection 0, 1, 9999 1 9999 195351 *2 Orientation speed 0 to 30Hz 0.01Hz 2Hz 195352 *2 Creep speed 0 to 10Hz 0.01Hz 0.5Hz 195353 *2 Creep switchover position 0 to 16383 1 511 195354 *2 Position loop switchover position 0 to 8191 1 96 195355 *2 DC injection brake start position 0 to 255 1 5 195356 *2 Internal stop position command 0 to 16383 1 0 195357 *2 Orientation in-position zone 0 to 255 1 5 195358 *2 Servo torque selection 0 to 13 1 1 195359 *2 Encoder rotation direction 0, 1 1 1 195360 *2 16 bit data selection 0 to 127 1 0 195361 *2 Position shift 0 to 16383 1 0 195362 *2 Orientation position loop gain 0.1 to 100 0.1 1 195363 *2 Completion signal output delay time 0 to 5s 0.1s 0.5s 195364 *2 Encoder stop check time 0 to 5s 0.1s 0.5s 195365 *2 Orientation limit 0 to 60s, 9999 1s 9999 195366 *2 Recheck time 0 to 5s, 9999 0.1s 9999 195367 *2 Speed feedback range 0 to 400Hz, 9999 0.01Hz 9999 349368 *2 Feedback gain 0 to 100 0.1 1 349369 *2 Number of encoder pulses 0 to 4096 1 1024195,349374 Overspeed detection level 0 to 400Hz 0.01Hz 140Hz 249376 *2Encoder signal loss detection enable/disable selection0, 1 1 0 249RefertoCustomerSettingS-pattern acceleration/deceleration C380 Acceleration S-pattern 1 0 to 50% 1% 0 158381 Deceleration S-pattern 1 0 to 50% 1% 0 158382 Acceleration S-pattern 2 0 to 50% 1% 0 158383 Deceleration S-pattern 2 0 to 50% 1% 0 158Pulse train input384 Input pulse division scaling factor 0 to 250 1 0 346385 Frequency for zero input pulse 0 to 400Hz 0.01Hz 0 346386 Frequency for maximum input pulse 0 to 400Hz 0.01Hz 60Hz 346Orientation controlPosition control393 *2 Orientation selection 0, 1, 2 1 0 195396 *2 Orientation speed gain (P term) 0 to 1000 1 60 195397 *2 Orientation speed integral time 0 to 20s 0.001s 0.333s 195398 *2 Orientation speed gain (D term) 0 to 100 0.1 1 195399 *2 Orientation deceleration ratio 0 to 1000 1 20 195419 *2 Position command source selection 0, 2 1 0117,120420 *2Command pulse scaling factornumerator0 to 32767 1 1 122421 *2Command pulse scaling factordenominator0 to 32767 1 1 122422 *2 Position loop gain 0 to 150s -1 1s -1 25s -1 124423 *2 Position feed forward gain 0 to 100% 1% 0 124424 *2Position command acceleration/deceleration time constant0 to 50s 0.001s 0s 122425 *2 Position feed forward command filter 0 to 5s 0.001s 0s 124426 *2 In-position width 0 to 32767pulse 1 100 123427 *2 Excessive level error 0 to 400K, 9999 1K 40K 123428 *2 Command pulse selection 0 to 5 1 0 120429 *2 Clear signal selection 0, 1 1 1 120430 *2 Pulse monitor selection 0 to 5, 9999 1 9999 12062
4PARAMETERSParameter listFunctionSecond motor constantsParameter Name Setting Range450 Second applied motor0 to 8, 13 to 18, 30, 33,34, 40, 43, 44, 50, 53, 54,9999MinimumSettingIncrementsInitial Value1 9999451Second motor control methodselection10, 11, 12, 20, 9999 1 9999 131453 Second motor capacity 0.4 to 55kW, 9999 0.01kW 9999 131454 Number of second motor poles 2, 4, 6, 8, 10, 9999 1 9999 131455 Second motor excitation current 0 to 500A,9999 0.01A 9999 171456 Rated second motor voltage 0 to 1000V 0.1V 200/400V*4 171457 Rated second motor frequency 10 to 120Hz 0.01Hz 60Hz 171458 Second motor constant (R1) 0 to 50Ω, 9999 0.001Ω 9999 171459 Second motor constant (R2) 0 to 50Ω, 9999 0.001Ω 9999 171RefertoPage131,169CustomerSettingParameter List460 Second motor constant (L1) 0 to 50Ω (0 to 1000mH), 9999 0.001Ω (0.1mH) 9999 171461 Second motor constant (L2) 0 to 50Ω (0 to 1000mH), 9999 0.001Ω (0.1mH) 9999 171462 Second motor constant (X) 0 to 500Ω (0 to 100%), 9999 0.01Ω (0.1%) 9999 171Conditional position feed function463Second motor auto tuning setting/status0, 1, 101 1 0 171464 *2Digital position control sudden stopdeceleration time0 to 360.0s 0.1s 0 117465 *2 First position feed amount lower 4 digits 0 to 9999 1 0 117466 *2 First position feed amount upper 4 digits 0 to 9999 1 0 117467 *2 Second position feed amount lower 4 digits 0 to 9999 1 0 117468 *2 Second position feed amount upper 4 digits 0 to 9999 1 0 117469 *2 Third position feed amount lower 4 digits 0 to 9999 1 0 117470 *2 Third position feed amount upper 4 digits 0 to 9999 1 0 117471 *2 Fourth position feed amount lower 4 digits 0 to 9999 1 0 117472 *2 Fourth position feed amount upper 4 digits 0 to 9999 1 0 117473 *2 Fifth position feed amount lower 4 digits 0 to 9999 1 0 117474 *2 Fifth position feed amount upper 4 digits 0 to 9999 1 0 117475 *2 Sixth position feed amount lower 4 digits 0 to 9999 1 0 117476 *2 Sixth position feed amount upper 4 digits 0 to 9999 1 0 117477 *2 Seventh position feed amount lower 4 digits 0 to 9999 1 0 117478 *2 Seventh position feed amount upper 4 digits 0 to 9999 1 0 117479 *2 Eighth position feed amount lower 4 digits 0 to 9999 1 0 117480 *2 Eighth position feed amount upper 4 digits 0 to 9999 1 0 117481 *2 Ninth position feed amount lower 4 digits 0 to 9999 1 0 117482 *2 Ninth position feed amount upper 4 digits 0 to 9999 1 0 117483 *2 Tenth position feed amount lower 4 digits 0 to 9999 1 0 117484 *2 Tenth position feed amount upper 4 digits 0 to 9999 1 0 117485 *2 Eleventh position feed amount lower 4 digits 0 to 9999 1 0 117486 *2 Eleventh position feed amount upper 4 digits 0 to 9999 1 0 117487 *2 Twelfth position feed amount lower 4 digits 0 to 9999 1 0 117488 *2 Twelfth position feed amount upper 4 digits 0 to 9999 1 0 117489 *2 Thirteenth position feed amount lower 4 digits 0 to 9999 1 0 117490 *2 Thirteenth position feed amount upper 4 digits 0 to 9999 1 0 117491 *2 Fourteenth position feed amount lower 4 digits 0 to 9999 1 0 117492 *2 Fourteenth position feed amount upper 4 digits 0 to 9999 1 0 117493 *2 Fifteenth position feed amount lower 4 digits 0 to 9999 1 0 117494 *2 Fifteenth position feed amount upper 4 digits 0 to 9999 1 0 117Remote output495 Remote output selection 0, 1, 10, 11 1 0 225496 Remote output data 1 0 to 4095 1 0 225497 Remote output data 2 0 to 4095 1 0 225Maintenance503 Maintenance timer 0 (1 to 9998) 1 0 357504Maintenance timer alarm output settime0 to 9998, 9999 1 9999 357⎯ 505 Speed setting reference 1 to 120Hz 0.01Hz 60Hz 22663
Parameter listFunctionParameter Name Setting RangeMinimumSettingIncrementsInitial ValueRefertoPageCustomerSettingParameter ListS-pattern acceleration/deceleration D516 S-pattern time at a start of acceleration 0.1 to 2.5s 0.1s 0.1s 158517S-pattern time at a completion ofacceleration0.1 to 2.5s 0.1s 0.1s 158518 S-pattern time at a start of deceleration 0.1 to 2.5s 0.1s 0.1s 158519⎯ 539⎯Communication547548S-pattern time at a completion ofdecelerationModbus-RTU communication checktime intervalParameter for manufacturer setting. Do not set.0.1 to 2.5s 0.1s 0.1s 1580 to 999.8s, 9999 0.1s 9999 316549 Protocol selection 0, 1 1 0 316550551NET mode operation command sourceselectionPU mode operation command sourceselection0, 1, 9999 1 9999 2921, 2 1 2 292Current averagevalue monitor555 Current average time 0.1 to 1.0s 0.1s 1s 358556 Data output mask time 0.0 to 20.0s 0.1s 0s 358557Current average value monitor signaloutput reference current0 to 500A 0.01ARatedinvertercurrent⎯ 563 Energization time carrying-over times (0 to 65535) 1 0 228⎯ 564 Operating time carrying-over times (0 to 65535) 1 0 228Second motorconstants569 Second motor speed control gain 0 to 200%, 9999 0.1% 9999 131⎯ 571 Holding time at a start 0.0 to 10.0s, 9999 0.1s 9999 157⎯ 574 Second motor online auto tuning 0, 1 1 0 181575 Output interruption detection time 0 to 3600s, 9999 0.1s 1s 329PID controlTorque command576 Output interruption detection level 0 to 400Hz 0.01Hz 0Hz 329577 Output interruption cancel level 900 to 1100% 0.1% 1000% 329⎯ 611 Acceleration time at a restart 0 to 3600s, 9999 0.1s 5s 239⎯ 665Regeneration avoidance frequencygain0 to 200% 0.1% 100% 351⎯ 684 Tuning data unit switchover 0, 1 1 0 171⎯ 800 Control method selection 0 to 5, 9 to 12, 20 1 2075,131⎯ 802 *2 Pre-excitation selection 0, 1 1 0 185803Constant power range torque83,0, 1 1 0characteristic selection108804 Torque command source selection 0, 1, 3 to 6 1 0 108Speed limit805 Torque command value (RAM) 600 to 1400% 1% 1000% 108806Torque command value(RAM,EEPROM)600 to 1400% 1% 1000% 108807 Speed limit selection 0, 1, 2 1 0 110808 Forward rotation speed limit 0 to 120Hz 0.01Hz 60Hz 110809 Reverse rotation speed limit 0 to 120Hz, 9999 0.01Hz 9999 11035864
4PARAMETERSParameter listFunctionTorque limitEasy gaintuningParameter Name Setting RangeMinimumSettingIncrementsInitial Value810 Torque limit input method selection 0, 1 1 0 83811 Set resolution switchover 0, 1, 10, 11 1 083,226812 Torque limit level (regeneration) 0 to 400%, 9999 0.1% 9999 83813 Torque limit level (3rd quadrant) 0 to 400%, 9999 0.1% 9999 83814 Torque limit level (4th quadrant) 0 to 400%, 9999 0.1% 9999 83815 Torque limit level 2 0 to 400%, 9999 0.1% 9999 83816 Torque limit level during acceleration 0 to 400%, 9999 0.1% 9999 83817 Torque limit level during deceleration 0 to 400%, 9999 0.1% 9999 83818Easy gain tuning response levelsetting1 to 15 1 2 88819 Easy gain tuning selection 0 to 2 1 0 88RefertoPageCustomerSettingParameter List820 Speed control P gain 1 0 to 1000% 1% 60% 88821 Speed control integral time 1 0 to 20s 0.001s 0.333s 88822 Speed setting filter 1 0 to 5s, 9999 0.001s 9999 265823 *2 Speed detection filter 1 0 to 0.1s 0.001s 0.001s 127824 Torque control P gain 1 0 to 200% 1% 100% 113825 Torque control integral time 1 0 to 500ms 0.1ms 5ms 113Adjustment functionTorque biasAdditional function826 Torque setting filter 1 0 to 5s, 9999 0.001s 9999 265827 Torque detection filter 1 0 to 0.1s 0.001s 0s 127828 Model speed control gain 0 to 1000% 1% 60% 95830 Speed control P gain 2 0 to 1000%, 9999 1% 9999 88831 Speed control integral time 2 0 to 20s, 9999 0.001s 9999 88832 Speed setting filter 2 0 to 5s, 9999 0.001s 9999 265833 *2 Speed detection filter 2 0 to 0.1s, 9999 0.001s 9999 127834 Torque control P gain 2 0 to 200%, 9999 1% 9999 113835 Torque control integral time 2 0 to 500ms, 9999 0.1ms 9999 113836 Torque setting filter 2 0 to 5s, 9999 0.001s 9999 265837 Torque detection filter 2 0 to 0.1s, 9999 0.001s 9999 127840 *2 Torque bias selection 0 to 3, 9999 1 9999 97841 *2 Torque bias 1 600 to 1400%, 9999 1% 9999 97842 *2 Torque bias 2 600 to 1400%, 9999 1% 9999 97843 *2 Torque bias 3 600 to 1400%, 9999 1% 9999 97844 *2 Torque bias filter 0 to 5s, 9999 0.001s 9999 97845 *2 Torque bias operation time 0 to 5s, 9999 0.01s 9999 97846 *2 Torque bias balance compensation 0 to 10V, 9999 0.1V 9999 97847 *2 Fall-time torque bias terminal 1 bias 0 to 400%, 9999 1% 9999 97848 *2 Fall-time torque bias terminal 1 gain 0 to 400%, 9999 1% 9999 97849 Analog input offset adjustment 0 to 200% 0.1% 100% 265850 Brake operation selection 0, 1 1 0 185853 *2 Speed deviation time 0 to 100s 0.1s 1s 100854 Excitation ratio 0 to 100% 1% 100% 128858 Terminal 4 function assignment 0, 1, 4, 9999 1 0 258859 Torque current 0 to 500A, 9999 0.01A 9999 171860 Second motor torque current 0 to 500A, 9999 0.01A 9999 171862 Notch filter time constant 0 to 60 1 0 101863 Notch filter depth 0, 1, 2, 3 1 0 101864 Torque detection 0 to 400% 0.1% 150% 224865 Low speed detection 0 to 400Hz 0.01Hz 1.5Hz 221Indicationfunction866 Torque monitoring reference 0 to 400% 0.1% 150% 233⎯ 867 AM output filter 0 to 5s 0.01s 0.01s 233⎯ 868 Terminal 1 function assignment 0 to 6, 9999 1 0 25865
Parameter listParameter ListFunctionProtectiveFunctionsControl method functionsParameter Name Setting RangeMinimumSettingIncrementsInitial Value872 Input phase failure protection selection 0, 1 1 1 249873 *2 Speed limit 0 to 120Hz 0.01Hz 20Hz 100874 OLT level setting 0 to 200% 0.1% 150% 83875 Fault definition 0, 1 1 0 250877Speed feed forward control/modeladaptive speed control selection0, 1, 2 1 0 95878 Speed feed forward filter 0 to 1s 0.01s 0s 95879 Speed feed forward torque limit 0 to 400% 0.1% 150% 95880 Load inertia ratio 0 to 200 times 0.1 7 88, 95881 Speed feed forward gain 0 to 1000% 1% 0% 95RefertoPageCustomerSettingRegeneration avoidance function882883884885Regeneration avoidance operationselectionRegeneration avoidance operationlevelRegeneration avoidance atdeceleration detection sensitivityRegeneration avoidance compensationfrequency limit value0, 1, 2 1 0 351300 to 800V 0.1V380/760VDC*43510 to 5 1 0 3510 to 10Hz, 9999 0.01Hz 6Hz 351886 Regeneration avoidance voltage gain 0 to 200% 0.1% 100% 351Freeparameters888 Free parameter 1 0 to 9999 1 9999 360889 Free parameter 2 0 to 9999 1 9999 360891Cumulative power monitor digit shiftedtimes0 to 4, 9999 1 9999 252892 Load factor 30 to 150% 0.1% 100% 252Energy saving monitor893894Energy saving monitor reference(motor capacity)Control selection during commercialpower-supply operation0.1 to 55kW 0.01kWInverterratedcapacity2520, 1, 2, 3 1 0 252895 Power saving rate reference value 0, 1, 9999 1 9999 252896 Power unit cost 0 to 500, 9999 0.01 9999 252897 Power saving monitor average time 0, 1 to 1000h, 9999 1h 9999 252898 Power saving cumulative monitor clear 0, 1, 10, 9999 1 9999 252899 Operation time rate (estimated value) 0 to 100%, 9999 0.1% 9999 25266
4PARAMETERSParameter listMinimumReferFunctionParameter Name Setting Range Setting Initial Value toIncrementsPageC0(900) *3FM terminal calibration ⎯ ⎯ ⎯ 236C1(901) *3AM terminal calibration ⎯ ⎯ ⎯ 236C2 Terminal 2 frequency setting bias(902) *3 frequency0 to 400Hz 0.01Hz 0Hz 267C3(902) *3Terminal 2 frequency setting bias 0 to 300% 0.1% 0% 267125 Terminal 2 frequency setting gain(903) *3 frequency0 to 400Hz 0.01Hz 60Hz 267C4(903) *3Terminal 2 frequency setting gain 0 to 300% 0.1% 100% 267C5 Terminal 4 frequency setting bias(904) *3 frequency0 to 400Hz 0.01Hz 0Hz 267C6(904) *3Terminal 4 frequency setting bias 0 to 300% 0.1% 20% 267126 Terminal 4 frequency setting gain(905) *3 frequency0 to 400Hz 0.01Hz 60Hz 267C7(905) *3Terminal 4 frequency setting gain 0 to 300% 0.1% 100% 267C12(917) *3Terminal 1 bias frequency (speed) 0 to 400Hz 0.01Hz 0Hz 267C13(917) *3Terminal 1 bias (speed) 0 to 300% 0.1% 0% 267C14(918) *3Terminal 1 gain frequency (speed) 0 to 400Hz 0.01Hz 60Hz 267C15(918) *3Terminal 1 gain (speed) 0 to 300% 0.1% 100% 267C16 Terminal 1 bias command (torque/(919) *3 magnetic flux)0 to 400% 0.1% 0% 273C17(919) *3Terminal 1 bias (torque/magnetic flux) 0 to 300% 0.1% 0% 273C18 Terminal 1 gain command (torque/(920) *3 magnetic flux)0 to 400% 0.1% 150% 273C19(920) *3Terminal 1 gain (torque/magnetic flux) 0 to 300% 0.1% 100% 273C38 Terminal 4 bias command (torque/(932) *3 magnetic flux)0 to 400% 0.1% 0% 273C39(932) *3Terminal 4 bias (torque/magnetic flux) 0 to 300% 0.1% 20% 273C40 Terminal 4 gain command (torque/(933) *3 magnetic flux)0 to 400% 0.1% 150% 273C41(933) *3Terminal 4 gain (torque/magnetic flux) 0 to 300% 0.1% 100% 273⎯ 989 Parameter for manufacturer setting. Do not set.Calibration parametersCalibration parametersPUClearparameters990 PU buzzer control 0, 1 1 1 363991 PU contrast adjustment 0 to 63 1 58 363Pr. CL Parameter clear 0, 1 1 0 364ALLC All parameter clear 0, 1 1 0 365Er.CL Faults history clear 0, 1 1 0 368PCPY Parameter copy 0, 1, 2, 3 1 0 366*1 Differ according to capacities. (7.5K or less/11K or more)*2 Setting can be made only when the <strong>FR</strong>-A7AP is mounted.*3 The parameter number in parentheses is the one for use with the parameter unit (<strong>FR</strong>-PU04/<strong>FR</strong>-PU07).*4 Differs according to the voltage class. (200V class/400V class)CustomerSettingParameter List67
Parameters according to purposes4.3 Control mode 714.3.1 What is vector control?................................................................................................................................ 724.3.2 Change the control method (Pr. 80, Pr. 81, Pr. 451, Pr. 800)..................................................................... 754.4 Speed control by real sensorless vector control, vector control 794.4.1 Setting procedure of real sensorless vector control (speed control) .......................................................... 814.4.2 Setting procedure of vector control (speed control) ................................................................................... 824.4.3 Torque limit level setting for speed control(Pr. 22, Pr. 803, Pr. 810 to Pr. 817, Pr. 858, Pr. 868, Pr. 874) .................................................................. 834.4.4 To perform high accuracy/fast response operation (gain adjustment of realsensorless vector control and vector control) (Pr. 818 to Pr. 821, Pr. 830,Pr. 831, Pr. 880) ....................................................................................................................................... 884.4.5 Speed feed forward control, model adaptive speed control (Pr. 828, Pr. 877 to Pr. 881) .......................... 954.4.6 Torque biases (Pr. 840 to Pr. 848) ............................................................................................................. 974.4.7 Prevent the motor from overrunning (Pr. 285, Pr. 853, Pr. 873) .............................................................. 1004.4.8 Notch filter (Pr. 862, Pr. 863) ................................................................................................................... 1014.5 Torque control by real sensorless vector control, vector control 1024.5.1 Torque control........................................................................................................................................... 1024.5.2 Setting procedure of real sensorless vector control (torque control) ........................................................ 1064.5.3 Setting procedure of vector control (torque control) ................................................................................. 1074.5.4 Torque command (Pr. 803 to Pr. 806) ...................................................................................................... 1084.5.5 Speed limit (Pr. 807 to Pr. 809) ................................................................................................................ 1104.5.6 Gain adjustment of torque control (Pr. 824, Pr. 825, Pr. 834, Pr. 835) .................................................... 1134.6 Position control by vector control 1154.6.1 Position control ......................................................................................................................................... 1154.6.2 Conditional position feed function by contact input (Pr. 419, Pr. 464 to Pr. 494) ..................................... 1174.6.3 Position control (Pr. 419, Pr. 428 to Pr. 430) by inverter pulse train input ............................................... 1204.6.4 Setting of the electronic gear (Pr. 420, Pr. 421, Pr. 424) ........................................................................ 1224.6.5 Setting of positioning adjustment parameter (Pr. 426, Pr. 427) ............................................................... 1234.6.6 Gain adjustment of position control (Pr. 422, Pr. 423, Pr. 425) ................................................................ 1244.6.7 Trouble shooting for when position control is not exercised normally ...................................................... 1264.7 Adjustment of real sensorless vector control, vector control 1274.7.1 Speed detection filter and torque detection filter (Pr. 823, Pr. 827, Pr. 833, Pr. 837) ............................. 1274.7.2 Excitation ratio (Pr. 854) .......................................................................................................................... 1284.8 Adjust the output torque (current) of the motor 1294.8.1 Manual torque boost (Pr. 0, Pr. 46, Pr. 112) ............................................................................................. 1294.8.2 Advanced magnetic flux vector control (Pr. 71, Pr. 80, Pr. 81, Pr. 89, Pr. 450,Pr. 451, Pr. 453, Pr. 454, Pr. 569, Pr. 800) .............................................................................................. 1314.8.3 Slip compensation (Pr. 245 to Pr. 247) ..................................................................................................... 1344.8.4 Stall prevention operation (Pr. 22, Pr. 23, Pr. 48, Pr. 49, Pr. 66, Pr. 114, Pr. 115,Pr. 148, Pr. 149, Pr. 154, Pr. 156, Pr. 157, Pr. 858, Pr. 868).................................................................... 1354.9 Limit the output frequency 1404.9.1 Maximum/minimum frequency (Pr. 1, Pr. 2, Pr. 18) .................................................................................. 1404.9.2 Avoid mechanical resonance points (Frequency jump) (Pr. 31 to Pr. 36)................................................. 1414.10 Set V/F pattern 1424.10.1 Base frequency, voltage (Pr. 3, Pr. 19, Pr. 47, Pr. 113)............................................................................ 1424.10.2 Load pattern selection (Pr. 14) ................................................................................................................. 1444.10.3 Elevator mode (automatic acceleration/deceleration) (Pr. 61, Pr. 64, Pr. 292) ........................................ 1464.10.4 Adjustable 5 points V/F (Pr. 71, Pr. 100 to Pr. 109) .................................................................................. 1474.11 Frequency setting by external terminals 1484.11.1 Multi-speed setting operation (Pr. 4 to Pr. 6, Pr. 24 to Pr. 27, Pr. 232 to Pr. 239) .................................... 1484.11.2 Jog operation (Pr. 15, Pr. 16).................................................................................................................... 1504.11.3 Input compensation of multi-speed and remote setting (Pr. 28) ............................................................... 1524.11.4 Remote setting function (Pr. 59) ............................................................................................................... 1524.12 Setting of acceleration/deceleration time andacceleration/deceleration pattern 1554.12.1 Setting of the acceleration and deceleration time (Pr. 7, Pr. 8, Pr. 20, Pr. 21,Pr. 44, Pr. 45, Pr. 110, Pr. 111)................................................................................................................. 1554.12.2 Starting frequency and start-time hold function (Pr. 13, Pr. 571) .............................................................. 15768
Parameters according to purposes4PARAMETERS4.12.3 Acceleration/deceleration pattern (Pr. 29, Pr. 140 to Pr. 143, Pr. 380 to Pr. 383,Pr. 516 to Pr. 519)..................................................................................................................................... 1584.12.4 Shortest acceleraiton/deceleration and optimum acceleration/deceleration(automatic acceleration/deceleration) (Pr. 61 to Pr. 63, Pr. 292, Pr. 293) ................................................ 1624.13 Selection and protection of a motor 1654.13.1 Motor protection from overheat (Electronic thermal relay function) (Pr. 9, Pr. 51).................................... 1654.13.2 <strong>Applied</strong> motor (Pr. 71, Pr. 450) ................................................................................................................. 1694.13.3 Offline auto tuning (Pr. 71, Pr. 80 to Pr. 84, Pr. 90 to Pr. 94, Pr. 96, Pr. 450,Pr. 453 to Pr. 463, Pr. 684, Pr. 859, Pr. 860) ........................................................................................ 1714.13.4 Online auto tuning (Pr. 95, Pr. 574) ...................................................................................................... 1814.14 Motor brake and stop operation 1854.14.1 DC injection brake and zero speed control, servo lock (LX signal, X13 signal,Pr. 10 to Pr. 12, Pr. 802, Pr. 850).............................................................................................................. 1854.14.2 Stop selection (Pr. 250)............................................................................................................................. 1884.14.3 Stop-on contact control function (Pr. 6, Pr. 48, Pr. 270, Pr. 275, Pr. 276) ............................................... 1894.14.4 Brake sequence function (Pr. 278 to Pr. 285, Pr. 292) ............................................................................. 1924.14.5 Orientation control (Pr. 350 to Pr. 366, Pr. 369, Pr. 393, Pr. 396 to Pr. 399) ......................................... 1954.15 Function assignment of external terminal and control 2064.15.1 Input terminal function selection (Pr. 178 to Pr. 189)................................................................................ 2064.15.2 Inverter output shutoff signal (MRS signal, Pr. 17) ................................................................................... 2094.15.3 Condition selection of function validity by the second function selection signal (RT) andthird function selection signal (X9) (RT signal, X9 signal, Pr. 155) ........................................................... 2104.15.4 Start signal operation selection (STF, STR, STOP signal, Pr. 250).......................................................... 2114.15.5 Magnetic flux decay output shutoff signal (X74 signal)............................................................................. 2134.15.6 Output terminal function selection (Pr. 190 to Pr. 196) ............................................................................. 2144.15.7 Detection of output frequency (SU, FU, FU2 , FU3, FB, FB2, FB3, LS signal,Pr. 41 to Pr. 43, Pr. 50, Pr. 116, Pr. 865).................................................................................................. 2214.15.8 Output current detection function(Y12 signal, Y13 signal, Pr. 150 to Pr. 153, Pr. 166, Pr. 167)................................................................... 2234.15.9 Detection of output torque (TU signal, Pr. 864)......................................................................................... 2244.15.10 Remote output function (REM signal, Pr. 495 to Pr. 497) ......................................................................... 2254.16 Monitor display and monitor output signal 2264.16.1 Speed display and speed setting (Pr. 37, Pr. 144, Pr. 505, Pr. 811) ........................................................ 2264.16.2 DU/PU, FM, AM terminal monitor display selection (Pr. 52, Pr. 54, Pr. 158, Pr. 170,Pr. 171, Pr. 268, Pr. 563, Pr. 564, Pr. 891)............................................................................................... 2284.16.3 Reference of the terminal FM (pulse train output) and AM (analog voltageoutput) (Pr. 55, Pr. 56, Pr. 291, Pr. 866, Pr. 867)...................................................................................... 2334.16.4 Terminal FM, AM calibration (Calibration parameter C0 (Pr. 900), C1 (Pr. 901)) ..................................... 2364.17 Operation selection at power failure and instantaneous power failure 2394.17.1 Automatic restart after instantaneous power failure/flying start(Pr. 57, Pr. 58, Pr. 162 to Pr. 165, Pr. 299, Pr. 611) ................................................................................. 2394.17.2 Power failure-time deceleration-to-stop function (Pr. 261 to Pr. 266, Pr. 294 )......................................... 2434.18 Operation setting at fault occurrence 2464.18.1 Retry function (Pr. 65, Pr. 67 to Pr. 69)..................................................................................................... 2464.18.2 Fault code output selection (Pr. 76) .......................................................................................................... 2484.18.3 Input/output phase loss protection selection (Pr. 251, Pr. 872) ................................................................ 2494.18.4 Overspeed detection (Pr. 374).................................................................................................................. 2494.18.5 Encoder signal loss detection (Pr. 376) ................................................................................................... 2494.18.6 Fault definition (Pr. 875)............................................................................................................................ 2504.19 Energy saving operation and energy saving monitor 2514.19.1 Energy saving control (Pr. 60) .................................................................................................................. 2514.19.2 Energy saving monitor (Pr. 891 to Pr. 899)............................................................................................... 2524.20 Motor noise, EMI measures 2574.20.1 PWM carrier frequency and Soft-PWM control (Pr. 72, Pr. 240)............................................................... 2574.21 Frequency/torque setting by analog input (terminal 1, 2, 4) 2584.21.1 Function assignment of analog input terminal (Pr. 858, Pr. 868) .............................................................. 2584.21.2 Analog input selection (Pr. 73, Pr. 267) .................................................................................................... 2594.21.3 Analog input compensation (Pr. 73, Pr. 242, Pr. 243, Pr. 252, Pr. 253) ................................................... 26369
4.21.4 Response level of analog input and noise elimination(Pr. 74, Pr. 822, Pr. 826, Pr. 832, Pr. 836, Pr. 849) .................................................................................. 2654.21.5 Bias and gain of frequency setting voltage (current)(Pr. 125, Pr. 126, Pr. 241, C2(Pr. 902) to C7(Pr. 905), C12(Pr. 917) to C15(Pr. 918))............................. 2674.21.6 Bias and gain of torque (magnetic flux) setting voltage (current)(Pr. 241, C16(Pr. 919) to C19(Pr. 920), C38 (Pr. 932) to C41 (Pr. 933)) ................................................ 2734.22 Misoperation prevention and parameter setting restriction 2784.22.1 Reset selection/disconnected PU detection/PU stop selection (Pr. 75).................................................... 2784.22.2 Parameter write selection (Pr. 77)............................................................................................................. 2804.22.3 Reverse rotation prevention selection (Pr. 78).......................................................................................... 2814.22.4 Display of applied parameters and user group function (Pr. 160, Pr. 172 to Pr. 174)............................... 2814.23 Selection of operation mode and operation location 2834.23.1 Operation mode selection (Pr. 79) ............................................................................................................ 2834.23.2 Operation mode at power on (Pr. 79, Pr. 340) .......................................................................................... 2914.23.3 Start command source and frequency command source duringcommunication operation (Pr. 338, Pr. 339, Pr. 550, Pr. 551) .................................................................. 2924.24 Communication operation and setting 2974.24.1 Wiring and configuration of PU connector................................................................................................. 2974.24.2 Wiring and arrangement of RS-485 terminals........................................................................................... 2994.24.3 Initial settings and specifications of RS-485 communication(Pr. 117 to Pr. 124, Pr. 331 to Pr. 337, Pr. 341, Pr. 549) .......................................................................... 3024.24.4 Communication EEPROM write selection (Pr. 342).................................................................................. 3034.24.5 Mitsubishi inverter protocol (computer link communication) ..................................................................... 3044.24.6 Modbus-RTU communication specifications (Pr. 331, Pr. 332, Pr. 334, Pr. 343,Pr. 539, Pr. 549)........................................................................................................................................ 3164.25 Special operation and frequency control 3294.25.1 PID control (Pr. 127 to Pr. 134, Pr. 575 to Pr. 577)................................................................................... 3294.25.2 Bypass-inverter switchover function (Pr. 57, Pr. 58, Pr. 135 to Pr. 139, Pr. 159) ..................................... 3374.25.3 Load torque high speed frequency control (Pr. 4, Pr. 5, Pr. 270 to Pr. 274) ............................................. 3424.25.4 Droop control (Pr. 286 to Pr. 288) .......................................................................................................... 3444.25.5 Frequency setting by pulse train input (Pr. 291, Pr. 384 to Pr. 386) ......................................................... 3464.25.6 Encoder feedback control (Pr. 144, Pr. 285, Pr. 359, Pr. 367 to Pr. 369) ................................................ 3494.25.7 Regeneration avoidance function (Pr. 665, Pr. 882 to Pr. 886) ................................................................ 3514.26 Useful functions 3534.26.1 Cooling fan operation selection (Pr. 244).................................................................................................. 3534.26.2 Display of the life of the inverter parts (Pr. 255 to Pr. 259) ....................................................................... 3544.26.3 Maintenance timer alarm (Pr. 503, Pr. 504) .............................................................................................. 3574.26.4 Current average value monitor signal (Pr. 555 to Pr. 557)........................................................................ 3584.26.5 Free parameter (Pr. 888, Pr. 889)............................................................................................................. 3604.27 Setting of the parameter unit and operation panel 3614.27.1 PU display language selection (Pr. 145)................................................................................................... 3614.27.2 Operation panel frequency setting/key lock operation selection (Pr. 161) ................................................ 3614.27.3 Buzzer control (Pr. 990) ............................................................................................................................ 3634.27.4 PU contrast adjustment (Pr. 991).............................................................................................................. 3634.28 Parameter clear 3644.29 All parameter clear 3654.30 Parameter copy and parameter verification 3664.30.1 Parameter copy......................................................................................................................................... 3664.30.2 Parameter verification ............................................................................................................................... 3674.31 Check and clear of the faults history 36870
4PARAMETERSControl mode4.3 Control modeV/F control (initial setting), advanced magnetic flux vector control, real sensorless vector control and vector control areavailable with this inverter.(1) V/F Control⋅ It controls frequency and voltage so that the ratio of frequency (F) to voltage (V) is constant when changing frequency.(2) Advanced magnetic flux vector control⋅ This control devides the inverter output current into an excitation current and a torque current by vector calculationand makes voltage compensation to flow a motor current which meets the load torque.POINTIf the following conditions are not satisfied, select V/F control since malfunction such as insufficient torque and unevenrotation may occur.· The motor capacity should be equal to or one rank lower than the inverter capacity.· Motor to be used is any of Mitsubishi standard motor, high efficiency motor (SF-JR, SF-HR two-pole, four-pole, six-pole0.4kW or more) or Mitsubishi constant torque motor (SF-JRCA four-pole, SF-HRCA 3.7kW or more). When using amotor other than the above (other manufacturer's motor, etc.), perform offline auto tuning without fail.· Single-motor operation (one motor run by one inverter) should be performed.· Wiring length from inverter to motor should be within 30m. (Perform offline auto tuning in the state where wiring work isperformed when the wiring length exceeds 30m.)(3) Real sensorless vector control⋅ By estimating the motor speed, speed control and torque control with more advanced current control function areenabled. When high accuracy and fast response is necessary, select the real sensorless vector control andperform offline auto tuning and online auto tuning.⋅ This control can be applied to the following applications.⋅ To minimize the speed fluctuation even at at a severe load fluctuation⋅ To generate low speed torque⋅ To prevent machine from damage due to too large torque (torque limit)⋅ To perform torque controlPOINTIf the following conditions are not satisfied, select V/F control since malfunction such as insufficient torque and unevenrotation may occur.· The motor capacity should be equal to or one rank lower than the inverter capacity.· Perform offline auto tuning without fail. Offline auto tuning is necessary under real sensorless vector control even whenthe Mitsubishi motor is used.· Single-motor operation (one motor run by one inverter) should be performed.(4) Vector control⋅ When the <strong>FR</strong>-A7AP is mounted, full-scale vector control operation can be performed using a motor with encoder.Fast response/high accuracy speed control (zero speed control, servo lock), torque control, and position controlcan be performed.⋅ What is vector control?Excellent control characteristics when compared to V/F control and other control techniques, achieving the controlcharacteristics equal to those of DC machines.It is suitable for applications below.⋅ To minimize the speed fluctuation even at a severe load fluctuation⋅ To generate low speed torque⋅ To prevent machine from damage due to too large torque (torque limit)⋅ To perform torque control or position control⋅ Servo-lock torque control which generates torque at zero speed (i.e. status of motor shaft = stopped)POINTIf the conditions below are not satisfied, malfunction such as insufficient torque and uneven rotation may occur.· The motor capacity should be equal to or one rank lower than the inverter capacity.· Motor to be used is any of Mitsubishi standard motor with encoder, high efficiency motor with encoder (SF-JR, SF-HRtwo-pole, four-pole, six-pole) or Mitsubishi constant torque motor with encoder (SF-JRCA four-pole, SF-HRCA 3.7kW ormore) or vector control dedicated motor (SF-V5RU). When using a motor other than the above (other manufacturer'smotor), perform offline auto tuning without fail.· Single-motor operation (one motor run by one inverter) should be performed.· Wiring length from inverter to motor should be within 30m. (Perform offline auto tuning in the state where wiring work isperformed when the wiring length exceeds 30m.)71
Control mode4.3.1 What is vector control?Vector control is one of the control techniques for driving an induction motor. To help explain vector control, thefundamental equivalent circuit of an induction motor is shown below:imr11 2idMiqr2Sr1 : Primary resistancer2 : Secondary resistance1 : Primary leakage inductance2 : Secondary leakage inductanceM : Mutual inductanceS : Slipid : Excitation currentiq : Torque currentim : Motor currentIn the above diagram, currents flowing in the induction motor can be classified into a current id (excitation current) formaking a magnetic flux in the motor and a current iq (torque current) for causing the motor to develop a torque.iqmotor current imIn vector control, the voltage and output frequency arecalculated to control the motor so that the excitation currentand torque current (as shown in the left figure) flow to theoptimum as described below:torque currentexcitation currentid(1) The excitation current is controlled to place the internalmagnetic flux of the motor in the optimum status.(2) Derive the torque command value so that thedifference between the motor speed command and theactual speed (speed estimated value for realsensorless vector control) obtained from the encoderconnected to the motor shaft is zero. Torque current iscontrolled so that torque as set in the torque commandis developed.Motor-generated torque (TM), slip angular velocity (ωs) and the motor's secondary magnetic flux (φ2) can be found bythe following calculation:T M ∝ φ 2 ⋅ iqφ 2 = M ⋅ idωs = r2L2iqidwhere, L2 = secondary inductanceL2 = 2 + MVector control provides the following advantages:(1) Excellent control characteristics when compared to V/F control and other control techniques, achieving thecontrol characteristics equal to those of DC machines.(2) Applicable to fast response applications with whichinduction motors were previously regarded as difficultto use. Applications requiring a wide variable-speedrange from extremely low speed to high speed,frequent acceleration/deceleration operations,continuous four-quadrant operations etc.(3) Allows torque control.(4) Allows servo-lock torque control which generates atorque at zero speed (i.e. status of motor shaft =stopped). (Cannot be performed under real sensorlessvector control.)72
4PARAMETERSControl modeBlock diagram of real sensorless vector controlω * +-ωFBφ2PWMmodulationmagneticpre-excitationid * +VdfluxcurrentoutputIMcontrol - idcontrolvoltageconversionspeedcontrol+ωFB +ωsω0iq *slipcalculationspeed estimationiqφ2+-iqmagneticfluxcalculationtorquecurrentcontrolididVqidiqω0currentconversionω * +-ωFBVdVqIMPWMmodulationmagneticφ2 id *fluxcontrolspeedcontrol+ωFB +ωsω0iq *+-idslipcalculationiqφ2+-iqpre-excitationcurrentcontrolmagneticfluxcalculationtorquecurrentcontrolidVdVqidiqoutputvoltageconversionω0currentconversionEncoderBlock diagram of vector control73
Control mode(1) Speed controlSpeed control operation is performed to zero the difference between the speed command (ω*) and actual rotationdetection value (ωFB). At this time, the motor load is found and its result is transferred to the torque currentcontroller as a torque current command (iq*).(2) Torque current controlA voltage (Vq) is calculated to start a current (iq*) which is identical to the torque current command (iq) found bythe speed controller.(3) Magnetic flux controlThe magnetic flux (φ2) of the motor is derived from the excitation current (id). The excitation current command (id*)is calculated to use that motor magnetic flux (φ2) as a predetermined magnetic flux.(4) Excitation current controlA voltage (Vd) is calculated to start a current (id) which is identical to the excitation current command (id*) found bymagnetic flux control.(5) Output frequency calculationMotor slip (ωs) is calculated on the basis of the torque current value (iq) and magnetic flux (φ2). The outputfrequency (ω0) is found by adding that slip (ωs) to the feedback (ωFB) found by a feedback from the encoder.The above results are used to make PWM modulation and run the motor.74
4PARAMETERS4.3.2 Change the control method (Pr. 80, Pr. 81, Pr. 451, Pr. 800)(1) Setting of the motor capacity and the number of motor poles (Pr. 80, Pr. 81 )Control modeSet when selecting the advanced magnetic flux vector control, real sensorless vector control or vector control.Select a control mode from speed control mode, torque control mode and position control mode under realsensorless vector control or vector control. The initial value is V/F control.•Select a control method using Pr. 800 (Pr. 451) Control method selection .•Each control method can be switched using a method switching signal (MC).ParameterNumberNameInitialValue80 Motor capacity 999981 Number of motor poles 9999800451Control methodselectionSecond motor controlmethod selection209999Setting RangeDescription0.4 to 55kW Set the applied motor capacity.9999 V/F control2, 4, 6, 8, 10 Set the number of motor poles.12, 14, 16, 18, 20 X18 signal-ON:V/F controlSet 10 + numberof motor poles9999 V/F control0 to 5 Vector control9 Vector control test operation10, 11, 12 Real sensorless vector control20 V/F control (advanced magnetic flux vector control)10, 11, 12 Real sensorless vector control20, 9999 V/F control (advanced magnetic flux vector control)⋅ Motor specifications (the motor capacity and the number of motor poles) must be set to select advanced magneticflux vector control, real sensorless vector control or vector control.⋅ Set the motor capacity (kW) in Pr. 80 Motor capacity and set the number of motor poles in Pr. 81 Number of motorpoles.REMARKS⋅ Setting number of motor poles in Pr. 81 changes the Pr. 144 Speed setting switchover setting automatically. (Refer to page 226.)(2) Selection of control method and control mode⋅ Select the inverter control method for V/F control, advanced magnetic flux vector control (speed control), realsensorless vector control (speed control, torque control) and vector control (speed control, torque control, andposition control).Pr. 80,Pr. 81SettingOtherthan9999Pr. 800SettingPr. 451SettingControl Method Control Mode Remarks0 ⎯Speed control⎯1 ⎯ Torque control ⎯2 ⎯Speed control-torque control MC ON: Torque controlswitchoverMC OFF: Speed control3 ⎯ Vector control Position control ⎯4 ⎯Speed control-positioncontrol switchover5 ⎯Position control-torquecontrol switchover9 ⎯ Vector control test operation10Speed control⎯11 Real sensorless vector Torque control ⎯1220(Pr. 800 initial value)9999(Pr. 451⎯initialvalue)controlAdvanced magnetic fluxvector controlSpeed control-torque controlswitchoverSpeed controlV/F control, advanced magnetic flux vector control9999 ⎯ * V/F controlMC ON: Position controlMC OFF: Speed controlMC ON: Torque controlMC OFF: Position controlMC ON: Torque controlMC OFF: Speed control* Control method is V/F control regardless of the setting value of Pr. 800 when "9999" is set in Pr. 80 Motor capacity or Pr. 81 Number of motor poles.⎯75
Control mode(3) Vector control test operation (Pr. 800 = "9")⋅⋅⋅ Speed control test operation can be performed even when the motor is not connected.The speed calculation value changes to track the speed command and the transition can be checked with theoperation panel and analog signal output at FM and AM.CAUTIONSince current is not detected and voltage is not output, monitors related to current and voltage such as output current and outputvoltage, etc. and output signals do not function.For speed calcuration, speed is calculated in consideration of Pr. 880 Load inertia ratio.(4) Control method switching by external terminals (RT signal, X18 signal)⋅ The switching of the control method (V/F control, advanced magnetic flux vector control, real sensorless vectorcontrol and vector control) by the external terminal may be made in either of the following two ways: switching bythe second function selection signal (RT), or V/F switching signal (X18).⋅ Two types of control method can be switched with the RT signal by setting the type of motor to be used as secondmotor in Pr. 450 Second applied motor and control method of the motor in Pr. 451 Second motor control method selection.Turn on the RT signal to select the second function.⋅ For switching by the X18 signal, setting "12, 14, 16, 18, 20" in Pr. 81 Number of motor poles and turning the X18signal on switches the currently selected control method (advanced magnetic flux vector control, real sensorlessvector control and vector control) to V/F control. In this case, use this signal only for changing the control method ofone motor since second function as electronic thermal relay characteristic, etc. can not be changed. (Use the RTsignal to change the second function.)For the terminal used for X18 signal input, set "18" in any of Pr. 178 to Pr. 189 (input terminal function selection) toassign the function.First Motor Control MethodV/F controlAdvanced magnetic flux vectorcontrolReal sensorless vector controlVector controlSecond Motor Control Method(RT signal is on)Pr. 450SettingPr. 453, Pr. 454SettingPr. 451Setting9999 ⎯ ⎯V/F control9999 ⎯Other thanAdvanced magnetic flux vector control9999 Other than 20, 9999Real sensorless vector control 9999 10 to 12Same control as the first motor *1 9999 ⎯ ⎯V/F control9999 ⎯Other thanAdvanced magnetic flux vector control9999 Other than 20, 9999Real sensorless vector control 9999 10 to 12*1 V/F control is selected when "12, 14, 16, 18, 20" is set in Pr. 81 and the X18 signal is on. When the X18 signal is not assigned, turning the RTsignal on selects V/F control as the RT signal shares this function.REMARKS⋅ The RT signal is assigned to the terminal RT in the initial setting. By setting "3" in any of Pr. 178 to Pr. 189 (input terminal functionselection), you can assign the RT signal to the other terminal.⋅ The RT signal acts as the second function selection signal and makes the other second functions valid. (Refer to page 210.)76
4PARAMETERSControl mode(5) Switching the control method from the external terminal (MC signal)⋅ When "12 (2)" is set in Pr. 800 (Pr. 451 ), speed control is selected when the control mode switching signal (MC) isoff, and torque control is selected when the signal is off under real sensorless vector control and vector control.Switching between speed control and torque control is always enabled.Under vector control, speed control/position control switchover and torque control/position control switchover can bemade by setting "4, 5" in Pr. 800. For the terminal used for MC signal input, set "26" in any of Pr. 178 to Pr. 189 (inputterminal function selection) to assign the function.⋅ When an analog input terminal (terminal 1,4) is used for torque limit, torque command, etc., terminal functions alsoswitch as below if control mode is switched.• Terminal 1 function according to controlPr. 868 SettingReal Sensorless Vector Control (Pr. 800 = 12), Vector Control (Pr. 800 = 2)Speed control (MC signal-OFF)Torque control (MC signal-ON)0 (initial value) Speed setting auxiliary Speed limit auxiliary1 Magnetic flux command Magnetic flux command2 Regenerative torque limit (Pr. 810 = 1) ⎯3 ⎯ Torque command (Pr. 804 = 0)4 Torque limit (Pr. 810 = 1) Torque command (Pr. 804 = 0)5 ⎯ Forward reverse speed limit (Pr. 807 = 2)6 ⎯ ⎯9999 ⎯ ⎯Pr. 868 SettingVector Control (Pr. 800 = 4)Speed control (MC signal-OFF)Position control (MC signal-ON)0 (initial value) Speed setting auxiliary ⎯1 Magnetic flux command Magnetic flux command2 Regenerative torque limit (Pr. 810 = 1) Regenerative torque limit (Pr. 810 = 1)3 ⎯ ⎯4 Torque limit (Pr. 810 = 1) Torque limit (Pr. 810 = 1)5 ⎯ ⎯6 Torque bias ⎯9999 ⎯ ⎯Pr. 868 SettingVector Control (Pr. 800 = 5)Position control (MC signal-OFF) Torque control (MC signal-ON)0 (initial value) ⎯ Speed setting auxiliary1 Magnetic flux command Magnetic flux command2 Regenerative torque limit (Pr. 810 = 1) ⎯3 ⎯ Torque command (Pr. 804 = 0)4 Torque limit (Pr. 810 = 1) Torque command (Pr. 804 = 0)5 ⎯ Forward reverse speed limit (Pr. 807 = 2)6 ⎯ ⎯9999 ⎯ ⎯77
Control mode• Terminal 4 function according to controlPr. 858 Setting⎯ :No functionReal Sensorless Vector Control (Pr. 800 = 12), Vector Control (Pr. 800 = 2)Speed control (MC signal-OFF)Torque control (MC signal-ON)0 (initial value) Speed command (AU signal-ON) Speed limit (AU signal-ON)1 Magnetic flux command Magnetic flux command4 Torque limit (Pr. 810 = 1) ⎯9999 ⎯ ⎯Pr. 858 SettingVector Control (Pr. 800 = 4)Speed control (MC signal-OFF)Position control (MC signal-ON)0 (initial value) Speed command (AU signal-ON) ⎯1 Magnetic flux command Magnetic flux command4 Torque limit (Pr. 810 = 1) Torque limit (Pr. 810 = 1)9999 ⎯ ⎯Pr. 858 SettingVector Control (Pr. 800 = 5)Position control (MC signal-OFF) Torque control (MC signal-ON)0 (initial value) ⎯ Speed limit (AU signal-ON)1 Magnetic flux command Magnetic flux command4 Torque limit (Pr. 810 = 1) ⎯9999 ⎯ ⎯REMARKS⋅ Switching between speed control and torque control is always enabled independently of whether the motor is at a stop orrunning or the DC injection brake operation (pre-excitation).⋅ During motor operation, speed control/position control switchover and torque control/position control switchover is made whenfrequency drops to the Pr. 865 Low speed detection.⋅CAUTIONChanging the terminal assignment using Pr. 178 to Pr. 189 (input terminal function selection) may affect the other functions. Pleasemake setting after confirming the function of each terminal.♦ Parameters referred to ♦Advanced magnetic flux vector control Refer to page 131Real sensorless vector control, vector control (speed control) Refer to page 79Real sensorless vector control, vector control (torque control) Refer to page 102Vector control (position control) Refer to page 115Pr. 178 to Pr. 189 (input terminal function selection) Refer to page 206Pr. 450 Second applied motor Refer to page 169Pr. 804 Torque command source selection Refer to page 108Pr. 807 Speed limit selection Refer to page 110Pr. 810 Torque limit input method selection Refer to page 83Pr. 858 Terminal 4 function assignment, Pr. 868 Terminal 1 function assignment Refer to page 25878
4PARAMETERSSpeed control by real sensorless vectorcontrol, vector control4.4 Speed control by real sensorless vector control, vectorcontrolPurpose Parameter that should be Set Refer to PageTo perform torque limit during speed control Torque limitPr. 22, Pr. 803, Pr. 810,Pr. 812 to Pr. 817,83Pr. 858, Pr. 868, Pr. 874Gain adjustment of speed controlEasy gain tuningGain adjustmentPr. 818 to Pr. 821, Pr. 830,Pr. 831, Pr. 88088To enhance the trackability of the motor inresponse to a speed command changeSpeed feed forward control,model adaptive speed controlPr. 828, Pr. 877 to Pr. 881 95Stabilize the speed detection signal Speed detection filter Pr. 823, Pr. 833 127Accelerates the rise of the torque at a start Torque bias Pr. 840 to Pr. 848 97Avoid mechanical resonance Notch filter Pr. 862, Pr. 863 101Speed control is exercised to match the speed command and actual motor speed.(1) Control block diagramTerminal 2Terminal 4[Pr. 858 = 0]Terminal 1[Pr. 868 = 0]Speed settingfilterAUAURTRTTerminal 2 bias [C2, C3 (Pr. 902)]Terminal 2 gain [Pr. 125, C4 (Pr. 903)]Terminal 4 bias [C5, C6 (Pr. 904)]Terminal 4 gain [Pr. 126, C7 (Pr. 905)][Pr. 822 = 9999][Pr. 822 = 9999][Pr. 832 = 9999][Pr. 832 = 9999][Pr. 822][Pr. 74][Pr. 832][Pr. 74]Analog input offsetadjustment [Pr. 849]Analoginputselection[Pr. 73]Operation Mode[Pr. 79]RLRMRHREXMulti-speedselection[Pr. 4 to 6,24 to 27,232 to 239]OptionOperation panelMaximum/minimum settingAcceleration/deceleration processing[Pr. 1][Pr. 2][Pr. 13][Pr. 7] [Pr. 8][Pr. 10]RunningDuring stopAServo lockzero speed controlZero speed control[Pr. 802 = 1][Pr. 802 = 0]LXDecelerates to stop[Pr. 11]LXVector control[Pr. 800 = 0]Real sensorlessvector control[Pr. 800 = 10]Zero speed controlDC injection brake operation[Pr. 850 = 1][Pr. 850 = 0]Decelerates to stop[Pr. 11]LX79
Speed control by real sensorless vectorcontrol, vector controlSpeed feed forward controlLoad inertia ratioJ s[Pr. 880]Speed feed forwardgain[Pr. 881]Speed feed forwardtorque limit[Pr. 879]Speed feedforwardfilter [Pr. 878]Model adaptive speed controlJ [Pr. 880]A[Pr. 877 = 1]RT[Pr. 877 = 2][Pr. 877 = 0]RTModel speedcontrol gain[Pr. 828]TorquecoefficientModel speedcalculation1J sRTRTVector control[Pr. 800 = 0]SpeedcontrolP gain 1[Pr. 820]X44X440When torque bias is selectedSpeedcontrolP gain 2[Pr. 830]X44Speed controlintegraltime 1[Pr. 821]Integration cleared to 0Torque biasoperationtime [Pr. 845]Speed controlintegraltime 2[Pr. 831]Integration cleared to 0X440When torque bias is selectedTorque biasoperationtime [Pr. 845]Speed detection filterNotchfilter[Pr. 862][Pr. 863]BTorque biasTerminal 1[Pr. 868 = 6]Real sensorlessvector control[Pr. 800 = 10]Torque bias balancecompensation[Pr. 846] Terminal 1 bias [C16, C17(Pr. 919)]Terminal 1 gain [C18, C19(Pr. 920)]Fall-time torque bias terminal 1 bias [Pr. 847]Fall-time torque bias terminal 1 gain [Pr. 848]SpeedestimationRTRT[Pr. 823][Pr. 833]X42X43TorquesettingfilterTorque bias[Pr. 841 to 843]RT [Pr. 826 = 9999][Pr. 826][Pr. 74][Pr. 826 = 9999]RT [Pr. 836 = 9999][Pr. 836 = 9999][Pr. 836][Pr. 74]Torque biasselection[Pr. 840 = 1, 2][Pr. 840 = 0]Torque biasfilter[Pr. 844]BVector control[Pr. 800 = 0]Torque bias selection[Pr. 840 = 0 to 2][Pr. 840 = 9999]Torque limitTorquecontrolMotorEncoderReal sensorlessvector control[Pr. 800 = 10]Torque limit[Pr. 22, 812 to 817][Pr. 810 = 0]Terminal 1[Pr. 868 = 4]Terminal 4[Pr. 858 = 4]TorquesettingfilterTerminal 1 bias [C16, C17(Pr. 919)]Terminal 1 gain [C18, C19(Pr. 920)]Terminal 4 bias [C38, C39(Pr. 932)]Terminal 4 gain [C40, C41(Pr. 933)]RT [Pr. 826 = 9999][Pr. 826][Pr. 74][Pr. 826 = 9999]RT [Pr. 836 = 9999][Pr. 836][Pr. 74][Pr. 836 = 9999][Pr. 810 = 1]Torque limitConstant powerinput methodrange torqueselectioncharacteristicselection[Pr. 803]80
4PARAMETERSSpeed control by real sensorless vectorcontrol, vector control4.4.1 Setting procedure of real sensorless vector control (speed control)SensorlessPerform secure wiring. (Refer to page 14.)Set the motor. (Pr. 71) (Refer to page 169.)Set "3" (standard motor) or "13" (constant torque motor) in Pr. 71<strong>Applied</strong> motor.Set the motor capacity and the number of motor poles. (Pr. 80, Pr. 81)(Refer to page 75.)Set the motor capacity (kW) in Pr. 80 Motor capacity and set the number ofmotor poles (number of poles) in Pr. 81 Number of motor poles.(V/F control is performed when the setting is "9999" (initial value).)Select a control method. (Refer to page 75)Set "10" (speed control) or "12" (speed-torque switchover) in Pr. 800 and makespeed control valid.Set the operation command. (Refer to page 283)Select the start command and speed command.(1) Start commandSet the torque limit. (Pr. 810)(Refer to page 83.)1) Operation panel: Setting by pressing / of the operation panel2) External command: Setting by forward rotation and reverse rotationcommand (terminal STF or STR)(2) Speed command1) Operation panel: Setting by turning of the operation panel2) External analog command (terminal 2 or 4) :Give a speed command using the analog signal input to terminal 2 (orterminal 4).3) Multi-speed command:The external signals (RH, RM, RL) may also be used to give speedcommand.Perform offline auto tuning. (Pr. 96) (Refer to page 171.)⋅⋅⋅⋅⋅⋅⋅⋅Test runAs required⋅ Easy gain tuning (Refer to page 88)⋅ Select online auto tuning. (Pr. 95) (Refer to page 181)⋅ Manual input speed control gain adjustment (Refer to page 91)CAUTIONMake sure to perform offline auto tuning before performing real sensorless vector control.Speed command setting range is 0 to 120Hz for real sensorless vector control.The carrier frequencies are selectable from among 2k, 6k, 10k, 14kHz for real sensorless vector control.Torque control can not be performed in the low speed (approx. 10Hz or less) regeneration range and with light load at low speed(approx. 20% or less of rated torque at approx. 5Hz or less). Choose vector control.Performing pre-excitation (LX signal and X13 signal) under torque control may start the motor running at a low speed even whenthe start command (STF or STR) is not input. The motor may run also at a low speed when the speed limit value = 0 with a startcommand input. Perform pre-excitation after making sure that there will be no problem in safety if the motor runs.Do not switch between the STF (forward rotation command) and STR (reverse rotation command) during operation under torquecontrol. Overcurrent trip (E.OC) or opposite rotation deceleration fault (E.11) occurs.When the inverter is likely to start during motor coasting under real sensorless vector control, set to make frequency search ofautomatic restart after instantaneous power failure valid (Pr. 57 ≠ "9999", Pr. 162 = "10").Enough torque may not be generated in the ultra-low speed range less than approx. 2Hz when performing real sensorless vectorcontrol.The guideline of speed control range is as shown below.Driving: 1:200 (2, 4, 6 poles) Can be used at 0.3Hz or more at rated 60Hz1:30 (8, 10 poles) Can be used at 2Hz or more at rated 60HzRegeneration:1:12 (2 to 10 poles) Can be used at 5Hz or more at rated 60Hz81
Speed control by real sensorless vectorcontrol, vector control4.4.2 Setting procedure of vector control (speed control)VectorPerform secure wiring. (Refer to page 33.)Mount the <strong>FR</strong>-A7AP.Set the motor and encoder. (Pr. 71, Pr. 359, Pr. 369)Set Pr. 71 <strong>Applied</strong> motor, Pr. 359 Encoder rotation direction and Pr. 369Number of encoder pulses according to the motor and encoder used.(Refer to page 35.)Set the motor capacity and the number of motor poles(Pr. 80, Pr. 81) (Refer to page 75.)Set the motor capacity (kW) in Pr. 80 Motor capacity and set the numberof motor poles (number of poles) in Pr. 81 Number of motor poles. (V/Fcontrol is performed when the setting is "9999" (initial value).)Select a control method. (Refer to page 75.)Set the run command. (Refer to page 283.)Set the torque limit. (Pr. 810)(Refer to page 83.)Make speed control valid by selecting "0" (speed control), "2" (speedtorqueswitchover), or "4" (speed-position switchover) for Pr. 800.Select the start command and speed command.(1) Start command1)Operation panel: Setting by pressing / of theoperation panel2)External command: Setting by forward rotation or reverserotation command (terminal STF or STR)(2)Speed command1)Operation panel: Setting by pressing of the operation panel2)External analog command (terminal 2 or 4) :Give a speed command using the analog signal input toterminal 2 (or terminal 4).3)Multi-speed command:The external signals (RH, RM, RL) may also be used to givespeed command.Test runAs required· Perform offline auto tuning. (Pr. 96) (refer to page 171).· Select online auto tuning. (Pr. 95) (refer to page 181).· Easy gain tuning (refer to page 88)· Manual input speed control gain adjustment (refer to page 91)⋅⋅CAUTIONSpeed command setting range is 0 to 120Hz for vector control.The carrier frequencies are selectable from among 2k, 6k, 10k, 14kHz for vector control.82
4PARAMETERSSpeed control by real sensorless vectorcontrol, vector control4.4.3 Torque limit level setting for speed control(Pr. 22, Pr. 803, Pr. 810 to Pr. 817, Pr. 858, Pr. 868, Pr. 874)SensorlessVectorThis function limits the output torque to the predetermined value during speed control under real sensorlessvector control or vector control.• Set the torque limit level within the range 0 to 400% in Pr. 22.When the TL signal is turned on, torque limit level 2 functions.• You can select whether the torque limit level is set using parameters or analog input teminals (terminal 1, 4).In addition, you can set torque limit level for forward (power driving/regeneration) and reverse (power driving/regeneration) operation individually.⋅ParameterNumber22803810Name Initial Value Setting Range DescriptionStall prevention operationlevel(torque limit level)Constant power rangetorque characteristicselectionTorque limit input methodselection811 Set resolution switchover 0812813814Torque limit level(regeneration)Torque limit level (3rdquadrant)Torque limit level (4thquadrant)150% 0 to 400%00999999999999815 Torque limit level 2 9999816817858868Torque limit level duringaccelerationTorque limit level duringdecelerationTerminal 4 functionassignmentTerminal 1 functionassignment999999990 0, 4, 99990 0, 2 to 5, 9999874 OLT level setting 150% 0 to 200%Set the torque limit level in % on theassumption that the rated torque is 100%Constant motor Select the torque limit0output limitin the constant powerConstant torque range by torque limit1limitsetting.Internal torque limit (torque limit by parameter0settings)External torque limit (torque limit by terminal11, 4)Speed setting andrunning speedmonitor increments Torque limit settingfrom the PU, RS- increments485 communication Pr. 22, Pr. 812 to Pr. 817or communicationoption.0 1r/min0.1%1 0.1r/min0.01%Set the torque limit level for forward rotation0 to 400%regeneration.9999 Limit at the value of Pr. 22 or analog terminalSet the torque limit level for reverse rotation0 to 400%driving.9999 Limit at the value of Pr. 22 or analog terminalSet the torque limit level for reverse rotation0 to 400%regeneration.9999 Limit at the value of Pr. 22 or analog terminalWhen the torque limit selection (TL) signal is0 to 400% on, the Pr. 815 value is a torque limit valueregardless of Pr. 810 .9999 Limit at the value of Pr. 22 or analog terminal0 to 400% Set the torque limit value during acceleration.9999 Same torque limit as at constant speed0 to 400% Set the torque limit value during deceleration.9999 Same torque limit as at constant speed10 1r/min11 0.1r/minWhen "4" is set in, the torque limit can bechanged with a signal to terminal 4.When "4" is set in, the torque limit can bechanged with a signal to terminal 1.This function can make an inverter trip if thetorque limit is activated to stall the motor. Setthe output at which an inverter trip is made.CAUTIONUnder real sensorless vector control, the lower limit of torque limit level is set 30% if the value less than 30% is input.83
Speed control by real sensorless vectorcontrol, vector control(1) Torque limit block diagramSpeed controlTorque limitIq current controlSpeed command +-IMEncoder(2) Selection of torque limit input method (Pr. 810)⋅ Set Pr. 810 Torque limit input method selection to select the method to limit output torque during speed control.Torque limit by parameter setting is initially set.ParameterNumber810Setting RangeTorque Limit InputMethod0 (initial value) Internal torque limit1 External torque limitDescriptionParameter-set torque limit operation is performed.Changing the torque limit parameter value by communicationenables torque limit to be input by communication.Torque limit using the analog voltage (current) from terminal 1 orterminal 4 is made valid.(3) Torque limit level by parameter setting (Pr. 810 = "0", Pr. 812 to Pr. 814 )⋅ In the initial setting, limit is made on all quadrants on the Pr.Torque limit22 Stall prevention operation level (torque limit level) .+⋅ When you want to set the level on a quadrant basis, set theReverseForwardtorque limit level in Pr. 812 Torque limit level (regeneration), Pr.regenerationdriving813 Torque limit level (3rd quadrant), Pr. 814 Torque limit levelReverse quad4 quad1 Forward (4th quadrant).rotation ( Pr. 814) ( Pr. 22) rotationWhen "9999" is set, Pr. 22 is the torque limit level.Reversedrivingquad3( Pr. 813)-quad2( Pr. 812)Rated speedSpeedForwardregeneration(4) Torque limit level by analog input (terminal 1, 4) (Pr. 810 = "1", Pr. 858, Pr. 868 )⋅ With the upper limit of torque limit as set in Pr. 22, the analog input from terminal 1 input is used as the torque limitvalue within the Pr. 22 setting range.⋅ When torque limit value is input from terminal 1, set "4" in Pr. 868 Terminal 1 function assignment. When torque limitvalue is input from terminal 4, set "4" in Pr. 858 Terminal 4 function assignment.⋅ When Pr. 858 = "4" and Pr. 868 = "2", torque is limitted by analog input from terminal 1 for regeneration and by terminal4 for driving.⋅ Torque limit by analog input can be calibrated using calibration parameter C16 (Pr. 919) to C19 (Pr. 920), C38 (Pr. 932) toC41 (Pr. 933) . (Refer to page 273)ReverseregenerationReverserotation **ReversedrivingTorque limit+quad4( Pr. 814)quad3( Pr. 813)-quad1( Pr. 22)quad2( Pr. 812)ForwarddrivingForward* rotationSpeed*ForwardregenerationWhen Pr.858=4, Pr.868=2ReverseregenerationTerminal 1 input orinternal torque limit(Pr.22 etc.) whicheveris smallerReverse rotationSpeedTerminal 4 input orinternal torque limit(Pr.22 etc.) whicheveris smallerReversedrivingRated speed* Analog input (terminal 1, 4) or internal torque control (Pr. 22 etc.) whichever is smallerTorque limit+quad4quad1quad3quad2-Rated speedForwarddrivingTerminal 4 input orinternal torque limit(Pr.22 etc.) whicheveris smallerForward rotationTerminal 1 input orinternal torque limit(Pr.22 etc.) whicheveris smallerForwardregeneration84
4PARAMETERSSpeed control by real sensorless vectorcontrol, vector control• Terminal 1, 4 function according to control (⎯ : without function)Pr. 858 Setting *1 Pr. 868 Setting *2Real Sensorless Vector Control (Speed Control)Terminal 4 functionTerminal 1 function0(initial value)Speed setting auxiliary1 *4 Magnetic flux command2 ⎯0Speed command3 ⎯(initial value)(AU signal-ON)4 Torque limit (Pr. 810 = 1)5 ⎯6 *4 Torque bias (Pr. 840 = 1 to 3)9999 ⎯0(initial value)Magnetic flux commandSpeed setting auxiliary1 *4 ⎯ *3 Magnetic flux command2⎯1 *43 ⎯4 Torque limit (Pr. 810 = 1)Magnetic flux command5 ⎯6 *4 Torque bias (Pr. 840 = 1 to 3)9999 ⎯0(initial value) Torque limit (Pr. 810 = 1)Speed setting auxiliary1 *4 Magnetic flux command2 Driving torque limit (Pr. 810 = 1) Regenerative torque limit (Pr. 810 = 1)4 *23 Torque limit (Pr. 810 = 1) ⎯4 ⎯ *3 Torque limit (Pr. 810 = 1)5⎯6 *4 Torque limit (Pr. 810 = 1)Torque bias (Pr. 840 = 1 to 3)9999 ⎯9999 ⎯ ⎯ ⎯*1 When the Pr. 868 setting is other than "0", other functions of terminal 1 (auxiliary input, override function, PID control) do not function.*2 When the Pr. 858 setting is other than "0", PID control and speed command from terminal 4 do not function even if the AU signal turns on.*3 When "1" (magnetic flux command) or "4" (torque limit) is set in both Pr. 858 and Pr. 868, function of terminal 1 has higher priority and terminal 4has no function.*4 Setting is valid only when exercising vector control with the <strong>FR</strong>-A7AP.(5) Second torque limit level (TL signal, Pr. 815)ReverseregenerationPr.815-quad4Torque limitquad1ForwarddrivingPr.815+Speed⋅⋅For Pr. 815 Torque limit level 2 , the Pr. 815 value is a torquelimit value regardless of Pr. 810 Torque limit input methodselection when the torque limit selection signal (TL) is on.Set "27" in Pr. 178 to Pr. 189 (input terminal function selection)to assign a function to the TL signal.Pr.815ReversedrivingReverserotationquad3Rated speedquad2Pr.815ForwardregenerationForwardrotation⋅CAUTIONChanging the terminal assignment using Pr. 178 to Pr. 189 (input terminal function selection) may affect the other functions. Pleasemake setting after confirming the function of each terminal.85
4PARAMETERSSpeed control by real sensorless vectorcontrol, vector control(9) Trip when torque limit is activated (Pr. 874 )⋅ This function can cause a trip if the torque limit is activatedTorqueto stall the motor.⋅ The motor stalls if the torque limit is activated under a highPr. 874Torque limit load applied during speed control or position control. At thisOutput torquetime, if the motor speed is lower than the speed set in Pr.Time 865 Low speed detection and also the output torque exceedsOutputfrequencythe level set in Pr. 874 OLT level setting for 3s, it is regardedas a stop effected by stall prevention and E. OLT is output,resulting in a trip.Startsignal(STF)FaultoutputPr. 8653sTimeE.OLT occurrence⋅REMARKSIf the frequency has fallen to 0.5Hz by stall prevention operation and remains for 3s under V/F control and advanced magneticflux vector control, a fault (E.OLT) appears and trip the inverter. In this case, this function is activated regardless of Pr. 874 .This fault is not provided under torque control.♦Parameters referred to♦⋅ Pr. 22 Stall prevention operation level Refer to page 135⋅ Pr. 178 to Pr. 189 (input terminal function selection) Refer to page 206⋅ Pr. 840 Torque bias selection Refer to page 97⋅ Pr. 865 Low speed detection Refer to page 22187
Speed control by real sensorless vectorcontrol, vector control4.4.4 To perform high accuracy/fast response operation (gain adjustment of realsensorless vector control and vector control) (Pr. 818 to Pr. 821, Pr. 830,Pr. 831, Pr. 880)SensorlessVectorThe ratio of the load inertia to the motor inertia (load moment of inertia) is estimated in real time from the torquecommand and speed during motor operation by vector control. As optimum gain of speed control and positioncontrol are automatically set from the load inertia ratio and response level, time and effort of making gainadjustment are reduced. (Easy gain tuning)When the load inertia ratio can not be estimated due to load fluctuation or real sensorless vector control isexercised, control gain is automatically set by manually inputting the load inertia ratio.Make a manual input adjustment when vibration, noise or any other unfavorable phenomenon occurs due tolarge load inertia or gear backlash, for example, or when you want to exhibit the best performance that matchesthe machine.ParameterNumber818819Name Initial Value Setting Range DescriptionEasy gain tuningresponse level settingEasy gain tuningselection2 1 to 15820 Speed control P gain 1 60% 0 to 1000%821Speed control integraltime 1830 Speed control P gain 2 9999831Speed control integraltime 200.333s 0 to 20s9999Set the response level.1: Slow response to 15: Fast response0 Without easy gain tuningWith load estimation, with gain calculation1(valid only during vector control)2 With load (Pr. 880) manual input, gain calculationSet the proportional gain for speed control.(Increasing the value improves trackability inresponse to a speed command change andreduces speed variation with disturbance.)Set the integral time during speed control.(Decrease the value to shorten the time taken forreturning to the original speed if speed variationwith disturbance occurs.)0 to 1000%Second function of Pr. 820 (valid when RT signal ison)9999 No function0 to 20sSecond function of Pr. 821 (valid when RT signal ison)9999 No function880 Load inertia ratio 7 times 0 to 200 times Set the load intertia ratio to the motor.88
4PARAMETERSSpeed control by real sensorless vectorcontrol, vector control(1) Block diagram of easy gain tuning functionAutomatic settingLoadinertiamomentCommandSpeed control/position loop gain+ +Model speed control gain- -[Pr. 820, Pr. 821, Pr. 828, Pr. 422]CurrentcontrolMotorDetectorEncoderOn when [Pr. 819 = "1, 2"]Gain tableLoad inertia ratio[Pr. 880]On when[Pr. 819 = "1"]Load inertiaratio estimationsectionTorque commandActual motor speedResponse levelsetting [Pr. 818](2) Easy gain tuning execution procedure (Pr. 819 = "1" load inertia ratio automatic estimation)Easy gain tuning (load inertia ratio automaticestimation) is valid only in the speed control orposition control mode under vector control.It is invalid under torque control, V/F control,advanced magnetic flux vector control and realsensorless vector control.1) Set the response level using Pr. 818 Easy gaintuning response level setting.Refer to the diagram on the right and set theresponse level.Increasing the value will improve trackabilityto the command, but too high value willgenerate vibration. The relationship betweenthe setting and response level are shown onthe right.Pr. 818 settingResponse levelGuideline ofmechanical resonancefrequency (Hz)Speed/position feedback1 2 3 4 5 6 7 8 9 10 11 12 13 14 15Slowresponse8 10 12 15 18 22 28 34 42 52 64 79 98 122 150Large conveyorMiddleresponseArm robotGeneral machine tool,conveyorPrecisionmachine toolFastresponse2) Each control gain is automatically set from the load inertia ratio estimated during acceleration/decelerationoperation and the Pr. 818 Easy gain tuning response level setting value.Pr. 880 Load inertia ratio is used as the initial value of the load inertia ratio for tuning. Estimated value is set in Pr.880 during tuning.The load inertia ratio may not be estimated well, e.g. it takes a long time for estimation, if the followingconditions are not satisfied.· Time taken for acceleration/deceleration to reach 1500r/min is 5s or less.· Speed is 150r/min or more.· Acceleration/deceleration torque is 10% or more of the rated torque.· Abrupt disturbance is not applied during acceleration/deceleration.· Load inertia ratio is approx. 30 times or less.· No gear backlash nor belt looseness is found.3) Press or to estimate the load inertia ratio or calculate gain any time. (The operation command forexternal operation is the STF or STR signal.)89
Speed control by real sensorless vectorcontrol, vector control(3) Easy gain tuning execution procedure (Pr. 819 = "2" load inertia manual input)Easy gain tuning (load inertia ratio manual input) is valid only in the speed control mode under real sensorless vectorcontrol or in the speed control or position control mode under vector control.1) Set the load inertia ratio to the motor in Pr. 880 Load inertia ratio.2) Set "2" (with easy gain tuning) in Pr. 819 Easy gain tuning selection. Then, Pr. 820 Speed control P gain 1 and Pr. 821Speed control integral time 1 are automaticaly set by gain calculation.Operation is performed in a gain adjusted status from the next operation.3) Perform a test run and set the response level in Pr. 818 Easy gain tuning response level setting. Increasing the value willimprove trackability to the command, but too high value will generate vibration. (When "2" (parameter write enabledduring operation) is set in Pr. 77 Parameter write selection , response level adjustment can be made during operation.)REMARKS· When "1 or 2" is set in Pr. 819 and then returned the Pr. 819 setting to "0" after tuning is executed, tuning results which are set ineach parameter remain unchanged.· When good tuning accuracy is not obtained after executing easy gain tuning due to disturbance and such, perform fineadjustment by manual input. Set "0" (without easy gain tuning) in Pr. 819.(4) Parameters automatically set by easy gain tuningThe following table indicates the relationship between easy gain tuning function and gain adjustment parameter.Load inertia ratio(Pr. 880)Speed control P gain 1(Pr. 820)Speed control integral time 1(Pr. 821)Model speed control gain(Pr. 828)Position loop gain(Pr. 422)Manual inputManual inputEasy Gain Tuning Selection (Pr. 819) Setting0 1 2a) Inertia estimation result (RAM) byeasy gain tuning is dispayed.b) Set the value in the following cases:• Every hour after power-on• When a value other than "1" isset in Pr. 819• When vector control is changedto other control (V/F control etc.)using Pr. 800c) Write is enabled only during a stop(manual input)Manual inputa) Tuning result (RAM) is displayed. a) Gain is calculated when "2" isset in Pr. 819 and the result isset in the parameter.b) Set the value in the following cases:• Every hour after power-on• When a value other than "1" isset in Pr. 819• When vector control is changedto other control (V/F control etc.)using Pr. 800b) When the value is read, thetuning result (parametersetting value) is displayed.c) Write (manual input) disabled c) Write (manual input) disabledCAUTION· Performing easy gain tuning with larger inertia than the specified value during vector control may cause malfunction such ashunting. In addition, when the motor shaft is fixed with servo lock or position control, bearing may be damaged. To prevent these,make gain adjustment by manual input without performing easy gain tuning.90
4PARAMETERS(5) Manual input speed control gain adjustmentSpeed control by real sensorless vectorcontrol, vector control· Make adjustment when any of such phenomena as unusual machine vibration/noise, low response level andovershoot has occurred.Proportional gain200rad/s120rad/s60% 100%(initial value)Pr. 820Setting· When there is load inertia, the actual speed gain is as given below.· Pr. 820 Speed control P gain 1 = "60%" (initial value) is equivalent to120rad/s (speed responce of the motor alone). Increasing thesetting value improves the response level, but a too large gain willproduce vibration and/or unusual noise.· Decreasing the Pr. 821 Speed control integral time 1 shortens thereturn time taken at a speed change. However, a too short time willgenerate an overshoot.LoadfluctuationSpeedSince increasing the proportional gain enhances theresponse level and decreases the speed fluctuation.Decreasing the integral time shortens the return time taken.Actual speed gain = speed gain of motor without load ×JMJM+JLJM: Inertia of the motorJL: Motor shaft-equivalent load inertia· Adjustment procedures are as below:1)Check the conditions and simultaneously change the Pr. 820 value.2)If you cannot make proper adjustment, change the Pr. 821 value and repeat step 1).No.12Phenomenon/ConditionLoad inertiais largeVibration/noisegenerated frommechanical system3 Slow response45Long return time(response time)Overshootor unstablephenomenon occurs.Adjustment MethodSet the Pr. 820 and Pr. 821 values a little higher.When a speed rise is slow, increase the value 10% by 10% until just beforePr. 820vibration/noise is produced, and set about 0.8 to 0.9 of that value.If an overshoot occurs, double the value until an overshoot does not occur, andPr. 821set about 0.8 to 0.9 of that value.Set the Pr. 820 value a little lower and the Pr. 821 value a little higher.Decrease the value 10% by 10% until just before vibration/noise is not produced,Pr. 820and set about 0.8 to 0.9 of that value.If an overshoot occurs, double the value until an overshoot does not occur, andPr. 821set about 0.8 to 0.9 of that value.Set the Pr. 820 value a little higher.When a speed rise is slow, increase the value 5% by 5% until just beforePr. 820vibration/noise is produced, and set about 0.8 to 0.9 of that value.Set the Pr. 821 value a little lower.Decrease the Pr. 821 value by half until just before an overshoot or the unstable phenomenondoes not occur, and set about 0.8 to 0.9 of that value.Set the Pr. 821 value a little higher.Increase the Pr. 821 value double by double until just before an overshoot or the unstablephenomenon does not occur, and set about 0.8 to 0.9 of that value.REMARKS· When making manual input gain adjustment, set "0" (without easy gain tuning) (initial value) in Pr. 819 Easy gain tuningselection.· Pr. 830 Speed control P gain 2 and Pr. 831 Speed control integral time 2 are made valid when the RT terminal is switched on. Makeadjustments in the same way as Pr. 820 and Pr. 821.91
Speed control by real sensorless vectorcontrol, vector control(6) When using a multi-pole motor (8 poles or more)Specially when using a multi-pole motor with more than 8 poles under real sensorless vector control or vector control,adjust Pr. 820 Speed control P gain 1 and Pr. 824 Torque control P gain 1 according to the motor referring to the followingmethods.· For Pr. 820 Speed control P gain 1, increasing the setting value improves the response level, but a too large gain willproduce vibration and/or unusual noise.· For Pr. 824 Torque control P gain 1, note that a too low value will produce current ripples, causing the motor to generatesound synchronizing the cycle of current ripples.Adjustment methodNo. Phenomenon/Condition Adjustment Method1The motor rotation is unstable in the lowspeed range.(7) P/PI switchover (X44 signal)· By turning the P/PI control switching signal (X44) on/off during seed control operation under real sensorless vectorcontrol or vector control, you can select whether to add the integral time (I) or not when performing gain adjustmentwith P gain and integral time.When the X44 signal is off............. PI controlWhen the X44 signal is on............. P control· For the terminal used for X44 signal input, set "44" in any of Pr. 178 to Pr. 189 (input terminal function selection) toassign the function.[Function block diagram]Set a higher value in Pr. 820 Speed control P gain 1 according to the motorinertia.Since the self inertia of a multi-pole motor tends to become large, makeadjustment to improve the unstable phenomenon, then make fine adjustmentin consideration of the response level using that setting as reference.In addition, when performing vector control with encoder, gain adjustmentaccording to the inertia can be easily done using easy gain tuning (Pr. 819 = 1).2 Speed trackability is poor Set a higher value in Pr. 820 Speed control P gain 1.3456Speed variation at the load fluctuation islargeTorque becomes insufficient or torqueripple occurs at starting or in the lowspeed range under real sensorless vectorcontrol.Increase the value 10% by 10% until just before vibration or unusual noise isproduced, and set about 0.8 to 0.9 of that value.If you cannot make proper adjustment, increase the value of Pr. 821 Speedcontrol integral time 1 double by double and make adjustment of Pr. 820 again.Set the speed control gain a little higher. (same as No. 1)If the problem still persists after gain adjustment, increase Pr. 13 Startingfrequency or set the acceleration time shorter if the inverter is starting to avoidcontinuous operation in the ultra low speed range.Unusual motor and machine vibration,noise or overcurrent occurs. Set a lower value in Pr. 824 Torque control P gain 1.Overcurrent or overspeed (E.OS) occursat a start under real sensorless vectorcontrol.Decrease the value 10% by 10% until just before the phenomenon isimproved, and set about 0.8 to 0.9 of that value.SpeedcommandSpeedcommand+-Speedproportionaloperation++TorquecontrolMotor0X44Integrationcleared to 0X44SpeedintegraloperationSpeed estimator⋅CAUTIONChanging the terminal assignment using Pr. 178 to Pr. 189 (input terminal function selection) may affect the other functions. Makesetting after confirming the function of each terminal.92
4PARAMETERSSpeed control by real sensorless vectorcontrol, vector control(8) Troubleshooting (speed)1Phenomenon Cause CountermeasuresMotor does not rotate.(Vector control)(1) The motor wiring is wrong (1) Wiring checkSelect V/F control (set "9999" in Pr. 80 or Pr. 81 ) andcheck the rotation direction of the motor.For the SF-V5RU (1500r/min series), set "160V(320V)" in Pr. 19 Base frequency voltage, and set "50Hz"in Pr. 3 Base frequency.When the forward rotation signal is input,the motor running in the counterclockwisedirection as viewed from the motor shaft isnormal. (If it runs in the clockwise direction,the phase sequence of the invertersecondary side wiring is incorrect.)(2) Encoder specifications (encoderspecification selection switch<strong>FR</strong>-A7AP) are wrong(2) Check the encoder specifications.Check the encoder specifications selection switch(<strong>FR</strong>-A7AP) of differential/complementary(3) The encoder wiring is wrong. (3) Check that FWD is displayed when running the motorin the counter-clockwise direction from outside duringa stop of the inverter with vector control setting.If REV is displayed, the encoder phase sequence iswrong.Perform the correct wiring or match the Pr. 359 Encoderrotation direction.Pr. 359SettingRelationship between the Motorand Encoder0AEncoderClockwise direction as viewedfrom A is forward rotationCW1(Initial value)CCWAEncoderCounter clockwise direction asviewed from A is forward rotation23Motor does not run atcorrect speed. (Speedcommand does not matchactual speed)Speed does not rise to thespeed command.(4) The Pr. 369 Number of encoderpulses setting and the number ofencoder used are different.(5) Encoder power specificationsare wrong. Or, power is not input.(1) The speed command from thecommand device is incorrect.The speed command iscompounded with noise.(2) The speed command valuedoes not match the inverterrecognizedvalue.(3) The number of encoder pulsessetting is incorrect.(1) Insufficient torque.Torque limit is actuated.(2) Only P (proportional) control isselected.(4) The motor will not run if the parameter setting issmaller than the number of encoder pulses used. Setthe Pr. 369 Number of encoder pulses correctly.(5) Check the power specifications (5V/12V/15V/24V) ofencoder and input the external power supply.(1) Check that a correct speed command comes from thecommand device.Decrease Pr. 72 PWM frequency selection.(2) Readjust speed command bias/gain Pr. 125, Pr. 126, C2to C7 and C12 to C15.(3) Check the setting of Pr. 369 Number of encoder pulses.(vector control)(1) -1 Increase the torque limit value.(Refer to torque limit of speed control on page 83 )(1) -2 Insufficient capacity(2) When the load is heavy, speed deviation will occurunder P (proportional) control. Select PI control.93
Speed control by real sensorless vectorcontrol, vector control4 Motor speed is unstable.5678Phenomenon Cause CountermeasuresMotor or machine hunts(vibration/noise isproduced).Acceleration/decelerationtime does not match thesetting.Machine operation isunstableSpeed fluctuates at lowspeed.(1) The speed command varies. (1) -1 Check that a correct speed command comes fromthe command device. (Take measures againstnoises.)(1) -2 Decrease Pr. 72 PWM frequency selection.(1) -3 Increase Pr. 822 Speed setting filter 1. (Refer to page 265 )(2) Insufficient torque. (2) Increase the torque limit value.(Refer to torque limit of speed control on page 83 )(3) The speed control gains do notmatch the machine. (mechanicalresonance)(3) -1 Perform easy gain tuning. (Refer to page 89 )(3) -2 Adjust Pr. 820, Pr. 821. (Refer to page 91)(3) -3 Perform speed feed forward/model adaptive speedcontrol.(1) The speed control gain is high. (1) -1 Perform easy gain tuning. (Refer to page 89)(1) -2 Decrease Pr. 820 and increase Pr. 821.(1) -3 Perform speed feed foward control and modeladaptive speed control.(2) The torque control gain is high. (2) Decrease the Pr. 824 value.(3) The motor wiring is wrong. (3) Check the wiring(1) Insufficient torque. (1) -1 Increase the torque limit value.(Refer to torque limit of speed control on page 83 )(1) -2 Perform speed feed foward control.(2) Large load inertia. (2) Set the acceleration/deceleration time that meets theload.(1) The speed control gains do notmatch the machine.(2) Slow response because ofimproper acceleration/deceleration time of the inverter.(1) -1 Perform easy gain tuning. (Refer to page 89)(1) -2 Adjust Pr. 820, Pr. 821. (Refer to page 91)(1) -3 Perform speed feed foward control and modeladaptive speed control.(2) Change the acceleration/deceleration time to anoptimum value.(1) Adverse effect of high carrier (1) Decrease Pr. 72 PWM frequency selection.frequency.(2) Low speed control gain. (2) Increase Pr. 820 Speed control P gain 1.94
4PARAMETERSSpeed control by real sensorless vectorcontrol, vector control4.4.5 Speed feed forward control, model adaptive speed control (Pr. 828, Pr. 877 to Pr.881)SensorlessVector(1) Speed feed forward control (Pr. 877 = "1")⋅⋅⋅⋅• By making parameter setting, select the speed feed forward control or model adaptive speed control.The speed feed forward control enhances the trackability of the motor in response to a speed commandchange.The model adaptive speed control enables individual adjustment of speed trackability and motor disturbancetorque response.ParameterNumber828877878879Name Initial Value Setting Range DescriptionModel speed controlgainSpeed feed forwardcontrol/modeladaptive speedcontrol selectionSpeed feed forwardfilterSpeed feed forwardtorque limit60% 0 to 1000% Set the gain for model speed controller.00s0 Normal speed control is exercised.1 Speed feed forward control is exercised.2 Model adaptive speed control is enabled.0 to 1s150% 0 to 400%Set the primary delay filter for the speed feedforward result calculated using the speedcommand and load inertia ratio.Limits the maximum value of the speed feedforward torque.880 Load inertia ratio 7 times 0 to 200 times Set the load inertia ratio to the motor.881Speed feed forwardgain0% 0 to 1000% Set the feed forward calculation result as a gain.POINTWhen model adaptive speed control is selected, the data obtained from easy gain tuning is used for Pr. 828 Modelspeed control gain. Perform easy gain tuning also (simultaneously). (Refer to page 88)Calculate required torque in responce to the acceleration/deceleration command for the inertia ratio set in Pr. 880 andgenerate torque immediately.When the speed feed forward gain is 100%, the calculation result of the speed feed forward is reflected as-is.If the speed command changes suddenly, large torque is generated due to the speed feed forward calculation. Themaximum value of the speed feed forward is limited using Pr. 879.Using Pr.878, the speed feed forward result can be dulled by the primary delay filter.[Block diagram]Load inertia ratioSpeed feedJ s forward[Pr. 880] gain[Pr. 881]Speed feed forward control[Pr. 879] [Pr. 878]Speed feed Speed feedforward torque forwardlimit filterSpeed command+Speed+control+P gain 1- [Pr. 820]+Actual speed controllerSpeed controlintegral time 1[Pr. 821]Torque controlIMSpeed estimator95
Speed control by real sensorless vectorcontrol, vector control(2) Model adaptive speed control (Pr. 877 = "2")⋅ The motor's model speed is calculated to feed back the model side speed controller. This model speed is also usedas the actual speed controller command.⋅ The inertia ratio in Pr. 880 is used for calculation of the torque current command value given by the model side speedcontroller.⋅ The torque current command value of the model side speed controller is added to the output of the actual speedcontroller, and the result is used as the iq current control input.Pr. 828 is used for model side speed control (P control), and the first gain in Pr. 820 is used for the actual speedcontroller. The model adaptive speed control is valid for the first motor only.⋅ When Pr. 877 = 2, switching to the second motor handles the second motor as Pr. 877 = 0.[Block diagram]Model adaptive speed controlJTorque coefficient(J: [Pr. 880] )Speed command+-Model speedcontrol gain[Pr. 828]1J sModel speedcalculation+ Speed control++P gain 1- [Pr. 820]+Speed controlActual speed controllerintegral time 1[Pr. 821]TorquecontrolIMCAUTIONThe adequate gain value for the model and actual loop parts are set according to the responce setting of easy gain tuning undermodel adaptive speed control. To increase the responce level, the Pr. 818 Easy gain tuning response level setting needs to bechanged (increased).(3) Combination of easy gain tuningThe following table indicates the relationships between the speed feed forward/model adaptive speed control and easygain tuning function.Load inertia ratio(Pr. 880)Speed control P gain 1(Pr. 820)Speed control integral time 1(Pr. 821)Model speed control gain(Pr. 828)Speed feed forward gain(Pr. 881)Manual inputManual inputManual inputManual inputEasy Gain Tuning Selection (Pr. 819) Setting0 1 2Inertia ratio estimation valuefound by easy gain tuning isdisplayed.Manual input enabled onlyduring a stop.Tuning results are displayed.Write disabledTuning results are displayed.Write disabledTuning results are displayed.Write disabledSpeedestimatorManual inputManual input Manual input Manual inputTuning results are displayed.Write disabledTuning results are displayed.Write disabledTuning results are displayed.Write disabled♦Parameters referred to♦Pr. 820 Speed control P gain 1, Pr. 830 Speed control P gain 2 Refer to page 88Pr. 821 Speed control integral time 1, Pr. 831 Speed control integral time 2 Refer to page 8896
4PARAMETERSSpeed control by real sensorless vectorcontrol, vector control4.4.6 Torque biases (Pr. 840 to Pr. 848)VectorThis function accelerates the rise of the torque at a start. Adjust the torque at a motor start using the contactsignals or analog signals .ParameterNumberName Initial Value Setting Range Description0Set the torque bias amount with the contact signal(X42, X43) using Pr. 841 to Pr. 843.1Set the terminal 1-based torque bias amount asdesired in C16 to C19 . (in the case a cage goes upwhen a motor runs reversely)840 Torque bias selection 9999Set the terminal 1-based torque bias amount as2 desired in C16 to C19 . (in the case a cage goes upwhen a motor runs forward)The terminal 1-based torque bias amount can be3 set automatically in C16 to C19, Pr. 846 accordingto the load.9999 Without torque bias, rated torque 100%841 Torque bias 1600 to 999% Negative torque bias amount (-400% to -1%)842 Torque bias 2 9999 1000 to 1400% Positive torque bias amount (0% to 400%)843 Torque bias 3 9999 Without torque bias setting844 Torque bias filter 9999845846847848(1) Block diagramTorque bias operationtimeTorque bias balancecompensationFall-time torque biasterminal 1 biasFall-time torque biasterminal 1 gain9999999999999999The above parameters can be set when the <strong>FR</strong>-A7AP (option) is mounted.0 to 5s Time until torque rises.9999 Same operation as when 0s is set.0 to 5sTime for maintaining torque equivalent to thetorque bias amount.9999 Same operation as when 0s is set.0 to 10V Set the voltage under balanced load.9999 Same operation as when 0V is set.0 to 400% Set the bias value of the torque command.9999 Same as at a rise time (C16, C17 (Pr. 919)).0 to 400% Set the gain value of the torque command.9999 Same as at a rise time (C18, C19 (Pr. 920)).Speed commandSpeed command+-SpeedcontrolP gain+Speedcontrolintegral time+++TorquecontrolIMEncoderCWTorque bias selection 1Torque bias selection 2X42X43SDInternal parameters[Pr. 841][Pr. 842][Pr. 843]+-0[Pr. 846]Integration cleared to 0[Pr. 845]C16, C17[Pr. 919]C18, C19[Pr. 920][Pr. 840 = 0]CW CageCW > Cage[Pr. 840 = 1, 2, 3][Pr. 826]Torque setting filter 1Terminal 1 LoaddetectorCage97
Speed control by real sensorless vectorcontrol, vector control(2) Setting torque bias amount with the contact input (Pr. 840 = "0")⋅ Select the torque bias amount in the table below according to the combination of contact signals.⋅ Set "42" in Pr. 178 to Pr. 189 (input terminal function selection) for the terminal used for X42 signal input and set "43" forthe terminal used for X43 signal input to assign functions.Torque BiasSelection 1(X42)Torque BiasSelection 2(X43)Torque Bias AmountOFF OFF 0%ON OFF Pr. 841 -400% to +400% (setting value : 600 to 1400%)OFF ON Pr. 842 -400% to +400% (setting value : 600 to 1400%)ON ON Pr. 843 -400% to +400% (setting value : 600 to 1400%)Example) when Pr. 841 = 1025, 25% when Pr. 842 = 975, -25% when Pr. 843 = 925, -75%CAUTIONChanging the terminal assignment using Pr. 178 to Pr. 189 (input terminal function selection) may affect the other functions. Makesetting after confirming the function of each terminal.(3) Setting torque bias amount with terminal 1 (Pr. 840 = "1, 2")⋅ Calculate torque bias from the load input from terminal 1 as shown in the diagram below and provide torque bias.⋅ When torque bias amount is set from terminal 1, set "6" in Pr. 868 Terminal 1 function assignment .Pr. 840SettingRise (Motor Forward Rotation)Fall (Motor Reverse Rotation)1Torque commandterminal 1 gainC18(Pr. 920)Torque commandterminal 1 biasC16(Pr. 919)Bias amountC17(Pr. 919)Terminal 1inputVoltage formax. loadVoltage for C19(Pr. 920)balanced loadPr. 846Fall-timetorque biasterminal 1biasPr. 848Fall-timetorque biasterminal 1gainPr. 847Bias amountC17(Pr. 919)Terminal 1inputVoltage formax. loadVoltage for C19(Pr. 920)balanced loadPr. 8462Torque commandterminal 1 biasC16(Pr. 919)Torque commandterminal 1 gainC18(Pr. 920)Bias amountVoltage forbalanced loadPr. 846 Voltage formax. loadC19(Pr. 920)C17(Pr. 919)Terminal 1inputFall-timetorque biasterminal 1biasPr. 847Fall-timetorque biasterminal 1gainPr. 848Bias amountVoltage forbalanced loadPr. 846 Voltage formax. loadC19(Pr. 920)Terminal 1C17(Pr. 919) input98
4PARAMETERS(4) Setting torque bias amount with terminal 1 (Pr. 840 = "3")⋅⋅Speed control by real sensorless vectorcontrol, vector controlC16 Terminal 1 bias command (torque/magnetic flux), C17 Terminal 1 bias (torque/magnetic flux), C18 Terminal 1 gaincommand (torque/magnetic flux), C19 Terminal 1 gain (torque/magnetic flux), and Pr. 846 Torque bias balance compensationcan be set automatically according to the load.When torque command is set from terminal 1, set "6" in Pr. 868 Terminal 1 function assignment.⋅ Setting C16, C17 (Pr. 919) , C18, C19 (Pr. 920)Operation without aloadRead C16, C17(Pr. 919) whenspeed is stablePress .(setting C16, C17(Pr. 919) is completed)⋅ Setting Pr. 846Press .(setting C18, C19(Pr. 920) is completed)Read C18, C19(Pr. 920) whenspeed is stableOperation with amaximum loadOperation with abalanced loadRead Pr. 846Press .Torque balancecompensation underpower driving iscompleted.(5) Torque bias operation⋅⋅CAUTIONWhen starting torque bias operation after completion of automatic setting, set "1 or 2" in Pr. 840.When a value other than 9999 is set in Pr. 844 Torque bias filter, you can slow the rise of torque. At this time, thetorque rises according to the time constant of the primary delay filter.Set the time for output torque be maintained with the torque bias command value alone in Pr. 845 Torque bias operation time.SpeedTorque biasTorque bias filterprimary delay timeconstantPr. 844Output torqueTime when torque isgenerated bytorque bias settingPr. 845Pre-excitation LX *Start signal⋅⋅* When pre-excitation is not made, the torque bias functions simultaneously with the start signal.CAUTIONWhen torque bias is made valid and "6" is set in Pr. 868 , terminal 1 serves as torque command not as frequency setting auxiliary.When override compensation is set by Pr. 73 and terminal 1 acts as main speed, no main speed (main speed = 0Hz) is slected.Changing the terminal assignment using Pr. 178 to Pr. 189 (input terminal function selection) may affect the other functions. Makesetting after confirming the function of each terminal.Reference parameters⋅ Pr. 73 Analog input selection Refer to page 259.⋅ Pr. 178 to Pr. 189 (input terminal function selection) Refer to page 206.⋅ C16 to C19 (torque setting voltage (current) bias and gain) Refer to page 273.99
Speed control by real sensorless vectorcontrol, vector control4.4.7 Prevent the motor from overrunning (Pr. 285, Pr. 853, Pr. 873)VectorThis function prevents the motor from overrunning when the load torque is too large and incorrect number ofencoder is set.ParameterNumberName Initial Value Setting Range Description285Speed deviation excess9999 Without speed deviation excessive9999detection frequency *10 to 30Hz If the difference (absolute value) between the853 *2 Speed deviation time 1.0s 0 to 100sspeed command value and actual speed duringspeed control under vector control exceeds thePr. 285 Speed deviation excess detection frequencyfor more than the time set in Pr. 853 Speeddeviation time, speed deviation excessive occursand inverter fault (E. OSD) appears, resulting ina trip.873 *2 Speed limit 20Hz 0 to 120Hz Frequency is limited at the set frequency + Pr. 873.*1 Acts as overspeed detection frequency under encoder feed back operation. (Refer to page 192)*2 This parameter can be set when the <strong>FR</strong>-A7AP (option) is mounted.(1) Speed deviation excessive (Pr. 285, Pr. 853)When the deviation between the set frequency and actual speed is large, e.g. too large load torque, this function cancause the inverter to provide a speed deviation excessive fault (E.OSD) and come to a trip.Frequency(Hz)Fault output(across A-C)Pr. 853OFFPr. 285Set frequencyActual speedONSpeed deviationexcessive fault activated(E. OSD)Time(2) Speed limit (Pr. 873)This function prevents the motor from overrunning when the setting of number of encoder pulses and the actualnumber differ.When the setting of number of encoder pulses is smaller than the actual number, the motor may increase its speed.To prevent this, restrict the output frequency with frequency (obtained by adding the set frequency and Pr. 873 ).Set speed + Pr. 873 valueValue of Pr. 873Actual speedat error occurrenceSet speedSpeed duringnormal operation.⋅⋅CAUTIONIf automatic restart after instantaneous power failure (Pr. 57 ≠ 9999) is selected when the setting of number of encoder pulses issmaller than the actual number, the output speed is limited with the synchronous speed obtained by adding the maximumsetting (Pr. 1) and Pr. 873 setting.When speed limit function is activated due to regenerative torque limit, output torque may suddenly decrease. In addition,output phase loss (E.LF) may occur when speed limit function is activated during pre-excitation.When the setting of number of encoder pulses are correct, it is recommended to set a mamimum value (120Hz) in Pr. 873.Reference parametersPr. 285 Overspeed detection frequency Refer to page 192.100
4PARAMETERSSpeed control by real sensorless vectorcontrol, vector control4.4.8 Notch filter (Pr. 862, Pr. 863)SensorlessVector(1) Pr. 862 Notch filter time constant⋅ If you do not know the mechanical resonance frequency, decrease notch frequency gradually from the highest value.The point at which the smallest vibration is generated is the notch frequency setting.⋅ Machine characteristic can be obtained beforehand with machine analyzer by <strong>FR</strong>-Configurator. Necessary notchfrequency can be determined from this.(2) Pr. 863 Notch filter depth⋅You can reduce the response level of speed control in the resonance frequency band of the mechanical systemto avoid mechanical resonance.ParameterNumberName Initial Value Setting Range Description862 Notch filter time constant 0 0 to 60 Refer to the following table863 Notch filter depth 0 0 to 3 0 (deep) → 3 (shallow)Setting 0 1 2 3 4 5 6 7 8 9Frequency Invalid 1000 500 333.3 250 200 166.7 142.9 125 111.1Setting 10 11 12 13 14 15 16 17 18 19Frequency 100 90.9 83.3 76.9 71.4 66.7 62.5 58.8 55.6 52.6Setting 20 21 22 23 24 25 26 27 28 29Frequency 50 47.6 45.5 43.5 41.7 40 38.5 37 35.7 34.5Setting 30 31 32 33 34 35 36 37 38 39Frequency 33.3 32.3 31.3 30.3 29.4 28.6 27.8 27.0 26.3 25.6Setting 40 41 42 43 44 45 46 47 48 49Frequency 25.0 24.4 23.8 23.3 22.7 22.2 21.7 21.3 20.8 20.4Setting 50 51 52 53 54 55 56 57 58 59Frequency 20.0 19.6 19.2 18.9 18.5 18.2 17.9 17.5 17.2 16.9Setting 60Frequency 16.7The notch filter with deeper depth has an effect on minimizing mechanical resonance. However, large vibration maybe generated adversely due to substantial phase delay. Make adjustment of notch depth in order of the shallowerdepth.Setting 3 2 1 0Depth Shallow → ← DeepGain -4dB -8dB -14dB -40dB101
Torque control by real sensorless vectorcontrol, vector control4.5 Torque control by real sensorless vector control, vectorcontrolPurpose Parameter that must be Set Refer to PageSelection of torque commandsource and setting of torque Torque command Pr. 803 to Pr. 806 108command valuePrevent the motor overspeed Speed limit Pr. 807 to Pr. 809 110Improve torque control accuracyGain adjustment fortorque controlPr. 824, Pr. 825, Pr. 834, Pr. 835 113Stabilize the torque detection signal Torque detection filter Pr. 827, Pr. 837 1274.5.1 Torque control• Torque control is exercised to develop torque as set in the torque command.• The motor speed becomes constant when the motor output torque and load torque are balanced.For torque control, therefore, the speed is determined by the load.• For torque control, the motor gains speed as the motor output torque becomes greater than the motor load.To prevent overspeed, set the speed limit value so that the motor speed does not increase too high.(Torque control is disabled under speed limit since speed control is exercised.)• When speed limit is not set, the speed limit value setting is regarded as 0Hz to disable torque control.(1) Block diagramTerminal 1[Pr. 868 = 3, 4]TorquesettingfilterTerminal 1 bias [C16,C17 (Pr. 919)]Terminal 1 gain [C18,C19 (Pr. 920)]RT[Pr. 826 = 9999][Pr. 826 = 9999][Pr. 826][Pr. 74]Torque commandsource selection[Pr. 804]Constant power rangetorque characteristic selection[Pr. 803]RT[Pr. 836 = 9999][Pr. 836 = 9999][Pr. 836][Pr. 74]Parameter[Pr. 805, Pr. 806]CC-Link(<strong>FR</strong>-A7NC)16bitdigital input(<strong>FR</strong>-A7AX)Actual speed or estimated speed< Speed limit value+RT Torque controlP gain 1+-[Pr. 824]Torque controlintegral time 1[Pr. 825]+MotorEncoderRTTorque controlP gain 2[Pr. 834]+Torque controlintegral time 2[Pr. 835]+Torque detection filterAActual speed or estimated speed+Speed limit value Speed control(proportionalSpeed -control)limitvalueRTRT[Pr. 827][Pr. 837]Vector control[Pr. 800 = 1]Speed detection filterReal sensorlessvector control[Pr. 800 = 11]SpeedestimationRTRT[Pr. 823][Pr. 833]102
4PARAMETERSTorque control by real sensorless vectorcontrol, vector controlSpeed limitTerminal 2Terminal 4[Pr. 858 = 0]AUAUTerminal 2 bias [C2, C3 (Pr. 902)] [Pr. 849]Terminal 2 gain [Pr. 125, C4 (Pr. 903)]Terminal 4 bias [C5, C6 (Pr. 904)]Terminal 4 gain [Pr. 126, C7(Pr. 905)]Analog input offsetadjustmentAnaloginputselection[Pr. 73]Terminal 1[Pr. 868 = 0]RLRMRHREXOptionOperationpanelParameter[Pr. 808, Pr. 809]Maximumfrequency[Pr. 1]Terminal 1[Pr. 868 = 5]Speedsetting filterSpeedsettingfilterRT [Pr. 822 = 9999][Pr. 822][Pr. 74][Pr. 822 = 9999]RT [Pr. 832 = 9999]Multi-speedselection[Pr.4 to 6,24 to 27,232 to 239][Pr. 832 = 9999]Terminal 1 bias [C12,C13(Pr. 917)]Terminal 1 gain [C14,C15(Pr. 918)]RT [Pr. 832 = 9999][Pr. 832][Pr. 74]RT [Pr. 822 = 9999][Pr. 822][Pr. 74][Pr. 822 = 9999][Pr. 832 = 9999][Pr. 832][Pr. 74]Terminal 1 input 0 to 10VTerminal 1 input -10 to 0VTerminal 1 input 0 to 10VTerminal 1 input -10 to 0VOperation Mode[Pr. 79] Speed limit selection[Pr. 807 = 0]ReverserotationForwardrotationForwardrotationReverserotation[Pr. 807 = 1][Pr. 807 = 2]Maximum/minimumsetting[Pr.1][Pr.2]Acceleration/deceleration processing*A[Pr.7] [Pr.8]* When [Pr. 807 =2] and [Pr. 1 Maximumfrequency] is the speed limit,acceleration/deceleration processing is notperformed.103
Torque control by real sensorless vectorcontrol, vector control(2) Operation transitionSpeed limit value isincreased up to preset valueaccording to the Pr.7Acceleration time setting. Speed limit value Speed limit value is decreaseddown to zero according to the Pr.8Deceleration time setting.SpeedSpeed limitTorque controlSpeed limitStart signalOutput torqueSpeed control is peformed during speedlimit. (Thus, torque according to thecommanded is not developed.)Output torque is providedaccording to the terminal 1setting.⋅ When "0" is set in Pr. 7 or Pr. 8 , speed control is exercised upon powering off a start signal and the output torque islimited at the torque limit value.Speed limit valueSpeedStart signalOutput torqueTorque controlLimit at the torque limit valueSpeed control(speed limit)Output torque is providedaccording to the terminal 1setting.ItemStart signalTorque commandSpeed limitDescriptionExternal operation STF, STR signalPU operation and of <strong>FR</strong>-DU07, <strong>FR</strong>-PU07 or <strong>FR</strong>-PU04Select the input method of torque command and input the torque command.Select the input method of speed limit and input the speed limit value.104
4PARAMETERS(3) Operation example (when Pr. 804 = "0")Torque control by real sensorless vectorcontrol, vector controlTorque control is enabled if the actual speed is less than the speed limit value.When the actual speed reaches or exceeds the speed limit value, speed limit operation starts, torque control isstopped, and speed control (proportional control) starts.The following shows the operations in response to the analog input command from terminal 1.SpeedPr. 7Speed limit value*Pr. 8Speed**STF(Forward rotationcommand)1) When STF signal is turned on, the speed limit value is increased according to the time set in Pr. 7 .2) Speed control operation is performed if the actual speed rises to or above the speed limit value.3) When the STF signal is turned off, the speed limit value is decreased according to the time set in Pr. 8 .4) For torque control, the actual speed becomes constant when the torque command and load torque arebalanced.5) The motor torque developing direction is determined by the combination of the torque command input polarityand start signal as indicated in the following table.Torque CommandPolarityPositive torquecommandNegative torquecommandSpeed limitoperation(Speed control)Torque control operationTorque Developing DirectionSTF signal ONSTR signal ONForward rotation direction (forward rotationdriving/reverse rotation regeneration)Reverse rotation direction (forward rotationregeneration/reverse rotation driving)Speed limitoperation(Speed control)TorquecontroloperationOL ON ON ONSpeed limitoperation(Speed control)*When the speed limit activates, torque according to the commanded is not developed.Reverse rotation direction (forward rotationregeneration/reverse rotation driving)Forward rotation direction (forward rotationdriving/reverse rotation regeneration)REMARKS⋅ When speed limit operation starts, speed control is exercised to enable internal torque limit (Pr. 22 torque limit level) (initialvalue). Speed control may not be returned to torque control in this case.Torque limit be set to external torque limit (terminal 1, 4). (Refer to page 83.)⋅ Undervoltage avoidance function (Pr. 261 = "11, 12") of power-failure deceleration stop function is made invalid under torquecontrol. When Pr. 261 = "11 (12)", the inverter operates in the same manner as when "1 (2)" is set in Pr. 261.⋅ Set linear acceleration/deceleration (Pr. 29 = "0 (initial value)") when torque control is exercised. When acceleration/deceleration patterns other than the linear acceleration/deceleration are selected, the protective function of the inverter mayfunction. (Refer to page 158)Time⋅CAUTIONPerforming pre-excitation (LX signal and X13 signal) under torque control (real sensorless vector control) may start the motorrunning at a low speed even when the start command (STF or STR) is not input. The motor may run also at a low speed whenthe speed limit value = 0 with a start command input. Perform pre-excitation after making sure that there will be no problem insafety if the motor runs.105
Torque control by real sensorless vectorcontrol, vector control4.5.2 Setting procedure of real sensorless vector control (torque control)SensorlessPerform secure wiring.(Refer to page 14.)Set the motor. (Pr. 71)(Refer to page 169.)Set "3" (standard motor) or "13" (constant torque motor) in Pr. 71<strong>Applied</strong> motor.Set the motor capacity and the number of motor poles. (Pr. 80, Pr. 81)(Refer to page 75.)Set the motor capacity (kW) in Pr. 80 Motor capacity and set thenumber of motor poles in Pr. 81 Number of motor poles.(V/F control is performed when the setting is "9999" (initial value).)Select a control method. (Refer to page 75)Set either "11" (torque control) or "12" (speed-torque switchover) inPr. 800 and make torque control valid.Set the torque command. (Pr. 804)(Refer to page 108.)Set the speed limit. (Pr. 807)(Refer to page 110.)Perform offline auto tuning. (Pr. 96)(Refer to page 171.)Test runAs required⋅ Select online auto tuning. (Pr. 95) (Refer to page 181.)⋅ Manual input torque control gain adjustment (Refer to page 113)⋅⋅⋅⋅⋅⋅⋅CAUTIONMake sure to perform offline auto tuning before performing real sensorless vector control.The carrier frequencies are selectable from among 2k, 6k, 10k, 14kHz for real sensorless vector control.Torque control can not be performed in the low speed (approx. 10Hz or less) regeneration range and with light load at low speed(approx. 20% or less of rated torque at approx. 5Hz or less). Choose vector control.Performing pre-excitation (LX signal and X13 signal) under torque control may start the motor running at a low speed even whenthe start command (STF or STR) is not input. The motor may run also at a low speed when the speed limit value = 0 with a startcommand input. Perform pre-excitation after making sure that there will be no problem in safety if the motor runs.Do not switch between the STF (forward rotation command) and STR (reverse rotation command) during operation under torquecontrol. Overcurrent trip (E.OC) or opposite rotation deceleration error (E.11) occurs.When the inverter is likely to start during motor coasting under real sensorless vector control, set to make frequency search ofautomatic restart after instantaneous power failure valid (Pr. 57 ≠ "9999", Pr. 162 = "10").Enough torque may not be generated in the ultra-low speed range less than approx. 2Hz when performing real sensorless vectorcontrol.The guideline of speed control range is as shown below.Driving: 1:200 (2, 4, 6 poles) Can be used at 0.3Hz or more at rated 60Hz1:30 (8, 10 poles) Can be used at 2Hz or more at rated 60HzRegeneration:1:12 (2 to 10 poles) Can be used at 5Hz or more at rated 60Hz106
4PARAMETERSTorque control by real sensorlessvector control, vector control4.5.3 Setting procedure of vector control (torque control)VectorPerform secure wiring. (Refer to page 33.)Mount the <strong>FR</strong>-A7AP.Set the motor and encoder. (Pr. 71, Pr. 359, Pr. 369)Set the motor capacity and the number of motor poles. (Pr. 80, Pr. 81)(Refer to page 75.)Set the motor capacity (kW) in Pr. 80 Motor capacity and set the numberof motor poles in Pr. 81 Number of motor poles.(V/F control is performed when the setting is "9999" (initial value).)Select a control method. (Refer to page 75.)Set the torque command. (Pr. 804)(Refer to page 108.)Set Pr. 71 <strong>Applied</strong> motor, Pr. 359 Encoder rotation direction and Pr. 369Number of encoder pulses according to the motor and encoder used.(Refer to page 35.)Set either "1" (torque control), "2" (speed-torque switchover) or "5"(position-torque switchover) in Pr. 800 and make torque control valid.Set the speed limit. (Pr. 807)(Refer to page 110.)Test runAs required· Perform offline auto tuning. (Pr. 96) (refer to page 171).· Select online auto tuning. (Pr. 95) (refer to page 181).· Manual input torque control gain adjustment (refer to page 113)⋅CAUTIONThe carrier frequencies are selectable from among 2k, 6k, 10k, 14kHz for vector control.107
Torque control by real sensorless vectorcontrol, vector control4.5.4 Torque command (Pr. 803 to Pr. 806)SensorlessVectorTorque command source for torque control can be selected.ParameterNumber803804NameConstant power rangetorque characteristicselectionTorque commandsource selectionTorque command805value (RAM)Torque command806 value(RAM,EEPROM)(1) Control block diagramInitialValue001000%1000%SettingRange0 Constant motor output command1 Constant torque command013DescriptionTorque command by terminal1 analog input(Refer to page 273)Select the torque command inthe constant power range bytorque command setting.Torque command by parameter setting (Pr. 805 or Pr. 806)(-400% to 400%)Torque command by parametersetting(Pr. 805 or Pr. 806)(-400% to 400%)4 12 bit/16 bit digital input (<strong>FR</strong>-A7AX)5Torque command by parametersetting(Pr. 805 or Pr. 806)(Set from communication otherthan CC-Link communication: -400% to 400%)(Set from CC-Link communication: -327.68% to 327.67%)Torque command with using CC-Link communication (<strong>FR</strong>-A7NC)Setting from the remote resistercan be made. (-400% to 400%)Torque command with using CC-Link communication (<strong>FR</strong>-A7NC)Setting from the remote resistercan be made. (-327.68% to327.67%)6 —600 to1400%600 to1400%Writes the torque command value to the RAM.On the assumption that 1000% is 0%, the torque command is set byan offset from 1000%.Writes the torque command value to the RAM and EEPROM.On the assumption that 1000% is 0%, the torque command is set byan offset from 1000%.[Pr. 804] Torque commandsource selectionAnalog input0Parameter 1,3,5,6[Pr. 805, Pr. 806]16 bit digital input4(<strong>FR</strong>-A7AX)Speed limit input+-Speed estimatedvalueSpeed estimatedvalueSpeed limit valueSpeed control(proportional control)Speed limit valueReal sensorless vector control+Torque control-Speed estimatorMotorEncoderVector control(2) Torque command (Pr. 804 = "0" (initial value)) by analog input (terminal 1)-100%(-10V)Torque command150%0 100%(+10V)Terminal 1analog input⋅⋅⋅Torque command is given by voltage (current) input toterminal 1.When torque command is input from terminal 1, set "4 or3" in Pr. 868 Terminal 1 function assignment.Torque command by analog input can be calibrated usingcalibration parameter C16 (Pr. 919) to C19 (Pr. 920). (Refer topage 273 )-150%108
4PARAMETERS(3) Torque command using parameters (Pr. 804 = "1")600%(4) Torque command by CC-Link communication (Pr. 804 = "3, 5, 6")Torque control by real sensorless vectorcontrol, vector control⋅ Writing a value to Pr. 805 or Pr. 806 using the <strong>FR</strong>-A7NC (communication option) sets the torque command value.⋅ When "3 or 5" is set in Pr.804, torque command can be set in remote resister RWw1 or RWwC using the <strong>FR</strong>-A7NC(communication option).⋅ By setting "5, 6" in Pr.804, the range of torque command setting from <strong>FR</strong>-A7NC (communication option) is set from-327.68% to 327.67% (0.01% increments).(5) Torque command by 16 bit digital input (Pr. 804 = 4)⋅ Torque command value can be set by setting Pr. 805Torque command value (RAM) or Pr. 806 Torque commandvalue (RAM,EEPROM) .⋅ For Pr. 805 or Pr. 806, the torque command is set by anoffset from 1000% on the assumption that 1000% is 0%.The relationship between the Pr. 805 or Pr. 806 settingand actual torque command value at this time is shownon the left.⋅ When changing the torque command frequently, write toPr. 805. Performing frequent parameter write to Pr. 806 willshorten the life of the EEPROM.CAUTION⋅ When giving a torque command by parameter setting, set the speed limit value to an appropriate value to prevent overspeed.(Refer to page 110.)Pr. 804 Setting Torque Command Source Setting Range Increments1 Torque command by parameter setting (Pr. 805 or Pr. 806) 600 to 1400 (-400% to 400%) 1%356REMARKSTorque command value400%Pr.805, Pr.806settings1000% 1400%Torque command value=Pr.805(or Pr.806)-1000%-400%REMARKS⋅ When torque command is set in Pr. 805 (RAM), powering off the inverter will erase the changed parameter values. Therefore,the parameter value available when power is switched on again is the value set in Pr. 806 (EEPROM).Torque command by parameter setting (Pr. 805 or Pr. 806)Torque command from remote resister (RWw1 or RWwC)with using CC-Link communication (<strong>FR</strong>-A7NC)Torque command by parameter setting (Pr. 805 or Pr. 806)without using CC-Link communication (<strong>FR</strong>-A7NC)Torque command by parameter setting (Pr. 805 or Pr. 806)with using CC-Link communication (<strong>FR</strong>-A7NC)Torque command from remote resister (RWw1 or RWwC)with using CC-Link communication (<strong>FR</strong>-A7NC)Torque command by parameter setting (Pr. 805 or Pr. 806)without using CC-Link communication (<strong>FR</strong>-A7NC)Torque command by parameter setting (Pr. 805 or Pr. 806)with using CC-Link communication (<strong>FR</strong>-A7NC)For details of the setting with the <strong>FR</strong>-A7NC, refer to the <strong>FR</strong>-A7NC instruction manual.600 to 1400 (-400% to 400%) 1%600 to 1400 (-400% to 400%) 1%-32768 to 32767 (two's complement)(-327.68% to 327.67%)-32768 to 32767 (two's complement)(-327.68% to 327.67%)⋅ Give a torque command by 16 bit or 12 bit digital input using the <strong>FR</strong>-A7AX (plug-in option).0.01%0.01%600 to 1400 (-400% to 400%) 1%-32768 to 32767 (two's complement)(-327.68% to 327.67%)0.01%REMARKSFor details of the setting with the <strong>FR</strong>-A7AX, refer to the <strong>FR</strong>-A7AX instruction manual.(6) Change the torque characteristics in the constant power (Pr. 803)TorqueConstant torque rangeConstant power rangePr. 803 =1:constant torque commandPr. 803 =0:constant power command(torque reduction)⋅Due to the motor characteristics, torque is reduced at orabove the base frequency. Set "1" in Pr. 803 Constantpower range torque characteristic selection when you wantto keep the torque to be constant even at or above thebase frequency.Base speedSpeed♦Parameters referred to♦Pr. 868 Terminal 1 function assignment Refer to page 83.Calibration parameter C16 (Pr. 919) to C19 (Pr. 920) (terminal 1 bias, gain torque) Refer to page 273109
Torque control by real sensorless vectorcontrol, vector control4.5.5 Speed limit (Pr. 807 to Pr. 809)SensorlessVectorSet the speed limit value to prevent overspeed of the motor in case the load torque becomes less than the torquecommand value, etc. during torque control operation.ParameterNumberNameInitial Value807 Speed limit selection 0808809Forward rotation speedlimitReverse rotation speedlimitSettingRange012DescriptionUse the speed command value during speedcontrol as speed limit.According to Pr. 808 and Pr. 809 , set the speed limitin forward and reverse rotation directionsindividually.Forward/reverse rotation speed limitThe analog voltage of the terminal 1 input is used tomake speed limit.The speed limit of the forward rotation and reverserotation is switched according to the polarity.60Hz 0 to120Hz Set the speed limit for the forward rotation direction.99990 to120Hz Set the speed limit of the reverse rotation side.9999 As set in Pr. 808 .(1) Control block diagramSpeed estimated value < speed limit valueTorque command+Torque controlPr. 807 Speed limit selectionSame method 0-as speed command input1Speed control+Parameter(Pr. 808, Pr. 809)(proportional control)Forward/reverse rotation speed limit2-Speed estimated value speed limit valueSpeed estimatorReal sensorless vector controlMotorEncoderVector control110
4PARAMETERSTorque control by real sensorless vectorcontrol, vector controlSpeedForward rotationPr.7Speed settingvalue duringspeed controlThe speed settingvalue is a speedlimit value.Pr.8TimeTorque controllablerangeReverse rotationSTF(STR) ON OFF(2) Use the speed command for speed control(Pr. 807 = "0" initial value)⋅ Set the speed limit in the same method as speed settingfor speed control (speed setting by the PU (<strong>FR</strong>-DU07/<strong>FR</strong>-PU07/<strong>FR</strong>-PU04), multi-speed setting, options, etc.)⋅ According to the acceleration time set in Pr. 7 Accelerationtime, the limit level is increased from 0Hz upon turning onof the start signal, and when the start signal turns off, thespeed limit level is decreased from the then speed limitlevel to the DC injection brake operation speed in Pr. 10to a stop in accordance with the deceleration time set inPr. 8 Deceleration time.REMARKS⋅ When the above speed limit command is greater than the Pr. 1 Maximum frequency value, the speed limit value is the Pr. 1Maximum frequency value, and when the speed limit command is less than the Pr. 2 Minimum frequency value, the speed limitvalue is the Pr. 2 Minimum frequency value. Similarly when the speed limit command is smaller than Pr. 13 Starting frequency , thespeed limit value is 0Hz.⋅ When speed limit is to be made using analog input, perform calibration of the analog input terminal 1, 2 and 4. (Refer to page273.)CAUTIONWhen speed limit is to be made using the analog command (terminal 1,2,4), turn off the external signals (RH, RM, RL). If any ofexternal signals (RH, RM, RL) is on, multi-speed limits are made valid.(3) Set the forward rotation and reverse rotation individually (Pr. 807 = "1")Set the speed limit during foward rotation using Pr. 808 Forward rotation speed limit and the speed limit during reverserotation using Pr. 809 Reverse rotation speed limit.The speed during forward and reverse rotation is limited at the setting value of Pr. 808 when "9999" (initial value) is setin Pr. 809 .Speed limitSpeedTorque controllable rangeForward rotationForward rotationPr. 808Pr. 7 Pr. 8Speed limitPr. 808Output torque(%)Speed limit150 1500Pr. 809Reverse rotationSpeed limitReverse rotationTimePr. 809Torque controllable rangeSTF(STR) ON OFF111
Torque control by real sensorless vectorcontrol, vector control(4) Forward rotation/reverse rotation speed limit (Pr. 807 = "2")⋅ When making a speed limit using analog input from terminal 1, the speed limit of the forward and reverse rotationcan be switched according to the polarity of voltage.⋅ Forward/reverse rotation speed limit is made valid when Pr. 868 Terminal 1 function assignment = "5".⋅ For 0 to 10V input, set the forward rotation speed limit. The reverse rotation speed limit at this time is the value ofPr.1 Maximum frequency.⋅ For -10 to 0V input, set the reverse rotation speed limit. The forward rotation speed limit at this time is the value ofPr. 1 Maximum frequency .⋅ The maximum speed of both the forward and reverse rotations is Pr. 1 Maximum frequency .When terminal 1 input is "-10 to 0V" When terminal 1 input is "0 to 10V"SpeedTorque controllable rangeForward rotationPr. 1SpeedForward rotation150 0 150Output torque (%)150 0 150Terminal 1 inputTerminal 1inputOutputtorque (%)Reverse rotationPr. 1Torque controllable rangeReverse rotationSpeedPr. 1The forward rotationspeed limitTorque controllable rangeSpeedTerminal 1 input (0 to 10V)The forward rotation speedlimitPr. 7Torque controllable rangePr. 8Terminal 1 input(-10 to 0V)The reverserotation speedlimitPr. 7Pr. 8TimePr. 1The reverse rotationspeed limitTimeStart signalOFFONStart signal OFFONREMARKS⋅ When making speed limit from terminal 1, make calibration of terminal 1. (Refer to page 273.)CAUTIONWhen the actual speed reaches or exceeds the speed limit value, torque control is switched to speed control to preventoverspeed.(SL) appears on the operation panel during speed limit operation and the OL signal is output.♦Parameters referred to♦Pr. 1 Maximum frequency, Pr. 2 Minimum frequency Refer to page 140Pr. 7 Acceleration time, Pr. 8 Deceleration time Refer to page 155Pr. 13 Starting frequency Refer to page 157Pr. 4 to Pr. 6, Pr. 24 to Pr. 27, Pr. 232 to Pr. 239 (Multi-speed operation) Refer to page 148Pr. 868 Terminal 1 function assignment Refer to page 258Pr. 125, Pr. 126, C2 to C7, C12 to C15 (frequency setting voltage (current) bias/gain) Refer to page 267112
4PARAMETERSTorque control by real sensorless vectorcontrol, vector control4.5.6 Gain adjustment of torque control (Pr. 824, Pr. 825, Pr. 834, Pr. 835)SensorlessVectorAlthough stable operation is possible with the initial value, make adjustment when any of such phenomena asunusual motor and machine vibration/noise and overcurrent has occurred.ParameterNumberName(1) Adjustment of current loop proportional (P) gain⋅ For general adjustment, make setting within the range 50 to 200% as a guideline.⋅ Set the proportional gain for torque control.⋅ Increasing the value improves trackability in response to a current command change and reduces current variationwith disturbance. However, a too large gain will cause instability, generating harmonic torque pulsation.(2) Adjustment of current control integral time⋅ Set the integral time of current control during torque control.⋅ A small value enhances the torque response level, but a too small value will cause current fluctuation.⋅ Decreasing the value shortens the time taken to return to the original torque if current variation with disturbanceoccurs.(3) Use multiple gainsInitial ValueSettingRange824 Torque control P gain 1 100% 0 to 200%825Torque control integraltime 1834 Torque control P gain 2 9999835Torque control integraltime 2DescriptionSet the current loop proportional gain.100% is equivalent to 2000rad/s.5ms 0 to 500ms Set the current loop integral compensation time.99990 to 200%Set the current loop proportional gain when the RTsignal is on.9999 Without torque control P gain 2 function0 to 500msSet the current loop integral compensation time whenthe RT signal is on.9999 Without torque control integral time 2 function⋅ When you want to change the gain according to applications, switch multiple motors with one inverter, etc., useTorque control P gain 2 and Torque control integral time 2 .⋅ Pr. 834 Torque control P gain 2 and Pr. 835 Torque control integral time 2 are valid when the RT signal is on.REMARKS⋅ The RT signal acts as the second function selection signal and makes the other second functions valid. (Refer to page 210.)⋅ The RT signal is assigned to the terminal RT in the initial setting. By setting "3" in any of Pr. 178 to Pr. 189 (input terminal functionselection) , you can assign the RT signal to the other terminal.113
Torque control by real sensorless vectorcontrol, vector control(4) Adjustment procedureMake adjustment when any of such phenomena as unusual motor and machine vibration/noise/current andovercurrent has occurred.1)Check the conditions and simultaneously change the Pr. 824 value.2)If you cannot make proper adjustment, change the Pr. 825 value and repeat step 1).Adjustment MethodSet Pr. 824 a little lower and Pr. 825 a little higher. First lower Pr. 824 and check the motor for unusual vibration/noise andovercurrent. If the problem still persists, increase Pr. 825 .Pr. 824Pr. 825Decrease the value 10% by 10% until just before unusual noise and current are improved, and set about 0.8 to 0.9of that value.Note that a too low value will produce current ripples, causing the motor to generate sound synchronizing the cycleof current ripples.Increase the current value double by double until just before an unusual noise and current does not occur, and setabout 0.8 to 0.9 of that value.Note that taking a too long time will produce current ripples, causing the motor to generate sound synchronizingthe cycle of current ripples.(5) Troubleshooting (Torque)1234Phenomenon Cause CountermeasuresTorque control is notexercised normally.When the torquecommand is small, themotor rotates in thedirection opposite to thestart signal.Normal torque controlcannot be exercisedduring acceleration/deceleration.The motor vibrates.Output torque is not linearin response to the torquecommand.(1) The phase sequence of themotor or encoder wiring iswrong.(2) The Pr. 800 Control methodselection setting is improper.(3) The speed limit value is notinput.(1) Check the wiring. (Refer to page 14)(2) Check the Pr. 800 setting. (Refer to page 75)(3) Set the speed limit value. (If the speed limit value is notinput, the motor will not rotate since the speed limitvalue is regarded as 0Hz.)(4) The torque command varies. (4)-1 Check that the command device gives a correcttorque command.(4)-2 Decrease Pr. 72 PWM frequency selection .(4)-3 Increase Pr. 826 Torque setting filter 1(5) The torque command does notmatch the inverter-recognizedvalue.(6) Torque variation due to thechange in the motortemperature.The offset calibration of the torquecommand does not match.The speed limit is activated.(When Pr. 807 = "0, 2", the speedlimit may be activated since thespeed limit value changes with thesetting of the acceleration/deceleration time in Pr. 7 and Pr. 8. )Insufficient torque.(5) Recalibrate C16 Terminal 1 bias command (torque/magnetic flux), C17 Terminal 1 bias (torque/magnetic flux),C18 Terminal 1 gain command (torque/magnetic flux), C19Terminal 1 gain (torque/magnetic flux). (Refer to page 273)(6) Select magnetic flux observer by setting Pr. 95 Onlineauto tuning selection. (Refer to page 181)Recalibrate C16 Terminal 1 bias command (torque/magneticflux) and C17 Terminal 1 bias (torque/magnetic flux). (Refer topage 273)Reduce the acceleration/deceleration time.Or, set the acceleration/deceleration time to "0". (Thespeed limit during acceleration/deceleration depends onthe speed limit during the constant speed.)Return the excitation ratio in Pr. 854 to the initial value.♦Parameters referred to♦Pr. 72 PWM frequency selection Refer to page 257Pr. 178 to Pr. 189 (input terminal function selection) Refer to page 206Pr. 800 Control method selection Refer to page 75Pr. 807 Speed limit selection Refer to page 110C16 to C19 (torque setting voltage (current) bias and gain) Refer to page 273114
4PARAMETERSPosition control by vector control4.6 Position control by vector controlPurpose Parameter that must be Set Refer to PageConditional position control byparameter settingPosition control by pulse train inputof the inverterAdjust the gear ratio of motor andmachineSetting of positioning adjustmentparameterImprove position control accuracyPosition command byparameterPosition command byconditional pulse trainSetting the electronicgearIn-position widthExcessive level errorGain adjustment ofposition controlPr. 419, Pr. 464 to Pr. 494 117Pr. 419, Pr. 428 to Pr. 430 120Pr. 420, Pr. 421, Pr. 424 122Pr. 426, Pr. 427 123Pr. 422, Pr. 423, Pr. 425 1244.6.1 Position controlVector• In the position control, the speed command is calculated so that the difference between command pulse (orparameter setting) and the number of feedback pulses from the encoder is zero to run the motor.• This inverter can perform conditional position feed by contact input and position control by inverter conditionalpulse input.(1) Setting procedurePerform secure wiring. (Refer to page 34.)Mount the <strong>FR</strong>-A7AP.Set the motor and encoder. (Pr. 71, Pr. 359, Pr. 369)Set the motor capacity and the number of motor poles.(Pr. 80, Pr. 81) (Refer to page 75.)Set the motor capacity (kW) in Pr. 80 Motor capacity and set the numberof motor poles (number of poles) in Pr. 81 Number of motor poles. (V/Fcontrol is performed when the setting is "9999" (initial value).)Select a control method. (Refer to page 75.)Set Pr. 71 <strong>Applied</strong> motor, Pr. 359 Encoder rotation direction and Pr. 369Number of encoder pulses according to the motor and encoder used.(Refer to page 35.)Make speed control valid by selecting "3" (position control) "4" (speedpositionswitchover) or "5" (position-torque switchover) for Pr. 800.Selection of position command source. (Pr. 419)Position command by contact inputSet "0" (initial value) in Pr. 419.Position command by inverter pulse train inputSet "2" in Pr. 419.Setting of parameter for position feed(Pr. 465 to Pr. 494).(Refer to page 117.)Selection of command pulse form.(Pr. 428)(Refer to page 120.)Test runAs required· Set the electronic gear. (refer to page 122)· Setting of positioning adjustment parameter (refer to page 123)· Gain adjustment of position control (refer to page 124page 123)⋅CAUTIONThe carrier frequencies are selectable from among 2k, 6k, 10k, 14kHz for vector control.115
Position control by vector control(2) Control block diagramRHRMRLREXSTFSTRCommandpulseJOGPr. 4 to 6Pr. 24 to 27Pr. 232 to 239Pr. 465 to Pr. 494travelPr. 7 Pr. 8(Pr. 44, Pr. 110)(Pr. 45, Pr. 111)Command pulse selectionPr. 428Position commandsource selectionPr. 419Multi-speed,communication 02Position commandacceleration/decelerationtime constantElectronicgearPr. 420Pr. 421Pr. 424Position feedforwardcommand filterPr. 425+-DeviationcounterPosition feedforward gainPr. 423Positionloop gainPr. 422 ++-Speed controlIMNPPr. 429Clear signalselectionDifferentiationEncoder(3) Example of operationThe speed command given to rotate the motor is calculated to zero the difference between the number of internalcommand pulse train pulses (when Pr. 419 = 0, the number of pulses set by parameter (Pr. 465 to Pr. 494) is changed tothe command pulses in the inverter) and the number of pulses fed back from the motor end encoder.1)When a pulse train is input, pulses are accumulated in the deviation counter and these droop pulses act as positioncontrol pulses to give the speed command.2)As soon as the motor starts running under the speed command of the inverter, the encoder generates feed backpulses and the droop of the deviation counter is counted down. The deviation counter maintains a given droop pulsevalue to keep the motor running.3)When the command pulse input stops, the droop pulses of the deviation counter decrease, reducing the speed. Themotor stops when there are no droop pulses.4)When the number of droop pulses has fallen below the value set in Pr. 426 In-position width , it is regarded ascompletion of positioning and the in-position signal (Y36) turns on.Motor speed [r/min]Command pulse frequency[PPS]Droop pulse valuePulse distributionMotor speedAccelerationDecelerationTimeStop settling timeLX signalServo onSTF (STR)Forward (reverse)Y36 signalIn-position signalPulse train Rough Fine Rough⋅ For conditional position control function by contact input, the STF and STR terminals provide the forward (reverse)command signal. The motor can run only in the direction where the forward (reverse) signal is on. Turning the STFsignal off does not run the motor forward and turning the STR signal off does not run the motor reverse.⋅ The pulse train is rough during acceleration and coarse at the maximum speed. During deceleration the pulse train isrough and at last there are no pulses. The motor stops shortly after the command pulses stop.This time lag is necessary for maintaining the stop accuracy and called stop settling time.REMARKS⋅ For the servo on signal (LX), set "23" in Pr. 178 to Pr. 189 (input terminal function selection) to assign the function.⋅ For the in-position signal (Y36), set "36" in Pr. 190 to Pr. 196 (output terminal function selection) to assign the function.116
4PARAMETERSPosition control by vector controlCAUTIONChanging the terminal function using any of Pr. 178 to Pr. 189, 190 to Pr. 196 may affect the other functions. Make setting afterconfirming the function of each terminal.♦Parameters referred to♦Pr. 178 to Pr. 189 (input terminal function selection) Refer to page 206Pr. 190 to Pr. 196 (output terminal function selection) Refer to page 2144.6.2 Conditional position feed function by contact input (Pr. 419, Pr. 464 to Pr. 494)VectorInputting the number of pulses (positions) in the parameters and setting multi-speed and forward (reverse)commands enable position control. The motor does not return to the home position with this conditional positionfeed function .ParameterNumberNameInitial ValueSettingRangeDescription419Position command sourceselection002Conditional position control function by contactinput. (position command by parameter settings)Conditional pulse train position command byinverter pulse train input464Digital position controlsudden stop decelerationtime0s 0 to 360.0sSet the time until the inverter stops when theforward rotation (reverse rotation) command isturned off with the position feed forward function.ParameterNumberNameInitial ValueSettingRangeSelection Method(OFF: ×, ON: ◦)REX RH RM RLPosition FeedFrequency465466First position feed amountlower 4 digitsFirst position feed amountupper 4 digits0 0 to 99990 0 to 9999× ◦ × × High speed (Pr. 4)467468Second position feedamount lower 4 digitsSecond position feedamount upper 4 digits0 0 to 99990 0 to 9999× × ◦ × Middle speed (Pr. 5)469470Third position feedamount lower 4 digitsThird position feedamount upper 4 digits0 0 to 99990 0 to 9999× × × ◦ Low speed (Pr. 6)471472Fourth position feedamount lower 4 digitsFourth position feedamount upper 4 digits0 0 to 99990 0 to 9999× × ◦ ◦ 4 speed (Pr. 24)473474Fifth position feed amountlower 4 digitsFifth position feed amountupper 4 digits0 0 to 99990 0 to 9999× ◦ × ◦ 5 speed (Pr. 25)475476Sixth position feedamount lower 4 digitsSixth position feedamount upper 4 digits0 0 to 99990 0 to 9999× ◦ ◦ × 6 speed (Pr. 26)477478Seventh position feedamount lower 4 digitsSeventh position feedamount upper 4 digits0 0 to 99990 0 to 9999× ◦ ◦ ◦ 7 speed (Pr. 27)479480Eighth position feedamount lower 4 digitsEighth position feedamount upper 4 digits0 0 to 99990 0 to 9999◦ × × × 8 speed (Pr. 232)117
Position control by vector controlParameterNumber481482483484485486487488489490491492493NameNinth position feedamount lower 4 digitsNinth position feedamount upper 4 digitsTenth position feedamount lower 4 digitsTenth position feedamount upper 4 digitsEleventh position feedamount lower 4 digitsEleventh position feedamount upper 4 digitsTwelfth position feedamount lower 4 digitsTwelfth position feedamount upper 4 digitsThirteenth position feedamount lower 4 digitsThirteenth position feedamount upper 4 digitsFourteenth position feedamount lower 4 digitsFourteenth position feedamount upper 4 digitsFifteenth position feedamount lower 4 digitsInitial ValueSettingRange0 0 to 99990 0 to 99990 0 to 99990 0 to 99990 0 to 99990 0 to 99990 0 to 99990 0 to 99990 0 to 99990 0 to 99990 0 to 99990 0 to 99990 0 to 9999Fifteenth position feed4940 0 to 9999amount upper 4 digitsThe above parameters can be set when the <strong>FR</strong>-A7AP (option) is mounted.Selection Method(OFF: ×, ON: ◦)REX RH RM RLPosition FeedFrequency◦ × × ◦ 9 Speed (Pr. 233)◦ × ◦ × 10 speed (Pr. 234)◦ × ◦ ◦ 11 speed (Pr. 235)◦ ◦ × × 12 speed (Pr. 236)◦ ◦ × ◦ 13 speed (Pr. 237)◦ ◦ ◦ × 14 speed (Pr. 238)◦ ◦ ◦ ◦ 15 speed (Pr. 239)118
4PARAMETERS(1) Setting of position feed amount by parameterPosition control by vector control⋅Set position feed amount in Pr. 465 to Pr. 494 .⋅The feed amount set in each parameter is selected by mult-speed terminal (RH, RM, RL, REX).⋅Set (encoder resolution × speed × 4 times) for position feed amount.⋅For example, the formula for stopping the motor after 100 rotations using the <strong>FR</strong>-V5RU is as follows:2048 (pulse/rev) × 100 (speed) × 4 = 819200 (feed amount)To set 819200 for the first position feed amount, divide the value into upper four digits and lower four digits and set81 (decimal) in Pr. 466 (upper) and 9200 (decimal) in Pr. 465 (lower).(2) Position command operation by parameter⋅Feed speedPr. 4Pr. 7Pr. 8(Pr. 44, Pr. 110) (Pr. 45, Pr. 111)Servo on (LX)RHRMSTFSTRFrequency (Hz)Y36In-positionShaded part is the travelFirst position feed amountPr. 466 10000 + Pr. 465Pr. 5For deceleration by turning the STF(STR) off, use Pr. 464 Digital position control sudden stop deceleration time to setdeceleration time.REMARKS⋅ Acceleration/deceleration time is 0.1s minimum and 360s maximum.⋅ Pr. 20 Acceleration/deceleration reference frequency is clamped at a minimum of 16.66Hz (500r/min).⋅ The acceleration/deceleration patterns for position control are all linear acceleration and the setting of Pr. 29 Acceleration/deceleration pattern selection is invalid.CAUTIONInformation on multi-speed command (position command by RL, RM, RH, and REX signals) is determined at rising of the forward(reverse) command to perform position control. Therefore, set forward (reverse) command after multi-speed command (positioncommand). Position feed is invalid if the multi-speed command is given after forward (reverse) command.♦Parameters referred to♦Pr. 20 Acceleration/deceleration reference frequency Refer to page 155Pr. 29 Acceleration/deceleration pattern selection Refer to page 158Second positionfeed amountPr. 464Stops when the STF isturned offTimePosition feed isperformed by sendingrun command bycontact input orcommunication.119
Position control by vector control4.6.3 Position control (Pr. 419, Pr. 428 to Pr. 430) by inverter pulse train inputConditional position pulse train command can be input by pulse train input and sign signal (NP) from the JOGterminal.ParameterNumber419(1) OperationNamePosition command sourceselectionInitial Value428 Command pulse selection 0429 Clear signal selection 10SettingRangeDescriptionTurning on the servo on signal (LX) cancels the output shut-off and the operation ready signal (RDY) turns on after0.1s. Turning on the STF (forward stroke end signal) or STR (forward stroke end signal) runs the motor according tothe commanded pulse. When the forward (reverse) stroke end signal turns off, the motor does not run in thatdirection.02Conditional position control function by contactinput. (position command by parameter settings)Conditional pulse train position command byinverter pulse train input0 to 2Negative logicPulse train + sign3 to 5 Positive logic01Deviation counter is cleared at edge of turning onof the clear signal (CLR) from off.Deviation counter while the clear signal (CLR) isonThe status of various pulses during running is0 to 5430 Pulse monitor selection 9999displayed.9999 Frequency monitor is displayed.The above parameters can be set when the <strong>FR</strong>-A7AP (option) is mounted.VectorActual rotationBase signalServo on (LX)Forward stroke end (STF)Reverse stroke end (STR)Operation ready completion (RDY)Inverter pulse train commandSign signal (NP)In-position (Y36)Forward rotationReverse rotation0.1s(2) Pulse train form type selection (Pr. 428, NP signal)1)Set "2"(conditional pulse train position command) in Pr. 419.2)Set "68" in Pr. 178 to Pr. 189 (input terminal function selection) to assign conditional position pulse train sign (NP).3)Select command pulse train using Pr. 428Pr. 428 Setting Command Pulse Train Type At Forward Rotation At Reverse Rotation0 to 2NegativelogicPulse train + signJOGNPLH⋅3 to 5PositivelogicPulse train + sign4)Select vector control, then select position control.REMARKSJOGNP H LWhen Pr. 419 Position command source selection = "2" (conditional pulse train position command), JOG terminal serves asconditional position pulse train input terminal regardless of the Pr. 291 Pulse train I/O selection setting.120
4PARAMETERS(3) Selection of clear signal (Pr. 429, CLR signal)Position control by vector control⋅ Use this function to zero the droop pulse for home position operation, etc.⋅ When "0" is set in Pr. 429 , the deviation counter is cleared at the edge of truning on of the clear signal (CLR). Inaddition, the CLR signal turns on in synchronization with zero pulse signal of the encoder at home positionoperation, etc., deviation counter is cleared.⋅ For the terminal used for CLR signal, set "69" in any of Pr. 178 to Pr. 189 (input terminal function selection) to assignthe function.When Pr. 429 = "0"When Pr. 429 = "1 (initial value)"(4) Pulse monitor selection (Pr. 430 )The status of various pulses during running is displayed.Set "6" in Pr. 52 DU/PU main display data selection to display output frequency monitor.Pr. 430Setting0Deviation counterimageCLRDescriptionONCounter clear at the edge ofturning on of the signalDeviation counterimageCLRDisplay Range(<strong>FR</strong>-DU07)Display Range(<strong>FR</strong>-PU04/<strong>FR</strong>-PU07)Lower 4 digitsLower 5 digitsThe cumulative command pulse value is displayed.1 Upper 4 digits Upper 5 digits2Lower 4 digitsLower 5 digitsThe cumulative feedback pulse value is displayed.3 Upper 4 digits Upper 5 digits4Lower 4 digitsLower 5 digitsThe droop pulses are monitored.5 Upper 4 digits Upper 5 digits9999 Frequency monitor is displayed. (initial value)REMARKS⋅ Count the number of pulses when the servo is on.⋅ The cumulative pulse value is cleared when the base is shut off or the clear signal (CLR) is turned on.ONCounter clear while ON⋅CAUTIONChanging the terminal assignment using Pr. 178 to Pr. 189 (input terminal function selection) may affect the other functions. Makesetting after confirming the function of each terminal.♦Parameters referred to♦Pr. 52 DU/PU main display data selection Refer to page 228Pr. 178 to Pr. 189 (input terminal function selection) Refer to page 206121
Position control by vector control4.6.4 Setting of the electronic gear (Pr. 420, Pr. 421, Pr. 424)Vector(1) Calculation of the gear ratio (Pr. 420, Pr. 421)122Set the ratio of the machine side gear and the motor side gear.ParameterNumber420421424NameCommand pulse scalingfactor numeratorCommand pulse scalingfactor denominatorPosition commandacceleration/decelerationtime constantInitial ValueSettingRange1 0 to 32767 *1 0 to 32767 *0s0 to 50sDescriptionSet the electric gear.Pr. 420 is a numerator and Pr. 421 is a denominator.Used when rotation has become unsmooth at alarge electronic gear ratio (about 10 times or more)and low speed.The above parameters can be set when the <strong>FR</strong>-A7AP (option) is mounted.* When the operation panel (<strong>FR</strong>-DU07) is used, the maximum setting is 9999. When a parameter unit is used, up to the maximum value withinthe setting range can be set.⋅ The position resolution (travel per pulse Δ [mm]) is determined by the travel per motor revolution Δs [mm] and thefeedback pulses Pf [pulse/rev] of the detector, and is represented by the following expression.Δ = ΔsPfΔ :travel per pulse [mm]Δs: travel per motor rotation [mm]Pf: number of feedback pulses [pulse/rev] (number of pulses after multiplying the number ofencoder pulses by four)Using the parameters, the travel per command pulse can be set separately to set the travel per command pulsewithout a fraction.Δ = Δs Pr. 420×Pf Pr. 421In addition, the relationship between the motor speed and internal command pulse frequency is as follows:fo × Pr. 420 No fo : Internal command pulse frequency [pps]= Pf ×Pr. 421 60 No : Motor speed [r/min]CAUTIONSet the electronic gear in the range of 1/50 to 20.Note that too small a value will decrease the speed command and too large a value will increase the speed ripples.[Setting example 1]The electronic gear ratio is Δs = 10 (mm) when the travel per pulse Δ = 0.01 (mm) and the number of feedbackpulses Pf = 4000 (pulse/rev) in a drive system where the ballscrew pitch PB = 10 (mm) and the reduction ratio 1/n = 1.According to the following expression,Δ = Δs Pr. 420×Pf Pr. 421Pr. 420 = Δ ×Pr. 421PfΔs= 0.01 × 4000 = 410 1Therefore, set "4" in Pr. 420 and "1" in Pr. 421 .[Setting example 2]Find the internal command pulse frequency of the dedicated motor rated speed.Note that the command pulse scaling factor Pr. 420/Pr. 421 = 1.Assuming that the number of encoder pulses is 2048 (pulses/rev) (feedback pulse Pf = 2048 × 4),fo = 2048 ×= 2048004(multiplication) × No Pr. 421×60 Pr. 420Therefore, the internal command pulse frequency is 204800 (pps).
4PARAMETERSPosition control by vector controlRelationship between position resolution Δ and overall accuracySince overall accuracy (positioning accuracy of machine) is the sum of electrical error and mechanical error, normallytake measures to prevent the electrical system error from affecting the overall error. As a guideline, refer to thefollowing relationship.Δ < ( 1 to 1 ) × Δε Δε:positioning accuracy5 10When parameters are used to run the motor, the internal command pulse frequency and motor speed have therelationship as shown in the chart on page 116, and as the motor speed decreases, pulses are accumulated in thedeviation counter of the inverter. These pulses are called droop pulses (ε) and the relationship between commandfrequency (fo) and position loop gain (Kp: Pr. 422) is as represented by the following expression.ε = fo [pulse] ε = 204800 [pulse] (rated motor speed)Kp 25When the initial value of Kp is 25s -1 , the droop pulses (ε) are 8192 pulses.Since the inverter has droop pulses during running, a stop settling time (ts) is needed from when the command haszeroed until the motor stops. Set the operation pattern in consideration of the stop settling time.ts = 3 × 1 [s]KpWhen the initial value of Kp is 25s -1 , the stop settling time (ts) is 0.12s.The positioning accuracy Δε is (5 to 10) × Δ = Δε [mm](2) Position command acceleration/deceleration time constant (Pr. 424 )⋅ When the electronic gear ratio is large (about 10 or more times) and the speed is low, rotation will not be smooth,resulting in pulse-wise rotation. At such a time, set this parameter to smooth the rotation.⋅ When acceleration/deceleration time cannot be provided for the command pulses, a sudden change in commandpulse frequency may cause an overshoot or error excess alarm. At such a time, set this parameter to provideacceleration/deceleration time.Normally set 0.♦Parameters referred to♦Pr. 422 Position loop gain Refer to page 1244.6.5 Setting of positioning adjustment parameter (Pr. 426, Pr. 427)VectorParameterNumberName Initial Value Setting Range Description426 In-position width 100 pulses 0 to 32767 pulses *When the number of droop pulses has fallen belowthe setting value, the in-position signal (Y36) turns on.Excessive position error (E.OD) occurs when the0 to 400K427 Excessive level error 40Knumber of droop pulses exceeds the setting.9999 Function invalidThe above parameters can be set when the <strong>FR</strong>-A7AP (option) is mounted.* When the operation panel (<strong>FR</strong>-DU07) is used, the maximum setting is 9999. When a parameter unit is used, up to the maximum value withinthe setting range can be set.(1) In-position width (Pr. 426 )The Y36 signal acts as an in-position signal.When the number of droop pulses has fallen below the setting value, the in-position signal (Y36) turns on.For the Y36 signal, assign the function by setting "36" (positive logic) or "136" (negative logic) in any of Pr. 190 to Pr.196 (output terminal function selection) .(2) Excessive level error (Pr. 427 )When droop pulses exceed the value set in Pr. 427, excessive position error occurs and displays a fault (E.OD) totrip the inverter. When you decreased the Pr. 422 Position loop gain setting, increase the error excessive level setting.Also decrease the setting when you want to detect an error slightly earlier under large load.When "9999" is set in Pr. 427 , excessive position error (E.OD) does not occur regardless of droop pulses.123
Position control by vector control4.6.6 Gain adjustment of position control (Pr. 422, Pr. 423, Pr. 425)VectorEasy gain tuning is available as an easy tuning method. Refer to page 88 for easy gain tuning.If it does not produce any effect, make fine adjustment by using the following parameters.Set "0" in Pr. 819 Easy gain tuning selection before setting the parameters below.ParameterNumberNameInitial ValueSettingRangeDescription422 Position loop gain 25s -1 0 to 150s -1 Set the gain of the position loop.423 Position feed forward gain 0% 0 to 100%Position feed forward4250s0 to 5scommand filterThe above parameters can be set when the <strong>FR</strong>-A7AP (option) is mounted.Function to cancel a delay caused by the drooppulses of the deviation counter.Enters the primary delay filter in response to thefeed forward command.(1) Position loop gain (Pr. 422 )⋅ Make adjustment when any of such phenomena as unusual vibration, noise and overcurrent of the motor/machineoccurs.⋅ Increasing the setting improves trackability for the position command and also improves servo rigidity at a stop, butoppositely makes an overshoot and vibration more liable to occur.⋅ Normally set this parameter within the range about 5 to 50.Phenomenon/ConditionSlow responseOvershoot, stop-timevibration or other instablephenomenon occurs.Increase the Pr. 422 value.Pr. 422Decrease the Pr. 422 value.Pr. 422Adjustment MethodIncrease the value 3s -1 by 3s -1 until just before an overshoot, stop-time vibration orother instable phenomenon occurs, and set about 0.8 to 0.9 of that value.Decrease the value 3s -1 by 3s -1 until just before an overshoot, stop-time vibration orother instable phenomenon does not occur, and set about 0.8 to 0.9 of that value.(2) Position feed forward gain (Pr. 423 )⋅ This function is designed to cancel a delay caused by the droop pulses of the deviation counter.⋅ When a tracking delay for command pulses poses a problem, increase the setting gradually and use this parameterwithin the range where an overshoot or vibration will not occur.⋅ This function has no effects on servo rigidity at a stop.⋅ Normally set this parameter to 0.124
4PARAMETERSPosition control by vector control(3) Troubleshooting (Position control)Phenomenon Cause Countermeasures1 Motor does not rotate.2 Position shift occurs.3 Motor or machine hunts.4Machine operation isunstable.(1) The phase sequence of themotor or encoder wiring iswrong.(2) The control mode selection Pr.800 setting is improper.(3) The servo on signal or strokeend signal (STF, STR) is notinput.(4) Command pulse, position pulsesign (NP) are not correctlyinput.(5) Pr. 419 Position command sourceselection setting is not correct.(6) When "0" is set in Pr. 419Position command sourceselection, the settings of positionfeed amount in Pr. 465 to Pr. 494are not correct.(1) The command pulses are notinput correctly.(2) The command is affected bynoise. Or the encoder feedbacksignal is compounded withnoise.(1) Check the wiring. (Refer to page 33 )(2) Check the Pr. 800 setting. (Refer to page 75 )(3) Check that the signals are input normally.(4)-1 Check that the command pulses are input normally.(Check the cumulative command pulse value in Pr.430)(4)-2 Check the command pulse form and commandpulse selection, Pr. 428, setting.(4)-3 Check that the position pulse sign (NP) is assignedto the input terminal. (inverter pulse input)(5) Check the position command source selection in Pr.419.(6) Check the position feed amount in Pr. 465 to Pr. 494 .(1)-1 Check the command pulse form and commandpulse selection, Pr. 428 setting.(1)-2 Check that the command pulses are input normally.(Check the cumulative command pulse value in Pr.430 )(1)-3 Check that the position pulse sign (NP) is assignedto the input terminal. (inverter pulse input)(2)-1 Decrease the Pr. 72 PWM frequency selection value.(2)-2 Change the earthing (grounding) point of shieldedwire. Or leave the cable suspended.(1) The position loop gain is high. (1) Decrease the Pr. 422 value.(2) The speed gain is high. (2)-1 Perform easy gain tuning.(2)-2 Decrease Pr. 820 and increase Pr. 821 .(1) The acceleration/decelerationtime setting has adverse effect.♦Parameters referred to♦Pr. 7 Acceleration time Refer to page 155Pr. 8 Deceleration time Refer to page 155Pr. 72 PWM frequency selection Refer to page 257Pr. 800 Control method selection Refer to page 75Pr. 802 Pre-excitation selection Refer to page 185Pr. 819 Easy gain tuning selection Refer to page 88Pr. 820 Speed control P gain 1 Refer to page 88Pr. 821 Speed control integral time 1 Refer to page 88(1) Decrease Pr. 7 and Pr. 8 .125
Position control by vector control4.6.7 Trouble shooting for when position control is not exercised normallyVectorPosition control is notexercised normallyHave you checkedthe speed control items?NYCheck the speedcontrol measures.Position shift occurs.YNHave you madethe electronic gearsetting?YNSet the electronic gear.(Pr. 420, Pr. 421)The forward (reverse)rotation stroke end signal has Yturned off before completionof positioning.Do not turn off the forward(reverse) rotation stroke endNsignal before completion ofpositioning.Motor or machine ishunting.YNThe position loop gain(Pr. 422) is high.NMachine operation isunstable.NPlease contact your salesrepresentative.YDecreasethe position loop gain(Pr. 422).YInsufficient torque.Increase the excitationratio (Pr. 854).Perform easy gain tuning.The speed control gain is high.Decrease the speed controlproportional gain (Pr. 820).Increase the speed controlintegral time (Pr. 821).REMARKSThe speed command of position control relates to speed control. (Refer to page 81 )126
4PARAMETERSAdjustment of real sensorless vectorcontrol, vector control4.7 Adjustment of real sensorless vector control, vector controlPurpose Parameter that should be Set Refer to PageStabilize speed and feedback signalSpeed detection filterTorque detection filterPr. 823, Pr. 827, Pr. 833, Pr. 837 127Change the excitation ratio Excitation ratio Pr. 854 1284.7.1 Speed detection filter and torque detection filter (Pr. 823, Pr. 827, Pr. 833, Pr.837)SensorlessVectorSet the time constant of the primary delay filter relative to the speed feedback signal and torque feedback signal.Since this function reduces the speed loop response, use it with the initial value.ParameterNumberName Initial Value Setting Range Description823 *1 Speed detection filter 1 0.001s827 Torque detection filter 1 0s833 *1 Speed detection filter 2 9999837 Torque detection filter 2 9999*1 This parameter can be set when the <strong>FR</strong>-A7AP (option) is mounted.(1) Stabilize speed detection (Pr. 823, Pr. 833 )⋅ Since the current loop response reduces, use it with the initial value.Increase the setting value gradually and adjust the value to stabilize the speed when speed ripples occur due toharmonic disturbance, etc. A too large value will run the motor unstably.⋅ Pr. 823 and Pr. 833 are valid only during vector control(2) Stabilize speed detection (Pr. 827, Pr. 837 )0 Without filter0.001 to 0.1sSet the time constant of the primary delay filterrelative to the speed feedback signal.0 Without filter0.001 to 0.1sSet the time constant of the primary delay filterrelative to the torque feedback signal.0 to 0.1sSecond function of Pr. 823 (valid when RT signal ison)9999 Same as the Pr. 823 setting0 to 0.1sSecond function of Pr. 827 (valid when RT signal ison)9999 Same as the Pr. 827 setting⋅ Since the current loop response reduces, use it with the initial value.Increase the setting value gradually and adjust the value to stabilize the speed when torque ripples occur due toharmonic disturbance, etc. A too large value will run the motor unstably.(3) Use multiple primary delay filters.⋅ Use Pr. 833 and Pr. 837 to change the filter accroding to applications. Pr. 833 and Pr. 837 are valid when the RTsignal is on.REMARKS⋅ The RT signal acts as the second function selection signal and makes the other second functions valid. (Refer to page 210.)⋅ The RT signal is assigned to the RT terminal in the initial setting. By setting "3" in any of Pr. 178 to Pr. 189 (input terminal functionselection) , you can assign the RT signal to the other terminal.127
Adjustment of real sensorless vectorcontrol, vector control4.7.2 Excitation ratio (Pr. 854)SensorlessVectorDecrease the excitation ratio when you want to improve efficiency under light load. (Motor magnetic noisedecreases.)ParameterNumberName Initial Value Setting Range Description854 Excitation ratio 100% 0 to 100% Set the excitation ratio under no load.⋅ Note that the rise of output torque becomes slow ifexcitation ratio is decreased.This function is appropriate for applications as machinetools which repeat rapid acceleration/deceleration up tohigh speed.Excitationratio [%]100(initial value)Pr. 854set value0 100 Load [%]⋅REMARKSWhen "1" (magnetic flux with terminal) is set in Pr. 858 Terminal 4 function assignment or Pr. 868 Terminal 1 function assignment, thePr. 854 setting is made invalid.128
4PARAMETERSAdjust the output torque (current) of the motor4.8 Adjust the output torque (current) of the motorPurpose Parameter that must be Set Refer to PageSet starting torque manually Manual torque boost Pr. 0, Pr. 46, Pr. 112 129Automatically control output currentaccording to loadCompensate for motor slip to securelow-speed torqueLimit output current to prevent invertertripAdvanced magnetic fluxvector controlPr. 71, Pr. 80, Pr. 81, Pr. 89, Pr. 450,Pr. 451, Pr. 453, Pr. 454,Pr. 569, Pr. 800Slip compensation Pr. 245 to Pr. 247 134Stall prevention operationPr. 22, Pr. 23, Pr. 66,Pr. 154, Pr. 156, Pr. 1571311354.8.1 Manual torque boost (Pr. 0, Pr. 46, Pr. 112)V/FYou can compensate for a voltage drop in the low-frequency range to improve motor torque reduction in the lowspeedrange.•Motor torque in the low-frequency range can be adjusted to the load to increase the starting motor torque.•Three types of starting torque boost can be changed by switching terminals.ParameterNumber0 Torque boost(1) Starting torque adjustmentName Initial Value Setting Range Description7.5K or less 3%11K or more 2%46 Second torque boost 9999112 Third torque boost 99990 to 30% Set the output voltage at 0Hz as %.0 to 30%Set the torque boost value when theRT signal is on.9999 Without second torque boost0 to 30%Set the torque boost value when theX9 signal is on.9999 Without third torque boost⋅ On the assumption that Pr. 19 Base frequency voltage is 100%, set the output voltage at 0Hz in % in Pr. 0 (Pr. 46, Pr. 112).⋅ Adjust the parameter little by little (about 0.5%), and check the motor status each time. If the setting is too large, themotor will overheat. The guideline is about 10% at the greatest.100%OutputvoltagePr.0Pr.46Pr.112Settingrange0Outputfrequency(Hz)Basefrequency129
Adjust the output torque (current) of the motor(2) Set multiple torque boost (RT signal, X9 signal, Pr. 46, Pr. 112)⋅ Use the second (third) torque boost when changing the torque boost according to application or when usingmultiple motors by switching between them by one inverter.⋅ Pr. 46 Second torque boost is made valid when the RT signal turns on.⋅ Pr. 112 Third torque boost is valid when the X9 signal is on. For the terminal used for X9 signal input, set "9" in any ofPr. 178 to Pr. 189 (input terminal function selection) to assign the X9 signal function.REMARKS⋅ The RT(X9) signal acts as the second (third) function selection signal and makes the other second (third) functions valid.(Refer to page 210)⋅ The RT signal is assigned to the RT terminal in the default setting. By setting "3" in any of Pr. 178 to Pr. 189 (input terminal functionselection), you can assign the RT signal to the other terminal.⋅⋅⋅⋅CAUTIONIncrease the setting when the distance between the inverter and motor is long or when motor torque is insufficient in the lowspeedrange. If the setting is too large, an overcurrent trip may occur.The Pr. 0, Pr. 46, Pr. 112 settings are valid only when V/F control is selected.When using the inverter dedicated motor (constant torque motor) with the 5.5K or 7.5K, set the torque boost value to 2%. If theinitial set Pr. 71 value is changed to the setting for use with a constant-torque motor, the Pr. 0 setting changes to thecorresponding value in above.Changing the terminal assignment using Pr. 178 to Pr. 189 (input terminal function selection) may affect the other functions. Pleasemake setting after confirming the function of each terminal.♦ Parameters referred to ♦Pr. 3 Base frequency, Pr. 19 Base frequency voltage Refer to page 142Pr. 71 <strong>Applied</strong> motor Refer to page 169Pr. 178 to Pr. 189 (Input terminal function selection) Refer to page 206130
4PARAMETERSAdjust the output torque (current) of the motor4.8.2 Advanced magnetic flux vector control (Pr. 71, Pr. 80, Pr. 81, Pr. 89, Pr. 450,Pr. 451, Pr. 453, Pr. 454, Pr. 569, Pr. 800)Magnetic fluxAdvanced magnetic flux vector control can be selected by setting the capacity, number and type of motor to beused in Pr. 80 and Pr. 81.•What is advanced magnetic flux vector control?The low speed torque can be improved by providing voltage compensation so that the motor current whichmeets the load torque to flow. Output frequency compensation (slip compensation) is made so that the motoractual speed approximates a speed command value. Effective when load fluctuates drastically, etc.ParameterNumberNameInitialValue71 <strong>Applied</strong> motor 080 Motor capacity 999981 Number of motor poles 999989Speed control gain(magnetic flux vector)9999450 Second applied motor 9999451Second motor controlmethod selection9999453 Second motor capacity 9999454569Number of second motorpolesSecond motor speedcontrol gain99999999Setting Range0 to 8, 13 to 18,30, 33, 34, 40, 43, 44, 50,53, 54DescriptionBy selecting a standard motor or constanttorque motor, thermal characteristic and motorconstants of each motor are set.0.4 to 55kW Set the applied motor capacity.9999 V/F control2, 4, 6, 8, 10 Set the number of motor poles.12, 14, 16, 18, 20 X18 signal-ON:V/F control *Set 10 + numberof motor poles.9999 V/F controlMotor speed fluctuation due to load fluctuationis adjusted during advanced magnetic flux0 to 200%vector control.100% is a referenced value.9999 Gain matching with the motor set in Pr. 71.0 to 8, 13 to 18,30, 33, 34, 40, 43, 44, 50,53, 54Set when using the second motor.(same specifications as Pr. 71 )9999 Function invalid (Pr. 71 is valid)10, 11, 12 Real sensorless vector control20, 9999V/F control (advanced magnetic flux vectorcontrol)0.4 to 55kW Set the capacity of the second motor.9999 V/F control2, 4, 6, 8, 10 Set the number of poles of the second motor.9999 V/F control0 to 200%Second motor speed fluctuation due to loadfluctuation is adjusted during advancedmagnetic flux vector control.100% is a referenced value.9999 Gain matching with the motor set in Pr. 450.0 to 5 Vector control9 Vector control test operation800 Control method selection 2010, 11, 12 Real sensorless vector control20V/F control (advanced magnetic flux vectorcontrol)* Use Pr. 178 to Pr. 189 to assign the terminals used for the X18 and MC signal. (Refer to page 206 )POINTIf the following conditions are not satisfied, select V/F control since malfunction such as insufficient torque anduneven rotation may occur.• The motor capacity should be equal to or one rank lower than the inverter capacity.• Motor to be used is either Mitsubishi standard motor (SF-JR, SF-HR two-pole, four-pole, six-pole 3.7kW or more)or Mitsubishi constant torque motor (SF-JRCA four-pole, SF-HRCA 3.7kW or more). When using a motor otherthan the above (other manufacturer's motors, etc.), perform offline auto tuning without fail.• Single-motor operation (one motor run by one inverter) should be performed.• The wiring length from inverter to motor should be within 30m. (Perform offline auto tuning in the state wherewiring work is performed when the wiring length exceeds 30m.)131
Adjust the output torque (current) of the motor(1) Selection method of advanced magnetic flux vector controlPerform secure wiring.(Refer to page 14)Set the motor. (Pr. 71)Motor Pr. 71 Setting *1 REMARKSMitsubishi standard SF-JR0 (initial value)motor SF-HR 40Mitsubishi highefficiency motorOthers 3 Offline auto tuning is necessary. *2Mitsubishi constanttorquemotorSF-JRCA 4P 1SF-HRCA 50Others (SF-JRC, etc.) 13 Offline auto tuning is necessary. *2Othermanufacturer's⎯ 3 Offline auto tuning is necessary. *2standard motorOthermanufacturer'sconstant torque⎯ 13 Offline auto tuning is necessary. *2motor*1 For other settings of Pr. 71 , refer to page 169.*2 Refer to page 171 for offline auto tuning.Set the motor capacity and the number of motor poles.(Pr. 80, Pr. 81) (Refer to page 75)Set motor capacity (kW) in Pr. 80 Motor capacity and the numberof motor poles (number of poles) in Pr. 81 Number of motor poles.(V/F control is performed when the setting is "9999" (initial value).)Set the operation command. (Refer to page 283)Select the start command and speed command.(1) Start command1. Operation panel :Setting by pressing / of the operation panel2. External command : Setting by forward rotation or reverserotation command (terminal STF or STR)(2) Speed command1. Operation panel :Setting by of the operation panel2. External analog command (terminal 2 or 4) :Give a speed command using the analog signal input toterminal 2 (or terminal 4).3. Multi-speed command :The external signals (RH, RM, RL) may also be used to givespeed command.Test runAs required· Perform offline auto tuning. (Pr. 96) (refer to page 171)· Select online auto tuning. (Pr. 95) (refer to page 181)REMARKS· When higher accuracy operation is necessary, set online auto tuning after performing offline auto tuning and select realsensorless vector control.132
4PARAMETERSAdjust the output torque (current) of the motorCAUTION· Uneven rotation slightly increases as compared to the V/F control. (It is not suitable for machines such as grinding machine andwrapping machine which requires less uneven rotation at low speed.)· When a surge voltage suppression filter (<strong>FR</strong>-ASF-H) is connected between the inverter and motor, output torque may decrease.· Changing the terminal assignment using Pr. 178 to Pr. 189 (input terminal function selection) may affect the other functions. Makesetting after confirming the function of each terminal.(2) Adjust the motor speed fluctuation at load fluctuation (speed control gain)The motor speed fluctuation at load fluctuation can be adjusted using Pr. 89.(It is useful when the speed command does not match the motor speed afterthe <strong>FR</strong>-A201 series inverter is replaced with the <strong>FR</strong>-<strong>A701</strong> series inverter,etc.)Load torqueSpeed(3) Advanced magnetic flux vector control is performed with two motors• Turning the RT signal on allows the second motor to be controled.• Set the second motor in Pr. 450 Second applied motor. (Initial setting is "9999" (without second applied motor). Referto page 169.)Function RT signal ON (second motor) RT signal OFF (first motor)<strong>Applied</strong> motor Pr. 450 Pr. 71Motor capacity Pr. 453 Pr. 80Number of motorpolesPr. 454 Pr. 81Speed control gain Pr. 569 Pr. 89Control methodselectionPr. 451 Pr. 800REMARKS• The RT signal acts as the second function selection signal and makes the other second functions valid. (Refer to page 210)The RT signal is assigned to the terminal RT in the initial setting. By setting "3" in any of Pr. 178 to Pr. 189 (input terminal functionselection), the RT signal can be assigned to the other terminal.CAUTION• Changing the terminal assignment using Pr. 178 to Pr. 189 (input terminal function selection) may affect the other functions. Pleasemake setting after confirming the function of each terminal.♦Parameters referred to♦Pr. 71, Pr. 450 <strong>Applied</strong> motor Refer to page 169Pr. 800, Pr. 451 Control method selection Refer to page 75133
Adjust the output torque (current) of the motor4.8.3 Slip compensation (Pr. 245 to Pr. 247)V/FThe inverter output current may be used to assume motor slip to keep the motor speed constant.ParameterNumberName Initial Value Setting Range Description245 Rated slip 9999246247Slip compensation timeconstantConstant-power range slipcompensation selection0.5s 0.01 to 10s99990.01 to 50% Used to set the rated motor slip.0, 9999 No slip compensation09999Used to set the slip compensation responsetime. When the value is made smaller,response will be faster. However, as loadinertia is greater, a regenerative overvoltagefault (E.OV) is more liable to occur.Slip compensation is not made in theconstant power range (frequency rangeabove the frequency set in Pr. 3)Slip compensation is made in the constantpower range.⋅ Slip compensation is validated when the motor rated slip calculated by the following formula is set in Pr. 245. Slipcompensation is not made when Pr. 245 = "0" or "9999".Rated slip = Synchronous speed at base frequency - rated speed × 100[%]Synchronous speed at base frequencyREMARKSWhen performing slip compensation, the output frequency may become greater than the set frequency. Set the Pr. 1 Maximumfrequency value a little higher than the set frequency.♦ Parameters referred to ♦Pr. 1 Maximum frequency Refer to page 140Pr. 3 Base frequency Refer to page 142134
4PARAMETERSAdjust the output torque (current) of the motor4.8.4 Stall prevention operation (Pr. 22, Pr. 23, Pr. 48, Pr. 49, Pr. 66, Pr. 114, Pr. 115,Pr. 148, Pr. 149, Pr. 154, Pr. 156, Pr. 157, Pr. 858, Pr. 868)V/FMagnetic fluxThis function monitors the output current and automatically changes the output frequency to prevent the inverterfrom coming to trip due to overcurrent, overvoltage, etc. It can also limit stall prevention and fast responsecurrent limit operation during acceleration/deceleration, driving or regeneration. Invalid under real sensorlessvector control or vector control.• Stall preventionIf the output current exceeds the stall prevention operation level, the output frequency of the inverter isautomatically varied to reduce the output current.Also the second stall prevention function can restrict the output frequency range in which the stall preventionfunction is valid. (Pr. 49)• Fast response current limitIf the current exceeds the limit value, the output of the inverter is shut off to prevent an overcurrent.ParameterNumberPr. 22⋅⋅⋅2223484966114115148149154156NameStall prevention operationlevelStall prevention operationlevel compensation factorat double speedSecond stall preventionoperation currentSecond stall preventionoperation frequencyStall prevention operationreduction starting frequencyThird stall preventionoperation currentThird stall preventionoperation frequencyStall prevention level at 0VinputStall prevention level at10V inputVoltage reductionselection during stallprevention operationStall prevention operationselectionInitial Value150%9999150%0Hz60Hz150%0HzSettingRangeDescription0 Stall prevention operation selection becomes invalid.0.1 to 400%Set the current value at which stall preventionoperation will be started.0 to 200%The stall operation level can be reduced whenoperating at a high speed above the rated frequency.9999 Constant according to Pr. 220 Second stall prevention operation invalid0.1 to 220%The second stall prevention operation level can beset.0 Second stall prevention operation invalid0.01 to 400HzSet the frequency at which stall prevention operationof Pr. 48 is started.9999 Pr. 48 is valid when the RT signal is on.0 to 400HzSet the frequency at which the stall operation level isstarted to reduce.0 Third stall prevention operation invalid0.1 to 220%Stall prevention operation level can be changed withthe X9 signal.0 Third stall prevention operation invalid0.01 to 400HzSet the frequency at which stall prevention operationwhen the X9 signal is on starts.150% 0 to 220%200% 0 to 220%10010 to 31,100, 101Stall prevention operation level can be changed bythe analog signal input to terminal 1 (terminal 4).With voltageYou can select whether to usereductionoutput voltage reductionWithout voltage during stall preventionreductionoperation or not.You can select whether stall prevention operation andfast response current limit operation will be performedor not.Set the output start time of the OL signal output whenstall prevention is activated.157 OL signal output timer 0s0 to 25s9999 Without the OL signal output858Terminal 4 functionBy setting "4", the stall prevention operation level can0 0, 1, 4, 9999assignmentbe changed with a signal to terminal 4.868Terminal 1 functionBy setting "4", the stall prevention operation level can0 0 to 6, 9999assignmentbe changed with a signal to terminal 1.OLAccelerationConstantspeedOutput currentDecelerationStall prevention operation exampleOutput frequencyTime(1) Setting of stall prevention operation level (Pr. 22)⋅ Set in Pr. 22 the ratio of the output current to the rated inverter current atwhich stall prevention operation will be performed. Normally set 150%(initial value).⋅ Stall prevention operation stops acceleration (makes deceleration) duringacceleration, makes deceleration during constant speed, and stopsdeceleration during deceleration.⋅ When stall prevention operation is performed, the OL signal is output.CAUTIONIf an overload status lasts long, an inverter trip (e.g. electronic thermal relay function (E.THM)) may occur.When Pr. 156 has been set to activate the fast response current limit (initial setting), the Pr. 22 setting should not be higher than170%. The torque will not be developed by doing so.When real sensorless vector control or vector control is selected using Pr. 800 Control method selection, Pr.22 serves as torque limit level.135
Adjust the output torque (current) of the motor(2) Stall prevention operation signal output and output timing adjustment (OL signal, Pr. 157)⋅ When the output power exceeds the stall prevention operation level and stall prevention is activated, the stallprevention operation signal (OL signal) turns on for longer than 100ms. When the output power falls to or below thestall prevention operation level, the output signal turns off.⋅ Use Pr. 157 OL signal output timer to set whether the OL signal is output immediately or after a preset period of time.⋅ This operation is also performed when the regeneration avoidance function (overvoltage stall) is executed.Pr. 157 SettingDescription0(initial value)Output immediately0.1 to 25 Output after the set time (s) has elapsed9999 Not outputOverload state(OL operation)OL output signalPr.157 Set time(s)REMARKS⋅ The OL signal is assigned to the terminal OL in the initial setting. The OL signal can also be assigned to the other terminal bysetting "3 (positive logic) or 103 (negative logic)" to any of Pr. 190 to Pr. 196 (output terminal function selection).CAUTION· If the frequency has fallen to 0.5Hz by stall prevention operation and remains for 3s, a fault (E.OLT) appears to trip the inverteroutput.· Changing the terminal assignment using Pr. 190 to Pr. 196 (output terminal function selection) may affect the other functions.Please make setting after confirming the function of each terminal.(3) Setting of stall prevention operation in high frequency range (Pr. 22, Pr. 23, Pr. 66)Pr. 22Stall prevention operationlevel (%)Pr. 66When Pr. 23 = 9999When Pr. 23 = "9999", the stall preventionoperation level is as set in Pr. 22 to 400Hz.Stall prevention operation levelas set in Pr. 23400HzOutput frequency (Hz)Setting example (Pr. 22 = 150%, Pr. 23 = 100%, Pr. 66 = 60Hz)Stall prevention operation level (%)1509060453022.50 60 100 200 300 400Output frequency (Hz)⋅ During high-speed operation above the rated motor frequency, acceleration may not be made because the motorcurrent does not increase. If operation is performed in a high frequency range, the current at motor lockupbecomes smaller than the rated output current of the inverter, and the protective function (OL) is not executed if themotor is at a stop.To improve the operating characteristics of the motor in this case, the stall prevention level can be reduced in thehigh frequency range. This function is effective for performing operation up to the high-speed range on a centrifugalseparator etc. Normally, set 60Hz in Pr. 66 and 100% in Pr. 23.⋅ Formula for stall prevention operation levelStall prevention operation level in= A + B × [ Pr. 22 - A ] × [ Pr. 23 - 100 ]high frequency range (%)Pr. 22 - B 100However, A =Pr. 66(Hz) × Pr. 22(%)Output frequency (H), B =Pr. 66(Hz) × Pr. 22(%)400Hz⋅ When Pr. 23 Stall prevention operation level compensation factor at double speed = "9999" (initial value), the stallprevention operation level is kept constant at the Pr. 22 setting up to 400Hz.136
4PARAMETERSAdjust the output torque (current) of the motor(4) Set multiple stall prevention operation levels (Pr. 48, Pr. 49, Pr. 114, Pr. 115)⋅ Setting "9999" in Pr. 49 Second stall prevention operation frequency and turning the RT signal on make Pr. 48 Second stallprevention operation current valid.⋅ In Pr. 48 (Pr. 114), you can set the stall prevention operation level at the output frequency from 0Hz to that set in Pr. 49(Pr. 115).During acceleration, however, the operation level is as set in Pr. 22.⋅ This function can also be used for stop-on-contact or similar operation by decreasing the Pr. 48 (Pr. 114) setting toweaken the deceleration torque (stopping torque).⋅ Pr. 114 and Pr. 115 are made valid when the X9 signal is on. For the terminal used for X9 signal input, set "9" in any ofPr. 178 to Pr. 189 input terminal function selection to assign the X9 signal function.Stall preventionoperation currentPr. 48Pr. 114During accelerationDuring deceleration/constant speedPr. 49Pr. 115Running frequencyPr. 49SettingPr. 115Setting0(initial value)0.01Hz to 400Hz9999 *2Settingcan notbemade.OperationThe second (third) stall prevention operation is notperformed.The second (third) stall prevention operation isperformed according to the frequency.*1The second (third) stall prevention function isperformed according to the RT signal.RT signal ON ... Stall level Pr. 48RT signal OFF ... Stall level Pr. 22*1 The smaller setting of the stall prevention operation levels set in Pr. 22 and Pr. 48has a higher priority.*2 When Pr. 868 = "4" (Stall prevention operation level analog input), the stallprevention operation level also switches from the analog input (terminal 1 input)to the stall prevention operation level of Pr. 48 when the RT signal turns on.(The second stall prevention operation level cannot be input in an analog form.)Set frequency exceeds Pr. 49 (Pr. 115)Set frequency is Pr. 49 (Pr. 115) or lessSetfrequencyPr. 49(Pr. 115)StallpreventionlevelOutputfrequency (Hz)Pr. 22usedOutputfrequencyTimePr. 48(Pr.114)usedOutputfrequency (Hz)Pr. 49(Pr. 115)SetfrequencyPr. 22usedOutputfrequencyTimePr. 48(Pr. 114)usedREMARKS⋅ When Pr. 49 ≠ "9999" (level changed according to frequency) and Pr. 48 = "0%", the stall prevention operation level is 0% at orhigher than the frequency set in Pr. 49.⋅ In the initial setting, the RT signal is assigned to the RT terminal. By setting "3" in any of Pr. 178 to Pr. 189 (input terminalfunction selection), you can assign the RT signal to the other terminal.CAUTION⋅ Changing the terminal assignment using Pr. 178 to Pr. 189 (input terminal function selection) may affect the other functions. Pleasemake setting after confirming the function of each terminal.⋅ The RT(X9) signal acts as the second (third) function selection signal and makes the other second (third) functions valid. (Referto page 210)137
Adjust the output torque (current) of the motor(5) Stall prevention operation level setting by terminal 1 (terminal 4) (analog variable) (Pr. 148,Pr. 149, Pr. 858, Pr. 868)⋅ To set the stall prevention operation level usingCurrent limit level (%)Set the current limit level at 10V/5V input terminal 1 (analog input), set Pr. 868 Terminal 1power (input current 20mA) using Pr. 149. function assignment to "4".200%⋅ Input 0 to 5V (or 0 to 10V) to terminal 1. Select 5V orInitial setting150%10V using Pr. 73 Analog input selection. When Pr. 73 ="1" (initial value), 0 to ±10V is input.100%⋅ To set stall prevention operation level using terminal50%4 (analog current input), set "4" in Pr. 858 Terminal 4(-5V/10VDC)Input voltage (V)function assignment.0V(5V/10VDC) Input current (mA)Input 0 to 20mA to terminal 4. The AU signal need0mA(20mA)not be turned on.Set the current limit level at 0V input⋅ Set the current limit level at the input voltage of 0Vvoltage (input current 0mA) using Pr. 148.(0mA) in Pr. 148 Stall prevention level at 0V input⋅ Set the current limit level at the input voltage of 10V/5V (20mA) in Pr. 149 Stall prevention level at 10V input.Pr. 858 Setting Pr. 868 SettingV/F, Advanced Magnetic Flux Vector ControlTerminal 4 functionTerminal 1 function0(initial value)Frequency auxiliary1 Magnetic flux command2 ⎯0Frequency command3 ⎯(initial value)(AU signal-ON)4 *1 Stall prevention5 ⎯6 Torque bias9999 ⎯0(initial value)Magnetic flux command⎯1 ⎯ Magnetic flux command2⎯13 ⎯4 *1 Stall preventionMagnetic flux command5 ⎯6 Torque bias9999 ⎯0Frequency auxiliary(initial value)Stall prevention1 Magnetic flux command2 ⎯4 *23 ⎯ ⎯4 *1 ⎯ *3 Stall prevention5⎯6 Stall preventionTorque bias9999 ⎯9999 ⎯ ⎯ ⎯*1 When Pr. 868 = "4" (analog stall prevention), other functions of terminal 1 (auxiliary input, override function, PID control) do not function.*2 When Pr. 858 = "4" (analog stall prevention), PID control and speed command from terminal 4 do not function even if the AU signal turns on.*3 When "4" (stall prevention) is set in both Pr. 858 and Pr. 868, function of terminal 1 has higher priority and terminal 4 has no function.REMARKS⋅ The fast response current limit level cannot be set.(6) To further prevent an alarm stop (Pr. 154)⋅ When Pr. 154 is set to "0", the output voltage reduces during stall prevention operation. By making setting to reducethe output voltage, an overcurrent trip can further become difficult to occur.⋅ Use this function where a torque decrease will not pose a problem.Pr. 154 SettingDescription0 Output voltage reduced1(initial value)Output voltage not reduced138
4PARAMETERSAdjust the output torque (current) of the motor(7) Limit the stall prevention operation and fast response current limit operation according tothe operating status (Pr. 156)⋅ Refer to the following table and select whether stall prevention and fast-response current limit operation will beperformed or not and the operation to be performed at OL signal output.Pr. 156SettingFast ResponseCurrent Limit◦: Activated•: Not activatedStall PreventionOperation Selection◦:Activated•:Not activatedAccelerationConstantspeedDecelerationOL SignalOutput◦:Operationcontinued•:Operationnot continued*1Pr. 156SettingFast ResponseCurrent Limit◦:Activated•: Not activatedStall PreventionOperation Selection◦:Activated•:Not activatedAccelerationConstantspeedDecelerationOL SignalOutput◦:Operationcontinued•:Operationnot continued*10(initial ◦ ◦ ◦ ◦ ◦ 16 ◦ ◦ ◦ ◦ •value)1 • ◦ ◦ ◦ ◦ 17 • ◦ ◦ ◦ •2 ◦ • ◦ ◦ ◦ 18 ◦ • ◦ ◦ •3 • • ◦ ◦ ◦ 19 • • ◦ ◦ •4 ◦ ◦ • ◦ ◦ 20 ◦ ◦ • ◦ •5 • ◦ • ◦ ◦ 21 • ◦ • ◦ •6 ◦ • • ◦ ◦ 22 ◦ • • ◦ •7 • • • ◦ ◦ 23 • • • ◦ •8 ◦ ◦ ◦ • ◦ 24 ◦ ◦ ◦ ◦ •9 • ◦ ◦ • ◦ 25 • ◦ ◦ • •10 ◦ • ◦ • ◦ 26 ◦ • ◦ • •11 • • ◦ • ◦ 27 • • ◦ • •12 ◦ ◦ • • ◦ 28 ◦ ◦ • • •13 • ◦ • • ◦ 29 • ◦ • • •14 ◦ • • • ◦ 30 ◦ • • • •15 • • • • ⎯ *2 31 • • • • ⎯ *2100*3DrivingRegeneration◦ ◦ ◦ ◦ ◦• • • • ⎯ *2101*3DrivingRegeneration• ◦ ◦ ◦ ◦• • • • ⎯ *2*1 When "Operation not continued for OL signal output" is selected, the " " fault (stopped by stall prevention) is displayed and operationstopped.*2 Since both fast response current limit and stall prevention are not activated, OL signal and E.OLT are not output.*3 The settings "100" and "101" allow operations to be performed in the driving and regeneration modes, respectively. The setting "101" disables thefast response current limit in the driving mode.CAUTION⋅ When the load is heavy, when the lift is predetermined, or when the acceleration/deceleration time is short, stall prevention isactivated and acceleration/deceleration may not be made according to the preset acceleration/deceleration time. Set Pr. 156 andstall prevention operation level to the optimum values.⋅ In vertical lift applications, make setting so that the fast response current limit is not activated. Torque may not be produced,causing a drop due to gravity.CAUTIONDo not set a small value as the stall prevention operation current.Otherwise, torque generated will reduce.Always perform test operation.Stall prevention operation during acceleration may increase the acceleration time.Stall prevention operation performed during constant speed may cause sudden speed changes.Stall prevention operation during deceleration may increase the deceleration time, increasing the decelerationdistance.♦ Parameters referred to ♦⋅ Pr. 22 Torque limit level Refer to page 83⋅ Pr. 73 Analog input selection Refer to page 259⋅ Pr. 178 to Pr. 189 (Input terminal function selection) Refer to page 206⋅ Pr. 190 to Pr. 196 (output terminal function selection) Refer to page 214⋅ Pr. 858 Terminal 4 function assignment, Pr. 868 Terminal 1 function assignment Refer to page 258139
Limit the output frequency4.9 Limit the output frequencyPurpose Parameter that must be Set Refer to PageSet upper limit and lower limit ofoutput frequencyPerform operation by avoidingmechanical resonance pointsMaximum/minimumfrequency4.9.1 Maximum/minimum frequency (Pr. 1, Pr. 2, Pr. 18)Pr. 1, Pr. 2, Pr. 18 140Frequency jump Pr. 31 to Pr. 36 141You can limit the motor speed. Clamp the upper and lower limits of the output frequency.ParameterNumberName Initial Value Setting Range Description1 Maximum frequency 120Hz 0 to 120Hz Set the upper limit of the output frequency.2 Minimum frequency 0Hz 0 to 120Hz Set the lower limit of the output frequency.18High speed maximumfrequency120Hz 120 to 400Hz Set when performing the operation at 120Hz or more.Output frequency(Hz)Pr.1Pr.18Pr.20Clamped at the (4mA)minimum frequency(1) Set maximum frequencyClamped at themaximum frequency ⋅ Set the upper limit of the output frequency in Pr. 1 Maximumfrequency. If the frequency of the frequency command entered ishigher than the setting, the output frequency is clamped at themaximum frequency.⋅ When you want to perform operation above 120Hz, set the upperlimit of the output frequency to Pr. 18 High speed maximumFrequency settingfrequency. (When Pr. 18 is set, Pr. 1 automatically switches to the5, 10V(20mA)frequency of Pr. 18. When Pr. 18 is set, Pr. 18 automaticallyswitches to the frequency of Pr. 1.)REMARKS⋅ When performing operation above 60Hz using the frequency setting analog signal, change Pr. 125 (Pr. 126) (frequency settinggain). If only Pr. 1 or Pr. 18 is changed, operation above 60Hz cannot be performed.(2) Set minimum frequency⋅ Use Pr. 2 Minimum frequency to set the lower limit of the output frequency.⋅ The output frequency is clamped by the Pr. 2 setting even if the set frequency is equal to or less than the Pr. 2 setting(The frequency will not decrease to the Pr. 2 setting.)REMARKS⋅ When Pr. 15 Jog frequency is equal to or less than Pr. 2, the Pr. 15 setting has precedence over the Pr. 2 setting.⋅ When stall prevention is activated to decrease the output frequency, the output frequency may drop to Pr. 2 or below.CAUTIONNote that when Pr. 2 is set to any value equal to or more than Pr. 13 Starting frequency, simply turning on the startsignal will run the motor at the preset frequency according to the set acceleration time even if the commandfrequency is not input.♦ Parameters referred to ♦Pr. 13 Starting frequency Refer to page 157Pr. 15 Jog frequency Refer to page 150Pr. 125 Terminal 2 frequency setting gain frequency, Pr. 126 Terminal 4 frequency setting gain frequency Refer to page 267140
4PARAMETERSLimit the output frequency4.9.2 Avoid mechanical resonance points (Frequency jump) (Pr. 31 to Pr. 36)When it is desired to avoid resonance attributable to the natural frequency of a mechanical system, theseparameters allow resonant frequencies to be jumped.ParameterNumberName Initial Value Setting Range Description31 Frequency jump 1A 9999 0 to 400Hz, 999932 Frequency jump 1B 9999 0 to 400Hz, 999933 Frequency jump 2A 9999 0 to 400Hz, 999934 Frequency jump 2B 9999 0 to 400Hz, 999935 Frequency jump 3A 9999 0 to 400Hz, 999936 Frequency jump 3B 9999 0 to 400Hz, 99991A to 1B, 2A to 2B, 3A to 3B isfrequency jumps9999: Function invalidSet frequency (Hz)Pr.36Pr.35Pr.34Pr.33Pr.32Pr.31Frequency jump⋅⋅Up to three areas may be set, with the jump frequencies setto either the top or bottom point of each area.The settings of frequency jumps 1A, 2A, 3A are jump points,and operation is performed at these frequencies in the jumpareas.Pr.34:35HzPr.33:30HzExample 1 To fix the frequency to 30Hz in the range 30Hz to 35Hz, set 35Hz in Pr. 34and 30Hz in Pr. 33.Pr.33:35HzPr.34:30HzExample 2To jump the frequency to 35Hz in the range 30Hz to 35Hz, set 35Hz in Pr.33 and 30Hz in Pr. 34.⋅CAUTIONDuring acceleration/deceleration, the running frequency within the set area is valid.141
Set V/F pattern4.10 Set V/F patternSet motor ratingsPurpose Parameter that must be Set Refer to PageSelect a V/F pattern according toapplicationsAutomatically set a V/F pattern forelevatorsBase frequency, basefrequency voltagePr. 3, Pr. 19, Pr. 47, Pr. 113 142Load pattern selection Pr. 14 144Elevator mode (automaticacceleration/deceleration)Pr. 61, Pr. 64, Pr. 292 146Use special motor Adjustable 5 points V/F Pr. 71, Pr. 100 to Pr. 109 1474.10.1 Base frequency, voltage (Pr. 3, Pr. 19, Pr. 47, Pr. 113)V/FUsed to adjust the inverter outputs (voltage, frequency) to the motor rating.ParameterNumberOutput voltage (V)Name Initial Value Setting Range Description3 Base frequency 60Hz 0 to 400Hz19 Base frequency voltage 999947 Second V/F (base frequency) 9999113 Third V/F (base frequency) 9999Pr. 19(2) Set multiple base frequencies (Pr. 47, Pr. 113)Set the frequency when the motorrated torque is generated. (50Hz/60Hz)0 to 1000V Set the base voltage.8888 95% of power supply voltage9999 Same as power supply voltage0 to 400HzSet the base frequency when the RTsignal is on.9999 Second V/F invalid0 to 400HzSet the base frequency when the X9signal is ON.9999 Third V/F is invalid(1) Setting of base frequency (Pr. 3)⋅⋅⋅When operating a standard motor, generally set the ratedfrequency of the motor to Pr. 3 Base frequency. When runningthe motor using bypass operation, set Pr. 3 to the same valueas the power supply frequency.If the frequency given on the motor rating plate is "50Hz" only,always set to "50Hz". Leaving the base frequency unchangedfrom "60Hz" may make the voltage too low and the torqueinsufficient. It may result in an inverter trip due to overload.Special care must be taken when "1" (reduced torque load) isset in Pr. 14 Load pattern selection.When using the Mitsubishi constant-torque motor, set Pr. 3 to60Hz.⋅ When you want to change the base frequency when switching two motors with one inverter, use the Pr. 47 Second V/F(base frequency).⋅ Pr. 47 Second V/F (base frequency) is made valid when the RT signal in ON and Pr. 113 Third V/F (base frequency) ismade valid when the X9 signal is on. Assign the terminal for X9 signal input using any of Pr. 178 to Pr. 189 (inputterminal function selection).REMARKSOutput frequency(Hz)Pr. 3Pr. 47Pr. 113⋅ The RT(X9) signal acts as the second (third) function selection signal and makes the other second (third) functions valid. (Referto page 210)⋅ In the initial setting, the RT signal is assigned to the RT terminal. By setting "3" in any of Pr. 178 to Pr. 189 (input terminal functionselection), you can assign the RT signal to the other terminal.142
4PARAMETERS(3) Base frequency voltage setting (Pr. 19)Set V/F pattern⋅ Use Pr. 19 Base frequency voltage to set the base voltage (e.g. rated motor voltage).⋅ If the setting is less than the power supply voltage, the maximum output voltage of the inverter is as set in Pr. 19.⋅ Pr. 19 can be utilized in the following cases.(a) When regeneration frequency is high (e.g. continuous regeneration)During regeneration, the output voltage becomes higher than the reference and may cause an overcurrent trip(E.OC) due to an increased motor current.(b) When power supply voltage variation is largeWhen the power supply voltage exceeds the rated voltage of the motor, speed variation or motor overheat maybe caused by excessive torque or increased motor current.⋅ Set parameters as below when running the vector control dedicated motor (SF-V5RU, SF-V5RU1, SF-V5RU3, SF-V5RU4, SF-VR) under V/F control.Motor Type Pr. 19 Setting Pr. 3 SettingSF-V5RU-3.7kWSF-V5RU-5.5kW or moreSF-V5RUH-3.7kWSF-V5RUH-5.5kW or moreSF-V5RU1-30kW or lessSF-V5RU1-37kWSF-V5RU3-22kW or lessSF-V5RU3-30kWSF-V5RU4-3.7kW, 7.5kWSF-V5RU4-other than the aboveSF-VRSF-VRH170V160V340V320V160V170V160V170V150V160V160V320V50Hz33.33Hz16.67Hz50HzREMARKSWhen operation is discontinued under vector control due to failure of an encoder, etc., setting "9999" in Pr. 80 Motor capacity or Pr. 81Number of motor poles enables V/F control operation.⋅⋅⋅CAUTIONWhen advanced magnetic flux vector control mode, real sensorless vector control or vector control is selected, Pr. 3, Pr. 47, Pr.113 and Pr. 19 are made invalid and Pr. 83 and Pr. 84 are made valid.Note that Pr. 3 or Pr. 47 and Pr. 113 values are made valid as inflection points of S-pattern when Pr. 29 Acceleration/decelerationpattern selection = "1" (S-pattern acceleration/deceleration A).When Pr. 71 <strong>Applied</strong> motor is set to "2" (adjustable 5 points V/F characteristic), the Pr. 47 and Pr. 113 setting becomes invalid. Inaddition, you cannot set "8888" or "9999" in Pr. 19.Changing the terminal assignment using Pr. 178 to Pr. 189 (input terminal function selection) may affect the other functions. Makesetting after confirming the function of each terminal.♦ Parameters referred to ♦Pr. 14 Load pattern selection Refer to page 144Pr. 29 Acceleration/deceleration pattern selection Refer to page 158Pr. 71 <strong>Applied</strong> motor Refer to page 169Pr. 80 Motor capacity Refer to page 75.Pr. 83 Rated motor voltage, Pr. 84 Rated motor frequency Refer to page 171.Pr. 178 to Pr. 189 (input terminal function selection) Refer to page 206.Advanced magnetic flux vector control Refer to page 131.Real sensorless vector control Refer to page 75.143
Set V/F pattern4.10.2 Load pattern selection (Pr. 14)V/FYou can select the optimum output characteristic (V/F characteristic) for the application and load characteristics.ParameterNumberName Initial Value Setting Range Description14 Load pattern selection 00 For constant torque load1 For reduced-torque load2345For constant torque elevators(at reverse rotation boost of 0%)For constant torque elevators(at forward rotation boost of 0%)RT signal on ...for constant torque loadRT signal off ...for constant torqueelevators at reverse rotation boost of 0%RT signal on ...for constant torque loadRT signal off ...for constant torqueelevators at forward rotation boost of 0%Pr.14=0100%Output voltagePr.14=1100%Output voltagePr.14=2Pr.3 Base frequencyOutput frequency (Hz)Pr.3 Base frequencyOutput frequency (Hz)For vertical lift loadsAt forward rotation boost...Pr.0 settingAt reverse rotation boost...0%100%OutputvoltagePr.0ForwardrotationReverserotationBase frequencyOutput frequency (Hz)(1) For constant-torque load (setting "0", initial value)⋅ At or less than the base frequency, the output voltage varies linearly with the outputfrequency.⋅ Set this value when driving the load whose load torque is constant even if the speedvaries, e.g. conveyor, cart or roll drive.POINTIf the load is a fan or pump, select "for rated torque load (setting "0")" in any of thefollowing cases.⋅ When a blower of large moment of inertia (J) is accelerated in a short time⋅ For constant-torque load such as rotary pump or gear pump⋅ When load torque increases at low speed, e.g. screw pump(2) For variable-torque load (setting "1")⋅ At or less than the base frequency, the output voltage varies with the output frequencyin a square curve.⋅ Set this value when driving the load whose load torque varies in proportion to thesquare of the speed, e.g. fan or pump.Pr.14=3For vertical lift loadsAt forward rotation boost...0%At reverse rotation boost...Pr.0 setting100%OutputvoltagePr.0ReverserotationForwardrotationBase frequencyOutput frequency (Hz)(3) Vertical lift load applications (settingvalues "2, 3")⋅⋅⋅Set "2" when a vertical lift load is fixed as power drivingload at forward rotation and regenerative load atreverse rotation.Pr. 0 Torque boost is valid during forward rotation andtorque boost is automatically changed to "0%" duringreverse rotation.Set "3" for an elevated load that is in the driving modeduring reverse rotation and in the regenerative loadmode during forward rotation according to the loadweight, e.g. counterweight system.REMARKS⋅ When torque is continuously regenerated as vertical lift load, itis effective to set the rated voltage in Pr. 19 Base frequencyvoltage to prevent trip due to current at regeneration.144
4PARAMETERSSet V/F patternPr. 14Setting45RT(X17) Signal Output Characteristics (4) Change load pattern selection usingterminal (setting values are "4, 5")ONOFFONOFFFor constant torque load(same as when the settingis "0")For elevators at reverserotation boost of 0% (sameas when the setting is "2")For constant torque load(same as when the settingis "0")For elevators at forwardrotation boost of 0% (sameas when the setting is "3")⋅ Output characteristic can be switched between forconstant torque load and for elevator using the RTsignal or X17 signal.⋅ For the terminal used for X17 signal input, set "17"in any of Pr. 178 to Pr. 189 (input terminal functionselection) to assign the function.When X17 is assigned, switchover by the RT signalis made invalid.REMARKS⋅ The RT signal is assigned to the terminal RT in the initial setting. By setting "3" in any of Pr. 178 to Pr. 189 (input terminal functionselection), the RT signal can be assigned to the other terminal.⋅⋅CAUTIONWhen advanced magnetic flux vector control, real sensorless vector control or vector control is selected, this parameter setting isignored.Changing the terminal assignment using Pr. 178 to Pr. 189 (input terminal function selection) may affect the other functions. Makesetting after confirming the function of each terminal. When the RT signal is on, the other second functions are also valid.♦ Parameters referred to ♦Pr. 0 Torque boost Refer to page 129Pr. 3 Base frequency Refer to page 142Pr. 178 to Pr. 189 (input terminal function selection) Refer to page 206Advanced magnetic flux vector control Refer to page 131.Real sensorless vector control Refer to page 75.145
Set V/F pattern4.10.3 Elevator mode (automatic acceleration/deceleration) (Pr. 61, Pr. 64, Pr. 292)Operation matching a load characteristic of elevator with counterweight can be performed.V/FParameterNumberNameInitialValue61 Reference current 999964292Starting frequency forelevator modeAutomatic acceleration/deceleration99990Setting RangeDescription0 to 500A Set the reference current for elevator mode.9999 Rated inverter current value reference0 to 10% Set the starting frequency for the elevator mode.9999 Starting frequency 2Hz0 Normal modeOptimum acceleration/deceleration mode3(Refer to page 162.)Elevator mode 15(stall prevention operation level 150%)Elevator mode 26(stall prevention operation level 180%)7, 8 Brake sequence mode 1, 2 (Refer to page 192.)Minimum acceleration/deceleration mode11(Refer to page 162.)(1) Elevator mode⋅ When "5" or "6" is set in Pr. 292 Automatic acceleration/deceleration , elevator mode is selected and each setting ischanged as in the table below.⋅ Enough torque is generated during power driving and the torque boost value is automatically changed duringregeneration and operation without load so that overcurrent protection function does not activate due to overexcitation.Elevator ModeNormal ModeWhen Pr.0=6%Pr. 292 = 5 Pr. 292 = 6Torque boostStartingfrequencyBase frequencyvoltageStall preventionoperation level⋅Pr. 0(3/2%)Pr. 13 (0.5Hz)Pr. 19 (9999)Changes according to the outputcurrent (right chart)Pr. 64 (2Hz)Accelerate after maintaining 100ms220V (440V)Pr. 22 (150%) etc. 150% 180%⋅ When operating the elevator with load more than the rated inverter current, the maximum torque may becomeinsufficient.For the elevator without counterweight, setting "2 or 3" (for elevator load) in Pr. 14 Load pattern selection and anappropriate value in Pr. 19 Base frequency voltage will generate larger maximum torque than when elevator mode isselected.REMARKSStall prevention operation level automatically decreases according to the electronic thermal relay function cumulative value, toprevent inverter overload trip (E.THT, E.THM).(2) Adjustment of elevator mode (Pr. 61, Pr. 64)⋅ By setting the adjustment parameters Pr. 61 and Pr. 64, the application range can be made wider.ParameterNumber61 Reference current64Name Setting Range DescriptionStarting frequency forelevator modeTorque boost (%)For example, when the motor and inverter are different in0 to 500A capacity, set the rated motor current value. Set referencecurrent (A) of the stall prevention operation level9999 (initial value) The rated inverter output current is defined as reference.0 to 10Hz Set the starting frequency for the elevator mode.9999 (initial value) Starting frequency 2HzREMARKS⋅ Even if elevator mode has been selected, inputting the jog signal (jog operation), RT signal (second function selection) or X9signal (third function selection) during an inverter stop will switch to the normal operation and give priority to jog operation orsecond and third function selection. Note that JOG and RT signal input is invalid even if JOG signal and RT signal are inputduring operation with acceleration/deceleration selected.⋅ Elevator mode is invalid when advanced magnetic flux vector, real sensorless vector control or vector control is selected.⋅ Since the Pr. 61 and Pr. 64 settings automatically return to the initial value (9999) if the Pr. 292 setting is changed, set Pr. 292 firstwhen you need to set Pr. 61 and Pr. 64.6%Pr.03%Torque boost 0%Regenerative0currentPr.292= "5"Pr.292= "6"Driving100 120 140115 current(%)146
4PARAMETERS4.10.4 Adjustable 5 points V/F (Pr. 71, Pr. 100 to Pr. 109)Set V/F patternA dedicated V/F pattern can be made by freely setting the V/F characteristic between a startup and the basefrequency and base voltage under V/F control (frequency voltage/frequency).The torque pattern that is optimum for the machine's characteristic can be set.ParameterNumber0 to 8, 13 to 18,71 <strong>Applied</strong> motor 030, 33, 34, 40, 43,44, 50, 53, 54100 V/F1(first frequency) 9999 0 to 400Hz, 9999101 V/F1(first frequency voltage) 0V 0 to 1000V102 V/F2(second frequency) 9999 0 to 400Hz, 9999103 V/F2(second frequency voltage) 0V 0 to 1000V104 V/F3(third frequency) 9999 0 to 400Hz, 9999105 V/F3(third frequency voltage) 0V 0 to 1000V106 V/F4(fourth frequency) 9999 0 to 400Hz, 9999107 V/F4(fourth frequency voltage) 0V 0 to 1000V108 V/F5(fifth frequency) 9999 0 to 400Hz, 9999109 V/F5(fifth frequency voltage) 0V 0 to 1000VBase frequencyvoltagePr.19Torque boostPr.0Voltage0V/F4V/FName Initial Value Setting Range DescriptionV/F5V/F3V/F1V/F2FrequencyBase frequencyV/F Characteristic Pr.3Set "2" for adjustable 5 points V/Fcontrol.Set each points (frequency,voltage) of V/F pattern.9999: No V/F setting⋅ Any V/F characteristic can be provided by presetting the parameters ofV/F1 (first frequency voltage/first frequency) to V/F5.⋅ For a machine of large static friction coefficient and small dynamicstatic friction coefficient, for example, set a V/F pattern that willincrease the voltage only in a low-speed range since such a machinerequires large torque at a start.(Setting procedure)1)Set the rated motor voltage in Pr. 19 Base frequency voltage. (Nofunction at the setting of "9999" (initial value) or "8888".)2)Set Pr. 71 <strong>Applied</strong> motor to "2" (Adjustable 5 points V/F characteristic).3)Set the frequency and voltage you want to set in Pr. 100 to Pr. 109.CAUTIONSet this parameter correctly according to the motor used.Incorrect setting may cause the motor to overheat and burn.CAUTION⋅ Adjustable 5 points V/F characteristics function only under V/F control. They do not function under advanced magnetic fluxvector control, real sensorless vector control or vector control.⋅ When Pr. 19 Base frequency voltage = "8888" or "9999", Pr. 71 cannot be set to "2". To set Pr. 71 to "2", set the rated voltage value in Pr. 19.⋅ When the frequency values at each point are the same, a write disable error ( ) appears.⋅ Set the points (frequencies, voltages) of Pr. 100 to Pr. 109 within the ranges of Pr. 3 Base frequency and Pr. 19 Base frequency voltage.⋅ When "2" is set in Pr. 71, Pr. 47 Second V/F (base frequency) and Pr. 113 Third V/F (base frequency) will not function.⋅ When Pr. 71 is set to "2", the electronic thermal relay function makes calculation as a standard motor.REMARKS⋅ A greater energy saving effect can be expected by combining Pr. 60 Energy saving control selection and adjustable 5 points V/F.⋅ For the 5.5K, 7.5K, the Pr. 0 Torque boost and Pr. 12 DC injection brake operation voltage settings are automatically changedaccording to the Pr. 71 setting as follows.Pr. 71Standard Motor Setting0, 2, 3 to 8, 40, 43, 44Constant Torque Motor Setting1, 13 to 18, 50, 53, 54Pr. 0 3% 2%Pr. 12 4% 2%♦ Parameters referred to ♦⋅ Pr. 3 Base frequency, Pr. 19 Base frequency voltage Refer to page 142⋅ Pr. 12 DC injection brake operation voltage Refer to page 185⋅ Pr. 47 Second V/F (base frequency), Pr. 113 Third V/F (base frequency) Refer to page 142⋅ Pr. 60 Energy saving control selection Refer to page 251⋅ Pr. 71 <strong>Applied</strong> motor, Pr. 450 Second applied motor Refer to page 169⋅ Advanced magnetic flux vector control Refer to page 131⋅ Real sensorless vector control Refer to page 75⋅ Vector control Refer to page 75147
Frequency setting by external terminals4.11 Frequency setting by external terminalsMake frequency setting bycombination of terminalsPurpose Parameter that must be Set Refer to PageMulti-speed operationPr. 4 to Pr. 6, Pr. 24 to Pr. 27,Pr. 232 to Pr. 239Perform jog operation Jog operation Pr. 15, Pr. 16 150Added compensation for multi-speedsetting and remote settingInfinitely variable speed setting byterminalsMulti-speed inputcompensation selection4.11.1 Multi-speed setting operation (Pr. 4 to Pr. 6, Pr. 24 to Pr. 27, Pr. 232 to Pr. 239)The above parameters allow its setting to be changed during operation in any operation mode even if "0" (initial value) is set in Pr. 77 Parameter writeselection.148Pr. 28 152Remote setting function Pr. 59 152Can be used to change the preset speed in the parameter with the contact terminals.Any speed can be selected by merely turning on-off the contact signals (RH, RM, RL, REX signals).ParameterNumberName Initial Value Setting Range Description4Multi-speed setting (highspeed)60Hz 0 to 400Hz Set the frequency when RH turns on.5Multi-speed setting (middlespeed)30Hz 0 to 400Hz Set the frequency when RM turns on.6Multi-speed setting (lowspeed)10Hz 0 to 400Hz Set the frequency when RL turns on.24 Multi-speed setting (speed 4) 9999 0 to 400Hz, 999925 Multi-speed setting (speed 5) 9999 0 to 400Hz, 999926 Multi-speed setting (speed 6) 9999 0 to 400Hz, 999927 Multi-speed setting (speed 7) 9999 0 to 400Hz, 9999Frequency from speed 4 to speed 15232 Multi-speed setting (speed 8) 9999 0 to 400Hz, 9999can be set according to the233 Multi-speed setting (speed 9) 9999 0 to 400Hz, 9999combination of the RH, RM, RL and234 Multi-speed setting (speed 10) 9999 0 to 400Hz, 9999REX signals.235 Multi-speed setting (speed 11) 9999 0 to 400Hz, 99999999: not selected236 Multi-speed setting (speed 12) 9999 0 to 400Hz, 9999237 Multi-speed setting (speed 13) 9999 0 to 400Hz, 9999238 Multi-speed setting (speed 14) 9999 0 to 400Hz, 9999239 Multi-speed setting (speed 15) 9999 0 to 400Hz, 9999Output frequency (Hz)RHRMRLSpeed 1(High speed)Speed 2(Middle speed)Speed 3 Speed 4(Low speed)Speed 5Speed 6ON ON ON ONONON ON ONONONONOutput frequency(Hz)RHRMRLREXSpeed 9Speed 8ON ON ON ONON ON ON ONON ON ON ON ON ON ON ON*Speed 10Speed 11Speed 12Speed 13Speed 14Speed 15ON ON ON ONTimeSpeed 7Time(1) Multi-speed setting (Pr. 4 to Pr. 6)⋅ Operation is performed at the frequency set in Pr. 4 when the RHsignal turns on, Pr. 5 when the RM signal turns on, and Pr. 6 when theRL signal turns on.REMARKS⋅⋅In the initial setting, if two or three speeds are simultaneouslyselected, priority is given to the set frequency of the lower signal. Forexample, when the RH and RM signals turn on, the RM signal (Pr. 5)has a higher priority.The RH, RM, RL signals are assigned to the terminal RH, RM, RL inthe initial setting.By setting "0 (RL)", "1 (RM)", "2 (RH)" in any of Pr.178 to Pr.189 (inputterminal function assignment), the signals can be assigned to otherterminals.(2) Multi-speed setting higher than speed 4 (Pr. 24 to Pr. 27,Pr. 232 to Pr. 239)⋅ Frequency from speed 4 to speed 15 can be set according to thecombination of the RH, RM, RL and REX signals. Set the runningfrequencies in Pr. 24 to Pr. 27, Pr. 232 to Pr. 239. (In the initial valuesetting, speed 4 to speed 15 are unavailable.).⋅ For the terminal used for REX signal input, set "8" in any of Pr. 178 toPr. 189 (input terminal function selection) to assign the function.* When "9999" is set in Pr. 232 Multi-speed setting (speed 8), operation is performed atfrequency set in Pr. 6 when RH, RM and RL are turned off and REX is turned on.148
4PARAMETERSFrequency setting by external terminalsForwardrotationMulti-speed selectionInverterST<strong>FR</strong>EXRHRMRLSD10Multi-Speed OperationConnection Example25Frequency settingpotentiometerREMARKS⋅ The priorities of the frequency commands by the external signals are"jog operation > multi-speed operation > terminal 4 analog input >terminal 2 analog input". (Refer to page 267 for the frequencycommand by analog input)⋅ Valid in external operation mode or PU/external combined operationmode (Pr. 79 = "3" or "4").⋅ Multi-speed parameters can also be set in the PU or externaloperation mode.⋅ Pr. 24 to Pr. 27 and Pr. 232 to Pr. 239 settings have no priority between them.⋅ When a value other than “0” is set in Pr. 59 Remote function selection,the RH, RM and RL signals are used as the remote setting signalsand the multi-speed setting becomes invalid.⋅ When making analog input compensation, set "1" in Pr. 28 Multi-speedinput compensation selection.⋅CAUTIONChanging the terminal assignment using Pr. 178 to Pr. 189 (input terminal function selection) may affect the other functions. Makesetting after confirming the function of each terminal.♦ Parameters referred to ♦Pr. 15 Jog frequency Refer to page 150Pr. 28 Multi-speed input compensation selection Refer to page 152Pr. 59 Remote function selection Refer to page 152Pr. 79 Operation mode selection Refer to page 283Pr. 178 to Pr. 189 (input terminal function selection) Refer to page 206149
Frequency setting by external terminals4.11.2 Jog operation (Pr. 15, Pr. 16)You can set the frequency and acceleration/deceleration time for jog operation. Jog operation can be performedfrom either the outside or PU.Can be used for conveyor positioning, test operation, etc.ParameterNumberNameInitialValueSetting RangeDescription15 Jog frequency 5Hz 0 to 400Hz Set the frequency for jog operation.16Jogacceleration/decelerationtime0.5s 0 to 3600/360s*Set the acceleration/deceleration time for jog operation. Set thetime taken to reach the frequency (Initial value is 60Hz) set in Pr. 20Acceleration/deceleration reference frequency for acceleration/deceleration time.The acceleration and deceleration time cannot be set separately.The above parameters are displayed as simple mode parameters only when the parameter unit (<strong>FR</strong>-PU04/<strong>FR</strong>-PU07) is connected. When theoperation panel (<strong>FR</strong>-DU07) is connected, the above parameters can be set only when Pr. 160 User group read selection = "0". (Refer to page 281)* When the setting of Pr. 21 Acceleration/deceleration time increments is "0" (initial value), the setting range is "0 to 3600s" and the setting increments are"0.1s", and when the setting is "1", the setting range is "0 to 360s" and the setting increments are "0.01s"(1) Jog operation from outside⋅ When the jog signal is on, a start and stop can be made by the start signal (STF, STR). (The JOG signal isassigned to the terminal JOG in the initial setting)Outputfrequency(Hz)Pr.20Pr.15Jog frequencysetting rangeForwardrotationPr.16ReverserotationTimeThree-phase ACpower supplyForward rotation startReverse rotation startJOG signalR/L1S/L2T/L3STFSTRJOGInverterUVWMotorJOG signalForwardrotation ST<strong>FR</strong>everserotation STRONONONSD1025Connection diagram for external jog operationOperation1.Screen at powering onConfirm that the external operation mode is selected.([EXT] lit)If not displayed, press to change to theexternal [EXT] operation mode.If the operation mode still does not change,set Pr. 79 to change to the external operation mode.2.Turn the JOG switch on.ONIndication3.Turn the start switch (STF or STR) on.The motor rotates while start switch(STF or STR) is ON.Rotates at 5Hz. (Initial value of Pr. 15)4.Turn the start switch (STF or STR) off.ONForwardrotationForwardrotationReverserotationRotates while ONOF<strong>FR</strong>EMARKS⋅ When you want to change the running frequency, change Pr. 15 Jog frequency . (initial value "5Hz")⋅ When you want to change the acceleration/deceleration time change Pr. 16 Jog acceleration/deceleration time . (initial value"0.5s")ReverserotationStop150
4PARAMETERSFrequency setting by external terminals(2) Jog operation from PU⋅ Set the PU (<strong>FR</strong>-DU07/<strong>FR</strong>-PU07/<strong>FR</strong>-PU04) to thejog operation mode. Operation is performed onlywhile the start button is pressed.Three-phase ACpower supplyInverterR/L1S/L2T/L3UVWMotor<strong>FR</strong>-DU071.2.OperationConfirmation of the RUN indication andoperation mode indicationThe monitor mode should have been selected.The inverter should be at a stop.Press to choose thePU JOG operation mode.Indication3. Press (or ).5.6.7.While (or ) is pressed, themotor rotates.Rotates at 5Hz. (initial value of Pr. 15)4. Release (or ).[When changing the frequency of PU JOGoperation]Press to choose the parametersetting mode.Turn until Pr. 15 JOG frequencyappears.Press to show the currently setvalue. (5Hz)Hold down.ReleaseStopThe parameternumber readpreviouslyappears.8.9.10.Turn to set the value to" ". (10Hz)Press to set.Perform the operations in steps 1 to 4.The motor rotates at 10Hz.Flicker Parameter setting complete!!CAUTION⋅ When Pr. 29 Acceleration/deceleration pattern selection= "1" (S-pattern acceleration/deceleration A), the acceleration/decelerationtime is the period of time required to reach Pr. 3 Base frequency.⋅ The Pr. 15 setting should be equal to or higher than the Pr. 13 Starting frequency setting.⋅ The JOG signal can be assigned to the input terminal using any of Pr. 178 to Pr. 189 (input terminal function selection). When terminalassignment is changed, the other functions may be affected. Please make setting after confirming the function of each terminal.⋅ During jog operation, the second acceleration/deceleration via the RT signal cannot be selected. (The other second functionsare valid. (Refer to page 210))⋅ When Pr. 79 Operation mode selection = "4", push / of the PU (<strong>FR</strong>-DU07/<strong>FR</strong>-PU04/<strong>FR</strong>-PU07) to make a start or pushto make a stop.⋅ This function is invalid when Pr. 79 = "3".⋅ Jog operation is invalid under position control.♦ Parameters referred to ♦⋅ Pr. 13 Starting frequency Refer to page 157⋅ Pr. 29 Acceleration/deceleration pattern selection Refer to page 158⋅ Pr. 20 Acceleration/deceleration reference frequency, Pr. 21 Acceleration/deceleration time increments Refer to page 155⋅ Pr. 79 Operation mode selection Refer to page 283⋅ Pr. 178 to Pr. 189 (input terminal function selection) Refer to page 206151
Frequency setting by external terminals4.11.3 Input compensation of multi-speed and remote setting (Pr. 28)By inputting the frequency setting compensation signal (terminal 1, 2), the speed (frequency) can becompensated for relative to the multi-speed setting or the speed setting by remote setting function.ParameterNumber28Multi-speed inputcompensation selectionName Initial Value Setting Range Description00 Without compensation1 With compensationREMARKS⋅ Select the terminal (terminal 1, 2) used for compensation input voltage (0 to ±5V, 0 to ±10) using Pr. 73 Analog input selection.⋅ When using terminal 1 for compensation input, set "0" (initial value) in Pr. 868 Terminal 1 function assignment.♦ Parameters referred to ♦Pr. 4 to Pr. 6, Pr. 24 to Pr. 27, Pr. 232 to Pr. 239 (multi-speed operation) Refer to page 148Pr. 73 Analog input selection Refer to page 259Pr. 59 Remote function selection Refer to page 152Pr. 868 Terminal 1 function assignment Refer to page 2584.11.4 Remote setting function (Pr. 59)• Even if the operation panel is located away from the enclosure, you can use contact signals to performcontinuous variable-speed operation, without using analog signals.• By merely setting this parameter, you can use the acceleration, deceleration and setting clear functions of themotorized speed setter (<strong>FR</strong>-FK).ParameterNumberNameInitialValue59 Remote function selection 0SettingRangeRH, RM, RL signalfunctionDescriptionFrequency settingstorage function0 Multi-speed setting ⎯1 Remote setting Yes2 Remote setting No3 Remote settingNo(Turning STF/STR off clearsremotely- set frequency.)ForwardrotationAccelerationDecelerationClearInverterST<strong>FR</strong>HRM 10RL 2SD 5Connectiondiagram for remote setting(1) Remote setting functionOutput frequency(Hz)*When Pr. 59 = 1, 2 When Pr. 59 = 1When Pr. 59 = 3When Pr. 59 = 2, 30HzAccelerationONON(RH)ONDecelerationON(RM)Clear (RL)ONForwardONONONrotation (STF)Power supplyON* External operation frequency (other than multi-speed) or PU running frequency⋅ Use Pr. 59 to select whether the remote setting function is used or not and whether the frequency setting storagefunction in the remote setting mode is used or not.When Pr. 59 is set to any of "1 to 3" (remote setting function valid), the functions of the RH, RM and RL signals arechanged to acceleration (RH), deceleration (RM) and clear (RL).⋅ When the remote function is used, the output frequency of the inverter can be compensated for as follows:External operation .. Frequency set with RH and RM operation + external operation frequency other than multi-speed(PU operation frequency when Pr. 79 = "3" (external, PU combined)) and terminal 4 input.(When making analog input compensation, set "1" in Pr. 28 Multi-speed input compensationselection.When Pr. 28 is set to "0" and acceleration/deceleration is made to reach the set frequency ofthe analog voltage input (terminal 2 or terminal 4) by RH/RM, the auxiliary input by terminal 1becomes invalid.)PU operation ...........Frequency set by RH/RM operation + PU running frequencyONONTime152
4PARAMETERSFrequency setting by external terminals(2) Frequency setting storage⋅ The frequency setting storage function stores the remotely-set frequency (frequency set by RH/RM operation) intothe memory (EEPROM). When power is switched off once, then on, operation is resumed with that outputfrequency value. (Pr. 59 = 1)⋅ Frequency at the point when the start signal (STF or STR) turns off⋅ The remotely-set frequency is stored every one minute after one minute has elapsed since turn off (on) of boththe RH (acceleration) and RM (deceleration) signals. (The frequency is written if the present frequency settingcompared with the past frequency setting every one minute is different. The state of the RL signal does notaffect writing.)CAUTION⋅ The range of frequency changeable by RH(acceleration) and RM (deceleration) is 0 tomaximum frequency (Pr. 1 or Pr. 18 setting). Note thatthe maximum value of set frequency is (main speed+ maximum frequency).(Hz)Pr.1Main speed settingThe set frequency is clamped at (main speed + Pr.1 )Output frequency isclamped at Pr.1Set frequencyOutput frequency0HzAcceleration(RH)Deceleration(RM)Forward rotation(STF)ONONONTime⋅⋅⋅⋅⋅When the acceleration or deceleration signal switches on, acceleration/deceleration time is as set in Pr. 44 Second acceleration/deceleration time and Pr. 45 Second deceleration time. Note that when long time has been set in Pr. 7 or Pr. 8, the acceleration/deceleration time is as set in Pr. 7 or Pr. 8. (when RT signal is off)When the RT signal is on, acceleration/deceleration is made in the time set to Pr. 44 and Pr. 45, regardless of the Pr. 7 or Pr. 8setting.Even if the start signal (STF or STR) is off, turning on the acceleration (RH) or deceleration (RM) signal varies the presetfrequency.When switching the start signal from ON to OFF, or changing frequency by the RH or RM signal frequently, set the frequencysetting value storage function (write to EEPROM) invalid (Pr. 59 = "2, 3"). If set valid (Pr. 59 = "1"), frequency is written toEEPROM frequently, this will shorten the life of the EEPROM.The RH, RM, RL signals can be assigned to the input terminal using any Pr. 178 to Pr. 189 (input terminal function selection). Whenterminal assignment is changed, the other functions may be affected. Please make setting after confirming the function of eachterminal.Also available for the network operation mode.153
Frequency setting by external terminalsREMARKSDuring jog operation or PID control operation, the remote setting function is invalid.Setting frequency is "0"⋅⋅Even when the remotely-setfrequency is cleared by turningon the RL (clear) signal afterturn off (on) of both the RH andRM signals, the inverteroperates at the remotely-setfrequency stored in the lastoperation if power is reappliedbefore one minute has elapsedsince turn off (on) of both theRH and RM signalsWhen the remotely-setfrequency is cleared by turningon the RL (clear) signal afterturn off (on) of both the RH andRM signals, the inverteroperates at the frequency in theremotely-set frequency clearedstate if power is reapplied afterone minute has elapsed sinceturn off (on) of both the RH andRM signals.Remotely-set frequency stored last timeOutput frequency(Hz)Acceleration (RH)Deceleration (RM) OFFClear (RL)Forward rotation(STF)Power supplyONWithin 1 minuteONONRemotely-set frequency stored last timeOutput frequency(Hz)Acceleration (RH)Deceleration (RM) OFFClear (RL)Forward rotation (STF)Power supplyONONONONMore thanone minuteONRemotely-set frequency stored last timeOne minuteONONONONTimeOperation is performed at the setfrequency 0Hz.TimeCAUTIONWhen selecting this function, re-set the maximum frequency according to the machine.♦ Parameters referred to ♦Pr. 1 Maximum frequency, Pr. 18 High speed maximum frequency Refer to page 140Pr. 7 Acceleration time, Pr. 8 Deceleration time, Pr. 44 Second acceleration/deceleration time, Pr. 45 Second deceleration time Refer to page 155Pr. 28 Multi-speed input compensation selection Refer to page 152Pr. 178 to Pr. 189 (input terminal function selection) Refer to page 206154
4PARAMETERS4.12 Setting of acceleration/deceleration time andacceleration/deceleration patternSetting of acceleration/deceleration timeand acceleration/deceleration patternPurpose Parameter that must be Set Refer to PageMotor acceleration/deceleration timesettingStarting frequencySet acceleration/deceleration patternsuitable for applicationAutomatically set appropriateacceleration/deceleration timeAcceleration/deceleration timeStarting frequency and starttimeholdAcceleration/decelerationpattern and backlash measuresAutomatic acceleration/decelerationPr. 7, Pr. 8, Pr. 20, Pr. 21,Pr. 44, Pr. 45, Pr. 110, Pr. 1114.12.1 Setting of the acceleration and deceleration time (Pr. 7, Pr. 8, Pr. 20, Pr. 21,Pr. 44, Pr. 45, Pr. 110, Pr. 111)155Pr. 13, Pr. 571 157Pr. 29, Pr. 140 to Pr. 143,Pr. 380 to Pr. 383,Pr. 516 to Pr. 519158Pr. 61 to Pr. 63, Pr. 292 162Used to set motor acceleration/deceleration time.Set a larger value for a slower speed increase/decrease or a smaller value for a faster speed increase/decrease.For the acceleration time at automatic restart after instantaneous power failure, refer to Pr. 611 Acceleration time ata restart (page 239).ParameterNumber7 Acceleration time8 Deceleration time20214445110111Name Initial Value Setting Range DescriptionAcceleration/decelerationreference frequencyAcceleration/deceleration timeincrementsSecondacceleration/deceleration timeSeconddeceleration timeThird acceleration/deceleration timeThird decelerationtime7.5K or less 5s11K or more15s7.5K or less 5s11K or more60Hz015s0 to 3600/360s *1 Set the motor acceleration time.0 to 3600/360s *1 Set the motor deceleration time.1 to 400Hz5s 0 to 3600/360s *199999999999901Set the frequency that will be the basis ofacceleration/deceleration time.As acceleration/deceleration time, set thefrequency change time from stop to Pr. 20.Increments: 0.1sRange: 0 to 3600sIncrements: 0.01sRange: 0 to 360sIncrements and settingrange of acceleration/deceleration timesetting can bechanged.Set the acceleration/deceleration time whenthe RT signal is on.0 to 3600/360s *1Set the deceleration time when the RTsignal is on.9999 Acceleration time = deceleration time0 to 3600/360s *19999Set the acceleration/deceleration time whenthe X9 signal is on.Without the third acceleration/decelerationfunction.0 to 3600/360s *1Set the deceleration time when the X9signal is on.9999 Acceleration time = deceleration time*1 Depends on the Pr. 21 Acceleration/deceleration time increments setting. The initial value for the setting range is "0 to 3600s" and the settingincrements is "0.1s".Pr.20(60Hz)Outputfrequency (Hz)AccelerationtimePr.7Pr.44DecelerationtimeRunningfrequencyTimePr.8Pr.45(1) Acceleration time setting (Pr. 7, Pr. 20)⋅ Use Pr. 7 Acceleration time to set the acceleration time required to reach Pr.20 Acceleration/deceleration reference frequency from 0Hz.⋅ Set the acceleration time according to the following formula.Accelerationtime settingPr.110Pr.111Example) When Pr. 20 = 60Hz (initial value), Pr. 13 = 0.5Hz, and accelerationcan be made up to the maximum operating frequency of 50Hz in 10s=Pr. 20Maximum operatingfrequency - Pr. 13×Acceleration time from stop tomaximum operating frequency60HzPr. 7 =× 10s 12.1s50Hz - 0.5Hz155
Setting of acceleration/deceleration timeand acceleration/deceleration pattern(2) Deceleration time setting (Pr. 8, Pr. 20)⋅ Use Pr. 8 Deceleration time to set the deceleration time required to reach 0Hz from Pr. 20 Acceleration/decelerationreference frequency.⋅ Set the deceleration time according to the following formula.Example)When the frequency can be decelerated down to the maximumoperating frequency of 50Hz in 10s with 120Hz set in Pr. 20 and3Hz set in Pr. 10(3) Change the setting range and increments of the acceleration/deceleration time (Pr. 21)⋅ Use Pr. 21 to set the acceleration/deceleration time and minimum setting range.Setting "0" (initial value)......................0 to 3600s (minimum setting increments 0.1s)Setting "1" ...........................................0 to 360s (minimum setting increments 0.01s)CAUTION⋅ Changing the Pr. 21 setting changes the acceleration/deceleration time setting (Pr. 7, Pr. 8, Pr. 16, Pr. 44, Pr. 45, Pr. 110, Pr. 111, Pr.264, Pr. 265).(The Pr. 611 Acceleration time at a restart setting is not affected.)When Pr. 21 = "0", setting "5.0" s in Pr. 7 and "1" in Pr. 21 automatically changes the Pr. 7 setting to "0.5" s.(4) Set multiple acceleration/deceleration time (RT signal, Pr. 44, Pr. 45, Pr. 110, Pr. 111)⋅⋅Decelerationtime setting=Pr. 20Maximum operatingfrequency - Pr. 10×Deceleration time from maximumoperating frequency to stop.Pr. 8 =⋅ Pr. 44 and Pr. 45 are valid when the RT signal is on, and Pr. 110 and Pr. 111 are valid when the X9 signal is on. Whenboth the RT and X9 are on, Pr. 110 and Pr. 111 are valid.⋅ For the terminal used for X9 signal input, set "9" in any of Pr. 178 to Pr. 189 (input terminal function selection) to assignthe function.⋅ When "9999" is set in Pr. 45 or Pr. 111, the deceleration time becomes equal to the acceleration time (Pr. 44, Pr. 110).⋅ When Pr. 110 = "9999", third acceleration/deceleration time is invalid.CAUTIONIn S-shaped acceleration/deceleration pattern A (refer to page 158), the set time is the period required to reach the basefrequency set in Pr. 3 Base frequency.Acceleration/deceleration time formula when the set frequency is the base frequency or highert = 4 T 5× × f 2 + TT: Acceleration/deceleration time setting value(s)9 (Pr. 3) 2 9 f : Set frequency(Hz)120Hz50Hz - 3Hz× 10s 25.5s⋅Guideline for acceleration/deceleration time when Pr. 3 Base frequency = 60Hz (0Hz to set frequency)Frequency setting (Hz)Acceleration/deceleration time (s)60 120 200 4005 5 12 27 10215 15 35 82 305⋅The RT, X9 signal can be assigned to the input terminal using any of Pr. 178 to Pr. 189 (input terminal function selection). Whenterminal assignment is changed, the other functions may be affected. Please make setting after confirming the function of eachterminal.REMARKS⋅ The RT (X9) signal acts as the second (third) function selection signal and makes the other second (third) function valid. (Referto page 210)⋅ The RT signal is assigned to the RT terminal in the default setting. By setting "3" in any of Pr. 178 to Pr. 189 (input terminalfunction selection), you can assign the RT signal to the other terminal.⋅ If the Pr. 20 setting is changed, the Pr. 125 and Pr. 126 (frequency setting signal gain frequency) settings do not change. Set Pr. 125and Pr. 126 to adjust the gains.⋅ When the Pr. 7, Pr. 8, Pr. 44, Pr. 45, Pr. 110 and Pr. 111 settings are 0.03s or less, the acceleration/deceleration time is 0.04s(under V/F control, advanced magnetic flux vector control). At that time, set Pr. 20 to "120Hz" or less.⋅ If the acceleration/deceleration time is set, the actual motor acceleration/deceleration time cannot be made shorter than theshortest acceleration/deceleration time determined by the mechanical system J (moment of inertia) and motor torque.♦ Parameters referred to ♦Pr. 3 Base frequency Refer to page 142Pr. 10 DC injection brake operation frequency Refer to page 185Pr. 29 Acceleration/deceleration pattern selection Refer to page 158Pr. 125, Pr. 126 (frequency setting gain frequency) Refer to page 267Pr. 178 to Pr. 189 (input terminal function selection) Refer to page 206156
4PARAMETERSSetting of acceleration/deceleration timeand acceleration/deceleration pattern4.12.2 Starting frequency and start-time hold function (Pr. 13, Pr. 571)You can set the starting frequency and hold the set starting frequency for a certain period of time.Set these functions when you need the starting torque or want to smooth motor drive at a start.ParameterNumberName Initial Value Setting Range Description13 Starting frequency 0.5Hz 0 to 60Hz571 Holding time at a start 9999Frequency at start can be set in therange 0 to 60Hz.You can set the starting frequency atwhich the start signal is turned on.0.0 to 10.0sSet the holding time of Pr. 13 Startingfrequency.9999 Holding function at a start is invalidOutputfrequency(Hz)60Setting rangePr.130Time(1) Starting frequency setting (Pr. 13)⋅ Frequency at start can be set in the range 0 to 60Hz.⋅ You can set the starting frequency at which the start signal isturned on.STFONCAUTIONThe inverter will not start if the frequency setting signal is less than the value set in Pr. 13.For example, when 5Hz is set in Pr. 13, the motor will not start running until the frequency setting signal reaches 5Hz.Outputfrequency(Hz)60Setting rangePr. 13STF0Pr. 571 setting timeONTime(2) Start-time hold function (Pr. 571)⋅ This function holds the time set in Pr. 571 and the outputfrequency set in Pr. 13 Starting frequency.⋅ This function performs initial excitation to smooth the motor driveat a start.REMARKSWhen Pr. 13 = "0Hz", the starting frequency is held at 0.01Hz.CAUTION⋅ When the start signal was turned off during start-time hold, deceleration is started at that point.⋅ At switching between forward rotation and reverse rotation, the starting frequency is valid but the start-time hold function isinvalid.CAUTIONNote that when Pr. 13 is set to any value equal to or less than Pr. 2 Minimum frequency, simply turning on the startsignal will run the motor at the preset frequency even if the command frequency is not input.♦ Parameters referred to ♦Pr. 2 Minimum frequency Refer to page 140157
Setting of acceleration/deceleration timeand acceleration/deceleration pattern4.12.3 Acceleration/deceleration pattern (Pr. 29, Pr. 140 to Pr. 143, Pr. 380 to Pr. 383,Pr. 516 to Pr. 519)You can set the acceleration/deceleration pattern suitable for application.You can also set the backlash measures that stop acceleration/deceleration once at the parameter-set frequencyand time during acceleration/deceleration.ParameterNumberNameInitialValueSettingRangeDescription0 Linear acceleration/ deceleration1 S-pattern acceleration/deceleration A29Acceleration/deceleration pattern2 S-pattern acceleration/deceleration B0selection3 Backlash measures4 S-pattern acceleration/deceleration C5 S-pattern acceleration/deceleration D140 Backlash acceleration stopping frequency 1Hz 0 to 400Hz141 Backlash acceleration stopping time 0.5s 0 to 360s Set the stopping frequency and time forbacklash measures.142 Backlash deceleration stopping frequency 1Hz 0 to 400Hz Valid when Pr. 29 = 3143 Backlash deceleration stopping time 0.5s 0 to 360s380381Acceleration S-pattern 1Deceleration S-pattern 1000 to 50%0 to 50%Valid when S-pattern acceleration/deceleration C (Pr. 29 = 4) is set.Set the time taken for S-pattern fromstarting of acceleration/deceleration tolinear acceleration as % to the382 Acceleration S-pattern 2 0 0 to 50%acceleration/deceleration time (Pr. 7, Pr. 8etc.).An acceleration/deceleration pattern can383 Deceleration S-pattern 2 0 0 to 50% be changed with the X20 signal.516 S-pattern time at a start of acceleration 0.1s 0.1 to 2.5s517S-pattern time at a completion ofacceleration0.1s 0.1 to 2.5s518 S-pattern time at a start of deceleration 0.1s 0.1 to 2.5s519S-pattern time at a completion ofdeceleration0.1s 0.1 to 2.5sValid when S-pattern acceleration/deceleration D (Pr. 29 = 5) is set.Set the time taken for S-patternacceleration/deceleration (S-patternoperation).Output frequency(Hz)Output frequency(Hz)Setting value "0"[Linear acceleration/ deceleration]Setting value "1"fbTime[S-pattern acceleration/deceleration A]Time(1) Linear acceleration/ deceleration (Pr. 29 = "0", initial value)⋅ When the frequency is changed for acceleration, deceleration, etc. in inverteroperation, the output frequency is changed linearly (linear acceleration/deceleration) to reach the set frequency without straining the motor and inverter.Linear acceleration/deceleration has a uniform frequency/time slope.(2) S-pattern acceleration/deceleration A (Pr. 29 = "1")⋅ For machine tool spindle applications, etc.Used when acceleration/deceleration must be made in a short time to a highspeedrange of not lower than the base frequency. In this acceleration/deceleration pattern, Pr. 3 Base frequency (fb) is the inflection point of the Spattern and you can set the acceleration/deceleration time appropriate for motortorque reduction in a constant-power operation region of base frequency (fb) orhigher.CAUTION⋅ As the acceleration/deceleration time of S-pattern acceleration/deceleration A, set the time taken until Pr. 3 Base frequency isreached, not Pr. 20 Acceleration/deceleration reference frequency.158
4PARAMETERSSetting of acceleration/deceleration timeand acceleration/deceleration patternSet frequency(Hz)Setting value "2"[S-pattern acceleration/deceleration B](3) S-pattern acceleration/deceleration B (Pr. 29 = "2")⋅ For prevention of load shifting in conveyor and other applicationsSince acceleration/deceleration is always made in an S shape from currentfrequency (f2) to target frequency (f1), this function eases shock produced atacceleration/deceleration and is effective for load collapse prevention, etc.Output frequency(Hz)Output frequency (Hz)f1f2Pr. 13TimeSetting value "3"[Anti-backlash measurefunction]Pr. 142Pr. 141Pr. 140Pr. 143Time(4) Backlash measures (Pr. 29 = "3", Pr. 140 to Pr. 143)⋅ What is backlash?Reduction gears have an engagement gap and have a dead zone betweenforward rotation and reverse rotation. This dead zone is called backlash, andthis gap disables a mechanical system from following motor rotation.More specifically, a motor shaft develops excessive torque when the direction ofrotation changes or when constant-speed operation shifts to deceleration,resulting in a sudden motor current increase or regenerative status.⋅ To avoid backlash, acceleration/deceleration is temporarily stopped.Set the acceleration/deceleration stopping frequency and time in Pr. 140 to Pr.143.CAUTIONSetting the backlash measures increases the acceleration/deceleration time by the stopping time.S-patternacceleration/decelerationC switchover(X20)FrequencyPr.382Output frequencySet frequencyOFFPr.380ONOFFPr.381Pr.383Time(5) S-pattern acceleration/deceleration C (Pr. 29 ="4", Pr. 380 to Pr. 383)⋅ With the S-pattern acceleration/deceleration C switchsignal (X20), an acceleration/deceleration curve S-pattern 1or S-pattern 2 can be selected.⋅ For the terminal used for X20 signal input, set "20" in any ofPr. 178 to Pr. 189 (input terminal function selection) to assignthe function.OperationX20 signalOFFONDuringAccelerationPr. 380 Acceleration S-pattern 1Pr. 382 Acceleration S-pattern 2DuringDecelerationPr. 381 DecelerationS-pattern 1Pr. 383 DecelerationS-pattern 2Parameter setting (%) Ts / T × 100%S-patternacceleration⋅ Set % of time taken for forming an S-pattern in Pr. 380 to Pr.383 as acceleration time is 100%.TsTTsLinearaccelerationREMARKS⋅ At a start, the motor starts at Pr. 13 Starting frequency when thestart signal turns on.⋅ If there is a difference between the speed command and speedat a start of deceleration due to torque limit operation etc., thespeed command is matched with the speed to makedeceleration.⋅⋅⋅CAUTIONChange the S pattern acceleration/deceleration C switch (X20 signal) after the speed becomes constant.S pattern operation before switching continues even if the X20 signal is changed during acceleration or deceleration.The X20 signal can be assigned to the input terminal using any of Pr. 178 to Pr. 189 (input terminal function selection). Changingthe terminal assignment may affect the other functions. Make setting after confirming the function of each terminal.159
Setting of acceleration/deceleration timeand acceleration/deceleration patternOutput frequencyStart signalPr. 516Pr. 517 Pr. 518 Pr. 519ONTime(6) S-pattern acceleration/deceleration D (Pr. 29 ="5", Pr. 516 to Pr. 519)⋅ Set the time taken for S-pattern operation of S-patternacceleration/deceleration using Pr. 516 to Pr. 519.Set each S-pattern operation time for acceleration start (Pr.516), acceleration completion (Pr. 517), deceleration start(Pr. 518) and deceleration completion (Pr. 519).⋅ When S-pattern acceleration/deceleration D is set,acceleration/deceleration time will become longer asfollows:Actual acceleration time T2 = set acceleration time T1 +(S-pattern time at a start of acceleration+S-patterntime at a completion of acceleration) /2Actual deceleration time T2 = set deceleration time T1 +(S-pattern time at a start of deceleration+S-patterntime at a completion of deceleration) /2Set acceleration/deceleration time T1 indicates the actualtime taken for linear acceleration/deceleration calculatedbased on the Pr. 7, Pr. 8, Pr. 44, Pr. 45, Pr. 110 and Pr. 111setting.CAUTION⋅ Even if the start signal is turned off during acceleration, theinverter will not decelerate immediately to avoid suddenfrequency change. (Likewise, the inverter will notimmediately accelerate when deceleration is changed toreacceleration by turning the start signal on duringdeceleration, etc.)Pr. 516Pr. 516/2T1T2Pr. 517Pr. 517/2Linear accelerationSlope of Pr. 7, Pr. 44, Pr. 110Acceleration/decelerationreference frequency (Pr. 20)Starting frequency(Pr. 13)⋅ For example, the actual acceleration time when starting theinverter with an S-pattern acceleration/deceleration patternD selected for a stop to 60Hz in the parameter initial settingis as shown left:Set acceleration time T1 = (Set frequency - Pr. 13) × Pr. 7/Pr. 20Actual acceleration time T2 = set acceleration time T1 + (Pr. 516+ Pr. 517) /2Therefore,Set acceleration time T1 = (60Hz - 0.5Hz) × 5s/60Hz4.96s (actual acceleration timeat linear acceleration)Actual acceleration time T2 = 4.96s + (0.1s + 0.1s)/2= 5.06s (acceleration time atS-pattern acceleration)Acceleration/ Pr. 518decelerationreferencefrequency(Pr. 20)Pr. 518/2Linear decelerationPr. 8, Pr. 45 Pr. 111Pr. 519Pr. 519/2⋅ The actual deceleration time when stopping the inverterwith an S-pattarn acceleration/deceleration D selected fromrunning frequency to 0 Hz in the parameter initial setting isas shown left:Set deceleration time T1 = (Set frequency - Pr. 10*) × Pr. 8/Pr. 20Actual deceleration time T2 = Set deceleration time T1 + (Pr. 518+ Pr. 519) /2* Pr.10 .... DC injection brake operation frequencyTherefore,T1T2DC injectionbrake operationfrequency(Pr. 10)Set deceleration time T1 = (60Hz - 3Hz) × 5s/60Hz4.75s (actual deceleration timeat linear deceleration)Actual deceleration time T2 = 4.75s + (0.1s + 0.1s)/2= 4.85s (deceleration time atS-pattern deceleration)160
4PARAMETERSSetting of acceleration/deceleration timeand acceleration/deceleration pattern⋅⋅CAUTIONWhen the acceleration/deceleration time (Pr. 7, Pr. 8, etc.) setting under real sensorless vector control or vector control is 0s, theS-pattern acceleration/deceleration A to D (Pr. 29 = "1, 2, 4, 5") is linear acceleration/deceleration.Set linear acceleration/deceleration (Pr. 29 = "0 (initial value)") when torque control is exercised under real sensorless vectorcontrol or vector control. When acceleration/deceleration patterns other than the linear acceleration/deceleration are selected,the protective function of the inverter may function.♦ Parameters referred to ♦Pr. 3 Base frequency Refer to page 142Pr. 7 Acceleration time, Pr. 8 Deceleration time, Pr. 20 Acceleration/deceleration reference frequency Refer to page 155Pr. 10 DC injection brake operation frequency Refer to page 185Pr. 178 to Pr. 189 ( Input terminal function selection ) Refer to page 206161
Setting of acceleration/deceleration timeand acceleration/deceleration pattern4.12.4 Shortest acceleraiton/deceleration and optimum acceleration/deceleration(automatic acceleration/deceleration) (Pr. 61 to Pr. 63, Pr. 292, Pr. 293)The inverter operates in the same conditions as when appropriate values are set in each parameter even ifacceleration/deceleration time and V/F pattern are not set. This function is useful when you just want to operate,etc. without fine parameter setting.ParameterNumberNameInitialValue61 Reference current 99996263292293Reference valueat accelerationReference valueat decelerationAutomaticacceleration/decelerationAcceleration/decelerationseparateselection9999999900Setting RangeDescription0 to 500ASet the reference current during shortest/ optimumacceleration/deceleration.9999 Rated inverter output current value is reference0 to 220%Set the limit value/optimum value during shortest/optimumacceleration.9999Shortest acceleration/deceleration: 150% is a limit valueOptimum acceleration/deceleration: 100% is an optimum value0 to 220%Set the limit value/optimum value during shortest/optimumdeceleration.9999Shortest acceleration/deceleration: 150% is a limit valueOptimum acceleration/deceleration: 100% is an optimum value0 Normal mode3 Optimum acceleration/deceleration mode5, 6 Elevator mode1, 2 (refer to page 146)7, 8 Brake sequence mode 1, 2 (Refer to page 192.)11 Shortest acceleration/deceleration mode0Both acceleration and deceleration are made in the shortest/optimum acceleration/deceleration mode1Only acceleration is made in the shortest/optimumacceleration/deceleration mode2Only deceleration is made in the shortest/optimumacceleration/deceleration mode(1) Shortest acceleration/deceleration mode (Pr. 292 = "1, 11", Pr. 293)⋅ Set when you want to accelerate/decelerate the motor for the shortest time. It is desired to make acceleration/deceleration in a shorter time for a machine tool etc. but the design values of machine constants are unknown.⋅ Acceleration/deceleration speed is automatically adjusted at a start of acceleration/deceleration so thatacceleration/deceleration is made with the maximum torque the inverter can output according to the setting valueof Pr. 7 Acceleration time and Pr. 8 Deceleration time. (The setting values of Pr. 7 and Pr. 8 are not changed)⋅ Either acceleration or deceleration can be made in the shortest time using Pr. 293 Acceleration/deceleration separateselection.When the setting value is "0" (initial value), both acceleration and deceleration can be made in the shortest time.⋅ When the shortest acceleration/deceleration mode is selected under V/F control and advanced magnetic fluxvector control, the stall prevention operation level during acceleration/deceleration becomes 150% (adjustableusing Pr. 61 to Pr. 63 ). The setting of Pr. 22 Stall prevention operation level and stall level by analog input are usedonly during a constant speed operation.Adjustment using Pr. 61 to Pr. 63 can not be made under real sensorless vector control or vector control sincetorque limit level (Pr. 22 etc.) is used during acceleration/deceleration.⋅ It is inappropriate to use for the following applications.a)Machine with a large inertia such as a fan (more than 10 times). Since stall prevention operation will beactivated for a long time, this type of machine may be brought to an alarm stop due to motor overloading, etc. .b)It is desired to always perform operation with a constant acceleration/deceleration time.c)It is desired to perform operation making sure the inverter and motor have enough capability.REMARKS⋅ Even if automatic acceleration/deceleration mode has been selected, inputting the jog signal (jog operation), RT signal (secondfunction selection) or X9 signal (third function selection) during an inverter stop will switch to the normal operation and givepriority to jog operation, second function selection or third function selection. Note that JOG and RT signal input is invalid evenif JOG signal and RT signal are input during operation in automatic acceleration/deceleration mode.⋅ Since acceleration/deceleration is made with the stall prevention operation being activated, the acceleration/deceleration speedalways varies according to the load conditions.⋅ Note that when proper values are set in Pr. 7 and Pr. 8 , acceleration/deceleration time may be shorter than selecting shortestacceleration/deceleration mode.162
4PARAMETERS(2) Optimum acceleration/deceleration mode (Pr. 292 = "3", Pr. 293)Setting of acceleration/deceleration timeand acceleration/deceleration pattern⋅ The optimum operation within the rating range where the inverter can be continuously used regardless of theinverter capability is performed.Automatically set torque boost and acceleration/deceleration time so that the average current during acceleration/deceleration is the rated current by the self-learning of the inverter.It is appropriate for applications such as automatic transfer machine, etc. which is small in load change and isoperated in a predetermined pattern.⋅ At the initial time when the optimum acceleration/deceleration mode has been selected, operation is performed atthe values set in Pr. 0 Torque boost, Pr. 7 Acceleration time and Pr. 8 Deceleration time. After operation, the averagecurrent and peak current are calculated from the motor current during acceleration/deceleration.These values arecompared with the reference current (initial value is rated inverter current) and calculated, then more appropriatevalues are set in Pr. 0, Pr. 7 and Pr. 8 .After that, operation is performed under the conditions of Pr. 0, Pr. 7 and Pr. 8 set, and more appropriate values arecalculated.Note that the Pr. 0 value will not change under advanced magnetic flux vector control, real sensorless vector controlor vector control.⋅ When overvoltage fault (E.OV3) occurs at deceleration, the Pr. 8 setting value becomes 1.4 times larger.⋅ Storage of parametersThe optimum values of Pr. 0, Pr. 7 and Pr. 8 are written to both theparameter RAM and EEPROM only three times of acceleration/deceleration after the optimum acceleration/deceleration modehas been selected or after the power is switched on or theinverter is reset. At of after the fourth attempt, they are notstored into EEPROM. Hence, after power-on or inverter reset,the values changed at the third time are valid. Note that thevalues changed at the fourth or later time are calculated tooptimum and the values of Pr. 0, Pr. 7 and Pr. 8 are set to RAM,the values can be stored into EEPROM by reading and writtingthe values with the operation panel and paramter unit.Number ofOptimumValueChangesPr. 0, Pr. 7, Pr. 8EEPROMvalueRAMvalueOptimumConditions1 to 3 times Updated Updated Updated4 or moretimesUnchangedfrom thirdvalueUpdatedUpdated⋅ Either acceleration or deceleration can be made in the optimum acceleration/deceleration mode using Pr. 293Acceleration/deceleration separate selection.When the setting value is "0" (initial value), both acceleration and deceleration are made in the optimumacceleration/deceleration mode.⋅ It is inappropriate for machines which change in load and operation conditions.Since the stored optimum values are used for the next operation, faults, e.g. acceleration/deceleration is not madeif conditons change, alarm stop is made due to overcurrent protective function, may occur.⋅⋅⋅⋅⋅REMARKSIf shortest acceleration/deceleration mode has been selected, inputting the jog signal (jog operation), RT signal (secondfunction selection) or X9 signal (third function selection) during an inverter stop will switch to the normal operation and givepriority to jog operation, second function selection or third function selection. Note that JOG and RT signal input is invalid evenif JOG signal and RT signal are input during operation in shortest/optimum acceleration/deceleration mode.Because of the learning system, this mode is not valid at the first operation after the optimum acceleration/deceleration mode isset.The optimum value are operated on only when acceleration is made from a stop to 30Hz or more or when deceleration is madefrom 30Hz or more to stop.When the motor is not connected or output current is less than 5% of the rated inverter current, optimum acceleration/deceleration mode will not function.Even when the optimum acceleration/deceleration mode is selected and Pr. 293 = "1" (acceleration only for the optimumacceleration/deceleration mode), overvoltage fault (E.OV3) occurrence at deceleration makes the Pr. 8 setting value be setagain longer.163
Setting of acceleration/deceleration timeand acceleration/deceleration pattern(3) Adjustment of shortest and optimum acceleration/deceleration mode (Pr. 61 to Pr. 63)⋅ By setting the adjustment parameters Pr. 61 to Pr. 63, the application range can be made wider.ParameterNumber616263NameReferencecurrentReference valueat accelerationReference valueat decelerationSettingRange0 to 500A9999(initial value)0 to 220%9999(initial value)DescriptionFor example, when the motor and inverter are different in capacity, set therated motor current value.Shortest acceleration/deceleration: Set reference current (A) of the stallprevention operation level during acceleration/decelerationOptimum acceleration/deceleration: Set reference current (A) of theoptimum current during acceleration/decelerationThe rated inverter current is defined as reference.Set when it is desired to change the reference level of acceleration anddeceleration.Shortest acceleration/deceleration: Set the stall prevention operation level(ratio to the current value of Pr. 61 ) during acceleration/deceleration.Optimum acceleration/deceleration: Set the optimum current level (ratio tothe current value of Pr. 61 ) during acceleration/deceleration.Shortest acceleration/deceleration: The 150% value during shortestacceleration/deceleration is judged as the stall prevention operation level.Optimum acceleration/deceleration: 100% is the optimum valueREMARKS⋅ Pr. 61 to Pr. 63 are invalid when real sensorless vector control or vector control is selected in the shortest acceleration/deceleration mode.⋅ Since the Pr. 61 to Pr. 63 settings automatically return to the initial value (9999) if the Pr. 292 setting is changed, set Pr. 292 firstwhen you need to set Pr. 61 to Pr. 63.♦ Parameters referred to ♦Pr. 0 Torque boost Refer to page 129Pr. 7 Acceleration time, Pr. 8 Deceleration time Refer to page 155Pr. 22 Stall prevention operation level Refer to page 135Pr. 22 Torque limit level Refer to page 83164
4PARAMETERS4.13 Selection and protection of a motorSelection and protection of a motorPurpose Parameter that must be Set Refer to PageMotor protection from overheat Electronic thermal O/L relay Pr. 9, Pr. 51 165Use the constant torque motor <strong>Applied</strong> motor Pr. 71 169The motor performance can bemaximized for operation in magneticflux vector control methodHigh accuracy operation unaffectedby the motor temperature and stableoperation with high torque down toultra low speed are performedOffline auto tuningPr. 82 to Pr. 84,Pr. 90 to Pr. 94, Pr. 96Online auto tuning Pr. 95, Pr. 574 1814.13.1 Motor protection from overheat (Electronic thermal relay function) (Pr. 9, Pr. 51)Set the current of the electronic thermal O/L relay to protect the motor from overheat. This feature provides theoptimum protective characteristics, including reduced motor cooling capability, at low speed.171ParameterNumber951Name Initial Value Setting Range DescriptionElectronic thermalO/L relaySecond electronicthermal O/L relay *Rated invertercurrent99990 to 500A Set the rated motor current.0 to 500AMade valid when the RT signal is on.Set the rated motor current.9999 Second electronic thermal O/L relay invalid* When parameter is read using the <strong>FR</strong>-PU04, a parameter name different from an actual parameter is displayed.(1) Electronic thermal relay function operation characteristic (THM)[Electronic thermal relay function operation characteristic (E.THM)] This function detects the overload (overheat) of thePr. 9 = 50% setting ofPr. 9 = 100% settingmotor, stops the operation of the inverter's outputinverter rating*1.2of inverter rating*2transistor, and trips. (The operation characteristic isshown on the left)(min) unit display inthis range(s) unit display in this rangeOperation time (min)Operation time (s)706050 0.5Hz2401801206030Hzor more* 320Hz10Hz6Hz30Hz or more* 320Hz10Hz6Hz0.5HzOperation rangeRange on the right ofcharacteristic curveNon-operation rangeRange on the left ofcharacteristic curveCharacteristic whenelectronic thermal relayfunction for motorprotection is turned off(When Pr. 9 setting is 0(A))Electronic thermal relayfunction for transistorprotection52.5% 105%50 100 150Ratio of the motor current toPr. 9 Electronic thermal relay function (%)⋅⋅⋅Set the rated current [A] of the motor in Pr. 9. (If themotor has both 50Hz and 60Hz rating and the Pr. 3Base frequency is set to 60Hz, set the 1.1 times of the60Hz rated motor current.)Set "0" in Pr. 9 when you do not want to activate theelectronic thermal relay function, e.g. when using anexternal thermal relay with the motor. (Note that theoutput transistor protection of the inverter functions(E.THT).)When using the Mitsubishi constant-torque motor1) Set "1" or any of "13" to "18", "50", "53", "54" in Pr. 71.(This provides a 100% continuous torque characteristicin the low-speed range.)2) Set the rated current of the motor in Pr. 9.*1 When a value 50% of the rated inverter current (current value) isset in Pr. 9*2 The % value denotes the percentage to the rated inverter current. Itis not the percentage to the rated motor current.*3 When you set the electronic thermal relay function dedicated to theMitsubishi constant-torque motor, this characteristic curve appliesto operation at 6Hz or higher.⋅⋅⋅⋅⋅⋅CAUTIONFault by electronic thermal relay function is reset by inverter power reset and reset signal input. Avoid unnecessary reset andpower-off.When multiple motors are operated by a single inverter, protection cannot be provided by the electronic thermal relay function.Install an external thermal relay to each motor.When the difference between the inverter and motor capacities is large and the setting is small, the protective characteristics ofthe electronic thermal relay function will be deteriorated. In this case, use an external thermal relay.A special motor cannot be protected by the electronic thermal relay function. Use the external thermal relay.Since a thermal relay protector is built in a motor dedicated for vector control (SF-V5RU), set "0" in Pr. 9 to use the motor.Electronic thermal relay does not function when 5% or less of inverter rated current is set to electronic thermal relay setting.165
Selection and protection of a motor(2) Electronic thermal relay function operation characteristic (THT)Electronic thermal relay function (transistor protection thermal) operation characteristics of the inverter when the ratioof the motor current to the inverter rated current is presented as transverse is shown. Transverse is calculated asfollows: (motor current [A]/inverter rated current [A]) × 100 [%].Optimum ConditionsElectronic thermal relay function operation characteristic (THT)150120Running frequency : 1Hz or moreCarrier frequency: 2kHzOperation time (S)90603000 25 50 75 100 125 150 175 200Ratio of the motor currentto the inverter rated current (%)15Running frequency : 1Hz or lessCarrier frequency: 2kHzOperation time (S)1296300 25 50 75 100 125 150 175 200Ratio of the motor currentto the inverter rated current (%)⋅⋅CAUTIONFault by electronic thermal relay function is reset by inverter power reset and reset signal input. Avoid unnecessary reset andpower-off.The operation time of the transistor protection thermal relay shortens when the Pr. 72 PWM frequency selection setting increases.166
4PARAMETERSSelection and protection of a motor(3) Set multiple electronic thermal relay functions (Pr. 51)Use this function when rotating two motors of different rated currents individually by asingle inverter. (When rotating two motors together, use external thermal relays.)⋅ Set the rated current of the second motor in Pr. 51.⋅ When the RT signal is on, thermal protection is provided based on the Pr. 51 setting.Pr. 450Second appliedmotor9999 09999Other than9999Other than9999Pr. 9Electronic thermalO/L relayOther than00Other than0Pr. 51Second electronic thermal O/LrelayRT = OFFFirstmotorSecondmotorFirstmotorRT = ONSecondmotor9999 × × × ×0 × × × ×0.01 to 500 (0.1 to 3600) × × ◦9999 ◦ × ◦ ×0 ◦ × ×0.01 to 500 (0.1 to 3600) ◦ ◦9999 × × × ×0 × × × ×0.01 to 500 (0.1 to 3600) × × ◦9999 ◦ ◦0 ◦ × ×0.01 to 500 (0.1 to 3600) ◦ ◦UVWRTSDMCMCIMIM◦ .... Output current value is used to perform integration processing. .... Output current is assumed as 0A to perform integration processing. (cooling processing)× ..... Electronic thermal relay function is not activated.REMARKS⋅ The RT signal acts as the second function selection signal and makes the other secondfunctions valid. (Refer to page 210)⋅ The RT signal is assigned to the RT terminal in the initial setting. By setting "3" in any of Pr. 178to Pr. 189 (input terminal function selection), you can assign the RT signal to the other terminal.(4) Electronic thermal relay function prealarm (TH) and alarm signal (THP signal)100%: Electronic thermal relay function alarm operation value ⋅ The alarm signal (THP) is output and an electronic thermal prealarm (TH) is displayed when the electronic thermal relayElectronic thermal100%relay function85% function cumulative value reaches 85% of the level set in Pr. 9operation levelor Pr. 51. If it reaches 100% of the Pr. 9 Electronic thermal O/Lrelay setting, electronic thermal relay function protection (E.Electronic thermal O/LTHM/E.THT) occurs.relay alarm (THP) OFF ON ONTime ⋅ The inverter does not trip even when the alarm signal (THP) isoutput.⋅ For the terminal used for the THP signal output, assign thefunction by setting "8" (positive logic) or "108" (negative logic) inany of Pr. 190 to Pr. 196 (output terminal function selection).CAUTION⋅ Changing the terminal assignment using Pr. 190 to Pr. 196 (output terminal function selection) may affect the other functions. Makesetting after confirming the function of each terminal.(5) External thermal relay input (OH signal)⋅ To protect the motor against overheat, use the OH signal when using an externalThermal relay protectorthermal relay or the built-in thermal protector of the motor.InverterMotor ⋅ When the thermal relay operates, the inverter trips and outputs the fault signalUV IM (E.OHT).W⋅ For the terminal used for OH signal input, assign the function by setting "7" in anyOHSDof Pr. 178 to Pr. 189 (input terminal function selection)External thermal relay inputconnection example167
Selection and protection of a motorInverterPCCS(OH)SD*2W1kΩG1G2SF-V5RUConnection of the thermalprotector of the SF-V5RU⋅ A thermal protector is provided for a vector control dedicated motor (SF-V5RU).* Assign OH (external thermal input) signal to theCS terminal.CS(OH)(Pr. 186 = "7")PCControl circuitConnect a 2W1kΩ resistor between the terminalterminal blockPC and CS(OH).Install the resistor pushing it against the bottompart of the terminal block so as to avoid a contactResistor (2W1kΩ)with other cables.Refer to page 206 for details of Pr. 186 CS terminalfunction selection.⋅CAUTIONChanging the terminal assignment using Pr. 178 to Pr. 189 (input terminal function selection) may affect the other functions. Makesetting after confirming the function of each terminal.(6) PTC thermistor input (PTC signal)InverterUAU VPTC WAU(PTC)SDMotorAUPTCInverterPTC thermistor input connection exampleBuilt-in PTC thermistor of the motor can be input to the PTC signal (AU terminal).⋅ For the terminal used for PTC signal input, assign the function by setting "63" in Pr. 184 AU terminal function selectionand also set the AU/PTC switchover switch to the PTC terminal function. (The initial setting is the AU terminalfunction.)⋅ If a motor overheat state is detected for more than 10s according to the input from the PTC thermistor, the invertertrips and outputs the PTC thermal fault signal (E.PTC).⋅ The input specifications of the PTC thermistorare shown on the right.Motor TemperaturePTC Thermistor Resistance Value (Ω)Normal 0 to 500Boundary500 to 4kOverheat4k or higherCAUTION⋅ When the PTC signal was not assigned to Pr. 184 and the AU/PTC switchover switch was set to the PTC terminal function, thefunction assigned to the AU terminal is always off. Reversely, when the PTC signal was assigned to Pr. 184 and the AU/PTCswitchover switch was set to the AU terminal function, a PTC thermal fault (E.PTC) occurs since the function is always in amotor overheat state.⋅ When you want to input a current, assign the AU signal to the other signal.⋅ When terminal assignment is changed, the other functions may be affected. Please make setting after confirming the functionof the AU terminal.♦ Parameters referred to ♦Pr. 71 <strong>Applied</strong> motor Refer to page 169Pr. 72 PWM frequency selection Refer to page 257Pr. 178 to Pr. 189 (input terminal function selection) Refer to page 206Pr. 190 to Pr. 196 (output terminal function selection) Refer to page 214Specifications of the AU terminal Refer to page 22AU/PTC switchover switchFactory-set to "AU".Set to the "PTC" position tovalidate the PTC signal input.168
4PARAMETERS4.13.2 <strong>Applied</strong> motor (Pr. 71, Pr. 450)Selection and protection of a motorSetting of the used motor selects the thermal characteristic appropriate for the motor.Setting is necessary when using a constant-torque motor. Thermal characteristic of the electronic thermal relayfunction suitable for the motor is set.When advanced magnetic flux vector, real sensorless vector control or vector control is selected, the motorconstants (SF-JR, SF-HR, SF-JRCA, SF-HRCA, SF-V5RU (1500r/min series)) necessary for control areselected as well.ParameterNumberName Initial Value Setting Range Description71 <strong>Applied</strong> motor 0450 Second applied motor 99990 to 8, 13 to 18, 30,33, 34, 40, 43, 44,50, 53, 540 to 8, 13 to 18, 30,33, 34, 40, 43, 44,50, 53, 549999 Not function(1) Set the motor to be usedRefer to the following list and set this parameter according to the motor used.Pr. 71 (Pr. 450) SettingPr. 71 Pr. 450Thermal Characteristic of the Electronic Thermal RelayFunctionSelecting the standard motor or constanttorquemotor sets the corresponding motorthermal characteristic.Set when using the second motor.(same specifications as Pr. 71)Standard(SF-JR etc.)Motor (◦ : used motor)Constant torque(SF-JRCA etc.)Vector(SF-V5RU)0(Pr. 71 initial value)Thermal characteristics of a standard motor◦1 Thermal characteristics of the Mitsubishi constant-torque motor ◦2Thermal characteristics of a standard motorAdjustable 5 points V/F (Refer to page 147)◦30 Vector control dedicated motor SF-V5RU (1500r/min series) ◦40Thermal characteristic of Mitsubishi high efficiency motor SF-HR◦*150Thermal characteristic of Mitsubishi constant-torque motor SF-HRCA◦ *23 Standard motor◦Constant-torque motor13Vector control dedicatedmotor SF-V5RU (except for◦ ◦ *31500 r/min series).33Vector control dedicatedmotor SF-V5RU (1500r/minSelect "offline auto tuningsetting"◦series), SF-THY43Mitsubishi High efficiency motor(SF-HR)◦ *153Mitsubishi constant-torquemotor (SF-HRCA)◦ *24 Standard motor◦Constant-torque motor14Vector control dedicatedmotor SF-V5RU (except for◦ ◦ *31500 r/min series).344454Vector control dedicatedmotor SF-V5RU (1500r/minseries), SF-THYMitsubishi High efficiency motor(SF-HR)Mitsubishi constant-torquemotor (SF-HRCA)Auto tuning data can be read,changed, and set5 Standard motor Star Direct input of ◦15 Constant-torque motor connection motor◦6 Standard motor Delta constants is ◦16 Constant-torque motor connection enabled◦7 Standard motor Star Motor◦17 Constant-torque motor connection constants◦8 Standard motordirect input◦Delta+18 Constant-torque motor connection offline auto◦tuning9999— (initial Without second applied motorvalue)*1 Motor constants of Mitsubishi high efficiency motor SF-HR.*2 Motor constants of Mitsubishi constant-torque motor SF-HRCA.*3 Select this setting for vector control dedicated motor (SF-V5RU (except for 1500 r/min series).◦*1◦ *2◦169
Selection and protection of a motorREMARKS⋅ When performing offline auto tuning, set "3, 7, 8, 13, 17, 18, 33, 43, 53" in Pr. 71.(Refer to page 171 for offline auto tuning)⋅ For the 5.5K and 7.5K, the Pr. 0 Torque boost and Pr. 12 DC injection brake operation voltage settings are automatically changedaccording to the Pr. 71 setting as follows.Pr. 71Standard Motor Setting0, 2, 3 to 8, 40, 43, 44Constant Torque Motor Setting1, 13 to 18, 50, 53, 54Pr. 0 3% 2%Pr. 12 4% 2%(2) Use two types motors (Pr. 450)⋅ Set Pr. 450 Second applied motor to use two types motors with one inverter.⋅ When "9999" (initial value) is set, no function is selected.⋅ When Pr. 450 ≠ 9999, turning the RT signal on makes the following parameter valid.FunctionRT SignalON (secondmotor)RT SignalOFF (firstmotor)<strong>Applied</strong> motor Pr. 450 Pr. 71Control method selection Pr. 451 Pr. 800Motor capacity Pr. 453 Pr. 80Number of motor poles Pr. 454 Pr. 81Motor excitation current Pr. 455 Pr. 82Rated motor voltage Pr. 456 Pr. 83Rated motor frequency Pr. 457 Pr. 84Motor constant (R1) Pr. 458 Pr. 90FunctionRT SignalON (secondmotor)RT SignalOFF (firstmotor)Motor constant (R2) Pr. 459 Pr. 91Motor constant (L1) Pr. 460 Pr. 92Motor constant (L2) Pr. 461 Pr. 93Motor constant (X) Pr. 462 Pr. 94Auto tuning setting/status Pr. 463 Pr. 96Online auto tuning selection Pr. 574 Pr. 95Torque current Pr. 860 Pr. 859REMARKS⋅ The RT signal acts as the second function selection signal and makes the other second functions valid. (Refer to page 210)⋅ The RT signal is assigned to the terminal RT in the initial setting. By setting "3" in any of Pr. 178 to Pr. 189 (input terminal functionselection), you can assign the RT signal to the other terminal.⋅CAUTIONChanging the terminal assignment using Pr. 178 to Pr. 189 (input terminal function selection) may affect the other functions. Makesetting after confirming the function of each terminal.CAUTIONSet this parameter correctly according to the motor used.Incorrect setting may cause the motor to overheat and burn.♦ Parameters referred to ♦Pr. 0 Torque boost Refer to page 129Pr. 12 DC injection brake operation voltage Refer to page 185Pr. 80 Motor capacity, Pr. 81 Number of motor poles, Pr. 453 Second motor capacity, Pr. 454 Number of second motor poles Refer to page 131Pr. 82 to Pr. 84, Pr. 90 to Pr. 94, Pr. 96, Pr. 455 to Pr. 463, Pr. 859, Pr. 860 (Motor constant) Refer to page 171Pr. 95 Online auto tuning selection, Pr. 574 Second motor online auto tuning Refer to page 181Pr. 451 Second motor control method selection, Pr. 800 Control method selection Refer to page 75Pr. 100 to Pr. 109 (Adjustable 5 points V/F) Refer to page 147170
4PARAMETERSSelection and protection of a motor4.13.3 Offline auto tuning (Pr. 71, Pr. 80 to Pr. 84, Pr. 90 to Pr. 94, Pr. 96, Pr. 450,Pr. 453 to Pr. 463, Pr. 684, Pr. 859, Pr. 860)Magnetic fluxSensorlessVectorThe motor performance can be maximized with offline auto tuning.• What is offline auto tuning?When performing advanced magnetic flux vector control, real sensorless vector control or vector control, themotor can be run with the optimum operating characteristics by automaticaly measuring the motor constants(offline auto tuning) even when each motor constants differs, other manufacturer's motor is used, or the wiringlength is long.ParameterNumberNameInitialValue71 <strong>Applied</strong> motor 080 Motor capacity 999981 Number of motor poles 999982 Motor excitation current 9999Setting Range0 to 8, 13 to 18,30, 33, 34, 40,43, 44, 50, 53, 54DescriptionBy selecting a standard motor or constant torquemotor, thermal characteristic and motor constantsof each motor are set.0.4 to 55kW Set the applied motor capacity.9999 V/F control2, 4, 6, 8, 10 Set the number of motor poles.12, 14, 16, 18, 20X18 signal-ON:V/F controlSet 10 + number of motor poles.9999 V/F control0 to 500A9999Tuning data(The value measured by offline auto tuning isautomatically set.)Use the Mitsubishi motor (SF-JR, SF-HR, SF-JRCA, SF-HRCA, SF-V5RU (1500r/min series))constants83 Rated motor voltage 200/400V * 0 to 1000VSet the rated motor voltage(V).* The initial value differs according to the voltagelevel. (200V/400V)84 Rated motor frequency 60Hz 10 to 120Hz Set the rated motor frequency (Hz).90 Motor constant (R1) 9999 0 to 50Ω, 999991 Motor constant (R1) 9999 0 to 50Ω, 999992 Motor constant (L1) 999993 Motor constant (L2) 999994 Motor constant (X) 999996Auto tuning setting/status450 Second applied motor 9999453 Second motor capacity 9999454455456457Number of second motorpolesSecond motor excitationcurrentRated second motorvoltageRated second motorfrequency0999999990 to 50Ω,(0 to 1000mH),99990 to 50Ω(0 to 1000mH),99990 to 500Ω(0 to 100%), 9999Tuning data(The value measured by offline auto tuning isautomatically set.)9999: Use the Mitsubishi motor (SF-JR, SF-HR,SF-JRCA, SF-HRCA, SF-V5RU (1500r/min series))constants0 Offline auto tuning is not performedOffline auto tuning is performed without motor1running101 Offline auto tuning is performed with motor running0 to 8, 13 to 18,30, 33, 34, 40,43, 44, 50, 53, 549999 Not functionSet when using the second motor.(same specifications as Pr. 71)0.4 to 55kW Set the capacity of the second motor.9999 V/F control2, 4, 6, 8, 10 Set the number of poles of the second motor.9999 V/F control0 to 500A9999200/400V * 0 to 1000V60Hz10 to 120HzTuning data of the second motor(The value measured by offline auto tuning isautomatically set.)Use the Mitsubishi motor (SF-JR, SF-HR, SF-JRCA, SF-HRCA, SF-V5RU (1500r/min series))constantsSet the rated voltage (V) of the second motor.* The initial value differs according to the voltagelevel. (200V/400V)Set the rated motor frequency (Hz) of the secondmotor.171
Selection and protection of a motorParameterNumber458459460461462463684Second motor constant(R1)Second motor constant(R2)Second motor constant(L1)Second motor constant(L2)Second motor constant(X)Second motor autotuning setting/statusTuning data unitswitchover9999 0 to 50Ω, 99999999 0 to 50Ω, 9999999999999999859 Torque current 9999860NameSecond motor torquecurrentInitialValue009999Setting Range0 to 50Ω(0 to 1000mH),99990 to 50Ω(0 to 1000mH),99990 to 500Ω(0 to 100%), 9999Tuning data of the second motor(The value measured by offline auto tuning isautomatically set.)9999: Use the Mitsubishi motor (SF-JR, SF-HR,SF-JRCA, SF-HRCA, SF-V5RU (1500r/min series))constants0 Second motor auto tuning is not performed1101Offline auto tuning is performed without secondmotor runningOffline auto tuning is performed with second motorrunning0 Internal data converted value1 Displayed in "A, Ω, mH, %"0 to 500A99990 to 500A9999DescriptionTuning data(The value measured by offline auto tuning isautomatically set.)Use the Mitsubishi motor (SF-JR, SF-HR, SF-JRCA, SF-HRCA, SF-V5RU (1500r/min series))constantsTuning data of the second motor(The value measured by offline auto tuning isautomatically set.)Use the Mitsubishi motor (SF-JR, SF-HR, SF-JRCA, SF-HRCA, SF-V5RU (1500r/min series))constantsPOINT· This function is made valid only when a value other than "9999" is set in Pr. 80 and Pr. 81 and advanced magneticflux vector control, real sensorless vector control or vector control is selected.· You can copy the offline auto tuning data (motor constants) to another inverter with the PU (<strong>FR</strong>-DU07/<strong>FR</strong>-PU07).· Even when motors (other manufacturer's motor, SF-JRC, etc.) other than Mitsubishi standard motor, highefficiency motor (SF-JR SF-HR 3.7kW or more), Mitsubishi constant-torque motor (SF-JRCA four-pole, SF-HRCA3.7kW or more) and vector control dedicated motor (SF-V5RU (1500r/min series)) are used or the wiring length islong, using the offline auto tuning function runs the motor with the optimum operating characteristics.· Tuning is enabled even when a load is connected to the motor. (As the load is lighter, tuning accuracy is higher.Tuning accuracy does not change even if the inertia is large.)· For the offline auto tuning, you can select either the motor non-rotation mode (Pr. 96 = "1") or rotation mode (Pr. 96= "101").· The rotation mode has higher tuning accuracy than the non-rotation mode.· Reading/writing/copy of motor constants tuned by offline auto tuning are enabled.· The offline auto tuning status can be monitored with the PU (<strong>FR</strong>-DU07/<strong>FR</strong>-PU07/<strong>FR</strong>-PU04).· Do not use an inverter with a surge voltage suppression filter (<strong>FR</strong>-ASF-H) connected between the inverter and motor.172
4PARAMETERSSelection and protection of a motor(1) Before performing offline auto tuningCheck the following before performing offline auto tuning.· Make sure advanced magnetic flux vector control (Pr. 80, Pr. 81), real sensorless vector control or vector control (Pr.800) is selected.· A motor should be connected. Note that the motor should be at a stop at a tuning start.· The motor capacity should be equal to or one rank lower than the inverter capacity.· The maximum frequency is 120Hz.· Motors such as high-slip motor, high-speed motor and special motor cannot be tuned.· Even if tuning is performed without motor running (Pr. 96 Auto tuning setting/status = "1"), the motor may run slightly.Therefore, fix the motor securely with a mechanical brake, or before tuning, make sure that there will be noproblem in safety if the motor runs. (Caution is required especially in vertical lift applications). Note that if the motorruns slightly, tuning performance is unaffected.· Note the following when selecting offline auto tuning performed with motor running (Pr. 96 Auto tuning setting/status ="101").Torque is not enough during tuning.The motor may be run at nearly its rated speed.The brake is open.No external force is applied to rotate the motor.· Offline auto tuning will not be performed properly if it is performed with a surge voltage suppression filter (<strong>FR</strong>-ASF-H) connected between the inverter and motor. Remove it before starting tuning.· When exercising vector control, use the encoder that is coupled directly to the motor shaft without looseness.Speed ratio should be 1:1.173
Selection and protection of a motor(2) Setting1) Select the advanced magnetic flux vector control, real sensorless vector control or vector control (refer to page 75 ).2) Set "1" or "101" in Pr. 96 Auto tuning setting/status .· When the setting is "1" . . . . . . . . Tuning is performed without motor running.It takes approximately 25 to 120s * until tuning is completed.(Excitation noise is produced during tuning.)*Tuning time differs according to the inverter capacity and motor type.· When the setting is "101" . . . . . . Tuning is performed with motor running.It takes approximately 40s until tuning is completed.The motor runs at nearly its rated frequency.3) Set the rated motor current (initial value is rated inverter current) in Pr. 9 Electronic thermal O/L relay (refer to page165 ).4) Set the rated voltage of motor (initial value is 200V/400V) in Pr. 83 Rated motor voltage and rated frequency of motor(initial value is 60Hz) in Pr. 84 Rated motor frequency .(For a Japanese standard motor, etc. which has both 50Hz and 60Hz rated values, set 200V/60Hz or 400V/60Hz).)For vector control dedicated motor SF-V5RU1 / V5RU3 / V5RU4, set as the following table.SF-V5RU1-30kW or lessSF-V5RU1-37kWSF-V5RU3-22kW or lessSF-V5RU3-30kWSF-V5RU4-3.7kW, 7.5kWSF-V5RU4-other than the aboveREMARKS5) Set Pr. 71 <strong>Applied</strong> motor according to the motor used.* For other settings of Pr. 71, refer to page 169.Pr. 83 Setting160V170V160V170V150V160VPr. 84 Setting33.33Hz16.67Hz· When using the vector control dedicated motor SF-V5RU (1500r/min series) or SF-THY, setting 33 and 34 in Pr. 71 selectsinternal constants appropriate for dedicated motors. Therefore, Pr. 83 and Pr. 84 settings are unnecessary.· Perform auto tuning for SF-V5RU (except for 1500 r/min series) with setting 13 or 14 in Pr. 71 ( For perform auto tuning, setPr. 83 and Pr. 84)Mitsubishi standard motorMitsubishi high efficiency motorMitsubishi constant-torque motorVector control dediated motorOther manufacturer'sstandard motorOther manufacturer'sconstant torque motorMotor Pr. 71 Setting *SF-JR 3SF-HR 43Others 3SF-JRCA 4P 13SF-HRCA 53Others (SF-JRC, etc.) 13SF-V5RU (1500r/min series)SF-THY33SF-V5RU (except for 1500r/min series) 13− 3− 13174
4PARAMETERSSelection and protection of a motor(3) Execution of tuningCAUTION· Before performing tuning, check the monitor display of the operation panel (<strong>FR</strong>-DU07) or parameter unit (<strong>FR</strong>-PU04/<strong>FR</strong>-PU07) if the inverter is in the state ready for tuning. (Refer to 2) below) When the start command is turned on under V/Fcontrol, the motor starts.1)When performing PU operation, press / of the operation panel.For external operation, turn on the start command (STF signal or STR signal). Tuning starts.CAUTION· When selecting offline auto tuning performed with motor running (Pr. 96 Auto tuning setting/status = "101"), caution must betaken since the motor runs.· To force tuning to end, use the MRS or RES signal or press of the operation panel.(Turning the start signal (STF signal or STR signal) off also ends tuning.)· During offline auto tuning, only the following I/O signals are valid: (initial value)· Input signals STOP, OH, MRS, RT, CS, RES, STF, STR· Output terminal RUN, OL, IPF, FM, AM, A1B1C1Note that the progress status of offline auto tuning is output in fifteen steps from AM and FM when speed and outputfrequency are selected.· Since the RUN signal turns on when tuning is started, caution is required especially when a sequerence which releases amechanical brake by the RUN signal has been designed.· When executing offline auto tuning, input the run command after switching on the main circuit power (R/L1, S/L2, T/L3) of theinverter.· Do not perform ON/OFF switching of the second function selection signal (RT) during execution of offline auto tuning. Autotuning is not excecuted properly.· Setting offline auto tuning (Pr. 96 Auto tuning setting/status = "1 or 101") will make pre-excitation invalid.2)Monitor is displayed on the operation panel (<strong>FR</strong>-DU07) and parameter unit (<strong>FR</strong>-PU07/<strong>FR</strong>-PU04) during tuning asbelow.Parameter Unit(<strong>FR</strong>-PU07/<strong>FR</strong>-PU04) DisplayOperation Panel (<strong>FR</strong>-DU07) DisplayPr. 96 setting 1 101 1 101(1) Setting1STOP PU101STOP PU(2) Tuning inprogressTUNE 2STF FWD PUTUNE 102STF FWDPU(3) Normal endTUNE 3COMPLETIONSTF STOP PUTUNE 103COMPLETIONSTF STOP PUFlickeringFlickering(4) Error end (whenthe inverterprotective functionis activated)TUNEERRORSTF STOP9PU· Reference: Offline auto tuning time (when the initial value is set)Offline Auto Tuning SettingNon-rotation mode (Pr. 96 = "1")Rotation mode (Pr. 96 = "101")TimeApproximately 25 to 120s(Tuning time differs according to the inverter capacity and motor type.)Approximately 40s(Offline auto tuning time varies with the acceleration and deceleration timesettings as indicated below. Offline auto tuning time = acceleration time +deceleration time + approx. 30s)175
Selection and protection of a motor3)When offline auto tuning ends, press of the operation panel during PU operation. For external operation, turnoff the start signal (STF signal or STR signal).This operation resets the offline auto tuning and the PU's monitor display returns to the normal indication.(Without this operation, next operation cannot be started.)REMARKS· Do not change the Pr. 96 setting after completion of tuning (3 or 103).If the Pr. 96 setting is changed, tuning data is made invalid.If the Pr. 96 setting is changed, tuning must be performed again.4)If offline auto tuning ended in error (see the table below), motor constants are not set.Perform an inverter reset and restart tuning.Error Display Error Cause Remedy8 Forced endSet "1" or "101" in Pr. 96 and perform tuningagain.9 Inverter protective function operation Make setting again.919293Current limit (stall prevention) function wasactivated.Converter output voltage reached 75% ofrated value.Calculation errorA motor is not connected.Increase acceleration/deceleration time.Set "1" in Pr. 156 .Check for fluctuation of power supply voltage.Check the motor wiring and make settingagain.Set the rated current of the motor in Pr.9.5)When tuning is ended forcibly by pressing or turning off the start signal (STF or STR) during tuning, offlineauto tuning does not end normally. (The motor constants have not been set.)Perform an inverter reset and restart tuning.6)When using the motor corresponding to the following specifications and conditions, reset Pr.9 Electronic thermal O/Lrelay as below after tuning is completed.a)When the rated power specifications of the motor is 200/220V (400/440V) 60Hz, set 1.1 times rated motorcurrent value in Pr.9.b)When performing motor protection from overheat using a PTC thermistor or motor with temperature detectorsuch as Klixon, set "0" (motor overheat protection by the inverter is invalid) in Pr.9.CAUTION· The motor constants measured once in the offline auto tuning are stored as parameters and their data are held until theoffline auto tuning is performed again.· An instantaneous power failure occurring during tuning will result in a tuning error.After power is restored, the inverter goes into the normal operation mode. Therefore, when STF (STR) signal is on, the motorruns in the forward (reverse) rotation.· Any alarm occurring during tuning is handled as in the ordinary mode. Note that if a fault retry has been set, retry is ignored.· The set frequency monitor displayed during the offline auto tuning is 0Hz.CAUTIONNote that the motor may start running suddenly.When the offline auto tuning is used in vertical lift application, e.g. a lifter, it may drop due to insufficient torque.176
4PARAMETERSSelection and protection of a motor(4) Utilizing or changing offline auto tuning data for useThe data measured in the offline auto tuning can be read and utilized or changed.1)Set Pr. 71 according to the motor used.Mitsubishi standard motorMitsubishi high efficiencymotorMitsubishi constant-torquemotorVector control dedicatedmotorOther manufacturer'sstandard motorOther manufacturer'sconstant torque motorMotorPr. 71 Setting*SF-JR 4SF-HR 44Others 4SF-JRCA 4P 14SF-HRCA 54Others (SF-JRC, etc.) 14SF-V5RU (1500r/min series)SF-THY34SF-V5RU (except for 1500r/min series) 14− 4− 14*1 For other settings of Pr. 71, refer to the page 169.2)In the parameter setting mode, read the following parameters and set desired values.ParameterNumberNameSetting RangeSettingIncrementsInitialValue82 Motor excitation current 0 to ***, 9999 1 999990 Motor constant (R1) 0 to ***, 9999 1 999991 Motor constant (R2) 0 to ***, 9999 1 999992 Motor constant (L1) 0 to ***, 9999 1 999993 Motor constant (L2) 0 to ***, 9999 1 999994 Motor constant (X) 0 to ***, 9999 1 9999859 Torque current 0 to ***, 9999 1 9999REMARKS· The display units of the motor constants read using Pr. 684 Tuning data unit switchover can be changed. Note that parametervalues can not be changed.Pr. 684 SettingPr. 82,Pr. 455Pr. 90,Pr. 458Pr. 91,Pr. 459Pr. 92,Pr. 460Pr. 93,Pr. 461Pr. 94,Pr. 462Pr. 859,Pr. 8600 Internal data converted value1 0.01A 0.001Ω 0.001Ω 0.1mH 0.1mH 0.1% 0.01A· When "9999" is set in Pr. 82, Pr. 90 to Pr. 94, Pr. 455, Pr. 458 to Pr. 462, Pr. 859, Pr. 860, Mitsubishi motor (SF-JR, SF-HR,SF-JRCA, SF-HRCA, SF-V5RU (1500r/min series)) constants are used.· As the motor constants measured in the offline auto tuning have been converted into internal data (****), refer to the followingsetting example when making setting:Setting example To slightly increase Pr. 90 value (5%)When Pr. 90 is displayed "2516",set 2642, i.e. 2516 × 1.05 = 2641.8, in Pr. 90 .(The value displayed has been converted into a value for internal use. Hence, simple addition of a givenvalue to the displayed value has no significance.)177
Selection and protection of a motor(5) Method to set the motor constants without using the offline auto tuning dataThe Pr. 92 and Pr. 93 motor constants may either be entered in [Ω] or in [mH]. Before starting operation, confirm whichmotor constant unit is used.• To enter the Pr. 92 and Pr. 93 motor constants in [Ω]1) Set Pr. 71 according to the motor used.SettingStar ConnectionMotor2) In the parameter setting mode, read the following parameters and set desired values.ParametersNumber3)Refer to the following table and set Pr. 83 and Pr. 84 .Delta ConnectionMotorStandard motor 5 6Constant-torque motor 15 16Iq = torque current, I100 = rated current, I0 = no load currentIq = I100 2 - I0 2NameSetting RangeSettingIncrementsInitialValue82Motor excitation current(no load current)0 to 500A, 9999 0.01A 999990 Motor constant (r1) 0 to 50Ω, 9999 0.001Ω 999991 Motor constant (r2) 0 to 50Ω, 9999 0.001Ω 999992 Motor constant (x1) 0 to 50Ω, 9999 0.001Ω 999993 Motor constant (x2) 0 to 50Ω, 9999 0.001Ω 999994 Motor constant (xm) 0 to 500Ω, 9999 0.01Ω 9999859 Torque current 0 to 500A, 9999 0.01A 9999ParameterNumberNameSetting RangeSettingIncrementsInitialValue83 Rated motor voltage 0 to 1000V 0.1V 200V/400V*84 Rated motor frequency 10 to 120Hz 0.01Hz 60Hz* The initial value differs according to the voltage level. (200V/400V)REMARKS· When "9999" is set in Pr. 82, Pr. 90 to Pr. 94, Pr. 859, Mitsubishi motor (SF-JR, SF-HR,SF-JRCA, SF-HRCA, SF-V5RU (1500r/minseries)) constants are used.CAUTION· If "star connection" is mistaken for "delta connection" or vice versa during setting of Pr. 71, advanced magnetic flux vectorcontrol, real sensorless vector control and vector control cannot be exercised properly.178
4PARAMETERSSelection and protection of a motor• To enter the Pr. 92 and Pr. 93 motor constants in [mH]1) Set Pr. 71 according to the motor used.MotorPr.71 Setting*Mitsubishi standard motorMitsubishi high efficiencymotorSF-JR 0SF-HR 40Mitsubishi constant-torquemotorVector control dedicatedmotor*1 For other settings of Pr. 71, refer to the page 169.SF-JRCA 4P 1SF-HRCA 50SF-V5RU 1500r/min series 302) In the parameter setting mode, read the following parameters and set desired values.Calculate the Pr. 94 value from the following formula.Pr. 94 setting = (1 -M 2 ) × 100 (%)L1 × L2R1 I1 I2VMR2/SR1: Primary resistanceR2: Secondary resistanceI1: Primary leakage inductanceI2: Secondary leakage inductanceM: Excitation inductanceS: SlipL1= I1+ M: Primary inductanceL2= I2+ M: Secondary inductanceParameterNumberMotor equivalent circuit diagramNameSetting RangeSettingIncrementsInitialValue82Motor excitation current(no load current)0 to 500A, 9999 0.01A 999990 Motor constant (R1) 0 to 50Ω, 9999 0.001Ω 999991 Motor constant (R2) 0 to 50Ω, 9999 0.001Ω 999992 Motor constant (L1) 0 to 1000mH, 9999 0.1mH 999993 Motor constant (L2) 0 to 1000mH, 9999 0.1mH 999994 Motor constant (X) 0 to 100%, 9999 0.1% 9999859 Torque current 0 to 500A, 9999 0.01A 99993)Refer to the following table and set Pr. 83 and Pr. 84 .ParameterNumberNameSetting RangeSettingIncrementsInitialValue83 Rated motor voltage 0 to 1000V 0.1V 200V/400V*84 Rated motor frequency 10 to 120Hz 0.01Hz 60Hz* The initial value differs according to the voltage level. (200V/400V)REMARKS· When "9999" is set in Pr. 82, Pr. 90 to Pr. 94, Pr. 859, Mitsubishi motor (SF-JR, SF-HR,SF-JRCA, SF-HRCA, SF-V5RU (1500r/min series)) constants are used.179
Selection and protection of a motor(6) Tune second applied motor· When you want to switch two motors with one inverter, set the second motor in Pr. 450 Second applied motor (refer topage 169). Initial setting is without second applied motor.· Turning the RT signal on makes the following parameters for the second parameters valid.FunctionsRT Signal ON(second motor)RT Signal OFF(first motor)Motor capacity Pr. 453 Pr. 80Number of motor poles Pr. 454 Pr. 81Motor excitation current Pr. 455 Pr. 82Rated motor voltage Pr. 456 Pr. 83Rated motor frequency Pr. 457 Pr. 84Motor constant (R1) Pr. 458 Pr. 90Motor constant (R2) Pr. 459 Pr. 91Motor constant (L1) Pr. 460 Pr. 92Motor constant (L2) Pr. 461 Pr. 93Motor constant (X) Pr. 462 Pr. 94Auto tuning setting/status Pr. 463 Pr. 96REMARKS· The RT signal is assigned to the terminal RT in the initial setting. By setting "3" in any of Pr. 178 to Pr. 189 (input terminal functionselection), you can assign the RT signal to the other terminal.CAUTION· Changing the terminal assignment using Pr. 178 to Pr. 189 (input terminal function selection) may affect the other functions. Pleasemake setting after confirming the function of each terminal.♦ Parameters referred to ♦Pr. 7 Acceleration time, Pr. 8 Deceleration time Refer to page 155Pr. 9 Electronic thermal O/L relay Refer to page 165Pr. 71 <strong>Applied</strong> motor Refer to page 169Pr. 80 Motor capacity, Pr. 81 Number of motor poles Refer to page 75Pr. 95 Online auto tuning selection Refer to page 181Pr. 156 Stall prevention operation selection Refer to page 135Pr. 178 to Pr. 189 (input terminal function selection) Refer to page 206Pr. 190 to Pr. 196 (output terminal function selection) Refer to page 214Pr. 800 Control method selection Refer to page 75180
4PARAMETERSSelection and protection of a motor4.13.4 Online auto tuning (Pr. 95, Pr. 574)Magnetic fluxSensorlessVectorWhen online auto tuning is selected under advanced magnetic flux vector control, real sensorless vector controlor vector control, excellent torque accuracy is provided by temperature compensation even if the secondaryresistance value of the motor varies with the rise of the motor temperature.ParameterNumber95574NameOnline auto tuningselectionSecond motor online autotuningInitialValue0Setting Range0 0, 1Description0 Online auto tuning is not performed1 Start-time online auto tuning2 Magnetic flux observer (normal tuning)Select the second motor online auto tuning.(same as Pr. 95)(1) Start-time online auto tuning (setting is "1")· By quickly tuning the motor constants at a start, high accuracy operation unaffacted by the motor temperature andstable operation with high torque down to ultra low speed can be performed.· Make sure advanced magnetic flux vector control (Pr. 80, Pr. 81 ), real sensorless vector control or vector control (Pr.800 ) is selected.· Before performing online auto tuning, perform offline auto tuning without fail.1) Refer to page 171 to perform offline auto tuning.2) Check that "3" or "103" (offline auto tuning completion) is set in Pr. 96 Auto tuning setting/status.3) Set "1" (start-time online auto tuning) in Pr. 95 Online auto tuning selection.Online auto tuning is performed from the next starting.4) Before starting operation, check that the following parameters have been set.ParameterDescriptionNumber9 Used as rated motor current and electronic thermal relay parameters.71 <strong>Applied</strong> motor80Motor capacity (down to one rank lower than the inverter capacity, notethat the capacity should be 0.4kW or more)81 Number of motor poles5) When performing PU operation, press / of the operation panel.For external operation, turn on the run command (STF signal or STR signal).CAUTION· For using start-time online auto tuning in elevator, examine the utilization of a brake sequence for the brake opening timing at astart. Though the tuning ends in about a maximum of 500ms after a start, torque is not provided fully during that period.Therefore, note that there may be a possibility of drop due to gravity.It is recommended to perform tuning using a start time tuning signal (X28). (Refer to page 183.)181
Selection and protection of a motor(2) Magnetic flux observer (normal tuning) (setting value is "2")· When exercising vector control using a motor with encoder, it is effective for torque accuracy improvement.The current flowing in the motor and the inverter output voltage are used to estimate/observe the magnetic flux inthe motor.The magnetic flux of the motor is always (including during operation) detected with high accuracy so that anexcellent characteristic is provided regardless of the change in the temperature of the secondary resistance.· Vector control (Pr. 80, Pr. 81, Pr. 800) should be selected. (Refer to page 75.)CAUTION· For the SF-V5RU, SF-JR (with encoder), SF-HR (with encoder), SF-JRCA (with encoder) or SF-HRCA (with encoder), it is notnecessary to perform offline auto tuning to select adaptive magnetic flux observer. (Note that it is necessary to perform offlineauto tuning (non-rotation mode) for the wiring length resistance to be reflected on the control when the wiring length is long(30m or longer as reference).REMARKS· Online auto tuning does not operate if the MRS signal is input, if the preset speed is less than the Pr. 13 Starting frequency (V/Fcontrol or advanced magnetic flux vector control), or if the starting conditions of the inverter are not satisfied, e.g. inverter error.· Online auto tuning does not operate during deceleration or at a restart during DC brake operation.· Invalid for jog operation.· Automatic restart after instantaneous power failure overrides when automatic restart after instantaneous power failure is selected.(Start-time online auto tuning is not performed at frequency search.)Perform online auto tuning at a stop with the X28 signal when using automatic restart after instantaneous power failure together.(Refer to the following for details.)· Zero current detection and output current detection are valid during online auto tuning.· The RUN signal is not output during online auto tuning. The RUN signal turns on at a start.· If the period from an inverter stop to a restart is within 4s, start-time tuning is performed but the tuning results are not reflected.182
4PARAMETERSSelection and protection of a motor(3) Start-time online auto tuning from external terminal (X28 signal, Y39 signal)Output frequency(Hz)X28signalTuning statusat startingY39signalStart signalONTuneCompletionTime· By turning on the start-time tuning signal (X28) before thestart signal (STF or STR) turns on (at a stop), online tuningis performed and a starting delay after start signal turns ondue to tuning can be avoided.· Perform offline auto tuning and set "1" (start-time tuning) inPr. 95.· When the start-time tuning completion signal (Y39) is off,start-time tuning with the X28 signal is performed.· Start-time tuning ends within 500ms maximum.· When using the X28 signal, set "28" in Pr. 178 to Pr. 189(input terminal function selection) and assign functions to theinput terminal.· When using the Y39 signal, set "39 (positive logic) or 139(negative logic)" in Pr. 190 to Pr. 196 (output terminal functionselection) and assign functions to the output terminal.X28 SignalONOFFONONONX28 SignalOFFONTuning is performed at start when X28 signal is OFF(even when Y39 is ON).Tuning statusat startingY39 signalStart signalOFFOFFTuneTuneCompleted CompletedSecondary magnetic Secondary magneticflux exists a few seconds flux exists a few secondsONONY39 signal is OFF when the motor is stoppedand X28 is turned OFF. However if thesecondary magnetic flux exists after motor stop,the signal remains ON.TuneCompletedONTuning is notperformed if theY39 signal is ON.Tuning statusat startingY39 signalStart signalOFFOFFTuneCompleted Completed CompletedONTuneSecondary magneticflux exists a few secondsTuneSecondary magneticflux exists a few secondsX28 SignalTuning statusat startingONOFFTuneCompletedTuning is not performed at start since X28 signaland Y39 signal is ON.Output frequency0HzTimeY39 signalOFFONStart signalOFFOutputfrequency0HzTimeREMARKS· Start-time tuning is performed when the start signal is turned on during zero speed control also.· The Y39 signal is in on status while secondary magnetic flux exists after the motor stop.· While the Y39 signal is on, the X28 signal is not valid.· The STF, STR signals are valid after completion of the start-time tuning.· Only the output signals below are valid during tuning.IPF, THP, PU, Y12, RY, ER, LF, MT, FM, AM, A1, B1, C1, A2, B2, C2· Tuning is invalid during V/F control.CAUTION· Changing the terminal assignment using Pr. 178 to Pr. 189 (input terminal function selection) or Pr. 190 to Pr. 196 (output terminalfunction selection) may affect the other functions. Make setting after confirming the function of each terminal.183
Selection and protection of a motor(4) Tune second applied motor· When you want to switch two motors with one inverter, set the second motor in Pr. 450 Second applied motor. (Initialsetting is without second applied motor. (Refer to page 169))Perform tuning using Pr. 574 Second motor online auto tuning.Pr. 574 Second motor online auto tuning is made valid when the RT signal turns on.ParameterNumberDescription51Used as rated motor current and electronic thermal relayparameters.450 <strong>Applied</strong> motor453Motor capacity (down to one rank lower than the invertercapacity, note that the capacity should be 0.4kW or more)454 Number of motor polesREMARKS· The RT signal acts as the second function selection signal and makes the other second functions valid. (Refer to page 210.)The RT signal is assigned to the terminal RT in the initial setting. By setting "3" in any of Pr. 178 to Pr. 189 (input terminal functionselection), you can assign the RT signal to the other terminal.CAUTION· Changing the terminal assignment using Pr. 178 to Pr. 189 (input terminal function selection) may affect the other functions. Makesetting after confirming the function of each terminal.♦ Parameters referred to ♦Pr. 9 Electronic thermal O/L relay Refer to page 165Pr. 71 <strong>Applied</strong> motor Refer to page 169Pr. 80 Motor capacity Refer to page 75Pr. 81 Number of motor poles Refer to page 75Pr. 96 Auto tuning setting/status Refer to page 171Pr. 178 to Pr. 189 (input terminal function selection) Refer to page 206Pr. 190 to Pr .196 (output terminal function selection) Refer to page 214184
4PARAMETERSMotor brake and stop operation4.14 Motor brake and stop operationPurpose Parameter that must be Set Refer to PageMotor braking torque adjustmentDC injection brake and zero speedcontrol, servo lockPr. 10 to Pr. 12,Pr. 802, Pr. 850Coast the motor to a stop Selection of motor stopping method Pr. 250 188Used to stop the motor with amechanical brake (vibration restraintat stop-on-contact)Used to stop the motor with amechanical brake (operation timingof a mechanical brake)Perform position stop (orientation)control of the rotation shaftStop-on-contact controlBrake sequence functionOrientation controlPr. 270, Pr. 275,Pr. 276Pr. 278 to Pr. 285,Pr. 292Pr. 350 to Pr. 366,Pr. 369, Pr. 393,Pr. 396 to Pr. 3994.14.1 DC injection brake and zero speed control, servo lock (LX signal, X13 signal,Pr. 10 to Pr. 12, Pr. 802, Pr. 850)The DC injection brake can be operated at a motor stop to adjust the stop timing and braking torque.Zero speed control can be selected during real sensorless vector control and either zero speed control or servolock can be selected under vector control.In DC injection brake operation, DC voltage is directly applied to the motor to prevent the motor shaft fromrotating when a motor decelerates to stop. While, in zero speed control, vector control is performed to maintain0r/min. In either control, the motor will not return to the original position if the motor shaft rotates due to externalforce.The motor shaft position is maintained with servo lock. The motor will return to the original position if the motorshaft rotates due to external force.185189192195ParameterNumber101112802 *850Name Initial Value Setting Range DescriptionDC injection brakeoperation frequencyDC injection brakeoperation timeDC injection brakeoperation voltagePre-excitationselectionBrake operationselection3Hz0.5s7.5K or less 4%11K or more 2%* This parameter can be set when the <strong>FR</strong>-A7AP (option) is mounted.00Set the operation frequency of the DC0 to 120Hz injection brake (zero speed control, servolock).9999 Operated at Pr. 13 or less.00.1 to 10s0 to 30%DC injection brake (zero speed control)disabledSet the operation time of the DC injectionbrake (zero speed control, servo lock).Set the DC injection brake voltage (torque).When "0" is set, DC injection brake is disabled.0 Zero speed control1 Servo lock0 DC injection brake operation1 Zero speed control185
Motor brake and stop operationWhen Pr. 11 = "0.1 to 10s"Output frequency (Hz)DC injectionbrakevoltagePr.12OperationvoltagePr. 10 OperationfrequencyTimeTimePr. 11 Operation time(1) Operation frequency setting (Pr. 10)⋅ When the frequency at which the DC injection brake (zero speed control,servo lock) operates is set in Pr. 10, the DC voltage is applied to the motorwhen this frequency is reached during deceleration.⋅ At the Pr. 10 setting of "9999", the DC injection brake (zero speed control,servo lock) is applied to the motor when deceleration is made to thefrequency set in Pr. 13 Starting frequency.REMARKS⋅ Performing pre-excitation (zero speed control) under real sensorless vectormay cause motor vibration, etc. at deceleration to stop. To prevent this, setPr.10 DC injection brake operation frequency to 0.5Hz or less.⋅ The initial value of Pr. 10 automatically changes to 0.5Hz during vector control.When Pr. 11 = "8888"Pr. 12DC injectionbrakevoltageX13 signal(3) Operation voltage (torque) setting (Pr. 12)⋅⋅Output frequency(Hz)STF(2) Operation time setting (X13 signal, Pr. 11)⋅ Use Pr. 11 to set the duration period the DC injection brake (zero speedcontrol, servo lock) is applied.⋅ When the motor does not stop due to large load moment (J), increasing thesetting produces an effect.⋅ When Pr. 11 = "0s", the DC injection brake (zero speed control, servo lock)is not operated. (At a stop, the motor coasts.)⋅ When Pr. 11 = "8888", the DC injection brake (zero speed control, servolock) is applied when X13 signal is turned on.⋅ For the terminal used for X13 signal input, set "13" in any of Pr. 178 to Pr.189 to assign the function. (Refer to page 206)REMARKS⋅ Use Pr. 12 to set the percentage to the power supply voltage. (This parameter is not used during zero speed controlor servo lock.)⋅ When Pr. 12 = "0%", the DC injection brake is not operated. (At a stop, the motor coasts.)⋅ When using the constant-torque motor (SF-JRCA) and energy saving motor (SF-HR, SF-HRCA), change the Pr. 12setting as follows.SF-JRCA: 3.7K or less ...4%, 5.5K or more...2%SF-HR, SF-HRCA: 5.5K and 7.5K...3%, 11K or more...2%REMARKSONONTimeTimeON OFF⋅ When the X13 signal is turned on with Pr. 11 = "8888", zero speed control isactivated regardless of setting of Pr. 850 Brake operation selection.⋅ Under vector control, zero speed control or servo lock is activated dependingon the Pr. 802 setting.For the 5.5K and 7.5K, when the Pr. 12 setting is as below, changing the Pr. 71 <strong>Applied</strong> motor setting changes the Pr. 12 settingautomatically, it is not necessary to change the Pr. 12 setting.(a)When Pr. 12 is 4% (initial value)The Pr. 12 setting is automatically changed to 2% if the Pr. 71 value is changed from the value selecting the standard motor(0, 2 to 8, 40, 43, 44) to the value selecting the constant torque motor (1, 13 to 18, 50, 53, 54).(b)When Pr. 12 is 2%The Pr. 12 setting is automatically changed to 4% (initial value) if the Pr. 71 value is changed from the value selecting theconstant torque motor (1, 13 to 18, 50, 53, 54) to the value selecting the standard motor (0, 2 to 8, 40, 43, 44).Even if the Pr. 12 setting is increased, braking torque is limited so that the output current is within the rated inverter current.(4) Brake operation selection during real sensorless vector control (Pr. 850)⋅ You can select DC injection brake (initial value) or zero speed control for brake operation during real sensorlessvector control.When Pr. 850 = "1", zero speed control is exercised when the frequency reaches or decreases below the frequencyset in Pr. 10.REMARKS⋅ When the X13 signal is on with Pr. 11 = "8888", zero speed control is activated regardless of setting of Pr. 850 Brake operationselection.⋅ When restarting from brake operation during real sensorless vector control, set "1" (zero speed control) in Pr. 850. When thesetting value is "0" (DC injection brake), it may take approx. 2s until frequency is actually output from when the start commandis input.186
4PARAMETERS(5) Brake operation selection under vector control (Pr. 802)⋅ When pre-excitation is performed, select zero speed control or servo lock using Pr. 802.Motor brake and stop operationPr. 802 Setting Pre-excitation Description0 (initial value) Zero speed controlEven under load, an attempt is made to maintain 0r/min to keep the motor shaft stopped. Note thatif the shaft is overcome and turned by external force, it does not return to the original position.Position control is not exercised and only speed control is carried out to perform operation.1 Servo lockEven under load, an attempt is made to maintain the motor shaft position. Note that if the shaft isturned by external force, it returns to the original position after the external force has gone away.Since position control is exercised, you can adjust this position loop gain using Pr. 422 Position loop gain.⋅ The relationship between the DC injection brake operation and pre-excitation operation under each controlControl Method Control Mode Pr. 802 Pr. 850 Decelerates to Stop LX-ONX13-ON(Pr. 11 = "8888")V/F control ⎯ ⎯ ⎯ DC Injection brake ⎯ DC Injection brakeAdvanced magnetic fluxvector control⎯ ⎯ ⎯ DC Injection brake ⎯ DC Injection brake⎯ 0 DC Injection brakeReal sensorless vectorcontrolVector controlSpeedTorqueSpeed⎯ 1 Zero speedZero speed Zero speed⎯ 0 DC Injection brake⎯ 1 Zero speedZero speed Zero speed0 ⎯ Zero speed Zero speed Zero speed1 ⎯ Servo lock Servo lock Servo lockTorque ⎯ ⎯ Zero speed Zero speed Zero speedPosition ⎯ ⎯ ⎯ Servo lock ⎯(6) Pre-excitation signal (LX signal)⋅ When the LX signal is turned on under real sensorless vector control or vector control, pre-excitation (zero speedcontrol or servo lock) is exercised during a stop.⋅ For the terminal used for LX signal input, set "23" in any of Pr. 178 to Pr. 186 to assign the function.When Pr. 850 = 1Output frequency(Hz)Pr. 10OperationfrequencyTimeZero speed controlServo lockNormal operation Pr. 11Operation timeLX signalONCAUTION⋅ Changing the terminal assignment using Pr. 178 to Pr. 189 (input terminal function selection) may affect the other functions. Makesetting after confirming the function of each terminal.⋅ Performing pre-excitation (LX signal and X13 signal) under torque control (real sensorless vector control) may start the motorrunning at a low speed even when the start command (STF or STR) is not input.The motor may run also at a low speed whenthe speed limit value=0 with a start command input. Perform pre-excitation after making sure that there will be no problem insafety if the motor runs.⋅ Although FWD/REV of the operation panel is not lit during pre-excitation, note that voltage is applied to the motor.⋅ Note that when offline auto tuning (Pr. 96 Auto tuning setting/status = "1 or 101") is performed during pre-excitation, offline autotuning is not executed but the motor starts.CAUTIONDo not set Pr. 11 to "0, 8888" and Pr. 12 to "0" under orientation operation. Otherwise, the motor will not stop properly.As stop holding torque is not produced, install a mechanical brake.After the machine stops fully and the mechanical brake is applied, switch the LX signal (pre-excitation) off.♦ Parameters referred to ♦Pr. 13 Starting frequency Refer to page 157Pr. 71 <strong>Applied</strong> motor Refer to page 169Pr. 178 to Pr. 189 (Input terminal function selection) Refer to page 206Pr. 422 Position loop gain Refer to page 124Normal operation187
Motor brake and stop operation4.14.2 Stop selection (Pr. 250)Used to select the stopping method (deceleration to a stop or coasting) when the start signal turns off. Used tostop the motor with a mechanical brake, etc. together with switching off of the start signal.You can also select the operations of the start signals (STF/STR). (Refer to page 211 for start signal selection)ParameterNumberName Initial Value Setting Range250 Stop selection 99990 to 100s1000s to 1100s99998888DescriptionStart signal (STF/STR)Stop operation(Refer to page 211)STF signal: Forwardrotation startSTR signal: Reverserotation startSTF signal: Start signalSTR signal: Forward/reverse signalSTF signal: Forwardrotation startSTR signal: Reverserotation startSTF signal: Start signalSTR signal: Forward/reverse signalThe motor is coasted to astop when the preset timeelapses after the startsignal is turned off.Themotor is coasted to a stop(Pr. 250 - 1000)s after thestart signal is turned off.When the start signal isturned off, the motordecelerates to stop.Output frequency(Hz)StartsignalRUNsignalOutput frequency(Hz)Start signalRUN signalONONONONDeceleration startswhen start signal turns offOFFDeceleration time(Time set in Pr. 8, etc.)DC brakeTimeOFFOutput is shut off when settime elapses after start signalturns offPr.250Motor coasts to stopTimeOFFOFF(1) Decelerate the motor to a stop⋅ Set Pr. 250 to "9999" (initial value) or "8888".⋅ The motor decelerates to a stop when the startsignal (STF/STR) turns off.(2) Coast the motor to a stop⋅ Use Pr. 250 to set the time from when the start signalturns off until the output is shut off. When any of"1000" to "1100" is set, the output is shut off after(Pr. 250 − 1000)s.⋅ The output is shut off when the time set in Pr. 250has elapsed after the start signal had turned off. Themotor coasts to a stop.⋅ The RUN signal turns off when the output stops.REMARKSStop selection is invalid when the following functions are activated.⋅ Position control (Pr. 419 = 0)⋅ Power failure stop function (Pr. 261)⋅ PU stop (Pr. 75)⋅ Deceleration stop because of fault definition (Pr. 875)⋅ Deceleration stop because of communication error (Pr. 502)⋅ Offline auto tuning (with motor running)⋅ Emergency stop by LONWORKS communication⋅ When setting of Pr. 250 is not 9999 nor 8888, acceleration/deceleration is performed according to the frequency command,until start signal is OFF and output is shutoff.⋅CAUTIONWhen the start signal is turned on again during motor coasting, the motor starts at Pr. 13 Starting frequency.♦ Parameters referred to ♦Pr. 7 Acceleration time , Pr. 8 Deceleration time Refer to page 155Pr. 13 Starting frequency Refer to page 157188
4PARAMETERSMotor brake and stop operation4.14.3 Stop-on contact control function (Pr. 6, Pr. 48, Pr. 270, Pr. 275, Pr. 276)Magnetic fluxSensorlessTo ensure accurate positioning at the upper limit etc. of alift, stop-on-contact control causes a mechanical braketo be closed while the motor is developing a holdingtorque to keep the load in contact with a mechanicalstopper etc.This function suppresses vibration which is liable tooccur when the load is stopped upon contact in verticalmotion applications, ensuring steady precise positioning.VibrationLiftComplete stopLiftParameterNumber62248270275276NameMulti-speed setting(low speed)Stall preventionoperation levelSecond stallpreventionoperation currentStop-on contact/load torque highspeedfrequencycontrol selectionStop-on contactexcitation currentlow-speedmultiplying factorPWM carrierfrequency at stoponcontactInitialValueSetting RangeDescription10Hz 0 to 400Hz Set the output frequency for stop-on-contact control.150% 0 to 400%150% 0 to 220%099999999Set the stall prevention operation level for stop-on-contact control.The smaller value set in either Pr. 22 or Pr. 48 has a priority.0 Normal operation1 Stop-on-contact control2 Load torque high speed frequency control (Refer to page 342)3Stop-on-contact+load torque high speed frequency control (Referto page 342)Set the force (holding torque) for stop-on-contact control.0 to 1000% Normally set 130% to 180%.Valid only during advanced magnetic flux vector control9999 No compensation.Set a PWM carrier frequency for stop-on-contact control.0 to 9For real sensorless vector control, carrier frequency is always 2Hzwhen a setting value is 0 to 5 and always 6Hz when a setting valueis 6 to 9. (Valid at the frequency of 3Hz or less.)9999 As set in Pr. 72 PWM frequency selection .Sink logicPowersupplyMCCBR/L1S/L2T/L3UVWMCMechanicalbrakeMotorOutput frequencyPr. 4Pr. 5Pr. 60RH(a) (b) (c)ONNormal mode Stop-on contactcontrol modeTimeForward rotation commandHigh-speed operation commandMiddle-speed operation commandStop-on contact selection 0Stop-on contact selection 1ST<strong>FR</strong>H *RM *RL *RT *SD* The input terminal used differs according to the Pr. 180 to Pr. 189 settings.RMRLRTOFFOFFOFFONGoes into stop-on-contact control mode whenboth RL and RT switch on.*RL and RT may be switched on in any orderwith any time difference(a):Acceleration time (Pr. 7 )(b):Deceleration time (Pr. 8 )(c):Second deceleration time (Pr. 44/Pr. 45 )*ONON189
Motor brake and stop operation(1) Set stop-on-contact control⋅ Make sure that the inverter is in external operation mode. (Refer to page 283 )⋅ Select either real sensorless vector control or advanced magnetic flux vector control.⋅ Set"1 or 3" in Pr. 270 Stop-on contact/load torque high-speed frequency control selection .⋅ Set output frequency during stop-on-contact control in Pr. 6 Multi-speed setting (low speed).The frequency should be as low as possible (about 2Hz). If it is set to more than 30Hz, the operating frequency willbe 30Hz.⋅ When both the RT and RL signals are switched on, the inverter enters the stop-on-contact mode, in which operationis performed at the frequency set in Pr. 6 independently of the preceding speed.⋅⋅⋅⋅CAUTIONBy increasing the Pr. 275 setting, the low-speed (stop-on-contact) torque increases, but overcurrent fault (E.OCT) may occur orthe machine may oscillate in a stop-on-contact state.The stop-on-contact function is diferent from servo-lock function, and if used to stop or hold a load for an extended period, thisfunction can cause the motor to overheat.After a stop, immediately change to a mechanical brake to hold the load.Under the following operating conditions, the stop-on-contact function is made invalid:PU operation (Pr. 79) · JOG operation (JOG signal) · PU+external operation (Pr. 79) · PID control function operation (Pr. 128)· Remote setting function operation (Pr. 59) · Start time tuning · Orientation control function operationWhen performing stop-on-contact control during encoder feedback control, encoder feedback control is made invalid due to amode shift to the stop-on-contact control mode.(2) Function switching of stop-on-contact control selectionUseful FunctionsOutput frequencyNormal Operation(either RL or RT is off or both are off)Real sensorlessvector controlMulti-speed0 to 5V, 0 to 10V4 to 20mA etc.* When RL and RT are on, Pr. 49 Second stall prevention operation frequency is invalid.Advancedmagnetic flux vectorcontrolWith Stop-on-Contact Control(both RL and RT are on)Real sensorlessvector controlPr. 6 settingAdvancedmagnetic flux vectorcontrolStall prevention operation level ⎯ Pr. 22 setting ⎯The smaller value setin either Pr. 22 or Pr. 48.*Torque limit level Pr. 22 setting ⎯ Pr. 22 setting ⎯Excitation current low speedscaling factor⎯⎯The current iscompensated for by Pr.275 (0 to 1000%)settings before RL andRT are switched on.Pr. 276 setting when output frequency is 3Hz orCarrier frequencyPr. 72 settingless (Pr. 72 when Pr. 276 = "9999")Fast response current limit ⎯ Valid ⎯ Invalid190
4PARAMETERSMotor brake and stop operation(3) Set frequency when stop-on-contact control (Pr. 270 = 1, 3) is selected⋅ The following table lists the frequencies set when the input terminals (RH, RM, RL, RT, JOG) are selected together.Bold frame indicates stop-on-contact control is valid.⋅ Stop-on-contact control is disabled when remote setting function is selected (Pr. 59 = 1 to 3).Input Signal (◦ = on)RH RM RL RT JOGSet Frequency◦ Pr. 4 Multi-speed setting (high speed)◦ Pr. 5 Multi-speed setting (middle speed)◦ Pr. 6 Multi-speed setting (low speed)By 0 to 5V(0 to 10V), 4 to 20mA◦input◦ Pr. 15 Jog frequency◦ ◦ Pr. 26 Multi-speed setting (speed 6)◦ ◦ Pr. 25 Multi-speed setting (speed 5)◦ ◦ Pr. 4 Multi-speed setting (high speed)◦ ◦ Pr. 15 Jog frequency◦ ◦ Pr. 24 Multi-speed setting (speed 4)◦ ◦ Pr. 5 Multi-speed setting (middle speed)◦ ◦ Pr. 15 Jog frequency◦ ◦ Pr. 6 Multi-speed setting (low speed)◦ ◦ Pr. 15 Jog frequency◦ ◦ Pr. 15 Jog frequency◦ ◦ ◦ Pr. 15 Jog frequencyInput Signal (◦ = on)RH RM RL RT JOGSet Frequency◦ ◦ ◦ Pr. 15 Jog frequency◦ ◦ ◦ Pr. 15 Jog frequency◦ ◦ ◦ Pr. 6 Multi-speed setting (low speed)◦ ◦ ◦ Pr. 15 Jog frequency◦ ◦ ◦ Pr. 15 Jog frequency◦ ◦ ◦ Pr. 6 Multi-speed setting (low speed)◦ ◦ ◦ Pr. 15 Jog frequency◦ ◦ ◦ Pr. 26 Multi-speed setting (speed 6)◦ ◦ ◦ Pr. 27 Multi-speed setting (speed 7)◦ ◦ ◦ ◦ Pr. 15 Jog frequency◦ ◦ ◦ ◦ Pr. 15 Jog frequency◦ ◦ ◦ ◦ Pr. 15 Jog frequency◦ ◦ ◦ ◦ Pr. 15 Jog frequency◦ ◦ ◦ ◦ Pr. 6 Multi-speed setting (low speed)◦ ◦ ◦ ◦ ◦ Pr. 15 Jog frequencyBy 0 to 5V(0 to 10V), 4 to 20mAinputCAUTION⋅ Changing the terminal function using any of Pr. 178 to Pr. 189 may affect the other functions. Please make setting after confirmingthe function of each terminal.♦ Parameters referred to ♦Pr. 4 to Pr. 6, Pr. 24 to Pr. 27 (multi-speed setting) Refer to page 148Pr. 15 Jog frequency Refer to page 150Pr. 22 Stall prevention operation level, Pr. 48 Second stall prevention operation current Refer to page 135Pr. 22 Torque limit level Refer to page 83Pr. 59 Remote function selection Refer to page 152Pr. 72 PWM frequency selection Refer to page 257Pr. 79 Operation mode selection Refer to page 283Pr. 95 Online auto tuning selection Refer to page 181Pr. 128 PID action selection Refer to page 329Pr. 178 to Pr. 189 (input terminal function selection) Refer to page 206Pr. 270 = 2, 3 (load torque high-speed frequency control) Refer to page 342191
Motor brake and stop operation4.14.4 Brake sequence function (Pr. 278 to Pr. 285, Pr. 292)Magnetic fluxSensorlessVectorThis function is used to output from the inverter the mechanical brake operation timing signal in vertical lift andother applications.This function prevents the load from dropping with gravity at a start due to the operation timing error of themechanical brake or an overcurrent alarm from occurring at a stop, ensuring secure operation.ParameterNumberName*1 When exercising vector control with the <strong>FR</strong>-A7AP, this parameter changes to speed deviation excess detection frequency (For details, refer topage 100)InitialValueSettingRange278 Brake opening frequency 3Hz 0 to 30Hz279 Brake opening current 130% 0 to 220%280Brake opening currentdetection time281 Brake operation time at start 0.3s 0 to 5s282 Brake operation frequency 6Hz 0 to 30Hz283 Brake operation time at stop 0.3s 0 to 5s284285292Deceleration detectionfunction selectionOverspeed detectionfrequency *1Automatic acceleration/decelerationDescriptionSet to the rated slip frequency of the motor + about 1.0Hz.This parameter may be only set if Pr. 278 ≤ Pr. 282.Generally, set this parameter to about 50 to 90%. If the settingis too low, the load is liable to drop due to gravity at start.Suppose that the rated inverter current is 100%.0.3s 0 to 2s Generally, set this parameter to about 0.1 to 0.3s.099990Set the mechanical delay time until the brake is loosened.Set the mechanical delay time until the brake is loosened +about 0.1 to 0.2s when Pr. 292 = "8".Set the frequency to activate the mechanical brake by turningoff the brake opening request signal (BOF). Generally, set thisparameter to the Pr. 278 setting + 3 to 4Hz.Setting is enabled only when Pr. 282 ≥ Pr. 278.Set the mechanical delay time until the brake is closed + 0.1swhen Pr. 292=7.Set the mechanical delay time until the brake is closed + 0.2to 0.3s when Pr. 292 = 8.0 Deceleration is not detected.1If deceleration is not normal during deceleration operation, theinverter fault is provided.If (detected frequency) - (output frequency) ≥ Pr. 285 during0 to 30Hz encoder feedback control, the inverter fault (E.MB1) isprovided.9999 Overspeed is not detected.0 Normal operation mode3 Optimum acceleration/deceleration mode (Refer to page 163)5, 6 Elevator mode (Refer to page 146)7 Brake sequence mode 18 Brake sequence mode 211 Shortest acceleration/deceleration mode (Refer to page 162)Sink logicPr.184 = 15Pr.190 = 20PowersupplyMCCBStart signalMulti-speed signalBrake opening completion signal(BRI)R/L1S/L2T/L3ST<strong>FR</strong>HMCUVW*2RUN(BOF)AU(BRI) *1SD SE*3MechanicalbrakeMCMotor24VDCBrake opening requestsignal (BOF)*1 The input signal terminal used differsaccording to the Pr. 178 to Pr. 189settings.*2 The output signal terminal used differsaccording to the Pr. 190 to Pr. 196settings.*3 The current should be within thepermissible current of transistor in theinverter. (24V 0.1ADC)⋅⋅⋅CAUTIONWhen brake sequence mode is selected, automatic restart after instantaneous power failure is invalid.When using this function, set the acceleration time to 1s or longer.Changing the terminal function using any of Pr. 178 to Pr. 189, Pr. 190 to Pr. 196 may affect the other functions.Please make setting after confirming the function of each terminal.192
4PARAMETERSMotor brake and stop operation(1) Set the brake sequence mode⋅ Select either real sensorless vector control, vector control (speed control) or advanced magnetic flux vector control.The brake sequence function is valid only when the external operation mode, external/PU combined operation mode1 or network operation mode is selected.⋅ Set "7 or 8" (brake sequence mode) in Pr. 292 .To ensure more complete sequence control, it is recommended to set "7" (brake opening completion signal input) inPr. 292 .⋅ Set "15" in any of Pr. 178 to Pr. 189 (input terminal function selection) and assign the brake opening completion signal(BRI) to the input terminal.⋅ Set "20 (positive logic)" or "120 (negative logic)" in any of Pr. 190 to Pr. 196 (output terminal function selection) andassign the brake opening request signal (BOF) to the output terminal.(2) With brake opening completionOutput frequency(Hz)signal input (Pr. 292 = "7")Target frequencyPr.282Pr.278Pr.13STFOutput IBrake opening request(BOF signal)Brake opening completion(BRI signal)Electromagnetic brakeoperationOutput frequency(Hz)Target frequencyPr.282Pr.278Pr.13STFOutput IBrake opening request(BOF signal)Electromagnetic brakeoperationClosedPr.280Pr.280Pr.279ONPr.279Pr.281ONONOpenedPr.281ONONPr.283Pr.283⋅⋅When the start signal is input to the inverter,the inverter starts running. When the internalspeed command reaches the value set in Pr.278 and the output current is not less than thevalue set in Pr. 279 , the inverter outputs thebrake opening request signal (BOF) after thetime set in Pr. 280 has elapsed.When the time set in Pr. 281 elapses after thebrake opening completion signal (BRI) wasactivated, the inverter increases the outputfrequency to the set speed.When the speed has decreased to thefrequency set in Pr. 282 during deceleration,the BOF signal is turned off. When the timeset in Pr. 283 elapses after theelectromagnetic brake operation wascompleted and the BRI signal was turned off,the inverter output is switched off.(3) Without brake opening completionsignal input (Pr. 292 = "8")⋅⋅When the start signal is input to the inverter,the inverter starts running. When the internalspeed command reaches the value set in Pr.278 and the output current is not less than thevalue set in Pr. 279 , the inverter outputs thebrake opening request signal (BOF) after thetime set in Pr. 280 has elapsed.When the time set in Pr. 281 elapses after theBOF signal is output, the inverter increasesthe output frequency to the set speed.When the speed has decreased to thefrequency set in Pr. 282 during deceleration,the brake opening request signal (BOF) isturned off. When the time set in Pr. 283 haselapsed after the BOF signal is turned off, theinverter output is switched off.REMARKS⋅ Even if brake sequence mode has been selected, inputting the jog signal (jog operation), RT signal (second function selection)or X9 signal (third function selection) during an inverter stop will switch to the normal operation and give priority to jog operationor second and third function selection. Note that JOG and RT signal input is invalid even if JOG signal and RT signal are inputduring automatic acceleration/deceleration operation.ClosedClosed Opened ClosedTimeTime193
Motor brake and stop operation(4) Protective functionsIf any of the following errors occurs in the brake sequence mode, the inverter results in a fault, trips, and turns off thebrake opening request signal (BOF).Fault DisplayDescriptionE.MB1E.MB2E.MB3E.MB4E.MB5E.MB6E.MB7(Detection frequency) - (output frequency) > Pr. 285 during encoder feedback controlWhen Pr. 285 Overspeed detection frequency = 9999, overspeed is not detected.Deceleration is not normal during deceleration operation from the set frequency to the frequency set inPr. 282. (when Pr. 284 =1) (except stall prevention operation)Brake opening request signal (BOF) turned on though the motor is at a stop. (gravity drop prevention function)Although more than 2s have elapsed after the start command (forward or reverse rotation) is input, the brakeopening request signal (BOF) does not turn on.Although more than 2s have elapsed after the brake opening request signal (BOF) turned on, the brake openingcompletion signal (BRI) does not turn on.Though the inverter had turned on the brake opening request signal (BOF), the brake opening completion signal(BRI) turned off midway.Although more than 2s have elapsed after the brake opening request signal (BOF) turned off at a stop, the brakeopening completion signal (BRI) does not turn off.CAUTION⋅ Overspeed detection (Pr. 285) is valid under encoder feedback control (used with the <strong>FR</strong>-A7AP option) even if a value other than"7 or 8" is set in Pr. 292.⋅ A too large setting of Pr. 278 Brake opening frequency activates stall prevention operation and may cause E.MB4.⋅ If the sum of the time between Pr. 13 Starting frequency and Pr. 278Brake opening frequency + Pr. 280 Brake opening current detectiontime is more than 2s, E.MB4 occurs.Less than 2sOutputfrequencyPr. 278(Hz)Output frequency (Hz)Pr. 13Pr. 280TimeBrake opening request(BOF signal)ON♦ Parameters referred to ♦Pr. 80 Motor capacity, Pr. 81 Number of motor poles Refer to page 75Pr. 180 to Pr. 186 (input terminal function selection) Refer to page 206Pr. 190 to Pr. 195 (output terminal function selection) Refer to page 214Pr. 800 Control method selection Refer to page 75Encoder feedback control Refer to page 349194
4PARAMETERSMotor brake and stop operation4.14.5 Orientation control (Pr. 350 to Pr. 366, Pr. 369, Pr. 393, Pr. 396 to Pr. 399)V/FMagnetic fluxVectorThis function is used with a position detector (encoder) installed to the spindle of a machine tool, etc. to allow arotation shaft to be stopped at the specified position (oriented).Option <strong>FR</strong>-A7AP is necessary.Pr. 350 Stop position command selection is initially set to "9999", orientation control function is invalid.ParameterInitial SettingNameNumberValue RangeDescription3500 Internal stop position command (Pr. 356)Stop position command9999 1 External stop position command (<strong>FR</strong>-A7AX 16-bit data)selection9999 Orientation control invalid351 Orientation speed 2Hz 0 to 30HzDecrease the motor speed to the set value when theorientation command (X22) is given.352 Creep speed 0.5Hz 0 to 10Hz After the speed reaches the orientation speed, the speed353decreases to the creep speed set in Pr. 352 as soon as theCreep switchover511 0 to 16383* current position pulse reaches the creep switchoverpositionposition set in Pr. 353.354355356Position loop switchoverpositionDC injection brake startpositionInternal stop positioncommand96 0 to 81915 0 to 2550 0 to 16383*As soon as the current position pulse reaches the setposition loop switchover position, control is changed toposition loop.After changed to position loop, DC injection brake isapplied and the motor stops as soon as the currentposition pulse reaches the set DC injection brake startposition.When "0" is set in Pr. 350, the internal position command isactivated and the setting value of Pr. 356 becomes a stopposition.357Orientation in-positionzone5 0 to 255 Set the in-position zone at a stop of the orientation.358 Servo torque selection 1 0 to 13 Functions at orientation complete can be selected.359Encoder rotationdirection360 16 bit data selection 0361 Position shift 0 0 to 16383*362363Orientation position loopgainCompletion signal outputdelay time1010 Speed command16 bit data is used as1 external position commandas is.Set the stop positiondividing up to 128 stop2 to 127positions at regularintervals.1 0.1 to 1000.5s 0 to 5.0sCWAEncoderClockwise direction as viewedfrom A is forward rotationCCWAEncoderCounter clockwise direction asviewed from A is forward rotationWhen 1 is set in Pr. 350 andthe <strong>FR</strong>-A7AX is mounted,set a stop position using 16-bit data.Stop position command isinput as binary regardlessof the Pr. 304 setting.Shift the origin using a compensation value withoutchanging the origin of the encoder. The stop position is aposition obtained by adding the setting value of Pr. 361 tothe position command.When servo torque function is selected using Pr. 358,output frequency for generating servo torque increases tothe creep speed of Pr. 352 gradually according to the slopeset in Pr. 362. Although the operation becomes fasterwhen the value is increased, a machine may hunt, etc.The orientation complete signal is output delaying the settime after in-position zone is entered. Also, the signalturns off delaying the set time after in-position zone is out.195
Motor brake and stop operationParameterInitial SettingNameNumberValue RangeDescription364 Encoder stop check time 0.5s 0 to 5.0sOrientation fault signal (ORM) is output when the encoderremains stopped for the set time without orientationcomplete in the state where no orientation complete signal(ORA) is output. ORM signal is output when orientation isnot completed again in the set time in the state whereORA signal is output.Measure the time taken after passing the creep365 Orientation limit 99990 to 60.0s switchover position and output the orientation fault signal(ORM) if orientation is not completed within the set time.9999 Set to 120s.366 Recheck time 9999Turning off the start signal with orientation command(X22) on after stopping the motor by orientation control,0 to 5.0s the present position is checked again after the set timeelapses and the orientation complete signal (ORA) ororientation fault signal (ORM) is output.9999 Not checked.369Number of encoderSet the number of pulses of the encoder.1024 0 to 4096pulsesSet the number of pulses before multiplied by four.0 Orientation is executed from the current rotation direction.393 Orientation selection 01 Orientation is executed from the forward rotation direction.2 Orientation is executed from the reverse rotation direction.396Orientation speed gain (P60 0 to 1000term)Response level during position control loop (servo rigidity)397Orientation speedat orientation stop can be adjusted.0.333 0 to 20.0sintegral time398Orientation speed gain (Dterm)1 0 to 100.0 Lag/advance compensation gain can be adjusted.399Orientation decelerationMake adjustment when the motor runs back at orientation20 0 to 1000ratiostop or the orientation time is long.The above parameters can be set when the <strong>FR</strong>-A7AP (option) is mounted.* When the operation panel (<strong>FR</strong>-DU07) is used, the maximum setting is 9999. When a parameter unit is used, up to the maximum value withinthe setting range can be set.196
4PARAMETERSMotor brake and stop operation(1) Connection exampleThree-phaseAC powersupplyForward rotation startReverse rotation startOrientation commandContact input commonMCCBInverterR/L1S/L2T/L3STFSTRX22*2SDORA*3ORM*3UVW<strong>FR</strong>-A7APPA1PA2PB1PB2PZ1SEPZ2DifferentialSDPG<strong>FR</strong>-A7AX*9 Complementary SDX15PGX14TerminatingSDresistor ONX1*7X0*6DY OFFSF-JR motor with encoderUVIMWEEarth (Ground)C *1RANBPHK*5(+) (-)Encoder*45VDC powersupply*8For complementary type (SF-V5RU)MCCBSF-V5RU*10AThree-phaseAC powerBFANsupplyCInverterUVWExternalPCthermal relayinput *11 CS(OH)SD<strong>FR</strong>-A7APTerminatingresistor ON*6OFFPA1PA2PB1PB2Differential PZ1PZ2Complementary PGSDPGSD*7UVIMWEEarth (Ground)Thermal2W1kΩrelayG1 protectorG2*5ABCDFGSR*1(+) (-)Encoder*412VDC powersupply *8*1 The pin number differs according to the encoder used.*2 Use Pr. 178 to Pr. 189 (input terminal function selection) to assign the function to any of terminal. (Refer to page 206.)*3 Use Pr. 190 to Pr. 196 (output terminal function selection) to assign the function to any of terminal. (Refer to page 214.)*4 Connect the encoder so that there is no looseness between the motor and motor shaft. Speed ratio should be 1:1.*5 Earth (Ground) the shielded cable of the encoder cable to the enclosure with a P clip, etc. (Refer to page 35.)*6 For the differential line driver, set the terminating resistor selection switch to on position (initial status) to use. (Refer to page 31.)Note that the terminating resistor switch should be set to off position when sharing the same encoder with other unit (NC, etc) or a terminatingresistor is connected to other unit.For the complementary, set the switch to off position.*7 For terminal compatibility of the <strong>FR</strong>-JCBL, <strong>FR</strong>-V7CBL and <strong>FR</strong>-A7AP, refer to page 32.*8 A separate power supply of 5V/12V/15V/24V is necessary according to the encoder power specification.When performing encoder feedback control and vector control together, an encoder and power supply can be shared.*9 When a stop position command is input from outside, a plug-in option <strong>FR</strong>-A7AX is necessary. Refer to page 198 for external stop positioncommand.)*10 For the fan of the 7.5kW or less dedicated motor, the power supply is single phase. (200V/50Hz, 200 to 230V/60Hz)*11 Assign OH (external thermal input) signal to the terminal CS. (Set "7" in Pr. 186 )Connect a 2W1kΩ resistor between the terminal PC and CS(OH).Install the resistor pushing it against the bottom part of the terminal block so as to avoid a contact withother cables.CS(OH)PCControl circuitterminal blockIf the orientation command signal (X22) is turned on during operation after the variousparameters have been set, the speed will decelerate to the "orientation switchover speed". After the "orientation stopdistance" is calculated, the speed will further decelerate, and the "orientation state" (servo lock) will be entered. The"orientation complete signal" (ORA) will be output when the "orientation complete width" is entered.(2) Setting I/O singalsSignal Signal Name Application ExplanationX22*1 Orientation command inputUsed to enter an orientation signal for orientation.For the terminal used for X22 signal input, set "22" in any of Pr. 178 to Pr. 189 to assignthe function.SD Contact input common Common terminal for the orientation signal.ORA*2Orientaiton complete signaloutputResistor (2W1kΩ)Switched low if the orientation has stopped within the in-position zone while the startand orientation signals are input.For the terminal used for the ORA signal output, assign the function by setting "27(positive logic) or 127 (negative logic)" in any of Pr. 190 to Pr. 196.ORM*2 Orientation fault signal outputSwitched low if the orientation has not stopped within the in-position zone while thestart and orientation signals are input.For the terminal used for the ORM signal output, assign the function by setting "28(positive logic) or 128 (negative logic)" in any of Pr. 190 to Pr. 196.SE Open collector output common Common terminal for the ORA and ORM open collector output terminals.*1 For X22 signals, assign functions to any of terminal using Pr. 178 to Pr. 189 (ouput terminal function selection). (Refer to page 206)*2 For ORA and ORM signals, assign functions to any of terminal using Pr. 190 to Pr. 196 (ouput terminal function selection). (Refer to page 214)197
Motor brake and stop operation(3) Selecting stop position command (Pr. 350 Stop position command selection )⋅ Select either the internal stop position command (Pr. 356) or the external stop position command (16-bit data usingthe <strong>FR</strong>-A7AX).Pr. 350 SettingStop Position Command Source0 Internal stop position command (Pr. 356: 0 to 16383)1 External stop position command (<strong>FR</strong>-A7AX) 16-bit data9999Orientation control invalid(Initial value)1)Internal stop position command (Pr. 350 = "0")The value set in Pr. 356 is the stop position.When the number of encoder pulses is 1024p/r, onerevolution of the encoder is divided into 4096 positions,i.e. 360°/4096 pulses = 0.0879°/pulses per address, asshown on the right. The stop positions (addresses) areindicated in parentheses.2)External stop position command (Pr. 350 = "1")Mount the option <strong>FR</strong>-A7AX and set a stop position using 16-bit data (binary input).⋅ The value set in Pr. 360 16 bit data selection should be the number of stop positions less 1.Pr. 360 SettingDescription0 External position command is made invalid (speed command or torque command with the <strong>FR</strong>-A7AX)12 to 127270(3072)Origin (0) Origin (0)CW CCW180 (2048)Pr. 359 = 190 90(1024) (1024)180 (2048)Pr. 359 = 1270(3072)Position command direct inputThe 16-bit digital signal from the <strong>FR</strong>-A7AX is directly serves as stop position command.When the Pr. 369 Number of encoder pulses setting is 1024, stop position command from 0 to 4095 can bedirectly input using the <strong>FR</strong>-A7AX and input digital signal of 2048 (H800) to stop the motor at 180° position. Thecommand more than 4096 is considered as 4095.Set the stop position command dividing up to 128 stop positions at regular intervals.If the external stop command entered is greater than the setting, the stop positions are the same as those inthe maximum external stop command value.When the number of stop positions is 90 (divided at intervals of 4°), 90 - 1 = 89. Hence, set "89".[Example] When Pr. 369 = "1024" [Example 2] 8 stop positions [Example 3] 120 stop positions270(3072(HC00))Origin (0)CW180(2048(H800))90(1024(H400))Origin(0)(7 or more)315(6)270(5)225180(4)Pr. 360 = "1" Pr. 360 = "7" Pr. 360 = "119"CAUTION⋅ Values in parentheses indicate binary data entered from the terminals. Even if the position pulse monitor (Pr. 52 DU/PU maindisplay data selection = 19) is selected, the data monitored is not the number of stop positions but is 0 to 65535 pulses.⋅ <strong>FR</strong>-A7AX parameters (Pr. 300 to Pr. 305) are invalid. (Valid when Pr. 360 = "0")⋅ Terminal DY (data read timing input signal) is made invalid during vector control. (The position data is downloaded at the start oforientation.)⋅ Internal stop position command is given even if "1" (external stop position command) is set in Pr. 350 when an option card (<strong>FR</strong>-A7AX) is not mounted or Pr. 360 = "0".(1)45135(3)90(2)CW270(90)Origin (0)CWAt intervalsof 3180(60)90(30)198
4PARAMETERSMotor brake and stop operation• Relationship between stop position command and 16-bit dataPr. 350Stop positioncommand selection0:internal1: externalPr. 36016 bit data selectionStop position commandOperation16 bit data(<strong>FR</strong>-A7AX)Speed command0: speed command Internal (Pr. 356) Speed command 16 bit data1, 2 to 127: positioncommandInternal (Pr. 356)InvalidExternal command(or PU)0: speed command Internal (Pr. 356) Speed command 16 bit data1, 2 to 127: positioncommandExternal(Internal when the <strong>FR</strong>-A7AX is notmounted (Pr. 356))Position commandExternal command(or PU)3)Pr. 361 Position shift (initial value "0")The stop position is a position obtained by adding the setting value of Pr. 361 to the position command.Shift the origin using a compensation value without changing the origin of the poisition detector (encoder).REMARKS• When orientation control is made valid using Pr. 350 Stop position command selection with the <strong>FR</strong>-A7AP mounted, the rotationdirection of encoder is displayed on the rotation direction display of the PU (<strong>FR</strong>-DU07/<strong>FR</strong>-PU04/<strong>FR</strong>-PU07).Set the parameter so that turning on the STF signal displays FWD or turning on the STR signal displays REV.(4) Monitor display changeMonitorPosition pulse monitor(5) Pr. 357 Orientation in-position zone (initial value "5")RemarksWhen "19" is set in Pr. 52 , position pulse monitor is displayed instead of output voltage monitorof the PU. (Displayed only when the <strong>FR</strong>-A7AP is mounted.)When "22" is set in Pr. 52 , orientation status is displayed instead of output voltage monitor ofthe PU. (Displayed only when the <strong>FR</strong>-A7AP is mounted.)0-Other than orientation operation or orientation speed is not reached1-Orientation speed is reached2-Creep speed is reachedOrientation status* 3-Position loop is reached4-Orientation complete5-Orientation fault (pulse stop)6-Orientation fault (orientation limit)7-Orientation fault (recheck)8-Continuous multi-point orientation* Invalid during vector control. ("0" is always displayed )• The positioning width for orientation stop can be set.The initial setting of Pr. 357 is "5". To change the Δθvalue, finely adjust with ±10 increments, and makefine adjustment.• If the position detection value from the encoderenters ±Δθ during orientation stop, the orientationcomplete signal (ORA) will be output.Example of operationSet360Pr.369Number of encoder pulsesfour timesPr. 357199
Motor brake and stop operation(6) Orientation operation (under V/F control, advanced magnetic flux vector control)• Orientation during running1) When the orientation command (X22) is input, the motor speed decreases to the orientation speed set in Pr. 351Orientation speed . (Pr. 351 initial value: 2Hz)2) After the speed reaches the orientation speed, the speed decreases to the creep speed set in Pr. 352 Creep speedas soon as the current position pulse reaches the creep switchover position set in Pr. 353 Creep switchover position(Pr. 352 initial value:0.5Hz, Pr. 353 initial value: 511)3) Moreover, as soon as the current position pulse reaches the set position loop switchover position in Pr. 354 Positionloop switchover position , control is changed to position loop. (Pr. 354 initial value: 96)4) After switching to position loop, the inverter decelerates and stops with DC injection brake as soon as the currentposition pulse has rached the DC injection brake start position set in Pr. 355 DC injection brake start position. (Pr. 355initial value: 5)5) When the position pulse has stopped within the in-position zone set in Pr. 357 Orientation in-position zone , theorientation complete signal (ORA) is output after the comletion signal output delay time set in Pr. 363 Completionsignal output delay time has elapsed. If the motor does not stop within the in-position zone due to external force, etc.,the orientation complete signal is turned off after the time set in Pr. 363 Completion signal output delay time haselapsed. (Pr. 357 initial value: 5)6) If the orientation is not completed continusouly for the time set in Pr. 365 Orientation limit after passing the creepswitchover position, the orientation fault signal (ORM) is output.7) When the motor stops before the position pulse reaching the in-position zone due to external force after orientationstart and orientation complete signal (ORA) is not output, orientation fault signal (ORM) is output after the time set inencoder stop check time set in Pr. 364 Encoder stop check time has elapsed. Moreover, the orientation complete signal(ORA) is turned off after the time set in Pr. 363 Completion signal output delay time has elapsed if the position pulse isoutside the in-position zone due to external force, etc. after outputting the orientation complete signal (ORA), andthe orientation fault signal (ORM) is output if the orientation has not completed within the time set in Pr. 364 Encoderstop check time .8) When the start signal (STF or STR) is turned off with the orientation command on after outputting the orientationcomplete signal (ORA) and orientation fault signal (ORM), the orientation complete signal (ORM) or orientation faultsignal (ORM) is output again after recheck time set in Pr. 366 Recheck time has elapsed.9) The orientation complete signal (ORA) and orientation fault signal (ORM) are not output when the orientationcommand is off.REMARKS• When the orientation command is off with the start signal on, the speed accelerates to the command speed.OrientationspeedCreep switchover positionPosition loopOriginOrientation stop position commandDC injection brakePosition loop switchover positionCreepspeed• If the motor shaft hants, set a larger value in Pr. 354 Position loop switchover position or a smaller value in Pr. 352 Creep speed toprevent it.• Action time chartMain spindle speed (encoder)Pr. 351Pr. 3520Start signal (STF, STR)Orientation command (X22)Current position signalOrigin signalOFFOrientation speed (set with Pr. 351 )Creep speed (set with Pr. 352 )DC injectionbrake startposition(set with Pr. 355 )Creep switchover position(set with Pr. 353)Position loop switchover(set with Pr. 354 )Stop position commandDC injection brake OFF ONOFFOrientation complete signal (ORA) OFF 5)ONOFF1)ON2) 3) 4)ONOFFOFFTime200
4PARAMETERSMotor brake and stop operation• Orientation from stopAfter turning on the orientation command (X22), turning on the start signal will increase the motor speed to theorientation speed set in Pr. 351 Orientation speed, then orientation operation same as when "orientation during running"is performed.Note that, DC injection brake is operated if the position signal is within the DC injection brake start position.• Action time chartMain spindle speed (encoder)Pr. 351Pr. 352Start signal (STF, STR)OFFOrientation speed (orientation switchover speed)Creep speed (orientation deceleration ratio)TimeONOFFOrientation command (X22)OFFONOFFDC injection brakeOFFONOFFOrientation complete signal (ORA)• Continuous multi-point orientationOFFOrientation command and orientation with STF/STR on(Orientation in servo in status)ONOFFMain spindle speed (encoder)Pr. 351Pr. 352Orientation speed (orientation switchover speed)Creep speed (orientation deceleration ratio)Start signalOrientation commandOrientation complete signalServo-inONONServo-inDYPosition signalON50ms or more is necessaryPosition command latch• Read the position data at starting up of DY (refer to the <strong>FR</strong>-A7AX instruction manual ).• When the position signal is within the creep switchover position, the speed starts up to the creep speed not to theorientation speed.• When the position signal is not within the creep switchover position, the speed starts up to the orientation speed.• The DC injection brake is operated if the position signal is within the DC injection brake start position.• 16-bit data with the <strong>FR</strong>-A7AX is valid only when the DY signal is on.CAUTION• The encoder should be coupled with the motor shaft or main spindle oriented with a speed ratio of 1 to 1 without any mechanicallooseness.• DC injection brake operates when orientation stop is made. Release the DC injection brake in a time as short as possible (withinseveral seconds) since continuous operation of the DC injection brake will cause the motor to overheat, leading to burnout.• Since no servo lock function is available after orientation stop, provide a holding mechanism such as mechanical brake or knockpin when secure holding of a main spindle is required.• To ensure correct positioning, the encoder must be set in the proper rotation direction and the A and B phases connected correctly.• When the pulse signal from the encoder stops due to the encoder signal loss, etc. during orientation, the orientation fault signal(ORM) may be output.• When the DC injection brake is set to disabled using parameter for DC injection brake adjustment (voltage, frequency, speed, time)when performing orientation control, orientation operation can not be completed. Always set the DC injection brake enabled.• To terminate orientation, the start signal (STF or STR) must be first switched off and the orientation signal (X22) must be switchedoff. As soon as this orientation signal is switched off, orientation control ends.(Depending on the Pr. 358 Servo torque selectionsetting, orientation status continues if the orientation signal remains on even if DC injection brake is released at turning off of thestart signal. Therefore, the orientation status of the monitor function is not 0.)• When retry function of Pr. 358 Servo torque selection is selected, the retry operation is performed three times including the first orientation.• When performing orientation control, make proper setting of Pr. 350 Stop position command selection and Pr. 360 16 bit data selection(external position command selection). If the values set are incorrect, proper orientation control will not be performed.• When Pr. 11 DC injection brake operation time = "8888" (DC injection brake external selection), DC injection brake does not operate if theX13 signal is not turned on. Note that the DC injection brake is applied under orientation control regardless of the X13 signal status.• When orientation control is exercised, PID control is invalid.ONPosition command latch201
Motor brake and stop operation• Servo torque selection (Pr. 358 )Valid only under V/F control and advanced magnetic flux vector control.Pr. 358 SettingFunction1) Servo torque function selectionuntil output of the orientationcomplete signal (ORA)0 1 2 3 4 5 6 7 8 9 10 11 12 13× ◦ ◦ ◦ ◦ × ◦ × ◦ × ◦ × × ◦2) Retry function selection × × × × × × × ◦ × × × ◦ × ×3) Output frequency is compensatedwhen the motor stops outside thein-position zone4) DC injection brake and servotorque selection when the positionpulse comes off the in-positionzone after output of the orientationcomplete signal (ORA)5) End switch selection of the DCinjection brake and orientationcomplete signal (ORA)6) Completion signal off selectionwhen the position pulse comes offthe in-position zone after output ofthe orientation complete signal(ORA)× × ◦ ◦ × ◦ ◦ × × × × × ◦ ◦◦ × × × × ◦ ◦ ◦ ◦ ◦ ◦ ◦ ◦ ◦◦ ◦ ◦ × × ◦ ◦ ◦ ◦ × × × × ×◦ ◦ ◦ ◦ ◦ × × × × × × × × ×Remarks◦: With servo torque function×: Without servo torque function◦: With retry function×: Without retry function◦: With frequency compensation×: Without frequency compensation◦: With DC injection brake×: With servo torque◦: When the start signal (STF, STR) ororientation command is turned off×: When the orientation command isturned off◦: Turnes off the completion signal whenthe motor stops outside of the inpositionzone×: Completion signal remains on even ifthe position pulse comes off thecompletion zone(orientation fault singal (ORM) is notoutput)REMARKS• When the orientation command is off with the start signal on, the speed accelerates to the command speed.• When the motor shaft stops outside of the set setting range of stop position, the motor shaft is returned to the stop position byservo torque function (if enough torque is generated).1)Servo torque function selection until output of the orientation complete signalWhether servo torque is available or not is selected using Pr. 358 Servo torque selection. Servo torque is not generatedif the current position pulse is in between the orientation stop position and DC injection brake start position. Although,the shaft is retained by the DC injection brake, servo torque is generated to return the shaft within the width if theshaft moves out of the width by external force, etc. Once the orientation complete signal (ORA) is output, the motorruns according to the setting made in 4).2)Retry function selectionSelect retry function using Pr. 358 Servo torque selection . Note that servo torque function can not be used together.When the motor shaft is not stopped within the in-position zone when the motor stop is checked, orientationoperation is performed again by retry function.With this retry function, three orientations including the first one are performed. More than three times retryoperations are not made. (The orientation fault signal (ORM) is not output during retry operation)3)Frequency compensation function when the motor stops outside the orinetation in-position zoneWhen the motor stops before entering the in-position zone due to external force, etc., output frequency is increasedto move the shaft to the orientation stop position. The output frequency is gradually increased to the creep speed ofPr. 352 Creep speed .Note that retry function can not be used together.4)DC injection brake and servo torque selection when the position pulse comes off the in-position zone after output ofthe orientation complete signal (ORA)If the position pulse comes off the orientation in-position width, you can select a setting either fixing a shaft with theDC injection brake or returning the motor to the orientation stop position with servo torque.5)Orientation operation end switch operation selection between DC injection brake or servo torqueWhen ending the orientation operation, turn off the start signal (STF or STR), then turn off the orientation command(X22). At this time, you can select when to turn off the orientation complete signal (ORA) from between at turning offof the start signal or turning off of the orientation command signal.6)Selection of completion signal off or on when the motor stops outside of the in-position zone after output of theorientation complete signal (ORA)You can select the mode to turn off the completion signal or keep the completion signal on (orientation fault signal(ORM) is not output) when the motor stops outside of the in-position zone.202
4PARAMETERS• Position loop gain (Pr. 362 )Motor brake and stop operationWhen servo torque function is selected using Pr. 358 Servo torque selection , output frequency for generating servotorque increases to the creep speed of Pr. 352 Creep speed gradually according to the slope set in Pr. 362 Orientationposition loop gain .Although the operation becomes faster when the value is increased, a machine may hunt, etc.(7) Orientation operation explanation (during vector control)• Setting the rotation direction (Pr. 393 Orientation selection )Pr. 393 Setting0(initial value)12RotationDirectionPre-orientationForward rotationorientationReverse rotationorientationRemarksOrientation is executed from the current rotation direction.Orientation is executed from the forward rotation direction.(If the motor is running in reverse, orientation is executed from theforward rotation direction after deceleration.)Orientation is executed from the reverse rotation direction.(If the motor is running in forward, orientation is executed from thereverse rotation direction after deceleration.)1)Orientation from the current rotation direction• When the orientation command (X22) is input, the motor speed willdecelerate from the runnig speed to Pr. 351 Orientation speed.At the same time, the orientation stop position command will be read in.(The stop position command is determined by the setting of Pr. 350 and Pr.360. Refer to the right chart.)• When the orientation switchover speed is reached, the encoder Z phasepulse will be confirmed, and the mode will change from speed control toposition control (Pr. 362 Orientation position loop gain ).• The distance to the orientation stop position is calculated at switching ofthe control, and the motor decelerates and stops with a set decelerationpattern (Pr. 399) and the orientation (servo lock) state will be entered.• When entered in the Pr. 357 Orientation in-position zone, the orientationcomplete signal (ORA) will be output.• The zero point position (origin) can be moved using Pr. 361 Position shift .Speed(forward rotation)X22ORASpeed(reverse rotation)X22ORAOFFOFFONONOFFOFFONON[t][t]WARNINGIf the orientation command (X22) is turned off while the start signal is input, the motor will accelerate toward thespeed of the current speed command. Thus, to stop, turn the forward rotation (reverse rotation) signal off.2)Orientation from the forward rotation direction• This method is used to improve the stopping precision and maintain themechanical precision when the backlash is large.• If the motor is running in the forward rotation direction, it will make anorientation stop with the same method as "orientation from the currentrotation direction".• If the motor is running in reverse, it will decelerate, the rotation directionwill be changed to forward run, and then orientation stop will be executed.Speed(forward rotation)X22ORA[t]Speed(reverse rotation)[t]X22ORA203
Motor brake and stop operation3)Orientation from the reverse rotation direction• If the motor is running in the reverse rotation direction, it will make anorientation stop with the same method as "orientation from the currentrotation direction".• If the motor is running in forward, it will decelerate, the rotation directionwill be changed to reverse run, and then orientation stop will be executed.Speed(forward rotation)X22ORA[t]Speed(reverse rotation)[t]X22ORACAUTION• The encoder should be coupled with the motor shaft oriented with a speed ratio of 1 to 1 without any mechanical looseness.• To ensure correct positioning, the encoder must be set in the proper rotation direction and the A and B phases connectedcorrectly.• Orientation may not be completed if the pulse signals are not received from the encoder during orientation due to a break in thecable or the like.• To terminate orientation, the start signal (STF or STR) must be first switched off and the orientation signal (X22) must be switchedoff. As soon as this orientation signal is switched off, orientation control ends.• When performing orientation control, make proper setting of Pr. 350 Stop position command selection and Pr. 360 16 bit data selection.If the values set are incorrect, proper orientation control will not be performed.• When orientation control is exercised, PID control is invalid.REMARKSIf "E.ECT" (no encoder signal) is displayed causing the inverter to trip when the orient signal (X22) is ON, check for a single loss inthe cable of the Z phase of the encoder.• Servo rigidity adjustment (Pr. 362, Pr. 396 to Pr. 398)•To increase the servo rigidity *1 during orientation stop using Pr. 396 or Pr. 397 , adjust with the following procedures.1) Increase the Pr. 362 Orientation position loop gain value to the extent that rocking *2 does not occur duringorientation stop.2) Increase Pr. 396 and Pr. 397 at the same rate.Generally adjust Pr. 396 in the range from 10 to 100, and Pr. 397 from 0.1 to 1.0s.(Note that these do not need to be set to the same rate.)When the Pr. 396 value is multiplied by 1.2, divide the Pr. 397 value by 1.2.If vibration occurs during orientation stop, the scale cannot be raised any higher.3) Pr. 398 is the lag/advance compensation gain.The limit cycle *3 can be prevented by increasing the value, and the running can be stopped stably. However, thetorque in regard to the position deviation will drop, and the motor will stop with deviation.POINTApplication of lag/advance control and PI controlPI control can be applied by setting Pr. 398 to 0. Normally, the lag/advance control is selected. Note that PI controlshoud be used when using a machine with a high spindle stationary friction torque and requires a stopping positionprecision.*1 Servo rigidity: This is the response when a position control loop is configured.When the servo rigidity is raised, the holding force will increase, the running will stabilize, but vibration will occur easily.When the servo rigidity is lowered, the holding force will drop, and the setting time will increase.*2 Rocking: Movement in which return occurs if the stopping position is exceeded.*3 Limit cycle: This is a phenomenon that generates ± continuous vibration centering on the target position.204
4PARAMETERS• Pr. 399 Orientation deceleration ratio (initial value is 20)• Make adjustments as shown below according to the orientation status.(Refer to the Pr. 396 and Pr. 397 details also.)Generally adjust Pr. 362 in the range from 5 to 20, and Pr. 399 from 5 to 50.PhenomenonRocking occurs duringstoppingThe orientation time is longHunting occurs whenstoppingThe servo rigidity duringstopping is lowAdjustment ProcedurePr. 396 Pr. 397 Pr. 362 Pr. 3993) 3) 2) 1)2) 2) 1)1) 1) 2)2) 1)Motor brake and stop operationREMARKS1. :Increase the parameter setting value.:Do not change the parameter settingvalue.:Decrease the parameter setting value.2. The numbers 1) , 2) and 3) in the table showthe order of priority for changing theparameters setting value.CAUTIONOr, if the motor does forward/reverse reciprocation operation , the parameter setting value for the orientation detectorinstallation direction may be incorrect. Review Pr. 393 Orientation selection (refer to page 196) and Pr. 359 Encoder rotation direction(refer to page 195).• Pr. 351 Orientation speed (initial value: 2Hz)• Set the speed when switching beween the speed control mode and the position control mode is performed underorientation operation.Decreasing the set speed enables stable orientation stop. Note that the orientation time will increase.[Hz]FrequencyPr.351 Orientation speedDecelerate according to the deceleration ratio of Pr. 399Orientation command completionTime[t]Orientation start(X22)Orientation complete(ORA)OFFONONREMARKSEncoder Z phase pulseWhen "19" is set in Pr. 52 DU/PU main display data selection , position pulse monitor is displayed instead of PU output voltagemonitor.205
Function assignment of external terminal and control4.15 Function assignment of external terminal and controlPurpose Parameter that must be Set Refer to PageAssign function to input terminalInput terminal functionselectionPr. 178 to Pr. 189 206Set MRS signal (output shutoff) tonormally closed contact specificationMRS input selection Pr. 17 209Make the second (third) functionvalid only during constant speedoperationAssign start signal and forward/reverse command to other signalsAssign function to output terminalDetect output frequencyDetect output currentRT signal function validitycondition selectionStart signal (STF/STR)operation selectionOutput terminal functionassignmentUp-to-frequency sensitivityOutput frequency detectionLow speed detectionOutput current detectionZero current detection4.15.1 Input terminal function selection (Pr. 178 to Pr. 189)(1) Input terminal function assignment⋅ Use Pr. 178 to Pr. 189 to set the functions of the input terminals.⋅ Refer to the following table and set the parameters:Pr. 155 210Pr. 250 211Pr. 190 to Pr. 196 214Pr. 41 to Pr. 43, Pr. 50, Pr. 116,Pr. 865Pr. 150 to Pr. 153, Pr. 166,Pr. 167Remote output function Remote output Pr. 495 to Pr. 497 225Detect output torque Output torque detection Pr. 864 224Use these parameters to select/change the input terminal functions.ParameterNumberNameInitialValueInitial Signal178 STF terminal function selection 60 STF (forward rotation command)179 STR terminal function selection 61 STR (reverse rotation command)180 RL terminal function selection 0 RL (low-speed operation command)181 RM terminal function selection 1 RM (middle-speed operation command)182 RH terminal function selection 2 RH (high speed operation command)183 RT terminal function selection 3 RT (second function selection)184 AU terminal function selection 4 AU (terminal 4 input selection)185 JOG terminal function selection 5 JOG (Jog operation selection)186 CS terminal function selection 6CS (selection of automatic restartafter instantaneous power failure)187 MRS terminal function selection 24 MRS (output stop)188 STOP terminal function selection 25 STOP (start self-holding selection)189 RES terminal function selection 62 RES (inverter reset)SettingSignalName0 RL1 RM2 RH221223Setting Range0 to 9, 12 to 20, 22 to 28, 42to 44, 60, 62, 64 to 69, 74,99990 to 9, 12 to 20, 22 to 28, 42to 44, 61, 62, 64 to 69, 74,99990 to 9, 12 to 20, 22 to 28, 42to 44, 62, 64 to 69, 74, 99990 to 9, 12 to 20, 22 to 28, 42to 44, 62 to 69, 74, 99990 to 9, 12 to 20, 22 to 28, 42to 44, 62, 64 to 69, 74, 9999FunctionRelated ParametersRefer toPagePr. 59 = 0 (initial value) Low-speed operation commandPr. 4 to Pr. 6, Pr. 24 to Pr. 27,Pr. 232 to Pr. 239148Pr. 59 = 1, 2 *1 Remote setting (setting clear) Pr. 59 152Pr. 270 = 1, 3 *2 Stop-on-contact selection 0 Pr. 270, Pr. 275, Pr. 276 189Pr. 59 = 0 (initial value) Middle-speed operation commandPr. 4 to Pr. 6, Pr. 24 to Pr. 27, Pr.232 to Pr. 239148Pr. 59 = 1, 2 *1 Remote setting (deceleration) Pr. 59 152Pr. 59 = 0 (initial value) High-speed operation commandPr. 4 to Pr. 6, Pr. 24 to Pr. 27,Pr. 232 to Pr. 239148Pr. 59 = 1, 2 *1 Remote setting (acceleration) Pr. 59 152206
4PARAMETERSFunction assignment of external terminal and controlSettingSignalRefer toFunctionRelated ParametersNamePagePr. 44 to Pr. 51, Pr. 450 to Pr. 463,Second function selection3 RTPr. 569, Pr. 832, Pr. 836, etc.210Pr. 270 = 1, 3 *2 Stop-on-contact selection 1 Pr. 270, Pr. 275, Pr. 276 1894 AU Terminal 4 input selection Pr. 267 2595 JOG Jog operation selection Pr. 15, Pr. 16 1506 CSSelection of automatic restart after instantaneous power Pr. 57, Pr. 58, Pr.162 to Pr.165,239failure, flying startPr. 299, Pr. 611Pr. 57, Pr. 58, Pr.135 to Pr.139,Electronic bypass function337Pr. 1597 OH External thermal relay input *3 Pr. 9 1658 REX15 speed selection (combination with three speeds RL, RM, Pr. 4 to Pr. 6, Pr. 24 to Pr. 27,RH)Pr.232 to Pr.2391489 X9 Third function selection Pr. 110 to Pr. 116 21012 X12 PU operation external interlock Pr. 79 28313 X13 External DC injection brake operation start Pr. 10 to Pr. 12 18514 X14 PID control valid terminalPr. 127 to Pr. 134, Pr. 575 to Pr.57732915 BRI Brake opening completion signal Pr. 278 to Pr. 285 19216 X16PU-external operation switchover (turning on X16 selectsexternal operation)Pr. 79, Pr. 340 28917 X17Load pattern selection forward/reverse rotation boost (turningon X17 changes the output characteristics to constant torque Pr. 14 144load)18 X18 V/F switchover (turning on X18 selects V/F control) Pr. 80, Pr. 81, Pr. 800 75, 13119 X19 Load torque high-speed frequency Pr. 270 to Pr. 274 34220 X20 S-pattern acceleration/deceleration C switching terminal Pr. 380 to Pr. 383 15822 X22 Orientation command *4, *6 Pr. 350 to Pr. 369 19523 LX Pre-excitation/servo on *5 Pr. 850 185Output stop Pr. 17 20924 MRSPr. 57, Pr. 58, Pr.135 to Pr.139,Electronic bypass functionPr. 15933725 STOP Start self-holding selection ⎯ 21126 MC Control mode changing Pr. 800 7527 TL Torque limit selection Pr. 815 8328 X28 Start-time tuning start external input Pr. 95 18142 X42 Torque bias selection 1 *6 Pr. 840 to Pr. 845 9743 X43 Torque bias selection 2 *6 Pr. 840 to Pr. 845 9744 X44 P/PI control switchover (turning on X44 selects P control) Pr. 820, Pr. 821, Pr. 830, Pr. 831 8860 STFForward rotation command(assigned to STF terminal (Pr. 178) only)⎯ 21161 STRReverse rotation command(assigned to STR terminal (Pr. 179) only)⎯ 21162 RES Inverter reset ⎯ ⎯63 PTC PTC thermistor input (assigned to AU terminal (Pr. 184) only) Pr. 9 16564 X64 PID forward/reverse action switchover Pr. 127 to Pr. 134, Pr. 5 32965 X65PU-NET operation switchover (turning on X65 selects PUoperation)Pr. 79, Pr. 340 29066 X66External-NET operation switchover (turning on X66 selectsNET operation)Pr. 79, Pr. 340 29067 X67Command source switchover (turning on X67 makes Pr. 338and Pr. 339 commands valid)Pr. 338, Pr. 339 29268 NP Conditional position pulse train sign *6 Pr. 291, Pr. 419 to Pr. 430, Pr. 464 12069 CLR Conditional position droop pulse clear *6 Pr. 291, Pr. 419 to Pr. 430, Pr. 464 12074 X74 Magnetic flux decay output shutoff signal ⎯ 2139999 ⎯ No function ⎯ ⎯*1 When Pr. 59 Remote function selection = "1 or 2", the functions of the RL, RM and RH signals change as listed above.*2 When Pr. 270 Stop-on contact/load torque high-speed frequency control selection = "1 or 3", the functions of the RL and RM signals change as listed above.*3 The OH signal turns on when the relay contact "opens".*4 The <strong>FR</strong>-A7AX (16-bit digital input) is needed to externally input a stop position under orientation control.*5 Servo ON is made valid during position control under vector control operation.*6 Available only when used with the <strong>FR</strong>-A7AP (option).207
Function assignment of external terminal and control⋅⋅⋅⋅⋅REMARKSOne function can be assigned to two or more terminals. In this case, the terminal inputs are ORed.The priorities of the speed commands are in order of jog > multi-speed setting (RH, RM, RL, REX) > PID (X14).When the PU operation external interlock (X12) signal is not assigned at the Pr. 79 Operation mode selection setting of "7", theMRS signal shares this function.Use common terminals to assign multi-speeds (speed 7) and remote setting. They cannot be set individually.(Common terminals are used since these functions are designed for speed setting and need not be set at the same time.)When V/F switching (X18) signal and load pattern selection forward rotation reverse rotation boost (X17) signal are notassigned, the RT signal shares this function. (Pr. 81 Number of motor poles = "12, 14, 16, 18, 20")In this case, V/F control is controlled by the second function.⋅CAUTIONChanging the terminal assignment using Pr. 178 to Pr. 189 (input terminal function selection) may affect the other functions. Alsocheck that wiring is correct, since the terminal name and the signal function became different.Please make setting after confirming the function of each terminal.208
4PARAMETERS4.15.2 Inverter output shutoff signal (MRS signal, Pr. 17)Function assignment of external terminal and controlThe inverter output can be shut off from the MRS signal. The logic of the MRS signal can also be selected.ParameterNumberNameInitialValue17 MRS input selection 0SettingRangeDescription0 Normally open input2 Normally closed input (NC contact input specifications)4External terminal: Normally closed input(NC contact input specifications)Communication: Normally open inputMRS signalSTF (STR)signalONONMotor coaststo stopTimeSetting value "0" (Initialvalue)Setting value "2"OutputstopInverterOutputstopInverterMRSMRS(1) Output shutoff signal (MRS signal)⋅ Turning on the output shutoff signal (MRS) during inverter running shutsoff the output immediately.⋅ Terminal MRS may be used as described below.(a) When mechanical brake (e.g. electromagnetic brake) is used to stopmotorThe inverter output is shut off when the mechanical brake operates.(b) To provide interlock to disable operation by the inverterWith the MRS signal on, the inverter cannot be operated if the startsignal is entered into the inverter.(c) Coast the motor to a stopWhen the start signal is turned off, the inverter decelerates the motorto a stop in the preset deceleration time, but when the MRS signal isturned on, the motor coasts to a stop(2) MRS signal logic inversion (Pr. 17 = "2")SDSD⋅ When Pr. 17 is set to "2", the MRS signal (output stop) can be changedto the normally closed (NC contact) input specification. When the MRSsignal turns on (opens), the inverter shuts off the output.(3) Assign a different action for each MRS signal input from communication and external terminal(Pr. 17 = "4")⋅ When Pr. 17 is set to "4", the MRS signal from external terminal (output stop) can be changed to the normallyclosed (NC contact) input, and the MRS signal from communication can be changed to the normally open (NOcontact) input.This function is useful to perform operation by communication with MRS signal from external terminal remained on.External MRS Communication MRSPr. 17 Setting0 2 4OFF OFF Operation enabled Output shutoff Output shutoffOFF ON Output shutoff Output shutoff Output shutoffON OFF Output shutoff Output shutoff Operation enabledON ON Output shutoff Operation enabled Output shutoffREMARKS⋅ The MRS signal is assigned to the terminal MRS in the initial setting. By setting "24" in any of Pr. 178 to Pr. 189 (input terminalfunction selection), the MRS signal can be assigned to the other terminal.⋅ The MRS signal can shut off the output, independently of the PU, external or network operation mode.⋅CAUTIONChanging the terminal assignment using Pr. 178 to Pr. 189 (input terminal function selection) may affect the other functions. Pleasemake setting after confirming the function of each terminal.♦ Parameters referred to ♦Pr. 178 to Pr. 189 (Input terminal function selection) Refer to page 206209
Function assignment of external terminal and control4.15.3 Condition selection of function validity by the second function selection signal (RT) andthird function selection signal (X9) (RT signal, X9 signal, Pr. 155)You can select the second (third) function using the RT(X9) signal.You can also set the condition (reflection conditon) where the second function and third function become valid.ParameterNumber155Name Initial Value Setting Range DescriptionRT signal function validitycondition selection⋅ When the RT signal turns on, the second function becomes valid.⋅ When the X9 signal turns on, the third function becomes valid.For the X9 signal, set "9" in any of Pr. 178 to Pr. 189 (input terminal function selection) to assign the function.⋅ The second (third) function has the following applications.(a)Switching between normal use and emergency use(b)Switching between heavy load and light load(c)Changing of acceleration/deceleration time by broken line acceleration/deceleration(d)Switching of characteristic between main motor and sub motorSecond function connection diagram⋅ Functions that can be set as second and third functionsFunction0First FunctionParameter Number010Second (third) function is immediately made valid with onof the RT(X9) signal.Second (third) function is valid only during the RT (X9)signal is on and constant speed operation. (invalid duringacceleration/deceleration)Second acceleration/deceleration time exampleSecond FunctionParameter NumberThird FunctionParameter NumberRefer toPageTorque boost Pr. 0 Pr. 46 Pr. 112 129Base frequency Pr. 3 Pr. 47 Pr. 113 142Acceleration time Pr. 7 Pr. 44 Pr. 110 155Deceleration time Pr. 8 Pr. 44, Pr. 45 Pr. 110, Pr. 111 155Electronic thermal relayfunctionPr. 9 Pr. 51 ⎯ 165Stall prevention Pr. 22 Pr. 48, Pr. 49 Pr. 114, Pr. 115 135<strong>Applied</strong> motor Pr. 71 Pr. 450 ⎯ 169Motor constantStartSecondfunctionselectionHigh speedMiddle speedInverterSTF(STR)RTRHRMSDPr. 80 to Pr. 84, Pr. 89,Pr. 90 to Pr. 94, Pr. 96, Pr. 859Pr. 453 to Pr. 457, Pr. 569,Pr. 458 to Pr. 462, Pr. 463, Pr. 860⎯ 171Online auto tuningselectionPr. 95 Pr. 574 ⎯ 181Motor control method Pr. 800 Pr. 451 ⎯ 75Speed control gain Pr. 820, Pr. 821 Pr. 830, Pr. 831 ⎯ 88Analog input filter Pr. 822, Pr. 826 Pr. 832, Pr. 836 ⎯ 265Speed detection filter Pr. 823 Pr. 833 ⎯ 127Torque control gain Pr. 824, Pr. 825 Pr. 834, Pr. 835 ⎯ 113Torque detection filter Pr. 827 Pr. 837 ⎯ 127REMARKS⋅ The RT signal is assigned to the RT terminal in the initial setting. By setting "3" in any of Pr. 178 to Pr. 189 (input terminal functionselection), the RT signal can be assigned to the other terminal.⋅ When the RT (X9) signal is on, the other functions such as the second (third) are also selected.Output frequencyRTRHRMSetting value "0"(initial value)Accelerationtime is reflectedTime⋅CAUTIONChanging the terminal assignment using Pr. 178 to Pr. 189 (input terminal function selection) may affect the other functions. Pleasemake setting after confirming the function of each terminal.♦ Parameters referred to ♦Pr. 178 to Pr.189 (input terminal function selection) Refer to page 206210
4PARAMETERSFunction assignment of external terminal and control4.15.4 Start signal operation selection (STF, STR, STOP signal, Pr. 250)You can select the operation of the start signal (STF/STR).Used to select the stopping method (deceleration to a stop or coasting) when the start signal turns off.Used to stop the motor with a mechanical brake, etc. together with switching off of the start signal.(Refer to page 188 for stop selection)ParameterNumberNameInitialValue250 Stop selection 9999SettingRange0 to 100s1000s to1100s99998888DescriptionStop operationStart signal (STF/STR)(Refer to page 188)STF signal: Forward rotationstartSTR signal: Reverse rotationstartSTF signal: Start signalSTR signal: Forward/reverserotation signalSTF signal: Forward rotationstartSTR signal: Reverse rotationstartSTF signal: Start signalSTR signal: Forward/reverserotation signalThe motor is coasted to a stopwhen the preset time elapsesafter the start signal is turnedoff. When the setting is any of1000s to 1100s, the invertercoasts to a stop in (Pr. 250 -1000)s.When the start signal is turnedoff, the motor decelerates tostop.(1) 2-wire type (STF, STR signal)⋅ A two-wire type connection is shown below.⋅ In the initial setting, the forward/reverse rotation signals (STF/STR) are used as start and stop signals. Turn oneither of the forward and reverse rotation signals to start the motor in the corresponding direction. If both are turnedoff (or on) during operation, the inverter decelerates to a stop.⋅ The speed setting signal may either be given by entering 0 to 10VDC across the speed setting input terminal 2-5,by setting the required values in Pr. 4 to Pr. 6 Multi-speed setting (high, middle, low speeds), etc. (For multi-speedoperation, refer to page 148)⋅ When Pr. 250 is set to any of "1000 to 1100, 8888", the STF signal becomes a start command and the STR signal aforward/reverse command.Forwardrotation startReverserotation startSTFSTRSD1025InverterStart signalForward/reversesignalSTFSTRSD1025InverterOutput frequencyForwardrotationReverserotationSTFSTRONONTime2-wire connection example (Pr. 250 = "9999") 2-wire connection example (Pr. 250 = "8888")Output frequencyForwardrotationReverserotationSTFSTRONONTimeREMARKS⋅ When Pr. 250 is set to any of "0 to 100, 1000 to 1100", the motor coasts to a stop if the start command is turned off. (Refer to page188)⋅ The STF and STR signals are assigned to the STF and STR terminals in the initial setting. The STF signal can be assigned toPr. 178 STF terminal function selection and the STR signal to Pr. 179 STR terminal function selection only.211
Function assignment of external terminal and control(2) 3-wire type (STF, STR, STOP signal)⋅ A three-wire type connection is shown below.⋅ The start self-holding selection becomes valid when the STOP signal is turned on. In this case, the forward/reverserotation signal functions only as a start signal.⋅ If the start signal (STF or STR) is turned on and then off, the start signal is held and makes a start. When changingthe direction of rotation, turn STR (STF) on once and then off.⋅ To stop the inverter, turning off the STOP signal once decelerates it to a stop.StopForwardrotation startReverserotation startSTFSTRInverterStopStartSTFSTOPInverterSTOPSDForward rotation/reverse rotationSTRSDOutput frequencyForwardrotationReverserotationSTFSTRONONTimeOutput frequencyForwardrotationReverserotationSTFSTRONONONTimeSTOPONOFFOFFThree-Wire Type Connection Example (Pr. 250 = "9999") Three-Wire Type Connection Example (Pr. 250 = "8888")STOPONOFFOF<strong>FR</strong>EMARKS⋅ The STOP signal is assigned to the terminal STOP in the initial setting. By setting "25" in Pr. 178 to Pr. 189, the STOP signal canalso be assigned to the other terminal.⋅ When the JOG signal is turned on to enable jog operation, the STOP signal becomes invalid.⋅ If the MRS signal is turned on to stop the output, the self-holding function is not canceled.(3) Start signal selectionSTFSTRPr. 250 Setting Inverter Status0 to 100s, 9999 1000s to 1100s, 8888OFF OFF StopOFF ON Reverse rotationStopON OFF Forward rotation Forward rotationON ON Stop Reverse rotation♦ Parameters referred to ♦Pr. 4 to Pr. 6 (Multi-speed setting) Refer to page 148Pr. 178 to Pr. 189 (Input terminal function selection) Refer to page 206212
4PARAMETERS4.15.5 Magnetic flux decay output shutoff signal (X74 signal)Function assignment of external terminal and controlPerforming frequent start/stop (inching operation) with mechanical brake using output shutoff signal (MRS)during real sensorless vector control may cause an inverter fault (electronic thermal realy function fault: E.THT,etc) due to residual magnetic flux and an error in monitor output (running speed, motor torque, load meter, torquecommand, torque current command, motor output).In such a case, use magnetic flux decay output shutoff signal (X74) as output shutoff signal.Turning X74 signal on shuts off output after decaying motor residual magnetic flux.⋅⋅⋅For the X74 signal, set "74" in any of Pr. 178 to Pr. 189 (input terminal function selection) to assign the function.Operate a mechanical brake after turning X74 signal on.When the MC is provided on the inverter output side, turn X74 signal on and open the MC after magnetic flux decayoperation time (refer to below) has elapsed.Inverter output voltage shutoff timingX74 signalX74ONMagnetic flux decayprocessing time*MRS signalMRSONOutput voltageONOutput voltageONRUNONRUNONMechanical brakeONMechanical brakeONMC on the output sideONMC on the output sideON* Maximum time of magnetic flux decay operationMotor Capacity(Pr. 80 setting) 5.5kW to 11kW 15kW to 30kW 37kW to 55kWMagnetic flux decayprocessing timeDo not turn off MCduring this processing time500ms 800ms 900msREMARKS⋅ When performing operation other than real sensorless vector control, turning X74 signal on immediately shuts off inverteroutput.⋅ During an automatic restart after instantaneous power failure or start-time online auto tuning under real sensorless vectorcontrol, turning X74 signal on immediately shuts off inverter output.⋅ When some other factor affecting output shutoff (inverter alarm, MRS signal on, etc.) occurs during magnetic flux decayoperation, magnetic flux decay operation is stopped to immideately shut off output.⋅⋅⋅CAUTIONChanging the terminal assignment using Pr. 178 to Pr. 189 (input terminal function selection) may affect the other functions. Makesetting after confirming the function of each terminal.Different from MRS signal, voltage is output during magnetic flux decay processing even if X74 signal turns on.If the timing of mechanical brake opening is early, motor shaft may be forced to turn by a gravity drop or external force. If thetiming of mechanical brake opening is late, overcurrent, stall prevention operation or electronic thermal relay function may beactivated. Use output frequency detection signal (FU) or output current detection signal (Y12) to perform the mechanical brakeopening suitable for the machine.213
Function assignment of external terminal and control4.15.6 Output terminal function selection (Pr. 190 to Pr. 196)You can change the functions of the open collector output terminal and relay output terminal.ParameterNumber190191192193194195196NameRUN terminalfunction selectionSU terminal functionselectionIPF terminal functionselectionOL terminal functionselectionFU terminal functionselectionABC1 terminalfunction selectionABC2 terminalfunction selectionOpencollectoroutputterminalRelayoutputterminalInitialValueInitial Signal0 RUN (inverter running)1 SU (up to frequency)2IPF (instantaneous powerfailure, undervoltage)3 OL (overload alarm)4FU (output frequencydetection)99 ALM (fault output)9999 No functionSetting Range0 to 6, 8, 10 to 20, 25 to 28, 30 to36, 39, 41 to 47, 64, 70, 84, 90 to99, 100 to 106, 108, 110 to 116,120, 125 to 128, 130 to 136, 139,141 to 147, 164, 170, 184, 190 to199, 99990 to 6, 8, 10 to 20, 25 to 28, 30 to36, 39, 41 to 47, 64, 70, 84, 85, 90,91, 94 to 99, 100 to 106, 108, 110to 116, 120, 125 to 128, 130 to136, 139, 141 to 147, 164, 170,184, 190, 191, 194 to 199, 9999(1) Output signal list⋅ You can set the functions of the output terminals.⋅ Refer to the following table and set the parameters: (0 to 99: Positive logic, 100 to 199: Negative logic)PositiveLogicSettingNegativeLogicSignalNameFunction0 100 RUN Inverter running1 101 SU Up to frequency *12 102 IPFInstantaneous powerfailure/undervoltage3 103 OL Overload alarm4 104 FU5 105 FU26 106 FU38 108 THPOutput frequencydetectionSecond outputfrequency detectionThird output frequencydetectionElectronic thermalrelay function prealarmOperationOutput during operation when the inverteroutput frequency rises to or above Pr. 13Starting frequency.Output when the output frequency is reachedto the set frequency. *3Output at occurrence of an instantaneouspower failure or when undervoltage protectionis activated.Output while stall prevention function isactivated.Output when the output frequency reachesthe frequency set in Pr. 42 (Pr. 43 for reverserotation). *3Output when the output frequency reachesthe frequency set in Pr. 50. *3Output when the output frequency reachesthe frequency set in Pr. 116. *3Output when the electronic thermal relayfunction cumulative value reaches 85% of thetrip level.(Electronic thermal relay function protection(E.THT/E.THM) activates, when the valuereached 100%.)RelatedParametersRefer toPage⎯ 217Pr. 41 221Pr. 57 239Pr. 22, Pr. 23,Pr. 66, Pr. 148,Pr. 149, Pr. 154135Pr. 42, Pr. 43 221Pr. 50 221Pr. 116 221Pr. 9 16710 110 PU PU operation modeOutput when the PU operation mode isselected.Pr. 79 283Output when the inverter power is turned on,11 111 RYInverter operation then output after reset process is completedready(when the inverter can be started by switching⎯ 217the start signal on or while it is running).12 112 Y12Output when the output current is higher thanOutput currentthe Pr. 150 setting for longer than the time set Pr. 150, Pr. 151detectionin Pr. 151.223Output when the output power is lower than13 113 Y13 Zero current detection the Pr. 152 setting for longer than the time set Pr. 152, Pr. 153in Pr. 153.223214
4PARAMETERSFunction assignment of external terminal and controlPositiveLogicSettingNegativeLogicSignalName14 114 FDN PID lower limit15 115 FUP PID upper limit16 116 RLFunctionPID forward/reverserotation outputOperationOutput when the feedback value falls belowthe lower limit of PID control.Output when the feedback value rises abovethe upper limit of PID controlOutput when forward rotation is performed inPID control.RelatedParametersPr. 127 to Pr. 134,Pr. 575 to Pr. 577Refer toPage32917 ⎯ MC1 Electronic bypass MC1 Used when the commercial power supplyinverterswitchover function is used. Pr. 159Pr. 135 to Pr. 139,18 ⎯ MC2 Electronic bypass MC219 ⎯ MC3 Electronic bypass MC333720 120 BOF Brake opening requestOutput to open the brake when the brake Pr. 278 to Pr. 285,sequence function is selected.Pr. 29219225 125 FAN Fan fault output Output at the time of a fan fault. Pr. 244 353Output when the heatsink temperaturereaches about 85% of the heatsink overheat⎯ 380protection providing temperature.26 126 FINHeatsink overheat prealarm27 127 ORA Orientation complete28 128 ORM Orientation faultWhen orientation is valid *4Pr. 350 to Pr. 366,Pr. 369, Pr. 393,Pr. 396 to Pr. 39930 130 Y30Forward rotation Output when the motor is running in forwardoutputdirection. *421931 131 Y31Reverse rotation Output when the motor is running in reverseoutputdirection. *4⎯21932 132 Y32Regenerative status Output in the regenerative status underoutputvector control operation. *421933 133 RY2 Operation ready 2Output during pre-exitation or operation underreal sensorless vector control.⎯ 21734 134 LS Low speed outputOutput when the output frequency reducesPr. 865below the Pr. 865 setting.22135 135 TU Torque detectionOutput when the motor torque rises abovePr. 864the Pr. 864 value.22436 136 Y36 In-positionOutput when the number of droop pulses hasPr. 426fallen below the setting value. *412339 139 Y39Start time tuningcompletionOutput on completion of start-time tuning. Pr. 95, Pr. 574 18141 141 FB Speed detectionOutput when the actual motor speedSecond speedPr. 42, Pr. 50,42 142 FB2(estimated actual speed value) reaches thedetectionPr. 116Pr. 42 (Pr. 50, Pr.116) setting.43 143 FB3 Third speed detection22144 144 RUN2 Inverter running 2⋅ Output during forward rotation or thereverse rotation signal is on.⋅ Output at deceleration even during forwardrotation or the reverse rotation signal is off.(Does not output during pre-excitation LX ison.)⎯ 217⋅ Output during the orientation commandsignal (X22) is on.⋅ Switched on when the servo is on (LX-ON)under position control. (Switched off whentne servo is off (LX-OFF))45 145 RUN3Inverter running and Output when the inverter is running and startstart command is on command is on.⎯ 21746 146 Y46During deceleration atoccurrence of powerOutput when the power failure-timedeceleration function is executed.Pr. 261 to Pr. 266 243failure(retained until release)47 147 PIDDuring PID controlPr. 127 to Pr. 134,Output during PID control.activatedPr. 575 to Pr. 57732964 164 Y64 During retry Output during retry processing. Pr. 65 to Pr. 69 24670 170 SLEEPOutput when the PID output interruption Pr. 127 to Pr. 134,PID output interruptionfunction is executed.Pr. 575 to Pr. 57732984 184 RDYPosition control Output when the servo is on (LX-ON) and Pr. 419, Pr. 428 topreparation ready ready to operate. *4Pr. 430120195215
Function assignment of external terminal and controlPositiveLogicSettingNegativeLogicSignalName90 190 Y90 Life alarm91 191 Y9192 192 Y9293 193 Y93FunctionFault output 3(power-off signal)Energy saving averagevalue updated timingCurrent average valuemonitor signal94 194 ALM2 Fault output 295 195 Y95Maintenance timersignal96 196 REM Remote output97 197 ER Alarm output 298 198 LF Alarm output99 199 ALM Fault outputOperationOutput when any of the control circuitcapacitor, main circuit capacitor and inrushcurrent limit circuit or the cooling fanapproaches the end of its service life.Output when a fault occurs due to the circuitfailure of the inverter wiring mistake.Turned on and off alternately every time thepower saving average value is updated whenthe power saving monitor is used.Cannot be set to Pr. 195 and Pr. 196 (relayoutput terminal).Average current value and maintenance timervalue are output as pulses.Cannot be set to Pr. 195 and Pr. 196 (relayoutput terminal).Output when the fault occurs. Continueoutputting the signal during inverter reset andstop outputting after reset status is finished. *2Output when Pr. 503 rises to or above the Pr.504 setting.Output to the terminal when a value is set tothe parameter.When Pr. 875 = "0" (initial value), the signal isoutput when the fault occurs.When Pr. 875 = "1", the signal is output whenthe inverter protective function is activated atoccurrence of OHT/THM/PTC fault anddeceleration is started.Output when other protective functions areactivated and the inverter trips.Output when an alarm (fan failure orcommunication error warning) occurs.Output when the fault occurs. The signaloutput is stopped when the fault is reset.RelatedParametersPr. 255 to Pr. 259 354Pr. 52, Pr. 54,Pr. 158, Pr. 891 toPr. 899⎯ 220252Pr. 555 to Pr. 557 358⎯ 220Pr. 503, Pr. 504 357Pr. 495 to Pr. 497 225Pr. 875 250Pr. 121, Pr. 244 302, 353⎯ 2209999 ⎯ No function ⎯ ⎯ ⎯Refer toPage*1 Note that when the frequency setting is varied using an analog signal or of the operation panel (<strong>FR</strong>-DU07), the output of the SU (up tofrequency) signal may alternate on and off depending on that varying speed and the timing of the varying speed due to acceleration/decelerationtime setting. (The output will not alternate on and off when the acceleration/deceleration time setting is "0s".)*2 When a power supply reset is performed, the fault output 2 signal (ALM2) turns off as soon as the power supply switches off.*3 Up to frequency SU, frequency detection FU, FU2, FU3 under encoder feed back control or vector control (option <strong>FR</strong>-A7AP is mounted) signalsare as below.SU, FU: Output when the actual speed (frequency) by the encoder feedback signal exceeds detected specification frequency.FU2, FU3: Output when the inverter output frequency exceeds detected specification frequency.*4 This function is valid when the <strong>FR</strong>-A7AP (option) is mounted.REMARKS⋅ The same function may be set to more than one terminal.⋅ When the function is executed, the terminal conducts at the setting of any of "0" to "99", and does not conduct at the setting ofany of "100" to "199".⋅ When Pr. 76 Fault code output selection = "1", the output signals of the terminals SU, IPF, OL and FU are switched as set in Pr. 76.(When an inverter fault occurs, the signal output is switched to the fault code output.)⋅ The output assignment of the terminal RUN and alarm output relay are as set above regardless of Pr. 76.⋅⋅CAUTIONChanging the terminal assignment using Pr. 190 to Pr. 196 (output terminal function selection) may affect the other functions.Please make setting after confirming the function of each terminal.Do not assign signals which repeat frequent ON/OFF to A1, B1, C1, A2, B2, C2. Otherwise, the life of the relay contactdecreases.216
4PARAMETERSFunction assignment of external terminal and control(2) Inverter operation ready signal (RY, RY2 signal) and inverter running signal (RUN, RUN2,RUN3 signal)Under V/F control, advanced magnetic fluxvector controlPowersupplyOutput frequencyST<strong>FR</strong>HRYRUN(RUN2)RUN3ONPr. 13StartingfrequencyResetprocessingONONONONONOFFDC injection brakeoperation pointOFFDC injectionbrakeoperationOFFOFFTimeOFF⋅⋅⋅When the inverter is ready to operate, the output of theoperation ready signal (RY) is on. (It is also on during inverterrunning.)When the output frequency of the inverter rises to or abovePr. 13 Starting frequency, the output of the inverter runningsignals (RUN, RUN2) is turned on. During an inverter stop orDC injection brake operation, the output is off.For the RUN3 signal, output is on while the inverter runningand the start signal is on.(For the RUN3 signal, output is on if the starting command ison even when a fault occurrs or the MRS signal is on.)The output is on during DC injection brake operation and offduring an inverter stop.InverterStatusOutputSignalStartSignal isOFF(duringstop)StartSignal isON(duringstop)StartSignal isON(duringrunning)*1 This signal turns off during power failure or undervoltage.Under DCInjectionBrakeAt Alarm Occurrenceor MRS Signal is on(output shutoff)Start signalis ONStart signalis OFFAutomatic Restart afterInstantaneous Power FailureCoastingStart signalis ONStart signalis OF<strong>FR</strong>estartingRY ON ON ON ON OFF ON *1 ONRY2 OFF OFF OFF OFF OFF OFF OF<strong>FR</strong>UN OFF OFF ON OFF OFF OFF ONRUN2 OFF OFF ON OFF OFF OFF ONRUN3 OFF ON ON ON ON OFF ON OFF ON217
Function assignment of external terminal and controlPowersupplyST<strong>FR</strong>HMRSOutput frequencyRYRY2RUNRUN2RUN3Under real sensor less vector control,vector controlONResetprocessingONPre-excitation(0 speed control)ONONONONPr. 13ONONONOFFOFFOFFOFFOFFOFFOFFTime⋅⋅⋅⋅⋅⋅When the inverter is ready to operate, the output of theoperation ready signal (RY) is on.(It is also on during inverter running.)When the inverter output frequency rises to or above the Pr.13 Starting frequency setting, the output of the inverter runningsignal (RUN) is turned on. During an inverter stop, DCinjection brake operation, start time tuning or pre-excitation,the output is off.For the RUN2 signal, the output is on while the inverter isrunning and the start signal is on. (For the RUN2 signal, theoutput is off when the inverter protective function is activatedand the MRS signal is on.)For the RUN3 signal, the output is on while the inverter isrunning and the start signal is on.The RUN2 and RUN3 signals are on when the start commandis on and even during pre-excitation with "0" set in speedcommand. (Note that the RUN2 signal turns off during preexcitationby turning the LX signal on.)The RY2 signal turns on at the start of pre-excitation.The signal is on while pre-excitation is activated even duringan inverter stop. The signal turns off while the output is shutoff (MRS signal).REMARKSFor pre-excitation by pre-excitation signal (LX), the RY2 signalturns on when 100ms has elapsed after LX signal turn on.LXRY2ON100msONInverterStatusOutputSignalStartSignalis OFF(duringstop)StartSignal isON *1(preexcitation)StartSignal isON(duringrunning)LX Signalis ON(preexcitation)DCInjectionBrakeOperation(preexcitation)*1 Pre-excitation is made when the start signal is ON and frequency command is 0Hz.*2 This signal turns OFF during power failure or undervoltage.*3 There is a delay of 100ms when the signal is ON.*4 This signal turns ON during servo ON (LX signal is ON) under position control.At AlarmOccurrence orMRS Signal is on(output shutoff)Startsignal isONStartsignal isOFFAutomatic Restart afterInstantaneous Power FailureStartsignal isONCoastingStartsignal isOF<strong>FR</strong>estartingRY ON ON ON ON ON OFF ON *2 ONRY2 OFF ON ON ON *3 ON OFF OFF OF<strong>FR</strong>UN OFF OFF ON OFF OFF OFF OFF ONRUN2 OFF ON ON OFF *4 OFF OFF OFF ONRUN3 OFF ON ON ON ON ON OFF ON OFF ONOutputSignalPr. 190 to Pr. 196 SettingPositive logicNegative logicRY 11 111RY2 33 133RUN 0 100RUN2 44 144RUN3 45 145REMARKS⋅ The RUN signal is assigned to the terminal RUN in the initial setting.⋅When using the RY, RY2, RUN, RUN2 and RUN3 signals, assignfunctions to Pr. 190 to Pr. 196 (output terminal selection function)referring to the table on the left.218
4PARAMETERS(3) Forward rotation and reverse rotation signal (Y30, Y31 signal)ActualmotorspeedY30Y31(4) Regenerative mode output signal (Y32 signal)⋅⋅⋅⋅Function assignment of external terminal and controlThe status during forward rotation (Y30) and reverserotation (Y31) are output from the actual motor speedunder vector control.Y30 and Y31 signals turn off during pre-excitation (zerospeed, servo lock) under speed control or torquecontrol operation. Note that signals are outputaccording to the motor rotation during servo lock underposition control as same as inverter running.When using the Y30 signal, set "30 (positive logic) or130 (negative logic)" to any of Pr. 190 to Pr. 196 (outputterminal function selection) to assign the function to theoutput terminal.When using the Y31 signal, set "31 (positive logic) or131 (negative logic)" to any of Pr. 190 to Pr. 196 (outputterminal function selection) to assign the function to theoutput terminal.REMARKS⋅ This signal is always off during V/F control, advanced magnetic flux vector control or real sensorless vector control.⋅ If the motor is made to run by external force, etc. during an inverter stop, Y30 and Y31 remain OFF.⋅ The <strong>FR</strong>-A7AP (option) is necessary for vector control.Driving+Regeneration-Y32ForwardrotationONONPre-excitationReverserotationOFFONLess than 100msONTimeTimeSignal is retained for 100ms.⋅⋅⋅While the motor is in regenerative status (motor is inpower regenerative status), the regenerative statusoutput signal (Y32) is turned on.If the signal is turned on once, it will be retained for atleast 100ms.It turns off while the inverter is stopped and during preexcitation.When using the Y32 signal, set "32 (positive logic) or132 (negative logic)" to any of Pr. 190 to Pr. 196 (outputterminal function selection) to assign the function to theoutput terminal.REMARKS⋅ This signal is always off during V/F control, advanced magnetic flux vector control or real sensorless vector control.⋅ The <strong>FR</strong>-A7AP (option) is necessary for vector control.219
Function assignment of external terminal and control(5) Fault output signal (ALM, ALM2 signal)Output frequencyALMALM2RESInverter fault occurrence(trip)ON OFFONOFFON OF<strong>FR</strong>eset processing(about 1s)Reset ONTime⋅ If the inverter comes to trip, the ALM and ALM2 signals areoutput.⋅ The ALM2 signal remains on during a reset period after faultoccurrence.⋅ When using the ALM2 signal, set "94 (positive logic)" or "194(negative logic)" to any of Pr. 190 to Pr. 196 (output terminalfunction selection) to assign the function to the outputterminal.⋅ The ALM signal is assigned to the A1B1C1 contact in theinitial setting.REMARKSRefer to page 374 for the inverter fault description.(6) Input MC shutoff signal (Y91 signal)⋅ The Y91 signal is output at occurrence of a fault attributable to the failure of the inverter circuit or a fault caused bya wiring mistake.⋅ When using the Y91 signal, set "91 (positive logic)" or "191 (negative logic)" to any of Pr. 190 to Pr. 196 (outputterminal function selection) to assign the function to the output terminal.⋅ The following table indicates the faults that will output the Y91 signal. (Refer to page 374 for the fault description.)No.Fault Description1 Inrush current limit circuit fault (E.IOH)2 CPU error (E.CPU)3 CPU error (E.6)4 CPU error (E.7)5 Parameter storage device fault (E.PE)6 Parameter storage device fault (E.PE2)7 24VDC power output short circuit (E.P24)Operation panel power supply short circuit, RS-485 terminal8power supply short circuit(E.CTE)9 Output side earth(ground) fault overcurrent protection(E.GF)10 Output phase loss (E.LF)♦ Parameters referred to ♦Pr. 13 Starting frequency Refer to page 157 .Pr. 76 Fault code output selection Refer to page 248220
4PARAMETERSFunction assignment of external terminal and control4.15.7 Detection of output frequency (SU, FU, FU2 , FU3, FB, FB2, FB3, LS signal,Pr. 41 to Pr. 43, Pr. 50, Pr. 116, Pr. 865)The inverter output frequency is detected and output to the output signal.ParameterNumberNameInitialValueSettingRangeDescription41 Up-to-frequency sensitivity 10% 0 to 100% Set the level where the SU signal turns on.42 Output frequency detection 6Hz 0 to 400Hz Set the frequency where the FU (FB) signal turns on.4350116Output frequency detectionfor reverse rotationSecond output frequencydetectionThird output frequencydetection99990 to 400HzSet the frequency where the FU (FB) signal turns onin reverse rotation.9999 Same as Pr. 42 setting30Hz 0 to 400Hz60Hz0 to 400HzSet the frequency where the FU2 (FB2) signal turnson.Set the frequency where the FU3 (FB3) signal turnson.865 Low speed detection 1.5Hz 0 to 400Hz Set the frequency where the LS signal turns on.Output frequency(Hz)SUOFFSet frequencyONAdjustmentrange Pr.41OFFTime(1) Up-to-frequency sensitivity (SU signal, Pr. 41)⋅ When the output frequency reaches the set frequency, the up-to-frequencysignal (SU) is output.⋅ The Pr. 41 value can be adjusted within the range ±1% to ±100% on theassumption that the set frequency is 100%.⋅ This parameter can be used to ensure that the set frequency has beenreached to provide the operation start signal etc. for related equipment.(2) Output frequency detection (FU (FB) signal, FU2 (FB2) signal, FU3 (FB3) signal, Pr. 42, Pr. 43,Pr. 50, Pr. 116)⋅ When the output frequency rises to or above the Pr. 42 setting, the output frequency detection signal (FU, FB) isoutput.⋅ This function can be used for electromagnetic brake operation, open signal, etc.⋅ The FU (FU2, FU3) signal is output when the output frequency reaches the set frequency. While the FB (FB2, FB3)signal is output when the actual rotation detection speed (during real sensorless vector control : speed estimatedvalue, during vector control : feedback value) of the motor reaches the set frequency. The FU signal and FB signalare output simultaneously during V/F control and advanced magnetic flux vector control.⋅ When the detection frequency is set in Pr. 43, frequency detection used exclusively for reverse rotation can also beset. This function is effective for switching the timing of electromagnetic brake operation between forward rotation(rise) and reverse rotation (fall) during elevator operation, etc.⋅ When Pr. 43 ≠ "9999", the Pr. 42 setting applies to forward rotation and the Pr. 43 setting applies to reverse rotation.⋅ When outputting a frequency detection signal besides the FU signal, set the detection frequency in Pr. 50 or Pr. 116.The FU2 (FB2) signal (FU3(FB3) signal if Pr. 116 or more) is output when the output frequency reaches or exceedsthe Pr. 50 setting.⋅ For each signal, assign functions to Pr. 190 to Pr. 196 (output terminal function selection) referring to the table below.Output frequency(Hz)OutputsignalFU/FBOFFForwardrotationONPr.116Pr.50Pr.42OF<strong>FR</strong>everserotationONPr.43Pr.50Pr.116OFFTimeParameterNumber42, 4350116OutputSignalPr. 190 to Pr. 196SettingPositivelogicNegativelogicFU 4 104FB 41 141FU2 5 105FB2 42 142FU3 6 106FB3 43 143FU2/FB2OFFONOFFONOFFFU3/FB3OFFONOFFONOFF221
Function assignment of external terminal and control(3) Low speed detection (LS signal, Pr. 865)Output frequency(Hz)LSPr.865ONOFFONTime⋅ The low speed detection signal (LS) is output when theoutput frequency reduces below the Pr. 865 Low speeddetection setting.⋅ When speed control is performed by real sensorlessvector control or vector control, a fault (E.OLT) isdisplayed and the inverter trips if frequency drops to thePr. 865 setting by torque limit operation and the outputtorque exceeds Pr. 874 OLT level setting and remains formore than 3s.⋅ For the LS signal, set "34 (positive logic) or 134 (negativelogic)" in Pr. 190 to Pr. 196 (output terminal functionselection) and assign functions to the output terminal.REMARKS⋅ The FU signal is assigned to the terminal FU and the SU signal is assigned to the terminal SU in the initial setting.⋅ All signals are OFF during DC injection brake, pre-excitation (zero speed control, servo lock), or start time tuning.⋅ The output frequency to be compared with the set frequency at the SU signal and LS signal differs according to the controlmethod.Control MethodV/F controlAdvanced magneticflux vector controlReal sensorlessvector controlEncoder feedbackcontrol, vector controlCompared Output FrequencyOutput frequencyOutput frequency before slip compensationFrequency (actual motor speed) estimated valueValue of actual motor rotation represented in termsof frequency setting⋅CAUTIONChanging the terminal assignment using Pr. 190 to Pr. 196 (output terminal function selection) may affect the other functions.Please make setting after confirming the function of each terminal.♦ Parameters referred to ♦Pr. 190 to Pr. 196 (output terminal function selection) Refer to page 214Pr. 874 OLT level setting Refer to page 83222
4PARAMETERS4.15.8 Output current detection function(Y12 signal, Y13 signal, Pr. 150 to Pr. 153, Pr. 166, Pr. 167)Function assignment of external terminal and controlThe output power during inverter running can be detected and output to the output terminal.ParameterNumber150151Name Initial Value Setting Range DescriptionOutput current detectionlevelOutput current detectionsignal delay time150% 0 to 220%0s 0 to 10s152 Zero current detection level 5% 0 to 220%153 Zero current detection time 0.5s 0 to 1s166167Output current detectionsignal retention timeOutput current detectionoperation selection0.1s00 to 10s999901Set the output current detection level. 100%is the rated inverter current.Set the output current detection period. Setthe time from when the output current hasrisen above the setting until the output currentdetection signal (Y12) is output.Set the zero current detection level. The ratedinverter current is assumed to be 100%.Set this parameter to define the period fromwhen the output current drops below the Pr.152 value until the zero current detectionsignal (Y13) is output.Set the retention time when the Y12 signal ison.The Y12 signal on status is retained. Thesignal is turned off at the next start.Operation continues when the Y12 signal isonThe inverter is brought to an alarm stop whenthe Y12 signal is on. (E.CDO)Pr. 166 9999, Pr. 167 = 0(1) Output current detection (Y12 signal, Pr. 150, Pr.151, Pr. 166, Pr. 167 )Pr. 150Output currentOutput currentdetection signal(Y12)Pr. 151Pr. 166Minimum 0.1s(initial value)TimeOFF ON OFF⋅ The output current detection function can be used for excessivetorque detection, etc.⋅ If the output current remains higher than the Pr. 150 setting duringinverter operation for longer than the time set in Pr. 151, theoutput current detection signal (Y12) is output from the inverter'sopen collector or relay output terminal.⋅ When the Y12 signal turns on, the ON state is held for the timeset in Pr. 166 .⋅ When Pr. 166 = "9999", the ON state is held until a next start.⋅ At the Pr. 167 setting of "1", the inverter trips and the outputcurrent detection fault (E.CDO) is displayed when the Y12 signalturns on. When fault occurs, the Y12 signal is on for the time setin Pr. 166 at the Pr. 166 setting of other than "9999", and remainson until a reset is made at the Pr. 166 setting of "9999". E.CDOdoes not occur even if "1" is set in Pr. 167 while Y12 is ON. ThePr. 167 setting is made valid after Y12 turns OFF.⋅ Set "12 (positive logic)" or "112 (negative logic)" to any of Pr. 190to Pr. 196 (output terminal function selection) to assign the functionof the Y12 signal to the output terminal.223
Function assignment of external terminal and controlOutputcurrentPr.1520[A]Start signalZero currentdetection time(Y13)OFFPr.152ONOFFONPr. 153Detection time(2) Zero current detection (Y13 signal, Pr. 152, Pr. 153)⋅ If the output current remains lower than the Pr. 152 settingduring inverter operation for longer than the time set in Pr.153, the zero current detection (Y13) signal is output fromthe inverter's open collector or relay output terminal.⋅ When the inverter's output current falls to "0", torque will notbe generated. This may cause a drop due to gravity whenthe inverter is used in vertical lift application. To prevent this,the Y13 signal can be output from the inverter to close themechanical brake when the output current has fallen to"zero".⋅ Set "13 (positive logic)" or "113 (negative logic)" in any of Pr.190 to Pr. 196 (output terminal function selection) to assign thefunction of the Y13 signal to the output terminal.CAUTION⋅ This function is also valid during execution of the online or offline auto tuning.⋅ The response time of Y12 and Y13 signals is approximately 0.1s. Note that the response time changes according to the loadcondition.When Pr. 152 = "0", detection is disabled.⋅ Changing the terminal assignment using Pr. 190 to Pr. 196 (output terminal function selection) may affect the other functions.Please make setting after confirming the function of each terminal.CAUTIONThe zero current detection level setting should not be too high, and the zero current detection time setting not toolong. Otherwise, the detection signal may not be output when torque is not generated at a low output current.To prevent the machine and equipment from resulting in hazardous conditions by use of the zero currentdetection signal, install a safety backup such as an emergency brake.♦ Parameters referred to ♦0.1s*OFFTimeOnline auto tuning Refer to page 181Offline auto tuning Refer to page 171Pr. 190 to Pr. 196 (output terminal function selection) Refer to page 214ONPr. 153Detection time* Once turned on, the zero current detection timesignal (Y13) is held on for at least 0.1s.4.15.9 Detection of output torque (TU signal, Pr. 864)SensorlessOutput the signal when the motor torque rises above the setting value.This function can be used for electromagnetic brake operation, open signal, etc.Magnetic fluxVectorParameterNumberName Initial Value Setting Range Description864 Torque detection 150% 0 to 400%Set the torque value where the TUsignal turns on.⋅Output torque (%)TUPr.864ONOFFTime⋅⋅When the output torque reaches or exceeds the detectedtorque value set in Pr. 864 under real sensorless vectorcontrol, advanced magnetic flux vector control or vectorcontrol, the torque detection signal (TU) turns on.It turns off when the torque falls below the detectiontorque value.For the TU signal, set "35 (positive logic) or 135 (negativelogic)" in Pr. 190 to Pr. 196 (output terminal functionselection) and assign functions to the output terminal.CAUTIONChanging the terminal assignment using Pr. 190 to Pr. 196 (output terminal function selection) may affect the other functions.Please make setting after confirming the function of each terminal.♦ Parameters referred to ♦Pr. 190 to Pr. 196 (output terminal function selection) Refer to page 214224
4PARAMETERS4.15.10 Remote output function (REM signal, Pr. 495 to Pr. 497)Function assignment of external terminal and controlYou can utilize the on/off of the inverter's output signals instead of the remote output terminal of theprogrammable logic controller.ParameterNumberNameInitialValue495 Remote output selection 0SettingRangeDescription0 Remote output data clear at powering off Remote output data1Remote output data retention even at clear at inverterpowering offreset10 Remote output data clear at powering off Remote output data11Remote output data retention even atpowering offretention at inverterreset496 * Remote output data 1 0 0 to 4095 Refer to the following diagram.497 * Remote output data 2 0 0 to 4095* The above parameters allow its setting to be changed during operation in any operation mode even if "0" (initial value) is set in Pr.77 Parameter write selection.Pr. 496b11*1Pr. 497b11*1*1*1*1RA3 *3*1RA2 *3*1RA1 *3ABC2Y6 *2*1 As desired*2 Y0 to Y6 are available only when the extension output option (<strong>FR</strong>-A7AY)is fitted*3 RA1 to RA3 are available only when the relay output option (<strong>FR</strong>-A7AR) isfittedABC1Y5 *2FUY4 *2OLY3 *2IPFY2 *2SUY1 *2b0RUNb0Y0 *2⋅⋅⋅The output terminal can be turned on/off depending onthe Pr. 496 or Pr. 497 setting. The remote outputselection can be controlled on/off by computer linkcommunication from the PU connector or RS-485 portor by communication from the communication option.Set "96" (positive logic) or "196" (negative logic) to anyof Pr. 190 to Pr. 196 (output terminal function selection),and assign the remote output (REM) signal to theterminal used for remote output,When you refer to the diagram on the left and set 1 tothe terminal bit (terminal where the REM signal hasbeen assigned) of Pr. 496 or Pr. 497, the output terminalturns on (off for negative logic). By setting 0, the outputterminal turns off (on for negative logic).Example)When "96" (positive logic) is set in Pr. 190 RUN terminal function selection and "1" (H01) is set in Pr. 496,the terminal RUN turns on.ON/OFF example for positive logic ⋅ When Pr. 495 = "0 (initial value), 10", performing a powerPr. 495 = 0, 10 Pr. 495 = 1, 11supply reset (including a power failure) clears the REM signaloutput. (The ON/OFF status of the terminals are as set in Pr.Power OFF Power OFF190 to Pr. 196.) The Pr. 496 and Pr. 497 settings are also "0".supplysupplyInverter When Pr. 495 = "1, 11", the remote output data before powerreset time supply-off is stored into the EEPROM, so the signal output at(about 1s)REMOFF REMONpower recovery is the same as before power supply-off.However, it is not stored when the inverter is reset (terminalREM signal clear REM signal held reset, reset request through communication).(See the chart on the left)⋅ When Pr. 495 = "10, 11", the signal before reset is held evenan inverter reset is made.REMARKS⋅ The output terminal where the REM signal is not assigned using any of Pr. 190 to Pr. 196 does not turn on/off if 0/1 is set to theterminal bit of Pr. 496 or Pr. 497 . (It turns on/off with the assigned function.)⋅ When the inverter is reset (terminal reset, reset request through communication), Pr. 496 and Pr. 497 values turn to "0". When Pr.495 = "1, 11", however, they are the settings at power supply-off. (The settings are stored at power supply-off.) When Pr. 495 ="10, 11", they are the same as before an inverter reset is made.CAUTION⋅ When Pr. 495 = "1" (remote output data retention even at powering off), take such a step as to connect R1/L11, S1/L21 and P/+,N/- to ensure that control power will be retained to some degree. If you do not take such a step, the output signals provided afterpower-on are not guaranteed.♦ Parameters referred to ♦⋅ Pr. 190 to Pr. 196 (output terminal function selection) Refer to page 214225
Monitor display and monitor output signal4.16 Monitor display and monitor output signalDisplay motor speedSet speedPurpose Parameter that must be Set Refer to PageChange PU monitor display dataChange of the monitor outputfrom terminal FM and AMSet the reference of the monitoroutput from terminal FM and AMAdjust terminal FM, AM outputsSpeed display and speedsettingDU/PU main display dataselectionCumulative monitor clearTerminal FM, AM functionselectionSetting of reference ofterminal FM and AMTerminal FM, AMcalibrationPr. 37, Pr. 144, Pr. 505, Pr. 811 226Pr. 52, Pr. 170, Pr. 171, Pr. 268, Pr. 891 228Pr. 54, Pr. 158, Pr. 291, Pr. 866, Pr. 867 228Pr. 55, Pr. 56, Pr. 291, Pr. 866, Pr. 867 233Pr. 900, Pr. 901 2364.16.1 Speed display and speed setting (Pr. 37, Pr. 144, Pr. 505, Pr. 811)You can change the PU (<strong>FR</strong>-DU07/<strong>FR</strong>-PU04/<strong>FR</strong>-PU07) monitor display or frequency setting to motor speed ormachine speed.ParameterNumberNameInitialValue37 Speed display 0SettingRangeDescription0 Frequency display, setting1 to 9998* Set the machine speed at Pr. 505.144 Speed setting switchover 40, 2, 4, 6, 8,10, 102, 104, Set the number of motor poles when displaying the motor speed.106, 108, 110505 Speed setting reference 60Hz 1 to 120Hz Set the reference speed for Pr. 37.811 Set resolution switchover 0Speed setting and runningspeed monitor increments fromthe PU, RS-485 communicationor communication option.0 1r/min1 0.1r/min10 1r/min11 0.1r/minTorque limit setting incrementsPr. 22, Pr. 812 to Pr. 817* The maximum value of the setting range differs according to the Pr. 1 Maximum frequency and Pr. 505 Speed setting reference settingsand it can be calculated from the following formula.0.1%0.01%Maximum setting value of Pr. 37
4PARAMETERSMonitor display and monitor output signal⋅ To display the machine speed, set in Pr. 37 the machine speed for operation with frequency set in Pr. 505.For example, when Pr. 505 = "60Hz" and Pr. 37 = "1000", "1000" is displayed on the running speed monitor when therunning frequency is 60Hz. When running frequency is 30Hz, "500" is displayed.⋅ When displaying the motor speed, set the number of motor poles (2, 4, 6, 8, 10) or number of motor poles + 100(102, 104, 106, 108, 110) in Pr. 144.⋅ The Pr. 144 setting is automatically changed if the number of motor poles is set in Pr. 81 Number of motor poles. The Pr.81 setting is not automatically changed even if the setting of Pr. 144 is changed.Example 1) When the initial setting of Pr. 81 is changed to "2" or "12", the Pr. 144 setting changes from "4" to "2".Example 2) When Pr. 144 = "104", setting "2" in Pr. 81 changes the Pr. 144 setting from "104" to "102".⋅ When "1, or 11" is set in Pr. 811, the setting increments of speed setting from the PU, speed setting from RS-485communication or communication options (other than <strong>FR</strong>-A7ND, <strong>FR</strong>-A7NL) and running speed monitor is 0.1r/min.⋅ When both Pr. 37 and Pr. 144 have been set, their priorities are as given below.Pr. 144, 102 to 110 > Pr. 37, 1 to 9998 > Pr. 144, 2 to 10⋅ When the running speed monitor is selected, each monitor and setting are determined by the combination of Pr. 37and Pr. 144 as listed below. (The units within the thick frame are the initial values.)Pr. 37Setting0(initialvalue)Pr. 144SettingOutput FrequencyMonitorSet FrequencyMonitorRunning SpeedMonitorFrequency SettingParameter Setting0 Hz Hz r/min *1 Hz2 to 10 Hz Hz r/min *1 Hz102 to 110 r/min *1 r/min *1 r/min *1 r/min *10 Hz Hz Machine speed *1 Hz1 to 9998 2 to 10 Machine speed *1 Machine speed *1 Machine speed *1 Machine speed *1102 to 110 Hz Hz r/min *1 Hz*1 Motor speed r/min conversion formula............ frequency × 120/number of motor poles (Pr. 144)Machine speed conversion formula................... Pr. 37 × frequency/Pr. 505For Pr. 144 in the above formula, the value is "Pr. 144 - 100" when "102 to 110" is set in Pr. 144 and the value is "4" when Pr. 37 = 0 and Pr. 144 = 0.*2 Hz is in 0.01Hz increments, machine speed is in 1 increments, and r/min is in 1r/min increments (depending on Pr. 811 ).*3 Pr. 505 is always set as frequency (Hz).⋅⋅⋅⋅⋅⋅⋅CAUTIONUnder V/F control, the output frequency of the inverter is displayed in terms of synchronous speed, and therefore, displayedvalue = actual speed + motor slip. This display changes to the actual speed (estimated value calculated based on the motorslip) when the advanced magnetic flux vector control or real sensorless vector control is selected, and actual speed from theencoder is displayed when encoder feed back control or vector control is performed.When the running speed display is selected at the setting of Pr. 37 = "0" and Pr. 144 = "0", the monitor display is provided on theassumption that the number of motor poles is 4. (1800r/min is displayed at 60Hz)Refer to Pr. 52 when you want to change the PU main monitor (PU main display).Since the panel display of the operation panel (<strong>FR</strong>-DU07) is 4 digits in length, the monitor value of more than "9999" isdisplayed "----".After setting the running speed in 0.1r/min increments (Pr. 811 = "1, 11"), changing the setting increments to 1r/min increments(Pr. 811 = "0, 10") changes the speed resolution from 0.1r/min to 0.3r/min (four poles), which may round down 0.1r/minincrements.When the machine speed is displayed on the <strong>FR</strong>-PU04/<strong>FR</strong>-PU07, do not change the speed by using an up/down key in thestate where the set speed exceeding 65535 is displayed. The set speed may become arbitrary value.When an optional <strong>FR</strong>-A7ND or <strong>FR</strong>-A7NL card is mounted, frequency is displayed regardless of Pr. 37 and Pr. 144 setting.CAUTIONMake sure that the settings of the running speed and number of motor poles are correct. Otherwise, the motormight run at extremely high speed, damaging the machine.♦ Parameters referred to ♦Pr. 1 Maximum frequency Refer to page 140Pr. 52 DU/PU main display data selection Refer to page 228Pr. 80 Motor capacity, Pr. 81 Number of motor poles Refer to page 131Pr. 800 Control method selection Refer to page 75Pr. 811 Set resolution switchover Refer to page 83227
Monitor display and monitor output signal4.16.2 DU/PU, FM, AM terminal monitor display selection (Pr. 52, Pr. 54, Pr. 158, Pr. 170,Pr. 171, Pr. 268, Pr. 563, Pr. 564, Pr. 891)The monitor to be displayed on the main screen of the operation panel (<strong>FR</strong>-DU07)/parameter unit (<strong>FR</strong>-PU04/<strong>FR</strong>-PU07) can be selected.In addition, signals to be output from the terminal FM (pulse train output) and AM (analog voltage output) can beselected.ParameterNumber52*54*158*(1) Monitor description list (Pr. 52)Name Initial Value Setting Range DescriptionDU/PU main display dataselectionFM terminal functionselectionAM terminal functionselection0(outputfrequency)1(outputfrequency)170 Watt-hour meter clear 99990, 5 to 8, 10 to14, 17 to 20, 22to 25,32 to 35, 50 to57, 1001 to 3, 5 to 8, 10to 14, 17, 18, 21,24, 32 to 34, 50,52, 53Select the monitor to be displayed on theoperation panel and parameter unit.Refer to the following table for monitor description.Select the monitor output to terminal FM.Select the monitor output to terminal AM.0 Set "0" to clear the watt-hour meter monitor.⋅ Set the monitor to be displayed on the operation panel (<strong>FR</strong>-DU07) and parameter unit (<strong>FR</strong>-PU04/<strong>FR</strong>-PU07) in Pr.52 DU/PU main display data selection.⋅ Set the monitor to be output to the terminal FM (pulse train output) in Pr. 54 FM terminal function selection.⋅ Set the monitor to be output to the terminal AM (analog voltage output (0 to 10VDC voltage output)) in Pr. 158 AMterminal function selection.⋅ Refer to the following table and set the monitor to be displayed. (The signals marked × cannot be selected formonitoring)109999171 Operation hour meter clear 9999 0, 9999268*563564891Monitor decimal digitsselectionEnergization timecarrying-over timesOperating time carryingovertimesCumulative power monitordigit shifted times9999009999Set the maximum value when monitoring fromcommunication to 0 to 9999kWh.Set the maximum value when monitoring fromcommunication to 0 to 65535kWh.Set "0" to clear the operation time monitor.Setting "9999" has no effect.0 Displayed as integral value1 Displayed in 0.1 increments9999 No function0 to 65535(reading only)0 to 65535(reading only)0 to 49999Displays the numbers of cumulative energizationtime monitor exceeded 65535h. Reading onlyDisplays the numbers of operation time monitorexceeded 65535h. Reading onlySet the number of times to shift the cumulativepower monitor digit.Clamps the monitor value at maximum.No shiftClears the monitor value when it exceeds themaximum value.* The above parameters allow its setting to be changed during operation in any operation mode even if "0" (initial value) is set inPr. 77 Parameter write selection.Types of Monitor IncrementsPr. 52 SettingFull-scalePr. 54 (FM)Value of thePU main Pr. 158 (AM)DU LEDTerminal FMmonitor Settingand AMDescriptionOutput frequency 0.01Hz 0/100 1 Pr. 55 Displays the inverter output frequency.Output current 0.01A 0/100 2 Pr. 56Displays the inverter output current effectivevalue.Output voltage 0.1V 0/100 3200V class:400V400V class:Displays the inverter output voltage.800VAlarm display ⎯ 0/100 × ⎯ Displays 8 past alarms individually.Frequency setting 0.01Hz 5 *1 5 Pr. 55 Displays the set frequency.228
4PARAMETERSMonitor display and monitor output signalTypes of MonitorRunning speed 1(r/min) 6 *1 6The valueconvertedwith the Pr.37 valuefrom Pr. 55Motor torque 0.1% 7 *1 7 Pr. 866Converter outputvoltageElectronic thermalrelay function loadfactorOutput currentpeak valueConverter outputvoltage peak value0.1V 8 *1 80.1% 10 *1 10 100%0.01A 11 *1 11 Pr. 560.1V 12 *1 12Input power 0.01kW 13 *1 13Output power 0.01kW 14 *1 14200V class:400V400V class:800V200V class:400V400V class:800VRatedinverterpower × 2Ratedinverterpower × 2Displays the motor speed(The display differs depending on the Pr. 37and Pr. 144 settings. The running speed isthe actual speed by the encoder signalduring encoder feedback control and vectorcontrol. For details, refer to page 226.)Displays the motor torque in percentage on theassumption that the rated motor torque is 100%(0% is displayed during V/F control)Displays the DC bus voltage value.Displays the motor thermal cumulative valueon the assumption that the thermal operationlevel is 100%.Retains the peak value of the output currentmonitor and displays (clears at every start)Retains the peak value of the DC busvoltage value and displays (clears at everystart)Displays power on the inverter input sideDisplays power on the inverter output sideLoad meter 0.1% 17 17 Pr. 866Displays the torque current in % on theassumption that the Pr. 56 setting is 100%(displayed on the assumption that ratedmotor torque is 100% during sensorlessvector and vector control)Motor excitationcurrent0.01A 18 18 Pr. 56 Displays the excitation current of the motorPosition pulse *2 ⎯ 19 × ⎯Displays the number of pulses per rotation ofthe motor when orientation control is validCumulativeenergization time *4Reference voltageoutput1h 20 × ⎯⎯ ⎯ 21 ⎯Orientation status *2 1 22 × ⎯Actual operationtime *4, *51h 23 × ⎯Motor load factor 0.1% 24 24 200%Cumulative power *7 0.01kWh *6 25 × ⎯Torque command 0.1% 32 32 Pr. 866Torque currentcommandIncrementsPr. 52 SettingDU LEDPU mainmonitorPr. 54 (FM)Pr. 158 (AM)SettingDisplays the cumulative energization timesince the inverter shipment.You can check the numbers of the monitorvalue exceeded 65535h with Pr. 563.Terminal FM:1440 pulse/s is output when Pr. 291 = 0, 1.50k pulse/s is output when Pr. 291 ≠ 0, 1.Terminal AM: 10V is outputDisplays only when orientation control isvalid(Refer to page 195)Displays the cumulative inverter runningtime.You can check the numbers of the monitorvalue exceeded 65535h with Pr. 564.Use Pr. 171 to clear the value. (Refer to page232)Displays the output current value in % on theassumption that the rated inverter currentvalue is 100%.Monitor value = output current monitor value/rated inverter current × 100 [%]Displays the cumulative power amountaccording to the output power monitor.Use Pr. 170 to clear the value. (Refer to page232)Displays torque command value obtainedfrom vector control0.1% 33 33 Pr. 866 Displays torque current command valueMotor output 0.01kW 34 34Full-scaleValue of theTerminal FMand AMRated motorcapacityDescriptionMultiplies the motor speed by the then outputtorque and displays the machine output ofthe motor shaft end229
Monitor display and monitor output signalTypes of MonitorFeedback pulse*3, *7Power savingeffectCumulative savingpower *7⎯ 35 × ⎯Variableaccordingtoparameters50 50Invertercapacity51 × ⎯PID set point 0.1% 52 52 100%PID measuredvalue0.1% 53 53 100%PID deviation 0.1% 54 × ⎯Input terminalstatus⎯*1 × ⎯55Output terminalstatus⎯ *1 × ⎯Option inputterminal status⎯ 56 × × ⎯Option outputterminal status⎯ 57 × × ⎯Displays the number of pulses fed back fromthe encoder during one sampling (displaysduring a stop).Displays energy saving effect monitorYou can change the monitor to power saving,power saving average value, charge displayand % display using parameters.(For details, refer to page 253)Displays the set point, measured value anddeviation during PID control (For details,refer to page 334)Displays the input terminal ON/OFF statuson the PU (refer to page 231 for DU display)Displays the output terminal ON/OFF statuson the PU (refer to page 231 for DU display)Displays the input terminal ON/OFF status ofthe digital input option (<strong>FR</strong>-A7AX) on the DU(refer to page 231 for details)Displays the output terminal ON/OFF statesof the digital output option (<strong>FR</strong>-A7AY) orrelay output option (<strong>FR</strong>-A7AR) on the DU(refer to page 231 for details)*1 Frequency setting to output terminal status on the PU main monitor are selected by "other monitor selection" of the parameter unit (<strong>FR</strong>-PU04/<strong>FR</strong>-PU07).*2 Position pulse and orientation status function when used with an option (<strong>FR</strong>-A7AP). When orientation control is invalid, "0" remains displayed and thesefunctions are invalid.*3 Feedback pulse functions when the option (<strong>FR</strong>-A7AP) is used and vector control is performed.*4 The cumulative energization time and actual operation time are accumulated from 0 to 65535 hours, then cleared, and accumulated again from 0.When the operation panel (<strong>FR</strong>-DU07) is used, the time is displayed up to 65.53 (65530h) on the assumption that 1h = 0.001, and thereafter, it isadded up from 0.*5 The actual operation time is not added up if the cumulative operation time before power supply-off is less than 1h.*6 When using the parameter unit (<strong>FR</strong>-PU04/<strong>FR</strong>-PU07), "kW" is displayed.*7 Since the panel display of the operation panel (<strong>FR</strong>-DU07) is 4 digits in length, the monitor value of more than "9999" is displayed "----".REMARKS⋅ By setting "0" in Pr. 52, the monitoring of output frequency to fault display can be selected in sequence by .⋅ When the operation panel (<strong>FR</strong>-DU07) is used, the displayed units are Hz, V and A only and the others are not displayed.⋅ The monitor set in Pr. 52 is displayed in the third monitor position (The output voltage monitor is changed).Note that load meter, motor excitation current, and motor load factor are displayed in the second monitor (output current).Initial valueIncrementsPr. 52 SettingDU LEDPU mainmonitorPr. 54 (FM)Pr. 158 (AM)SettingFull-scaleValue of theTerminal FMand AMDescription* The monitor displayed at powering on is the first monitor. Display the monitor you want to display on the first monitor and hold downfor 1s. (To return to the output frequency monitor, hold down for 1s after displaying the output frequency monitor.)• Power-on monitor (first monitor) • Second monitor • Third monitor • Fault monitorWith faultOutput frequency monitorOutput current monitorOutput voltage monitorExample)When Pr. 52 is set to "20" (cumulative energization time), the monitor is displayed on the operation panel as describedbelow.• Power-on monitor (first monitor) • Second monitor • Third monitor • Fault monitorWith faultOutput frequency monitorOutput current monitorCumulative energization time monitor230
4PARAMETERSMonitor display and monitor output signal(2) Display set frequency during stop (Pr. 52)⋅ When Pr. 52 is set to "100", the set frequency monitoris displayed during a stop and the output frequencymonitor is displayed during operation. (LED of Hzflickers during stop and is lit during running.)⋅ When Pr. 52 = "100", the set frequency displayed at astop indicates frequency to be output when the startcommand is on.Different from the frequency setting displayed whenPr. 52 = "5", the value based on maximum/minimumfrequency and frequency jump is displayed.Type of MonitorOutputfrequencyOutput currentOutput voltageFault displayPr. 520 100Duringrunning/stopOutputfrequencyDuringstopSetfrequencyOutput currentOutput voltageFault displayDuringrunningOutputfrequencyREMARKS⋅ During an error, the output frequency at error occurrence appears.⋅ During MRS, the values displayed are the same as during a stop.⋅ During offline auto tuning, the tuning status monitor has priority.(3) Operation panel (<strong>FR</strong>-DU07) I/O terminal monitor (Pr. 52)⋅ When Pr. 52 is set to any of "55 to 57", the I/O terminal states can be monitored on the operation panel (<strong>FR</strong>-DU07).⋅ The I/O terminal monitor is displayed on the third monitor.⋅ The LED is on when the terminal is on, and the LED is off when the terminal is off. The center line of LED is always on.Pr. 52 SettingMonitor Description55 Displays the I/O and output terminal ON/OFF status of the inverter unit.56 * Displays the input terminal ON/OFF status of the digital input option (<strong>FR</strong>-A7AX).57 * Displays the output terminal ON/OFF status of the digital output option (<strong>FR</strong>-A7AY) or relay output option (<strong>FR</strong>-A7AR).* You can set "56" or "57" even if the option is not fitted. When the option is not fitted, the monitor displays are all off.⋅ On the unit I/O terminal monitor (Pr. 52 = "55"), the upper LEDs denote the input terminal status and the lower theoutput terminal status.RMRHAUSTOPRESSTFJOGCSRLRT MRS STRRUN OLFree FreeABC1 SU FUABC2 IPF Free Free FreeInput terminalCenter line is always onOutput terminal- Display example -When signals STF,RH and RUN are onHzAVPUREVMON P.RUNEXTNETFWD⋅ On the input option terminal monitor (Pr. 52 = "56"), the decimal point LED of the first digit LED is on.X1X2X4X5X7X8X0X3 X6 X9X12 X15 FreeX10 X13 DYX11 X14 Free Free FreeFreeCenter line is always onDecimal point LED of first digit LED is always on⋅ On the input option terminal monitor (Pr. 52 = "57"), the decimal point LED of the second digit LED is on.Y0Y1Y2Y3Y4Y5Y6<strong>FR</strong>-A7AYCenter line is always onRA1 RA2RA3<strong>FR</strong>-A7ARDecimal point LED of second digit LED is always on231
Monitor display and monitor output signal(4) Cumulative power monitor and clear (Pr. 170, Pr. 891)⋅ On the cumulative power monitor (Pr. 52 = "25"), the output power monitor value is added up and is updated in 1hincrements.⋅ The operation panel (<strong>FR</strong>-DU07), parameter unit (<strong>FR</strong>-PU04, <strong>FR</strong>-PU07) and communication (RS-485 communication,communication option) display increments and display ranges are as indicated below.Operation Panel *1 Parameter Unit *2 CommunicationRangeRange Increments Range IncrementsPr. 170 = 10 Pr. 170 = 99990 to 99.99kWh 0.01kWh 0 to 999.99kWh 0.01kWh100.0 to 999.9kWh 0.1kWh 1000.0 to 9999.9kWh 0.1kWh1000 to 9999kWh 1kWh 10000 to 99999kWh 1kWh⋅ The monitor data digit can be shifted to the right by the number of Pr. 891 settings.For example, if the cumulative power value is 1278.56kWh when Pr. 891 = "2", the PU/DU display is 12.78 (displayin 100kWh increments) and the communication data is 12.⋅ If the maximum value is exceeded at Pr. 891 = "0 to 4", the power is clamped at the maximum value, indicating thata digit shift is necessary. If the maximum value is exceeded at Pr. 891 = "9999", the power returns to 0 and isrecounted.If the maximum value is exceeded at Pr. 891 = "9999", the power returns to 0 and is recounted.⋅ Writing "0" in Pr. 170 clears the cumulative power monitor.(5) Cumulative energization time and actual operation time monitor (Pr. 171, Pr. 563, Pr. 564)⋅ On the cumulative energization time monitor (Pr. 52 = "20"), the inverter running time is added up every hour.⋅ On the actual operation time monitor (Pr. 52 = "23"), the inverter running time is added up every hour. (Time is notadded up during a stop.)⋅ If the numbers of monitor value exceeds 65535, it is added up from 0. You can check the numbers of cumulativeenergization time monitor exceeded 65535h with Pr. 563 and the numbers of actual operation time monitorexceeded 65535h with Pr. 564.⋅ Writing "0" in Pr. 171 clears the actual operation time monitor. (Energization time monitor can not be cleared.)(6) You can select the decimal digits of the monitor (Pr. 268)0 to 9999kWh0 to 65535kWh(initial value)*1 Power is measured in the range 0 to 9999.99kWh, and displayed in 4 digits.When the monitor value exceeds "99.99", a carry occurs, e.g. "100.0", so the value is displayed in 0.1kWh increments.*2 Power is measured in the range 0 to 99999.99.99kWh, and displayed in 5 digits.When the monitor value exceeds "999.99", a carry occurs, e.g. "1000.0", so the value is displayed in 0.1kWh increments.REMARKS⋅ If "0" is written in Pr. 170 and Pr. 170 is read again, "9999" or "10" is displayed.REMARKSIncrements⋅ The actual operation time is not added up unless the inverter is operated one or more hours continuously.⋅ If "0" is written in Pr. 171 and Pr. 171 is read again, "9999" is always displayed. Setting "9999" does not clear the actual operationtime meter.⋅ As the operation panel (<strong>FR</strong>-DU07) display is 4 digits long, the decimal places may vary at analog input, etc. Thedecimal places can be hidden by selecting the decimal digits.In such a case, the decimal digits can be selected by Pr. 268.Pr. 268 Setting9999 (initial value) No function01Description1kWhWhen 1 or 2 decimal places (0.1 increments or 0.01 increments) are monitored, the decimal places aredropped and the monitor displays an integer value (1 increments).The monitor value of 0.99 or less is displayed as 0.When 2 decimal places (0.01 increments) are monitored, the 0.01 decimal place is dropped and themonitor displays the first decimal place (0.1 increments).When the monitor display digit is originally in 1 increments, it is displayed unchanged in 1 increments.REMARKS⋅ The number of display digits on the cumulative energization time (Pr. 52 = "20"), actual operation time (Pr. 52 = "23"), cumulativepower (Pr. 52 = "25") or cumulative saving power monitor (Pr. 52 = "51") does not change.♦ Parameters referred to ♦Pr. 37 Speed display, Pr. 144 Speed setting switchover Refer to page 226Pr. 55 Frequency monitoring reference, Pr. 56 Current monitoring reference, Pr. 866 Torque monitoring reference Refer to page 233Pr. 291 Pulse train I/O selection Refer to page 233232
4PARAMETERSMonitor display and monitor output signal4.16.3 Reference of the terminal FM (pulse train output) and AM (analog voltageoutput) (Pr. 55, Pr. 56, Pr. 291, Pr. 866, Pr. 867)Two types of monitor output, pulse train output from the terminal FM and analog voltage output from the terminalAM, are available. In addition, pulse train output by voltage output and by open collector output can be selectedfor terminal FM.Set the reference of the signal output from terminal FM and AM.ParameterNumber55 *56 *291866 *NameFrequency monitoringreferenceCurrent monitoringreferencePulse train I/OselectionTorque monitoringreferenceInitialValue60HzRatedinvertercurrentSettingRange0 to 400Hz0 to 500A(1) Pulse train output of the terminal FM (Pr. 291)• Two types of pulse train can be output to the terminal FM.DescriptionSet the full-scale value to output the output frequency monitorvalue to terminal FM and AM.Set the full-scale value to output the output current monitorvalue to terminal FM and AM.Pulse train input Pulse train output0 Terminal JOG FM output1 Pulse train input FM output10 Terminal JOG High speed pulse train output (50%Duty)11 Pulse train input High speed pulse train output (50%Duty)020 Terminal JOGHigh speed pulse train output (ON widthis always same)21 Pulse train inputHigh speed pulse train output (ON widthis always same)100 Pulse train inputHigh speed pulse train output (ON widthis always same)The inverter outputs the signal input aspulse train as is150% 0 to 400%Set the full-scale value to output the torque monitor value toterminal FM and AM.867 AM output filter 0.01s 0 to 5s Set the output filter of terminal AM.* The above parameters allow its setting to be changed during operation in any operation mode even if "0" (initial value) is set in Pr.77 Parameter write selection.FM output circuit • When Pr. 291 Pulse train I/O selection = "0 (initial value) or 1",InverterFM output is selected and pulse train with maximum of8VDC 2400pulses/s is output.24VThe pulse width can be adjusted by calibration parameter C0(Pr. 900) FM terminal calibration using the operation panel2.2Kand parameter unit.3.3K FM• Output frequency, etc. of the inverter can be indicated by20KSDconnecting a DC ammeter of full-scale 1mA, digital indicator,etc.FMSDIndicator1mA full-scaleanalog meter1mA(+)(-)Calibrationresistor*18VDCT1FMSD1440 pulses/s(+)(Digital indicator)(-)T2Pulse width T1: Adjust using calibration parameter C0Pulse cycle T2: Set with Pr. 55 (frequency monitor)Set with Pr.56 (current monitor)*1 Not needed when the operation panel (<strong>FR</strong>-DU07) or parameter unit (<strong>FR</strong>-PU04/<strong>FR</strong>-PU07) is used for calibration.This resistor is used when calibration must be made near the frequency meter for such a reason as a remote frequency meter.Note that the needle of the frequency meter may not deflect to full-scale when the calibration resistor is connected. In this case, use thisresistor and operation panel or parameter unit together.*2 The initial setting is 1mA full-scale and 1440 pulse/s teminal FM frequency at 60Hz.233
Monitor display and monitor output signalHigh speed pulse train output circuit(connection example with a pulse counter)InverterPulse when Pr. 291 = "10, 11"50%dutyHi *Pull up resistance *FMSDPulse when Pr. 291 = "20, 21, 100"Approx. 10μsLowPulse counter50%dutyApprox. 10μs• When Pr. 291 Pulse train I/O selection = "10, 11, 20, 21, 100",high speed pulse train is output by open collector output.Pulse train of maximum of 55k pulses/s is output.Two types of pulse width, 50% Duty and fixed ON width, areavailable. Adjustment by calibration parameter C0 (Pr. 900)FM terminal calibration can not be performed.* When the output wiring length is long, a pulse shape is deformed due to the straycapacitances of the wiring and output pulse can not be recognized. If the wiringlength is long, connect the open collector output signal and the power supply usingan external pull up resistance.Check specifications of a pulse counter for a resistance value to pull up. Select anappropriate resistance value so that the load current is 80mA or less.• When Pr. 291 = "10, 11", the pulse cycle is 50% Duty (ONwidth and OFF width are the same).• When Pr. 291 = "20, 21, 100", fixed ON width of pulse is output(approx. 10µs).• When the setting value is "100", the pulse train from thepulse train input (terminal JOG) is output as is. Use thisvalue for synchronous speed operation of multiple inverters.(Refer to page 346)Hi *Low• High speed pulse train output specificationsItemSpecificationsOutput methodNPN open collector outputVoltage between a collector and emitter30V (max)Maximum permissible load current80mAOutput pulse rate 0 to 55kpps *Output resolution3pps (excluding a jitter)* Hi indicates that the open collector output transistor is on.* The output pulse rate is 50kpps when a monitor output value is 100%.CAUTION⋅ Input specifications of terminal JOG (pulse train input or contact input) can be selected with Pr. 291.Change the setting value using care not to change input specifications of terminal JOG. (Refer to page 346 for pulse train input.)⋅ After changing a setting value of Pr. 291, connect a meter between terminal FM and SD. Take care that a voltage should not beapplied to terminal FM when FM output (voltage output) pulse train is selected.⋅ The FM output of the inverter can not be connected to devices which have source logic type pulse input.⋅ When high speed pulse train output (Pr. 291 = "10, 11, 20, 21, 100") isselected, performing parameter all clear returns the Pr. 291 setting to theFM output circuitinitial value of "0", changing the terminal FM output from high speed pulse3.3kΩ Pr.291train output to FM output (voltage output).8.2V0, 1Terminal FM10, 11,20, 21, 100Open collector output circuit234
4PARAMETERSMonitor display and monitor output signal(2) Frequency monitoring reference (Pr. 55)• Set the frequency when the frequency meter (1mA analog meter), which is connected to terminal FM and SD,shows full scale such as 60Hz and 120Hz.• Set the frequency when the indicator (10V DC voltmeter), which is connected to terminal AM-5, shows full scalesuch as 60Hz and 120Hz.• Set the inverter output frequency (set frequency) at which the pulse speed of the FM output is 1440 pulses/s (50kpulse/s).The pulse speed and inverter output frequency are proportional to each other. (The maximum pulse train output is2400 pulses/s (55k pulses/s)• Set the reference value of the frequency at which the output voltage of terminal AM is 10VDC.• The output voltage and frequency are proportional to each other. (The maximum output voltage is 10VDC.)Pulse speed (pulses/s)2400(55K)1440(50K)1Hz 60Hz Output frequency 400Hz(initial value)Output voltage10VDC1Hz60Hz(initial value)400HzSetting range of Pr. 55Setting range of Pr. 55(3) Current monitoring reference (Pr. 56)• Set the output current at which the pulse speed of the FM output is 1440 pulses/s (50k pulse/s).• The pulse speed and current value are proportional to each other. (The maximum pulse train output is 2400 pulses/s(55K pulses/s). )• Set the reference value of the output current at which the output voltage of terminal AM is 10VDC.• The output voltage and output current monitor value are proportional each other. (The maximum output voltage is10VDC.)Pulse speed (pulses/s)2400(55K)1440(50K)Rated current(initial value)500AOutput voltage10VDCRated current(initial value)500ASetting range of Pr. 56Setting range of Pr. 56(4) Reference of torque monitor (Pr. 866)• Set the output torque at which the pulse speed of the FM output is 1440 pulses/s (50k pulse/s).• The pulse speed and torque monitor value are proportional to each other. (The maximum pulse train output is 2400pulses/s (55k pulses/s).• Set the reference value of the output torque at which the output voltage of terminal AM is 10VDC.• The output voltage and torque monitor value are proportional to each other. (The maximum output voltage is10VDC.)Pulse speed (pulses/s)2400(55k)1440(50k)150%(initial value)400%Output voltage10VDC150%(initial value)400%Setting range of Pr. 866Setting range of Pr. 866(5) Terminal AM response adjustment (Pr. 867)• Using Pr. 867, the output voltage response of the terminal AM can be adjusted within the range 0 to 5s.• Increasing the setting stabilizes the terminal AM output more but reduces the response level. (Setting "0" sets theresponse level to 4ms)235
Monitor display and monitor output signal4.16.4 Terminal FM, AM calibration (Calibration parameter C0 (Pr. 900), C1 (Pr. 901))By using the operation panel or parameter unit, you can calibrate terminal FM and terminal AM to full scaledeflection.ParameterNumber(1) FM terminal calibration (C0(Pr. 900))Name Initial Value Setting Range DescriptionC0(900) FM terminal calibration ⎯ ⎯Calibrate the scale of the meterconnected to terminal FM.C1(901) AM terminal calibration ⎯ ⎯Calibrate the scale of the analog meterconnected to terminal AM.*1 The parameter number in parentheses is the one for use with the parameter unit (<strong>FR</strong>-PU04/<strong>FR</strong>-PU07).*2 The above parameters allow its setting to be changed during operation in any operation mode even if "0" (initial value) is set in Pr. 77 Parameterwrite selection.⋅ The terminal FM is preset to output pulses. By setting the Calibration parameter C0 (Pr. 900), the meter connected tothe inverter can be calibrated by parameter setting without use of a calibration resistor.⋅ Using the pulse train output of the terminal FM, a digital display can be provided by a digital counter. The monitorvalue is 1440 pulses/s output at the full-scale value of the table on the previous page (Pr. 54 FM terminal functionselection).FMSDIndicator1mA full-scaleanalog meter1mA(+)(-)Calibrationresistor*18VDCT1FMSD1440 pulses/s(+)(Digital indicator)(-)T2Pulse width T1: Adjust using calibration parameter C0Pulse cycle T2: Set with Pr. 55 (frequency monitor)Set with Pr.56 (current monitor)*1 Not needed when the operation panel (<strong>FR</strong>-DU07) or parameter unit (<strong>FR</strong>-PU04/<strong>FR</strong>-PU07) is used for calibration.This resistor is used when calibration must be made near the frequency meter for such a reason as a remote frequency meter.Note that the needle of the frequency meter may not deflect to full-scale when the calibration resistor is connected. In this case, usethis resistor and operation panel or parameter unit together.*2 The initial settings are 1mA full-scale and 1440 pulses/s terminal FM frequency at 60Hz.⋅ Calibrate the terminal FM in the following procedure.1) Connect an indicator (frequency meter) across the terminals FM-SD of the inverter. (Note the polarity. Theterminal FM is positive.)2) When a calibration resistor has already been connected, adjust the resistance to "0" or remove the resistor.3) Refer to the output signal list (page 228) and set Pr. 54. When you selected the running frequency or inverteroutput current as the output signal, preset the running frequency or current value, at which the output signal willbe 1440 pulses/s, to Pr. 55 Frequency monitoring reference or Pr. 56 Current monitoring reference. At 1440 pulses/s,the meter generally deflects to full-scale.REMARKS⋅ When calibrating a monitor output signal, which cannot adjust to a 100% value without an actual load and a measurementequipment, set Pr.54 to "21" (reference voltage output) and make calibration. 1440 pulses/s are output from the terminal FM.⋅ The wiring length of the terminal FM should be 200m maximum.⋅⋅⋅CAUTIONThe initial value of the calibration parameter C0 (Pr. 900) is set to 1mA full-scale and 1440 pulses/s FM output frequency at60Hz. The maximum pulse train output of terminal FM is 2400 pulses/s.When a frequency meter is connected to across terminals FM-SD to monitor the running frequency, the FM terminal output isfilled to capacity at the initial setting if the maximum output frequency reaches or exceeds 100Hz. In this case, the Pr. 55 settingmust be changed to the maximum frequency.When Pr. 291 Pulse train I/O selection = "10, 11, 20, 21, 100" (high speed pulse train output), calibration using calibrationparameter C0 (Pr. 900) can not be made.236
4PARAMETERSMonitor display and monitor output signal(2) AM terminal calibration (C1 (Pr. 901))InverterAM10VDC⋅Terminal AM is factory-set to provide a 10VDC output in the full-scalestatus of the corresponding monitor item. Calibration parameter C1 (Pr.901) allows the output voltage ratios (gains) to be adjusted accordingto the meter scale. Note that the maximum output voltage is 10VDC.5⋅ Calibrate the AM terminal in the following procedure.1) Connect a 0-10VDC meter (frequency meter) to across inverter terminals AM-5. (Note the polarity. The terminalAM is positive.)2) Refer to the monitor description list (page 228) and set Pr. 158.When you selected the running frequency, inverter output current, etc. as monitor, preset in Pr. 55 or Pr. 56 therunning frequency or current value at which the output signal will be 10V.3) When outputting the item that cannot achieve a 100% value easily by operation, e.g. output current, set "21"(reference voltage output) in Pr. 158 and perform the following operation. After that, set "2" (output current, forexample) in Pr. 158.REMARKS⋅ When outputting such an item as the output current, which cannot reach a 100% value easily by operation, set Pr. 158 to "21"(reference voltage output) and make calibration. 10VDC is output from the terminal AM.237
Monitor display and monitor output signal(3) How to calibrate the terminal FM when using the operation panel (<strong>FR</strong>-DU07)Operation1.Confirmation of the RUN indication andoperation mode indicationDisplay(When Pr. 54=1)2. Press to choose the parametersetting mode.3. Turn until appears.4. Press to display .The parameternumber readpreviously appears.C0 to C41settingis enabled.5. Turn until appears.Set to C0 FM terminal calibration.6. Press to enable setting.7. If the inverter is at a stop, (pressor ) to start the inverter.(Motor needs not be connected.)8. Turn to adjust the indicator needleto the desired position.9. Press . Setting is complete.( )+-Analog indicatorThe monitor set to Pr. 54 FM terminalfunction selection is displayed.Flicker...Parameter setting complete!!Turn to read another parameter.Press to return to the indication (step 4).Press twice to show the next parameter ( ).REMARKS⋅ Calibration can also be made for external operation. Set the frequency in external operation mode, and make calibration in theabove procedure.⋅ Calibration can be made even during operation.⋅ For the operating procedure using the parameter unit (<strong>FR</strong>-PU04/<strong>FR</strong>-PU07), refer to the parameter unit instruction manual.♦ Parameters referred to ♦Pr. 54 FM terminal function selection Refer to page 228Pr. 55 Frequency monitoring reference Refer to page 233Pr. 56 Current monitoring reference Refer to page 233Pr. 158 AM terminal function selection Refer to page 228Pr. 291 Pulse train I/O selection Refer to page 346238
4PARAMETERSOperation selection at power failureand instantaneous power failure4.17 Operation selection at power failure and instantaneouspower failurePurpose Parameter that must be Set Refer to PageAt instantaneous power failureoccurrence, restart inverter withoutstopping motorWhen undervoltage or a powerfailure occurs, the inverter can bedecelerated to a stop.Automatic restart operationafter instantaneous powerfailure/flying startPower failure-timedeceleration-to-stopfunctionPr. 57, Pr. 58, Pr. 162 to Pr. 165,Pr. 299, Pr. 6114.17.1 Automatic restart after instantaneous power failure/flying start(Pr. 57, Pr. 58, Pr. 162 to Pr. 165, Pr. 299, Pr. 611)You can restart the inverter without stopping the motor in the following cases.⋅ when commercial power supply operation is switched to inverter operation⋅ when power comes back on after an instantaneous power failure⋅ when motor is coasting at start239Pr. 261 to Pr. 266, Pr. 294 243ParameterNumberNameInitialValue57 Restart coasting time 9999SettingRange0Description⋅ 5.5K, 7.5K ................................................... 1s,⋅ 11K or more................................................. 3.0s,The above times are coasting time.0.1 to 5sSet the waiting time for inverter-triggered restart after aninstantaneous power failure.9999 No restart58 Restart cushion time 1s 0 to 60s Set a voltage starting time at restart.162163164165299611Automatic restart afterinstantaneous powerfailure selectionFirst cushion time forrestartFirst cushion voltage forrestartStall preventionoperation level forrestartRotation directiondetection selection atrestartingAcceleration time at arestart00 With frequency search1 Without frequency search (reduced voltage system)2 Encoder detection frequency search10 Frequency search at every start11 Reduced voltage system at every start12 Encoder detection frequency search at every start0s 0 to 20s Set a voltage starting time at restart.Consider using these parameters according to the load0% 0 to 100% (moment of inertia, torque) magnitude.150% 0 to 220%05sConsider the rated inverter current as 100% and set thestall prevention operation level during restart operation.0 Without rotation direction detection1 With rotation direction detection99990 to 3600s,9999When Pr. 78 = "0", the rotation direction is detected.When Pr. 78 = "1","2", the rotation direction is not detected.Set the acceleration time to reach the set frequency at arestart.Acceleration time for restart is the normal acceleration time(e.g. Pr. 7 ) when "9999" is set.239
Operation selection at power failureand instantaneous power failurePowersupplyMCCBIPFMC1ON15ms to 100msOF<strong>FR</strong>/L1S/L2T/L3R1/L11S1/L21UVWSTFCSSDCSSDOFFMC2MC3ONMCswitchoversequence(1) Automatic restart after instantaneous power failure operation⋅ When instantaneous power failure protection (E.IPF) and undervotageprotection (E.UVT) are activated, the inverter trips. (Refer to page 381 forE.IPF and E.UVT.)When automatic restart after instantaneous power failure operation is set,the motor can be restarted if power is restored after an instantaneouspower failure or undervoltage is corrected. (E.IPF and E.UVT are notactivated.)⋅ When E.IPF and E.UVT are activated, instantaneous power failure/undervoltage signal (IPF) is output.⋅ The IPF signal is assigned to the terminal IPF in the initial setting. The IPFsignal can also be assigned to the other terminal by setting "2 (positivelogic) or 102 (negative logic)" to any of Pr. 190 to Pr. 196 (output terminalfunction selection).IMFor use for onlyautomatic restartafter instantaneouspower failure or flying start,short CS-SD in advance.•When Pr. 162 = 0, 10 (with frequency search)V/F control, advanced magnetic flux vector controlPower supply(R/L1, S/L2,T/L3)Motor speed N(r/min)Inverter outputfrequency f(Hz)Inverter outputvoltage E(V)Coastingtime (Pr.57)Instantaneous (power failure) time+*Speeddetectiontime* The output shut off timing differsaccording to the load condition.Real sensorless vector controlPower supply(R/L1, S/L2,T/L3)Motor speed N(r/min)Inverter outputfrequency f(Hz)output voltageE(V)Coastingtime (Pr.57)*Restart cushiontime (Pr.58 setting)Acceleration timeat a restart(Pr.611 setting)Instantaneous (power failure) time+Speeddetectiontime* The output shut off timing differsaccording to the load condition.Acceleration timeat a restart(Pr.611 setting)(2) Connection (CS signal)⋅ When the automatic restart after instantaneous power failureselection signal (CS) is turned on, automatic restart operationis enabled.⋅ When Pr. 57 is set to other than "9999" (automatic restartoperation enabled), the inverter will not operate if used with theCS signal remained off.REMARKS⋅ The CS signal is assigned to the terminal CS in the initial setting.By setting "6" in any of Pr. 178 to Pr. 189 (input terminal functionselection), you can assign the CS signal to the other terminal.(3) Automatic restart operation selection (Pr. 162, Pr.299)• With frequency searchWhen "0 (initial value), 10" is set in Pr. 162, the invertersmoothly starts after detecting the motor speed upon powerrestoration.⋅ During reverse rotation, the inverter can be restarted smoothlyas the direction of rotation is detected.⋅ You can select whether to make rotation direction detection ornot with Pr. 299 Rotation direction detection selection at restarting.When capacities of the motor and inverter differ, set "0"(without rotation direction detection) in Pr. 299.Pr. 299 SettingPr. 78 Setting0 1 29999 ◦ × ×0 (initial value) × × ×1 ◦ ◦ ◦◦:with rotation direction detection× :without rotation direction detectionREMARKS⋅ Speed detection time (frequency search) changes according tothe motor speed. (maximum 500ms)⋅ When the inverter capacity is two rank or more larger than themotor capacity, the inverter may not start due to overcurrent trip(E.OC).⋅ If two or more motors are connected to one inverter, the inverterfunctions abnormally. (The inverter does not start smoothly.)⋅ Since the DC injection brake is operated instantaneously whenthe speed is detected at a restart, the speed may reduce if themoment of inertia of the load is small.⋅ When reverse rotation is detected when Pr. 78 = "1" (reverserotation disabled), the rotation direction is changed to forwardrotation after decelerates in reverse rotation when the startcommand is forward rotation. The inverter will not start when thestart command is reverse rotation.240
4PARAMETERSOperation selection at power failureand instantaneous power failure•When Pr. 162 = 1, 11 (without frequency serch)V/F control, advanced magnetic flux vector controlInstantaneous (power failure) timePower supply(R/L1, S/L2,T/L3)Motor speed N(r/min)Inverter output*frequency f(Hz)Inverter outputvoltage E(V)Coasting timePr.57 setting* The output shut off timing differsaccording to the load condition.Restart cushion time(Pr.58 setting)• Without frequency searchWhen Pr. 162 = "1" or "11", automatic restart operation isperformed in a reduced voltage system, where the voltage isgradually risen with the output frequency unchanged from priorto an instantaneous power failure independently of thecoasting speed of the motor.For real sensorless vector control, output frequency andvoltage before instantaneous power failure are output. (Pr. 58 ismade invalid.)REMARKS⋅ This system stores the output frequency prior to aninstantaneous power failure and increases the voltage.Therefore, if the instantaneous power failure time exceeds 0.2s,the inverter starts at Pr. 13 Starting frequency (initial value = 0.5Hz)since the stored output frequency cannot be retained.Real sensorless vector controlInstantaneous (power failure) timePower supply(R/L1, S/L2,T/L3)Motor speed N(r/min)Inverter outputfrequency f(Hz)*output voltageE(V)Coasting timePr.57 setting* The output shut off timing differsaccording to the load condition.•When Pr. 162 = 2, 12 (encoder detectionfrequency search)Power supply(R/L1, S/L2, T/L3)Motor speed N(r/min)Inverter outputfrequency f(Hz)Output voltage E(V)Instantaneous(power failure) time*Coasting time(Pr.57)Acceleration timeat a restart(Pr.611 setting)* The output shut off timing differs according to the load condition.• Encoder detection frequency search⋅ When "2 or 12" is set in Pr. 162 under encoder feedbackcontrol, the motor starts at the motor speed and in the rotationdirection detected from the encoder at power restoration.⋅ Encoder detection frequency search is performed regardlessof the Pr. 162 setting under vector control.⋅ The Pr. 58 and Pr. 299 settings are invalid for encoder detectionfrequency search.REMARKS⋅ When encoder feedback control is invalid, setting "2 or 12" in Pr.162 enables frequency search (Pr. 162 = "0, 10").• Restart operation at every startWhen Pr. 162 = "10, 11 or 12", automatic restart operation isalso performed every start, in addition to the automatic restartafter instantaneous power failure. When Pr. 162 = "0" or "2",automatic restart operation is performed at the first start afterpower supply-on, but the inverter starts at the startingfrequency at the second time or later.241
Operation selection at power failureand instantaneous power failure(4) Restart coasting time (Pr. 57)⋅ Coasting time is the time from when the motor speed is detected until automatic restart control is started.⋅ Set Pr. 57 to "0" to perform automatic restart operation. The coasting time is automatically set to the value below.Generally this setting will pose no problems.5.5K, 7.5K . . . . . . . 1s, 11K or more . . . . . . . 3.0s⋅ Operation may not be performed well depending on the magnitude of the moment of inertia (J) of the load orrunning frequency. Adjust the coasting time between 0.1s and 5s according to the load specifications.(5) Restart cushion time (Pr. 58)⋅ Cushion time is the length of time taken to raise the voltage appropriate to the detected motor speed (outputfrequency prior to instantaneous power failure when Pr. 162 = "1" or "11").⋅ Normally the initial value need not be changed for operation, but adjust it according to the magnitude of themoment of inertia (J) of the load or torque.⋅ Pr. 58 is invalid during encoder feedback control (Pr. 162 = "2, 12"), real sensorless vector control or vector control.Voltage100%Pr.164(Pr.163) Pr.58 Time(6) Automatic restart operation adjustment (Pr. 163 toPr. 165, Pr. 611)⋅ Using Pr. 163 and Pr. 164, you can adjust the voltage rise time ata restart as shown on the left.⋅ Using Pr. 165, you can set the stall prevention operation level ata restart.⋅ Using Pr. 611, you can set the acceleration time until theacceleration time reference frequency is reached afterautomatic restart operation is performed besides the normalacceleration time.REMARKS⋅ If the setting of Pr. 21 Acceleration/deceleration time increments ischanged, the setting increments of Pr. 611 does not change.CAUTION⋅ Changing the terminal assignment using Pr. 178 to Pr. 189 (input terminal function selection) may affect the other functions. Pleasemake setting after confirming the function of each terminal.⋅ When automatic restart operation is selected, undervotage protection (E.UVT) and instantaneous power failure protection(E.IPF) among the fault output signals will not be provided at occurrence of an instantaneous power failure.⋅ The SU and FU signals are not output during a restart. They are output after the restart cushion time has elapsed.⋅ Automatic restart operation will also be performed after a reset or when a retry is made by the retry function.⋅ Automatic restart after instantaneous power failure function is invalid when load torque high speed frequency control (Pr. 270 ="2, 3") is set.CAUTIONProvide mechanical interlocks for MC1 and MC2. The inverter will be damaged if the power supply is input to theinverter output section.When automatic restart after instantaneous power failure has been selected, the motor and machine will startsuddenly (after the reset time has elapsed) after occurrence of an instantaneous power failure. Stay away fromthe motor and machine. When you have selected automatic restart after instantaneous power failure function,apply in easily visible places the CAUTION stickers supplied to the instruction manual (basic).♦ Parameters referred to ♦Pr. 7 Acceleration time, Pr. 21 Acceleration/deceleration time increments Refer to page 155Pr. 13 Starting frequency Refer to page 157Pr. 65, Pr. 67 to Pr. 69 Retry function Refer to page 246Pr. 78 Reverse rotation prevention selection Refer to page 281Pr. 178 to Pr. 189 (input terminal function selection) Refer to page 206242
4PARAMETERSOperation selection at power failureand instantaneous power failure4.17.2 Power failure-time deceleration-to-stop function (Pr. 261 to Pr. 266, Pr. 294 )When a power failure or undervoltage occurs, the inverter can be decelerated to a stop or can be deceleratedand re-accelerated to the set frequency.ParameterNumber261262263NamePower failure stopselectionSubtracted frequency atdeceleration startSubtraction startingfrequencyInitialValue0Setting Range Description01112123Hz 0 to 20Hz60Hz0 to 120Hz9999Coasting to stopWhen undervoltage or power failure occurs, the inverter outputis shut off.Without undervoltage avoidanceWith undervoltage avoidanceWithout undervoltage avoidanceWith undervoltage avoidanceWhen undervoltage or a power failureoccurs, the inverter can be deceleratedto a stop.When undervoltage or a power failureoccurs, the inverter can be deceleratedto a stop.If power is restored during a powerfailure, the inverter accelerates again.Normally operation can be performed with the initial valueunchanged. But adjust the frequency according to themagnitude of the load specifications (moment of inertia, torque).When output frequency ≥ Pr. 263Decelerate from the speed obtained from output frequencyminus Pr. 262.When output frequency < Pr. 263Decelerate from output frequencyDecelerate from the speed obtained from output frequencyminus Pr. 262.264Power-failure decelerationtime 15s 0 to 3600/ 360s * Set a deceleration slope down to the frequency set in Pr. 266.265Power-failure deceleration0 to 3600/ 360s * Set a deceleration slope below the frequency set in Pr. 266.9999time 29999 Same slope as in Pr. 264266Power failure decelerationSet the frequency at which the deceleration slope is switched60Hz 0 to 400Hztime switchover frequencyfrom the Pr. 264 setting to the Pr. 265 setting.294 UV avoidance voltage gain 100% 0 to 200%Adjust the response level during undervoltage avoidanceoperation. A larger setting will improve responsiveness to thebus voltage change.* When the setting of Pr. 21 Acceleration/deceleration time increments is "0" (initial value), the setting range is "0 to 3600s" and the setting increments are"0.1s", and when the setting is "1", the setting range is "0 to 360s" and the setting increments are "0.01s"Power supplyRemove the jumperConnect terminalsR1/L11 and P/+and terminalsS1/L21 and N/-.InverterR/L1S/L2T/L3R1/L11S1/L21P/+N/−(1) Connection and parameter setting⋅ Remove the jumpers across terminals R/L1-R1/L11 andacross terminals S/L2-S1/L21, and connect terminals R1/L11 and P/+ and terminals S1/L21 and N/-.⋅ When setting of Pr. 261 is not "0", the inverter decelerates toa stop if an undervoltage, power failure or input phase loss(when Pr. 872 ="1"(input phase loss enabled)) occurs.Power supplyOutputfrequency Subtractedfrequency atPower-failuredecelerationtime switchoverfrequencyPr.266deceleration startPr.262Pr.264Power-failuredeceleration time 1Pr.265Power-failuredecelerationtime 2Time(2) Operation outline of deceleration to stop atpower failure⋅ If an undervoltage or power failure occurs, the outputfrequency is dropped by the frequency set in Pr. 262 .⋅ Deceleration is made in the deceleration time set in Pr. 264.(The deceleration time setting is the time required from Pr. 20Acceleration/deceleration reference frequency to a stop.)⋅ When the frequency is low and enough regeneration energyis not provided, for example, the deceleration time (slope)from Pr. 265 to a stop can be changed.243
Operation selection at power failureand instantaneous power failurePowersupplyOutput frequencySTFY46Pr.261 = 1During deceleration atoccurrence of power failureDuring stop atoccurrence ofpower failureTimeTurn off STF once to make acceleration again(3) Power failure stop function (Pr. 261 = "1, 11")⋅ If power is restored during power failure deceleration, decelerationto a stop is continued and the inverter remains stopped. To restart,turn off the start signal once, then turn it on again.⋅⋅REMARKSPower supplySTFY46ONNot started as inverteris stopped due to powerfailureOFFWhen automatic restart after instantaneous power failure is selected(Pr. 57 ≠ "9999"), deceleration to stop function is invalid and therestart after instantaneous power failure operation is performed.After a power failure stop, the inverter will not start if the powersupply is switched on with the start signal (STF/STR) input. Afterswitching on the power supply, turn off the start signal once and thenon again to make a start.ONOutputfrequencyTime(4) Original operation continuation at instantaneous power failure function (Pr. 261 = "2, 12")⋅ When power is restored during deceleration after an instantaneous power failure, acceleration is made again up tothe set frequency.⋅ When this function is used in combination with the automatic restart after instantaneous power failure operation,deceleration can be made at a power failure and acceleration can be made again after power restoration. Whenpower is restored after a stop by deceleration at an instantaneous power failure, automatic restart operation isperformed if automatic restart after instantaneous power failure has been selected (Pr. 57 ≠ "9999")PowersupplyOutputfrequencyY46Pr. 261 = 2During decelerationat occurrence ofpower failureWhen power is restored duringdeceleration at occurrence ofpower failureIPF* Acceleration time depends on Pr. 7 (Pr. 44 ).Reacceleration*TimePowersupplyOutputfrequencyY46Pr.261 = 2, Pr.57 9999During decelerationat occurrence ofpower failureWhen used with automatic restartafter instantaneous power failureDuring power failureAutomatic restartafter instantaneouspower failureReset time + Pr.57Time(5) Undervoltage avoidance function (Pr. 261 = "11, 12", Pr. 294 )⋅ When Pr. 261 = "11, 12", the deceleration time is automatically adjusted (shortened) to prevent undervoltage fromoccuring during deceleration at an instantaneous power failure.⋅ Adjust the slope of frequency decrease and response level with Pr. 294. A larger setting will improveresponsiveness to the bus voltage.REMARKSUndervoltage avoidance function is invalid during torque control by real sensorless vector control. When Pr. 261 = "11 (12)", theinverter operates in the same manner as when "1 (2)" is set in Pr. 261.244
4PARAMETERS(6) Power failure deceleration signal (Y46 signal)Operation selection at power failureand instantaneous power failure⋅ After deceleration at an instantaneous power failure, inverter can not start even if the start command is given. Inthis case, check the power failure deceleration signal (Y46 signal). (at occurrence of input phase failure protection(E.ILF), etc.)⋅ The Y46 signal is on during deceleration at an instantaneous power failure or during a stop after deceleration at aninstantaneous power failure.⋅ For the Y46 signal, set "46 (positive logic)" or "146 (negative logic)" in any of Pr. 190 to Pr. 196 (output terminalfunction selection) to assign the function.⋅⋅⋅⋅⋅CAUTIONWhen the (output frequency - Pr. 262) at undervoltage or power failure occurrence is negative, the calculation result is regardedas 0Hz. (DC injection brake operation is performed without deceleration).During a stop or trip, the power failure stop selection is not performed.Y46 signal turns on when undervoltage occurs even when the motor is not decelerating at an instantaneous power failure.For this reason, Y46 signal outputs instantly at powering off, which is not a fault.When power failure deceleration stop function is selected, undervotage protection (E.UVT), instantaneous power failureprotection (E.IPF), and input phase loss protection (E.ILF) do not function.Changing the terminal assignment using Pr. 190 to Pr. 196 (output terminal function selection) may affect the other functions. Pleasemake setting after confirming the function of each terminal.CAUTIONIf power-failure stop function is set, some loads may cause the inverter to trip and the motor to coast. The motorwill coast if enough regenerative energy is given from the motor.♦ Parameters referred to ♦Pr. 12 DC injection brake operation voltage Refer to page 185Pr. 20 Acceleration/deceleration reference frequency, Pr. 21 Acceleration/deceleration time increments Refer to page 155Pr. 57 Restart coasting time Refer to page 239Pr. 190 to Pr. 196 (output terminal function selection) Refer to page 214Pr. 872 Input phase failure protection selection Refer to page 249245
Operation setting at fault occurrence4.18 Operation setting at fault occurrencePurposeParameter that must be SetRefer toPageRecover by retry operation at faultoccurrenceRetry operatoin Pr. 65, Pr. 67 to Pr. 69 246Output fault code from terminal Fault code output function Pr. 76 248Do not output input/output phasefailure alarmThe motor is decelerated to stop atmotor thermal activationInput/output phase lossprotection selection4.18.1 Retry function (Pr. 65, Pr. 67 to Pr. 69)Pr. 251, Pr. 872 249Fault definition Pr. 875 250If a fault occurs, the inverter resets itself automatically to restart. You can also select the fault description for aretry.When automatic restart after instantaneous power failure is selected (Pr. 57 Restart coasting time ≠ "9999"), restartoperation is performed at retry operation as at an instantaneous power failure. (Refer to page 239 for the restartfunction.)ParameterNumberNameInitialValueSettingRangeDescription65 Retry selection 0 0 to 5 A fault for retry can be selected. (Refer to the next page)67Number of retries at faultoccurrence00 No retry function1 to 10101 to 110Set the number of retries at fault occurrence.A fault output is not provided during retry operation.Set the number of retries at fault occurrence. (Thesetting value of minus 100 is the number of retries.)A fault output is provided during retry operation.68 Retry waiting time 1s 0 to 10sSet the waiting time from when an inverter fault occursuntil a retry is made.69 Retry count display erase 0 0 Clear the number of restarts succeeded by retry.Retry success exampleInverteroutputfrequencyY64Retry failure exampleInverteroutputfrequency00Fault signal(ALM)Pr. 68Retry startFault occurrenceRetry success countONFaultoccurrenceFirstretryPr. 68 5FaultoccurrenceSecondretryRetry successPr. 68 Pr. 68 Pr. 68FaultoccurrenceY64 ON ON ONTimeSuccess count + 1ThirdretryTimeRetry failure(E.RET)ON⋅⋅⋅⋅⋅⋅⋅Retry operation automatically resets a fault andrestarts the inverter at the starting frequency when thetime set in Pr. 68 elapses after the inverter is tripped.Retry operation is performed by setting Pr. 67 to anyvalue other than "0". Set the number of retries at faultoccurrence in Pr. 67.When retries fail consecutively more than the numberof times set in Pr. 67 , a retry count excess fault(E.RET) occurs, resulting in inverter trip.(Refer to retry failure example)Use Pr. 68 to set the waiting time from when an invertertrips until a retry is made in the range 0 to 10s. (Whenthe setting value is "0s", the actual time is 0.1s.)Reading the Pr. 69 value provides the cumulativenumber of successful restart times made by retry. Thecumulative count in Pr. 69 is increased by 1 when aretry is regarded as successful after normal operationcontinues without faults occurring for more than fourtimes longer than the time set in Pr. 68 after a retry start.(When retry is successful, cumulative number of retryfailure is cleared.)Writing "0" in Pr. 69 clears the cumulative count.During a retry, the Y64 signal is on. For the Y64 signal,assign the function by setting "64 (positive logic)" or"164 (negative logic)" in any of Pr. 190 to Pr. 196 (outputterminal function selection) .CAUTIONChanging the terminal assignment using Pr. 190 to Pr. 196(output terminal function selection) may affect the otherfunctions. Please make setting after confirming the functionof each terminal.246
4PARAMETERS⋅⋅⋅⋅Operation setting at fault occurrenceUsing Pr. 65 you can select the fault that will cause a retry to be executed. No retry will be made for the fault notindicated. (Refer to page 374 for the fault description.)• indicates the errors selected for retry.Fault forPr. 65 SettingFault forPr. 65 SettingRetry 0 1 2 3 4 5 Retry 0 1 2 3 4 5E.OC1 • • • • • E.MB2 • •E.OC2 • • • • E.MB3 • •E.OC3 • • • • • E.MB4 • •E.OV1 • • • • E.MB5 • •E.OV2 • • • • E.MB6 • •E.OV3 • • • • E.MB7 • •E.THM • E.OS • •E.THT • E.OSD • •E.IPF • • E.OD • •E.UVT • • E.PTC •E. GF • • E.CDO • •E.OHT • E.SER • •E.OLT • • E.ILF • •E.OPT • • E.4 • •E.OP3 • • E.8 • •E. PE • • E.10 • •E.MB1 • •CAUTIONFor a retry error, only the description of the first fault is stored.When an inverter fault is reset by the retry function at the retry time, the accumulated data of the electronic thermal relayfunction etc. are not cleared. (Different from the power-on reset.)Retry is not performed if E.PE (Parameter storage device fault) occurred at power on.CAUTIONWhen you have selected the retry function, stay away from the motor and machine when the inverter is tripped.They will start suddenly (after the reset time has elapsed) after the inverter trip.When you have selected the retry function, apply in easily visible places the CAUTION stickers supplied to theinstruction manual (basic).♦ Parameters referred to ♦Pr. 57 Restart coasting time Refer to page 239247
Operation setting at fault occurrence4.18.2 Fault code output selection (Pr. 76)At fault occurrence, its description can be output as a 4-bit digital signal from the open collector outputterminals.The fault code can be read by a programmable controller, etc., and its corrective action can be shownon a display, etc.ParameterNumberName Initial Value Setting Range Description76 Fault code output selection 00 Without fault code output12With fault code output(Refer to the following table)Fault code output at fault occurrenceonly (Refer to the following table)⋅ By setting Pr. 76 to "1" or "2", the fault code can be output to the output terminals.⋅ When the setting is "2", a fault code is output at only fault occurrence, and during normal operation, the terminalsoutput the signals assigned to Pr. 190 to Pr. 196 (output terminal function selection).⋅ The following table indicates fault codes to be output. (0: output transistor off, 1: output transistor on)Operation PanelOutput of Output TerminalsIndicationFault CodeSU IPF OL FU(<strong>FR</strong>-DU07)Normal * 0 0 0 0 0E.OC1 0 0 0 1 1E.OC2 0 0 1 0 2E.OC3 0 0 1 1 3E.OV1 to E.OV3 0 1 0 0 4E.THM 0 1 0 1 5E.THT 0 1 1 0 6E.IPF 0 1 1 1 7E.UVT 1 0 0 0 8E.FIN 1 0 0 1 9E. GF 1 0 1 1 BE.OHT 1 1 0 0 CE.OLT 1 1 0 1 DE.OPT 1 1 1 0 EE.OP3 1 1 1 0 EOther than the above 1 1 1 1 F* When Pr. 76 = "2", the output terminals output the signals assigned to Pr. 190 to Pr. 196 .CAUTION⋅ When a value other than "0" is set in Pr. 76When a fault occurs, the output terminals SU, IPF, OL, FU output the signal in the above table, independently of the Pr. 190 toPr. 196 (output terminal function selection) settings. Please be careful when inverter control setting has been made with the outputsignals of Pr. 190 to Pr. 196.♦ Parameters referred to ♦Pr. 190 to Pr. 196 (output terminal function selection) Refer to page 214248
4PARAMETERS4.18.3 Input/output phase loss protection selection (Pr. 251, Pr. 872)(1) Output phase loss protection selection (Pr. 251)⋅ When Pr. 251 is set to "0", output phase loss protection (E.LF) becomes invalid.Operation setting at fault occurrenceYou can disable the output phase loss protection function that trips the inverter if one phase of the inverter outputside (load side) three phases (U, V, W) is lost.The input phase loss protection function of the inverter input side (R/L1, S/L2, T/L3) can be made invalid.ParameterNumber251872Name Initial Value Setting Range DescriptionOutput phase loss protectionselectionInput phase loss protectionselection110 Without output phase loss protection1 With output phase loss protection0 Without input phase loss protection1 With input phase loss protection(2) Input phase loss protection selection (Pr. 872)⋅ When Pr. 872 is set to "1"(initial value), input phase loss protection (E.ILF) is provided if a phase loss of one phaseamong the three phases is detected for 1s continuously.⋅ When Pr.872 is set to "0", input phase loss protection (E.ILF) becomes invalid.REMARKSIf input phase is lost when Pr. 872 = "1" (with input phase loss) and Pr. 261 ≠ "0" (power failure stop function valid), input phaseloss protection (E.ILF) is not provided but power-failure deceleration is made.⋅⋅CAUTIONWhen an input phase loss occurs in the R/L1 and S/L2 phases, input phase loss protection is not provided but the inverteroutput is shut off.If an input phase loss continues for a long time, the converter section and capacitor lives of the inverter will be shorter.♦ Parameters referred to ♦Pr. 261 Power failure stop selection Refer to page 2434.18.4 Overspeed detection (Pr. 374)ParameterNumberName Initial Value Setting Range Description374 Overspeed detection level 140Hz 0 to 400HzWhen the motor speed reaches or exceedsthe speed set in Pr. 374 during encoderfeedback control, real sensorless vectorcontrol, or vector control, over speed (E.OS)occurs and trips the inverter.Motor speed *Pr. 374Coast to stopTimeALME.OSON* The output frequency and Pr. 374 are compared duringreal sensorless vector control.4.18.5 Encoder signal loss detection (Pr. 376)V/FMagnetic fluxVectorWhen the encoder signal is lost during encoder feedback control, orientation control, or vector control, signal lossdetection (E.ECT) is activated to trip the inverter.ParameterNumber376Name Initial Value Setting Range DescriptionEncoder signal lossdetection enable/disableselection* Setting can be made only when the <strong>FR</strong>-A7AP is mounted.00 Signal loss detection is invalid1 Signal loss detection is valid249
Operation setting at fault occurrence4.18.6 Fault definition (Pr. 875)When motor thermal protection is activated, a fault can be output after the motor decelerates to a stop.ParameterNumber⋅NameInitialValue875 Fault definition 0When Pr. 875 = "1"⋅OutputspeedSettingRangeDescription0 Normal operation1 The motor decelerates to stop when motor thermal protection is activated.(1) The inverter trips immediately at occurrence of anyfault (setting value is "0", initial value)⋅ The inverter trips immediately and a fault signal output is provided atfault occurrence.(2) The motor decelerates to stop when motor thermalprotection is activated (setting value is "1")⋅ When external thermal relay (OHT), motor overload(electronic thermal relay function) (THM) or PTC thermistorON(PTC) is activated, turning on the alarm output 2 signal (ER)starts the motor to decelerate and provides a fault after deceleration toAlarmONa stop.output 2⋅ When the ER signal turns on, decrease load, etc. to allow the inverter(ER)OHT E.OHT to decelerate.occurrence display⋅ At occurrence of a fault other than OHT, THM and PTC, the invertertrips immediately and a fault signal is output.⋅ Set "97 (positive logic) or 197 (negative logic)" in Pr. 190 to Pr. 196 (outputterminal function selection) and assign the ER signal to the output terminal.⋅ This function is invalid during position control.CAUTIONThe value "0" is recommended for the system in which the motor continues running without deceleration due to a large torqueon the load side.Changing the terminal assignment using Pr. 190 to Pr. 196 (output terminal function selection) may affect the other functions. Makesetting after confirming the function of each terminal.Fault output(ALM, ALM2)♦ Parameters referred to ♦Pr. 190 to Pr. 196 (output terminal function selection) Refer to page 214250
4PARAMETERSEnergy saving operation and energy saving monitor4.19 Energy saving operation and energy saving monitorRefer toPurposeParameter that must be SetPageEnergy saving operation Energy saving operation Pr. 60 251How much energy can be savedEnergy saving monitorPr. 52, Pr. 54, Pr. 158,Pr. 891 to Pr. 8992524.19.1 Energy saving control (Pr. 60)V/FWithout a fine parameter setting, the inverter automatically performs energy saving control.This inverter is optimum for fan and pump applications.ParameterNumberName Initial Value Setting Range Description0 Normal operation mode60 Energy saving control selection* 04 Energy saving operation mode* When parameter is read using the <strong>FR</strong>-PU04, a parameter name different from an actual parameter is displayed.Energy saving operation mode (setting "4")⋅ When "4" is set in Pr. 60, the inverter operates in the energy saving operation mode.⋅ In the energy saving operation mode, the inverter automatically controls the output voltage to minimize the inverteroutput voltage during a constant operation.REMARKS⋅ For applications a large load torque is applied to or machines repeat frequent acceleration/deceleration, an energy saving effectis not expected.⋅⋅⋅CAUTIONWhen the energy saving mode is selected, deceleration time may be longer than the setting value. Since overvoltage alarmtends to occur as compared to the constant torque load characteristics, set a longer deceleration time.The energy saving operation mode functions only under V/F control. When the advanced magnetic flux vector control, realsensorless vector control and vector control are selected, the energy saving mode is invalid.Since output voltage is controlled in energy saving operation mode, output current may slightly increase.251
Energy saving operation and energy saving monitor4.19.2 Energy saving monitor (Pr. 891 to Pr. 899)From the power consumption estimated value during commercial power supply operation, the energy savingeffect by use of the inverter can be monitored/output.ParameterNumber5254158891NameDU/PU main display dataselectionFM terminal functionselectionAM terminal functionselectionCumulative power monitordigit shifted timesInitialValue0(outputfrequency)1(outputfrequency)9999Setting Range0, 5 to 8, 10 to 14, 17 to 20, 22to 25, 32 to 35, 50 to 57, 1001 to 3, 5 to 8, 10 to 14, 17, 18,21, 24, 32 to 34, 50, 52, 53892 Load factor 100% 30 to 150%893894895Energy saving monitorreference (motor capacity)Control selection duringcommercial power-supplyoperationPower saving ratereference valueInverterratedcapacity09999896 Power unit cost 9999897898899Power saving monitoraverage timePower saving cumulativemonitor clearOperation time rate(estimated value)999999999999Description50:Power saving monitor51:Cumulative saving power monitor50:Power saving monitorSet the number of times to shift thecumulative power monitor digit0 to 4Clamps the monitor value atmaximum.No shift9999Clears the monitor value when itexceeds the maximum value.Set the load factor for commercialpower-supply operation. Multiplied bythe power consumption rate (page 255)during commercial power supplyoperation.Set the motor capacity (pumpcapacity). Set when calculating power0.1 to 55kWsaving rate, power saving rate averagevalue, commercial operation power.0 Discharge damper control (fan)1 Inlet damper control (fan)2 Valve control (pump)Commercial power-supply drive (fixed3value)Consider the value during commercial0power-supply operation as 100%1 Consider the Pr. 893 setting as 100%.9999 No functionSet the power unit cost. Displays the0 to 500power saving amount charge on theenergy saving monitor.9999 No function0 Average for 30 minutes1 to 1000h Average for the set time9999 No function0 Cumulative monitor value clear1 Cumulative monitor value holdTotalization continued10(communication data upper limit 9999)Totalization continued9999(communication data upper limit65535)Use for calculation of annual powersaving amount. Set the annual0 to 100%operation ratio (consider 365 days ×24hr as 100%).9999 No functionThe above parameters allow its setting to be changed during operation in any operation mode even if "0" (initial value) is set in Pr. 77 Parameter writeselection.252
4PARAMETERSEnergy saving operation and energy saving monitor(1) Energy saving monitor list⋅ The following provides the items that can be monitored by the power saving monitor (Pr. 52, Pr. 54, Pr. 158 = "50").(Only 1) power saving and 3) power saving average value can be output to Pr. 54 (terminal FM) and Pr. 158(terminal AM))Energy SavingMonitor Item1) Power saving2) Power saving rate3)4)5)Power saving averagevaluePower saving rateaverage valuePower saving amountaverage valueDescription and FormulaDifference between the estimated value of powernecessary for commercial power supply operationand the input power calculated by the inverterPower during commercial power supplyoperation − input power monitorRatio of power saving on the assumption that powerduring commercial power supply operation is 100%1) Power saving× 100Power during commercialpower supply operationRatio of power saving on the assumption that Pr.893 is 100%1) Power saving× 100Pr. 893Average value of power saving amount per hourduring predetermined time (Pr. 897)Σ ( 1) Power saving × Δt)Pr. 897Ratio of power saving average value on theassumption that the value during commercialpower supply operation is 100%Σ ( 2) Power saving rate × Δt)× 100Pr. 897Ratio of power saving average value on theassumption that Pr. 893 is 100%3) Power saving average value× 100Pr. 893Power saving average value represented in termsof charge3) Power saving average value × Pr. 8960.01kW 9999Parameter SettingPr. 895 Pr. 896 Pr. 897 Pr. 899⎯ 9999⋅ The following shows the items which can be monitored by the cumulative saving power monitor (Pr. 52 = "51").(The monitor value of the cumulative monitor can be shifted to the right with Pr. 891 Cumulative power monitor digitshifted times.)6)7)8)9)Energy SavingMonitor ItemPower savingamountPower savingamount chargeAnnual powersaving amountAnnual powersaving amountchargeDescription and FormulaPower saving is added up per hour.Σ ( 1) Power saving × Δt)Power saving amount represented in terms of charge6) Power saving amount × Pr. 896Estimated value of annual power saving amount6) Power saving amount× 24 × 365 ×Operation time during accumulationof power saving amountAnnual power saving amount represented in terms ofcharge8) Annual power saving amount × Pr. 896Pr. 8991000.1%010.01kWh 99990.1%010.01 ⎯IncrementsIncrements0.01kWh*1*20.01 *1 ⎯0.01kWh*1*20.01*1 ⎯99990 to5000 to1000h⎯Parameter SettingPr. 895 Pr. 896 Pr. 897 Pr. 899⎯ 99990 to500⎯ 99990 to500⎯99990 to100%*1 For communication (RS-485 communication, communication option), the display increments are 1. For example, the communication data is"10" for "10.00kWh".*2 When using the parameter unit (<strong>FR</strong>-PU04/<strong>FR</strong>-PU07), "kW" is displayed.REMARKS⋅ As the operation panel (<strong>FR</strong>-DU07) is 4-digit display, it displays in 0.1 increments since a carry occurs, e.g. "100.0", when amonitor value in 0.01 increments exceeds "99.99". The maximum display is "9999".⋅ As the operation panel (<strong>FR</strong>-PU04/<strong>FR</strong>-PU07) is 5-digit display, it displays in 0.1 increments since a carry occurs, e.g. "1000.0",when a monitor value in 0.01 increments exceeds "999.99". The maximum display is "99999".⋅ The upper limit of communication (RS-485 communication, communication option) is "65535" when Pr. 898 Power savingcumulative monitor clear = "9999". The upper limit of 0.01 increments monitor is "655.35" and that of 0.1 increments monitor is"6553.5".253
Energy saving operation and energy saving monitor(2) Power saving instantaneous monitor ( 1) power savings, 2) power saving rate )⋅ On the power saving monitor ( 1)), an energy saving effect as compared to the power consumption duringcommercial power supply operation (estimated value) is calculated and displays on the main monitor.⋅ In the following case, the power saving monitor ( 1)) is "0".(a)Calculated values of the power saving monitor are negative values.(b)During the DC injection brake operation(c)Motor is not connected (output current monitor is 0A)⋅ On the power saving rate monitor ( 2)), setting "0" in Pr. 895 Power saving rate reference value displays the powersaving rate on the assumption that power (estimated value) during commercial power supply operation is 100%.When Pr. 895 = "1", the power saving rate on the assumption that the Pr. 893 Energy saving monitor reference (motorcapacity) value is 100% is displayed.(3) Power saving average value monitor ( 3) power saving average value, 4) average powersaving rate average value, 5) power saving amount average value)⋅ Power saving average value monitor can be displayed when a value other than "9999" is set in Pr. 897 Power savingmonitor average time.⋅ The power saving average value monitor ( 3)) displays the average value per unit time of the power saving amountat averaging.⋅ The average value is updated every time an average time has elapsed after the Pr. 897 setting is changed, power isturned on or the inverter is reset, assuming as a starting point.The power savings average value update timingsignal (Y92) is inverted every time the average value is updated.⋅ The power saving average value monitor ( 4)) displays the average value per unit time of power saving rate ( 2)) atevery average time by setting "0" or "1" in Pr. 895 Power saving rate reference value.⋅ By setting the charge (power unit) per 1kWh of power amount in Pr. 896 Power unit cost, the power saving amountaverage value monitor ( 5)) displays the charge relative to the power saving average value (power saving averagevalue ( 3)) × Pr. 896).(4) Cumulative saving power monitor ( 6) power saving amount, 7) power saving amountcharge, 8) annual power saving amount, 9) annual power saving amount charge)⋅ On the cumulative saving power monitor, the monitor data digit can be shifted to the right by the number of Pr. 891Cumulative power monitor digit shifted times settings. For example, if the cumulative power value is 1278.56kWhwhen Pr. 891 = "2", the PU/DU display is 12.78 (display in 100kWh increments) and the communication data is 12.If the maximum value is exceeded at Pr. 891 = "0 to 4", the power is clamped at the maximum value, indicating thata digit shift is necessary. If the maximum value is exceeded at Pr. 891 = "9999", the power returns to 0 and isrecounted. The other monitors are clamped at the display maximum value.⋅ The cumulative saving power monitor ( 6)) can measure the power amount during a predetermined period.Measure according to the following steps1) Write "9999" or "10" in Pr. 898 Power saving cumulative monitor clear.2) Write "0" in Pr. 898 at measurement start timing to clear the cumulative saving power monitor value and starttotalization of power saving.3) Write "1" in Pr. 898 at measurement end timing to hold the cumulative saving power monitor value.REMARKS⋅When Pr.897=4 [Hr]Poweris offPower savingDuring stopinstantaneousvalue [kW]0 4 8 12 16 20 TPr. 897 setting Operation startAverage AverageAverage Last valuePower savingaverage value[kW]Y92: power savingaverage valueupdate timing signal0 in the firstmeasurementAverageStores Hi/Low when thepower is off and starts.0 48 12 16 0 4The cumulative saving power monitor value is stored every hour. Hence, when the power supply is switched on again within onehour after it was switched off, the previously stored monitor value is displayed and totalization starts. (The cumulative monitorvalue may decrease)254
4PARAMETERSEnergy saving operation and energy saving monitor(5) Power estimated value of commercial power supply operation (Pr. 892, Pr. 893, Pr. 894)⋅ Select the commercial power supply operation pattern from among the four patterns of discharge damper control(fan), inlet damper control (fan), valve control (pump) and commercial power supply drive, and set it to Pr. 894Control selection during commercial power-supply operation.⋅ Set the motor capacity (pump capacity) in Pr. 893 Energy saving monitor reference (motor capacity).⋅ The power consumption rate (%) during commercial power supply operation is estimated from the operationpattern and the ratio of speed to rating (current output frequency/Pr. 3 Base frequency) in the following chart.Power consumption [%]1101009080706050403020100Commercial power-supply driveDischarge sidedamper control(fan)Valve control(pump)Inlet damper control(fan)0 102030405060708090100110Ratio of speed to rating [%]⋅ From the motor capacity set in Pr. 893 and Pr. 892 Load factor, the power estimated value (kW) during commercialpower supply operation is found by the following formula.Power estimated value (kW) during commercial power supply operationPower consumption (%)= Pr. 893 (kW) × ×100Pr. 892 (%)100⋅REMARKSSince the speed does not increase above the power supply frequency in commercial power supply operation, it becomesconstant when the output frequency rises to or above Pr. 3 Base frequency.255
Energy saving operation and energy saving monitor(6) Annual power saving amount, power charge (Pr. 899)⋅ By setting the operation time rate [%] (ratio of time when the motor is actually driven by the inverter during a year)in Pr. 899, the annual energy saving effect can be predicted.⋅ When the operation pattern is predetermined to some degree, the estimated value of the annual power savingamount can be found by measurement of the power saving amount during a given measurement period.⋅ Refer to the following and set the operation time rate.1) Predict the average time [h/day] of operation in a day.2) Find the annual operation days [days/year]. (Monthly average operation days × 12 months)3) Calculate the annual operation time [h/year] from 1) and 2).Annual operation time (h/year) = Average time (h/day) × Operation days (days/year)4) Calculate the operation time rate and set it to Pr. 899.Annual operation time (h/year)Operation time rate (%) = 24 (h/day) × 365 (days/year) × 100(%)⋅REMARKSOperation time rate setting example: When operation is performed for about 21 hours per day and the monthly averageoperation days are 16 daysAnnual operation time = 21 (h/day) × 16 (days/month) × 12 months = 4032 (h/year)4032 (h/year)Operation time rate (%) = 24 (h/day) × 365 (days/year) × 100(%) = 46.03%Set 46.03% to Pr. 899.⋅ Calculate the annual power saving amount from Pr. 899 Operation time rate (estimated value) and power savingaverage value monitorPower saving average valueAnnual power saving amount (kWh/year) = (kW) during totalizationwhen Pr. 898 = 10 or 9999× 24h × 365 days ×Pr. 899100⋅ The annual power saving amount charge can be monitored by setting the power charge per hour in Pr. 896 Powerunit cost.Calculate the annual power saving amount charge in the following method.Annual power saving amount charge = Annual power saving amount (kWh/year) × Pr. 896REMARKSIn the regeneration mode, make calculation on the assumption that "power saving = power during commercial power supplyoperation (input power = 0)".♦ Parameters referred to ♦Pr. 3 Base frequency Refer to page 142Pr. 52 DU/PU main display data selection Refer to page 228Pr. 54 FM terminal function selection Refer to page 228Pr. 158 AM terminal function selection Refer to page 228256
4PARAMETERSMotor noise, EMI measures4.20 Motor noise, EMI measures4.20.1 PWM carrier frequency and Soft-PWM control (Pr. 72, Pr. 240)You can change the motor sound.ParameterNumberName(1) PWM carrier frequency changing (Pr. 72)⋅ You can change the PWM carrier frequency of the inverter.⋅ Changing the PWM carrier frequency produces an effect on avoiding the resonance frequency of a mechanicalsystem or motor or on measures against noise (EMI) generated from the inverter or on leakage current reductioncaused by the PWM switching.⋅ Carrier frequencies under real sensorless vector control or vector control are as shown below.(2) Soft-PWM control (Pr. 240)InitialValueSettingRange72 *1 PWM frequency selection 2 0 to 15DescriptionPWM carrier frequency can be changed.The setting displayed is in [kHz]. Note that 0 indicates0.7kHz and 15 indicates 14.5kHz.0 Soft-PWM is invalid240 *1 Soft-PWM operation selection 11 When Pr. 72 = "0 to 5", soft-PWM is valid.*1 The above parameters allow its setting to be changed during operation in any operation mode even if "0" (initial value) is set inPr. 77 Parameter write selection.Pr. 72 SettingCarrier Frequencies (kHz)0 to 5 26 to 9 610 to 13 1014, 15 14⋅ Soft-PWM control is a control method that changes the motor noise from a metallic tone into an unoffendingcomplex tone.⋅⋅CAUTIONDecreasing the PWM carrier frequency effect on measures against noises (EMI) generated from the inverter and on leakagecurrent reduction, but increases motor noise.When PWM carrier frequency is set to 1kHz or less (Pr. 72 ≤ 1), fast response current limit may function prior to stall preventionoperation due to increase in ripple currents, resulting in insufficient torque. In such case, set fast response current limitoperation invalid using Pr. 156 Stall prevention operation selection.♦ Parameters referred to ♦Pr. 156 Stall prevention operation selection Refer to page 135257
Frequency/torque setting by analoginput (terminal 1, 2, 4)4.21 Frequency/torque setting by analog input (terminal 1, 2, 4)Purpose Parameter that must be Set Refer to PageFunction assignment of analog inputterminalSelection of voltage/current input(terminal 1, 2, 4) Perform forward/reverse rotation by analog inputAdjust the main speed by analogauxiliary inputNoise elimination at the analog inputAdjustment (calibration) of analoginput frequency and voltage (current)Adjustment (calibration) of analoginput torque and voltage (current)Terminal 1 and terminal 4 functionassignment4.21.1 Function assignment of analog input terminal (Pr. 858, Pr. 868)Pr. 858, Pr. 868 258Analog input selection Pr. 73, Pr. 267 259Analog auxliary input andcompensation (addedcompensation and overridefunction)Input filterBias and gain of frequency settingvoltage (current)Bias and gain of torque settingvoltage (current)Pr. 73, Pr. 242, Pr. 243,Pr. 252, Pr. 253Pr. 74, Pr. 822, Pr. 826,Pr. 832, Pr. 836, Pr. 849Pr. 125, Pr. 126, Pr. 241,C2 to C7 (Pr. 902 to Pr. 905)C12 to C15 (Pr. 917 to Pr. 918)Pr. 241, C16 to C19 (Pr. 919to Pr. 920), C38 to C41 (Pr.932 to Pr. 933)Function assignment of terminal 1 and terminal 4 of analog input can be selected and changed by parameter.ParameterNumberName Initial Value Setting Range Description858 Terminal 4 function assignment 0 0, 1, 4, 9999868 Terminal 1 function assignment 0 0 to 6, 9999Select the terminal 4 function.(Refer to the following list)Select the terminal 1 function.(Refer to the following list)⋅ For the terminal 1 and terminal 4 used for analog input, frequency (speed) command, magnetic flux command,torque command, etc. can be selected.Functions change according to the control mode as in the table below.•Terminal 1 function according to controlPr. 868SettingV/F Control,Advanced MagneticFlux Vector ControlReal Sensorless Vector Control, Vector Control263265267273Vector ControlSpeed control Torque control Position control0(Initial value)Frequency setting auxiliary Speed setting auxiliary Speed limit auxiliary ⎯1 ⎯ Magnetic flux command Magnetic flux command Magnetic flux command2 ⎯Regenerative torque limitRegenerative torque⎯(Pr. 810 = 1)limit (Pr. 810 = 1)3 ⎯ ⎯Torque command(Pr. 804 = 0)⎯4Stall prevention operationlevel input(Pr. 810 = 1)Torque limit (Pr. 810 = 1)5 ⎯ ⎯Torque command(Pr. 804 = 0)Forward/reverse rotationspeed limit (Pr. 807 = 2)Torque limit (Pr. 810 = 1)⎯6 ⎯Torque bias input(Pr. 840 = 1, 2, 3)⎯⎯9999 ⎯ ⎯ ⎯ ⎯•Terminal 4 function according to controlPr. 858V/F Control, Real Sensorless Vector Control, Vector Control Vector ControlAdvanced Magnetic FluxSetting Vector ControlSpeed control Torque control Position control0Frequency command Speed commandSpeed limit(Initial value) (AU signal-ON)(AU signal-ON)(AU signal-ON)⎯1 ⎯ Magnetic flux command Magnetic flux command Magnetic flux commandStall prevention operation4level inputTorque limit (Pr. 810 = 1) ⎯ Torque limit (Pr. 810 = 1)(Pr. 810 = 1)9999 ⎯ ⎯ ⎯ ⎯⎯ :No function258
4PARAMETERSFrequency/torque setting by analoginput (terminal 1, 2, 4)REMARKS⋅ When "1 or 4" is set in both Pr. 868 and Pr. 858, terminal 1 is made valid and terminal 4 has no function.⋅ When "1" (magnetic flux), "4" (stall prevention/torque limit) is set in Pr. 868, functions of terminal 4 become valid independentlyof whether the AU terminal is on or off.♦ Parameters referred to ♦Advanced magnetic flux vector control Refer to page 131Real sensorless vector control Refer to page 75Pr. 804 Torque command source selection Refer to page 108Pr. 807 Speed limit selection Refer to page 110Pr. 810 Torque limit input method selection Refer to page 834.21.2 Analog input selection (Pr. 73, Pr. 267)You can select the function that switches between forward rotation and reverse rotation according to the analoginput terminal selection specifications, the override function and the input signal polarity.ParameterNumberNameInitialValue73 Analog input selection 1267 Terminal 4 input selection 0SettingRange0 to 5,10 to 156, 7,16, 17Voltage/currentinput switchSwitch 2 - OFF(initial status)Switch 2 - ONDescriptionYou can select the input specificationsof terminal 2 (0 to 5V, 0 to 10V, 0 to20mA) and input specifications ofterminal 1 (0 to ±5V, 0 to ±10V).Override and reversible operation canbe selected.Switch 1 - ON0Terminal 4 input 0 to 20mA(initial status)1Terminal 4 input 0 to 5VSwitch 1 - OFF2 Terminal 4 input 0 to 10V(1) Selection of analog input specifications⋅ For the terminals 2, 4 used for analog input, voltage input (0 to 5V, 0 to 10V) or current input (0 to 20mA) can beselected.Change parameters (Pr. 73, Pr. 267) and a voltage/current input switch (switch 1, 2) to change input specifications.Switch 1:Terminal 4 inputVoltage/currentinput switch2 4ON: Current input (initial status)OFF: Voltage inputSwitch 2: Terminal 2 inputON: Current inputOFF: Voltage input (initial status)Switch 1Switch 2⋅ Rated specifications of terminal 2 and 4 change according to the voltage/current input switch setting.Voltage input: Input resistance 10kΩ ± 1kΩ, Maximum permissible voltage 20VDCCurrent input: Input resistance 245Ω ± 5Ω, Maximum permissible current 30mA⋅CAUTIONSet Pr. 73, Pr. 267, and a voltage/current input switch correctly, then input an analog signal in accordance with the setting.Incorrect setting as in the table below could cause component damage. Incorrect settings other than below can cause abnormaloperation.Setting Causing Component DamageSwitch setting Terminal inputON (Current input)OFF (Voltage input)Voltage inputCurrent inputOperationThis could cause component damage to the analog signal output circuit ofsignal output devices.(electrical load in the analog signal output circuit of signal output devices increases)This could cause component damage of the inverter signal input circuit .(output power in the analog signal output circuit of signal output devices increases)259
Frequency/torque setting by analoginput (terminal 1, 2, 4)⋅ Refer to the following table and set Pr. 73 and Pr. 267. (Pr. 73SettingTerminal 2InputTerminal 1InputTerminal 4 InputAUsignalindicates the main speed setting)Pr. 73SettingCompensation InputTerminal andCompensationMethod0 0 to 10V 0 to ±10V0110 to to 5V 0 to ±10V(initial value)(initial value)2 0 to 10V 0 to ±5V 23 0 to 5V 0 to ±5V 34 0 to 10V 0 to ±10V 4 Terminal 25 0 to 5V 0 to ±5V 5Override6 0 to 20mA 0 to ±10V 67 0 to 20mA 0 to ±5V Off ⎯710 0 to 10V 0 to ±10V 10Terminal 1Added compensationTerminal 1Added compensationPolarityReversibleNo(Indicates thata frequencycommandsignal ofnegativepolarity is notaccepted.)11 0 to 5V 0 to ±10V 1112 0 to 10V 0 to ±5V 1213 0 to 5V 0 to ±5V 1314 0 to 10V 0 to ±10V 14 Terminal 2Yes15 0 to 5V 0 to ±5V 15Override16 0 to 20mA 0 to ±10V 16 Terminal 117 0 to 20mA 0 to ±5V 17 Added compensation00 to ±10V01 (initial1No0 to ±10VTerminal 1value)⎯(initial value)(Indicates thatAdded compensation2 0 to ±5V 2a frequencycommand3 0 to ±5V 3signal of4 0 to 10V4 Terminal 2⎯According tonegative5 0 to 5V 5OverridePr. 267 settingpolarity is not60 to ±10V 6⎯0: 4 to 20mAaccepted.)7 0 to ±5V On7(initial value)100 to ±10V 101: 0 to 5VTerminal 111 0 to ±10V 2: 0 to 10V 11 Added compensation⎯12 0 to ±5V 1213 0 to ±5V 13Yes14 0 to 10V14 Terminal 2⎯15 0 to 5V 15Override160 to ±10V 16 Terminal 1⎯17 0 to ±5V 17 Added compensation⎯ : Invaild⋅ Set the voltage/current input switch referring to the table below.Terminal 2 InputSpecificationsPr. 73 Setting Switch 2Terminal 4 InputSpecificationsPr. 267 Setting Switch 1Voltage input (0 to 10V) 0, 2, 4, 10, 12, 14 OFF Voltage input (0 to 10V) 2 OFFVoltage input (0 to 5V) 1 (initial value), 3, 5, 11, 13, 15 OFF Voltage input (0 to 5V) 1 OFFCurrent input (0 to 20mA) 6, 7, 16, 17 ON Current input (4 to 20mA) 0 (initial value) ONindicates an initial value.CAUTION⋅ Turn the AU signal on to make terminal 4 valid.⋅ Match the setting of parameter and switch. A different setting may cause a fault, failure or malfunction.⋅ The terminal 1 (frequency setting auxiliary input) signal is added to the main speed setting signal of the terminal 2 or 4.⋅ When an override is selected, the terminal 1 or 4 is used for the main speed setting and the terminal 2 for the override signal(50% to 150% at 0 to 5V or 0 to 10V). (When the main speed of the terminal 1 or terminal 4 is not input, compensation by theterminal 2 is made invalid.))⋅ Use Pr. 125 (Pr. 126) (frequency setting gain) to change the maximum output frequency at input of the maximum output frequencycommand voltage (current). At this time, the command voltage (current) need not be input.Also, the acceleration/deceleration time, which is a slope up/down to the acceleration/deceleration reference frequency, is notaffected by the change in Pr. 73 setting.⋅ When Pr. 858 Terminal 4 function assignment, Pr. 868 Terminal 1 function assignment = "4", the value of the terminal 1 or terminal 4 is asset to the stall prevention operation level. When terminal 1 and terminal 4 are used for frequency setting, set "0" (initial value) in Pr.858 and Pr. 868.260
4PARAMETERSFrequency/torque setting by analoginput (terminal 1, 2, 4)Forwardrotation0 to 5VDC 10Frequency2setting5InverterSTFSD4Voltage/currentinput switchConnection diagram usingterminal 2 (0 to 5VDC)Forwardrotation2InverterSTF Voltage/currentinput switchSD 4 20 to 10VDC 10EFrequency 2setting5Connection diagramusing terminal 2 (0 to 10VDC)ForwardrotationTerminal 4input selectionInverterSTFVoltage/currentAU input switchSD 4 2(2) Perform operation by analog input voltage⋅ The frequency setting signal inputs 0 to 5VDC (or 0 to 10VDC) to acrossthe terminals 2-5. The 5V (10V) input is the maximum output frequency.The maximum output frequency is reached when 5V (10V) is input.⋅ The power supply 5V (10V) can be input by either using the internalpower supply or preparing an external power supply. The internal powersupply outputs 5VDC across terminals 10-5, or 10V across terminals10E-5.TerminalInverter Built-in PowerSupply VoltageFrequency SettingResolutionPr. 73 (terminal 2input voltage)10 5VDC 0.030Hz/60Hz 0 to 5VDC input10E 10VDC 0.015Hz/60Hz 0 to 10VDC input⋅ When inputting 10VDC to the terminal 2, set any of "0, 2, 4, 10, 12, 14"in Pr. 73. (The initial value is 0 to 5V)⋅ Setting "1 (0 to 5VDC)" or "2 (0 to 10VDC)" in Pr. 267 and a voltage/current input switch in the OFF position changes the terminal 4 to thevoltage input specification. When the AU signal turns on, the terminal 4input becomes valid.REMARKSThe wiring length of the terminal 10, 2, 5 should be 30m maximum.DC0 to 5V 10Frequency 4setting5Connection diagramusing terminal 4 (0 to 5VDC)261
Frequency/torque setting by analoginput (terminal 1, 2, 4)Forwardrotation4 to 20mADCFrequency CurrentinputsettingequipmentInverterSTFVoltage/currentAU input switch4 2SD45(3) Perform operation by analog input current⋅ When the pressure or temperature is controlled constant by a fan, pump,etc., automatic operation can be performed by inputting the output signal0 to 20mADC of the adjuster to across the terminals 4-5.⋅ The AU signal must be turned on to use the terminal 4.Connection diagram usingterminal 4 (4 to 20mADC)Forwardrotation4 to 20mADCCurrentFrequency inputsetting equipmentInverterSTFinput switchSD4 225Voltage/current⋅ Setting any of "6, 7, 16, 17" in Pr. 73 and a voltage/current input switch inthe ON position changes the terminal 2 to the current input specification.At this time, the AU signal need not be turned on.Connection diagram usingterminal 2 (4 to 20mADC)ReverserotationReversibleNot reversibleSet frequency(Hz)60Forwardrotation+5(+10)(4) Perform forward/reverse rotation by analog input(polarity reversible operation)⋅ Setting any of "10 to 17" in Pr. 73 enables polarity reversible operation.⋅ Providing ± input (0 to ±5V or 0 to ±10V) to the terminal 1 enablesforward/reverse rotation operation according to the polarity.-50 Terminal 1 input (V)(-10)Compensation input characteristicwhen STF is on♦ Parameters referred to ♦Pr. 22 Stall prevention operation level Refer to page 135Pr. 125 Terminal 2 frequency setting gain frequency, Pr. 126 Terminal 4 frequency setting gain frequency Refer to page 267Pr. 252, Pr. 253 Override bias/gain Refer to page 263Pr. 858 Terminal 4 function assignment, Pr. 868 Terminal 1 function assignment Refer to page 258262
4PARAMETERSFrequency/torque setting by analoginput (terminal 1, 2, 4)4.21.3 Analog input compensation (Pr. 73, Pr. 242, Pr. 243, Pr. 252, Pr. 253)A fixed ratio of analog compensation (override) can be made by the added compensation or terminal 2 as anauxiliary input for multi-speed operation or the speed setting signal (main speed) of the terminal 2 or terminal 4.ParameterNumberNameInitial Value73 Analog input selection 1242243Terminal 1 added compensationamount (terminal 2)Terminal 1 added compensationamount (terminal 4)SettingRangeDescription0 to 3, 6, 7, 10to 13, 16, 17Added compensation4, 5, 14, 15 Override compensation100% 0 to 100%75% 0 to 100%252 Override bias 50% 0 to 200%253 Override gain 150% 0 to 200%5Auxiliary input 10 to 10V( 5V)Added compensationconnection exampleSet the ratio of added compensation amountwhen terminal 2 is the main speed.Set the ratio of added compensation amountwhen terminal 4 is the main speed.Set the bias side compensation value ofoverride function.Set the gain side compensation value ofoverride function.(1) Added compensation (Pr. 242, Pr. 243)⋅ The compensation signal can be input for the main speed setting forForwardsynchronous/continuous speed control operation, etc.rotationInverter⋅ Setting any of "0 to 3, 6, 7, 10 to 13, 16, 17" in Pr. 73 adds the voltage acrossSTFterminals 1-5 to the voltage signal across terminals 2-5.SD⋅ If the result of addition is negative, it is regarded as 0 at the Pr. 73 setting of any10of "0 to 3, 6, 7", or reverse rotation operation (polarity reversible operation) is2performed when the STF signal turns on at the Pr. 73 setting of any of "10 to 13,16, 17".⋅⋅The compensation input of the terminal 1 can also be added to the multi-speedsetting or terminal 4 (initial value 4 to 20mA).The added compensation for terminal 2 can be adjusted by Pr. 242, and thecompensation for terminal 4 by Pr. 243.Analog command value using terminal 2= Terminal 2 input + Terminal 1 input ×Analog command value using terminal 4= Terminal 4 input + Terminal 1 input ×Pr. 242100(%)Pr. 243100(%)Output frequencyWhen voltage acrossterminals 2-5 is 2.5V(5V)When voltageacross terminals2-5 is 0VOutput frequencyWhen voltage acrossterminals 2-5 is 2.5V(5V)When voltaacross term2-5 is 0V-5V -2.5V(-10V) (-5V)0+2.5V +5V Terminal 1(+5V) (+10V)-5V(-10V)-2.5V(-5V)0+2.5V(+5V)+5V Terminal 1(+10V)STF SignalONForward rotationReverse rotationSTF SignalONForward rotationSTF SignalONForward rotationReverse rotationSTF SignalONForward rotation(a) When Pr. 73 setting is 0 to 5(b) When Pr. 73 setting is 10 to 15Auxiliary input characteristics⋅CAUTIONWhen the Pr. 73 setting was changed, check the voltage/current input switch setting. Different setting may cause a fault, failureor malfunction. (Refer to page 259 for setting.)263
Frequency/torque setting by analoginput (terminal 1, 2, 4)(2) Override function (Pr. 252, Pr. 253)⋅ Use the override function to change the main speed at a fixed ratio.⋅ Set any of "4, 5, 14, 15" in Pr. 73 to select an override.Forward Inverter ⋅ When an override is selected, the terminal 1 or terminal 4 is used for the main speedrotationSTFSD10setting and the terminal 2 for the override signal. (When the main speed of theterminal 1 or terminal 4 is not input, compensation made by the terminal 2 becomesinvalid.)Override2⋅ Using Pr. 252 and Pr. 253, set the override range.setting5⋅ How to find the set frequency for overrideMain (+) 1Compensation amount (%)speed (-)Set frequency (Hz) = Main speed set frequency (Hz) ×100(%)Override connection diagramMain speed set frequency (Hz): Terminal 1, 4 input, multi-speed settingCompensation amount (%): Terminal 2 input200Example)When Pr. 73 = "5"The set frequency changes as shown below according to theterminal 1 (main speed) and terminal 2 (auxiliary) inputs.Pr.252Pr.253Override value (%)15010050Initial value(50% to 150%)00V 2.5V(5V)5V(10V)Voltage across terminals 2-5Set frequency (Hz)906045301500 2.5 5Terminal 1 input voltage (V)Terminal 2 5VDCinput(150%)Terminal 2 2.5VDCinput(100%)Terminal 2 0Vinput(50%)⋅CAUTIONWhen the Pr. 73 setting was changed, check the voltage/current input switch setting. Different setting may cause a fault, failureor malfunction. (Refer to page 259 for setting.)REMARKS⋅ The AU signal must be turned on to use the terminal 4.⋅ When inputting compensation to multi-speed operation or remote setting, set "1" (compensation made) in Pr. 28 Multi-speed inputcompensation selection. (Initial value is "0")♦ Parameters referred to ♦Pr. 28 Multi-speed input compensation selection Refer to page 152Pr. 73 Analog input selection Refer to page 259264
4PARAMETERS4.21.4 Response level of analog input and noise elimination(Pr. 74, Pr. 822, Pr. 826, Pr. 832, Pr. 836, Pr. 849)Frequency/torque setting by analoginput (terminal 1, 2, 4)Response level and stability of frequency reference command and torque reference command by analog input(terminal 1, 2, 4) signal can be adjusted.ParameterNumber(1) Block diagramNameInitialValueSettingRange74 Input filter time constant 1 0 to 8822 Speed setting filter 1 9999DescriptionThe primary delay filter time constant for the analog inputcan be set. A larger setting results in slower response.0 to 5sSet the time constant of the primary delay filter relative tothe external speed command (analog input command).9999 Pr. 74 usedSet the time constant of the primary delay filter relative to0 to 5s826 Torque setting filter 1 9999the external torque command (analog input command).9999 Pr. 74 used832 Speed setting filter 2 9999 0 to 5s, 9999 Second function of Pr. 822 (valid when RT terminal is on)836 Torque setting filter 2 9999 0 to 5s, 9999 Second function of Pr. 826 (valid when RT terminal is on)849Analog input offsetadjustment100% 0 to 200%This function provides speed command by analog input(terminal 2) with offset. Motor rotation due to noise, etc.by analog input can be avoided at zero speed command.Pr. 822 = 9999Pr. 74Speed commandTerminal 1 (2, 4 ) inputRT-OFFPr. 822RT-ONPr. 822 9999Pr. 826 = 9999Pr. 74Torque commandPr. 826Pr. 826 9999Pr. 832 = 9999Pr. 832Pr. 832 9999Pr. 836 = 9999Pr. 836Pr. 836 9999265
Frequency/torque setting by analoginput (terminal 1, 2, 4)(2) Time constant of analog input (Pr. 74)⋅ Effective for eliminating noise in the frequency setting circuit.⋅ Increase the filter time constant if steady operation cannnot be performed due to noise.A larger setting results in slower response (The time constant can be set between approximately 10ms to 1s withthe setting of 0 to 8).(3) Time constant of analog speed command input (Pr. 822, Pr. 832)⋅ Set the time constant of the primary delay filter relative to the external torque command (analog input command)using Pr. 822 Speed setting filter 1.Set a large time constant when you want to delay the tracking of the speed command, when the analog inputvoltage fluctuates, etc.⋅ When you want to change time constant when switching two motors with one inverter, use the Pr. 832 Speed settingfilter 2.⋅ Pr. 832 Speed setting filter 2 is made valid when the RT signal turns on.(4) Time constant of analog torque command input (Pr. 826, Pr. 836)⋅ Set the time constant of the primary delay filter relative to the external torque command (analog input command)using Pr. 826 Torque setting filter 1.Set a large time constant value when you want to delay the tracking of the torque command, when the analog inputvoltage fluctuates, etc.⋅ When you want to change time constant when switching two motors with one inverter, etc., use Pr. 836 Torque settingfilter 2.⋅ Pr. 836 Torque setting filter 2 is made valid when the RT signal turns on.Frequencycommand0% 100%(10V or 5V)0% 100% 200%♦ Parameters referred to ♦Slope determinedaccording to Pr.125and C2 to C4Slope does notchange.Speed settingsignalPr.849 settingPr. 73 Analog input selection Refer to page 259Pr. 125, C2 to C4 (Bias and gain of the terminal 2 frequency setting) Refer to page 267(5) Offset adjustment of analog speed commandinput (Pr. 849)⋅ When speed command by analog input is set, create therange where the motor remains stop to prevent malfunctionat very low speed.⋅ On the assumption that the Pr. 849 setting 100% as 0, theoffset voltage is offset as follows:100% < Pr. 849 ........ positive side100% > Pr. 849 ........negative sideThe offset voltage is found by the following formula.Offset voltage =* According to the Pr. 73 settingVoltage at 100%(5V or 10V *)× Pr. 849 − 100 [V]100266
4PARAMETERSFrequency/torque setting by analoginput (terminal 1, 2, 4)4.21.5 Bias and gain of frequency setting voltage (current)(Pr. 125, Pr. 126, Pr. 241, C2(Pr. 902) to C7(Pr. 905), C12(Pr. 917) to C15(Pr. 918))You can set the magnitude (slope) of the output frequency as desired in relation to the frequency setting signal (0to 5V, 0 to 10V or 0 to 20mADC).Set Pr. 73, Pr. 267 and voltage/current input switch to switch between 0 to 5VDC, 0 to 10VDC and 4 to 20mADC.(Refer to page 259)• Frequency setting bias/gain parameterParameterNumberName125Terminal 2 frequency setting gainfrequency126Terminal 4 frequency setting gainfrequencyAnalog input display unit241 *2switchoverC2(902) *1Terminal 2 frequency setting biasfrequencyC3(902) *1 Terminal 2 frequency setting bias 0% 0 to 300%C4(903) *1 Terminal 2 frequency setting gain 100% 0 to 300%C5(904) *1Terminal 4 frequency setting biasfrequencyC6(904) *1 Terminal 4 frequency setting bias 20% 0 to 300%C7(905) *1 Terminal 4 frequency setting gain 100% 0 to 300%Initial ValueSettingRangeDescription60Hz 0 to 400HzSet the frequency of terminal 2 input gain(maximum).60Hz 0 to 400HzSet the frequency of terminal 4 input gain(maximum).00 Displayed in % Select the unit of1 Displayed in V/mA analog input display.0Hz 0 to 400HzSet the frequency on the bias side ofterminal 2 input.Set the converted % of the bias sidevoltage (current) of terminal 2 input.Set the converted % of the gain sidevoltage (current) of terminal 2 input.0Hz 0 to 400HzSet the frequency on the bias side ofterminal 4 input.Set the converted % of the bias sidecurrent (voltage) of terminal 4 input.Set the converted % of the gain sidecurrent (voltage) of terminal 4 input.• Speed limit bias/gain parameterParameterSettingNumberNameInitial ValueRangeC12(917) *1 Terminal 1 bias frequency (speed) 0Hz 0 to 400HzC13(917) *1 Terminal 1 bias (speed) 0% 0 to 300%C14(918) *1 Terminal 1 gain frequency (speed) 60Hz 0 to 400HzDescriptionSet the frequency (speed) on the bias sideof terminal 1 input.Set the converted % of the bias sidevoltage of terminal 1 input.Set the frequency (speed) of terminal 1input gain (maximum).C15(918) *1 Terminal 1 gain (speed) 100% 0 to 300%Set the converted % of the gain sidevoltage of terminal 1 input.*1 The parameter number in parentheses is the one for use with the parameter unit (<strong>FR</strong>-PU04/<strong>FR</strong>-PU07).*2 The above parameters allow its setting to be changed during operation in any operation mode even if "0" (initial value) is set in Pr. 77 Parameter write selection.267
Frequency/torque setting by analoginput (terminal 1, 2, 4)(1) The relationship between analog input terminal and calibration parameter•Terminal 1 functional calibration parameterPr. 868Calibration ParametersTerminal FunctionSettingBias settingGain settingC2(Pr. 902) Terminal 2 frequency setting bias frequency Pr. 125 Terminal 2 frequency setting gain frequency0Frequency (speed) setting C3(Pr. 902) Terminal 2 frequency setting biasC4(Pr. 903) Terminal 2 frequency setting gain(initialvalue)auxiliaryC5(Pr. 904) Terminal 4 frequency setting bias frequency Pr. 126 Terminal 4 frequency setting gain frequencyC6(Pr. 904) Terminal 4 frequency setting biasC7(Pr. 905) Terminal 4 frequency setting gain1 Magnetic flux command2 Regenerative torque limit3 Torque command45Stall prevention operation level */torque limit/torque commandForward/reverse rotation speedlimit6 Torque bias input•Terminal 4 functional calibration parameterPr. 858Terminal FunctionSettingC16(Pr.919) Terminal 1bias command (torque/magnetic flux)C17(Pr.919) Terminal 1bias (torque/magnetic flux)C16(Pr. 919) Terminal 1 bias command (torque/magnetic flux)C17(Pr. 919) Terminal 1 bias (torque/magnetic flux)C12(Pr. 917) Terminal 1 bias frequency (speed)C13(Pr. 917) Terminal 1 bias (speed)C16(Pr. 919) Terminal 1 bias command (torque/magnetic flux)C17(Pr. 919) Terminal 1 bias (torque/magnetic flux)C18(Pr. 920) Terminal 1 gain command (torque/magnetic flux)C19(Pr. 920) Terminal 1 gain (torque/magnetic flux)C18(Pr. 920) Terminal 1 gain command (torque/magnetic flux)C19(Pr. 920) Terminal 1 gain (torque/magnetic flux)C14(Pr. 918) Terminal 1 gain frequency (speed)C15(Pr. 918) Terminal 1 gain (speed)C18(Pr. 920) Terminal 1 gain command (torque/magnetic flux)C19(Pr. 920) Terminal 1 gain (torque/magnetic flux)9999 ⎯ ⎯ ⎯0(initialvalue)Frequency command/speedcommand1 Magnetic flux command4Stall prevention operation level */torque limitBias settingC5(Pr. 904) Terminal 4 frequency setting bias frequencyC6(Pr. 904) Terminal 4 frequency setting biasC38(Pr.932) Terminal 4 bias command (torque/magnetic flux)C39(Pr.932) Terminal 4 bias (torque/magnetic flux)C38(Pr. 932) Terminal 4 bias command (torque/magnetic flux)C39(Pr. 932) Terminal 4 bias (torque/magnetic flux)Calibration ParametersGain settingPr. 126 Terminal 4 frequency setting gain frequencyC7(Pr. 905) Terminal 4 frequency setting gainC40(Pr.933) Terminal 4 gain command (torque/magnetic flux)C41(Pr.933) Terminal 4 gain (torque/magnetic flux)C40(Pr. 933) Terminal 4 gain command (torque/magnetic flux)C41(Pr. 933) Terminal 4 gain (torque/magnetic flux)9999 ⎯ ⎯ ⎯⎯ : No function* Use Pr. 148 Stall prevention level at 0V input and Pr. 149 Stall prevention level at 10V input to adjust bias/gain of stall prevention operation level268
4PARAMETERSFrequency/torque setting by analoginput (terminal 1, 2, 4).⋅⋅⋅Output frequency(Hz)C2 (Pr. 902)C12 (Pr. 917)Output frequency(Hz)C5(Pr. 904)60HzBias60HzBias(2) Change the frequency at maximumanalog input. (Pr. 125, Pr. 126)⋅ Set a value in Pr. 125 (Pr. 126) when changing onlythe frequency setting (gain) of the maximum analoginput power (current). (C2 (Pr. 902) to C7 (Pr. 905)setting need not be changed)(3) Analog input bias/gain calibration (C2(Pr.902) to C7(Pr. 905), C12(Pr. 917) to C15(Pr.918))⋅ The "bias" and "gain" functions are used to adjust therelationship between the input signal entered fromoutside the inverter to set the output frequency, e.g. 0to 5V, 0 to 10V or 4 to 20mADC, and the outputfrequency.⋅ Set the bias frequency of the terminal 2 input usingC2 (Pr. 902). (factory-set to the frequency at 0V)⋅ Using Pr. 125, set the output frequency relative to thefrequency command voltage (current) set in Pr. 73Analog input selection.⋅ Set the bias frequency of the terminal 1 input usingC12 (Pr. 917). (factory-set to the frequency at 0V)⋅ Set the gain frequency of the terminal 1 input usingC14 (Pr. 918). (factory-set to the frequency at 10V)⋅ Set the bias frequency of the terminal 4 input usingC5 (Pr. 904). (factory-set to the frequency at 4mA)⋅ Using Pr. 126, set the output frequency relative to20mA of the frequency command current (4 to20mA).⋅ There are three methods to adjust the frequencysetting voltage (current) bias/gain.(a) Method to adjust any point by application ofvoltage (current) to across the terminals 2-5 (4-5).page 270(b) Method to adjust any point without application of avoltage (current) to across terminals 2-5(4-5).page 271(c) Adjusting only the frequency without adjusting thevoltage (current). page 272CAUTIONWhen the terminal 2 is calibrated to change the inclination of the set frequency, the setting of the terminal 1 is also changed.When a voltage is input to the terminal 1 to make calibration, (terminal 2 (4) analog value + terminal 1 analog value) is the analogcalibration value.When the voltage/current input signal was changed using Pr. 73, Pr. 267 and voltage/current input switch, be sure to makecalibration.(4) Analog input display unit changing (Pr. 241)⋅ You can change the analog input display unit (%/V/mA) for analog input bias/gain calibration.⋅ Depending on the terminal input specification set to Pr. 73, Pr. 267 and voltage/current input switch, the display units ofC3 (Pr. 902), C4 (Pr. 903), C6 (Pr. 904) C7 (Pr. 905) change as shown below.Analog Command(terminal 2, 4)(according to Pr. 73, Pr. 267,voltage/current input switch)Initial valueGainPr. 125C14 (Pr. 918)00 Frequency setting signal100%5V010VC3 (Pr. 902)C4 (Pr. 903)C13 (Pr. 917)C15 (Pr. 918)Initial valueGain00204 Frequency setting signal100%20mAC6 (Pr. 904) C7 (Pr. 905)Pr. 126Pr. 241 = 0 (initial value) Pr. 241 = 10 to 5V input 0 to 5V → displayed in 0 to 100% (0.1%). 0 to 100% → displayed in 0 to 5V (0.01V).0 to 10V input 0 to 10V → displayed in 0 to 100% (0.1%). 0 to 100% → displayed in 0 to 10V (0.01V).0 to 20mA input 0 to 20mA → displayed in 0 to 100% (0.1%). 0 to 100% → displayed in 0 to 20mA (0.01mA).REMARKS⋅ Analog input display is not displayed correctly if voltage is applied to terminal 1 when terminal 1 input specifications (0 to ±5V, 0to ±10V) and main speed (terminal 2, terminal 4 input) specifications (0 to 5V, 0 to 10V, 0 to 20mA) differ. (For example, 5V(100%) is analog displayed when 0V and 10V are applied to terminal 2 and terminal 1 respectively in the initial status.In this case, set "0" (initial value is 0% display) in Pr. 241 to use.269
Frequency/torque setting by analoginput (terminal 1, 2, 4)(5) Frequency setting voltage (current) bias/gain adjustment method(a)Method to adjust any point by application of voltage (current) to across the terminals 2-5 (4-5).Operation1. Confirmation of the RUN indication and operationmode indicationThe inverter must be at a stop.The inverter must be in the PU operation mode.(Using )2.Press to choose the parameter setting mode.3.Turn until appears.DisplayThe parameternumber readpreviously appears.4. Press to display .5. Turn until ( )appears. Set to C4 Terminal 2 frequencysetting gain.Terminal 2 inputC0 to C41settingis enabled.Terminal 4 input6.Press to display the analog voltage (current)value (%).7. Apply a 5V (20mA) voltage (current).(Turn the external potentiometer connectedacross terminals 2-5 (across terminals 4-5) tomaximum (any position).)CAUTIONAfter performing the operation in step 6, do not touch untilcompletion of calibration.8.Press to set.*Analog voltage (current)value (%) across terminals 2-5(across terminals 4-5)** The value is nearly 100 (%) in the maximumposition of the potentiometer.Terminal 2 input Terminal 4 inputFlicker...Parameter setting complete!!(Adjustment completed)* The value is nearly 100 (%) in the maximumposition of the potentiometer.Turn to read another parameter.Press to return to the indication (step 4).Press twice to show the next parameter ( ).REMARKS⋅ If the frequency meter (indicator) connected to across terminals FM-SD does not indicate just 60Hz, set calibration parameter C0FM terminal calibration. (Refer to page 236)⋅ If the gain and bias of frequency setting voltage (current) are too close, an error ( ) may be displayed at setting.270
4PARAMETERSFrequency/torque setting by analoginput (terminal 1, 2, 4)(b) Method to adjust any point without application of a voltage (current) to across terminals 2-5(4-5).(To change from 4V (80%) to 5V (100%))Operation1. Confirmation of the RUN indication and operationmode indicationThe inverter must be at a stop.The inverter must be in the PU operation mode.(Using )2. Press to choose the parametersetting mode.3. Turn until appears.DisplayThe parameternumber readpreviously appears.4. Press to display .5. Turn until ( )appears. Set to C4 Terminal 2 frequencysetting gain.6. Press to display the analog voltage(current) value (%).Terminal 2 inputC0 to C41settingis enabled.Terminal 4 inputAnalog voltage (current)value (%) across terminals 2-5(across terminals 4-5)7. Turn to set the gain voltage (%)."0V (0mA) equals to 0%, 5V (10V, 20mA) to 100%"REMARKSThe current setting at the instant of turningis displayed.8. Press to set.The gain frequency is reachedwhen the analogvoltage (current) value acrossterminals 2-5 (across terminals4-5) is 100%.Terminal 2 input Terminal 4 inputFlicker...Parameter setting complete!!(Adjustment completed)Turn to read another parameter.Press to return to the indication (step 4).Press twice to show the next parameter ( ).REMARKSBy pressing after step 6, you can confirm the current frequency setting bias/gain setting.It cannot be confirmed after execution of step 7.271
Frequency/torque setting by analoginput (terminal 1, 2, 4)(c) Method to adjust only the frequency without adjustment of a gain voltage (current).(When changing the gain frequency from 60Hz to 50Hz)OperationDisplay1. Pr. 125) or(Pr. 126) appears.Terminal 2 inputorTerminal 4 input2. Press to show the currently set value.(60.00Hz)3. Turn to change the set value to" ". (50.00Hz)Terminal 2 inputTerminal 4 input4. Press to set.5. Mode/monitor checkPress twice to choose themonitor/frequency monitor.Flicker...Parameter setting complete!!6. Apply a voltage across the inverterterminals 2-5 (across 4-5) and turn on thestart command (STF, STR).Operation starts at 50Hz.REMARKS⋅ Changing C4 (Pr. 903) or C7 (Pr. 905) (gain adjustment) value will not change the Pr. 20 value. The input of terminal 1 (frequencysetting auxiliary input) is added to the frequency setting signal.⋅ For the operating procedure using the parameter unit (<strong>FR</strong>-PU04/<strong>FR</strong>-PU07), refer to the <strong>FR</strong>-PU04/<strong>FR</strong>-PU07 instruction manual.⋅ When setting the value to 120Hz or more, it is necessary to set Pr. 18 High speed maximum frequency to 120Hz or more. (Refer topage 140)⋅ Make the bias frequency setting using calibration parameter C2 (Pr. 902) or C5 (Pr. 904). (Refer to page 269)CAUTIONTake care when setting any value other than "0" as the bias frequency at 0V (0mA). Even if a speed command isnot given, merely turning on the start signal will start the motor at the preset frequency.♦ Parameters referred to ♦Pr. 20 Acceleration/deceleration reference frequency Refer to page 155Pr. 73 Analog input selection, Pr. 267 Terminal 4 input selection Refer to page 259Pr. 79 Operation mode selection Refer to page 283272
4PARAMETERSFrequency/torque setting by analoginput (terminal 1, 2, 4)4.21.6 Bias and gain of torque (magnetic flux) setting voltage (current)(Pr. 241, C16(Pr. 919) to C19(Pr. 920), C38 (Pr. 932) to C41 (Pr. 933))SensorlessVectorYou can set the magnitude (slope) of the torque as desired in relation to the torque setting signal (0 to 5VDC, 0 to10V or 4 to 20mA).Use Pr. 73 and Pr. 267 to switch from among 0 to 5V, 0 to 10V, 4 to 20mADC. (Refer to page 259)ParameterNumber241 *2C16(919) *1C17(919) *1C18(920) *1C19(920) *1C38(932) *1C39(932) *1C40(933) *1C41(933) *1NameAnalog input display unitswitchoverTerminal 1 bias command (torque/magnetic flux)Terminal 1 bias (torque/magneticflux)Terminal 1 gain command (torque/magnetic flux)Terminal 1 gain (torque/magneticflux)Terminal 4 bias command (torque/magnetic flux)Terminal 4 bias (torque/magneticflux)Terminal 4 gain command (torque/magnetic flux)Terminal 4 gain (torque/magneticflux)Initial SettingValue RangeDescription00 Displayed in % Select the unit of analog input1 Displayed in V/mA display.0% 0 to 400%Set the torque (magnetic flux) on the bias side ofterminal 1 input.0% 0 to 300%Set the converted % of the bias side voltage(current) of terminal1 input.150% 0 to 400%Set the torque (magnetic flux) of the terminal 1 inputgain (maximum).100% 0 to 300%Set the converted % of the gain side voltage ofterminal1 input.0% 0 to 400%Set the torque (magnetic flux) on the bias side ofterminal 4 input.20% 0 to 300%Set the converted % of the bias side current(voltage) of terminal 4 input.150% 0 to 400%Set the torque (magnetic flux) of the terminal 4 inputgain (maximum).100% 0 to 300%Set the converted % of the gain side current(voltage) of terminal 4 input.*1 The parameter number in parentheses is the one for use with the parameter unit (<strong>FR</strong>-PU04/<strong>FR</strong>-PU07).*2 The above parameters allow its setting to be changed during operation in any operation mode even if "0" (initial value) is set in Pr. 77 Parameterwrite selection .(1) Change functions of analog input terminalIn the initial setting status, terminal 1 and terminal 4 used for analog input are respectively set to speed settingauxiliary (speed limit auxiliary) and speed command (speed limit). To use an analog input terminal as torquecommand, torque limit input or magnetic flux command input, set Pr. 868 Terminal 1 function assignment and Pr. 858Terminal 4 function assignment to change functions. (Refer to page 258)(2) The relationship between analog input terminal and calibration parameter• Terminal 1 functional calibration parameterPr. 868Setting0(initialvalue)TerminalFunctionFrequency (speed)setting auxiliaryMagnetic flux1commandRegenerative2torque limit3 Torque commandStall preventionoperation level */4torque limit/torquecommandCalibration ParametersBias settingGain settingC2(Pr. 902) Terminal 2 frequency setting bias frequency Pr. 125 Terminal 2 frequency setting gain frequencyC3(Pr. 902) Terminal 2 frequency setting biasC4(Pr. 903) Terminal 2 frequency setting gainC5(Pr. 904) Terminal 4 frequency setting bias frequency Pr. 126 Terminal 4 frequency setting gain frequencyC6(Pr. 904) Terminal 4 frequency setting biasC7(Pr. 905) Terminal 4 frequency setting gainC16(Pr. 919) Terminal 1bias command (torque/magnetic flux) C18(Pr. 920) Terminal 1 gain command (torque/magnetic flux)C17(Pr. 919) Terminal 1bias (torque/magnetic flux)C19(Pr. 920) Terminal 1 gain (torque/magnetic flux)C16(Pr. 919) Terminal 1 bias command (torque/magnetic flux)C17(Pr. 919) Terminal 1 bias (torque/magnetic flux)C18(Pr. 920) Terminal 1 gain command (torque/magnetic flux)C19(Pr. 920) Terminal 1 gain (torque/magnetic flux)Forward/reverse C12(Pr. 917) Terminal 1 bias frequency (speed)C14(Pr. 918) Terminal 1 gain frequency (speed)5rotation speed limit C13(Pr. 917) Terminal 1 bias (speed)C15(Pr. 918) Terminal 1 gain (speed)C16(Pr. 919) Terminal 1 bias command (torque/magnetic flux) C18(Pr. 920) Terminal 1 gain command (torque/magnetic flux)6 Torque bias inputC17(Pr. 919) Terminal 1 bias (torque/magnetic flux)C19(Pr. 920) Terminal 1 gain (torque/magnetic flux)9999 ⎯ ⎯ ⎯* Use Pr. 148 Stall prevention level at 0V input and Pr. 149 Stall prevention level at 10V input to adjust bias/gain of stall prevention operation level.273
Frequency/torque setting by analoginput (terminal 1, 2, 4)• Terminal 4 functional calibration parameterPr. 858 TerminalSetting FunctionBias setting0 Frequency (speed) C5(Pr. 904) Terminal 4 frequency setting bias frequency(initial command/speedvalue)limit C6(Pr. 904) Terminal 4 frequency setting bias14Magnetic fluxcommandStall preventionoperation level */torque limitC38(Pr. 932) Terminal 4 bias command (torque/magnetic flux)C39(Pr. 932) Terminal 4 bias (torque/magnetic flux)C38(Pr. 932) Terminal 4 bias command (torque/magnetic flux)C39(Pr. 932) Terminal 4 bias (torque/magnetic flux)Calibration ParametersGain settingPr. 126 Terminal 4 frequency setting gain frequencyC7(Pr. 905) Terminal 4 frequency setting gainC40(Pr. 933) Terminal 4 gain command (torque/magnetic flux)C41(Pr. 933) Terminal 4 gain (torque/magnetic flux)C40(Pr. 933) Terminal 4 gain command (torque/magnetic flux)C41(Pr. 933) Terminal 4 gain (torque/magnetic flux)9999 ⎯ ⎯ ⎯⎯ : No function* Use Pr. 148 Stall prevention level at 0V input and Pr. 149 Stall prevention level at 10V input to adjust bias/gain of stall prevention operation level.(-5V)(-10V)-100%Torque(%)BiasC38(Pr.932)400150Torque(%)400150BiasC16(Pr.919)Calibration example of terminal 1(3) Change the torque at maximum analoginput (C18(Pr. 920), C40(Pr. 933))· Set C18(Pr. 920), C40(Pr. 933) when changing onlytorque setting (gain) of the maximum analog inputvoltage (current).(4) Calibration of analog input bias and gain(C16(Pr. 919) to C19(Pr. 920), C38 (Pr. 932) toC41 (Pr. 933))· The "bias" and "gain" functions are used to adjust therelationship between the input signal entered fromoutside the inverter to set the torque command andtorque limit, e.g. 0 to 5V, 0 to 10V or 4 to 20mADC, andthe torque.· Set the bias torque of terminal 1 input in C16 (Pr. 919) .(It is factory-set to the torque at 0V)· Set the torque in C18 (Pr. 920) for the torque commandvoltage set with Pr. 73 Analog input selection.(initial value is 10V)· Set the bias torque of terminal 4 input in C38 (Pr. 932) .(It is factory-set to the torque at 4mA)· Set the torque in C40 (Pr. 933) for 20mA of the torquecommand current (4 to 20mA).· There are the following three methods to adjust thetorque setting voltage (current) bias and gain.a) Method to adjust any point without application ofvoltage (current) to across terminals 1-5(4-5)page 275b) Method to adjust any point without application ofvoltage (current) to across terminals 1-5(4-5)page 276c) Method to adjust torque only without adjustment ofvoltage (current) page 277CAUTION· When voltage/current input specifications were switched using Pr. 73 and Pr. 267 , perform calibration without fail.(5) Analog input display unit changing (Pr. 241)· You can change the analog input display unit (%/V/mA) for analog input bias/gain calibration.· Display unit of C17 (Pr. 919), C19 (Pr. 920), C39 (Pr. 932), C41 (Pr. 933) changes as follows accrding to the terminalinput specifications set in Pr. 73 and Pr. 267 .Analog Command (terminal 1,4)(according to Pr. 73, Pr. 267 )GainC18(Pr.920)Initial value000Torque setting signal100%5V10VC17(Pr.919)C19(Pr.920)-150Initial valueGainC40(Pr.933)0 20100%0 4 20mATorque setting signalC39(Pr.932)C41(Pr.933)Calibration example of terminal 4Pr. 241 = 0 (initial value) Pr. 241 = 10 to 5V input 0 to 5V → displayed in 0 to 100% (0.1%) 0 to 100% → displayed in 0 to 5V (0.01V)0 to 10V input 0 to 10V → displayed in 0 to 100% (0.1%) 0 to 100% → displayed in 0 to 10V (0.01V)0 to 20mA input 0 to 20mA → displayed in 0 to 100% (0.1%) 0 to 100% → displayed in 0 to 20mA (0.01mA)274
4PARAMETERS(6) Adjustment method of torque setting voltage (current) bias and gainFrequency/torque setting by analoginput (terminal 1, 2, 4)a) Method to adjust any point without application of a voltage (current) to across terminals 1-5(4-5)Operation1. Confirmation of the RUN indication andoperation mode indicationThe inverter must be at a stop.The inverter must be in the PU operationmode.(Using )2. Press to choose the parameter settingmode.DisplayThe parameternumber readpreviously appears.3. Turn until appears.4. Press to display .5. Turn until ( ) appears.Set to C19 Terminal 1 gain (torque).Terminal 1 inputC0 to C41settingis enabled.Terminal 4 input6. Press to display the analog voltage(current) value (%).7. Apply a 10V (20mA) voltage (current).(Turn the external potentiomerter connectedacross terminals 1-5 (across terminals 4-5)to maximum (any position).)CAUTIONAfter performing the operation in step 6, do not touch untilcompletion of calibration.8. Press to set.Analog voltage (current)value (%) across terminals 1-5(across terminals 4-5)The value is nearly 100 (%) inthe maximum position of thepotentiometer.Terminal 1 input Terminal 4 inputFlicker...Parameter setting complete!!(Adjustment completed)Turn to read another parameter.Press to return to the indication (step 4).Press twice to show the next parameter ( ).REMARKS· An error at writing ( ) may appear if torque setting value of gain and bias are too close.275
Frequency/torque setting by analoginput (terminal 1, 2, 4)b) Method to adjust any point without application of a voltage (current) to across terminals 1-5(4-5)(To change from 8V (80%) to 10V (100%))Operation1. Confirmation of the RUN indication andoperation mode indicationThe inverter must be at a stop.The inverter must be in the PU operationmode. (Using )2. Press to choose the parametersetting mode.DisplayThe parameternumber readpreviously appears.3. Turn until appears.4. Press to display .5. Turn until ( )appears. Set to C19 Terminal 1 gain (torque).Terminal 1 inputC0 to C41settingis enabled.Terminal 4 input6. Press to display the analog voltage(current) value (%).7. Turn to set the gain voltage (%)."0V (0mA) equals to 0%, 10V (5V,20mA) to 100%"REMARKSThe current setting at the instant of turningis displayed.8. Press to set.Analog voltage (current)value (%) across terminals 1-5(across terminals 4-5)The gain torque isreached when the analogvoltage (current) value acrossterminals 1-5 (across terminals4-5) is 100%.Terminal 1 input Terminal 4 inputFlicker...Parameter setting complete!!(Adjustment completed)Turn to read another parameter.Press to return to the indication (step 4).Press twice to show the next parameter ( ).REMARKSYou can check the current torque setting bias/gain setting by pressing after step 6.You can not check after performing operation in step 7.276
4PARAMETERSc) Method to adjust torque only without adjustment of gain voltage (current)(when changing gain torque from 150% to 130%)Frequency/torque setting by analoginput (terminal 1, 2, 4)OperationDisplay1. Pr.920) or(Pr.933) appears.2. Press to show the currently set value.(150%)Terminal 1 inputorTerminal 4 input3. Turn o change the set value to" " (130.0%)4. Press to set.5. Mode/monitor checkPress twice to choose themonitor/frequency monitor.Terminal 1 input Terminal 4 inputFlicker...Parameter setting complete!!6. Apply a voltage across the inverterterminals 1-5 (across 4-5) and turn on thestart command (STF, STR).Operation starts with 130% torque.REMARKS· For operation from the parameter unit (<strong>FR</strong>-PU04/<strong>FR</strong>-PU07), refer to the instruction manual of the <strong>FR</strong>-PU04/<strong>FR</strong>-PU07.· Set bias torque setting using calibration parameter C16 (Pr. 919) or C38 (Pr. 932). (Refer to page 274 )CAUTIONTake care when setting any value other than "0" as the bias torque at 0V (0mA). Torque is applied to the motor bymerely tuning on the start signal without torque command.♦ Parameters referred to ♦Pr. 20 Acceleration/deceleration reference frequency Refer to page 155Pr. 73 Analog input selection, Pr. 267 Terminal 4 input selection Refer to page 259Pr. 79 Operation mode selection Refer to page 283Pr. 858 Terminal 4 function assignment, Pr. 868 Terminal 1 function assignment Refer to page 258277
Misoperation prevention and parametersetting restriction4.22 Misoperation prevention and parameter setting restrictionLimit reset functionTrips when PU is disconnectedStop from PUPrevention of parameter rewrite4.22.1 Reset selection/disconnected PU detection/PU stop selection (Pr. 75)(1) Reset selectionPurpose Parameter that must be Set Refer to PagePrevention of reverse rotation of themotorDisplay necessary parametersControl of parameter write bycommunicationReset selection/disconnectedPU detection/PU stop selectionParameter write disableselectionReverse rotation preventionselectionDisplay of applied parametersand user group functionPr. 75 278Pr. 77 280Pr. 78 281Pr. 160, Pr. 172 to Pr. 174 281EEPROM write selection Pr. 342 303You can select the reset input acceptance, disconnected PU (<strong>FR</strong>-DU07/<strong>FR</strong>-PU04/<strong>FR</strong>-PU07) connector detectionfunction and PU stop function.ParameterNumber75NameReset selection/disconnectedPU detection/PU stop selectionInitialValueSetting Range14 0 to 3, 14 to 17⋅The Pr. 75 value can be set any time. Also, if parameter (all) clear is executed, this setting will not return to the initial value.Pr. 75Setting0 Reset input normally enabled.DescriptionFor the initial value, reset always enabled,without disconnected PU detection, andwith PU stop function are set.Reset Selection Disconnected PU Detection PU Stop SelectionReset input enabled only when the1fault occurs2 Reset input normally enabled.314(initialvalue)Reset input enabled only when thefault occursReset input normally enabled.15Reset input enabled only when thefault occurs16 Reset input normally enabled.17Reset input enabled only when thefault occursIf the PU is disconnected, operationwill be continued.When the PU is disconnected, theinverter trips.Pressing decelerates the motor toa stop only in the PU operation mode.If the PU is disconnected, operationwill be continued. Pressing decelerates the motor toWhen the PU is disconnected, theinverter trips.a stop in any of the PU, external andcommunication operation modes.• You can select the operation timing of reset function (RES signal, reset command through communication) input.• When Pr. 75 is set to any of "1, 3, 15, 17", a reset can be input only when a fault occurs.CAUTION⋅ When the reset signal (RES) is input during operation, the motor coasts since the inverter being reset shuts off the output.Also, the cumulative value of the electronic thermal relay function and regenerative brake duty is cleared.⋅ The reset key of the PU is valid only when a fault occurs, independently of the Pr. 75 setting.278
4PARAMETERS(2) Disconnected PU detectionMisoperation prevention and parametersetting restriction• This function detects that the PU (<strong>FR</strong>-DU07/<strong>FR</strong>-PU04/<strong>FR</strong>-PU07) has been disconnected from the inverter forlonger than 1s and causes the inverter to provide a fault output (E.PUE) and come to trip.• When Pr. 75 is set to any of "0, 1, 14, 15", operation is continued if the PU is disconnected.CAUTION⋅ When the PU has been disconnected since before power-on, it is not judged as a fault.⋅ To make a restart, confirm that the PU is connected and then reset the inverter.⋅ The motor decelerates to a stop when the PU is disconnected during PU jog operation with Pr. 75 set to any of "0, 1, 14, 15"(operation is continued if the PU is disconnected).⋅ When RS-485 communication operation is performed through the PU connector, the reset selection/PU stop selection functionis valid but the disconnected PU detection function is invalid.(3) PU stop selection• In any of the PU operation, external operation and network operation modes, the motor can be stopped by pressingof the PU.• When the inverter is stopped by the PU stop function, "" is displayed. A fault signal is not provided.• When Pr. 75 is set to any of "0 to 3", deceleration to a stop by is valid only in the PU operation mode.REMARKSThe motor will also decelerate to a stop (PU stop) when is input during operation in the PU mode through RS-485communication with Pr. 551 PU mode operation command source selection set to "1" (PU mode RS-485 terminals).(4) Restarting method when stop was made by pressing from the PU during externaloperation (PU stop (PS) reset method)SpeedOperationpanelSTF ON(STR) OFFKeyKeyTime(a) When operation panel (<strong>FR</strong>- DU07) is used1)After the motor has decelerated to a stop, turn off theSTF or STR signal.2)Press to display .••••••( canceled)3)Press to return to .4)Turn on the STF or STR signal.Stop/restart example for external operation(b) Connection of the parameter unit (<strong>FR</strong>-PU04/<strong>FR</strong>-PU07)1)After the motor has decelerated to a stop, turn off theSTF or STR signal.2)PressEXT.••••••( canceled)3)Turn on the STF or STR signal.• The motor can be restarted by making a reset using a power supply reset or RES signal.CAUTION⋅ If Pr. 250 Stop selection is set to other than "9999" to select coasting to a stop, the motor will not be coasted to a stop butdecelerated to a stop by the PU stop function during external operationCAUTIONDo not reset the inverter with the start signal on. Doing so will cause the inverter to start immediately after areset, leading to hazardous conditions.♦ Parameters referred to ♦Pr. 250 Stop selection Refer to page 188279
Misoperation prevention and parametersetting restriction4.22.2 Parameter write selection (Pr. 77)You can select whether write to various parameters can be performed or not. Use this function to preventparameter values from being rewritten by misoperation.ParameterNumberNameInitial Value77 Parameter write selection 0Pr. 77 can be always set independently of the operation mode and operating status.SettingRangeDescription0 Write is enabled only during a stop.1 Parameter write is not enabled.(1) Write parameters only at a stop (setting "0", initial value)⋅ Parameters can be written only during a stop in the PU operation mode.⋅ The shaded parameters in the parameter list (page 55) can always be written, regardless of the operation mode andoperating status. However, Pr. 72 PWM frequency selection and Pr. 240 Soft-PWM operation selection can be writtenduring operation in the PU operation mode, but cannot be written in external operation mode.(2) Disable parameter write (setting "1")⋅ Parameter write is not enabled. (Reading isenabled.)⋅ Parameter clear and all parameter clear cannotbe performed, either.⋅ The parameters given on the right can be writteneven if Pr. 77 = "1".(3) Write parameters during operation (setting "2")⋅ Parameters can always be written.⋅ The following parameters cannot be written during operation if Pr. 77 = "2". Stop operation when changing theirparameter settings.2Parameter write is enabled in any operationmode regardless of operating status.ParameterNumberName22 Stall prevention operation level75 Reset selection/disconnected PU detection/PU stop selection77 Parameter write selection79 Operation mode selection160 User group read selectionParameterNumberName19 Base frequency voltage23Stall prevention operation level compensationfactor at double speed48 Second stall prevention operation current49 Second stall prevention operation frequency60 Energy saving control selection61 Reference current66Stall prevention operation reduction startingfrequency71 <strong>Applied</strong> motor79 Operation mode selection80 Motor capacity81 Number of motor poles82 Motor excitation current83 Rated motor voltage84 Rated motor frequency90 to 94 (Motor constants)95 Online auto tuning selection96 Auto tuning setting/status100 to 109 (Adjustable 5 points V/F parameter)135 to 139 (Parameter for electronic bypass sequence)178 to 196 (I/O terminal function selection)255 Life alarm status display256 Inrush current limit circuit life display257 Control circuit capacitor life display258 Main circuit capacitor life display291 Pulse train I/O selection292 Automatic acceleration/decelerationParameterNumberName293 Acceleration/deceleration separate selection329Digital input increments selection(Parameter for the plug-in option <strong>FR</strong>-A7AX)343 Communication error count450 Second applied motor451 Second motor control method selection453 Second motor capacity454 Number of second motor poles455 Second motor excitation current456 Rated second motor voltage457 Rated second motor frequency458 to 462 (Second motor constant)463 Second motor auto tuning setting/status541Frequency command sign selection (CC-Link)(Parameter for the plug-in option <strong>FR</strong>-A7NC)563 Energization time carrying-over times564 Operating time carrying-over times574 Second motor online auto tuning800 Control method selection819 Easy gain tuning selection858 Terminal 4 function assignment859 Torque current860 Second motor torque current868 Terminal 1 function assignment♦ Parameters referred to ♦Pr. 79 Operation mode selection Refer to page 283280
4PARAMETERS4.22.3 Reverse rotation prevention selection (Pr. 78)⋅⋅Misoperation prevention and parametersetting restrictionThis function can prevent reverse rotation fault resulting from the incorrect input of the start signal.ParameterNumber78Reverse rotation preventionselectionName Initial Value Setting Range Description0Both forward and reverse rotations0allowed1 Reverse rotation disabled2 Forward rotation disallowedSet this parameter when you want to limit the motor rotation to only one direction.This parameter is valid for all of the reverse rotation and forward rotation keys of the operation panel (<strong>FR</strong>-DU07),parameter unit (<strong>FR</strong>-PU04/<strong>FR</strong>-PU07), start signals (STF, STR signals) via external terminals, and the forward andreverse rotation commands through communication.4.22.4 Display of applied parameters and user group function (Pr. 160, Pr. 172 to Pr. 174)Parameter which can be read from the operation panel and parameter unit can be restricted.ParameterNumberName Initial Value Setting Range Description160 User group read selection 0172User group registered display/batch clear09999173 *1 User group registration 9999 0 to 999, 9999174 *1 User group clear 9999 0 to 999, 9999*1 The values read from Pr. 173 and Pr. 174 are always "9999".01Only the simple mode parameters canbe displayed.The simple mode and extendedparameters can be displayedOnly parameters registered in the usergroup can be displayed.(0 to 16)Displays the number of cases registeredas a user group. (Reading only)9999 Batch clear the user group registrationSet the parameter numbers to beregistered to the user group.Set the parameter numbers to be clearedfrom the user group.(1) Display of simple mode parameters and extended parameters (Pr. 160)⋅⋅ When Pr. 160 = "9999", only the simple mode parameters can be displayed on the operation panel (<strong>FR</strong>-DU07) andparameter unit (<strong>FR</strong>-PU04/<strong>FR</strong>-PU07). (Refer to the parameter list, pages 55 to 67, for the simple mode parameters.)⋅ In the initial setting (Pr. 160 = "0") status, simple mode parameters and extended parameters can be displayed.REMARKS⋅ When a plug-in option is fitted to the inverter, the option parameters can also be read.⋅ When reading the parameters using the communication option, all parameters can be read regardless of the Pr. 160 setting.⋅ When reading the parameters using the RS-485terminals, all parameters can be read reagrdless of thePr. 551 Pr. 550 Pr. 160 Valid/InvalidPr. 160 setting by setting Pr.550 NET mode operation1 (RS-485) ⎯ Validcommand source selection and Pr. 551 PU mode operation0 (OP) Validcommand source selection.1 (RS-485) Invalid (all readable)2 (PU)(initial value)With OP: valid9999(auto-detect)(initial value)* OP indicates a communication optionWithout OP: invalid(all readable)Pr. 15 Jog frequency, Pr. 16 Jog acceleration/deceleration time Pr. 991 PU contrast adjustment are displayed as simple modeparameters when the parameter unit (<strong>FR</strong>-PU04/<strong>FR</strong>-PU07) is mounted.281
Misoperation prevention and parametersetting restriction(2) User group function (Pr. 160, Pr. 172 to Pr. 174)⋅ The user group function is designed to display only the parameters necessary for setting.⋅ From among all parameters, a maximum of 16 parameters can be registered to a user group. When Pr. 160 is set to"1", only the parameters registered to the user group can be accessed. (Reading of parameters other than the usergroup registration is disabled.)⋅ To register a parameter to the user group, set its parameter number to Pr. 173.⋅ To delete a parameter from the user group, set its parameter number to Pr. 174. To batch-delete the registeredparameters, set Pr. 172 to "9999".(3) Registration of parameter to user group (Pr. 173)When registering Pr. 3 to user groupOperation1.Confirm the operation display and operationmode display.The inverter must be at a stop.The inverter must be in the PU operation mode.(Press in the external operation mode.)Indication2.Press to choose the parameter settingmode.3.Turn until appears.4.Press to display. " "5.Turn until Pr. 3 appears.Parameter setting modePr. 173 User groupregistration is displayed.When Pr. 173 is read,"9999" is displayed.Select the parameternumber to be registered.6.Press to set." " and " " are displayed alternately.To continue parameter registration, repeatsteps 3 to 6.(4) Deletion of parameter from user group (Pr. 174)When deleting Pr. 3 from user groupOperation1.Confirm the operation display and operationmode display.The inverter must be at a stop.The inverter must be in the PU operation mode.(Press in the external operation mode.)Flicker ··· Registration of Pr. 3 to user groupcompleted!!Indication2.Press to choose the parameter settingmode.3.Turn until appears.4.Press to display. " "5.Turn until Pr. 3 appears.6.Press to clear." " and " " are displayed alternately.To continue parameter registration, repeatsteps 3 to 6.Parameter setting modePr. 174 User groupclear is displayed.When Pr. 174 is read,"9999" is displayed.Select the parameternumber to be deleted.Flicker ··· Deletion of Pr. 3 from user groupcompleted!!REMARKS⋅ Pr. 77, Pr. 160 and Pr. 991 can always be read, independently of the user group setting.⋅ Pr. 77, Pr. 160 and Pr. 172 to Pr. 174 cannot be registered to the user group.⋅ When Pr. 174 is read, "9999" is always displayed. Although "9999" can be written, no function is available.⋅ When any value other than "9999" is set to Pr. 172, no function is available.♦ Parameters referred to ♦Pr. 550 NET mode operation command source selection Refer to page 292Pr. 551 PU mode operation command source selection Refer to page 292282
4PARAMETERSSelection of operation mode and operation location4.23 Selection of operation mode and operation locationPurposeParameter that must be SetRefer toPageOperation mode selection Operation mode selection Pr. 79 283Started in network operation mode Operation mode at power on Pr. 79, Pr. 340 291Selection of control location4.23.1 Operation mode selection (Pr. 79)Selection of control source, speedcommand source and control locationduring communication operationPr. 338, Pr. 339,Pr. 550, Pr. 551Used to select the operation mode of the inverter.Mode can be changed as desired between operation using external command signals (external operation),operation from the PU (<strong>FR</strong>-DU07/<strong>FR</strong>-PU07/<strong>FR</strong>-PU04), combined operation of PU operation and externaloperation (external/PU combined operation, and network operation (when RS-485 terminals or a communicationoption is used).292ParameterNumberNameInitialValueSettingRange0DescriptionUse external/PU switchover mode ( ) to switchbetween the PU and external operation mode.At power on, the inverter is placed in the externaloperation mode.LED Indication: Off: OnExternal operation modePU operation mode1 Fixed to PU operation mode2Fixed to external operation modeOperation can be performed by switching between theexternal and Net operation mode.External operation modeNET operation mode79Operationmodeselection034External/PU combined operation mode 1Frequency command Start commandPU (<strong>FR</strong>-DU07/<strong>FR</strong>-PU04/<strong>FR</strong>-PU07) setting or external signalExternal signal inputinput (multi-speed setting,(terminal STF, STR)across terminals 4-5 (validwhen AU signal turns on)). *External/PU combined operation mode 2Frequency command Start commandExternal signal input(Terminal 2, 4, 1, JOG, multispeedselection, etc.)Input from the PU (<strong>FR</strong>-DU07/<strong>FR</strong>-PU04/<strong>FR</strong>-PU07)( , )PU operation mode6Switch-over modeSwitch among PU operation, external operation, and NEToperation while keeping the same operating status.External operation modeNET operation modeExternal operation mode (PU operation interlock)X12 signal ONPU operation modeOperation mode can be switched to the PU operationmode.7(output stop during external operation)External operation modeX12 signal OFFOperation mode can not be switched to the PUoperation mode.* The priorities of the frequency commands when Pr. 79 = "3" are "Multi-speed operation (RL/RM/RH/REX) > PID control (X14) > terminal 4 analoginput (AU) > digital input from the operation panel".The above parameters can be changed during a stop in any operation mode.283
Selection of operation mode and operation location(1) Operation mode basicsRS-485terminalsInverterNetwork operation modeCommunicationoptionExternal terminalPU operationmodePU connectorNetwork operationmodeExternaloperationmodeOperationpanelPersonalcomputerPersonalcomputerPotentiometerProgrammablecontrollerSwitch⋅⋅⋅The operation mode is specifies the source of thestart command and frequency command for theinverter.Select the "external operation mode" when the startcommand and the frequency command are appliedfrom a potentiometer, switches, etc. which areprovided externally and connecting them to thecontrol terminals, select "PU operation mode" whenthe commands are applied from the operation panelor parameter unit (<strong>FR</strong>-PU04/<strong>FR</strong>-PU07), or select the"network operation mode (NET operation mode)"when the commands are applied from the RS-485communication with the PU connector or thenetwork to the communication option card.The operation mode can be selected from theoperation panel or with the communicationinstruction code.REMARKS⋅ Either "3" or "4" may be set to select the PU/external combined operation, and these settings differ in starting method.⋅ In the initial setting, the stop function by of the PU (<strong>FR</strong>-DU07/<strong>FR</strong>-PU07) (PU stop selection) is valid also in other than thePU operation mode. (Pr. 75 Reset selection/disconnected PU detection/PU stop selection. Refer to page 278.)(2) Operation mode switching methodWhen "0, 1, or 2" is set in Pr. 340External operationSwitching from the networkSwitching from the PUSwitch to the externaloperation mode fromthe network.Switch to the network operationmode from the network.Press ofthe PU to lightPress ofthe PU to lightNetwork operationPU operationWhen "10 or 12" is set in Pr. 340Network operationPress of the PU to lightPU operationPress of the PU to lightREMARKS⋅ For switching of operation by external terminals, refer to the following:PU operation external interlock signal (X12 signal) page 288PU-external operation switch-over signal (X16) page 289PU-NET operation switchover signal (X65), External-NET operation switchover signal (X66) page 290Pr. 340 Communication startup mode selection page 291284
4PARAMETERSSelection of operation mode and operation location(3) Operation mode selection flowIn the following flowchart, select the basic parameter setting and terminal connection related to the operation mode.START Connection Parameter setting OperationWhere is the start commandsource?From external (STF/STR terminal)Where is the frequency set?From external (Terminal 2, 4,JOG, multi-speed, etc.)STF (forward rotation)/STR(reverse rotation) -SD(Refer to page 206.)Terminal 2, 4-5 (analog), RL, RM,RH, JOG-SD, etc.Frequency setting terminal ONSTF(STR) ONFrom PU (Digital setting)STF (forward rotation)/STR(reverse rotation) -SD(Refer to page 206.)From communication (RS-485 terminals/communication option)RS-485 terminals orcommunication option?RS-485 terminalsSTF (forward rotation)/STR(reverse rotation) -SD(Refer to page 206.)Connection of RS-485 terminals(Refer to page 299.)Pr. 79 = "3"(External/PU combinedoperation 1)Pr. 338 = "1"Pr. 340 = "1, 2"DU digital settingSTF(STR) ONCommunication frequency settingcommand sendingSTF(STR) ONCommunication optionFrom PU (FWD/REV key)Connection of communicationoption(Refer to the corresponding communicationoption instruction manual)Pr. 338 = "1"Pr. 340 = "1"Communication frequency settingcommand sendingSTF(STR) ONWhere is the frequency set?From external (Terminal 2, 4, JOG,multi-speed, etc.)Terminal 2, 4-5 (analog), RL, RM,RH, JOG-SD, etc.Pr. 79 = "4"(External/PU combinedoperation 2)Frequency setting terminal ONFWD/REV key ONFrom PU (Digital setting)From communicationPr. 79 = "1"(Fixed to PU operation)(RS-485 terminals/communication option)DisabledDigital settingFWD/REV key ONFrom communication (RS-485 terminals/communication option)RS-485 terminals orcommunication option?RS-485 terminalsWhere is the frequency set?From external (Terminal 2, 4, JOG, multi-speed, etc.)Connection of RS-485 terminals(Refer to page 299.)Terminal 2, 4-5 (analog), RL, RM,RH, JOG-SD, etc.From PU (Digital setting)From communicationRS-485 terminalsCommunication optionConnection of RS-485 terminals(Refer to page 299.)Pr. 339 = "1"Pr. 340 = "1, 2"DisabledPr. 340 = "1, 2"Frequency setting terminal ONCommunication start commandsendingCommunication frequency settingcommand sendingCommunication start commandsendingWhere is the frequency set?From external (Terminal 2, 4, JOG, multi-speed, etc.)Connection of communication option(Refer to the corresponding communicationoption instruction manual)Terminal 2, 4-5 (analog), RL, RM,RH, JOG-SD, etc.From PU (Digital setting)From communication (communication option)Connection of communication option(Refer to the corresponding communicationoption instruction manual)Pr. 339 = "1"Pr. 340 = "1"DisabledPr. 340 = "1"Frequency setting terminal ONCommunication start commandsendingCommunication frequency settingcommand sendingCommunication start commandsending285
Selection of operation mode and operation location(4) External operation mode (setting "0" (initial value), "2")3 4 5 6 78910Three-phaseAC power supplyForward rotationstartReverse rotationstartFrequency settingpotentiometerHzInverterR/L1 US/L2 VT/L3 WSTFSTRSD1025Motor⋅ Select the external operation mode when the startcommand and the frequency command are appliedfrom a frequency setting potentiometer, start switch, etc.externally and connecting them to the control circuitterminals of the inverter.⋅ Basically, parameter changing is disabled in externaloperation mode. (Some parameters can be changed.Refer to page 55 for the parameter list.)⋅ When "0" or "2" is selected for Pr. 79, the inverter entersthe external operation mode at power on. (When usingthe network operation mode, refer to page 291)⋅ When parameter changing is seldom necessary, setting"2" fixes the operation mode to external operationmode. When frequent parameter changing isnecessary, setting "0" (initial value) allows the operationmode to be changed easily to PU operation mode bypressing of the operation panel. When youswitched to PU operation mode, always return toexternal operation mode.⋅ The STF and STR signal are used as a start command,and the voltage or current signal to terminal 2, 4, multispeedsignal, JOG signal, etc. are used as frequencycommand.(5) PU operation mode (setting "1")Three-phaseAC power supplyInverterR/L1S/L2T/L3<strong>FR</strong>-DU07,,UVWMotor⋅ Select the PU operation mode when applying start andspeed command by only the key operation of theoperation panel (<strong>FR</strong>-DU07) or parameter unit (<strong>FR</strong>-PU04/<strong>FR</strong>-PU07). Also select the PU operation modewhen making communication using the PU connector.⋅ When "1" is selected for Pr. 79, the inverter enters thePU operation mode at power on. You cannot change tothe other operation mode.⋅ The setting dial of the operation panel can be used forsetting like a potentiometer. (Pr. 161 Frequency setting/keylock operation selection, refer to page 361.)⋅ When PU operation mode is selected, the PU operationmode signal (PU) can be output.For the terminal used for the PU signal output, assignthe function by setting "10 (positive logic) or 110(negative logic)" in any of Pr. 190 to Pr. 196 (outputterminal function selection).286
4PARAMETERS(6) PU/external combined operation mode 1 (setting "3")Three-phaseAC power supplyForward rotationstartReverse rotationstartInverterR/L1S/L2T/L3STFSTRSD<strong>FR</strong>-DU07UVWMotorSelection of operation mode and operation location⋅ Select the PU/external combined operation mode 1when applying frequency command from the operationpanel (<strong>FR</strong>-DU07) or parameter unit (<strong>FR</strong>-PU04/<strong>FR</strong>-PU07) and inputting the start command with theexternal start switch.⋅ Select "3" for Pr. 79. You cannot change to the otheroperation mode.⋅ When a frequency is input from the external signal bymulti-speed setting, it has a higher priority than thefrequency setting of the PU. When AU is on, thecommand signal to terminal 4 is used.(7) PU/external combined operation mode 2 (setting "4")3 4 5 6 78910Hz⋅ Select the PU/external combined operation mode 2when applying frequency command from the externalpotentiometer, multi-speed or JOG signal and inputtingthe start command by key operation of the operationpanel (<strong>FR</strong>-DU07) or parameter unit (<strong>FR</strong>-PU04/<strong>FR</strong>-PU07).⋅ Select "4" for Pr. 79. You cannot change to the otheroperation mode.Three-phaseAC power supplyR/L1S/L2T/L3InverterUVWMotorFrequency settingpotentiometer1025<strong>FR</strong>-DU07,287
Selection of operation mode and operation location(8) Switch-over mode (setting "6")⋅ While continuing operation, you can switch between the PU operation, external operation and network operation(when RS-485 terminals or communication option is used).Operation Mode SwitchingExternal operation → PUoperationExternal operation → NEToperationPU operation → externaloperationPU operation → NEToperationNET operation → externaloperationNET operation → PUoperationSwitching Operation/Operating StatusSelect the PU operation mode with the operation panel or parameter unit.⋅ Rotation direction is the same as that of external operation.⋅ The frequency set with the potentiometer (frequency setting command), etc. is used unchanged.(Note that the setting will disappear when power is switched off or the inverter is reset.)Send the mode change command to network operation mode through communication.⋅ Rotation direction is the same as that of external operation.⋅ The value set with the setting potentiometer (frequency setting command) or like is used unchanged.(Note that the setting will disappear when power is switched off or the inverter is reset.)Press the external operation key of the operation panel, parameter unit.⋅ The rotation direction is determined by the input signal of the external operation.⋅ The set frequency is determined by the external frequency command signal.Send the mode change command to network operation mode through communication.⋅ Rotation direction and set frequency are the same as those of PU operation.Command to change to external mode is transmitted by communication.⋅ Rotation direction is determined by the external operation input signal.⋅ The set frequency is determined by the external frequency command signal.Select the PU operation mode with the operation panel or parameter unit.⋅ The rotation direction and frequency command in network operation mode are used unchanged.(9) PU operation interlock (setting "7")⋅ The PU operation interlock function is designed to forcibly change the operation mode to external operation mode when thePU operation interlock signal (X12) input turns off. This function prevents the inverter from being inoperative by theexternal command if the mode is accidentally left unswitched from PU operation mode.⋅ Set "7" (PU operation interlock) in Pr. 79.⋅ For the terminal used for X12 signal (PU operation interlock signal) input, set "12" in any of Pr. 178 to Pr. 189 (inputterminal function selection) to assign the function. (Refer to page 206 for Pr. 178 to Pr. 189.)⋅ When the X12 signal has not been assigned, the function of the MRS signal switches from MRS (output stop) to thePU operation interlock signal.X12 (MRS)Function/OperationSignalOperation modeParameter writeOperation mode (external, PU, NET) switching Parameter write enabled (Pr. 77 Parameter writeON enabledselection, depending on the corresponding parameterOutput stop during external operationwrite condition (Refer to page 55 for the parameter list))Forcibly switched to external operation modeOFF External operation allowedParameter write disabled with exception of Pr. 79Switching to PU or NET operation mode disabledOperating ConditionOperationStatusmodePU/NETX12 (MRS)SignalOperationModeOperating StatusSwitching toPU, NETOperation ModeDisallowedDuring stop ON→OFF *1If external operation frequency setting and start signalExternal *2Running ON→OFF are entered, operation is performed in that status.*1 DisallowedOFF→ONAllowedDuring stopDuring stopON→OFFDisallowedExternalExternal *2OFF→ON During operation → output stop DisallowedRunningON→OFF Output stop → operation Disallowed*1 The operation mode switches to external operation mode independently of whether the start signal (STF, STR) is on or off. Therefore, themotor is run in external operation mode when the X12 (MRS) signal is turned off with either of STF and STR on.*2 At alarm occurrence, pressing of the operation panel resets the inverter.CAUTION⋅ If the X12 (MRS) signal is on, the operation mode cannot be switched to PU operation mode when the start signal (STF, STR) is on.⋅ When the MRS signal is used as the PU interlock signal, the MRS signal serves as the normal MRS function (output stop) byturning on the MRS signal and then changing the Pr. 79 value to other than "7" in the PU operation mode. Also as soon as "7"is set in Pr. 79, the signal acts as the PU interlock signal.⋅ When the MRS signal is used as the PU operation interlock signal, the logic of the signal is as set in Pr. 17. When Pr. 17 = "2",read ON as OFF and OFF as ON in the above explanation.⋅ Changing the terminal assignment using Pr. 178 to Pr. 189 (input terminal function selection) may affect the other functions. Pleasemake setting after confirming the function of each terminal.288
4PARAMETERS(10) Switching of operation mode by external signal (X16 signal)Selection of operation mode and operation location⋅ When external operation and operation from the operation panel are used together, use of the PU-externaloperation switching signal (X16) allows switching between the PU operation mode and external operation modeduring a stop (during a motor stop, start command off).⋅ When Pr. 79 = any of "0, 6, 7", the operation mode can be switched between the PU operation mode and externaloperation mode. (Pr. 79 = "6" switch-over mode can be changed during operation)⋅ For the terminal used for X16 signal input, set "16" in any of Pr. 178 to Pr. 189 (input terminal function selection) toassign the function.Pr. 79SettingX16 Signal State Operation ModeON (external) OFF (PU)RemarksExternal operation0 (initial value)PU operation mode Can be switched to external, PU or NET operation modemode1 PU operation mode Fixed to PU operation mode72 External operation modeFixed to external operation mode (Can be switched to NEToperation mode)3, 4 External/PU combined operation mode External/PU combined mode fixed6X12 (MRS)ONX12 (MRS)OFFExternal operationmodeExternal operationmodePU operation modePU operation modeExternal operation modeCan be switched to external, PU or NET operation mode withoperation continuedCan be switched to external, PU or NET operation mode (Outputstop in external operation mode)Fixed to external operation mode (Forcibly switched to externaloperation mode)REMARKS⋅ The operation mode status changes depending on the setting of Pr. 340 Communication startup mode selection and the ON/OFFstatus of the X65 and X66 signals. (For details, refer to page 290.)⋅ The priorities of Pr. 79, Pr. 340 and signals are Pr. 79 > X12 > X66 > X65 > X16 > Pr. 340.⋅CAUTIONChanging the terminal assignment using Pr. 178 to Pr. 189 (input terminal function selection) may affect the other functions. Pleasemake setting after confirming the function of each terminal.289
Selection of operation mode and operation location(11) Switching of operation mode by external signal (X65, X66 signal)⋅ When Pr. 79 = any of "0, 2, 6" the operation mode switching signals (X65, X66) can be used to change the PU orexternal operation mode to network operation mode during a stop (during a motor stop or start command off). (Pr.79 = "6" switch-over mode can be changed during operation)⋅ When switching between the network operation mode and PU operation mode1) Set Pr. 79 to "0" (initial value), "6".2) Set "10 or 12" in Pr. 340 Communication startup mode selection.3) Set "65" in any of Pr. 178 to Pr. 189 to assign the NET-PU operation switchover signal (X65) to the terminal.4) The operation mode changes to PU operation mode when the X65 signal turns on, or to network operation modewhen the X65 signal turns off.Pr. 340SettingPr. 79SettingX65 Signal StateON (PU)OFF (NET)Remarks0 (initial value) PU operation mode *1 NET operation mode *2 Cannot be switched to external operation mode1 PU operation mode Fixed to PU operation mode2 NET operation mode Fixed to NET operation mode3, 4 External/PU combined operation mode External/PU combined mode fixed10, 12Operation mode can be switched with operation continued6 PU operation mode *1 NET operation mode *2Cannot be switched to external operation mode7X12(MRS) Switching among the external andOutput stop in external operation modeONPU operation mode is enabled *3X12(MRS)External operation modeForcibly switched to external operation modeOFF*1 NET operation mode when the X66 signal is on.*2 PU operation mode when the X16 signal is off. PU operation mode also when Pr. 550 NET mode operation command source selection = "0"(communication option control source) and the communication option is not fitted.*3 External operation mode when the X16 signal is on.⋅ When switching between the network operation mode and external operation mode1)Set Pr. 79 to "0" (initial value), "2", "6" or "7". (At the Pr. 79 setting of "7", the operation mode can be switched when theX12 (MRS) signal turns on.)2)Set "0 (initial value), 1 or 2" in Pr. 340 Communication startup mode selection.3)Set "66" in any of Pr. 178 to Pr. 189 to assign the NET-external operation switchover signal (X66) to the terminal.4)The operation mode changes to network operation mode when the X66 signal turns on, or to external operation modewhen the X66 signal turns off.Pr. 340Setting0(initialvalue),1, 27Pr. 79SettingX66 Signal StateON (NET)OFF(external)0 (initial value) NET operation mode *1 External operation mode *21 PU operation mode Fixed to PU operation modeRemarks2 NET operation mode *1 External operation mode Cannot be switched to PU operation mode3, 4 External/PU combined operation mode External/PU combined mode fixed6 NET operation mode *1 External operation mode *2 Operation mode can be switched with operation continuedX12(MRS)ONNET operation mode *1 External operation mode *2 Output stop in external operation modeX12(MRS)OFFExternal operation modeForcibly switched to external operation mode*1 PU operation mode is selected when Pr. 550 NET mode operation command source selection = "0" (communication option control source) and thecommunication option is not fitted.*2 PU operation is selected when the X16 signal is off. When the X65 signal has been assigned, the operation mode changes with the ON/OFFstate of the X65 signal.REMARKS⋅ The priorities of Pr. 79, Pr. 340 and signals are Pr. 79 > X12 > X66 > X65 > X16 > Pr. 340.CAUTION⋅ Changing the terminal assignment using Pr. 178 to Pr. 189 (input terminal function selection) may affect the other functions. Pleasemake setting after confirming the function of each terminal.♦ Parameters referred to ♦Pr. 15 Jog frequency Refer to page 150Pr. 4 to 6, Pr. 24 to 27, Pr. 232 to Pr. 239 Multi-speed operation Refer to page 148Pr. 75 Reset selection/disconnected PU detection/PU stop selection Refer to page 278Pr. 161 Frequency setting/key lock operation selection Refer to page 361Pr. 178 to Pr. 189 (input terminal function selection) Refer to page 206Pr. 190 to Pr. 196 (output terminal function selection) Refer to page 214Pr. 340 Communication startup mode selection Refer to page 291Pr. 550 NET mode operation command source selection Refer to page 292290
4PARAMETERS4.23.2 Operation mode at power on (Pr. 79, Pr. 340)Selection of operation mode and operation locationWhen power is switched on or when power comes back on after instantaneous power failure, the inverter can bestarted up in network operation mode.After the inverter has started up in the network operation mode, parameter write and operation can be performedfrom a program.Set this mode for communication operation using the RS-485 terminals or communication option.ParameterNumberNameInitialValueSettingRangeDescription79 Operation mode selection 0 0 to 4, 6, 7 Select the operation mode. (Refer to page 285.)340 *Communication startupmode selection00 As set in Pr. 79.1, 210, 12The above parameters can be changed during a stop in any operation mode.* The parameters can be set whenever the communication option is connected. (Refer to page 281.).Started in network operation mode.When the setting is "2", it will resume the pre-instantaneous powerfailure operation mode after an instantaneous power failure occurs.Started in network operation mode. Operation mode can bechanged between the PU operation mode and network operationmode from the operation panel. When the setting is "12", it willresume the pre-instantaneous power failure operation mode afteran instantaneous power failure occurs.(1) Specify operation mode at power on (Pr. 340)⋅ Depending on the Pr. 79 and Pr. 340 settings, the operation mode at power on (reset) changes as described below.Pr. 340Setting0(initialvalue)1, 2 *110, 12*1Pr. 79Setting0(initialvalue)Operation Mode at Power on, PowerRestoration, ResetExternal operation modeOperation Mode SwitchingSwitching among the external, PU, and NET operationmode is enabled *21 PU operation mode Fixed to PU operation mode2 External operation modeSwitching between the external and Net operation mode isenabledSwitching to PU operation mode is disabled3, 4 External/PU combined operation mode Operation mode switching is disabled6 External operation mode7X12 (MRS) signal ON ....External operation modeX12 (MRS) signal OFF ...External operation mode0 NET operation modeSwitching among the external, PU, and NET operationmode is enabled while runningSwitching among the external, PU, and NET operationmode is enabled *2Fixed to external operation mode (forcibly switched toexternal operation mode.)1 PU operation mode2 NET operation mode3, 4 External/PU combined operation mode Same as when Pr. 340 = "0"6 NET operation mode7X12 (MRS) signal ON ....NET operation modeX12 (MRS) signal OFF ...External operation mode0 NET operation mode Switching between the PU and NET operation mode is enabled *31 PU operation mode Same as when Pr. 340 = "0"2 NET operation mode Fixed to NET operation mode3, 4 External/PU combined operation mode Same as when Pr. 340 = "0"6 NET operation modeSwitching among the external, PU, and NET operationmode is enabled while running *37 External operation mode Same as when Pr. 340 = "0"*1 The Pr. 340 setting "2" or "12" is mainly used for communication operation using the inverter RS-485 terminals. When a value other than "9999"(selection of automatic restart after instantaneous power failure) is set in Pr. 57 Restart coasting time, the inverter will resume the same operationstate which was in before after power has been restored from an instantaneous power failure.When Pr. 340 = "1, 10", a start command turns off if power failure has occurred and then restored during a start command is on.*2 The operation mode cannot be switched directly between the PU operation mode and network operation mode.*3 Operation mode can be changed between the PU operation mode and network operation mode with key of the operation panel (<strong>FR</strong>-DU07) andX65 signal.♦ Parameters referred to ♦Pr. 57 Restart coasting time Refer to page 239.Pr. 79 Operation mode selection Refer to page 283.291
Selection of operation mode and operation location4.23.3 Start command source and frequency command source duringcommunication operation (Pr. 338, Pr. 339, Pr. 550, Pr. 551)When the RS-485 terminals or communication option is used, the external start command and frequencycommand can be made valid. Command source in the PU operation mode can be selected.ParameterNumber338339550 *551 *NameCommunication operationcommand sourceCommunication speedcommand sourceNET mode operationcommand sourceselectionPU mode operationcommand source selectionInitialValue0099992SettingRangeDescription0 Start command source communication1 Start command source external0 Frequency command source communication1 Frequency command source external(1) Select the command source of the network operation mode (Pr. 550)⋅ Either the RS-485 terminals or communication option can be specified as the command source in networkoperation mode.⋅ For example, set Pr. 550 to "1" when executing parameter write, start command or frequency command from theinverter RS-485 terminals in the network operation mode independently of whether the communication option isconnected or not.CAUTION⋅(2) Select the control source of the PU operation mode (Pr. 551)⋅ Either the PU connector or RS-485 terminals can be specified as the source of control in the PU operation mode.⋅ In the PU operation mode, set Pr. 551 to "1" when executing parameter write, start command or frequencycommand through communication from the unit RS-485 terminals.CAUTION⋅⋅fitted*1 The Modbus-RTU protocol cannot be used in the PU operation mode. When using the Modbus-RTU protocol, set Pr. 551 to "2".*2 When the communication option is not fitted, the operation mode cannot be switched to network operation mode.2019999Frequency command source external (Frequency command fromcommunication is valid, frequency command terminal 2 is invalid)The communication option is the command source when NEToperation mode.RS-485 terminals are the command source when NET operationmode.Automatic communication option recognitionNormally, RS-485 terminals are the command source. When acommunication option is mounted, the communication option is thecommand source.1 RS-485 terminals are the command source when PU operation mode2 PU connector is the command source when PU operation mode.3 For manufacturer’s setting. Do not set.The above parameters can be set whenever the communication option is connected. (Refer to page 281.)* Pr 550 and Pr. 551 are always write-enabled.Since Pr. 550 = "9999" (automatic recognition of the communication option) in the initial setting, parameter write, start commandand frequency command cannot be executed by communication using the inverter RS-485 terminals when the communicationoption is fitted. (Monitor and parameter read can be performed.)The PU operation mode has a higher priority when Pr. 550 = "1" (NET mode RS-485 terminals) and Pr. 551 = "1" (PU mode RS-485terminals). When the communication option is not fitted, therefore, the operation mode cannot be switched to network operationmode.Changed setting value is made valid when powering on or resetting the inverter.Pr. 550Setting019999(initialvalue)Pr. 551SettingCommand SourcePU connector RS-485 terminals Communication option1 × PU operation mode *1 NET operation mode *22 (initialvalue)PU operation mode × NET operation mode *21 × PU operation mode *1 ×2 (initialvalue)PU operation mode NET operation mode ×1 × PU operation mode *1 NET operation mode *22 (initialvalue)PU operation mode× NET operation mode *2NET operation mode ×RemarksSwitching to NEToperation mode disabledCommunication optionfittedCommunication option not292
4PARAMETERSSelection of operation mode and operation location(3) Controllability through communcationOperationLocationControl by RS-485 communication from PU connectorControl by communication fromRS-485 terminalsControl by communicationfrom communication optionControl circuitexternal terminalsCondition(Pr. 551Setting)2(PUconnector)Except for 21(RS-485terminals)Except for 1⎯⎯ItemOperationModeRun command(start)Run command(stop)PUOperationExternalOperationExternal/PUCombinedOperation Mode1(Pr. 79 = 3)External/PUCombinedOperationMode 2(Pr. 79 = 4)NET Operation(when RS-485terminals areused) *6◦ × × ◦ ×◦ *3 *3 ◦ *3Running frequencysetting◦ × ◦ × ×Monitor ◦ ◦ ◦ ◦ ◦Parameter write ◦ *4 × *5 ◦ *4 ◦ *4 × *5Parameter read ◦ ◦ ◦ ◦ ◦Inverter reset ◦ ◦ ◦ ◦ ◦Run command(start)Run command(stop)× × × × × *3 *3 *3 *3 *3Running frequencysetting× × × × ×Monitor ◦ ◦ ◦ ◦ ◦Parameter write × *5 × *5 × *5 × *5 × *5Parameter read ◦ ◦ ◦ ◦ ◦Inverter reset ◦ ◦ ◦ ◦ ◦Run command(start, stop)◦ × × ◦ ×Running frequencysetting◦ × ◦ × ×Monitor ◦ ◦ ◦ ◦ ◦Parameter write ◦ *4 × *5 ◦ *4 ◦ *4 × *5Parameter read ◦ ◦ ◦ ◦ ◦Inverter reset ◦ ◦ ◦ ◦ ◦NET Operation(whencommunicationoption is used) *7Run command(start, stop)× × × × ◦ *1 ×Running frequencysetting× × × × ◦ *1 ×Monitor ◦ ◦ ◦ ◦ ◦ ◦Parameter write × *5 × *5 × *5 × *5 ◦ *4 × *5Parameter read ◦ ◦ ◦ ◦ ◦ ◦Inverter reset × × × × ◦ *2 ×Run command(start, stop)× × × × × ◦ *1Running frequencysetting× × × × × ◦ *1Monitor ◦ ◦ ◦ ◦ ◦ ◦Parameter write × *5 × *5 × *5 × *5 × *5 ◦ *4Parameter read ◦ ◦ ◦ ◦ ◦ ◦Inverter reset × × × × × ◦ *2Inverter reset ◦ ◦ ◦ ◦ ◦Run command(start, stop)× ◦ ◦ × × *1Frequency setting × ◦ × ◦ × *1◦: Enabled, ×: Disabled, : Some are enabled*1 As set in Pr. 338 Communication operation command source and Pr. 339 Communication speed command source. (Refer to page 292)*2 At occurrence of RS-485 communication error, the inverter cannot be reset from the computer.*3 Enabled only when stopped by the PU. At a PU stop, PS is displayed on the operation panel. As set in Pr. 75 Reset selection/disconnected PUdetection/PU stop selection. (Refer to page 278)*4 Some parameters may be write-disabled according to the Pr. 77 Parameter write selection setting and operating status. (Refer to page 280)*5 Some parameters are write-enabled independently of the operation mode and command source presence/absence. When Pr. 77 = 2, write isenabled. (Refer to page 55 for the parameter list)Parameter clear is disabled.*6 When Pr. 550 NET mode operation command source selection = 1 (RS-485 terminals valid) or Pr. 550 NET mode operation command source selection =9999 and the communication option is not fitted.*7 When Pr. 550 NET mode operation command source selection = 0 (communication option valid) or Pr. 550 NET mode operation command source selection= 9999 and the communication option is fitted.293
Selection of operation mode and operation location(4) Operation at alarm occurrenceAlarmDefinitionOperationModeCondition(Pr. 551 setting)PUOperationExternalOperationExternal/PUCombinedOperationMode 1(Pr. 79 = 3)External/PUCombinedOperation Mode2(Pr. 79 = 4)Inverter fault ⎯ StopPUdisconnectionof the PUconnectorCommunicationalarm of PUconnectorCommunicationalarm of RS-485 terminalsCommunicationalarm ofcommunicationoption2 (PU connector) Stop/continued *1, 4Except for 2 Stop/continued *12 (PU connector)Except for 21 (RS-485 terminals)Except for 1⎯Stop/continued*2Stop/continued*2ContinuedContinuedContinuedContinuedStop/continued*2ContinuedStop/continued*2NET Operation(when RS-485terminals areused) *5Stop/continued*2Stop/continued*3ContinuedContinuedNET Operation(whencommunicationoption is used)*6ContinuedContinued*1 Can be selected using Pr. 75 Reset selection/disconnected PU detection/PU stop selection*2 Can be selected using Pr. 122 PU communication check time interval or Pr. 336 RS-485 communication check time interval.*3 As controlled by the communication option.*4 In the PU jog operation mode, operation is always stopped when the PU is disconnected. Whether fault (E.PUE) occurrence is allowed or not is asset in Pr. 75 Reset selection/disconnected PU detection/PU stop selection.*5 When Pr. 550 NET mode operation command source selection = 1 (RS-485 terminals valid) or Pr. 550 NET mode operation command source selection =9999 and the communication option is not fitted*6 When Pr. 550 NET mode operation command source selection = 0 (communication option valid) or Pr. 550 NET mode operation command source selection= 9999 and the communication option is fitted294
4PARAMETERSSelection of operation mode and operation location(5) Selection of control source in network operation mode (Pr. 338, Pr. 339)⋅ As control sources, there are the operation command sources that control the signals related to the inverter startcommand and function selection and the speed command source that controls the signals related to frequency setting.⋅ In network operation mode, the commands from the external terminals and communication (RS-485 terminals orcommunication option) are as listed below.OperationLocationSelectionPr. 338 Communication operation commandsourcePr. 339 Communication speed commandsourceRunning frequency fromcommunication0: NET 1: External0: NET 1:External 2:External 0: NET 1:External 2:ExternalFixed functionNET ⎯ NET NET ⎯ NET(TerminalequivalentTerminal 2 ⎯ External ⎯ ⎯ External ⎯Terminal 4 ⎯ External ⎯ Externalfunction)Terminal 1CompensationSelective functionPr. 178 to Pr. 189 setting0 RL1 RMLow speed operation command/remotesetting clearstop-on-contact selection 0Middle-speed operationcommand/remote setdecelerationNET External NET ExternalNET External NET External2 RHHigh speed operationcommand/remote setNET External NET Externalacceleration3 RTSecond function selection/Stop-on contact selection 1NETExternal4 AU Current input selection ⎯ Combined ⎯ Combined5 JOG Jog operation selection ⎯ ExternalSelection of automatic restart6 CS after instantaneous powerExternalfailure7 OH External thermal relay input External8 REX Fifteen speed selection NET External NET External9 X9 Third function selection NET External12 X12PU operation externalinterlockExternalExternal DC injection brake13 X13operation startNETExternal14 X14 PID control valid terminal NET External NET External15 BRIBrake opening completionsignalNETExternalPU-external operation16 X16switchoverExternal17 X17Load pattern selection forwardrotation reverse rotation boostNETExternal18 X18 V/F switching NET ExternalLoad torque high-speed frequency19 X19NETExternal20 X20S-pattern acceleration/decelerationC switchoverNETExternal22 X22 Orientation command NET External23 LX Pre-excitation NET External24 MRSRemarksPr. 59 = "0" (multispeeds)Pr. 59 = "1 , 2"(remote)Pr. 270 = "1 , 3"(stop-on-contact)Pr. 270 = "1 , 3"(stop-on-contact)Pr. 59 = "0"(multi-speeds)Output stop Combined External Pr. 79 ≠ "7"PU operation interlockExternal25 STOP Start self-holding selection ⎯ External26 MC Control mode swichover NET External27 TL Torque limit selection NET ExternalStart-time tuning start external28 X28inputNETExternalPr. 79 = "7"When X12 signalis not assigned295
Selection of operation mode and operation locationOperationLocationSelectionSelective functionPr. 178 to Pr. 189 settingPr. 338 Communication operation commandsourcePr. 339 Communication speed commandsource0: NET 1: External0: NET 1:External 2:External 0: NET 1:External 2:External42 X42 Torque bias selection 1 NET External43 X43 Torque bias selection 2 NET External44 X44 P/PI control switchover NET External60 STF Forward rotation command NET External61 STR Reverse rotation command NET External62 RES Reset External63 PTC PID forward action switchover External64 X64 PID forward action switchover NET External NET External65 X65 PU-NET operation switchover External66 X66External-NET operationswitchoverExternal67 X67 Command source switchover External68 NPConditional position pulsetrain signExternal69 CLRConditional position drooppulse clearExternalMagnetic flux decay output74 X74shutoffNETExternalRemarks[Explanation of table]External : Control is valid only from external terminal signal.NET : Control only from communication is validCombined : Control is valid from either of external terminal and communication.⎯: Control is invalid from either of external terminal and communication.Compensation : Control by signal from external terminal is only valid when Pr. 28 Multi-speed input compensation selection = "1"REMARKS⋅ The command source of communication is as set in Pr. 550 and Pr. 551.⋅ The Pr. 338 and Pr. 339 settings can be changed during operation when Pr. 77 = 2. Note that the setting change is reflected afterthe inverter has stopped. Until the inverter has stopped, communication operation command source and communication speedcommand source before the setting change are valid.(6) Switching of command source by external terminal (X67)⋅ In network operation mode, the command source switching signal (X67) can be used to switch the start commandsource and speed command source. This signal can be utilized to control the signal input from both the controlterminal and communication.⋅ Set "67" in any of Pr. 178 to Pr. 189 (input terminal function selection) to assign the X67 signal to the control terminal.⋅ When the X67 signal is off, the start command source and speed command source are control terminal.X67 Signal State Start Command Source Speed Command SourceNo signal assignmentONAccording to Pr. 338 According to Pr. 339OFFCommand is valid only from control terminal signal.REMARKS⋅ The ON/OFF state of the X67 signal is reflected only during a stop. It is reflected after a stop when the terminal is switchedduring operation.⋅ When the X67 signal is off, a reset via communication is disabled.⋅CAUTIONChanging the terminal assignment using Pr. 178 to Pr. 189 (input terminal function selection) may affect the other functions. Pleasemake setting after confirming the function of each terminal.♦ Parameters referred to ♦Pr. 28 Multi-speed input compensation selection Refer to page 152.Pr. 59 Remote function selection Refer to page 152.Pr. 79 Operation mode selection Refer to page 283.296
4PARAMETERS4.24 Communication operation and settingCommunication operation and settingPurposeCommunication operation from PU connectorCommunication operation from RS-485terminalsRestrictions on parameter write throughcommunicationParameter that must be SetInitial setting of computer linkcommunication (PU connector)Initial setting of computer linkcommunication (RS-485 terminals)Modbus-RTU communicationspecificationsCommunication EEPROM writeselectionPr. 117 to Pr. 124Pr. 331 to Pr. 337,Pr. 341Pr. 331, Pr. 332,Pr. 334, Pr. 343,Pr. 549Refer toPage302316Pr. 342 3034.24.1 Wiring and configuration of PU connectorUsing the PU connector, you can perform communication operation from a personal computer etc.When the PU connector is connected with a personal, FA or other computer by a communication cable, a user programcan run and monitor the inverter or read and write to parameters.(1) PU connector pin-outs8)to1)Inverter(Receptacle side)Front viewPin Number Name Description1) SGEarth (Ground)(connected to terminal 5)2) ⎯ Operation panel power supply3) RDA Inverter receive+4) SDB Inverter send-5) SDA Inverter send+6) RDB Inverter receive-7) SGEarth (Ground)(connected to terminal 5)8) ⎯ Operation panel power supply⋅⋅CAUTIONPins No. 2 and 8 provide power to the operation panel or parameter unit. Do not use these pins for RS-485 communication.Do not connect the PU connector to the computer's LAN board, FAX modem socket or telephone modular connector. Theproduct could be damaged due to differences in electrical specifications.297
Communication operation and setting(2) PU connector communication system configuration and wiring• System configuration<strong>FR</strong>-DU07Operationpanelconnector<strong>FR</strong>-ADP(option)RJ-45 connector 2)InverterPUconnectorRS-485interface/terminalsRJ-45 connector 2)10BASE-T cable 1)• Connection with RS-485 computerComputerStation 0InverterPUconnector10BASE-T cable 1)RS-232CcableRJ-45connector 2)ComputerRS-232CconnectorMaximum15mRS-232C-RS-485converterStation 0InverterPUconnectorRJ-45connector2)10BASE-T cable 1)Computer Side TerminalsSignal nameRDARDBSDASDBRSARSBCSACSBSGFGDescriptionReceive dataReceive dataSend dataSend dataRequest to sendRequest to sendClear to sendClear to sendSignal groundFrame groundInverterCable connection and signal direction PU connector10BASE-T cableRS-485 terminalSDASDBRDARDB*0.2mm 2 or moreSG* Make connections in accordance with the manual of the computer used. Fully check the terminal numbers of the computer sincethey change with the model.REMARKS⋅ Refer to the following when fabricating the cable on the user side.Commercially available product examples (as of February, 2008)Product Type Maker1) 10BASE-T cable SGLPEV-T 0.5mm × 4P * Mitsubishi Cable Industries, Ltd.2) RJ-45 connector 5-554720-3 Tyco Electronics Corporation* Do not use pins No. 2, 8 of the 10- BASE-T cable.CAUTIONWhen performing RS-485 communication with multiple inverters, use the RS-485 terminals. (Refer to page 300)298
4PARAMETERS4.24.2 Wiring and arrangement of RS-485 terminals(1) RS-485 terminal layoutCommunication operation and settingOPEN100ΩTXDRDA1(RXD1+)(RXD1-) RDB1(RXD2+) RDA2(RXD2-)RDB2SDA1 SDB1 SDA2 SDB2(TXD1+)(TXD1-)(TXD2+) (TXD2-)P5S(VCC)SG(GND)Terminating resistor switchFactory-set to "OPEN".Set only the terminating resistor switch of theremotest inverter to the "100Ω" position.P5S(VCC)SG(GND)RXDVCC(2) Connection of RS-485 terminals and wiresLoosen the terminal screw and insert the cable into the terminal.NameRDA1(RXD1+)RDB1(RXD1-)RDA2(RXD2+)RDB2(RXD2-)SDA1(TXD1+)SDB1(TXD1-)SDA2(TXD2+)SDB2(TXD2-)P5S(VCC)SG(GND)DescriptionInverter receive+Inverter receive-Inverter receive+(for branch)Inverter receive-(for branch)Inverter send+Inverter send-Inverter send+(for branch)Inverter send-(for branch)5VPermissible load current 100mAEarth (Ground)(connected to terminal SD)Screw size M2 Wire the stripped cable after twisting it to prevent it fromTighteningbecoming loose. In addition, do not solder it.0.22N•m to 0.25N•mtorqueCable stripping sizeCable size 0.3mm 2 to 0.75mm 2ScrewdriverSmall flat-blade screwdriver(Tip thickness: 0.4mm /tip width: 2.5mm)Use a bar terminal as necessary.CAUTIONUndertightening can cause signal loss or malfunction. Overtightening can cause a short circuit or malfunction due to damage tothe screw or unit.REMARKSInformation on bar terminalsIntroduced products (as of March, 2008)5mmTerminal ScrewSizeWire Size (mm 2 )Bar Terminal Modelwith insulation sleeve without insulation sleeveM2 0.3, 0.5 AI 0,5-6WH A 0,5-6MakerPhoenix ContactCo.,Ltd.Bar terminal crimping tool: CRIMPFOX ZA3 (Phoenix Contact Co., (Ltd.))Use shielded or twisted cables for connection to the control circuit terminals and run them away from the main and power circuits(including the 200V relay sequence circuit).When using the bar terminal (without insulation sleeve), use care so that the twisted wires do not come out.299
Communication operation and setting(3) RS-485 terminal system configuration• Connection of a computer to the inverter (1:1 connection)ComputerComputerRS-485interface/terminalsInverterRS-485terminals*RS-232CcableConverterMaximum15mInverterRS-485terminals*Twisted pair cableTwisted pair cable*Set the terminating resistor switch to the "100Ω" position.• Combination of computer and multiple inverters (1:n connection)RS-485interface terminalsComputerStation 0 Station 1 Station nInverterRS-485terminals*InverterRS-485terminals*InverterRS-485terminals*Twisted pair cable*Set only the terminating resistor switch of theremotest inverter to the "100Ω" position.RS-232CcableComputerRS-232CconverterConverterMaximum15mStation 0 Station 1 Station nInverterRS-485terminals*InverterRS-485terminals*InverterRS-485terminals*Twisted pair cable*Set only the terminating resistor switch of theremotest inverter to the "100Ω" position.300
4PARAMETERSCommunication operation and setting(4) RS-485 terminal wiring method• Wiring of one RS-485 computer and one inverterComputerRDARDBSDASDBRSARSBCSACSBSGFG*1-+-+SDB1SDA1RDB1RDA1SG*2• Wiring of one RS-485 computer and "n" inverters (several inverters)ComputerRDARDBSDASDBRSARSBCSACSB*1-+-+-+-+SDB1SDA1SDB2SDA2RDB1RDA1RDB2RDA2SGSG SGFG Station 0-+-+SDB1SDA1SDB2SDA2-+SGStation 1-+RDB1RDA1RDB2RDA2SG-+-+SDB1SDA1RDB1RDA1SGStation n*2*1 Make connections in accordance with the manual of the computer used.Fully check the terminal numbers of the computer since they change with the model.*2 For the inverter farthest from the computer, set the terminating resistor switch to ON (100Ω side).REMARKSFor branching, connect the wires as shown below.+ - + - RXD +-+ -RXDTo computer sendTXD+ - + -TXD+ - + -To receiving terminalof the next inverterTo computer receiveTo computer groundSGSG VCCSGSGVCCTo receiving terminalof the next inverterTo next inverterTo earth (ground)terminal(5) 2-wire type connectionIf the computer is 2-wire type, pass wires across receiving terminals and transmission terminals of the RS-485terminals to enable 2-wire type connection with the inverter.ComputerInverterTXD+TransmissionenableTXD-RXD+ReceptionenableSGPass a wireRXD-SGREMARKS⋅ A program should be created so that transmission is disabled (receiving state) when the computer is not sending and receptionis disabled (sending state) during sending to prevent the computer from receiving its own data.301
Communication operation and setting4.24.3 Initial settings and specifications of RS-485 communication(Pr. 117 to Pr. 124, Pr. 331 to Pr. 337, Pr. 341, Pr. 549)Used to perform required settings for communication between the inverter and personal computer.• There are two different communications: communication using the PU connector of the inverter andcommunication using the RS-485 terminals.• You can perform parameter setting, monitor, etc. from the PU connector or RS-485 terminals of the inverterusing the Mitsubishi inverter protocol (computer link communication).• To make communication between the personal computer and inverter, initialization of the communicationspecifications must be made to the inverter.Data communication cannot be made if the initial settings are not made or there is any setting error.[PU connector communication related parameter]ParameterNumber117Name Initial Value Setting Range DescriptionPU communication stationnumber0 0 to 31118 PU communication speed 192 48, 96, 192, 384119120121122123124PU communication stop bitlengthPU communication paritycheckNumber of PUcommunication retriesPU communication checktime intervalPU communication waitingtime settingPU communication CR/LFselection121999999991Specify the inverter station number.Set the inverter station numbers when two ormore inverters are connected to onepersonal computer.Set the communication speed.The setting value × 100 equals thecommunication speed.For example, the communication speed is19200bps when the setting value is "192".Stop bit length0 1bit1 2bit10 1bit11 2bit0 Without parity check1 With odd parity check2 With even parity check0 to 1099998bit7bitData lengthSet the permissible number of retries atoccurrence of a data receive error. If thenumber of consecutive errors exceeds thepermissible value, the inverter will come totrip.If a communication error occurs, the inverterwill not come to trip.0 No PU connector communication0.1 to 999.8s9999Set the interval of communication check(signal loss detection) time.If a no-communication state persists forlonger than the permissible time, the inverterwill come to trip.No communication check (signal lossdetection)0 to 150msSet the waiting time between datatransmission to the inverter and response.9999 Set with communication data.0 Without CR/LF1 With CR2 With CR/LF302
4PARAMETERSCommunication operation and setting[RS-485 terminal communication related parameter]ParameterNumber331NameRS-485 communication stationnumberInitialValue332 RS-485 communication speed 96333 *2334335 *3336 *3337 *3341 *3RS-485 communication stop bitlengthRS-485 communication paritycheck selectionRS-485 communication retrycountRS-485 communication checktime intervalRS-485 communication waitingtime settingRS-485 communication CR/LFselection0Setting Range0 to 31 (0 to 247)*13, 6, 12, 24, 48,96, 192, 3841 0, 1, 10, 112 0, 1, 21 0 to 10, 99990s999900.1 to 999.8s99990 to 150ms,99991 0, 1, 2DescriptionSet the inverter station number. (samespecifications as Pr. 117)Used to select the communication speed.(same specifications as Pr. 118)Select stop bit length and data length. (samespecifications as Pr. 119)Select the parity check specifications. (samespecifications as Pr. 120)Set the permissible number of retries atoccurrence of a data receive error.(same specifications as Pr. 121)RS-485 communication can be made, but theinverter will come to trip in the NET operationmode.Set the interval of communication check(signal loss detection) time. (samespecifications as Pr. 122)No communication check (signal lossdetection)Set the waiting time between datatransmission to the inverter and response.(same specifications as Pr. 123)Select presence/absence of CR/LF.(same specifications as Pr. 124)549 Protocol selection 00 Mitsubishi inverter (computer link) protocol1 Modbus-RTU protocol *4*1 When "1" (Modbus-RTU protocol) is set in Pr. 549, the setting range within parenthesis is applied.*2 For the Modbus-RTU protocol, the data length is fixed to 8 bits and the stop bit depends on the Pr. 334 setting. (Refer to page 316)*3 The Modbus-RTU protocol becomes invalid.*4 The Modbus-RTU protocol is valid for only communication from the RS-485 terminals.⋅⋅CAUTIONIf communication is made without Pr. 336 RS-485 communication check time interval being changed from "0" (initial value), monitor,parameter read, etc. can be performed, but the inverter results in a fault as soon as it is switched to the NET operation mode. Ifthe operation mode at power on is the network operation mode, a communication fault (E.SER) occurs after firstcommunication.When performing operation or parameter write through communication, set "9999" or a greater value to Pr. 336. (The settingdepends on the computer side program.) (Refer to page 308)Always reset the inverter after making the initial settings of the parameters. After you have changed the communication-relatedparameters, communication cannot be made until the inverter is reset.4.24.4 Communication EEPROM write selection (Pr. 342)When parameter write is performed from the inverter PU connector, RS-485 terminal, and communication option,parameters storage device can be changed from EEPROM + RAM to RAM only. Set this parameter whenfrequent parameter changes are required.⋅ParameterNumber342NameCommunication EEPROM writeselectionInitial ValueSettingRangeThe above parameters can be set any time when the communication option is connected. (Refer to page 281)0DescriptionWhen changing the parameter values frequently, set "1" in Pr. 342 to write them to the RAM. The life of the EEPROM willbe shorter if parameter write is performed frequently with the setting unchanged from "0 (initial value)" (EEPROM write).01Parameter values written by communication arewritten to the EEPROM and RAM.Parameter values written by communicationare written to the RAM.REMARKS⋅ When Pr. 342 is set to "1" (only RAM write), the new values of the parameters will be cleared at power supply-off of the inverter.Therefore, the parameter values available when power is switched on again are the values stored in EEPROM previously.303
Communication operation and setting4.24.5 Mitsubishi inverter protocol (computer link communication)You can perform parameter setting, monitor, etc. from the PU connector or RS-485 terminals of the inverter usingthe Mitsubishi inverter protocol (computer link communication).(1) Communication specifications⋅ The communication specifications are given below.ItemDescriptionRelatedParametersCommunication protocol Mitsubishi protocol (computer link) Pr. 551Conforming standard EIA-485 (RS-485) ⎯Number of inverters connectedCommunicationspeed1:N (maximum 32 units), setting is 0 to 31 stationsPr. 117Pr. 331PU connector Selected from among 4800/9600/19200 and 38400bps Pr. 118RS-485 terminal(2) Communication procedureCan be selected from 300, 600, 1200, 2400, 4800, 9600, 19200 and38400bpsControl protocol Asynchronous system ⎯Communication method Half-duplex system ⎯CommunicationspecificationsWaiting time settingComputer(Data flow)InverterInverter(Data flow)ComputerPr. 332Character systemASCII (7 bits or 8 bits can be selected)Pr. 119Pr. 333Start bit 1bit ⎯Stop bit length1 bit or 2 bits can be selectedPr. 119Pr. 333Parity checkCheck (even, odd) or no check can be selectedPr. 120Pr. 334Error check Sum code check ⎯Terminator*1When data is read*21) 4) 5)2) 3)When data is writtenCR/LF (presence or absence can be selected)Selectable between presence and absencePr. 124Pr. 341Pr. 123Pr. 337⋅ Data communication between the computer andinverter is made in the following procedure.1)Request data is sent from the computer to theinverter. (The inverter will not send data unlessTimerequested.)2)After waiting for the waiting time3)The inverter sends return data to the computer inresponse to the computer request.4)After having waited for the time taken for inverterprocessing5)Answer from computer in response to reply data3) is sent. (Even if 5) is not sent, subsequentcommunication is made properly.)*1 If a data error is detected and a retry must be made, execute retry operation with the user program. The inverter comes to trip if the number ofconsecutive retries exceeds the parameter setting.*2 On receipt of a data error occurrence, the inverter returns "reply data 3)" to the computer again. The inverter comes to trip if the number ofconsecutive data errors reaches or exceeds the parameter setting.304
4PARAMETERSCommunication operation and setting(3) Communication operation presence/absence and data format types⋅ Data communication between the computer and inverter is made in ASCII code (hexadecimal code).⋅ Communication operation presence/absence and data format types are as follows:SymbolOperationRunCommandRunningFrequencyParameterWriteInverterResetMonitorParameterReadCommunication request is sent to theA1) inverter in accordance with the userA A A B BA’program in the computer.2) Inverter data processing time Present Present Present Absent Present Present3)Reply data from theinverter (Data 1) ischecked for error)No error *1(Request accepted)With error.(Request rejected)C C C C *2EE’ED D D D *2 D D4) Computer processing delay time 10ms or more5)Answer from computer inresponse to reply data 3)(Data 3) is checked forerror)1)Communication request data from the computer to the inverter⋅ When data is readNo error *1(No inverterprocessing)With error(Inverter reoutputs3))Absent Absent Absent AbsentAbsent(C)Absent(C)Absent Absent Absent Absent F F*1 In the communication request data from the computer to the inverter, 10ms or more is also required after "no data error (ACK)". (Refer to page306)*2 The inverter response to the inverter reset request can be selected. (Refer to page 311)FormatA(Data write)A'(Data write)B(Data read)Number of Characters1 2 3 4 5 6 7 8 9 10 11 12 13ENQ Inverter stationInstruction code WaitingData Sum check *4*1 number *2time *3ENQ*1ENQ*1Inverter stationnumber *2Inverter stationnumber *2Instruction code Waitingtime *3Instruction code Waitingtime *33)Reply data from the inverter to the computer⋅ When data is writtenNumber of CharactersFormat1 2 3 4 5CACK Inverter station*4(No data error detected) *1 number *2D(Data error detected)FormatE(No data error detected)E'(No data error detected)D(Data error detected)NAK*1STX*1STX*1NAKInverter stationnumber *2ErrorCode*4Data Sum check *4Sum check *4Number of Characters1 2 3 4 5 6 7 8 9 10 11Inverter stationRead dataETXSum check *4number *2*1*1Inverter stationnumber *2Inverter stationnumber *2Read dataErrorCode*4*1 Indicate a control code*2 Specify the inverter station numbers between H00 and H1F (stations 0 to 31) in hexadecimal.*3 When Pr. 123, Pr. 337 (waiting time setting) ≠ "9999", create the communication request data without "waiting time" in the data format. (The numberof characters decreases by 1.)*4 CR, LF codeWhen data is transmitted from the computer to the inverter, CR (carriage return) and LF (line feed) codes are automatically set at the end of a datagroup on some computers. In this case, setting must also be made on the inverter according to the computer. Whether the CR and LF codes willbe present or absent can be selected using Pr. 124 or Pr. 341 (CR/LF selection).ETX*15)Send data from the computer to the inverter during data readNumber of CharactersFormat1 2 3 4CACK Inverter station*4(No data error detected) *1 number *2F(Data error detected)NAK*1Inverter stationnumber *2*4Sum check *4305
Communication operation and setting(4) Data definitions1) Control codesSignal Name ASCII Code DescriptionSTX H02 Start Of Text (start of data)ETX H03 End Of Text (end of data)ENQ H05 Enquiry (communication request)ACK H06 Acknowledge (no data error detected)LF H0A Line FeedCR H0D Carriage ReturnNAK H15 Negative Acknowledge (data error detected)2) Inverter station numberSpecify the station number of the inverter which communicates with the computer.3) Instruction codeSpecify the processing request, e.g. operation or monitoring, given by the computer to the inverter. Hence, theinverter can be run and monitored in various ways by specifying the instruction code as appropriate. (Refer to page429)4) DataIndicates the data such as frequency and parameters transferred to and from the inverter. The definitions andranges of set data are determined in accordance with the instruction codes. (Refer to page 429)5) Waiting timeSpecify the waiting time between the receipt of data at the inverter from the computer and the transmission ofreply data. Set the waiting time in accordance with the response time of the computer between 0 and 150ms in10ms increments (e.g. 1 = 10ms, 2 = 20ms).ComputerInverterInverterComputerInverter data processing time= Waiting time(setting 10ms)+ data check time(About 10 to 30ms,which depends on theinstruction code)REMARKS⋅ When Pr. 123, Pr. 337 (waiting time setting) ≠ "9999", create the communication request data without "waiting time" in the dataformat. (The number of characters decreases by 1.)⋅ The data check time changes depending on the instruction code. (Refer to page 307)6) Sum check codeThe sum check code is 2-digit ASCII (hexadecimal) representing the lower 1 byte (8 bits) of the sum (binary)derived from the checked ASCII data(Example 1)Computer InverterASCII CodeENQStationnumber0 1Instructioncode*WaitingtimeH05 H30 H31 H45 H31 H31DataSumcheckcodeE 1 1 0 7 A D F 4H30 H37 H41 H44 H46 H34Binary codeH30 + H31+ H45+ H31+ H31+ H30+ H37+ H41+H44=H1F4Sum* When the Pr. 123 Waiting time setting "9999", create the communication requestdata without "waiting time" in the data format. (The number of characters decreases by 1.)(Example 2)Inverter ComputerASCII CodeSTXStationnumberData readETXSumcheckcode0 1 1 7 7 0 3 0H02 H30 H31 H31 H37 H37 H30 H03 H33 H30Binary codeH30 + H31+ H31+ H37+ H37+H30= H130Sum306
4PARAMETERSCommunication operation and setting7) Error CodeIf any error is found in the data received by the inverter, its definition is sent back to the computer together with theNAK code.ErrorCodeH0Error Item Error Description Inverter OperationComputer NAK errorThe number of errors consecutively detected in communicationrequest data from the computer is greater than allowed number ofretries.H1 Parity error The parity check result does not match the specified parity.H2Sum check errorThe sum check code in the computer does not match that of thedata received by the inverter.The data received by the inverter has a grammatical mistake.H3 Protocol error Alternatively, data receive is not completed within thepredetermined time. CR or LF is not as set in the parameter.H4 Framing error The stop bit length differs from the initial setting.Brought to trip if erroroccurs continuouslymore than the allowablenumber of retries.(E.PUE/E.SER)H5 Overrun errorNew data has been sent by the computer before the invertercompletes receiving the preceding data.H6 ⎯ ⎯ ⎯H7Character errorThe character received is invalid (other than 0 to 9, A to F, controlcode).Does not acceptreceived data but is notbrought to trip.H8 ⎯ ⎯ ⎯H9 ⎯ ⎯ ⎯HAMode errorParameter write was attempted in other than the computer linkoperation mode, when operation command source is not selectedor during inverter operation.HB Instruction code error The specified command does not exist.HCData range errorInvalid data has been specified for parameter write, frequencysetting, etc.Does not acceptreceived data but is notbrought to trip.HD ⎯ ⎯ ⎯HE ⎯ ⎯ ⎯HF ⎯ ⎯ ⎯(5) Response timeData sending time (refer to the following formula)Inverter data processing time Waiting time Data check timeComputer(setting 10ms) (depends on theinstruction code (see theInverterTimefollowing table))Inverter10ms or more necessaryComputerData sending time (refer to the following formula)[Formula for data sending time]1Communicationspeed (bps)•Communication specificationsNameStop bit lengthData length×Number of datacharacters(Refer to page 305)Number ofBits1 bit2 bits7 bits8 bits×Communication specifications(total number of bits) = Data send time (s)(See below.)•Data check timeItemVarious monitors, run command,frequency setting (RAM)Parameter read/write, frequency setting(EEPROM)Check Time< 12ms< 30msYes 1 bit Parameter clear/all clear < 5sParity checkNo 0 Reset command No answerIn addition to the above, 1 start bit is necessary.Minimum number of total bits....... 9 bitsMaximum number of total bits...... 12 bits307
Communication operation and setting(6) Retry count setting (Pr. 121, Pr. 335)⋅ Set the permissible number of retries at occurrence of a data receive error. (Refer to page 307 for data receive errorfor retry)⋅ When data receive errors occur consecutively and exceed the permissible number of retries set, an inverter trips(E.PUE) and a motor stops.⋅ When "9999" is set, the inverter will not trip even if data receive error occurs but an alarm output signal (LF) is output.For the terminal used for the LF signal output, assign the function by setting "98 (positive logic) or 198 (negativelogic)" in any of Pr. 190 to Pr. 196 (output terminal function selection).Example: PU connector communication, Pr. 121 = "1" (initial value)Operation modeComputerInverterInverterComputerACKENQWrongNAKENQWrongNAKFault (E.PUE)Reception errorReception errorExample: PU connector communication, Pr. 121 = "9999"Operation modeComputerInverterInverterComputerACKENQWrongNAKENQWrongNAKENQNormalACKReception errorReception errorLF OFF ONOFF(7) Signal loss detection (Pr. 122, Pr. 336 RS-485 communication check time interval)⋅ If a signal loss (communication stop) is detected between the inverter and computer as a result of a signal lossdetection, a communication fault (PU connector communication: E.PUE, RS-485 terminal communication: E.SER)occurs and the inverter trips.⋅ When the setting is "9999", communication check (signal loss detection) is not made.⋅ When the setting is "0", communication from the PU connector cannot be performed. For communication via the RS-485 terminals, monitor, parameter read, etc. can be peformed, but a communication fault (E.SER) occurs as soon asthe inverter is switched to network operation mode.⋅ A signal loss detection is made when the setting is any of "0.1s" to "999.8s". To make a signal loss detection, it isnecessary to send data (control code refer to page 306) from the computer within the communication check timeinterval. (The send data has nothing to do with the station number)⋅ Communication check is started at the first communication in the operation mode having the operation source (PUoperation mode for PU connector communication in the initial setting or network operation mode for RS-485 terminalcommunication).Example: PU connector communication, Pr. 122 = "0.1 to 999.8s"Operation ModeExternalPUComputerInverterInverterENQComputerPr. 122Communicationcheck counterCheck startAlarm(E.PUE)Time308
4PARAMETERS(8) Instructions for the programCommunication operation and setting1) When data from the computer has any error, the inverter does not accept that data. Hence, in the user program,always insert a retry program for data error.2) All data communication, e.g. run command or monitoring, are started when the computer gives a communicationrequest. The inverter does not return any data without the computer's request. Hence, design the program so thatthe computer gives a data read request for monitoring, etc. as required.3) Program exampleTo change the operation mode to computer link operationProgramming example of Microsoft ® Visual C++ ® (Ver.6.0)#include #include void main(void){HANDLE hCom; //Communication handleDCB hDcb; //Structure for communication settingCOMMTIMEOUTS hTim; // Structure for time out settingchar szTx[0x10]; // Send bufferchar szRx[0x10]; // Receive buffercharszCommand[0x10];// Commandint nTx,nRx; // For buffer size storingint nSum; // For sum code calculationBOOLbRet;intnRet;int i;//∗∗∗∗ Opens COM1 port∗∗∗∗hCom = CreateFile ("COM1", (GENERIC_READ | GENERIC_WRITE), 0, NULL, OPEN_EXISTING, FILE_ATTRIBUTE_NORMAL, NULL);if (hCom != NULL) {//∗∗∗∗ Makes a communication setting of COM1 port∗∗∗∗GetCommState(hCom,&hDcb);// Retrieves current communication informationhDcb.DCBlength = sizeof(DCB);// Structure size settinghDcb.BaudRate = 19200;// Communication speed=09200bpshDcb.ByteSize = 8;// Data length=8bithDcb.Parity = 2;// Even parityhDcb.StopBits = 2;// Stop bit=2bitbRet = SetCommState(hCom,&hDcb);// Sets the changed communication dataif (bRet == TRUE) {//∗∗∗∗ Makes a time out setting of COM1 port∗∗∗∗Get CommTimeouts(hCom,&hTim);// Obtains the current time out valuehTim.WriteTotalTimeoutConstant = 1000;// Write time out 1shTim.ReadTotalTimeoutConstant = 1000;// Read time out 1sSetCommTimeouts(hCom,&hTim);// Changed time out value setting//∗∗∗∗ Sets the command to switch the operation mode of the station 1 inverter to the network operation mode ∗∗∗∗sprintf(szCommand,"01FB10000");// Send data (NET operation write)nTx = strlen(szCommand);//Send data size//∗∗∗∗ Generates sum code∗∗∗∗nSum = 0;// Initialization of sum datafor (i = 0;i < nTx;i++) {nSum += szCommand[i];// Calculates sum codenSum &= (0xff);// Masks data}//∗∗∗∗ Generates send data∗∗∗∗memset(szTx,0,sizeof(szTx));// Initialization of send buffermemset(szRx,0,sizeof(szRx));// Initialization of receive buffersprintf(szTx,"\5%s%02X",szCommand,nSum);// ENQ code+send data+sum codenTx = 1 + nTx + 2;// Number of ENQ code+number of send data+number of sum code}}nRet = WriteFile(hCom,szTx,nTx,&nTx,NULL);//∗∗∗∗ Sending ∗∗∗∗if(nRet != 0) {nRet = ReadFile(hCom,szRx,sizeof(szRx),&nRx,NULL);//∗∗∗∗ Receiving ∗∗∗∗if(nRet != 0) {//∗∗∗∗ Displays the receive data ∗∗∗∗for(i = 0;i < nRx;i++) {printf("%02X ",(BYTE)szRx[i]);// Consol output of receive data// Displays ASCII coder in hexadecimal. Displays 30 when "0"}printf("\n\r");}}}CloseHandle(hCom);// Close communication port309
Communication operation and settingGeneral flowchartPort openCommunication settingTime out settingSend data processing◦Data setting◦Sum code calculation◦Data transmissionReceive data waitingReceive data processing◦Data retrieval◦Screen displayCAUTIONAlways set the communication check time interval before starting operation to prevent hazardous conditions.Data communication is not started automatically but is made only once when the computer provides acommunication request. If communication is disabled during operation due to signal loss etc., the inverter cannotbe stopped. When the communication check time interval has elapsed, the inverter will come to a trip (E.PUE,E.SER). The inverter can be coasted to a stop by switching on its RES signal or by switching power off.If communication is broken due to signal loss, computer fault etc., the inverter does not detect such a fault. Thisshould be fully noted.310
4PARAMETERS(9) Setting items and set dataCommunication operation and settingAfter completion of parameter setting, set the instruction codes and data then start communication from the computerto allow various types of operation control and monitoring.No.Item1 Operation mode2MonitorOutputfrequency/speedOutputcurrentOutputvoltageSpecialmonitorSpecialmonitorselection No.Read/WriteReadWriteReadInstructionCodeH7BHFBH6FData DescriptionH0000: Network operationH0001: External operationH0002: PU operation(RS-485 communication operation via PU connector)H0000 to HFFFF: Output frequency in 0.01Hz incrementsSpeed in 1r/min increments (when Pr. 37 = 1 to 9998 or Pr. 144 = 2 to10, 102 to 110)Read H70 H0000 to HFFFF: Output current (hexadecimal) in 0.01A incrementsRead H71 H0000 to HFFFF: Output voltage (hexadecimal) in 0.1V incrementsRead H72 H0000 to HFFFF: Monitor data selected in instruction code HF3ReadWriteH73HF3H01 to H3C: Monitor selection dataRefer to the special monitor No. table (page 313)H0000 to HFFFF: Two most recent fault definitionsH74b15 b8 b7 b0Second fault in pastLatest faultNumber ofData Digits(format)4 digits(B.E/D)4 digits(A,C/D)4 digits(B.E/D)4 digits(B.E/D)4 digits(B.E/D)4 digits(B.E/D)2digits(B.E'/D)2digits(A',C/D)FaultdefinitionReadH74 toH77H75H76Fourth fault in pastSixth fault in pastThird fault in pastFifth fault in past4 digits(B.E/D)H77Eighth fault in pastSeventh fault in past345Refer to the fault data table (page 314)Run commandWrite HF9(extended)You can set the control input commands such as the forwardrotation signal (STF) and reverse rotation signal (STR). (Refer toRun command Write HFA page 314 for details)Inverter statusmonitor(extended)Inverter statusmonitorSet frequency(RAM)Set frequency(EEPROM)Set frequency(RAM)Set frequency(RAM, EEPROM)Read H79 You can monitor the status of the output signals such as forwardrotation, reverse rotation and inverter running (RUN). (Refer to pageRead H7A315 for details)ReadWriteH6DH6EHEDHEE6 Inverter reset Write HFDRead the set frequency/speed from the RAM or EEPROM.H0000 to HFFFF: Set frequency in 0.01Hz incrementsSpeed in 1r/min increments (When Pr. 37 = 1 to 9998 or Pr. 144 = 2to 10, 102 to 110)Write the set frequency/speed into the RAM or EEPROM.H0000 to H9C40 (0 to 400.00Hz) : frequency in 0.01Hz incrementsH0000 to H270E (0 to 9998) : speed in r/min increments (when Pr.37 = 1 to 9998 or Pr. 144 = 2 to 10, 102 to 110)⋅ To change the running frequency consecutively, write data to theinverter RAM. (Instruction code: HED)Fault definition7Write HF4 H9696: Faults history batch clearall clearRefer to page 305 for data formats (A, A', B, B', C, D)H9696: Resets the inverter.⋅ As the inverter is reset at start of communication by the computer,the inverter cannot send reply data back to the computer.H9966: Resets the inverter.⋅ When data is sent normally, ACK is returned to the computer andthen the inverter is reset.4 digits(A,C/D)2digits(A',C/D)4 digits(B.E/D)2digits(B.E'/D)4 digits(B.E/D)4 digits(A,C/D)4 digits(A,C/D)4 digits(A,D)4 digits(A,C/D)311
Communication operation and settingNo.ItemRead/WriteInstructionCodeData DescriptionAll parameters return to the initial values.Whether to clear communication parameters or not can be selectedaccording to data. (◦: clear, ×: not clear)Refer to page 423 for parameter clear, all clear, and communicationparameters.Number ofData Digits(format)8Parameter clearAll parameterclearWrite9ReadParameters10 Write1112Link parameterextended settingSecondparameterchanging(instruction codeHFF=1, 9)HFCH00 toH63H80 toHE3When clear is executed for H9696 or H9966, communication-relatedparameter settings also return to the initial values. When resumingoperation, set the parameters again.Executing clear will clear the instruction code HEC, HF3, and HFFsettings.Refer to the instruction code (page 429) and write and/or read thevalues as required.When setting Pr. 100 and later, link parameter extended setting mustbe set.Read H7F Parameter description is changed according to the H00 to H09setting.Write HFF For details of the setting, refer to the instruction code (page 429).ReadWriteH6CHECRefer to page 305 for data formats (A, A', B, B', C, D)Clear typeParameter clearAll parameter clearDataH9696CommunicationparametersH5A5A ×H9966H55AA ×◦◦When setting the calibration parameters *1H00:Frequency *2H01: Parameter-set analog valueH02: Analog value input from terminal*1 Refer to the list of calibration parameters on the next page for calibrationparameters.*2 The gain frequency can also be written using Pr. 125 (instruction codeH99) or Pr. 126 (instruction code H9A).4 digits(A,C/D)4 digits(B.E/D)4 digits(A,C/D)2digits(B.E'/D)2digits(A',C/D)2digits(B.E'/D)2digits(A',C/D)REMARKS⋅ Set 65520 (HFFF0) as a parameter value "8888" and 65535 (HFFFF) as "9999".⋅ For the instruction codes HFF, HEC and HF3, their values are held once written but cleared to zero when an inverter reset or allclear is performed.Example) When reading the C3 (Pr. 902) and C6 (Pr. 904) settings from the inverter of station 0Computer Send Data Inverter Send Data Description1) ENQ 00 FF 0 01 82 ACK 00 Set "H01" in the extended link parameter.2) ENQ 00 EC 0 01 7E ACK 00 Set "H01" in second parameter changing.3) ENQ 00 5E 0 0F STX 00 0000 ETX 25 C3 (Pr. 902) is read. 0% is read.4) ENQ 00 60 0 FB STX 00 0000 ETX 25 C6 (Pr. 904) is read. 0% is read.To read/write C3 (Pr. 902) and C6 (Pr. 904) after inverter reset or parameter clear, execute from 1) again.312
4PARAMETERSCommunication operation and setting•List of calibration parametersParameterC2(902)C3(902)125(903)C4(903)C5(904)C6(904)126(905)C7(905)C12(917)NameTerminal 2 frequencysetting bias frequencyTerminal 2 frequencysetting biasTerminal 2 frequencysetting gain frquencyTerminal 2 frequencysetting gainTerminal 4 frequencysetting bias frequencyTerminal 4 frequencysetting biasTerminal 4 frequencysetting gain frequencyTerminal 4 frequencysetting gainTerminal 1 biasfrequency (speed)InstructioncodeReadWriteExtended5E DE 15E DE 15F DF 15F DF 160 E0 160 E0 161 E1 161 E1 111 91 9ParameterC13(917)C14(918)C15(918)C16(919)C17(919)C18(920)C19(920)C38(932)NameTerminal 1 biasfrequency (speed)Terminal 1 gainfrequency (speed)Terminal 1 gain(speed)Terminal 1 biascommand (torque/magnetic flux)Terminal 1 bias(torque/magnetic flux)Terminal 1 gaincommand (torque/magnetic flux)Terminal 1 gain(torque/magnetic flux)Terminal 4 biascommand (torque/magnetic flux)InstructioncodeReadWriteExtended11 91 912 92 912 92 913 93 913 93 914 94 914 94 920 A0 9ParameterC39(932)C40(933)C41(933)NameTerminal 4 bias(torque/magnetic flux)Terminal 4 gaincommand (torque/magnetic flux)Terminal 4 gain(torque/magnetic flux)InstructioncodeReadWriteExtended20 A0 921 A1 921 A1 9[Special monitor selection No.]Refer to page 228 for details of the monitor description.Data Description IncrementsH01 Output frequency 0.01HzH02 Output current 0.01AH03 Output voltage 0.1VH05 Frequency setting 0.01HzH06 Running speed1r/minH07 Motor torque 0.1%H08 Converter output voltage 0.1VElectronic thermal relayH0Afunction load factor0.1%Output current peakH0BvalueConverter output voltageH0Cpeak valueH0D Input powerH0E Output powerH0F Input terminal status *10.01A/0.1A *10.1V0.01kW0.01kW⎯Data Description IncrementsH10 Output terminal status *2 ⎯H11 Load meter 0.1%H12 Motor excitation current 0.01AH13 Position pulse⎯Cumulative energizationH14time1hH16 Orientation status⎯H17 Actual operation time 1hH18 Motor load factor 0.1%H19 Cumulative power 1kWhH20 Torque command 0.1%H21 Torque current command 0.1%H22 Motor output0.01kWH23 Feedback pulse⎯H32 Power saving effect VariableH33 Cumulative saving power VariableData Description IncrementsH34 PID set point 0.1%H35 PID measured value 0.1%H36 PID deviation value 0.1%Option input terminalH3Astatus1 *3⎯Option input terminalH3Bstatus2 *4⎯Option output terminalH3Cstatus *5⎯*1 Input terminal monitor detailsb15b0⎯ ⎯ ⎯ ⎯ CS RES STOP MRS JOG RH RM RL RT AU STR STF*2 Output terminal monitor detailsb15b0⎯ ⎯ ⎯ ⎯ ⎯ ⎯ ⎯ ⎯ ⎯ ABC2 ABC1 FU OL IPF SU RUN*3 Details of option input terminal monitor 1 (input terminal status of <strong>FR</strong>-A7AX)-all terminals are off when an option is not fittedb15b0X15 X14 X13 X12 X11 X10 X9 X8 X7 X6 X5 X4 X3 X2 X1 X0*4 Details of option input terminal monitor 2 (input terminal status of <strong>FR</strong>-A7AX)-all terminals are off when an option is not fittedb15b0⎯ ⎯ ⎯ ⎯ ⎯ ⎯ ⎯ ⎯ ⎯ ⎯ ⎯ ⎯ ⎯ ⎯ ⎯ DY*5 Details of option output terminal monitor (output terminal status of <strong>FR</strong>-A7AY/A7AR)-all terminals are off when an option is not fittedb15b0⎯ ⎯ ⎯ ⎯ ⎯ ⎯ RA3 RA2 RA1 Y6 Y5 Y4 Y3 Y2 Y1 Y0313
Communication operation and setting[Fault data]Refer to page 373 for details of fault description.DataH00DescriptionNo alarmDataHA0DescriptionE.OPTDataHD6DescriptionE.MB2Fault description display example (instruction code H74)H10H11H12H20E.OC1E.OC2E.OC3E.OV1HA3HB0HB1HB2E.OP3E.PEE.PUEE.RETHD7HD8HD9HDAE.MB3E.MB4E.MB5E.MB6For read data H30A0(Previous fault ...... THT)(Latest fault ...... OPT)b15 b8 b7 b00 0 1 1 0 0 0 0 1 0 1 0 0 0 0 0H21H22E.OV2E.OV3HB3HC0E.PE2E.CPUHDBHDCE.MB7E.EPPrevious fault(H30)Latest fault(HA0)H30E.THTHC1E.CTEHF1 E.1H31E.THMHC2E.P24HF2 E.2H40E.FINHC4E.CDOHF3 E.3H50E.IPFHC5E.IOHHF4 E.4H51E.UVTHC6E.SERHF6 E.6H52E.ILFHC7E.AIEHF7 E.7H60E.OLTHD0E.OSHF8 E.8H80E.GFHD1E.OSDHFA E.10H81E.LFHD2E.ECTHFB E.11H90E.OHTHD3E.ODHFD E.13H91E.PTCHD5E.MB1HFF E.15[Run command]ItemInstructionCodeBitLengthDescriptionExampleRuncommandHFA8bitb0: AU (current input selection) *1 *3b1: Forward rotation commandb2: Reverse rotation commandb3: RL (low speed operationcommand) *1 *3b4: RM (middle speed operationcommand) *1 *3b5: RH (high speed operationcommand) *1 *3b6: RT (second function selection) *1 *3b7: MRS (output stop) *1 *3[Example 1] H02 Forward rotationb7b00 0 0 0 0 0 1 0[Example 2] H00 Stopb7b00 0 0 0 0 0 0 0Runcommand(extended)HF916bitb0:AU (current input selection) *1 *3b1:Forward rotation commandb2:Reverse rotation commandb3:RL (low speed operation command) *1*3b4:RM (middle speed operationcommand) *1 *3b5: RH (high speed operationcommand) *1 *3b6:RT (second function selection) *1 *3b7:MRS (output stop) *1 *3b8:JOG (Jog operation) *2 *3b9:CS (selection of automatic restart afterinstantaneous power failure) *2 *3b10: STOP (start self-holding) *2 *3b11:RES (reset) *2 *3b12:⎯b13:⎯b14:⎯b15:⎯[Example 1] H0002 Forward rotationb150 0 0 0 0 0 0 0b00 0 0 0 0 0 1 0[Example 2] H0800 low speed operation(When Pr. 189 RES terminal function selection is set to "0")b150 0 0 0 1 0 0 0b00 0 0 0 0 0 0 0*1 The signal within parentheses is the initial setting. The description changes depending on the setting of Pr. 180 to Pr. 184, Pr. 187 (input terminalfunction selection) (page 206).*2 The signal within parentheses is the initial setting. Since jog operation/selection of automatic restart after instantaneous power failure/start selfholding/resetcannot be controlled by the network, bit 8 to bit 11 are invalid in the initial status. When using bit 8 to bit 11, change the signals withPr. 185, Pr. 186, Pr. 188, Pr. 189 (input terminal function selection) (page 206). (Reset can be executed with the instruction code HFD.)*3 Only forward rotation command and reverse rotation command are available for RS-485 communication using PU connector.314
4PARAMETERSCommunication operation and setting[Inverter status monitor]ItemInstructionCodeBitLengthDescriptionExampleInverterstatusmonitorH7A8bitb0:RUN (inverter running)*b1:Forward rotationb2:Reverse rotationb3:SU (up to frequency) *b4:OL (overload) *b5:IPF (instantaneous power failure) *b6:FU (frequency detection)*b7:ABC1 (fault) *[Example 1] H02 During forwardb7rotationb00 0 0 0 0 0 1 0[Example 2] H80b7Stop at faultoccurrenceb01 0 0 0 0 0 0 0Inverterstatusmonitor(extended)H7916bitb0:RUN (inverter running) *b1:Forward rotationb2:Reverse rotationb3:SU (up to frequency) *b4:OL (overload) *b5:IPF (instantaneous power failure) *b6:FU (frequency detection) *b7:ABC1 (fault) *b8:ABC2 (⎯)*b9:⎯b10:⎯b11:⎯b12:⎯b13:⎯b14:⎯b15: Fault occurrence[Example 1] H0002 During forward rotationb15b00 0 0 0 0 0 0 0 0 0 0 0 0 0 1 0[Example 2] H8080 Stop at fault occurrenceb151 0 0 0 0 0 0 0b01 0 0 0 0 0 0 0* The signal within parentheses is the initial setting. The description changes depending on the setting of Pr. 190 to Pr. 196 (output terminal functionselection).315
Communication operation and setting4.24.6 Modbus-RTU communication specifications (Pr. 331, Pr. 332, Pr. 334, Pr. 343,Pr. 539, Pr. 549)Using the Modbus-RTU communication protocol, communication operation or parameter setting can beperformed from the RS-485 terminals of the inverter.ParameterName Initial Value Setting Range DescriptionNumber331RS-485 communication stationnumber332 RS-485 communication speed 96334RS-485 communication paritycheck selection020 Broadcast communication is selected.1 to 2473, 6, 12, 24, 48,96, 192, 384343 Communication error count 0 ⎯539Modbus-RTU communicationcheck time interval9999549 Protocol selection 001200.1 to 999.8s99990Specify the inverter station number.Set the inverter station numbers when twoor more inverters are connected to onepersonal computer.Set the communication speed.The setting value × 100 equals thecommunication speed.For example, the communication speed is9600bps when the setting value is "96".Without parity checkStop bit length 2bitsWith odd parity checkStop bit length 1bitWith even parity checkStop bit length 1bitDisplay the number of communicationerrors during Modbus-RTUcommunication. Reading onlyModbus-RTU communication can bemade, but the inverter will come to trip inthe NET operation mode.Set the interval of communication check time.(same specifications as Pr. 122)No communication check (signal lossdetection)Mitsubishi inverter (computer link)protocol1 Modbus-RTU protocolCAUTIONWhen Modbus-RTU communication is performed from the master with address 0 (station 0) set, broadcast communication isselected and the inverter does not send a response message to the master.When response from the inverter is necessary, set a value other than "0" in Pr. 331 (initial value 0).Some functions are invalid for broadcast communication. (Refer to page 318)REMARKS⋅ When using the Modbus-RTU protocol, set Pr. 549 Protocol selection to "1".⋅ When the communication option is fitted with Pr. 550 NET mode operation command source selection set to "9999" (initial value), thecommand source (e.g. run command) from the RS-485 terminals is invalid. (Refer to page 292)(1) Communication specifications⋅ The communication specifications are given below.RelatedItemDescriptionParametersCommunication protocol Modbus-RTU protocol Pr. 549Conforming standard EIA-485 (RS-485) ⎯Number of inverters connected 1: N (maximum 32 units), setting is 0 to 247 stations Pr. 331Communication speed Can be selected from 300, 600, 1200, 2400, 4800, 9600, 19200 and 38400bps Pr. 332Control protocol Asynchronous system ⎯Communication method Half-duplex system ⎯Character system Binary(fixed to 8 bits) ⎯CommunicationspecificationsStart bit 1bit ⎯Stop bit lengthParity checkSelect from the following three types⋅ No parity, stop bit length 2 bits⋅ Odd parity, stop bit length 1 bit⋅ Even parity, stop bit length 1 bitError check CRC code check ⎯Terminator Not used ⎯Waiting time setting Not used ⎯Pr. 334316
4PARAMETERSCommunication operation and setting(2) OutlineThe Modbus protocol is the communication protocol developed by Modicon for programmable controller.The Modbus protocol performs serial communication between the master and slave using the dedicated messageframe. The dedicated message frame has the functions that can perform data read and write. Using the functions,you can read and write the parameter values from the inverter, write the input command of the inverter, and checkthe operating status. In this product, the inverter data are classified in the holding register area (register addresses40001 to 49999). By accessing the assigned holding register address, the master can communicate with the inverterwhich is a slave.REMARKSThere are two different serial transmission modes: ASCII (American Standard Code for Information Interchange) mode and RTU(Remote Terminal Unit) mode. This product supports only the RTU mode in which 1-byte (8-bit) data is transmitted as-is.Only the communication protocol is defined by the Modbus protocol, and the physical layer is not stipulated.(3) Message formatQuery communicationProgrammable controller (Master)Query MessageInverter response time(Refer to the following table for thedata check time)Inverter (slave)Broadcast communicationData absence time(3.5 bytes or more)Response MessageProgrammable controller (Master)Query MessageInverter (slave)No Response•Data check timeItemCheck TimeVarious monitors, operation command,< 12msfrequency setting (RAM)Parameter read/write, frequencysetting (EEPROM)< 30msParameter clear/all clear< 5sReset commandNo answer1)QueryThe master sends a message to the slave (= inverter) at the specified address.2)Normal ResponseAfter receiving the query from the master, the slave executes the requested function and returns the correspondingnormal response to the master.3)Error ResponseIf an invalid function code, address or data is received, the slave returns it to the master.When a response description is returned, the error code indicating that the request from the master cannot beexecuted is added.No response is returned for the hardware-detected error, frame error and CRC check error.4)BroadcastBy specifying address 0, the master can send a message to all slaves. All slaves that received the message from themaster execute the requested function. In this communication, the slaves do not return a response to the master.REMARKSThe slave executes the function independently of the inverter station number setting (Pr. 331) during broadcast communication.317
Communication operation and setting(4) Message frame (protocol)• Communication methodBasically, the master sends a query message (question) and the slave returns a response message(response). When communication is normal, Device Address and Function Code are copied as they are, andwhen communication is abnormal (function code or data code is illegal), bit 7 (= 80h) of Function Code isturned on and the error code is set to Data Bytes.Query message from MasterDevice AddressFunction CodeEight-BitData BytesError CheckDevice AddressFunction CodeEight-BitData BytesError CheckResponse message from slaveThe message frame consists of the four message fields as shown above.By adding the no-data time (T1: Start, End) of 3.5 characters to the beginning and end of the message data,the slave recognizes it as one message.• Protocol detailsThe four message fields will be explained below.Start 1) ADDRESS 2) FUNCTION 3) DATA 4) CRC CHECK EndT1 8bit 8bit n × 8bitL8bitH8bitT1Message Field1) ADDRESS field2) FUNCTION field3) DATA field4) CRC CHECK fieldDescriptionThe address is 1 byte long (8 bits) and any of 0 to 247 can be set. Set 0 to send a broadcastmessage (all-address instruction) or any of 1 to 247 to send a message to each slave.When the slave responds, it returns the address set from the master.The value set to Pr. 331 RS-485 communication station number is the slave address.The function code is 1 byte long (8 bits) and any of 1 to 255 can be set. The master sets thefunction that it wants to request from the slave, and the slave performs the requestedoperation. The following table gives the supported function codes. An error response isreturned if the set function code is other than those in the following table.When the slave returns a normal response, it returns the function code set by the master.When the slave returns an error response, it returns H80 + function code.Code Function Name OutlineBroadcastCommunicationH03 Read Holding Register Reads the holding register data. DisallowedH06 Preset Single Register Writes data to the holding register. AllowedH08DiagnosticsH10 Preset Multiple RegistersH46Read Holding RegisterAccess LogMakes a function diagnosis.(communication check only)Writes data to multiple consecutiveholding registers.Reads the number of registers thatsucceeded in communication lasttime.Table 1: Function code listDisallowedAllowedDisallowedThe format changes depending on the function code (refer to page 319). Data includes the bytecount, number of bytes, description of access to the holding register, etc.The received message frame is checked for error. CRC check is performed, and 2 byte longdata is added to the end of the message. When CRC is added to the message, the low-orderbyte is added first and is followed by the high-order byte.The CRC value is calculated by the sending side that adds CRC to the message. The receivingside recalculates CRC during message receiving, and compares the result of that calculationand the actual value received in the CRC CHECK field. If these two values do not match, theresult is defined as error.318
4PARAMETERS(5) Message format typesCommunication operation and settingThe message formats corresponding to the function codes in Table 1 on page 318 will be explained.• Read holding register data (H03 or 03)Can read the description of 1) system environment variables, 2) real-time monitor, 3) faults history, and 4)inverter parameters assigned to the holding register area (refer to the register list (page 324)).Query Message1) Slave Address 2) Function 3) Starting Address 4) No. of Points CRC Check(8bit)Normal response (Response message)1) Slave Address 2) Function 5) Byte Count 6) Data CRC Check(8bit)⋅ Query message settingMessageH03(8bit)H03(8bit)⋅ Description of normal responseH(8bit)(8bit)L(8bit)H(8bit)H(8bit)L(8bit)L(8bit)L(8bit)...(n × 16bit)Setting DescriptionH(8bit)L(8bit)1)Slave AddressSet the address to which the message will be sent. Broadcastcommunication cannot be made (0 is invalid).2)Function Set H03.3)Starting Address4)No. of PointsH(8bit)Set the address at which holding register data read will be started.Starting address = starting register address (decimal) − 40001For example, setting of the starting address 0001 reads the data of theholding register 40002.Set the number of holding registers from which data will be read. Thenumber of registers from which data can be read is a maximum of 125.5)Byte Count6)DataMessageSetting DescriptionThe setting range is H02 to H14 (2 to 20).Twice greater than the No. of Points specified at 4) is set.The number of data specified at 4) is set. Data are read in order of Hi byteand Lo byte, and set in order of starting address data, starting address + 1data, starting address + 2 data, ...Example) To read the register values of 41004 (Pr. 4) to 41006 (Pr. 6) from the slave address 17 (H11)Query messageSlave Address Function Starting Address No. of Points CRC CheckH11(8bit)H03(8bit)H03(8bit)HEB(8bit)H00(8bit)H03(8bit)H77(8bit)H2B(8bit)Normal response (Response message)Slave Address Function Byte Count Data CRC CheckH11(8bit)H03(8bit)H06(8bit)H17(8bit)H70(8bit)H0B(8bit)HB8(8bit)H03(8bit)HE8(8bit)H2C(8bit)HE6(8bit)Read valueRegister 41004 (Pr. 4): H1770 (60.00Hz)Register 41005 (Pr. 5): H0BB8 (30.00Hz)Register 41006 (Pr. 6): H03E8 (10.00Hz)319
Communication operation and setting• Write multiple holding register data (H06 or 06)You can write the description of 1) system environment variables and 4) inverter parameters assigned to theholding register area (refer to the register list (page 324)).Query message1) Slave Address 2) Function 3) Register Address 4) Preset Data CRC Check(8bit)H06(8bit)Normal response (Response message)⋅ Query message settingH (8bit) L (8bit) H (8bit) L (8bit) L (8bit) H (8bit)1) Slave Address 2) Function 3) Register Address 4) Preset Data CRC Check(8bit)MessageH06(8bit)H (8bit) L (8bit) H (8bit) L (8bit) L (8bit) H (8bit)Setting Description1)Slave AddressSet the address to which the message will be sent. Setting of address 0enables broadcast communication2)Function Set H06.3)RegisterAddress4)Preset DataSet the address of the holding register to which data will be written.Register address = holding register address (decimal) − 40001For example, setting of register address 0001 writes data to the holdingregister address 40002.Set the data that will be written to the holding register. The written data isfixed to 2 bytes.⋅ Description of normal response1) to 4) (including CRC check) of the normal response are the same as those of the query message.No response is made for broadcast communication.Example) To write 60Hz (H1770) to 40014 (running frequency RAM) at slave address 5 (H05).Query messageSlave Address Function Register Address Preset Data CRC CheckH05(8bit)H06(8bit)H00(8bit)Normal Response (Response message)Same data as the query messageH0D(8bit)H17(8bit)H70(8bit)H17(8bit)H99(8bit)CAUTIONFor broadcast communication, no response is returned in reply to a query. Therefore, the next query must be madewhen the inverter processing time has elapsed after the previous query.320
4PARAMETERSCommunication operation and setting• Function diagnosis (H08 or 08)A communication check can be made since the query message sent is returned unchanged as a responsemessage (function of subfunction code H00).Subfunction code H00 (Return Query Data)Query Message1) Slave Address 2) Function 3) Subfunction 4) Date CRC Check(8bit)H08(8bit)Normal Response (Response message)1) Slave Address 2) Function 3) Subfunction 4) Date CRC Check(8bit)H08(8bit)⋅ Query message settingH00(8bit)H00(8bit)H00(8bit)H00(8bit)H(8bit)H(8bit)L(8bit)L(8bit)L(8bit)L(8bit)H(8bit)H(8bit)MessageSetting Description1)Slave AddressSet the address to which the message will be sent. Broadcastcommunication cannot be made (0 is invalid).2)Function Set H08.3)Subfunction Set H0000.4)DataAny data can be set if it is 2 bytes long. The setting range is H0000to HFFFF.⋅ Description of normal response1) to 4) (including CRC check) of the normal response are the same as those of the query message.CAUTIONFor broadcast communication, no response is returned in reply to a query. Therefore, the next query must be made whenthe inverter processing time has elapsed after the previous query.• Write multiple holding register data (H10 or 16)You can write data to multiple holding registers.Query message1) SlaveAddress2)Function3)Starting Address4) No. ofRegisters5)ByteCount6) Data CRC Check(8bit)H10(8bit)H(8bit)L(8bit)H(8bit)L(8bit)(8bit)H(8bit)L(8bit)...(n × 2 × 8bit)L(8bit)H(8bit)Normal Response (Response message)1) Slave Address 2) Function 3) Starting Address 4) No. of Registers CRC Check(8bit)⋅ Query message settingH10(8bit)H(8bit)L(8bit)H(8bit)L(8bit)L(8bit)H(8bit)MessageSetting Description1)Slave AddressSet the address to which the message will be sent. Setting of address 0enables broadcast communication.2)Function Set H10.3)Starting Address4)No. of Points5)Byte Count6)DataSet the address where holding register data write will be started.Starting address = starting register address (decimal) − 40001For example, setting of the starting address 0001 reads the data of theholding register 40002.Set the number of holding registers where data will be written. The number ofregisters where data can be written is a maximum of 125.The setting range is H02 to HFA (0 to 250).Set a value twice greater than the value specified at 4).Set the data specified by the number specified at 4). The written data are setin order of Hi byte and Lo byte, and arranged in order of the starting addressdata, starting address + 1 data, starting address + 2 data ...321
Communication operation and setting⋅ Description of normal response1) to 4) (including CRC check) of the normal response are the same as those of the query message.Example) To write 0.5s (H05) to 41007 (Pr. 7) at the slave address 25 (H19) and 1s (H0A) to 41008 (Pr. 8).Query MessageSlaveAddress Function StartingAddressH19(8bit)H10(8bit)H03(8bit)HEE(8bit)No. of PointsH008bit)H02(8bit)ByteCountH04(8bit)H00(8bit)H05(8bit)DataH00(8bit)H0A(8bit)CRC CheckH86(8bit)H3D(8bit)Response message (Response message)SlaveStartingFunctionNo. of PointsAddressAddressH19(8bit)H10(8bit)H03(8bit)HEE(8bit)H00(8bit)H02(8bit)CRC CheckH22(8bit)H61(8bit)• Read holding register access log (H46 or 70)A response can be made to a query made by the function code H03 or H10.The starting address of the holding registers that succeeded in access during previous communication and thenumber of successful registers are returned.In response to the query for other than the above function code, 0 is returned for the address and number ofregisters.Query Message1) Slave Address 2) Function CRC Check(8bit)Normal Response (Response message)1) Slave Address 2) Function 3) Starting Address 4) No. of Points CRC Check(8bit)⋅ Query message settingMessageH46(8bit)H46(8bit)⋅ Description of normal responseL(8bit)H(8bit)H(8bit)L(8bit)H(8bit)L(8bit)L(8bit)Setting DescriptionH(8bit)1)Slave AddressSet the address to which the message will be sent. Broadcastcommunication cannot be made (0 is invalid)2)Function Set H46.3)Starting Address4)No. of PointsMessageSetting DescriptionThe starting address of the holding registers that succeeded in access isreturned.Starting address = starting register address (decimal) − 40001For example, when the starting address 0001 is returned, the address of theholding register that succeeded in access is 40002.The number of holding registers that succeeded in access is returned.Example) To read the successful register starting address and successful count from the slave address 25 (H19).Query MessageSlave Address Function CRC CheckH19(8bit)Normal Response (Response message)Slave Address Function Starting Address No. of Points CRC CheckH19(8bit)H46(8bit)H10(8bit)H8B(8bit)H03(8bit)HD2(8bit)HEE(8bit)H00(8bit)Success of two registers at starting address 41007 (Pr. 7) is returned.H02(8bit)H22(8bit)H61(8bit)322
4PARAMETERSCommunication operation and setting• Error responseAn error response is returned if the query message received from the master has an illegal function, address ordata. No response is returned for a parity, CRC, overrun, framing or busy error.CAUTIONNo response message is sent in the case of broadcast communication also.Error response (Response message)1) Slave Address 2) Function 3) Exception Code CRC Check(8bit)H80 + Function(8bit)(8bit)L(8bit)H(8bit)Message1)Slave address2)Function3)Exception codeSetting DescriptionSet the address received from the master.The master-requested function code + H80 is set.The code in the following table is set.Error code listCode Error Item Error Definition010203ILLEGAL FUNCTION(Function code illegal)ILLEGAL DATA ADDRESS *1(Address illegal)ILLEGAL DATA VALUE(Data illegal)The set function code in the query message from the master cannot behandled by the slave.The set register address in the query message from the master cannot behandled by the inverter.(No parameter, parameter read disabled, parameter write disabled)The set data in the query message from the master cannot be handled bythe inverter.(Out of parameter write range, mode specified, other error)*1 An error will not occur in the following cases.1) Function code H03 (Read Holding Register Data )When the No. of Points is 1 or more and there is one or more holding registers from which data can be read2) Function code H10 (Write Multiple Holding Register Data)When the No. of Points is 1 or more and there is 1 or more holding registers to which data can be writtenNamely, when the function code H03 or H10 is used to access multiple holding registers, an error will not occur if a non-existing holdingregister or read disabled or write disabled holding register is accessed.REMARKSAn error will occur if all accessed holding registers do not exist.Data read from a non-existing holding register is 0, and data written there is invalid.⋅ Message data mistake detectionTo detect the mistakes of message data from the master, they are checked for the following errors. If an erroris detected, a trip will not occur.Error check itemError Item Error Definition Inverter Side OperationParity errorFraming errorOverrun errorMessage frameerrorCRC check errorThe data received by the inverter differs from thespecified parity (Pr. 334 setting).The data received by the inverter differs from thespecified stop bit length (Pr. 333).The following data was sent from the master beforethe inverter completes data receiving.The message frame data length is checked, and thereceived data length of less than 4 bytes is regardedas an error.A mismatch found by CRC check between themessage frame data and calculation result isregarded as an error.1)Pr. 343 is increased by 1 at erroroccurrence.2)The terminal LF is output at erroroccurrence.323
Communication operation and setting(6) Modbus registers• System environment variableRegister Definition Read/Write Remarks40002 Inverter reset Write Any value can be written40003 Parameter clear Write Set H965A as a written value.40004 All parameter clear Write Set H99AA as a written value.40006 Parameter clear *1 Write Set H5A96 as a written value.40007 All parameter clear *1 Write Set HAA99 as a written value.40009 Inverter status/control input instruction *2 Read/write See below.40010 Operation mode/inverter setting *3 Read/write See below.40014 Running frequency (RAM value) Read/write According to the Pr. 37 and Pr. 144 settings, thefrequency and selectable speed are in 1r/min40015 Running frequency (EEPROM value) Write increments.*1 The communication parameter values are not cleared.*2 For write, set the data as a control input instruction. For read, data is read as an inverter operating status.*3 For write, set data as the operation mode setting. For read, data is read as the operation mode status.BitDefinitionControl input instructionInverter status0 Stop command RUN (inverter running) *21 Forward rotation command Forward rotation2 Reverse rotation command Reverse rotation3 RH (high speed operation command) *1 SU (up to frequency) *24 RM (middle speed operation command) *1 OL (overload) *25 RL (low speed operation command) *1 IPF (instantaneous power failure) *26 JOG (Jog operation) *1 FU (frequency detection) *27 RT (second function selection) *1 ABC1 (alarm) *28 AU (current input selection) *1 ABC2 (⎯) *2CS9 (selection of automatic restart after0instantaneous power failure) *110 MRS (output stop) *1 011 STOP (start self-holding) *1 012 RES (reset) *1 013 0 014 0 015 0 Fault occurrenceModeRead WrittenValue ValueEXT H0000 H0010PU H0001 ⎯EXTJOGH0002 ⎯PUJOGH0003 ⎯NET H0004 H0014PU+EXTH0005 ⎯The restrictions depending on theoperation mode changes accordingto the computer link specifications.*1 The signal within parentheses is the initial setting. The description changes depending on the setting of Pr. 180 to Pr. 189 (inputterminal function selection) (page 206).Each assigned signal is valid or invalid depending on NET. (Refer to page 292)*2 The signal within parentheses is the initial setting. The description changes depending on the setting of Pr. 190 to Pr. 196 (outputterminal function selection) (page 214).324
4PARAMETERSCommunication operation and setting• Real-time monitorRefer to page 228 for details of the monitor description.Register Definition Increments40201 Output frequency 0.01Hz40202 Output current 0.01A40203 Output voltage 0.1V40205 Frequency setting 0.01Hz40206 Running speed 1r/min40207 Motor torque 0.1%402084021040211Converter outputvoltageElectronic thermalrelay function loadfactorOutput current peakvalue0.1V0.1%0.01A40212Converter outputvoltage peak value0.1V40213 Input power 0.01kW40214 Output power 0.01kW40215Input terminalstatus *1⎯Register Definition Increments40216Output terminalstatus *2⎯40217 Load meter 0.1%40218Motor excitationcurrent0.01A40219 Position pulse ⎯40220 Cumulativeenergization time1h40222 Orientation status ⎯40223Actual operationtime1h40224 Motor load factor 0.1%40225 Cumulative power 1kWh40226 Torque command 0.1%40227Torque currentcommand0.1%40228 Motor output 0.0140229 Feedback pulse ⎯40250 Power saving effect VariableRegister Definition Increments40251Cumulative savingpowerVariable40252 PID set point 0.1%40253PID measuredvalue0.1%40254 PID deviation value 0.1%402584025940260Option inputterminal status1 *3Option inputterminal status2 *4Option outputterminal status *5⎯⎯⎯*1 Input terminal monitor detailsb15b0⎯ ⎯ ⎯ ⎯ CS RES STOP MRS JOG RH RM RL RT AU STR STF*2 Output terminal monitor detailsb15b0⎯ ⎯ ⎯ ⎯ ⎯ ⎯ ⎯ ⎯ ⎯ ABC2 ABC1 FU OL IPF SU RUN*3 Details of option input terminal monitor 1 (input terminal status of <strong>FR</strong>-A7AX)-all terminals are off when an option is not fittedb15b0X15 X14 X13 X12 X11 X10 X9 X8 X7 X6 X5 X4 X3 X2 X1 X0*4 Details of option input terminal monitor 2 (input terminal status of <strong>FR</strong>-A7AX)-all terminals are off when an option is not fittedb15b0⎯ ⎯ ⎯ ⎯ ⎯ ⎯ ⎯ ⎯ ⎯ ⎯ ⎯ ⎯ ⎯ ⎯ ⎯ DY*5 Details of option input terminal monitor (output terminal status of <strong>FR</strong>-A7AY/A7AR)-all terminals are off when an option is not fittedb15b0⎯ ⎯ ⎯ ⎯ ⎯ ⎯ RA3 RA2 RA1 Y6 Y5 Y4 Y3 Y2 Y1 Y0325
Communication operation and setting• ParameterParameters Register Parameter Name Read/Write Remarks0 to 99941000 to41999C2(902) 41902C3(902)4209243902125(903) 41903C4(903)4209343903C5(904) 41904C6(904)4209443904126(905) 41905Refer to the parameter list (page 55) forthe parameter names.Terminal 2 frequency setting bias(frequency)Terminal 2 frequency setting bias(analog value)Terminal 2 frequency setting bias(terminal analog value)Terminal 2 frequency setting gain(frequency)Terminal 2 frequency setting gain(analog value)Terminal 2 frequency setting gain(terminal analog value)Terminal 4 frequency setting bias(frequency)Terminal 4 frequency setting bias(analog value)Terminal 4 frequency setting bias(terminal analog value)Terminal 4 frequency setting gain(frequency)Read/writeRead/writeRead/writeReadRead/writeRead/writeReadRead/writeRead/writeReadRead/writeTerminal 4 frequency setting gain42095Read/write(analog value)C7(905)Terminal 4 frequency setting gain43905Read(terminal analog value)C12(917) 41917 Terminal 1 bias frequency (speed) Read/writeThe parameter number + 41000 is theregister number.The analog value (%) set to C3 (902) isread.The analog value (%) of the voltage(current) applied to the terminal 2 is read.The analog value (%) set to C4 (903) isread.The analog value (%) of the voltage(current) applied to the terminal 2 is read.The analog value (%) set to C6 (904) isread.The analog value (%) of the current(voltage) applied to the terminal 4 is read.The analog value (%) set to C7 (905) isread.The analog value (%) of the current(voltage) applied to the terminal 4 is read.42107 Terminal 1 bias (speed) Read/write Analog value (%) set in C13 (917) is read.C13(917)Terminal 1 bias (speed)43917Read(terminal analog value)C14(918) 41918 Terminal 1 gain frequency (speed) Read/writeAnalog value (%) of the voltage applied toterminal 1 is read.42108 Terminal 1 gain (speed) Read/write Analog value (%) set in C15 (918) is read.C15(918)Terminal 1 gain (speed)Analog value (%) of the voltage applied to43918Read(terminal analog value)terminal 1 is read.Terminal 1 bias command (torque/C16(919) 41919Read/writemagnetic flux)42109 Terminal 1 bias (torque/magnetic flux) Read/write Analog value (%) set in C17 (919) is read.C17(919)Terminal 1 bias (torque/magnetic flux)Analog value (%) of the voltage applied to43919Read(terminal analog value)terminal 1 is read.Terminal 1 gain command (torque/C18(920) 41920Read/writemagnetic flux)42110 Terminal 1 gain (torque/magnetic flux) Read/write Analog value (%) set in C19 (920) is read.C19(920)Terminal 1 gain (torque/magnetic flux)Analog value (%) of the voltage applied to43920Read(terminal analog value)terminal 1 is read.Terminal 4 bias command (torque/C38(932) 41932Read/writemagnetic flux)42122 Terminal 4 bias (torque/magnetic flux) Read/write Analog value (%) set in C39 (932) is read.C39(932)Terminal 4 bias (torque/magnetic flux)Analog value (%) of the current (voltage)43932Read(terminal analog value)applied to terminal 4 is read.Terminal 4 gain command (torque/C40(933) 41933Read/writemagnetic flux)42123 Terminal 4 gain (torque/magnetic flux) Read/write Analog value (%) set in C41 (933) is read.C41(933)43933Terminal 4 gain (torque/magnetic flux)(terminal analog value)ReadAnalog value (%) of the current (voltage)applied to terminal 4 is read.326
4PARAMETERSCommunication operation and setting• Alarm historyRegister Definition Read/Write Remarks40501 Fault history 1 Read/write40502 Fault history 2 Read40503 Fault history 3 Read40504 Fault history 4 Read40505 Fault history 5 Read40506 Fault history 6 Read40507 Fault history 7 Read40508 Fault history 8 ReadFault code listBeing 2 bytes in length, the data is stored as"H00◦◦". The error code can be referrred to inthe low-order 1 byte.Performing write using the register 40501 batchclearsthe faults history. Set any value as data.DataDescriptionDataDescriptionDataDescriptionDataDescriptionH00No alarmH80E.GFHC5E.IOHHDCE.EPH10E.OC1H81E.LFHC6E.SERHF1 E.1H11E.OC2H90E.OHTHC7E.AIEHF2 E.2H12E.OC3H91E.PTCHD0E.OSHF3 E.3H20E.OV1HA0E.OPTHD1E.OSDHF4 E.4H21E.OV2HA3E.OP3HD2E.ECTHF6 E.6H22E.OV3HB0E.PEHD3E.ODHF7 E.7H30E.THTHB1E.PUEHD5E.MB1HF8 E.8H31E.THMHB2E.RETHD6E.MB2HFA E.10H40E.FINHB3E.PE2HD7E.MB3HFB E.11H50E.IPFHC0E.CPUHD8E.MB4HFD E.13H51E.UVTHC1E.CTEHD9E.MB5HFF E.15H52E.ILFHC2E.P24HDAE.MB6H60E.OLTHC4E.CDOHDBE.MB7* Refer to page 373 for details of alarm definition.(7) Pr. 343 Communication error countYou can check the cumulative number of communication errors.Parameters Setting Range Minimum Setting Range Initial Value343 (Read only) 1 0CAUTIONThe number of communication errors is temporarily stored into the RAM. As it is not stored into the EEPROM, performinga power supply reset or inverter reset clears the value to 0.(8) Output signal LF "alarm output (communication error warnings)"During a communication error, the alarm signal (LF signal) is output by open collector output. Assign the usedterminal using any of Pr. 190 to Pr. 196 (output terminal function selection).MasterAlarm dataAlarm dataNormal dataAlarm dataNormal dataSlaveCommunicationError count(Pr. 343)0Not increasedReply data1 2Reply dataSignal LFOFF ON OFF OFFONTurns off when normal data is receivedCommunication error count is increased insynchronization with rising edge of LF signalAlarm data :Data resulting incommunication error.CAUTIONThe LF signal can be assigned to the output terminal using any of Pr. 190 to Pr. 196. When terminal assignment is changed, theother functions may be affected. Please make setting after confirming the function of each terminal.327
Communication operation and setting(9) Signal loss detection (Pr. 539 Modbus-RTU communication check time interval)If a signal loss (communication stop) is detected between the inverter and master as a result of a signal lossdetection, a communication fault (E.SER) occurs and the inverter trips.· When the setting is "9999", communication check (signal loss detection) is not made.· When the setting value is "0", monitor, parameter read, etc. can be performed. However, a communication fault(E.SER) occurs as soon as the inverter is switched to the network operation mode.· A signal loss detection is made when the setting is any of "0.1s to 999.8s". To make a signal loss detection, it isnecessary to send data from the master within the communication check time interval. (The inverter makescommunication check (clearing of communication check counter) regardless of the station number setting of the datasent from the master.)· Communication check is started from the first communication after switching to the network operation mode (use Pr.551 PU mode operation command source selection to change).· Communication check time of query communication includes data absence time (3.5 byte).Since this data absence time differs according to the communication speed, make setting considering this absencetime.Example: RS-485 terminal communication, Pr. 539 = "0.1 to 999.8s"Query communicationOperation modeExternalNETQuery Message1Query Message2Programmable controller (master)Inverter (slave)Inverter (slave)Data absence time(3.5 bytes or more)Programmable controller (master)Pr.539Response Message1Response Message2Fault(E.SER)Communicationcheck counterBroadcast communicationCheck startTimeOperation mode External NETProgrammable controller (master)Inverter (slave)Inverter (slave)Programmable controller (master)Pr.539Communicationcheck counterQuery Message1Data absence time(3.5 bytes or more)Check startQuery Message2Fault(E.SER)Time328
4PARAMETERS4.25 Special operation and frequency controlPurposePerform process control such as pump and airvolume.Switch between the inverter operation andbypass operation to operate.Increase speed when the load is light.PID controlBypass-inverter switchoverfunctionLoad torque high speedfrequency control4.25.1 PID control (Pr. 127 to Pr. 134, Pr. 575 to Pr. 577)Special operation and frequency controlParameter that must be SetPr. 127 to Pr. 134,Pr. 575 to Pr. 577Referto Page329Pr. 135 to Pr. 139, Pr. 159 337Pr. 4, Pr. 5, Pr. 270 to Pr. 274 342Frequency control appropriate for the load torque Droop control Pr. 286 to Pr. 288 344Frequency setting by pulse train input Pulse train input Pr. 291, Pr. 384 to Pr. 386 346Make the motor speed constant by encoderAvoid overvoltage alarm due to regeneration byautomatic adjustment of output frequencyEncoder feedback controlRegeneration avoidancefunctionPr. 144, Pr. 285, Pr. 359,Pr. 367 to Pr. 369349Pr. 882 to Pr. 886 351The inverter can be used to exercise process control, e.g. flow rate, air volume or pressure.The terminal 2 input signal or parameter setting is used as a set point and the terminal 4 input signal used as afeedback value to constitute a feedback system for PID control.ParameterNumber127NamePID control automaticswitchover frequencyInitialValue9999128 PID action selection 10SettingRangeDescription0 to 400HzSet the frequency at which the control is automaticallychanged to PID control.9999 Without PID automatic switchover function10 PID reverse action Deviation value signal input11 PID forward action(terminal 1 )20 PID reverse action Measured value (terminal 4 )21 PID forward action Set point (terminal 2 or Pr. 133)50 PID reverse action Deviation value signal input51 PID forward action (LONWORKS , CC-Link communication)60 PID reverse action Measured value, set point input61 PID forward action (LONWORKS , CC-Link communication)129 *1 PID proportional band 100% 0.1 to 1000% If the proportional band is narrow (parameter setting is small),the manipulated variable varies greatly with a slight change ofthe measured value. Hence, as the proportional band narrows,the response sensitivity (gain) improves but the stabilitydeteriorates, e.g. hunting occurs.Gain Kp = 1/proportional band9999 No proportional controlFor deviation step input, time (Ti) required for only the integral(I) action to provide the same manipulated variable as that for0.1 to 3600s130 *1 PID integral time 1sthe proportional (P) action. As the integral time decreases, theset point is reached earlier but hunting occurs more easily.9999 No integral controlSet the maximum value. If the feedback value exceeds thesetting, the FUP signal is output. The maximum input (20mA/0 to 100%131 PID upper limit 99995V/10V) of the measured value (terminal 4) is equivalent to100%.9999 No functionSet the minimum value. If the measured value falls below thesetting range, the FDN signal is output. The maximum input0 to 100%132 PID lower limit 9999(20mA/5V/10V) of the measured value (terminal 4) isequivalent to 100%.9999 No function133 *1 PID action set point 99990 to 100% Used to set the set point for PID control.9999 Terminal 2 input is the set point.329
Special operation and frequency controlParameterNumberNameInitialValue134 *1 PID differential time 9999(1) PID control basic configuration⋅Pr. 128 = "10, 11" (Deviation value signal input)SettingRange0.01 to10.00sDescriptionFor deviation ramp input, time (Td) required for providing onlythe manipulated variable for the proportional (P) action. As thedifferential time increases, greater response is made to adeviation change.9999 No differential controlThe inverter stops operation if the output frequency after PID575Output interruption0 to 3600s operation remains at less than the Pr. 576 setting for longer1sdetection timethan the time set in Pr. 575.9999 Without output interruption function576Output interruptionSet the frequency at which the output interruption processing0Hz 0 to 400Hzdetection levelis performed.577Output interruptionSet the level (Pr. 577 minus 1000%) at which the PID output1000% 900 to 1100%cancel levelinterruption function is canceled.*1 Pr. 129, Pr. 130, Pr. 133 and Pr. 134 can be set during operation. They can also be set independently of the operation mode.Set pointTo outsideInverter circuitPID operationManipulated MotorDeviation signalvariable+ - 1IMTerminal 1* Kp 1+Ti S+Td S0 to 10VDC(0 to 5V)Feedback signal (measured value)Kp: Proportionality constant Ti: Integral time S: Operator Td: Differential time* Set 0 in Pr. 868 Terminal 1 function assignment. PID control is invalid when Pr. 868 ≠ 0.⋅Pr. 128 = "20, 21" (Measured value input)Pr. 133 orterminal 2 *1Set point0 to 5VDC(0 to 10V, 4 to 20mA)Inverter circuitManipulated MotorPID operationvariable+ - 1IMKp 1+Ti S+Td STerminal 4 *2Feedback signal (measured value) 4 to 20mADC (0 to 5V, 0 to 10V)Kp: Proportionality constant Ti: Integral time S: Operator Td: Differential time*1 Note that terminal 1 input is added to the set point of terminal 2 input.*2 Set 0 in Pr. 858 Terminal 4 function assignment. PID control is invalid when Pr. 858 ≠ 0.330
4PARAMETERSSpecial operation and frequency control(2) PID action overview1) PI actionA combination of P action (P) and I action (I) for providing amanipulated variable in response to deviation and changes with time.[Operation example for stepped changes of measured value](Note) PI action is the sum of P and I actions.P actionDeviationSet pointMeasured valueTimeI actionTimePI actionTime2) PD actionA combination of P action (P) and differential control action (D) forproviding a manipulated variable in response to deviation speed toimprove the transient characteristic.Set pointDeviation[Operation example for proportional changes of measured value]P actionMeasured valueTime(Note) PD action is the sum of P and D actions.D actionTimePDactionTime3) PID actionThe PI action and PD action are combined to utilize the advantages of bothactions for control.Set point(Note) PID action is the sum of P, I and D actions.P actionMeasured valueDeviationTimeI actionD actionTimeTimePID actionTime331
Special operation and frequency control4)Reverse actionIncreases the manipulated variable (output frequency) if deviation X = (set point - measured value) is positive, anddecreases the manipulated variable if deviation is negative.Setpoint[Heating]+-X>0X0X
4PARAMETERSSpecial operation and frequency control(4) I/O signals and parameter settingInputOutput⋅ Turn on the X14 signal to perform PID control. When this signal is off, PID action is not performed and normalinverter operation is performed. (Note that it is not necessary to turn on X14 signal when performing PID controlwith using LONWORKS or CC-Link communication. )⋅ Enter the set point across inverter terminals 2-5 or into Pr. 133 and enter the measured value signal across inverterterminals 4-5. At this time, set "20" or "21" in Pr. 128.⋅ When entering the externally calculated deviation signal, enter it across terminals 1-5. At this time, set "10" or "11"in Pr. 128.SignalX14X64TerminalUsedDepending onPr. 178 to Pr.1892 2 Set point inputPU ⎯ Set point input1 14 4Communication*2FUPFDNRLPIDSLEEPSE⎯Depending onPr. 190 to Pr.196SEFunction Description Parameter SettingPID control selection Turn on X14 to perform PID control. Set 14 in any of Pr. 178 to Pr. 189.By turning on X64, forward action can bePID forward/selected for PID reverse action (Pr. 128 =reverse action10, 20), and reverse action for forwardswitchoveraction (Pr. 128 = 11, 21).Set 64 in any of Pr. 178 to Pr. 189.Enter the set point for PID control. Pr. 128 = 20, 21, Pr. 133 = 99990 to 5V................0 to 100% Pr. 73 = 1 *1, 3, 5, 11, 13, 150 to 10V..............0 to 100% Pr. 73 = 0, 2, 4, 10, 12, 140 to 20mA...........0 to 100% Pr. 73 = 6, 7, 16, 17Set the set value (Pr. 133) from theoperation panel or parameter unit.Pr. 128 = 20, 21, Pr. 133 = 0 to 100%Deviation signalinputMeasured valueinputDeviation valueinputSet value, measuredvalue inputUpper limit outputLower limit outputForward (reverse)rotation directionoutputDuring PIDcontrol activatedPID outputinterruptionOutput terminalcommonInput the deviation signal calculatedexternally.Pr. 128 = 10 *1, 11-5V to +5V..........-100% to +100% Pr. 73 = 2, 3, 5, 7, 12, 13, 15, 17-10V to +10V ......-100% to +100% Pr. 73 = 0, 1 *1, 4, 6, 10, 11, 14, 16Input the signal from the detector(measured value signal).Pr. 128 = 20, 214 to 20mA.0 to 100% Pr. 267 = 0 *10 to 5V......0 to 100% Pr. 267 = 10 to 10V.... 0 to 100% Pr. 267 = 2Input the deviation value fromLONWORKS, CC-Link communication.Pr. 128 = 50, 51Input the set value and measured valuefrom LONWORKS , CC-Link communication.Pr. 128 = 60, 61Output to indicate that the measured Pr. 128 = 20, 21, 60, 61value signal exceeded the maximum Pr. 131 ≠ 9999value (Pr. 131).Set 15 or 115 in any of Pr. 190 to Pr. 196. *3Output when the measured value signalfalls below the minimum value (Pr. 132)."Hi" is output to indicate that the outputindication of the parameter unit is forwardrotation (FWD) or "Low" to indicate that itis reverse rotation (REV) or stop (STOP).Turns on during PID control.Turns on when the PID outputinterruption function is performed.Common terminal for terminals FUP,FDN, RL, PID and SLEEPPr. 128 = 20, 21, 60, 61Pr. 132 ≠ 9999Set 14 or 114 in any of Pr. 190 to Pr. 196. *3Set 16 or 116 in any of Pr. 190 to Pr.196. *3Set 47 or 147 in any of Pr. 190 to Pr.196. *3Pr. 575 ≠ 9999Set 70 or 170 in any of Pr. 190 to Pr.196. *3*1 The shaded area indicates the parameter initial value.*2 For the setting method via LONWORKS communication, refer to the LONWORKS communication option (<strong>FR</strong>-A7NL) instruction manual.For the setting method via CC-Link communication, refer to the CC-Link communication option (<strong>FR</strong>-A7NC) instruction manual.*3 When 100 or larger value is set in any of Pr. 190 to Pr. 196 (output terminal function selection), the terminal output has negative logic. (Refer topage 214 for details)CAUTION⋅ Changing the terminal function using any of Pr. 178 to Pr. 189, Pr. 190 to Pr. 196 may affect the other functions. Please makesetting after confirming the function of each terminal.⋅ When the Pr. 73 and Pr. 267 settings were changed, check the voltage/current input switch setting. Different setting may cause afault, failure or malfunction. (Refer to page 259 for setting.)333
Special operation and frequency control(5) PID control automatic switchover control (Pr. 127)⋅ The inverter can be started up without PID control mode only at a start.⋅ When the frequency is set to Pr. 127 PID control automatic switchover frequency within the range 0 to 400Hz, thesystem starts up without PID operation from a start until Pr. 127 is reached, and then it shifts to PID controloperation mode. Once the system has entered PID control operation, it continues PID control if the outputfrequency falls to or below Pr. 127.Output frequencyWithoutPIDoperationPID controlPr.127TimeSTFPID(6) PID output suspension function (SLEEP function) (SLEEP signal, Pr. 575 to Pr. 577 )⋅ The inverter stops operation if the output frequency after PID operation remains at less than the Pr. 576 Outputinterruption detection level setting for longer than the time set in Pr. 575 Output interruption detection time. This functioncan reduce energy consumption in the low-efficiency, low-speed range.⋅ When the deviation (= set value - measured value) reaches the PID output shutoff cancel level (Pr. 577 setting -1000%) while the PID output interruption function is on, the PID output interruption function is canceled and PIDcontrol operation is resumed automatically.⋅ While the PID output interruption function is on, the PID output interruption signal (SLEEP) is output. At this time,the inverter running signal (RUN) is off and the PID control operating signal (PID) is on.Reverse action (Pr.128 10)DeviationPr.577 - 1000%CancellevelOutput frequencyPr.576Less than Pr. 575Pr. 575 or moreSLEEP periodTimeRUNOFF(7) PID monitor function⋅ The PID control set point, measured value and deviation value can be displayed on the operation panel and outputfrom terminal FM, AM.⋅ The deviation monitor can display a negative value on the assumption that 1000 is 0%. (The deviation monitorcannot be output from the terminal FM, AM.)⋅ For the monitors, set the following values in Pr. 52 DU/PU main display data selection, Pr. 54 FM terminal functionselection, and Pr. 158 AM terminal function selection.SettingPIDSLEEPMonitor DescriptionMinimumIncrementsTerminal FM,AM Full ScaleRemarks52 PID set point 0.1% 100% For deviation input (Pr. 128 = 10, 11), the monitor53 PID measurement value 0.1% 100% value is always displayed as 0.54 PID deviation value 0.1% ⎯ONValue cannot be set to Pr. 54 or Pr. 158.The PID deviation value of 0% is displayed as 1000.334
4PARAMETERSSpecial operation and frequency control(8) Adjustment procedureParameter settingAdjust the PID control parameters, Pr. 127 to Pr. 134 and Pr. 575 to Pr. 577.Terminal settingSet the I/O terminals for PID control. (Pr. 178 to Pr. 189 (input terminalfunction selection), Pr. 190 to Pr. 196 (output terminal function selection))Turn on the X14 signalOperation(9) Calibration example(A detector of 4mA at 0°C and 20mA at 50°C is used to adjust the room temperature to 25°C under PID control.The set point is given to across inverter terminals 2-5 (0 to 5V).)StartDetermination of set pointDetermine the set point ofwhat is desired to be adjusted.Set the room temperature to 25 .Set Pr. 128 and turn on the X14 signal to enable PID control.Conversion of set point into %Calculate the ratio of the setpoint to the detector output.Detector specificationsWhen 0 4mA and 50 20mA are used, the set point 25 is 50% onthe assumption that 4mA is 0% and 20mA is 100%.Make calibration.Setting of set pointInput a voltage across terminals2-5 according to the set value %.Make the following calibration* when the target setting input (0 to 5V) anddetector output (4 to 20mA) must be calibrated.When the set point is 50%As the terminal 2 specifications are 0% 0V and 100% 5V, input 2.5Vto the terminal 2 for the set point of 50%.OperationSet the proportional band (Pr.129 ) to a slightly larger value,the integral time (Pr. 130 ) to aslightly longer time, and thedifferential time (Pr. 134 ) to"9999" (no function), and turnon the start signal.When the parameter unit is used for operation, input the set point (0 to100%) in Pr. 133.When performing operation, first set the proportional band (Pr. 129 ) to aslightly larger value, the integral time (Pr. 130 ) to a slightly longer time,and the differential time (Pr. 134 ) to "9999" (no function), and while lookingat the system operation, decrease the proportional band (Pr. 129 ) andincrease the integral time (Pr. 130 ). For slow response system where adeadband exists, differential control (Pr. 134 ) shuold be turned on andincreased slowly.Is the set point stable?YesNoParameter adjustmentTo stabilize the measured value,change the proportional band (Pr.129 ) to a larger value, the integraltime (Pr. 130 ) to a slightly longertime, and the differential time (Pr.134 ) to a slightly shorter time.Parameter optimizationWhile the measured value is stablethroughout the operating status, theproportional band (Pr. 129 ) may bedecreased, the integral time (Pr. 130 )decreased, and the differential time(Pr. 134 ) increased.Adjustment end* When calibrationis requiredUsing calibration Pr. 902 and Pr. 903 (terminal 2) or Pr. 904 and Pr. 905 (terminal4), calibrate the detector output and target setting input.Make calibration in the PU mode during an inverter stop.335
Special operation and frequency control1. Apply the input voltage of 0% set point setting (e.g. 0V) across terminals 2-5.2. Enter in C2 (Pr. 902) the frequency which should be output by the inverter at the deviation of 0% (e.g. 0Hz).3. In C3 (Pr. 902), set the voltage value at 0%.4. Apply the voltage of 100% set point (e.g. 5V) to across terminals 2-5.5. Enter in Pr. 125 the frequency which should be output by the inverter at the deviation of 100% (e.g. 60Hz).6. In C4 (Pr. 903), set the voltage value at 100%.1. Apply the input current of 0% measured value (e.g. 4mA) across terminals 4-5.2. Make calibration using C6 (Pr. 904).3. Apply the input current of 100% measured value (e.g. 20mA) across terminals 4-5.4. Make calibration using C7 (Pr. 905).REMARKS⋅ The frequency set in C5 (Pr. 904) and Pr. 126 should be the same as set in C2 (Pr. 902) and Pr. 125.The results of the above calibration are as shown below:(%)100[Set point setting](%)100[Measured value][Manipulated variable]Manipulated variable (Hz)6000 5 (V)00 420 (mA)00 100 Deviation (%)CAUTION⋅ If the multi-speed (RH, RM, RL signal) or jog operation (jog signal) is entered with the X14 signal on, PID control is stopped andmulti-speed or jog operation is started.⋅ If the setting is as follows, PID control becomes invalid.Pr. 79 Operation mode selection = "6" (switchover mode)⋅ When the Pr. 128 setting is "20" or "21", note that the input across inverter terminals 1-5 is added to the set value acrossterminals 2-5.⋅ When using terminal 4 (measured value input) and terminal 1 (deviation input) under PID control, set "0" (initial value) in Pr. 858Terminal 4 function assignment and "0" (initial value) in Pr. 868 Terminal 1 function assignment. PID control can not be performedwhen a value other than 0 is set.⋅ Changing the terminal function using any of Pr. 178 to Pr. 189, Pr. 190 to Pr. 196 may affect the other functions. Please makesetting after confirming the function of each terminal.⋅ When PID control is selected, the minimum frequency is the frequency set in Pr. 902 and the maximum frequency is thefrequency set in Pr. 903. (Pr. 1 Maximum frequency and Pr. 2 Minimum frequency settings are also valid.)⋅⋅The remote operation function is invalid during PID operation.When the control is switched to PID control duringnormal operation, the frequency command valuecalculated by PID operation using 0Hz as standard isused without the frequency during the operation.PID set pointFrequencycommandFrequency commandduring normal operation♦ Parameters referred to ♦Pr. 59 Remote function selection Refer to page 152Pr. 73 Analog input selection Refer to page 259Pr. 79 Operation mode selection Refer to page 283Pr. 178 to Pr. 189 (input terminal function selection) Refer to page 206Pr. 190 to Pr. 196 (output terminal function selection) Refer to page 214C2 (Pr. 902) to C7 (Pr. 905) Frequency setting voltage (current) bias/gain Refer to page 267PID actionONNormal operation PID operation Normal operationOperation when control is switched to PID control during normal operation336
4PARAMETERSSpecial operation and frequency control4.25.2 Bypass-inverter switchover function (Pr. 57, Pr. 58, Pr. 135 to Pr. 139, Pr. 159)The complicated sequence circuit for bypass operation is built in the inverter. Hence, merely inputting the start,stop or automatic switchover selection signal facilitates the interlock operation of the switchover magneticcontactor.ParameterNumberNameInitialValueSetting Range Description⋅ 5.5K, 7.5K................................................... 1s,0 ⋅ 11K or more ................................................ 3.0s,The above times are coasting time.57 Restart coasting time 9999Set the waiting time for inverter-triggered restart after an0.1 to 5sinstantaneous power failure.9999 No restart58 Restart cushion time 1s 0 to 60s Set a voltage starting time at restart.135Electronic bypasssequence selection136MC switchover interlocktime137 Start waiting time 0.5s 0 to 100s00 Without electronic bypass sequence1 With electronic bypass sequence1s 0 to 100s Set the operation interlock time of MC2 and MC3.Set the time slightly longer (0.3 to 0.5s or so) than the time fromwhen the ON signal enters MC3 until it actually turns on.0 Inverter output is stopped (motor coast) at inverter fault.Bypass selection at a1380Operation is automatically switched to bypass operation atfault1 inverter fault (Not switched when an external thermal relayoperation (E.OHT) or CPU error (E.CPU) occurs).Set the frequency to switch inverter operation to bypassoperation.Automatic switchoverInverter operation is performed from a start until Pr. 139 is0 to 60Hz139 frequency from inverter 9999reached, and when the output frequency is at or above Pr.to bypass operation139, inverter operation is automatically switched to bypassoperation.9999 Without automatic switchoverValid during automatic switchover operation (Pr. 139 ≠ 9999)When the frequency command decreases below (Pr. 139 -Pr. 159) after operation is switched from inverter operation to0 to 10Hz bypass operation, the inverter automatically switchesoperation to inverter operation and operates at theAutomatic switchoverfrequency of frequency command. When the inverter startfrequency range from1599999command (STF/STR) is turned off, operation is switched tobypass to inverterinverter operation also.operationValid during automatic switchover operation (Pr. 139 ≠ 9999)When the inverter start command (STF/STR) is turned off9999 after operation is switched from inverter operation to bypassoperation, operation is switched to inverter operation andthe motor decelerates to stop.⋅ When the motor is operated at 60Hz (or 50Hz), more efficient operation can be performed by the commercial powersupply than by the inverter. When the motor cannot be stopped for a long time for the maintenance/inspection of theinverter, it is recommended to provide the commercial power supply circuit.⋅ To switch between inverter operation and bypass operation, an interlock must be provided to stop the motor onceand then start it by the inverter in order to prevent the inverter from resulting in an overcurrent alarm. Using theelectronic bypass sequence function that outputs the timing signal for operation of the magnetic contactor, acomplicated commercial power supply switchover interlock can be provided by the inverter.CAUTIONCommercial operation can not be performed with the Mitsubishi vector motor (SF-V5RU).337
Special operation and frequency control(1) Connection diagram⋅ The following shows the connection diagram of a typical electronic bypass sequence. Sink logic, Pr. 185 = "7", Pr.192 = "17", Pr. 193 = "18", Pr. 194 = "19"MC2MCCBInverter start(forward rotation)Inverter/bypassoperationinterlockExternalthermal resetFrequencysetting signalMC1R/L1S/L2T/L3R1/L11S1/L21STFCSMRSUVW(MC1)IPF*3 (MC2)OLJOG(OH)RESSD(MC3)FU102SE5*1*1*1MC3MC3MC2Externalthermal relayMC1MC2MC3IM*224VDC*1 Take caution for the capacity of the sequence output terminal.The used terminal changes depending on the setting of Pr. 190 toPr. 196 (output terminal function selection).Output Terminal CapacityInverter open collector output(RUN, SU, IPF, OL, FU)Inverter relay output (A1-C1, B1-C1, A2-B2, B2-C2)Relay output option (<strong>FR</strong>-A7AR)Output TerminalPermissble Load24VDC 0.1A230VAC 0.3A30VDC 0.3A*2 When connecting a DC power supply, insert a protective diode.When connecting an AC power supply, connect a relay outputoption (<strong>FR</strong>-A7AR) and use a contact output.*3 The used terminal changes depending on the setting of Pr. 180 toPr. 189 (input terminal function selection).Electronic bypass sequence connection diagram⋅⋅CAUTIONUse the bypass operation function in external operation mode. Be sure to connect the other power supply since the function isnot performed normally unless the connection terminals R1/L11, S1/L21 are not connected to the other power supply (powersupply that does not pass MC1).Be sure to provide mechanical interlocks for MC2 and MC3.⋅ Operations of magnetic contactors (MC1, MC2, MC3)MagneticContactorMC1Installation PlaceBetween power supply andinverter inputBypass operationOperation (◦: Shorted, ×: Open)During inverteroperation◦ ◦MC2 Between power supply and motor ◦ ×MC3Between inverter output andmotorAt an inverter faultoccurrence×(Shorted by reset)×(Can be selected usingPr. 138, always openwhen external thermalrelay is on)× ◦ ×338
4PARAMETERSSpecial operation and frequency control⋅ The input signals are as indicated below.Signal Terminal Used Function OperationMRSMRSOperation enable/disableselection *1CS CS Inverter/bypass *2STF(STR)OHRESSTF(STR)Set "7" in any ofPr. 180 to Pr. 189.RESInverter operation command(Invalid for bypass) *3External thermal relay inputOperating status initialization*4⋅ The output signals are as indicated below.ON ..... Bypass-inverter operationenabledOFF ... Bypass-inverter operationdisabledMC Operation *6MC1 *5 MC2 MC3◦ ⎯ ⎯◦ ×NochangeON...... Inverter operation ◦ × ◦OFF ... Bypass operation ◦ ◦ ×ON...... Forward rotation (reverserotation)◦ × ◦OFF.... Stop ◦ × ◦ON ..... Motor normal ◦ ⎯ ⎯OFF.... Motor abnormal × × ×ON...... InitializationNochange×NochangeOFF.... Normal operation ◦ ⎯ ⎯*1 Unless the MRS signal is turned on, neither bypass operation nor inverter operation can be performed.*2 The CS signal functions only when the MRS signal is on.*3 STF (STR) functions only when both the MRS signal and CS signal are on.*4 The RES signal enables reset input acceptance selection using Pr. 75 Reset selection/disconnected PU detection/PU stop selection.*5 MC1 turns off when an inverter fault occurs.*6 MC operation◦ : MC-ON× : MC-OFF⎯ : Inverter operation.................MC2 is off and MC3 is onBypass operation .................MC2 is on and MC3 is offNo change : The status before the signal turns on or off is held.SignalTerminal Used(Pr. 190 to Pr. 196 setting)MC1 17MC2 18MC3 19DescriptionControl signal output of inverter input side magneticcontactor MC1Control signal output of bypass operation magneticcontactor MC2Control signal output of inverter output sidemagnetic contactor MC3339
Special operation and frequency control(2) Electronic bypass operation sequence⋅ Operation sequence example when there is no automatic switchover sequence (Pr. 139 = "9999")ONPower supplyOFFOperation interlock ON(MRS) OFFInverter run command ON(STF) OFFONInverter/bypass (CS)OFFON : Operation enabledOFF: Operation disabledON : Forward rotationOFF: StopON : Inverter operationOFF: Bypass operationInverter input side MC(MC1)Inverter output side MC(MC3)MC for bypassoperation (MC2)Each timerONOFFONOFFONOFFOff only at inverter alarmPr. 137Pr. 58Pr. 136Pr. 57 Pr. 136 Pr. 57Indicates the delay time untilthe MC turns on (off).Pr. 136 MC switchover interlock timePr. 137 MC3 start (waiting time)Pr. 57 Reset timePr. 58 Switchover cushion timeOperating status(motor speed)INVoperationCoasting BypassoperationCoastingINVoperationStop⋅ Operation sequence example when there is automatic switchover sequence (Pr. 139 ≠ "9999", Pr. 159 = "9999")STFONOFFOutput frequency Pr. 139Frequency commandActual motor speedTimeINVoperationBypassoperationMC3 ONOFFMC2 ONOFFTimeC A A B C DA : Pr. 136 MC switchover interlock time B : Pr. 137 Start waiting timeC : Pr. 57 Restart coasting timeD : Pr. 58 Restart cushion time⋅ Operation sequence example when there is automatic switchover sequence (Pr. 139 ≠ "9999", Pr. 159 ≠ "9999")STFONOFFOutput frequency Pr. 139Frequency commandPr. 159Actual motor speedTimeINVoperationBypassoperationMC3 ONOFFMC2 ONOFFTimeC A A B C D A A B C DA : Pr. 136 MC switchover interlock time B : Pr. 137 Start waiting timeC : Pr. 57 Restart coasting timeD : Pr. 58 Restart cushion time340
4PARAMETERSSpecial operation and frequency control(3) Operating procedure1)Procedure for operationOperation patternPower supply ONSetting the parametersStart inverter operationConstant-speed bypassoperationDeceleration (stop)inverter operation2)Signal ON/OFF after parameter setting⋅⋅⋅⋅⋅Pr. 135 = "1" (open collector output terminal of inverter)Pr. 136 = "2.0s"Pr. 137 = "1.0s" (Set the time longer than the time from whenMC3 actually turns on until the inverter and motor areconnected. If the time is short, a restart may not functionproperly.)Pr. 57 = "0.5s"Pr. 58 = "0.5s" (Be sure to set this parameter when bypassoperation is switched to inverter operation.)MRS CS STF MC1 MC2 MC3 RemarksPower supplyONAt start(inverter)At constantspeed(commercialpower supply)Switched toinverter fordeceleration(inverter)OFF(OFF)OFF(OFF)OFF(OFF)OFF → ON(OFF → ON)OFF(OFF)OFF → ON(OFF → ON)OFF → ON OFF → ON OFF → ON ON OFF ONON ON → OFF ON ON OFF → ON ON → OFFON OFF → ON ON ON ON → OFF OFF → ONStop ON ON ON → OFF ON OFF ONExternal operation mode(PU operation mode)MC2 turns on after MC3turns off(coasting status during thisperiod)Waiting time 2sMC3 turns on after MC2turns off(coasting status during thisperiod)Waiting time 4sCAUTION⋅ Connect the control power supply (R1/L11, S1/L21) in front of input side MC1. If the control power supply is connected behindinput side MC1, the electronic bypass sequence function is not executed.⋅ The electronic bypass sequence function is valid only when Pr. 135 = "1" in the external operation or combined operation mode(PU speed command, external operation command Pr. 79 = "3"). When Pr. 135 = "1" in the operation mode other than the above,MC1 and MC3 turn on.⋅ When the MRS and CS signals are on and the STF (STR) signal is off, MC3 is on, but when the motor was coasted to a stopfrom bypass operation last time, a start is made after the time set in Pr. 137 has elapsed.⋅ Inverter operation can be performed when the MRS, STF (STR) and CS signals turn on. In any other case (MRS signal - ON),bypass operation is performed.⋅ When the CS signal is turned off, the motor switches to bypass operation. However, when the STF (STR) signal is turned off,the motor is decelerated to a stop in the inverter operation mode.⋅ When both MC2 and MC3 are off and either MC2 or MC3 is then turned on, there is a waiting time set in Pr. 136.⋅ If electronic bypass sequence is made valid (Pr. 135 = "1"), the Pr. 136 and Pr. 137 settings are ignored in the PU operationmode. The input terminals (STF, CS, MRS, OH) of the inverter return to their normal functions.⋅ When the electronic bypass sequence function (Pr. 135 = "1") and PU operation interlock function (Pr. 79 = "7") are usedsimultaneously, the MRS signal is shared by the PU operation external interlock signal unless the X12 signal is assigned.(When the MRS and CS signals turn on, inverter operation is enabled)⋅ Changing the terminal function using any of Pr. 178 to Pr. 189, 190 to Pr. 196 may affect the other functions. Please make settingafter confirming the function of each terminal.♦ Parameters referred to ♦Pr. 11 DC injection brake operation time Refer to page 185Pr. 57 Restart coasting time Refer to page 239Pr. 58 Restart cushion time Refer to page 239Pr. 79 Operation mode selection Refer to page 283Pr. 178 to Pr. 189 (Input terminal function selection) Refer to page 206Pr. 190 to Pr. 196 (Output terminal function selection) Refer to page 214341
Special operation and frequency control4.25.3 Load torque high speed frequency control (Pr. 4, Pr. 5, Pr. 270 to Pr. 274)Load torque high speed frequency control is a functionwhich automatically sets the operational maximumfrequency according to the load.More specifically, the magnitude of the load is judgedaccording to the average current at a certain time afterstarting to perform operation at higher than the presetfrequency under light load.This function is designed to increase speedautomatically under light load, for example to minimizethe incoming/outgoing time in a multi-story parking lot.Whether there is a load ornot, the lift is movedvertically at the same speed.LightFasterThe lift with a light load or withouta load is moved faster than the liftwith a load.(The output frequency is increased.)ParameterNumber45270271272NameMulti-speed setting (highspeed)Multi-speed setting (middlespeed)Stop-on contact/loadtorque high-speedfrequency controlselectionHigh-speed settingmaximum currentMiddle-speed settingminimum currentInitialValue273 Current averaging range 9999274Current averaging filtertime constantSettingRangeDescription60Hz 0 to 400Hz Set the higher-speed frequency.30Hz 0 to 400Hz Set the lower-speed frequency.00 Normal operation1 Stop-on-control (refer to page 189)2 Load torque high speed frequency control3Stop-on-contact (refer to page 189) + load torque highspeed frequency control50% 0 to 220% Set the upper and lower limits of the current at high and100% 0 to 220%middle speeds.0 to 400Hz999916 1 to 4000Average current during acceleration from (Pr. 273 × 1/2)Hz to (Pr. 273) Hz can be achieved.Average current during acceleration from (Pr. 5 × 1/2) Hzto (Pr. 5) Hz is achieved.Set the time constant of the primary delay filter relative tothe output current.The time constant [ms] is 0.75 × Pr. 274 and the initialvalue is 12ms.A larger setting provides higher stability but poorer response.Sink logicMCPr. 186 = 19MechanicalbrakeMCCBPower supplyR/L1S/L2T/L3UVWMotorStart signalSTFLoad torque high-speed frequency CS(X19)*SD* The used terminal changes according to the Pr. 180 to Pr. 189 (input terminal function selection) settings.342
4PARAMETERS(1) Load torque high speed frequency control settingSpecial operation and frequency control· Set "2 or 3" in Pr. 270 Stop-on contact/load torque high-speed frequency control selection.· When operating with the load torque high speed frequency function selection signal (X19) on, the inverterautomatically changes the maximum frequency within the setting range of Pr. 4 Multi-speed setting (high speed) andPr. 5 according to the magnitude of the average current during the time to accelerate from 1/2 of the frequency setin Pr. 5 Multi-speed setting (middle speed) to the frequency set in Pr. 5 .· Set "19" in Pr. 178 to Pr. 189 (input terminal function selection) and assign the X19 signal function to the input terminal.· Made valid only in the external operation mode.· This control can be activated at every start.Output frequency12Pr. 4Pr. 5Pr. 5Power runningRegeneratingABTimeCurrent averaging rangeCurrent averaging rangeLess thanPr. 272 setting rated currentPr. 271 setting rated currentor moreSTFONOFFONOFF(STR)X19 ON OFF ONOFFFrequencyPr. 4(60Hz)Pr. 5(30Hz)Pr. 271(50%)Pr. 272(100%)Average currentValue in parenthesis is initial value.(2) Operation of load torque high speed frequency control setting· When the average current of the current averaging range (above chart A) during operation with the X19 signal on isless than the "rated inverter current × Pr. 271 setting (%)", the maximum frequency automatically becomes the Pr. 4Multi-speed setting (high speed) setting value.· When the average current of the current averaging range (above chart B) during operation with the X19 signal on ismore than the "rated inverter current × Pr. 272 setting (%)", the maximum frequency automatically becomes the Pr.5 Multi-speed setting (middle speed) setting value.· During regeneration load operation, setting of Pr. 5 is the maximum frequency regardless of the average current.· The current averaging range can be set between 1/2 frequency of the Pr. 273 setting value and Pr. 273 set frequency.CAUTION· When the current averaging range includes the constant power range, the output current may become large in the constantpower range.· When the average current value in the current averaging range is small, deceleration time becomes longer as the runningfrequency increases.· The maximum output frequency is 120Hz. The output frequency is 120Hz even when the setting is above 120Hz.· The fast response current limit function is made invalid.· Changing the terminal function using any of Pr. 178 to Pr. 189 may affect the other functions. Please make setting afterconfirming the function of each terminal.· The load torque high speed frequency function is made invalid in the following operation conditions.PU operation (Pr. 79) , PU+external operation (Pr. 79) , JOG operation (JOG signal) , PID control function operation (X14 signal),remote setting function operation (Pr. 59), orientation control function operation, multi-speed setting (RH, RM, RL signal ), 16 bitdigital input option (<strong>FR</strong>-A7AX)· When the average current during acceleration is too small, it may be judged as regeneration and the maximum frequencybecomes the setting of Pr. 5.CAUTIONWhen the load is light, the motor may suddenly accelerate to 120Hz maximum, causing hazard.Securely provide mechanical interlock on the machine side to perform.♦ Parameters referred to ♦Pr. 4 to Pr. 6, Pr. 24 to Pr. 27 (multi-speed setting) Refer to page 148Pr. 59 Remote function selection Refer to page 152Pr. 79 Operation mode selection Refer to page 283Pr. 128 PID action selection Refer to page 329Pr. 178 to Pr. 189 (input terminal function selection) Refer to page 206343
Special operation and frequency control4.25.4 Droop control (Pr. 286 to Pr. 288)Magnetic fluxSensorlessVectorThis function is designed to balance the load in proportion to the load torque to provide the speed droopingcharacteristic under advanced magnetic flux vector control, real sensorless vector control and vector control.This function is effective for balancing the load when using multiple invertersParameterNumberNameInitialValue286 Droop gain 0%SettingRange0 Normal operation0.1% to100%287 Droop filter time constant 0.3s 0 to 1s288Droop function activationselection00121011DescriptionDroop control is validSet the drooping amount at the rated torque as apercentage with respect to the rated motor frequency.Set the time constant of the filter applied on the torquecurrent.Droop control is not exercised during acceleration/deceleration.Droop control is always exercised during operation. (with0 limit)Droop control is always exercised during operation.(without 0 limit)Droop control is not exercised during acceleration/deceleration. (Motor speed is referenced)Droop control is always exercised during operation.(Motor speed is referenced)Rated frequency-100%Frequency0Droop compensationfrequency100%DroopgainTorque(1) Droop control· The output frequency is changed according tothe magnitude of torque current underadvanced magnetic flux vector control, realsensorless vector control and vector control.The drooping amount at the rated torque is setby the droop gain as a percentage using therated frequency (Motor speed when Pr. 288 ="10, 11") as a reference.· The maximum droop compensation frequencyis 120Hz.When Pr. 288 = "0 to 2", or under advanced magnetic flux vector controlDroop compensation frequency =When Pr. 288 = "10, 11"Droop compensation frequency =REMARKSSet the droop gain to about the rated slip of the motor.Torque current after filteringRated motor frequency × Droop gain×Rated value of torque current 100Torque current after filteringMotor speed × Droop gain×Rated value of torque current 100Rated slip = Synchronous speed at base frequency - Rated speed × 100[%]Synchronous speed at base frequency344
4PARAMETERS(2) Limit the frequency after droop compensation (0 limit)Special operation and frequency control· Setting Pr. 288 under real sensorless vector control or vector control can limit the frequency command when thefrequency after droop compensation is negative.Pr. 288Setting0(initial value),101, 112Under advanced magnetic flux vector controlDroop control is not exercised during acceleration/deceleration.Note that the frequency command after droop control islimited at 0.5Hz when the frequency command afterdroop control is negative.Droop compensation amount is determined using therated motor frequency as reference.DescriptionUnder real sensorless vector controlor vector controlDroop control is not exercised during acceleration/deceleration.Note that the frequency command is limited at 0Hz whenthe frequency command after droop control is negative.When Pr. 288 = "10", droop compensation amount isdetermined using the motor speed as reference.Droop control is always exercised during operation.Note that the frequency command is limited at 0Hz whenthe frequency command after droop control is negative.When Pr. 288 = "11", droop compensation amount isdetermined using the motor speed as reference.Droop control is always exercised during operation.Note that under vector control, the frequency commandis not limited at 0Hz even when the frequency commandafter droop control is negative.(The frequency command is limited at 0Hz under realsesorless vector control.)REMARKSThe maximum value of frequency after droop compensation is either 120Hz or Pr. 1 Maximum frequency , whichever is smaller.♦ Parameters referred to ♦Pr. 1 Maximum frequency Refer to page 140345
Special operation and frequency control4.25.5 Frequency setting by pulse train input (Pr. 291, Pr. 384 to Pr. 386)The inverter speed can be set by inputting pulse train from terminal JOG.In addition, synchronous speed operation of inverters can be performed by combining pulse train I/O.ParameterNumberNameInitialValue291 Pulse train I/O selection 0384385386Input pulse divisionscaling factorFrequency for zero inputpulseFrequency for maximuminput pulse0SettingRangeDescriptionPulse train inputPulse train output0 Terminal JOG FM output1 Pulse train input FM output10 Terminal JOG High speed pulse train output (50%Duty)11 Pulse train input High speed pulse train output (50%Duty)20 Terminal JOG21 Pulse train input100 Pulse train input0 Pulse train input invalid1 to 250High speed pulse train output (ON width isalways same)High speed pulse train output (ON width isalways same)High speed pulse train output (ON width isalways same)The inverter outputs the signal input aspulse train as itIndicates division scaling factor to the input pulse and thefrequency resolution to the input pulse changes according tothe value.0Hz 0 to 400Hz Set the frequency when the input pulse is 0 (bias).60Hz 0 to 400Hz Set the frequency when the input pulse is maximum (gain).(1) Pulse train input selection (Pr. 291)· Setting any of "1, 11, 21, 100" in Pr. 291 Pulse train I/O selection and a value other than "0" in Pr. 384 Input pulse divisionscaling factor switches terminal JOG to pulse train input terminal and frequency setting of the inverter can beperformed. (The initial value is JOG signal)Pulse train input of maximum of 100k pulse/s is enabled.· Output specifications (high speed pulse train output or FM output) of terminal FM can be selected using Pr. 291.Connection with an open collector output systempulse generatorSink logicPCInverterConnection with a complementary output systempulse generatorSink logicPCInverterPull up resistance *JOG2kΩ24V powerJOG2kΩSDSDConnection with an open collector output systempulse generatorSource logicPCInverterConnection with a complementary output systempulse generatorSource logicInverterPCJOG2kΩ24V powerJOG2kΩPull down resistance *SDSD346
4PARAMETERSSpecial operation and frequency control* When the wiring length of the open collector output connection is long, input pulse can not be recognized because of a pulse shape deformation due to thestray capacitances of the wiring.When wiring length is long (10m or more of 0.75mm 2 twisted cable is recommended), connect an open collector output signal and power supply using a pullup resistance. The reference of resistance value to the wiring length is as in the table below,Wiring Length Less than 10m 10 to 50m 50 to 100mPull up/down resistance Not necessary 1kΩ 470ΩLoad current (for reference) 10mA 35mA 65mAStray capacitances of the wiring greately differ according to the cable type and cable laying, the above cable length is not a guaranteed value.When using a pull up/down resistance, check the permissible power of the resistor and permissible load current of output transistor and use them within apermissible range.REMARKS· When pulse train input is selected, a function assigned to terminal JOG using Pr. 185 JOG terminal function selection is made invalid.· When Pr. 419 Position command source selection = "2" (conditional position pulse train command by inverter pulse train input),JOG terminal serves as conditional position pulse train terminal regardless of the Pr. 291.CAUTION· Since Pr. 291 is a selection parameter for pulse train output/FM output, check the specifications of a device connected toterminal FM when changing the setting value. (Refer to page 233 for pulse train output.)· Output specifications (high speed pulse train output or FM output) of terminal FM can be selected using Pr. 291. Change thesetting value using care not to change output specifications of terminal FM. (Refer to page 233 for pulse train output.)•Pulse train input specificationsItemSpecificationsOpen collector outputAvailable pulse methodComplementary output(power supply voltage 24V)H input level20V or more (voltage between JOG-SD)L input level5V or less (voltage between JOG-SD)Maximum input pulse rate100kppsMinimum input pulse width2.5usInput resistance/load current2kΩ (typ) / 10mA (typ)Maximum wiring Open collector output system 10m (0.75mm 2 / twisted pair)length(reference value)Complemenraty output system 100m (output resistance 50Ω) *Detection resolution 1/3750* The wiring length of complementaryoutput depends on the output wiringspecifications of complementaryoutput device.Stray capacitances of the wiringgreatly differ according to the cabletype and cable laying, themaximum cable length is not aguaranteed value.60HzPr. 386OutputfrequencyLimit value *(2) Adjustment of pulse train input and frequency(Pr. 385, Pr. 386 )· Frequency for zero input pulse can be set using Pr. 385Frequency for zero input pulse and frequency at maximum inputpulse can be set using Pr. 386 Frequency for maximum inputpulse.(Hz)0HzPr. 3850Maximum input pulseInput pulse(pulse/s)* Limit value can be calculated from the following formula.(Pr. 386 - Pr. 385 ) × 1.1 + Pr. 385(3) Calculation method of division scaling factor of input pulse (Pr. 384 )· Maximum input pulse can be calcualted from the following formula using Pr. 384 Input pulse division scaling factor.Maximum of input pulse (pulse/s) = Pr. 384 × 400(maximum of 100kpulse/s)Detectable pulse = 11.45 pulse/s· For example, when you want to operate at 0Hz when pulse train input is zero and operate at 30Hz when pulse trainis 4000 pulse/s, set parameters as below.Pr. 384 = 10(maximum input pulse 4000 pulse/s)Pr. 385 = 0Hz, Pr. 386 = 30Hz(pulse train limit value is 33Hz)REMARKSThe priorities of the frequency commands by the external signals are "jog operation > multi-speed operation > teminal 4 analoginput > pulse train input".When pulse train input is made valid (when Pr. 291 = "1, 11, 21, or 100" and Pr. 384 ≠ "0"), terminal 2 analog input is made invalid.347
Special operation and frequency control(4) Synchronous speed operation by pulse I/OInverter (master)Pull up To next inverter (slave)resistance*PCJOGSpeedcommandPulse traininputSpeedcommandFMPulse trainoutputFMSDJOGSDPulse trainoutputTo next inverter (slave)SD* When the wiring length between FM and JOG is long, a pulse shape is deformed due to the stray capacitances of the wiring and input pulse can not berecognized.When wiring length is long (10m or more of 0.75mm 2 twisted cable is recommended), connect terminal JOG and terminal PC using an external pull upresistance. The reference of resistance value to the wiring length is as in the table below.Wiring Length Less than 10m 10 to 50m 50 to 100mPull up resistance Not necessary 1kΩ 470ΩLoad current (forreference)10mA 35mA 65mAStray capacitances of the wiring greately differ according to the cable type and cable laying, the above cable length is not a guaranteed value.When using a pull up resistance, check the permissible power and permissible load current (terminal PC : 100mA, high speed pulse train output : 85mA) of theresistor and use them within a permissible range.· By setting "100" in Pr. 291, pulse train input can be output at pulse train output (terminal FM) as it is.Synchronous speed operation of multiple inverters can be enabled by daisy chain connection.· Since maximum pulse train output is maximum of 50k pulse/s, set "125" in Pr. 384 of the inverter receiving pulse train.· When operating two or more inverters synchronously, perform wiring according to the following steps. (so that 24Vcontact input will not be applied to terminal FM)1) Set pulse train output (a value other than "0, 1") in Pr. 291 of the master side inverter.2) Turn off the inverter power3) Perform wiring of the master side terminal FM-SD and slave side terminal JOG-SD4) Turn on the inverter powerCAUTION· After changing a setting value of Pr. 291 , connect JOG terminal between termial FM and SD. Take note that a voltage shouldnot be applied to terminal FM specially when FM output (voltage output) pulse train is selected.· For the slave side inverter, use sink logic (factory setting). The inverter will not function properly if source logic is selected.•Specifications of synchronous speed operationItemSpecificationsOutput pulse type Pulse width is fixed (10μs)Pulse rate0 to 50kppsPulse transmission delay 1 to 2μs per inverter ** When a pulse transmission delay in a slave is approximately 1 to 2μs and wiring length is long, the delay further increases.♦ Parameters referred to ♦Pr. 291 (pulse train output ) Refer to page 233348
4PARAMETERSSpecial operation and frequency control4.25.6 Encoder feedback control (Pr. 144, Pr. 285, Pr. 359, Pr. 367 to Pr. 369)V/FMagnetic fluxThis controls the inverter output frequency so that the motor speed is constant to the load variation by detecting themotor speed with the speed detector (encoder) to feed it back to the inverter.Option <strong>FR</strong>-A7AP is necessary.ParameterNumbersNameInitialValue144 Speed setting switchover 4285Overspeed detectionfrequency(Speed deviation excessdetection frequency) *19999Setting RangeDescription0, 2, 4, 6, 8, 10,Set the number of motor poles when performing102, 104, 106,encoder feedback control under V/F control.108, 110If (detected frequency) - (output frequency) > Pr. 2850 to 30Hz during encoder feedback control, the inverter fault(E.MB1) is provided.9999 Overspeed is not detected.359 *2 Encoder rotation direction 1367 *2 Speed feedback range 999901CWAEncoderClockwise direction as viewedfrom A is forward rotationCCWAEncoderCounter clockwise direction asviewed from A is forward rotation0 to 400Hz Set the range of speed feedback control.9999 Encoder feedback control is invalid368 *2 Feedback gain 1 0 to 100 Set when the rotation is unstable or response is slow.Set the number of pulses of the encoder.369 *2 Number of encoder pulses 1024 0 to 4096Set the number of pulses before multiplied by four.*1 When exercising vector control with the <strong>FR</strong>-A7AP, this parameter changes to speed deviation excess detection frequency. (For details, refer topage 100)*2 The above parameters can be set when the <strong>FR</strong>-A7AP (option) is mounted.(1) Setting before the operation (Pr. 144, Pr. 359, Pr. 369 )⋅⋅When performing encoder feedback control under V/F control, set the number of motor poles in Pr. 144 Speed settingswitchover according to the motor used. Because the number of motor poles is set in Pr. 81 Number of motor polesunder advanced magnetic flux vector control, it is unnecessary to change Pr. 144.Set the rotation direction and the number of encoder pulses of the encoder using Pr. 359 Encoder rotation direction andPr. 369 Number of encoder pulses.REMARKS⋅ When "0, 10, 110" is set in Pr. 144 and run the inverter, fault E.1 to E.3 occurs.⋅ When "102, 104, 106, 108" is set in Pr. 144, the value subtracting 100 is set as the number of motor poles.⋅ Setting Pr. 81 Number of motor poles changes the Pr. 144 setting automatically. However, changing the Pr. 144 setting will notchange the Pr. 81 setting automatically.⋅⋅CAUTIONIf the number of motor poles is wrong, control at correct speed can not be performed. Always check before operation.Encoder feedback control can not be performed when the setting of encoder rotation direction is wrong. (Inverter operation isenabled.)Encoder rotation direction can be checked with the rotation direction display of the parameter unit.349
Special operation and frequency control(2) Selection of encoder feedback control (Pr. 367 )Speed feedback rangeSet value(Set command)Driven loadRegeneration load⋅When a value other than "9999" is set in Pr. 367 Speedfeedback range, encoder feedback control is valid.Using the set point (frequency at which stable speedoperation is performed) as reference, set the higher andlower setting range. Normally, set the frequencyconverted from the slip amount (r/min) of the rated motorspeed (rated load). If the setting is too large, responsebecomes slow.Example: Rated speed of a 4-pole motor is 1740r/min (60Hz)Slip Nsp = Synchronous speed - Rated speed Frequency equivalent to slip (fsp)= 1800 - 1740 = 60(r/min)Nsp × Number of poles 60 × 4fsp ==120 120= 2 (Hz)(3) Feedback gain (Pr. 368 )⋅ Set Pr. 368 Feedback gain when the rotation is unstable or response is slow.⋅ If the acceleration/deceleration time is long, feedback response becomes slower. In this case, increase the Pr. 368setting.⋅Pr. 368 SettingPr. 368 > 1(4) Overspeed detection (Pr. 285 )DescriptionAlthough the response becomes faster, overcurrent or unstable rotation is liable to occur.1 < Pr. 368 Although the response becomes slower, the motor rotation becomes stable.⋅ If (detection frequency) - (output frequency) > Pr. 285 under encoder feedback control, E.MB1 occurs and the inverteroutput is stopped to prevent malfunction when the accurate pulse signal from the encoder can not be detected.Overspeed is not detected when Pr. 285 = "9999".CAUTION⋅ The encoder should be coupled on the same axis with the motor shaft without any mechanical looseness with a speed ratio of1 to 1.⋅ During acceleration/deceleration, encoder feedback control is not performed to prevent unstable phenomenon such as hunting.⋅ Encoder feedback control is performed once output frequency has reached within [set speed] ± [speed feedback range].⋅ If the following conditions occur during encoder feedback control, the inverter operates at the frequency within [set speed] ±[speed feedback range] without coming to trip nor tracking the motor speed.⋅ The pulse signals are not received from the encoder due to a signal loss, etc.⋅ The accurate pulse signal from the encoder can not be detected due to induction noise, etc.⋅ The motor has been forcibly accelerated (regeneration) or decelerated (motor lock or the like) by large external force.⋅ For the motor with brake, use the RUN signal (inverter running) to open the brake. (The brake may not be opened if the FU(output frequency detection) signal is used.)⋅ Do not turn off the external power supply of the encoder during encoder feedback control. Encoder feedback control functionsabnormally.♦ Parameters referred to ♦Pr. 81 Number of motor poles Refer to page 131350
4PARAMETERS4.25.7 Regeneration avoidance function (Pr. 665, Pr. 882 to Pr. 886)(1) What is regeneration avoidance function? (Pr. 882, Pr. 883)Special operation and frequency controlThis function detects a regenerative status and increases the frequency to avoid the regenerative status.• Possible to avoid regeneration by automatically increasing the frequency and continue operation if the fanhappens to rotate faster than the set speed due to the effect of another fan in the same duct.ParameterNumber882883884885886665NameRegenerationavoidance operationselectionRegenerationavoidance operationlevelRegenerationavoidance atdecelerationdetection sensitivityRegenerationavoidancecompensationfrequency limit valueRegenerationavoidance voltagegainRegenerationavoidance frequencygain200Vclass400VclassInitialValue006Hz380VDC/760VDCSettingRangeDescription0 Regeneration avoidance function invalid1 Regeneration avoidance function is always valid2300 to800VRegeneration avoidance function is valid only during a constantspeed operationSet the bus voltage level at which regeneration avoidanceoperates. When the bus voltage level is set to low, overvoltageerror will be less apt to occur. However, the actual decelerationtime increases. The set value must be higher than the powersupply voltage × 2.0 Regeneration avoidance by bus voltage change ratio is invalid1 to 5100% 0 to 200%100% 0 to 200%Set sensitivity to detect the bus voltage change ratioSetting 1 5Detection sensitivity low high0 to 10HzSet the limit value of frequency which rises at activation ofregeneration avoidance function.9999 Frequency limit invalidAdjust responsiveness at activation of regeneration avoidance.A larger setting will improve responsiveness to the bus voltagechange. However, the output frequency could becomeunstable. When vibration is not suppressed by decreasing thePr. 886 setting, set a smaller value in Pr. 665.⋅ When the regenerative status is serious, the DC bus voltage rises and an overvoltage fault (E. OV) may occur.When this bus voltage rise is detected and the bus voltage level reaches or exceeds Pr. 883, increasing thefrequency avoids the regenerative status.⋅ For regeneration avoidance operation, you can select whether it is always activated or activated only at a constantspeed.Regeneration avoidance operationexample for accelerationBus voltage(VDC)Outputfrequency(Hz)Pr. 883TimeDuring regeneration Timeavoidance function operationRegeneration avoidance operationexample for constant speedBus voltage(VDC)Outputfrequency(Hz)Pr. 883TimeDuring regenerationavoidance function operationTimeBus voltage(VDC)Outputfrequency(Hz)Regeneration avoidance operationexample for decelerationPr. 883During regenerationavoidance function operationTimeTime⋅ Setting Pr. 882 to "1, 2" validates the regeneration avoidance function.REMARKS⋅ The inclination of the frequency increased or decreased by the regeneration avoidance function changes depending on theregenerative status.⋅ The DC bus voltage of the inverter is normally about 2 times greater than the input voltage.When the input voltage is 220VAC (440VAC), the bus voltage is about 311VDC (622VDC).However, it varies with the input power supply waveform.⋅ The Pr. 883 setting should be kept higher than the DC bus voltage level. Otherwise, the regeneration avoidance function isalways on even if the non-regeneration status and the frequency increases.⋅ While overvoltage stall ( ) is activated only during deceleration and stops the decrease in output frequency, the regenerationavoidance function is always on (Pr. 882 = 1) or activated only during a constant speed (Pr. 882 = 2) and increases the frequencyaccording to the regeneration amount.351
Special operation and frequency control(2) To detect the regenerative status during deceleration faster (Pr. 884)⋅ As the regeneration avoidance function cannot respond to an abrupt voltage change by detection of the busvoltage level, the ratio of bus voltage change is detected to stop deceleration if the bus voltage is less than Pr. 883Regeneration avoidance operation level.Set that detectable bus voltage change ratio to Pr. 884 as detection sensitivity.Increasing the setting raises the detection sensitivity.CAUTIONToo small setting (low detection sensitivity) will disable detection, and too large setting will turn on the regeneration avoidancefunction if the bus voltage is varied by an input power change, etc.(3) Limit regeneration avoidance operation frequency (Pr. 885)Outputfrequency(Hz)Pr.885Limit levelOutput frequency (Hz)Pr.885/2TimeYou can limit the output frequency compensated for (increased) bythe regeneration avoidance function.⋅ The frequency is limited to the output frequency (frequency prior toregeneration avoidance operation) + Pr. 885 Regeneration avoidancecompensation frequency limit value during acceleration or constantspeed. If the frequency increased by regeneration avoidancefunction exceeds the limit value during deceleration, the limit valueis held until the output frequency falls to 1/2 of Pr. 885.⋅ When the frequency increased by regeneration avoidance functionhas reached Pr. 1 Maximum frequency, it is limited to the maximumfrequency.⋅ Pr. 885 is set to "9999", regeneration avoidance function operationfrequency setting is invalid.(4) Regeneration avoidance function adjustment (Pr. 665, Pr. 886)⋅ If the frequency becomes unstable during regeneration avoidance operation, decrease the setting of Pr. 886Regeneration avoidance voltage gain. Reversely, if sudden regeneration causes an overvoltage alarm, increase thesetting.⋅ When vibration is not suppressed by decreasing the Pr. 886 Regeneration avoidance voltage gain setting, set a smallervalue in Pr. 665 Regeneration avoidance frequency gain.CAUTION⋅ When regeneration avoidance operation is performed, (overvoltage stall) is displayed and the OL signal is output.⋅ When regeneration avoidance operation is performed, stall prevention is also activated.⋅ When regeneration avoidance operation is performed, the OL signal output item of Pr. 156 also becomes the target of(overvoltage stall). Pr. 157 OL signal output timer also becomes the target of (overvoltage stall).⋅ Under vector control, unusual noise may be generated from the motor during deceleration when using regeneration avoidancefunction. To prevent this, make gain adjustment, e.g. by performing easy gain tuning. (Refer to page 88)♦ Parameters referred to ♦Pr. 1 Maximum frequency Refer to page 140Pr. 8 Deceleration time Refer to page 155Pr. 22 Stall prevention operation level Refer to page 135352
4PARAMETERSUseful functions4.26 Useful functions4.26.1 Cooling fan operation selection (Pr. 244)⋅⋅Refer toPurposeParameter that must be SetPageIncrease cooling fan life Cooling fan operation selection Pr. 244 353Inverter part life display Pr. 255 to Pr. 259 354To determine the maintenance time Maintenance output function Pr. 503, Pr. 504 357of parts.Current average value monitorsignalPr. 555 to Pr. 557 358Freely available parameter Free parameter Pr. 888, Pr. 889 360You can control the operation of the cooling fan built in the inverter.ParameterNumberName Initial Value Setting Range Description244 Cooling fan operation selection 1In either of the following cases, fan operation is regarded as faulty, [FN] is shown on the operation panel, and the fanfault (FAN) and alarm signals are output.⋅Pr. 244 = "0"When the fan comes to a stop with power on⋅Pr. 244 = "1"When the fan stops during the fan ON command while the inverter is runningFor the terminal used for FAN signal output, set "25" (positive logic) or "125" (negative logic) in any of Pr. 190 to Pr.196 (output terminal function selection), and for the LF signal, set "98" (positive logic) or "198" (negative logic).CAUTION⋅ Changing the terminal assignment using Pr. 190 to Pr. 196 (output terminal function selection) may affect the other functions.Please make setting after confirming the function of each terminal.♦ Parameters referred to ♦Pr. 190 to Pr. 196 (output terminal function selection) Refer to page 21401A cooling fan operates at power onCooling fan on/off control invalid (Thecooling fan is always on at power on)Cooling fan on/off control validThe fan is always on while the inverter isrunning. During a stop, the inverter statusis monitored and the fan switches on-offaccording to the temperature.353
Useful functions4.26.2 Display of the life of the inverter parts (Pr. 255 to Pr. 259)Degrees of deterioration of main circuit capacitor, control circuit capacitor, cooling fan and inrush current limitcircuit can be diagnosed by monitor.When any part has approached the end of its life, an alarm can be output by self diagnosis to prevent a fault.(Use the life check of this function as a guideline since the life except the main circuit capacitor is calculatedtheoretically.)For the life check of the main circuit capacitor, the alarm signal (Y90) will not be output if a measuring method of(4) is not performed.ParameterNumberName Initial Value Setting Range Description255 Life alarm status display 0 (0 to 15)256257258259Inrush current limit circuitlife displayControl circuit capacitor lifedisplayMain circuit capacitor lifedisplayMain circuit capacitor lifemeasuring100% (0 to 100%)100% (0 to 100%)100% (0 to 100%)00, 1(2, 3, 8, 9)Display whether the control circuit capacitor,main circuit capacitor, cooling fan, and eachparts of the inrush current limit circuit hasreached the life alarm output level or not.Reading onlyDisplay the deterioration degree of the inrushcurrent limit circuit. Reading onlyDisplay the deterioration degree of the controlcircuit capacitor. Reading onlyDisplay the deterioration degree of the maincircuit capacitor. Reading onlyThe value measured by Pr. 259 is displayed.Setting "1" and switching the power supply offstarts the measurement of the main circuitcapacitor life.When the Pr. 259 value is "3" after powering onagain, the measuring is completed. Read thedeterioration degree in Pr. 258.354
4PARAMETERS(1) Life alarm display and signal output (Y90 signal, Pr. 255)Useful functions⋅ Whether any of the control circuit capacitor, main circuit capacitor, cooling fan and inrush current limit circuit hasreached the life alarm output level or not can be checked by Pr. 255 Life alarm status display and life alarm signal (Y90).bit 157 00 0 0 0 0 0 0 0 0 0 0 0 1 0 0 1Pr. 255(decimal)Bit(binary)InrushCurrent LimitCircuit Lifebit0 Control circuit capacitor lifebit1 Main circuit capacitor lifebit2 Cooling fan lifebit3 Inrush current limit circuit lifeCoolingFan LifeMain CircuitCapacitor Life• Pr.255 readControl CircuitCapacitor Life15 1111 ◦ ◦ ◦ ◦14 1110 ◦ ◦ ◦ ×13 1101 ◦ ◦ × ◦12 1100 ◦ ◦ × ×11 1011 ◦ × ◦ ◦10 1010 ◦ × ◦ ×9 1001 ◦ × × ◦8 1000 ◦ × × ×7 0111 × ◦ ◦ ◦6 0110 × ◦ ◦ ×5 0101 × ◦ × ◦4 0100 × ◦ × ×3 0011 × × ◦ ◦2 0010 × × ◦ ×1 0001 × × × ◦0 0000 × × × ×◦: With warnings, ×: Without warnings• Pr.255 setting readBit image is displayedin decimal⋅⋅ The life alarm signal (Y90) turns on when any of the control circuit capacitor, main circuit capacitor, cooling fan andinrush current limit circuit reaches the life alarm output level.⋅ For the terminal used for the Y90 signal, set "90" (positive logic) or "190" (negative logic) to any of Pr. 190 to Pr. 196(output terminal function selection).REMARKSThe digital output option (<strong>FR</strong>-A7AY, <strong>FR</strong>-A7AR, <strong>FR</strong>-A7NC) allows the control circuit capacitor life signal (Y86), main circuitcapacitor life signal (Y87), cooling fan life signal (Y88) and inrush current limit circuit life signal (Y89) to be output individually.CAUTION⋅ Changing the terminal assignment using Pr. 190 to Pr. 196 (output terminal function selection) may affect the other functions.Please make setting after confirming the function of each terminal.(2) Life display of the inrush current limit circuit (Pr. 256)⋅ The life of the inrush current limit circuit (relay, contactor and inrush resistor) is displayed in Pr. 256.⋅ The number of contact (relay, contactor, thyristor) ON times is counted, and it is counted down from 100% (zerotimes) every 1%/10,000 times. As soon as 10% (900,000 times) is reached, Pr. 255 bit 3 is turned on and also analarm is output to the Y90 signal.(3) Control circuit capacitor life display (Pr. 257)⋅ The deterioration degree of the control circuit capacitor is displayed in Pr. 257 as a life.⋅ In the operating status, the control circuit capacitor life is calculated from the energization time and temperature,and is counted down from 100%. As soon as the control circuit capacitor life falls below 10%, Pr. 255 bit 0 is turnedon and also an alarm is output to the Y90 signal.355
Useful functions(4) Main circuit capacitor life display (Pr. 258, Pr. 259)⋅ The deterioration degree of the main circuit capacitor is displayed in Pr. 258 as a life.⋅ On the assumption that the main circuit capacitor capacitance at factory shipment is 100%, the capacitor life isdisplayed in Pr. 258 every time measurement is made. When the measured value falls to or below 85%, Pr. 255 bit 1is turned on and also an alarm is output to the Y90 signal.⋅ Measure the capacitor capacity according to the following procedure and check the deterioration level of thecapacitor capacity.1) Check that the motor is connected and at a stop.2) Set "1" (measuring start) in Pr. 2593) Switch power off. The inverter applies DC voltage to the motor to measure the capacitor capacity while theinverter is off.4) After making sure that the power lamp is off, switch on the power supply again.5) Check that "3" (measuring completion) is set in Pr. 259, read Pr. 258, and check the deterioration degree of themain circuit capacitor.Pr. 259 Description Remarks0 No measurement Initial value1 Measurement startMeasurement starts when thepower supply is switched off.2 During measurement3 Measurement complete8 Forced end9 Measurement errorOnly displayed and cannot besetREMARKS⋅ When the main circuit capacitor life is measured under the following conditions, "forced end" (Pr. 259 = "8") or "measuring error"(Pr. 259 = "9") occurs or it remains in "measuring start" (Pr. 259 = "1").When measuring, avoid the following conditions to perform.In addition, even when "measurement completion" (Pr. 259 = "3") is confirmed under the following conditions, normalmeasurement can not be done.(a)Terminals R1/L11, S1/L21 or DC power supply is connected to the terminal P/+ and N/-.(b)Switch power on during measuring.(c) The motor is not connected to the inverter.(d)The motor is running. (The motor is coasting.)(e)The motor capacity is two rank smaller as compared to the inverter capacity.(f) The inverter is tripped or a fault occurred when power is off.(g)The inverter output is shut off with the MRS signal.(h)The start command is given while measuring.⋅ Operating environment: Surrounding air temperature (annual average 40°C (free from corrosive gas, flammable gas, oil mist, dust and dirt))Output current (80% of the inverter rated current)POINTFor the accurate life measuring of the main circuit capacitor, perform after more than 3h passed since the turn off ofthe power as it is affected by the capacitor temperature.WARNINGWhen measuring the main circuit capacitor capacity (Pr. 259 Main circuit capacitor life measuring = "1"), the DCvoltage is applied to the motor for 1s at powering off. Never touch the motor terminal, etc. right after powering offto prevent an electric shock.(5) Cooling fan life display⋅⋅ The cooling fan speed of 50% or less is detected and "FN" is displayed on the operation panel (<strong>FR</strong>-DU07) andparameter unit (<strong>FR</strong>-PU04/<strong>FR</strong>-PU07). As an alarm display, Pr. 255 bit 2 is turned on and also an alarm is output tothe Y90 signal.REMARKSWhen the inverter is mounted with two or more cooling fans, the life of even one cooling fan is diagnosed.CAUTION⋅ For replacement of each part, contact the nearest Mitsubishi FA center.356
4PARAMETERSUseful functions4.26.3 Maintenance timer alarm (Pr. 503, Pr. 504)When the cumulative energization time of the inverter reaches the parameter set time, the maintenance timeroutput signal (Y95) is output. (MT) is displayed on the operation panel (<strong>FR</strong>-DU07).This can be used as a guideline for the maintenance time of peripheral devices.ParameterNumberName Initial Value Setting Range Description503 Maintenance timer 0 0 (1 to 9998)504Maintenance timer alarm outputset time9999Display the cumulative energization time ofthe inverter in 100h increments.Reading onlyWriting the setting of "0" clears thecumulative energization time.Set the time taken until when the0 to 9998 maintenance timer alarm output signal(Y95) is output.9999 No functionMaintenancetimer(Pr. 503)First power9998(999800h)Pr.504ONSet "0" in Pr.503Y95 signal OFF ON ONMT display⋅ The cumulative energization time of the inverter is stored into the EEPROM every hour and indicated in Pr. 503Maintenance timer in 100h increments. Pr. 503 is clamped at 9998 (999800h).⋅ When the Pr. 503 value reaches the time set in Pr. 504 Maintenance timer alarm output set time (100h increments), themaintenance timer alarm output signal (Y95) is output.⋅ For the terminal used for the Y95 signal output, assign the function by setting "95" (positive logic) or "195" (negativelogic) to any of Pr. 190 to Pr. 196 (output terminal function selection).CAUTION⋅ The cumulative energization time is counted every hour. The energization time of less than 1h is not counted.⋅ Changing the terminal assignment using Pr. 190 to Pr. 196 (output terminal function selection) may affect the other functions.Please make setting after confirming the function of each terminal.♦ Parameters referred to ♦Pr. 190 to Pr. 196(output terminal function selection) Refer to page 214Time357
Useful functions4.26.4 Current average value monitor signal (Pr. 555 to Pr. 557)The average value of the output current duringconstant speed operation and the maintenancetimer value are output as a pulse to the currentaverage value monitor signal (Y93).The pulse width output to the I/O module of theprogrammable controller etc. can be used as aguideline due to abrasion of machines andelongation of belt and for aged deterioration ofdevices to know the maintenance time.The current average value monitor signal (Y93) isoutput as pulse for 20s as 1 cycle and repeatedlyoutput during constant speed operation.maintenancetimeProgrammablecontrollerparts havereached their lifeOutputunitInputunitInverterParameterNumberName Initial Value Setting Range Description555 Current average time 1s 0.1 to 1.0s556 Data output mask time 0s 0.0 to 20.0s557Current average valuemonitor signal outputreference currentRated invertercurrent0 to 500ASet the time taken to average the current duringstart pulse output (1s).Set the time for not obtaining (mask) transientstate data.Set the reference (100%) for outputting thesignal of the current average value.The above parameters allow its setting to be changed during operation in any operation mode even if "0" (initial value) is set in Pr. 77 Parameter writeselection.From acceleration to constant speed operationOutputfrequency1 cycle (20s)TimeNext cycleY93 signal1) Data output mask timeWhen the speed has changed to constantfrom acceleration/deceleration, Y93 signal isnot output for Pr. 556 time.2) Start pulseOutput as Hi pulse shape for 1s (fixed)Output current set in Pr. 555 time is averaged.3) Output current average value pulseThe averaged current value is output as low pulse shape for0.5 to 9s (10 to 180%) during start bit output.output current average value (A)Signal output time= 5sPr. 557 (A)5) End pulseoutput as low pulseshape for 1 to 16.5s4) Maintenance timer pulseThe maintenance timer value (Pr. 503) is outputas Hi output pulse shape for 2 to 9s (16000h to72000h).Pr. 503 100hSignal output time=5s40000h⋅ The pulse output of the current average value monitor signal (Y93) is shown above.⋅ For the terminal used for the Y93 signal output, assign the function by setting "93" (positive logic) or "193" (negativelogic) to any of Pr. 190 to Pr. 194 (output terminal function selection). (The function can not be assigned to Pr. 195 ABC1terminal function selection and Pr. 196 ABC2 terminal function selection.)(1) Setting of Pr. 556 Data output mask timeThe output current is unstable (transient state) right after the operation is changed from the acceleration/deceleration state to the constant speed operation. Set the time for not obtaining (mask) transient state data in Pr.556.(2) Setting of the Pr. 555 Current average timeThe average output current is calculated during Hi output of start bit (1s). Set the time taken to average the currentduring start bit output in Pr. 555.358
4PARAMETERSUseful functions(3) Setting of Pr. 557 Current average value monitor signal output reference currentSet the reference (100%) for outputting the signal of the current average value. Obtain the time to output the signalfrom the following formula.Output current average value × 5s (output current average value 100%/5s)Pr. 557 settingNote that the output time range is 0.5 to 9s, and it is 0.5s when the output currentaverage value is less than 10% of the setting value of Pr. 557 and 9s when exceeds180%.Example)When Pr. 557 = 10A and the average value of output current is 15AAs 15A/10A × 5s = 7.5, the current average value monitor signal is outputas low pulse shape for 7.5s.(4) Output of Pr. 503 Maintenance timerAfter the output current average value is output as low pulse shape, themaintenance timer value is output as high pulse shape. The output time of themaintenance timer value is obtained from the following formula.Pr. 503 × 100× 5s (maintenance timer value 100%/5s)40000hNote that the output time range is 2 to 9s, and it is 2s when Pr. 503 is less than16000h and 9s when exceeds 72000h.REMARKS⋅ Mask of data output and sampling of output current are not performed during acceleration/deceleration.⋅ When the speed is changed to acceleration/deceleration from constant speed during start pulse output, the data is judged asinvalid, the start pulse is output as high pulse shape for 3.5s, and the end signal is output as low pulse shape for 16.5s.The signal is output for at least 1 cycle even when acceleration/deceleration state continues after the start pulse output iscompleted.Output frequencyThe speed is changed to deceleration fromthe constant speed during start pulse outputSignal output timeSignal output time(s)90.510 180 (%)Output current average value(s)9216000 72000 (h)Maintenance timer value⋅⋅Previous cycleY93signal2) Start pulseOutput as highpulse shape for3.5sInvalid cycle (20s)TimeNext cycle5) End signalOutput as low pulseshape for 16.5sWhen the output current value (inverter output current monitor) is 0A on completion of the 1 cycle signal output, the signal is notoutput until the speed becomes constant next timeThe current average value monitor signal (Y93) is output as low pulse shape for 20s (without data output) under the followingcondition.(a)When the motor is in the acceleration/deceleration state on completion of the 1 cycle signal output(b)When 1-cycle signal output was ended during restart operation with the setting of automatic restart after instantaneous powerfailure (Pr. 57 ≠ "9999")(c)When automatic restart operation was being performed with automatic restart after instantaneous power failure selected (Pr.57 ≠ "9999") on completion of the data output mask⋅CAUTIONChanging the terminal assignment using Pr. 190 to Pr. 196 (output terminal function selection) may affect the other functions.Please make setting after confirming the function of each terminal.♦ Parameters referred to ♦Pr. 190 to Pr. 196(output terminal function selection) Refer to page 214Pr. 503 Maintenance timer Refer to page 357Pr. 57 Restart coasting time Refer to page 239359
Useful functions4.26.5 Free parameter (Pr. 888, Pr. 889)You can input any number within the setting range 0 to 9999.For example, the number can be used:⋅ As a unit number when multiple units are used.⋅ As a pattern number for each operation application when multiple units are used.⋅ As the year and month of introduction or inspection.ParameterNumberName Initial Value Setting Range Description888 Free parameter 1 9999 0 to 9999 Desired values can be input.889 Free parameter 2 9999 0 to 9999Data is held even if the inverterpower is turned off.The above parameters allow its setting to be changed during operation in any operation mode even if "0" (initial value) is set in Pr. 77 Parameter writeselection.REMARKS⋅ Pr. 888 and Pr. 889 do not influence the inverter operation.360
4PARAMETERSSetting of the parameter unit andoperation panel4.27 Setting of the parameter unit and operation panelPurpose Parameter that must be Set Refer to PageSwitch the display language of theparameter unitUse the setting dial of the operationpanel like a potentiometer forfrequency setting.Key lock of operation panelControl of the parameter unit,operation panel buzzerAdjust the LCD contrast of theparameter unit4.27.1 PU display language selection (Pr. 145)PU display language selection Pr. 145 361Operation panel operation selection Pr. 161 361PU buzzer control Pr. 990 363PU contrast adjustment Pr. 991 363You can switch the display language of the parameter unit (<strong>FR</strong>-PU04/<strong>FR</strong>-PU07) to another.ParameterNumberName Initial Value Setting Range Description145 PU display language selection 00 Japanese1 English2 Germany3 French4 Spanish5 Italian6 Swedish7 Finnish4.27.2 Operation panel frequency setting/key lock operation selection (Pr. 161)The setting dial of the operation panel (<strong>FR</strong>-DU07) can be used like a potentiometer to perform operation.The key operation of the operation panel can be disabled.ParameterNumberNameInitial ValueSettingRangeDescription161Frequency setting/key lockoperation selection0011011Setting dial frequencysetting modeSetting dial potentiometermodeSetting dial frequencysetting modeSetting dial potentiometermodeKey lockmode invalidKey lockmode valid361
Setting of the parameter unit andoperation panel(1) Using the setting dial like a potentiometer to set the frequency.Operation example Changing the frequency from 0Hz to 60Hz during operationOperation1. Screen at powering onThe monitor display appears.2. Press to choose the PU operationmode.DisplayPU indication is lit.3. Press to choose the parametersetting mode.The parameter numberpreviously read appears.4. Turn until (Pr. 161) appears.5. Press to read the currently set value." " (initial value) appears.6. Turn to change it to the setting value" ".7. Press to set.8. Mode/monitor checkPress twice to choosemonitor/frequency monitor.Flicker ··· Parameter setting complete!!9. Press (or ) to start the inverter.10. Turn until " " appears.The flickering frequency is the set frequency.You need not press .The frequency flickers for about 5s.REMARKS⋅ If the display changes from flickering "60.00" to "0.00", the setting of Pr. 161 Frequency setting/key lock operation selection may notbe "1".⋅ Independently of whether the inverter is running or at a stop, the frequency can be set by merely turning the dial.⋅ When the frequency is changed, it will be stored in EEPROM as the set frequency after 10s.362
4PARAMETERSSetting of the parameter unit andoperation panel(2) Disable the setting dial and key operation of the operation panel (Press [MODE] long (2s))⋅ Operation using the setting dial and key of the operation panel can be made invalid to prevent parameter change,and unexpected start or frequency setting.⋅ Set "10 or 11" in Pr. 161, then press for 2s to make the setting dial and key operation invalid.⋅ When the setting dial and key operation is made invalid, appears on the operation panel. When thesetting dial and key operation is invalid, appears if the setting dial or key operation is performed. (Whenthe setting dial or key operation is not performed for 2s, the monitor display appears.)⋅ To make the setting dial and key operation valid again, press for 2s.REMARKS⋅ Even if the setting dial and key operation are disabled, the monitor display is valid.CAUTION• Release the operation lock to release the PU stop by key operation.4.27.3 Buzzer control (Pr. 990)You can make the buzzer "beep" when you press key of the operation panel (<strong>FR</strong>-DU07) and parameter unit (<strong>FR</strong>-PU04/<strong>FR</strong>-PU07).ParameterNumberName Initial Value Setting Range Description990 PU buzzer control 1The above parameters allow its setting to be changed during operation in any operation mode even if "0" (initial value) is set in Pr. 77 Parameter writeselection.4.27.4 PU contrast adjustment (Pr. 991)0 Without buzzer1 With buzzerContrast adjustment of the LCD of the parameter unit (<strong>FR</strong>-PU04/<strong>FR</strong>-PU07) can be performed.Decreasing the setting value makes contrast light.ParameterNumberName Initial Value Setting Range Description991 PU contrast adjustment 58 0 to 630 : Light↓63: DarkThe above parameters are displayed as simple mode parameters only when the parameter unit (<strong>FR</strong>-PU04/<strong>FR</strong>-PU07) is connected.363
Parameter clear4.28 Parameter clearPOINT· Set "1" in Pr. CL parameter clear to initialize all parameters. (Parameters are not cleared when "1" is set in Pr. 77Parameter write selection. In addition, calibration parameters are not cleared.)OperationDisplay1.Screen at powering onThe monitor display appears.2.Press to choose the PU operationmode.PU indication is lit.3.Press to choose the parametersetting mode.The parameternumber readpreviously appears.4.Turn until " " appears.5.Press to read the currently set value." "(initial value) appears.6.Turn to change it to the setting value" ".7.Press to set.· Turn to read another parameter.· Press to show the setting again.· Press twice to show the next parameter.Flicker ··· Parameter setting complete!!Setting0 Not executed.1DescriptionReturns all parameters to the initial values except for calibration parameters, terminal functionselection parameters, etc.Refer to the list of parameters on page 423 for availability of parameter clear.and are displayed alternately ... Why?The inverter is not in PU operation mode.1. Press .is lit and the monitor (4 digit LED) displays "0" (Pr. 79 = "0" (initial value)).2. Carry out operation from step 6 again.364
4PARAMETERSAll parameter clear4.29 All parameter clearPOINT· Set "1" in ALLC parameter clear to initialize all parameters. (Parameters are not cleared when "1" is set in Pr. 77Parameter write selection.)OperationDisplay1.Screen at powering onThe monitor display appears.2.Press to choose the PU operationmode.PU indication is lit.3.Press to choose the parametersetting mode.The parameternumber readpreviously appears.4.Turn until (all parameterclear) appears.5.Press to read the currently setvalue." "(initial value) appears.6.Turn to change it to the setting value" ".7.Press to set.· Press to read another parameter.· Press to show the setting again.· Press twice to show the next parameter.Flicker ··· Parameter setting complete!!Setting0 Not executed.1DescriptionAll parameters return to the initial values. Refer to the list of parameters on page 423 foravailability of all parameter clear.Refer to the list of parameters on page 423 for availability of parameter clear.and are displayed alternately ... Why?The inverter is not in the PU operation mode.1. Press .is lit and the monitor (4 digit LED) displays "0" (Pr. 79 = "0" (initial value)).2. Carry out operation from step 6 again.365
Parameter copy and parameter verification4.30 Parameter copy and parameter verificationPCPY SettingDescription0 Cancel1 Copy the source parameters to the operation panel.2 Write the parameters copied to the operation panel into the destination inverter.3 Verify parameters in the inverter and operation panel. (Refer to page 367.)REMARKS· When the copy destination inverter is not the <strong>FR</strong>-<strong>A701</strong> series or parameter copy write is performed after parameter copy read isstopped, "model error ( )" is displayed.· Refer to the parameter list on page 423 and later for availability of parameter copy.· When the power is turned off or an operation panel is disconnected, etc. during parameter copy write, perform write again orcheck the values by parameter verification.4.30.1 Parameter copyParameter settings can be copied to multiple inverters.OperationDisplay1.Connect the operation panel to thecopy source inverter.• Connect it during a stop.2.Press to choose the parametersetting mode.The parameternumber previouslyread appears.3.Turn until (parameter copy)appears.4.Press to to read the currently set value." "(initial value) appears.5.Turn to change it to the setting value" ".6.Press to copy the source parametersto the operation panel.About 30s laterFlickers for about 30sFlicker ··· Parameter copy complete!!7.Connect the operation panel to thecopy source inverter.8.After performing steps 2 to 5,turn to change it to " ".9.Press to write the parameters copied tothe operation panel to the destination inverter.The frequency flickersfor about 30s10.When copy is completed," " and " " flicker.11.After writing the parameter values to the copydestination inverter, always reset the inverter,e.g. switch power off once, before starting operation.Flicker ··· Parameter copy complete!!366
4PARAMETERSParameter copy and parameter verificationappears...Why?appears...Why?Parameter read error. Perform operation from step 3 again.Parameter write error. Perform operation from step 8 again.4.30.2 Parameter verificationWhether same parameter values are set in other inverters or not can be checked.Operation1.Replace the operation panel on theinverter to be verified.• Replace it during a stop.Display2.Screen at powering onThe monitor display appears.3.Press to choose the parametersetting mode.The parameternumber readpreviously appears.4.Turn until (parameter copy)appears.5.Press to read the currently setvalue." "(initial value) appears.6.Turn to change it to the set value" "(parameter copy verification mode).7.Press to read the parameter settingof the verified inverter to the operation panel.Flickers for about 30s• If different parameters exist, differentparameter numbers and flicker.• Hold down to verify.FlickeringREMARKS8.It there is no difference, " " and " "flicker to complete verification.When the copy destination inverter is not the <strong>FR</strong>-<strong>A701</strong> series, "model error (Flicker ··· Parameter verification complete!!)" is displayed.flickers ... Why?Set frequencies, etc. may be different. Check set frequencies.367
Check and clear of the faults history4.31 Check and clear of the faults history(1) Check for the faults historyMonitor/frequency setting[Operation panel is usedfor operation]Parameter setting[Parameter setting change]Faults history[Operation for displaying faults history]Eight past faults can be displayed with the setting dial.(The latest fault is ended by ".".)When no alarm exists, is displayed.Output frequencyOutput currentFlickeringFlickeringFlickeringEnergization timeOutput voltageFlickeringFlickeringFlickeringPress thesettingdial.Press thesettingdial.Faults history number(The number of past faults is displayed.)FlickeringPress thesettingdial.368
4PARAMETERSCheck and clear of the faults history(2) Clearing procedurePOINT· The faults history can be cleared by setting "1" in Er.CL Faults history clear.OperationDisplay1.Screen at powering onThe monitor display appears.2.Press to choose the parametersetting mode.3.appears.The parameternumber previouslyread appears.4.Press to read the currently set value." "(initial value) appears.5.Turn to change it to thesetting value " ".6.Press to set.· Press to read another parameter.· Press to show the setting again.· Press twice to show the next parameter.Flicker ··· Faults history clear complete!!369
MEMO370
5 PROTECTIVE FUNCTIONSThis chapter describes the basic "PROTECTIVE FUNCTION" foruse of this product.Always read the instructions before using the equipment5.1 Reset method of protective function........................3725.2 List of fault or alarm display ....................................3735.3 Causes and corrective actions ................................3745.4 Correspondences between digital and actualcharacters ...............................................................3895.5 Check first when you have troubles ........................3901234563717
Reset method of protective functionWhen a fault occurs in the inverter, the inverter trips and the PU display automatically changes to any of the following fault oralarm indications.If the fault does not correspond to any of the following faults or if you have any other problem, please contact your salesrepresentative.• Retention of fault output signal...When the magnetic contactor (MC) provided on the input side of the inverter is openedwhen a fault occurs, the inverter's control power will be lost and the fault output will not beheld.• Fault or alarm indication...........When a fault or alarm occurs, the operation panel display automatically switches to the faultor alarm indication.• Resetting method.....................When a fault occurs, the inverter output is kept stopped. Unless reset, therefore, the invertercannot restart. (Refer to page 372)• When any fault occurs, take the appropriate corrective action, then reset the inverter, and resume operation.Not doing so may lead to the inverter fault and damage.Inverter fault or alarm indications are roughly divided as below.(1) Error messageA message regarding operational fault and setting fault by the operation panel (<strong>FR</strong>-DU07) and parameter unit (<strong>FR</strong>-PU04/<strong>FR</strong>-PU07) is displayed. The inverter does not trip.(2) WarningsThe inverter does not trip even when a warning is displayed. However, failure to take appropriate measures will lead to afault.(3) AlarmThe inverter does not trip. You can also output an alarm signal by making parameter setting.(4) FaultWhen a fault occurs, the inverter trips and a fault signal is output.5.1 Reset method of protective function(1) Resetting the inverterThe inverter can be reset by performing any of the following operations. Note that the internal thermal integrated valueof the electronic thermal relay function and the number of retries are cleared (erased) by resetting the inverter.Recover about 1s after reset is cancelled.Operation 1: ..... Using the operation panel, press to reset the inverter.(This may only be performed when a fault occurs (Refer to page 378 forfault.))Operation 2:...... Switch power off once, then switch it on again.ONOFFOperation 3: ..... Turn on the reset signal (RES) for more than 0.1s. (If the RES signal iskept on, "Err." appears (flickers) to indicate that the inverter is in a resetstatus.)InverterRESSD372
List of fault or alarm display5.2 List of fault or alarm displayError messageWarningsAlarmFaultOperation PanelIndicationtotoNameRefertoE - - - Faults history 368HOLD Operation panel lock 374Er1 to 4 Parameter write error 374rE1 to 4 Copy operation error 375Err. Error 375OLStall prevention(overcurrent)376oLStall prevention(overvoltage)376THElectronic thermal relayfunction prealarm377PS PU stop 376MT Maintenance signal output 377CP Parameter copy 377SLSpeed limit indication(Output during speed limit)377FN Fan fault 378E.OC1E.OC2E.OC3E.OV1E.OV2E.OV3E.THTE.THMOvercurrent trip duringaccelerationOvercurrent trip duringconstant speedOvercurrent trip duringdeceleration or stopRegenerative overvoltagetrip during accelerationRegenerative overvoltagetrip during constant speedRegenerative overvoltagetrip during deceleration orstopInverter overload trip(electronic thermal relayfunction)Motor overload trip(electronic thermal relayfunction)378378379379379380380380E.FIN Fin overheat 380E.IPF Instantaneous power failure 381E.UVT Undervoltage 381E.ILF* Input phase failure 381E.OLT Stall prevention 381E.GFOutput side earth (ground)fault overcurrent381E.LF Output phase loss 382E.OHTExternal thermal relayoperation *2382FaultOperation PanelIndicationto//E.PTC* PTC thermistor operation 382E.OPT Option alarm 382E.OP3 Communication option alarm 382E. 1 toE. 3Option fault 383E.PEParameter storage devicefault383E.PUE PU disconnection 383E.RET Retry count excess 383E.PE2*Parameter storage devicefault383E. 6 /E. 7 /E.CPUNameCPU error 384E.CTEOperation panel powersupply short circuit, RS-485terminal power supply short384circuitE.P2424VDC power output shortcircuit386E.CDO*Output current detectionvalue exceeded386E.IOH*Inrush current limit circuitfault386E.SER*Communication error(inverter)386E.AIE* Analog input error 386RefertoE.OS Overspeed occurence 384E.OSDSpeed deviation excessdetection385E.ECT Signal loss detection 385E.OD Excessive position error 385toE.MB1to Brake sequence error 384E.MB7E.EP Encoder phase error 385E.4 Converter overcurrent 387E.8 Power supply fault 387E.10Converter transistorprotection thermal operation 387(electronic thermal)E.11Opposite rotationdeceleration fault387E.13 Internal circuit error 387E.15 Converter circuit fault 388* If an error occurs when using the <strong>FR</strong>-PU04, "Fault 14" is displayed onthe <strong>FR</strong>-PU04.PROTECTIVE FUNCTIONS5373
Causes and corrective actions5.3 Causes and corrective actions(1) Error messageA message regarding operational troubles is displayed. Output is not shut off.Operation PanelIndicationHOLDNameOperation panel lockDescription Operation lock mode is set. Operation other than is made invalid. (Refer to page 363.)Check point ------------Corrective action Press for 2s to release lock.Operation PanelIndicationNameDescriptionCheck pointEr1Write disable error1. You attempted to make parameter setting when Pr. 77 Parameter write selection has been set todisable parameter write.2. Frequency jump setting range overlapped.3. Adjustable 5 points V/F settings overlapped4. The PU and inverter cannot make normal communication1. Check the setting of Pr. 77 Parameter write selection (Refer topage 280.)2. Check the settings of Pr. 31 to 36 (frequency jump). (Refer topage 141.)3. Check the settings of Pr. 100 to Pr. 109 (adjustable 5 points V/F). (Refer topage 147.)4. Check the connection of the PU and inverter.Operation PanelIndicationNameDescriptionCheck pointCorrective actionEr2Write error during operationWhen parameter write was performed during operation with a value other than "2" (writing is enabledindependently of operating status in any operation mode) is set in Pr. 77 and the STF (STR) is on.1. Check the Pr. 77 setting. (Refer topage 280.)2. Check that the inverter is not operating.1. Set "2" in Pr. 77.2. After stopping operation, make parameter setting.Operation PanelIndicationEr3NameCalibration errorDescription Analog input bias and gain calibration values are too close.Check point Check the settings of C3, C4, C6 and C7 (calibration functions). (Refer topage 267.)Operation PanelIndicationEr4NameMode designation errorDescription You attempted to make parameter setting in the NET operation mode when Pr. 77 is not "2".Check pointCorrective action1. Check that operation mode is "PU operation mode".2. Check the Pr. 77 setting. (Refer topage 280.)1. After setting the operation mode to "PU operation mode", make parameter setting. (Refer to page 280.)2. After setting "2" in Pr. 77, make parameter setting.374
Causes and corrective actionsOperation PanelIndicationrE1NameParameter read errorDescription An error occurred in the EEPROM on the operation panel side during parameter copy reading.Check point ------------Corrective action· Make parameter copy again. (Refer to page 366.)· Check for an operation panel (<strong>FR</strong>-DU07) failure. Please contact your sales representative.Operation PanelIndicationNameDescriptionCheck pointCorrective actionrE2Parameter write error1. You attempted to perform parameter copy write during operation.2. An error occurred in the EEPROM on the operation panel side during parameter copy writing.Is the FWD or REV LED of the operation panel (<strong>FR</strong>-DU07) lit or flickering?1. After stopping operation, make parameter copy again. (Refer to page 366.)2. Check for an operation panel (<strong>FR</strong>-DU07) failure. Please contact your sales representative.Operation PanelIndicationNameDescriptionCheck pointCorrective actionrE3Parameter verification error1. Data on the operation panel side and inverter side are different.2. An error occurred in the EEPROM on the operation panel side during parameter verification.Check for the parameter setting of the source inverter and inverter to be verified.1. Press to continue verification.Make parameter verification again. (Refer to page 367.)2. Check for an operation panel (<strong>FR</strong>-DU07) failure. Please contact your sales representative.Operation PanelIndicationNameDescriptionCheck pointCorrective actionOperation PanelIndicationDescriptionCorrective actionrE4Model error1. A different model was used for parameter write and verification during parameter copy.2. When parameter copy write is stopped after parameter copy read is stopped1. Check that the verified inverter is the same model.2. Check that the power is not turned off or an operation panel is not disconnected, etc. duringparameter copy read.1. Use the same model (<strong>FR</strong>-<strong>A701</strong> series) for parameter copy and verification.2. Perform parameter copy read again.Err.1. The RES signal is on2. The PU and inverter cannot make normal communication (contact fault of the connector)3. When the control circuit power (R1/L11, S1/L21) and the main circuit power (R/L1, S/L2, T/L3) areconnected to a separate power, it may appear at turning on of the main circuit. It is not a fault.1. Turn off the RES signal.2. Check the connection of the PU and inverter.PROTECTIVE FUNCTIONS5375
Causes and corrective actions(2) WarningsWhen the protective circuit is activated, the output is not shut off.Operation Panel<strong>FR</strong>-PU04OLIndication<strong>FR</strong>-PU07NameStall prevention (overcurrent)DescriptionCheck pointCorrective actionDuringaccelerationDuringconstantspeedoperationDuringdecelerationOLWhen the output current (output torque during real sensorless vector control or vectorcontrol) of the inverter exceeds the stall prevention operation level (Pr. 22 Stall preventionoperation level, etc.), this function stops the increase in frequency until the overloadcurrent decreases to prevent the inverter from resulting in overcurrent trip. When theoverload current has decreased below stall prevention operation level, this functionincreases the frequency again.When the output current (output torque during real sensorless vector control or vectorcontrol) of the inverter exceeds the stall prevention operation level (Pr. 22 Stall preventionoperation level, etc.), this function reduces frequency until the overload currentdecreases to prevent the inverter from resulting in overcurrent trip. When the overloadcurrent has decreased below stall prevention operation level, this function increases thefrequency up to the set value.When the output current (output torque during real sensorless vector control or vectorcontrol) of the inverter exceeds the stall prevention operation level (Pr. 22 Stall preventionoperation level, etc.), this function stops the decrease in frequency until the overloadcurrent decreases to prevent the inverter from resulting in overcurrent trip. When theoverload current has decreased below stall prevention operation level, this functiondecreases the frequency again.1. Check that the Pr. 0 Torque boost setting is not too large.2. Check that the Pr. 7 Acceleration time and Pr. 8 Deceleration time settings are not too small.3. Check that the load is not too heavy.4. Are there any failure in peripheral devices?5. Check that the Pr. 13 Starting frequency is not too large.· Check the motor for use under overload.6. Check that the Pr. 22 Stall prevention operation level is appropriate.1. Increase or decrease the Pr. 0 Torque boost value 1% by 1% and check the motor status. (Refer to page 129.)2. Set a larger value in Pr. 7 Acceleration time and Pr. 8 Deceleration time. (Refer to page 155.)3. Reduce the load weight.4. Try advanced magnetic flux vector control, real sensorless vector control or vector control.5. Change the Pr. 14 Load pattern selection setting.6. Set stall prevention operation current in Pr. 22 Stall prevention operation level. (The initial value is150%.) The acceleration/deceleration time may change. Increase the stall prevention operation levelwith Pr. 22 Stall prevention operation level, or disable stall prevention with Pr. 156 Stall preventionoperation selection. (Use Pr. 156 to set either operation continued or not at OL operation.)Operation PanelIndicationNameDescriptionCheck pointCorrective actionoLStall prevention (overvoltage)Duringdeceleration<strong>FR</strong>-PU04<strong>FR</strong>-PU07oL· If the regenerative energy of the motor becomes excessive and exceeds theregenerative energy consumption capability, this function stops the decrease infrequency to prevent overvoltage trip. As soon as the regenerative energy hasdecreased, deceleration resumes.· If the regenerative energy of the motor becomes excessive when regenerationavoidance function is selected (Pr. 882 = 1), this function increases the speed toprevent overvoltage trip. (Refer topage 351.)· Check for sudden speed reduction.· Regeneration avoidance function (Pr. 882 to Pr. 886) is being used? (Refer topage 351.)The deceleration time may change.Increase the deceleration time using Pr. 8 Deceleration time.Operation PanelIndicationNamePSPU stop<strong>FR</strong>-PU04<strong>FR</strong>-PU07PSDescription Stop with of the PU is set in Pr. 75 Reset selection/disconnected PU detection/PU stop selection. (For Pr.75, refer to page 278.)Check point Check for a stop made by pressing of the operation panel.Corrective action Turn the start signal off and release with .376
Causes and corrective actionsOperation PanelIndicationNameDescriptionCheck pointCorrective action<strong>FR</strong>-PU04THTH<strong>FR</strong>-PU07Electronic thermal relay function prealarmAppears if the cumulative value of the Pr. 9 Electronic thermal O/L relay reaches or exceeds 85% of thepreset level. If it reaches 100% of the Pr. 9 Electronic thermal O/L relay setting, a motor overload trip (E.THM) occurs.The THP signal can be simultaneously output with the [TH] display. For the terminal used for the THPsignal output, assign the function by setting "8" (positive logic) or "108" (negative logic) in any of Pr. 190to Pr. 196 (output terminal function selection). (Refer to page 214)1. Check for large load or sudden acceleration.2. Is the Pr. 9 Electronic thermal O/L relay setting is appropriate? (Refer to page 165.)1. Reduce the load weight or the number of operation times.2. Set an appropriate value in Pr. 9 Electronic thermal O/L relay. (Refer to page 165.)Operation PanelIndicationNameDescriptionCheck pointCorrective action<strong>FR</strong>-PU04 ————MT<strong>FR</strong>-PU07 MTMaintenance signal outputIndicates that the cumulative energization time of the inverter has reached a given time.When the setting of Pr. 504 Maintenance timer alarm output set time is the initial value (Pr. 504 = "9999"),this protective function does not function.The Pr. 503 Maintenance timer setting is larger than the Pr. 504 Maintenance timer alarm output set timesetting. (Refer topage 357.)Setting "0" in Pr. 503 Maintenance timer erraces the signal.Operation PanelIndicationNameDescriptionCheck pointCorrective action<strong>FR</strong>-PU04 ————CP<strong>FR</strong>-PU07 CPParameter copyDisplayed when parameters are copied between the <strong>FR</strong>-<strong>A701</strong> series and <strong>FR</strong>-A700 series 75K or more.Check that parameters are not copied between the <strong>FR</strong>-<strong>A701</strong> series and <strong>FR</strong>-A700 series 75K or more.Copy between the same <strong>FR</strong>-<strong>A701</strong> series.Operation PanelIndicationNameDescriptionCheck pointCorrective action<strong>FR</strong>-PU04 ————SL<strong>FR</strong>-PU07 SLSpeed limit indication (output during speed limit)Output if the speed limit level is exceeded during torque control.• Check that the torque command is not larger than required.• Check that the speed limit level is not low.• Decrease the torque command.• Increase the speed limit level.PROTECTIVE FUNCTIONS5377
Causes and corrective actions(3) AlarmWhen an alarm occurs, the output is not shut off. You can also output an alarm signal by making parametersetting. (Set "98" in any of Pr. 190 to Pr. 196 (output terminal function selection). (Refer topage 214.))Operation PanelIndicationNameFN<strong>FR</strong>-PU04<strong>FR</strong>-PU07FNFan faultDescription For the inverter that contains a cooling fan, appears on the operation panel when the cooling fanstops due to a fault or different operation from the setting of Pr. 244 Cooling fan operation selection.Check pointCorrective actionCheck the cooling fan for a fault.Check for fan fault. Please contact your sales representative.(4) FaultWhen a fault occurs, the inverter trips and a fault signal is output.Operation PanelIndicationNameDescriptionCheck pointCorrective action<strong>FR</strong>-PU04E.OC1OC During Acc<strong>FR</strong>-PU07Overcurrent trip during accelerationWhen the inverter output current reaches or exceeds approximately 220% of the rated current duringacceleration, the protective circuit is activated to stop the inverter output.1. Check for sudden acceleration.2. Check that the downward acceleration time is not long in vertical lift application.3. Check for output short circuit.4. Check that the Pr. 3 Base frequency setting is not 60Hz when the motor rated frequency is 50Hz.5. Check that stall prevention operation is correct.6. Check that the regeneration is not performed frequently. (Check that the output voltage becomes largerthan the V/F reference voltage at regeneration and overcurrent due to increase in motor current occurs.)7. Check that the power supply for RS-485 terminal is not shorted. (under vector control)8. Check that the rotation direction is not switched from forward to reverse rotation (or from reverse toforward) during torque control under real sensorless vector control.1. Increase the acceleration time.(Shorten the downward acceleration time in vertical lift application.)2. When "E.OC1" is always lit at starting, disconnect the motor once and start the inverter.If "E.OC1" is still lit, contact your sales representative.3. Check the wiring to make sure that output short circuit does not occur.4. Set the Pr. 3 Base frequency to 50Hz. (Refer to page 142.)5. Perform a correct stall prevention operation. (Refer to page 135.)6. Set base voltage (rated voltage of the motor, etc.) in Pr. 19 Base frequency voltage. (Refer to page 142.)7. Check RS-485 terminal connection. (under vector control)8. Prevent the motor from switching the rotation direction from forward to reverse (or from reverse toforward) during torque control under real sensorless vector control.Operation PanelIndicationNameDescriptionCheck pointCorrective action<strong>FR</strong>-PU04E.OC2Stedy Spd OC<strong>FR</strong>-PU07Overcurrent trip during constant speedWhen the inverter output current reaches or exceeds approximately 220% of the rated current duringconstant speed operation, the protective circuit is activated to stop the inverter output.1. Check for sudden load change.2. Check for output short circuit.3. Check that stall prevention operation is correct4. Check that the power supply for RS-485 terminal is not shorted. (under vector control)5. Check that the rotation direction is not switched from forward to reverse rotation (or from reverse toforward) during torque control under real sensorless vector control.1. Keep load stable.2. Check the wiring to make sure that output short circuit does not occur.3. Check that stall prevention operation setting is correct. (Refer to page 135.)4. Check RS-485 terminal connection. (under vector control)5. Prevent the motor from switching the rotation direction from forward to reverse (or from reverse toforward) during torque control under real sensorless vector control.378
Causes and corrective actionsOperation PanelIndicationNameDescriptionCheck pointCorrective action<strong>FR</strong>-PU04E.OC3OC During Dec<strong>FR</strong>-PU07Overcurrent trip during deceleration or stopWhen the inverter output current reaches or exceeds approximately 220% of the rated inverter current duringdeceleration (other than acceleration or constant speed), the protective circuit is activated to stop the inverteroutput.1. Check for sudden speed reduction.2. Check for output short circuit.3. Check for too fast operation of the motor's mechanical brake.4. Check that stall prevention operation setting is correct.5. Check that the power supply for RS-485 terminal is not shorted. (under vector control)6. Check that the rotation direction is not switched from forward to reverse rotation (or from reverse toforward) during torque control under real sensorless vector control.1. Increase the deceleration time.2. Check the wiring to make sure that output short circuit does not occur.3. Check the mechanical brake operation.4. Check that stall prevention operation setting is correct. (Refer to page 135.)5. Check RS-485 terminal connection. (under vector control)6. Prevent the motor from switching the rotation direction from forward to reverse (or from reverse toforward) during torque control under real sensorless vector control.Operation PanelIndicationNameDescriptionCheck pointCorrective action<strong>FR</strong>-PU04E.OV1OV During Acc<strong>FR</strong>-PU07Regenerative overvoltage trip during accelerationIf regenerative energy causes the inverter's internal main circuit DC voltage to reach or exceed thespecified value, the protective circuit is activated to stop the inverter output. The circuit may also beactivated by a surge voltage produced in the power supply system. Protective circuit may activate evenif the regeneration converter is not activated due to power supply failure (Input phase failure andinstantaneous power failure).1. Check for power supply fault or wrong wiring.2. Check for too slow acceleration. (e.g. during descending acceleration in vertical lift load)3. Check that the Pr. 22 Stall prevention operation level is not lower than the no load current.1. Perform wiring correctly.2. · Decrease the acceleration time.· Use regeneration avoidance function (Pr. 882 to Pr. 886). (Refer to page 351.)3. Set a value larger than the no load current in Pr. 22 Stall prevention operation level.Operation PanelIndicationNameDescriptionCheck pointCorrective action<strong>FR</strong>-PU04E.OV2Stedy Spd OV<strong>FR</strong>-PU07Regenerative overvoltage trip during constant speedIf regenerative energy causes the inverter's internal main circuit DC voltage to reach or exceed thespecified value, the protective circuit is activated to stop the inverter output. The circuit may also beactivated by a surge voltage produced in the power supply system. Protective circuit may activate evenif the regeneration converter is not activated due to power supply failure (Input phase failure andinstantaneous power failure).· Check for power supply fault or wrong wiring.· Check for sudden load change.· Check that the Pr. 22 Stall prevention operation level is not lower than the no load current.· Perform wiring correctly.· Keep load stable.· Use regeneration avoidance function (Pr. 882 to Pr. 886). (Refer to page 351.)· Set a value larger than the no load current in Pr. 22 Stall prevention operation level.PROTECTIVE FUNCTIONS5379
Causes and corrective actionsOperation PanelIndicationNameDescriptionCheck pointCorrective action<strong>FR</strong>-PU04E.OV3OV During Dec<strong>FR</strong>-PU07Regenerative overvoltage trip during deceleration or stopIf regenerative energy causes the inverter's internal main circuit DC voltage to reach or exceed thespecified value, the protective circuit is activated to stop the inverter output. The circuit may also beactivated by a surge voltage produced in the power supply system. Protective circuit may activate evenif the regeneration converter is not activated due to power supply failure (Input phase failure andinstantaneous power failure).· Check for power supply fault or wrong wiring.· Check for sudden speed reduction.· Perform wiring correctly.· Increase the deceleration time. (Set the deceleration time which matches the moment of inertia ofthe load)· Decrease the braking duty.· Use regeneration avoidance function (Pr. 882 to Pr. 886). (Refer to page 351.)Operation PanelIndicationE.THT<strong>FR</strong>-PU04<strong>FR</strong>-PU07Inv. OverloadName Inverter overload trip (electronic thermal relay function) *1If a current not less than 150% of the rated output current flows and overcurrent trip does not occurDescription (220% or less), the electronic thermal relay activate to stop the inverter output in order to protect theoutput transistors. (Overload capacity 150% 60s inverse-time characteristics)1.Check that acceleration/deceleration time is not too short.2.Check that torque boost setting is not too large (small).Check point3.Check that load pattern selection setting is appropriate for the load pattern of the using machine.4.Check the motor for use under overload.1.Increase acceleration/deceleration time.2.Adjust the torque boost setting.Corrective action3.Set the load pattern selection setting according to the load pattern of the using machine.4.Reduce the load weight.Operation PanelIndicationE.THM<strong>FR</strong>-PU04<strong>FR</strong>-PU07Motor OvrloadName Motor overload trip (electronic thermal relay function) *1The electronic thermal relay function in the inverter detects motor overheat due to overload or reducedcooling capability during constant-speed operation and pre-alarm (TH display) is output when the I 2 tvalue reaches 85% of the Pr. 9 Electronic thermal O/L relay setting and the protection circuit is activatedDescriptionto stop the inverter output when the I 2 t value reaches the specified value. When running a specialmotor such as a multi-pole motor or two motors, provide a thermal relay on the inverter output sidesince such motor(s) cannot be protected by the electronic thermal relay function.1. Check the motor for use under overload.Check point 2. Check that the setting of Pr. 71 <strong>Applied</strong> motor for motor selection is correct. (Refer to page 169.)3. Check that stall prevention operation setting is correct.1. Reduce the load weight.Corrective action 2. For a constant-torque motor, set the constant-torque motor in Pr. 71 <strong>Applied</strong> motor.3. Check that stall prevention operation setting is correct. (Refer to page 135.)*1 Resetting the inverter initializes the internal thermal integrated data of the electronic thermal relay function.Operation PanelIndicationNameDescriptionCheck pointCorrective action<strong>FR</strong>-PU04E.FINH/Sink O/Temp<strong>FR</strong>-PU07Fin overheatIf the heatsink overheats, the temperature sensor is actuated to stop the inverter output.The FIN signal can be output when the temperature becomes approximately 85% of the heatsinkoverheat protection operation temperature.For the terminal used for the FIN signal output, assign the function by setting "26" (positive logic) or"126" (negative logic) in any of Pr. 190 to Pr. 196 (output terminal function selection). (Refer to page 214)1. Check for too high surrounding air temperature.2. Check for heatsink clogging.3. Check that the cooling fan is stopped. (Check that is displayed on the operation panel.)1. Set the surrounding air temperature to within the specifications.2. Clean the heatsink.3. Replace the cooling fan.380
Causes and corrective actionsOperation PanelIndicationNameDescriptionCheck pointCorrective action<strong>FR</strong>-PU04E.IPFInst. Pwr. Loss<strong>FR</strong>-PU07Instantaneous power failureIf a power failure occurs for longer than 15ms (this also applies to inverter input shut-off), theinstantaneous power failure protective function is activated to trip the inverter in order to prevent thecontrol circuit from malfunctioning. If a power failure persists for longer than 100ms, the fault output isnot provided, and the inverter restarts if the start signal is on upon power restoration. (The invertercontinues operating if an instantaneous power failure is within 15ms.) In some operating status (loadmagnitude, acceleration/deceleration time setting, etc.), overcurrent or other protection may beactivated upon power restoration.When instantaneous power failure protection is activated, the IPF signal is output. (Refer to page 239)Find the cause of instantaneous power failure occurrence.· Remedy the instantaneous power failure.· Prepare a backup power supply for instantaneous power failure.· Set the function of automatic restart after instantaneous power failure (Pr. 57). (Refer to page 239.)Operation PanelIndicationNameDescriptionCheck pointCorrective action<strong>FR</strong>-PU04E.UVTUnder Voltage<strong>FR</strong>-PU07UndervoltageIf the power supply voltage of the inverter decreases, the control circuit will not perform normal functions.In addition, the motor torque will be insufficient and/or heat generation will increase. To prevent this, ifthe power supply voltage decreases below about 150VAC (300VAC for the 400V class), this functionstops the inverter output.When undervoltage protection is activated, the IPF signal is output. (Refer to page 239)Check for start of large-capacity motor.· Check the power supply system equipment such as the power supply.· If the problem still persists after taking the above measure, please contact your sales representative.Operation PanelIndicationNameDescriptionCheck pointCorrective actionOperation PanelIndicationNameDescriptionCheck pointCorrective actionOperation PanelIndicationNameDescriptionCheck pointCorrective action<strong>FR</strong>-PU04 Fault 14E.ILF<strong>FR</strong>-PU07 Input phase lossInput phase failureThis fault is output when function valid setting (= 1) is set in Pr. 872 Input phase loss protection selectionand one phase of the three phase power input is lost. (Refer to page 249.)Check for a break in the cable for the three-phase power supply input.· Wire the cables properly.· Repair a break portion in the cable.· Check the Pr. 872 Input phase loss protection selection setting.E.OLT<strong>FR</strong>-PU04<strong>FR</strong>-PU07Stll Prev STP ( OL shown during stallprevention operation)Stall preventionIf the frequency has fallen to 0.5Hz by stall prevention operation and remains for 3s, a fault (E.OLT)appears and trips the inverter. OL appears while stall prevention is being activated.When speed control is performed by real sensorless vector control or vector control, a fault (E.OLT) isdisplayed and the inverter output is stopped if frequency drops to the Pr. 865 Low speed detection (initialvalue is 1.5Hz) setting by torque limit operation and the output torque exceeds Pr. 874 OLT level setting(initial value is 150%) setting and remains for more than 3s.· Check the motor for use under overload. (Refer to page 135.)· Check that the Pr. 865 Low speed detection and Pr. 874 OLT level setting values are correct. (Check thePr. 22 Stall prevention operation level setting if V/F control is exercised.)· Reduce the load weight.· Change the Pr. 22 Stall prevention operation level, Pr. 865 Low speed detection and Pr. 874 OLT levelsetting values. (Check the Pr. 22 Stall prevention operation level setting if V/F control is exercised.)<strong>FR</strong>-PU04E.GFGround Fault<strong>FR</strong>-PU07Output side earth (ground) fault overcurrentThis function stops the inverter output if an earth (ground) fault overcurrent flows due to an earth(ground) fault that occurred on the inverter's output (load) side.Check for an earth (ground) fault in the motor and connection cable.Remedy the earth (ground) fault portion.PROTECTIVE FUNCTIONS5381
Causes and corrective actionsOperation PanelIndicationNameDescriptionCheck pointCorrective actionOperation PanelIndicationNameDescriptionCheck pointCorrective actionOperation PanelIndicationNameDescriptionCheck pointCorrective actionOperation PanelIndicationNameDescriptionCheck pointCorrective actionOperation PanelIndicationNameDescriptionCheck pointCorrective action<strong>FR</strong>-PU04E.LFE. LF<strong>FR</strong>-PU07Output phase lossThis function stops the inverter output if one of the three phases (U, V, W) on the inverter's output side(load side) is lost.· Check the wiring (Check that the motor is normal.)· Check that the capacity of the motor used is not smaller than that of the inverter.· Wire the cables properly.· Check the Pr. 251 Output phase loss protection selection setting.<strong>FR</strong>-PU04E.OHTOH Fault<strong>FR</strong>-PU07External thermal relay operationIf the external thermal relay provided for motor overheat protection, or the internally mountedtemperature relay in the motor, etc. switches on (contacts open), the inverter output is stopped.Functions when "7" (OH signal) is set in any of Pr. 178 to Pr. 189 (input terminal function selection).When the initial value (without OH signal assigned) is set, this protective function does not function.· Check for motor overheating.· Check that the value of 7 (OH signal) is set correctly in any of Pr. 178 to Pr. 189 (input terminal function selection).· Reduce the load and operating duty.· Even if the relay contacts are reset automatically, the inverter will not restart unless it is reset.<strong>FR</strong>-PU04 Fault 14E.PTC<strong>FR</strong>-PU07 PTC activatedPTC thermistor operationStops the inverter output when the motor overheat status is detected for 10s or more by the externalPTC thermistor input connected to the terminal AU.This fault functions when "63" is set in Pr. 184 AU terminal function selection and AU/PTC switchoverswitch is set in PTC side. When the initial value (Pr. 184 = "4") is set, this protective function does notfunction.· Check the connection between the PTC thermistor switch and thermal protector.· Check the motor for operation under overload.· Is valid setting ( = 63) selected in Pr. 184 AU terminal function selection ? (Refer to page 168, 206.)Reduce the load weight.<strong>FR</strong>-PU04E.OPTOption Fault<strong>FR</strong>-PU07Option alarmAppears when torque command by the plug-in option is selected using Pr. 804 Torque command sourceselection and no plug-in option is mounted.Appears when the switch for the manufacturer setting of the plug-in option is changed.· Check that the plug-in option for torque command setting is connected.· Check for connection of the plug-in option. Check the Pr. 804 Torque command source selection setting.· Return the switch for the manufacturer setting of the plug-in option to the initial status. (Refer toinstruction manual of each option)<strong>FR</strong>-PU04E.OP3Option 3 Fault<strong>FR</strong>-PU07Communication option alarmStops the inverter output when a communication line error occurs in the communication option.· Check for a wrong option function setting and operation.· Check that the plug-in option is plugged into the connector securely.· Check for a break in the communication cable.· Check that the terminating resistor is fitted properly.· Check the option function setting, etc.· Connect the plug-in option securely.· Check the connection of communication cable.382
Causes and corrective actionsOperation PanelIndicationE. 1 toE. 3to<strong>FR</strong>-PU04<strong>FR</strong>-PU07Fault 1 to Fault 3NameDescriptionCheck pointCorrective actionOption faultStops the inverter output if a contact faullt, etc. of the connector between the inverter and plug-in optionoccurs or if a communication option is fitted to the connector 1 or 2.Appears when the switch for the manufacturer setting of the plug-in option is changed.1. Check that the plug-in option is plugged into the connector securely.(1 to 3 indicate the option connector numbers.)2. Check for excess electrical noises around the inverter.3. Check that the communication option is not fitted to the connector 1 or 2.1. Connect the plug-in option securely.2. Take measures against noises if there are devices producing excess electrical noises around the inverter.If the problem still persists after taking the above measure, please contact your sales representative ordistributor.3. Fit the communication option to the connector 3.4. Return the switch for the manufacturer setting of the plug-in option to the initial status. (Refer toinstruction manual of each option)Operation PanelIndicationNameDescriptionCheck pointCorrective action<strong>FR</strong>-PU04E.PECorrupt Memry<strong>FR</strong>-PU07Parameter storage device fault (control circuit board)Stops the inverter output if fault occurred in the parameter stored. (EEPROM failure)Check for too many number of parameter write times.Please contact your sales representative.When performing parameter write frequently for communication purposes, set "1" in Pr. 342 to enableRAM write. Note that powering off returns the inverter to the status before RAM write.Operation Panel<strong>FR</strong>-PU04 Fault 14E.PE2Indication<strong>FR</strong>-PU07 PR storage alarmNameParameter storage device fault (main circuit board)Description Stops the inverter output if fault occurred in the parameter stored. (EEPROM failure)Check point ——————Corrective action Please contact your sales representative.Operation PanelIndicationNameDescriptionCheck pointCorrective actionOperation PanelIndicationNameDescriptionCheck pointCorrective action<strong>FR</strong>-PU04E.PUEPU Leave Out<strong>FR</strong>-PU07PU disconnection· This function stops the inverter output if communication between the inverter and PU is suspended,e.g. the operation panel and parameter unit is disconnected, when "2", "3", "16" or "17" was set in Pr.75 Reset selection/disconnected PU detection/PU stop selection.· This function stops the inverter output when communication errors occurred consecutively for morethan permissible number of retries when a value other than "9999" is set in Pr. 121 Number of PUcommunication retries during the RS-485 communication with the PU connector.· This function stops the inverter output if communication is broken within the period of time set in Pr.122 PU communication check time interval during the RS-485 communication with the PU connector.· Check that the <strong>FR</strong>-DU07 or parameter unit (<strong>FR</strong>-PU04/<strong>FR</strong>-PU07) is fitted tightly.· Check the Pr. 75 setting.Fit the <strong>FR</strong>-DU07 or parameter unit (<strong>FR</strong>-PU04/<strong>FR</strong>-PU07) securely.<strong>FR</strong>-PU04E.RETRetry No Over<strong>FR</strong>-PU07Retry count excessIf operation cannot be resumed properly within the number of retries set, this function trips the inverter.Functions only when Pr. 67 Number of retries at fault occurrence is set. When the initial value (Pr. 67 = "0")is set, this protective function does not function.Find the cause of alarm occurrence.Eliminate the cause of the error preceding this error indication.PROTECTIVE FUNCTIONS5383
Causes and corrective actionsOperation PanelIndicationNameDescriptionCheck pointCorrective actionOperation PanelIndicationNameDescriptionCheck pointCorrective actionE. 6Fault 6E. 7<strong>FR</strong>-PU04<strong>FR</strong>-PU07Fault 7E.CPUCPU FaultCPU errorStops the inverter output if the communication error of the built-in CPU occurs.Check for devices producing excess electrical noises around the inverter.· Take measures against noises if there are devices producing excess electrical noises around theinverter.· Please contact your sales representative.<strong>FR</strong>-PU04 ⎯⎯E.CTE<strong>FR</strong>-PU07 E.CTEOperation panel power supply short circuit, RS-485 terminal power supply short circuitWhen the operation panel power supply (PU connector) is shorted, this function shuts off power outputand stops the inverter output. At this time, the operation panel (parameter unit) cannot be used andRS-485 communication from the PU connector cannot be made. When the internal power supply forthe RS-485 terminals are shorted, this function shuts off the power output.At this time, communication from the RS-485 terminals cannot be made.To reset, enter the RES signal or switch power off, then on again.1. Check for a short circuit in the PU connector cable.2. Check that the RS-485 terminals are connected correctly.1. Check the PU and cable.2. Check the connection of the RS-485 terminalsOperation PanelIndicationNameDescriptionCheck pointCorrective actionOperation PanelIndicationNameDescriptionCheck pointCorrective actionE.MB1 to 7to<strong>FR</strong>-PU04<strong>FR</strong>-PU07⎯⎯E.MB1 Fault to E.MB7 FaultBrake sequence errorThe inverter output is stopped when a sequence error occurs during use of the brake sequencefunction (Pr. 278 to Pr. 285). This protective function does not function in the initial status (brakesequence function is invalid). (Refer to page 192)Find the cause of alarm occurrence.Check the set parameters and perform wiring properly.<strong>FR</strong>-PU04E.OSE. OS<strong>FR</strong>-PU07Overspeed occurenceStops the inverter output when the motor speed exceeds the Pr. 374 Overspeed detection level duringencoder feedback control real sensorless vector control and vector control.This protective function does not function in the initial status.· Check that the Pr. 374 Overspeed detection level value is correct.· Check that the number of encoder pulses does not differ from the actual number of encoder pulses.· Set the Pr. 374 Overspeed detection level value correctly.· Set the correct number of encoder pulses in Pr. 369 Number of encoder pulses.384
Causes and corrective actionsOperation PanelIndicationNameDescriptionCheck pointCorrective action<strong>FR</strong>-PU04E.OSDE. OSd<strong>FR</strong>-PU07Speed deviation excess detectionStops the inverter output if the motor speed is increased or decreased under the influence of the loadetc. during vector control with Pr. 285 Speed deviation excess detection frequency set and cannot becontrolled in accordance with the speed command value.This protective function does not function in the initial status.· Check that the values of Pr. 285 Speed deviation excess detection frequency and Pr. 853 Speed deviationtime are correct.· Check for sudden load change.· Check that the number of encoder pulses does not differ from the actual number of encoder pulses.· Set Pr. 285 Speed deviation excess detection frequency and Pr. 853 Speed deviation time correctly.· Keep load stable.· Set the correct number of encoder pulses in Pr. 369 Number of encoder pulses.Operation PanelIndicationNameDescriptionCheck pointCorrective action<strong>FR</strong>-PU04E.ECTE. ECT<strong>FR</strong>-PU07Signal loss detectionTrips the inverter output when the encoder signal is shut off under orientation control, encoderfeedback control or vector control.This protective function does not function in the initial status.· Check for the encoder signal loss.· Check that the encoder specifications are correct.· Check for a loose connector.· Check that the switch setting of the <strong>FR</strong>-A7AP is correct.· Check that the power is supplied to the encoder. Or, check that the power is not supplied to theencoder later than the inverter.· Remedy the signal loss.· Use an encoder that meets the specifications.· Make connection securely.· Make a switch setting of the <strong>FR</strong>-A7AP correctly. (Refer to page 31)· Supply the power to the encoder. Or supply the power to the encoder at the same time when thepower is supplied to the inverter.If the power is supplied to the encoder after the inverter, check that the encoder signal is securelysent and set "0" in Pr. 376.Operation PanelIndicationNameDescriptionCheck pointCorrective actionOperation PanelIndicationNameDescriptionCheck pointCorrective action<strong>FR</strong>-PU04 Fault 14E.OD<strong>FR</strong>-PU07 E. OdExcessive position errorStops the inverter output when the difference between the position command and position feedbackexceeds Pr. 427 Excessive level error under position control.This protective function does not function in the initial status.· Check that the position detecting encoder mounting orientation matches the parameter.· Check that the load is not large.· Check that the Pr. 427 Excessive level error and Pr. 369 Number of encoder pulses are correct.· Check the parameters.· Reduce the load weight.· Set the Pr. 427 Excessive level error and Pr. 369 Number of encoder pulses correctly.<strong>FR</strong>-PU04 Fault 14E.EP<strong>FR</strong>-PU07 E.EPEncoder phase errorStops the inverter output when the rotation command of the inverter differs from the actual motorrotation direction detected from the encoder.This protective function does not function in the initial status.· Check for mis-wiring of the encoder cable.· Check for wrong setting of Pr. 359 Encoder rotation direction.· Perform connection and wiring securely.· Change the Pr. 359 Encoder rotation direction value.PROTECTIVE FUNCTIONS5385
Causes and corrective actionsOperation PanelIndicationNameDescriptionCheck pointCorrective action<strong>FR</strong>-PU04E.P24E.P24<strong>FR</strong>-PU0724VDC power output short circuitWhen the 24VDC power output from the PC terminal is shorted, this function shuts off the poweroutput.At this time, all external contact inputs switch off. The inverter cannot be reset by entering the RESsignal. To reset it, use the operation panel or switch power off, then on again.· Check for a short circuit in the PC terminal output.· Remedy the earth (ground) fault portion.Operation PanelIndicationNameDescriptionCheck point<strong>FR</strong>-PU04 Fault 14E.CDO<strong>FR</strong>-PU07 OC detect levelOutput current detection value exceededStops the inverter output when the output current exceeds the setting of Pr. 150 Output current detectionlevel. Functions when Pr. 167 Output current detection operation selection is set to "1".When the initial value (Pr. 167 = "0") is set, this protective function does not function.Check the settings of Pr. 150 Output current detection level, Pr. 151 Output current detection signal delay time,Pr. 166 Output current detection signal retention time, Pr. 167 Output current detection operation selection.(Refer to page 223.)Operation PanelIndicationNameDescriptionCheck pointCorrective action<strong>FR</strong>-PU04 Fault 14E.IOH<strong>FR</strong>-PU07 Inrush overheatInrush current limit circuit faultStops the inverter output when the resistor of inrush current limit circuit overheated. The inrush currentlimit circuit failure· Check that frequent power ON/OFF is not repeated.· Check that the power supply circuit of inrush current limit circuit contactor is not damaged.Configure a circuit where frequent power ON/OFF is not repeated.If the problem still persists after taking the above measure, please contact your sales representative.Operation PanelIndicationNameDescriptionCheck pointCorrective action<strong>FR</strong>-PU04 Fault 14E.SER<strong>FR</strong>-PU07 VFD Comm errorCommunication error (inverter)This function stops the inverter output when communication error occurs consecutively for more thanpermissible retry count when a value other than "9999" is set in Pr. 335 RS-485 communication retry countduring RS-485 communication from the RS-485 terminals. This function also stops the inverter output ifcommunication is broken for the period of time set in Pr. 336 RS-485 communication check time interval.Check the RS-485 terminal wiring.Perform wiring of the RS-485 terminals properly.Operation PanelIndicationNameDescriptionCheck pointCorrective action<strong>FR</strong>-PU04 Fault 14E.AIE<strong>FR</strong>-PU07 Analog in errorAnalog input errorStops the inverter output when 30mA or more is input or a voltage (7.5V or more) is input with theterminal 2/4 set to current input.Check the setting of Pr. 73 Analog input selection, Pr. 267 Terminal 4 input selection and voltage/currentinput switch. (Refer to page 259.)Either give a frequency command by current input or set Pr. 73 Analog input selection, Pr. 267 Terminal 4input selection, and voltage/current input switch to voltage input.386
Causes and corrective actionsOperation PanelIndicationNameDescriptionCheck pointCorrective action<strong>FR</strong>-PU04E.4Fault 4<strong>FR</strong>-PU07Converter overcurrentThe current flows in the regeneration converter module exceeds the specified value, protective circuitactivates and stops the inverter output.1. Check that sudden acceleration/deceleration is not performed.2. Check for sudden load change.3. Check that wiring is correct.4. Check that instantaneous power failure did not occur.5. Check that the thyristor load does not exist in the same power supply system.1. Increase acceleration/deceleration time.2. Keep load stable.3. Wire the cables properly.4. When a thyristor load exist in the same power supply system, install an AC reactor (<strong>FR</strong>-HAL).Operation PanelIndicationNameDescriptionCheck pointCorrective action<strong>FR</strong>-PU04E.8Fault 8<strong>FR</strong>-PU07Power supply fault· When overvoltage occurs in the converter side during input phase failure detection· When overvoltage occurs in the converter side during instantaneous power failure detection· When fault of power supply frequency is detected· When phase shift is not detectedWhen any of the above conditions applied, it is judged as power supply and the inverter output isstopped.Check the power supply and wiring.Perform wiring correctly.Operation PanelIndicationNameDescriptionCheck pointCorrective actionOperation PanelIndicationNameDescriptionCheck pointCorrective actionOperation PanelIndicationNameDescriptionCorrective action<strong>FR</strong>-PU04E.10Fault 10<strong>FR</strong>-PU07Converter transistor protection thermal operation (electronic thermal)Current flowing in the module of the regeneration converter is less than the overcurrent shutoff leveland exceeds the specified value, electronic thermal relay activates for protection and the inverteroutput is stopped.· Check the motor for use under overload. (excess regeneration amount)· Check that the thyristor load does not exist in the same power supply system.· Reduce the load weight.· When a thyristor load exists in the same power supply system, install an AC reactor (<strong>FR</strong>-HAL).<strong>FR</strong>-PU04E.11Fault 11<strong>FR</strong>-PU07Opposite rotation deceleration faultThe speed may not decelerate during low speed operation if the rotation direction of the speedcommand and the estimated speed differ when the rotation is changing from forward to reverse or fromreverse to forward during torque control under real sensorless vector control. At this time, the inverteroutput is stopped if the rotation direction will not change, causing overload.This protective function does not function in the initial status (V/F control). (It functions only during realsensorless vector control.)Check that the rotation direction is not switched from forward to reverse rotation (or from reverse toforward) during torque control under real sensorless vector control.· Prevent the motor from switching the rotation direction from forward to reverse (or from reverse toforward) during torque control under real sensorless vector control.· Please contact your sales representative.E.13<strong>FR</strong>-PU04<strong>FR</strong>-PU07Fault 13Internal circuit errorStop the inverter output when an internal circuit fault occurred.Please contact your sales representative.PROTECTIVE FUNCTIONS5387
Causes and corrective actionsOperation PanelIndicationNameDescriptionCheck pointCorrective action<strong>FR</strong>-PU04E.15Fault 15<strong>FR</strong>-PU07Converter circuit fault· When a fault occurs in the peripheral circuit of the regeneration converter CPU· When a fault occurs in the control power supply circuit.· When a fault occurs in the inrush current limit circuit.If any of the above conditions applied, it is judged as converter circuit fault and the inverter output isstopped.Check for devices producing excess electrical noises around the inverter.· Take measures against noises if there are devices producing excess electrical noises around theinverter.· Please contact your sales representative.CAUTION• If protective functions of E.ILF, E.PTC, E.PE2, E.EP, E.OD, E.CDO, E.IOH, E.SER, E.AIE are activated when using the <strong>FR</strong>-PU04, "Fault 14" appears.Also when the faults history is checked on the <strong>FR</strong>-PU04, the display is "E.14".• If faults other than the above appear, contact your sales representative.388
Correspondences between digital andactual characters5.4 Correspondences between digital and actual charactersThere are the following correspondences between the actual alphanumeric characters and the digital charactersdisplayed on the operation panel.ActualDigitalActualDigitalActualDigital0AM1BN2CO3Do4EP5FS6GT7HU8IV9JrL-PROTECTIVE FUNCTIONS5389
Check first when you have troubles5.5 Check first when you have troublesWhen performing real sensorless vector control or vector control, refer to trouble shooting on page 93 (speed control),page 114 (torque control) and page 126 (position control) in addition to the following check points.POINTIf the cause is still unknown after every check, it is recommended to initialize the parameters (initial value) then resetthe required parameter values and check again.5.5.1 Motor will not start1) Check the Pr.0 Torque boost setting if V/F control is exercised. (Refer to page 129)2) Check the main circuitCheck that a proper power supply voltage is applied (operation panel display is provided).Check that the motor is connected properly.3) Check the input signalsCheck that start signal is input.Check that both the forward and reverse rotation start signals are not input simultaneously.Check that the frequency setting signal is not zero. (When the frequency command is 0Hz and thestart command is entered, FWD or REV LED on the operation panel flickers.)Check that the AU signal is on when terminal 4 is used for frequency setting.Check that the output stop signal (MRS) or reset signal (RES) is not on.Check that the CS signal is not OFF with automatic restart after instantaneous power failure functionis selected (Pr. 57 ≠ "9999").Check that the sink or source jumper connector is fitted securely. (Refer to page 25)Check that the encoder wiring is correct. (during encoder feedback control or vector control)Check that the voltage/current input switch is correctly set for analog input signal (0 to 5V/0 to 10V, 4to 20mA).4) Check the parameter settingsCheck that Pr. 78 Reverse rotation prevention selection is not selected.Check that the Pr. 79 Operation mode selection setting is correct.Check that the bias and gain (calibration parameter C2 to C7) settings are correct.Check that the Pr. 13 Starting frequency setting is not greater than the running frequency.Check that frequency settings of each running frequency (such as multi-speed operation) are not zero.Check that especially the Pr. 1 Maximum frequency setting is not zero.Check that the Pr. 15 Jog frequency setting is not lower than the Pr. 13 Starting frequency setting.Check that the Pr. 359 Encoder rotation direction setting under encoder feed back control or vectorcontrol is correct.Set "1" in Pr. 359 if "REV" on the operation panel is on when the forward command is given.Check that the operation location by Pr. 550 and Pr. 551 is correct.(Refer to page 292)5) Inspection of loadCheck that the load is not too heavy.Check that the shaft is not locked.5.5.2 Motor generates abnormal noiseNo carrier frequency noises (metallic noises) are generated.Soft-PWM control to change the motor tone into an unoffending complex tone is factory-set to validby Pr. 72 PWM frequency selection.Adjust Pr. 72 PWM frequency selection to change the motor tone.Check that the gain value under real sensorless vector control or vector control is not too high. Check thesetting of Pr. 820 (Pr. 830) Speed control P gain when speed control is exercised and Pr. 824 (Pr. 834) Torquecontrol P gain when torque control is exercised.Check for any mechanical looseness.Contact the motor manufacturer.390
Check first when you have troubles5.5.3 Inverter generates abnormal noise.Check that a fan cover is correctly reinstalled when replacing a cooling fan.An AC reactor is built-in and a greater noise than at driving is produced during regeneration operation. But itis not a fault.5.5.4 Motor generates heat abnormallyIs the fan for the motor is running? (Check for accumulated dust.)Check that the load is not too heavy. Lighten the load.Check that the inverter output voltages (U, V, W) balanced.Check that the Pr. 0 Torque boost setting is correct.Was the motor type set? Check the setting of Pr. 71 <strong>Applied</strong> motor.When using any other manufacturer's motor, perform offline auto tuning. (Refer to page 171.)5.5.5 Motor rotates in opposite directionCheck that the phase sequence of output terminals U, V and W is correct.Check that the start signals (forward rotation, reverse rotation) are connected properly. (Refer to page 22)5.5.6 Speed greatly differs from the settingCheck that the frequency setting signal is correct. (Measure the input signal level.)Check that the Pr. 1, Pr. 2, Pr. 19, Calibration parameter C2 to C7 settings are correct.Check that the input signal lines are not affected by external noise.(Use shielded cables)Check that the load is not too heavy.Check that the Pr. 31 to Pr. 36 (frequency jump) settings are correct.5.5.7 Acceleration/deceleration is not smoothCheck that the acceleration and deceleration time settings are not too short.Check that the load is not too heavy.Check that the torque boost (Pr. 0, Pr. 46, Pr. 112) setting is not too large and the stall prevention function isnot activated under V/F control.5.5.8 Motor current is largeCheck that the load is not too heavy.Check that the Pr. 0 Torque boost setting is appropriate.Check that the Pr. 3 Base frequency setting is appropriate.Check that the Pr. 14 Load pattern selection setting is appropriate.Check that the Pr. 19 Base frequency voltage setting is appropriate.5.5.9 Speed does not increaseCheck that the maximum frequency (Pr. 1) setting is correct. (If you want to run the motor at 120Hz or more,set Pr. 18 High speed maximum frequency. (Refer to page 140.))Check that the load is not too heavy.(In agitators, etc., load may become heavier in winter.)Check that the torque boost (Pr. 0, Pr. 46, Pr. 112) setting is not too large and the stall prevention function isnot activated under V/F control.PROTECTIVE FUNCTIONS55.5.10 The motor and machine vibrate.Set Pr. 19 Base frequency voltage to the rated motor voltage under V/F control.Check for any mechanical looseness.391
Check first when you have troubles5.5.11 Speed varies during operationWhen advanced magnetic flux vector control, real sensorless vector control, vector control or encoderfeedback control is exercised, the output frequency varies with load fluctuation between 0 and 2Hz. This isa normal operation and is not a fault.1) Inspection of load3) OthersCheck that the load is not varying.2) Check the input signalsCheck that the frequency setting signal is not varying.Check that the frequency setting signal is not affected by noise. Input filter to the analog inputterminal using Pr. 74 Input filter time constant and Pr. 822 Speed setting filter 1.Check for a malfunction due to undesirable currents when the transistor output unit is connected.(Refer to page 26)Check that the settings of Pr. 80 Motor capacity and Pr. 81 Number of motor poles are correct to theinverter capacity and motor capacity under advanced magnetic flux vector control, real sensorlessvector control or vector control.Check that the wiring length is not exceeding 30m when advanced magnetic flux vector control, realsensorless vector control or vector control is exercised. Perform offline auto tuning. (Refer to pege 171)Check that the wiring length is not too long for V/F control.Change the Pr. 19 Base frequency voltage setting (about 3%) under V/F control.5.5.12 Operation mode is not changed properlyIf the operation mode does not change correctly, check the following:1) Inspection of loadCheck that the STF or STR signal is off.When it is on, the operation mode cannot be changed.2) Parameter settingCheck the Pr. 79 setting.When the Pr. 79 Operation mode selection setting is "0" (initial value), the inverter is placed in externaloperation mode at input power-on. At this time, press on the operation panel (press whenthe parameter unit (<strong>FR</strong>-PU04/<strong>FR</strong>-PU07) is used) to switch to PU operation mode.Check that the operation location by Pr. 550 and Pr. 551 is correct.(Refer to page 292)5.5.13 Operation panel (<strong>FR</strong>-DU07) display is not operatingCheck that the operation panel is connected to the inverter securely.5.5.14 POWER lamp is not litCheck that wiring is securely performed and installation is correct.5.5.15 Parameter write cannot be performedMake sure that operation is not being performed (signal STF or STR is not ON).Make sure that you are not attempting to set the parameter in external operation mode.Check Pr. 77 Parameter write selection.Check Pr. 161 Frequency setting/key lock operation selection.Check that the operation location by Pr. 550 and Pr. 551 is correct.(Refer to page 292)392
6 PRECAUTIONS FORMAINTENANCE AND INSPECTIONThis chapter provides the "PRECAUTIONS FOR MAINTENANCEAND INSPECTION" of this product.Always read the instructions before using the equipment6.1 Inspection item ........................................................3946.2 Measurement of main circuit voltages, currents andpowers.....................................................................4001234563937
Inspection itemThe inverter is a static unit mainly consisting of semiconductor devices. Daily inspection must be performed to preventany fault from occurring due to the adverse effects of the operating environment, such as temperature, humidity, dust,dirt and vibration, changes in the parts with time, service life, and other factors.• Precautions for maintenance and inspectionFor some short time after the power is switched off, a high voltage remains in the smoothing capacitor. When accessingthe inverter for inspection, wait for at least 10 minutes after the power supply has been switched off, and then makesure that the voltage across the main circuit terminals P/+-N/− of the inverter is not more than 30VDC using a tester,etc.6.1 Inspection item6.1.1 Daily inspectionBasically, check for the following faults during operation.(1) Motor operation fault(2) Improper installation environment(3) Cooling system fault(4) Unusual vibration and noise(5) Unusual overheat and discolorationDuring operation, check the inverter input voltages using a tester.6.1.2 Periodic inspectionCheck the areas inaccessible during operation and requiring periodic inspection.Consult us for periodic inspection.1) Check for cooling system fault.................Clean the air filter, etc.2) Tightening check and retightening ...........The screws and bolts may become loose due to vibration, temperaturechanges, etc.Tighten them according to the specified tightening torque. (Refer to page 18)3) Check the conductors and insulating materials for corrosion and damage.4) Measure insulation resistance.5) Check and change the cooling fan and relay.394
Inspection item6.1.3 Daily and periodic inspectionArea ofInspectionGeneralMaincircuitControlcircuitprotectivecircuitCoolingsystemDisplayLoadmotorInspection ItemSurroundingenvironmentDescriptionCheck the surrounding air temperature, humidity,dirt, corrosive gas, oil mist , etc.Overall unit Check for unusual vibration and noise. ◦Power supplyvoltageGeneralConductors, cablesTransformer/reactorCheck that the main circuit voltages and controlvoltages are normal.*1IntervalCorrective Action atAlarm Occurrence*1 It is recommended to install a device to monitor voltage for checking the power supply voltage to the inverter.*2 One to two years of periodic inspection cycle is recommended. However, it differs according to the installation environment.Consult us for periodic inspection.DailyPeriodic*2◦ Improve emvironmentCheck alarm location andretighten◦ Inspect the power supply(1)Check with megger (across main circuitterminals and earth (ground) terminal).◦ Contact the manufacturer(2)Check for loose screws and bolts. ◦ Retighten(3)Check for overheat traces on the parts. ◦ Contact the manufacturer(4)Check for stain. ◦ Clean(1)Check conductors for distortion.(2)Check cable sheaths for breakage anddeterioration (crack, discoloration, etc.).Check for unusual odor and abnormal increase inwhining sound.◦Terminal block Check for damage. ◦SmoothingaluminumelectrolyticcapacitorRelay/contactorResistorOperation checkParts checkOverallAluminumelectrolyticcapacitorCooling fanHeatsinkAir filter, etc.Indication◦ Contact the manufacturer◦ Contact the manufacturerStop the device and contactthe manufacturer.Stop the device and contactthe manufacturer.(1)Check for liquid leakage. ◦ Contact the manufacturer(2)Check for safety valve projection and bulge. ◦ Contact the manufacturer(3)Visual check and judge by the life check of themain circuit capacitor. (Refer to page 396)◦Check that the operation is normal and no chatteris heard.◦ Contact the manufacturer(1)Check for crack in resistor insulation. ◦ Contact the manufacturer(2)Check for a break in the cable. ◦ Contact the manufacturer(1)Check that the output voltages across phaseswith the inverter operated alone is balanced.(2)Check that no fault is found in protective anddisplay circuits in a sequence protectiveoperation test.◦ Contact the manufacturer◦ Contact the manufacturer(1)Check for unusual odor and discoloration. ◦Stop the device and contactthe manufacturer.(2)Check for serious rust development. ◦ Contact the manufacturer(1)Check for liquid leakage in a capacitor anddeformation trance.(2)Visual check and judge by the life check of thecontrol circuit capacitor. (Refer to page 354.)◦ Contact the manufacturer◦(1)Check for unusual vibration and noise. ◦ Replace the fan(2)Check for loose screws and bolts. ◦ Retighten(3)Check for stain. ◦ Clean(1)Check for clogging. ◦ Clean(2)Check for stain. ◦ Clean(1)Check for clogging. ◦ Clean or replace(2)Check for stain. ◦ Clean or replace(1)Check that display is normal. ◦ Contact the manufacturer(2)Check for stain. ◦ CleanMeter Check that reading is normal. ◦Operation checkCheck for vibration and abnormal increase inoperation noise.◦Stop the device and contactthe manufacturer.Stop the device and contactthe manufacturer.Customer'sCheckPRECAUTIONS FOR MAINTENANCE AND INSPECTION6395
Inspection item6.1.4 Display of the life of the inverter partsThe self-diagnostic alarm is output when the life span of the control circuit capacitor, cooling fan, each parts of theinrush current limit circuit is near to give an indication of replacement time .The life alarm output can be used as a guideline for life judgement.PartsJudgement LevelMain circuit capacitor 85% of the initial capacityControl circuit capacitor Estimated 10% life remainingInrush current limit circuit Estimated 10% life remaining (Power on: 100,000 times left)Cooling fanLess than 50% of the predetermined speedRefer to page 354 to perform the life check of the inverter parts.6.1.5 Checking the inverter and converter modules(1) Disconnect the external power supply cables (R/L1, S/L2, T/L3) and motor cables (U, V, W).(2) Prepare a tester. (Use 100Ω range.)Change the polarity of the tester alternately at the inverter terminals R/L1, S/L2, T/L3, U, V, W, P/+ and N/−, and checkfor continuity.Tester PolarityMeasuredValueTester PolarityMeasuredValueTR11R/L1 P/+ Discontinuity TR14R/L1 N/− ContinuityP/+ R/L1 Continuity N/− R/L1 DiscontinuityTR13S/L2 P/+ Discontinuity TR16S/L2 N/− ContinuityP/+ S/L2 Continuity N/− S/L2 DiscontinuityTR15T/L3 P/+ Discontinuity TR12T/L3 N/− ContinuityP/+ T/L3 Continuity N/− T/L3 DiscontinuityTR1U P/+ Discontinuity U N/− ContinuityTR4P/+ U Continuity N/− U DiscontinuityTR3V P/+ Discontinuity V N/− ContinuityTR6P/+ V Continuity N/− V DiscontinuityTR5W P/+ Discontinuity W N/− ContinuityTR2P/+ W Continuity N/− W Discontinuity(Assumes the use of an analog meter.)ConvertermoduleInvertermoduleR/L1S/L2T/L3Converter module P/+TR11 TR13 TR15CTR14 TR16 TR12N/−Inverter moduleTR1 TR3 TR5TR4 TR6 TR2UVW396
Inspection item6.1.6 CleaningAlways run the inverter in a clean status.When cleaning the inverter, gently wipe dirty areas with a soft cloth immersed in neutral detergent or ethanol.CAUTIONDo not use solvent, such as acetone, benzene, toluene and alcohol, as they will cause the inverter surface paint to peel off.The display, etc. of the operation panel (<strong>FR</strong>-DU07) and parameter unit (<strong>FR</strong>-PU04/<strong>FR</strong>-PU07) are vulnerable to detergent andalcohol. Therefore, avoid using them for cleaning.6.1.7 Replacement of partsThe inverter consists of many electronic parts such as semiconductor devices.The following parts may deteriorate with age because of their structures or physical characteristics, leading to reducedperformance or fault of the inverter. For preventive maintenance, the parts must be replaced periodically.Use the life check function as a guidance of parts replacement.Part Name Standard Replacement Interval *1 DescriptionCooling fan 10 years Replace (as required)Main circuit smoothing capacitor 10 years *2 Replace (as required)On-board smoothing capacitor 10 years Replace the board (as required)Relays − as required*1 Replacement years for when the yearly average surrounding air temperature is 40°C(without corrosive gas, flammable gas, oil mist, dust and dirt etc)*2 Output current : 80% of the inverter rated currentCAUTIONFor parts replacement, consult the nearest Mitsubishi FA Center.PRECAUTIONS FOR MAINTENANCE AND INSPECTION6397
Inspection item(1) Cooling fanThe replacement interval of the cooling fan used for cooling the parts generating heat such as the main circuitsemiconductor is greatly affected by the surrounding air temperature. When unusual noise and/or vibration is noticedduring inspection, the cooling fan must be replaced immediately.CAUTIONFor parts replacement, consult the nearest Mitsubishi FA Center.A721A741Inverter Type Fan Type Units5.5K to 15K MMF-08D24ES-RP4 BKO-CA1639H11 218.5K, 22KMMF-12D24DS-CP2 BKO-CA1619H11 1MMF-09D24TS-RP7 BKO-CA1640H11 130K2MMF-12D24DS-CP2 BKO-CA1619H1137K to 55K 35.5K to 15K MMF-08D24ES-RP4 BKO-CA1639H11 218.5K, 22K MMF-09D24TS-RP7 BKO-CA1640H11 230K2MMF-12D24DS-CP2 BKO-CA1619H1137K to 55K 3• Removal1) Remove a fan cover.2) After removing a fan connector, remove a fan block.3) Remove the fan.FanFan connectionconnector2)3)Fan block1)Fan cover• Reinstallation1) After confirming the orientation of the fan, reinstall the fan so that the arrow on the left of "AIR FLOW" faces up.AIR FLOW2) Install fans referring to the above figure.CAUTION• Installing the fan in the opposite air flow direction can cause the inverter life to be shorter.• Prevent the cable from being caught when installing a fan.• Switch the power off before replacing fans. Since the inverter circuits are charged with voltage even after power off,replace fans only when the inverter cover is on the inverter to prevent an electric shock accident.398
(2) Smoothing capacitorsInspection itemA large-capacity aluminum electrolytic capacitor is used for smoothing in the main circuit DC section, and an aluminumelectrolytic capacitor is used for stabilizing the control power in the control circuit. Their characteristics are deterioratedby the adverse effects of ripple currents, etc.The replacement intervals greatly vary with the surrounding air temperature and operating conditions. When theinverter is operated in air-conditioned, normal environment conditions, replace the capacitors about every 10 years.The appearance criteria for inspection are as follows:1) Case: Check the side and bottom faces for expansion2) Sealing plate: Check for remarkable warp and extreme crack.3) Check for external crack, discoloration, fluid leakage, etc. Judge that the capacitor has reached its life when themeasured capacitance of the capacitor reduced below 80% of the rating.Refer to page 354 to perform the life check of the main circuit capacitor.(3) RelaysTo prevent a contact fault, etc., relays must be replaced according to the cumulative number of switching times(switching life).PRECAUTIONS FOR MAINTENANCE AND INSPECTION6399
Measurement of main circuit voltages,currents and powers6.2 Measurement of main circuit voltages, currents and powersSince the voltages and currents on the inverter power supply and output sides include harmonics, measurementdata depends on the instruments used and circuits measured.When instruments for commercial frequency are used for measurement, measure the following circuits with theinstruments given on the next page.• When installing meters etc. on the inverter output sideWhen the inverter-to-motor wiring length is large, especially in the 400V class, small-capacity models, the metersand CTs may generate heat due to line-to-line leakage current. Therefore, choose the equipment which hasenough allowance for the current rating.When measuring and indicating the output voltage and output current of the inverter, it is recommended to utilizethe AM-5 and FM-SD terminal output function of the inverter.Input voltageOutput voltageInput currentOutput currentInverterThreephasepowersupplyArAsAtVrVsVtW11W12W13R/L1 US/L2 VT/L3 WP/+ N/-AuAvAwVuVvVwW21W22To the motor: Moving-iron typeInstrumenttypesV: Electrodynamometer type+ -: Moving-coil type: Rectifier typeExamples of Measuring Points and Instruments400
Measurement of main circuit voltages,currents and powersMeasuring points and instrumentsItemPower supply voltageV1Power supply sidecurrentI1Power supply sidepowerP1Power supply sidepower factorPf1Output side voltageV2Output side currentI2Output side powerP2Output side powerfactorPf2MeasuringPointAcross R/L1-S/L2, S/L2-T/L3, T/L3-R/L1R/L1, S/L2, andT/L3 line currentsR/L1, S/L2, T/L3 andR/L1-S/L2, S/L2-T/L3, T/L3-R/L1Measuring InstrumentMoving-iron type AC voltmeterMoving-iron type AC ammeterElectrodynamic type single-phasewattmeterRemarks (Reference Measured Value)Commercial power supplyWithin permissible AC voltage fluctuation(Refer to page 406)P1=W11+W12+W13 (3-wattmeter method)Calculate after measuring power supply voltage, power supply side current and power supply side power.P1Pf1 = ————— × 100%3 V1 × I1Across U-V, V-Wand W-UU, V and W linecurrentsU, V, W and U-V,V-WRectifier type AC voltage meter *1(Moving-iron type cannotmeasure)Moving-iron type AC ammeter *2Electrodynamic type single-phasewattmeterCalculate in similar manner to power supply side power factor.P2Pf2 = ————— × 100%3 V2 × I2Difference between the phases is within ±1% ofthe maximum output voltage.Difference between the phases is 10% or lower ofthe rated inverter current.P2 = W21 + W222-wattmeter method (or 3-wattmeter method)Converter output Across P/+-N/− Moving-coil type (such as tester) Inverter LED display is lit. 1.35 × V1Frequency settingsignalAcross 2, 4(+)-5Across 1(+)-50 to 10VDC, 4 to 20mA0 to ±5VDC, 0 to ±10VDCFrequency setting Across 10 (+) -55.2VDCpower supply Across 10E(+)-510VDCFrequency metersignalStart signalSelect signalResetOutput stopAlarm signalAcross AM(+)-5Across FM(+)-SDAcross STF, STR,RH, RM, RL, JOG,RT, AU, STOP, CS(+) -SDAcross RES (+) -SDAcross MRS (+) -SDAcross A1-C1Across B1-C1Moving-coil type(Tester and such may be used)(Internal resistance: 50kΩ orlarger)Moving-coil type(such as tester)Approximately 10VDC at maximumfrequency(without frequency meter)Approximately 5VDC at maximumfrequency(without frequency meter)T2Pulse width T1:Adjusted by C0 (Pr. 900)Pulse cycle T2: Set by Pr. 55(Valid for frequencymonitoring only)When open20 to 30VDCON voltage: 1V or less"5" iscommon"SD" iscommonContinuity check*3 Across A1-C1 Discontinuity ContinuityAcross B1-C1 Continuity Discontinuity*1 Use an FFT to measure the output voltage accurately. A tester or general measuring instrument cannot measure accurately.*2 When the carrier frequency exceeds 5kHz, do not use this instrument since using it may increase eddy-current losses produced in metal partsinside the instrument, leading to burnout. If the wiring length between the inverter and motor is long, the instrument and CT may generateheat due to line-to-line leakage current.*3 When the setting of Pr. 195 ABC1 terminal function selection is positive logic8VDCT1PRECAUTIONS FOR MAINTENANCE AND INSPECTION6401
Measurement of main circuit voltages,currents and powers6.2.1 Measurement of powersUsing an electro-dynamometer type meter, measure the power in both the input and output sides of the inverterusing the two- or three-wattmeter method. As the current is liable to be imbalanced especially in the input side, it isrecommended to use the three-wattmeter method.Examples of measured value differences produced by different measuring meters are shown below.An error will be produced by difference between measuring instruments, e.g. power calculation type and two- orthree-wattmeter type three-phase wattmeter. When a CT is used in the current measuring side or when the metercontains a PT on the voltage measurement side, an error will also be produced due to the frequency characteristicsof the CT and PT.[Measurement conditions]Constant-torque (100%) load, constant-power at 60Hzor more.3.7kW, 4-pole motor, value indicated in 3-wattmetermethod is 100%.%120[Measurement conditions]Constant-torque (100%) load, constant-power at 60Hzor more.3.7kW, 4-pole motor, value indicated in 3-wattmetermethod is 100%.%12010010080603-wattmeter method (Electro-dynamometer type)2-wattmeter method (Electro-dynamometer type)Clip AC power meter(For balanced three-phase load)Clamp-on wattmeter(Hall device power arithmetic type)80603-wattmeter method (Electro-dynamometer type)2-wattmeter method (Electro-dynamometer type)Clip AC power meter(For balanced three-phase load)Clamp-on wattmeter(Hall device power arithmetic type)0 20 40 60 80 100 120HzExample of measuring inverter input power0 20 40 60 80 100 120HzExample of measuring inverter output power6.2.2 Measurement of voltages and use of PT(1) Inverter input sideAs the input side voltage has a sine wave and it is extremely small in distortion, accurate measurement can bemade with an ordinary AC meter.(2) Inverter output sideSince the output side voltage has a PWM-controlled rectangular wave, always use a rectifier type voltmeter. Aneedle type tester can not be used to measure the output side voltage as it indicates a value much greater than theactual value. A moving-iron type meter indicates an effective value which includes harmonics and therefore thevalue is larger than that of the fundamental wave. The value monitored on the operation panel is the invertercontrolledvoltage itself. Hence, that value is accurate and it is recommended to monitor values (provide analogoutput) using the operation panel.(3) PTNo PT can be used in the output side of the inverter. Use a direct-reading meter. (A PT can be used in the input sideof the inverter.)402
Measurement of main circuit voltages,currents and powers6.2.3 Measurement of currentsUse a moving-iron type meter on both the input and output sides of the inverter. However, if the carrier frequencyexceeds 5kHz, do not use that meter since an overcurrent losses produced in the internal metal parts of the meterwill increase and the meter may burn out. In this case, use an approximate-effective value type.As the inverter input side current is easily imbalanced, measurement of currents in all three phases isrecommended. Correct values can not be measured in one or two phases. On the other hand, the phaseimbalanced ratio of the output side current must be within 10%.When using a clamp ammeter, always use an effective value detection type. A mean value detection type producesa large error and may indicate an extremely smaller value than the actual value. The value monitored on theoperation panel is accurate if the output frequency varies, and it is recommended to monitor values (provide analogoutput) using the operation panel.An example of the measured value difference produced by different measuring meters is shown below.[Measurement conditions]Value indicated by moving-iron type ammeter is 100%.[Measurement conditions]Value indicated by moving-iron type ammeter is 100%.%120Moving-irontype100Clip ACpower meter%120Moving-iron type100Clip ACpower meter8060Clamp meter Clamp-on wattmetercurrent measurement8060Clamp meterClamp-on wattmetercurrent measurement0 20 40 60HzExample of measuring inverter input current6.2.4 Use of CT and transducerA CT may be used in both the input and output sides of the inverter, but the one used should have the largestpossible VA ability because an error will increase if the frequency gets lower.When using a transducer, use the effective value calculation type which is immune to harmonics.6.2.5 Measurement of inverter input power factor0 20 40 60HzExample of measuring inverter output currentUse the effective power and apparent power to calculate the inverter input power factor. A power-factor meter cannot indicate an exact value.Total power factor of the inverter ==Effective powerApparent powerThree-phase input power found by 3-wattmeter method3 × V (power supply voltage) × I (input current effective value)PRECAUTIONS FOR MAINTENANCE AND INSPECTION6403
Measurement of main circuit voltages,currents and powers6.2.6 Measurement of converter output voltage (across terminals P/+ - N/-)The output voltage of the converter is developed across terminals P/+ - N/- and can be measured with a moving-coiltype meter (tester). Although the voltage varies according to the power supply voltage, approximately 270V to 300V(approximately 540V to 600V for the 400V class) is output when no load is connected and voltage decreases whena load is connected.When regenerative energy is returned from the motor during deceleration, for example, the converter output voltagerises to nearly 400V to 450V (800V to 900V for the 400V class) maximum.6.2.7 Measurement of inverter output frequencyA pulse train proportional to the output frequency is output across the frequency meter signal output terminal FM-SD of the inverter. This pulse train output can be counted by a frequency counter, or a meter (moving-coil typevoltmeter) can be used to read the mean value of the pulse train output voltage. When a meter is used to measurethe output frequency, approximately 5VDC is indicated at the maximum frequency.For detailed specifications of the frequency meter signal output terminal FM, refer to page 236.6.2.8 Insulation resistance test using meggerFor the inverter, conduct the insulation resistance test on the main circuit only as shown below and do not performthe test on the control circuit. (Use a 500VDC megger.)CAUTION• Before performing the insulation resistance test on the external circuit, disconnect the cables from all terminals of theinverter so that the test voltage is not applied to the inverter.• For the continuity test of the control circuit, use a tester (high resistance range) and do not use the megger or buzzer.PowersupplyR/L1S/L2T/L3InverterUVWMotorIM500VDCmeggerEarth (ground)6.2.9 Pressure testDo not conduct a pressure test. Deterioration may occur.404
7 SPECIFICATIONSThis chapter provides the "SPECIFICATIONS" of this product.Always read the instructions before using the equipment7.1 Rating......................................................................4067.2 Common specifications ...........................................4097.3 Outline dimension drawings ....................................4107.4 Installation of the heatsink portion outside theenclosure for use.....................................................4191234564057
Rating7.1 Rating7.1.1 Inverter rating•200V classType <strong>FR</strong>-A721-K 5.5 7.5 11 15 18.5 22 30 37 45 55Applicable motor capacity (kW) *1 5.5 7.5 11 15 18.5 22 30 37 45 55Rated capacity (kVA) *2 9.2 12.6 17.6 23.3 29 34 44 55 67 82Rated current (A) 24 33 46 61 76 90 115 145 175 215Overload current rating *3150% 60s, 200% 3s (inverse time characteristics)surrounding air temperature 50°CVoltage *4Three-phase 200 to 240VRegenerative braking torque100% continuous 150% 60sRated inputAC voltage/frequencyThree-phase 200 to 220V 50Hz, 200 to 240V 60HzPermissible AC voltage fluctuation170 to 242V 50Hz,170 to 264V 60HzPermissible frequency fluctuation ±5%Power supply capacity (kVA) *5 12 17 20 28 34 41 52 66 80 100Protective structure (JEM 1030) *6Open type (IP00)Cooling systemForced air coolingApprox. mass (kg) 20 22 33 35 50 52 69 87 90 120OutputPower supply*1 The applicable motor capacity indicated is the maximum capacity applicable for use of the Mitsubishi 4-pole standard motor.*2 The rated output capacity indicated assumes that the output voltage is 220V.*3 The % value of the overload current rating indicated is the ratio of the overload current to the inverter's rated output current. For repeated duty,allow time for the inverter and motor to return to or below the temperatures under 100% load.*4 The maximum output voltage does not exceed the power supply voltage. The maximum output voltage can be changed within the setting range.However, the pulse voltage value of the inverter output side voltage remains unchanged at about 2 that of the power supply.*5 The power supply capacity varies with the value of the power supply side inverter impedance (including those of the input reactor and cables).*6 <strong>FR</strong>-DU07:IP40 (except for the PU connector)406
Rating•400V classType <strong>FR</strong>-A741-K 5.5 7.5 11 15 18.5 22 30 37 45 55Applicable motor capacity (kW) *1 5.5 7.5 11 15 18.5 22 30 37 45 55Rated capacity (kVA) *2 9.1 13 17.5 23.6 29 32.8 43.4 54 65 84Rated current (A) 12 17 23 31 38 44 57 71 86 110Overload current rating *5150% 60s, 200% 3s (inverse time characteristics)surrounding air temperature 50°CVoltage *6Three-phase 380 to 480VRegenerative braking torque100% continuous 150% 60sRated inputAC voltage/frequencyThree-phase 380 to 480V 50Hz/60HzPermissible AC voltage fluctuation323 to 528V 50Hz/60HzPermissible frequency fluctuation ±5%Power supply capacity (kVA) *7 12 17 20 28 34 41 52 66 80 100Protective structure *9Open type (IP00)Cooling systemForced air coolingApprox. mass (kg) 25 26 37 40 48 49 65 80 83 115*1 The applicable motor capacity indicated is the maximum capacity applicable for use of the Mitsubishi 4-pole standard motor.*2 The rated output capacity indicated assumes that the output voltage is 440V.*3 The % value of the overload current rating indicated is the ratio of the overload current to the inverter's rated output current. For repeated duty,allow time for the inverter and motor to return to or below the temperatures under 100% load.*4 The maximum output voltage does not exceed the power supply voltage. The maximum output voltage can be changed within the setting range.However, the pulse voltage value of the inverter output side voltage remains unchanged at about 2 that of the power supply.*5 The power supply capacity varies with the value of the power supply side inverter impedance (including those of the input reactor and cables).*6 <strong>FR</strong>-DU07:IP40 (except for the PU connector)SPECIFICATIONSOutputPower supply4077
Rating7.1.2 Motor rating(1) SF-V5RU•200V class (Mitsubishi dedicated motor [SF-V5RU (1500r/min series)])Motor typeSF-V5RUKApplicable inverter type<strong>FR</strong>-A721-K3 5 7 11 15 18 22 30 37 455.5 7.5 11 15 18.5 22 30 37 45 55Rated output (kW) 3.7 5.5 7.5 11 15 18.5 22 30 *1 37 *1 45 *1Rated torque (N·m) 23.6 35.0 47.7 70.0 95.5 118 140 191 235 286Maximum torque 150%60s (N·m)35.4 52.4 71.6 105 143 176 211 287 353 429Rated speed (r/min) 1500Maximum speed (r/min) 3000Frame No. 112M 132S 132M 160M 160L 180M 180M 200L 200L 200LInertia moment J(×10 -4 kg·m 2 )175 275 400 750 875 1725 1875 3250 3625 3625Noise *4 75dB or less 80dB or lessCooling fan(with thermalprotector)VoltageInput *2Surrounding airtemperature, humidityStructure(Protective structure)DetectorEquipmentHeat resistance classVibration rankSingle-phase 200V/50HzSingle-phase 200V to 230V/60Hz36/55W(0.26/0.32A)22/28W(0.11/0.13A)55/71W(0.37/0.39A)Three-phase 200V/50HzThree-phase 200 to 230V/60Hz-10 to +40°C (non-freezing), 90%RH or less (non-condensing)Totally enclosed forced draft system(Motor: IP44, cooling fan: IP23S) *3Encoder 2048P/R, A phase, B phase, Z phase +12VDC power supplyEncoder, thermal protector, fanFV10100/156W(0.47/0.53A)Approx. mass (kg) 41 52 62 99 113 138 160 238 255 255•400V class (Mitsubishi dedicated motor [SF-V5RUH (1500r/min series)])Motor typeSF-V5RUHKApplicable inverter type<strong>FR</strong>-A741-K5 7 11 15 18 22 30 37 457.5 11 15 18.5 22 30 37 45 55Rated output (kW) 5.5 7.5 11 15 18.5 22 30 *1 37 *1 45 *1Rated torque (N·m) 35.0 47.7 70.0 95.5 118 140 191 235 286Maximum torque 150% 60s(N·m)52.4 71.6 105 143 176 211 287 353 429Rated speed (r/min) 1500Maximum speed (r/min) 3000Frame No. 132S 132M 160M 160L 180M 180M 200L 200L 200LInertia moment J(×10 -4 kg·m 2 )275 400 750 875 1725 1875 3250 3625 3625Noise *4 75dB or less 80dB or lessCooling fan(with thermalprotector)VoltageInput *1Surrounding airtemperature, humidityStructure(Protective structure)DetectorEquipmentHeat resistance classVibration rankSingle-phase 200V/50HzSingle-phase 200V to 230V/60Hz22/28W(0.11/0.13A)55/71W(0.19/0.19A)Three-phase 380 to 400V/50HzThree-phase 400 to 460V/60Hz-10 to +40°C (non-freezing), 90%RH or less (non-condensing)Totally enclosed forced draft system(Motor: IP44, cooling fan: IP23S) *3Encoder 2048P/R, A phase, B phase, Z phase +12VDC power supplyEncoder, thermal protector, fan100/156W(0.27/0.30A)Approx. mass (kg) 52 62 99 113 138 160 238 255 255*1 80% output in the high-speed range. (The output is reduced when the speed is 2400r/min or more. Contact us separately for details.)*2 Power (current) at 50Hz/60Hz.*3 Since a motor with brake has a window for gap check, the protective structure of both the cooling fan section and brake section is IP20. S ofIP23S is an additional code indicating the condition that protection from water intrusion is established only when a cooling fan is not operating.*4 The value when high carrier frequency is set (Pr.72 = 6, Pr.240 = 0).FV10408
Common specifications7.2 Common specificationsControl specificationsOperation specificationsIndicationSoft-PWM control/high carrier frequency PWM control (selectable from among V/F control, advanced magnetic flux vector control andControl methodreal sensorless vector control) / vector control *1Output frequency range 0.2 to 400Hz (The maximum frequency is 120Hz under real sensorless vector control and vector control *1.)FrequencysettingresolutionAnalog input0.015Hz/0 to 60Hz (terminal 2, 4: 0 to 10V/12bit)0.03Hz/0 to 60Hz (terminal 2, 4: 0 to 5V/11bit, 0 to 20mA/about 11bit, terminal 1: 0 to ±10V/12bit)0.06Hz/0 to 60Hz (terminal 1: 0 to ±5V/11bit)0.01HzWithin ±0.2% of the max. output frequency (25°C±10°C)Within 0.01% of the set output frequencyBase frequency can be set from 0 to 400Hz Constant torque/variable torque pattern or adjustable 5 points V/F can be selectedDigital inputFrequency Analog inputaccuracy Digital inputVoltage/frequency characteristicsStarting torque 150% 0.3Hz (under real sensorless vector control or vector control *1)Torque boostManual torque boostAcceleration/deceleration time 0 to 3600s (acceleration and deceleration can be set individually), linear or S-pattern acceleration/deceleration mode, backlashsettingmeasures acceleration/deceleration can be selected.DC injection brakeOperation frequency (0 to 120Hz), operation time (0 to 10s), operation voltage (0 to 30%) variableStall prevention operation level Operation current level can be set (0 to 220% adjustable), whether to use the function or not can be selectedTorque limit levelTorque limit value can be set (0 to 400% variable)Frequency Analog input • Terminal 2, 4: 0 to 10V, 0 to 5V, 4 to 20mA (0 to 20mA) can be selected• Terminal 1: -10 to +10V, -5 to +5V can be selectedsettingInput using the setting dial of the operation panel or parameter unitsignalDigital inputFour-digit BCD or 16 bit binary (when used with option <strong>FR</strong>-A7AX)Start signalForward and reverse rotation or start signal automatic self-holding input (3-wire input) can be selected.You can select any twelve signals using Pr. 178 to Pr. 189 (input terminal function selection) from among multi speed selection, remote setting,stop-on-contact, second function selection, third function selection, terminal 4 input selection, JOG operation selection, selection ofautomatic restart after instantaneous power failure, flying start, external thermal relay input, PU operation/external inter lock signal , externalDC injection brake operation start, PID control enable terminal, brake opening completion signal, PU operation/external operationswitchover, load pattern selection forward rotation reverse rotation boost, V/F switching, load torque high-speed frequency, S-patternInput signalsacceleration/deceleration C switchover, pre-excitation, output stop, start self-holding selection, control mode changing, torque limit selection,start-time tuning start external input, torque bias selection 1, 2 *1, P/PI control switchover, forward rotation command, reverse rotationcommand, inverter reset, PTC thermistor input, PID forward reverse operation switchover, PU-NET operation switchover, NET-externaloperation switchover, and command source switchover, conditional position pulse train sign *1, conditional position droop pulse clear *1,magnetic flux decay output shutoff.Pulse train input100kppsMaximum/minimum frequency setting, frequency jump operation, external thermal relay input selection, polarity reversible operation,automatic restart after instantaneous power failure operation, electronic bypass operation, forward/reverse rotation prevention, remotesetting, brake sequence, second function, third function, multi-speed operation, original operation continuation at instantaneous powerOperational functionsfailure, stop-on-contact control, load torque high speed frequency control, droop control, regeneration avoidance, slip compensation,operation mode selection, offline auto tuning function, online auto tuning function, PID control, computer link operation (RS-485),motor end orientation*1, pre-excitation, notch filter, easy gain tuning, speed feed forward, and torque bias*1You can select any signals using Pr. 190 to Pr. 196 (output terminal function selection) from among inverter running, up-to-frequency,instantaneous power failure/undervoltage, overload warning, output frequency (speed) detection, second output frequency (speed)detection, third output frequency (speed) detection, electronic thermal relay function pre-alarm, PU operation mode, inverter operationready, output current detection, zero current detection, PID lower limit, PID upper limit, PID forward rotation reverse rotation output,electronic bypass MC1, electronic bypass MC2, electronic bypass MC3, orientation complete*1, brake opening request, fan fault output,Operating statusheatsink overheat pre-alarm , inverter running/start command on, deceleration at an instantaneous power failure, PID control activated,during retry, PID output interruption, life alarm, fault output 1, 2, 3 (power-off signal), power savings average value update timing, currentaverage monitor, maintenance timer alarm, remote output, forward rotation output*1, reverse rotation output*1, low speed output, torquedetection, regenerative status output *1, start-time tuning completion, in-position completion*1, alarm output and fault output. Opencollector output (5 points), relay output (2 points) and alarm code of the inverter can be output (4 bit) from the open collector.When used with the In addition to the above, you can select any signals using Pr. 313 to Pr. 319 (extension output terminal function selection) from among control<strong>FR</strong>-A7AY, <strong>FR</strong>-A7AR circuit capacitor life, main circuit capacitor life, cooling fan life, inrush current limit circuit life. (only positive logic can be set for extension(option)terminals of the <strong>FR</strong>-A7AR)Pulse train output50kppsYou can select any signals using Pr. 54 FM terminal function selection (pulse train output) and Pr. 158 AM terminal function selection (analogoutput) from among output frequency, motor current (steady or peak value), output voltage, frequency setting, operation speed, motorPulse/analog output torque, converter output voltage (steady or peak value), electronic thermal relay function load factor, input power, output power, loadmeter, motor excitation current, reference voltage output, motor load factor, power saving effect, PID set point, PID measured value,motor output, torque command, torque current command, and torque monitor.Output frequency, motor current (steady or peak value), output voltage, frequency setting, running speed,motor torque, overload,converter output voltage (steady or peak value), electronic thermal relay function load factor, input power, output power, load meter,motor excitation current, cumlative energization time, actual operation time, motor load factor, cumulative power, energy saving effect,PU Operating statuscumulative saving power, PID set point, PID measured value, PID deviation, inverter I/O terminal monitor, input terminal option(<strong>FR</strong>-DU07/monitor*2, output terminal option monitor*2, option fitting status*3, terminal assignment status*3, torque command, torque current<strong>FR</strong>-PU07/command, feed back pulse*1,motor output<strong>FR</strong>-PU04)Fault definition is displayed during the fault occurs, the output voltage/current/frequency/cumulative energization time right before theFault definitionfault occurs and past 8 fault definitions are stored.Interactive guidance Operation guide/trouble shooting with a help function*3Overcurrent during acceleration, overcurrent during constant speed, overcurrent during deceleration, overvoltage during acceleration,overvoltage during constant speed, overvoltage during deceleration, inverter protection thermal operation, motor protection thermaloperation, heatsink overheat, instantaneous power failure occurrence, undervoltage, input phase failure, motor overload, output sideearth (ground) fault overcurrent, output short circuit, main circuit element overheat, output phase failure, external thermal relayoperation*5, PTC thermistor operation*5, option alarm, parameter error, PU disconnection, retry count excess*5, CPU alarm, operationProtective/warning function panel power supply short circuit, 24VDC power output short circuit, output current detection value excess*5, inrush current limit circuitalarm, communication alarm (inverter), opposite rotation deceleration error*5, analog input error, fan fault, overcurrent stall prevention,overvoltage stall prevention, electronic thermal relay function prealarm, PU stop, maintenance timer alarm*2*5, parameter write error,copy operation error, operation panel lock, parameter copy alarm, speed limit indication, signal loss detection*1*5, speed deviationlarge*1*5, overspeed*1*5, excessive position error*1*5, brake sequence error*5, encoder phase error*1*5, regeneration converterovercurrent, regeneration converter circuit fault, regeneration converter transistor protection thermalSurrounding air temperature -10°C to +50°C (non-freezing)Ambient humidity90%RH maximum (non-condensing)Storage temperature*4 -20°C to +65°CAtmosphereIndoors (without corrosive gas, flammable gas, oil mist, dust and dirt etc.)Altitude/vibrationMaximum 1000m above sea level, 5.9m/s 2 or less*1 Available only when the option (<strong>FR</strong>-A7AP) is mounted*2 Can be displayed only on the operation panel (<strong>FR</strong>-DU07).*3 Can be displayed only on the parameter unit (<strong>FR</strong>-PU07/<strong>FR</strong>-PU04).*4 Temperature applicable for a short period in transit, etc.*5 This protective function does not function in the initial status.EnvironmentOutput signalsSPECIFICATIONS4097
Outline dimension drawings7.3 Outline dimension drawings7.3.1 Inverter outline dimension drawings•<strong>FR</strong>-A721-5.5K, 7.5K•<strong>FR</strong>-A741-5.5K, 7.5K2-φ10 hole454470425101902502702.3205170100D1 D2Inverter type D1 D2<strong>FR</strong>-A721-5.5K, A7.5K 163 90<strong>FR</strong>-A741-5.5K, A7.5K 168 85234(Unit: mm)•<strong>FR</strong>-A721-11K, 15K•<strong>FR</strong>-A741-11K, 15K2- φ10 hole5756001554010220300102943.2255169125D2D1Inverter type D1 D2<strong>FR</strong>-A721-11K, 15K 213 64<strong>FR</strong>-A741-11K, 15K 224 53284(Unit: mm)410
Outline dimension drawings•<strong>FR</strong>-A721-18.5K, 22K2-φ12 hole1229039010 575 15600320FAN3.2535345130 19021984370(Unit: mm)•<strong>FR</strong>-A741-18.5K, 22K2-φ12 hole1226036010 575 15600320FAN3.2535315130 19065340238(Unit: mm)SPECIFICATIONS7411
Outline dimension drawings•<strong>FR</strong>-A721-30K•<strong>FR</strong>-A741-30K2-φ12 hole12 35045040510 675 15700340FAN635145 195D1 D2Inverter type D1 D2<strong>FR</strong>-A721-30K 240.5 82.5<strong>FR</strong>-A741-30K 252.5 70.5430(Unit: mm)•<strong>FR</strong>-A721-37K, 45K•<strong>FR</strong>-A741-37K, 45K2-φ14 hole1437047040515 670 15700368FAN3.2630205163D2D1Inverter type D1 D2<strong>FR</strong>-A721-37K, 45K 257.5 93.5<strong>FR</strong>-A741-37K, 45K 281.5 69.5450(Unit: mm)412
Outline dimension drawings•<strong>FR</strong>-A721-55K•<strong>FR</strong>-A741-55KSPECIFICATIONS152-φ14 holeFAN87090083014480600154053.2555190 215D1 D2Inverter type D1 D2<strong>FR</strong>-A721-55K 312 76<strong>FR</strong>-A741-55K 324.5 64580(Unit: mm)4137
Outline dimension drawings• Operation panel (<strong>FR</strong>-DU07)33.2maxPanel<strong>FR</strong>-DU072127.84450363 72 378811625442-M3 screw2272Airbleedinghole20CableOperation panel connection connector(<strong>FR</strong>-ADP option)(Unit: mm)• Parameter unit (option) (<strong>FR</strong>-PU07)25.0583(14.2)(11.45)2.54040135*1*1*1*15067 5156.8Air-bleedinghole57.84-R180.326.526.5 4-φ4 hole(Effective depth of the installationscrew hole 5.0)M3 screw *2*1 When installing the <strong>FR</strong>-PU07 on the enclosure, etc., remove screws for fixingthe <strong>FR</strong>-PU07 to the inverter or fix the screws to the <strong>FR</strong>-PU07 with M3 nuts.*2 Select the installation screws whose length will not exceed the effectivedepth of the installation screw hole.(Unit: mm)414
Outline dimension drawings7.3.2 Dedicated motor outline dimension drawings• Dedicated motor (SF-V5RU(H)) outline dimension drawings (standard horizontal type)Frame Number 112M, 132S, 132MSF-V5RU(H) 3K , 5K , 7KAWKGSliding distance4T12UHIIConnector (for encoder)MS3102A20-29PLRSuctionAKAExhaustBQQKAKLDFor cooling fan (A, B)For motor (U, V, W)Thermal protector (G1, G2)Direction ofcooling fan windFMark for earthing(grounding)Earth (ground) terminal (M5)NFXBφ2740E EMML6.5CA B U V W G1 G2Earthing (grounding) terminal (M4)SSection AAFrame leg viewedfrom aboveFrame Number 160M, 160L, 180M, 180LFrame Number 200LSF-V5RU(H) 11K , 15K , 18K , 22K SF-V5RU(H) 30K , 37K , 45KConnector (for encoder)MS3102A20-29PConnector (for encoder)MS3102A20-29PSuctionWith guardwiresDirection ofcooling fanwindTMark for earthing(grounding)Earth (ground)terminal (M8)WSUSection AAAKAExhaustFLNFBRXBSliding distance414.5Frame leg viewedfrom above11090AAKGφ56KL50EMDE8CHFor motor (U, V, W)SuctionWith guardwiresDirection ofcooling fanwindEarthing (grounding)terminal (M8)For cooling fan (A, B, C) For thermal protector (G1, G2)AMark for earthing(grounding)Earth (ground)terminal (M12)KAFLNExhaustFBRXBT140110AAWφ90USliding distance4SFrame leg viewedSection AAfrom aboveMake sure to earth the earth terminal of the frame installation footas well as the earth terminal in the terminal box.KG70EDME18.511CHKPDimensions table(Unit: mm)SF-V5RU SF-V5RU SF-V5RU SF-V5RU Frame MassMotorTerminal Screw SizeK K1 K3 K4 No. (kg) A B C D E F H I KA KG KL(KP) L M ML N XB Q QK R S T U W U,V,W A,B,(C) G1,G23 — — — 112M 41 278 135 112 228 95 70 226 253 69 93 242 478 230 242 180 70 60 45 200 28j6 7 4 8 M6 M4 M45 3 — — 132S 52 303 152 132 266 108 70 265 288 75 117 256 542 256 268 180 89 80 63 239 38k6 8 5 10 M6 M4 M47 5 3 — 132M 62 322 171 132 266 108 89 265 288 94 117 256 580 256 268 218 89 80 63 258 38k6 8 5 10 M6 M4 M411 7 5 — 160M 99 412 198 160 318 127 105 316 367 105 115 330 735 310 — 254 108 — — 323 42k6 8 5 12 M8 M4 M415 11 7 3 160L 113 434 220 160 318 127 127 316 367 127 115 330 779 310 — 298 108 — — 345 42k6 8 5 12 M8 M4 M418 — — —138180M22 15 11 — 160438.5 225.5 180 363 139.5 120.5 359 410 127 139 352 790 335 — 285 121 — — 351.5 48k6 9 5.5 14 M8 M4 M4— 18 15 5 180L 200 457.5 242.5 180 363 139.5 139.5 359 410 146 139 352 828 335 — 323 121 — — 370.5 55m6 10 6 16 M8 M4 M430 — — 7238200L37, 45 22, 30 18, 22 — 255483.5 267.5 200 406 159 152.5 401 — 145 487 (546) 909 390 — 361 133 — — 425.5 60m6 — — — M10 M4 M4— 37 30 11, 15 225S 320 500 277 225 446 178 143 446 — 145 533 (592) 932 428 — 342 149 — — 432 65m6 — — — M10 M4 M4Note) 1. Install the motor on the floor and use it with the shaft horizontal.2. Leave an enough clearance between the fan suction port and wall to ensure adequate cooling.Also, check that the ventilation direction of a fan is from the opposite load side to the load side.3 The size difference of top and bottom of the shaft center height is4 The 400V class motor has -H at the end of its type name.0-0.5SPECIFICATIONS4157
Outline dimension drawings• Dedicated motor (SF-V5RU(H)) outline dimension drawings (standard horizontal type with brake)Frame Number 112M, 132S, 132MSF-V5RU(H) 3KB , 5KB , 7KBConnector (for encoder)MS3102A20-29PTerminal box for cooling fanLARKA BExhaust MainSuctionterminal box1QQKAφ22KL1D2HKPMain terminal boxTerminal box for cooling fanFor brake (B1, B2)For motor (U, V, W)For thermal protector (G1, G2)For cooling fan (A, B)2Direction ofcooling fan windMark for earthing(grounding)Earth (ground)terminal (M5)AF F XBNWTUKGφ27JE EMMLGCSliding distanceXSSection AAZB1 B2 U V W G1 G2Earthing (grounding)terminal (M4)ABCEarthing (grounding)terminal (M4)Frame leg viewedfrom aboveFrame Number 160M, 160L, 180M, 180LFrame Number 200LSF-V5RU(H) 11KB , 15KB , 18KB , 22KB SF-V5RU(H) 30KB , 37KB , 45KBConnector (for encoder)MS3102A20-29PTSuctionDirection ofcooling fan windWSUSection AAMark for earthing(grounding)Earth (ground)terminal (M8)Terminal box for cooling fanA1, 2LRKAExhaustBMainterminal box11090F F XBNSliding distanceXZAAFrame leg viewedfrom aboveKG1φ56KLφ22Main terminal boxDJE EMUB1 B2VG1 G2G2CHKPConnector (for encoder)MS3102A20-29P Terminal box for cooling fanLARB 140φ22 KAMain110terminal boxExhaustSuctionDirection ofcooling fan wind1, 2Mark for earthing(grounding)Terminal box for cooling fanFor motor (U, V, W)WEarthing(grounding)terminal (M8)For brake (B1, B2) For thermal protector (G1, G2)ABCEarth (ground)terminal (M12)For cooling fan (A, B, C)Earthing (grounding)terminal (M4)F F XBNAATWSφ901KGUSection AADJE EMSliding distanceXZGC2HKPFrame leg viewedfrom above indicates an inserting position of a bolt with hexhead holes for manual opening.Make sure to earth the earth terminal of the frameinstallation foot as well as the earth terminal in theterminal box.Dimensions tableNote) 1. Install the motor on the floor and use it with the shaft horizontal.2. Leave an enough clearance between the fan suction port and wall to ensure adequate cooling.Also, check that the ventilation direction of a fan is from the opposite load side to the load side.03. The size difference of top and bottom of the shaft center height is -0.54. The 400V class motor has -H at the end of its type name.5. Since a brake power device is a stand-alone, install it inside the enclosure.(This device should be arranged at the customer side.)(Unit: mm)SF-V5RU SF-V5RU SF-V5RU SF-V5RU Frame MassMotor Shaft End Terminal Screw SizeK K1 K3 K4 No. (kg) A B C D E F G H I J KA KD KG KL KP L M ML N X XB Z Q QK R S T U W U,V,W A,B,(C) G1,G2 B1,B23 — — — 112M 53 355 135 112 228 95 70 6.5 — — 40 69 27 93 242 290 555 230 242 180 4 70 12 60 45 200 28j6 7 4 8 M6 M4 M4 M45 3 — — 132S 70 416 152 132 266 108 70 6.5 — — 40 75 27 117 256 329 655 256 268 180 4 89 12 80 63 239 38k6 8 5 10 M6 M4 M4 M47 5 3 — 132M 80 435 171 132 266 108 89 6.5 — — 40 94 27 117 256 329 693 256 268 218 4 89 12 80 63 258 38k6 8 5 10 M6 M4 M4 M411 7 5 — 160M 140 522.5 198 160 318 127 105 8 — — 50 105 56 115 330 391 845.5 310 — 254 4 108 14.5 110 90 323 42k6 8 5 12 M8 M4 M4 M415 11 7 3 160L 155 544.5 220 160 318 127 127 8 — — 50 127 56 115 330 391 889.5 310 — 298 4 108 14.5 110 90 345 42k6 8 5 12 M8 M4 M4 M418 — — —180M 185 22 15 11 — 215568.5 225.5 180 363 139.5 120.5 8 — — 50 127 56 139 352 428 920 335 — 285 4 121 14.5 110 90 351.5 48k6 9 5.5 14 M8 M4 M4 M4— 18 15 5 180L 255 587.5 242.5 180 363 139.5 139.5 8 — — 50 146 56 139 352 428 958 335 — 323 4 121 14.5 110 90 370.5 55m6 10 6 16 M8 M4 M4 M430 — — 7305200L37, 45 22, 30 18, 22 — 330 644.5 267.5 200 406 159 152.5 11 — — 70 145 90 487 — 546 1070 390 — 361 4 133 18.5 140 110 425.5 60m6 11 7 18 M10 M4 M4 M4— 37 30 11, 15 225S 395 659 277 225 446 178 143 11 — — 70 145 90 533 — 592 1091 428 — 342 4 149 18.5 140 110 432 65m6 11 7 18 M10 M4 M4 M4416
Outline dimension drawings• Dedicated motor (SF-V5RU(H)) outline dimension drawings (flange type)Frame Number 112M, 132S, 132MSF-V5RUF(H) 3K , 5K , 7KConnector (for encoder)MS3102A20-29PLLSuctionExhaustKBLGSectionAALRLEBQQKKLALN LZLAIEFor cooling fan (A, B)For motor (U, V, W)For thermal protector (G1, G2)A B U V W G1 G2DDirection ofcooling fan windBWLBLCKDAEarthing (grounding)terminal (M4)Earth (ground) terminal (M5)Mark for earthing (grounding)TUSSection BBFrame Number 160M, 160L, 180M, 180LFrame Number 200LSF-V5RUF(H) 11K , 15K , 18K , 22K SF-V5RUF(H) 30K , 37K , 45KDConnector (for encoder)MS3102A20-29PSuctionDirection ofcooling fan windWith guard wiresLLExhaustKBLGSectionAAEarth (ground) terminal (M8)Mark for earthing (grounding)LRLEBBQQKLBLCTKDWAUKLALALN LZIEConnector (for encoder)MS3102A20-29PDSuctionDirection ofcooling fan windEarth (ground) terminal (M12)Mark for earthing (grounding)With guard wiresFor motor (U, V, W)LLExhaustKBLGSectionAALRLEBBTQQKLBLCWSUKDKLAALALN LZIESSection BBEarthing (grounding)terminal (M8)Section BBFor cooling fan (A, B, C) For thermal protector (G1, G2)Make sure to earth the earth terminal of the flange sectionas well as the earth terminal in the terminal box.Dimensions tableNote) 1. Install the motor on the floor and use it with the shaft horizontal.For use under the shaft, the protection structure of the cooling fan is IP20.2. Leave an enough clearance between the fan suction port and wall to ensure adequate cooling.Also, check that the ventilation direction of a fan is from the opposite load side to the load side.3. The size difference of top and bottom of the shaft center height is4 The 400V class motor has -H at the end of its type name.(Unit: mm)SF-V5RU SF-V5RU SF-V5RU SF-V5RU Flange Frame MassMotor Shaft End Terminal Screw SizeK K1 K3 K4 Number No. (kg) D IE KB KD KL LA LB LC LE LG LL LN LZ LR Q QK S T U W U,V,W A,B,(C) G1,G23 — — — FF215 112M 46 228 141 239 27 242 215 180j6 250 4 16 448 4 14.5 60 60 45 28j6 7 4 8 M6 M4 M45 3 — — FF265 132S 65 266 156 256 27 256 265 230j6 300 4 20 484 4 14.5 80 80 63 38k6 8 5 10 M6 M4 M47 5 3 — FF265 132M 70 266 156 294 27 256 265 230j6 300 4 20 522 4 14.5 80 80 63 38k6 8 5 10 M6 M4 M411 7 5 — FF300 160M 110 318 207 318 56 330 300 250j6 350 5 20 625 4 18.5 110 110 90 42k6 8 5 12 M8 M4 M415 11 7 3 FF300 160L 125 318 207 362 56 330 300 250j6 350 5 20 669 4 18.5 110 110 90 42k6 8 5 12 M8 M4 M418 — — —160FF350 180M22 15 11 — 185363 230 378.5 56 352 350 300j6 400 5 20 690 4 18.5 110 110 90 48k6 9 5.5 14 M8 M4 M4— 18 15 5 FF350 180L 225 363 230 416.5 56 352 350 300j6 400 5 20 728 4 18.5 110 110 90 55m6 10 6 16 M8 M4 M430 — — 7270FF400 200L37, 45 22, 30 18, 22 — 290406 255 485 90 346 400 350j6 450 5 22 823.5 8 18.5 140 140 110 60m6 11 7 18 M10 M4 M40-0.5SPECIFICATIONS4177
Outline dimension drawings• Dedicated motor (SF-V5RU(H)) outline dimension drawings (flange type with brake)Frame Number 112M, 132S, 132MSF-V5RUF(H) 3KB , 5KB , 7KBConnector (for encoder)MS3102A20-29PTerminal box for cooling fanSuctionD12LLKBExhaust LGMainterminal boxSectionAADirection ofcooling fan windEarth (ground) terminal (M5)Mark for earthing (grounding)LRLEBBTQKWQLBLCUKDAKLφ22A1LALN LZ2KPSSection BBMain terminal boxTerminal box for cooling fanFor brake (B1, B2)For motor (U, V, W)For thermal protector (G1, G2)For cooling fan (A, B)B1 B2 U V W G1 G2ABCEarthing(grounding)terminal (M4)Earthing(grounding)terminal (M4)Frame Number 160M, 160LSF-V5RUF(H) 11KB , 15KBConnector (for encoder)MS3102A20-29PTerminal box for cooling fanDSuction1, 2Direction ofcooling fan windEarth (ground) terminal (M8)Mark for earthing (grounding)Main terminal boxLLExhaustKBMain LGterminal boxSectionAALRLEBBQQKLBLCKD1KLAφ22Terminal box for cooling fanFor motor (U, V, W)ALAFor cooling fan (A, B, C)LN LZ2WKPTUSSection BBUB1 B2VG1 G2WEarthing(grounding)terminal (M8)For brake (B1, B2) For thermal protector (G1, G2)ABCEarthing(grounding)terminal (M4) indicates an inserting position of a bolt with hex head holesfor manual opening.Make sure to earth the earth terminal of the flange sectionas well as the earth terminal in the terminal box.Dimensions tableNote) 1. Install the motor on the floor and use it with the shaft horizontal.2. Leave an enough clearance between the fan suction port and wall to ensure adequate cooling.Also, check that the ventilation direction of a fan is from the opposite load side to the load side.03. The size difference of top and bottom of the shaft center height is -0.54. The 400V class motor has -H at the end of its type name.5. Since a brake power device is a stand-alone, install it inside the enclosure.(This device should be arranged at the customer side.)(Unit: mm)SF-V5RU SF-V5RU SF-V5RU SF-V5RU Flange Frame MassMotor Shaft End Terminal Screw SizeK K1 K3 K4 Number No. (kg) D KB KD KL KP LA LB LC LE LG LL LN LZ LR Q QK S T U W U,V,W A,B,(C) B1,B2 G1,G23 — — — FF215 112M 58 228 239 27 242 178 215 180j6 250 4 16 525 4 14.5 60 60 45 28j6 7 4 8 M6 M4 M4 M45 3 — — FF265 132S 83 266 256 27 256 197 265 230j6 300 4 20 597 4 14.5 80 80 63 38k6 8 5 10 M6 M4 M4 M47 5 3 — FF265 132M 88 266 294 27 256 197 265 230j6 300 4 20 635 4 14.5 80 80 63 38k6 8 5 10 M6 M4 M4 M411 7 5 — FF300 160M 151 318 318 56 330 231 300 250j6 350 5 20 735.5 4 18.5 110 110 90 42k6 8 5 12 M8 M4 M4 M415 11 7 3 FF300 160L 167 318 362 56 330 231 300 250j6 350 5 20 779.5 4 18.5 110 110 90 42k6 8 5 12 M8 M4 M4 M4418
Installation of the heatsink portionoutside the enclosure for use7.4 Installation of the heatsink portion outside the enclosurefor useWhen encasing the inverter in an enclosure, the generated heat amount in an enclosure can be greatly reduced byinstalling the heatsink portion of the inverter outside the enclosure. When installing the inverter in a compactenclosure, etc., this installation method is recommended.7.4.1 Protrusion of heatsink(1) Panel cuttingCut the panel of the enclosure according to the inverter capacity.• <strong>FR</strong>-A721-5.5K to 55K, <strong>FR</strong>-A741-5.5K to 55K4-C screwW1WH1 H3Unit: mmSPECIFICATIONSH2HInverter type W W1 H H1 H2 H3 C<strong>FR</strong>-A721-5.5K, 7.5K<strong>FR</strong>-A741-5.5K, 7.5K240 190 454 434 12 8 M8<strong>FR</strong>-A721-11K, 15K<strong>FR</strong>-A741-11K, 15K290 220 575 548 17 10 M8<strong>FR</strong>-A721-18.5K, 22K 376 290 575 546 17 12 M10<strong>FR</strong>-A741-18.5K, 22K 346 260 575 546 17 12 M10<strong>FR</strong>-A721-30K<strong>FR</strong>-A741-30K436 350 675 646 17 12 M10<strong>FR</strong>-A721-37K, 45K<strong>FR</strong>-A741-37K, 45K456 370 670 641 17 12 M12<strong>FR</strong>-A721-55K<strong>FR</strong>-A741-55K586 480 870 841 17 12 M124197
Installation of the heatsink portionoutside the enclosure for use(2) Shift and removal of a rear side installation frameOne installation frame is attached to each of the upper and lowerparts of the inverter. Change the position of the rear sideinstallation frame on the upper and lower sides of the inverter tothe front side as shown on the right. When changing theinstallation frames, make sure that the installation orientation iscorrect.ShiftUpperinstallationframeShiftLowerinstallationframe(3) Installation of the inverterPush the inverter heatsink portion outside the enclosure and fix the enclosure and inverter with upper and lowerinstallation frame.EnclosureInside theenclosureExhausted airInverterCoolingwindD1InstallationframeDimension ofthe outside ofthe enclosureInverter type<strong>FR</strong>-A721-5.5K, 7.5K<strong>FR</strong>-A741-5.5K, 7.5K<strong>FR</strong>-A721-11K, 15K<strong>FR</strong>-A741-11K, 15K<strong>FR</strong>-A721-18.5K, 22K<strong>FR</strong>-A741-18.5K, 22K<strong>FR</strong>-A721-30K<strong>FR</strong>-A741-30K<strong>FR</strong>-A721-37K, 45K<strong>FR</strong>-A741-37K, 45K<strong>FR</strong>-A721-55K<strong>FR</strong>-A741-55KD1100125130145163190(Unit: mm)CAUTION· Having a cooling fan, the cooling section which comes out of the enclosure can not be used in the environment of waterdrops, oil, mist, dust, etc.· Be careful not to drop screws, dust etc. into the inverter and cooling fan section.420
APPENDICESThis chapter provides the "APPENDICES" of this product.Always read the instructions before using the equipment.421
Appendix 1 Main differences and compatibilities with the <strong>FR</strong>-A700 seriesItem <strong>FR</strong>-A700 <strong>FR</strong>-<strong>A701</strong>Model configurationRegenerative brakingtorque200V class......0.4K to 90K400V class......0.4K to 500K5.5/7.5K...........100%torque 2%ED11K to 55K.....20%torque continuousBuilt-in EMC filter With WithoutPr. 30 Regenerative function selection, Pr. 70 Specialregenerative brake dutyDeletedChanged/clearedfunctionsStand-alone optionOutline dimensionInstallation sizePr. 872 Input phase loss protection selectionInitial value "0" (without input phase protection)Protective functionsE.BE· AC reactor (<strong>FR</strong>-HAL)· DC reactor (<strong>FR</strong>-HEL)· High-duty brake resistor (<strong>FR</strong>-ABR)· Power regeneration common converter (<strong>FR</strong>-CV)· High power factor converter (<strong>FR</strong>-HC)· Power regeneration converter (<strong>FR</strong>-RC)200V class ..... 5.5K to 55K400V class ..... 5.5K to 55K100% torque/continuous150% torque 60sThe initial value is changed to "1" (with input phasefailure protection)DeletedE.4, E.10, E.8, E.15 addedNot available(AC reactor (<strong>FR</strong>-HAL) is built-in)* Note that an AC reactor (<strong>FR</strong>-HAL) should be used onlywhen a thyristor load exists in the same power supplysystem and protective function E.4 and E.10 activate.Not compatible422
Appendix 2 Control mode-based parameter (function) correspondencetable and instruction code list*1 These instruction codes are used for parameter read and write by using Mitsubishi inverter protocol with the RS-485 communication.(Refer to page 302 for RS-485 communication)*2 Validity and invalidity according to operation mode are as follows:◦:Usable parameter×:Unusable parameterΔ :Parameters available only during position control set by parameter*3 "◦" indicates valid and "×" indicates invalid of "parameter copy", "parameter clear", and "all parameter clear".*4 Parameters can be used with conditions. Refer to page 185 for details.*5 These parameters are communication parameters that are not cleared when parameter clear (all clear) is executed from RS-485 communication.(Refer to page 297 for RS-485 communication)Symbols in the table indicate parameters which function when an option is mounted......... <strong>FR</strong>-A7AX, ......... <strong>FR</strong>-A7AY, ......... <strong>FR</strong>-A7AR, ........ <strong>FR</strong>-A7AP, ......... <strong>FR</strong>-A7AZ, ......... <strong>FR</strong>-A7NC,........ <strong>FR</strong>-A7ND, ........ <strong>FR</strong>-A7NL, ......... <strong>FR</strong>-A7NP, ......... <strong>FR</strong>-A7NSParameterNameInstructionCode * 1ReadWriteExtendedV/FControlControl Mode-based Correspondence Table *2AdvancedmagneticfluxvectorcontrolSpeedcontrolVector controlTorquecontrolPositioncontrolReal sensorlessvector control0 Torque boost 00 80 0 ◦ × × × × × × ◦ ◦ ◦1 Maximum frequency 01 81 0 ◦ ◦ ◦ ◦ ◦ ◦ ◦ ◦ ◦ ◦2 Minimum frequency 02 82 0 ◦ ◦ ◦ ◦ × ◦ ◦ ◦ ◦ ◦3 Base frequency 03 83 0 ◦ × × × × × × ◦ ◦ ◦4 Multi-speed setting (high speed) 04 84 0 ◦ ◦ ◦ ◦ Δ ◦ ◦ ◦ ◦ ◦5 Multi-speed setting (middle speed) 05 85 0 ◦ ◦ ◦ ◦ Δ ◦ ◦ ◦ ◦ ◦6 Multi-speed setting (low speed) 06 86 0 ◦ ◦ ◦ ◦ Δ ◦ ◦ ◦ ◦ ◦7 Acceleration time 07 87 0 ◦ ◦ ◦ ◦ Δ ◦ ◦ ◦ ◦ ◦8 Deceleration time 08 88 0 ◦ ◦ ◦ ◦ Δ ◦ ◦ ◦ ◦ ◦9 Electronic thermal O/L relay 09 89 0 ◦ ◦ ◦ ◦ ◦ ◦ ◦ ◦ ◦ ◦10DC injection brake operationfrequency0A 8A 0 ◦ ◦ ◦ ◦ × ◦ ◦ ◦ ◦ ◦11DC injection brake operationtime0B 8B 0 ◦ ◦ ◦ ◦ × ◦ ◦ ◦ ◦ ◦12DC injection brake operationvoltage0C 8C 0 ◦ ◦ × × × ◦ *4 ◦ *4 ◦ ◦ ◦13 Starting frequency 0D 8D 0 ◦ ◦ ◦ ◦ × ◦ ◦ ◦ ◦ ◦14 Load pattern selection 0E 8E 0 ◦ × × × × × × ◦ ◦ ◦15 Jog frequency 0F 8F 0 ◦ ◦ ◦ ◦ × ◦ ◦ ◦ ◦ ◦16Jog acceleration/deceleration time10 90 0 ◦ ◦ ◦ ◦ × ◦ ◦ ◦ ◦ ◦17 MRS input selection 11 91 0 ◦ ◦ ◦ ◦ ◦ ◦ ◦ ◦ ◦ ◦18High speed maximumfrequency12 92 0 ◦ ◦ × × × × × ◦ ◦ ◦19 Base frequency voltage 13 93 0 ◦ × × × × × × ◦ ◦ ◦20Acceleration/decelerationreference frequency14 94 0 ◦ ◦ ◦ ◦ Δ ◦ ◦ ◦ ◦ ◦21Acceleration/decelerationtime increments15 95 0 ◦ ◦ ◦ ◦ Δ ◦ ◦ ◦ ◦ ◦22Stall prevention operationlevel (Torque limit level )16 96 0 ◦ ◦ ◦ × ◦ ◦ × ◦ ◦ ◦23Stall prevention operationlevel compensation factor at 17 97 0 ◦ ◦ × × × × × ◦ ◦ ◦double speed24 Multi-speed setting (speed 4) 18 98 0 ◦ ◦ ◦ ◦ Δ ◦ ◦ ◦ ◦ ◦25 Multi-speed setting (speed 5) 19 99 0 ◦ ◦ ◦ ◦ Δ ◦ ◦ ◦ ◦ ◦26 Multi-speed setting (speed 6) 1A 9A 0 ◦ ◦ ◦ ◦ Δ ◦ ◦ ◦ ◦ ◦27 Multi-speed setting (speed 7) 1B 9B 0 ◦ ◦ ◦ ◦ Δ ◦ ◦ ◦ ◦ ◦SpeedcontrolTorquecontrolParameter Copy *3Parameter Clear *3All Parameter Clear *3423
ParameterNameInstructionCode * 1ReadWriteExtendedV/FControlControl Mode-based Correspondence Table *2AdvancedmagneticfluxvectorcontrolSpeedcontrolVector controlTorquecontrolPositioncontrolReal sensorlessvector control28Multi-speed inputcompensation selection1C 9C 0 ◦ ◦ ◦ ◦ × ◦ ◦ ◦ ◦ ◦29Acceleration/decelerationpattern selection1D 9D 0 ◦ ◦ ◦ ◦ × ◦ ◦ ◦ ◦ ◦31 Frequency jump 1A 1F 9F 0 ◦ ◦ ◦ ◦ × ◦ ◦ ◦ ◦ ◦32 Frequency jump 1B 20 A0 0 ◦ ◦ ◦ ◦ × ◦ ◦ ◦ ◦ ◦33 Frequency jump 2A 21 A1 0 ◦ ◦ ◦ ◦ × ◦ ◦ ◦ ◦ ◦34 Frequency jump 2B 22 A2 0 ◦ ◦ ◦ ◦ × ◦ ◦ ◦ ◦ ◦35 Frequency jump 3A 23 A3 0 ◦ ◦ ◦ ◦ × ◦ ◦ ◦ ◦ ◦36 Frequency jump 3B 24 A4 0 ◦ ◦ ◦ ◦ × ◦ ◦ ◦ ◦ ◦37 Speed display 25 A5 0 ◦ ◦ ◦ ◦ ◦ ◦ ◦ ◦ ◦ ◦41 Up-to-frequency sensitivity 29 A9 0 ◦ ◦ ◦ × × ◦ × ◦ ◦ ◦42 Output frequency detection 2A AA 0 ◦ ◦ ◦ ◦ ◦ ◦ ◦ ◦ ◦ ◦43Output frequency detectionfor reverse rotation2B AB 0 ◦ ◦ ◦ ◦ ◦ ◦ ◦ ◦ ◦ ◦44Second acceleration/deceleration time2C AC 0 ◦ ◦ ◦ ◦ Δ ◦ ◦ ◦ ◦ ◦45 Second deceleration time 2D AD 0 ◦ ◦ ◦ ◦ Δ ◦ ◦ ◦ ◦ ◦46 Second torque boost 2E AE 0 ◦ × × × × × × ◦ ◦ ◦47 Second V/F (base frequency) 2F AF 0 ◦ × × × × × × ◦ ◦ ◦48Second stall preventionoperation current30 B0 0 ◦ ◦ × × × × × ◦ ◦ ◦49Second stall preventionoperation frequency31 B1 0 ◦ ◦ × × × × × ◦ ◦ ◦50Second output frequencydetection32 B2 0 ◦ ◦ ◦ ◦ ◦ ◦ ◦ ◦ ◦ ◦51Second electronic thermalO/L relay33 B3 0 ◦ ◦ ◦ ◦ ◦ ◦ ◦ ◦ ◦ ◦52DU/PU main display dataselection34 B4 0 ◦ ◦ ◦ ◦ ◦ ◦ ◦ ◦ ◦ ◦54FM terminal functionselection36 B6 0 ◦ ◦ ◦ ◦ ◦ ◦ ◦ ◦ ◦ ◦55Frequency monitoringreference37 B7 0 ◦ ◦ ◦ ◦ ◦ ◦ ◦ ◦ ◦ ◦56Current monitoringreference38 B8 0 ◦ ◦ ◦ ◦ ◦ ◦ ◦ ◦ ◦ ◦57 Restart coasting time 39 B9 0 ◦ ◦ ◦ ◦ × ◦ ◦ ◦ ◦ ◦58 Restart cushion time 3A BA 0 ◦ ◦ × × × × × ◦ ◦ ◦59 Remote function selection 3B BB 0 ◦ ◦ ◦ ◦ × ◦ ◦ ◦ ◦ ◦60Energy saving controlselection3C BC 0 ◦ × × × × × × ◦ ◦ ◦61 Reference current 3D BD 0 ◦ ◦ ◦ × × ◦ × ◦ ◦ ◦62Reference value atacceleration3E BE 0 ◦ ◦ ◦ × × ◦ × ◦ ◦ ◦63Reference value atdcceleration3F BF 0 ◦ ◦ ◦ × × ◦ × ◦ ◦ ◦64Starting frequency forelevator mode40 C0 0 ◦ × × × × × × ◦ ◦ ◦65 Retry selection 41 C1 0 ◦ ◦ ◦ ◦ × ◦ ◦ ◦ ◦ ◦66Stall prevention operationreduction starting frequency42 C2 0 ◦ ◦ × × × × × ◦ ◦ ◦67Number of retries at faultoccurrence43 C3 0 ◦ ◦ ◦ ◦ × ◦ ◦ ◦ ◦ ◦68 Retry waiting time 44 C4 0 ◦ ◦ ◦ ◦ × ◦ ◦ ◦ ◦ ◦69 Retry count display erase 45 C5 0 ◦ ◦ ◦ ◦ × ◦ ◦ ◦ ◦ ◦SpeedcontrolTorquecontrolParameter Copy *3Parameter Clear *3All Parameter Clear *3424
ParameterNameInstructionCode * 1ReadWriteExtendedV/FControlControl Mode-based Correspondence Table *2AdvancedmagneticfluxvectorcontrolSpeedcontrolVector controlTorquecontrolPositioncontrolReal sensorlessvector controlSpeedcontrolTorquecontrolParameter Copy *3Parameter Clear *3All Parameter Clear *371 <strong>Applied</strong> motor 47 C7 0 ◦ ◦ ◦ ◦ ◦ ◦ ◦ ◦ ◦ ◦72 PWM frequency selection 48 C8 0 ◦ ◦ ◦ ◦ ◦ ◦ ◦ ◦ ◦ ◦73 Analog input selection 49 C9 0 ◦ ◦ ◦ ◦ × ◦ ◦ ◦ ◦ ◦74 Input filter time constant 4A CA 0 ◦ ◦ ◦ ◦ × ◦ ◦ ◦ ◦ ◦75Reset selection/disconnected PU detection/PU stop selection4B CB 0 ◦ ◦ ◦ ◦ ◦ ◦ ◦ ◦ × ×76 Alarm code output selection 4C CC 0 ◦ ◦ ◦ ◦ ◦ ◦ ◦ ◦ ◦ ◦77 * Parameter write selection 4D CD 0 ◦ ◦ ◦ ◦ ◦ ◦ ◦ ◦ ◦ ◦78Reverse rotation preventionselection4E CE 0 ◦ ◦ ◦ ◦ ◦ ◦ ◦ ◦ ◦ ◦79 * Operation mode selection 4F CF 0 ◦ ◦ ◦ ◦ ◦ ◦ ◦ ◦ ◦ ◦80 Motor capacity 50 D0 0 × ◦ ◦ ◦ ◦ ◦ ◦ ◦ ◦ ◦81 Number of motor poles 51 D1 0 × ◦ ◦ ◦ ◦ ◦ ◦ ◦ ◦ ◦82 Motor excitation current 52 D2 0 × ◦ ◦ ◦ ◦ ◦ ◦ ◦ × ◦83 Rated motor voltage 53 D3 0 × ◦ ◦ ◦ ◦ ◦ ◦ ◦ ◦ ◦84 Rated motor frequency 54 D4 0 × ◦ ◦ ◦ ◦ ◦ ◦ ◦ ◦ ◦89Speed control gain(magnetic flux vector)59 D9 0 × ◦ × × × × × ◦ × ◦90 Motor constant (R1) 5A DA 0 × ◦ ◦ ◦ ◦ ◦ ◦ ◦ × ◦91 Motor constant (R2) 5B DB 0 × ◦ ◦ ◦ ◦ ◦ ◦ ◦ × ◦92 Motor constant (L1) 5C DC 0 × ◦ ◦ ◦ ◦ ◦ ◦ ◦ × ◦93 Motor constant (L2) 5D DD 0 × ◦ ◦ ◦ ◦ ◦ ◦ ◦ × ◦94 Motor constant (X) 5E DE 0 × ◦ ◦ ◦ ◦ ◦ ◦ ◦ × ◦95 Online auto tuning selection 5F DF 0 × ◦ ◦ ◦ ◦ ◦ ◦ ◦ ◦ ◦96 Auto tuning setting/status 60 E0 0 × ◦ ◦ ◦ ◦ ◦ ◦ ◦ × ◦100 V/F1(first frequency) 00 80 1 ◦ × × × × × × ◦ ◦ ◦101 V/F1(first frequency voltage) 01 81 1 ◦ × × × × × × ◦ ◦ ◦102 V/F2(second frequency) 02 82 1 ◦ × × × × × × ◦ ◦ ◦103V/F2(second frequencyvoltage)03 83 1 ◦ × × × × × × ◦ ◦ ◦104 V/F3(third frequency) 04 84 1 ◦ × × × × × × ◦ ◦ ◦105V/F3(third frequencyvoltage)05 85 1 ◦ × × × × × × ◦ ◦ ◦106 V/F4(fourth frequency) 06 86 1 ◦ × × × × × × ◦ ◦ ◦107V/F4(fourth frequencyvoltage)07 87 1 ◦ × × × × × × ◦ ◦ ◦108 V/F5(fifth frequency) 08 88 1 ◦ × × × × × × ◦ ◦ ◦109 V/F5(fifth frequency voltage) 09 89 1 ◦ × × × × × × ◦ ◦ ◦110Third acceleration/deceleration time0A 8A 1 ◦ ◦ ◦ ◦ Δ ◦ ◦ ◦ ◦ ◦111 Third deceleration time 0B 8B 1 ◦ ◦ ◦ ◦ Δ ◦ ◦ ◦ ◦ ◦112 Third torque boost 0C 8C 1 ◦ × × × × × × ◦ ◦ ◦113 Third V/F (base frequency) 0D 8D 1 ◦ × × × × × × ◦ ◦ ◦114Third stall preventionoperation current0E 8E 1 ◦ ◦ × × × × × ◦ ◦ ◦115Thrid stall preventionoperation frequency0F 8F 1 ◦ ◦ × × × × × ◦ ◦ ◦* Read and write from communication with PU connector only is enabled.425
ParameterNameInstructionCode * 1ReadWriteExtendedV/FControlControl Mode-based Correspondence Table *2AdvancedmagneticfluxvectorcontrolSpeedcontrolVector controlTorquecontrolPositioncontrolReal sensorlessvector control116Third output frequencydetection10 90 1 ◦ ◦ ◦ ◦ ◦ ◦ ◦ ◦ ◦ ◦117PU communication stationnumber11 91 1 ◦ ◦ ◦ ◦ ◦ ◦ ◦ ◦ ◦ *5 ◦ *5118 PU communication speed 12 92 1 ◦ ◦ ◦ ◦ ◦ ◦ ◦ ◦ ◦ *5 ◦ *5119PU communication stop bitlength13 93 1 ◦ ◦ ◦ ◦ ◦ ◦ ◦ ◦ ◦ *5 ◦ *5120PU communication paritycheck14 94 1 ◦ ◦ ◦ ◦ ◦ ◦ ◦ ◦ ◦ *5 ◦ *5121Number of PUcommunication retries15 95 1 ◦ ◦ ◦ ◦ ◦ ◦ ◦ ◦ ◦ *5 ◦ *5122PU communication checktime interval16 96 1 ◦ ◦ ◦ ◦ ◦ ◦ ◦ ◦ ◦ *5 ◦ *5123PU communication waitingtime setting17 97 1 ◦ ◦ ◦ ◦ ◦ ◦ ◦ ◦ ◦ *5 ◦ *5124PU communication CR/LFpresence/absence selection 18 98 1 ◦ ◦ ◦ ◦ ◦ ◦ ◦ ◦ ◦*5 ◦ *5125Terminal 2 frequency settinggain frequency19 99 1 ◦ ◦ ◦ ◦ × ◦ ◦ ◦ × ◦126Terminal 4 frequency settinggain frequency1A 9A 1 ◦ ◦ ◦ ◦ × ◦ ◦ ◦ × ◦127PID control automaticswitchover freqeuncy1B 9B 1 ◦ ◦ ◦ × × ◦ × ◦ ◦ ◦128 PID action selection 1C 9C 1 ◦ ◦ ◦ × × ◦ × ◦ ◦ ◦129 PID proportional band 1D 9D 1 ◦ ◦ ◦ × × ◦ × ◦ ◦ ◦130 PID integral time 1E 9E 1 ◦ ◦ ◦ × × ◦ × ◦ ◦ ◦131 PID upper limit 1F 9F 1 ◦ ◦ ◦ × × ◦ × ◦ ◦ ◦132 PID lower limit 20 A0 1 ◦ ◦ ◦ × × ◦ × ◦ ◦ ◦133 PID action set point 21 A1 1 ◦ ◦ ◦ × × ◦ × ◦ ◦ ◦134 PID differential time 22 A2 1 ◦ ◦ ◦ × × ◦ × ◦ ◦ ◦135Electronic bypass sequenceselection23 A3 1 ◦ ◦ ◦ × × ◦ × ◦ ◦ ◦136MC switchover interlocktime24 A4 1 ◦ ◦ ◦ × × ◦ × ◦ ◦ ◦137 Start waiting time 25 A5 1 ◦ ◦ ◦ × × ◦ × ◦ ◦ ◦138 Bypass selection at a fault 26 A6 1 ◦ ◦ ◦ × × ◦ × ◦ ◦ ◦139Automatic switchoverfrequency from inverter to 27 A7 1 ◦ ◦ ◦ × × ◦ × ◦ ◦ ◦bypass operation140Backlash accelerationstopping frequency28 A8 1 ◦ ◦ ◦ ◦ × ◦ ◦ ◦ ◦ ◦141Backlash accelerationstopping time29 A9 1 ◦ ◦ ◦ ◦ × ◦ ◦ ◦ ◦ ◦142Backlash decelerationstopping frequency2A AA 1 ◦ ◦ ◦ ◦ × ◦ ◦ ◦ ◦ ◦143Backlash decelerationstopping time2B AB 1 ◦ ◦ ◦ ◦ × ◦ ◦ ◦ ◦ ◦144 Speed setting switchover 2C AC 1 ◦ ◦ ◦ ◦ ◦ ◦ ◦ ◦ ◦ ◦145PU display languageselection2D AD 1 ◦ ◦ ◦ ◦ ◦ ◦ ◦ ◦ × ×148Stall prevention level at 0Vinput30 B0 1 ◦ ◦ × × × × × ◦ ◦ ◦149Stall prevention level at 10Vinput31 B1 1 ◦ ◦ × × × × × ◦ ◦ ◦150Output current detectionlevel32 B2 1 ◦ ◦ ◦ ◦ ◦ ◦ ◦ ◦ ◦ ◦SpeedcontrolTorquecontrolParameter Copy *3Parameter Clear *3All Parameter Clear *3426
ParameterNameInstructionCode * 1ReadWriteExtendedV/FControlControl Mode-based Correspondence Table *2AdvancedmagneticfluxvectorcontrolSpeedcontrolVector controlTorquecontrolPositioncontrolReal sensorlessvector control151Output current detectionsignal delay time33 B3 1 ◦ ◦ ◦ ◦ ◦ ◦ ◦ ◦ ◦ ◦152 Zero current detection level 34 B4 1 ◦ ◦ ◦ ◦ ◦ ◦ ◦ ◦ ◦ ◦153 Zero current detection time 35 B5 1 ◦ ◦ ◦ ◦ ◦ ◦ ◦ ◦ ◦ ◦154Voltage reduction selectionduring stall prevention 36 B6 1 ◦ ◦ × × × × × ◦ ◦ ◦operation155RT signal function validitycondition selection37 B7 1 ◦ ◦ ◦ × × ◦ × ◦ ◦ ◦156Stall prevention operationselection38 B8 1 ◦ ◦ × × × × × ◦ ◦ ◦157 OL signal output timer 39 B9 1 ◦ ◦ ◦ ◦ ◦ ◦ ◦ ◦ ◦ ◦158AM terminal functionselection3A BA 1 ◦ ◦ ◦ ◦ ◦ ◦ ◦ ◦ ◦ ◦159Automatic switchoverfrequency range from 3B BB 1 ◦ ◦ ◦ × × ◦ × ◦ ◦ ◦bypass to inverter operation160 User group read selection 00 80 2 ◦ ◦ ◦ ◦ ◦ ◦ ◦ ◦ ◦ ◦161Frequency setting/key lockoperation selection01 81 2 ◦ ◦ ◦ ◦ ◦ ◦ ◦ ◦ × ◦162Automatic restart afterinstantaneous power failure 02 82 2 ◦ ◦ ◦ ◦ × ◦ ◦ ◦ ◦ ◦selection163 First cushion time for restart 03 83 2 ◦ ◦ × × × × × ◦ ◦ ◦164First cushion voltage forrestart04 84 2 ◦ ◦ × × × × × ◦ ◦ ◦165Stall prevention operationlevel for restart05 85 2 ◦ ◦ × × × × × ◦ ◦ ◦166Output current detectionsignal retention time06 86 2 ◦ ◦ ◦ ◦ ◦ ◦ ◦ ◦ ◦ ◦167Output current detectionoperation selection07 87 2 ◦ ◦ ◦ ◦ ◦ ◦ ◦ ◦ ◦ ◦168169Parameter for manufacturer setting. Do not set.170 Watt-hour meter clear 0A 8A 2 ◦ ◦ ◦ ◦ ◦ ◦ ◦ ◦ × ◦171 Operation hour meter clear 0B 8B 2 ◦ ◦ ◦ ◦ ◦ ◦ ◦ × × ×172User group registereddisplay/batch clear0C 8C 2 ◦ ◦ ◦ ◦ ◦ ◦ ◦ ◦ × ×173 User group registration 0D 8D 2 ◦ ◦ ◦ ◦ ◦ ◦ ◦ × × ×174 User group clear 0E 8E 2 ◦ ◦ ◦ ◦ ◦ ◦ ◦ × × ×178STF terminal functionselection12 92 2 ◦ ◦ ◦ ◦ ◦ ◦ ◦ ◦ × ◦179STR terminal functionselection13 93 2 ◦ ◦ ◦ ◦ ◦ ◦ ◦ ◦ × ◦180RL terminal functionselection14 94 2 ◦ ◦ ◦ ◦ ◦ ◦ ◦ ◦ × ◦181RM terminal functionselection15 95 2 ◦ ◦ ◦ ◦ ◦ ◦ ◦ ◦ × ◦182RH terminal functionselection16 96 2 ◦ ◦ ◦ ◦ ◦ ◦ ◦ ◦ × ◦183RT terminal functionselection17 97 2 ◦ ◦ ◦ ◦ ◦ ◦ ◦ ◦ × ◦184AU terminal functionselection18 98 2 ◦ ◦ ◦ ◦ ◦ ◦ ◦ ◦ × ◦185JOG terminal functionselection19 99 2 ◦ ◦ ◦ ◦ ◦ ◦ ◦ ◦ × ◦SpeedcontrolTorquecontrolParameter Copy *3Parameter Clear *3All Parameter Clear *3427
ParameterNameInstructionCode * 1ReadWriteExtendedV/FControlControl Mode-based Correspondence Table *2AdvancedmagneticfluxvectorcontrolSpeedcontrolVector controlTorquecontrolPositioncontrolReal sensorlessvector control186CS terminal functionselection1A 9A 2 ◦ ◦ ◦ ◦ ◦ ◦ ◦ ◦ × ◦187MRS terminal functionselection1B 9B 2 ◦ ◦ ◦ ◦ ◦ ◦ ◦ ◦ × ◦188STOP terminal functionselection1C 9C 2 ◦ ◦ ◦ ◦ ◦ ◦ ◦ ◦ × ◦189RES terminal functionselection1D 9D 2 ◦ ◦ ◦ ◦ ◦ ◦ ◦ ◦ × ◦190RUN terminal functionselection1E 9E 2 ◦ ◦ ◦ ◦ ◦ ◦ ◦ ◦ × ◦191SU terminal functionselection1F 9F 2 ◦ ◦ ◦ ◦ ◦ ◦ ◦ ◦ × ◦192IPF terminal functionselection20 A0 2 ◦ ◦ ◦ ◦ ◦ ◦ ◦ ◦ × ◦193OL terminal functionselection21 A1 2 ◦ ◦ ◦ ◦ ◦ ◦ ◦ ◦ × ◦194FU terminal functionselection22 A2 2 ◦ ◦ ◦ ◦ ◦ ◦ ◦ ◦ × ◦195ABC1 terminal functionselection23 A3 2 ◦ ◦ ◦ ◦ ◦ ◦ ◦ ◦ × ◦196ABC2 terminal functionselection24 A4 2 ◦ ◦ ◦ ◦ ◦ ◦ ◦ ◦ × ◦232 Multi-speed setting (speed 8) 28 A8 2 ◦ ◦ ◦ ◦ Δ ◦ ◦ ◦ ◦ ◦233 Multi-speed setting (speed 9) 29 A9 2 ◦ ◦ ◦ ◦ Δ ◦ ◦ ◦ ◦ ◦234 Multi-speed setting (speed 10) 2A AA 2 ◦ ◦ ◦ ◦ Δ ◦ ◦ ◦ ◦ ◦235 Multi-speed setting (speed 11) 2B AB 2 ◦ ◦ ◦ ◦ Δ ◦ ◦ ◦ ◦ ◦236 Multi-speed setting (speed 12) 2C AC 2 ◦ ◦ ◦ ◦ Δ ◦ ◦ ◦ ◦ ◦237 Multi-speed setting (speed 13) 2D AD 2 ◦ ◦ ◦ ◦ Δ ◦ ◦ ◦ ◦ ◦238 Multi-speed setting (speed 14) 2E AE 2 ◦ ◦ ◦ ◦ Δ ◦ ◦ ◦ ◦ ◦239 Multi-speed setting (speed 15) 2F AF 2 ◦ ◦ ◦ ◦ Δ ◦ ◦ ◦ ◦ ◦240Soft-PWM operationselection30 B0 2 ◦ ◦ ◦ ◦ ◦ ◦ ◦ ◦ ◦ ◦241Analog input display unitswitchover31 B1 2 ◦ ◦ ◦ ◦ ◦ ◦ ◦ ◦ ◦ ◦242Terminal 1 addedcompensation amount 32 B2 2 ◦ ◦ ◦ ◦ × ◦ ◦ ◦ ◦ ◦(terminal 2)243Terminal 1 addedcompensation amount 33 B3 2 ◦ ◦ ◦ ◦ × ◦ ◦ ◦ ◦ ◦(terminal 4)244Cooling fan operationselection34 B4 2 ◦ ◦ ◦ ◦ ◦ ◦ ◦ ◦ ◦ ◦245 Rated slip 35 B5 2 ◦ × × × × × × ◦ ◦ ◦246Slip compensation timeconstant36 B6 2 ◦ × × × × × × ◦ ◦ ◦247Constant-power region slipcompensation selection37 B7 2 ◦ × × × × × × ◦ ◦ ◦250 Stop selection 3A BA 2 ◦ ◦ ◦ ◦ × ◦ ◦ ◦ ◦ ◦251Output phase lossprotection selection3B BB 2 ◦ ◦ ◦ ◦ ◦ ◦ ◦ ◦ ◦ ◦252 Override bias 3C BC 2 ◦ ◦ ◦ ◦ × ◦ ◦ ◦ ◦ ◦253 Override gain 3D BD 2 ◦ ◦ ◦ ◦ × ◦ ◦ ◦ ◦ ◦255 Life alarm status display 3F BF 2 ◦ ◦ ◦ ◦ ◦ ◦ ◦ × × ×256Inrush current limit circuit lifedisplay40 C0 2 ◦ ◦ ◦ ◦ ◦ ◦ ◦ × × ×SpeedcontrolTorquecontrolParameter Copy *3Parameter Clear *3All Parameter Clear *3428
ParameterNameInstructionCode * 1ReadWriteExtendedV/FControlControl Mode-based Correspondence Table *2AdvancedmagneticfluxvectorcontrolSpeedcontrolVector controlTorquecontrolPositioncontrolReal sensorlessvector control257Control circuit capacitor lifedisplay41 C1 2 ◦ ◦ ◦ ◦ ◦ ◦ ◦ × × ×258Main circuit capacitor lifedisplay42 C2 2 ◦ ◦ ◦ ◦ ◦ ◦ ◦ × × ×259Main circuit capacitor lifemeasuring43 C3 2 ◦ ◦ ◦ ◦ ◦ ◦ ◦ ◦ ◦ ◦261 Power failure stop selection 45 C5 2 ◦ ◦ ◦ ◦ × ◦ ◦ ◦ ◦ ◦262Subtracted frequency atdeceleration start46 C6 2 ◦ ◦ ◦ ◦ × ◦ ◦ ◦ ◦ ◦263Subtraction startingfrequency47 C7 2 ◦ ◦ ◦ ◦ × ◦ ◦ ◦ ◦ ◦264Power-failure decelerationtime 148 C8 2 ◦ ◦ ◦ ◦ × ◦ ◦ ◦ ◦ ◦265Power-failure decelerationtime 249 C9 2 ◦ ◦ ◦ ◦ × ◦ ◦ ◦ ◦ ◦266Power failure decelerationtime switchover frequency4A CA 2 ◦ ◦ ◦ ◦ × ◦ ◦ ◦ ◦ ◦267 Terminal 4 input selection 4B CB 2 ◦ ◦ ◦ ◦ ◦ ◦ ◦ ◦ × ◦268Monitor decimal digitsselection4C CC 2 ◦ ◦ ◦ ◦ ◦ ◦ ◦ ◦ ◦ ◦269 Parameter for manufacturer setting. Do not set.270Stop-on contact/load torquehigh-speed frequency 4E CE 2 ◦ ◦ ◦ × × ◦ × ◦ ◦ ◦control selection271High-speed settingmaximum current4F CF 2 ◦ ◦ ◦ × × ◦ × ◦ ◦ ◦272Middle-speed settingminimum current50 D0 2 ◦ ◦ ◦ × × ◦ × ◦ ◦ ◦273 Current averaging range 51 D1 2 ◦ ◦ ◦ × × ◦ × ◦ ◦ ◦274Current averaging filter timeconstant52 D2 2 ◦ ◦ ◦ × × ◦ × ◦ ◦ ◦275Stop-on contact excitationcurrent low-speed53 D3 2 × ◦ × × × × × ◦ ◦ ◦multiplying factor276PWM carrier frequency atstop-on contact54 D4 2 × ◦ × × × × × ◦ ◦ ◦278 Brake opening frequency 56 D6 2 × ◦ ◦ × × ◦ × ◦ ◦ ◦279 Brake opening current 57 D7 2 × ◦ ◦ × × ◦ × ◦ ◦ ◦280Brake opening currentdetection time58 D8 2 × ◦ ◦ × × ◦ × ◦ ◦ ◦281 Brake operation time at start 59 D9 2 × ◦ ◦ × × ◦ × ◦ ◦ ◦282 Brake operation frequency 5A DA 2 × ◦ ◦ × × ◦ × ◦ ◦ ◦283 Brake operation time at stop 5B DB 2 × ◦ ◦ × × ◦ × ◦ ◦ ◦284Deceleration detectionfunction selection5C DC 2 ◦ ◦ ◦ × × × × ◦ ◦ ◦285Overspeed detectionfrequency (Speed deviation 5D DD 2 ◦ ◦ ◦ × × ◦ × ◦ ◦ ◦excess detection frequency)286 Droop gain 5E DE 2 × ◦ ◦ × × ◦ × ◦ ◦ ◦287 Droop filter time constant 5F DF 2 × ◦ ◦ × × ◦ × ◦ ◦ ◦288Droop function activationselection60 E0 2 × × ◦ × × ◦ × ◦ ◦ ◦291 Pulse train I/O selection 63 E3 2 ◦ ◦ ◦ ◦ × ◦ ◦ ◦ × ◦292Automatic acceleration/deceleration64 E4 2 ◦ ◦ ◦ × × ◦ × ◦ ◦ ◦SpeedcontrolTorquecontrolParameter Copy *3Parameter Clear *3All Parameter Clear *3429
ParameterNameInstructionCode * 1ReadWriteExtendedV/FControlControl Mode-based Correspondence Table *2AdvancedmagneticfluxvectorcontrolSpeedcontrolVector controlTorquecontrolPositioncontrolReal sensorlessvector control293Acceleration/decelerationtime individual calculation 65 E5 2 ◦ ◦ ◦ × × ◦ × ◦ ◦ ◦selection294 UV avoidance voltage gain 66 E6 2 ◦ ◦ ◦ ◦ × ◦ ◦ ◦ ◦ ◦299Rotation direction detectionselection at restarting6B EB 2 ◦ ◦ × × × ◦ × ◦ ◦ ◦300 BCD input bias 00 80 3 ◦ ◦ ◦ ◦ × ◦ ◦ ◦ ◦ ◦301 BCD input gain 01 81 3 ◦ ◦ ◦ ◦ × ◦ ◦ ◦ ◦ ◦302 BIN input bias 02 82 3 ◦ ◦ ◦ ◦ × ◦ ◦ ◦ ◦ ◦303 BIN input gain 03 83 3 ◦ ◦ ◦ ◦ × ◦ ◦ ◦ ◦ ◦304Digital input and analoginput compensation enable/ 04 84 3 ◦ ◦ ◦ ◦ × ◦ ◦ ◦ ◦ ◦disable selection305Read timing operationselection05 85 3 ◦ ◦ ◦ ◦ × ◦ ◦ ◦ ◦ ◦306Analog output signalselection06 86 3 ◦ ◦ ◦ ◦ ◦ ◦ ◦ ◦ ◦ ◦307Setting for zero analogoutput07 87 3 ◦ ◦ ◦ ◦ ◦ ◦ ◦ ◦ ◦ ◦308Setting for maximum analogoutput08 88 3 ◦ ◦ ◦ ◦ ◦ ◦ ◦ ◦ ◦ ◦309Analog output signalvoltage/current09 89 3 ◦ ◦ ◦ ◦ ◦ ◦ ◦ ◦ ◦ ◦switchover310Analog meter voltage outputselection0A 8A 3 ◦ ◦ ◦ ◦ ◦ ◦ ◦ ◦ ◦ ◦311Setting for zero analogmeter voltage output0B 8B 3 ◦ ◦ ◦ ◦ ◦ ◦ ◦ ◦ ◦ ◦312Setting for maximum analogmeter voltage output0C 8C 3 ◦ ◦ ◦ ◦ ◦ ◦ ◦ ◦ ◦ ◦313DO0 outputselection0D 8D 3 ◦ ◦ ◦ ◦ ◦ ◦ ◦ ◦ ◦ ◦314DO1 outputselection0E 8E 3 ◦ ◦ ◦ ◦ ◦ ◦ ◦ ◦ ◦ ◦315DO2 outputselection0F 8F 3 ◦ ◦ ◦ ◦ ◦ ◦ ◦ ◦ ◦ ◦316 DO3 output selection 10 90 3 ◦ ◦ ◦ ◦ ◦ ◦ ◦ ◦ ◦ ◦317 DO4 output selection 11 91 3 ◦ ◦ ◦ ◦ ◦ ◦ ◦ ◦ ◦ ◦318 DO5 output selection 12 92 3 ◦ ◦ ◦ ◦ ◦ ◦ ◦ ◦ ◦ ◦319 DO6 output selection 13 93 3 ◦ ◦ ◦ ◦ ◦ ◦ ◦ ◦ ◦ ◦320 RA1 output selection 14 94 3 ◦ ◦ ◦ ◦ ◦ ◦ ◦ ◦ ◦ ◦321 RA2 output selection 15 95 3 ◦ ◦ ◦ ◦ ◦ ◦ ◦ ◦ ◦ ◦322 RA3 output selection 16 96 3 ◦ ◦ ◦ ◦ ◦ ◦ ◦ ◦ ◦ ◦323 AM0 0V adjustment 17 97 3 ◦ ◦ ◦ ◦ ◦ ◦ ◦ ◦ × ◦324 AM1 0mA adjustment 18 98 3 ◦ ◦ ◦ ◦ ◦ ◦ ◦ ◦ × ◦SpeedcontrolTorquecontrolParameter Copy *3Parameter Clear *3All Parameter Clear *3329331332Digital input incrementsselectionRS-485 communicationstationRS-485 communicationspeed1D 9D 3 ◦ ◦ ◦ ◦ × ◦ ◦ ◦ × ◦1F 9F 3 ◦ ◦ ◦ ◦ ◦ ◦ ◦ ◦ ◦ *5 ◦ *520 A0 3 ◦ ◦ ◦ ◦ ◦ ◦ ◦ ◦ ◦ *5 ◦ *5430
ParameterNameInstructionCode * 1ReadWriteExtendedV/FControlControl Mode-based Correspondence Table *2AdvancedmagneticfluxvectorcontrolSpeedcontrolVector controlTorquecontrolPositioncontrolReal sensorlessvector control333RS-485 communication stopbit length21 A1 3 ◦ ◦ ◦ ◦ ◦ ◦ ◦ ◦ ◦ *5 ◦ *5334RS-485 communicationparity check selection22 A2 3 ◦ ◦ ◦ ◦ ◦ ◦ ◦ ◦ ◦ *5 ◦ *5335RS-485 communicationretry count23 A3 3 ◦ ◦ ◦ ◦ ◦ ◦ ◦ ◦ ◦ *5 ◦ *5336RS-485 communicationcheck time interval24 A4 3 ◦ ◦ ◦ ◦ ◦ ◦ ◦ ◦ ◦ *5 ◦ *5337RS-485 communicationwaiting time setting25 A5 3 ◦ ◦ ◦ ◦ ◦ ◦ ◦ ◦ ◦ *5 ◦ *5338Communication operationcommand source26 A6 3 ◦ ◦ ◦ ◦ ◦ ◦ ◦ ◦ ◦ *5 ◦ *5339Communication speedcommand source27 A7 3 ◦ ◦ ◦ ◦ ◦ ◦ ◦ ◦ ◦ *5 ◦ *5340Communication startupmode selection28 A8 3 ◦ ◦ ◦ ◦ ◦ ◦ ◦ ◦ ◦ *5 ◦ *5341RS-485 communication CR/LF selection29 A9 3 ◦ ◦ ◦ ◦ ◦ ◦ ◦ ◦ ◦ *5 ◦ *5342Communication EEPROMwrite selection2A AA 3 ◦ ◦ ◦ ◦ ◦ ◦ ◦ ◦ ◦ ◦343 Communication error count 2B AB 3 ◦ ◦ ◦ ◦ ◦ ◦ ◦ × × ×345 DeviceNet address 2D AD 3 ◦ ◦ ◦ ◦ ◦ ◦ ◦ ◦ ◦ *5 ◦ *5346 DeviceNet baud rate 2E AE 3 ◦ ◦ ◦ ◦ ◦ ◦ ◦ ◦ ◦ *5 ◦ *5349Communication resetselection31 B1 3 ◦ ◦ ◦ ◦ ◦ ◦ ◦ ◦ ◦ *5 ◦ *5350Stop position commandselection32 B2 3 ◦ ◦ ◦ × × × × ◦ ◦ ◦351 Orientation speed 33 B3 3 ◦ ◦ ◦ × × × × ◦ ◦ ◦352 Creep speed 34 B4 3 ◦ ◦ ◦ × × × × ◦ ◦ ◦353Creep switchover position35 B5 3 ◦ ◦ ◦ × × × × ◦ ◦ ◦354Position loop switchoverposition36 B6 3 ◦ ◦ ◦ × × × × ◦ ◦ ◦355DC injection brake startposition37 B7 3 ◦ ◦ ◦ × × × × ◦ ◦ ◦356Internal stop positioncommand38 B8 3 ◦ ◦ ◦ × × × × ◦ ◦ ◦357Orientation in-positionzone39 B9 3 ◦ ◦ ◦ × × × × ◦ ◦ ◦358 Servo torque selection 3A BA 3 ◦ ◦ ◦ × × × × ◦ ◦ ◦359Encoder rotation direction3B BB 3 ◦ ◦ ◦ ◦ ◦ × × ◦ ◦ ◦360 16 bit data selection 3C BC 3 ◦ ◦ ◦ × × × × ◦ ◦ ◦361 Position shift 3D BD 3 ◦ ◦ ◦ × × × × ◦ ◦ ◦SpeedcontrolTorquecontrolParameter Copy *3Parameter Clear *3All Parameter Clear *3362363364Orientation position loopgainCompletion signal outputdelay timeEncoder stop check time3E BE 3 ◦ ◦ ◦ × × × × ◦ ◦ ◦3F BF 3 ◦ ◦ ◦ × × × × ◦ ◦ ◦40 C0 3 ◦ ◦ ◦ × × × × ◦ ◦ ◦365 Orientation limit 41 C1 3 ◦ ◦ ◦ × × × × ◦ ◦ ◦366 Recheck time 42 C2 3 ◦ ◦ ◦ × × × × ◦ ◦ ◦367 Speed feedback range 43 C3 3 ◦ ◦ ◦ × × × × ◦ ◦ ◦431
ParameterNameInstructionCode * 1ReadWriteExtendedV/FControlControl Mode-based Correspondence Table *2AdvancedmagneticfluxvectorcontrolSpeedcontrolVector controlTorquecontrolPositioncontrolReal sensorlessvector controlSpeedcontrolTorquecontrolParameter Copy *3Parameter Clear *3All Parameter Clear *3368 Feedback gain 44 C4 3 ◦ ◦ × × × × × ◦ ◦ ◦369Number of encoder pulses45 C5 3 ◦ ◦ ◦ ◦ ◦ × × ◦ ◦ ◦374 Overspeed detection level 4A CA 3 × × ◦ ◦ ◦ ◦ ◦ ◦ ◦ ◦376Encoder signal lossdetection enable/disable 4C CC 3 ◦ ◦ ◦ ◦ ◦ × × ◦ ◦ ◦selection379SSCNET III rotationdirection selection4F CF 3 × × ◦ ◦ ◦ × × ◦ ◦ ◦380 Acceleration S-pattern 1 50 D0 3 ◦ ◦ ◦ ◦ × ◦ ◦ ◦ ◦ ◦381 Deceleration S-pattern 1 51 D1 3 ◦ ◦ ◦ ◦ × ◦ ◦ ◦ ◦ ◦382 Acceleration S-pattern 2 52 D2 3 ◦ ◦ ◦ ◦ × ◦ ◦ ◦ ◦ ◦383 Deceleration S-pattern 2 53 D3 3 ◦ ◦ ◦ ◦ × ◦ ◦ ◦ ◦ ◦384Input pulse division scalingfactor54 D4 3 ◦ ◦ ◦ ◦ × ◦ ◦ ◦ ◦ ◦385 Frequency for 0 input pulse 55 D5 3 ◦ ◦ ◦ ◦ × ◦ ◦ ◦ ◦ ◦386Frequency for maximuminput pulse56 D6 3 ◦ ◦ ◦ ◦ × ◦ ◦ ◦ ◦ ◦387Initial communication delaytime57 D7 3 ◦ ◦ ◦ ◦ ◦ ◦ ◦ ◦ ◦ ◦388Send time interval at heartbeat58 D8 3 ◦ ◦ ◦ ◦ ◦ ◦ ◦ ◦ ◦ ◦389Minimum sending time atheart beat59 D9 3 ◦ ◦ ◦ ◦ ◦ ◦ ◦ ◦ ◦ ◦390% setting referencefrequency5A DA 3 ◦ ◦ ◦ ◦ ◦ ◦ ◦ ◦ ◦ ◦391Receive time interval atheart beat5B DB 3 ◦ ◦ ◦ ◦ ◦ ◦ ◦ ◦ ◦ ◦392Event driven detectionwidth5C DC 3 ◦ ◦ ◦ ◦ ◦ ◦ ◦ ◦ ◦ ◦393 Orientation selection 5D DD 3 × × ◦ × × × × ◦ ◦ ◦396Orientation speed gain (Pterm)60 E0 3 × × ◦ × × × × ◦ ◦ ◦397Orientation speed integraltime61 E1 3 × × ◦ × × × × ◦ ◦ ◦398Orientation speed gain (Dterm)62 E2 3 × × ◦ × × × × ◦ ◦ ◦399Orientation decelerationratio63 E3 3 × × ◦ × × × × ◦ ◦ ◦406High resolution analog inputselection06 86 4 ◦ ◦ ◦ ◦ ◦ ◦ ◦ ◦ × ◦407Motor temperature detectionfilter07 87 4 ◦ ◦ ◦ ◦ ◦ ◦ ◦ ◦ ◦ ◦408Motor thermistorselection08 88 4 ◦ ◦ ◦ ◦ ◦ ◦ ◦ ◦ ◦ ◦419Position command sourceselection13 93 4 × × × × ◦ × × ◦ ◦ ◦420Command pulse scalingfactor numerator14 94 4 × × × × ◦ × × ◦ ◦ ◦421Command pulse scalingfactor denominator15 95 4 × × × × ◦ × × ◦ ◦ ◦422 Position loop gain 16 96 4 × × × × ◦ × × ◦ ◦ ◦432
Parameter423NamePosition feed forward gainInstructionCode * 1ReadWriteExtendedV/FControlControl Mode-based Correspondence Table *2AdvancedmagneticfluxvectorcontrolSpeedcontrolVector controlTorquecontrolPositioncontrolReal sensorlessvector controlSpeedcontrolTorquecontrol17 97 4 × × × × ◦ × × ◦ ◦ ◦Parameter Copy *3Parameter Clear *3All Parameter Clear *3424Position commandacceleration/deceleration 18 98 4 × × × × ◦ × × ◦ ◦ ◦time constant425Position feed forwardcommand filter19 99 4 × × × × ◦ × × ◦ ◦ ◦426 In-position width 1A 9A 4 × × × × ◦ × × ◦ ◦ ◦427 Excessive level error 1B 9B 4 × × × × ◦ × × ◦ ◦ ◦428Command pulse selection1C 9C 4 × × × × ◦ × × ◦ ◦ ◦429 Clear signal selection 1D 9D 4 × × × × ◦ × × ◦ ◦ ◦430 Pulse monitor selection 1E 9E 4 × × × × ◦ × × ◦ ◦ ◦447Digital torque commandbias2F AF 4 × × × ◦ × × ◦ ◦ ◦ ◦448Digital torque commandgain30 B0 4 × × × ◦ × × ◦ ◦ ◦ ◦449SSCNET III input filtersetting31 B1 4 × × ◦ ◦ ◦ × × ◦ ◦ ◦450 Second applied motor 32 B2 4 ◦ ◦ × × × ◦ ◦ ◦ ◦ ◦451Second motor controlmethod selection33 B3 4 ◦ ◦ × × × ◦ ◦ ◦ ◦ ◦453 Second motor capacity 35 B5 4 × ◦ × × × ◦ ◦ ◦ ◦ ◦454Number of second motorpoles36 B6 4 × ◦ × × × ◦ ◦ ◦ ◦ ◦455Second motor excitationcurrent37 B7 4 × ◦ × × × ◦ ◦ ◦ × ◦456 Rated second motor voltage 38 B8 4 × ◦ × × × ◦ ◦ ◦ ◦ ◦457Rated second motorfrequency39 B9 4 × ◦ × × × ◦ ◦ ◦ ◦ ◦458 Second motor constant (R1) 3A BA 4 × ◦ × × × ◦ ◦ ◦ × ◦459 Second motor constant (R2) 3B BB 4 × ◦ × × × ◦ ◦ ◦ × ◦460 Second motor constant (L1) 3C BC 4 × ◦ × × × ◦ ◦ ◦ × ◦461 Second motor constant (L2) 3D BD 4 × ◦ × × × ◦ ◦ ◦ × ◦462 Second motor constant (X) 3E BE 4 × ◦ × × × ◦ ◦ ◦ × ◦463Second motor auto tuningsetting/status3F BF 4 × ◦ × × × ◦ ◦ ◦ × ◦464Digital position controlsudden stop deceleration 40 C0 4 × × × × ◦ × × ◦ ◦ ◦time465First position feed amountlower 4 digits41 C1 4 × × × × ◦ × × ◦ ◦ ◦466First position feed amountupper 4 digits42 C2 4 × × × × ◦ × × ◦ ◦ ◦467Second position feedamount lower 4 digits43 C3 4 × × × × ◦ × × ◦ ◦ ◦468Second position feedamount upper 4 digits44 C4 4 × × × × ◦ × × ◦ ◦ ◦469Third position feed amountlower 4 digits45 C5 4 × × × × ◦ × × ◦ ◦ ◦470Third position feed amountupper 4 digits46 C6 4 × × × × ◦ × × ◦ ◦ ◦433
ParameterNameInstructionCode * 1ReadWriteExtendedV/FControlControl Mode-based Correspondence Table *2AdvancedmagneticfluxvectorcontrolSpeedcontrolVector controlTorquecontrolPositioncontrolReal sensorlessvector control471Fourth position feed amountlower 4 digits47 C7 4 × × × × ◦ × × ◦ ◦ ◦472Fourth position feed amountupper 4 digits48 C8 4 × × × × ◦ × × ◦ ◦ ◦473Fifth position feed amountlower 4 digits49 C9 4 × × × × ◦ × × ◦ ◦ ◦474Fifth position feed amountupper 4 digits4A CA 4 × × × × ◦ × × ◦ ◦ ◦475Sixth position feed amountlower 4 digits4B CB 4 × × × × ◦ × × ◦ ◦ ◦476Sixth position feed amountupper 4 digits4C CC 4 × × × × ◦ × × ◦ ◦ ◦477Seventh position feedamount lower 4 digits4D CD 4 × × × × ◦ × × ◦ ◦ ◦478Seventh position feedamount upper 4 digits4E CE 4 × × × × ◦ × × ◦ ◦ ◦479Eighth position feed amountlower 4 digits4F CF 4 × × × × ◦ × × ◦ ◦ ◦480Eighth position feed amountupper 4 digits50 D0 4 × × × × ◦ × × ◦ ◦ ◦481Ninth position feed amountlower 4 digits51 D1 4 × × × × ◦ × × ◦ ◦ ◦482Ninth position feed amountupper 4 digits52 D2 4 × × × × ◦ × × ◦ ◦ ◦483Tenth position feed amountlower 4 digits53 D3 4 × × × × ◦ × × ◦ ◦ ◦484Tenth position feed amountupper 4 digits54 D4 4 × × × × ◦ × × ◦ ◦ ◦485Eleventh position feedamount lower 4 digits55 D5 4 × × × × ◦ × × ◦ ◦ ◦486Eleventh position feedamount upper 4 digits56 D6 4 × × × × ◦ × × ◦ ◦ ◦487Twelfth position feedamount lower 4 digits57 D7 4 × × × × ◦ × × ◦ ◦ ◦488Twelfth position feedamount upper 4 digits58 D8 4 × × × × ◦ × × ◦ ◦ ◦489Thirteenth position feedamount lower 4 digits59 D9 4 × × × × ◦ × × ◦ ◦ ◦490Thirteenth position feedamount upper 4 digits5A DA 4 × × × × ◦ × × ◦ ◦ ◦491Fourteenth position feedamount lower 4 digits5B DB 4 × × × × ◦ × × ◦ ◦ ◦492Fourteenth position feedamount upper 4 digits5C DC 4 × × × × ◦ × × ◦ ◦ ◦493Fifteenth position feedamount lower 4 digits5D DD 4 × × × × ◦ × × ◦ ◦ ◦494Fifteenth position feedamount upper 4 digits5E DE 4 × × × × ◦ × × ◦ ◦ ◦495 Remote output selection 5F DF 4 ◦ ◦ ◦ ◦ ◦ ◦ ◦ ◦ ◦ ◦496 Remote output data 1 60 E0 4 ◦ ◦ ◦ ◦ ◦ ◦ ◦ × × ×497 Remote output data 2 61 E1 4 ◦ ◦ ◦ ◦ ◦ ◦ ◦ × × ×499SSCNET III operationselection63 E3 4 × × ◦ ◦ ◦ × × ◦ ◦ ◦SpeedcontrolTorquecontrolParameter Copy *3Parameter Clear *3All Parameter Clear *3434
Parameter500NameInstructionCode * 1ReadWriteExtendedV/FControlControl Mode-based Correspondence Table *2AdvancedmagneticfluxvectorcontrolSpeedcontrolVector controlTorquecontrolPositioncontrolReal sensorlessvector controlCommunication errorexecution waiting time 00 80 5 ◦ ◦ ◦ ◦ ◦ ◦ ◦ ◦ ◦ ◦SpeedcontrolTorquecontrolParameter Copy *3Parameter Clear *3All Parameter Clear *3501Communication erroroccurrence count display 01 81 5 ◦ ◦ ◦ ◦ ◦ ◦ ◦ × ◦ ◦502Stop mode selection atcommunication error 02 82 5 ◦ ◦ ◦ ◦ ◦ ◦ ◦ ◦ ◦ ◦503 Maintenance timer 03 83 5 ◦ ◦ ◦ ◦ ◦ ◦ ◦ × × ×504Maintenance timer alarmoutput set time04 84 5 ◦ ◦ ◦ ◦ ◦ ◦ ◦ ◦ × ◦505 Speed setting reference 05 85 5 ◦ ◦ ◦ ◦ ◦ ◦ ◦ ◦ ◦ ◦516S-pattern time at a start ofacceleration10 90 5 ◦ ◦ ◦ ◦ × ◦ ◦ ◦ ◦ ◦517S-pattern time at acompletion of acceleration11 91 5 ◦ ◦ ◦ ◦ × ◦ ◦ ◦ ◦ ◦518S-pattern time at a start ofdeceleraiton12 92 5 ◦ ◦ ◦ ◦ × ◦ ◦ ◦ ◦ ◦519S-pattern time at acompletion of deceleraiton13 93 5 ◦ ◦ ◦ ◦ × ◦ ◦ ◦ ◦ ◦539Modbus-RTUcommunication check time 27 A7 5 ◦ ◦ ◦ ◦ ◦ ◦ ◦ ◦ ◦ *5 ◦ *5interval541Frequency command signselection (CC-Link)29 A9 5 ◦ ◦ ◦ × × ◦ × ◦ ◦ *5 ◦ *5542Communication stationnumber (CC-Link)2A AA 5 ◦ ◦ ◦ ◦ ◦ ◦ ◦ ◦ ◦ *5 ◦ *5543 Baud rate (CC-Link) 2B AB 5 ◦ ◦ ◦ ◦ ◦ ◦ ◦ ◦ ◦ *5 ◦ *5544547548CC-Link extendedsettingParameter for manufacturer setting. Do not set.2C AC 5 ◦ ◦ ◦ ◦ ◦ ◦ ◦ ◦ ◦ *5 ◦ *5549 Protocol selection 31 B1 5 ◦ ◦ ◦ ◦ ◦ ◦ ◦ ◦ ◦ *5 ◦ *5550NET mode operationcommand source selection32 B2 5 ◦ ◦ ◦ ◦ ◦ ◦ ◦ ◦ ◦ *5 ◦ *5551PU mode operationcommand source selection33 B3 5 ◦ ◦ ◦ ◦ ◦ ◦ ◦ ◦ ◦ *5 ◦ *5555 Current average time 37 B7 5 ◦ ◦ ◦ ◦ ◦ ◦ ◦ ◦ ◦ ◦556 Data output mask time 38 B8 5 ◦ ◦ ◦ ◦ ◦ ◦ ◦ ◦ ◦ ◦557Current average valuemonitor signal output39 B9 5 ◦ ◦ ◦ ◦ ◦ ◦ ◦ ◦ ◦ ◦reference current563Energization time carryingovertimes3F BF 5 ◦ ◦ ◦ ◦ ◦ ◦ ◦ × × ×564Operating time carryingovertimes40 C0 5 ◦ ◦ ◦ ◦ ◦ ◦ ◦ × × ×569Second motor speed controlgain45 C5 5 × ◦ × × × × × ◦ × ◦571 Holding time at a start 47 C7 5 ◦ ◦ ◦ ◦ × ◦ ◦ ◦ ◦ ◦574Second motor online autotuning4A CA 5 × ◦ × × × ◦ ◦ ◦ ◦ ◦575Output interruption detectiontime4B CB 5 ◦ ◦ ◦ × × ◦ × ◦ ◦ ◦576Output interruption detectionlevel4C CC 5 ◦ ◦ ◦ × × ◦ × ◦ ◦ ◦435
ParameterNameInstructionCode * 1ReadWriteExtendedV/FControlControl Mode-based Correspondence Table *2AdvancedmagneticfluxvectorcontrolSpeedcontrolVector controlTorquecontrolPositioncontrolReal sensorlessvector control577Output interruption cancellevel4D CD 5 ◦ ◦ ◦ × × ◦ × ◦ ◦ ◦611Acceleration time at arestart0B 8B 6 ◦ ◦ ◦ × × ◦ × ◦ ◦ ◦665Regeneration avoidancefrequency gain41 C1 6 ◦ ◦ ◦ × × ◦ × ◦ ◦ ◦684Tuning data incrementsswitchover54 D4 6 × ◦ ◦ ◦ ◦ ◦ ◦ ◦ ◦ ◦800 Control method selection 00 80 8 ◦ ◦ ◦ ◦ ◦ ◦ ◦ ◦ ◦ ◦802 Pre-excitation selection 02 82 8 × × ◦ × × × × ◦ ◦ ◦803Constant power rangetorque characteristic03 83 8 × × ◦ ◦ ◦ ◦ ◦ ◦ ◦ ◦selection804Torque command sourceselection04 84 8 × × × ◦ × × ◦ ◦ ◦ ◦805Torque command value(RAM)05 85 8 × × × ◦ × × ◦ × ◦ ◦806Torque command value(RAM,EEPROM)06 86 8 × × × ◦ × × ◦ ◦ ◦ ◦807 Speed limit selection 07 87 8 × × × ◦ × × ◦ ◦ ◦ ◦808 Forward rotation speed limit 08 88 8 × × × ◦ × × ◦ ◦ ◦ ◦809 Reverse rotation speed limit 09 89 8 × × × ◦ × × ◦ ◦ ◦ ◦810Torque limit input methodselection0A 8A 8 × × ◦ × ◦ ◦ × ◦ ◦ ◦811 Set resolution switchover 0B 8B 8 ◦ ◦ ◦ ◦ ◦ ◦ ◦ ◦ ◦ ◦812Torque limit level(regeneration)0C 8C 8 × × ◦ × ◦ ◦ × ◦ ◦ ◦813 Torque limit level (3rd quadrant) 0D 8D 8 × × ◦ × ◦ ◦ × ◦ ◦ ◦814 Torque limit level (4th quadrant) 0E 8E 8 × × ◦ × ◦ ◦ × ◦ ◦ ◦815 Torque limit level 2 0F 8F 8 × × ◦ × ◦ ◦ × ◦ ◦ ◦816Torque limit level duringacceleration10 90 8 × × ◦ × ◦ ◦ × ◦ ◦ ◦817Torque limit level duringdeceleration11 91 8 × × ◦ × ◦ ◦ × ◦ ◦ ◦818Easy gain tuning responselevel setting12 92 8 × × ◦ × ◦ ◦ × ◦ ◦ ◦819 Easy gain tuning selection 13 93 8 × × ◦ × ◦ ◦ × ◦ × ◦820 Speed control P gain 1 14 94 8 × × ◦ × ◦ ◦ × ◦ ◦ ◦821 Speed control integral time 1 15 95 8 × × ◦ × ◦ ◦ × ◦ ◦ ◦822 Speed setting filter 1 16 96 8 × × ◦ ◦ × ◦ ◦ ◦ ◦ ◦823 Speed detection filter 1 17 97 8 × × ◦ ◦ ◦ × × ◦ ◦ ◦824 Torque control P gain 1 18 98 8 × × ◦ ◦ ◦ ◦ ◦ ◦ ◦ ◦825 Torque control integral time 1 19 99 8 × × ◦ ◦ ◦ ◦ ◦ ◦ ◦ ◦826 Torque setting filter 1 1A 9A 8 × × ◦ ◦ ◦ ◦ ◦ ◦ ◦ ◦827 Torque detection filter 1 1B 9B 8 × × ◦ ◦ ◦ ◦ ◦ ◦ ◦ ◦828 Model speed control gain 1C 9C 8 × × ◦ × ◦ ◦ × ◦ ◦ ◦830 Speed control P gain 2 1E 9E 8 × × ◦ × ◦ ◦ × ◦ ◦ ◦831 Speed control integral time 2 1F 9F 8 × × ◦ × ◦ ◦ × ◦ ◦ ◦832 Speed setting filter2 20 A0 8 × × ◦ ◦ × ◦ ◦ ◦ ◦ ◦833 Speed detection filter 2 21 A1 8 × × ◦ × ◦ × × ◦ ◦ ◦834 Torque control P gain 2 22 A2 8 × × ◦ ◦ ◦ ◦ ◦ ◦ ◦ ◦835 Torque control integral time 2 23 A3 8 × × ◦ ◦ ◦ ◦ ◦ ◦ ◦ ◦836 Torque setting filter2 24 A4 8 × × ◦ ◦ ◦ ◦ ◦ ◦ ◦ ◦837 Torque detection filter 2 25 A5 8 × × ◦ ◦ ◦ ◦ ◦ ◦ ◦ ◦SpeedcontrolTorquecontrolParameter Copy *3Parameter Clear *3All Parameter Clear *3436
ParameterNameInstructionCode * 1ReadWriteExtendedV/FControlControl Mode-based Correspondence Table *2AdvancedmagneticfluxvectorcontrolSpeedcontrolVector controlTorquecontrolPositioncontrolReal sensorlessvector control838DA1 terminal functionselection26 A6 8 ◦ ◦ ◦ ◦ ◦ ◦ ◦ ◦ ◦ ◦839 DA1 output filter 27 A7 8 ◦ ◦ ◦ ◦ ◦ ◦ ◦ ◦ ◦ ◦840 Torque bias selection 28 A8 8 × × ◦ × × × × ◦ ◦ ◦841 Torque bias 1 29 A9 8 × × ◦ × × × × ◦ ◦ ◦842 Torque bias 2 2A AA 8 × × ◦ × × × × ◦ ◦ ◦843 Torque bias 3 2B AB 8 × × ◦ × × × × ◦ ◦ ◦844 Torque bias filter 2C AC 8 × × ◦ × × × × ◦ ◦ ◦845Torque bias operation time2D AD 8 × × ◦ × × × × ◦ ◦ ◦846Torque bias balancecompensation2E AE 8 × × ◦ × × × × ◦ ◦ ◦847Fall-time torque biasterminal 1 bias2F AF 8 × × ◦ × × × × ◦ ◦ ◦848Fall-time torque biasterminal 1 gain30 B0 8 × × ◦ × × × × ◦ ◦ ◦849Analog input off setadjustment31 B1 8 ◦ ◦ ◦ ◦ ◦ ◦ ◦ ◦ ◦ ◦850 Control operation selection 32 B2 8 × × × × × ◦ ◦ ◦ ◦ ◦853 Speed deviation time 35 B5 8 × × ◦ × × × × ◦ ◦ ◦854 Excitation ratio 36 B6 8 × × ◦ ◦ ◦ ◦ ◦ ◦ ◦ ◦857 DA1-0V adjustment 39 B9 8 ◦ ◦ ◦ ◦ ◦ ◦ ◦ ◦ × ◦858Terminal 4 functionassignment3A BA 8 ◦ ◦ ◦ ◦ ◦ ◦ ◦ ◦ × ◦859 Torque current 3B BB 8 × ◦ ◦ ◦ ◦ ◦ ◦ ◦ × ◦860Second motor torquecurrent3C BC 8 × ◦ × × × ◦ ◦ ◦ × ◦862 Notch filter time constant 3E BE 8 × × ◦ × ◦ ◦ × ◦ ◦ ◦863 Notch filter depth 3F BF 8 × × ◦ × ◦ ◦ × ◦ ◦ ◦864 Torque detection 40 C0 8 × × ◦ ◦ ◦ ◦ ◦ ◦ ◦ ◦865 Low speed detection 41 C1 8 × × ◦ ◦ ◦ ◦ ◦ ◦ ◦ ◦866 Torque monitoring reference 42 C2 8 × ◦ ◦ ◦ ◦ ◦ ◦ ◦ ◦ ◦867 AM output filter 43 C3 8 ◦ ◦ ◦ ◦ ◦ ◦ ◦ ◦ ◦ ◦868Terminal 1 functionassignment44 C4 8 ◦ ◦ ◦ ◦ ◦ ◦ ◦ ◦ × ◦872Input phase failureprotection selection48 C8 8 ◦ ◦ ◦ ◦ ◦ ◦ ◦ ◦ ◦ ◦873 Speed limit 49 C9 8 × × ◦ × × × × ◦ ◦ ◦874 OLT level setting 4A CA 8 × × ◦ × ◦ ◦ × ◦ ◦ ◦875 Fault definition 4B CB 8 ◦ ◦ ◦ ◦ × ◦ ◦ ◦ ◦ ◦877Speed feed forward control/model adaptive speed 4D CD 8 × × ◦ × ◦ ◦ × ◦ ◦ ◦control selection878 Speed feed forward filter 4E CE 8 × × ◦ × ◦ ◦ × ◦ ◦ ◦879Speed feed forward torquelimit4F CF 8 × × ◦ × ◦ ◦ × ◦ ◦ ◦880 Load inertia ratio 50 D0 8 × × ◦ × ◦ ◦ × ◦ × ◦881 Speed feed forward gain 51 D1 8 × × ◦ × ◦ ◦ × ◦ ◦ ◦882Regeneration avoidanceoperation selection52 D2 8 ◦ ◦ ◦ × × ◦ × ◦ ◦ ◦883Regeneration avoidanceoperation level53 D3 8 ◦ ◦ ◦ × × ◦ × ◦ ◦ ◦SpeedcontrolTorquecontrolParameter Copy *3Parameter Clear *3All Parameter Clear *3437
Parameter884Regeneration avoidance atdeceleration detection 54 D4 8 ◦ ◦ ◦ × × ◦ × ◦ ◦ ◦sensitivity885Regeneration avoidancecompensation frequency 55 D5 8 ◦ ◦ ◦ × × ◦ × ◦ ◦ ◦limit value886Regeneration avoidancevoltage gain56 D6 8 ◦ ◦ ◦ × × ◦ × ◦ ◦ ◦888 Free parameter 1 58 D8 8 ◦ ◦ ◦ ◦ ◦ ◦ ◦ ◦ × ×889 Free parameter 2 59 D9 8 ◦ ◦ ◦ ◦ ◦ ◦ ◦ ◦ × ×891Cumulative power monitordigit shifted times5B DB 8 ◦ ◦ ◦ ◦ ◦ ◦ ◦ ◦ ◦ ◦892 Load factor 5C DC 8 ◦ ◦ ◦ ◦ ◦ ◦ ◦ ◦ ◦ ◦893Energy saving monitorreference (motor capacity)5D DD 8 ◦ ◦ ◦ ◦ ◦ ◦ ◦ ◦ ◦ ◦894Control selection duringcommercial power-supply 5E DE 8 ◦ ◦ ◦ ◦ ◦ ◦ ◦ ◦ ◦ ◦operation895Power saving rate referencevalue5F DF 8 ◦ ◦ ◦ ◦ ◦ ◦ ◦ ◦ ◦ ◦896 Power unit cost 60 E0 8 ◦ ◦ ◦ ◦ ◦ ◦ ◦ ◦ ◦ ◦897Power saving monitoraverage time61 E1 8 ◦ ◦ ◦ ◦ ◦ ◦ ◦ ◦ ◦ ◦898Power saving cumulativemonitor clear62 E2 8 ◦ ◦ ◦ ◦ ◦ ◦ ◦ ◦ × ◦899Operation time rate(estimated value)63 E3 8 ◦ ◦ ◦ ◦ ◦ ◦ ◦ ◦ ◦ ◦C0(900)FM terminal calibration 5C DC 1 ◦ ◦ ◦ ◦ ◦ ◦ ◦ ◦ × ◦C1(901)AM terminal calibration 5D DD 1 ◦ ◦ ◦ ◦ ◦ ◦ ◦ ◦ × ◦C2(902)C3(902)125(903)C4(903)C5(904)C6(904)126(905)C7(905)C12(917)C13(917)C14(918)C15(918)NameTerminal 2 frequency settingbias frequencyTerminal 2 frequency settingbiasTerminal 2 frequency settinggain frequencyTerminal 2 frequency settinggainTerminal 4 frequency settingbias frequencyTerminal 4 frequency settingbiasTerminal 4 frequency settinggain frequencyTerminal 4 frequency settinggainTerminal 1 bias frequency(speed)Terminal 1 bias frequency(speed)Terminal 1 gain frequency(speed)InstructionCode * 1ReadWriteExtendedV/FControlControl Mode-based Correspondence Table *2AdvancedmagneticfluxvectorcontrolSpeedcontrolVector controlTorquecontrolPositioncontrolReal sensorlessvector control5E DE 1 ◦ ◦ ◦ ◦ ◦ ◦ ◦ ◦ × ◦5E DE 1 ◦ ◦ ◦ ◦ ◦ ◦ ◦ ◦ × ◦5F DF 1 ◦ ◦ ◦ ◦ ◦ ◦ ◦ ◦ × ◦5F DF 1 ◦ ◦ ◦ ◦ ◦ ◦ ◦ ◦ × ◦60 E0 1 ◦ ◦ ◦ ◦ ◦ ◦ ◦ ◦ × ◦60 E0 1 ◦ ◦ ◦ ◦ ◦ ◦ ◦ ◦ × ◦61 E1 1 ◦ ◦ ◦ ◦ ◦ ◦ ◦ ◦ × ◦61 E1 1 ◦ ◦ ◦ ◦ ◦ ◦ ◦ ◦ × ◦11 91 9 × × ◦ ◦ ◦ ◦ ◦ ◦ × ◦11 91 9 × × ◦ ◦ ◦ ◦ ◦ ◦ × ◦12 92 9 × × ◦ ◦ ◦ ◦ ◦ ◦ × ◦Terminal 1 gain (speed) 12 92 9 × × ◦ ◦ ◦ ◦ ◦ ◦ × ◦SpeedcontrolTorquecontrolParameter Copy *3Parameter Clear *3All Parameter Clear *3438
ParameterC16(919)C17(919)C18(920)C19(920)C29(925)C30(926)C31(926)C32(927)C33(927)C34(928)C35(928)C36(929)C37(929)C38(932)C39(932)C40(933)C41(933)NameTerminal 1 bias command(torque/magnetic flux)Terminal 1 bias (torque/magnetic flux)Terminal 1 gain command(torque/magnetic flux)Terminal 1 gain (torque/magnetic flux)Motor temperature detectioncalibration (analoginput)Terminal 6 bias frequency(speed)13 93 9 × × ◦ ◦ ◦ ◦ ◦ ◦ × ◦13 93 9 × × ◦ ◦ ◦ ◦ ◦ ◦ × ◦14 94 9 × × ◦ ◦ ◦ ◦ ◦ ◦ × ◦14 94 9 × × ◦ ◦ ◦ ◦ ◦ ◦ × ◦19 99 9 ◦ ◦ ◦ ◦ ◦ ◦ ◦ ◦ × ◦1A 9A 9 ◦ ◦ ◦ ◦ ◦ ◦ ◦ ◦ × ◦Terminal 6 bias (speed) 1A 9A 9 ◦ ◦ ◦ ◦ ◦ ◦ ◦ ◦ × ◦Terminal 6 gain frequency(speed)1B 9B 9 ◦ ◦ ◦ ◦ ◦ ◦ ◦ ◦ × ◦Terminal 6 gain (speed) 1B 9B 9 ◦ ◦ ◦ ◦ ◦ ◦ ◦ ◦ × ◦Terminal 6 bias command(torque)1C 9C 9 × × ◦ ◦ ◦ ◦ ◦ ◦ × ◦Terminal 6 bias (torque) 1C 9C 9 × × ◦ ◦ ◦ ◦ ◦ ◦ × ◦Terminal 6 gain command(torque)1D 9D 9 × × ◦ ◦ ◦ ◦ ◦ ◦ × ◦Terminal 6 gain (torque) 1D 9D 9 × × ◦ ◦ ◦ ◦ ◦ ◦ × ◦Terminal 4 bias command(torque/magnetic flux)Terminal 4 bias (torque/magnetic flux)Terminal 4 gain command(torque/magnetic flux)Terminal 4 gain (torque/magnetic flux)InstructionCode * 1ReadWriteExtendedV/FControlControl Mode-based Correspondence Table *2AdvancedmagneticfluxvectorcontrolSpeedcontrolVector controlTorquecontrolPositioncontrolReal sensorlessvector control20 A0 9 × × ◦ ◦ ◦ ◦ ◦ ◦ × ◦20 A0 9 × × ◦ ◦ ◦ ◦ ◦ ◦ × ◦21 A1 9 × × ◦ ◦ ◦ ◦ ◦ ◦ × ◦21 A1 9 × × ◦ ◦ ◦ ◦ ◦ ◦ × ◦989 Parameter for manufacturer setting. Do not set.990 PU buzzer control 5A DA 9 ◦ ◦ ◦ ◦ ◦ ◦ ◦ ◦ ◦ ◦991 PU contrast adjustment 5B DB 9 ◦ ◦ ◦ ◦ ◦ ◦ ◦ ◦ × ◦SpeedcontrolTorquecontrolParameter Copy *3Parameter Clear *3All Parameter Clear *3439
REVISIONS*The manual number is given on the bottom left of the back cover.Print Date * Manual Number RevisionJan., 2008 IB(NA)-0600337ENG-A First editionMar., 2008 IB(NA)-0600337ENG-B Additions⋅ <strong>FR</strong>-A721-18.5K to 55KSep., 2008 IB(NA)-0600337ENG-C Additions⋅ <strong>FR</strong>-A741-5.5K to 55KFor Maximum Safety• Mitsubishi inverters are not designed or manufactured to be used in equipment or systems in situations thatcan affect or endanger human life.• When considering this product for operation in special applications such as machinery or systems used inpassenger transportation, medical, aerospace, atomic power, electric power, or submarine repeatingapplications, please contact your nearest Mitsubishi sales representative.• Although this product was manufactured under conditions of strict quality control, you are strongly advisedto install safety devices to prevent serious accidents when it is used in facilities where breakdowns of theproduct are likely to cause a serious accident.• Please do not use this product for loads other than three-phase induction motors.440IB(NA)-0600337ENG-C