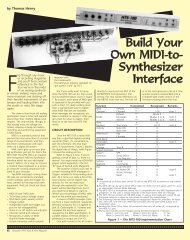
download - Nuts & Volts Magazine
download - Nuts & Volts Magazine
download - Nuts & Volts Magazine
- No tags were found...

Create successful ePaper yourself
Turn your PDF publications into a flip-book with our unique Google optimized e-Paper software.
Driving Brushed DC MotorsThis section will guide you through connecting and testing the DC Brushed Gear Motors included with theStingray robot. Familiarizing yourself with the motors included in the Stingray robot kit will help you takeadvantage of the benefits of using these motors as well as understanding the nuances.DC motors are usually driven by an H-Bridge since such a circuit can reverse the polarity of the motorconnected to it. The DC brushed motors included in this kit are driven by the L6205 H-Bridge on thePropeller Robot Control Board. Understanding how to control this H-Bridge is the key to controlling thedirection, speed and duration that the motors are on or off.Parallax has released a Propeller object called, “PWM_32” which makes it easy to drive servos as well ascontrol motors using pulse width modulation. This object can be used with the Propeller Robot ControlBoard to drive the on-board H-Bridge, which in turn drives the DC motors. This object can be <strong>download</strong>edfrom the Stingray robot product page on our website or from the Propeller object exchange listed in theUseful Websites section at the end of this document.Brushed DC Spur-Gear MotorsThe Stingray robot was designed to be fast when needed and as such a method of locomotion was chosento support this requirement. Servo motors used in many smaller robots are too slow and have too little loadcapacity for the Stingray. Instead, brushed DC gear motors were selected. Specifically the motors used areknown as Spur-Gear motors. These motors provide a good value and performance in a reasonably sizedpackage.The motors included in the Stingray kit have the followingspecifications:• 7.2 VDC Nominal @ ~180 mA (no load)• 310 RPM (30:1 gear ratio on output shaft)• 6mm diameter output shaft w/5.5mm detent for hubs withset screws• Output shaft length: 18 mm (0.70”)• Motor shaft extends from back of motor allowing encodersupport• Motor shaft length: 10 mm (0.40”)• Four M3 size mounting holesInternally the Spur-gear motor looks like the picture shown below, left. The back side of the motor is shownin the figure on the right. Take note of the (+) sign that is used to indicate polarity. While motors don’thave a specific polarity per se, the plus signs help to match polarity of the motors on either side so you knowthe direction the motor will turn when you apply power to it. When you apply power to the motor so thatthe positive supply is connected to the (+) terminal and the other terminal connects to ground the internalmotor shaft turns clockwise while the output shaft spins counter-clockwise.Spur-gear motorinternalsBack side of motor; notethe ⊕ symbol to helpmatch polarity.Copyright © Parallax Inc. Stingray Robot (#28980) v1.1 10/6/2009 Page 24 of 26