309029D Automatic Delta Spray Air Spray Gun ... - Graco Inc.
309029D Automatic Delta Spray Air Spray Gun ... - Graco Inc.
309029D Automatic Delta Spray Air Spray Gun ... - Graco Inc.
You also want an ePaper? Increase the reach of your titles
YUMPU automatically turns print PDFs into web optimized ePapers that Google loves.
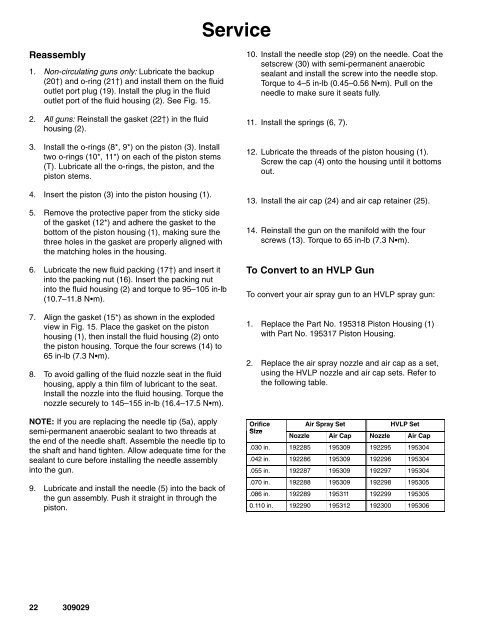
ServiceReassembly1. Non-circulating guns only: Lubricate the backup(20) and o-ring (21) and install them on the fluidoutlet port plug (19). Install the plug in the fluidoutlet port of the fluid housing (2). See Fig. 15.2. All guns: Reinstall the gasket (22) in the fluidhousing (2).3. Install the o-rings (8*, 9*) on the piston (3). Installtwo o-rings (10*, 11*) on each of the piston stems(T). Lubricate all the o-rings, the piston, and thepiston stems.4. Insert the piston (3) into the piston housing (1).5. Remove the protective paper from the sticky sideof the gasket (12*) and adhere the gasket to thebottom of the piston housing (1), making sure thethree holes in the gasket are properly aligned withthe matching holes in the housing.6. Lubricate the new fluid packing (17) and insert itinto the packing nut (16). Insert the packing nutinto the fluid housing (2) and torque to 95–105 in-lb(10.7–11.8 Nm).7. Align the gasket (15*) as shown in the explodedview in Fig. 15. Place the gasket on the pistonhousing (1), then install the fluid housing (2) ontothe piston housing. Torque the four screws (14) to65 in-lb (7.3 Nm).8. To avoid galling of the fluid nozzle seat in the fluidhousing, apply a thin film of lubricant to the seat.Install the nozzle into the fluid housing. Torque thenozzle securely to 145–155 in-lb (16.4–17.5 Nm).NOTE: If you are replacing the needle tip (5a), applysemi-permanent anaerobic sealant to two threads atthe end of the needle shaft. Assemble the needle tip tothe shaft and hand tighten. Allow adequate time for thesealant to cure before installing the needle assemblyinto the gun.9. Lubricate and install the needle (5) into the back ofthe gun assembly. Push it straight in through thepiston.10. Install the needle stop (29) on the needle. Coat thesetscrew (30) with semi-permanent anaerobicsealant and install the screw into the needle stop.Torque to 4–5 in-lb (0.45–0.56 Nm). Pull on theneedle to make sure it seats fully.11. Install the springs (6, 7).12. Lubricate the threads of the piston housing (1).Screw the cap (4) onto the housing until it bottomsout.13. Install the air cap (24) and air cap retainer (25).14. Reinstall the gun on the manifold with the fourscrews (13). Torque to 65 in-lb (7.3 Nm).To Convert to an HVLP <strong>Gun</strong>To convert your air spray gun to an HVLP spray gun:1. Replace the Part No. 195318 Piston Housing (1)with Part No. 195317 Piston Housing.2. Replace the air spray nozzle and air cap as a set,using the HVLP nozzle and air cap sets. Refer tothe following table.OrificeSize<strong>Air</strong> <strong>Spray</strong> SetHVLP SetNozzle <strong>Air</strong> Cap Nozzle <strong>Air</strong> Cap.030 in. 192285 195309 192295 195304.042 in. 192286 195309 192296 195304.055 in. 192287 195309 192297 195304.070 in. 192288 195309 192298 195305.086 in. 192289 195311 192299 1953050.110 in. 192290 195312 192300 19530622 309029


