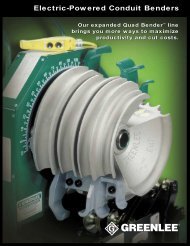
881 and 881CT Cam Track Hydraulic Benders
881 and 881CT Cam Track® Hydraulic Benders - CableOrganizer.com
881 and 881CT Cam Track® Hydraulic Benders - CableOrganizer.com
- No tags were found...
Create successful ePaper yourself
Turn your PDF publications into a flip-book with our unique Google optimized e-Paper software.
Assembly <strong>and</strong> Operation Instructions<strong>881</strong> <strong>and</strong> <strong>881</strong>CT with 1813 Bending Table (cont’d)<strong>881</strong> <strong>and</strong> <strong>881</strong>CT <strong>Cam</strong> <strong>Track</strong> ® <strong>Hydraulic</strong> <strong>Benders</strong>35. Position the vise unit at a distance from the pumpsupport so that the vise unit will not contact thepump support before the bend is complete. Clampthe conduit down in the vise unit.38. Hold the shoe against the conduit <strong>and</strong> position thesaddle so the saddle insert is toward the operator.Align the hole in the saddle with the hole in the shoe<strong>and</strong> insert the saddle pin (M). Secure the saddle pinwith the hitch pin clip (E).SADDLESADDLE INSERTSADDLE39. Allow the bender to rock forward <strong>and</strong> ensure that thefollow bar comes forward with it, so that the followbar contacts the saddle.PINFollow the instructions <strong>and</strong> safety informationsupplied with your hydraulic pump.36. Push the follow bar back (to the right in the illustration)until the follow bar foot contacts the bendermounting unit. Position the saddle <strong>and</strong> saddle pin(M) where they can be reached for assembly.ALIGN BENDING MARK WITHFRONT EDGE OF SADDLE INSERT37. Rock the bender frame as shown <strong>and</strong> rotate theshoe back for the assembly of the saddle <strong>and</strong> pin.40. Rotate the pump control lever counterclockwise.Activate the hydraulic pump until the shoe justcontacts the conduit. Check that the saddle <strong>and</strong>follow bar are snug, <strong>and</strong> that the follow bar isagainst the saddle, as shown. Be sure that thebending mark on the conduit is aligned with the frontedge of the saddle insert. Attach the model 1805Bending Degree Indicator (35) to the conduit. Zerothe indicator by rotating the degree wheel.


