P-Bus Gateway Firmware PBGW2.128 Version 1.61
P-Bus Gateway Firmware PBGW2.128 Version 1.61 - Persy
P-Bus Gateway Firmware PBGW2.128 Version 1.61 - Persy
- No tags were found...

Create successful ePaper yourself
Turn your PDF publications into a flip-book with our unique Google optimized e-Paper software.
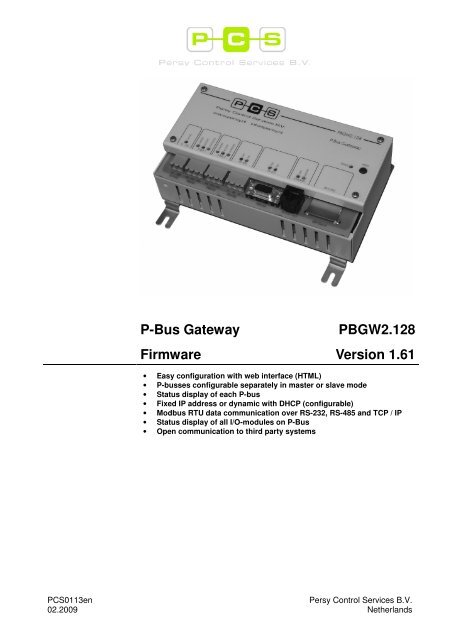
P-<strong>Bus</strong> <strong>Gateway</strong><br />
<strong>Firmware</strong><br />
<strong>PBGW2.128</strong><br />
<strong>Version</strong> <strong>1.61</strong><br />
• Easy configuration with web interface (HTML)<br />
• P-busses configurable separately in master or slave mode<br />
• Status display of each P-bus<br />
• Fixed IP address or dynamic with DHCP (configurable)<br />
• Modbus RTU data communication over RS-232, RS-485 and TCP / IP<br />
• Status display of all I/O-modules on P-<strong>Bus</strong><br />
• Open communication to third party systems<br />
PCS0113en<br />
02.2009<br />
Persy Control Services B.V.<br />
Netherlands
General<br />
The gateway is being configured by means of a web interface (HTML). Use a<br />
standard web browser ie. MSIE5.5 or higher.<br />
If you have more than one PC, you must use an external hub. Connect the<br />
Ethernet port on the gateway (X6) to a port on the hub using a straight through<br />
Ethernet cable. If you only have one PC, you can connect the gateway to the PC<br />
directly without a hub. For a single PC, connect the Ethernet port on the gateway<br />
(X6) to the Network Adapter on the PC using a crossover cable (red tag).<br />
Make sure that the PC is configured in the same subnet as the gateway is.<br />
Go to the Network Connections of your PC from the Control Panel.<br />
Make sure the LAN connection to which the gateway is connected is disabled. If<br />
not, right click on the LAN connection and choose ‘disable’.<br />
Now, right click on the LAN connection and choose ‘properties’.<br />
In the next window select Internet Protocol (TCP/IP) and click ‘Properties’.<br />
2/17<br />
Persy Control Services B.V.<br />
Netherlands<br />
<strong>PBGW2.128</strong> – P-bus <strong>Gateway</strong><br />
PCS0113en<br />
02.2009
Select ‘Use the following IP address:’ and use the following settings:<br />
IP address 192.168.1.1 (last digit could range from 1-253)<br />
Subnet mask 255.255.255.0<br />
Now click OK to confirm these settings. Click OK again in the next window.<br />
Establish a connection by double clicking the LAN connection in the Network<br />
Connections Window.<br />
Factory defaults<br />
The standard IP settings (factory default) of the gateway are:<br />
IP address 192.168.1.254<br />
Subnet mask 255.255.255.0<br />
When the gateway isn’t reachable (anymore) over TCP / IP or the configuration<br />
isn’t desirable somehow, it can be set back to factory defaults.<br />
Follow the next procedure in order to set the gateway to factory defaults:<br />
1. Interrupt the gateway’s power supply by unplugging the screw terminal X1<br />
2. Press the RESET-button and keep it pressed<br />
3. Power up the gateway by plugging in the screw terminal X1<br />
4. Keep pressing the RESET-button until the STATUS-led is off<br />
5. Release the RESET-button<br />
NOTE:<br />
When the gateway is set back to factory defaults, all settings are lost.<br />
Persy Control Services B.V.<br />
Netherlands<br />
<strong>PBGW2.128</strong> – P-bus <strong>Gateway</strong><br />
3/17<br />
PCS0113en<br />
02.2009
Device configuration<br />
System Overview<br />
Open the web browser and type the IP address of the gateway in the URL field of<br />
the browser. The following page will show (System Overview):<br />
In the upper right corner of the page you can find the current <strong>Firmware</strong> version in<br />
the gateway (see also “<strong>Firmware</strong> upgrade”).<br />
On the left is the navigation panel. You can navigate to a page by clicking on the<br />
corresponding menu item in the panel. The page is being reloaded and the active<br />
item is printed bold in the menu. As you can see in the example above we are<br />
currently in the ‘System Overview’. This page displays the present status and<br />
configuration of the gateway. To make changes in the configuration navigate to the<br />
corresponding subject in the navigation panel.<br />
4/17<br />
Persy Control Services B.V.<br />
Netherlands<br />
<strong>PBGW2.128</strong> – P-bus <strong>Gateway</strong><br />
PCS0113en<br />
02.2009
Device Setup<br />
TCP / IP Settings<br />
NOTE:<br />
In this page you can make changes in the TCP / IP communication settings. The<br />
Physical Address (or MAC address) is unique for each device and can be used by<br />
the DHCP server to identify the gateway and to assign it a reserved IP address.<br />
When the gateway is configured in a network containing a DHCP server, and you<br />
want the DHCP server to configure the gateway’s IP address and Subnet mask,<br />
check the checkbox next to ‘DHCP Enabled’.<br />
If you want to manually specify the IP address and Subnet mask, uncheck the<br />
checkbox next to ‘DHCP Enabled’. The fields ‘IP Address’ en ‘Subnet mask’ will<br />
become active and the addresses can be filled in here.<br />
To apply the settings click ‘Apply Settings’. The settings will be saved to the nonvolatile<br />
memory and the gateway will restart. After restart you’ll have to reconnect<br />
to the gateway by specifying the new IP address in the URL field at the top of the<br />
browser.<br />
If you want to discard the settings click ‘Discard Settings’. The same result can be<br />
achieved by reloading the page.<br />
!! When applying the settings (‘Apply Settings’) all communications could be<br />
interrupted temporarily.<br />
Persy Control Services B.V.<br />
Netherlands<br />
<strong>PBGW2.128</strong> – P-bus <strong>Gateway</strong><br />
5/17<br />
PCS0113en<br />
02.2009
Device Setup<br />
Port Settings<br />
In this page you can make changes in the RS-232 and RS-485 configuration. This<br />
configuration is being applied to the Modbus RTU protocol when enabled in the<br />
Modbus RTU Server Protocol Settings. Match these settings to the device the<br />
gateway communicates with (Modbus Client).<br />
The possible settings are:<br />
Baudrate: 110, 300, 1200, 2400, 4800, 9600, 19200, 38400, 57600, 115200<br />
Databits: 8<br />
Parity: None, Even, Odd<br />
Stopbits: 1, 2<br />
Handshaking: None, RTS/CTS<br />
The factory defaults for RS-232 are: 9600, 8, N, 1, No Handshaking<br />
The factory defaults for RS-485 are: 9600, 8, N, 1.<br />
If RTS/CTS handshaking is used with RS-232, pin 7 & 8 of the DSUB-9 connector<br />
(X5) have to be connected also.<br />
NOTE:<br />
!! When applying the settings (‘Apply Settings’) all communications could be<br />
interrupted temporarily.<br />
6/17<br />
Persy Control Services B.V.<br />
Netherlands<br />
<strong>PBGW2.128</strong> – P-bus <strong>Gateway</strong><br />
PCS0113en<br />
02.2009
P-<strong>Bus</strong><br />
Settings (1)<br />
In this page you can make changes to the P-bus configuration.<br />
At ‘Configured Operating Mode’ you can choose the operating mode for the<br />
corresponding P-bus. The possible operating modes are: ‘Slave’ and ‘Master’.<br />
At ‘Current Operating Mode’ the current operating mode of the corresponding P-<br />
bus is being displayed.<br />
Choose Slave mode if the corresponding P-bus has already a master controller<br />
(Siemens PRU/PRV or PX) attached to it. In this mode the gateway depends on the<br />
master controller which also provides the reference voltage on the PU-line. The<br />
gateway will act as a slave on the P-bus. The green led ‘MASTER’ above the P-bus<br />
connector (X2 or X3) is off in this mode.<br />
Choose Master mode if you want the corresponding P-bus of the gateway to act as<br />
a master controller on the P-bus. The reference voltage on the PU-line will then be<br />
provided by the gateway. The green led ‘MASTER’ above the P-bus connector (X2<br />
or X3) is on in this mode.<br />
To protect external equipment and the gateway itself, the reference voltage is<br />
switched on only when the gateway doesn’t detect any reference voltage on the<br />
PU-line. If the gateway does detect a reference voltage on the PU-line, it will<br />
configure the particular P-bus automatically in slave mode. This could lead to a P-<br />
bus configured in master mode displaying the Current Operating Mode as SLAVE.<br />
In this case, check if there is a master controller already present on the P-bus.<br />
At ‘I/O-Modules’ the number of slaves (I/O-modules) currently detected on the P-<br />
bus is being displayed.<br />
When ‘Overload’ displays YES, this means that there are too many load units<br />
detected on the P-bus. In this case, reduce the number of slaves on the P-bus.<br />
Persy Control Services B.V.<br />
Netherlands<br />
<strong>PBGW2.128</strong> – P-bus <strong>Gateway</strong><br />
7/17<br />
PCS0113en<br />
02.2009
P-<strong>Bus</strong><br />
Settings (2)<br />
NOTE:<br />
Each P-bus can handle a maximum of 64 load units. For the gateway in total (2x64)<br />
the maximum is 128 load units. The buffer in the gateway has space for a<br />
maximum of 127 slaves per P-bus in the range of address 1..127.<br />
!! When applying the settings (‘Apply Settings’) all communications could be<br />
interrupted temporarily.<br />
8/17<br />
Persy Control Services B.V.<br />
Netherlands<br />
<strong>PBGW2.128</strong> – P-bus <strong>Gateway</strong><br />
PCS0113en<br />
02.2009
P-<strong>Bus</strong><br />
Modulelist (1)<br />
.<br />
This page displays the status of all I/O-modules on the P-<strong>Bus</strong>. Each module-type is<br />
being displayed with the module-address number in front. By mouse-click on the +<br />
sign the module expands and all I/O-channels become visible:<br />
Persy Control Services B.V.<br />
Netherlands<br />
<strong>PBGW2.128</strong> – P-bus <strong>Gateway</strong><br />
9/17<br />
PCS0113en<br />
02.2009
P-<strong>Bus</strong><br />
Modulelist (2)<br />
To expand all modules at once simply click ‘expand all’:<br />
The value / status of each I/O-channel is displayed depending on the module type<br />
as measurement, command, input or control-output followed by the standard unit.<br />
The LG Ni-1000 modules PTM1.*R1K are displayed as -50 .. 150 °C<br />
n.c. = not connected<br />
M = manual control<br />
short-circuit = input is short-circuited<br />
By clicking on ‘collapse all’ all I/O-modules are collapsed to their initial state.<br />
By default, the I/O-modules being displayed are those which are actually on the P-<br />
<strong>Bus</strong> (‘hide empty modules’). To show all I/O-addresses (also the unused<br />
addresses) click ‘show empty modules’.<br />
In order to switch the display to P-<strong>Bus</strong> 2 navigate by clicking on P-<strong>Bus</strong> 2 in the<br />
navigation bar:<br />
10/17<br />
Persy Control Services B.V.<br />
Netherlands<br />
<strong>PBGW2.128</strong> – P-bus <strong>Gateway</strong><br />
PCS0113en<br />
02.2009
P-<strong>Bus</strong><br />
Virtual Modules (1)<br />
Open communication through the P-<strong>Bus</strong> gateway is possible by making use of<br />
‘virtual modules’. These virtual modules are fictitious modules which are read by<br />
the system-controller if the corresponding P-<strong>Bus</strong> is configured as SLAVE. The<br />
modules are read as if they were really present at the P-<strong>Bus</strong>.<br />
The data fed to these virtual modules is coming from the modbus-registers in the<br />
gateway. In this manner an open communication path is created between the<br />
system-controller and an open DDC system by means of modbus-communication.<br />
Persy Control Services B.V.<br />
Netherlands<br />
<strong>PBGW2.128</strong> – P-bus <strong>Gateway</strong><br />
11/17<br />
PCS0113en<br />
02.2009
P-<strong>Bus</strong><br />
Virtual Modules (2)<br />
In this picture an example is shown in which a communication-link is created with a<br />
PRU / PRV through the P-<strong>Bus</strong> gateway. The PRU / PRV communicates with the<br />
I/O-modules via P-<strong>Bus</strong>. The P-<strong>Bus</strong> of the gateway is configured as SLAVE and is<br />
also visible by the PRU / PRV. In the virtual module-list fictive I/O-modules can be<br />
configured which are provided with information by the universal DDC controller.<br />
Click ‘add’ to create a new virtual module:<br />
12/17<br />
Persy Control Services B.V.<br />
Netherlands<br />
<strong>PBGW2.128</strong> – P-bus <strong>Gateway</strong><br />
PCS0113en<br />
02.2009
P-<strong>Bus</strong><br />
Virtual Modules (3)<br />
In the left column the fictive module address can be configured.<br />
By clicking on the module-type in the right column the type can be configured.<br />
A listbox is being shown in which you can choose from all available PTM-..<br />
moduletypes. Choose the desired type.<br />
The delete a module move the indicator in the most left column to the module you<br />
wish to delete by clicking in the empty square. Click ‘delete’.<br />
To delete all modules click ‘clear all’.<br />
If all desired virtual modules are entered into the table you need to store the table<br />
into the gateway’s non-volatile memory by clicking ‘apply’.<br />
If you wish to discard the changes you made in the table click ‘discard’.<br />
Persy Control Services B.V.<br />
Netherlands<br />
<strong>PBGW2.128</strong> – P-bus <strong>Gateway</strong><br />
13/17<br />
PCS0113en<br />
02.2009
Modbus RTU Server<br />
Protocol Settings<br />
In this page you can make changes to the Modbus communication configuration.<br />
A Modbus RTU connection can be established over each of the 3 electrical<br />
interfaces: RS-232, RS-485 and Ethernet (TCP/IP). It’s recommended to use one<br />
connection at the same time. Check the checkbox next to Enabled of the electrical<br />
interface you want to use and uncheck the other two.<br />
At RS-232 and RS-485 you can specify a ‘Slave-address’. This is the modbus<br />
slave address the gateway will respond to at modbus requests form a modbus<br />
client.<br />
Also the modbus inter-frame timeout can be specified. If the checkbox before ‘Auto’<br />
is checked, the gateway will calculate the inter-frame timeout automatically. In most<br />
cases this auto timeout is sufficient for reliable communication.<br />
Sometimes it’s desirable to manually specify the inter-frame timeout to be able to<br />
adjust the value to the connected client. For example if the client drops out in the<br />
middle of a modbus frame for a long period of time, the frames don’t always survive<br />
intact when they’ve reached the gateway. This could lead to frame-errors and<br />
delays in the communication. In this case uncheck the checkbox before ‘Auto’ and<br />
specify the inter-frame timeout in the field next to it (in tenths of milliseconds).<br />
Under ‘Modbus on TCP/IP’ you can specify the TCP Port number at which the<br />
gateway listens for modbus requests. Match this to the Port number at which the<br />
modbus client sends out its requests. The default TCP Port for modbus<br />
communications and also the gateway’s factory default is 502.<br />
NOTE:<br />
!! When applying the settings (‘Apply Settings’) all communications could be<br />
interrupted temporarily.<br />
14/17<br />
Persy Control Services B.V.<br />
Netherlands<br />
<strong>PBGW2.128</strong> – P-bus <strong>Gateway</strong><br />
PCS0113en<br />
02.2009
Mod<strong>Bus</strong> Registers<br />
Each PTM I/O-module contains 9 registers (16-bit). There are 4 read registers, 4<br />
write registers and 1 register to identify the moduletype. The interpretation of the<br />
read and write registers depends on the moduletype. For example: a digital output<br />
module (PTM1.2Q250) with 2 relay outputs just needs 2 bits (0 or 1) of one register<br />
to indicate if a relay is on or off. An analog input module (PTM1.4R1K) with 4 inputs<br />
uses one register for each A/D converter (input). A detailed description of the I/O<br />
module’s register contents can be found in the documents: PCS013x to PCS018x.<br />
The P-bus <strong>Gateway</strong> is a transparent gateway. This means: all of the I/O-module’s<br />
registers are identically matched on modbus level. With use of holding registers or<br />
input registers the register contents of every I/O-module can directly be read or<br />
written to.<br />
modbus functions<br />
The following modbus functions are supported by the gateway:<br />
Function Code<br />
Modbus Function<br />
Dec. Hex. Description<br />
3 0x03 READ HOLDING REGISTERS<br />
4 0x04 READ INPUT REGISTERS<br />
6 0x06 WRITE SINGLE REGISTER<br />
16 0x10 WRITE MULTIPLE REGISTERS<br />
There’s no distinction being made between input registers and holding registers.<br />
So the modbus functions 3 and 4 will always have the same result.<br />
register mapping<br />
The general mapping of the modbus registers is as follows:<br />
Dec. Hex. Description<br />
0 – 0x0000 – Diagnostic functions of the gateway<br />
255 0x00FF<br />
256 –<br />
511<br />
512 –<br />
2559<br />
2560 –<br />
2815<br />
0x0100 –<br />
0x01FF<br />
0x0200 –<br />
0x09FF<br />
0x0A00 –<br />
0x0AFF<br />
Moduletype Registers PBUS 1<br />
Register 256 matches the moduletype at moduleaddress 0.<br />
Register 257 matches the moduletype at moduleaddress 1.<br />
etc, etc..<br />
Read/Write Registers PBUS 1<br />
Per I/O-module:<br />
4 read registers<br />
4 write registers<br />
Register 512-515 matches read register 0-3 of module 0.<br />
Register 516-519 matches write register 0-3 of module 0.<br />
Register 520-523 matches read register 0-3 of module 1.<br />
Register 524-527 matches write register 0-3 of module 1.<br />
etc, etc..<br />
Moduletype Registers PBUS 2<br />
Mapping in the same manner as for PBUS 1<br />
2816 –<br />
4863<br />
0x0B00 –<br />
0x12FF<br />
Read/Write Registers PBUS 2<br />
Mapping in the same manner as for PBUS 1<br />
Only the I/O module write registers are writable (modbus functions 6 and 16). All<br />
other registers are read-only.<br />
Persy Control Services B.V.<br />
Netherlands<br />
<strong>PBGW2.128</strong> – P-bus <strong>Gateway</strong><br />
15/17<br />
PCS0113en<br />
02.2009
Calculating example<br />
If you want to calculate the modbus register offset Y to control an I/O Module at<br />
address A then:<br />
for P-<strong>Bus</strong> 1: Y = 512 + A * 8<br />
and<br />
for P-<strong>Bus</strong> 2: Y = 2816 + A * 8<br />
in which the registers:<br />
Y + 0 to Y + 3 are the read registers 0 – 3 of the I/O Module at address A and<br />
Y + 4 to Y + 7 are the write registers 0 – 3 of the I/O Module at address A.<br />
Now, suppose you’ll want to control an I/O Module at address 7 on P-<strong>Bus</strong> 2 then:<br />
Y = 2816 + 7 * 8 = 2872.<br />
The read registers 0 – 3 of the I/O Module at address 7 are: 2872 – 2875 and<br />
The write registers 0 – 3 of the I/O Module at address 7 are: 2876 – 2879.<br />
An easy tool for calculating the modbus-addresses is available on our website:<br />
www.persy.nl and can be found under document number: PCS018x<br />
diagnostic functions<br />
Detailed mapping of the diagnostic functions:<br />
Dec. Hex. Description<br />
0 0x00 Device Status<br />
1 – 7 0x01 – 0x07 Not used<br />
8 0x08 PBUS 1 Current Operating Mode<br />
9 0x09 PBUS 1 Error Status<br />
10 0x0A PBUS 1 Number of I/O Modules present<br />
11 0x0B PBUS 1 Number of load units present<br />
12 – 15 0x0C – 0x0F Not used<br />
16 0x10 PBUS 2 Current Operating Mode<br />
17 0x11 PBUS 2 Error Status<br />
18 0x12 PBUS 2 Number of I/O Modules present<br />
19 0x13 PBUS 2 Number of load units present<br />
20 – 255 0x14 – 0xFF Not used<br />
Device Status:<br />
0 = normal operations<br />
1 = firmware upgrade mode<br />
2 = reset<br />
3 = hardware failure, gateway need to be reset or exchanged<br />
PBUS Current Operating Mode:<br />
0 = not used<br />
1 = slave<br />
2 = master<br />
PBUS Error Status:<br />
Bit Description<br />
0 Set = general failure, gateway need to be reset or exchanged<br />
1 Set = overload<br />
2..15 not used<br />
16/17<br />
Persy Control Services B.V.<br />
Netherlands<br />
<strong>PBGW2.128</strong> – P-bus <strong>Gateway</strong><br />
PCS0113en<br />
02.2009
<strong>Firmware</strong> upgrade<br />
The firmware in the gateway can be upgraded. New firmware releases will be<br />
offered to you on our website or can be ordered by mail and keep your product upto-date.<br />
The upgrade is done by use of a SD card. If you have downloaded the firmware<br />
from our website you can copy it to a SD card with a PC equipped with a cardreader/writer.<br />
Check if the SD card is formatted with the FAT16 (or FAT) file<br />
system. Only SD cards with a capacity between 32MB and 2GB are supported.<br />
Copy the firmware file ‘PBGW2128.BIN’ into the root folder of the SD card. If the<br />
firmware file is placed in a sub folder the gateway will not respond to it. To upgrade<br />
the gateway follow the next procedure:<br />
1. Place the SD card with the firmware in the SD slot of the gateway.<br />
2. Press the RESET-button until the STATUS-led starts blinking.<br />
3. The gateway is now ready for the upgrade. Release the RESET-button.<br />
4. <strong>Firmware</strong> upgrade process has started. Wait until the STATUS-led is off.<br />
The upgrade process takes approximately 2 minutes. During the process the<br />
STATUS-led will blink rapidly. On completion of the upgrade the gateway will<br />
restart and the STATUS-led will go off.<br />
If the STATUS-led doesn’t start blinking in step 2 this means that:<br />
- the gateway couldn’t find the firmware file ‘PBGW2128.BIN’ in the root<br />
folder of the SD card Copy the firmware file into the root folder<br />
- the firmware file on the SD card is corrupted Download the file again<br />
from our website and copy it onto the SD card<br />
- the gateway can’t handle the file system on the SD card Format the SD<br />
card with the FAT16 file system and copy the firmware file onto it<br />
- the SD card isn’t properly placed in the SD slot Take the SD card out<br />
and place it back again in the SD slot of the gateway<br />
Warning!<br />
!! Never switch off the gateway or interrupt its power supply during the firmware<br />
upgrade process (rapidly blinking STATUS-led) !!<br />
Switching off the gateway or interrupting its power supply during the upgrade<br />
process can permanently damage the gateway.<br />
NOTE:<br />
During the upgrade process the normal functions of the gateway are interrupted.<br />
Data communication over RS-232, RS-485, Ethernet and P-bus is not possible.<br />
© 2009 Persy Control Services B.V.<br />
www.persy.nl<br />
Subject to changes<br />
Persy Control Services B.V.<br />
Netherlands<br />
<strong>PBGW2.128</strong> – P-bus <strong>Gateway</strong><br />
17/17<br />
PCS0113en<br />
02.2009