


You also want an ePaper? Increase the reach of your titles
YUMPU automatically turns print PDFs into web optimized ePapers that Google loves.
<strong>QGIS</strong> <strong>for</strong> <strong>Archaeologists</strong> <strong>–</strong> A <strong>Basic</strong> <strong>Guide</strong><br />
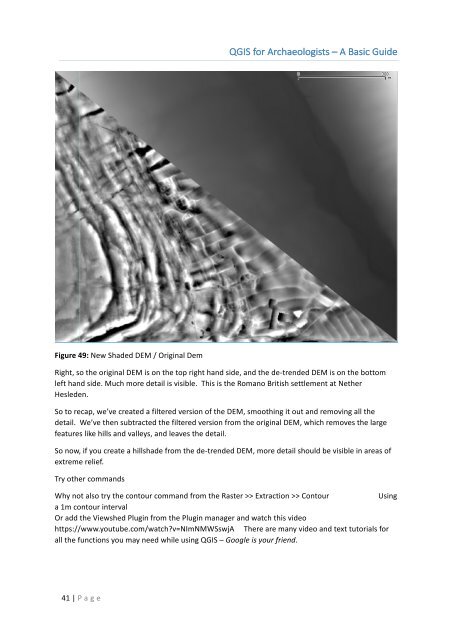
Figure 49: New Shaded DEM / Original Dem<br />
Right, so the original DEM is on the top right hand side, and the de-trended DEM is on the bottom<br />
left hand side. Much more detail is visible. This is the Romano British settlement at Nether<br />
Hesleden.<br />
So to recap, we’ve created a filtered version of the DEM, smoothing it out and removing all the<br />
detail. We’ve then subtracted the filtered version from the original DEM, which removes the large<br />
features like hills and valleys, and leaves the detail.<br />
So now, if you create a hillshade from the de-trended DEM, more detail should be visible in areas of<br />
extreme relief.<br />
Try other commands<br />
Why not also try the contour command from the Raster >> Extraction >> Contour<br />
Using<br />
a 1m contour interval<br />
Or add the Viewshed Plugin from the Plugin manager and watch this video<br />
https://www.youtube.com/watch?v=NImNMWSswjA There are many video and text tutorials <strong>for</strong><br />
all the functions you may need while using <strong>QGIS</strong> <strong>–</strong> Google is your friend.<br />
41 | P age