Compiled Embroidery Skill Articles

Create successful ePaper yourself
Turn your PDF publications into a flip-book with our unique Google optimized e-Paper software.
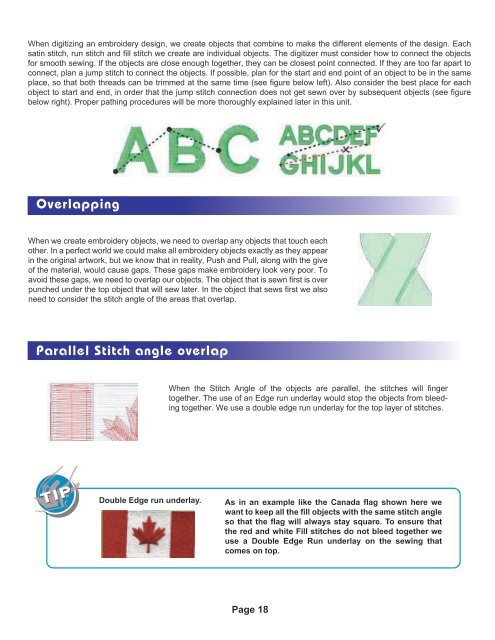
When digitizing an embroidery design, we create objects that combine to make the different elements of the design. Each<br />
satin stitch, run stitch and fill stitch we create are individual objects. The digitizer must consider how to connect the objects<br />
for smooth sewing. If the objects are close enough together, they can be closest point connected. If they are too far apart to<br />
connect, plan a jump stitch to connect the objects. If possible, plan for the start and end point of an object to be in the same<br />
place, so that both threads can be trimmed at the same time (see figure below left). Also consider the best place for each<br />
object to start and end, in order that the jump stitch connection does not get sewn over by subsequent objects (see figure<br />
below right). Proper pathing procedures will be more thoroughly explained later in this unit.<br />
Overlapping<br />
When we create embroidery objects, we need to overlap any objects that touch each<br />
other. In a perfect world we could make all embroidery objects exactly as they appear<br />
in the original artwork, but we know that in reality, Push and Pull, along with the give<br />
of the material, would cause gaps. These gaps make embroidery look very poor. To<br />
avoid these gaps, we need to overlap our objects. The object that is sewn first is over<br />
punched under the top object that will sew later. In the object that sews first we also<br />
need to consider the stitch angle of the areas that overlap.<br />
Parallel Stitch angle overlap<br />
When the Stitch Angle of the objects are parallel, the stitches will finger<br />
together. The use of an Edge run underlay would stop the objects from bleeding<br />
together. We use a double edge run underlay for the top layer of stitches.<br />
TIP<br />
TIP<br />
Double Edge run underlay.<br />
As in an example like the Canada flag shown here we<br />
want to keep all the fill objects with the same stitch angle<br />
so that the flag will always stay square. To ensure that<br />
the red and white Fill stitches do not bleed together we<br />
use a Double Edge Run underlay on the sewing that<br />
comes on top.<br />
Page 18