


Create successful ePaper yourself
Turn your PDF publications into a flip-book with our unique Google optimized e-Paper software.
TECH: CAMBELT CONVERSION<br />
1<br />
The kit could potentially be fitted to an<br />
engine in situ, but it’s far less awkward away<br />
from the car. Better still would be to<br />
assemble as part of an engine rebuild. It’s<br />
recommended to first check the fit of the<br />
pulley on the crankshaft. Here’s the<br />
crankshaft pulley checked for fitment.<br />
2<br />
If the pulley seems too tight, it’s easier to<br />
rectify issues now than when assembled in<br />
the aluminium casing. If the pulley is too<br />
tight, remove the woodruff key and check<br />
for burrs. Try to push the pulley back on and<br />
you’ll soon tell if it’s a burr on the key or the<br />
crankshaft tail itself. Ours went straight on.<br />
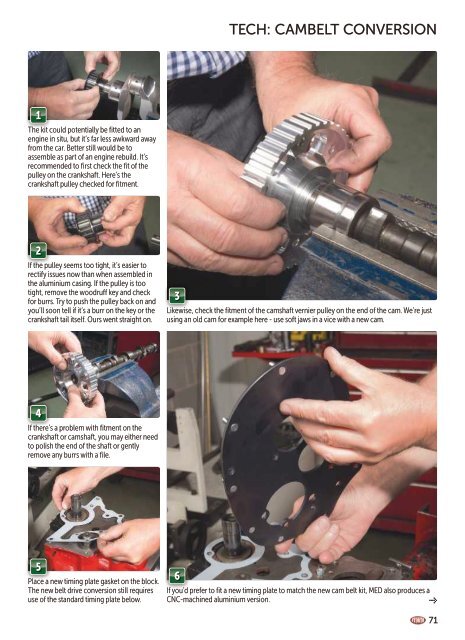
3<br />
Likewise, check the fitment of the camshaft vernier pulley on the end of the cam. We’re just<br />
using an old cam for example here - use soft jaws in a vice with a new cam.<br />
4<br />
If there’s a problem with fitment on the<br />
crankshaft or camshaft, you may either need<br />
to polish the end of the shaft or gently<br />
remove any burrs with a file.<br />
5<br />
Place a new timing plate gasket on the block.<br />
The new belt drive conversion still requires<br />
use of the standard timing plate below.<br />
6<br />
If you’d prefer to fit a new timing plate to match the new cam belt kit, MED also produces a<br />
CNC-machined aluminium version.<br />
71