


You also want an ePaper? Increase the reach of your titles
YUMPU automatically turns print PDFs into web optimized ePapers that Google loves.
Tech<br />
25<br />
Turn the hub over, remembering to fit the<br />
spacer before the remaining bearing race<br />
and inner grease seal. A new plastic shield is<br />
supplied to stop water ingress. Check the old<br />
one is not still on the driveshaft.<br />
26<br />
Before the hub is refitted, check the ball<br />
joints. You should be able to move the pin in<br />
all directions with slight tension felt using a<br />
1/2-inch ring spanner over the taper as a<br />
lever. If they are worn, fit new ones.<br />
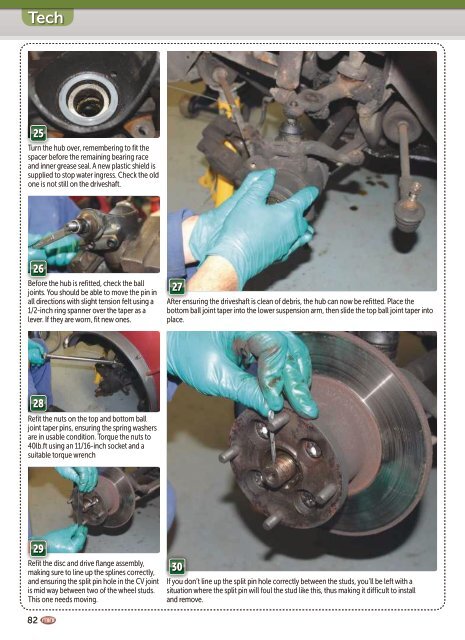
27<br />
After ensuring the driveshaft is clean of debris, the hub can now be refitted. Place the<br />
bottom ball joint taper into the lower suspension arm, then slide the top ball joint taper into<br />
place.<br />
28<br />
Refit the nuts on the top and bottom ball<br />
joint taper pins, ensuring the spring washers<br />
are in usable condition. Torque the nuts to<br />
40lb.ft using an 11/16-inch socket and a<br />
suitable torque wrench<br />
29<br />
Refit the disc and drive flange assembly,<br />
making sure to line up the splines correctly,<br />
and ensuring the split pin hole in the CV joint<br />
is mid way between two of the wheel studs.<br />
This one needs moving.<br />
30<br />
If you don’t line up the split pin hole correctly between the studs, you’ll be left with a<br />
situation where the split pin will foul the stud like this, thus making it difficult to install<br />
and remove.<br />
82