


Create successful ePaper yourself
Turn your PDF publications into a flip-book with our unique Google optimized e-Paper software.
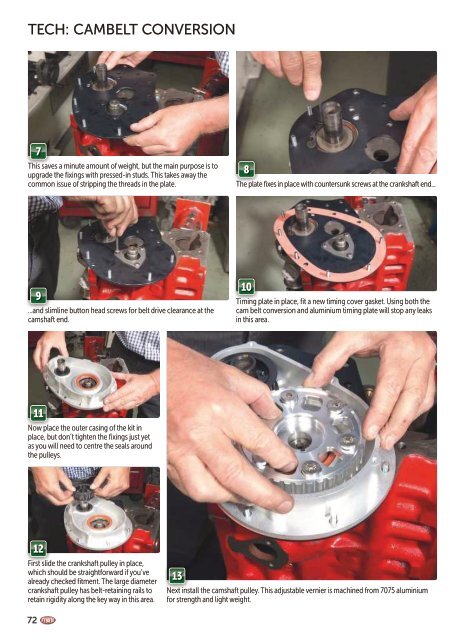
TECH: CAMBELT CONVERSION<br />
7<br />
This saves a minute amount of weight, but the main purpose is to<br />
upgrade the fixings with pressed-in studs. This takes away the<br />
common issue of stripping the threads in the plate.<br />
8<br />
The plate fixes in place with countersunk screws at the crankshaft end...<br />
9<br />
...and slimline button head screws for belt drive clearance at the<br />
camshaft end.<br />
10<br />
Timing plate in place, fit a new timing cover gasket. Using both the<br />
cam belt conversion and aluminium timing plate will stop any leaks<br />
in this area.<br />
11<br />
Now place the outer casing of the kit in<br />
place, but don’t tighten the fixings just yet<br />
as you will need to centre the seals around<br />
the pulleys.<br />
12<br />
First slide the crankshaft pulley in place,<br />
which should be straightforward if you’ve<br />
already checked fitment. The large diameter<br />
crankshaft pulley has belt-retaining rails to<br />
retain rigidity along the key way in this area.<br />
13<br />
Next install the camshaft pulley. This adjustable vernier is machined from 7075 aluminium<br />
for strength and light weight.<br />
72