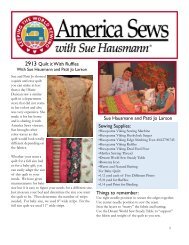
2413 Terrific Free Motion Trapunto - Husqvarna Viking
2413 Terrific Free Motion Trapunto - Husqvarna Viking
2413 Terrific Free Motion Trapunto - Husqvarna Viking

You also want an ePaper? Increase the reach of your titles
YUMPU automatically turns print PDFs into web optimized ePapers that Google loves.
hold the switch down. Take 3-4 stitches in<br />
place then begin moving the Fabric Mover<br />
surface guiding the surface so you stitch<br />
all the way around the outside of the rose<br />
design. Do not stitch other lines of the<br />
design yet.<br />
Remember—you do not need to control the<br />
speed of the sewing; your Stitch Regulator<br />
does all the work for you. And you do not<br />
push the fabric as you sew, instead, simply<br />
move the Fabric Mover surface. There will<br />
be no stitching except in place until you<br />
move the Fabric Mover surface. When<br />
you reach the edge of the Fabric Mover<br />
opening, stop with the needle down, lift the<br />
fabric sandwich and move the Fabric Mover<br />
surface to the next area to be stitched.<br />
7. Remove the fabric from the Fabric Mover.<br />
Trim away the stabilizer and trim up to the<br />
stitching to trim away the high loft batting<br />
outside the rose design. Now the center<br />
rose design of your wall hanging will be<br />
very puffy for “easy trapunto”. This original<br />
stitching can be removed when the project is<br />
fi nished by spraying it with water.<br />
Batting and Backing:<br />
1. Re-thread with cotton sewing thread top<br />
and bobbin. Place the cotton batting square<br />
under the wall hanging top and stitch around<br />
the outside with a 3-step zigzag to stitch the<br />
edges together.<br />
2. The backing is cut 1” larger than the batting<br />
and top all the way around so that the edges<br />
can be folded to the front to create the ½”<br />
binding. Place the backing wrong side up and<br />
center the wall hanging top/batting on top<br />
and baste the layers with temporary spray<br />
adhesive or safety pins.<br />
Quilting:<br />
1. Thread with cotton or rayon thread top<br />
and bobbin. Place the wall hanging onto<br />
the Fabric Mover surface. Step on the “foot<br />
switch” and move the Fabric Mover surface.<br />
Begin by stitching free motion around the<br />
outside of the rose design stitching over your<br />
Wash-A-Way thread stitching then stitch<br />
over all the marked lines in the rose design to<br />
create the trapunto detail of the roses.<br />
2. Once the roses are quilted, move to the area<br />
around the roses and stipple stitch open<br />
swirling stitch designs up to the borders. If<br />
you stitched the optional framing stitch, do<br />
not catch this in the stippling. Continue<br />
stippling the borders<br />
Binding:<br />
1. Fold the raw edge of the backing toward<br />
the wall hanging top ½”. The raw edge of<br />
the backing should be against the edge of<br />
the top. For perfect mitred corners use the<br />
Mitred binding tool. Fold the backing over<br />
the edge of the top and pin or fuse in place<br />
with Steam a Seam fusible web strips.<br />
2. Snap on the Left Edge Topstitch foot And<br />
select a blanket stitch or buttonhole stitch<br />
and stitch the binding in place with the right<br />
side up. Enjoy!!<br />
Thanks to the underwriter:<br />
www.sulky.com
![[pdf] husqvarna viking sewing machine stitch comparison chart](https://img.yumpu.com/11869478/1/190x146/pdf-husqvarna-viking-sewing-machine-stitch-comparison-chart.jpg?quality=85)