

MakerBot Educators Guidebook 3rd Edition

Create successful ePaper yourself
Turn your PDF publications into a flip-book with our unique Google optimized e-Paper software.
MAKERBOT EDUCATORS GUIDEBOOK Chapter 4: Curriculum Project Ideas<br />
PAGE 100<br />
07<br />
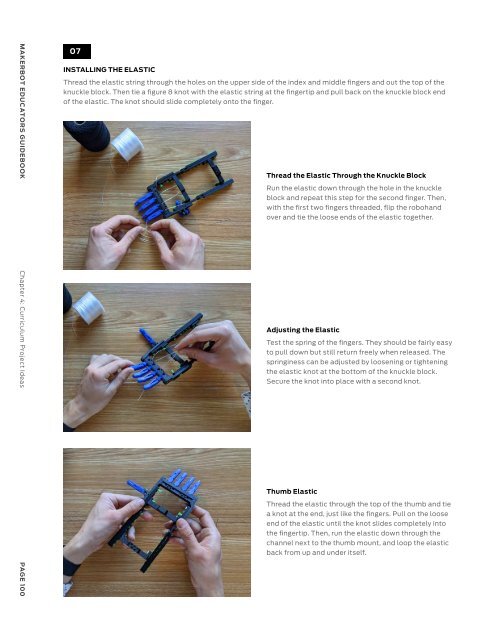
INSTALLING THE ELASTIC<br />
Thread the elastic string through the holes on the upper side of the index and middle fingers and out the top of the<br />
knuckle block. Then tie a figure 8 knot with the elastic string at the fingertip and pull back on the knuckle block end<br />
of the elastic. The knot should slide completely onto the finger.<br />
Thread the Elastic Through the Knuckle Block<br />
Run the elastic down through the hole in the knuckle<br />
block and repeat this step for the second finger. Then,<br />
with the first two fingers threaded, flip the robohand<br />
over and tie the loose ends of the elastic together.<br />
Adjusting the Elastic<br />
Test the spring of the fingers. They should be fairly easy<br />
to pull down but still return freely when released. The<br />
springiness can be adjusted by loosening or tightening<br />
the elastic knot at the bottom of the knuckle block.<br />
Secure the knot into place with a second knot.<br />
Thumb Elastic<br />
Thread the elastic through the top of the thumb and tie<br />
a knot at the end, just like the fingers. Pull on the loose<br />
end of the elastic until the knot slides completely into<br />
the fingertip. Then, run the elastic down through the<br />
channel next to the thumb mount, and loop the elastic<br />
back from up and under itself.<br />
08<br />
INSTALLING THE STRING<br />
Pull a long piece of string through the hole and slot in the bottom of the finger. Tie a knot on the end of the string<br />
at the fingertip, pull on the loose end of the string until the knot slides inside the finger tip. Find the angled hole in<br />
the knuckle block behind the finger, run the thread through the hole and pull it through to the other side and flip the<br />
robohand over to run the string through holes in both the first and second bridge.<br />
A. Repeat<br />
Follow the same steps to install the other four fingers.<br />
B. Secure the Strings<br />
Bend the wrist hinge to a 30 degree angle and install a<br />
short screw to clamp down on the first string. The screw<br />
will allow you to adjust the tension in each finger so that<br />
they all move in unison. Repeat for the other 5 strings.<br />
TIP:<br />
These screws are optional and can be omitted by<br />
tying the string to the rear bridge.<br />
MAKERBOT EDUCATORS GUIDEBOOK Chapter 4: Curriculum Project Ideas<br />
PAGE 101

