

MakerBot Educators Guidebook 3rd Edition

Create successful ePaper yourself
Turn your PDF publications into a flip-book with our unique Google optimized e-Paper software.
MAKERBOT EDUCATORS GUIDEBOOK Chapter 3: Get to Know Your <strong>MakerBot</strong> 3D Printer<br />
PAGE 56<br />
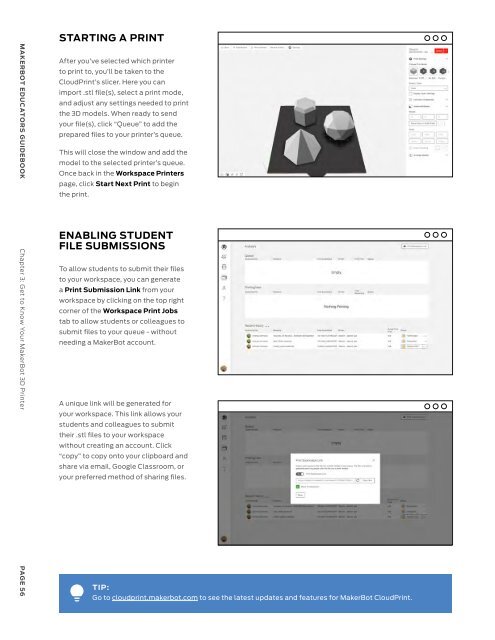
STARTING A PRINT<br />
After you’ve selected which printer<br />
to print to, you’ll be taken to the<br />
CloudPrint’s slicer. Here you can<br />
import .stl file(s), select a print mode,<br />
and adjust any settings needed to print<br />
the 3D models. When ready to send<br />
your file(s), click “Queue” to add the<br />
prepared files to your printer’s queue.<br />
This will close the window and add the<br />
model to the selected printer’s queue.<br />
Once back in the Workspace Printers<br />
page, click Start Next Print to begin<br />
the print.<br />
ENABLING STUDENT<br />
FILE SUBMISSIONS<br />
To allow students to submit their files<br />
to your workspace, you can generate<br />
a Print Submission Link from your<br />
workspace by clicking on the top right<br />
corner of the Workspace Print Jobs<br />
tab to allow students or colleagues to<br />
submit files to your queue - without<br />
needing a <strong>MakerBot</strong> account.<br />
A unique link will be generated for<br />
your workspace. This link allows your<br />
students and colleagues to submit<br />
their .stl files to your workspace<br />
without creating an account. Click<br />
“copy” to copy onto your clipboard and<br />
share via email, Google Classroom, or<br />
your preferred method of sharing files.<br />
TIP:<br />
Go to cloudprint.makerbot.com to see the latest updates and features for <strong>MakerBot</strong> CloudPrint.<br />
CHAPTER<br />
FOUR<br />
CURRICULUM<br />
PROJECT IDEAS<br />
MAKERBOT EDUCATORS GUIDEBOOK Chapter 4: Curriculum Project Ideas<br />
PAGE 57

