

MakerBot Educators Guidebook 3rd Edition

Create successful ePaper yourself
Turn your PDF publications into a flip-book with our unique Google optimized e-Paper software.
MAKERBOT EDUCATORS GUIDEBOOK Chapter 4: Curriculum Project Ideas<br />
PAGE 72<br />
02<br />
List of items that need to be designed<br />
● Gripper Fingers<br />
● Phalanges<br />
Interact with objects and is capable of picking<br />
up and dropping objects.<br />
Responsible for expanding and retracting the<br />
gripper’s fingers.<br />
● Actuator<br />
● Core Connector<br />
Element that moves in a fixed up and down<br />
direction, and drives movement to the phalanges.<br />
Center element that joins the phalanges to the<br />
actuator.<br />
● Trident Housing<br />
● Nuts and Bolts<br />
An element that acts both as housing for the<br />
gripper and works with the gripper fingers and<br />
Used throughout the design to keep parts in<br />
place.<br />
secures the gripper fingers in place.<br />
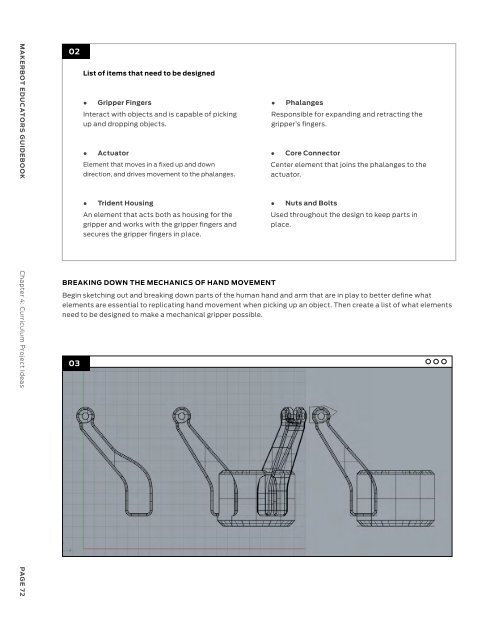
BREAKING DOWN THE MECHANICS OF HAND MOVEMENT<br />
Begin sketching out and breaking down parts of the human hand and arm that are in play to better define what<br />
elements are essential to replicating hand movement when picking up an object. Then create a list of what elements<br />
need to be designed to make a mechanical gripper possible.<br />
03<br />
PLAN AND DESIGN<br />
Using a preferred 3D modeling program (beginner-friendly modeling programs will work for this, too), begin thinking<br />
about how you will start designing the mechanical gripper. Will the actuator be designed first or the housing for the<br />
gripper? Is it best to start designing the biggest component first?<br />
Keep in mind there is no linear path for designing a prototype. It’s a cyclical process that develops over a period of time.<br />
04<br />
TIP:<br />
A good rule of thumb when designing something complex or with multiple parts is to break the designs down into<br />
simple shapes first, this will allow you to add design complexities later on.<br />
PRINT, REDESIGN AND PRINT AGAIN<br />
A mechanical gripper will require multiple printed parts. When preparing files to print, be sure to keep in mind how<br />
you orient the different parts on the build plate and if the orientation of parts will lend to stronger or weaker parts.<br />
The printing part of the process is where you’ll most likely find areas that need improvement - are the gripper fingers<br />
too long? Is there too much tolerance between the bolts and the parts? Keep these things in mind for the next<br />
iteration of this prototype.<br />
MAKERBOT EDUCATORS GUIDEBOOK Chapter 4: Curriculum Project Ideas<br />
PAGE 73

