18.64MB - View From The Trenches
18.64MB - View From The Trenches
18.64MB - View From The Trenches
- TAGS
- trenches
- www.vftt.co.uk
You also want an ePaper? Increase the reach of your titles
YUMPU automatically turns print PDFs into web optimized ePapers that Google loves.
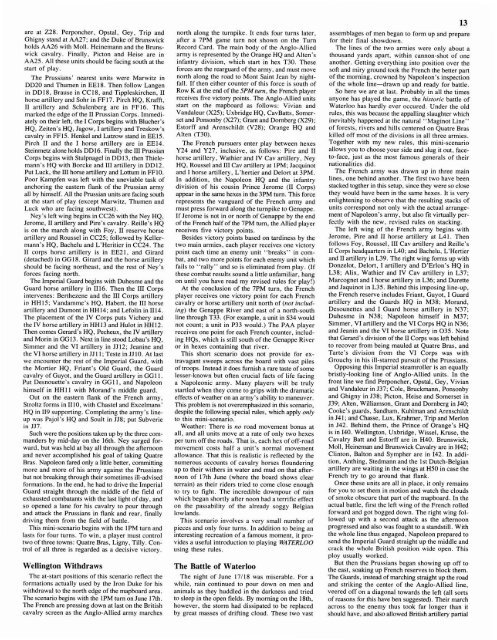
are at 228. Perponcher, Opstal, Gey, Trip and<br />
Ghigny stand at AA27; and the Duke of Brunswick<br />
holds AA26 with Moll. Heinemann and the Bruns-<br />
wick cavalry. Finally, Picton and Heise are in<br />
AA25. All these units should be facing south at the<br />
start of play.<br />
<strong>The</strong> Prussians' nearest units were Marwitz in<br />
DD20 and Thumen in EE18. <strong>The</strong>n follow Langen<br />
in DD18, Brause in CC18, and Tippleskirchen, I1<br />
horse artillery and Sohr in FF17. Pirch HQ, Krafft,<br />
I1 artillery and Schulenberg are in FF16. This<br />
marked the edge of the I1 Prussian Corps. Immedi-<br />
ately on their left, the I Corps begins with Blucher's<br />
HQ, Zeiten's HQ, Jagow, I artillery and Treskow's<br />
cavalry in FF15. Henkel and Lutzow stand in EE15.<br />
Pirch I1 and the I horse artillery are in EE14.<br />
Steinmetz alone holds DD16. Finally the 111 Prussian<br />
Corps begins with Stulpnagel in DD13, then Thiele-<br />
mann's HQ with Borcke and 111 artillery in DD12.<br />
Put Luck, the 111 horse artillery and Lottum in FF10.<br />
Poor Kampfen was left with the uneviable task of<br />
anchoring the eastern flank of the Prussian army<br />
all by himself. All the Prussian units are facing south<br />
at the start of play (except Marwitz, Thumen and<br />
Luck who are facing southwest).<br />
Ney's left wing begins in CC26 with the Ney HQ,<br />
Jerome, I1 artillery and Pire's cavalry. Reille's HQ<br />
is on the march along with Foy, I1 reserve horse<br />
artillery and Roussel in CC25; followed by Keller-<br />
mann's HQ, Bachelu and L'Heritier in CC24. <strong>The</strong><br />
I1 corps horse artillery is in EE21, and Girard<br />
(detached) in GG18. Girard and the horse artillery<br />
should be facing northeast, and the rest of Ney's<br />
forces facing north.<br />
<strong>The</strong> Imperial Guard begins with Duhesme and the<br />
Guard horse artillery in 1116. <strong>The</strong>n the 111 Corps<br />
intervenes: Berthezene and the 111 Corps artillery<br />
in HH15; Vandamme's HQ, Habert, the 111 horse<br />
artillery and Dumont in HH14; and Lefolin in 1114.<br />
<strong>The</strong> placement of the IV Corps puts Vichery and<br />
the IV horse artillery in HH13 and Hulot in HH12.<br />
<strong>The</strong>n comes Gerard's HQ, Pecheux, the IV artillery<br />
and Morin in GG13. Next in line stood Lobau's HQ,<br />
Simmer and the VI artillery in 5512; Jeanine and<br />
the VI horse artillery in JJ11; Teste in JJIO. At last<br />
we encounter the rest of the Imperial Guard, with<br />
the Mortier HQ, Friant's Old Guard, the Guard<br />
cavalry of Guyot, and the Guard artillery in GGI 1.<br />
Put Desnouette's cavalry in GGl 1, and Napoleon<br />
himself in HHll with Morand's middle guard.<br />
Out on the eastern flank of the French army,<br />
Stroltz forms in 1110, with Chaste1 and Excelmans'<br />
HQ in I19 supporting. Completing the army's line-<br />
up was Pajol's HQ and Soult in 558; put Subverie<br />
in 557.<br />
Such were the positions taken up by the three com-<br />
manders by mid-day on the 16th. Ney surged for-<br />
ward, but was held at bay all through the afternoon<br />
and never accomplished his goal of taking Quatre<br />
Bras. Napoleon fared only a little better, committing<br />
more and more of his army against the Prussians<br />
but not breaking through their sometimes ill-advised<br />
formations. In the end, he had to drive the Imperial<br />
Guard straight through the middle of the field of<br />
exhausted combatants with the last light of day, and<br />
so opened a lane for his cavalry to pour through<br />
and attack the Prussians in flank and rear, finally<br />
driving them from the field of battle.<br />
This mini-scenario begins with the IPM turn and<br />
lasts for four turns. To win, a player must control<br />
two of three towns: Quatre Bras, Ligny, Tilly. Con-<br />
trol of all three is regarded as a decisive victory.<br />
Wellington Withdraws<br />
<strong>The</strong> at-start positions of this scenario reflect the<br />
formations actually used by the Iron Duke for his<br />
withdrawal to the north edge of the mapboard area.<br />
<strong>The</strong> scenario begins with the IPM turn on June 17th.<br />
<strong>The</strong> French are pressing down at last on the British<br />
cavalry screen as the Anglo-Allied army marches<br />
north along the turnpike. It ends four turns later,<br />
after a 7PM game turn not shown on the Turn<br />
Record Card. <strong>The</strong> main body of the Anglo-Allied<br />
army is represented by the Orange HQ and Alten's<br />
infantry division, which start in hex T30. <strong>The</strong>se<br />
forces are the rearguard of the army, and must move<br />
north along the road to Mont Saint Jean by night-<br />
fall. If then either counter of this force is south of<br />
Row K at the end of the 5PM turn, the French player<br />
receives five victory points. <strong>The</strong> Anglo-Allied units<br />
start on the mapboard as follows: Vivian and<br />
Vandaleur (X25); Uxbridge HQ, CavBatts, Somer-<br />
set and Ponsonby (X27); Grant and Dornberg (X29);<br />
Estorff and Arenschildt (V28); Orange HQ and<br />
Alten (T30).<br />
<strong>The</strong> French pursuers enter play between hexes<br />
Y24 and Y27, inclusive, as follows: Pire and I1<br />
horse artillery, Wathier and IV Cav artillery, Ney<br />
HQ, Roussel and 111 Cav artillery at IPM; Jacquinot<br />
and I horse artillery, L'hertier and Delort at 3PM.<br />
In addition, the Napoleon HQ and the infantry<br />
division of his cousin Prince Jerome (I1 Corps)<br />
appear in the same hexes in the 3PM turn. This force<br />
represents the vanguard of the French army and<br />
must press forward along the turnpike to Genappe.<br />
If Jerome is not in or north of Genappe by the end<br />
of the French half of the 7PM turn, the Allied player<br />
receives five victory points.<br />
Besides victory points based on tardiness by the<br />
two main armies, each player receives one victory<br />
point each time an enemy unit "breaks" in com-<br />
bat, and two more points for each enemy unit which<br />
fails to "rally" and so is eliminated from play. (If<br />
these combat results sound a little unfamiliar, hang<br />
on until you have read my revised rules for play!)<br />
At the conclusion of the 7PM turn, the French<br />
player receives one victory point for each French<br />
cavalry or horse artillery unit north of (not includ-<br />
ing) the Genappe River and east of a north-south<br />
line through T33. (For example, a unit in S34 would<br />
not count; a unit in P33 would.) <strong>The</strong> PAA player<br />
receives one point for each French counter, includ-<br />
ing HQs, which is still south of the Genappe River<br />
or in hexes containing that river.<br />
This short scenario does not provide for ex-<br />
travagant sweeps across the board with vast piles<br />
of troops. Instead it does furnish a rare taste of some<br />
lesser-known but often crucial facts of life facing<br />
a Napoleonic army. Many players will be truly<br />
startled when they come to grips with the dramatic<br />
effects of weather on an army's ability to maneuver.<br />
This problem is not overemphasized in this scenario,<br />
despite the following special rules, which apply only<br />
to this mini-scenario.<br />
Weather: <strong>The</strong>re is no road movement bonus at<br />
all, and all units move at a rate of only two hexes<br />
per turn off the roads. That is, each hex of off-road<br />
movement costs half a unit's normal movement<br />
allowance. That this is realistic is reflected by the<br />
numerous accounts of cavalry horses floundering<br />
up to their withers in water and mud on that after-<br />
noon of 17th June (where the board shows clear<br />
terrain) as their riders tried to come close enough<br />
to try to fight. <strong>The</strong> incredible downpour of rain<br />
which began shortly after noon had a terrific effect<br />
on the passability of the already soggy Belgian<br />
lowlands.<br />
This scenario involves a very small number of<br />
pieces and only four turns. In addition to being an<br />
interesting recreation of a famous moment, it pro-<br />
vides a useful introduction to playing WATERLOO<br />
using these rules.<br />
<strong>The</strong> Battle of Waterloo<br />
<strong>The</strong> night of June 17/18 was miserable. For a<br />
while, rain continued to pour down on men and<br />
animals as they huddled in the darkness and tried<br />
to sleep in the open fields. By morning on the 18th,<br />
however, the storm had dissipated to be replaced<br />
by great masses of drifting cloud. <strong>The</strong>se two vast<br />
assemblages of men began to form up and prepare<br />
for their final showdown.<br />
<strong>The</strong> lines of the two armies were only about a<br />
thousand yards apart, within cannon-shot of one<br />
another. Getting everything into position over the<br />
soft and miry ground took the French the better part<br />
of the morning, crowned by Napoleon's inspection<br />
of the whole line-drawn up and ready for battle.<br />
So here we are at last. Probably in all the times<br />
anyone has played the game, the historic battle of<br />
Waterloo has hardly ever occured. Under the old<br />
rules, this was because the appalling slaughter which<br />
inevitably happened at the natural "Maginot Line"<br />
of forests, rivers and hills centered on Quatre Bras<br />
killed off most of the divisions in all three armies.<br />
Together with my new rules, this mini-scenario<br />
allows you to choose your side and slug it out, face-<br />
to-face, just as the most famous generals of their<br />
nationalities did.<br />
<strong>The</strong> French army was drawn up in three main<br />
lines, one behind another. <strong>The</strong> first two have been<br />
stacked togther in this setup, since they were so close<br />
they would have been in the same hexes. It is very<br />
enlightening to observe that the resulting stacks of<br />
units correspond not only with the actual arrange-<br />
ment of Napoleon's army, but also fit virtually per-<br />
fectly with the new, revised rules on stacking.<br />
<strong>The</strong> left wing of the French army begins with<br />
Jerome, Pire and I1 horse artillery at L41. <strong>The</strong>n<br />
follows Foy, Roussel, I11 Cav artillery and Reille's<br />
I1 Corps headquarters in L40; and Bachelu, L'Hertier<br />
and II artillery in L39. <strong>The</strong> right wing forms up with<br />
Donzelot, Delort, I artillery and D'Erlon's HQ in<br />
L38; Alix, Wathier and IV Cav artillery in L37;<br />
Marcognet and I horse artillery in L36; and Durette<br />
and Jaquinot in L35. Behind this imposing line-up,<br />
the French reserve includes Friant, Guyot, I Guard<br />
artillery and the Guards HQ in M38; Morand,<br />
Desounettes and I Guard horse artillery in N37;<br />
Duhesme in N38; Napoleon himself in M37;<br />
Simmer, VI artillery and the VI Corps HQ in N36;<br />
and Jeanin and the VI horse artillery in 035. Note<br />
that Gerard's division of the II Corps was left behind<br />
to recover from being mauled at Quatre Bras, and<br />
Tarte's division from the VI Corps was with<br />
Grouchy in his ill-starred pursuit of the Prussians.<br />
Opposing this Imperial steamroller is an equally<br />
bristly-looking line of Anglo-Allied units. In the<br />
front line we find Perponcher, Opstal, Gey, Vivian<br />
and Vandaleur in J37; Cole, Bruckmann, Ponsonby<br />
and Ghigny in J38; Picton, Heise and Somerset in<br />
539; Alten, Williamson, Grant and Dornberg in 540;<br />
Cooke's guards, Sandham, Kuhlman and Arenschildt<br />
in J41; and Chasse, Lux, Krahmer, Trip and Merlon<br />
in J42. Behind them, the Prince of Orange's HQ<br />
is in 140. Wellington, Uxbridge, Wissel, Kruse, the<br />
Cavalry Batt and Estorff are in H40. Brunswick,<br />
Moll, Heineman and Brunswick Cavalry are in H42;<br />
Clinton, Balton and Sympher are in 142. In addi-<br />
tion, Anthing, Stedmann and the 1st Dutch-Belgian<br />
artillery are waiting in the wings at H50 in case the<br />
French try to go around that flank.<br />
Once these units are all in place, it only remains<br />
for you to set them in motion and watch the clouds<br />
of smoke obscure that part of the mapboard. In the<br />
actual battle, first the left wing of the French rolled<br />
forward and got bogged down. <strong>The</strong> right wing fol-<br />
lowed up with a second attack as the afternoon<br />
progressed and also was fought to a standstill. With<br />
the whole line thus engaged, Napoleon prepared to<br />
send the Imperial Guard straight up the middle and<br />
crack the whole British position wide open. This<br />
ploy usually worked.<br />
But then the Prussians began showing up off to<br />
the east, soaking up French reserves to block them.<br />
<strong>The</strong> Guards, instead of marching straight up the road<br />
and striking the center of the Anglo-Allied line,<br />
veered off on a diagonal towards the left (all sorts<br />
of reasons for this have ben suggested). <strong>The</strong>ir march<br />
across to the enemy thus took far longer than it<br />
should have, and also allowed British artillery partial


