إرﺷïºØ¯Ø§Øª اï»ïºïº¸ï»ï»´ï» - Ufesa
إرﺷïºØ¯Ø§Øª اï»ïºïº¸ï»ï»´ï» - Ufesa
إرﺷïºØ¯Ø§Øª اï»ïºïº¸ï»ï»´ï» - Ufesa

Create successful ePaper yourself
Turn your PDF publications into a flip-book with our unique Google optimized e-Paper software.
Figure 3<br />
Attach the floor brush to the telescopic tube<br />
Figure 4<br />
Disconnect the telescopic tube and adjust its length by moving<br />
the adjusting button in the direction of the arrow.<br />
Figure 5<br />
Holding the power cord by the plug, pull out the required<br />
length and plug it into the mains socket.<br />
Figure 6<br />
Press the on/off button in the direction of the arrow to switch<br />
your vacuum cleaner on/off.<br />
Figure 7<br />
Set the power with the regulator.<br />
Figure 8<br />
The intensity can be regulated from the hand grip. Opening<br />
the flap reduces suction whereas closing it increases suction.<br />
Figure 9<br />
Attach the nozzles to the suction pipe or handle as required:<br />
a) Crevice nozzle. Long nozzle for vacuuming deep grooves<br />
and nooks, etc.<br />
b) Upholstery nozzle for vacuuming upholstered furniture,<br />
curtains, etc.<br />
c) Upholstery nozzle to prevent surfaces from being damaged.<br />
Figure 10<br />
You can use the parking aid on the back of the vacuum cleaner<br />
if you wish to stop vacuuming for a short time.<br />
Slide the catch on the floor tool into the groove at the rear of<br />
the appliance.<br />
Figure 11<br />
The appliance can also be carried using the two handles when<br />
vacuuming steps, for example.<br />
WHEN THE WORK IS DONE<br />
Figure 12<br />
When you have finished using the appliance press the On/Off<br />
pedal. Disconnect the plug from the mains and wind in the<br />
cord by pressing down on the automatic cord rewind pedal.<br />
Figure 13<br />
To store or transport the vacuum cleaner, use the storage aid<br />
on the underside of the vacuum cleaner.<br />
Stand the vacuum cleaner up on its end. Slide the catch on the<br />
floor tool into the groove on the underside of the appliance.<br />
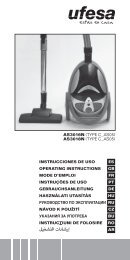
You have purchased a floor vacuum cleaner which can vacuum<br />
up any type of dry dirt using the dust collector or dust bag.<br />
We recommend that you use:<br />
- the dust collector, in particular for your hobbies, e.g. to remove<br />
wood shavings, etc.<br />
- the dust bag principally for everyday household cleaning.<br />
USING THE DUST COLLECTOR<br />
Figure 14<br />
Set the power setting to maximum for the best results when<br />
vacuuming.<br />
We recommend that you reduce the setting only when vacuuming<br />
very delicate materials.<br />
Attention! The cover on this appliance cannot be closed<br />
if the dust collector or filter bag are not present inside.<br />
Do not force it shut and check that the desired dirt collection<br />
system is fitted correctly.<br />
Emptying the dust collector<br />
To achieve an optimal result when vacuuming, the dust collector<br />
should be emptied each time the vacuum cleaner is used.<br />
Figure 15<br />
Turn the dust compartment locking lever in the direction of the<br />
arrow to open the dust compartment cover.<br />
Figure 16<br />
Remove the dust container from the appliance.<br />
Figure 17<br />
To open the container base cover, press the button and empty<br />
the contents into a dustbin.<br />
– Close the bottom flap so that it can be heard snapping into<br />
position.<br />
Figure 18<br />
Put the dust bag back into the vacuum cleaner and close the<br />
dust bag compartment lid.<br />
!Caution: The inside of the dust container may become<br />
scratched with use and Stara to look opaque. This does<br />
not, however, affect the performance of the vacuum cleaner<br />
in any way, i.e. it will continue to function as normal.<br />
CLEANING THE HEPA FILTER AND THE NYLON<br />
FILTER FOR THE DUST CONTAINER<br />
The filters must be cleaned:<br />
– After any operating malfunctions, i.e. after a blockage is<br />
cleared.<br />
At least every six months.<br />
Figure 19<br />
Remove the HEPA filter by pulling it straight out.<br />
Turn the nylon filter anti-clockwise to remove it and pull it out<br />
of its housing.<br />
Figure 20<br />
- Wash the HEPA and nylon filters. Then leave them to dry for<br />
at least 24 hours.<br />
Once clean and dry fit them back into their housings on the<br />
container.<br />
Place the container back into its housing on the vacuum cleaner.<br />
VACUUMING WITH THE FILTER BAG<br />
If necessary, the filter bag can also be used instead of the dust<br />
collector.