Sony HDR-PJ760E - HDR-PJ760E Consignes d’utilisation Anglais
Sony HDR-PJ760E - HDR-PJ760E Consignes d’utilisation Anglais
Sony HDR-PJ760E - HDR-PJ760E Consignes d’utilisation Anglais
You also want an ePaper? Increase the reach of your titles
YUMPU automatically turns print PDFs into web optimized ePapers that Google loves.
Preparing a computer<br />
(Windows)<br />
Step 1 Checking the computer<br />
system<br />
OS* 1<br />
Microsoft Windows XP SP3* 2 /Windows Vista<br />
SP2* 3 /Windows 7 SP1<br />
CPU* 4<br />
Intel Core Duo 1.66 GHz or faster, or Intel<br />
Core 2 Duo 1.66 GHz or faster (Intel Core<br />
2 Duo 2.26 GHz or faster is required when<br />
processing FX or FH movies, and Intel Core<br />
2 Duo 2.40 GHz or faster is required when<br />
processing PS movies.)<br />
However, Intel Pentium III 1 GHz or faster is<br />
sufficient for the following operations:<br />
Importing the movies and photos to the<br />
computer<br />
Creating a Blu-ray disc/AVCHD recording<br />
disc/DVD-video (Intel Core Duo 1.66 GHz<br />
or faster is required when creating a DVD<br />
video by converting high definition image<br />
quality (HD) to standard definition image<br />
quality (STD).)<br />
Processing only the movies with standard<br />
definition image quality (STD)<br />
Memory<br />
Windows XP: 512 MB or more (1 GB or<br />
more is recommended)<br />
Windows Vista/ Windows 7: 1 GB or more<br />
Hard disk<br />
Disk volume required for installation:<br />
Approximately 500 MB (10 GB or more<br />
may be necessary when creating AVCHD<br />
recording discs. 50 GB maximum may be<br />
necessary when creating Blu-ray discs.)<br />
Display<br />
Minimum 1,024 × 768 dots<br />
Others<br />
USB port (this must be provided as standard,<br />
Hi-Speed USB (USB 2.0 compatible)), Blu-ray<br />
disc/DVD burner Either NTFS or exFAT file<br />
system is recommended as the hard disk file<br />
system.<br />
56 GB<br />
* 1 Standard installation is required. Operation is<br />
not assured if the OS has been upgraded or in a<br />
multi-boot environment.<br />
* 2 64-bit editions and Starter (Edition) are not<br />
supported. Windows Image Mastering API<br />
(IMAPI) Ver.2.0 or newer is required to use disc<br />
creation function, etc.<br />
* 3 Starter (Edition) is not supported.<br />
* 4 Faster processor is recommended.<br />
<br />
Notes<br />
Operation with all computer environments is<br />
not assured.<br />
Step 2 Installing the built-in<br />
“PlayMemories Home” software<br />
1<br />
2<br />
Turn on the computer.<br />
<br />
<br />
Log on as an Administrator for<br />
installation.<br />
Close all applications running on the<br />
computer before installing the software.<br />
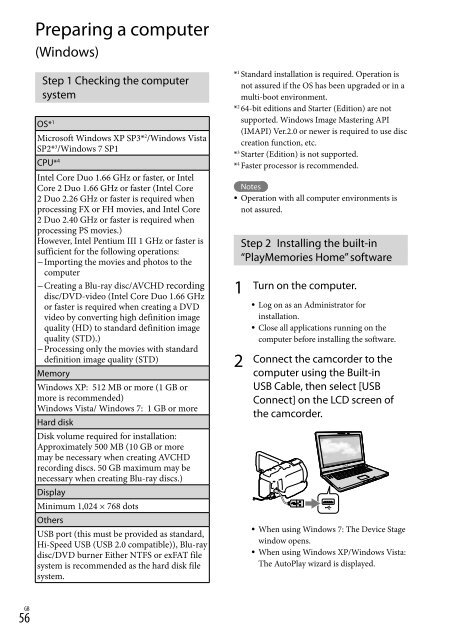
Connect the camcorder to the<br />
computer using the Built-in<br />
USB Cable, then select [USB<br />
Connect] on the LCD screen of<br />
the camcorder.<br />
When using Windows 7: The Device Stage<br />
window opens.<br />
When using Windows XP/Windows Vista:<br />
The AutoPlay wizard is displayed.


