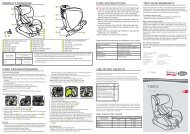
B-DUAL - Britax Römer
B-DUAL - Britax Römer
B-DUAL - Britax Römer

You also want an ePaper? Increase the reach of your titles
YUMPU automatically turns print PDFs into web optimized ePapers that Google loves.
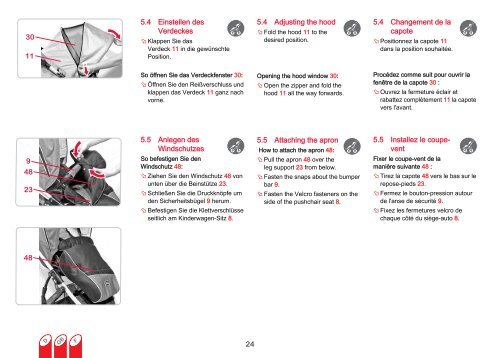
5.4 Einstellen des<br />
Verdeckes<br />
� Klappen Sie das<br />
Verdeck 11 in die gewünschte<br />
Position.<br />
So öffnen Sie das Verdeckfenster 30:<br />
� Öffnen Sie den Reißverschluss und<br />
klappen das Verdeck 11 ganz nach<br />
vorne.<br />
5.5 Anlegen des<br />
Windschutzes<br />
So befestigen Sie den<br />
Windschutz 48:<br />
� Ziehen Sie den Windschutz 48 von<br />
unten über die Beinstütze 23.<br />
� Schließen Sie die Druckknöpfe um<br />
den Sicherheitsbügel 9 herum.<br />
� Befestigen Sie die Klettverschlüsse<br />
seitlich am Kinderwagen-Sitz 8.<br />
24<br />
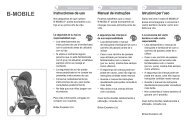
5.4 Adjusting the hood<br />
� Fold the hood 11 to the<br />
desired position.<br />
Opening the hood window 30:<br />
� Open the zipper and fold the<br />
hood 11 all the way forwards.<br />
5.5 Attaching the apron<br />
How to attach the apron 48:<br />
� Pull the apron 48 over the<br />
leg support 23 from below.<br />
� Fasten the snaps about the bumper<br />
bar 9.<br />
� Fasten the Velcro fasteners on the<br />
side of the pushchair seat 8.<br />
5.4 Changement de la<br />
capote<br />
� Positionnez la capote 11<br />
dans la position souhaitée.<br />
Procédez comme suit pour ouvrir la<br />
fenêtre de la capote 30 :<br />
� Ouvrez la fermeture éclair et<br />
rabattez complètement 11 la capote<br />
vers l'avant.<br />
5.5 Installez le coupevent<br />
Fixer le coupe-vent de la<br />
manière suivante 48 :<br />
� Tirez la capote 48 vers le bas sur le<br />
repose-pieds 23.<br />
� Fermez le bouton-pression autour<br />
de l'anse de sécurité 9.<br />
� Fixez les fermetures velcro de<br />
chaque côté du siège-auto 8.