
You also want an ePaper? Increase the reach of your titles
YUMPU automatically turns print PDFs into web optimized ePapers that Google loves.
BDAL 6906_116306906 05.08.13 17:32 Seite 45<br />
t<br />
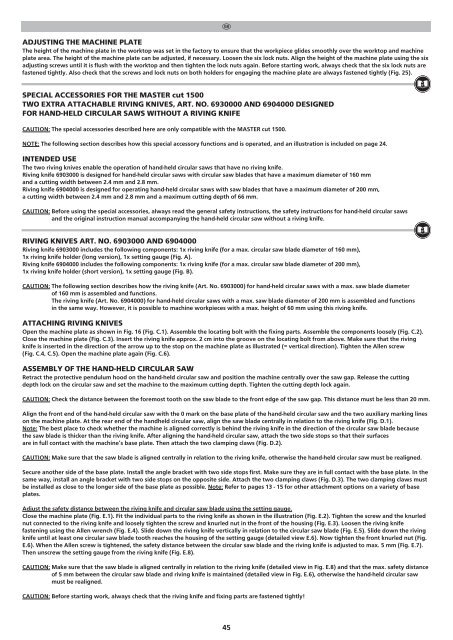
ADJUSTING THE MACHINE PLATE<br />
The height of the machine plate in the worktop was set in the factory to ensure that the workpiece glides smoothly over the worktop and machine<br />
plate area. The height of the machine plate can be adjusted, if necessary. Loosen the six lock nuts. Align the height of the machine plate using the six<br />
adjusting screws until it is flush with the worktop and then tighten the lock nuts again. Before starting work, always check that the six lock nuts are<br />
fastened tightly. Also check that the screws and lock nuts on both holders for engaging the machine plate are always fastened tightly (Fig. 25).<br />
SPECIAL ACCESSORIES FOR THE MASTER cut 1500<br />
TWO EXTRA ATTACHABLE RIVING KNIVES, ART. NO. 6930000 AND 6904000 DESIGNED<br />
FOR HAND-HELD CIRCULAR SAWS WITHOUT A RIVING KNIFE<br />
CAUTION: The special accessories described here are only compatible with the MASTER cut 1500.<br />
NOTE: The following section describes how this special accessory functions and is operated, and an illustration is included on page 24.<br />
INTENDED USE<br />
The two riving knives enable the operation of hand-held circular saws that have no riving knife.<br />
Riving knife 6903000 is designed for hand-held circular saws with circular saw blades that have a maximum diameter of 160 mm<br />
and a cutting width between 2.4 mm and 2.8 mm.<br />
Riving knife 6904000 is designed for operating hand-held circular saws with saw blades that have a maximum diameter of 200 mm,<br />
a cutting width between 2.4 mm and 2.8 mm and a maximum cutting depth of 66 mm.<br />
CAUTION: Before using the special accessories, always read the general safety instructions, the safety instructions for hand-held circular saws<br />
and the original instruction manual accompanying the hand-held circular saw without a riving knife.<br />
RIVING KNIVES ART. NO. 6903000 AND 6904000<br />
Riving knife 6903000 includes the following components: 1x riving knife (for a max. circular saw blade diameter of 160 mm),<br />
1x riving knife holder (long version), 1x setting gauge (Fig. A).<br />
Riving knife 6904000 includes the following components: 1x riving knife (for a max. circular saw blade diameter of 200 mm),<br />
1x riving knife holder (short version), 1x setting gauge (Fig. B).<br />
CAUTION: The following section describes how the riving knife (Art. No. 6903000) for hand-held circular saws with a max. saw blade diameter<br />
of 160 mm is assembled and functions.<br />
The riving knife (Art. No. 6904000) for hand-held circular saws with a max. saw blade diameter of 200 mm is assembled and functions<br />
in the same way. However, it is possible to machine workpieces with a max. height of 60 mm using this riving knife.<br />
ATTACHING RIVING KNIVES<br />
Open the machine plate as shown in Fig. 16 (Fig. C.1). Assemble the locating bolt with the fixing parts. Assemble the components loosely (Fig. C.2).<br />
Close the machine plate (Fig. C.3). Insert the riving knife approx. 2 cm into the groove on the locating bolt from above. Make sure that the riving<br />
knife is inserted in the direction of the arrow up to the stop on the machine plate as illustrated (= vertical direction). Tighten the Allen screw<br />
(Fig. C.4, C.5). Open the machine plate again (Fig. C.6).<br />
ASSEMBLY OF THE HAND-HELD CIRCULAR SAW<br />
Retract the protective pendulum hood on the hand-held circular saw and position the machine centrally over the saw gap. Release the cutting<br />
depth lock on the circular saw and set the machine to the maximum cutting depth. Tighten the cutting depth lock again.<br />
CAUTION: Check the distance between the foremost tooth on the saw blade to the front edge of the saw gap. This distance must be less than 20 mm.<br />
Align the front end of the hand-held circular saw with the 0 mark on the base plate of the hand-held circular saw and the two auxiliary marking lines<br />
on the machine plate. At the rear end of the handheld circular saw, align the saw blade centrally in relation to the riving knife (Fig. D.1).<br />
Note: The best place to check whether the machine is aligned correctly is behind the riving knife in the direction of the circular saw blade because<br />
the saw blade is thicker than the riving knife. After aligning the hand-held circular saw, attach the two side stops so that their surfaces<br />
are in full contact with the machine’s base plate. Then attach the two clamping claws (Fig. D.2).<br />
CAUTION: Make sure that the saw blade is aligned centrally in relation to the riving knife, otherwise the hand-held circular saw must be realigned.<br />
Secure another side of the base plate. Install the angle bracket with two side stops first. Make sure they are in full contact with the base plate. In the<br />
same way, install an angle bracket with two side stops on the opposite side. Attach the two clamping claws (Fig. D.3). The two clamping claws must<br />
be installed as close to the longer side of the base plate as possible. Note: Refer to pages 13 - 15 for other attachment options on a variety of base<br />
plates.<br />
Adjust the safety distance between the riving knife and circular saw blade using the setting gauge.<br />
Close the machine plate (Fig. E.1). Fit the individual parts to the riving knife as shown in the illustration (Fig. E.2). Tighten the screw and the knurled<br />
nut connected to the riving knife and loosely tighten the screw and knurled nut in the front of the housing (Fig. E.3). Loosen the riving knife<br />
fastening using the Allen wrench (Fig. E.4). Slide down the riving knife vertically in relation to the circular saw blade (Fig. E.5). Slide down the riving<br />
knife until at least one circular saw blade tooth reaches the housing of the setting gauge (detailed view E.6). Now tighten the front knurled nut (Fig.<br />
E.6). When the Allen screw is tightened, the safety distance between the circular saw blade and the riving knife is adjusted to max. 5 mm (Fig. E.7).<br />
Then unscrew the setting gauge from the riving knife (Fig. E.8).<br />
CAUTION: Make sure that the saw blade is aligned centrally in relation to the riving knife (detailed view in Fig. E.8) and that the max. safety distance<br />
of 5 mm between the circular saw blade and riving knife is maintained (detailed view in Fig. E.6), otherwise the hand-held circular saw<br />
must be realigned.<br />
CAUTION: Before starting work, always check that the riving knife and fixing parts are fastened tightly!<br />
45