SR SK BS HU MK TR EL RO BG ET HR SL CS RU LT LV ... - Stiga.org
SR SK BS HU MK TR EL RO BG ET HR SL CS RU LT LV ... - Stiga.org
SR SK BS HU MK TR EL RO BG ET HR SL CS RU LT LV ... - Stiga.org
- No tags were found...

Create successful ePaper yourself
Turn your PDF publications into a flip-book with our unique Google optimized e-Paper software.
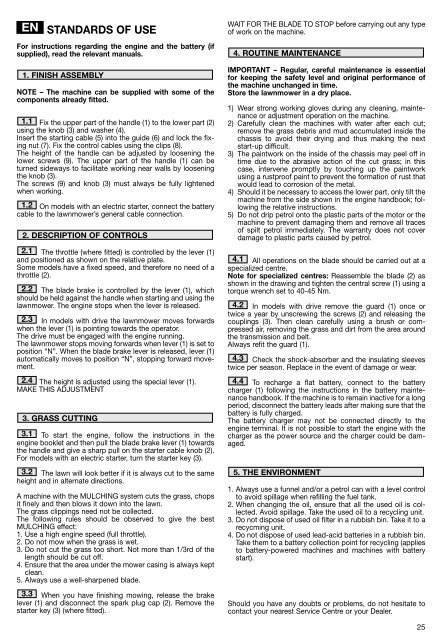
ENSTANDARDS OF USEFor instructions regarding the engine and the battery (ifsupplied), read the relevant manuals.1. FINISH ASSEMBLYNOTE – The machine can be supplied with some of thecomponents already fitted.1.1 Fix the upper part of the handle (1) to the lower part (2)using the knob (3) and washer (4).Insert the starting cable (5) into the guide (6) and lock the fixingnut (7). Fix the control cables using the clips (8).The height of the handle can be adjusted by loosening thelower screws (9). The upper part of the handle (1) can beturned sideways to facilitate working near walls by looseningthe knob (3).The screws (9) and knob (3) must always be fully lightenedwhen working.1.2 On models with an electric starter, connect the batterycable to the lawnmower’s general cable connection.2. DESCRIPTION OF CON<strong>TR</strong>OLS2.1 The throttle (where fitted) is controlled by the lever (1)and positioned as shown on the relative plate.Some models have a fixed speed, and therefore no need of athrottle (2).2.2 The blade brake is controlled by the lever (1), whichshould be held against the handle when starting and using thelawnmower. The engine stops when the lever is released.2.3 In models with drive the lawnmower moves forwardswhen the lever (1) is pointing towards the operator.The drive must be engaged with the engine running.The lawnmower stops moving forwards when lever (1) is set toposition “N”. When the blade brake lever is released, lever (1)automatically moves to position “N”, stopping forward movement.2.4 The height is adjusted using the special lever (1).MAKE THIS ADJUSTMENT3. GRASS CUTTING3.1 To start the engine, follow the instructions in theengine booklet and then pull the blade brake lever (1) towardsthe handle and give a sharp pull on the starter cable knob (2).For models with an electric starter, turn the starter key (3).3.2 The lawn will look better if it is always cut to the sameheight and in alternate directions.A machine with the MULCHING system cuts the grass, chopsit finely and then blows it down into the lawn.The grass clippings need not be collected.The following rules should be observed to give the bestMULCHING effect:1. Use a high engine speed (full throttle).2. Do not mow when the grass is wet.3. Do not cut the grass too short. Not more than 1/3rd of thelength should be cut off.4. Ensure that the area under the mower casing is always keptclean.5. Always use a well-sharpened blade.3.3 When you have finishing mowing, release the brakelever (1) and disconnect the spark plug cap (2). Remove thestarter key (3) (where fitted).WAIT FOR THE BLADE TO STOP before carrying out any typeof work on the machine.4. <strong>RO</strong>UTINE MAINTENANCEIMPORTANT – Regular, careful maintenance is essentialfor keeping the safety level and original performance ofthe machine unchanged in time.Store the lawnmower in a dry place.1) Wear strong working gloves during any cleaning, maintenanceor adjustment operation on the machine.2) Carefully clean the machines with water after each cut;remove the grass debris and mud accumulated inside thechassis to avoid their drying and thus making the nextstart-up difficult.3) The paintwork on the inside of the chassis may peel off intime due to the abrasive action of the cut grass; in thiscase, intervene promptly by touching up the paintworkusing a rustproof paint to prevent the formation of rust thatwould lead to corrosion of the metal.4) Should it be necessary to access the lower part, only tilt themachine from the side shown in the engine handbook; followingthe relative instructions.5) Do not drip petrol onto the plastic parts of the motor or themachine to prevent damaging them and remove all tracesof spilt petrol immediately. The warranty does not coverdamage to plastic parts caused by petrol.4.1 All operations on the blade should be carried out at aspecialized centre.Note for specialized centres: Reassemble the blade (2) asshown in the drawing and tighten the central screw (1) using atorque wrench set to 40-45 Nm.4.2 In models with drive remove the guard (1) once ortwice a year by unscrewing the screws (2) and releasing thecouplings (3). Then clean carefully using a brush or compressedair, removing the grass and dirt from the area aroundthe transmission and belt.Always refit the guard (1).4.3 Check the shock-absorber and the insulating sleevestwice per season. Replace in the event of damage or wear.4.4 To recharge a flat battery, connect to the batterycharger (1) following the instructions in the battery maintenancehandbook. If the machine is to remain inactive for a longperiod, disconnect the battery leads after making sure that thebattery is fully charged.The battery charger may not be connected directly to theengine terminal. It is not possible to start the engine with thecharger as the power source and the charger could be damaged.5. THE ENVI<strong>RO</strong>NMENT1. Always use a funnel and/or a petrol can with a level controlto avoid spillage when refilling the fuel tank.2. When changing the oil, ensure that all the used oil is collected.Avoid spillage. Take the used oil to a recycling unit.3. Do not dispose of used oil filter in a rubbish bin. Take it to arecycming unit.4. Do not dispose of used lead-acid batteries in a rubbish bin.Take them to a battery collection point for recycling (appliesto battery-powered machines and machines with batterystart).Should you have any doubts or problems, do not hesitate tocontact your nearest Service Centre or your Dealer.25