Manual de Instrucciones
Manual de Instrucciones
Manual de Instrucciones

Create successful ePaper yourself
Turn your PDF publications into a flip-book with our unique Google optimized e-Paper software.
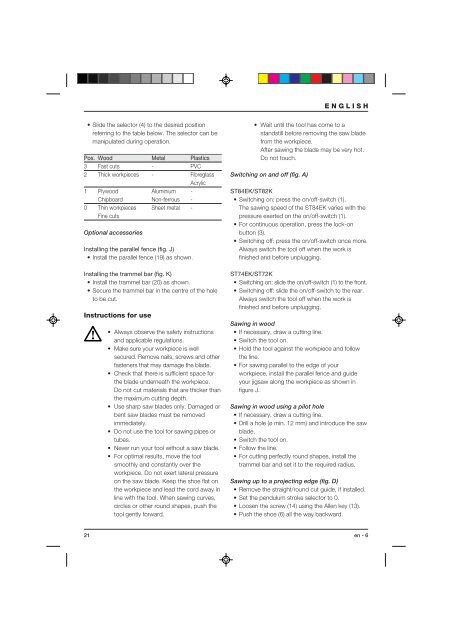
ENGLISH• Sli<strong>de</strong> the selector (4) to the <strong>de</strong>sired positionreferring to the table below. The selector can bemanipulated during operation.Pos. Wood Metal Plastics3 Fast cuts - PVC2 Thick workpieces - FibreglassAcrylic1 Plywood Aluminium -Chipboard Non-ferrous -0 Thin workpieces Sheet metal -Fine cutsOptional accessoriesInstalling the parallel fence (fig. J)• Install the parallel fence (19) as shown.Installing the trammel bar (fig. K)• Install the trammel bar (20) as shown.• Secure the trammel bar in the centre of the holeto be cut.Instructions for use• Always observe the safety instructionsand applicable regulations.• Make sure your workpiece is wellsecured. Remove nails, screws and otherfasteners that may damage the bla<strong>de</strong>.• Check that there is sufficient space forthe bla<strong>de</strong> un<strong>de</strong>rneath the workpiece.Do not cut materials that are thicker thanthe maximum cutting <strong>de</strong>pth.• Use sharp saw bla<strong>de</strong>s only. Damaged orbent saw bla<strong>de</strong>s must be removedimmediately.• Do not use the tool for sawing pipes ortubes.• Never run your tool without a saw bla<strong>de</strong>.• For optimal results, move the toolsmoothly and constantly over theworkpiece. Do not exert lateral pressureon the saw bla<strong>de</strong>. Keep the shoe flat onthe workpiece and lead the cord away inline with the tool. When sawing curves,circles or other round shapes, push thetool gently forward.• Wait until the tool has come to astandstill before removing the saw bla<strong>de</strong>from the workpiece.After sawing the bla<strong>de</strong> may be very hot.Do not touch.Switching on and off (fig. A)ST84EK/ST82K• Switching on: press the on/off-switch (1).The sawing speed of the ST84EK varies with thepressure exerted on the on/off-switch (1).• For continuous operation, press the lock-onbutton (3).• Switching off: press the on/off-switch once more.Always switch the tool off when the work isfinished and before unplugging.ST74EK/ST72K• Switching on: sli<strong>de</strong> the on/off-switch (1) to the front.• Switching off: sli<strong>de</strong> the on/off-switch to the rear.Always switch the tool off when the work isfinished and before unplugging.Sawing in wood• If necessary, draw a cutting line.• Switch the tool on.• Hold the tool against the workpiece and followthe line.• For sawing parallel to the edge of yourworkpiece, install the parallel fence and gui<strong>de</strong>your jigsaw along the workpiece as shown infigure J.Sawing in wood using a pilot hole• If necessary, draw a cutting line.• Drill a hole (ø min. 12 mm) and introduce the sawbla<strong>de</strong>.• Switch the tool on.• Follow the line.• For cutting perfectly round shapes, install thetrammel bar and set it to the required radius.Sawing up to a projecting edge (fig. D)• Remove the straight/round cut gui<strong>de</strong>, if installed.• Set the pendulum stroke selector to 0.• Loosen the screw (14) using the Allen key (13).• Push the shoe (6) all the way backward.21 en - 6