IKA® A 11 basic - Memphys
IKA® A 11 basic - Memphys
IKA® A 11 basic - Memphys
You also want an ePaper? Increase the reach of your titles
YUMPU automatically turns print PDFs into web optimized ePapers that Google loves.
102008<br />
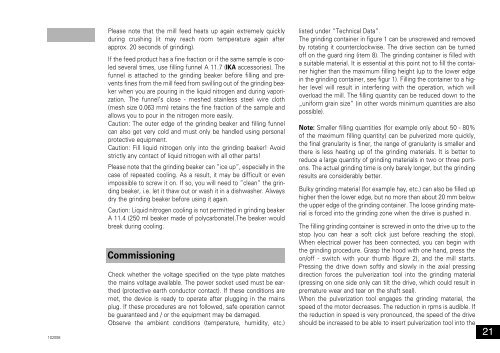
Please note that the mill feed heats up again extremely quickly<br />
during crushing (it may reach room temperature again after<br />
approx. 20 seconds of grinding).<br />
If the feed product has a fine fraction or if the same sample is cooled<br />
several times, use filling funnel A <strong>11</strong>.7 (IKA accessories). The<br />
funnel is attached to the grinding beaker before filling and prevents<br />
fines from the mill feed from swilling out of the grinding beaker<br />
when you are pouring in the liquid nitrogen and during vaporization.<br />
The funnel’s close - meshed stainless steel wire cloth<br />
(mesh size 0.063 mm) retains the fine fraction of the sample and<br />
allows you to pour in the nitrogen more easily.<br />
Caution: The outer edge of the grinding beaker and filling funnel<br />
can also get very cold and must only be handled using personal<br />
protective equipment.<br />
Caution: Fill liquid nitrogen only into the grinding beaker! Avoid<br />
strictly any contact of liquid nitrogen with all other parts!<br />
Please note that the grinding beaker can ”ice up”, especially in the<br />
case of repeated cooling. As a result, it may be difficult or even<br />
impossible to screw it on. If so, you will need to ”clean” the grinding<br />
beaker, i.e. let it thaw out or wash it in a dishwasher. Always<br />
dry the grinding beaker before using it again.<br />
Caution: Liquid nitrogen cooling is not permitted in grinding beaker<br />
A <strong>11</strong>.4 (250 ml beaker made of polycarbonate).The beaker would<br />
break during cooling.<br />
Commissioning<br />
Check whether the voltage specified on the type plate matches<br />
the mains voltage available. The power socket used must be earthed<br />
(protective earth conductor contact). If these conditions are<br />
met, the device is ready to operate after plugging in the mains<br />
plug. If these procedures are not followed, safe operation cannot<br />
be guaranteed and / or the equipment may be damaged.<br />
Observe the ambient conditions (temperature, humidity, etc.)<br />
listed under “Technical Data”.<br />
The grinding container in figure 1 can be unscrewed and removed<br />
by rotating it counterclockwise. The drive section can be turned<br />
off on the guard ring (item 8). The grinding container is filled with<br />
a suitable material. It is essential at this point not to fill the container<br />
higher than the maximum filling height (up to the lower edge<br />
in the grinding container, see figur 1). Filling the container to a higher<br />
level will result in interfering with the operation, which will<br />
overload the mill. The filling quantity can be reduced down to the<br />
„uniform grain size“ (in other words minimum quantities are also<br />
possible).<br />
Note: Smaller filling quantities (for example only about 50 - 80%<br />
of the maximum filling quantity) can be pulverized more quickly,<br />
the final granularity is finer, the range of granularity is smaller and<br />
there is less heating up of the grinding materials. It is better to<br />
reduce a large quantity of grinding materials in two or three portions.<br />
The actual grinding time is only barely longer, but the grinding<br />
results are considerably better.<br />
Bulky grinding material (for example hay, etc.) can also be filled up<br />
higher then the lower edge, but no more than about 20 mm below<br />
the upper edge of the grinding container. The loose grinding material<br />
is forced into the grinding zone when the drive is pushed in.<br />
The filling grinding container is screwed in onto the drive up to the<br />
stop (you can hear a soft click just before reaching the stop).<br />
When electrical power has been connected, you can begin with<br />
the grinding procedure. Grasp the hood with one hand, press the<br />
on/off - switch with your thumb (figure 2), and the mill starts.<br />
Pressing the drive down softly and slowly in the axial pressing<br />
direction forces the pulverization tool into the grinding material<br />
(pressing on one side only can tilt the drive, which could result in<br />
premature wear and tear on the shaft seal).<br />
When the pulverization tool engages the grinding material, the<br />
speed of the motor decreases. The reduction in rpms is audible. If<br />
the reduction in speed is very pronounced, the speed of the drive<br />
should be increased to be able to insert pulverization tool into the<br />
21


