und Bedienungsanleitung für den Garagentorantrieb ... - Rademacher
und Bedienungsanleitung für den Garagentorantrieb ... - Rademacher
und Bedienungsanleitung für den Garagentorantrieb ... - Rademacher

Sie wollen auch ein ePaper? Erhöhen Sie die Reichweite Ihrer Titel.
YUMPU macht aus Druck-PDFs automatisch weboptimierte ePaper, die Google liebt.
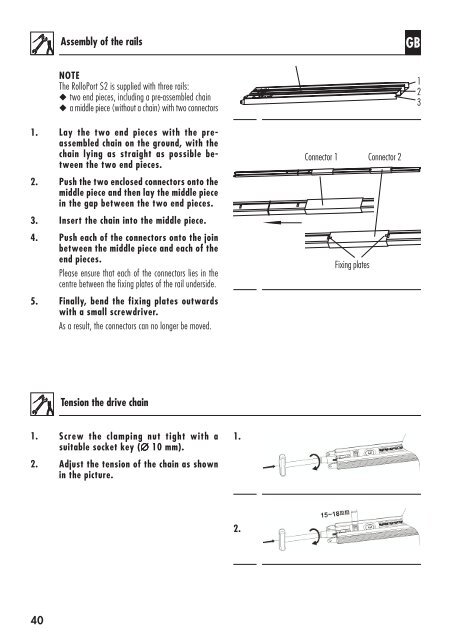
Assembly of the railsGBNOTEThe RolloPort S2 is supplied with three rails:◆ two end pieces, including a pre-assembled chain◆ a middle piece (without a chain) with two connectors1231.2.3.4.5.Lay the two end pieces with the preassembledchain on the gro<strong>und</strong>, with thechain lying as straight as possible betweenthe two end pieces.Push the two enclosed connectors onto themiddle piece and then lay the middle piecein the gap between the two end pieces.Insert the chain into the middle piece.Push each of the connectors onto the joinbetween the middle piece and each of theend pieces.Please ensure that each of the connectors lies in thecentre between the fixing plates of the rail <strong>und</strong>erside.Finally, bend the fixing plates outwardswith a small screwdriver.As a result, the connectors can no longer be moved.Connector 1Fixing platesConnector 2Tension the drive chain1.2.Screw the clamping nut tight with asuitable socket key (∅ 10 mm).Adjust the tension of the chain as shownin the picture.1.2.40